Creating a Tryout Lifecycle
A Tryout Lifecycle determines the workflow for the testing and validation of the Artifacts.
The Tryout workflow can be configured to meet specific company requirements. This allows organizations to customize processes to align with their quality standards and governance policies. Also, this ensures that each Tryout type or action can follow a unique validation path based on the organization’s needs.
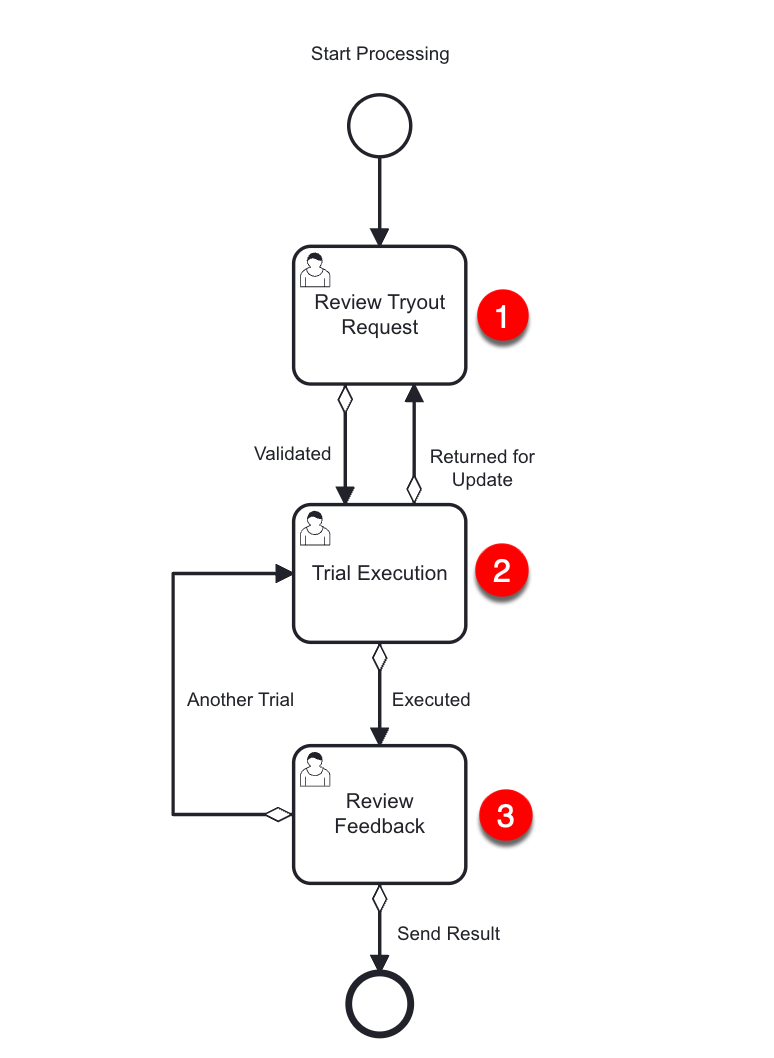
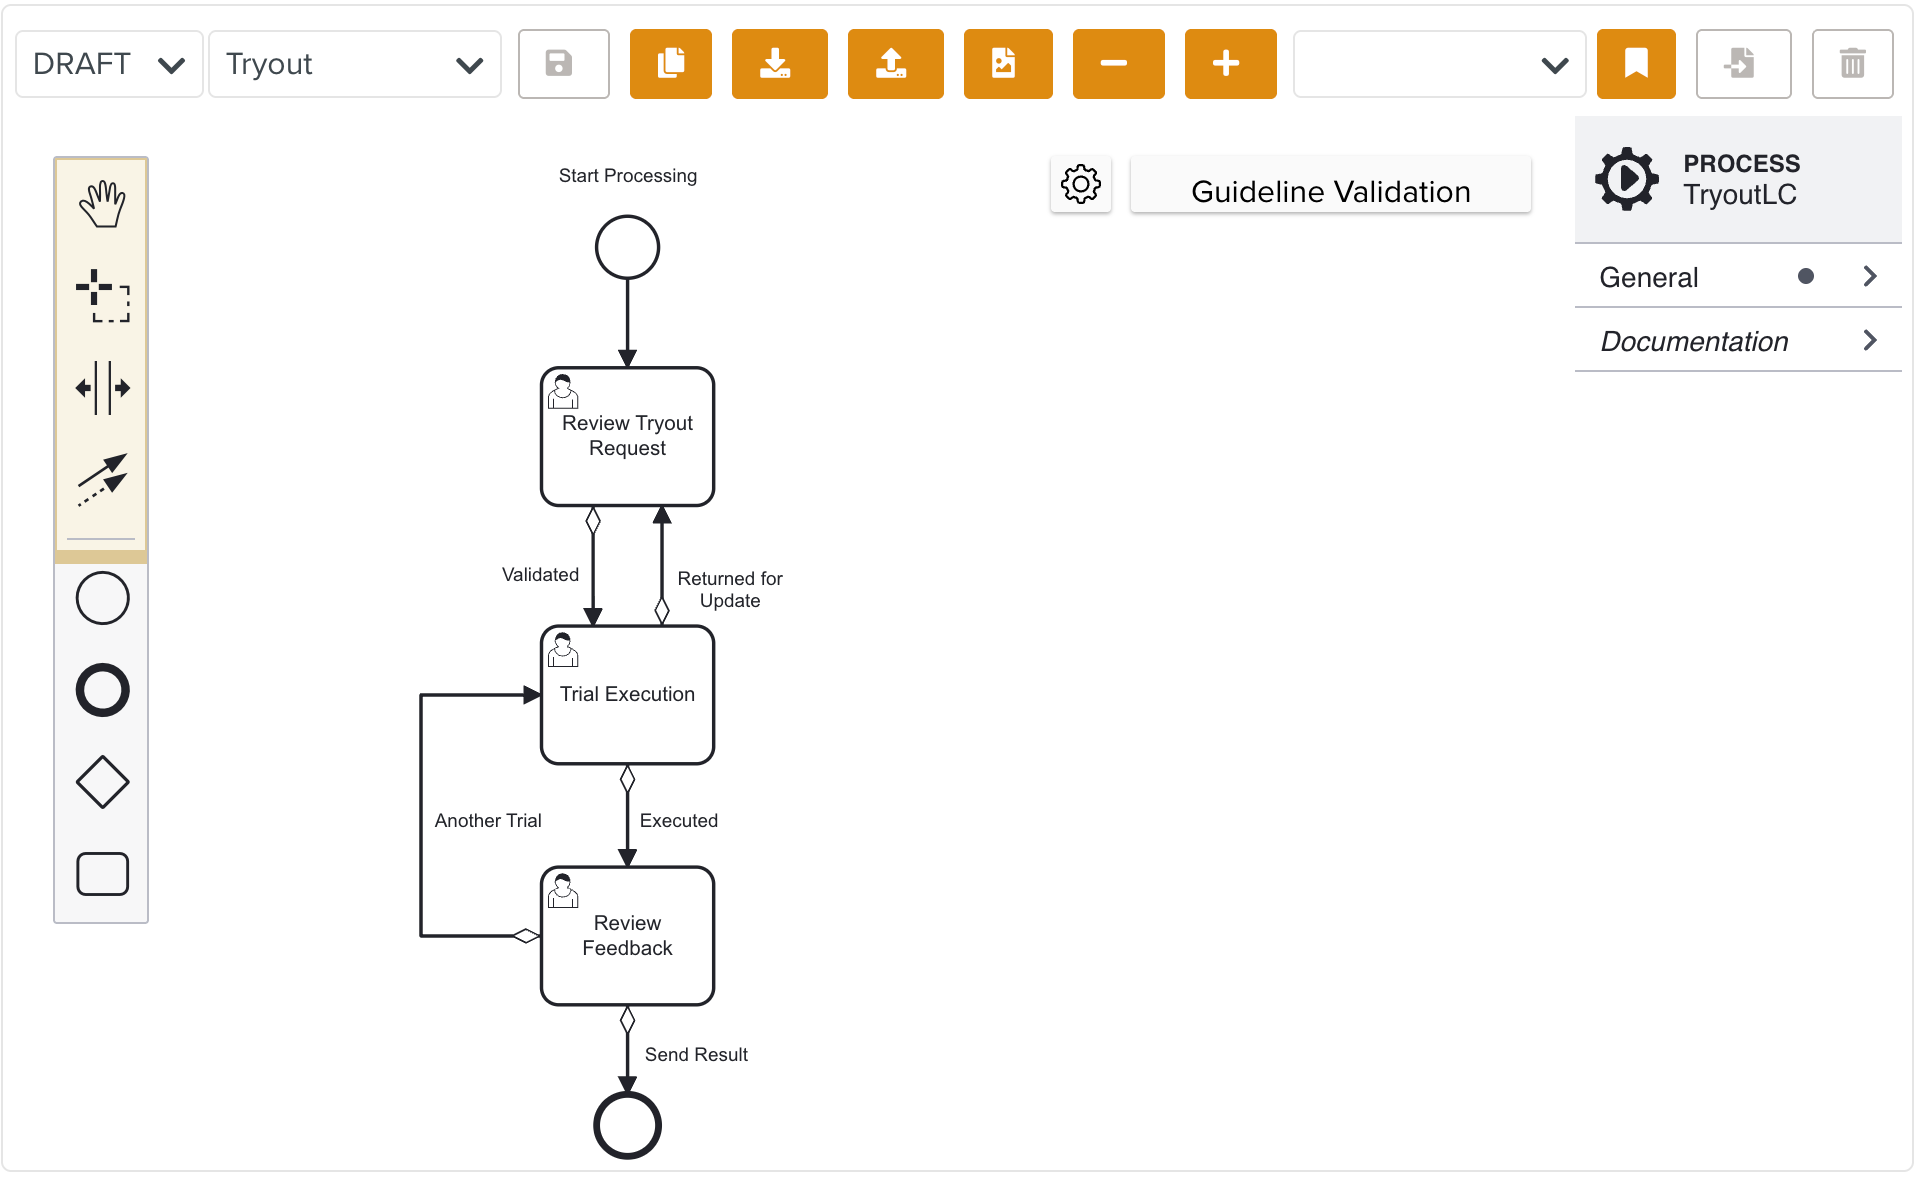
For example, the workflow created for a Tryout Approval shown below contains the steps involved in the validation of the Artifact.
 |
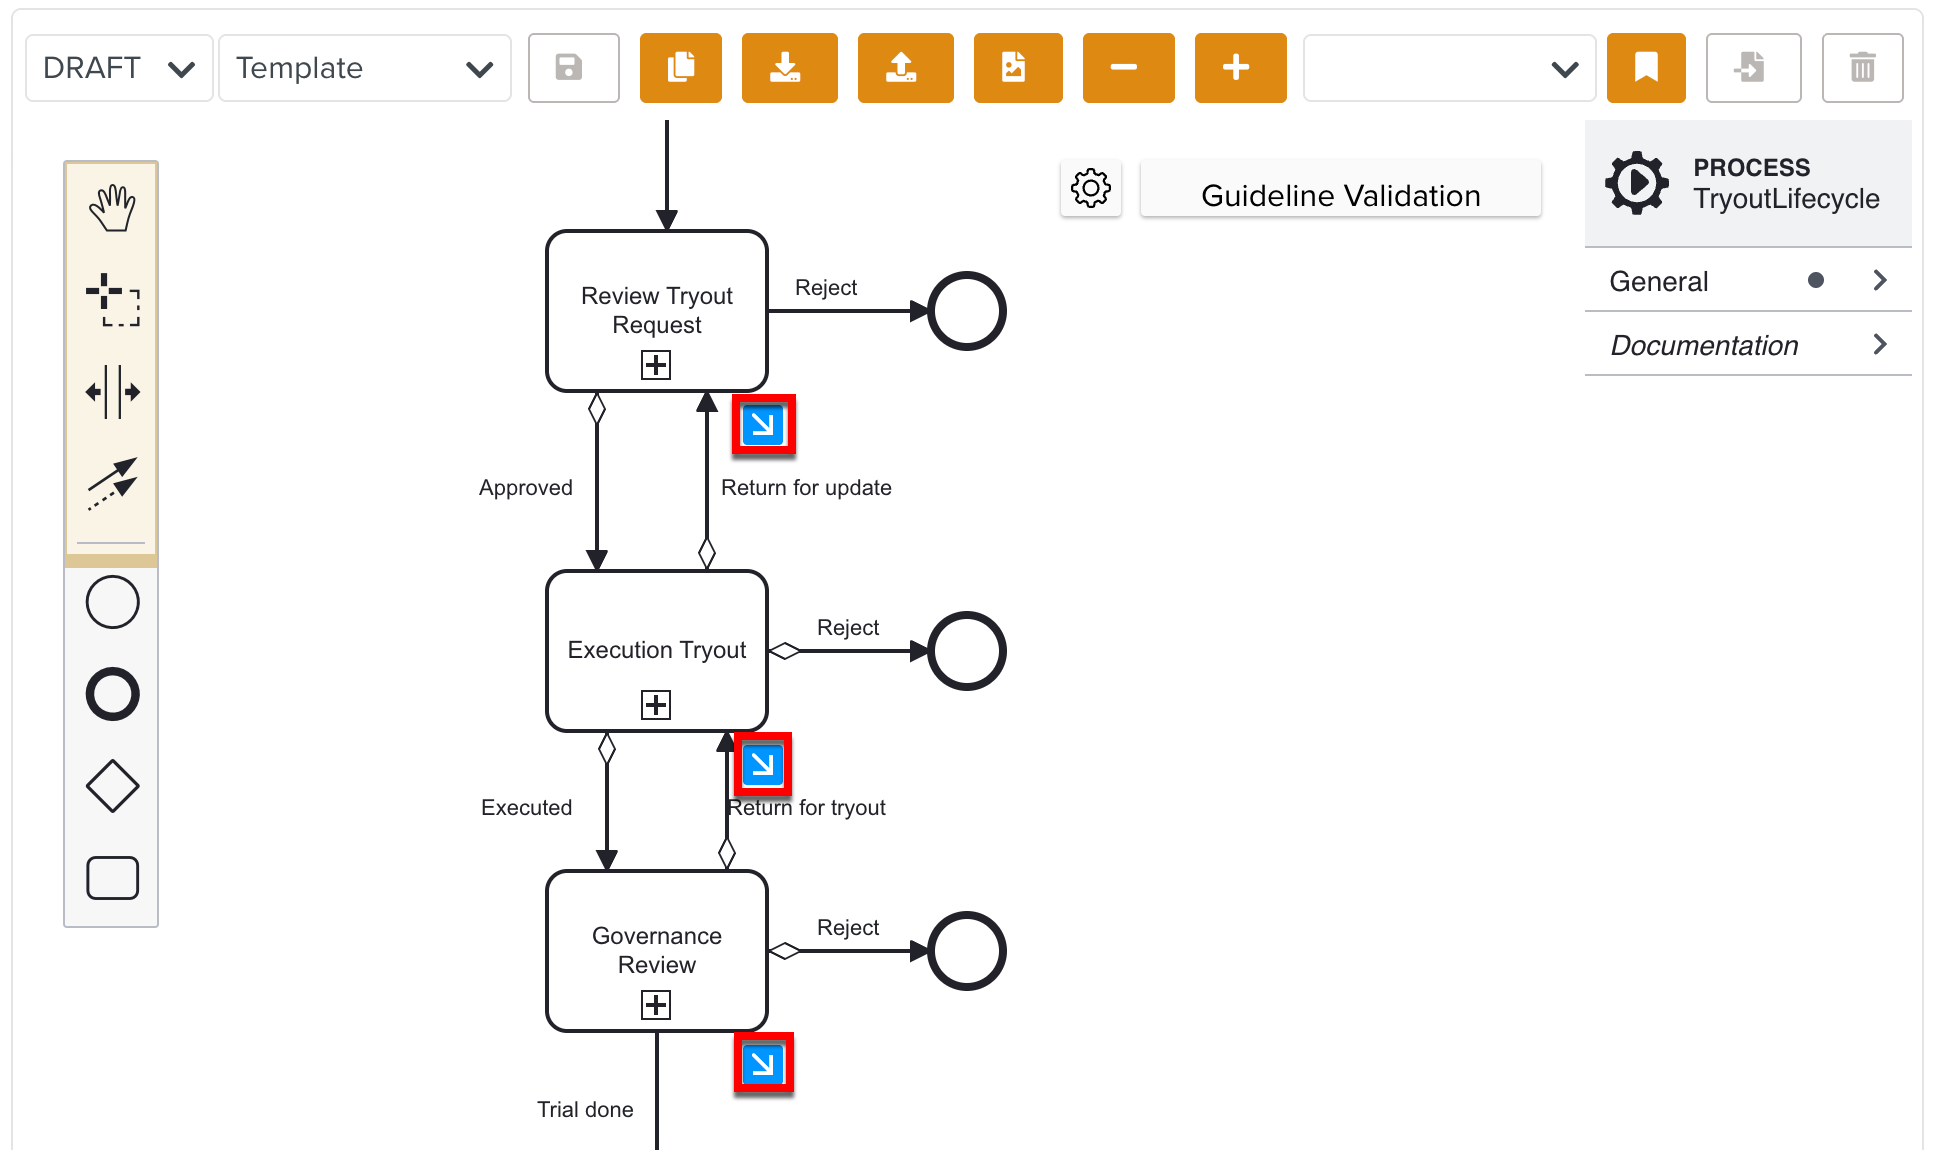
You can build the Tryout validation process as a Custom Lifecycle of type Tryout.
 |
In the below example, the different stages of the Tryout Lifecycle are highlighted. There are User Task elements associated with the FieldLogs Tasks required to validate the Artifact.
 |
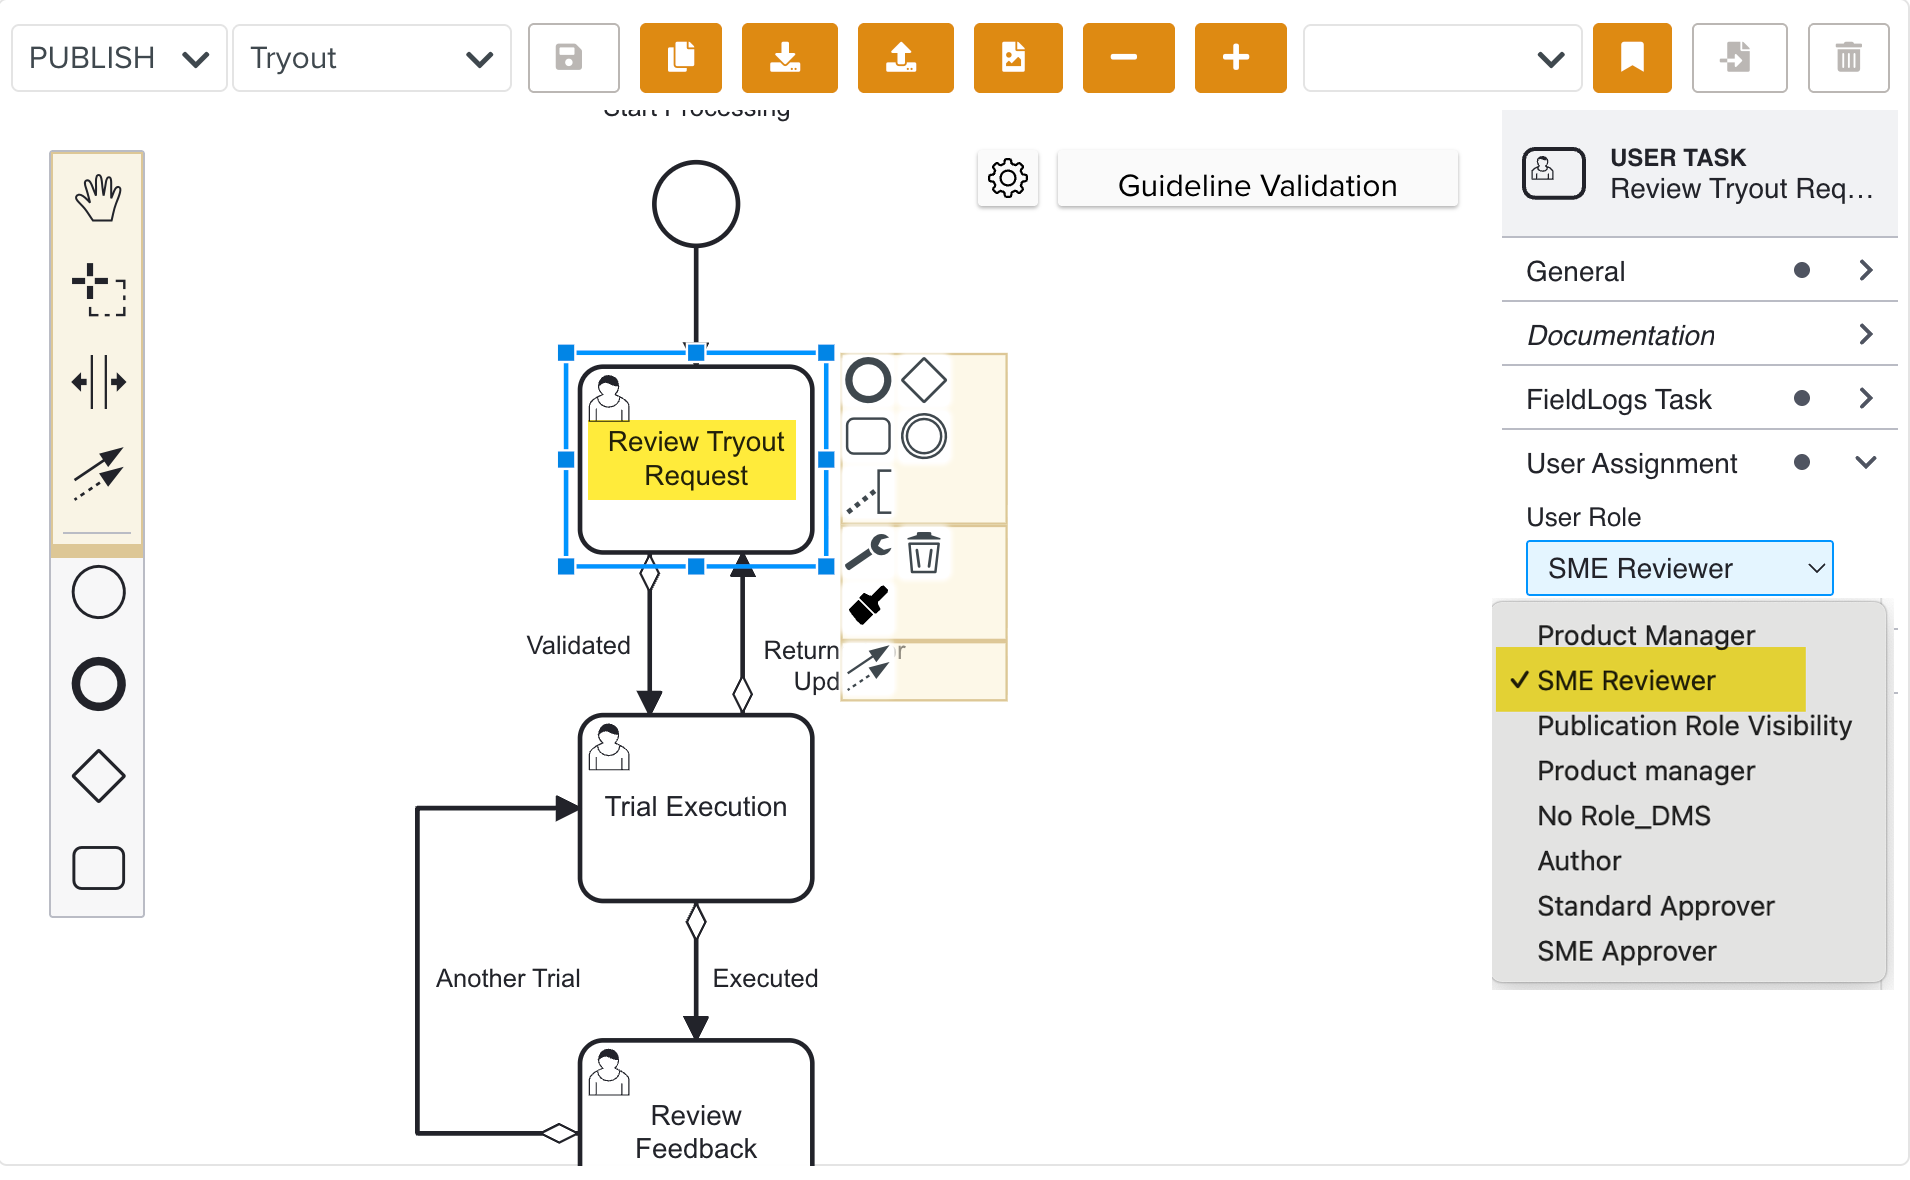
Each User Task can be assigned to a specific User Role. Only users with the assigned role can view, initiate, or complete the Task. This ensures Tasks are managed securely and in accordance with the responsibilities assigned to each Role.
You can select a User Role from the dropdown as shown.
 |
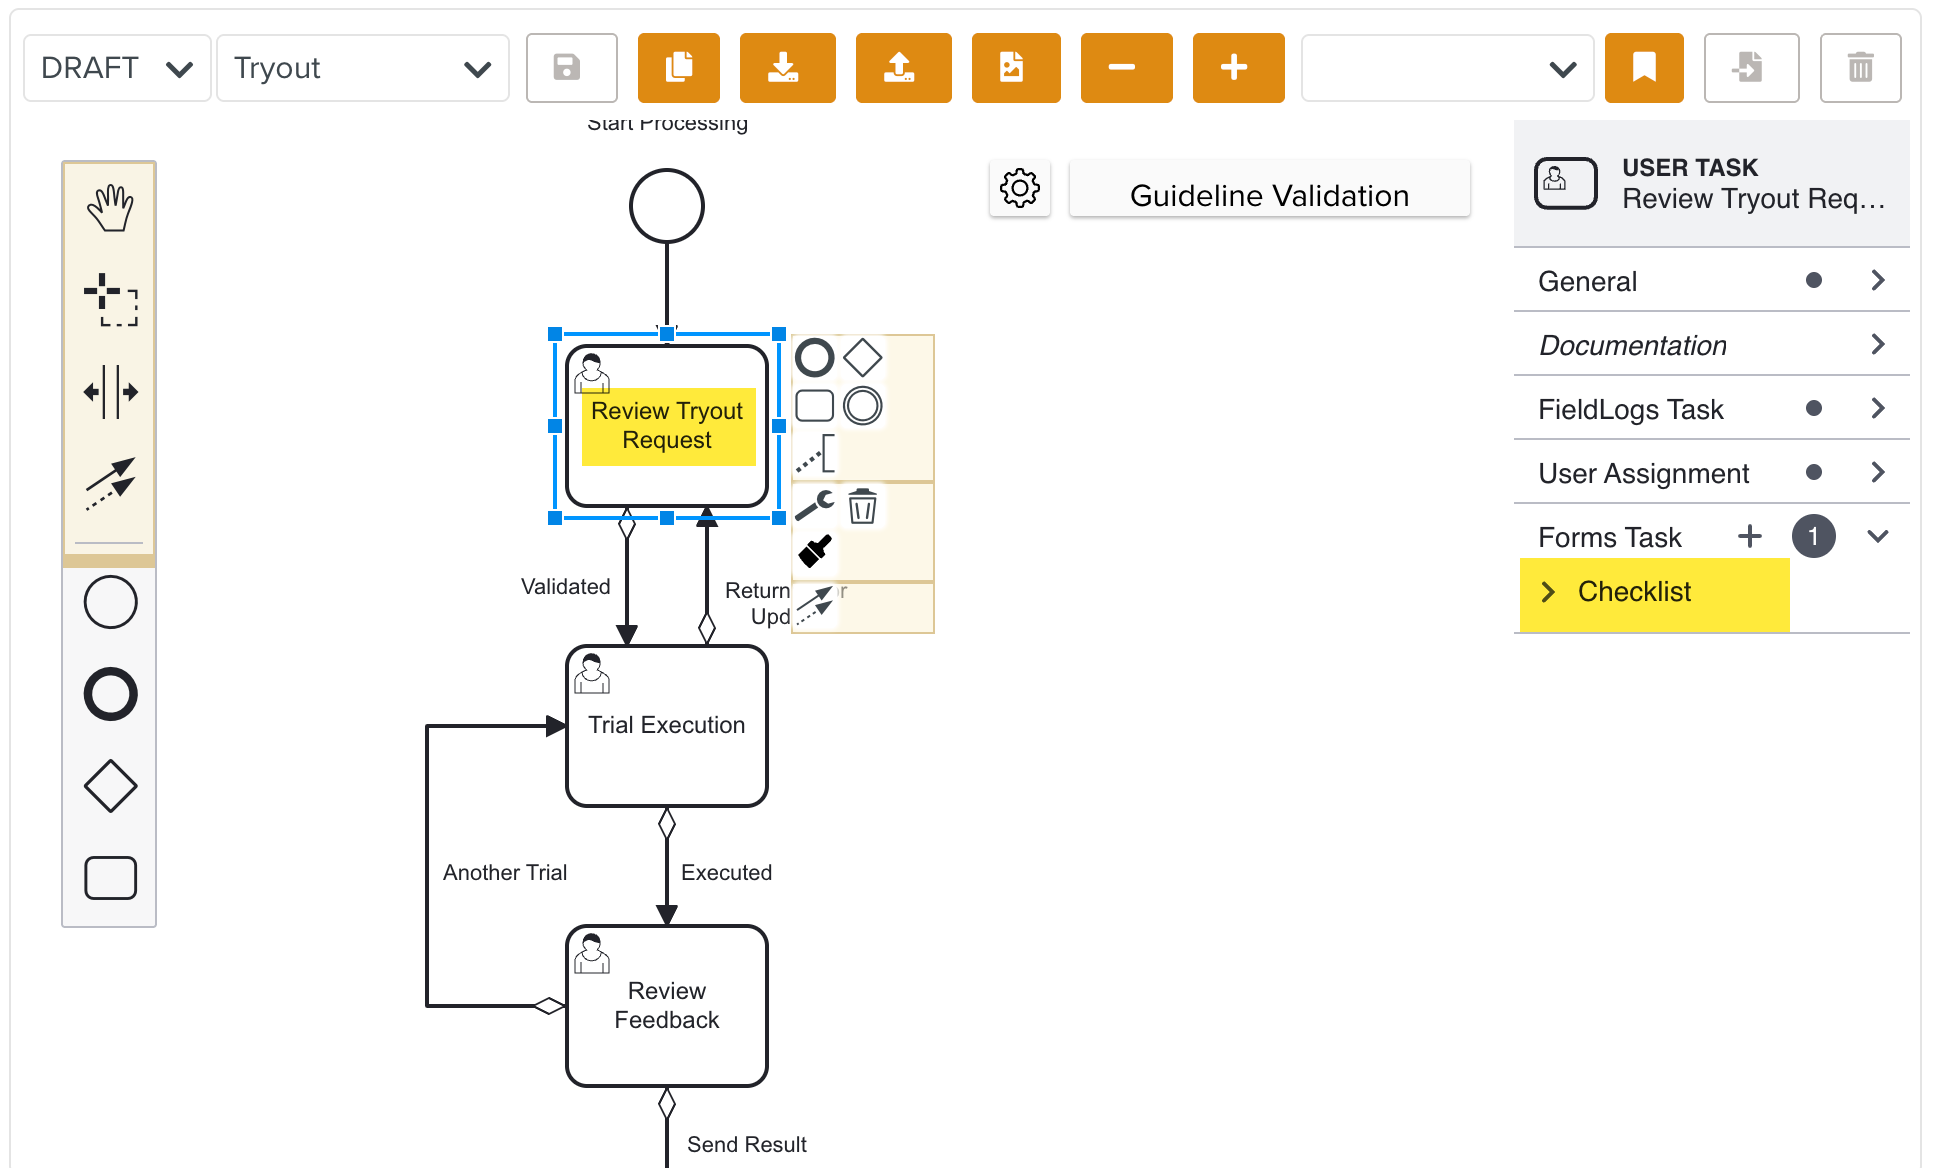
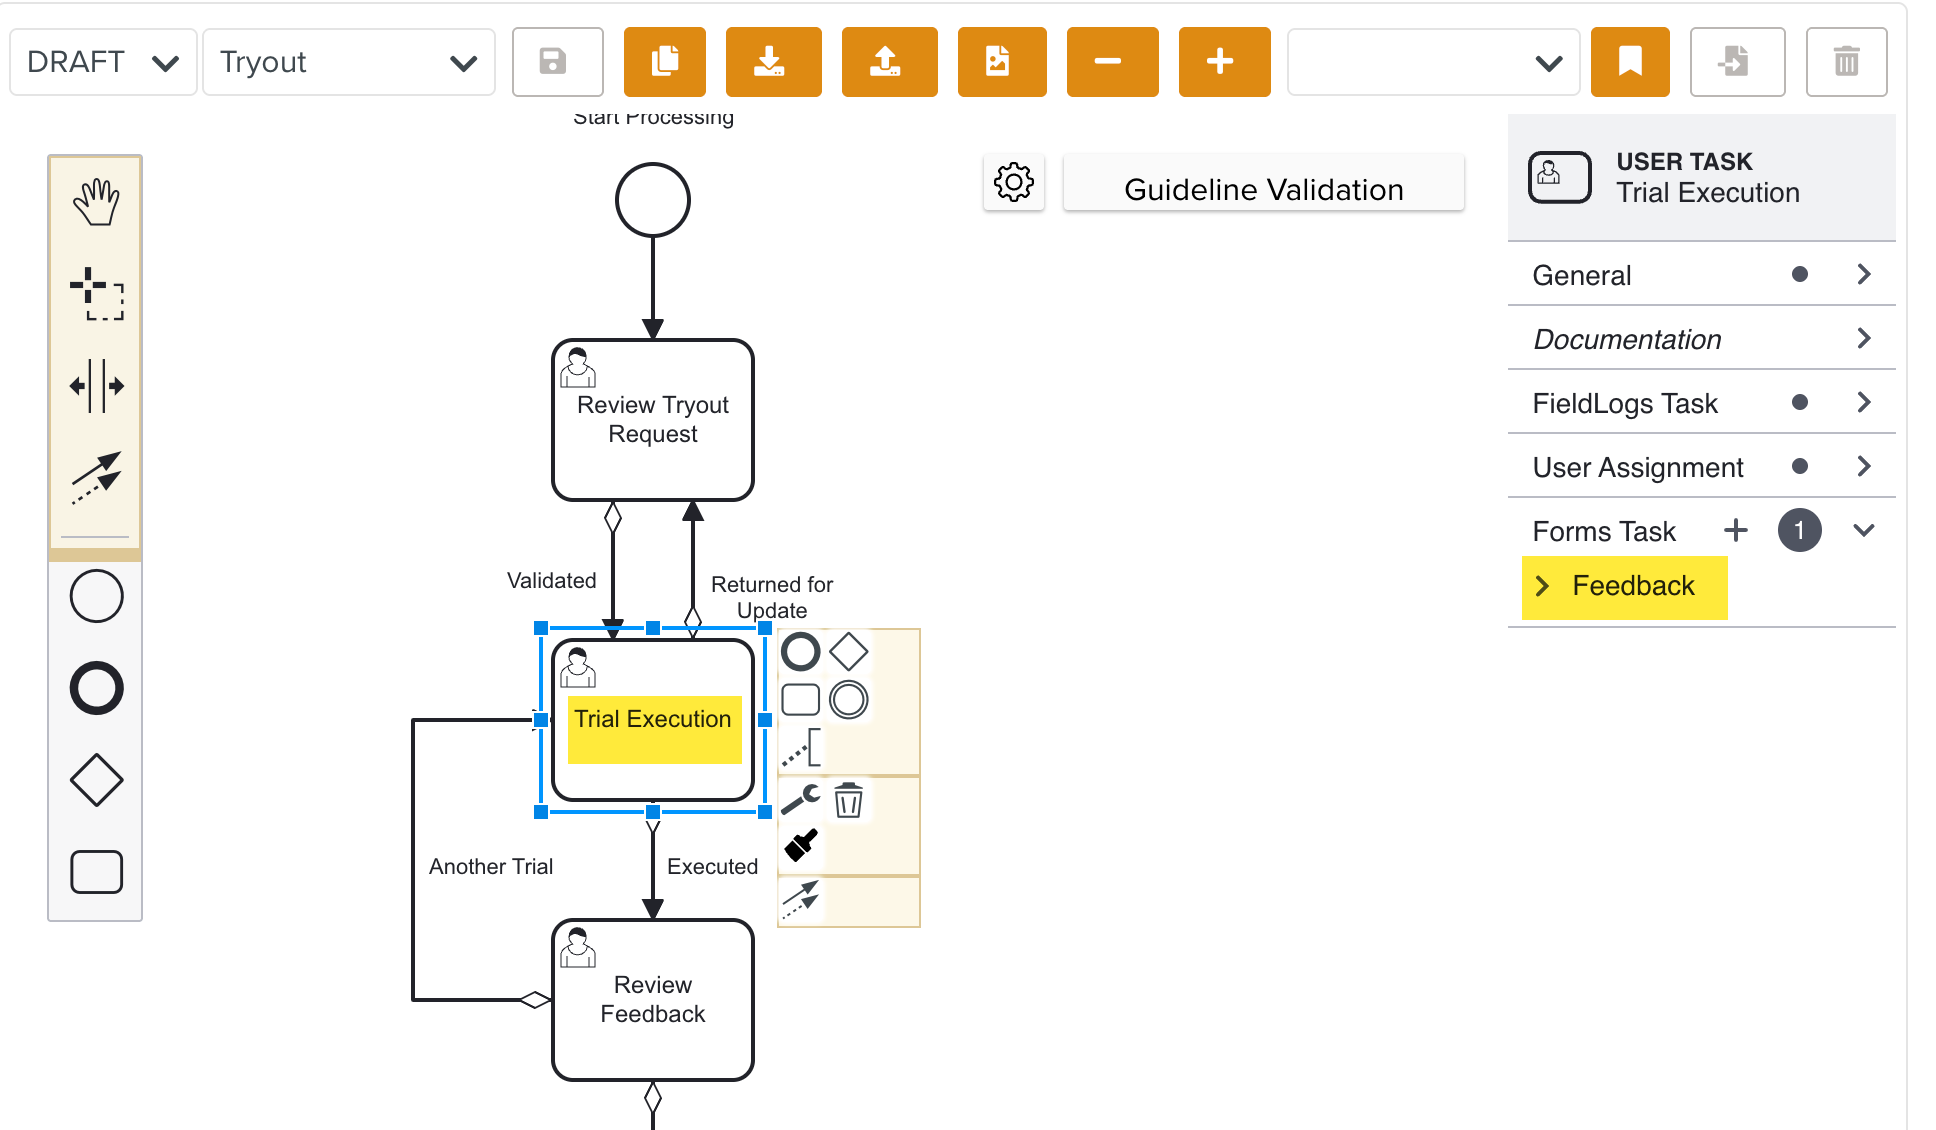
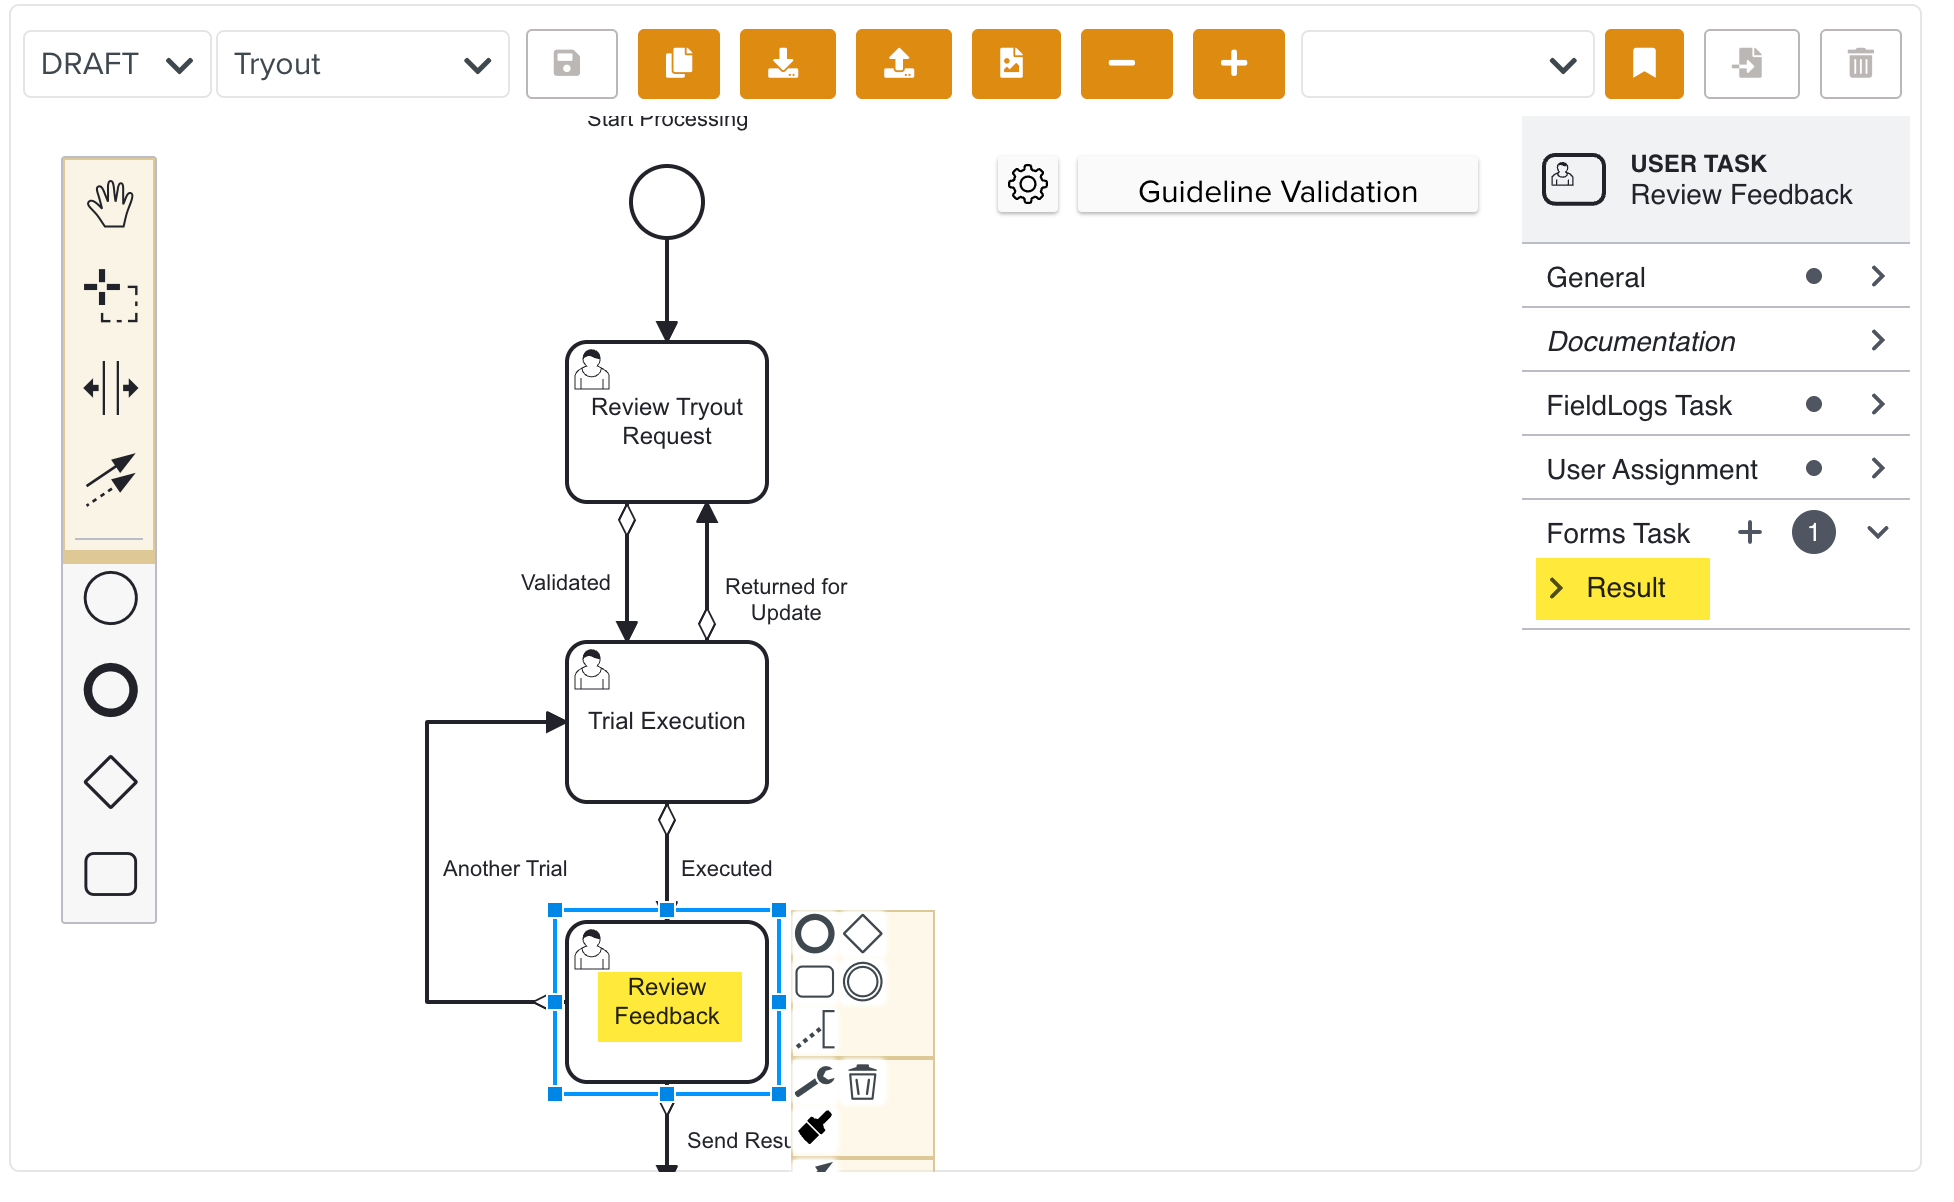
You can also link Lifecycle Forms to the User Tasks if required. Each User Task can have a different form attached to it. This allows users to enter the feedback relevant to each Task during the completion.
The collection of customized data inputs for each Task ensures that all the necessary information is captured accurately as per the Task’s requirements.
For the current example, Lifecycle Forms are linked to all the three stages - Review Tryout Request, Trial Execution, and Review Feedback.
The users provide their feedback using the Lifecycle Forms Checklist , Feedback and Result as shown below.
 |
 |
 |
These forms capture information and user feedback for review and action.
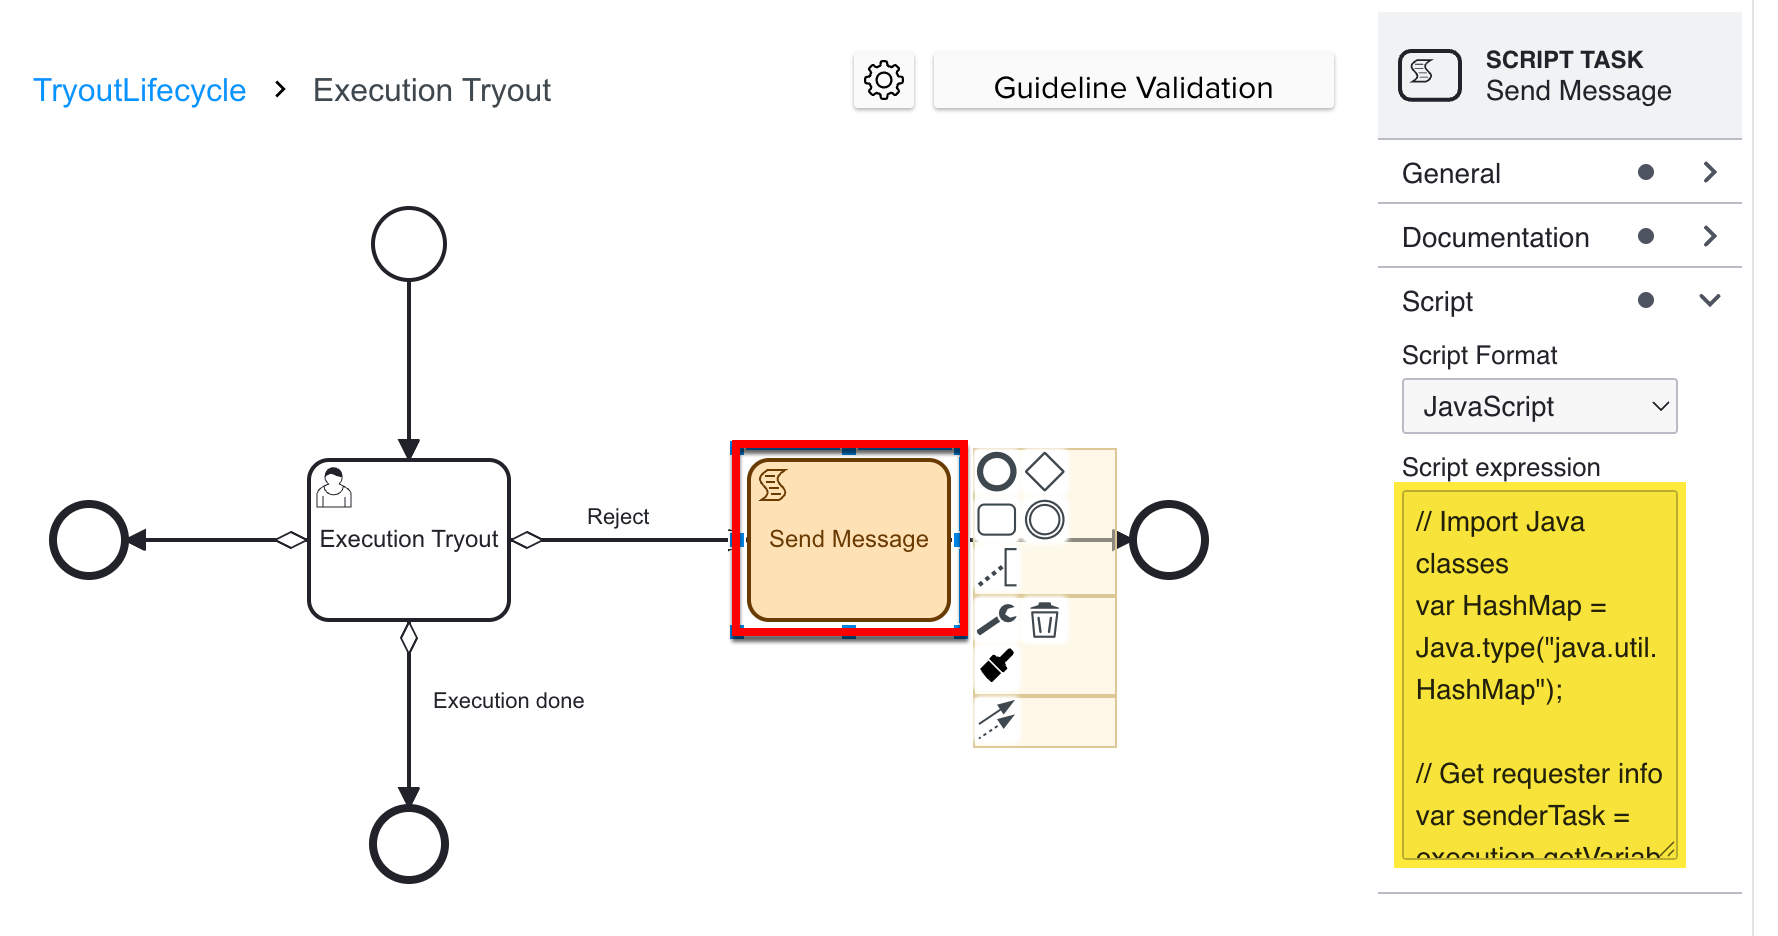
Sub-processes can also be added to include Script Tasks that manage the flow of comments and feedback captured across different teams.
The example below illustrates a sub-process Execution Tryout, where a Send Message Script Task defines the feedback message sent to the relevant users.
 |
 |
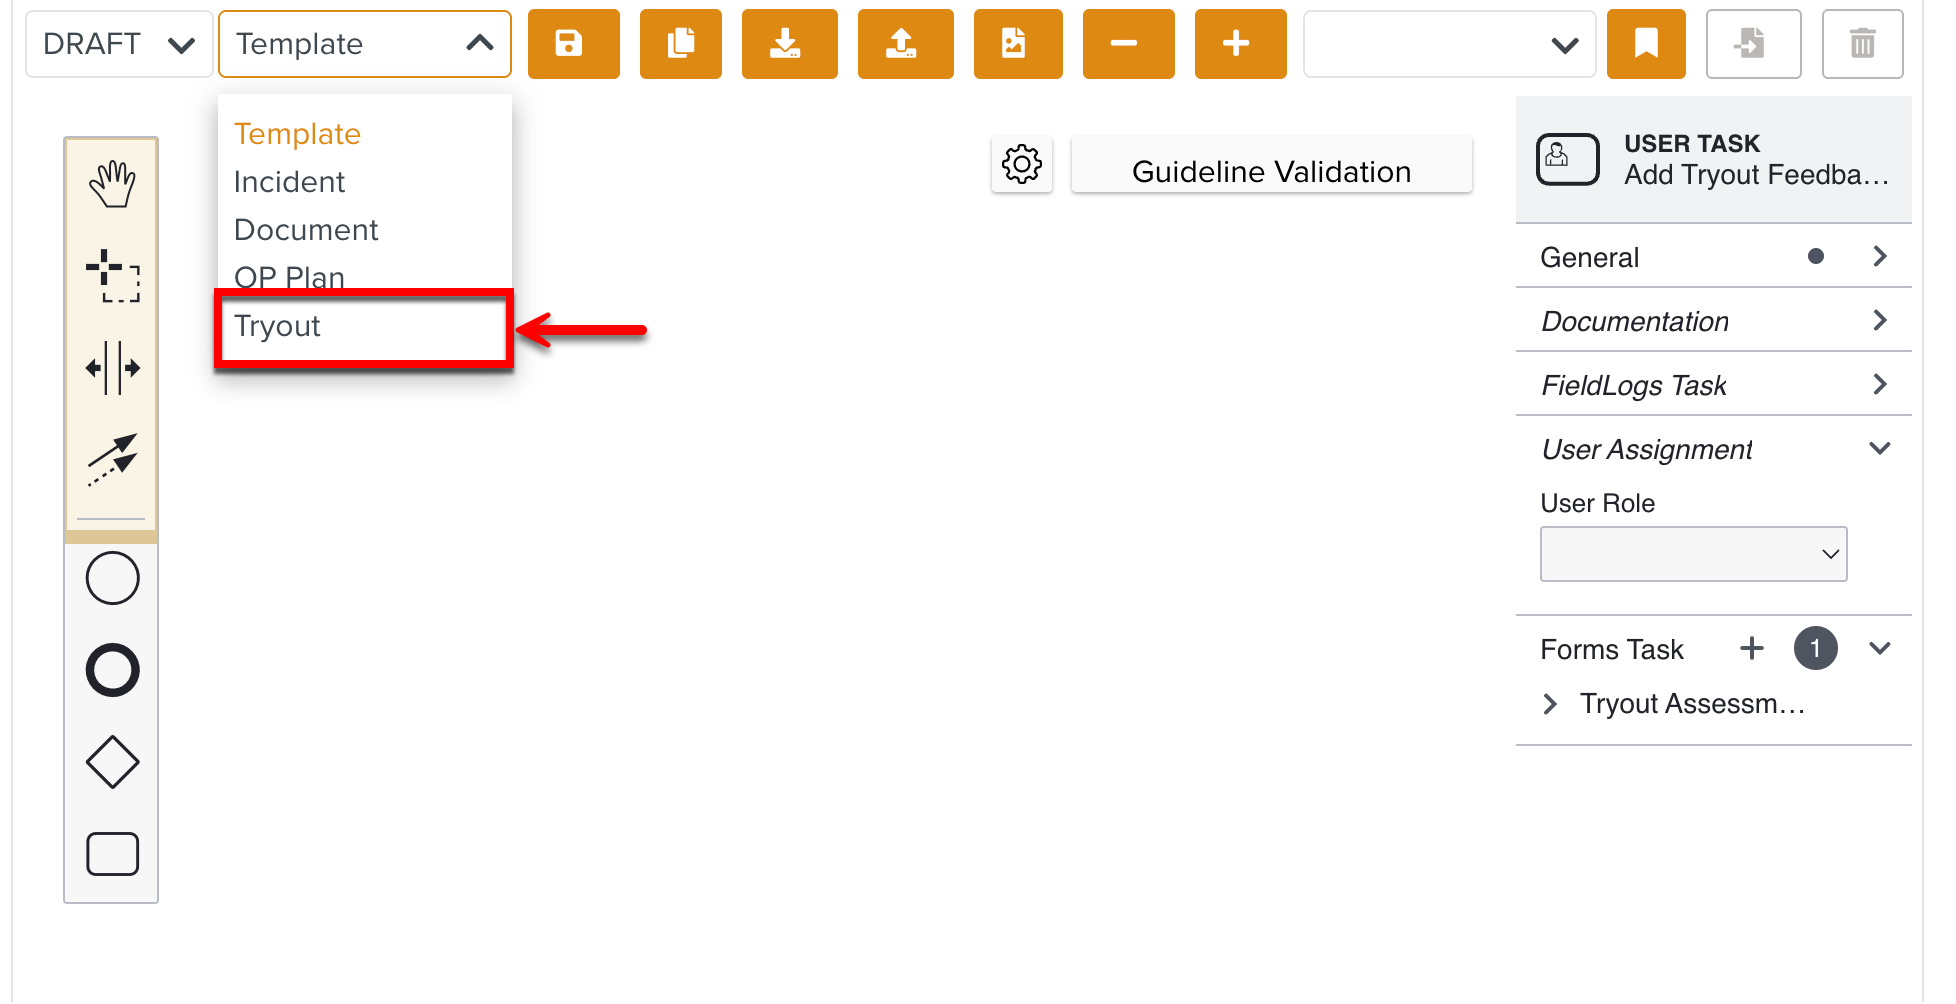
To create a Tryout validation Lifecycle:
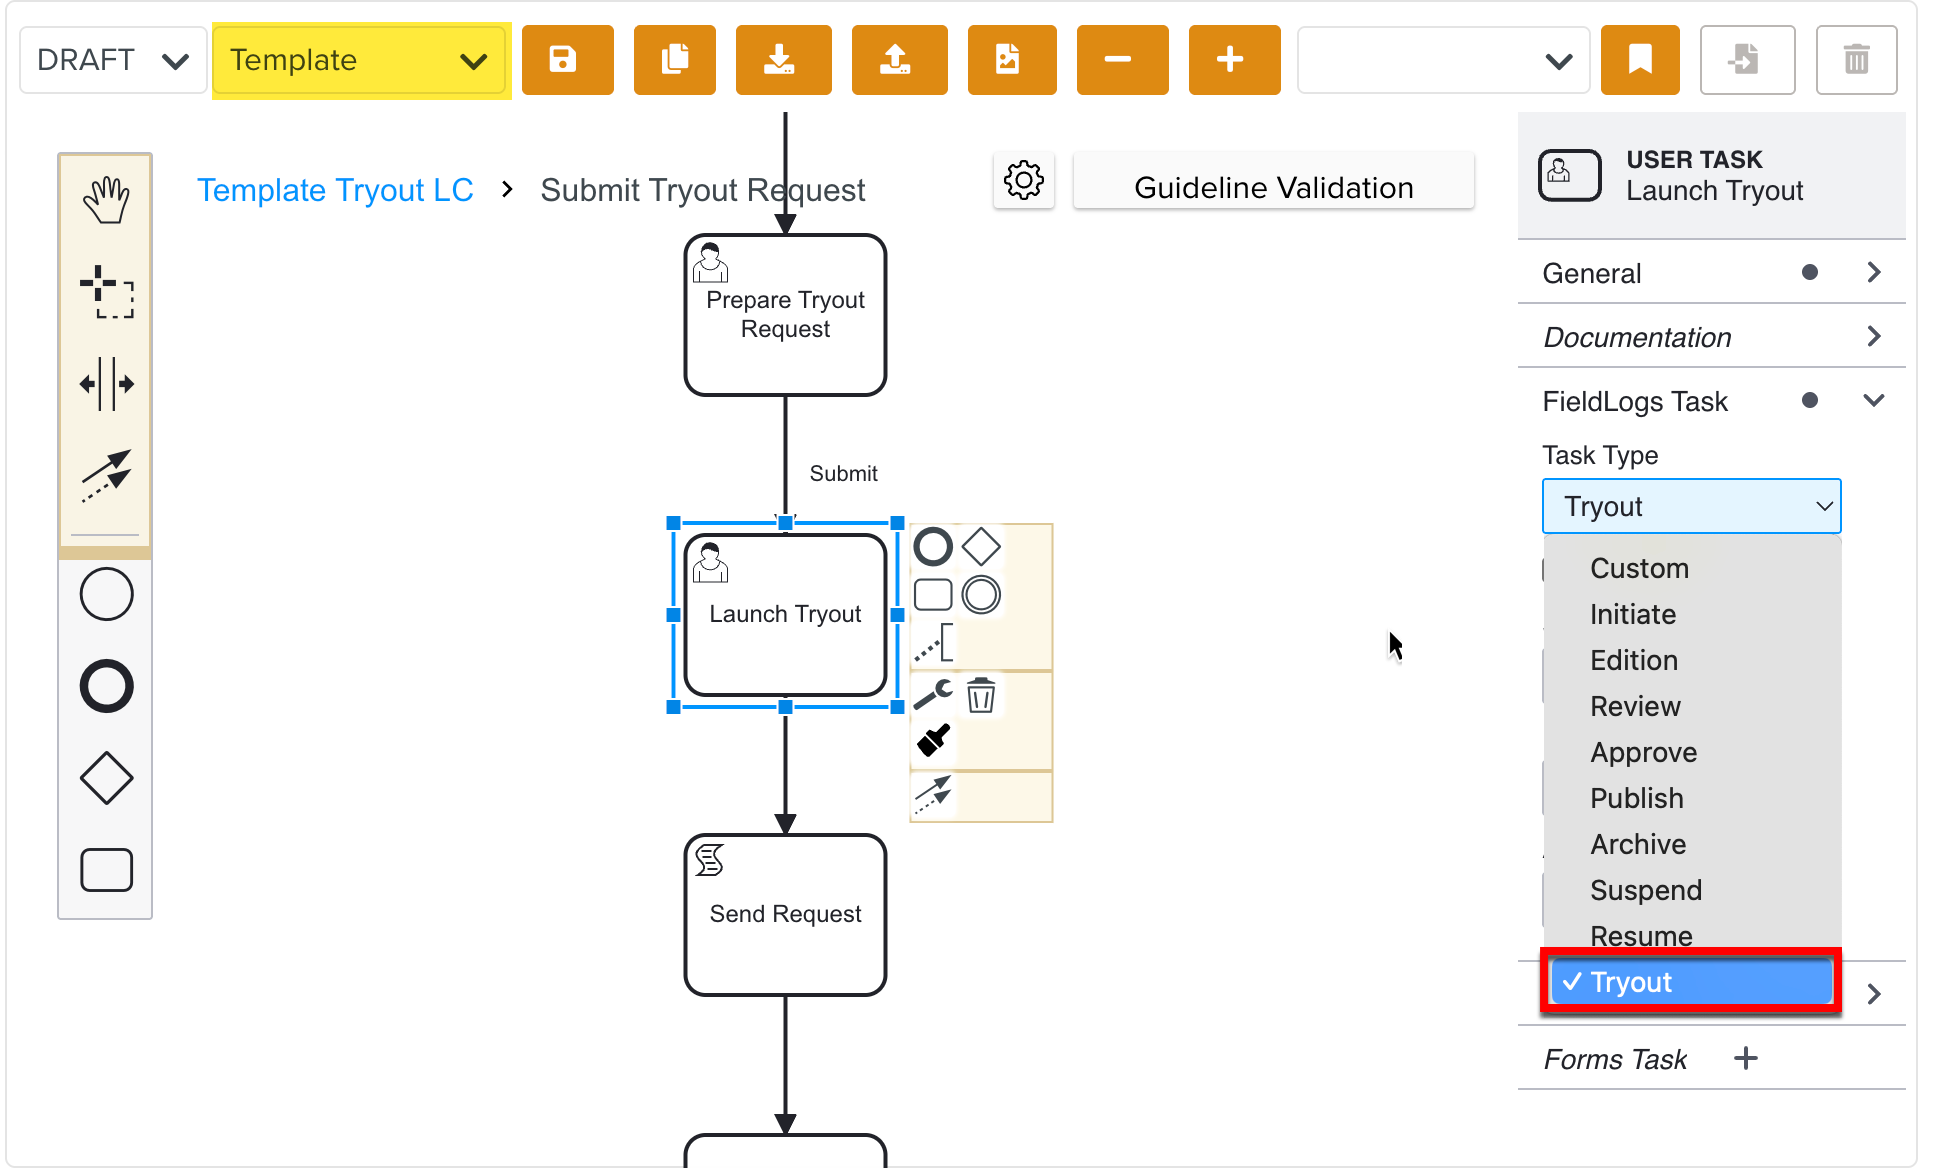
Select the type Tryout from the dropdown list as shown below.
Drag the required elements from the UI panel to build a Custom Lifecycle. Link Lifecycle Forms to the User Tasks where required.
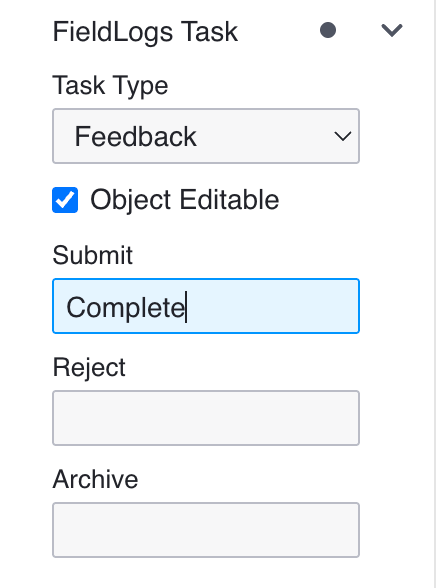
In every User Task, under FieldLogs Task property you can customize the actions as required.
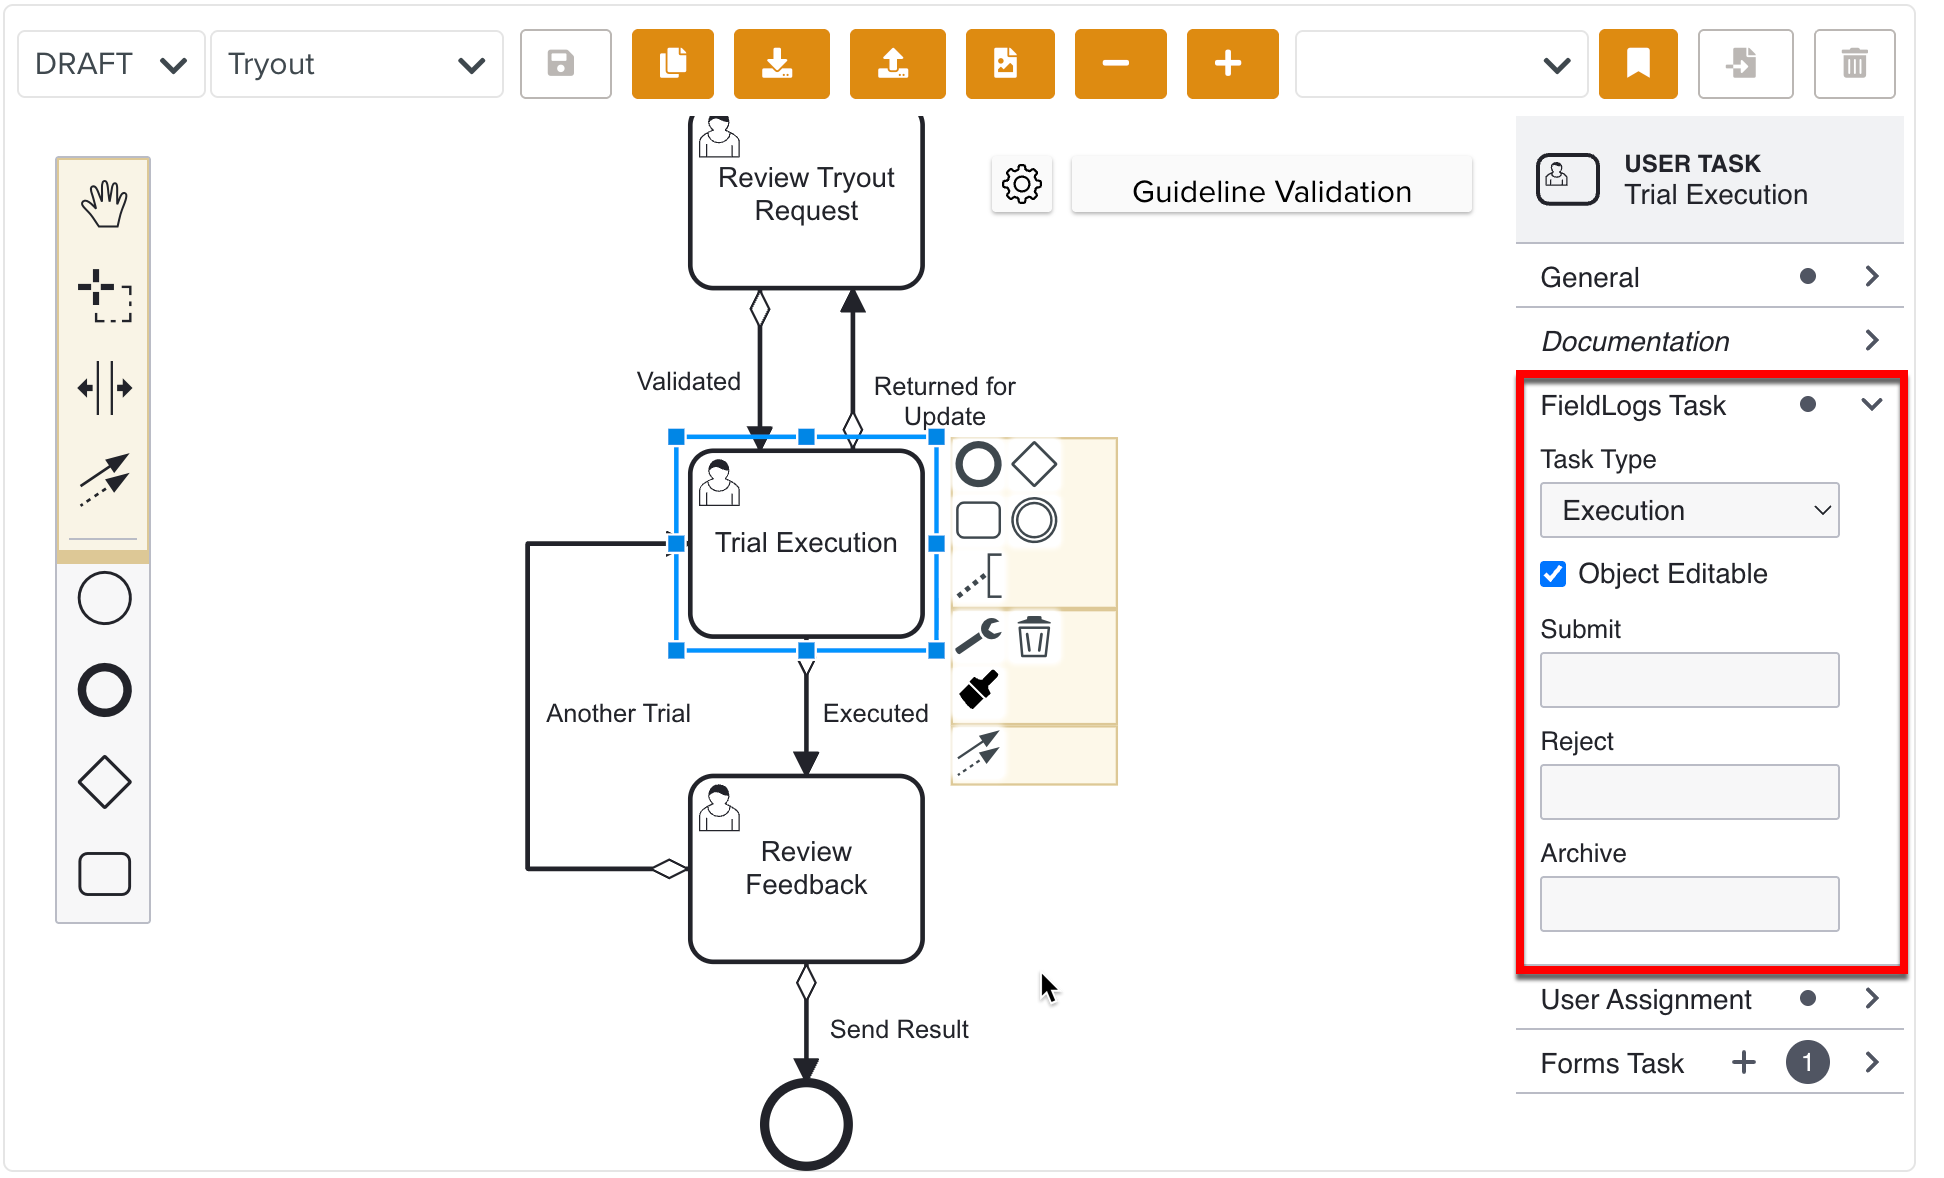
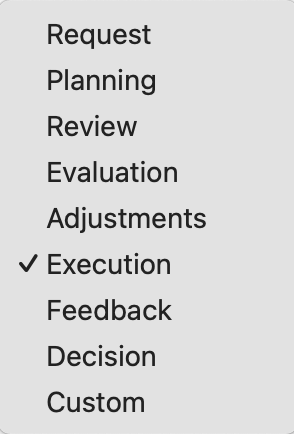
You can select a FieldLogs Task Type available for Tryout from the Task Type dropdown.
Important
A Task type Tryout is available for Template Lifecycles. This provides the ability to include the Tryout process into the workflow.
You can select Object Editable to make the User Tasks editable during the approval of Tryout Task.
Specific stages of the Tryout Task can be made editable where the user can edit the Tryout definition.
In each User Task, there are three pre-defined buttons:
Submit: This moves the Tryout Task to the next step of the Lifecycle.
Reject: This rejects the current action. The Tryout Task moves to the stage defined in the Tryout Lifecycle.
Archive: This archives the Tryout Task.
These buttons are mapped to decision actions that are controlled by a lifecycle variable named 'decision', with values as follows:
Submit = 1
Reject = 2
Archive = 9
These decision values enable conditional branching within the workflow diagram. When a user selects an action, the workflow uses the 'decision' variable to route the process to the appropriate next step.
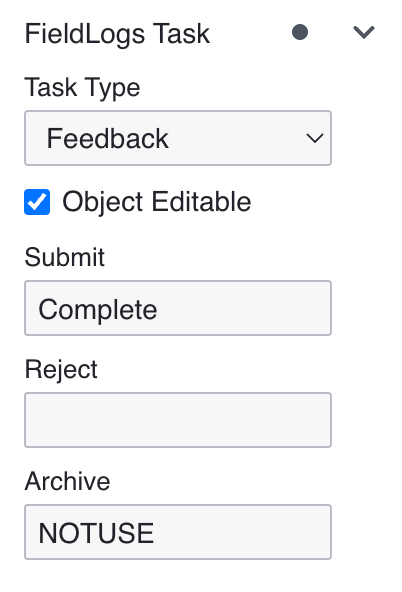
Additionally, the labels of the buttons can be customized to provide contextually meaningful labels.
The non-required buttons can be disabled by setting it to NOTUSE. This restricts it from being displayed in the Tryout Task.
Click .
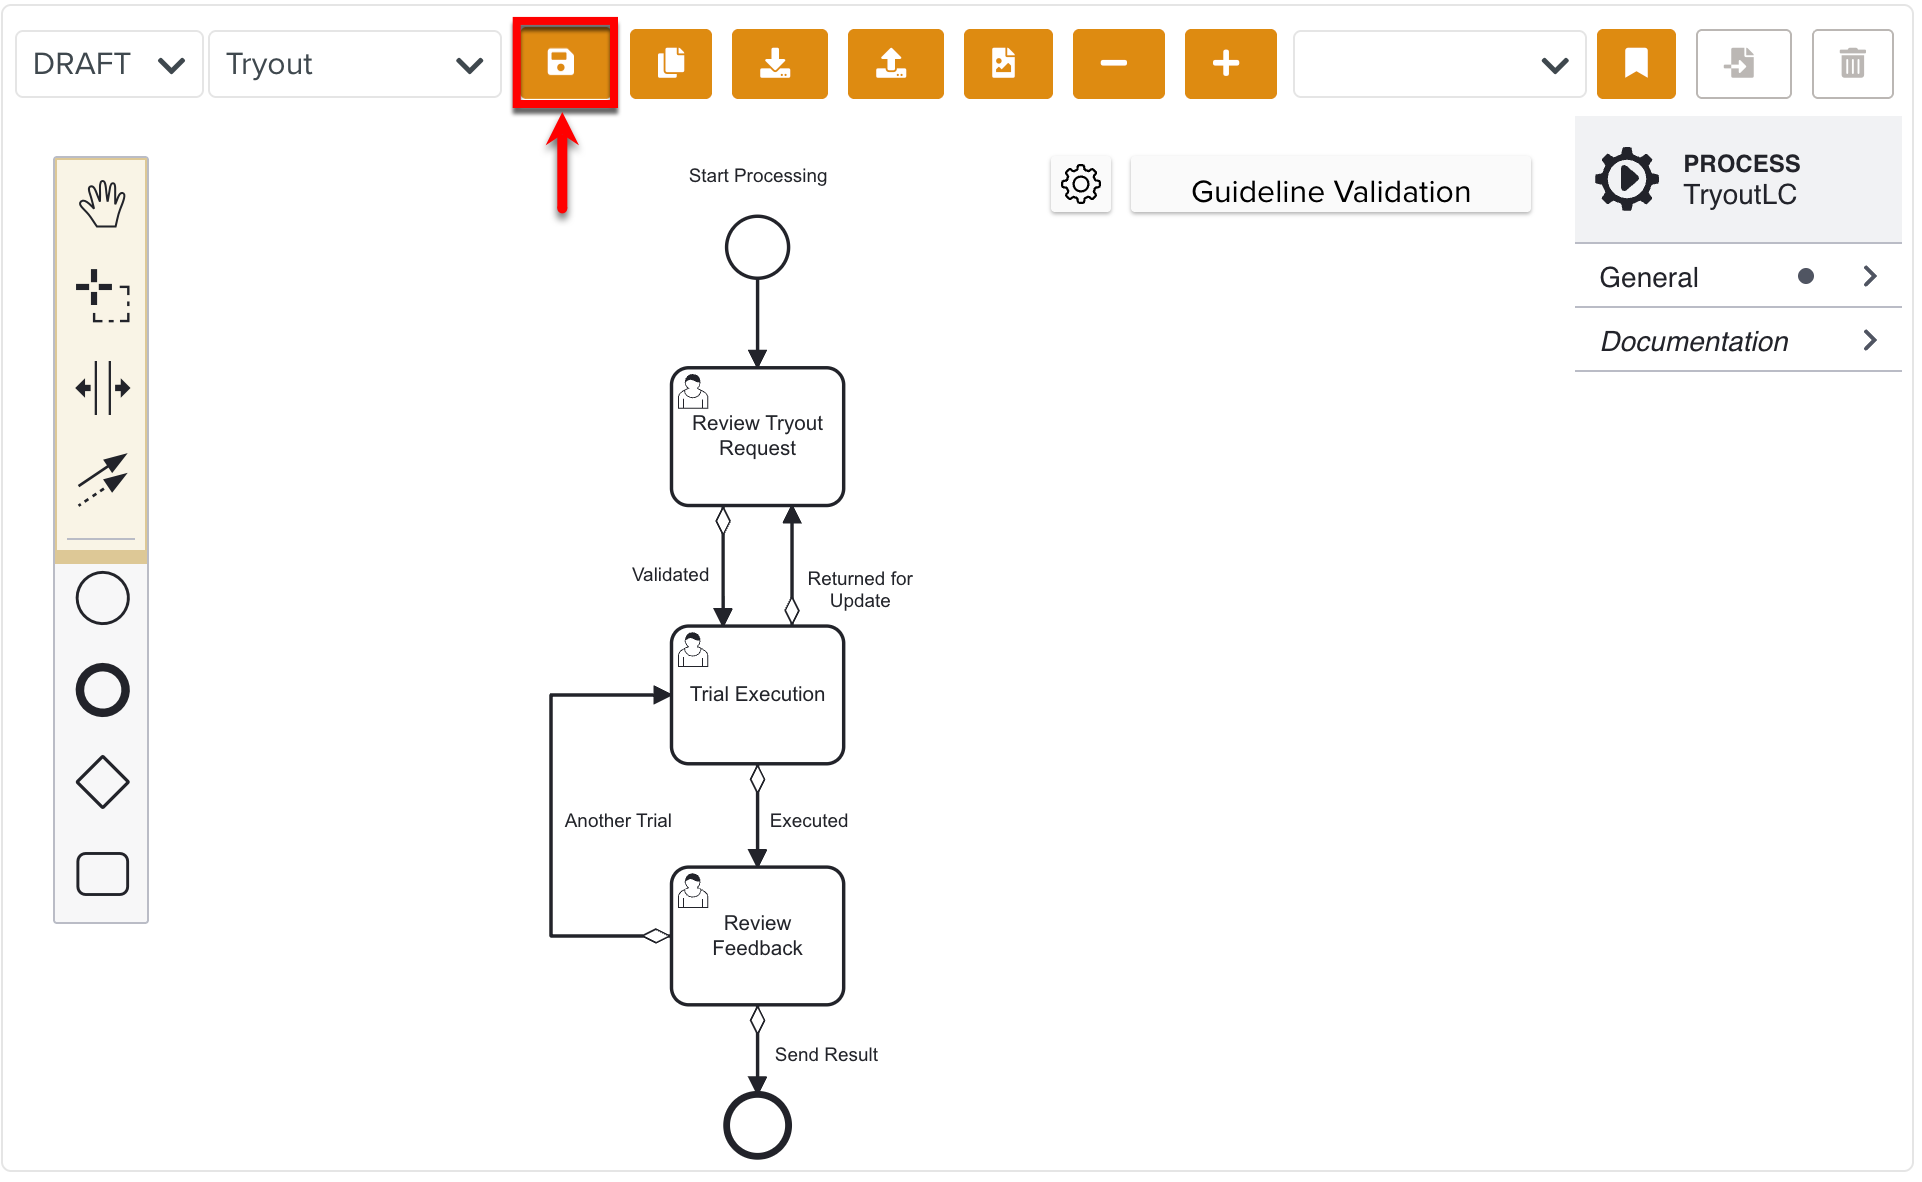
Users have the ability to save the workflow diagram at any point during creation, which will save it as a Draft. This allows users to pause and resume work without losing progress.
When the Lifecycle design is complete, users can publish it.
Click .
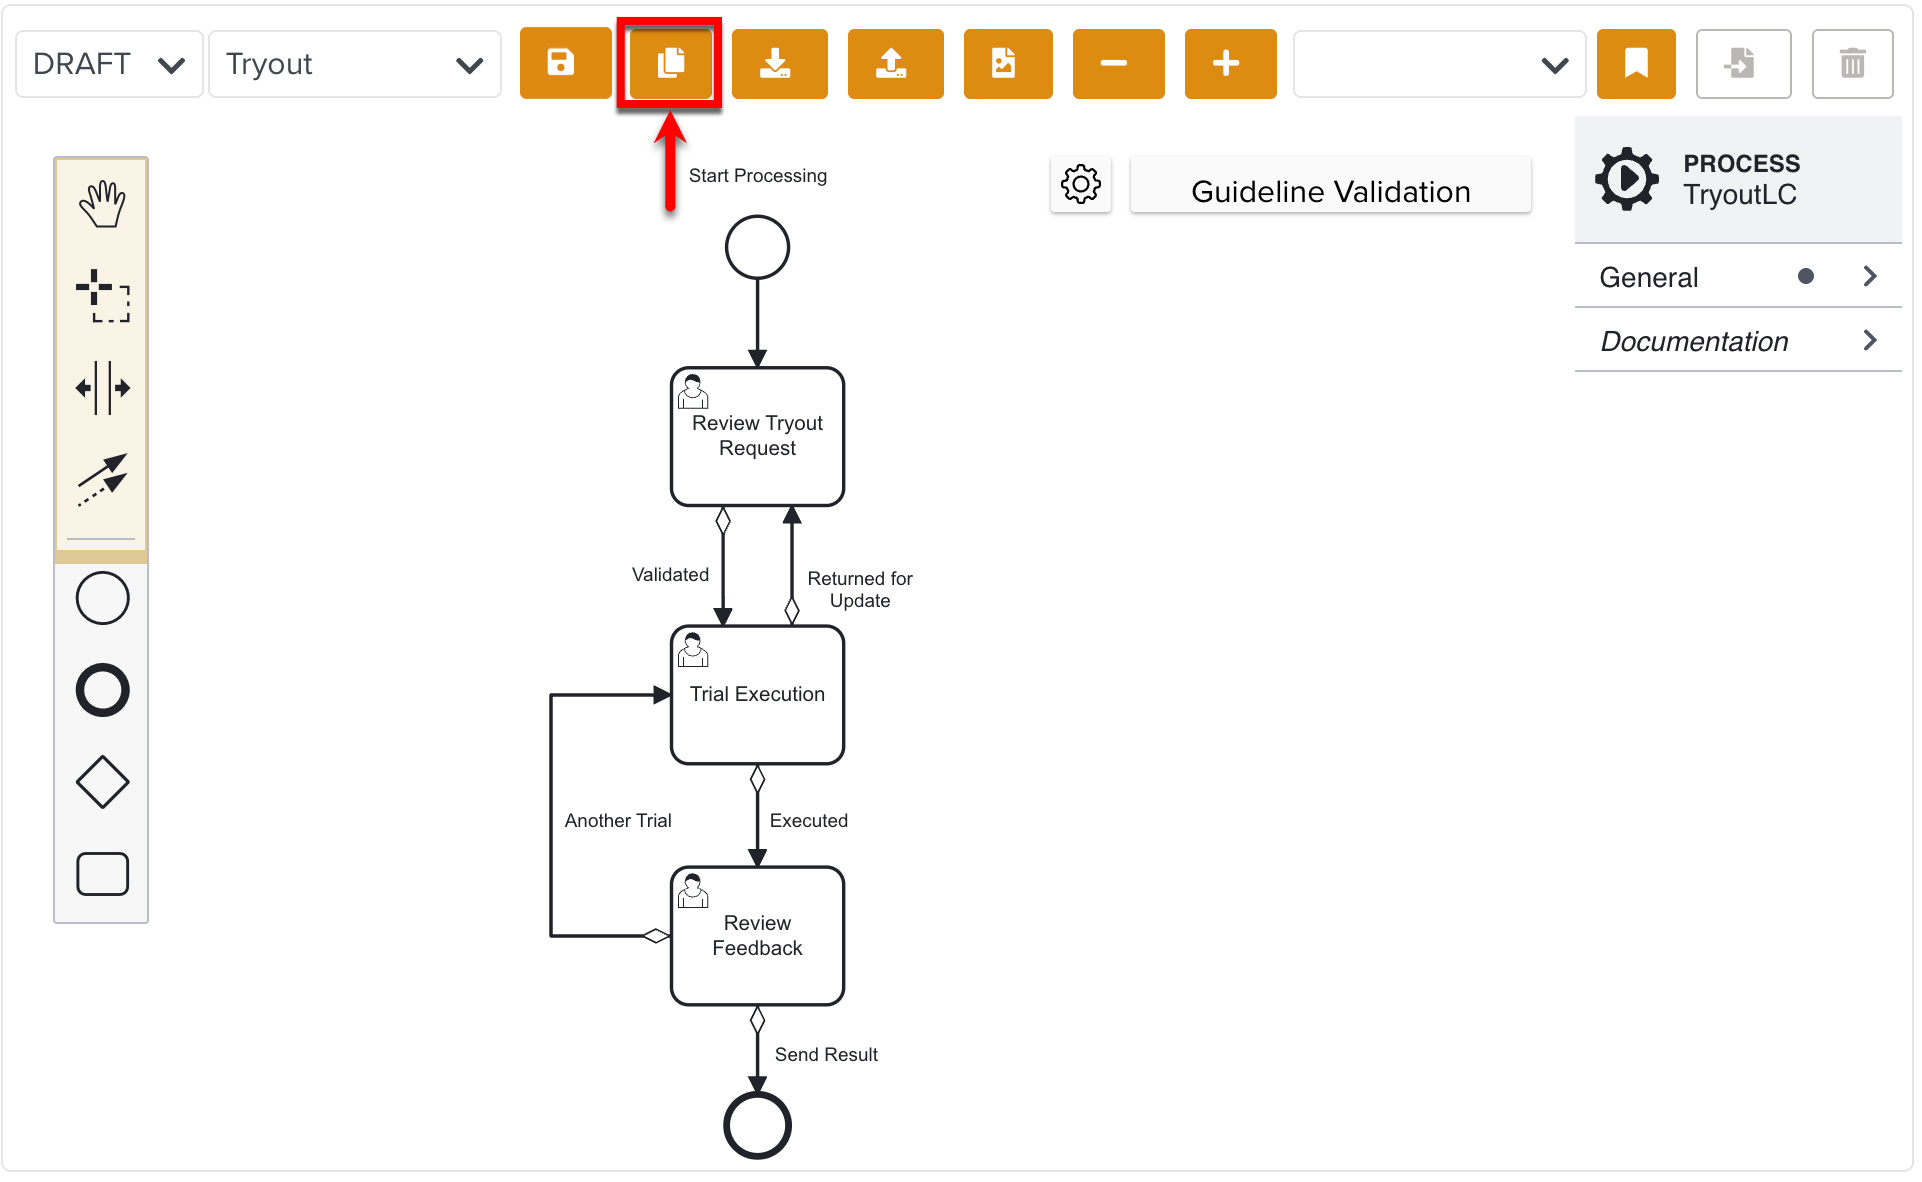
You have successfully published the Tryout Lifecycle. Publishing the Lifecycle makes it available for use in the Tryout definition. This Lifecycle is then accessible as workflow within the system, enabling it to guide and structure the validation process accordingly.
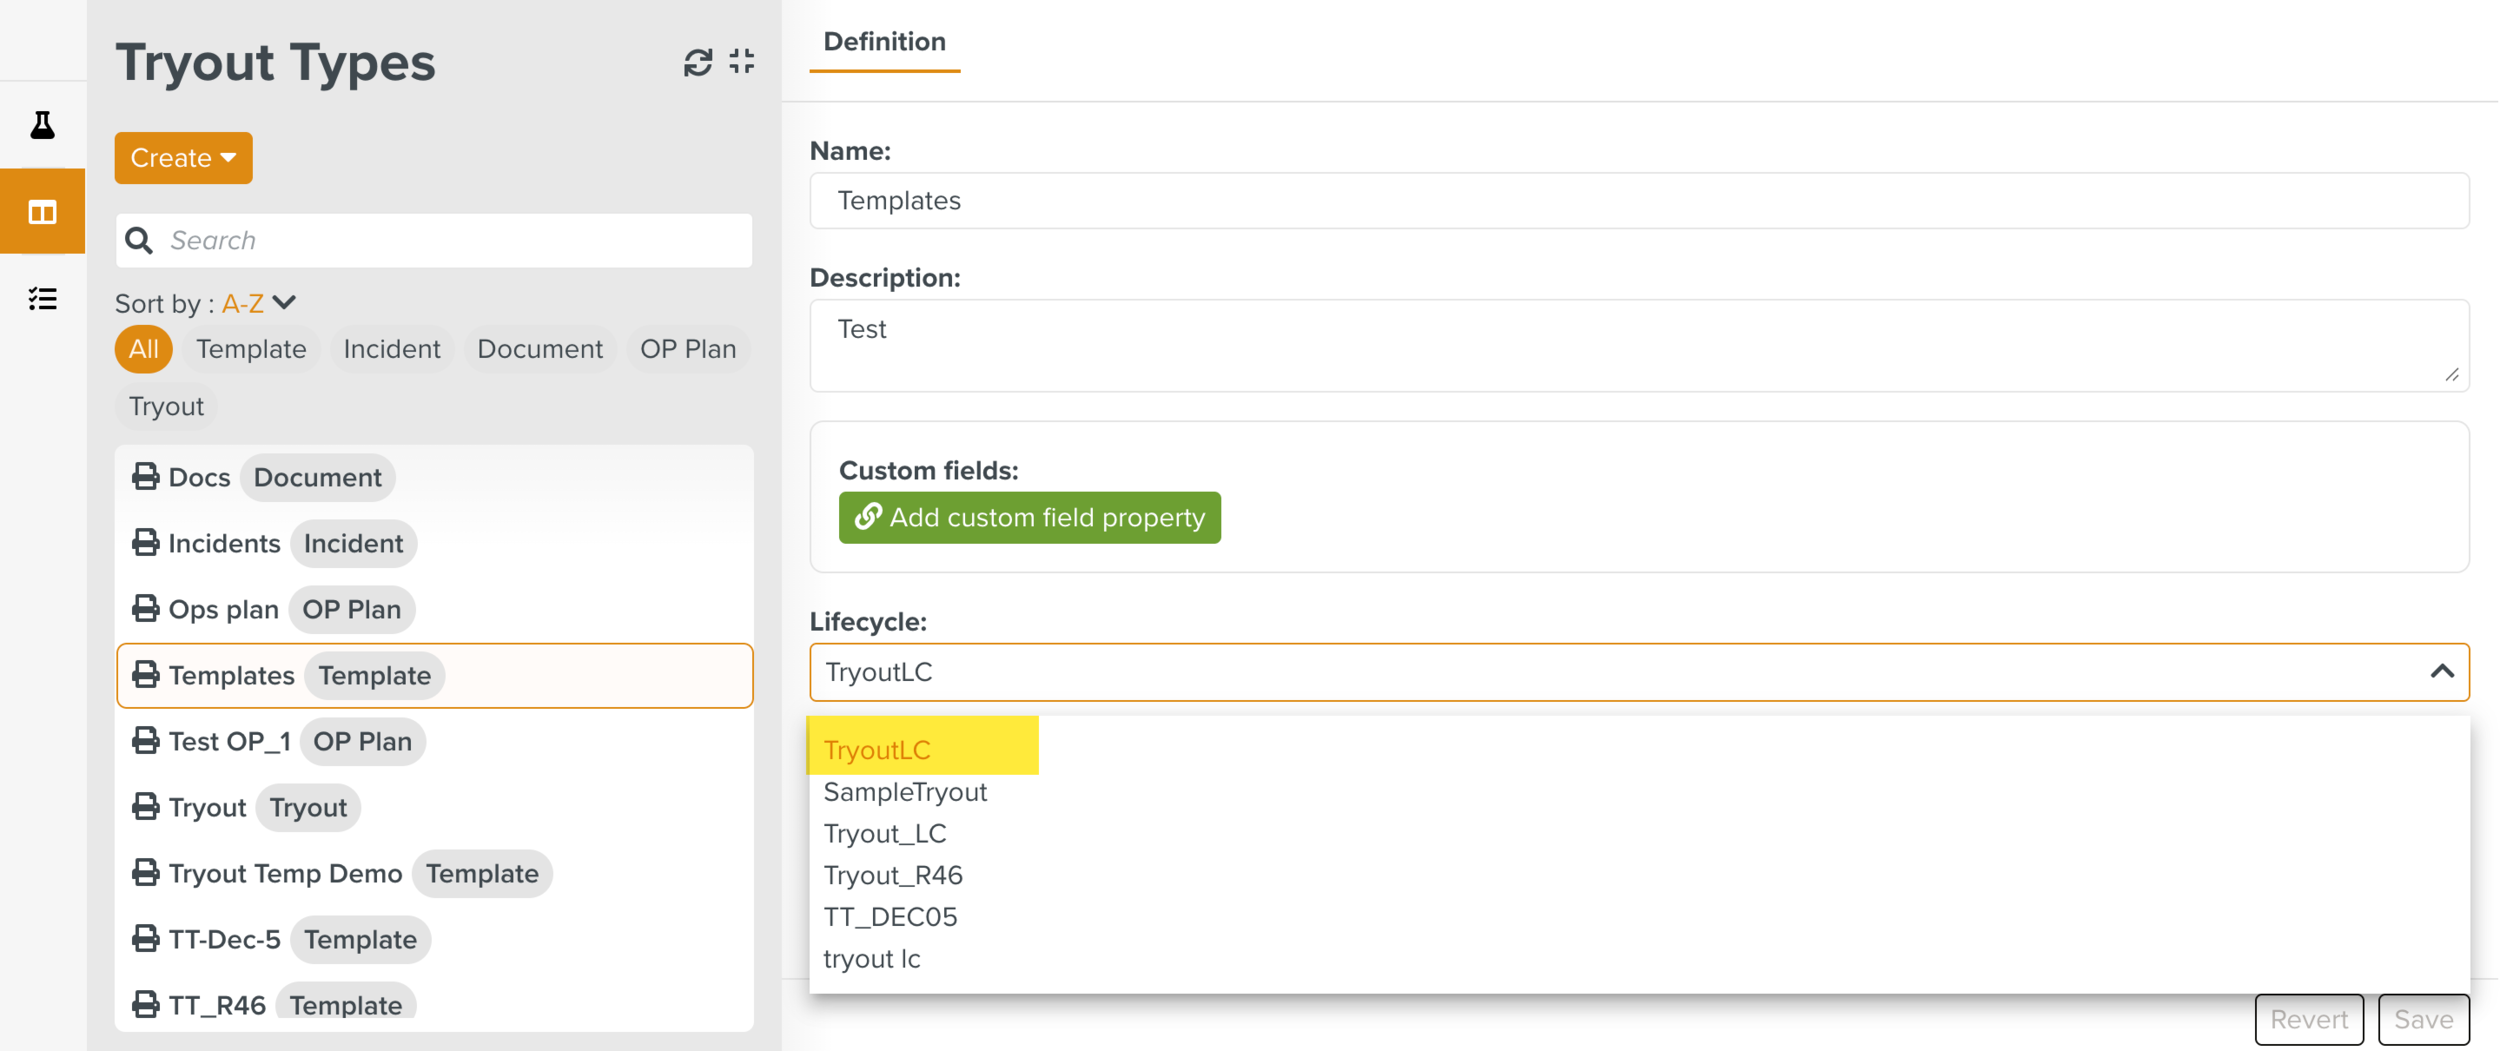
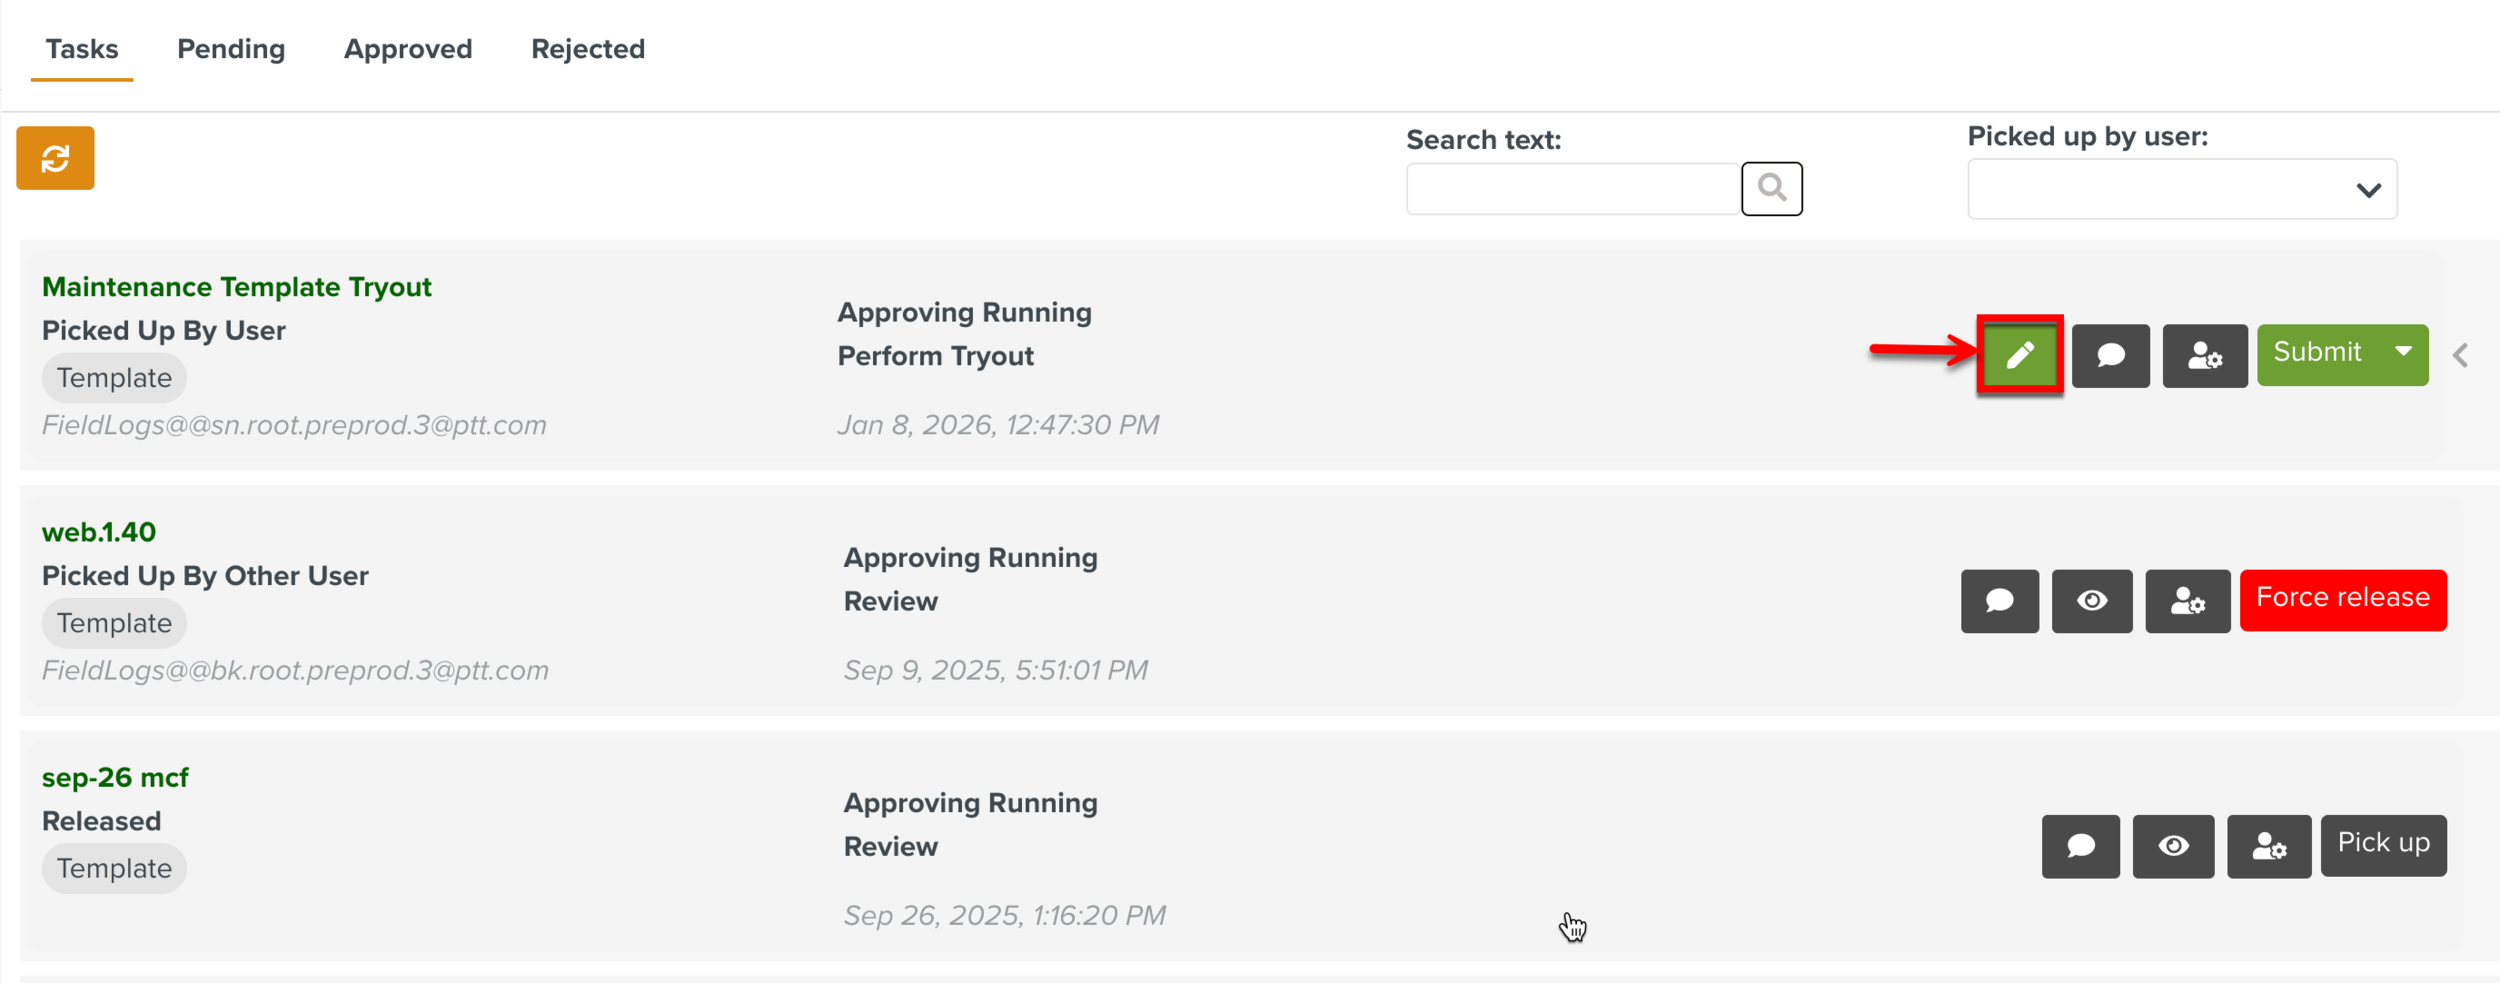
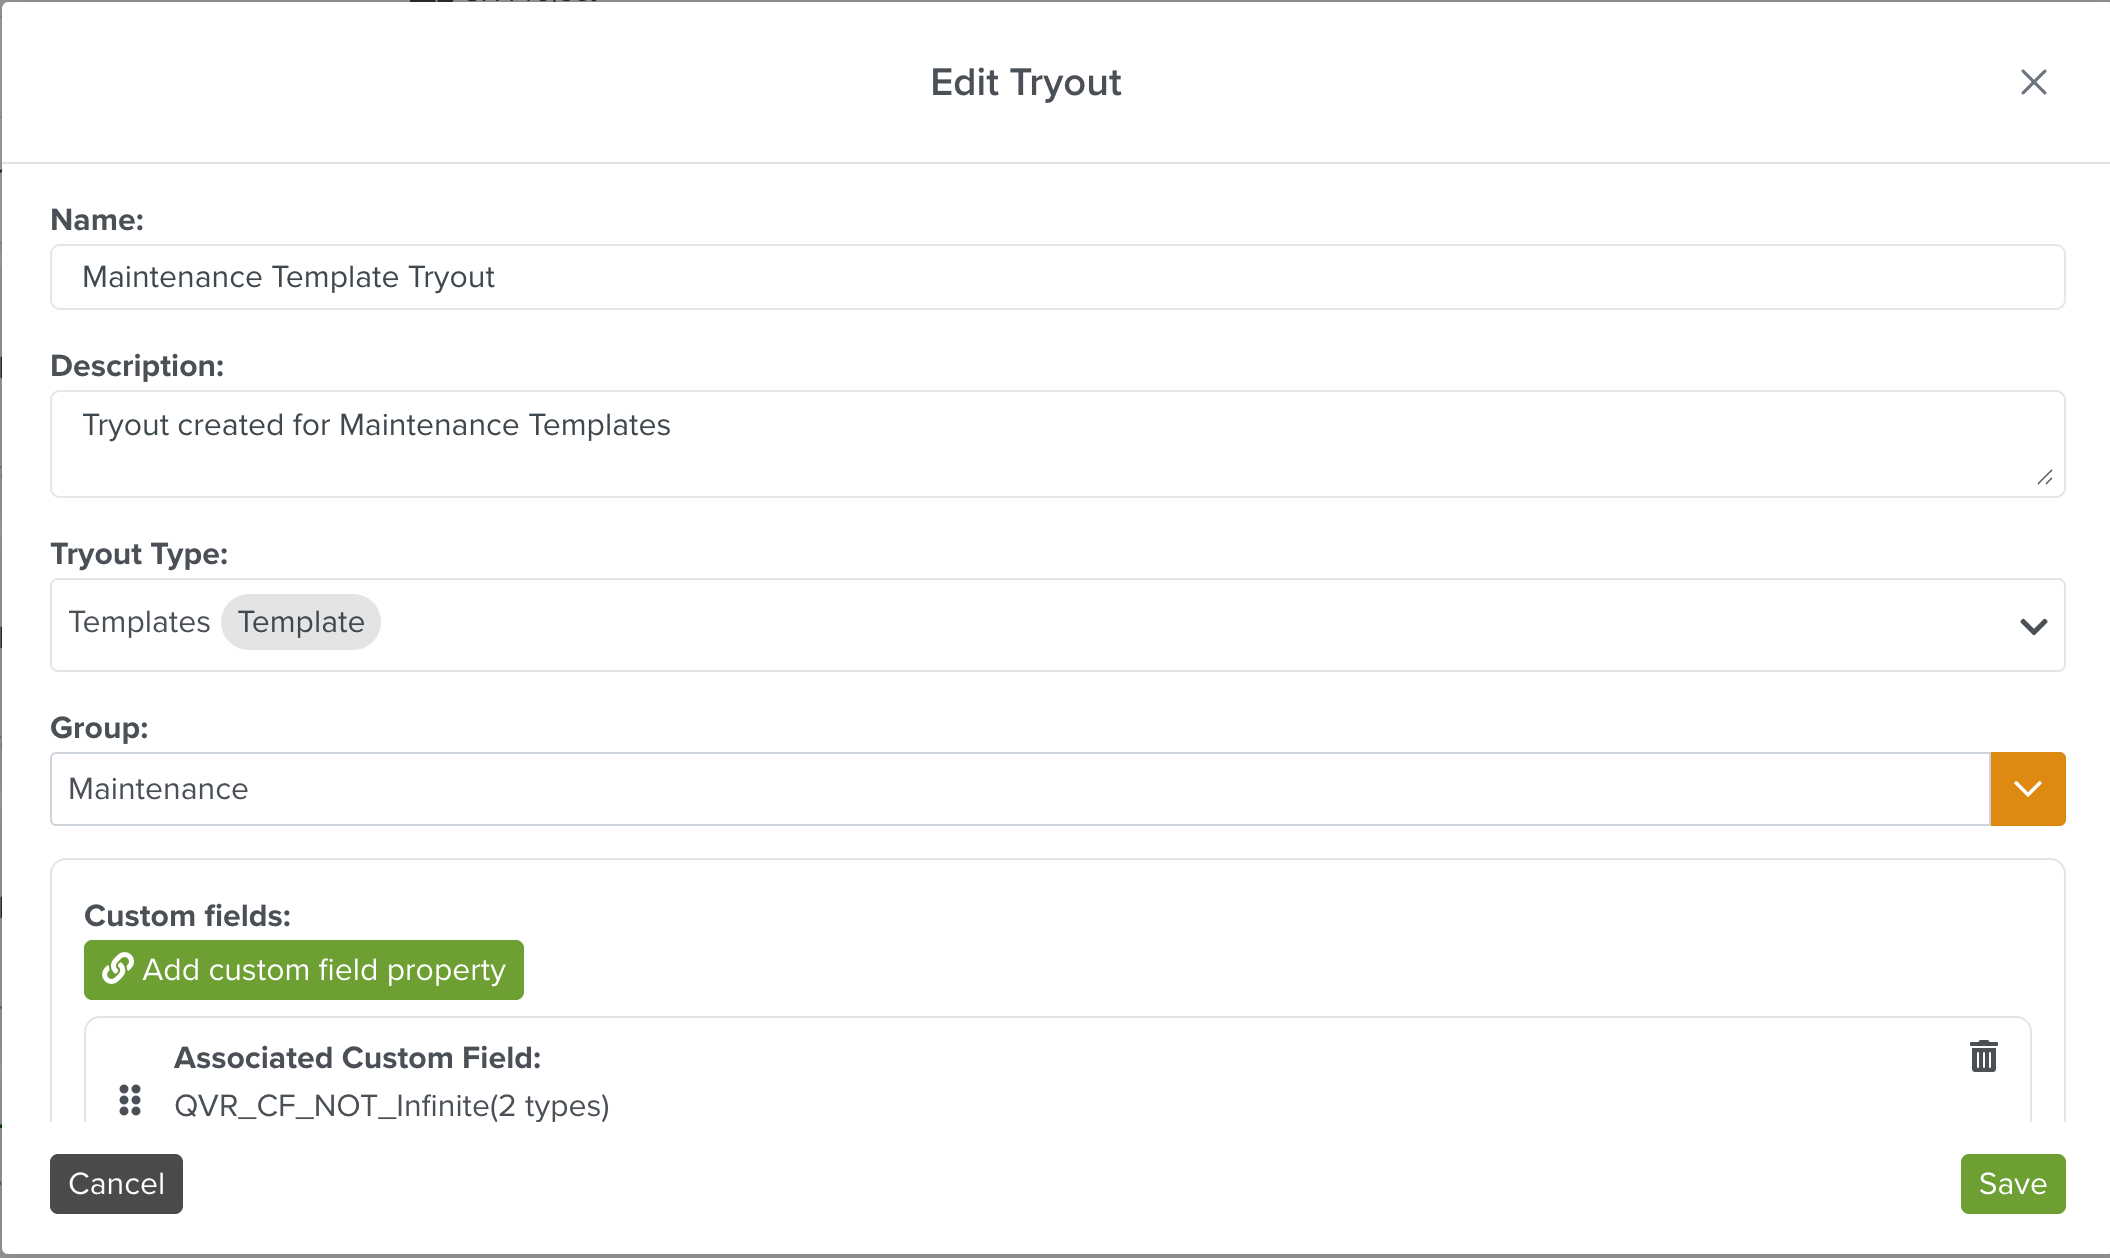
The created Tryout Types can then be added to the different Tryout definitions.
Note
There is a Guideline Validation feature, that checks the Custom Lifecycle dynamically as it is built and offers suggestions and highlights errors.