Creating a Lifecycle
The Lifecycle ensures that Templates can be published only when the specified industrial and regulatory procedures are followed.These procedures can include several reviews, conditions for approval, and rejection. Only Templates that successfully transition through the different stages in the selected Lifecycle get published for use in the Enterprise.
When a new Template version is initiated, it goes through the Lifecycle. The Lifecycle is embedded in the section  .
.
In the Enterprise section, you can create a Lifecycle that defines the steps involved in the Template publication process.
A Lifecycle can have some or all of the following steps:
Initiate
Edit
Review
Approve
Publish
and are required steps.
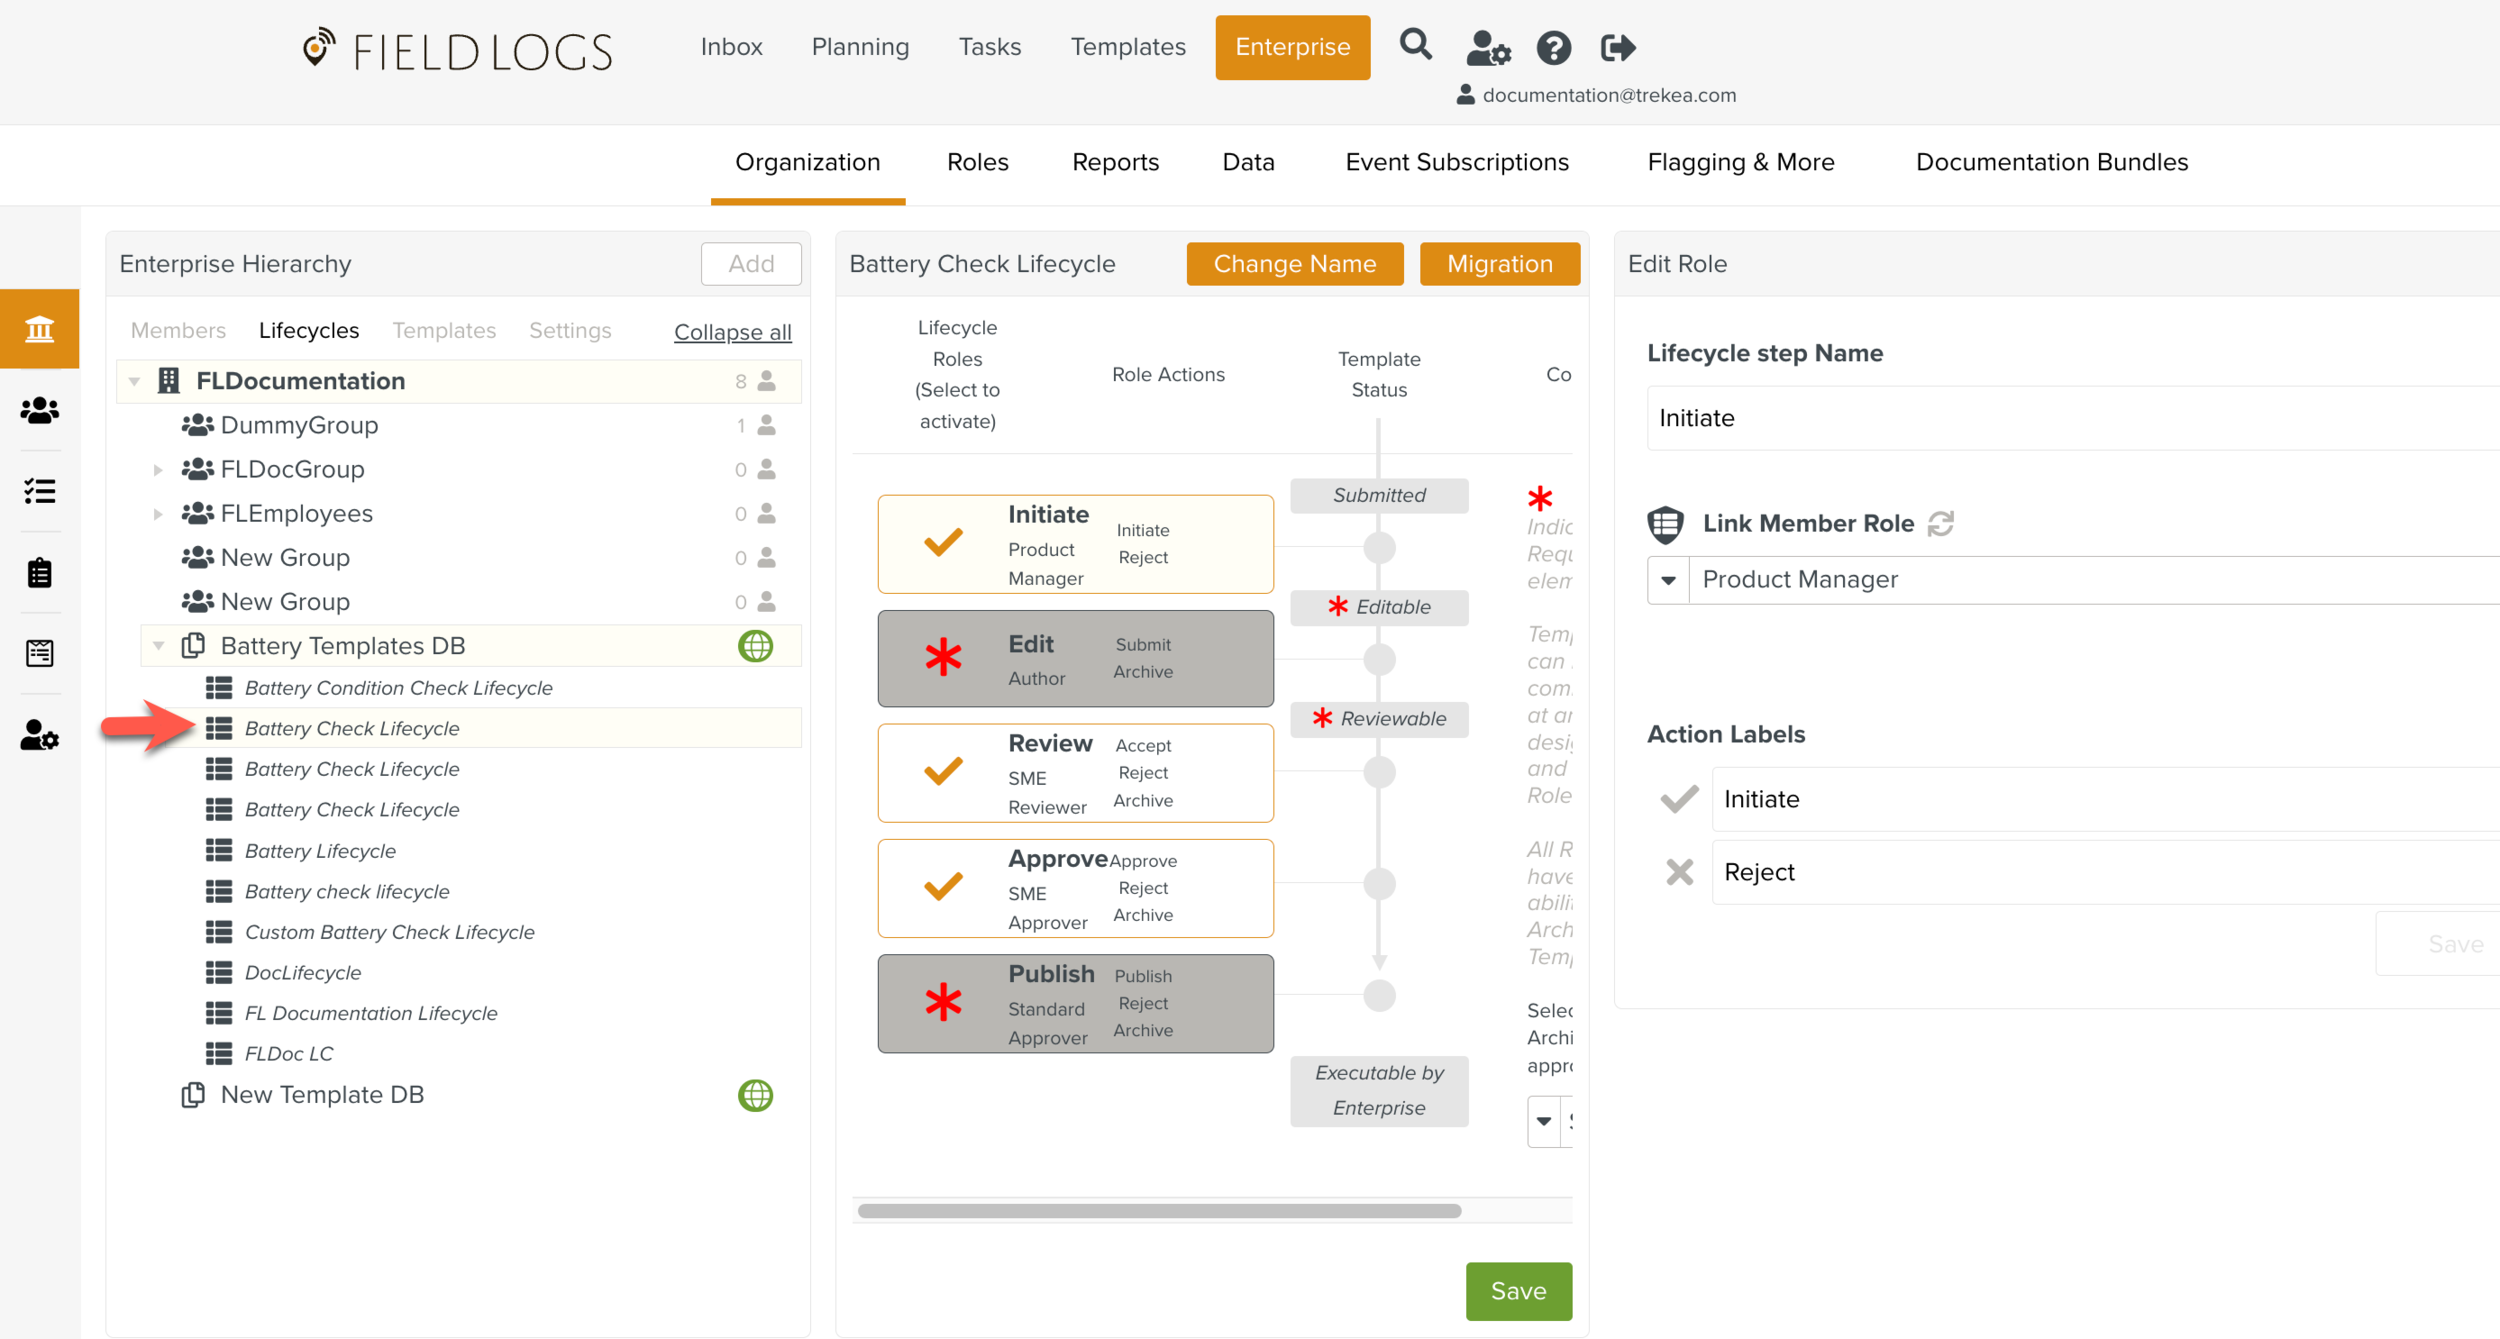
While creating the Lifecycle, you can associate a publication role to each step in the Lifecycle. During Template publication, the publication task moves to the Inbox of the user with the corresponding role. Once the Publication is picked up, it is locked and not available to anyone else with that role. The user can then perform the necessary action as defined on the action labels of the particular step in the Lifecycle.
You can modify an existing Lifecycle at any time. You can modify the Lifecycle name and include/exclude the Lifecycle steps. For each Lifecycle step, you can modify the publication role, the Lifecycle step name, and the action labels.
Note
Changes made to an existing Lifecycle do not impact the Templates that are already in publication. The modified Lifecycle comes into effect when a new version of the Template is submitted to the Enterprise for publication.
The following sections explain how to:
Create a Lifecycle
Note
To view the Enterprise menu, the user must be associated with a Security Role that has the appropriate access rights.
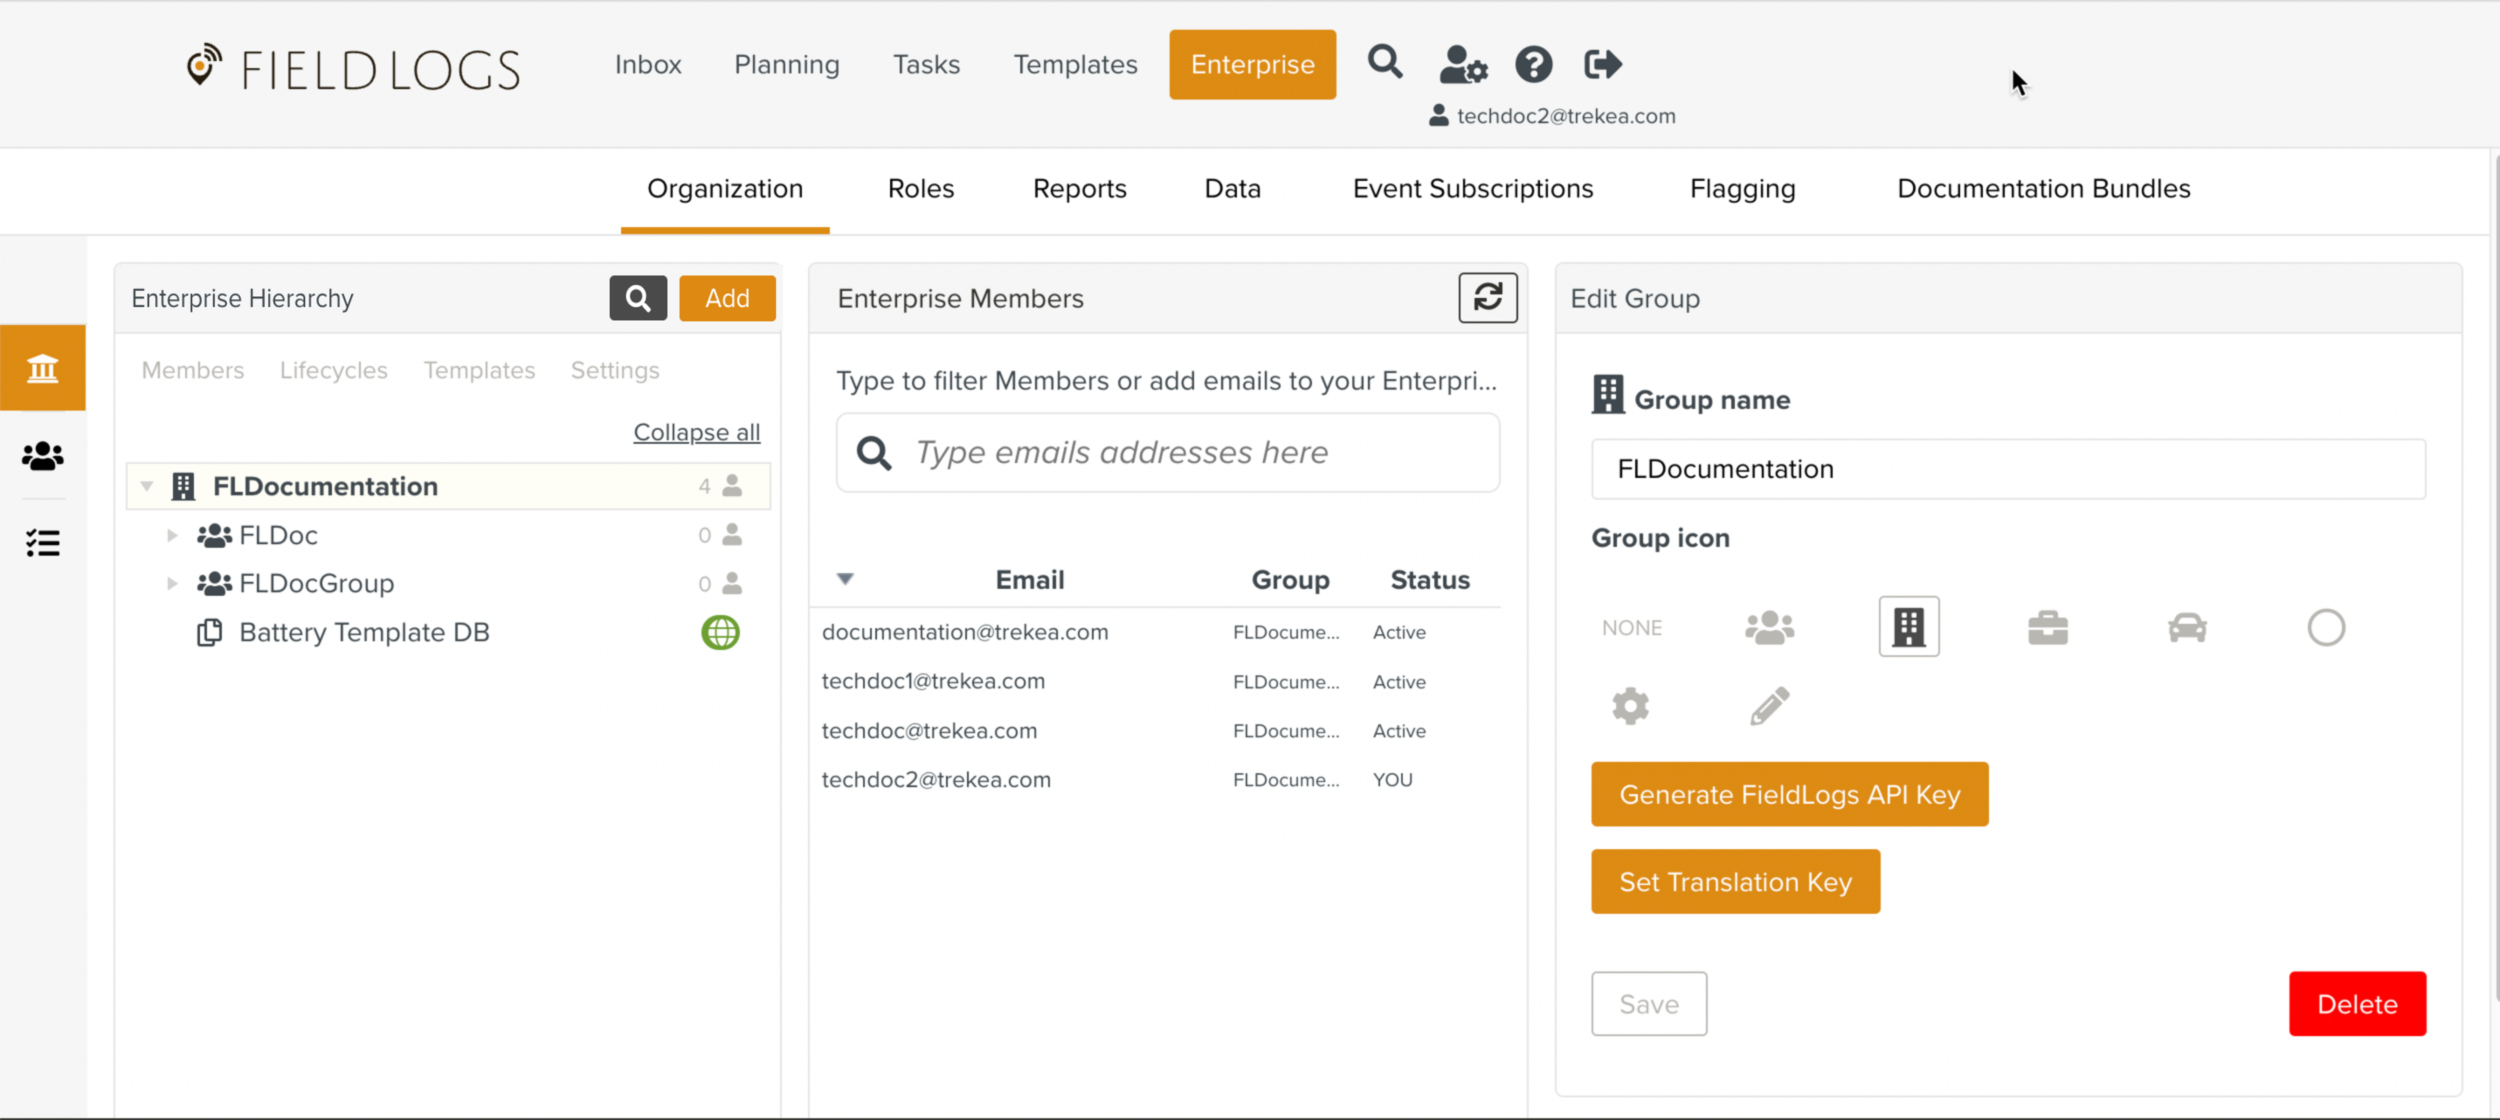
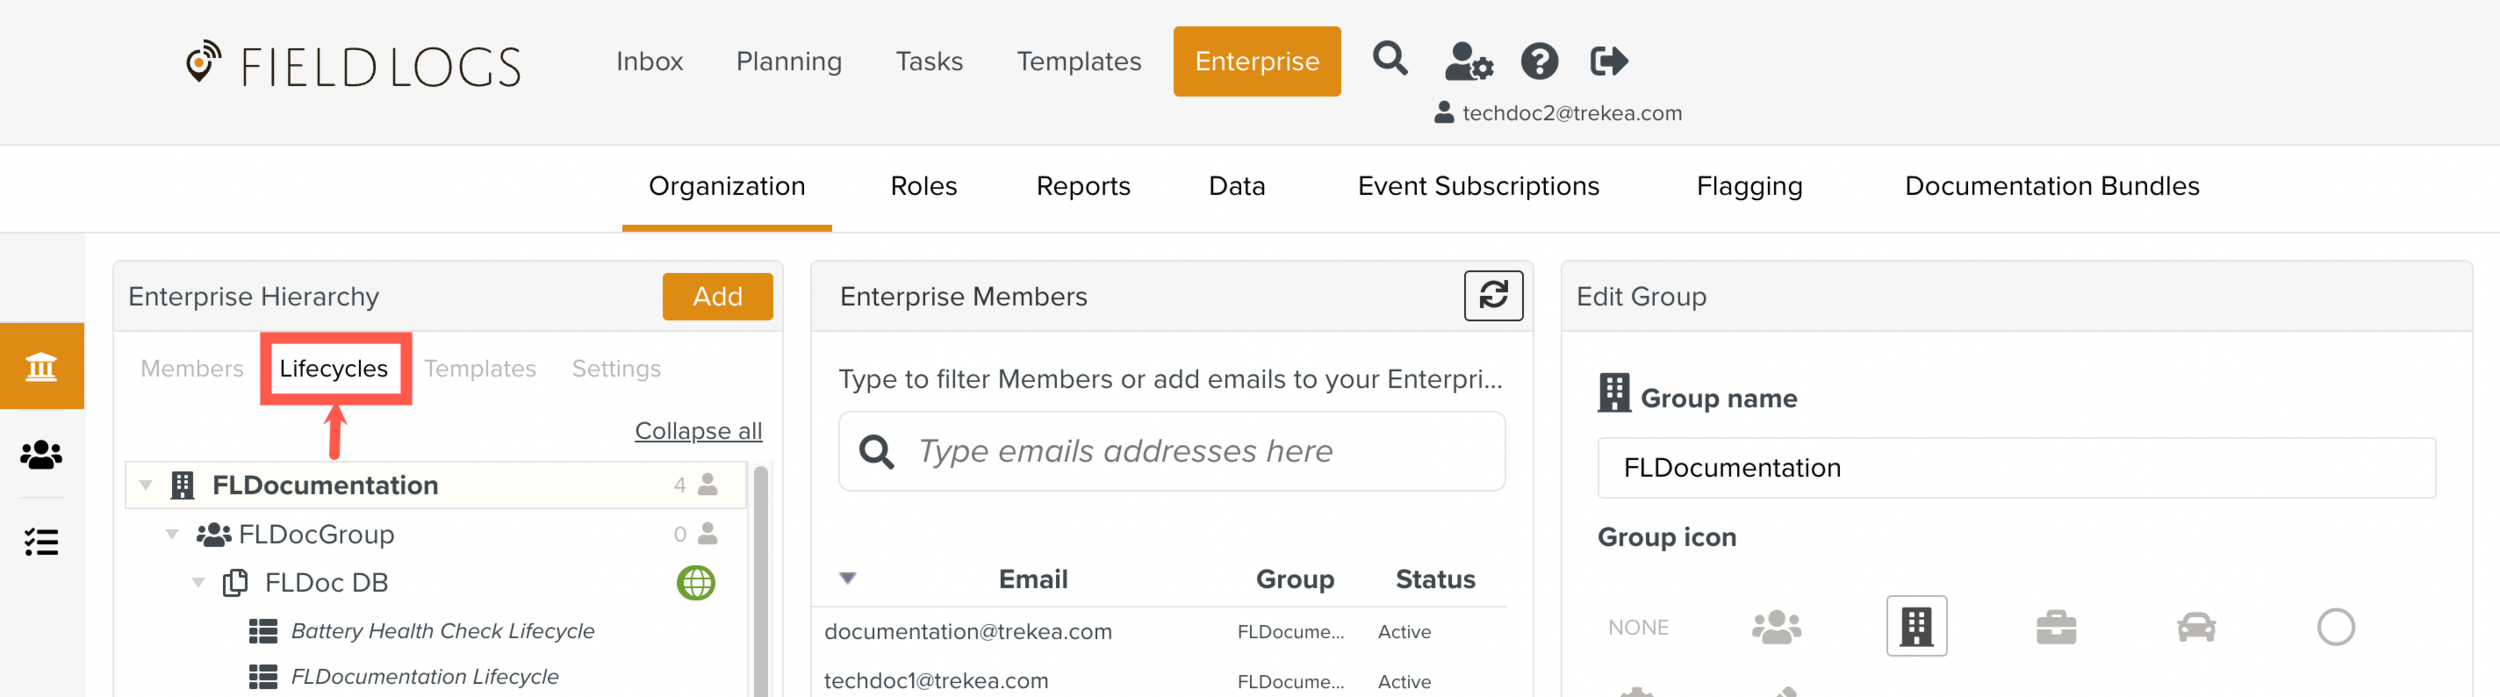
On the main menu, go to > > .

The Enterprise Hierarchy page is displayed.
Select the Template DB in which you want to add the Lifecycle. Template DB is a repository of all the Published Templates. More info on Template DB can be checked out here.
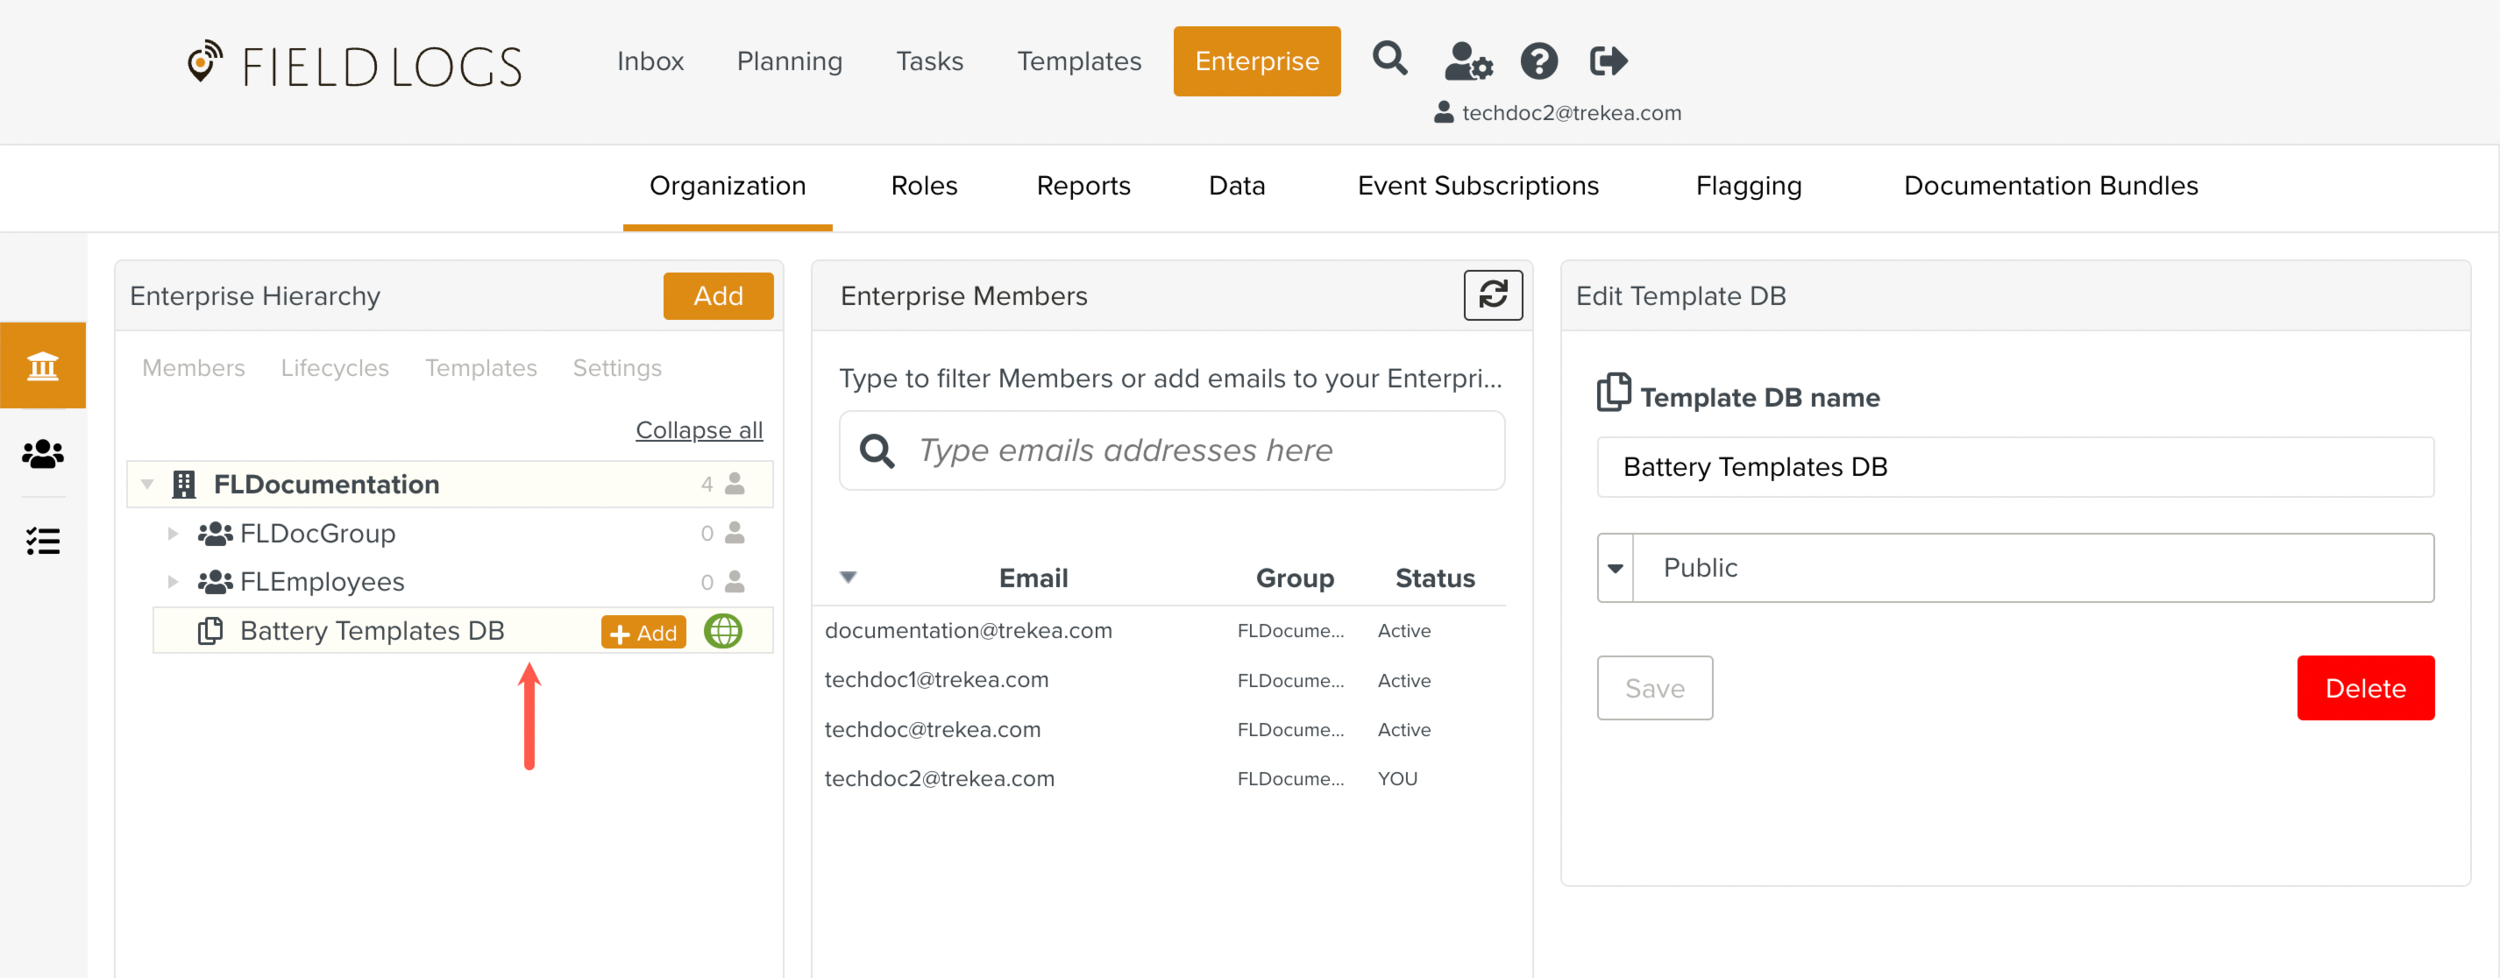
Click that appears next to the Template DB.
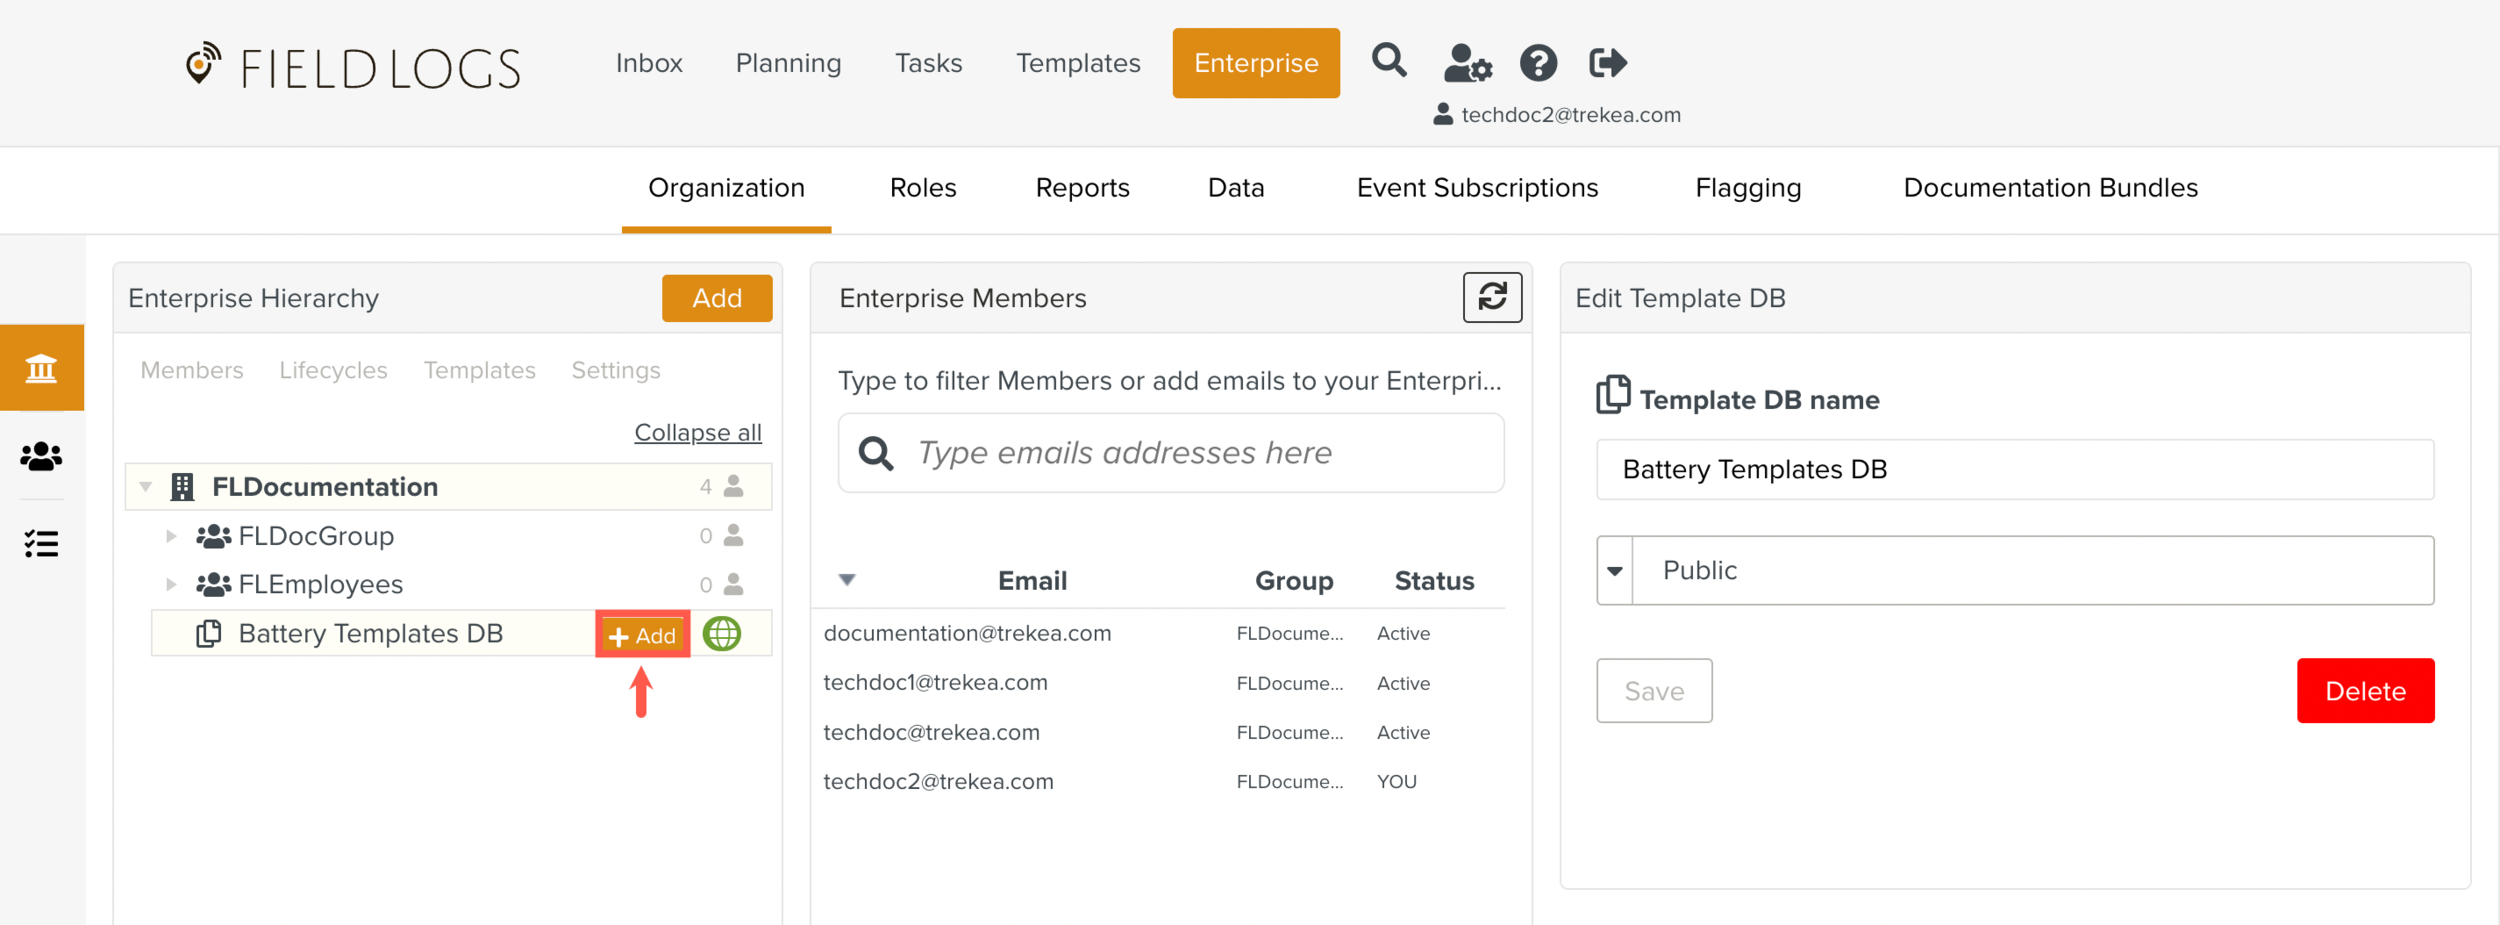
From the list that opens, select .
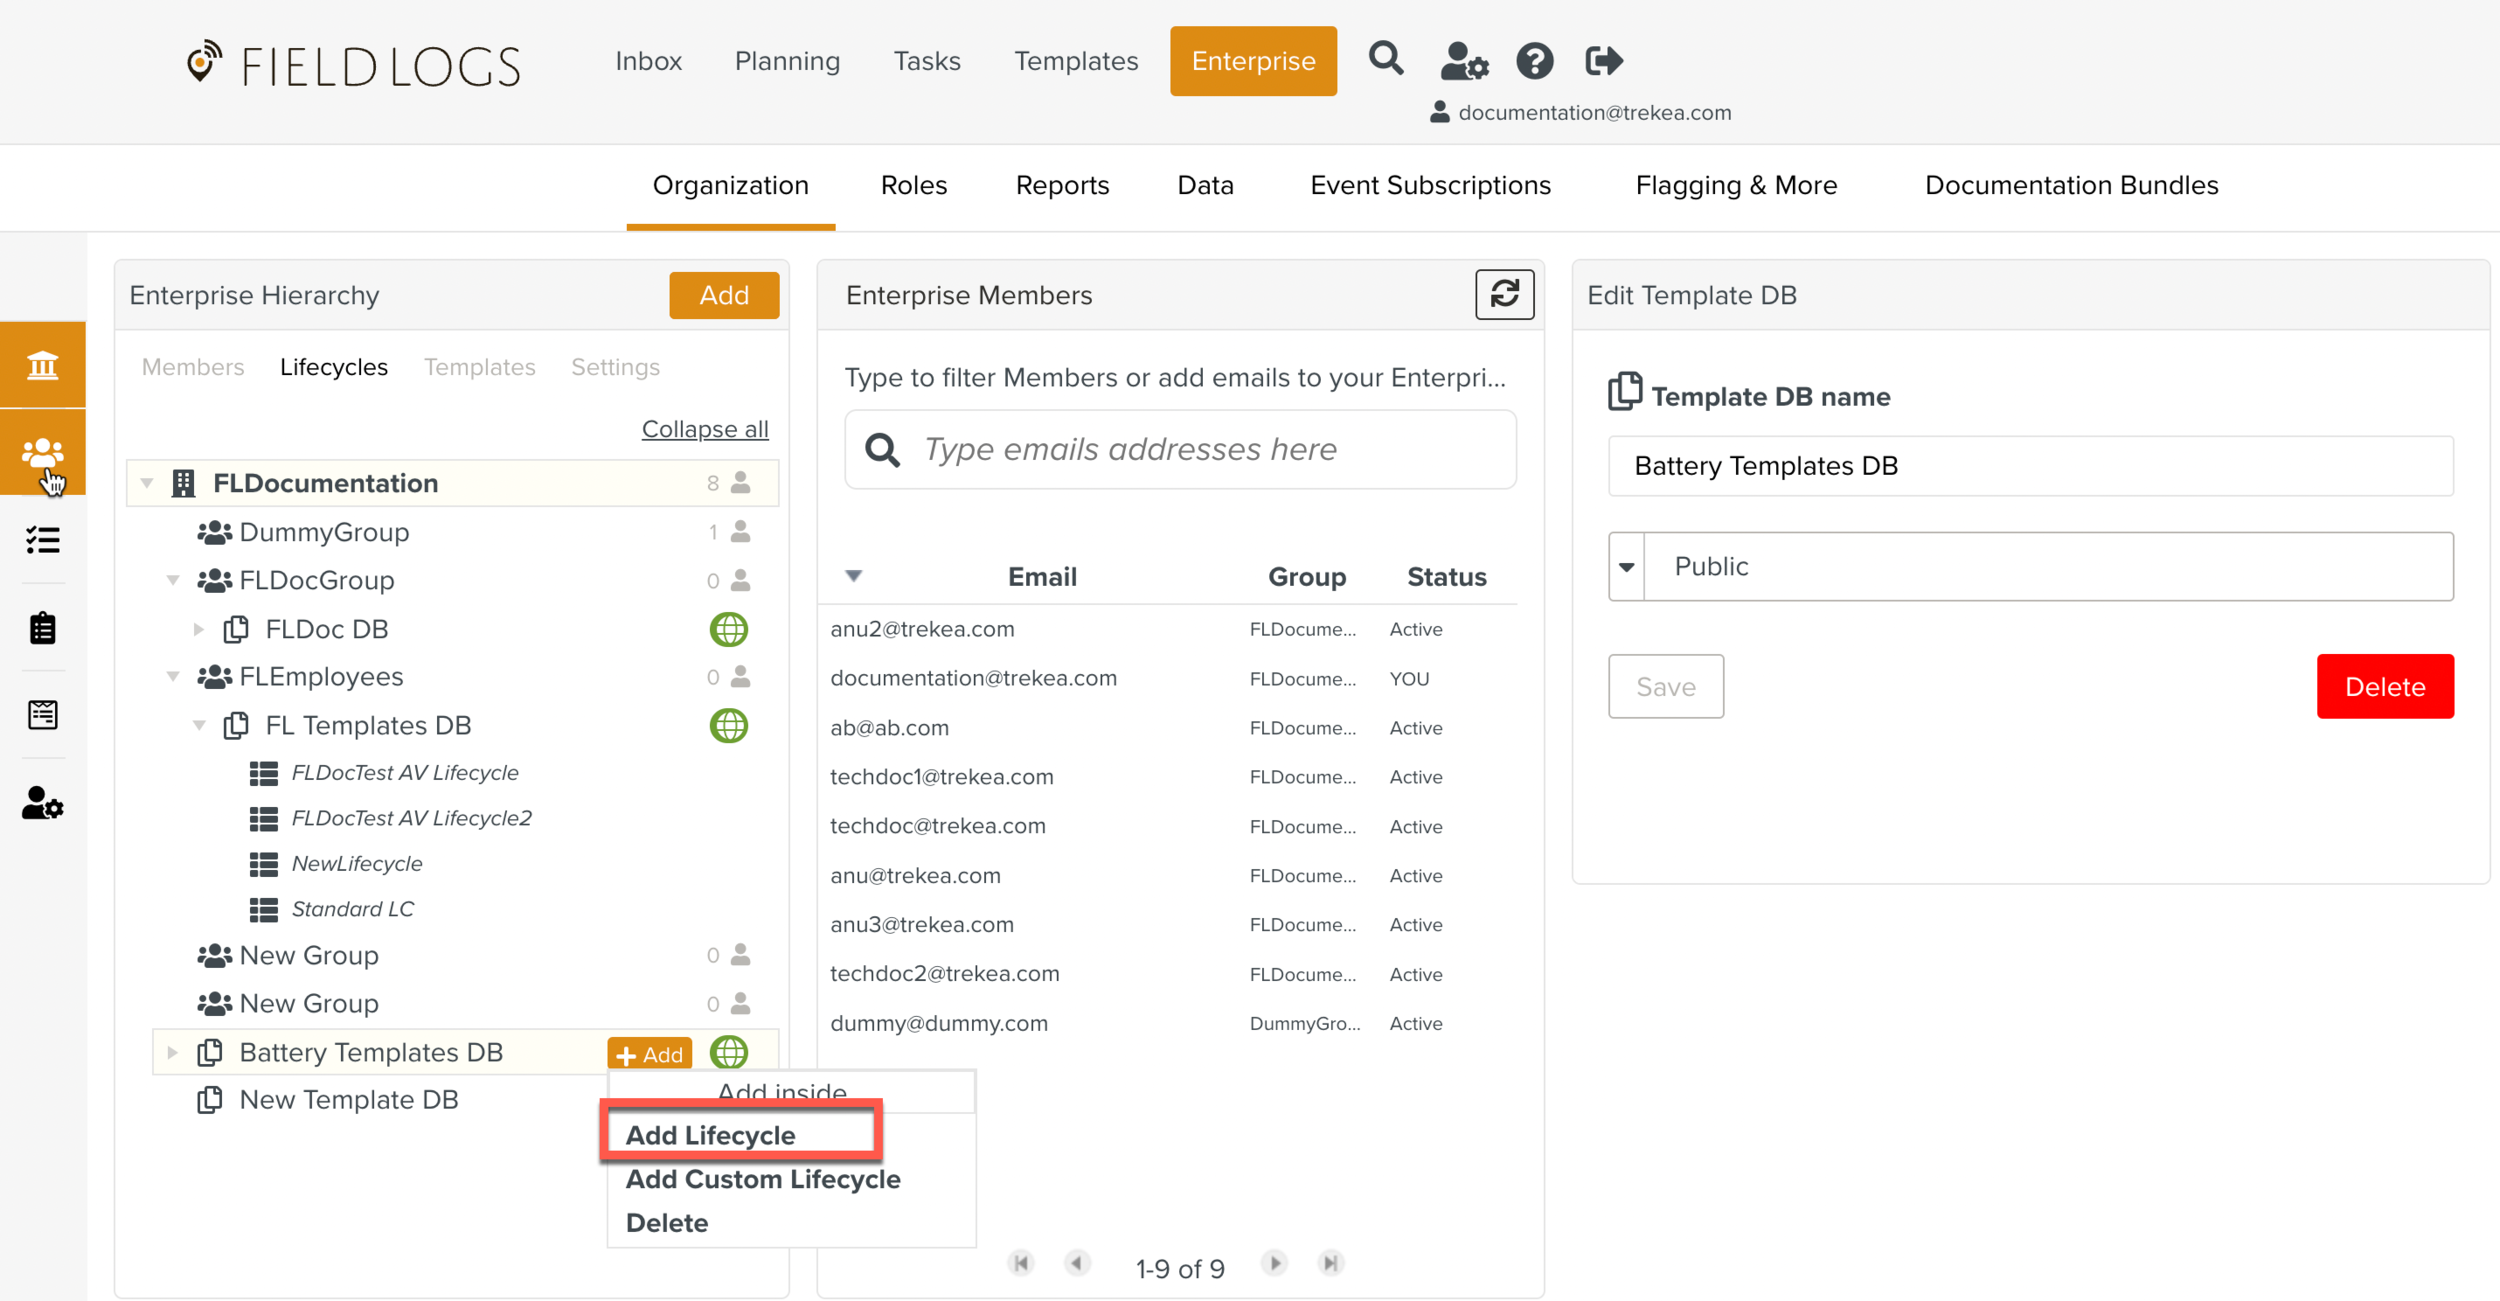
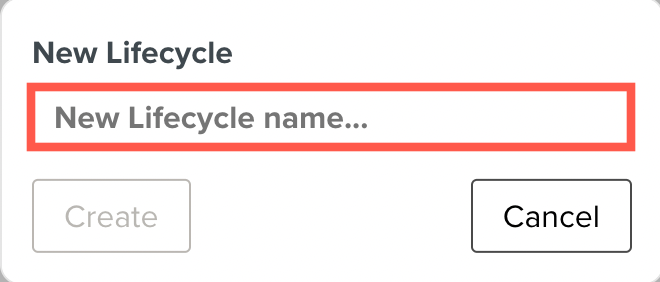
The window is displayed.
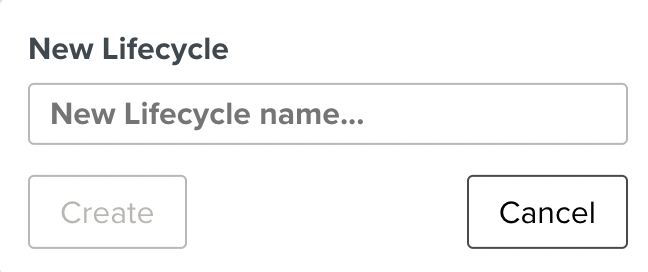
Enter the name of the Lifecycle.
Click .
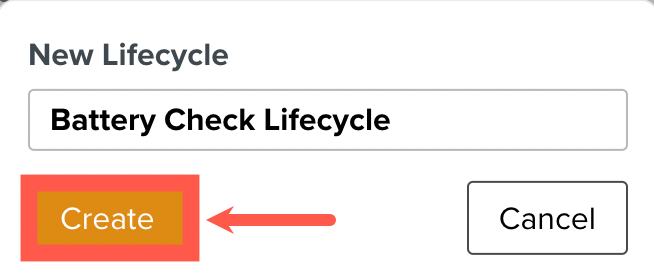
The new Lifecycle is added. Notice the details displayed on the right.
You can search through the list of Lifecycles.
After adding the Lifecycle, you can:
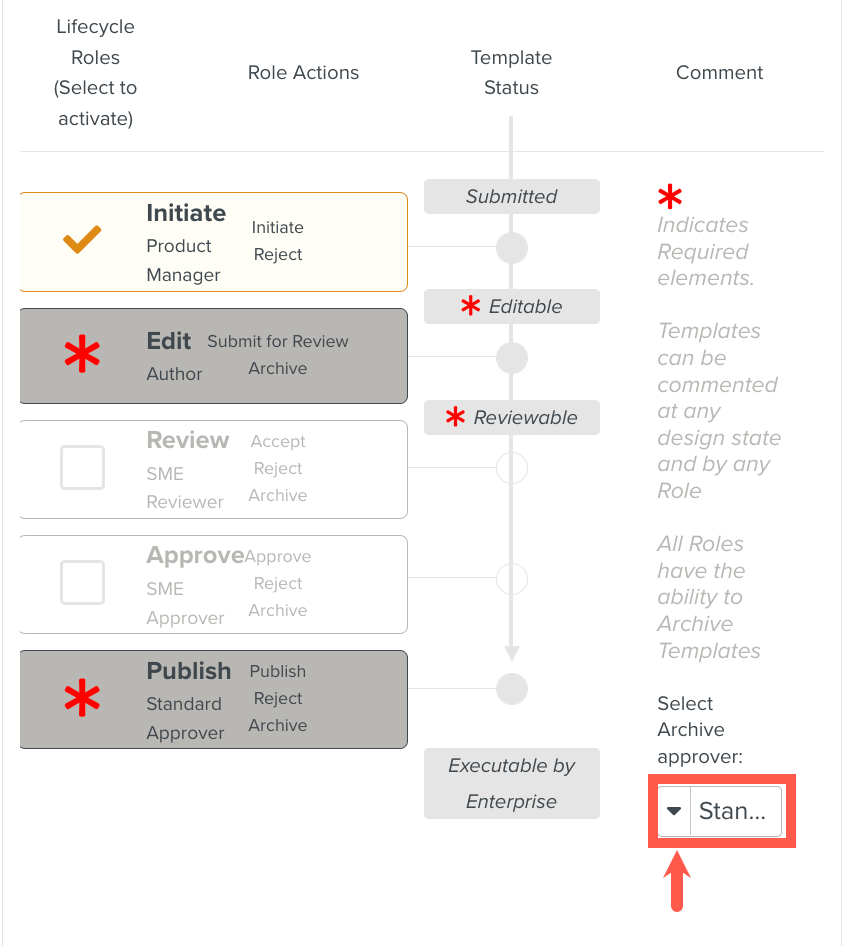
Include/ exclude Lifecycle steps
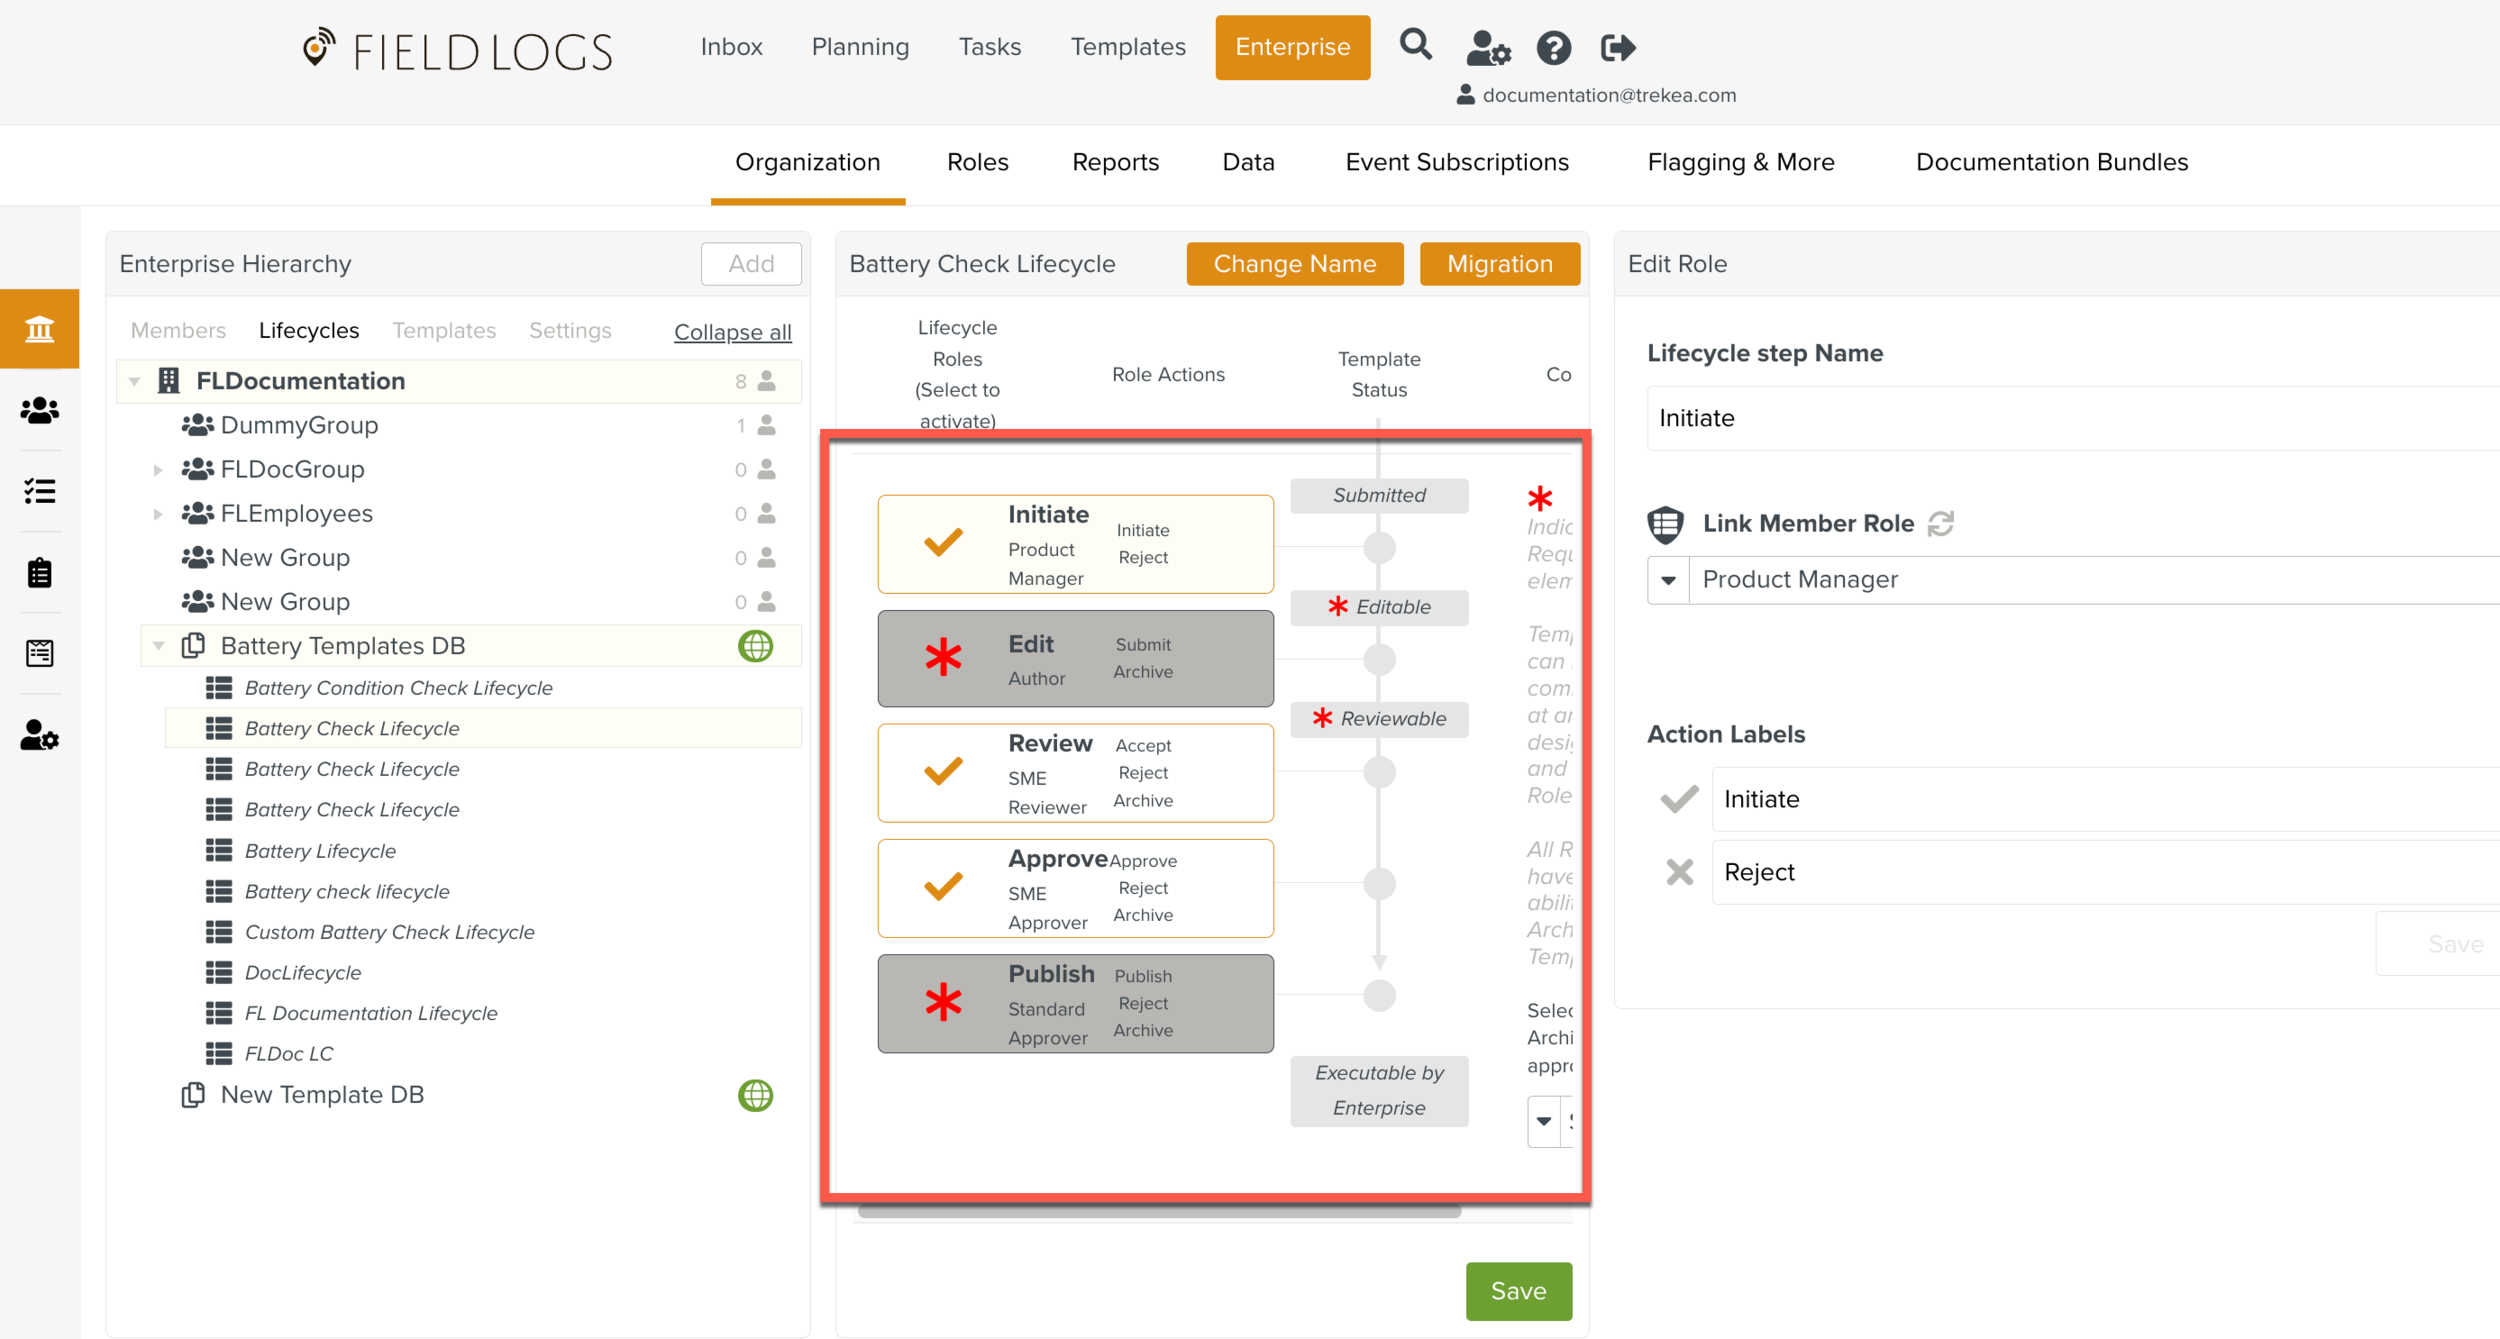
To include a step, select the corresponding checkbox. Clear the checkbox if you do not want the step to be a part of the Lifecycle.
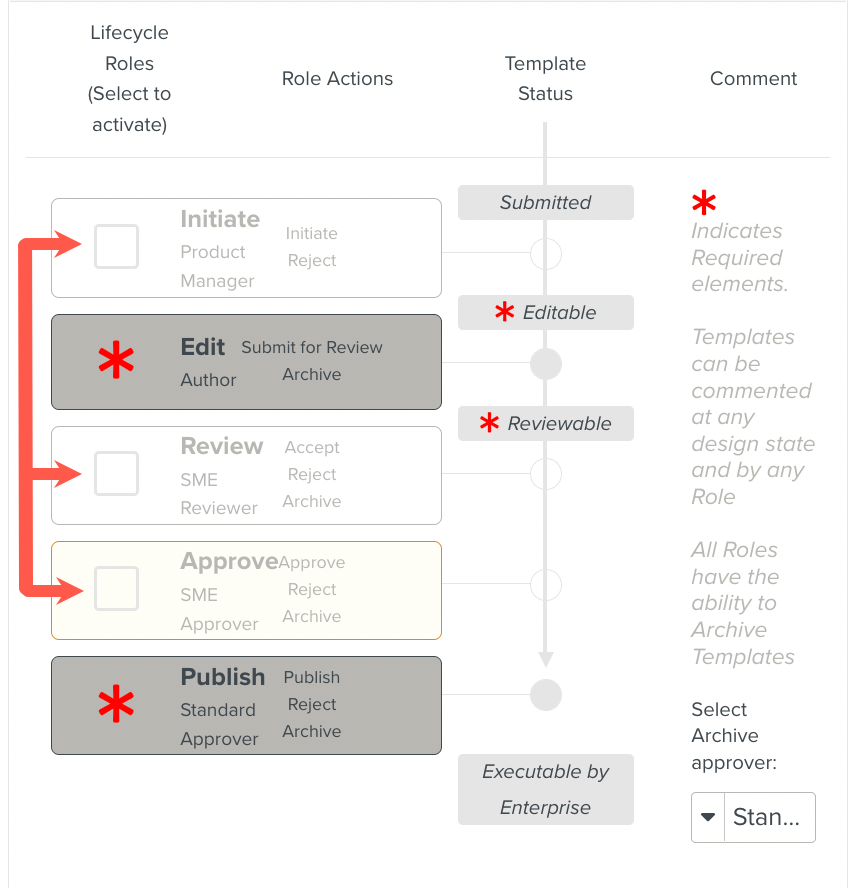
A selected step is denoted by
 . The and steps are required steps and indicated by
  .
.Select Archive approver
The option to archive the template is available in all the steps of the publication process. The archival action can be performed by all users.
If needed, you can define a role for the archival action from the dropdown list.
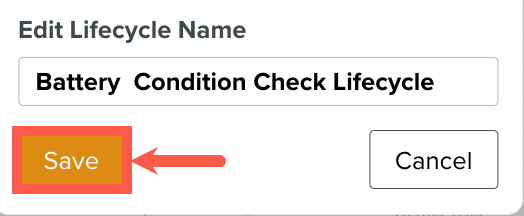
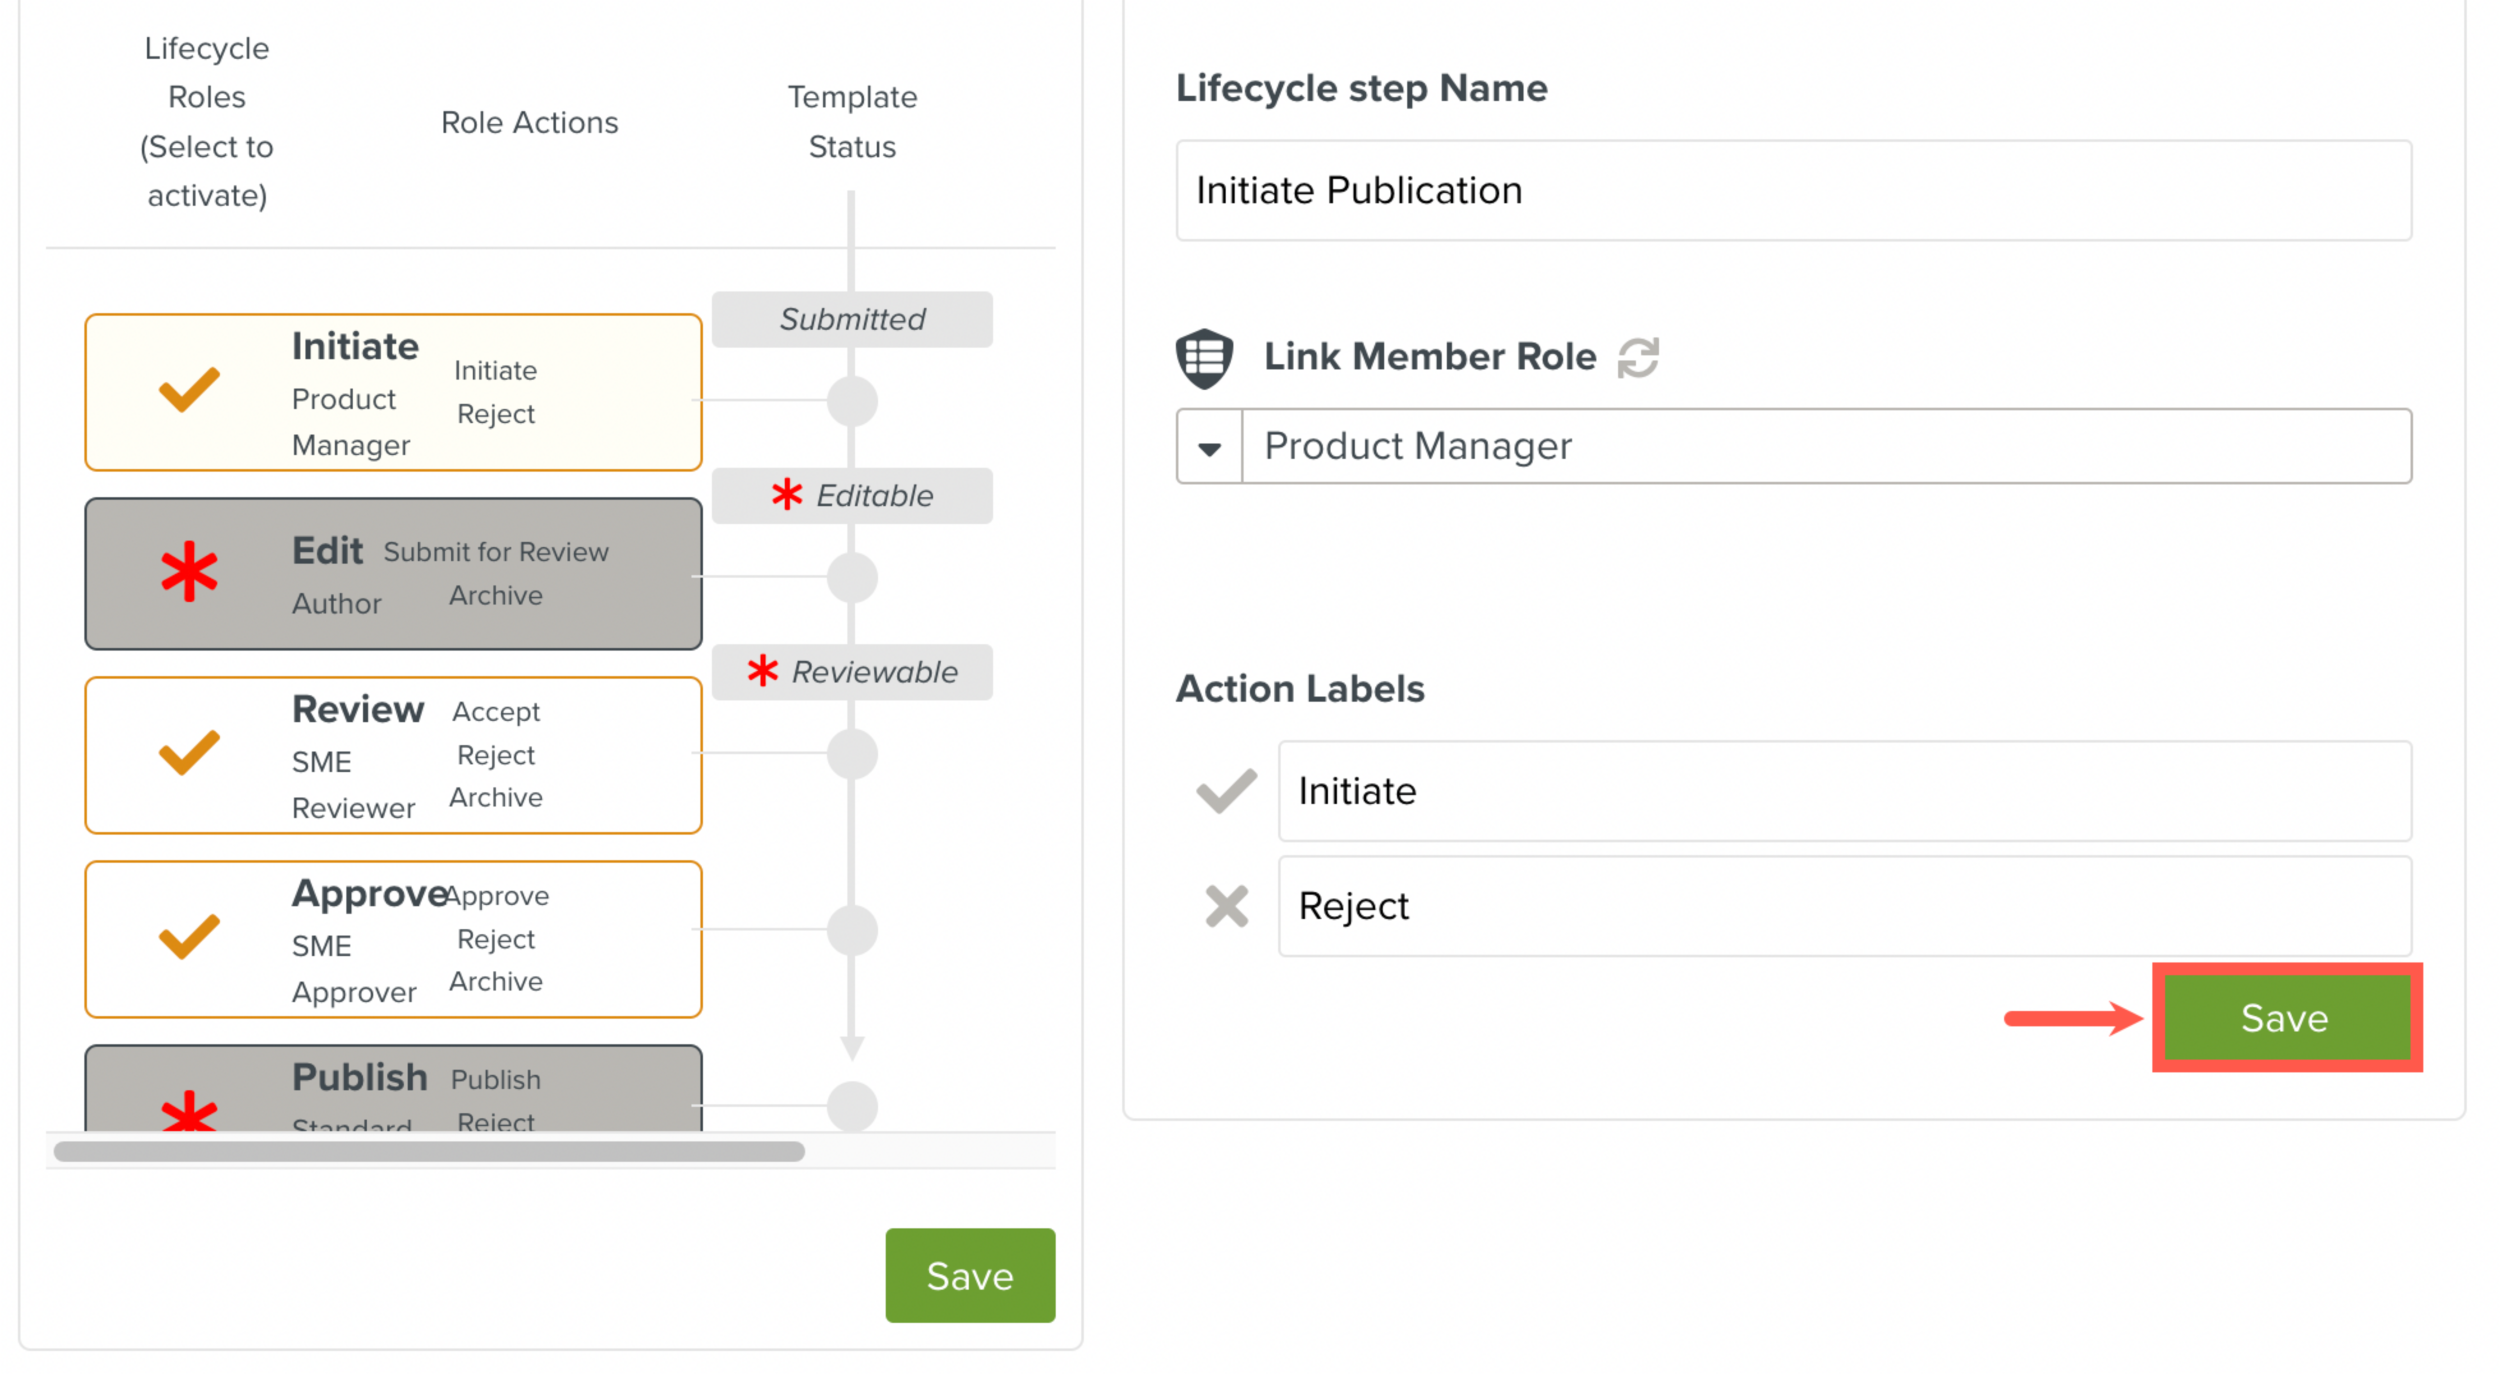
Modify the Lifecycle name
Click .
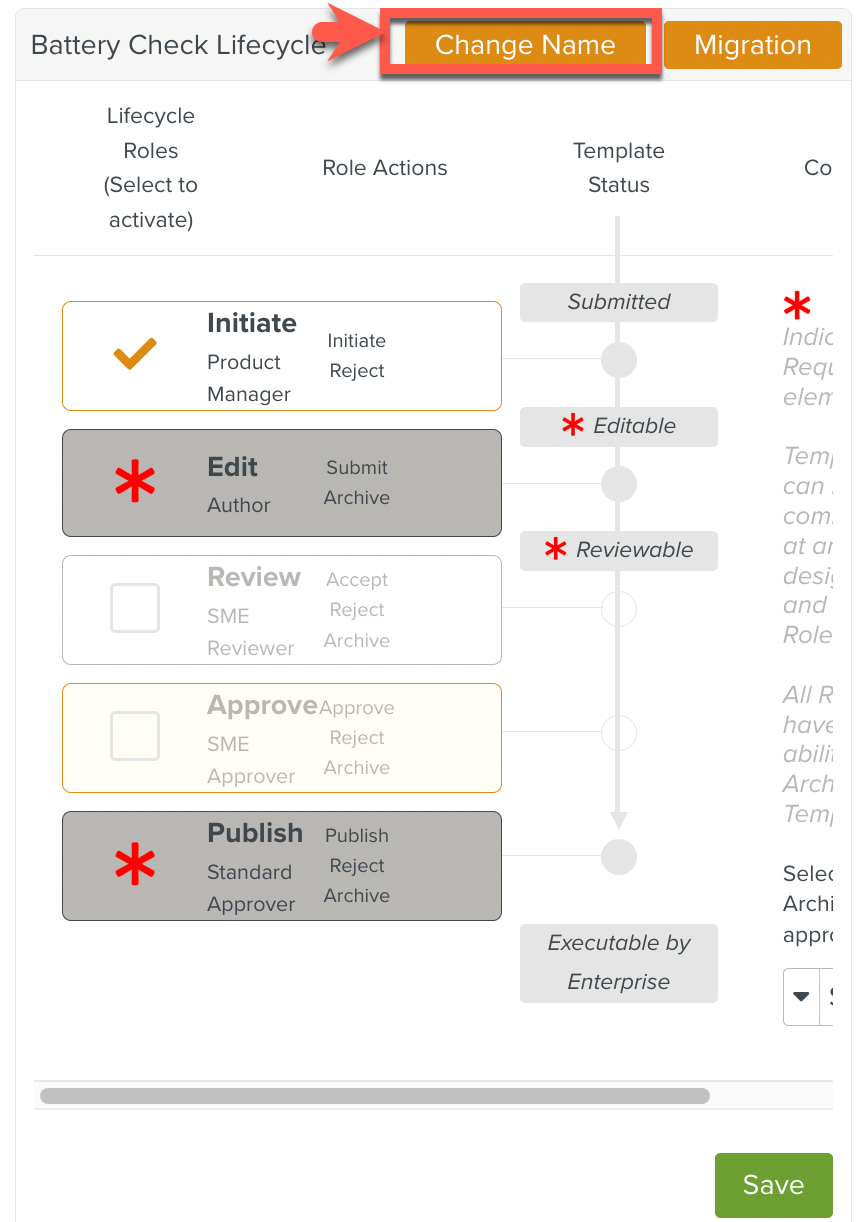
The window appears.
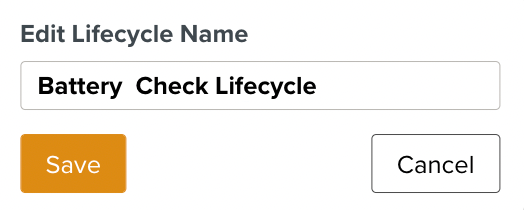
Modify the name as needed and then click .
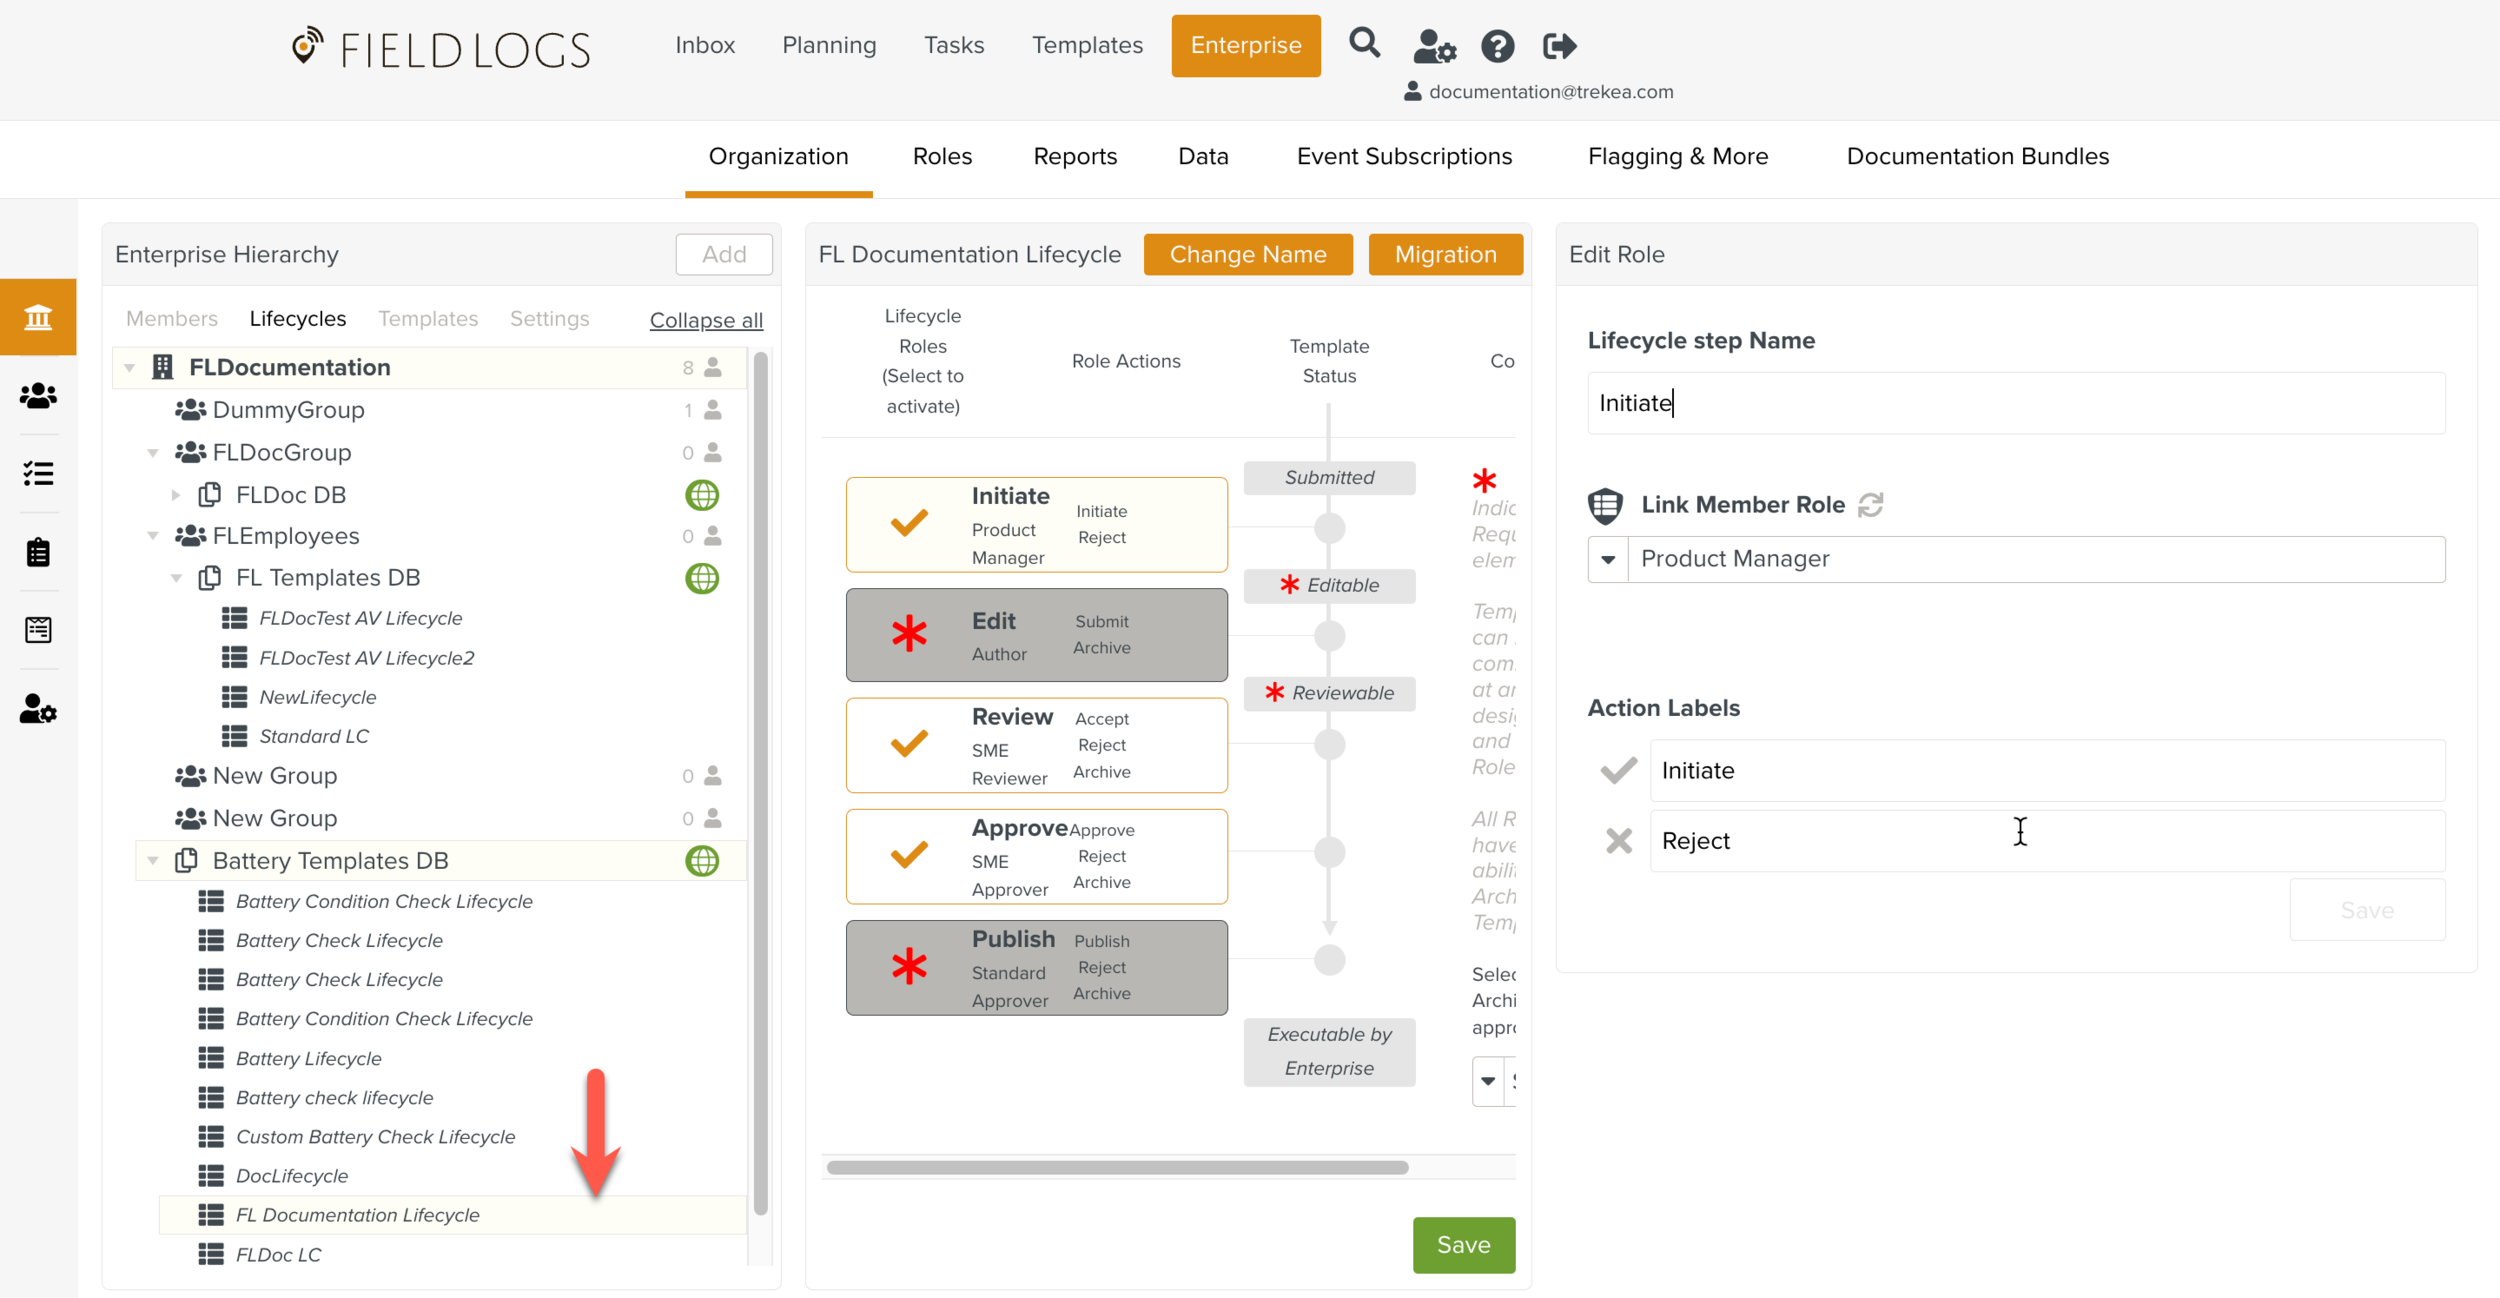
Modify the Lifecycle step name
Select the Lifecycle step.
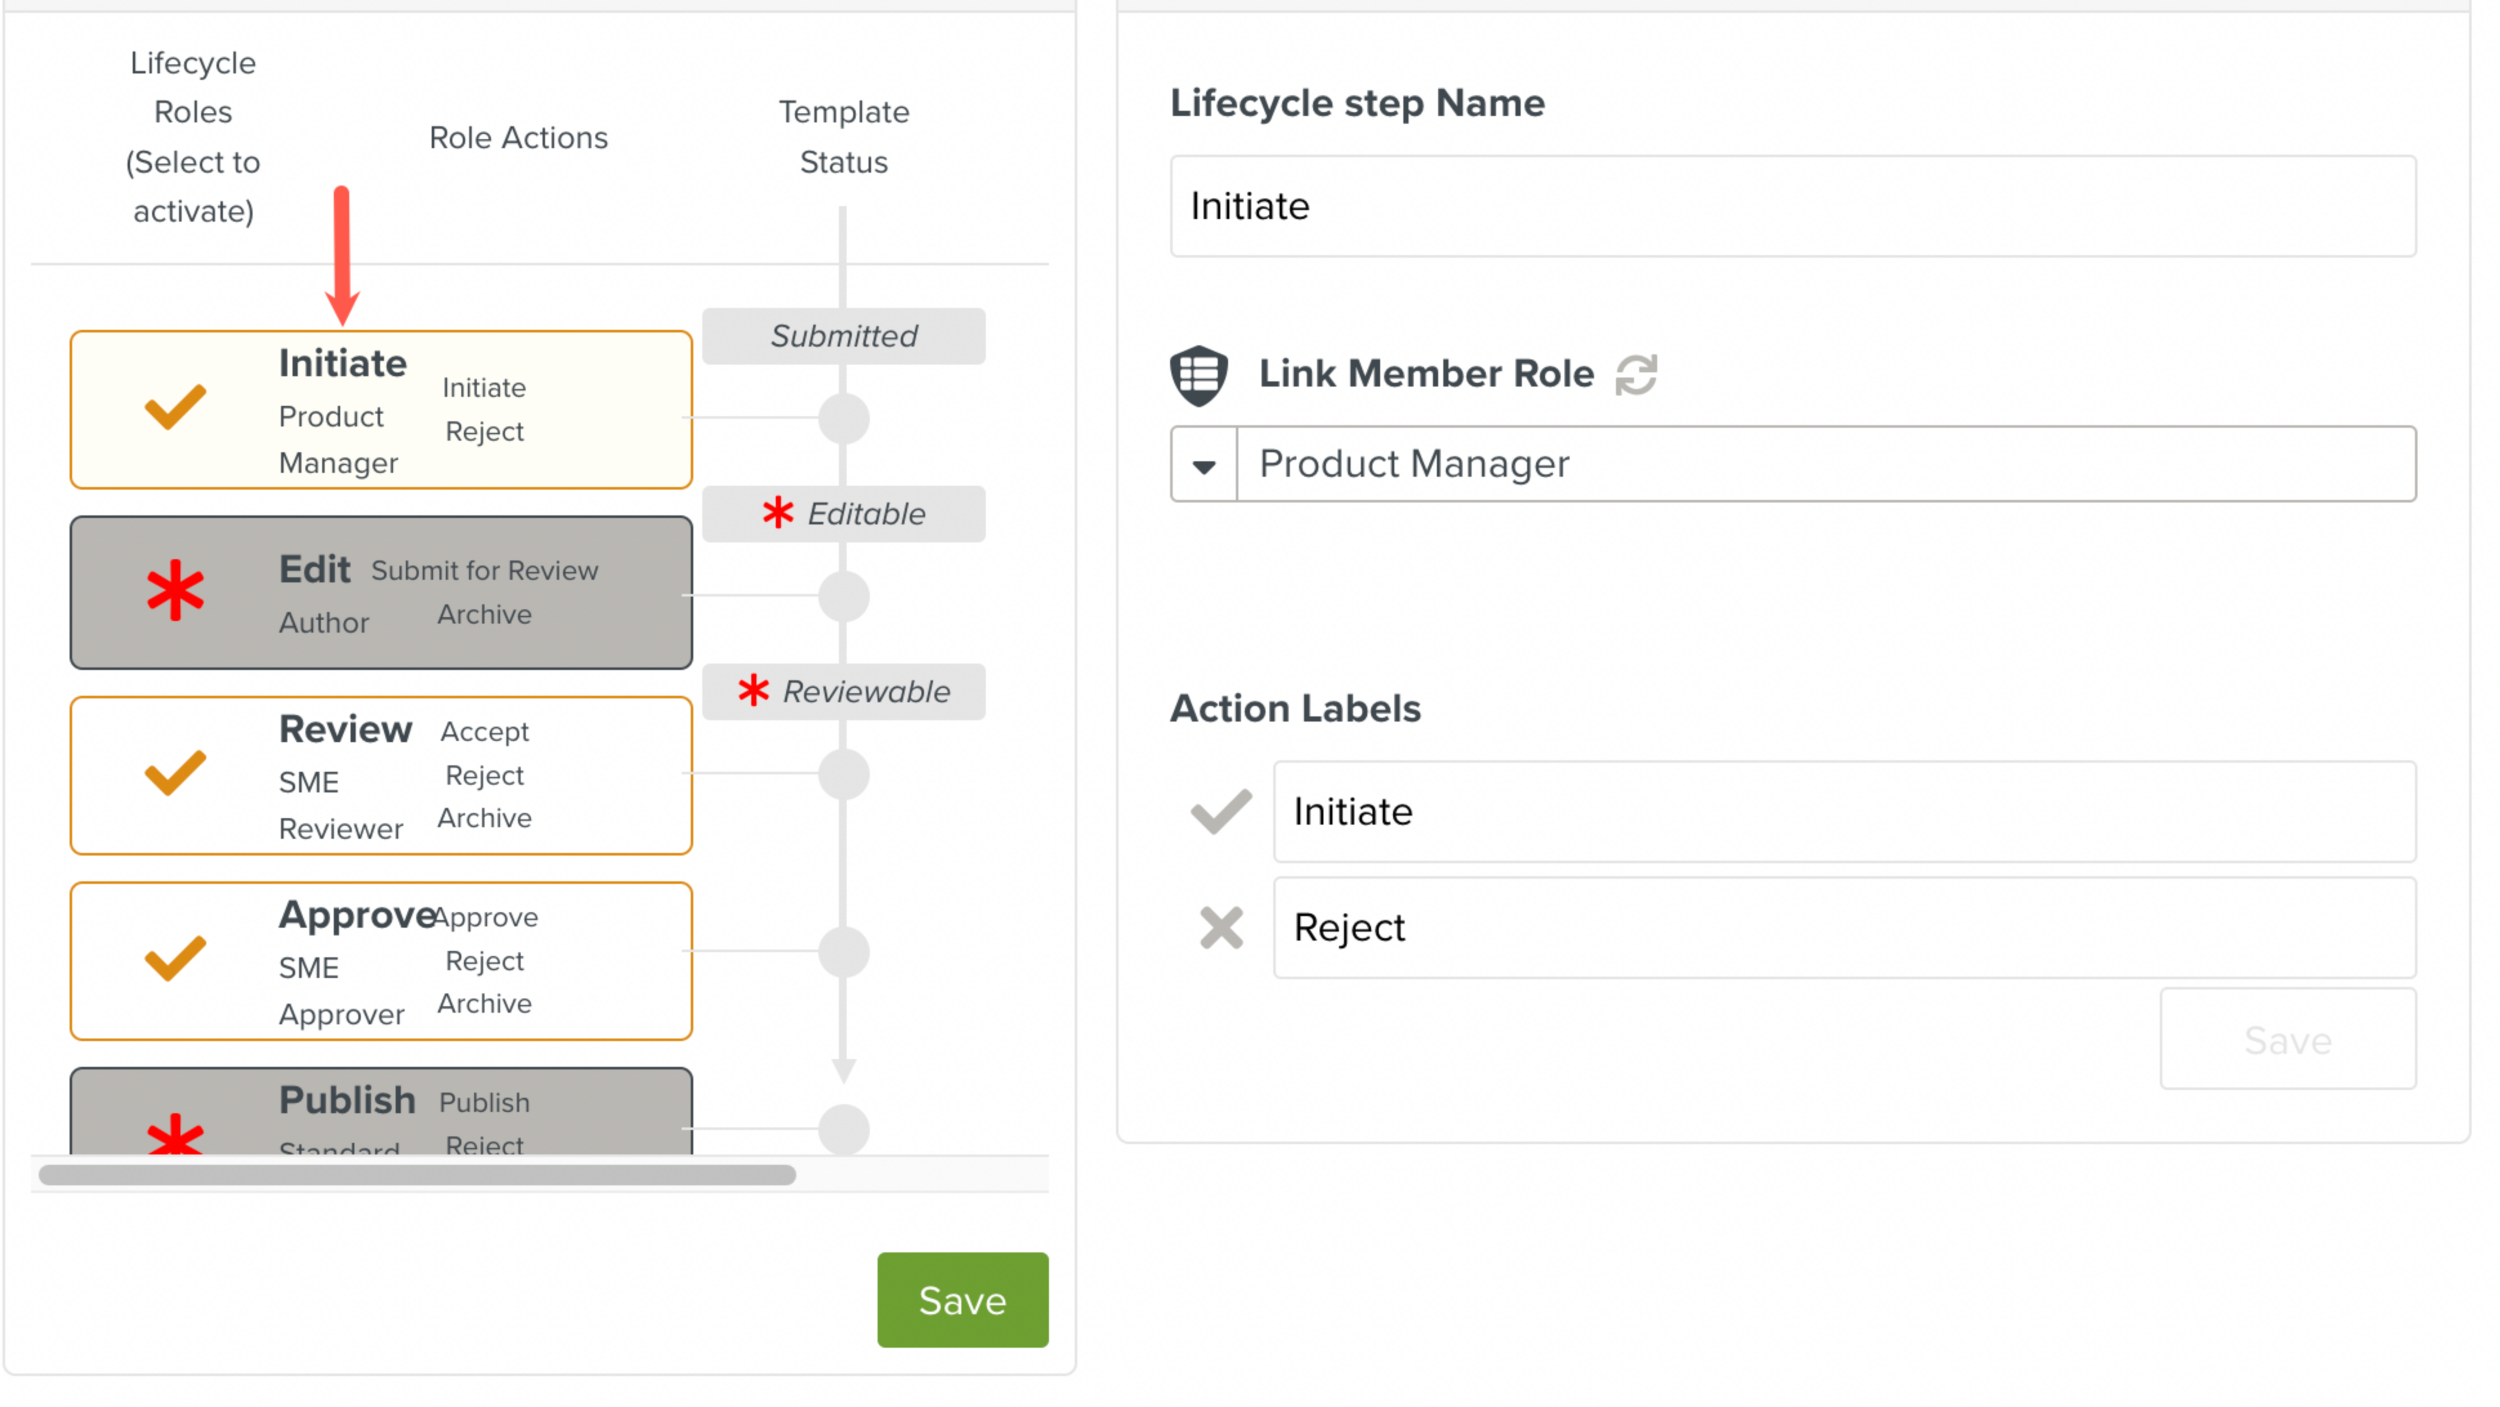
Modify the step name as needed.
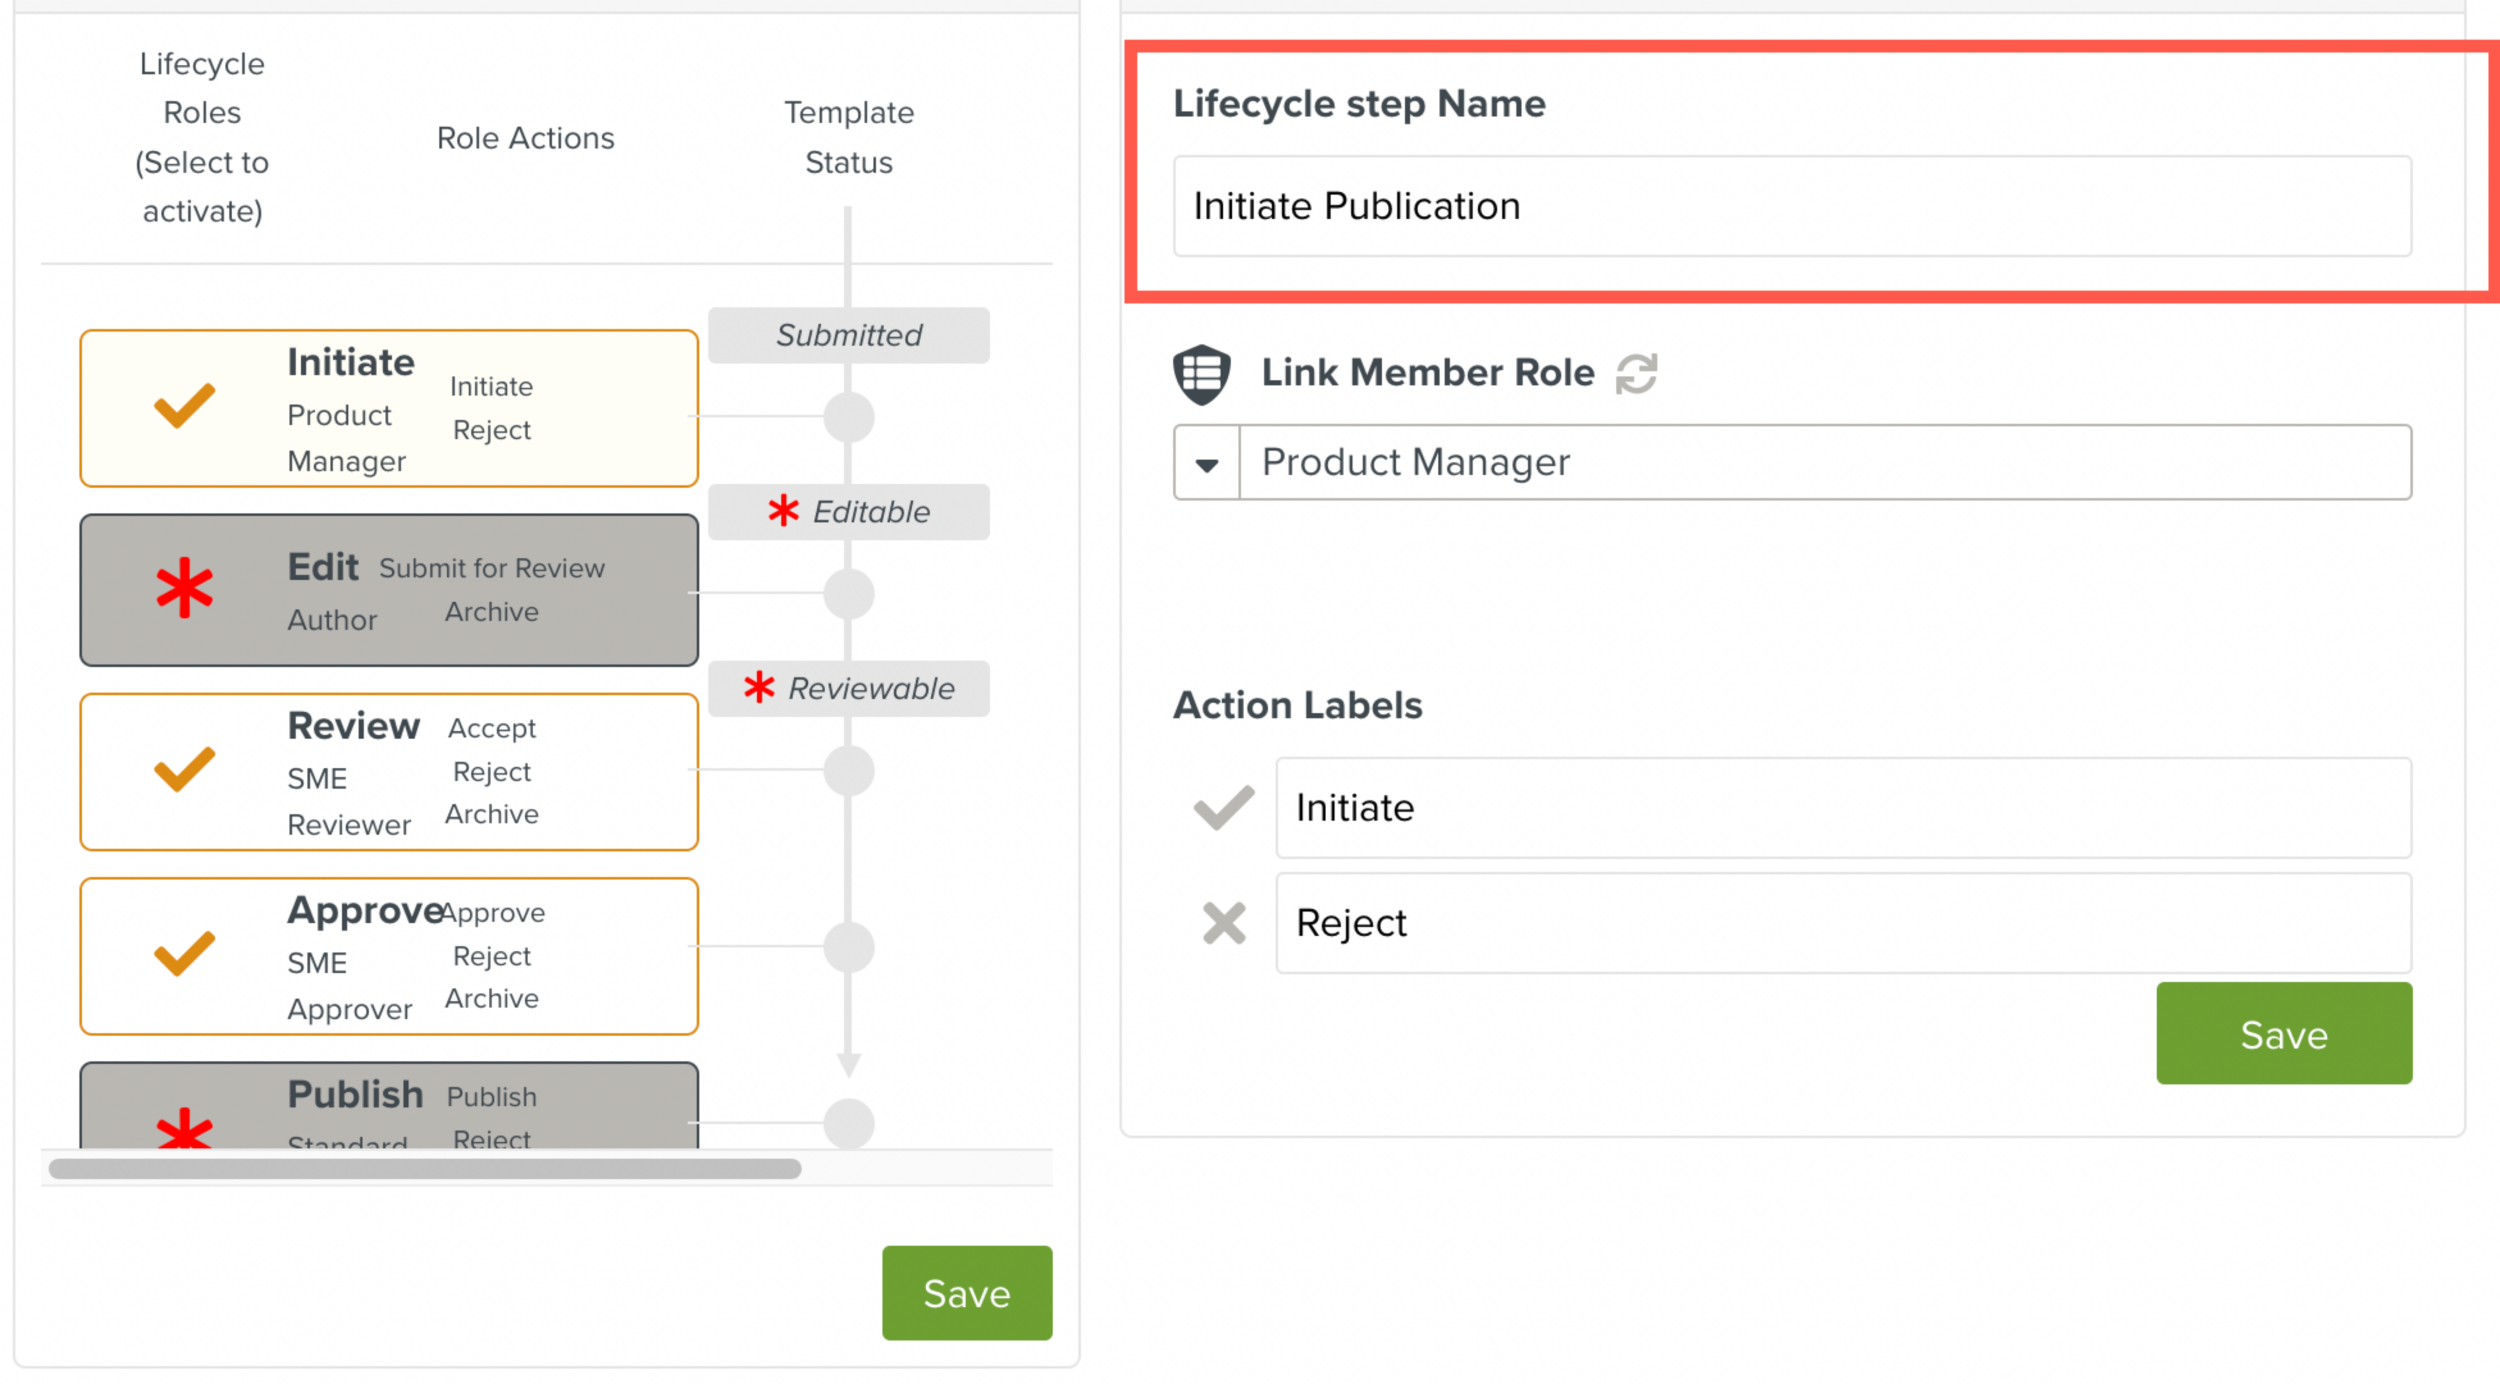
Click .
Link Member role
Select the Lifecycle step.
From the dropdown list, select the member role.
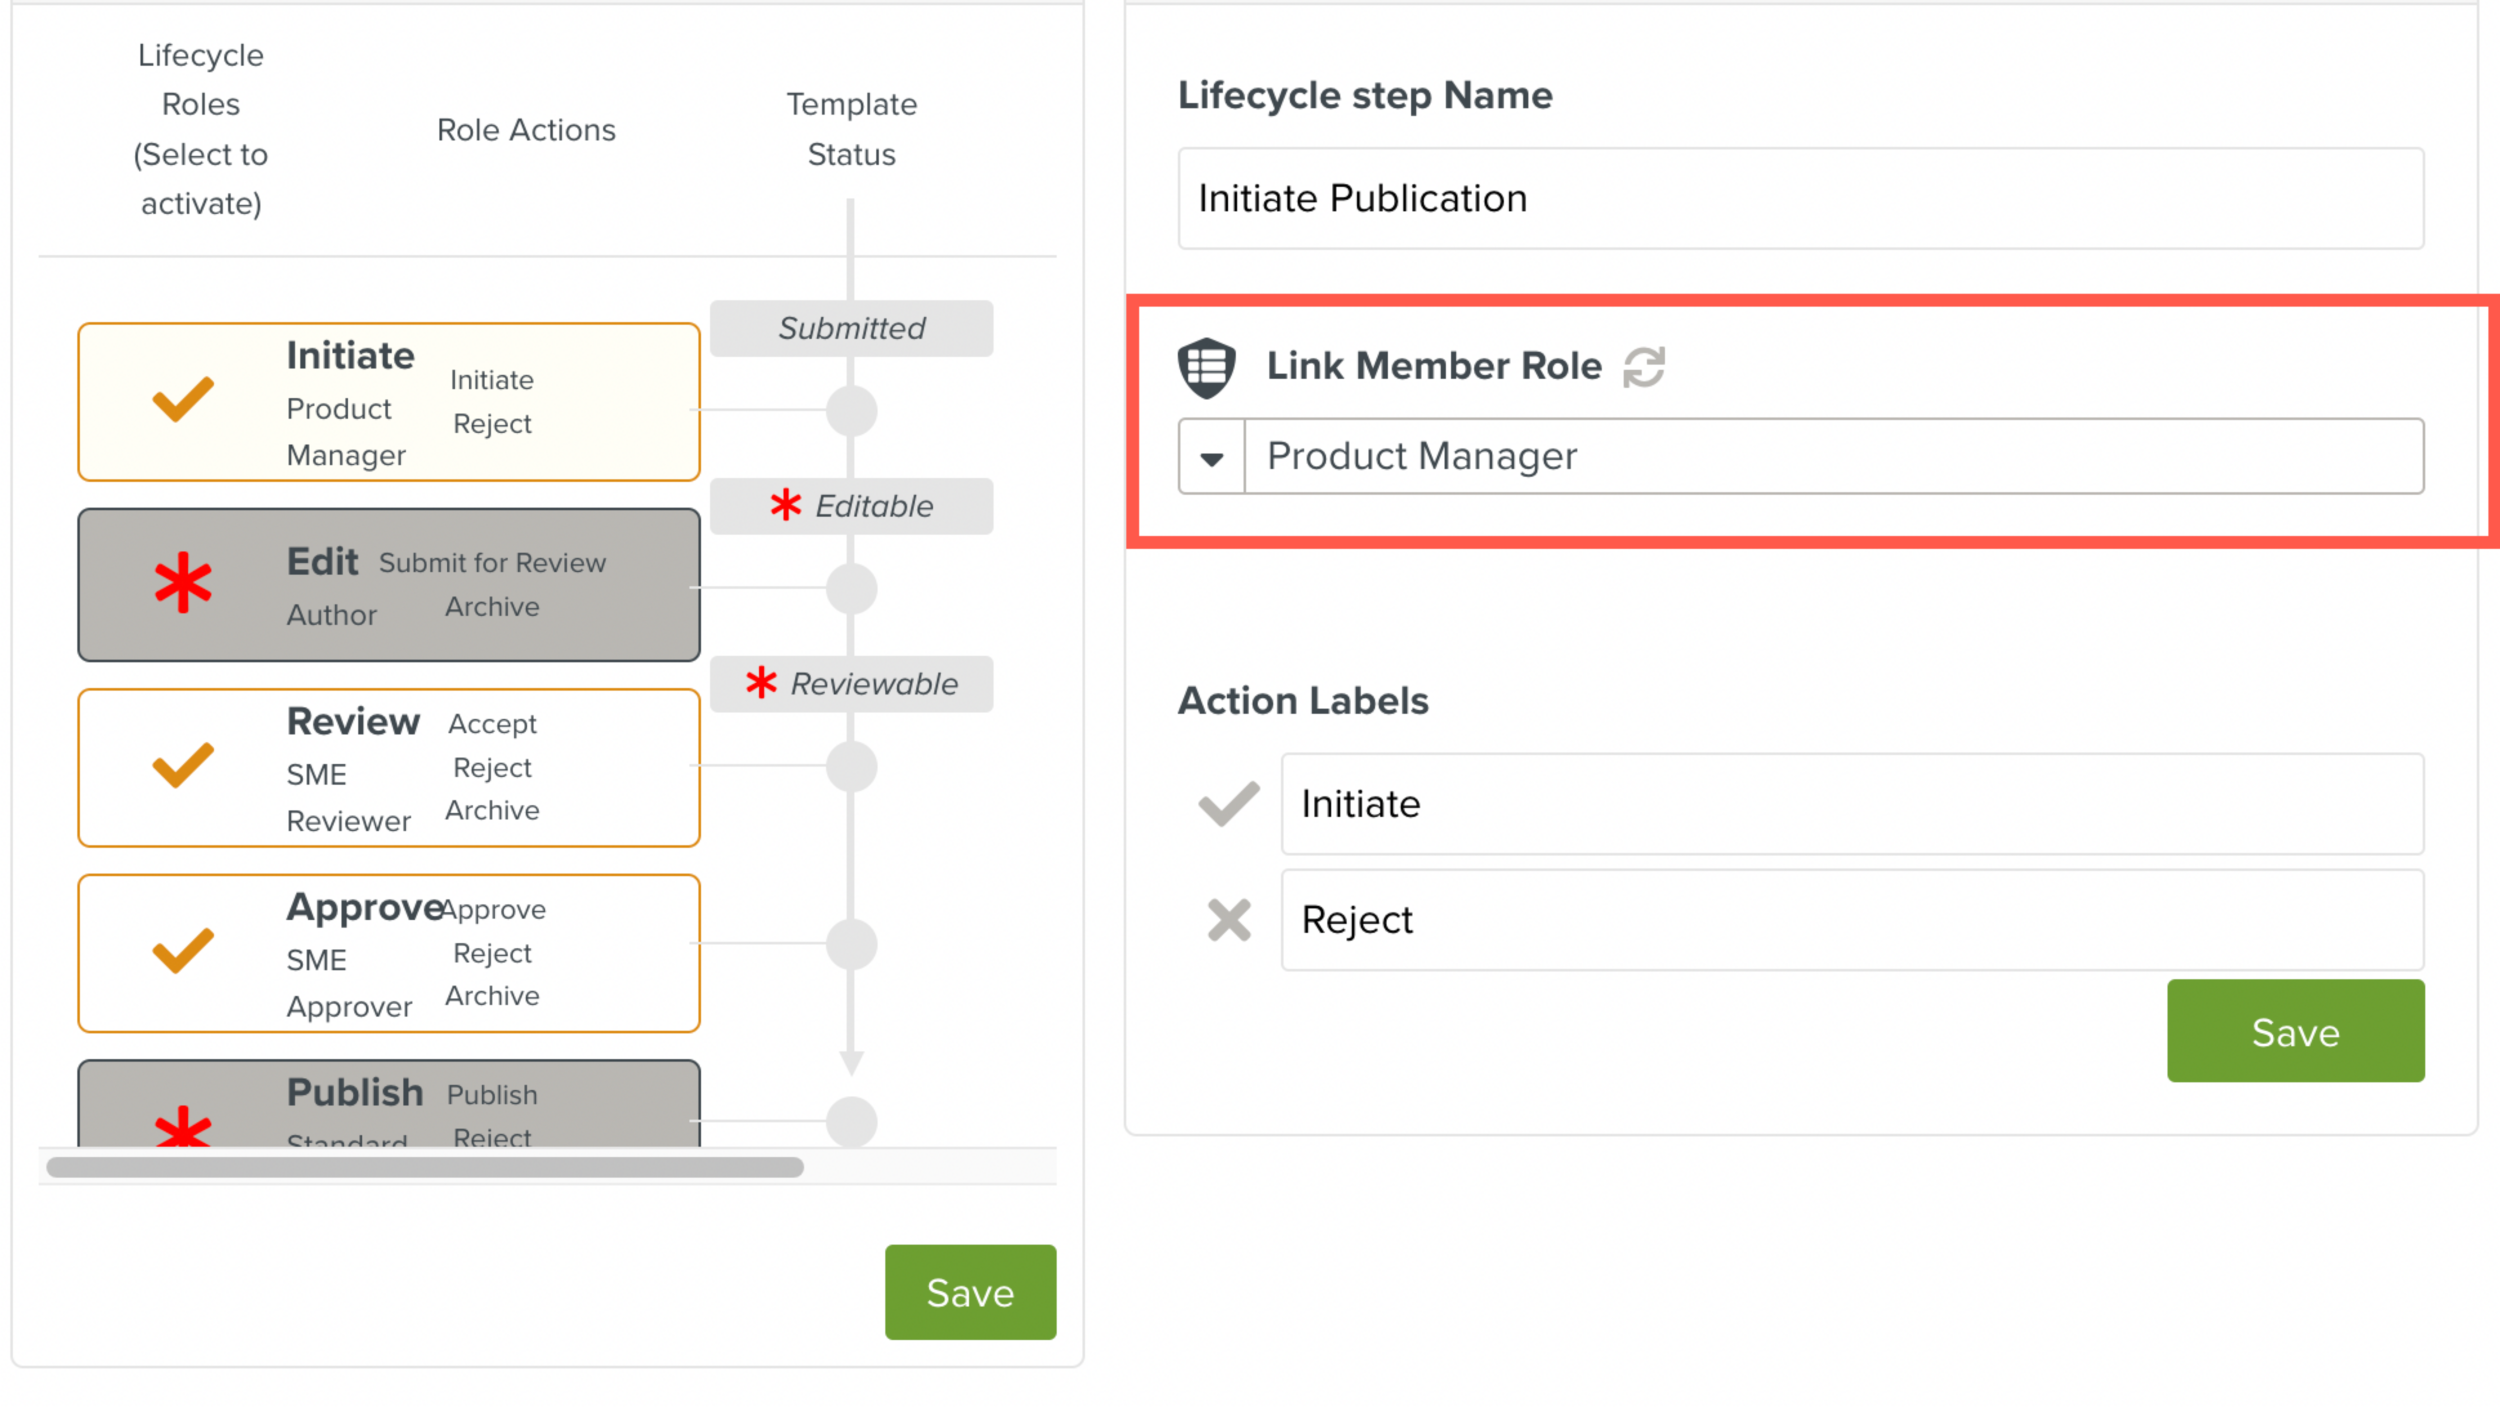
Clicking
 refreshes the member roles in the list.
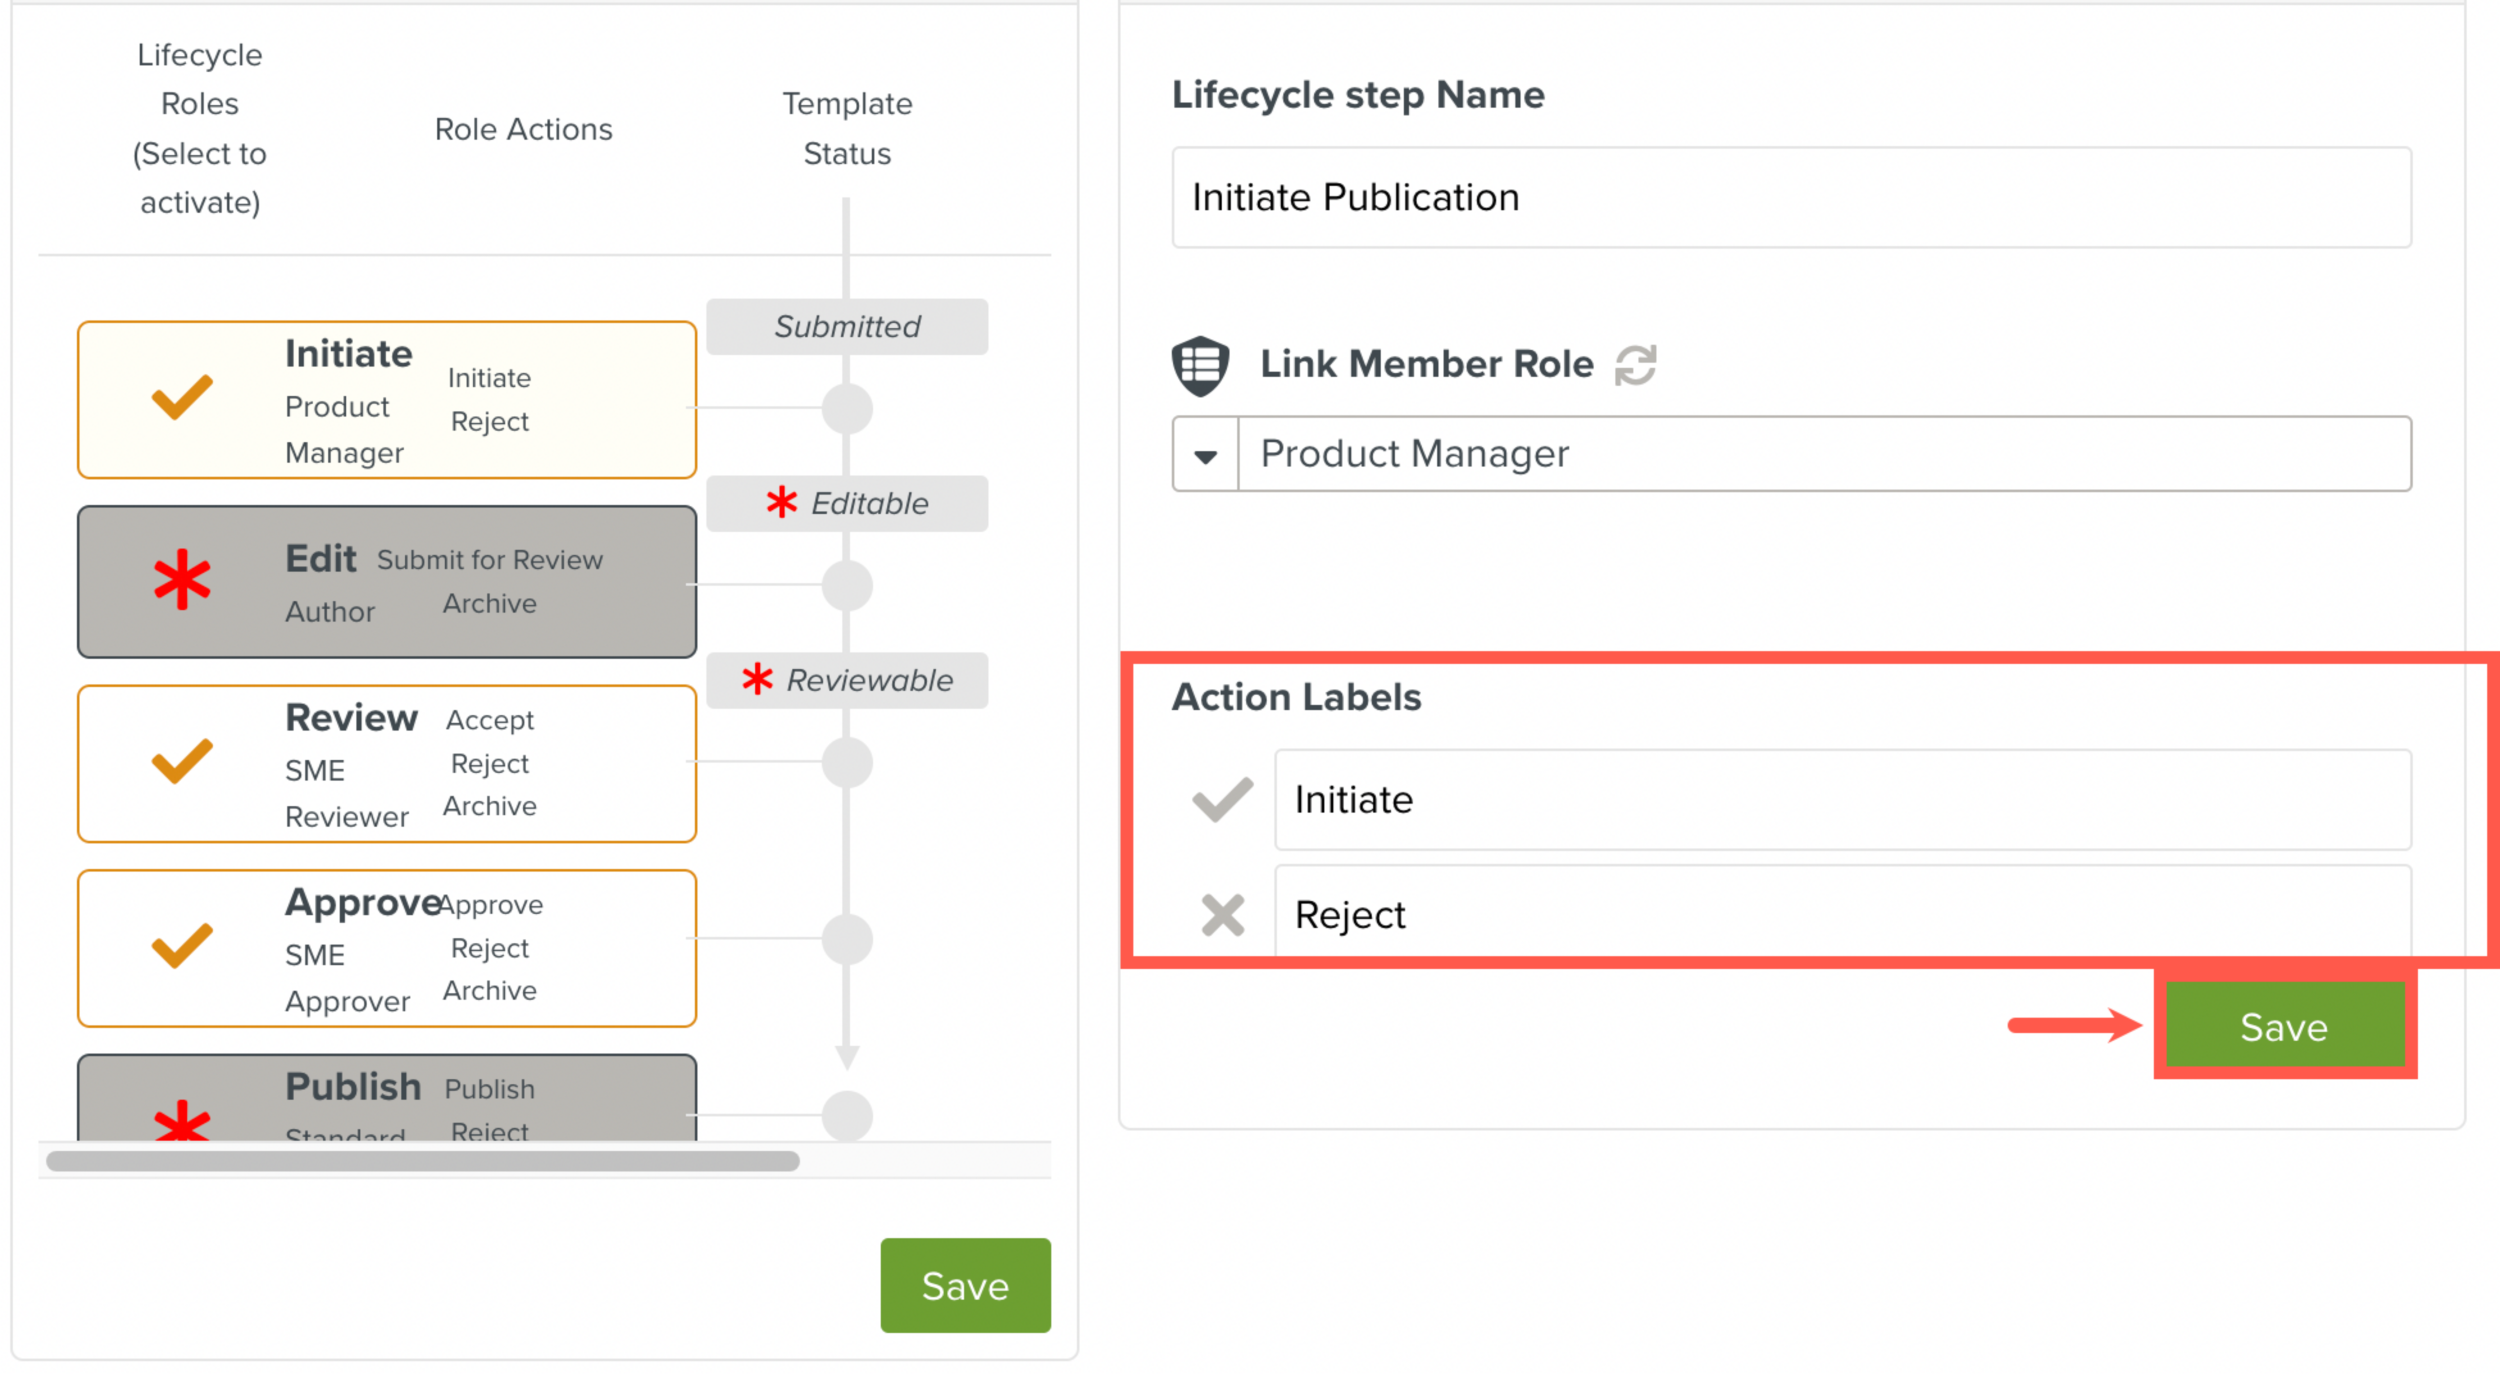
Modify the action labels
Select the Lifecycle step for which you want to modify the action labels.
Modify the action labels as needed and then click .
Modify an existing Lifecycle
On the main menu, go to > > .
The Enterprise Hierarchy page is displayed.

In the , select .
Select the Lifecycle that you want to modify. The details corresponding to the Lifecycle are displayed on the right.
Modify the required details. For more information on the permitted modifications, click here.
Click .
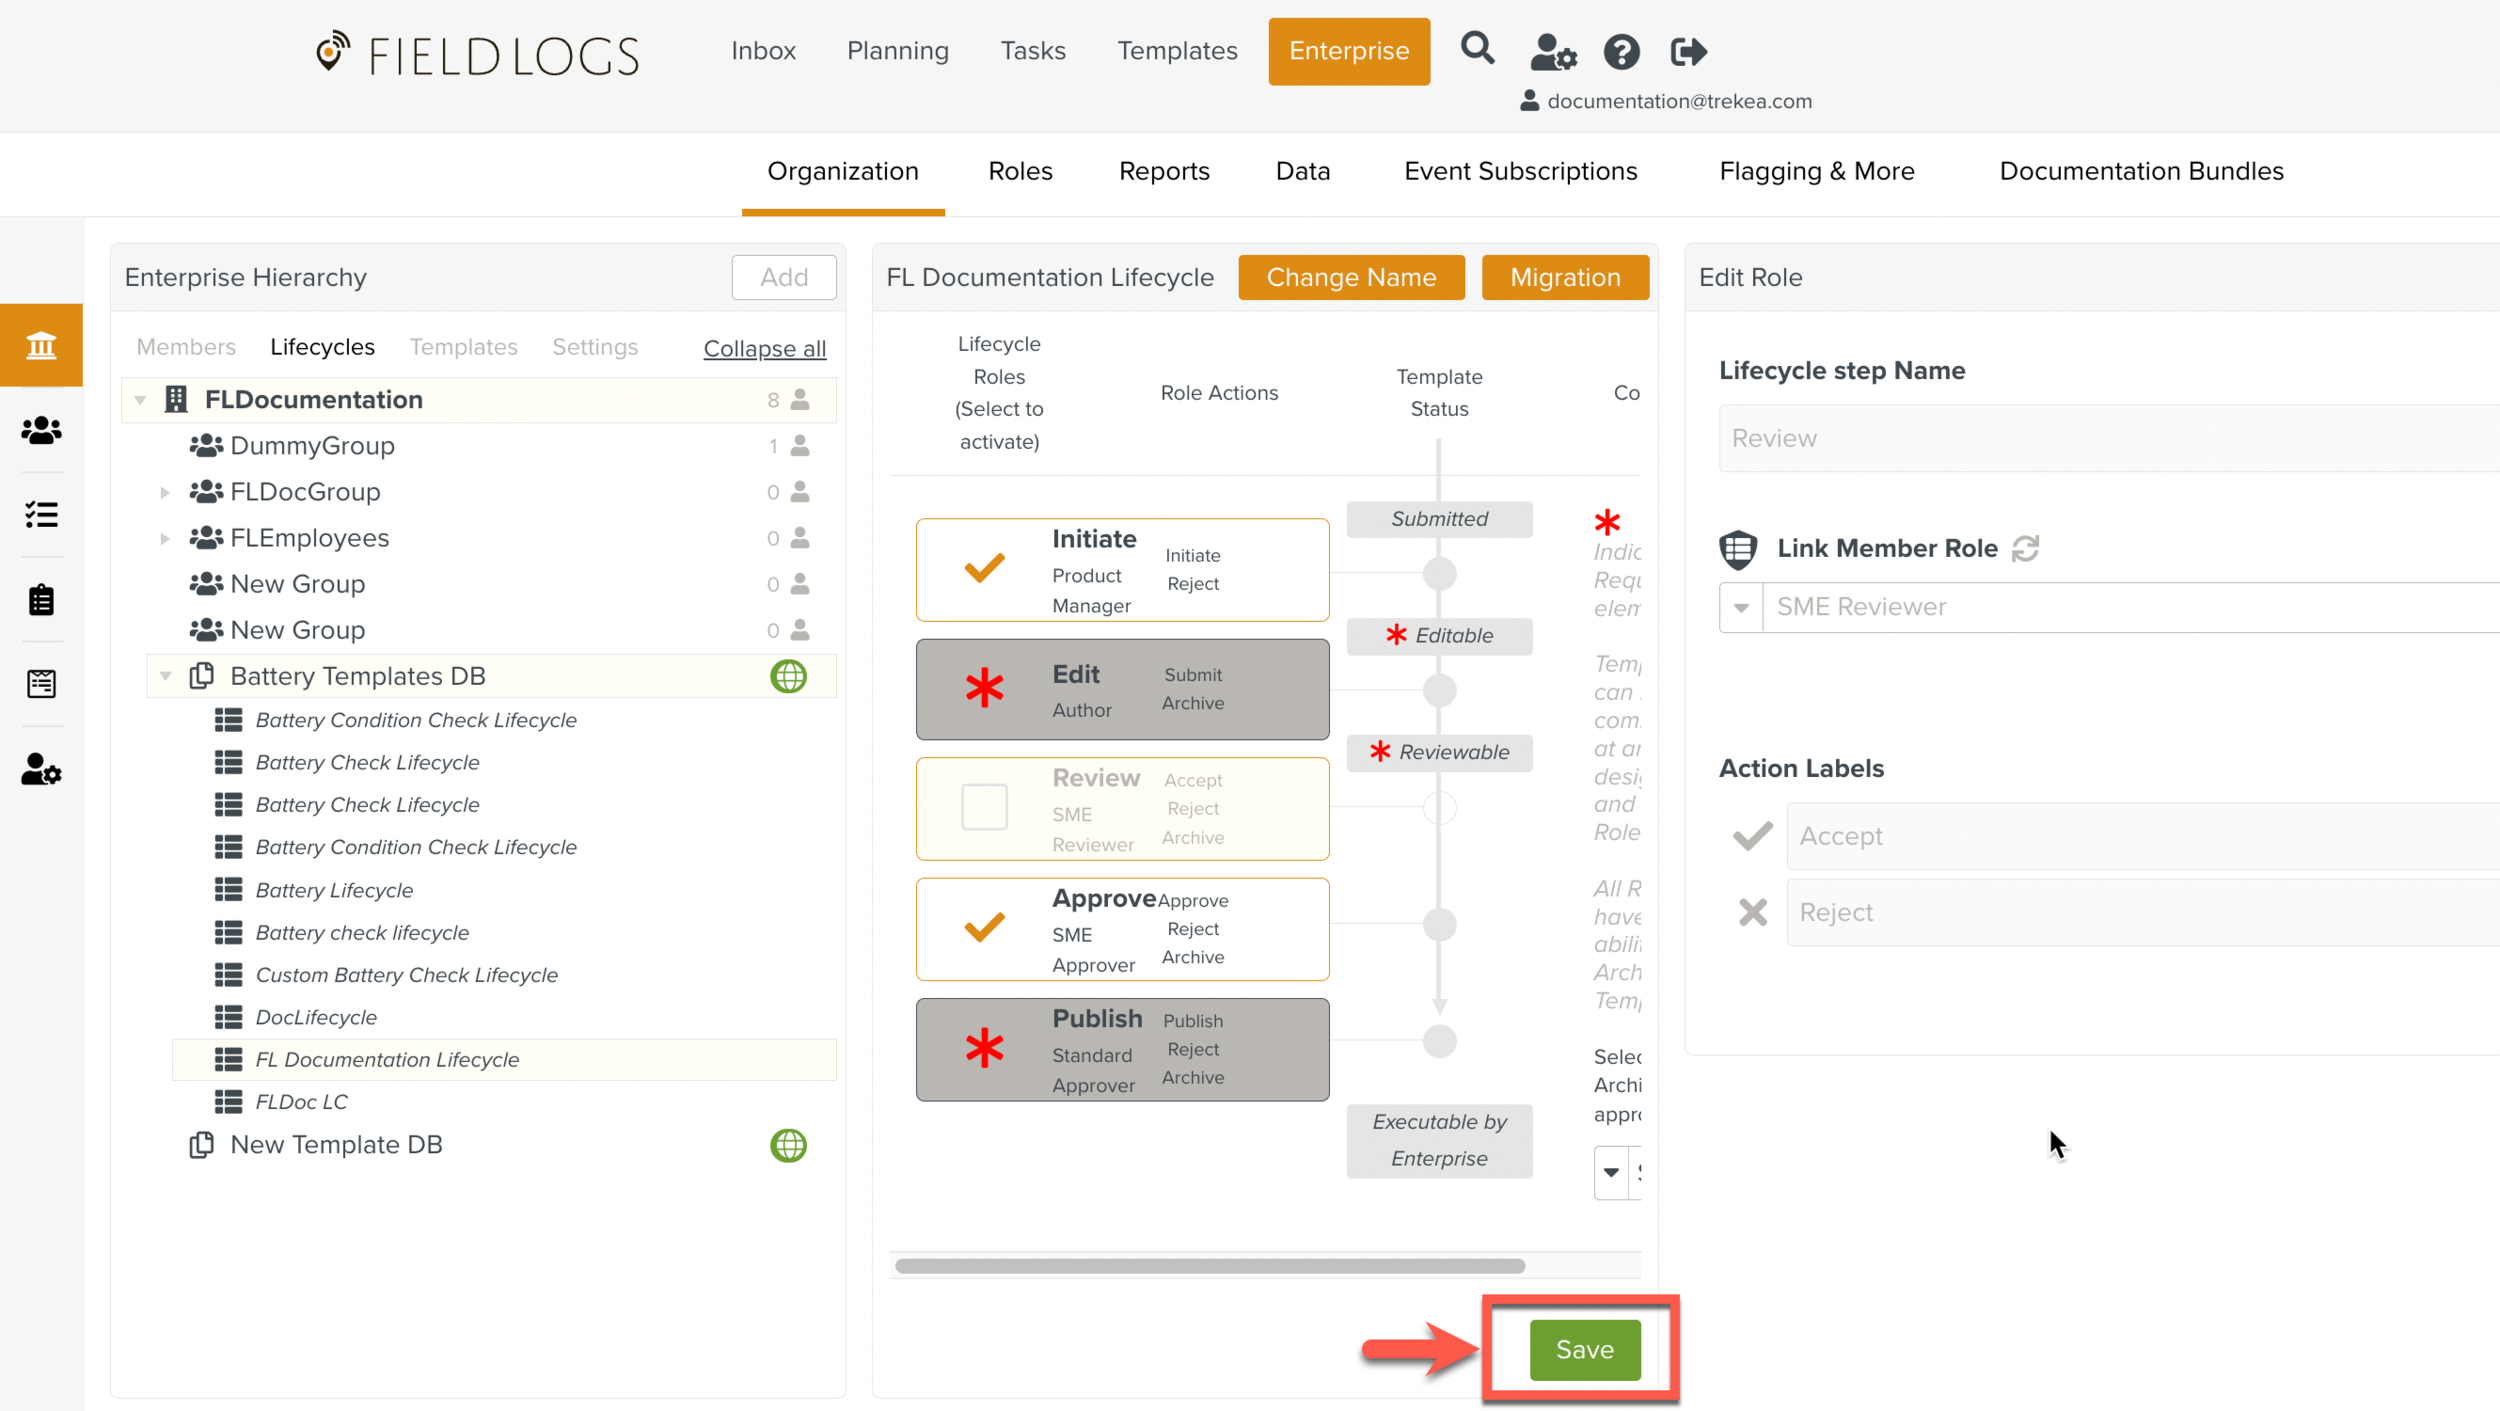
The changes are saved.