Publish
The Publish step is the final step of the publication process. After the completion of this step, the Template becomes available for all the users in the Enterprise and is executable.
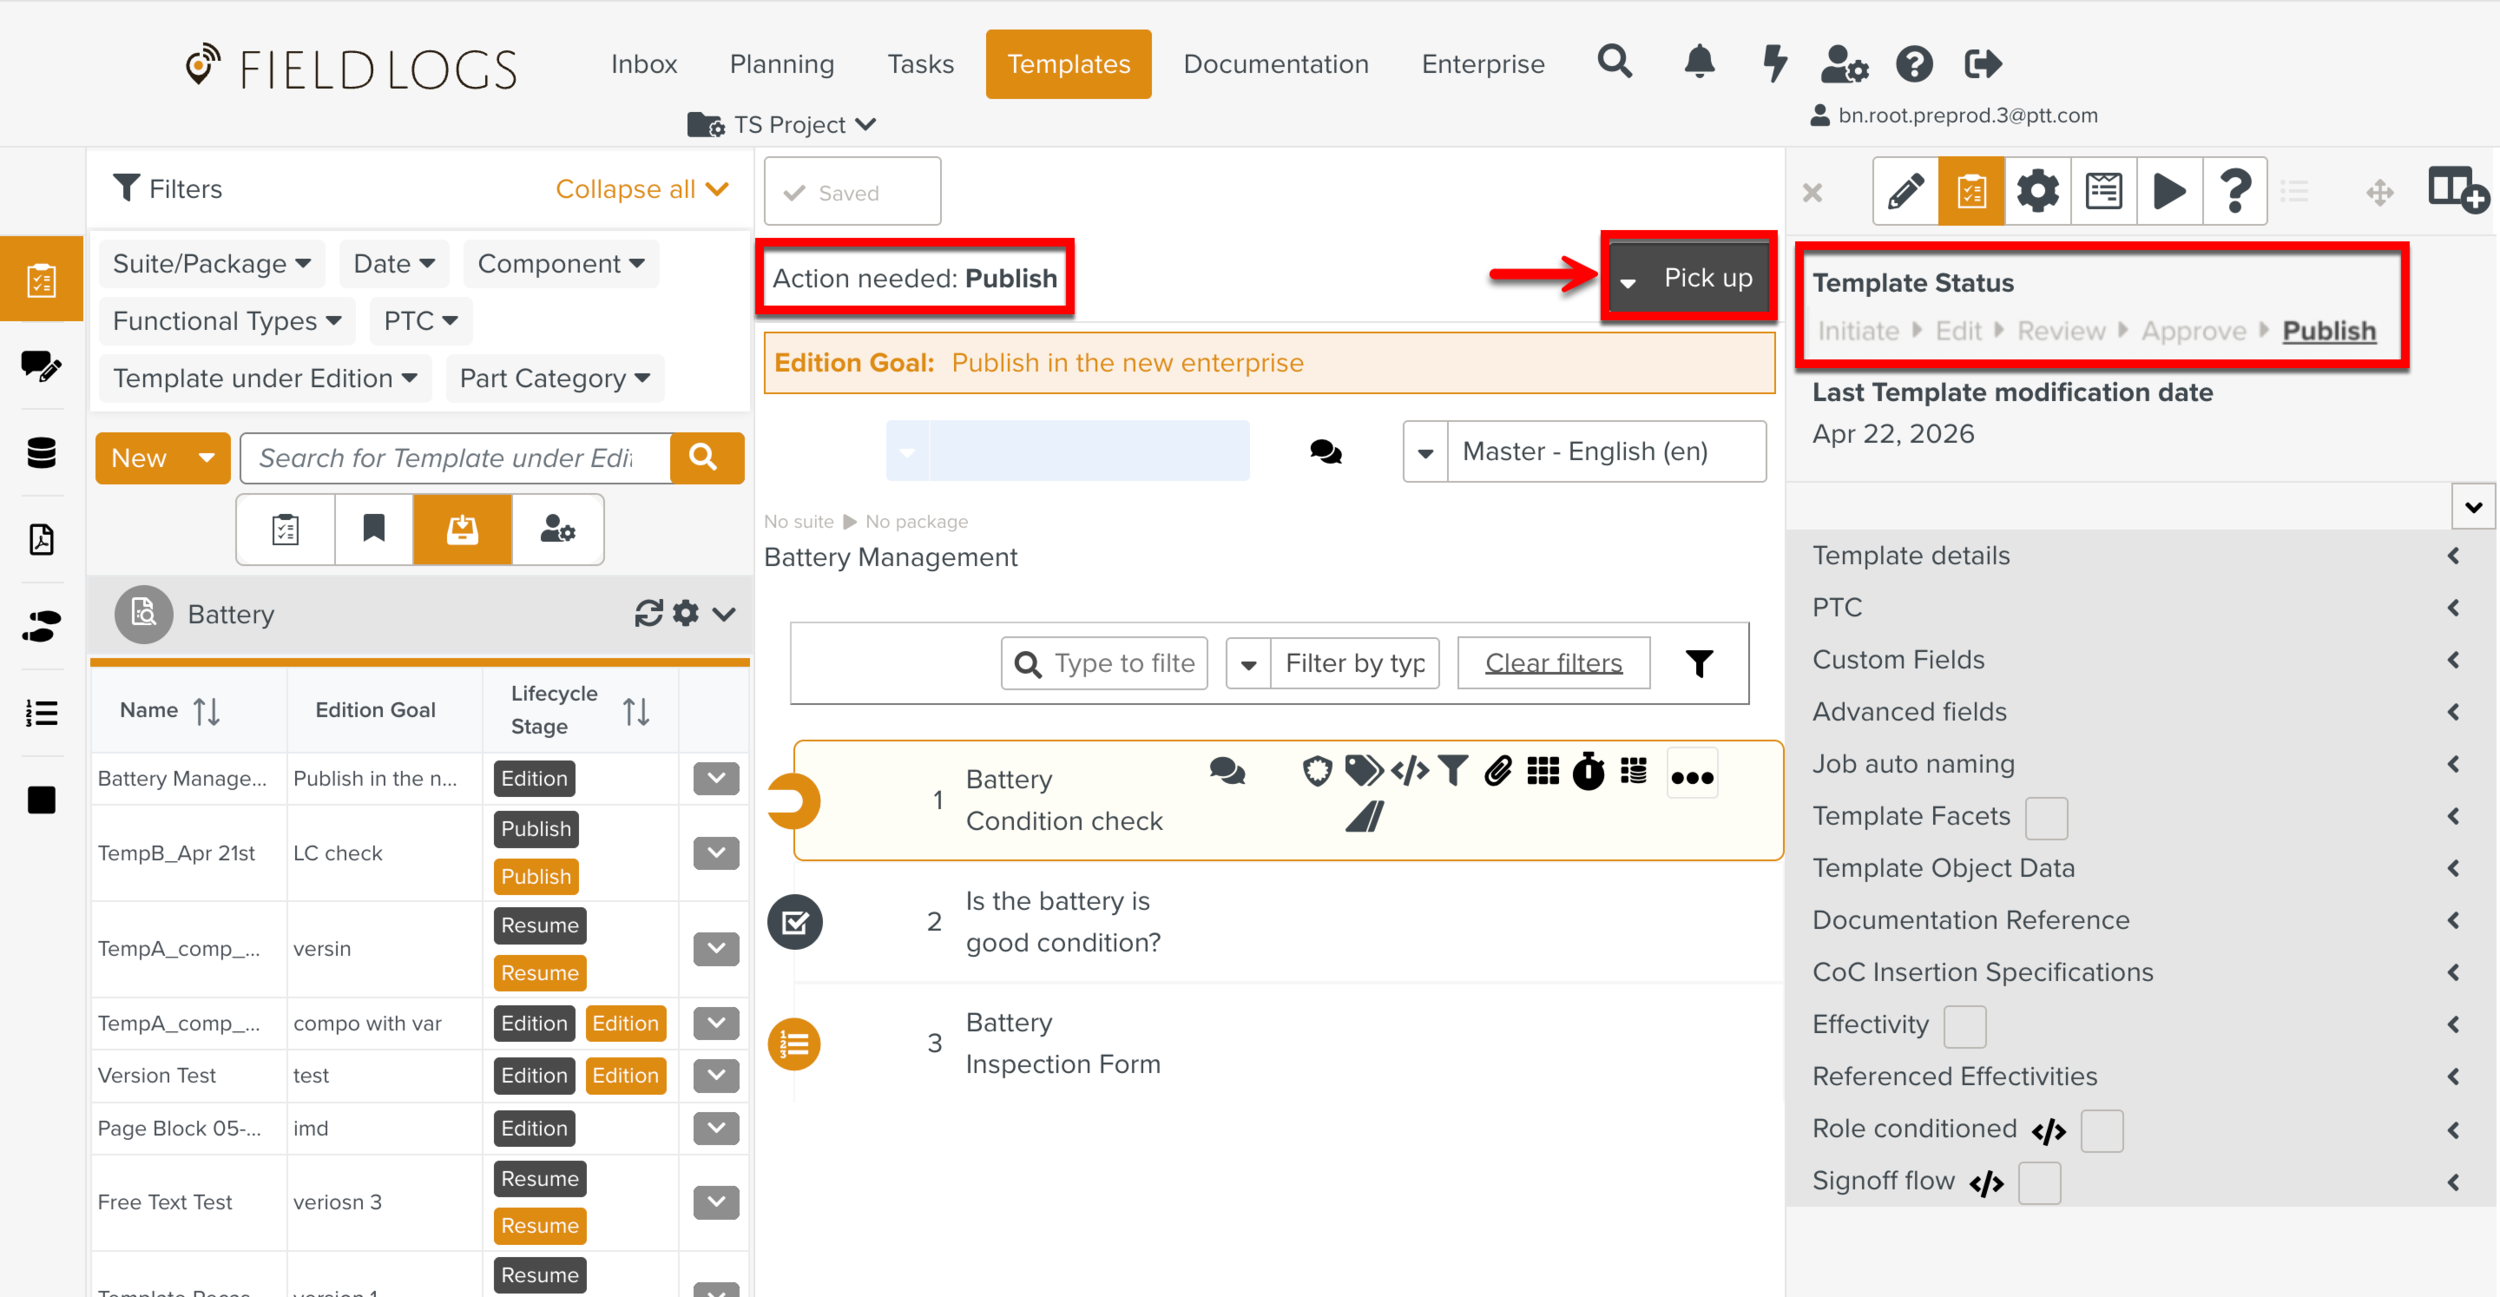
To Publish the Template:
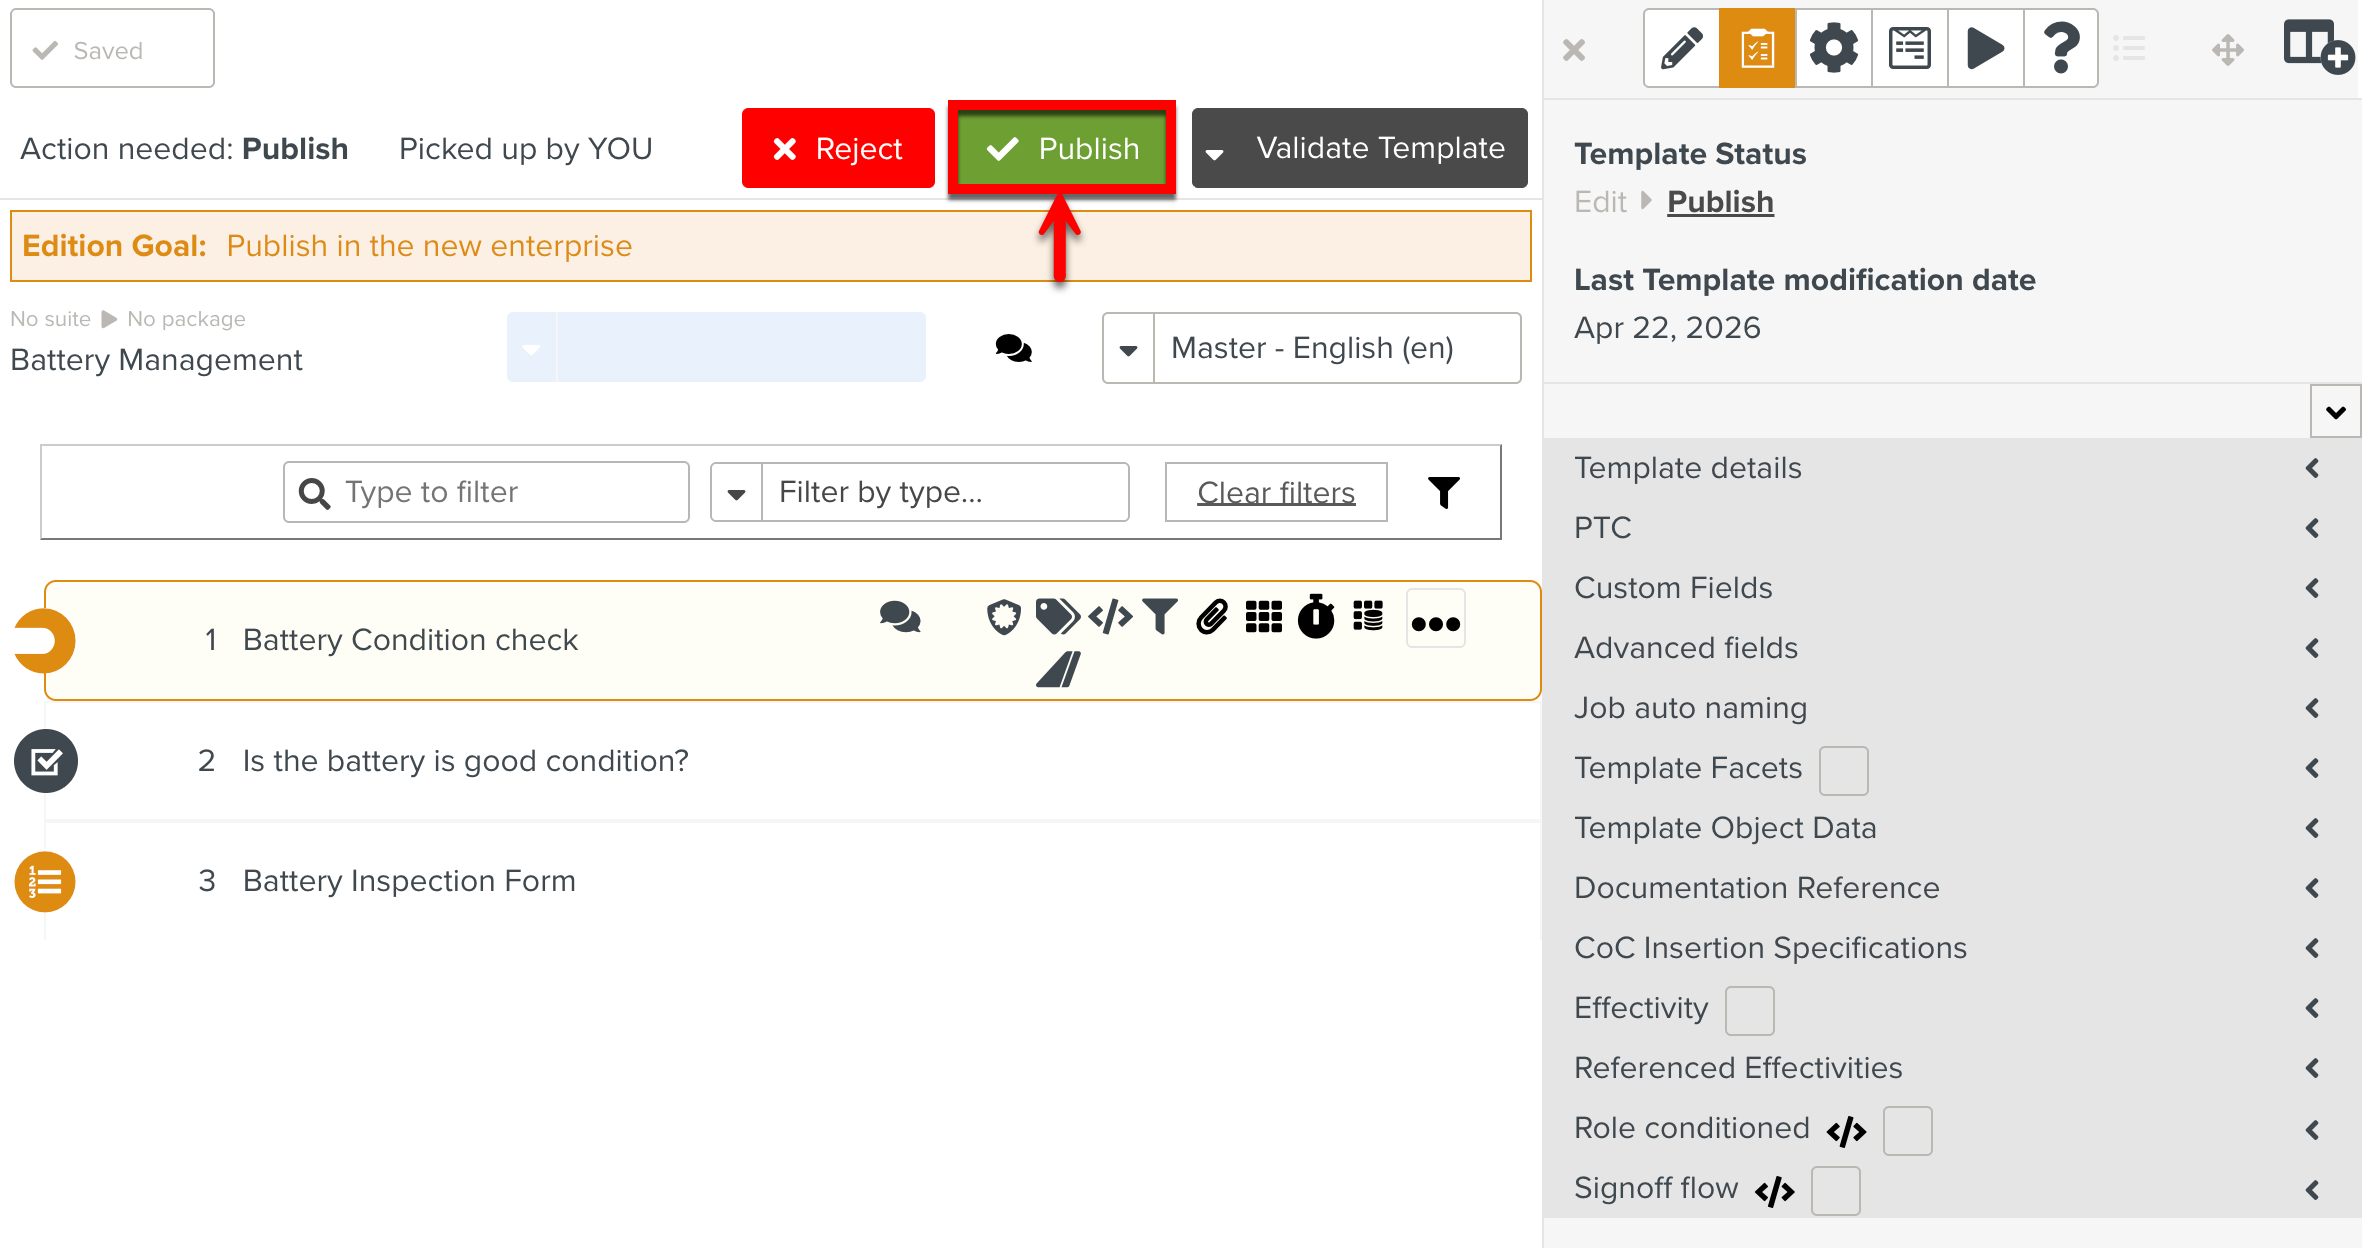
On the action bar of the workspace pane, click .
Note
If the Fast mode checkbox was selected in the previous step of the publication process, the next action is automatically picked up.
The Task is picked up.
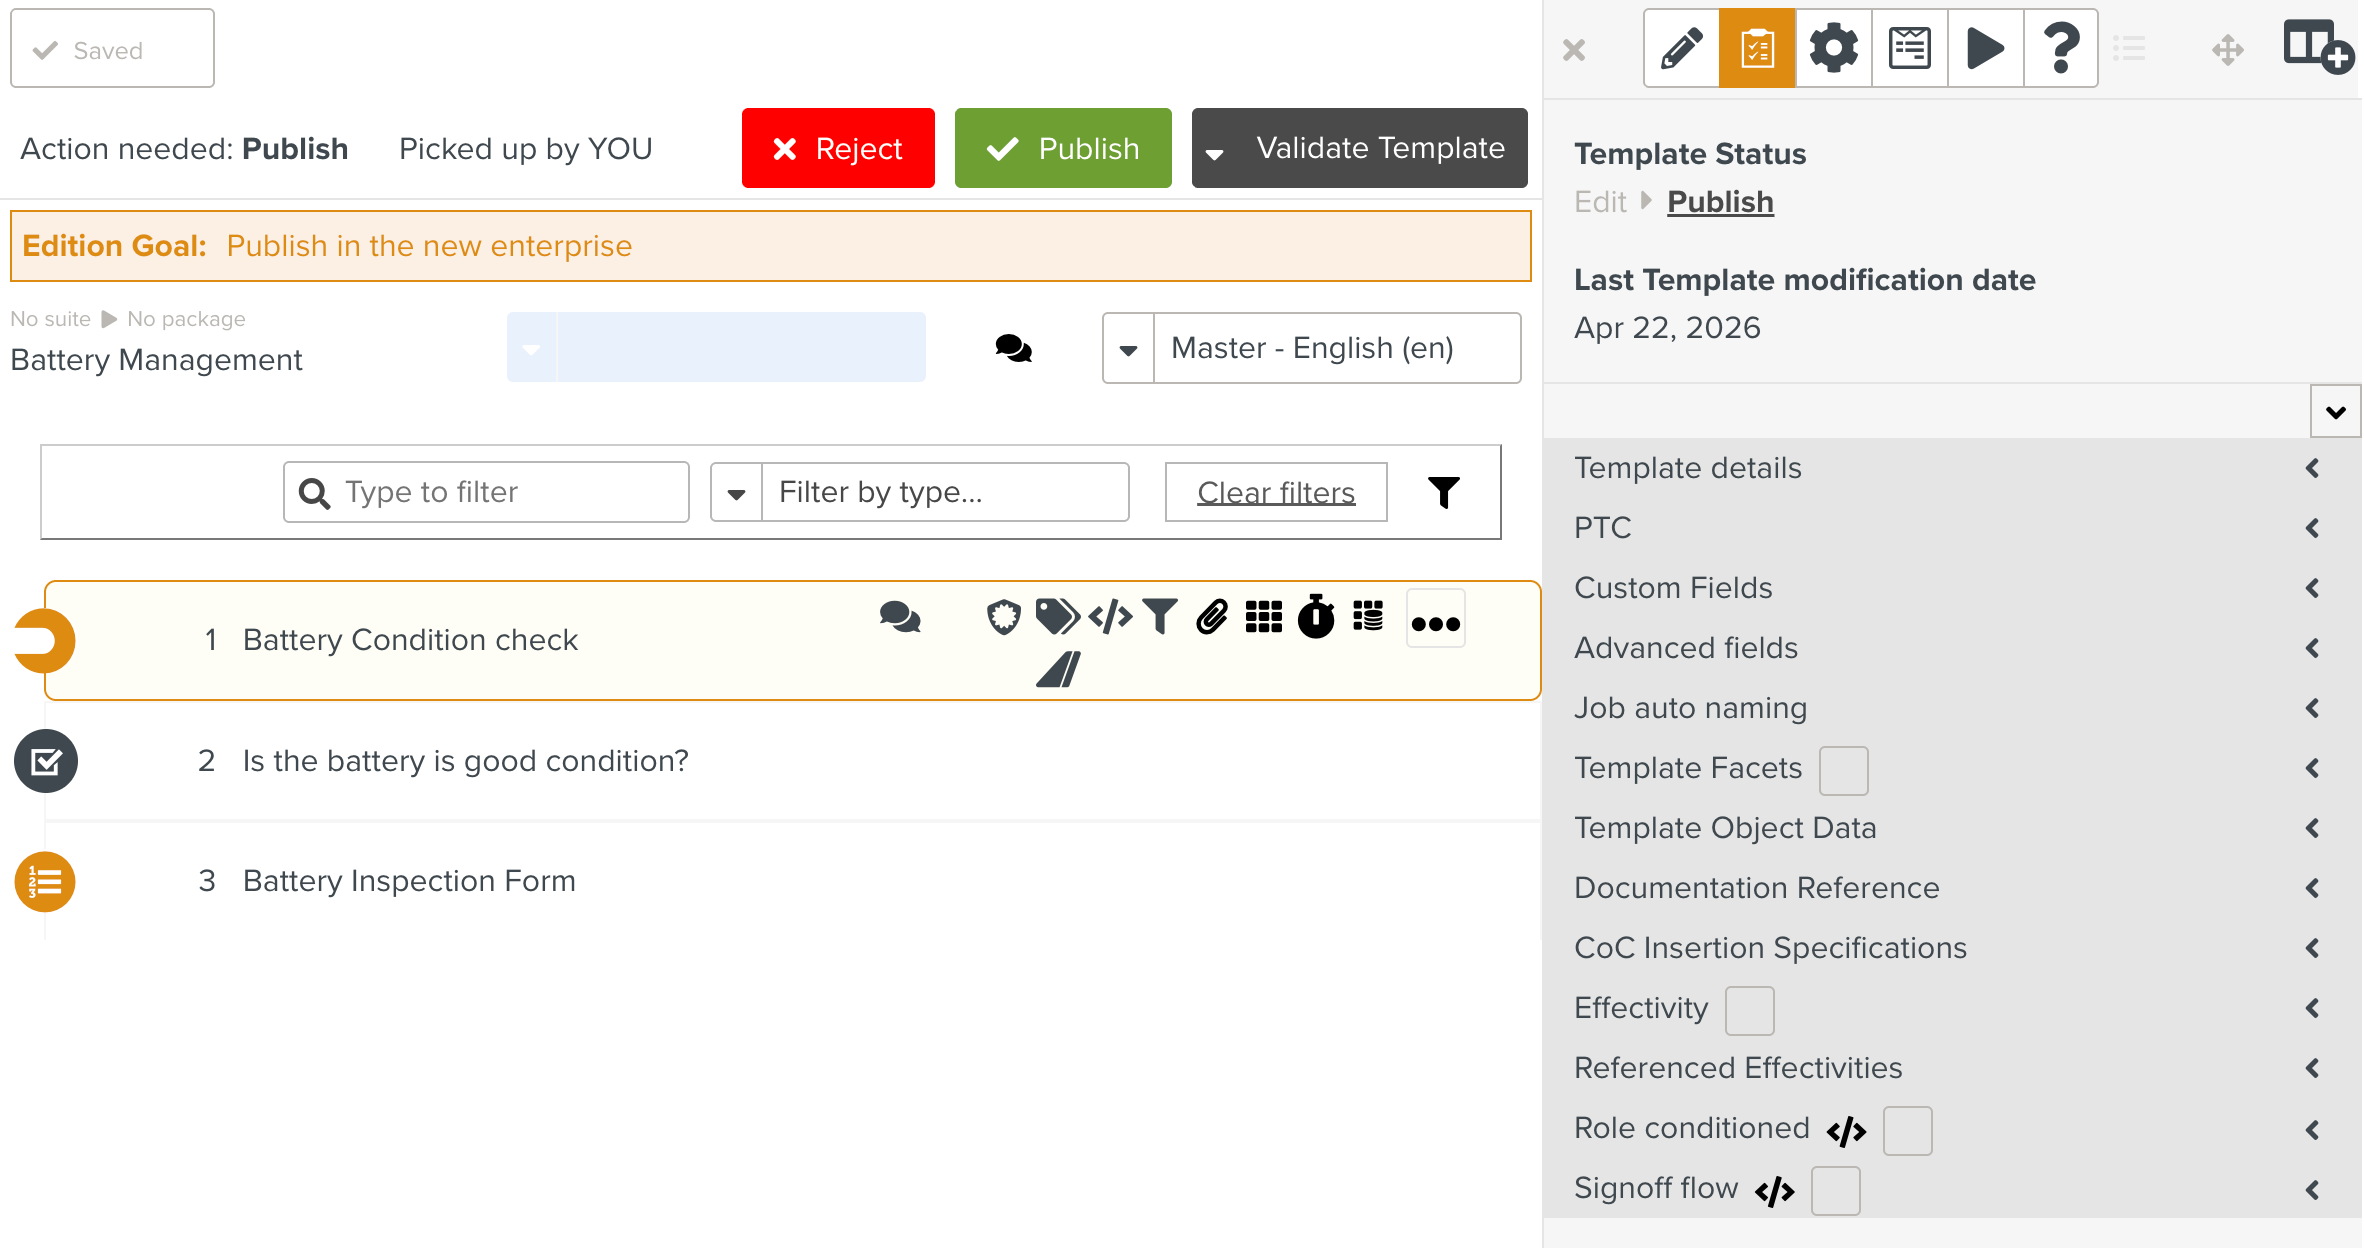
Click on the action bar of the workspace pane.
Clicking sends the Task back to the Edit step. The respective user picks up the Task after the Reject action.
If you click , the action of the Task is cancelled. After you release the Task, it becomes available to be picked up by another user.
Note
Clicking stops the Publication process. The Task is deleted.
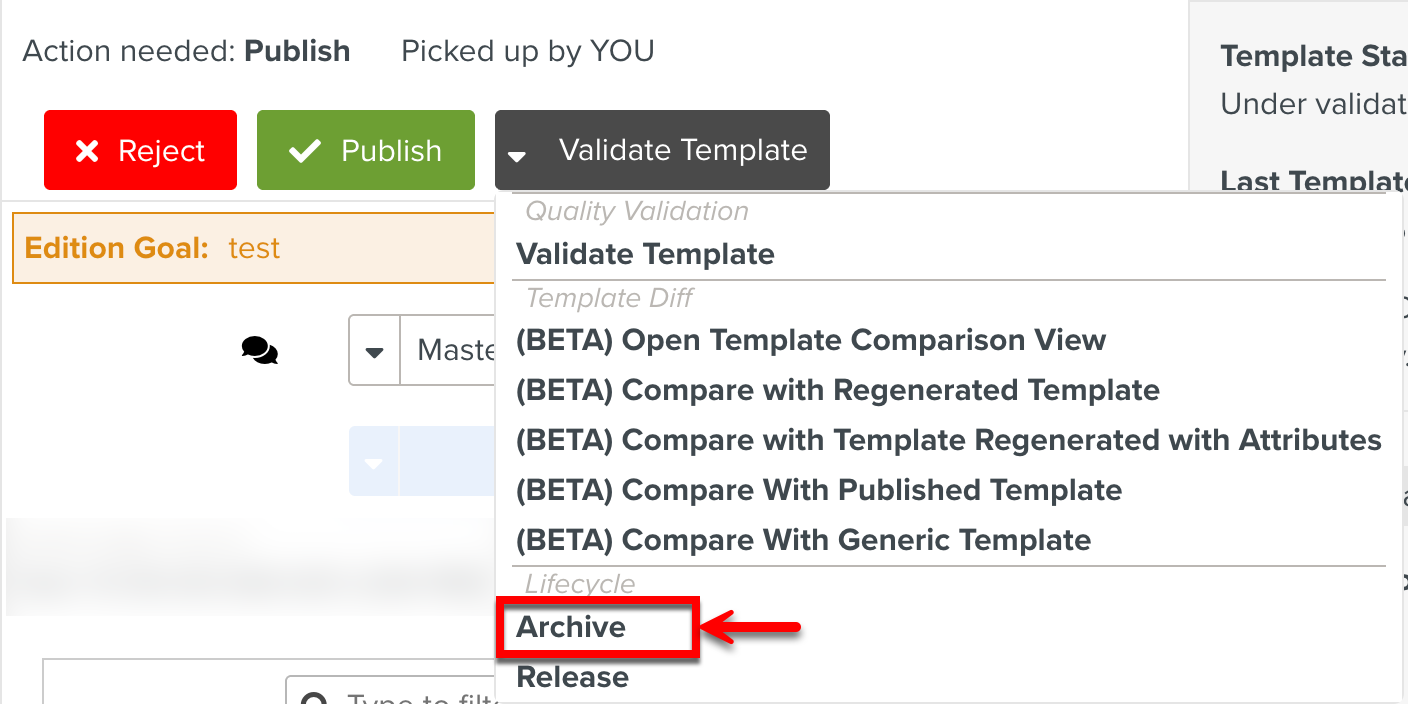
To Archive the Task:
Click .
On the Confirm Task action dialog that is displayed, click . The Task is sent to the next step of the archival process.
Click . The Task is Picked up.
Click . The Task is Archived.
Clicking , cancels the archival process and sends the Task back to the Edit step.
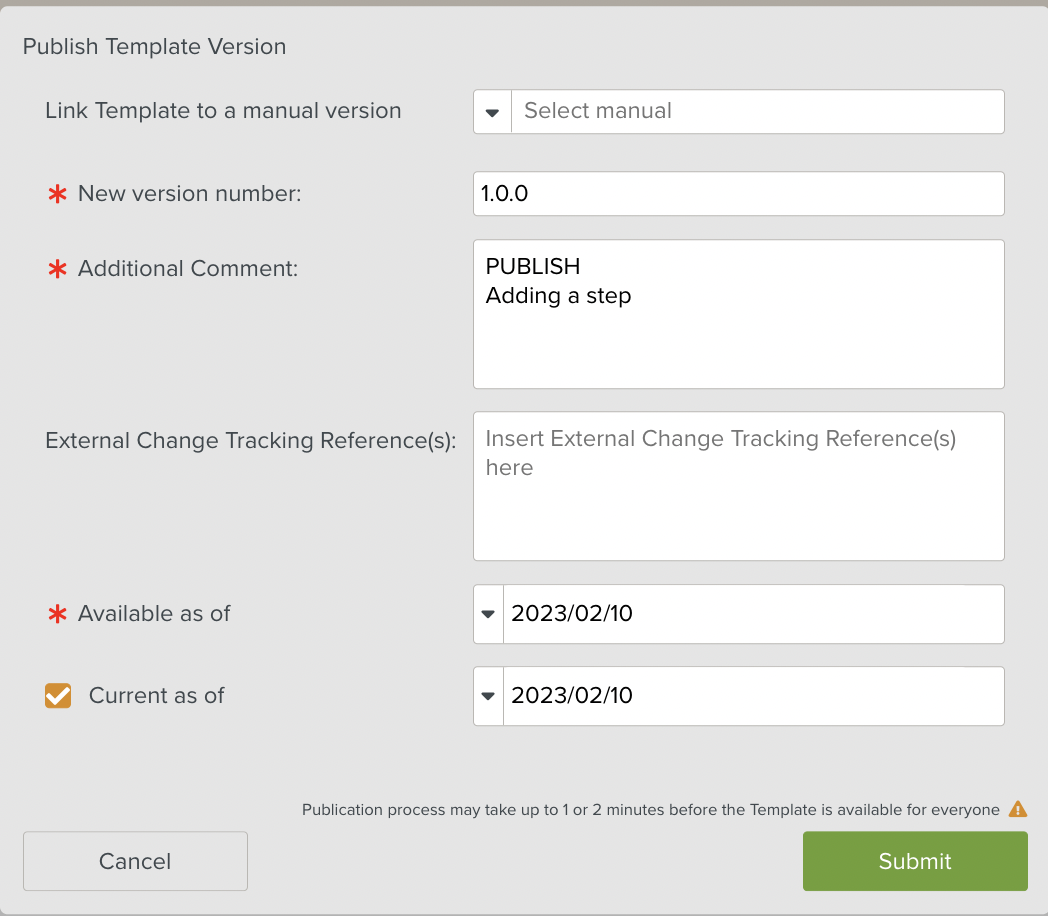
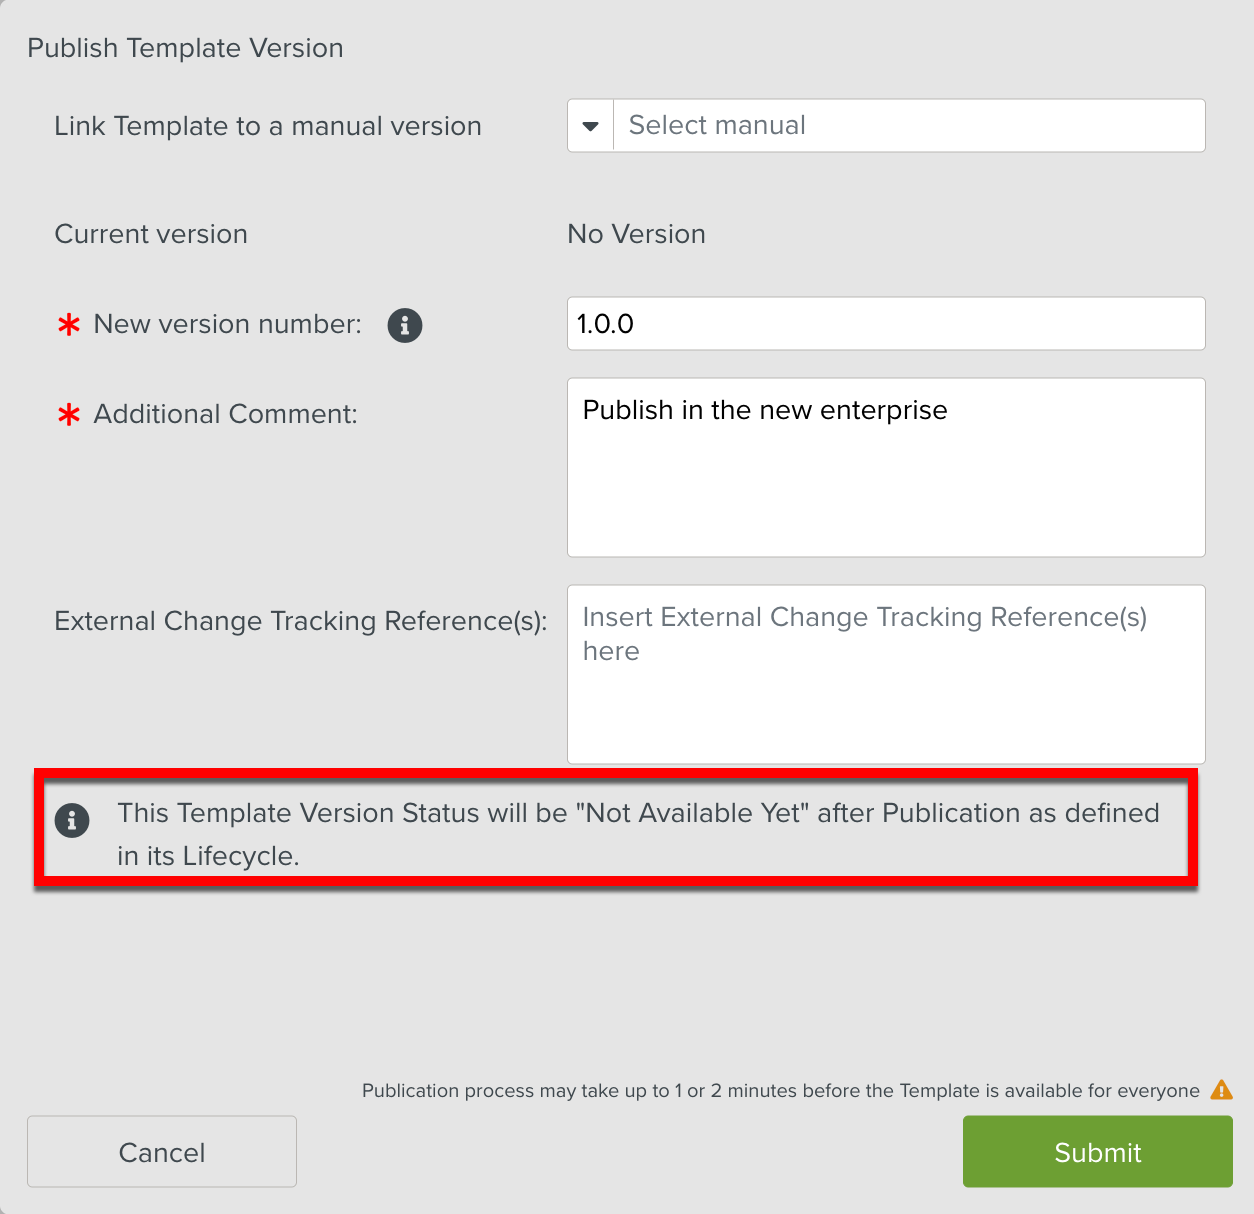
The Publish Template Version page is displayed.
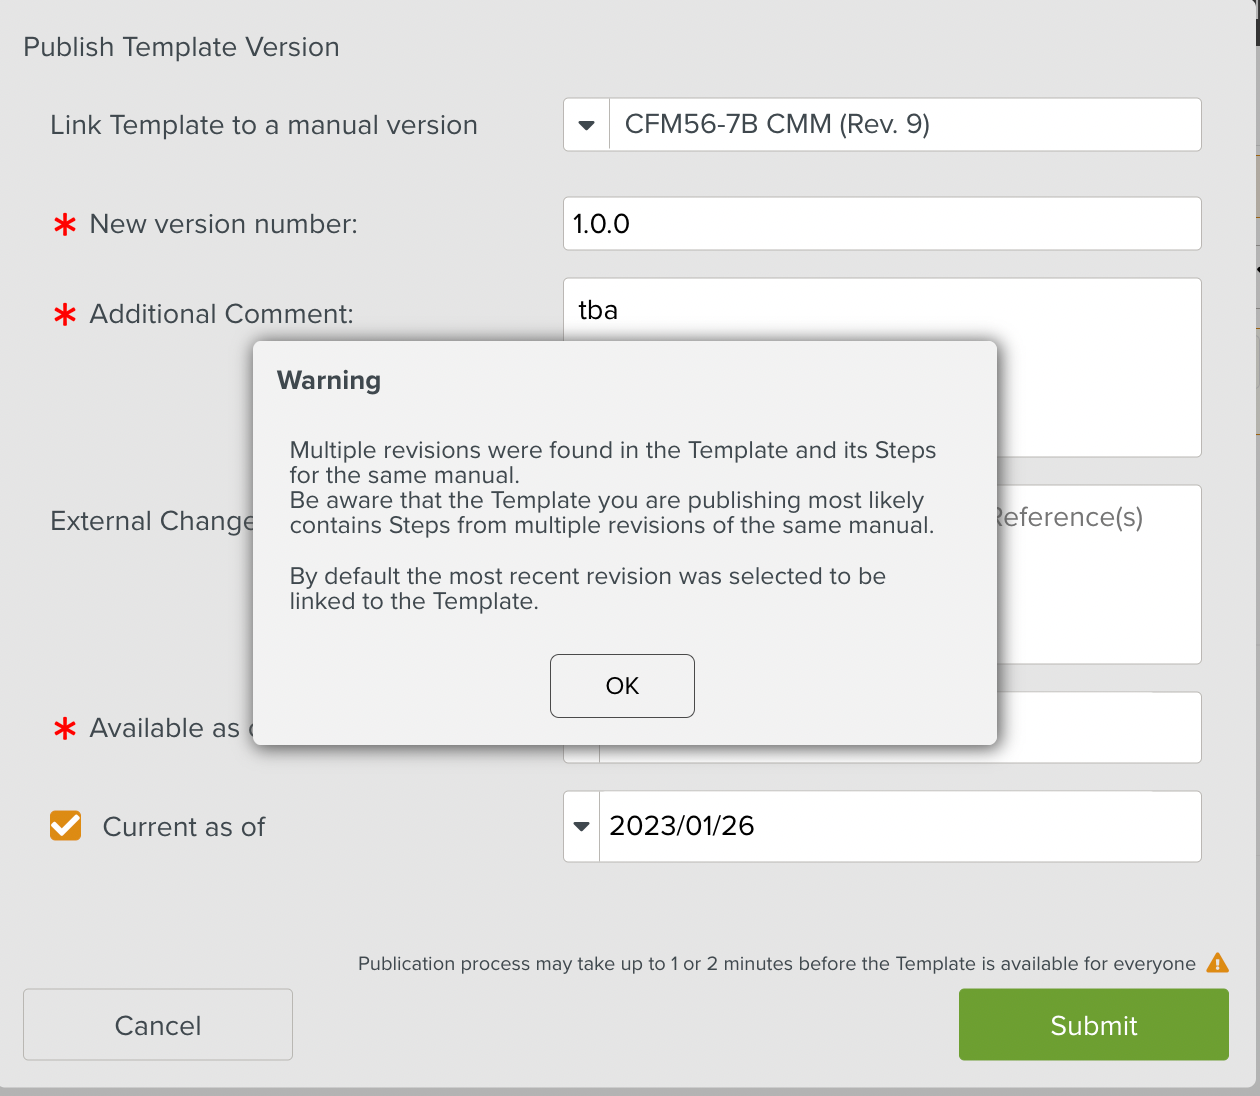
Note
If the Template and/or its Steps were generated from multiple versions of the same Reference Manual, a Warning appears as shown below to alert the user.
If a new version of the Template was initiated from the OEM Revised Content of Document Bundles, the Reference Manual version linked to this Template is displayed as read-only in the Publish Template Version dialog.
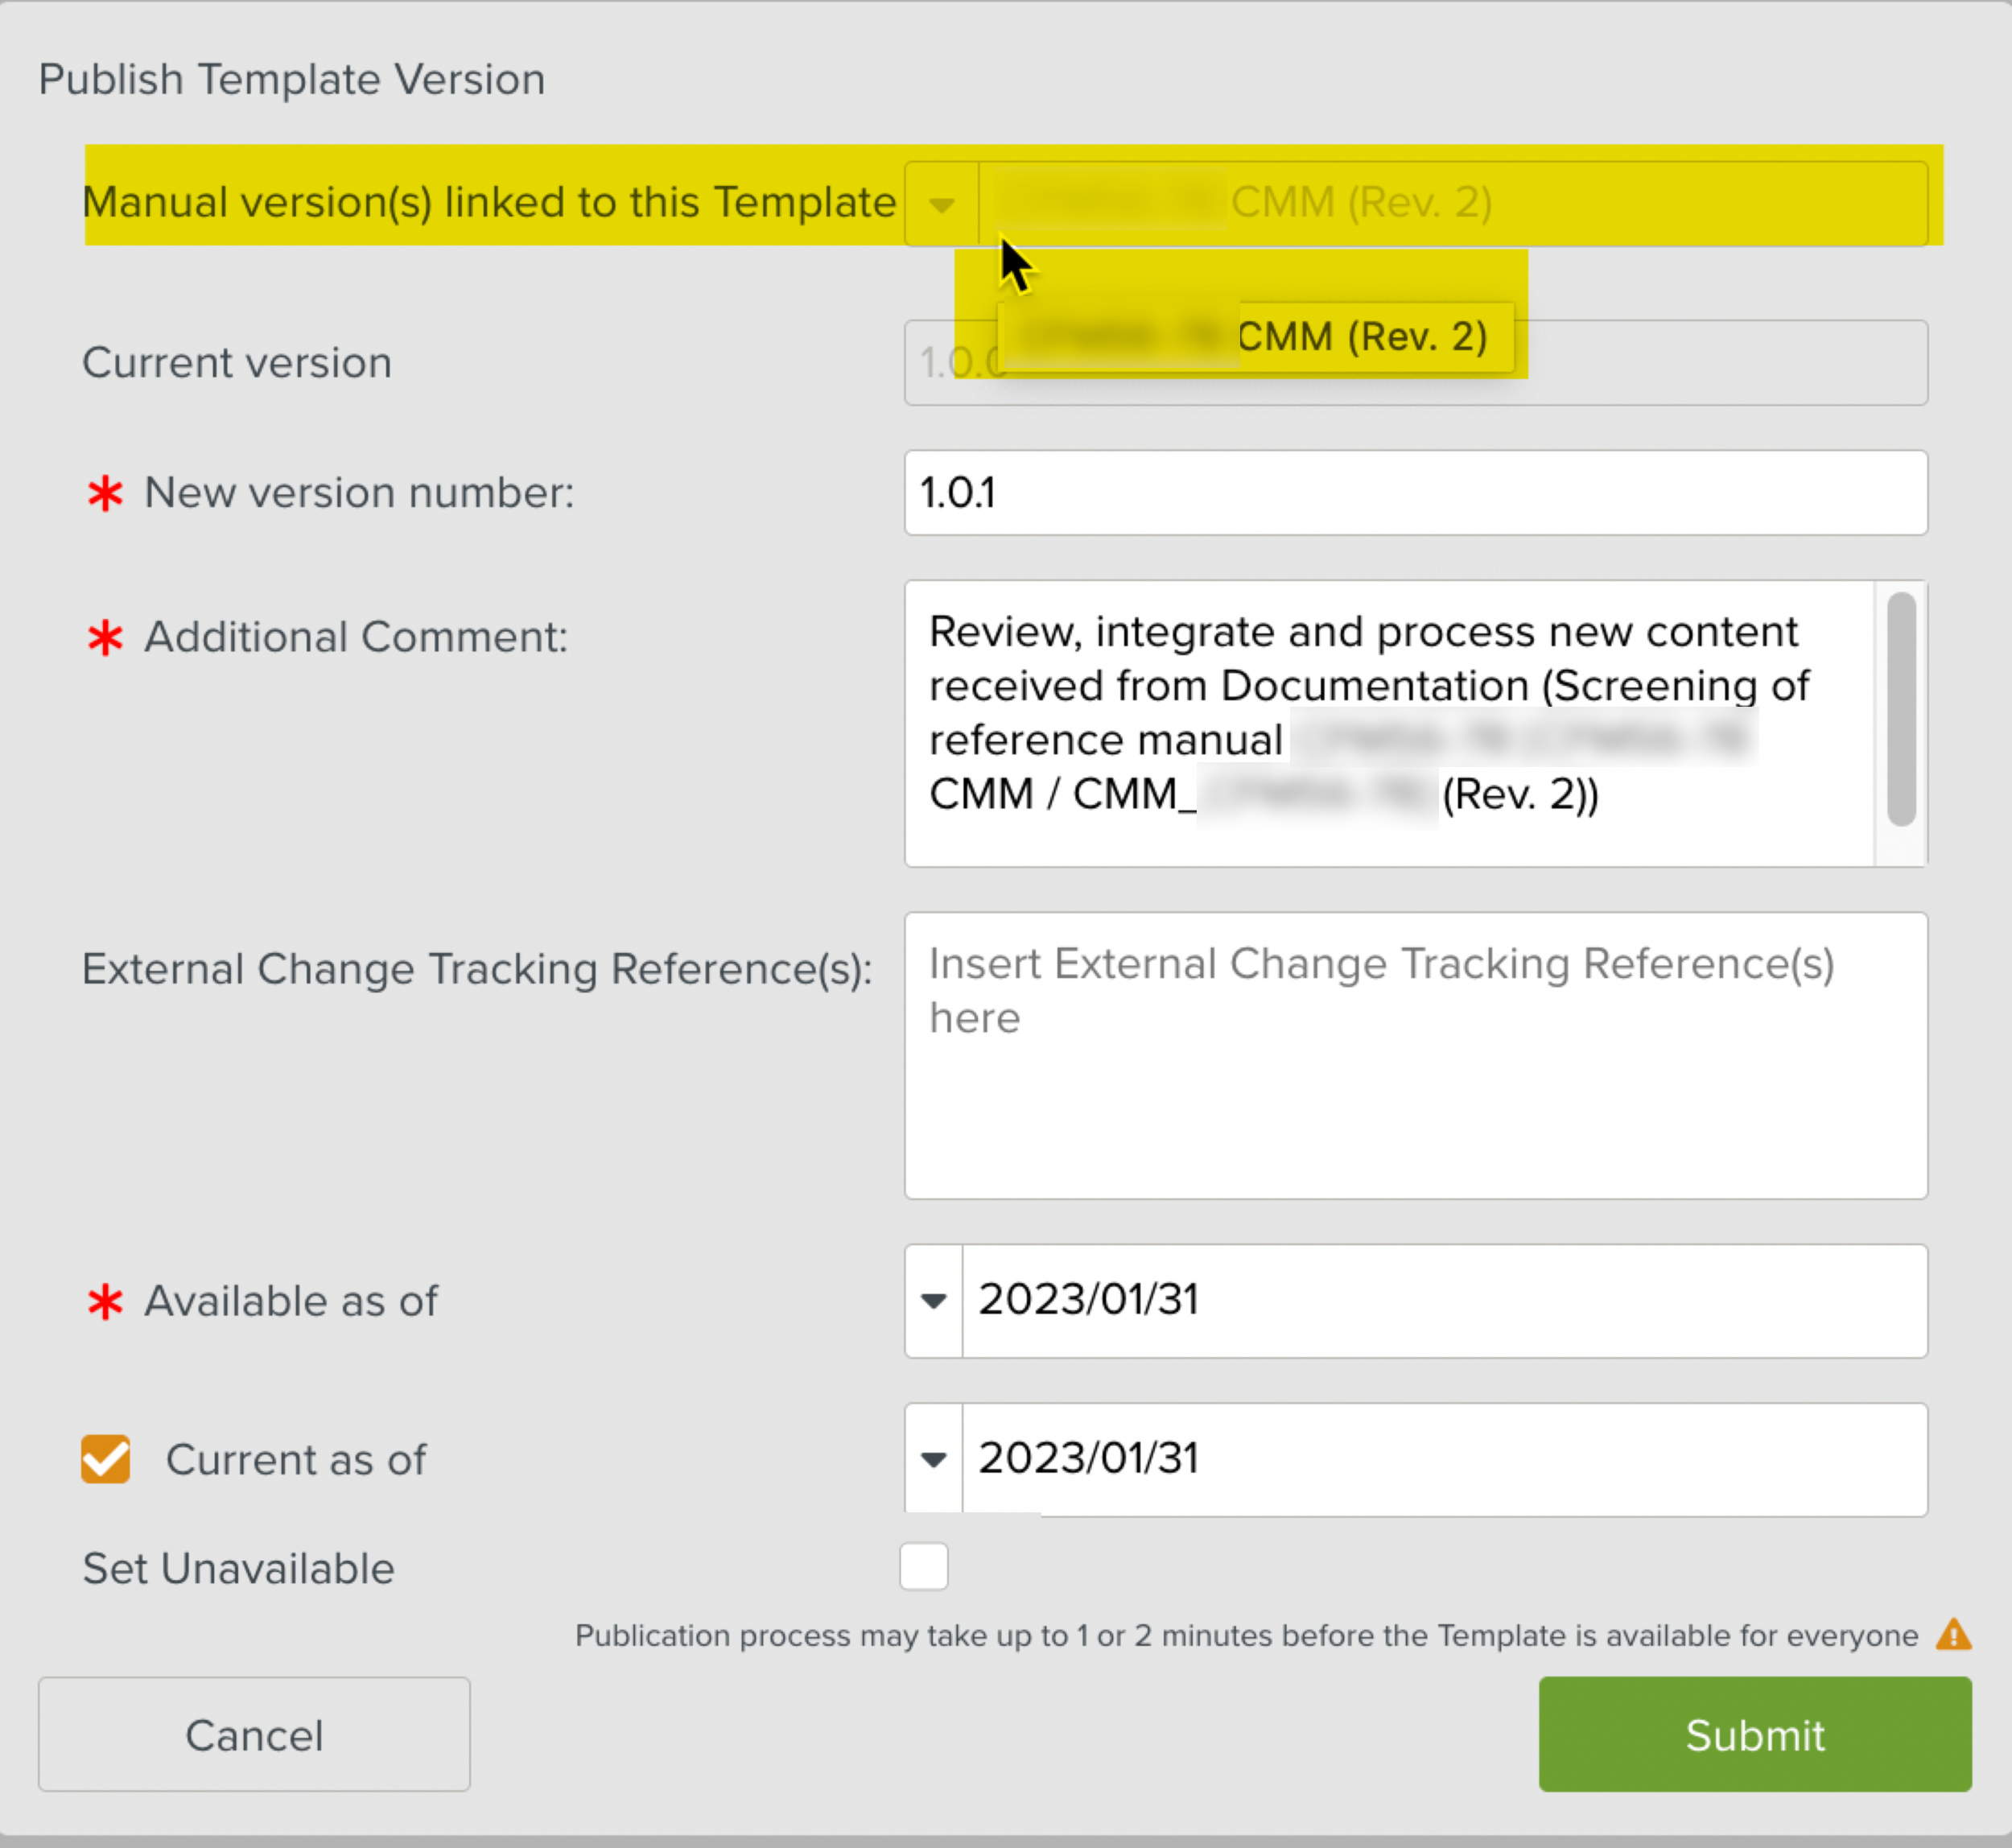
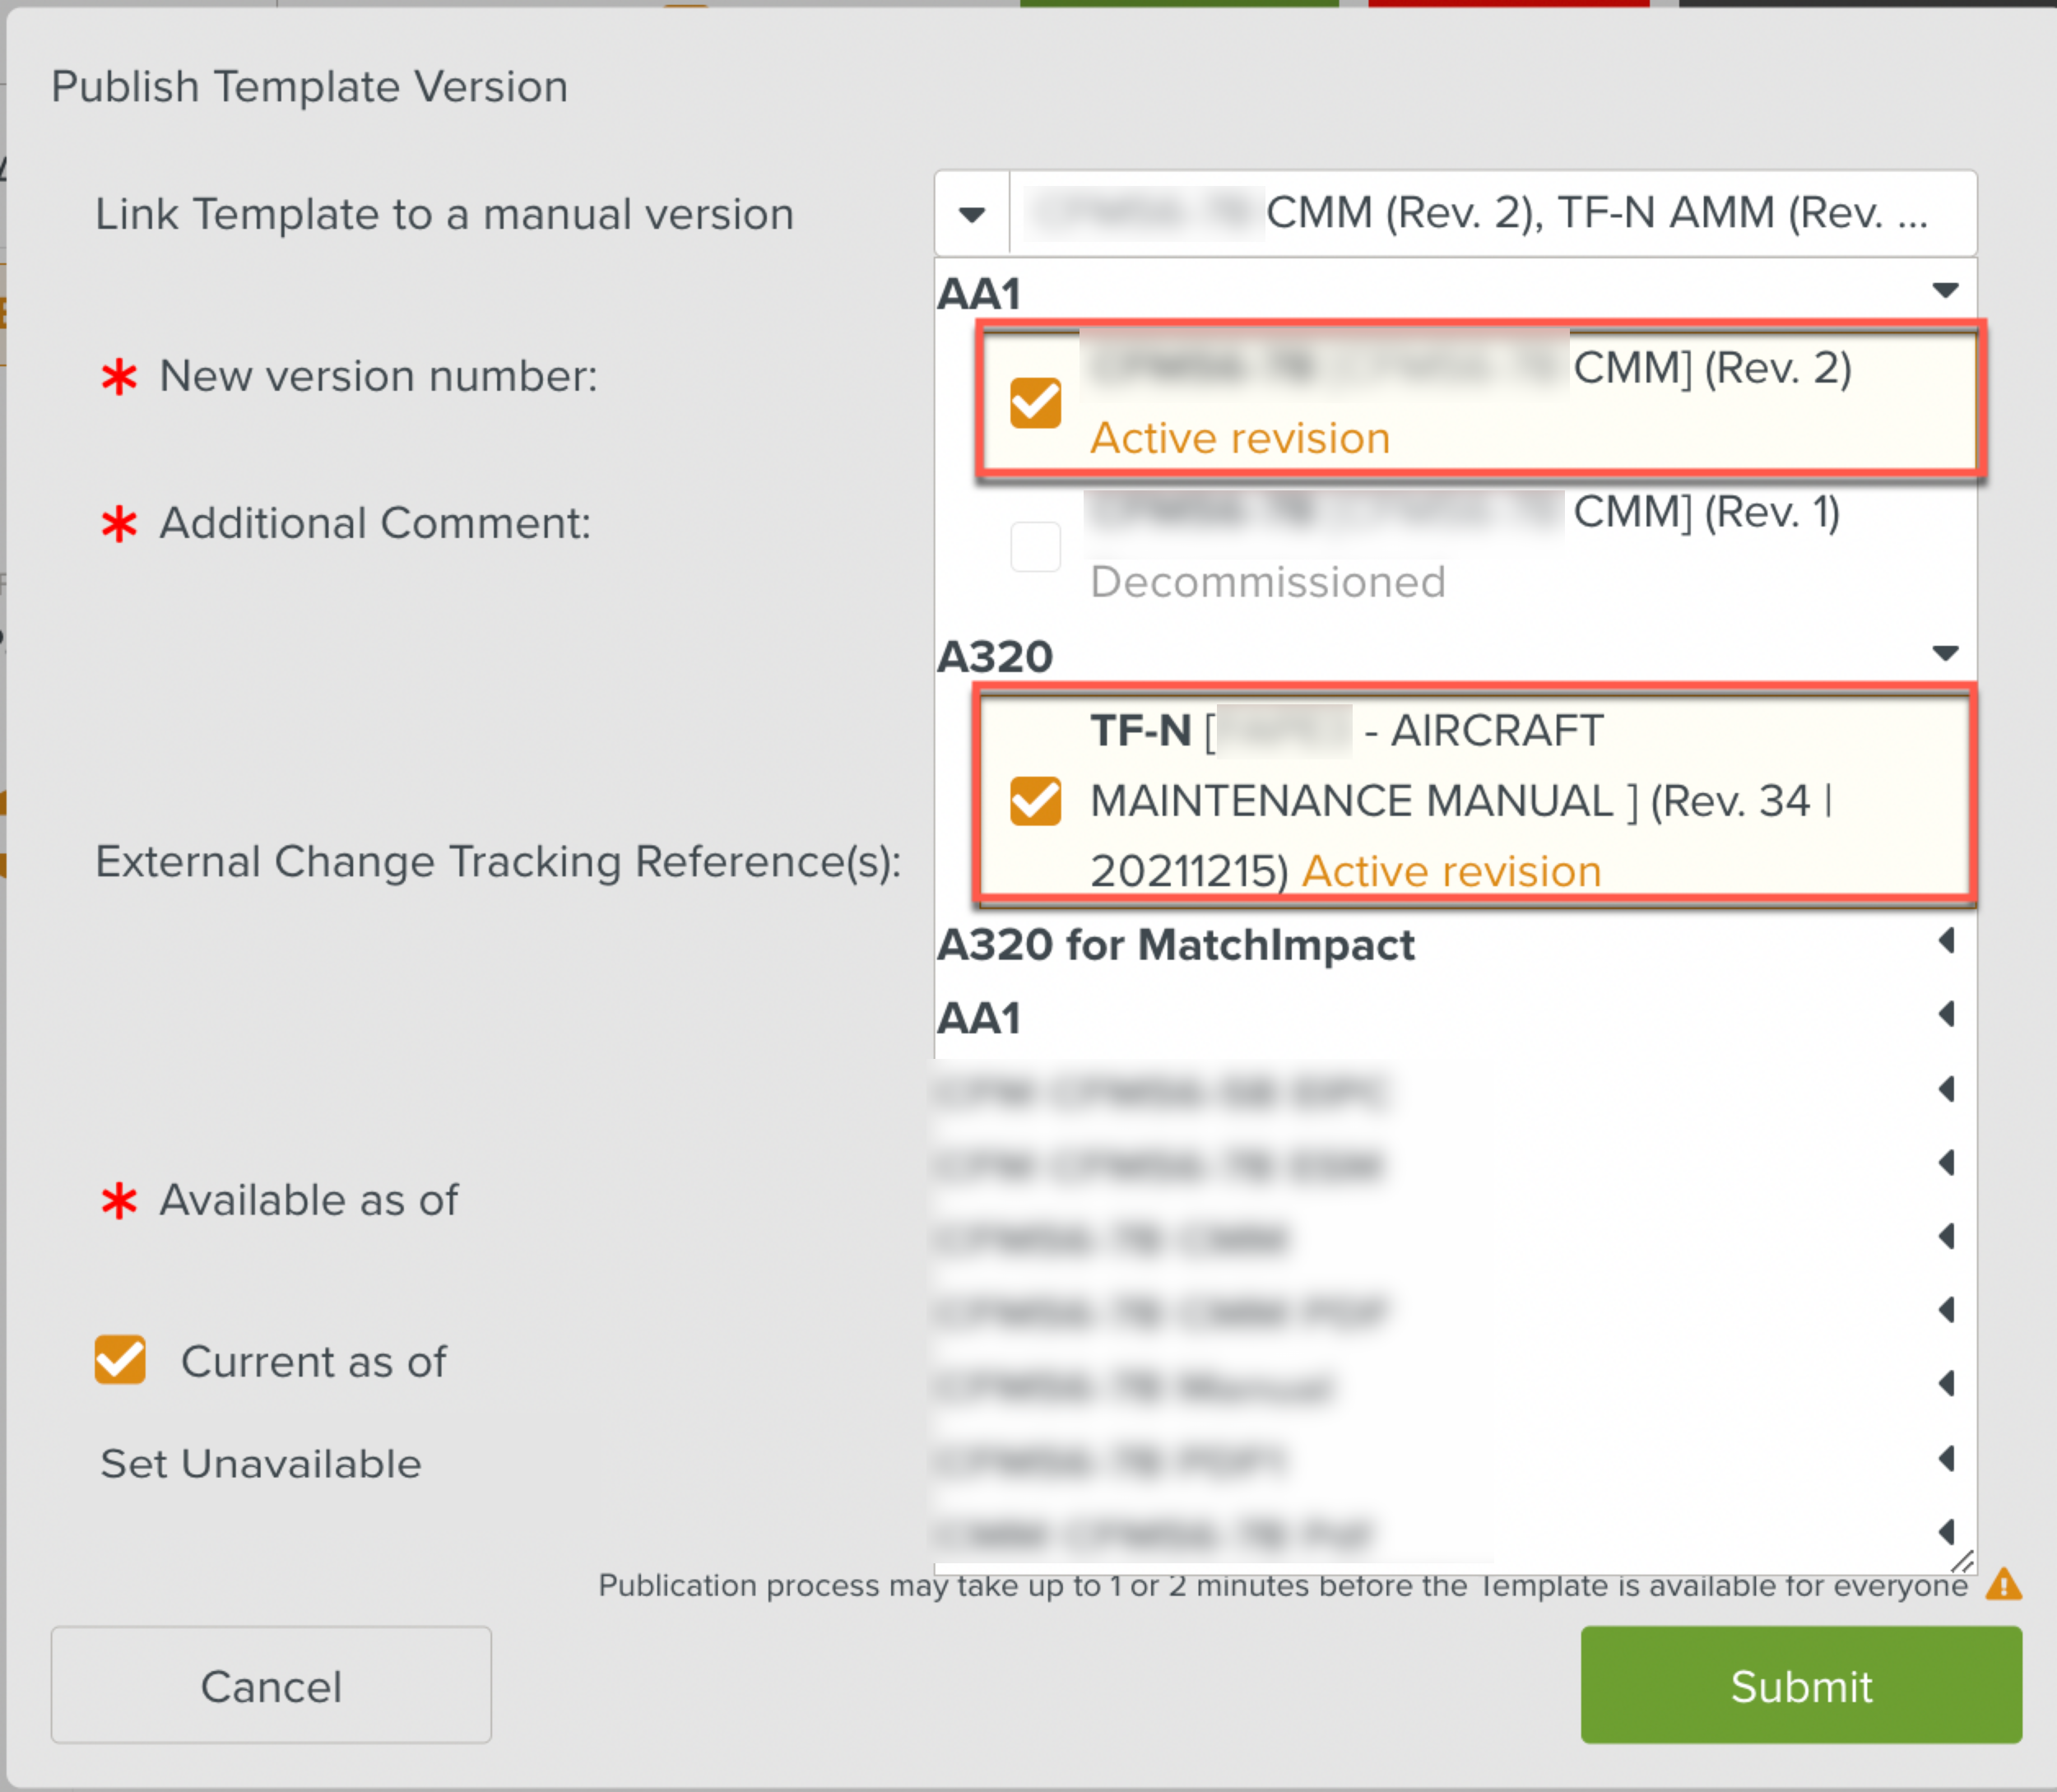
If multiple Reference Manual versions are linked to the Template, you can view all the Reference Manuals in the tooltip text by hovering over the field as shown above.
Add details in the following fields:
Field
Description
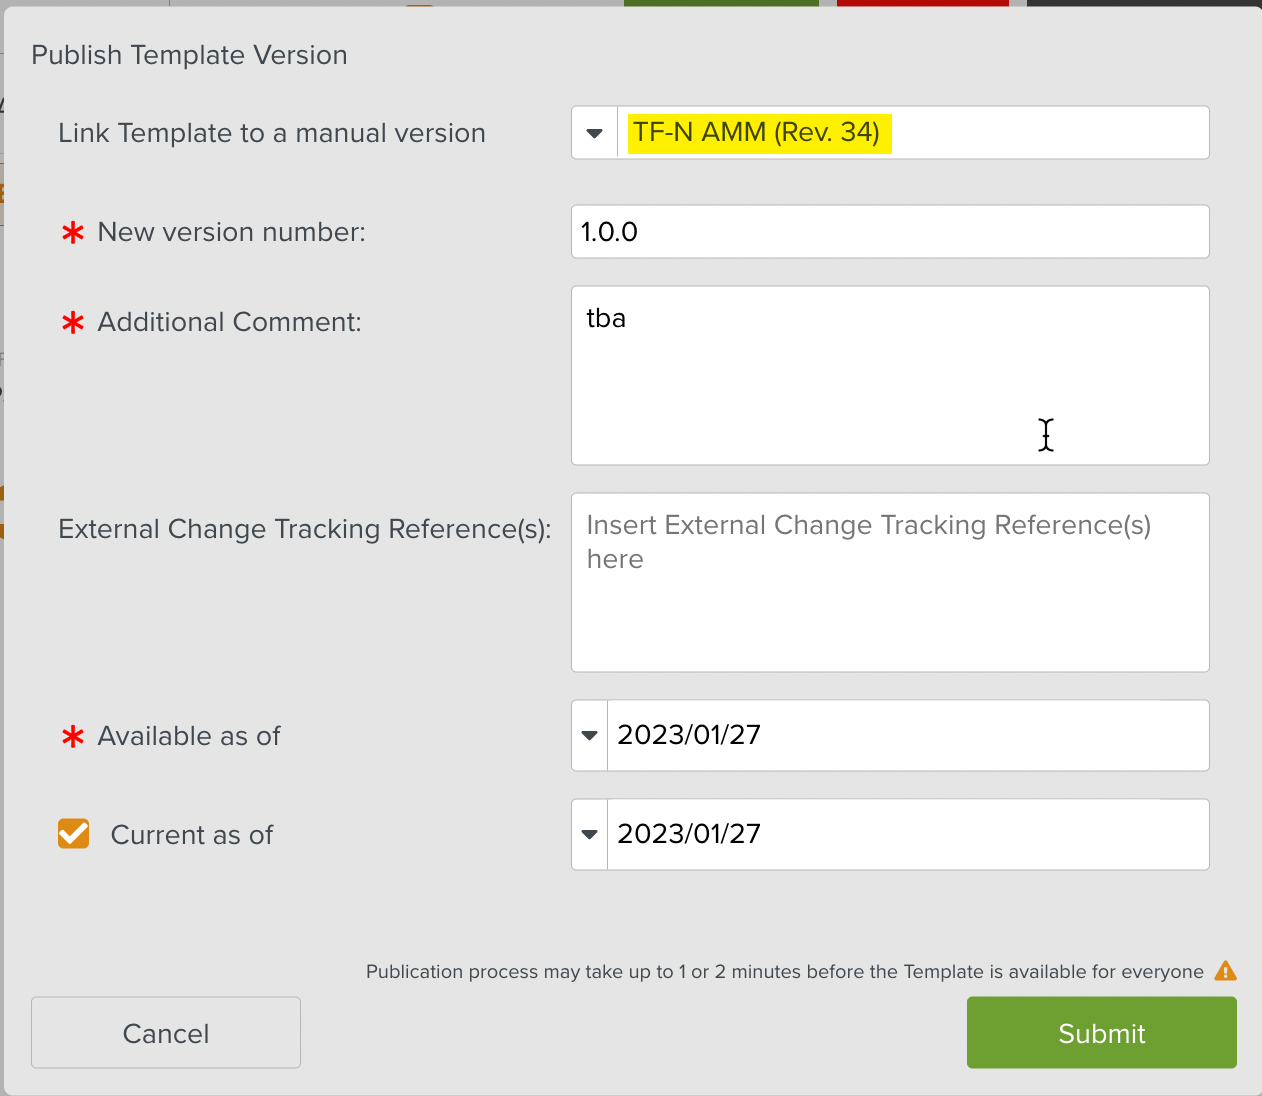
Link Template to a manual version
From the dropdown list, select the Manual to which you want to link the Template. With this link, the Template is linked to a Release Package.
This field is prefilled for Templates that are generated from Reference Manuals or have Steps generated from Reference Manuals.
If the Template is generated from a Reference Manual, the field is prefilled with the reference to the Manual.
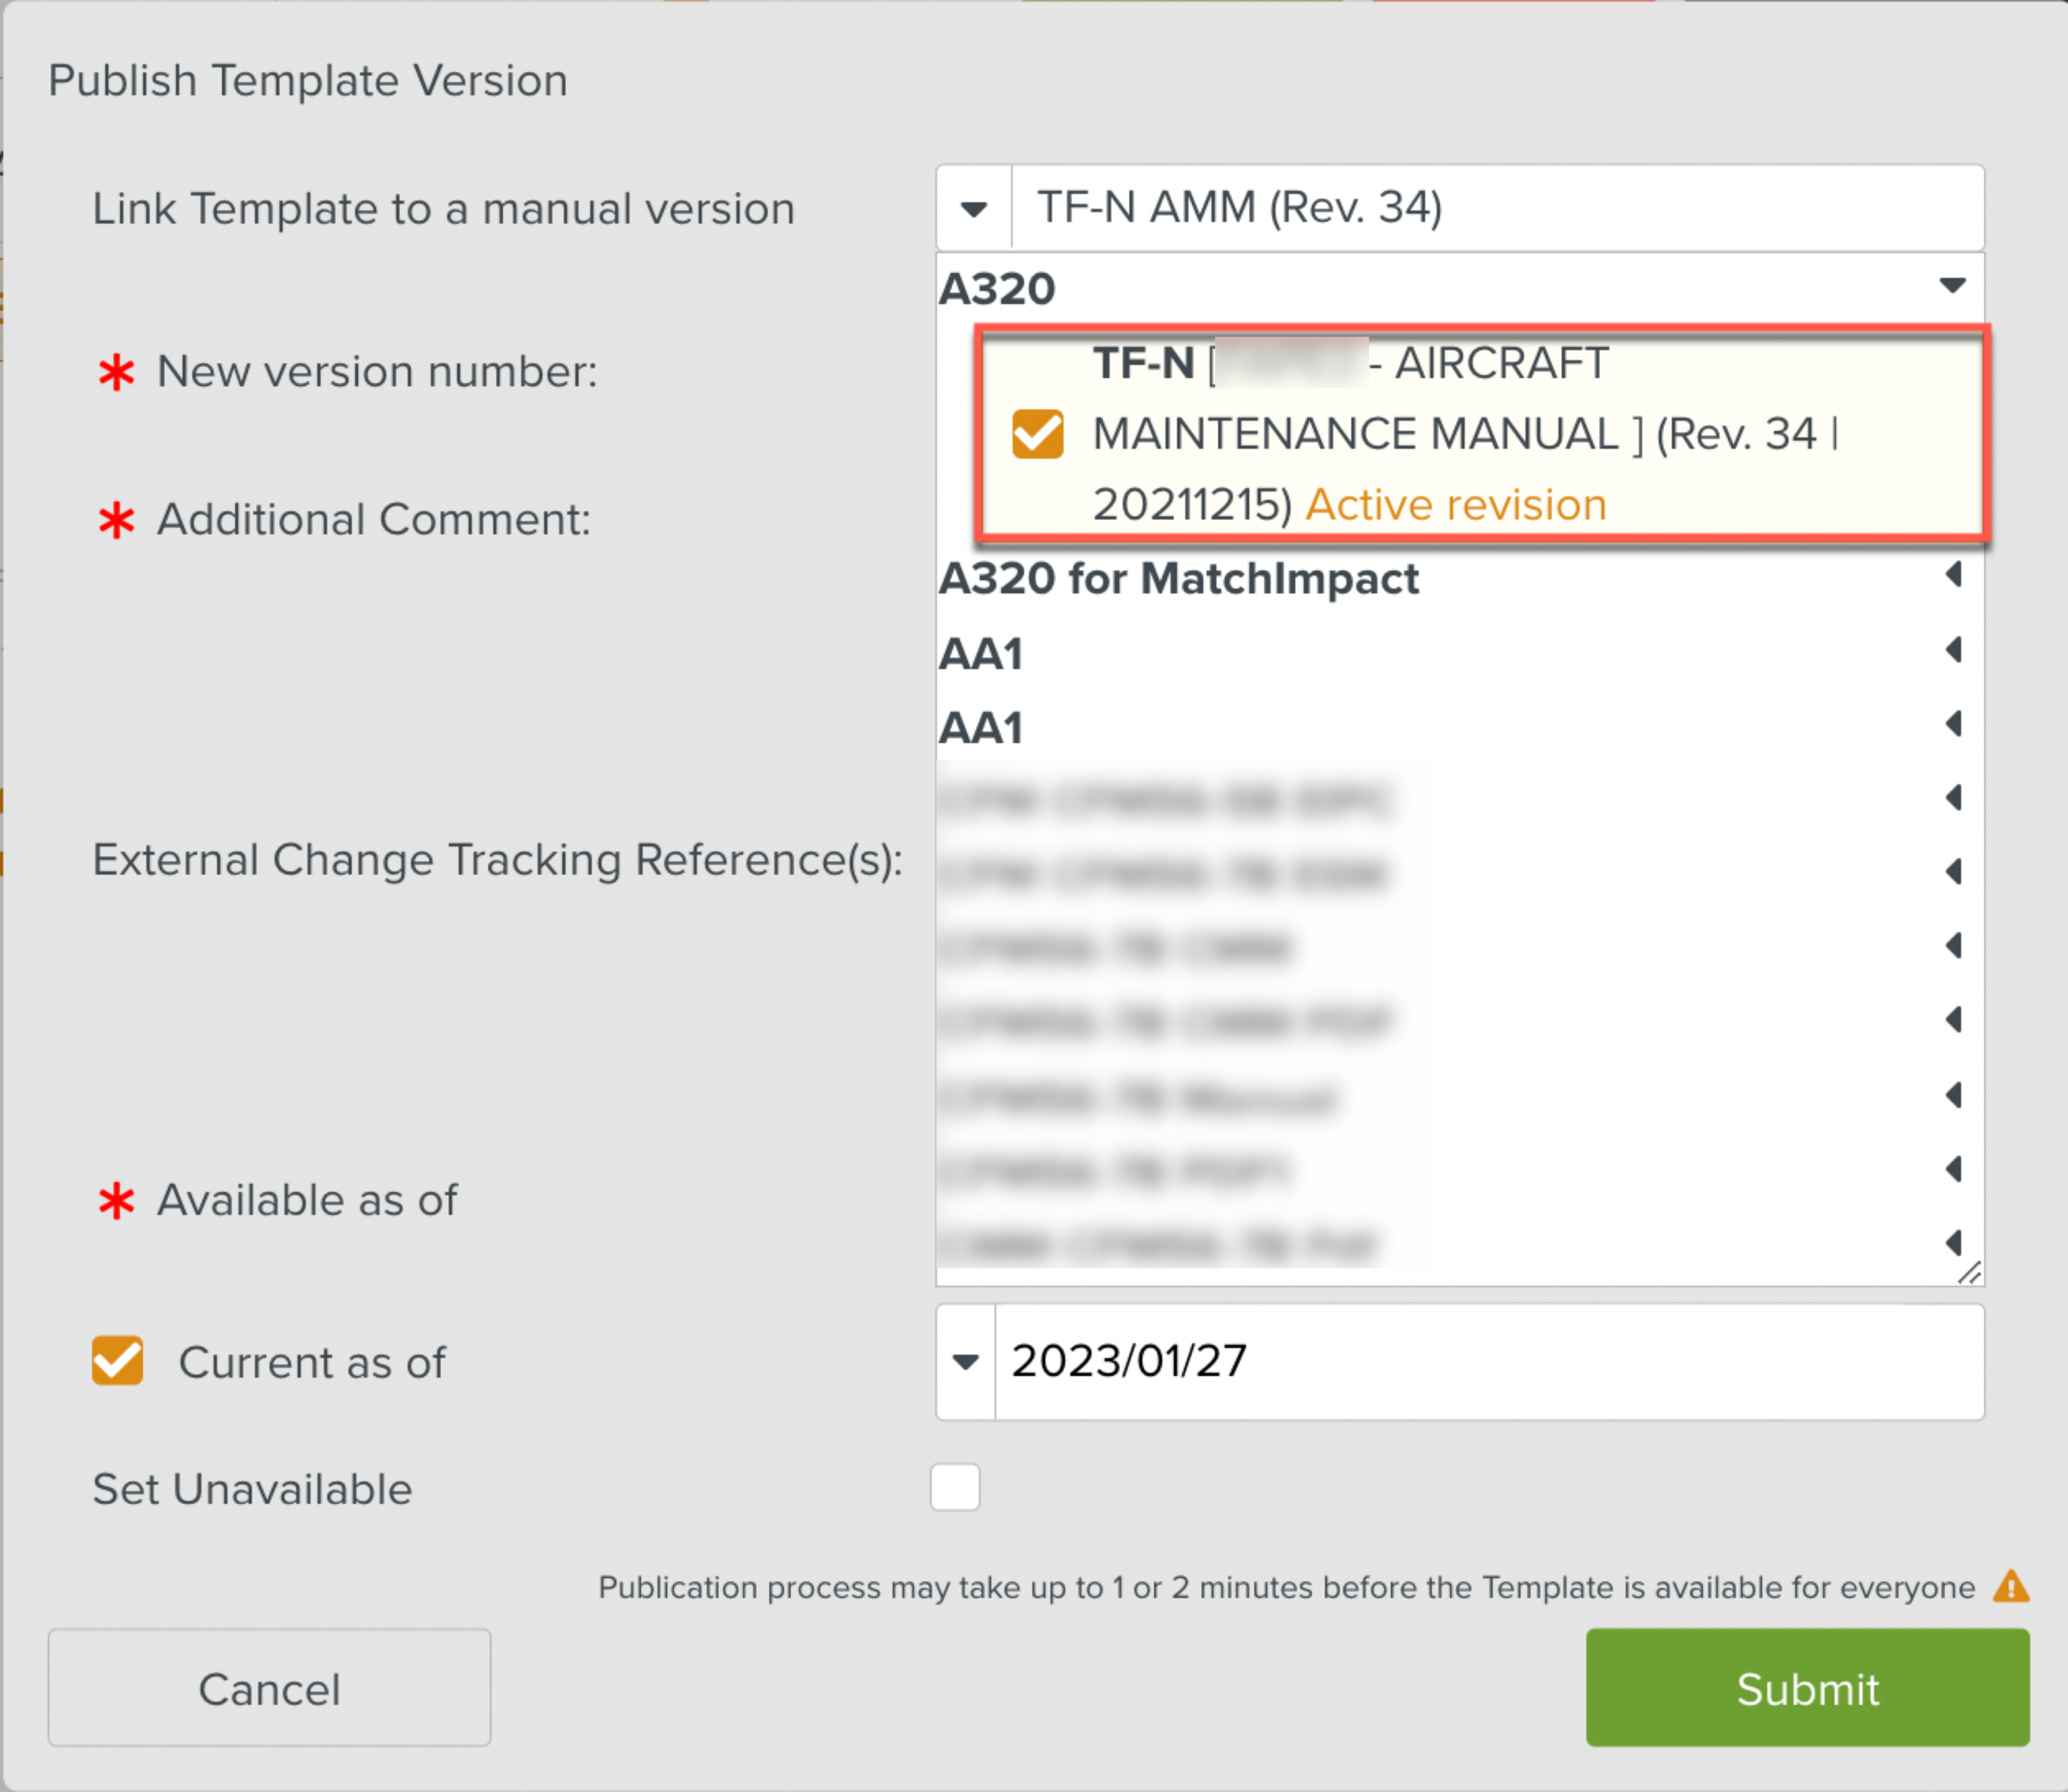
If the Template has Steps generated from one or more Reference Manuals, the field is prefilled with references to all those Manuals. A tooltip listing all the references to the Manuals appears as shown below.
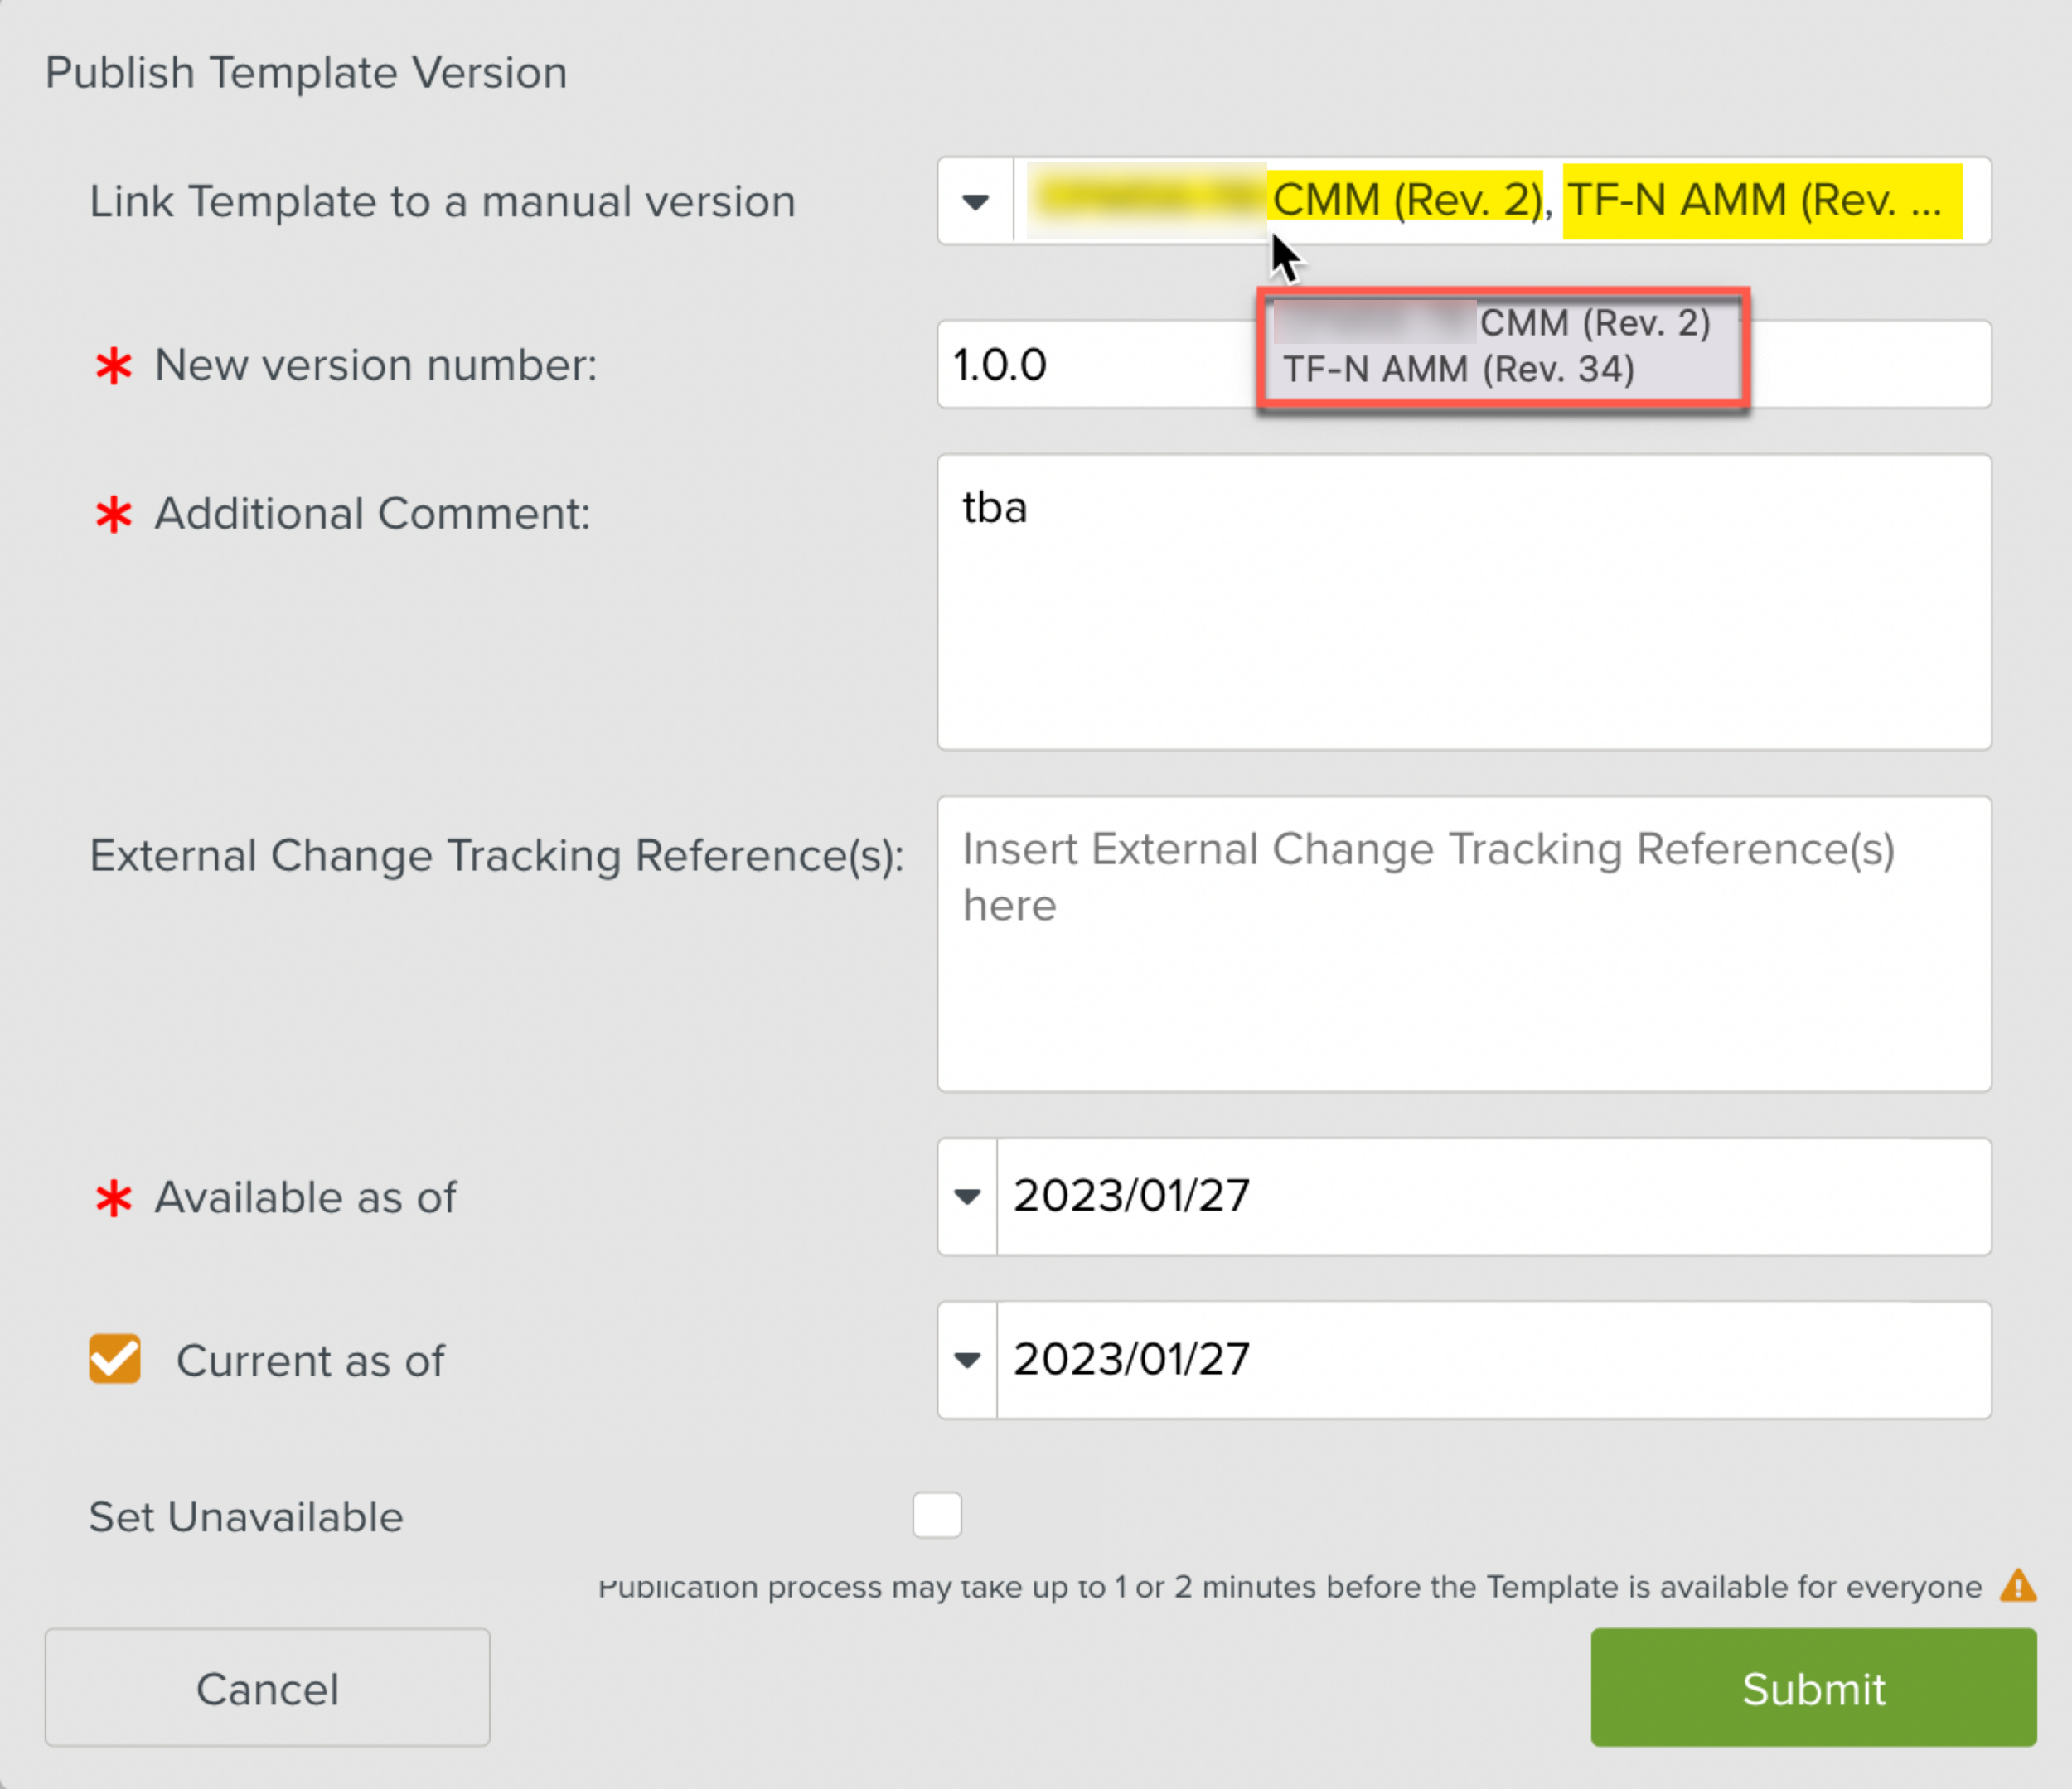
New version number
This is a required field.
Enter a new version number. The version number must have at least 3 digits separated by a period. For example, 1.0.0.
In the Enterprise Profile Settings, if the option Force Template version increment is set to Yes, then you cannot publish an older version number. For example, if the Template version 1.5.0 is active, you cannot publish 1.4.0. You must increment the version number.
If the option Force Template version increment is set to No, you can publish different branches simultaneously, for example 1.2.0 and 1.1.5. However, within the same branch, the version numbers must be incremental. You cannot publish 1.1.5 when 1.1.8 is already published.
The new version number can also be automatically generated. The version level can be configured using a Lifecycle Form in the Edition stage.
Additional Comment
This is a required field.
Enter additional comments. It cannot exceed 2000 characters.
This field default displays the edition goal and the global comments provided in the Template.
Available as of
This is a required field. By default, the current date is displayed. If you want to change the date, click
 next to the field. From the calendar that is displayed, select the date.
This field is used to set the date from when the new version of the Template will be available to the members.
If you did not check the option Current as of, it also becomes the current version at the selected date.
Current as of
This is a required field. By default, the current date is displayed.
Select the checkbox and then select the date from when you want the new version to become the current version. The new version of the Template would become the default version on the date you enter in this field instead of the date in the Available as of field.
Note that the Template will not be visible in the Template DB before the date set in this field.
If the checkbox corresponding to this field is not selected, then the new version of the Template becomes the current version, on the date selected in the field.
Set unavailable
When is checked, the and date fields are disabled.
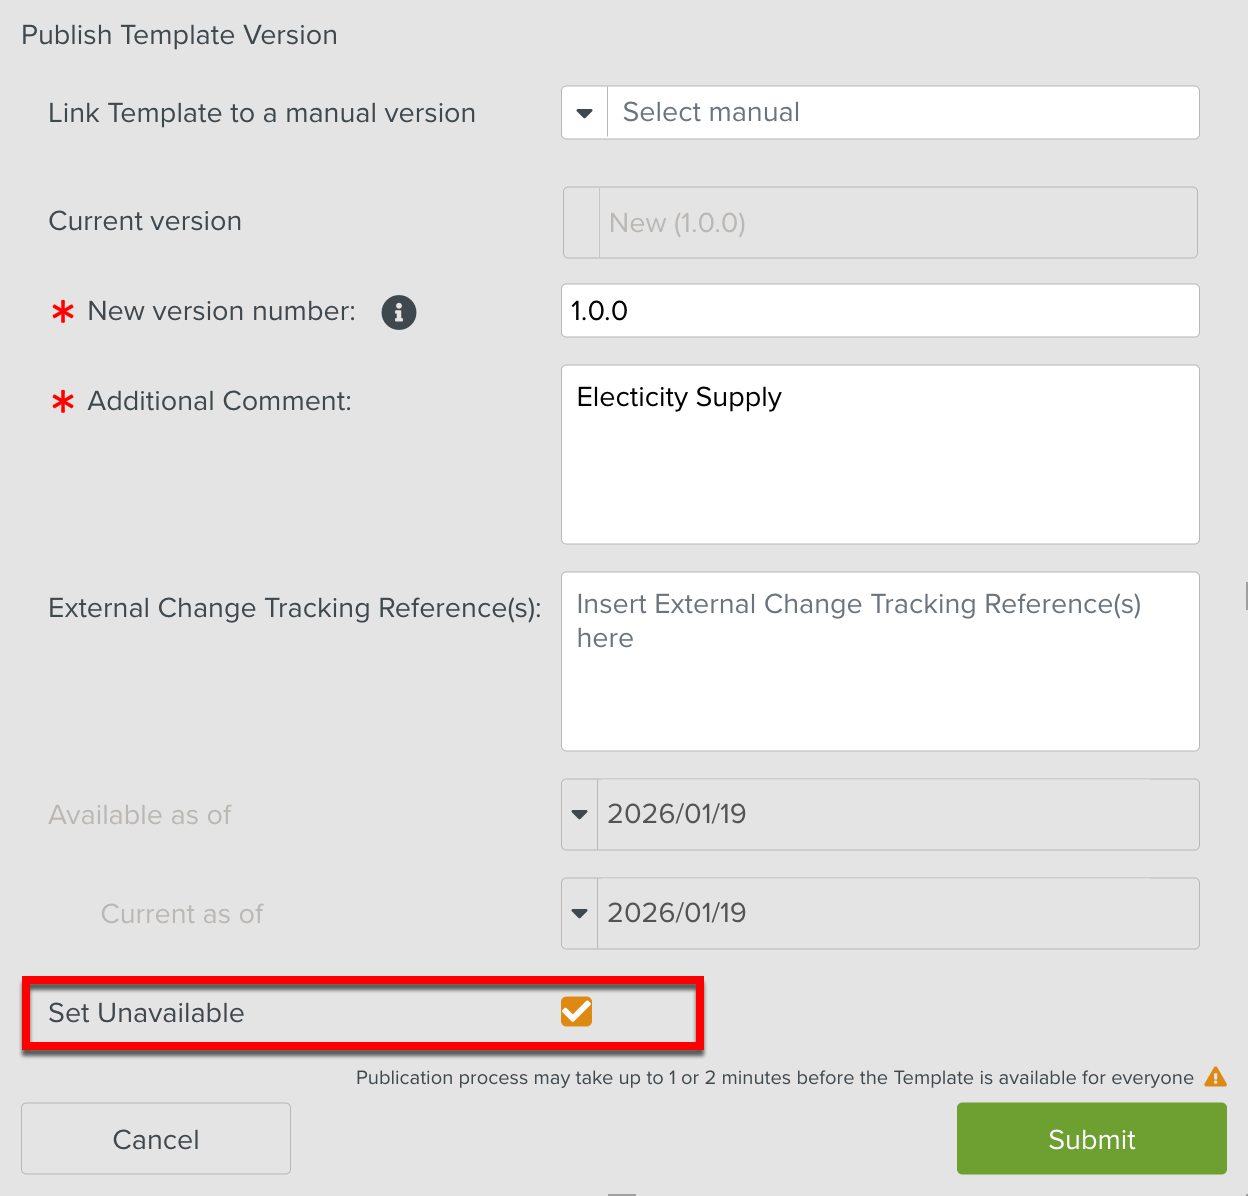
After publication, in the Template Version History, the Template version status is set to Unavailable. The Publish Date is automatically set to a far-future date +200 years, preventing manual changes.
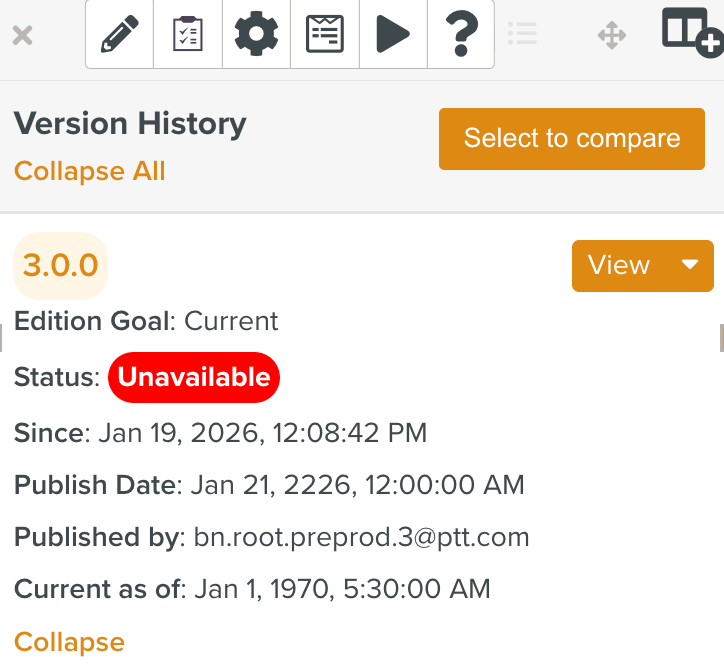
Note
In the associated Custom Lifecycle, when the Publication Behaviour of a Publish Task is set to Unavailable, the fields Available as of, Current as of, and Set Unavailable checkbox are hidden and the following message is displayed instead.
Click .

The Template is published.
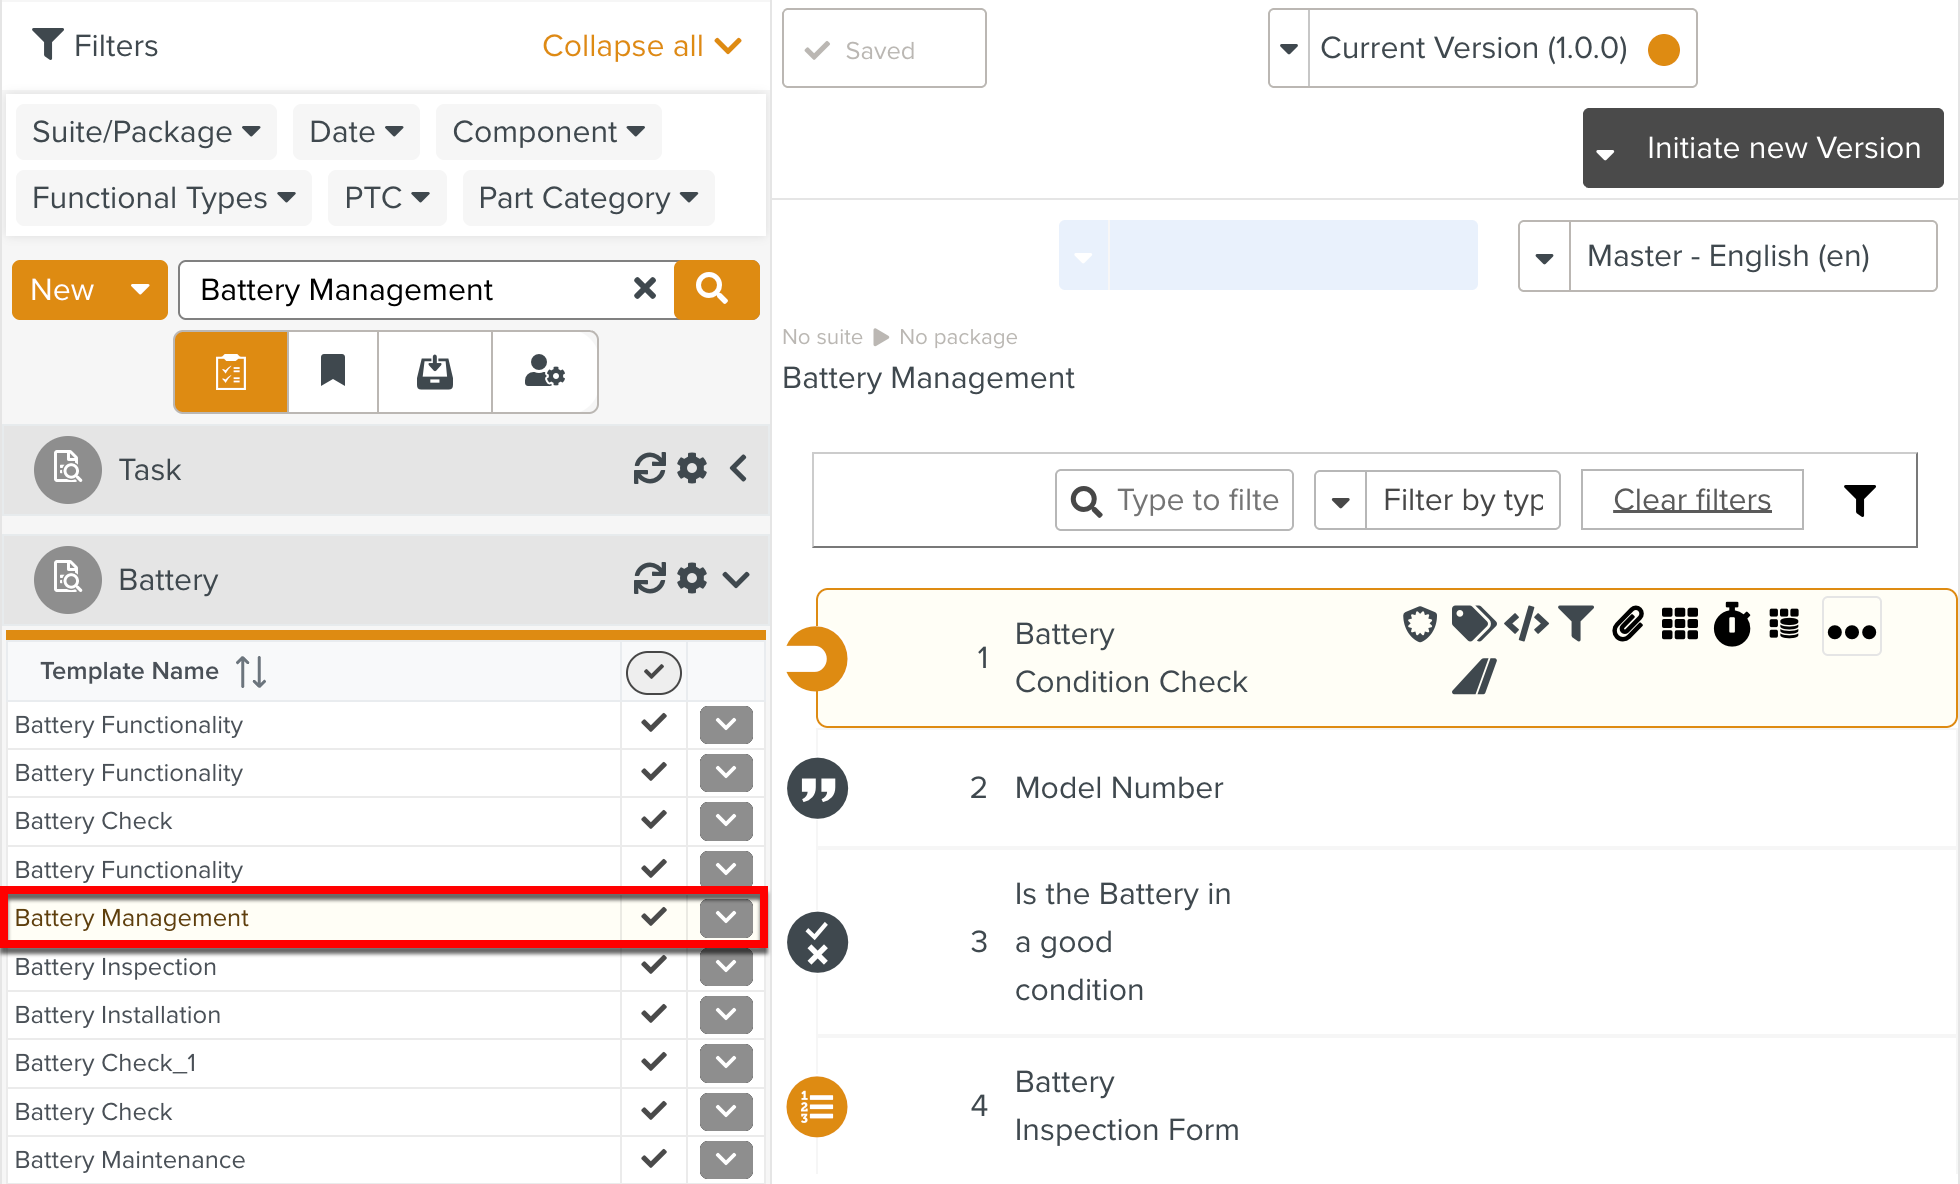
In the tab  Published Templates, the Published Template is denoted by the
  icon.
icon.
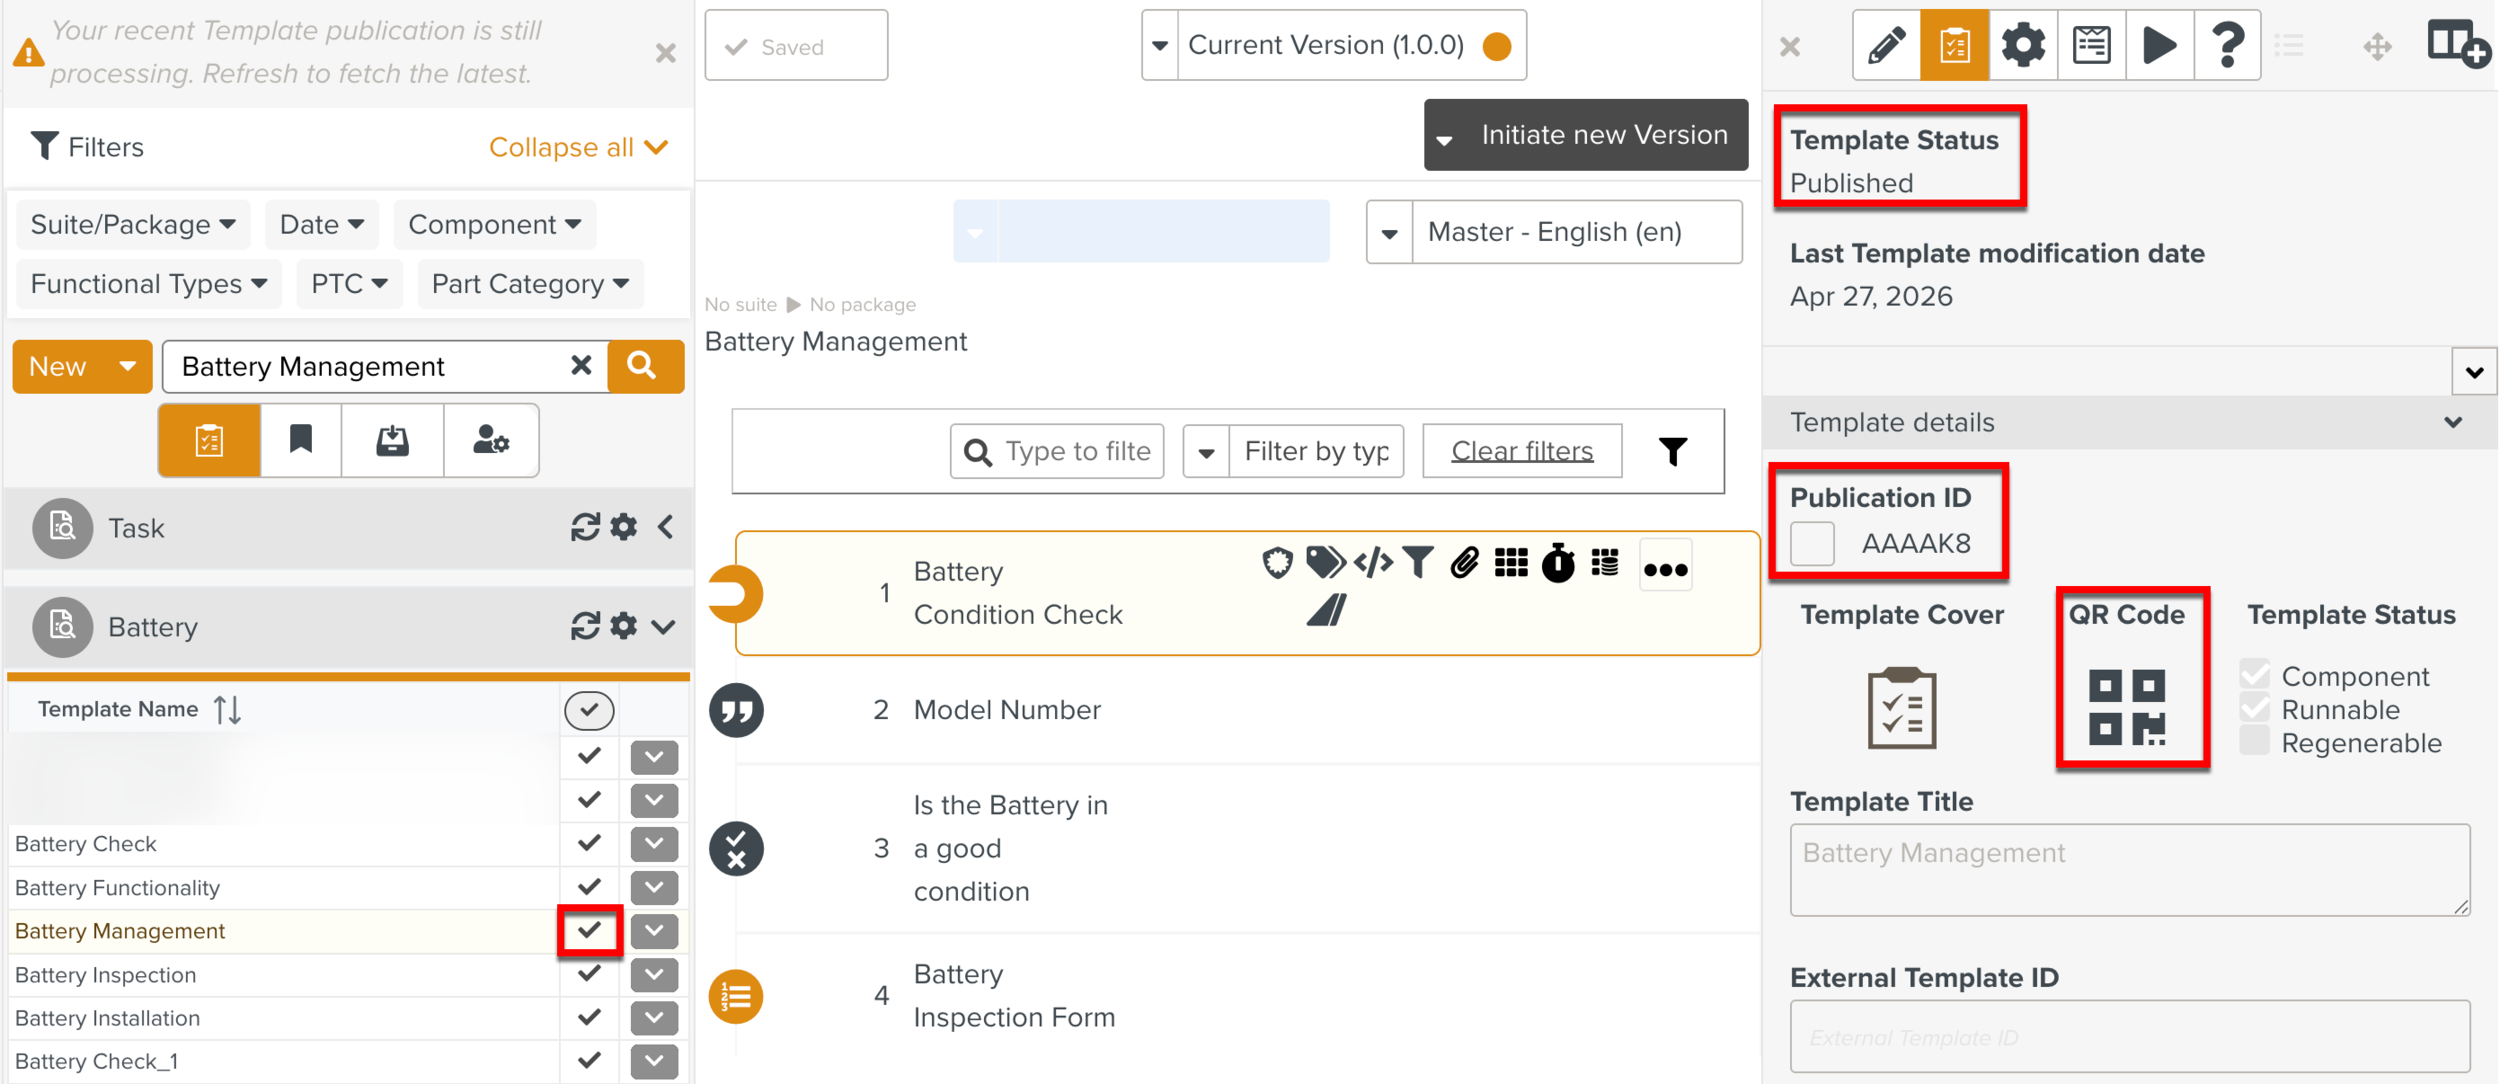 |
In the  Templates Information Editor, notice that the Template Status is Published. The section Template Details displays the following information:
Publication ID — A unique ID is automatically generated by FieldLogs when a Template is published.
QR Code — Quick Response code automatically generated by FieldLogs when a Template is published. Hover over the QR code icon to view the QR code generated for this Template.
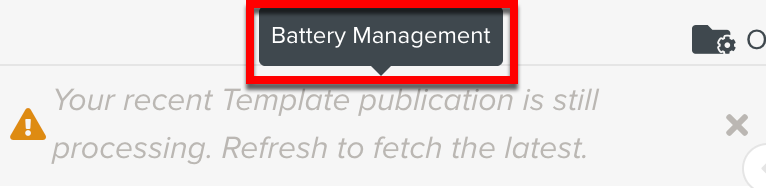
A message is displayed in the Library pane.
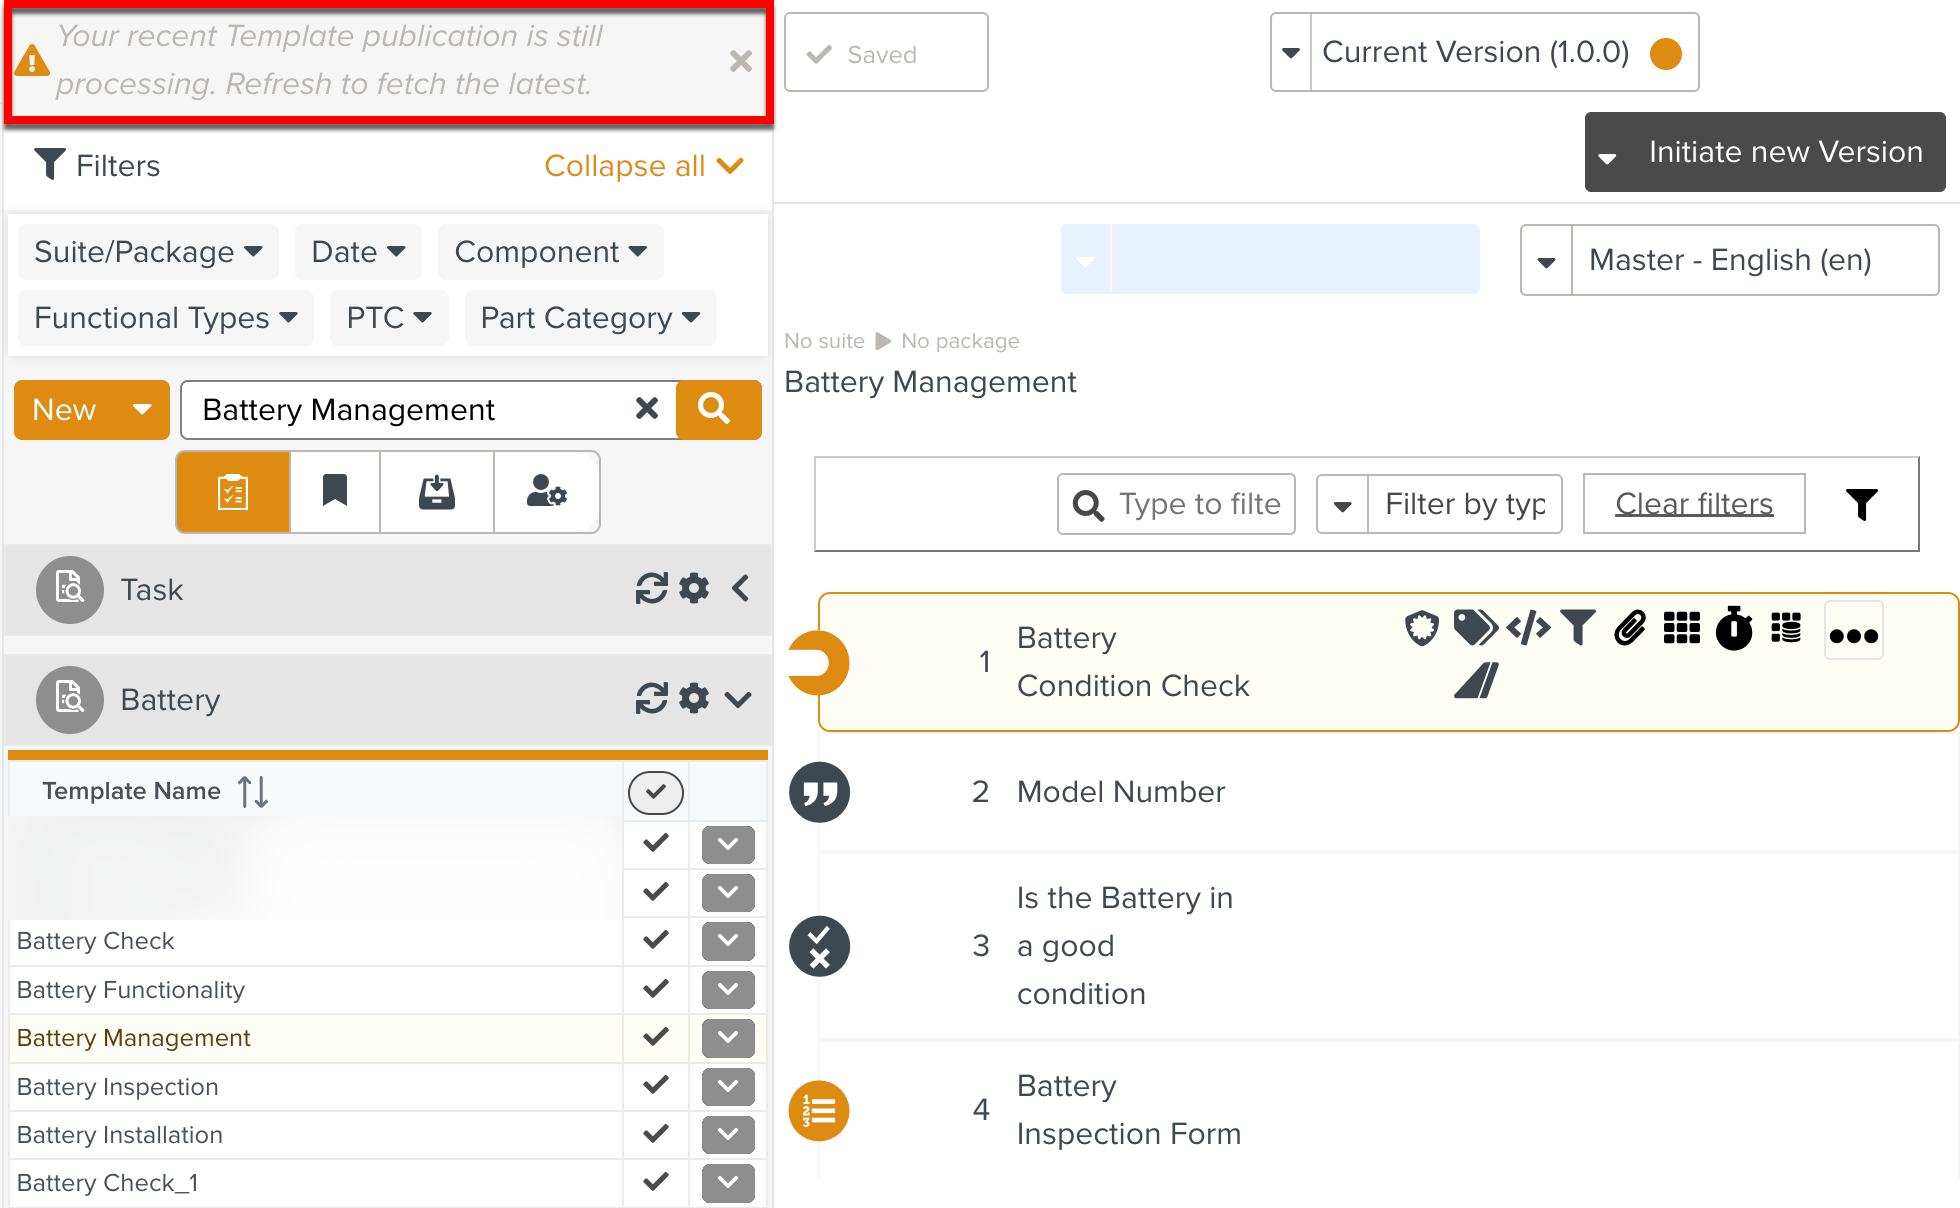 |
When you hover over the message, the name of the Template is displayed as shown below.
 |
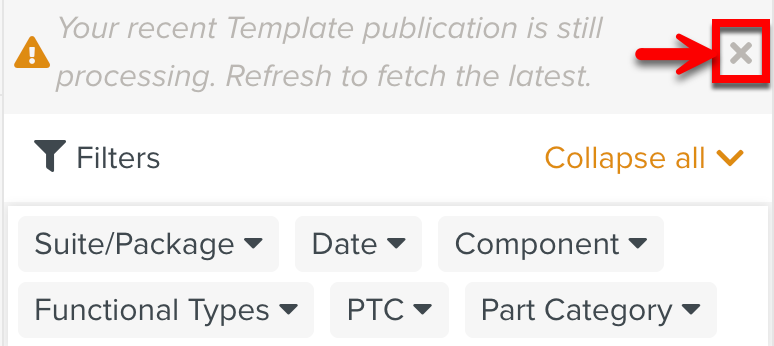
You can close the message as shown below.
 |