Uploading New Manuals from Manual Catalog Management
When new Manuals are uploaded, they need to be associated with the right Consumer and the right Technical Manual Index.
Note
To perform the following operations, you must have Write or All access rights.
To upload a new Manual, the following need to be done:
Create a new Consumer / Identify an existing Consumer.
Create a new Technical Manual Index / Identify an existing Technical Manual Index.
Create a new Manual Describer / Identify an existing Manual Describer.
Upload a New Manual.
A service provider might have several customers. These customers are referred to as Consumers. It is necessary to maintain the manuals pertaining to each Consumer separately.
For example, a maintenance service-provider might have several airline companies as their Consumers.
To create a new Consumer:
On the main menu, go to Enterprise > Documentation Bundles > Manual Catalog Management.
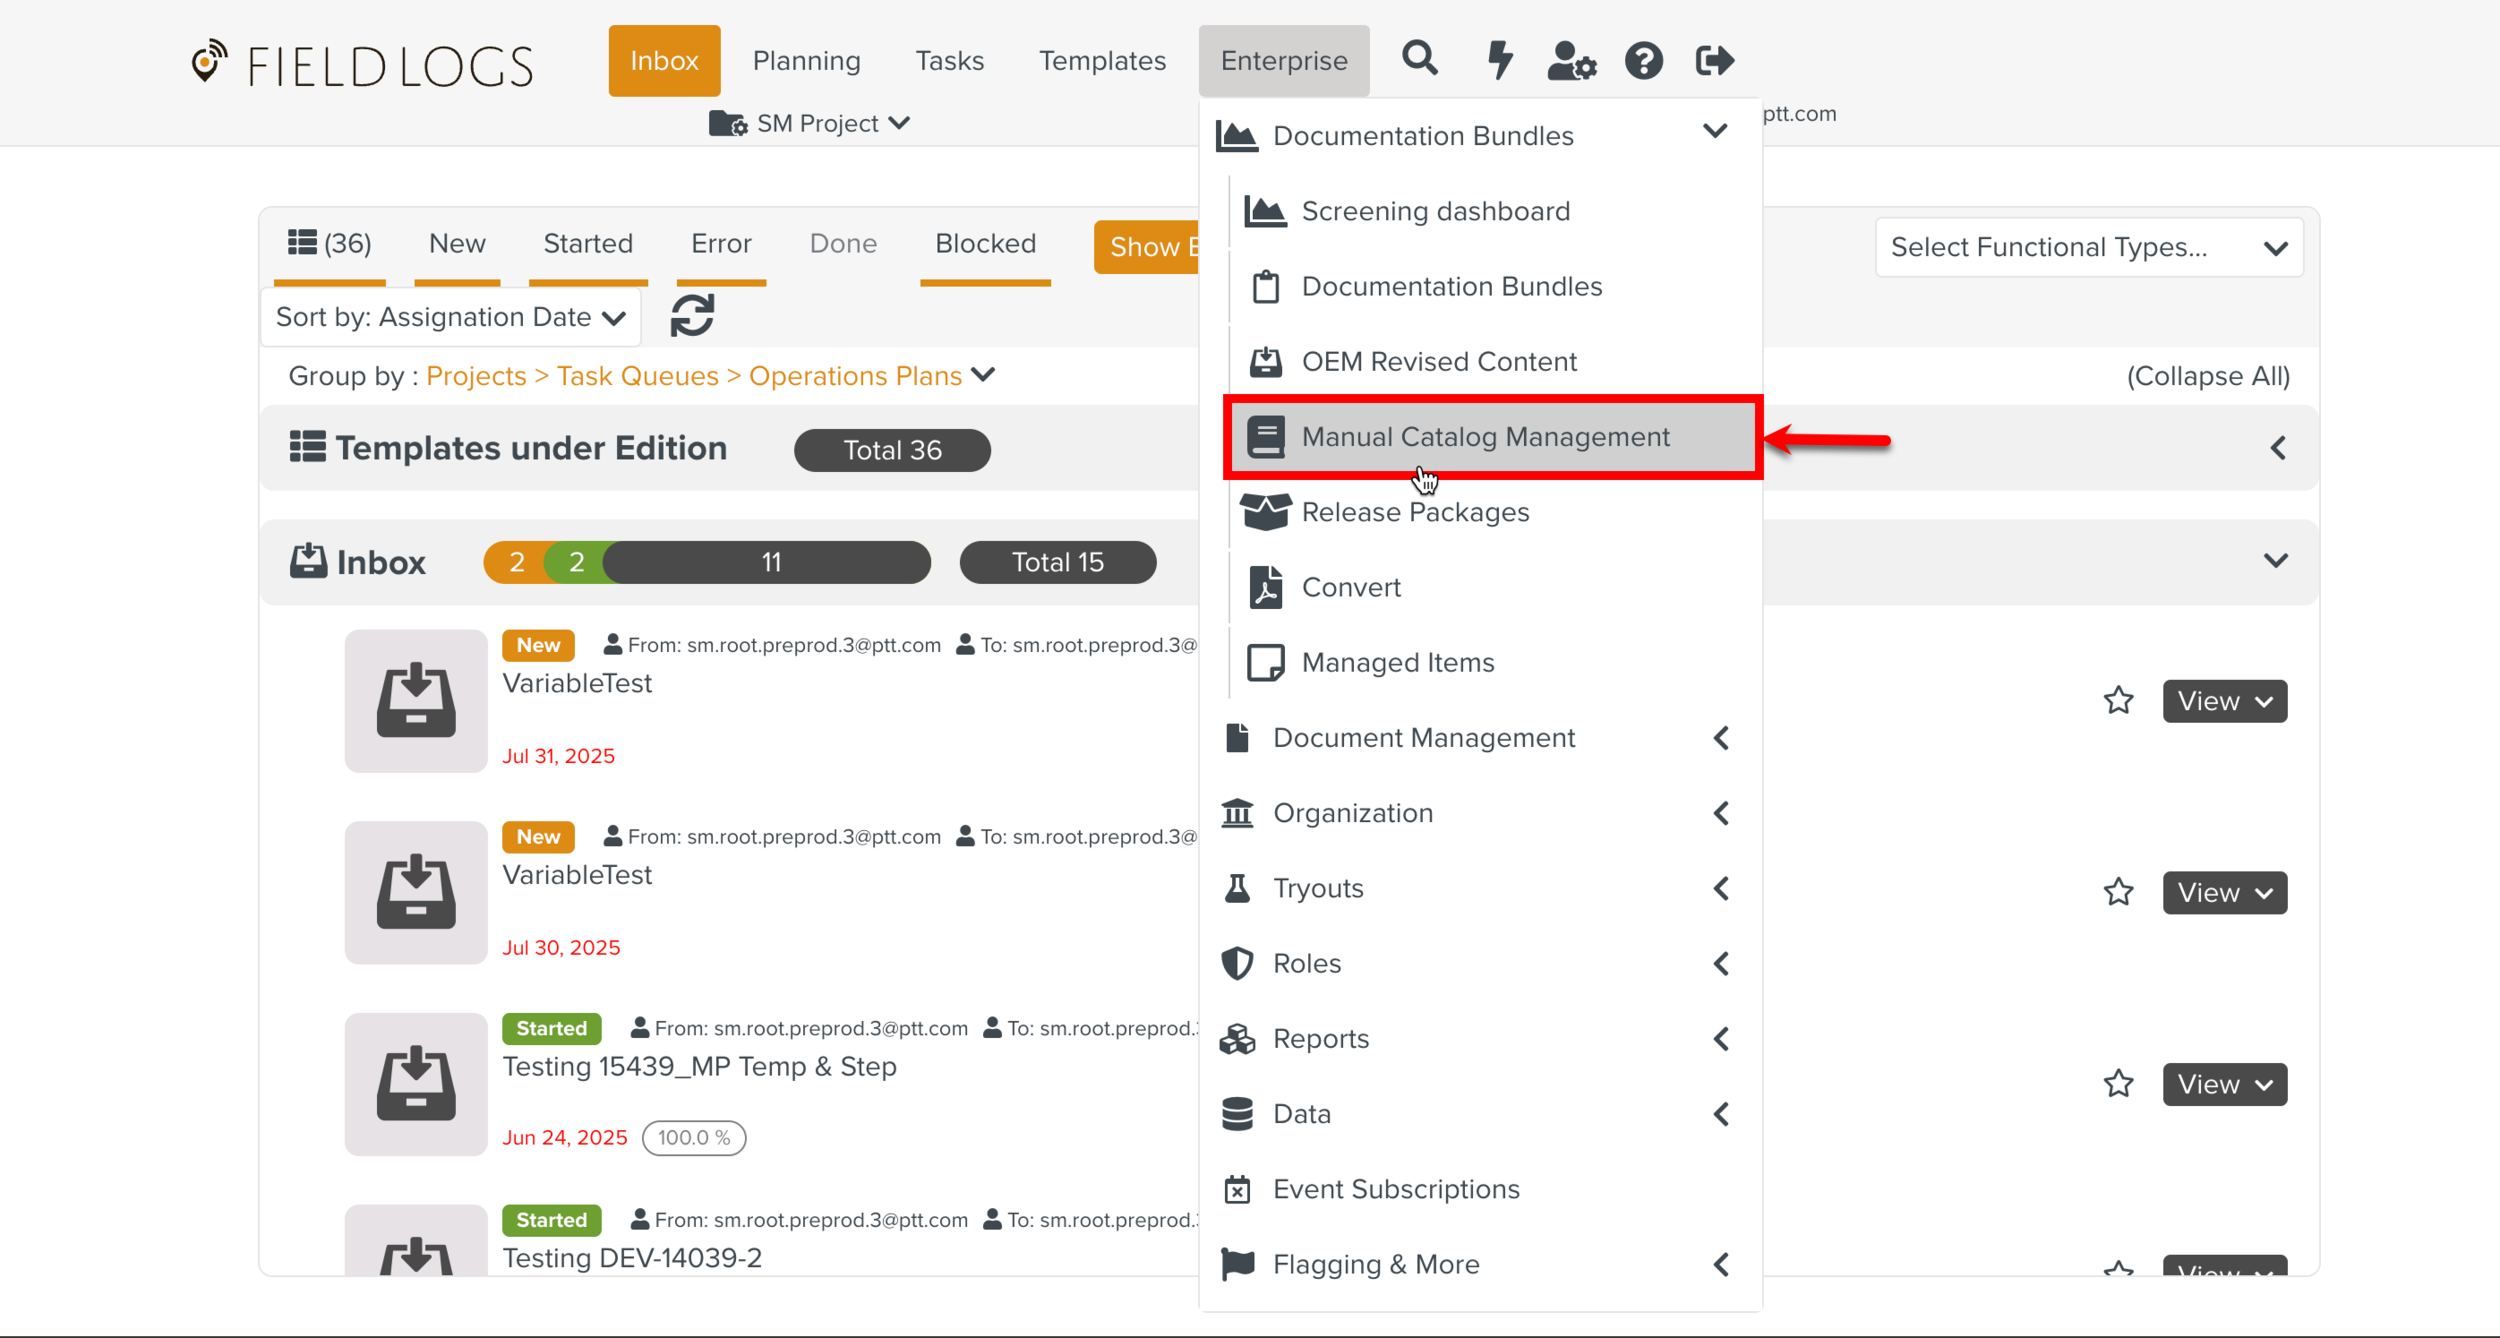
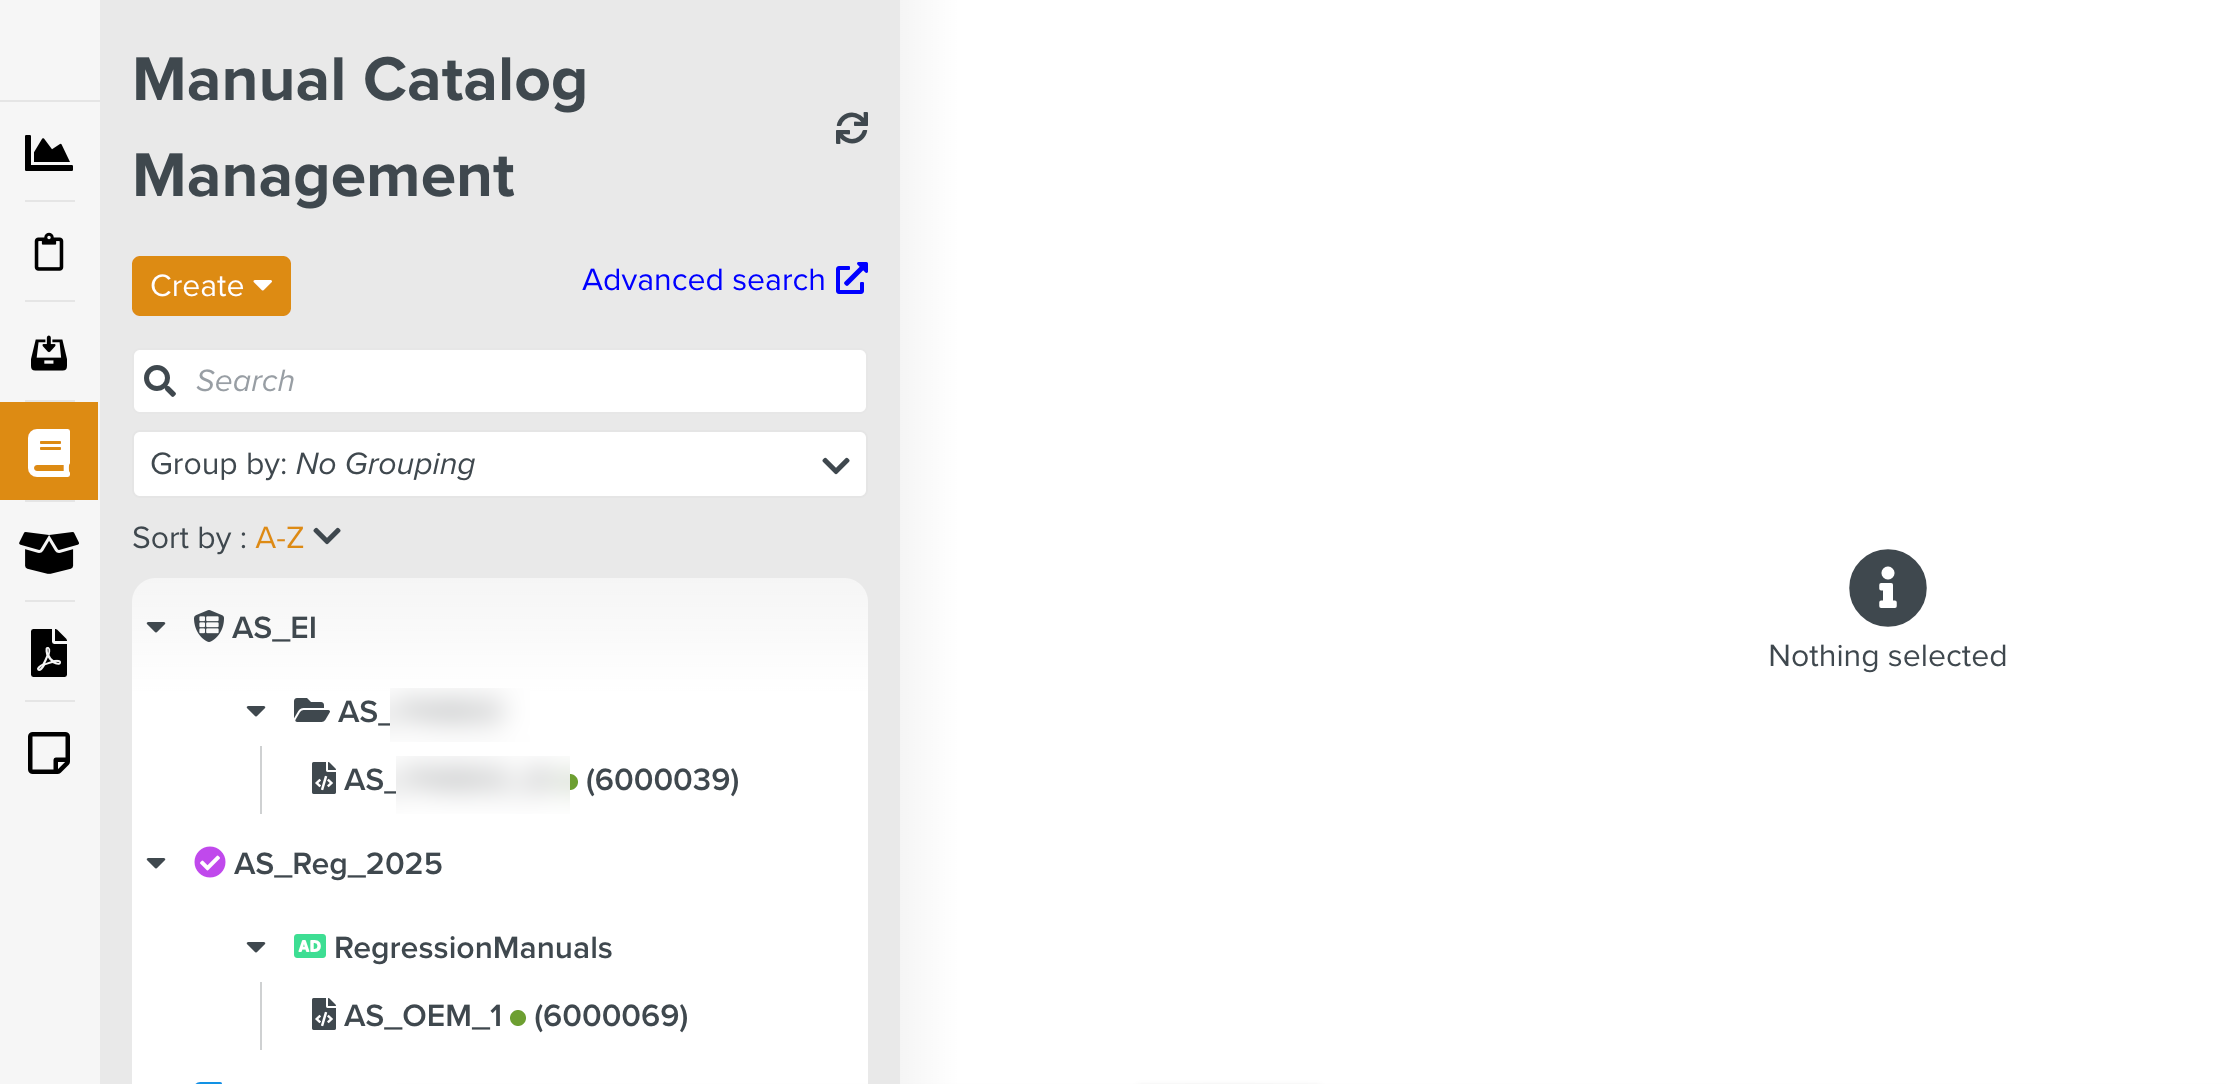
The page Manual Catalog Management appears.
Select from the dropdown menu.
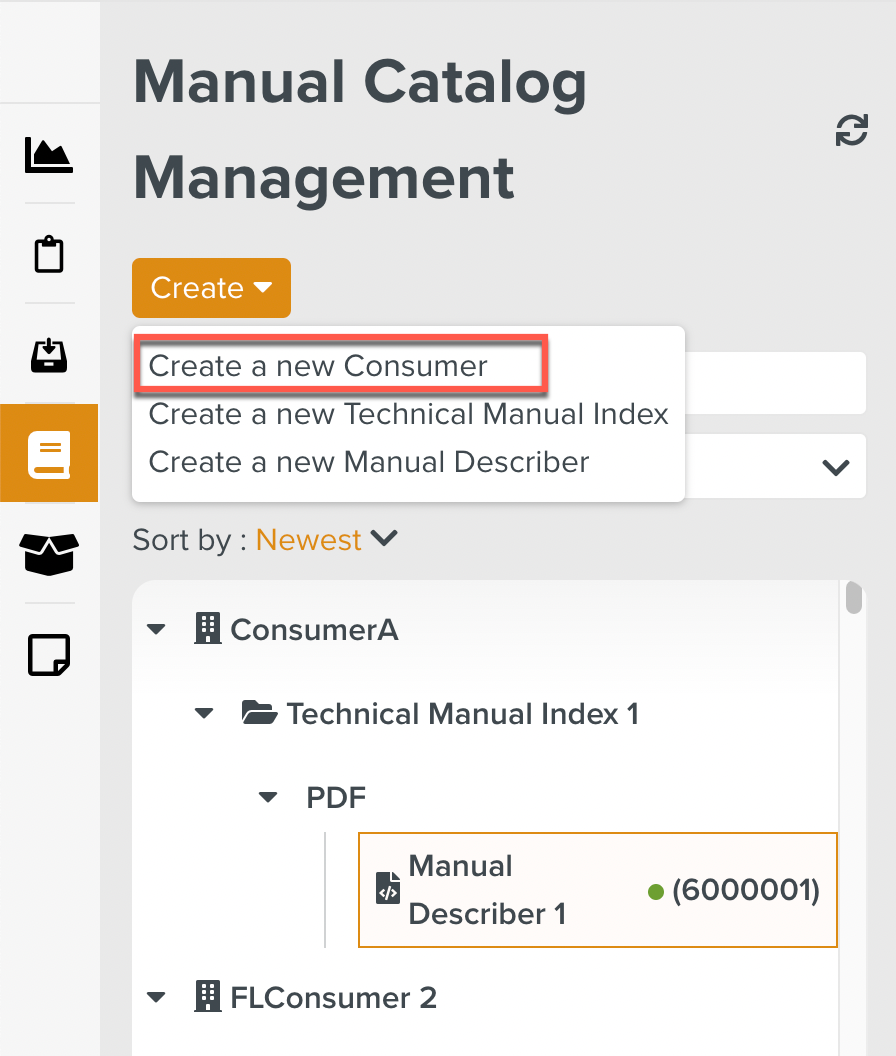
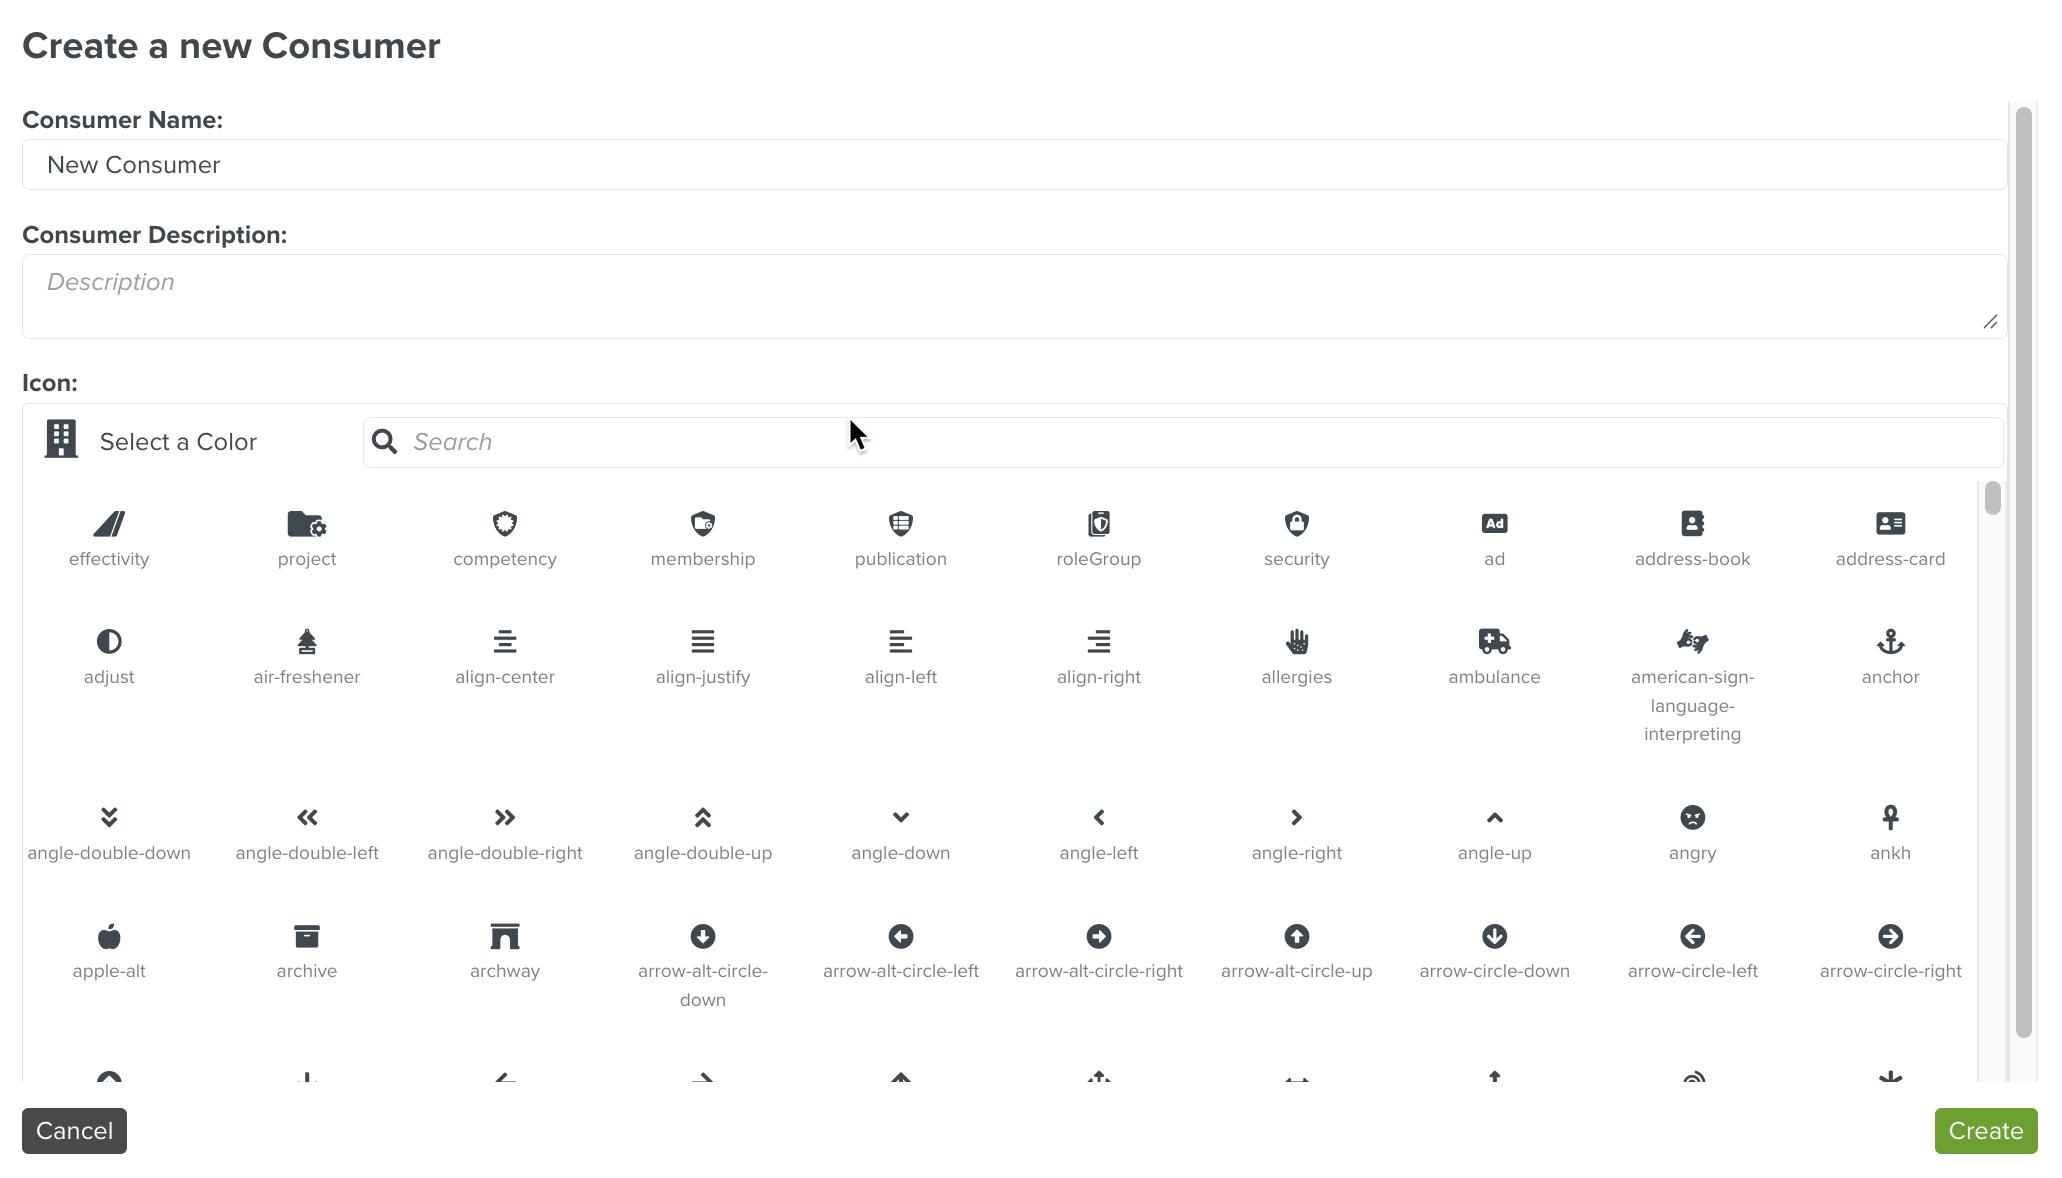
The dialog Create a new Consumer opens.
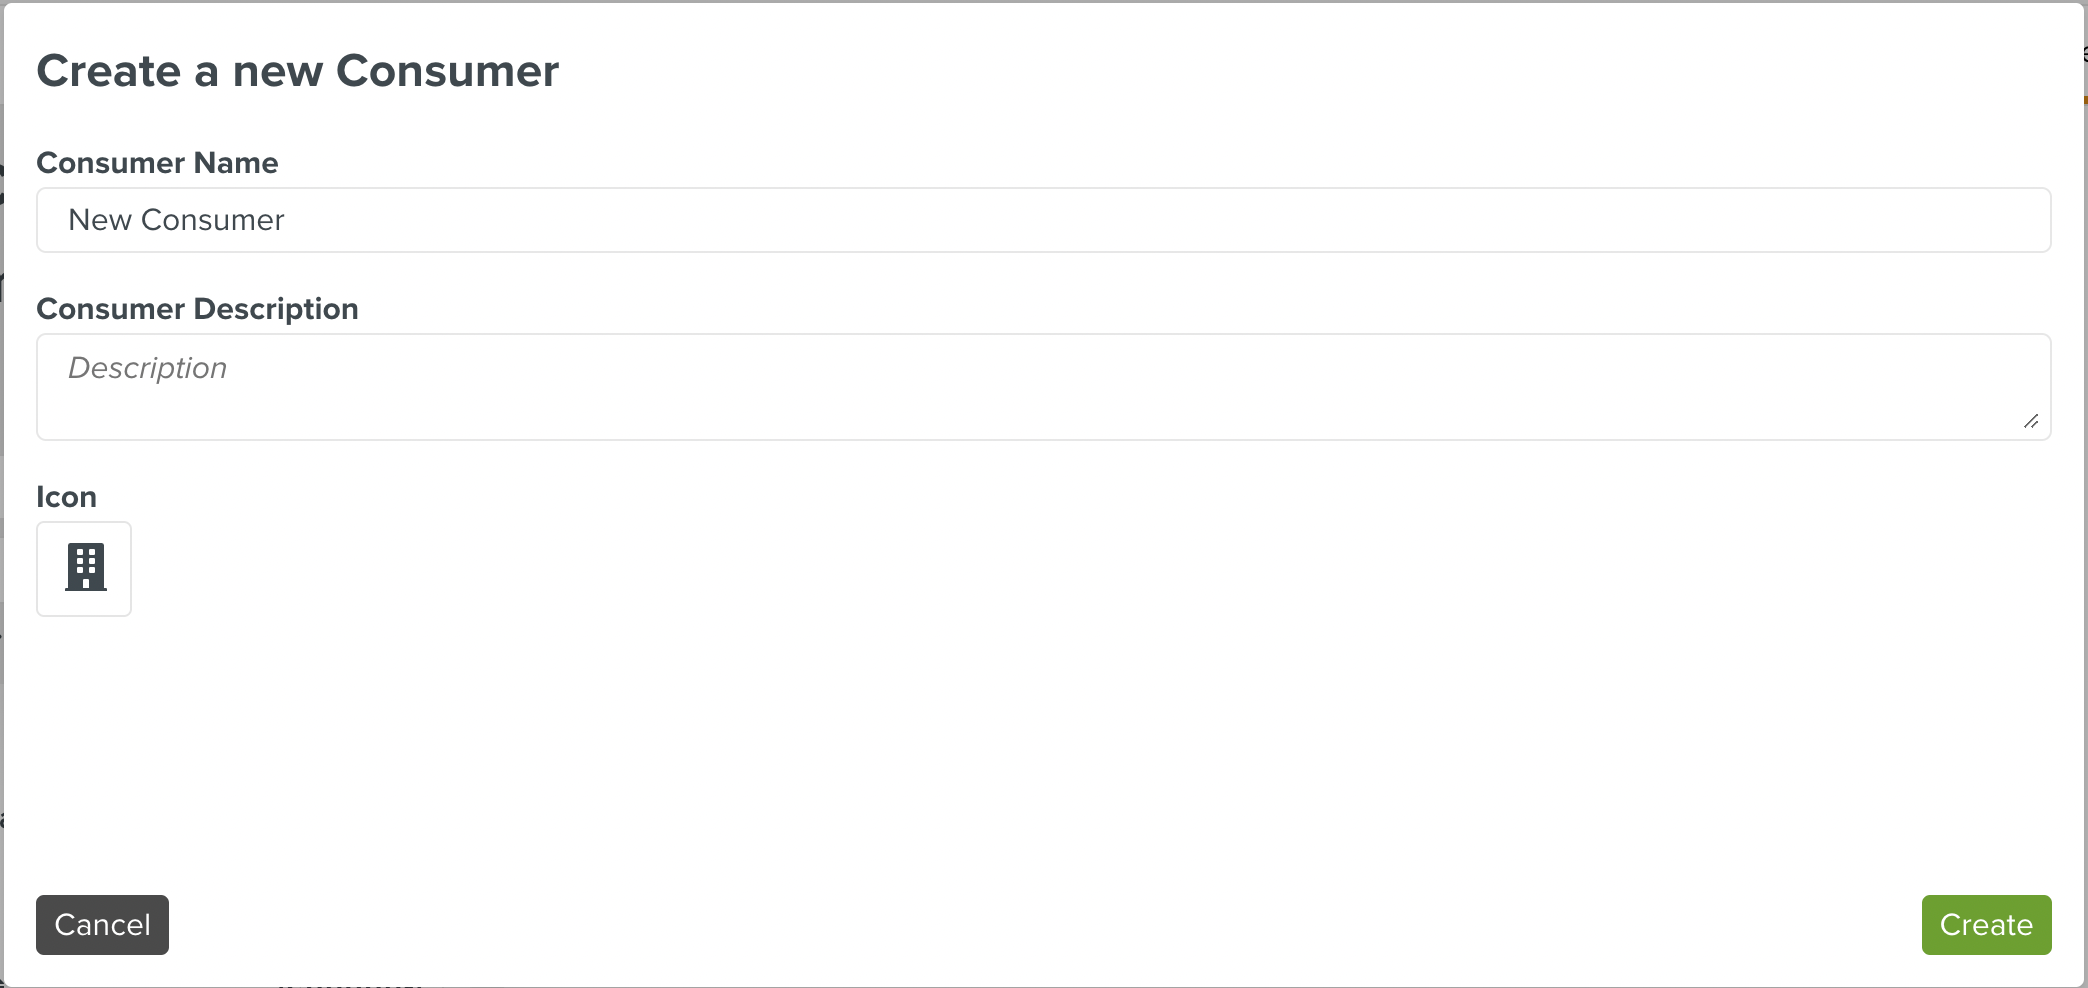
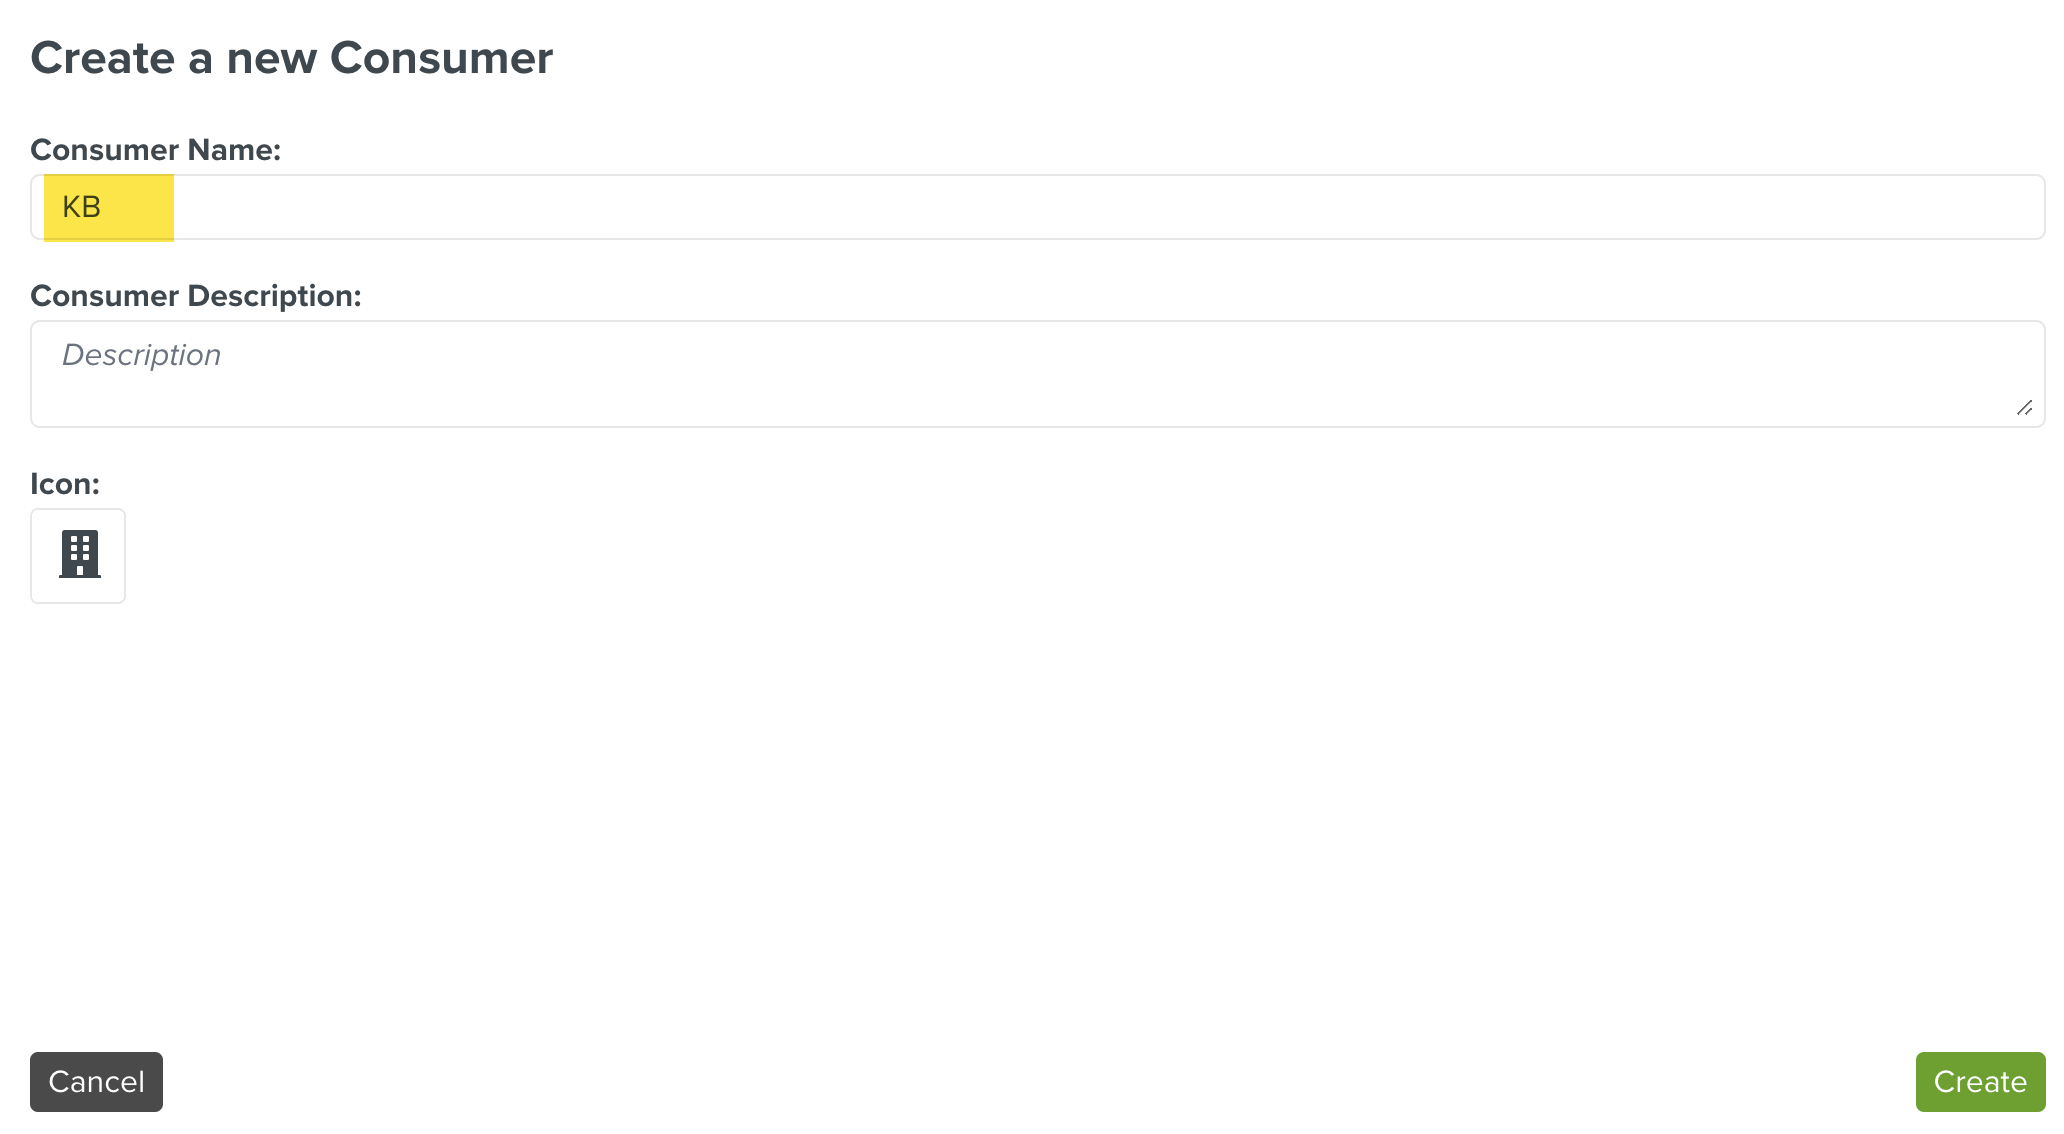
Enter the Consumer Name.
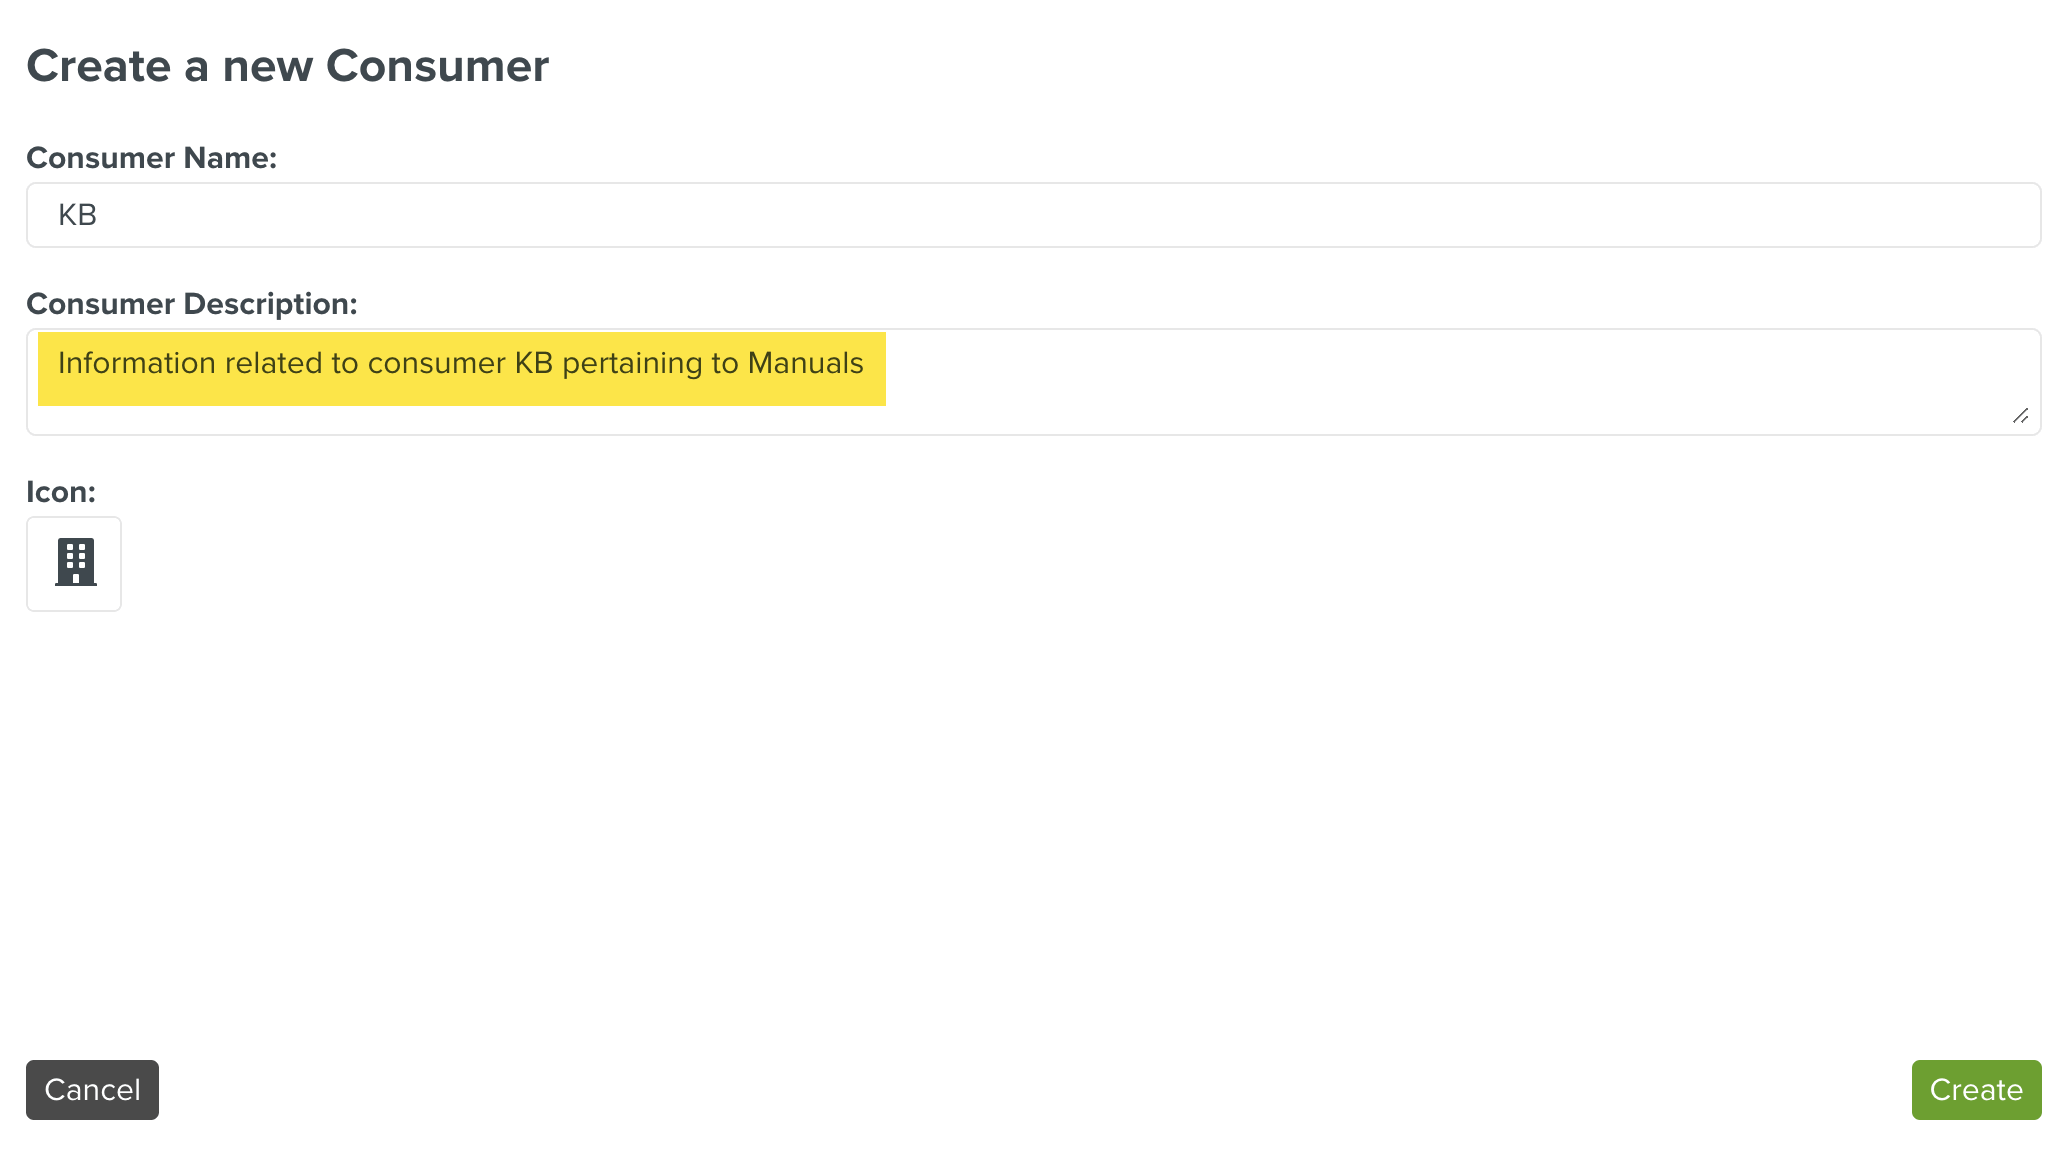
[Optional] Enter the description of the consumer in the Consumer Description field.
Click
 to select an icon.
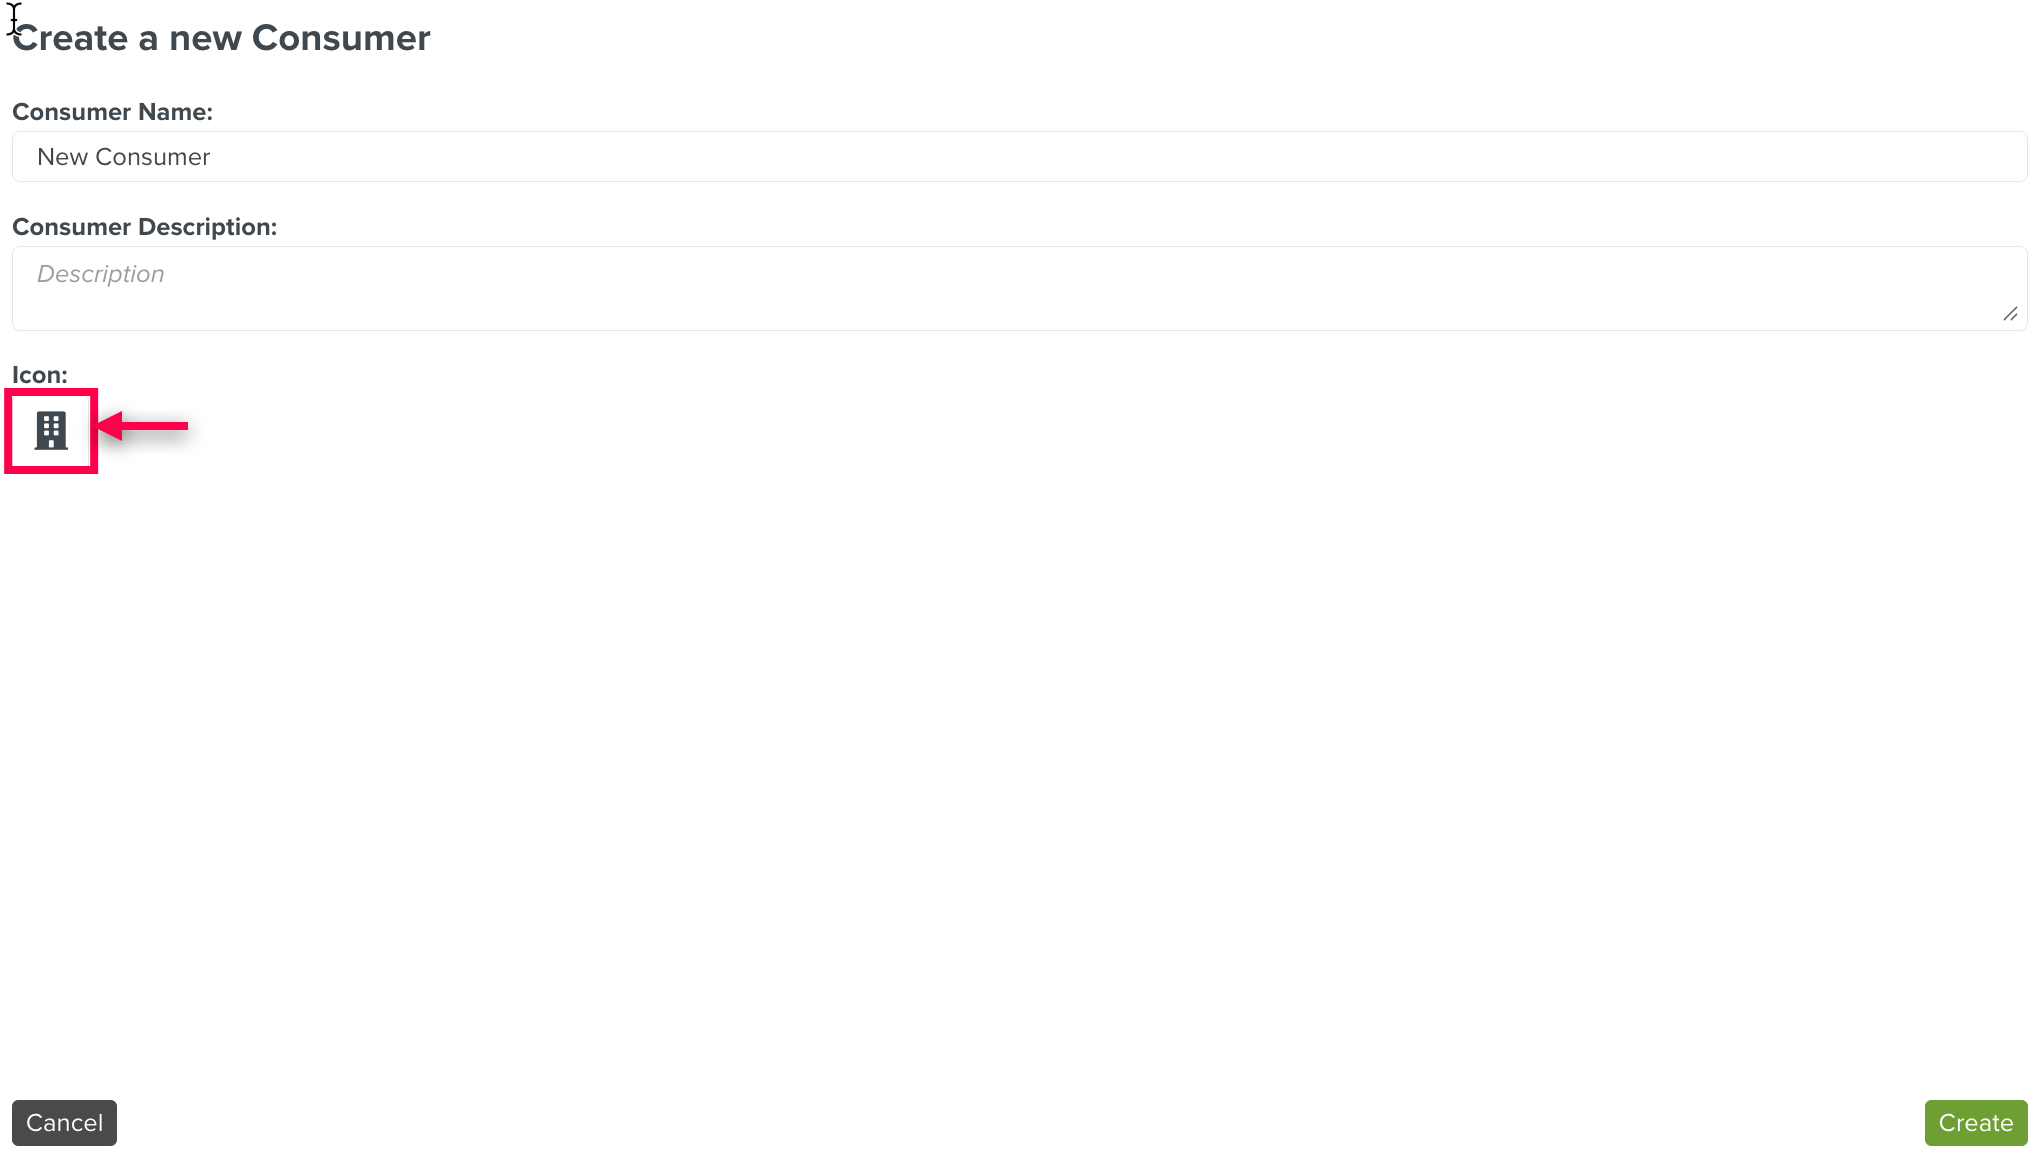
You can select an icon from the list, or search through the search option as shown below.
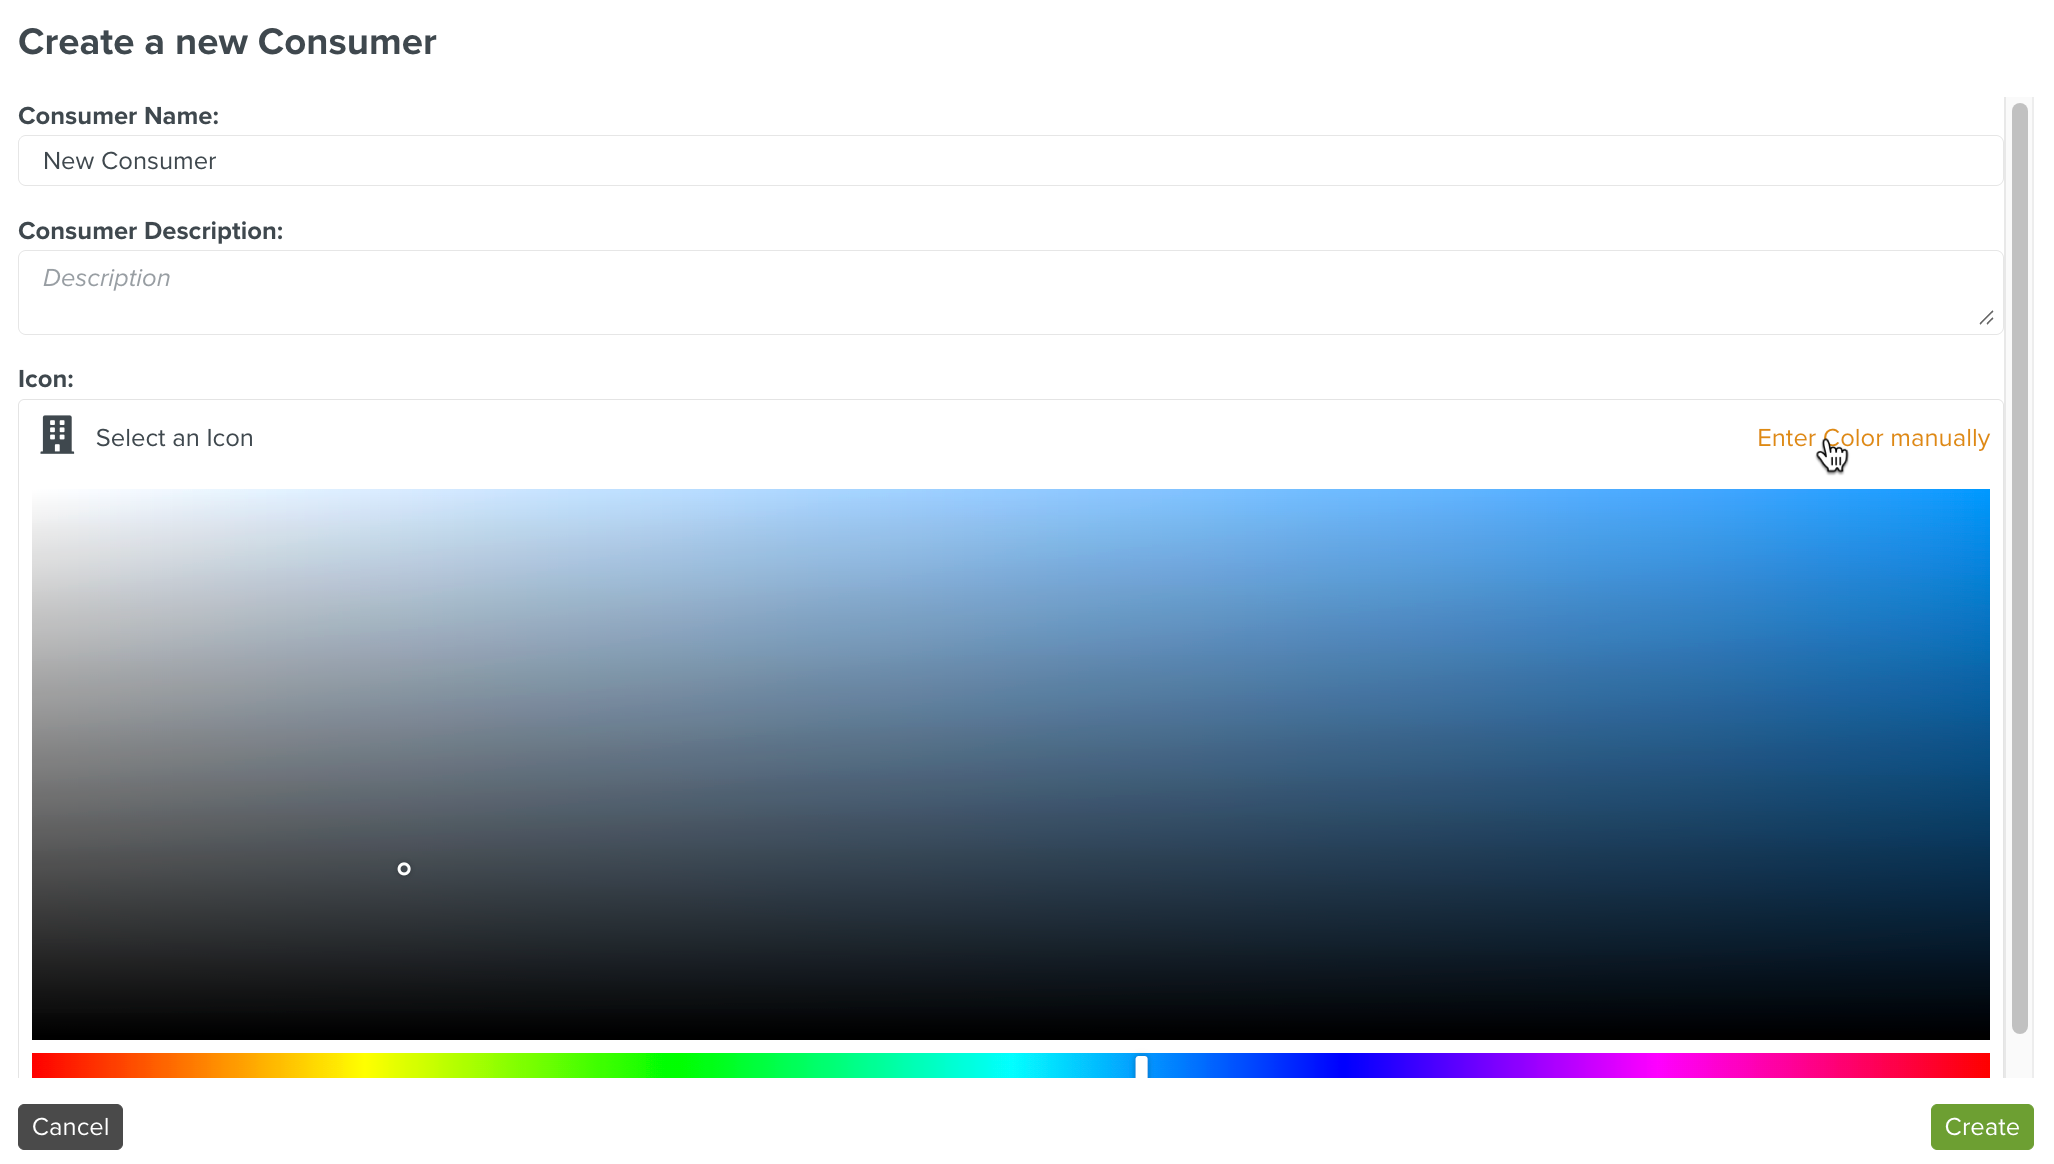
Click Select a Color to add a color to the icon.
To use the last color selected for an Icon, click Select last color selected.
Click .
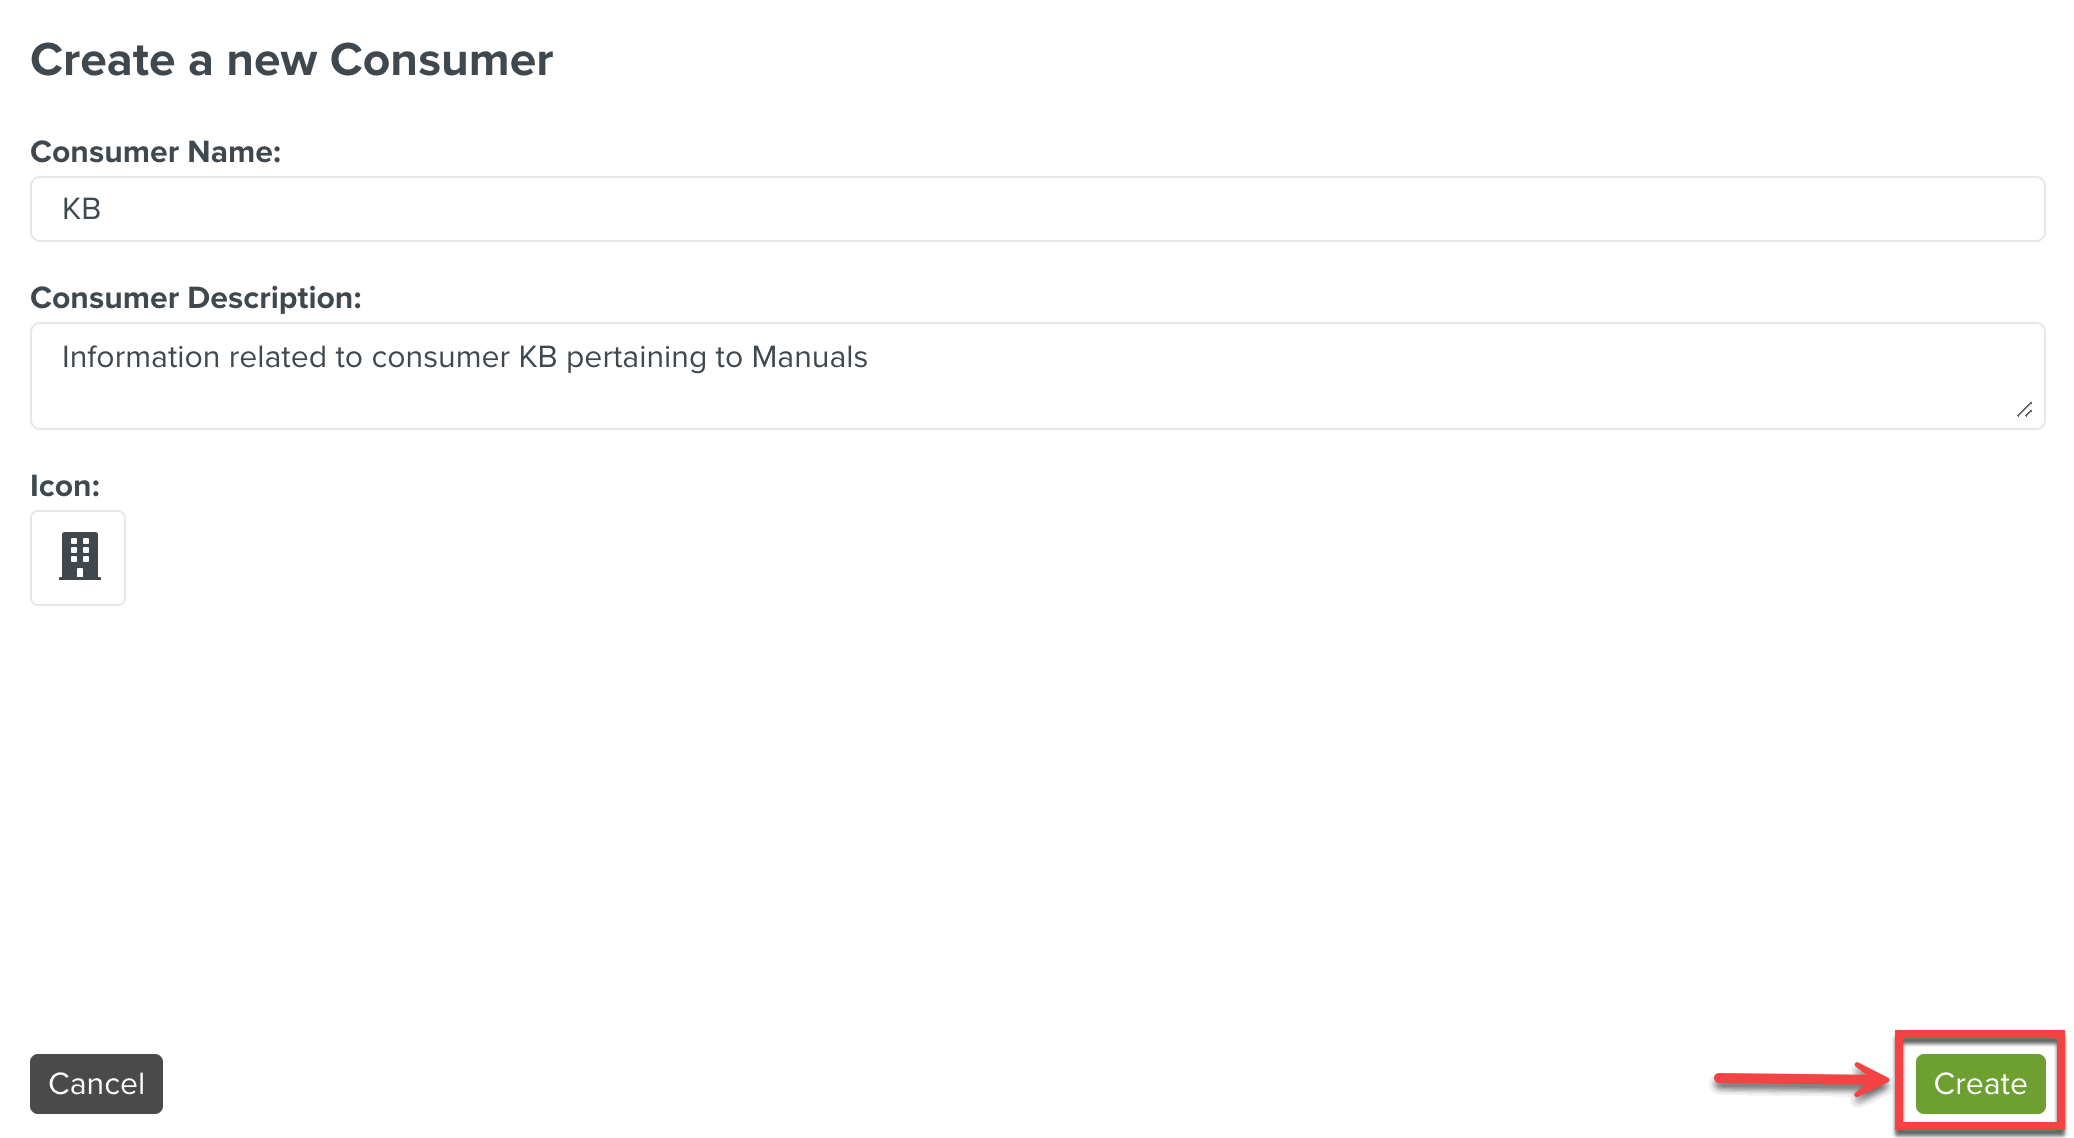
A new Consumer is created and added to the library.
 |
A Technical Manual Index allows related manuals to be grouped together in the library.
To create a new Technical Manual Index:
Select Create a new Technical Manual Index from the dropdown menu.
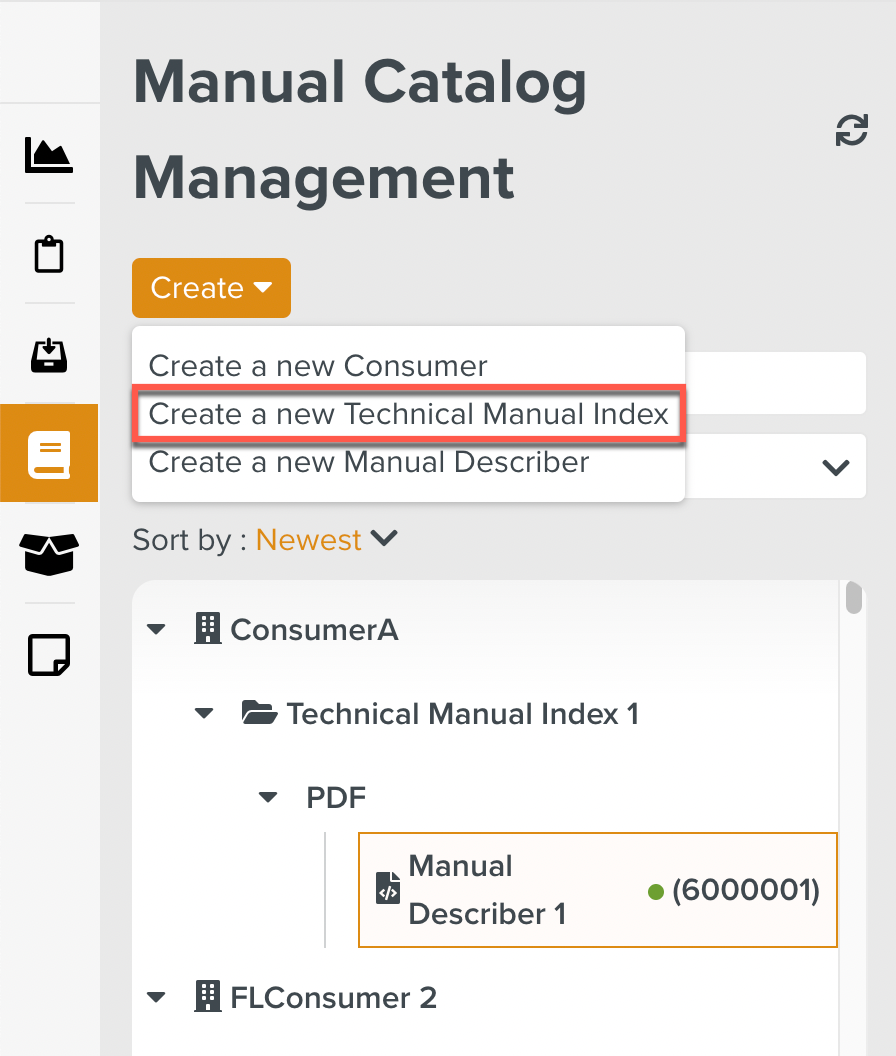
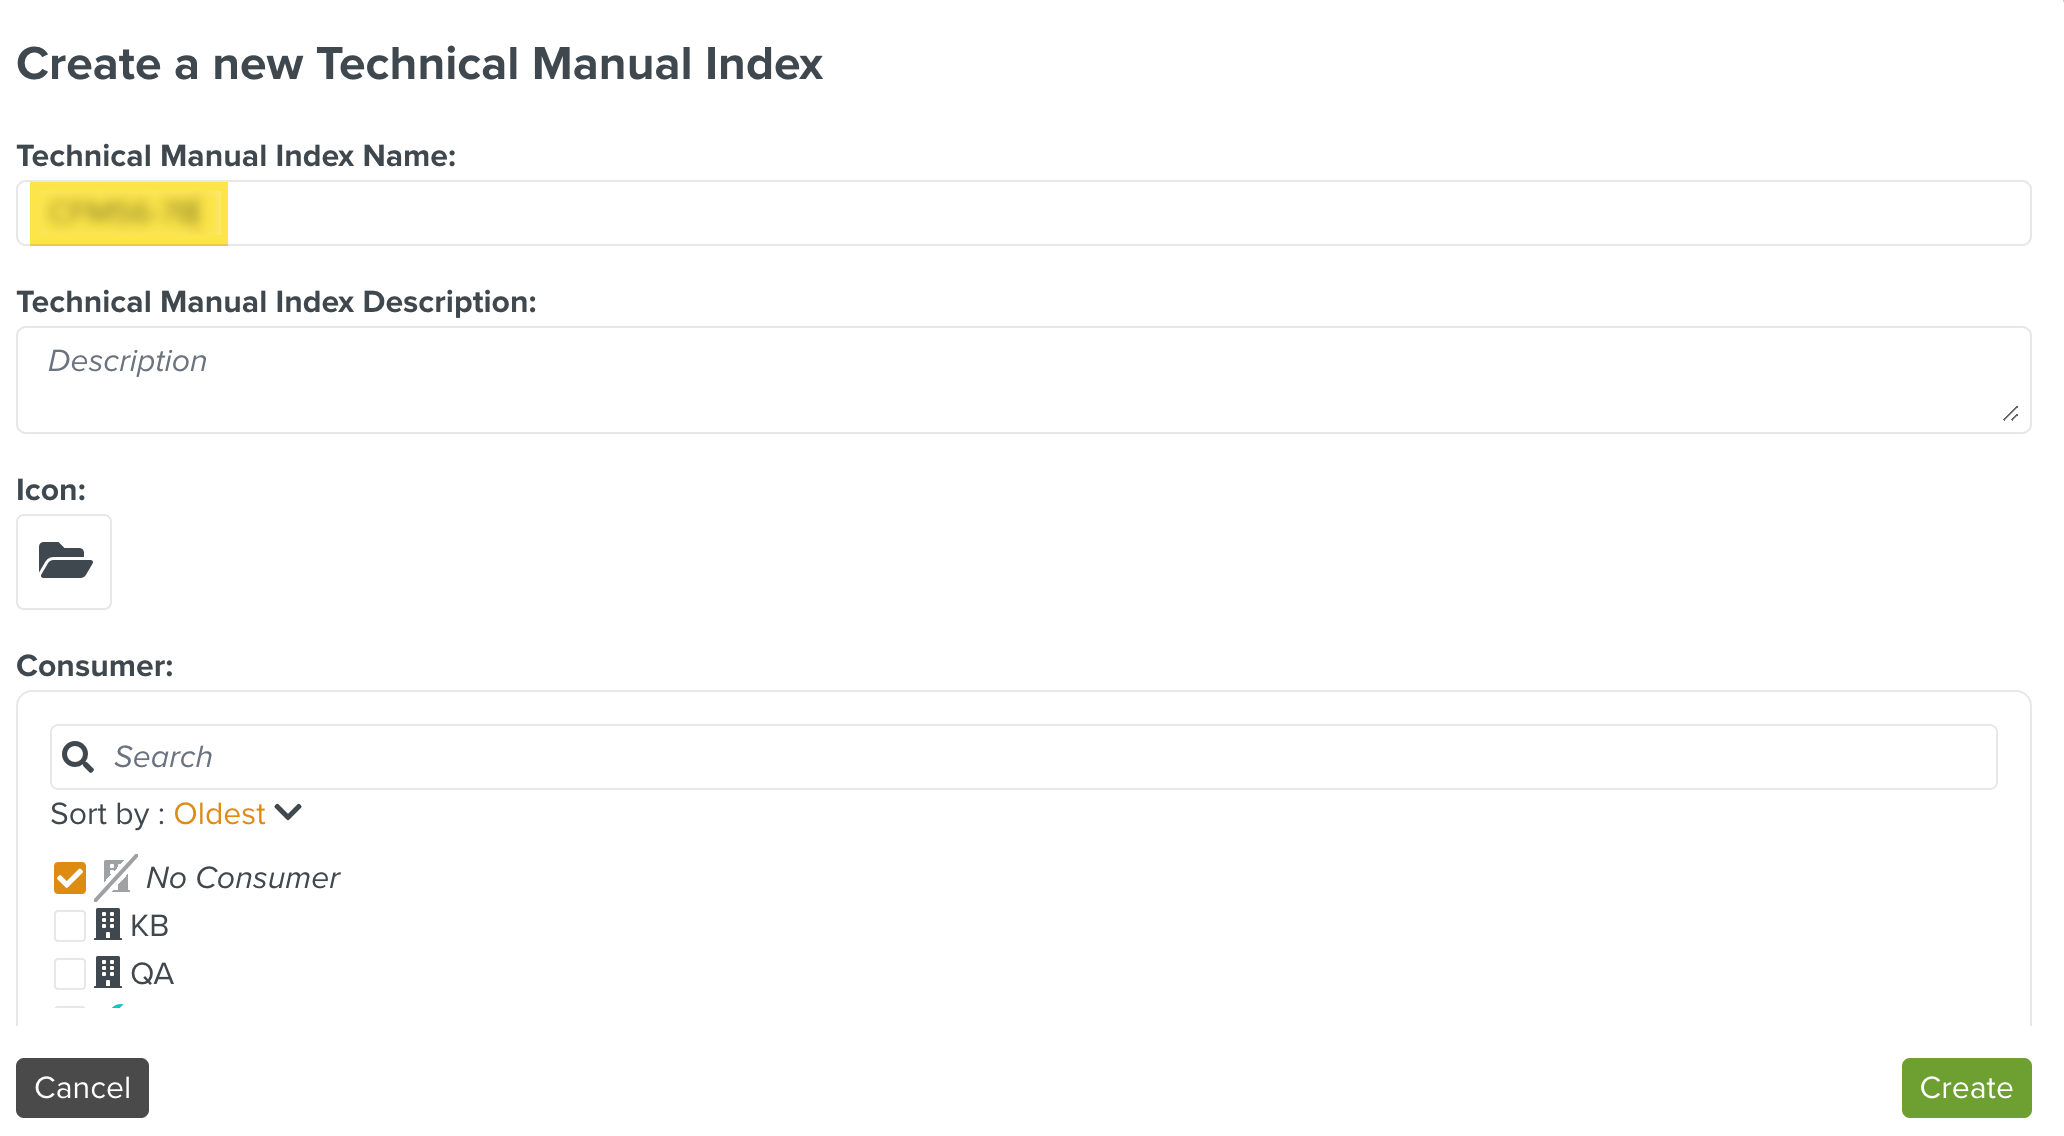
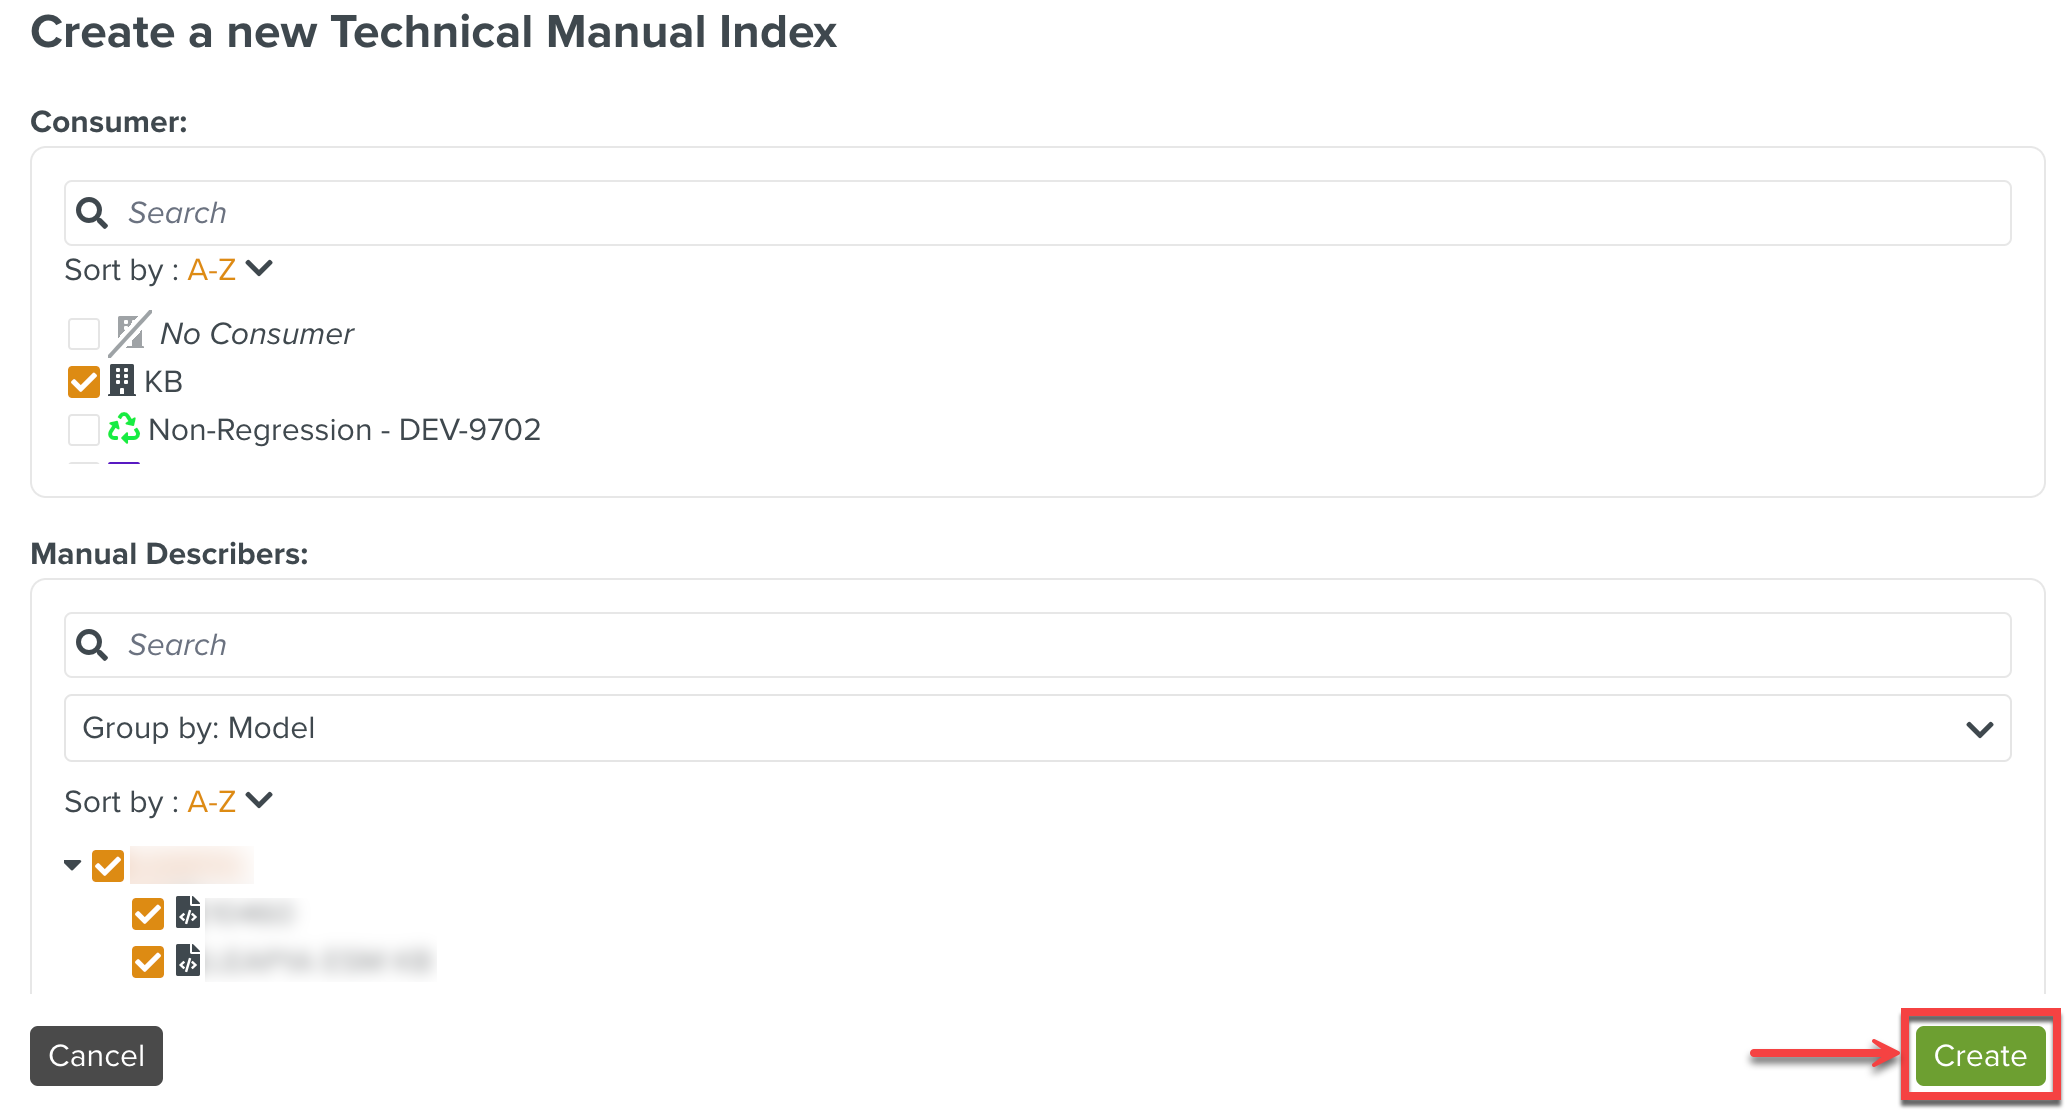
The dialog Create a new Technical Manual Index opens.
Enter the Technical Manual Index Name.
Revision 61 of its Engine Service Manual(ESM), may need to reference version 48 of its Engine Illustrated Parts Catalog (EIPC). This can be grouped under version 2 of the TMI.
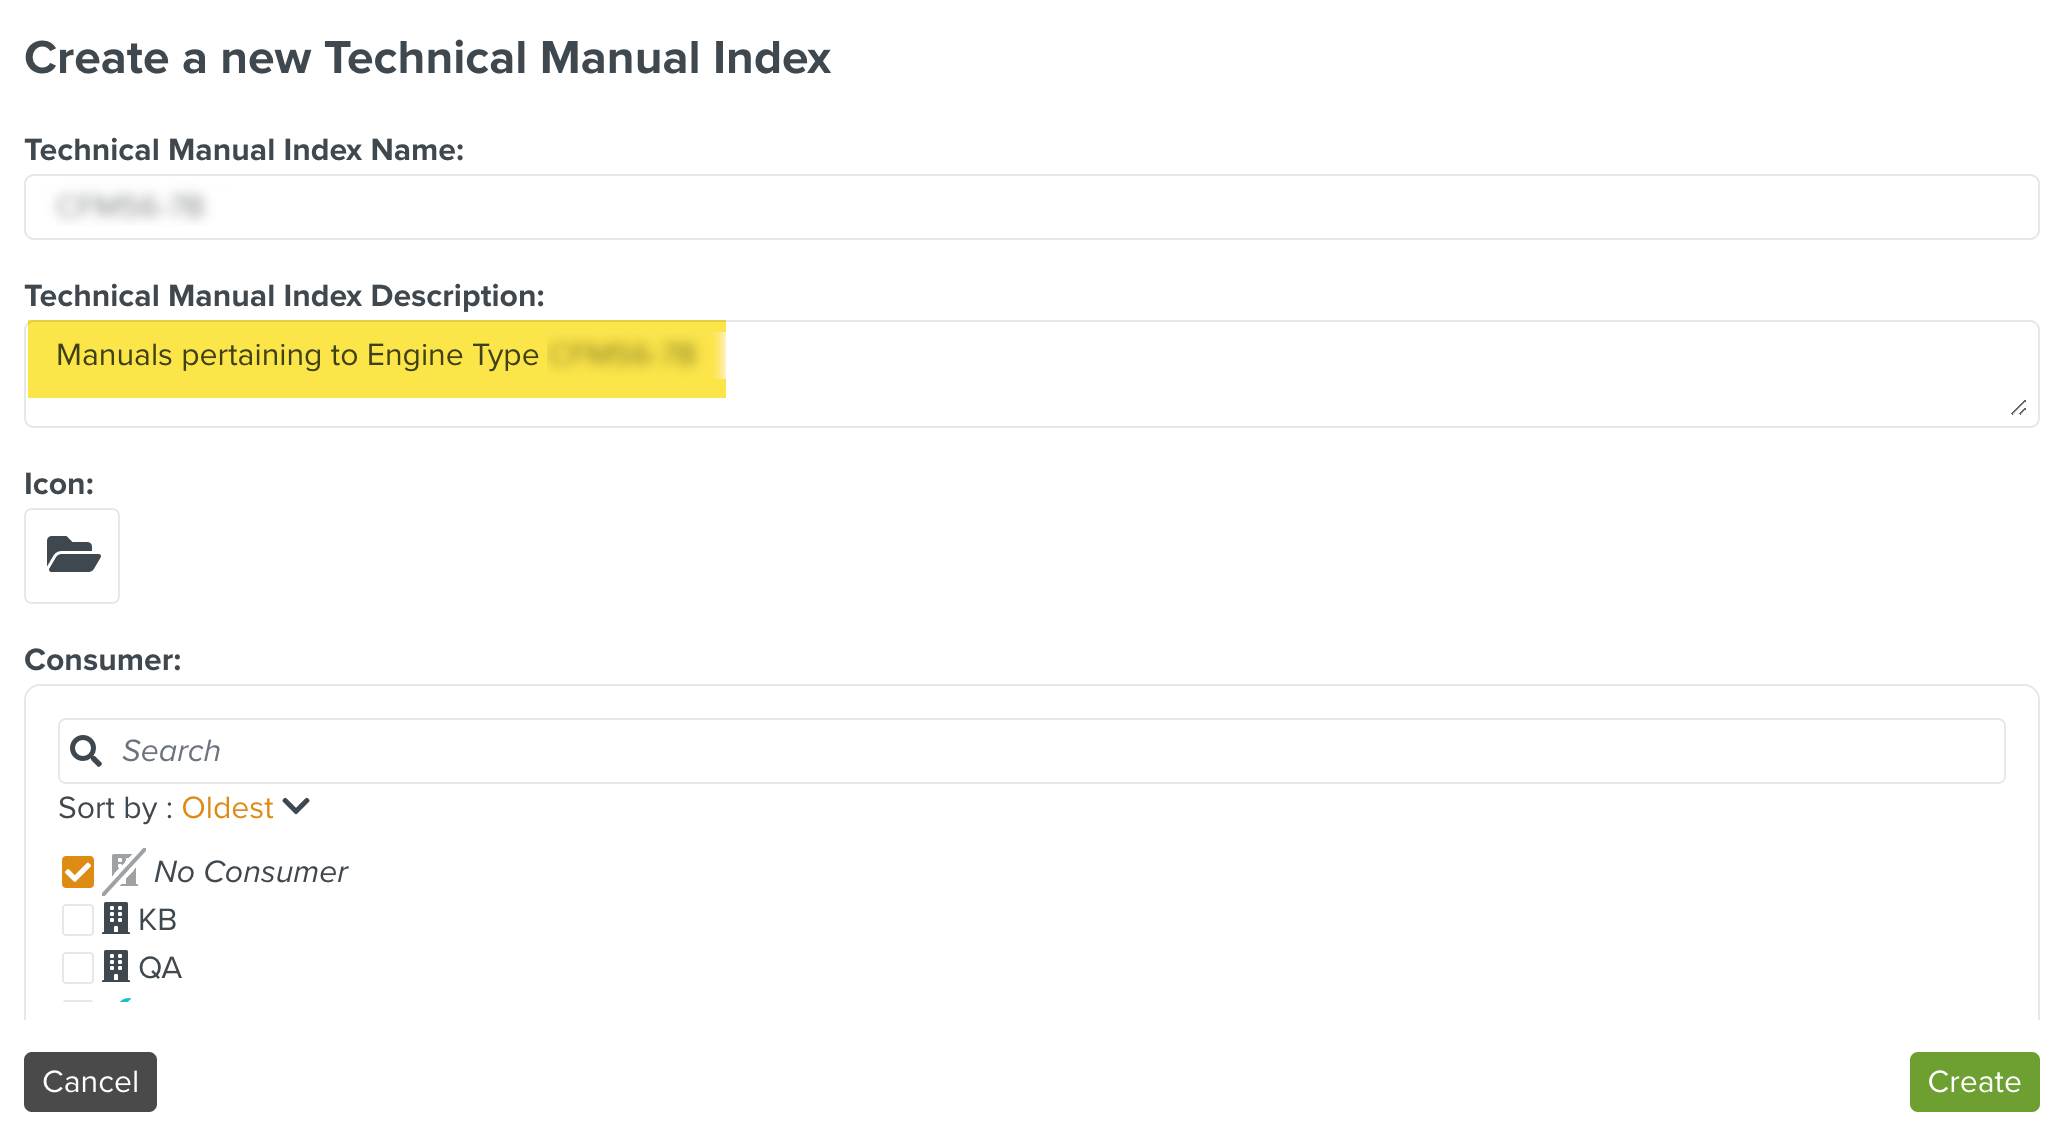
[Optional] Enter the description in the Technical Manual Index Description field.
Click
to select an icon.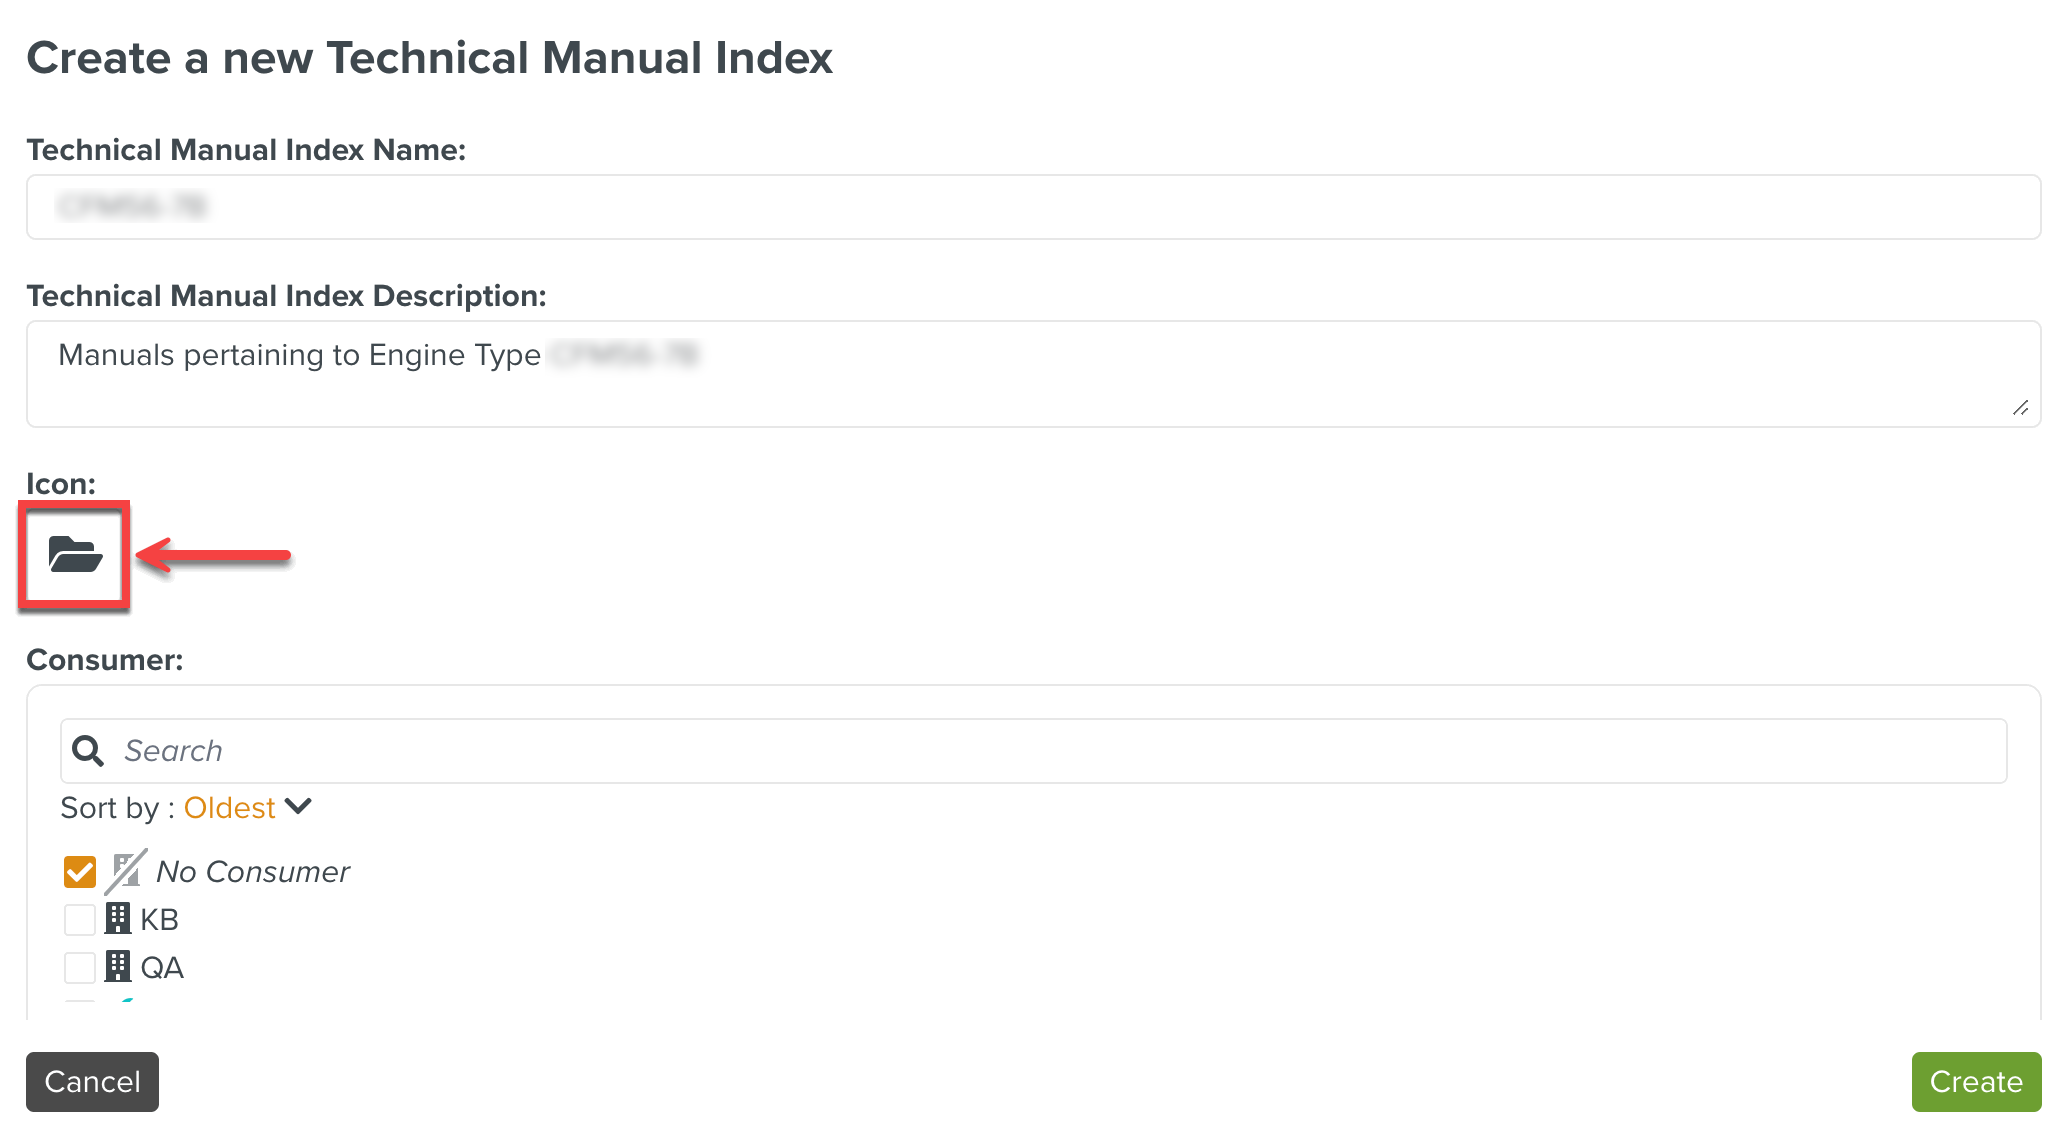
You can select an icon from the list, or search through the search option as shown below.
Click Select a Color to add a color to the icon.
To use the last color selected for an Icon, click Select last color selected.
Select the required Consumer to be associated with the Technical Manual Index.
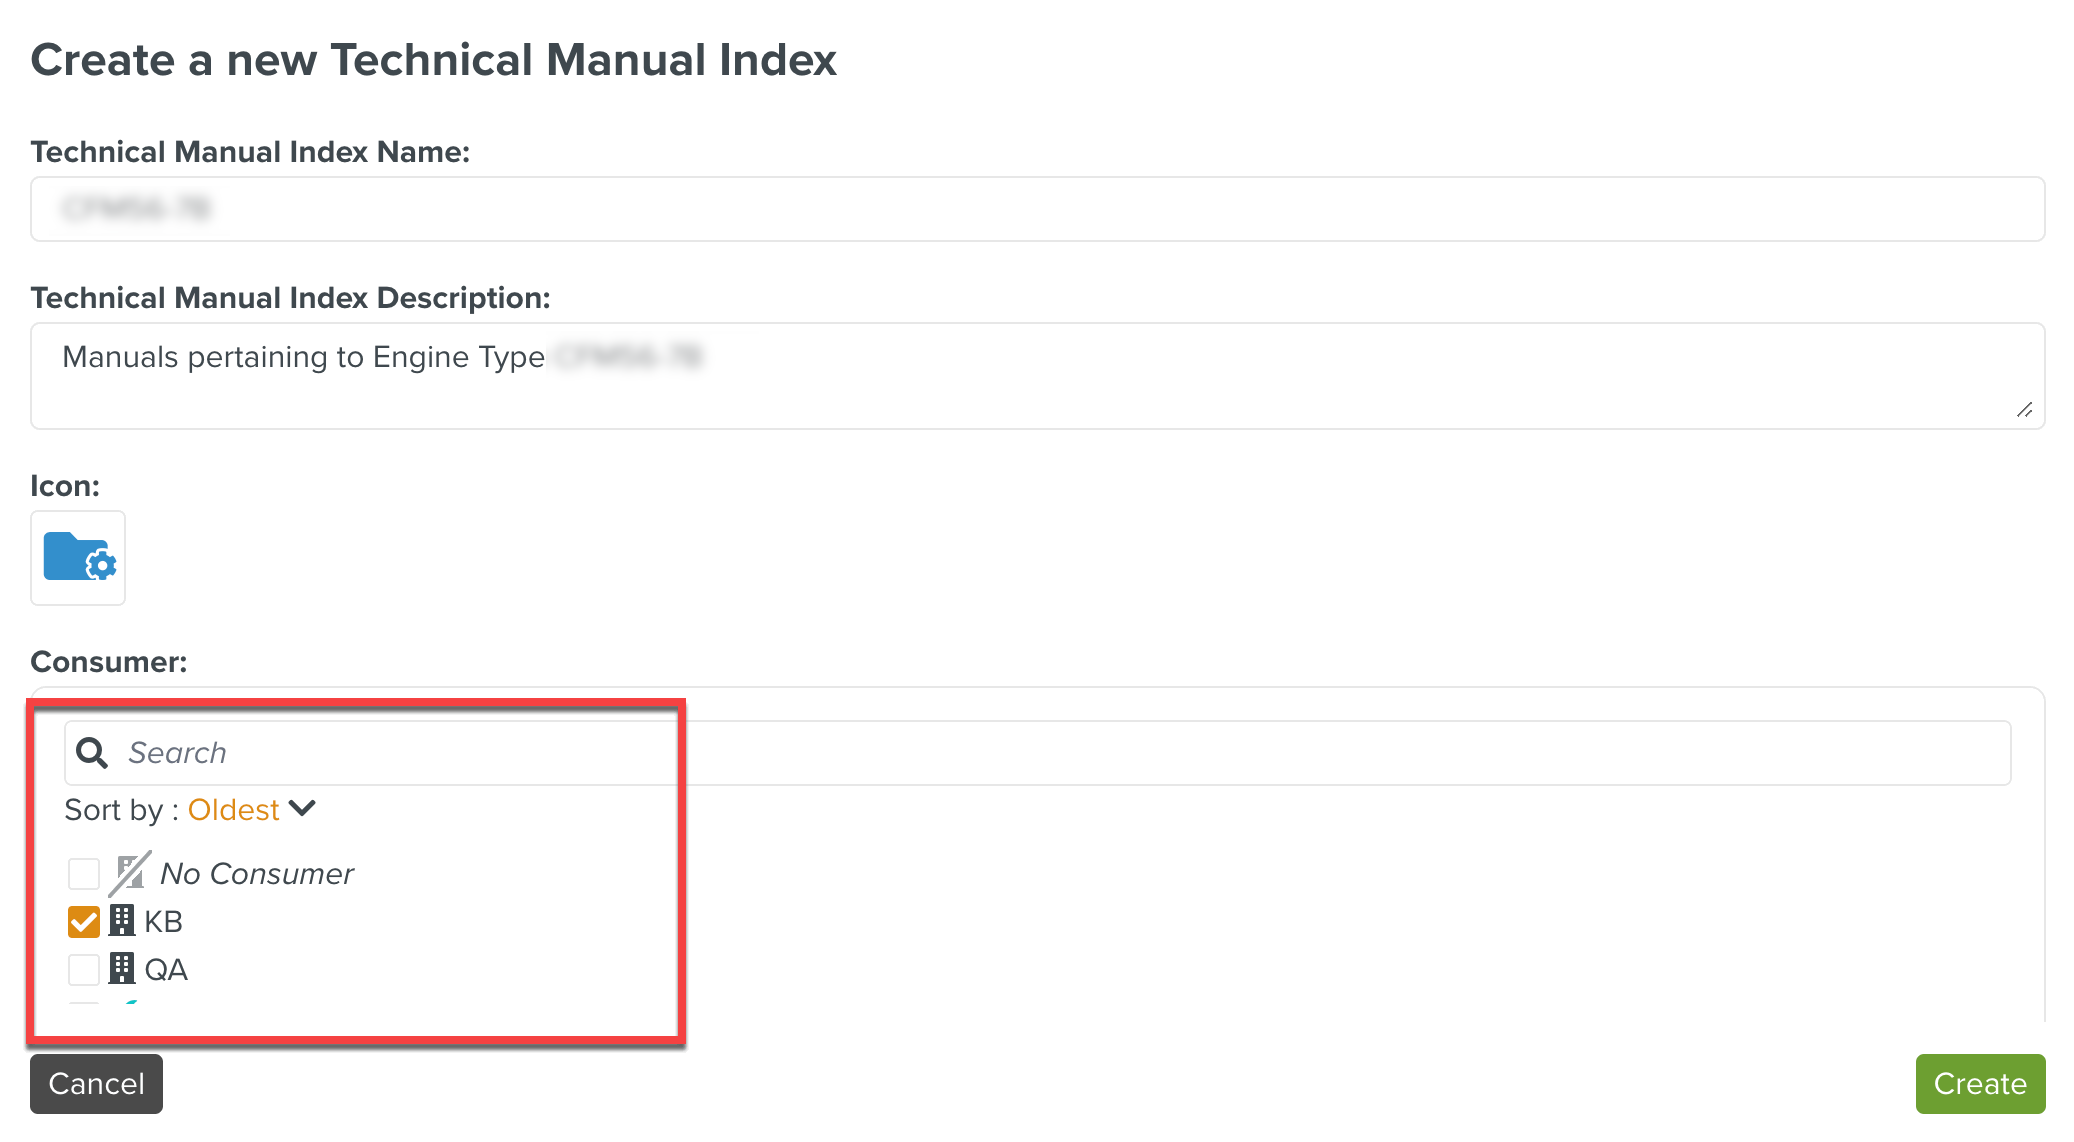
You can also use the Search bar to filter the list of Consumers based on search criteria. The results can also be sorted by A-Z, Z-A, Newest, Oldest and Relevance.
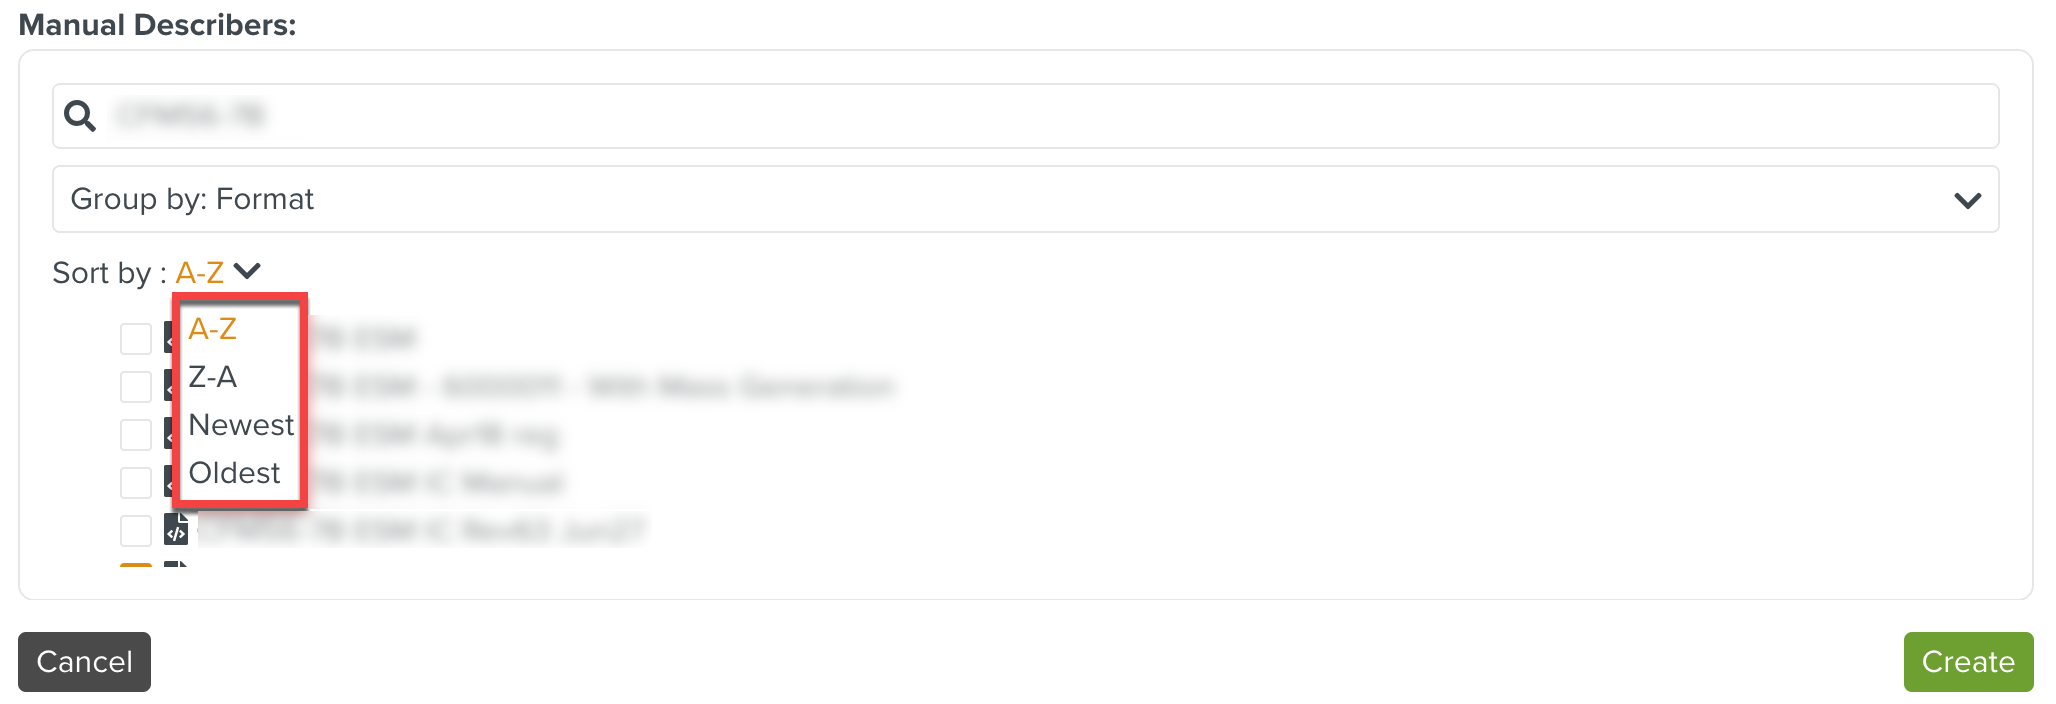
Select the relevant Manuals (Manual Describers) to be grouped under this Technical Manual Index.
In the example above, the Technical Manual Index for an engine type is created. It is associated with consumer KB. Some Manual Describers pertaining to the engine type are selected to be grouped under it.
If a Manual Describer to be associated with this Technical Manual Index is not created yet, this linking can be done by revisiting the Technical Manual Index page after creating the desired Manual Describer.
You can also use the Group by dropdown to list the manuals in the following categories:
Content Type
Format
Model
Status
Use the Search bar to filter the list of Manual Describers based on search criteria. The results can also be sorted by A-Z, Z-A, Newest, Oldest and Relevance.
Click .
A new Technical Manual Index is created.
A TMI groups a set of manuals that work together. A versioned TMI groups which revisions of those manuals need to be grouped together.
For an engine model E1, we may have a TMI that groups its Engine Service Manual (ESM) and Engine Illustrated Parts Catalog (EIPC).
Revision 60 of its Engine Service Manual (ESM), may need to reference version 45 of its Engine Illustrated Parts Catalog (EIPC). This can be grouped under version 1 of the TMI.
Revision 61 of its Engine Service Manual (ESM), may need to reference version 48 of its Engine Illustrated Parts Catalog (EIPC). This can be grouped under version 2 of the TMI.
While selecting an OEM manual, you can select the one that is part of a versioned TMI.
 |
To create a version of Technical Manual Index:
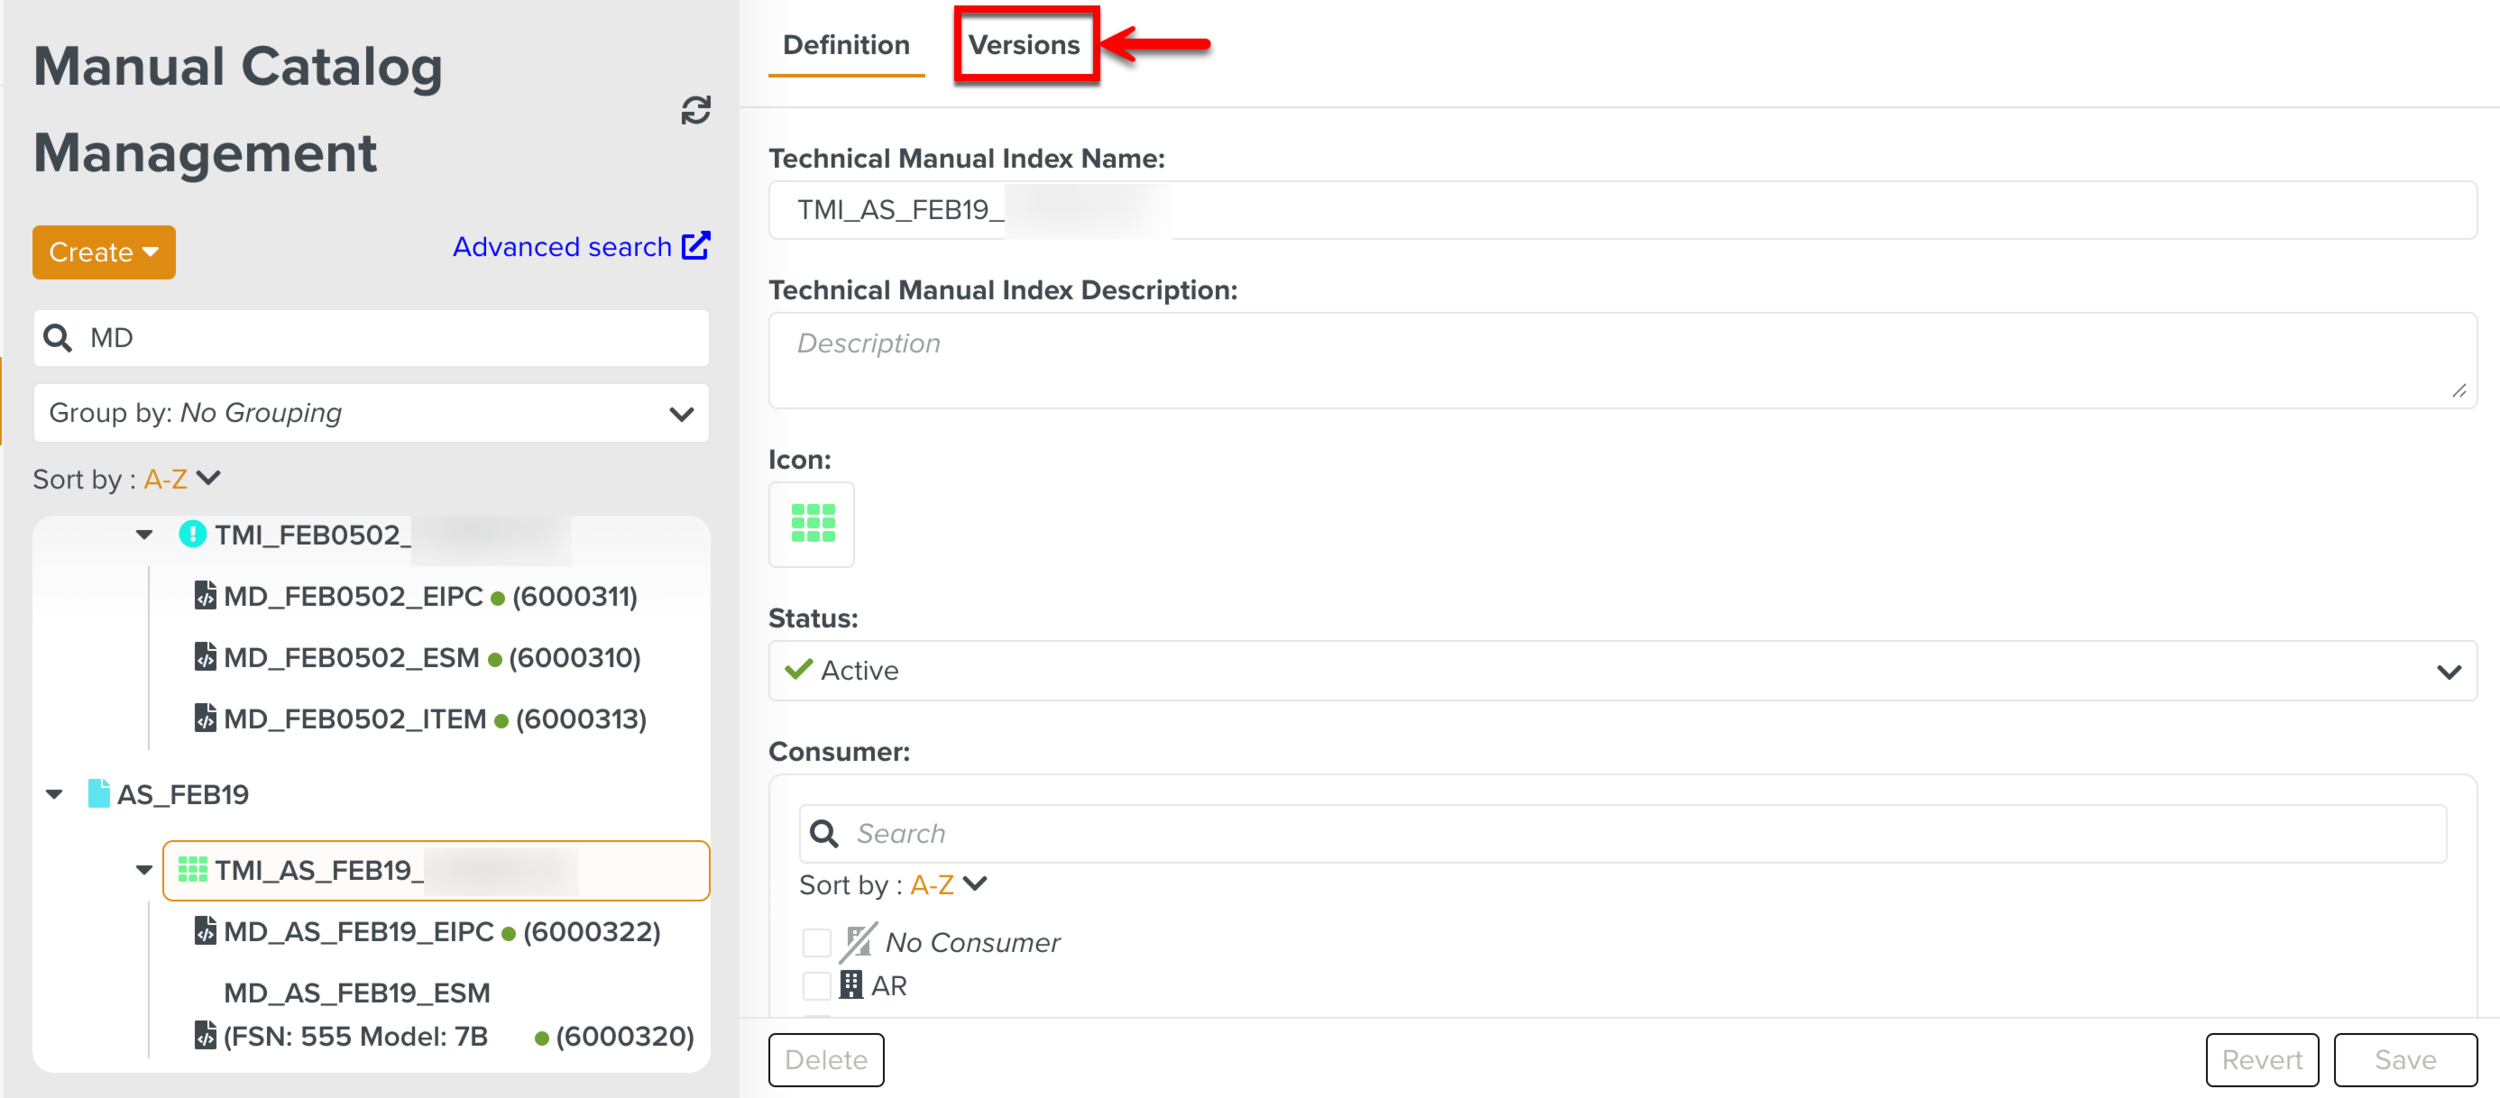
In the Technical Manual Index, go to the tab Versions.
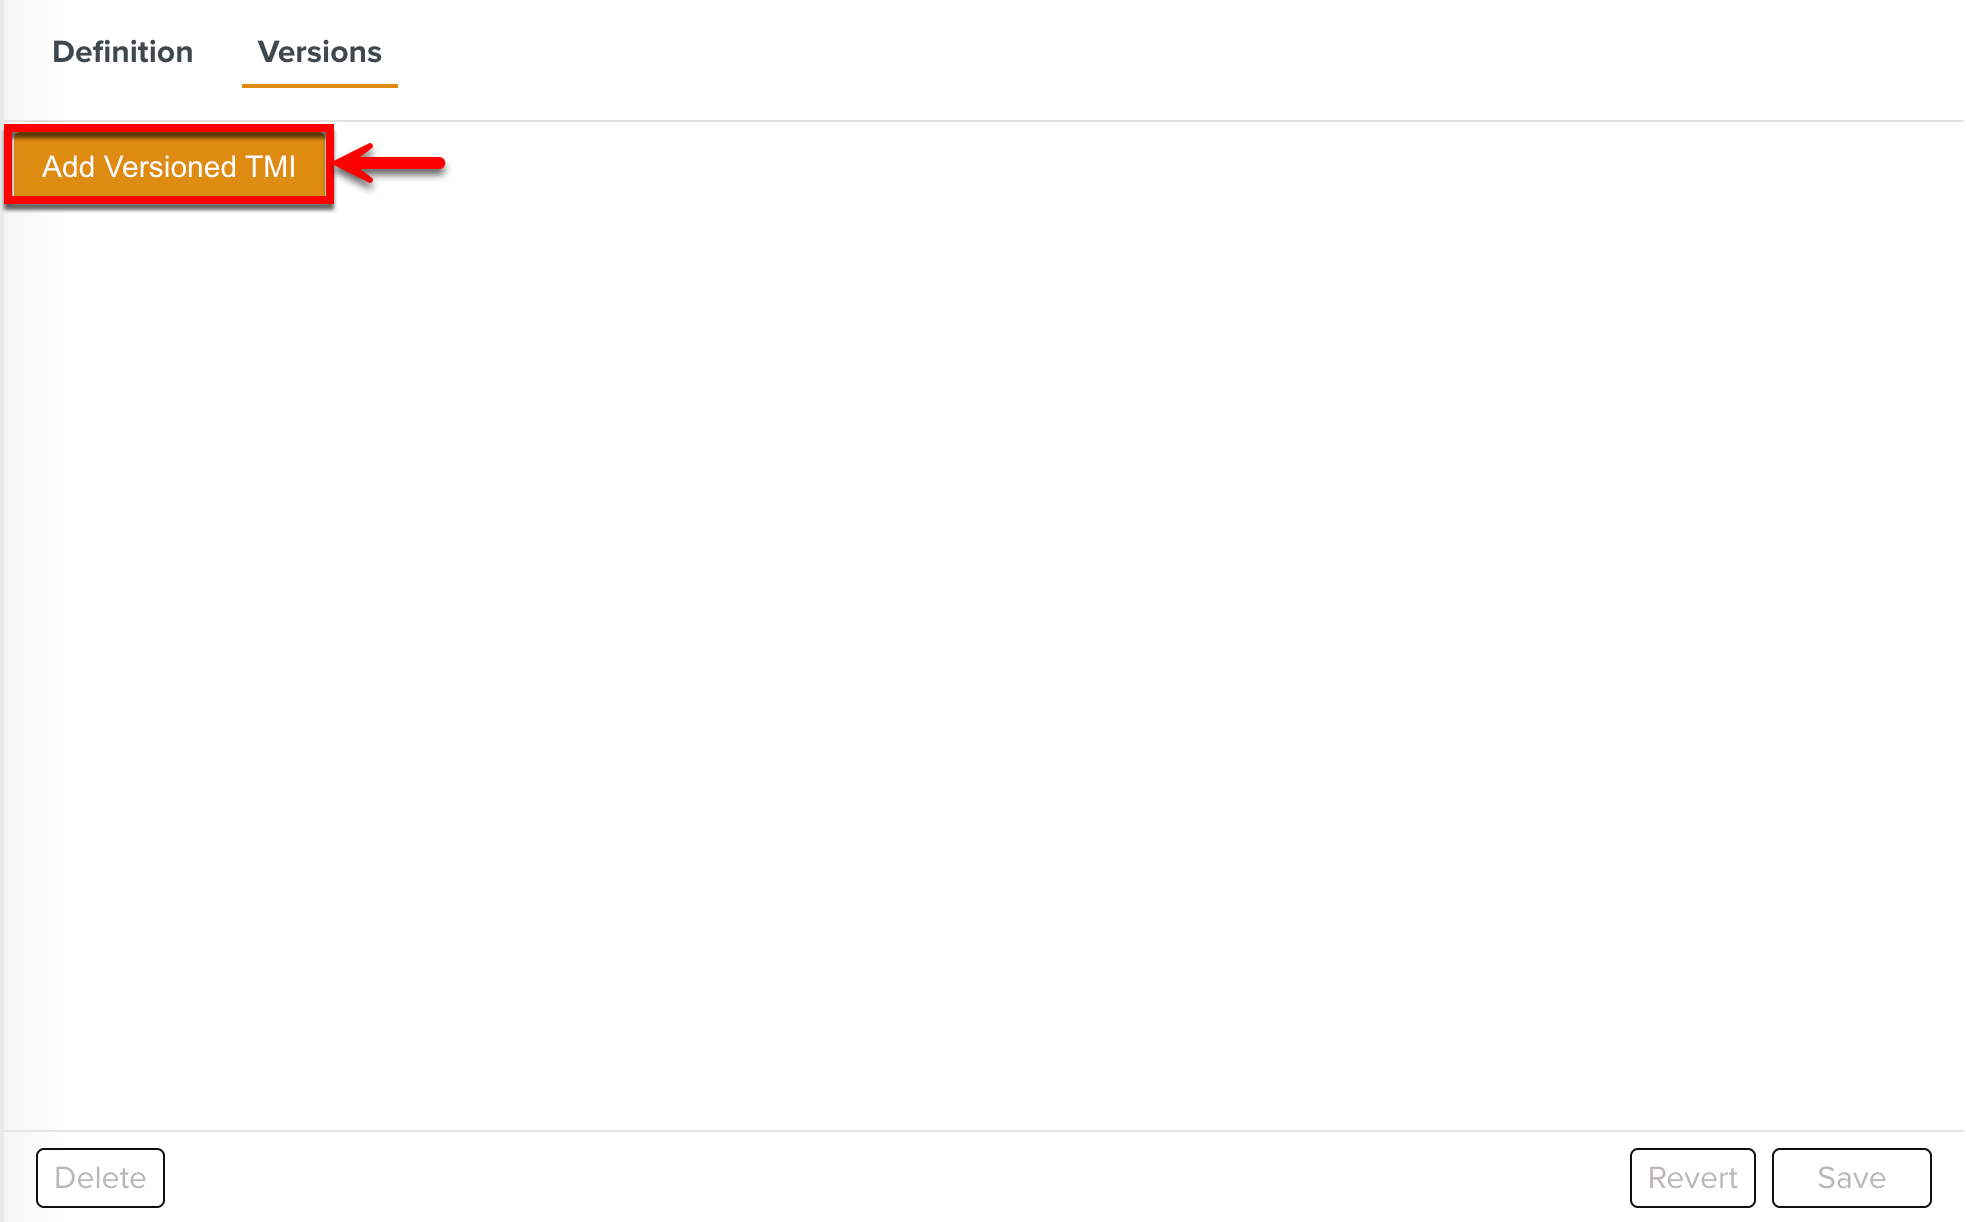
Click .
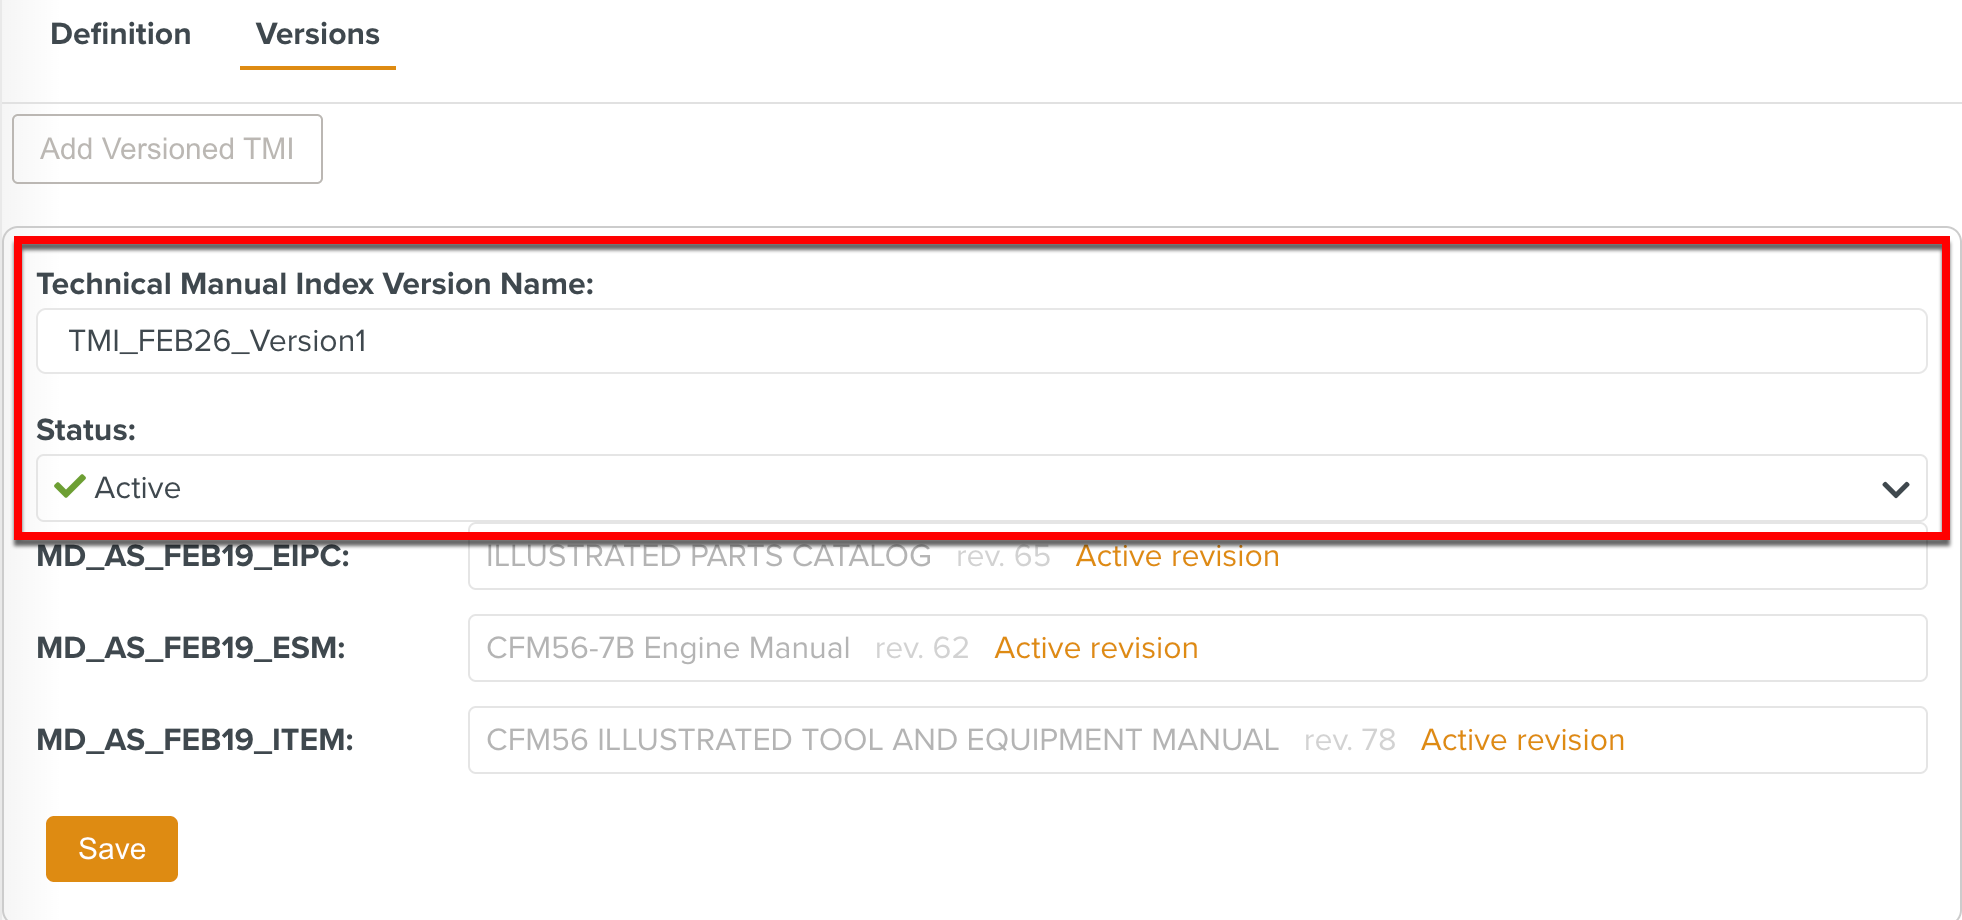
Clear the default name and enter the required Technical Manual Index version name.
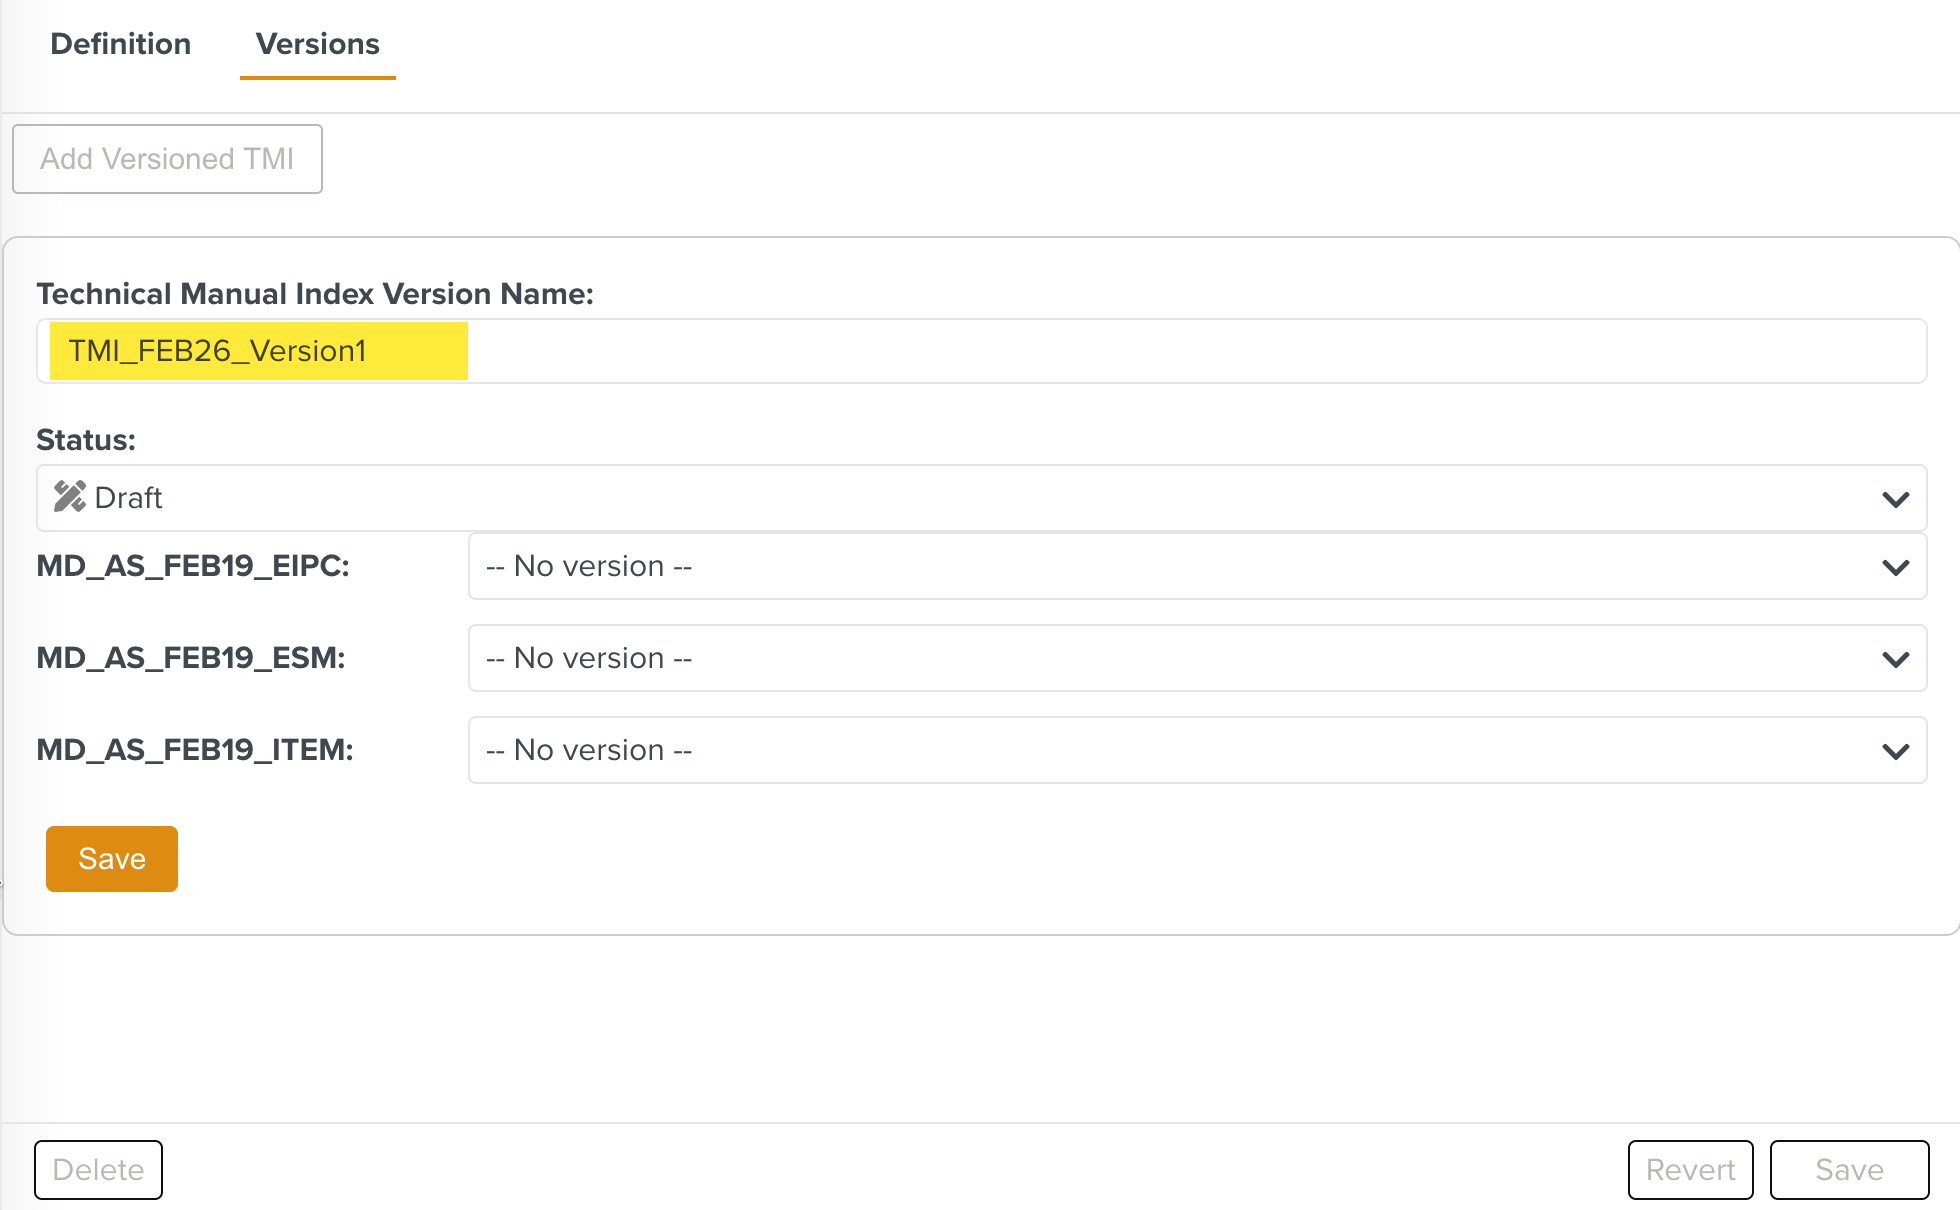
Expand the Manual Describers dropdown of each manual to select the manual revisions.
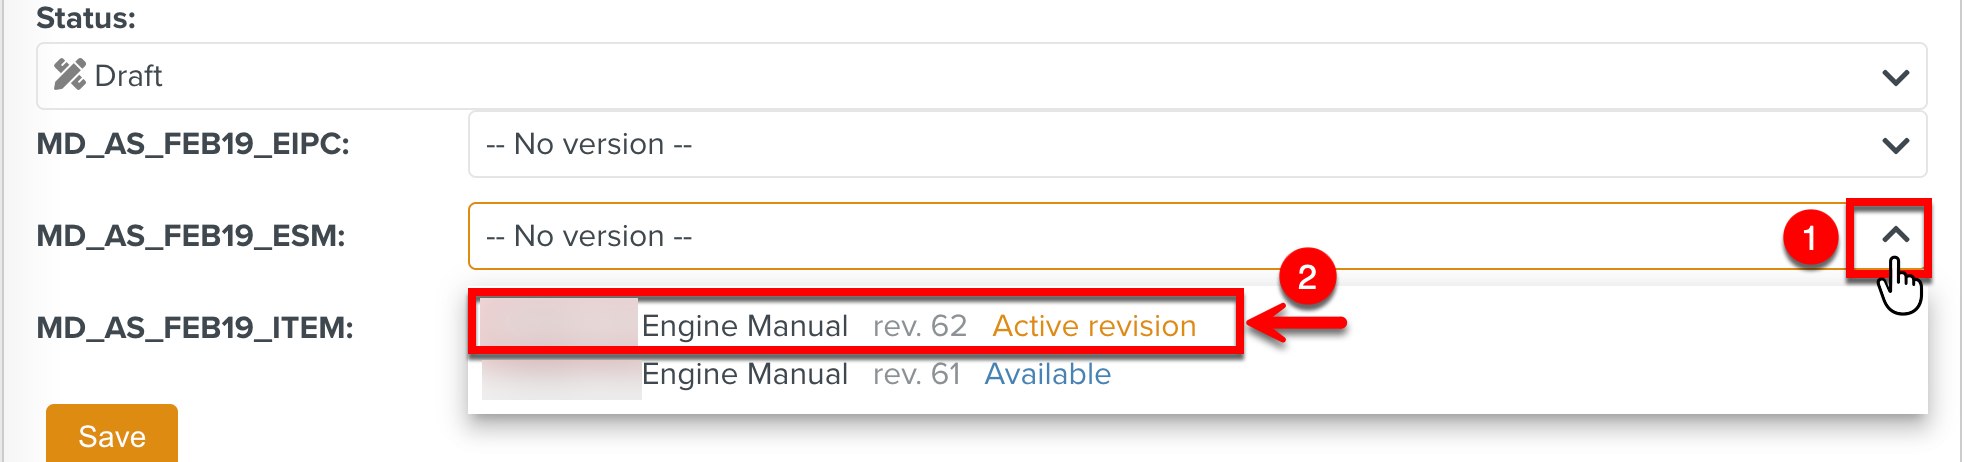
All the Manual Describers under this TMI are displayed. You can select the compatible revisions of the manuals to group them together.

Warning
You can select the manual revisions only when the TMI is in Draft status.
Select a status.
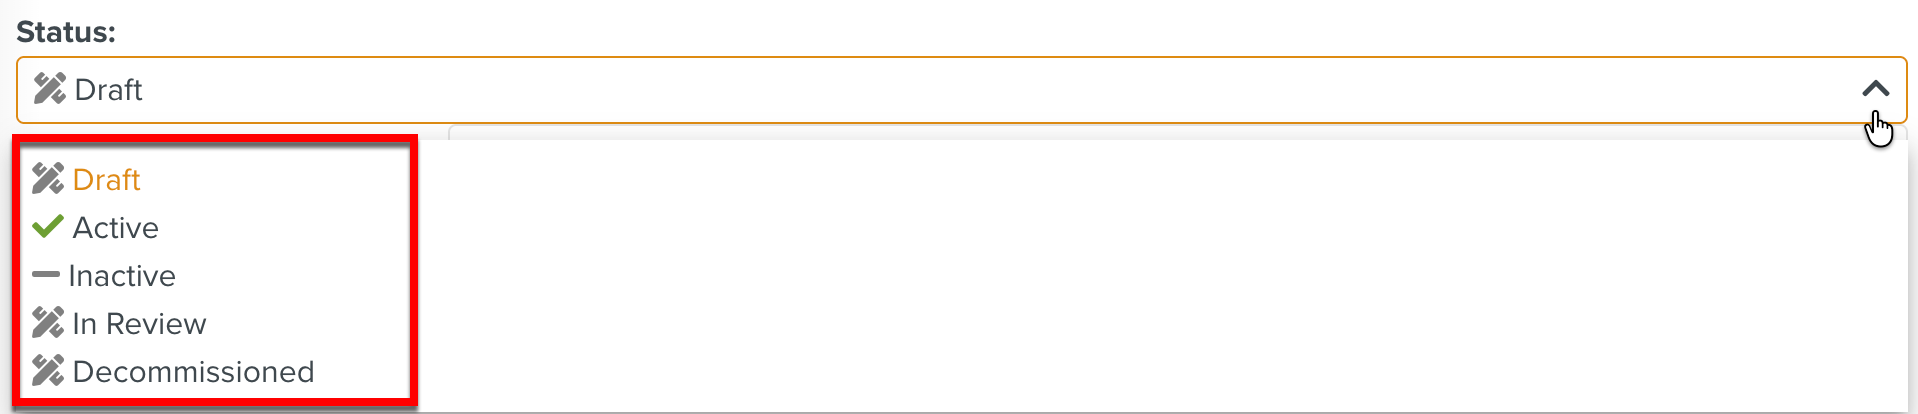
The following statuses are available:
Status
Description
Draft
The default selection is Draft.
You can modify the selection of Manual revisions only when the TMI version is in Draft status.
In Review
Disables the TMI version until the review is complete.
Active
Activates the created TMI version making it available for use in the corresponding pages.
You cannot modify the selected Manual revisions when in Active status.
Inactive
Disables the TMI version making it unavailable for use in the corresponding pages.
Decommissioned
Removes the TMI version from use.
Click .
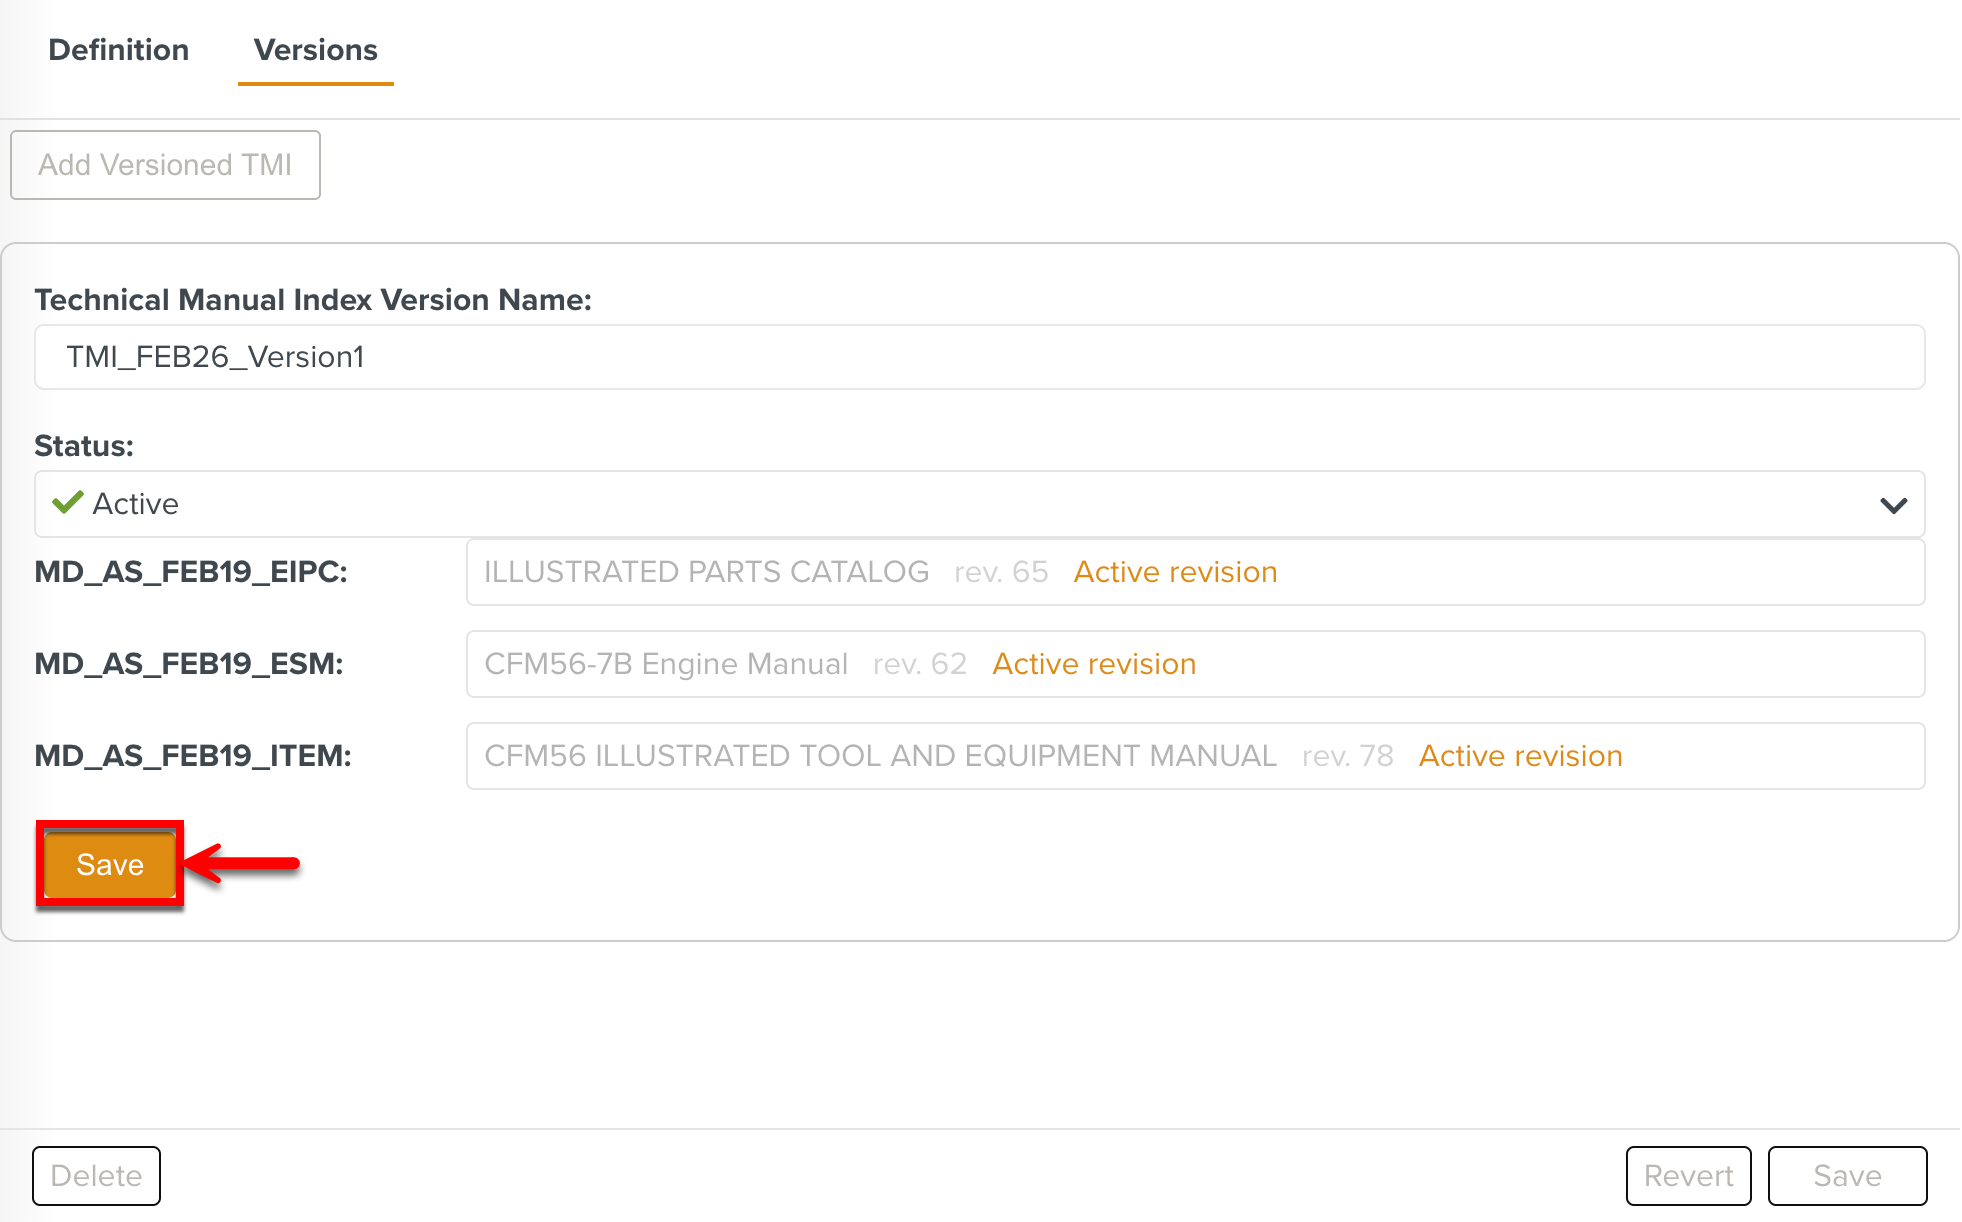
The TMI version is saved and the buttons highlighted below are enabled.
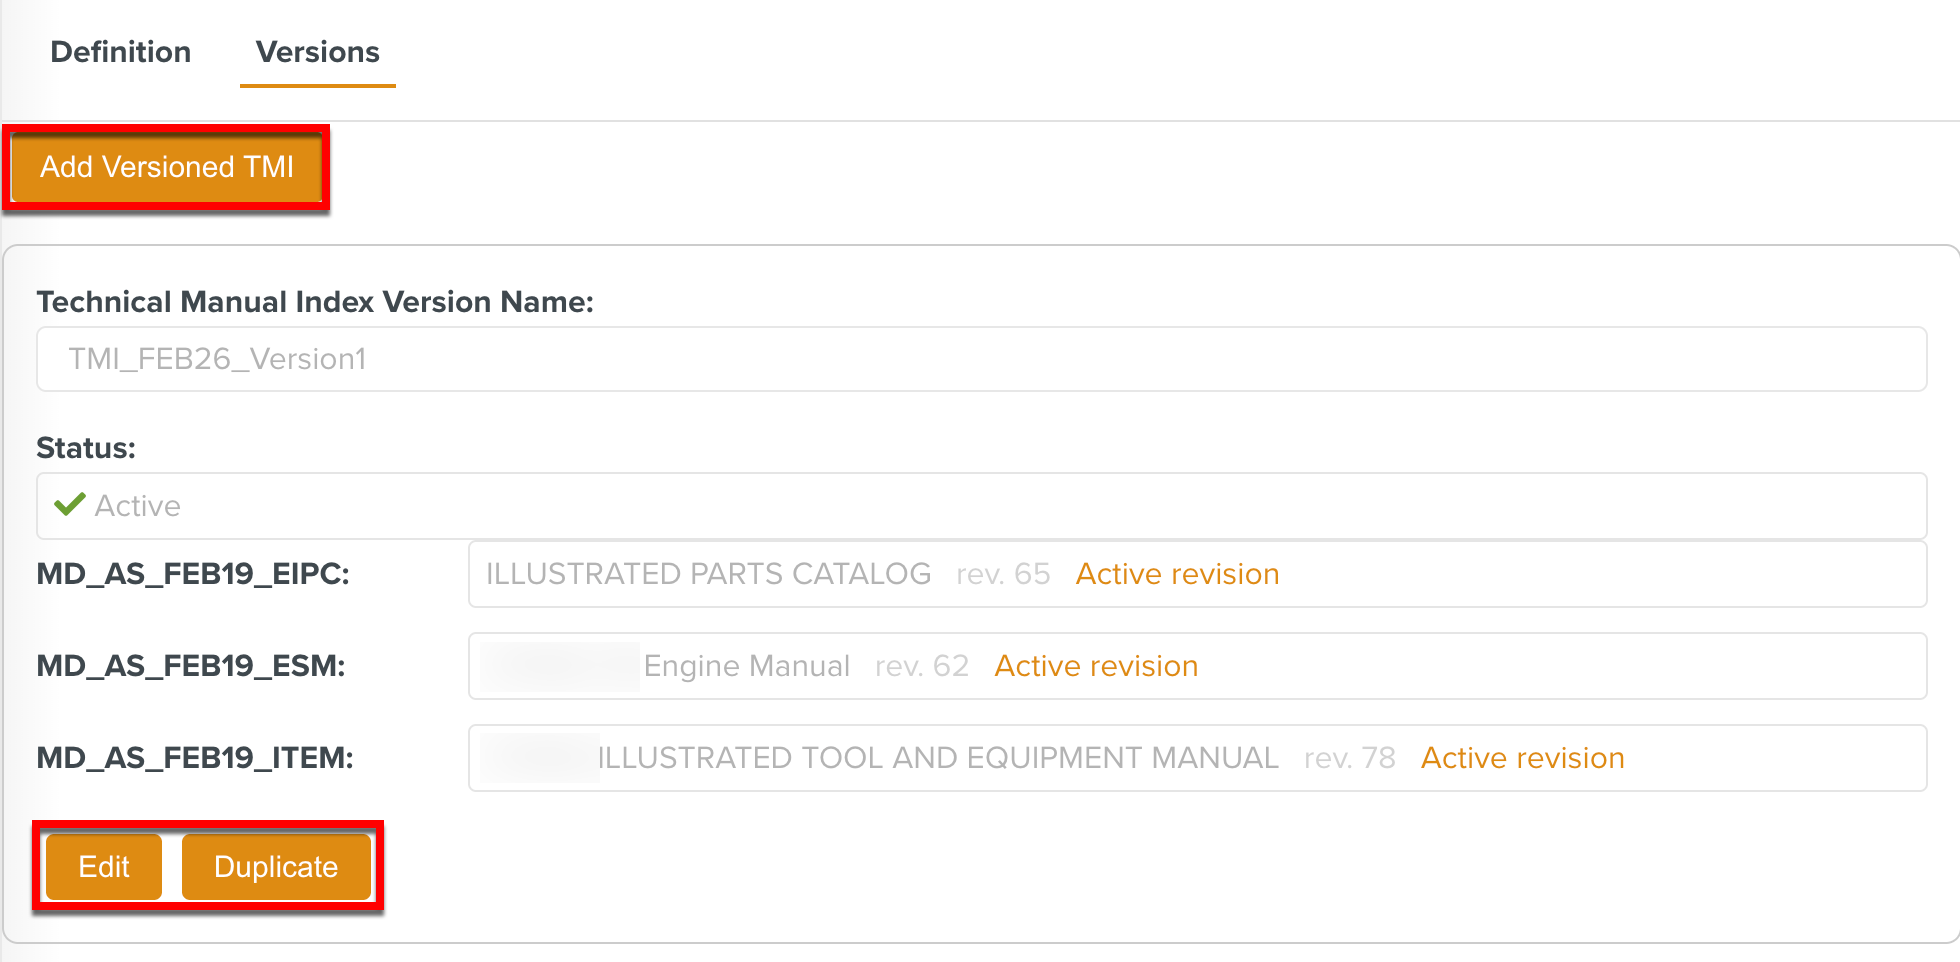
You can now edit or duplicate the created TMI version. In edit mode, you can only edit the Technical Manual Index Version Name and Status fields.
When you duplicate the TMI version, a copy of the TMI is created in Draft status with a (Copy) tag in the name as highlighted below.

A Manual Describer is the name and information of the Manual as stored in the library. It helps you identify a Manual.
Important
Enter accurate data in the Manual Describer.
We recommend opening the actual Manual in an editor and entering information in these fields from the Manual.
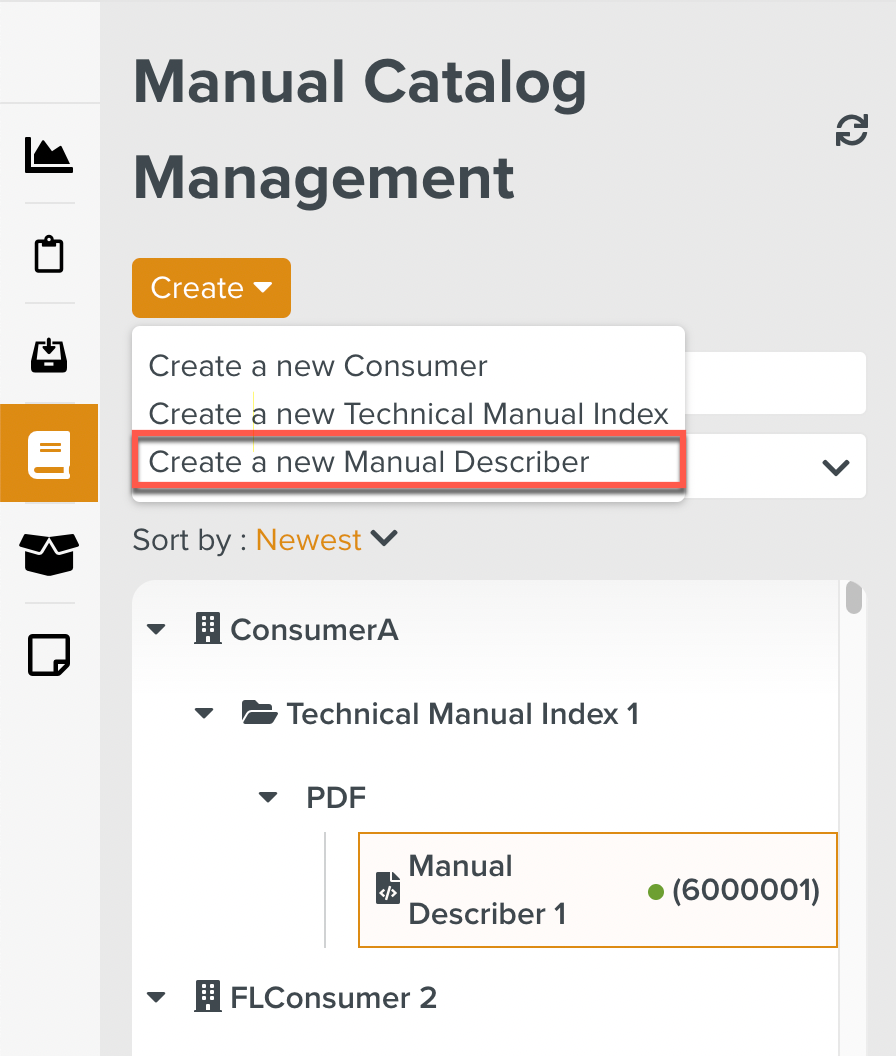
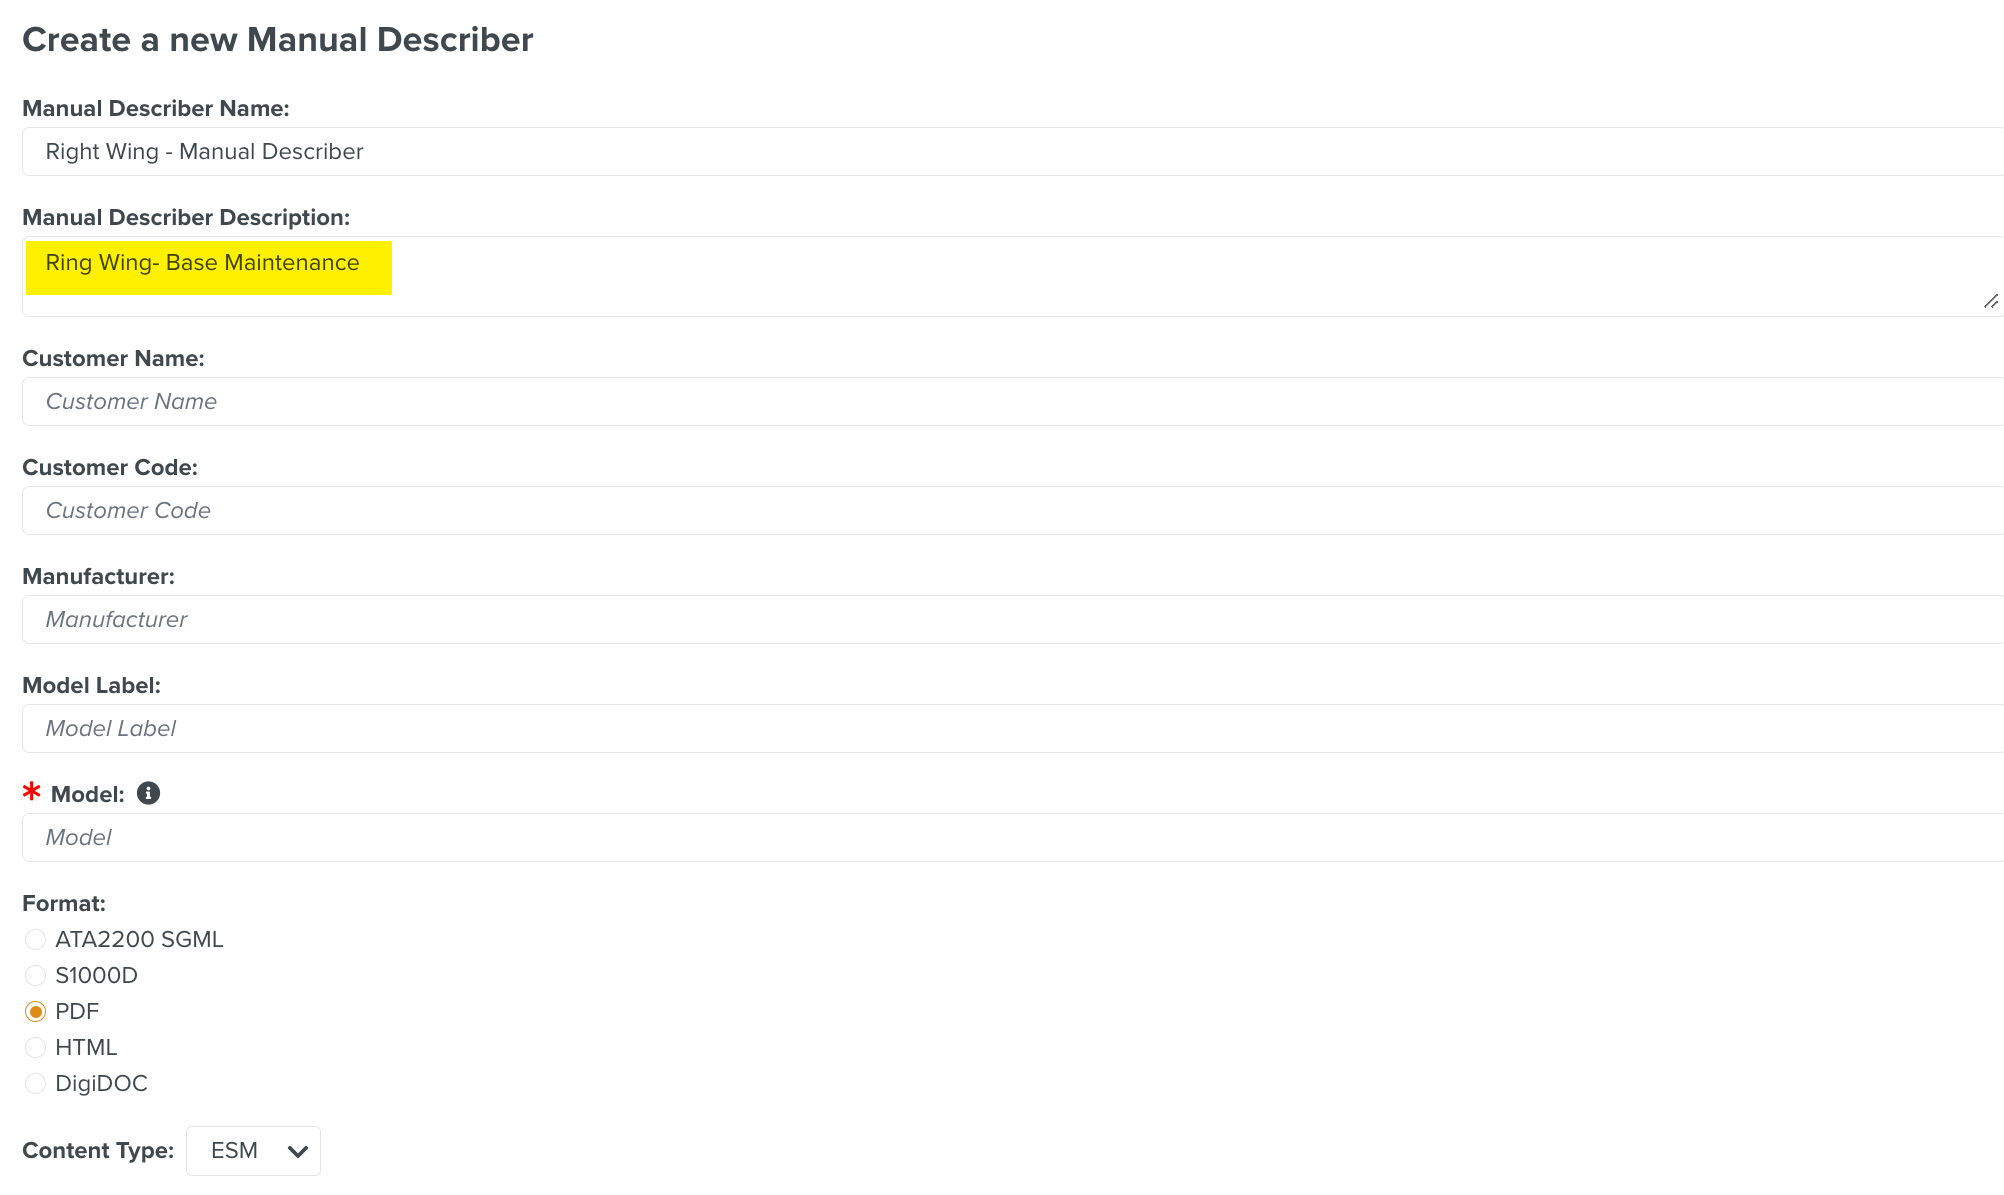
To create a new Manual Describer:
Select Create a new Manual Describer from the dropdown menu.
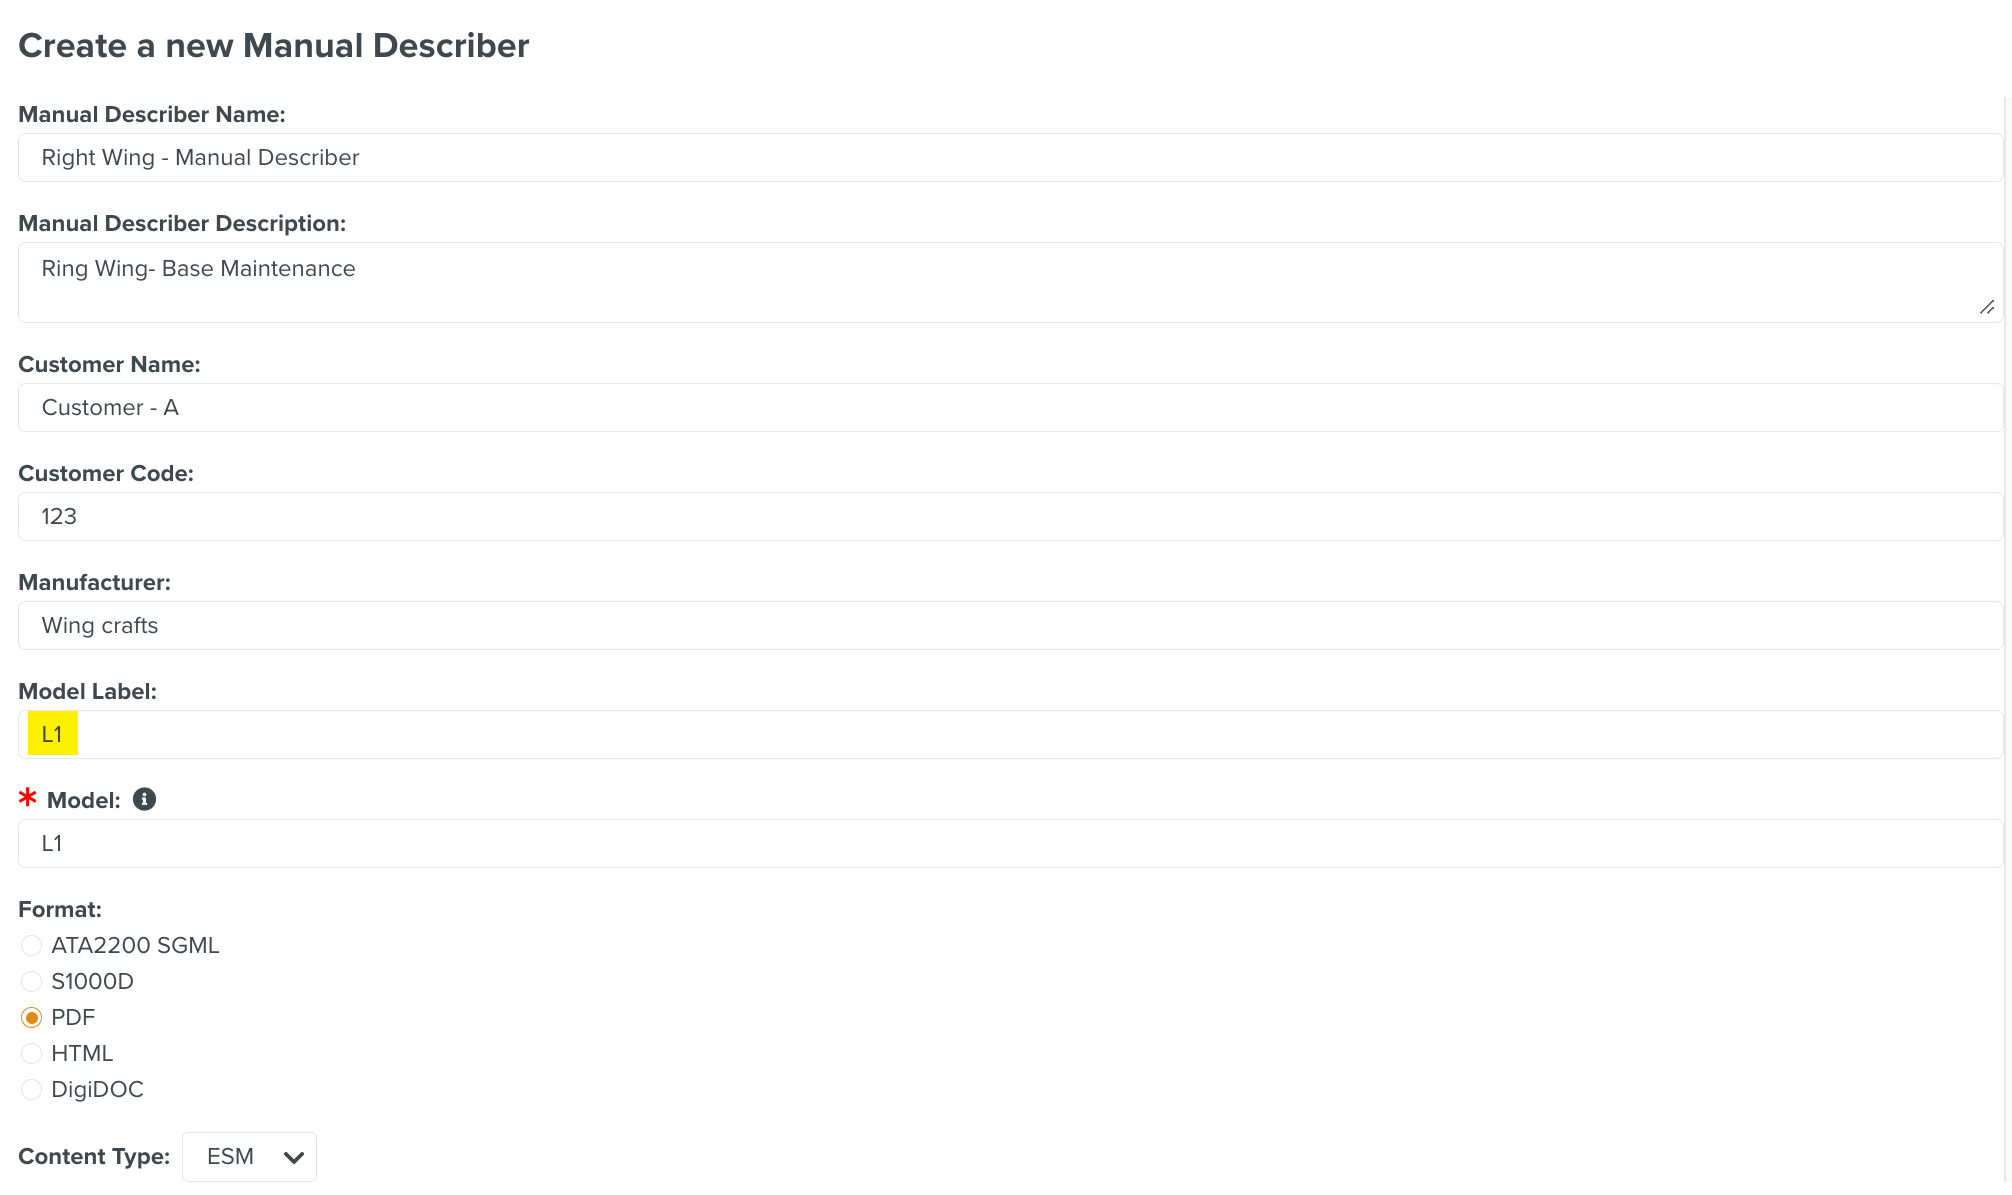
The dialog opens.
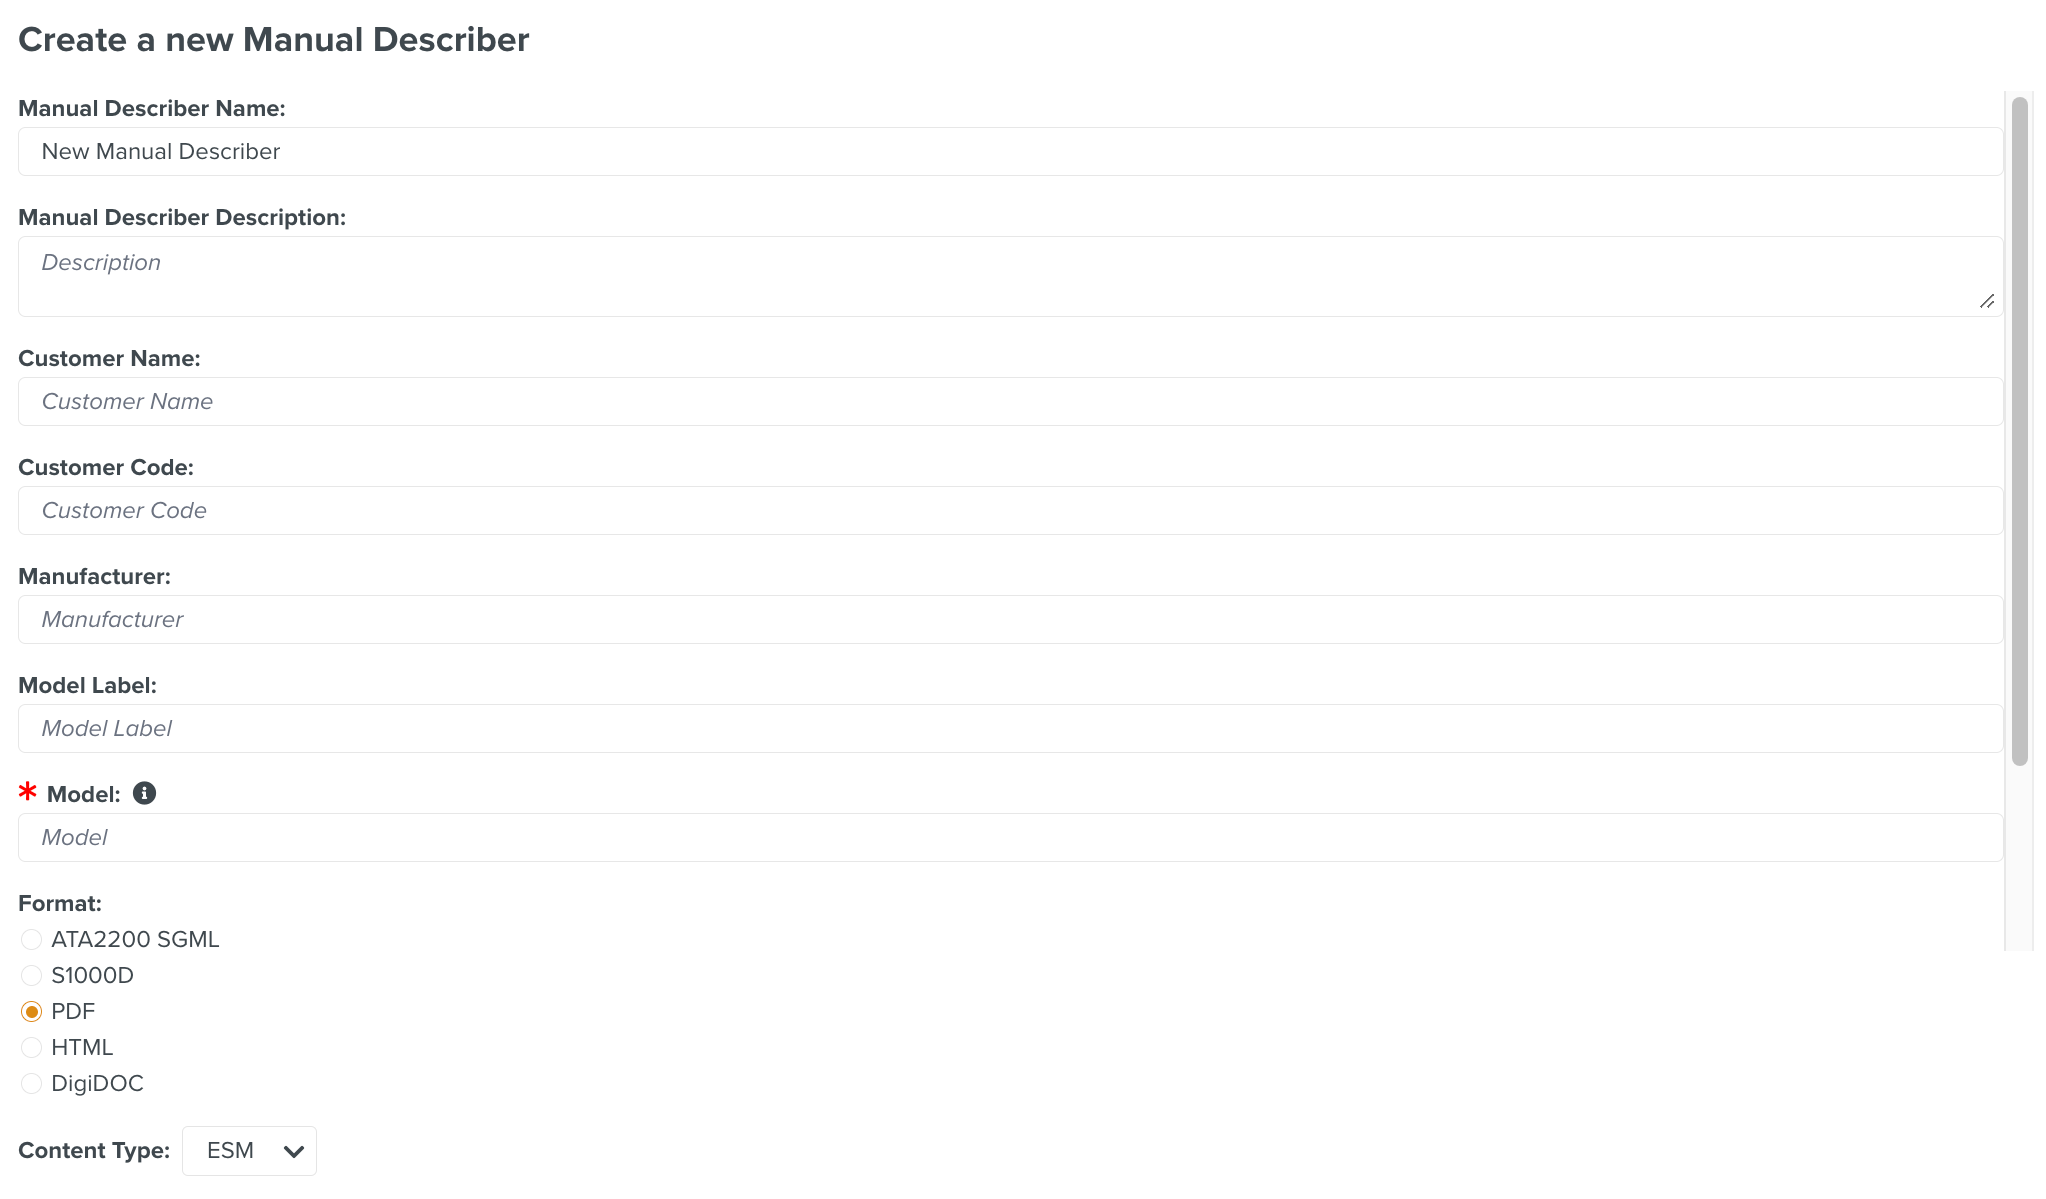
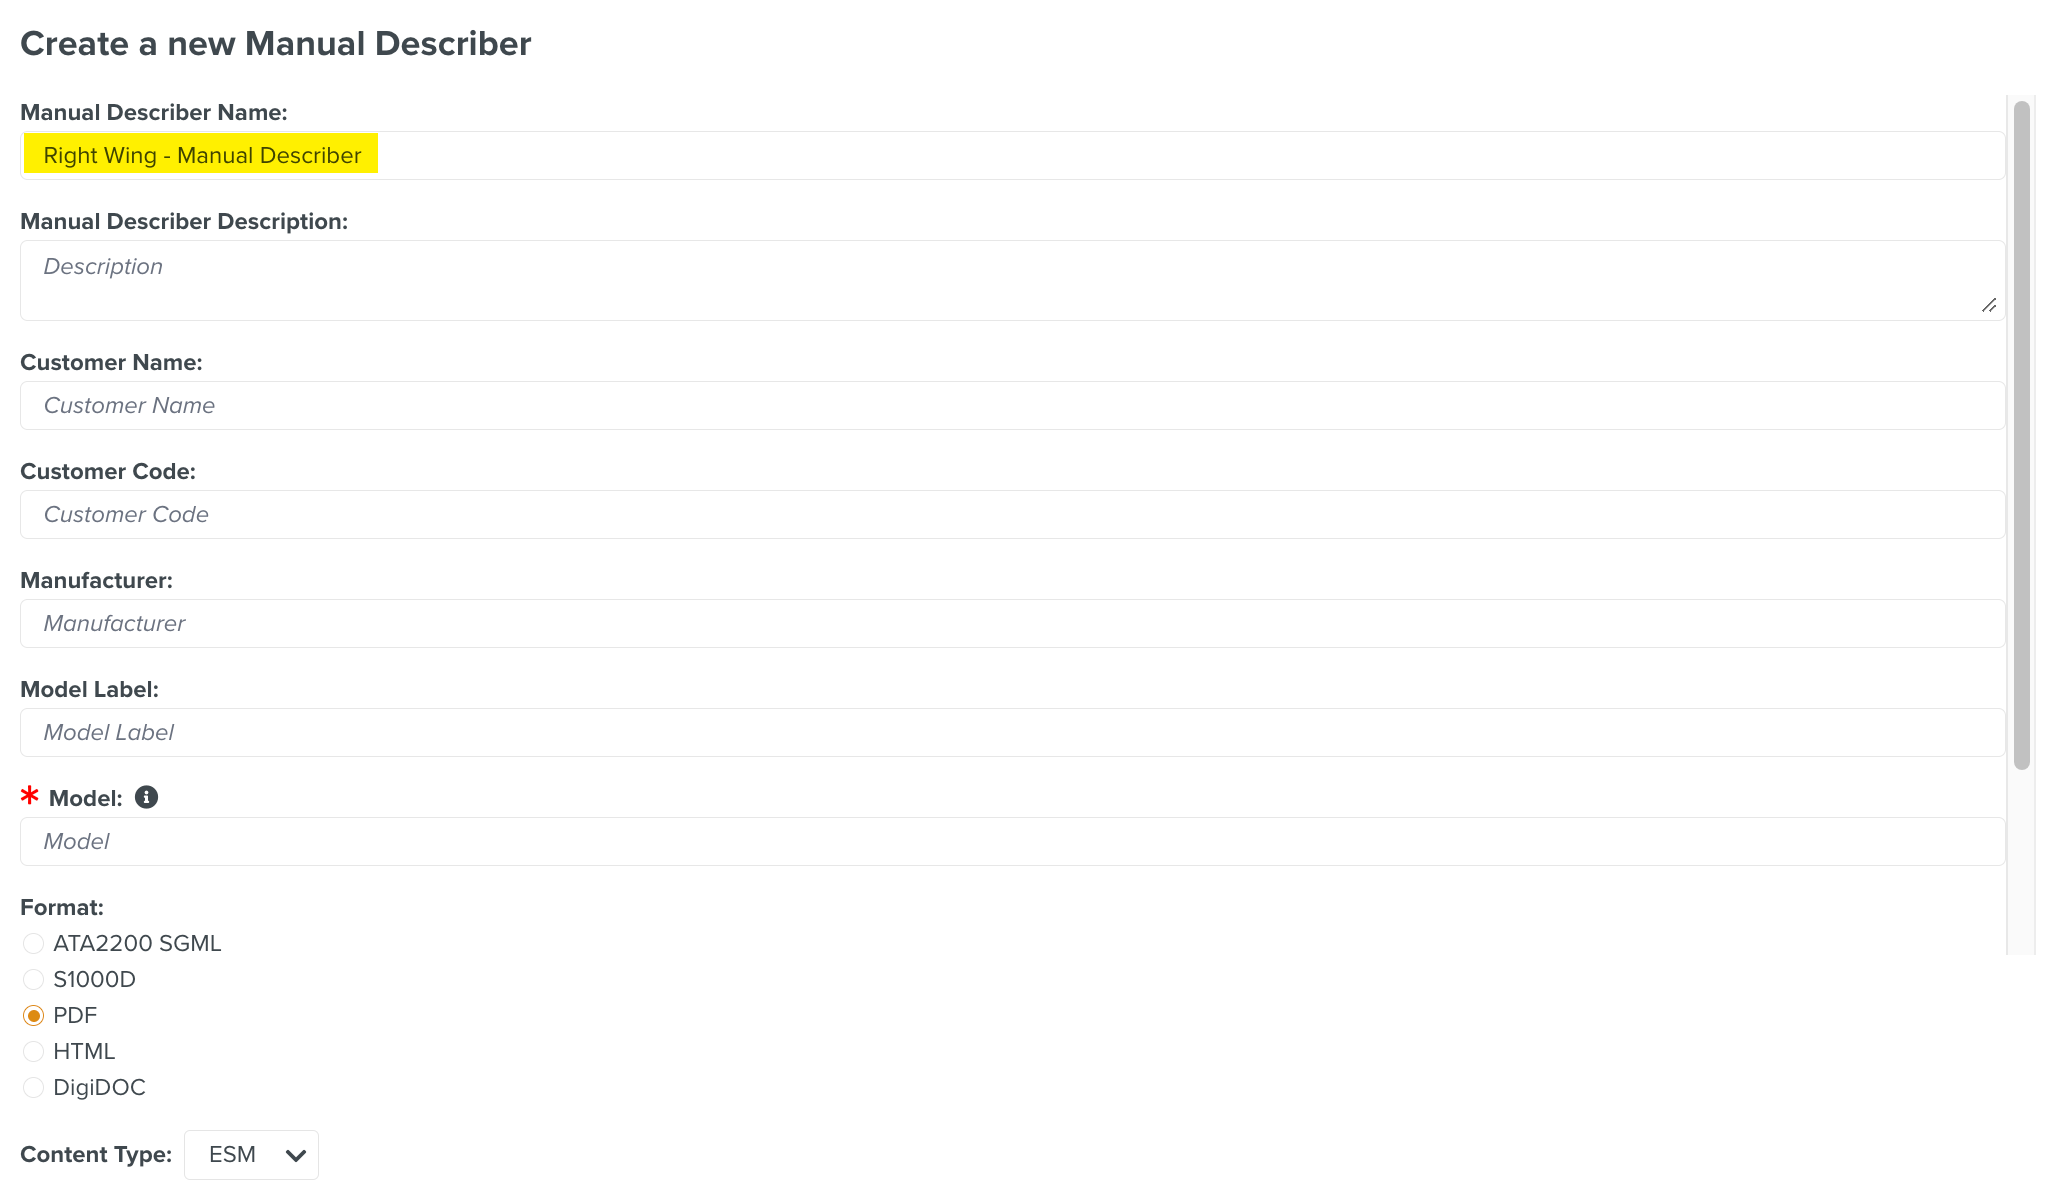
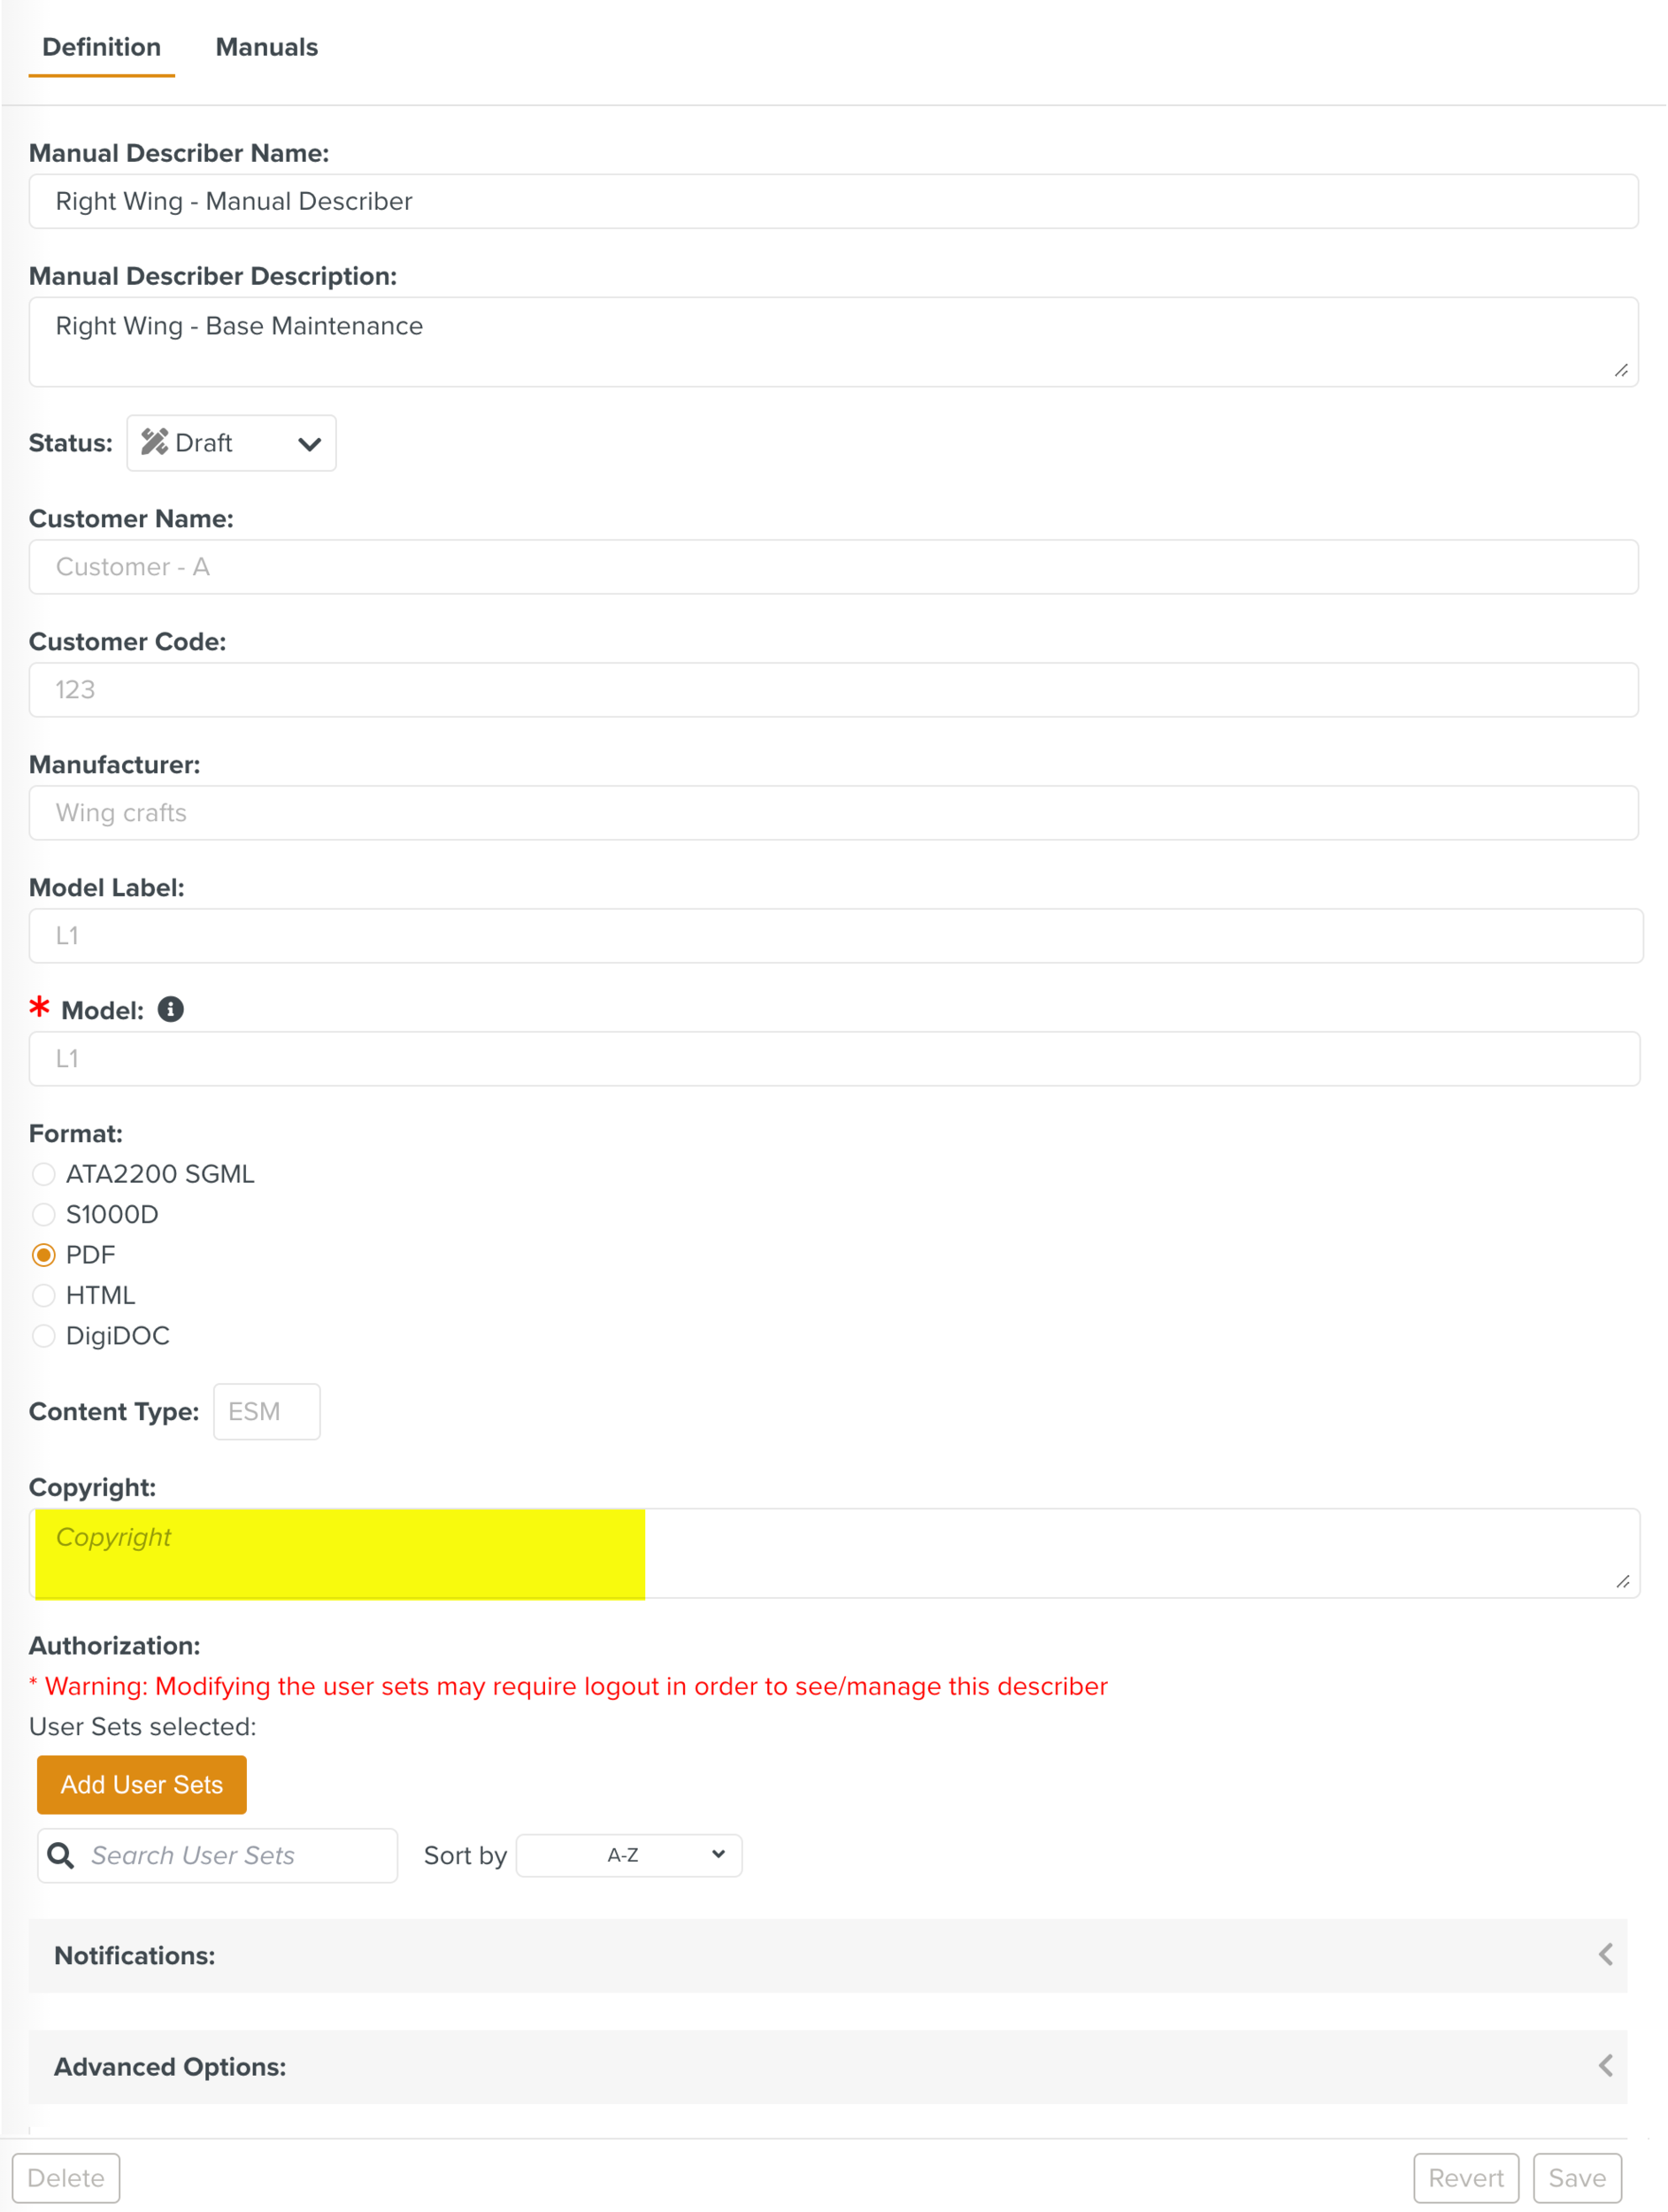
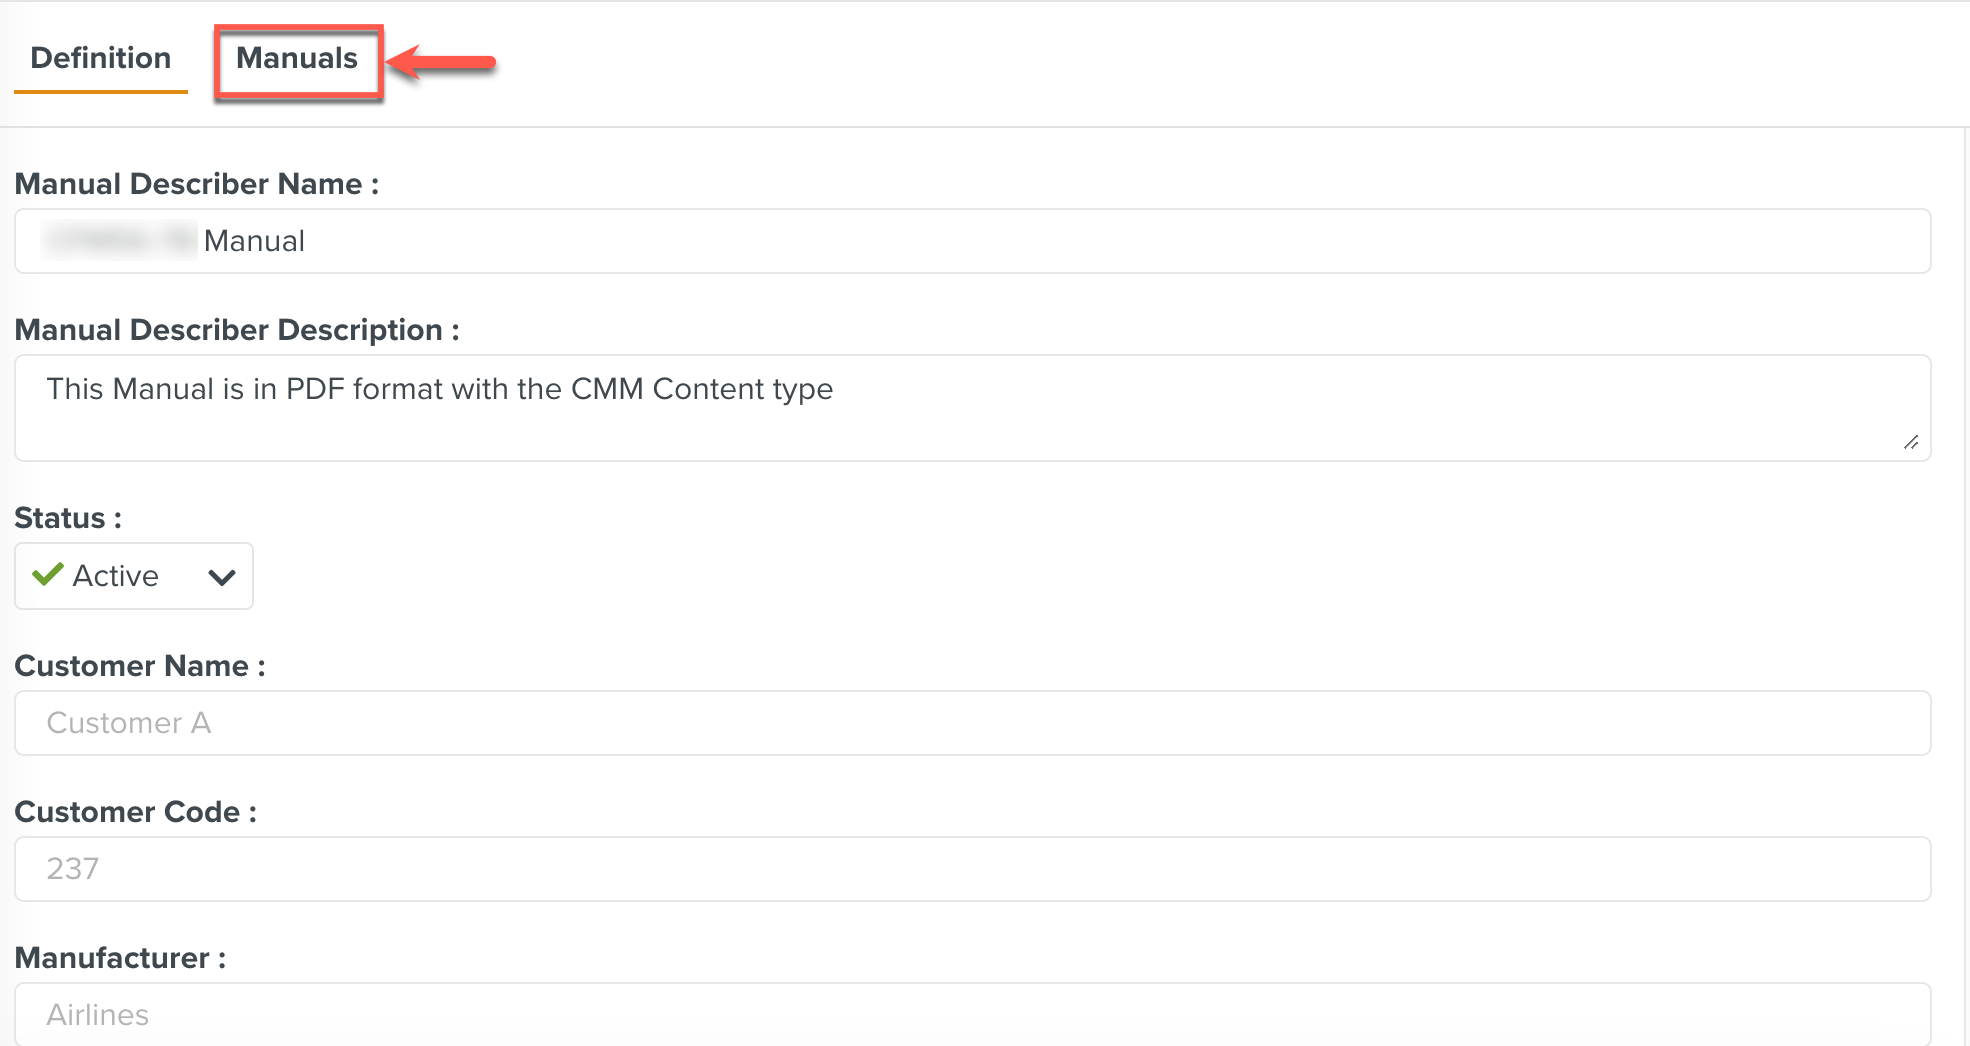
Enter the Manual Describer Name.
[Optional] Enter the description in the Manual Describer Description field.
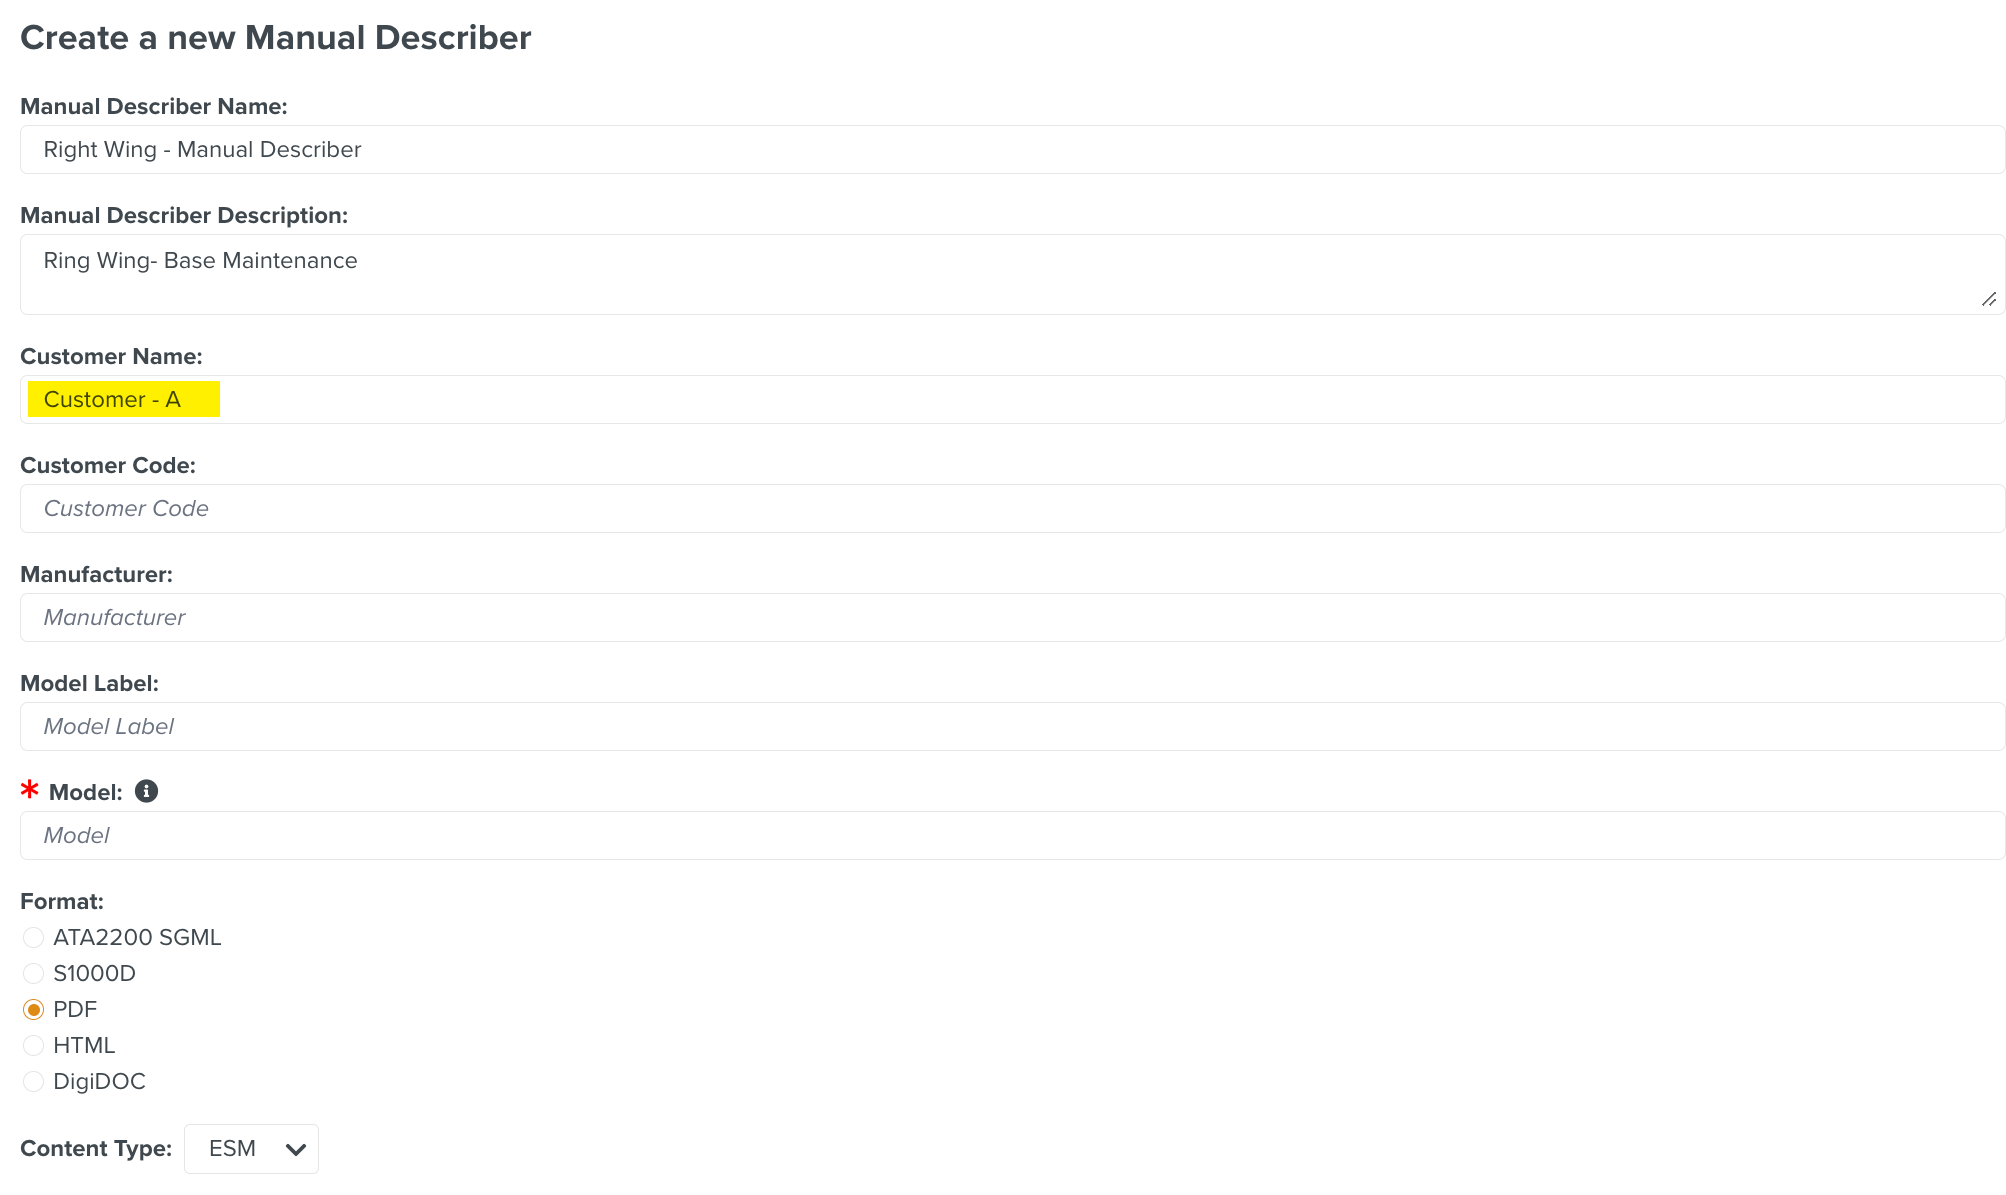
[Optional] Enter Customer Name.
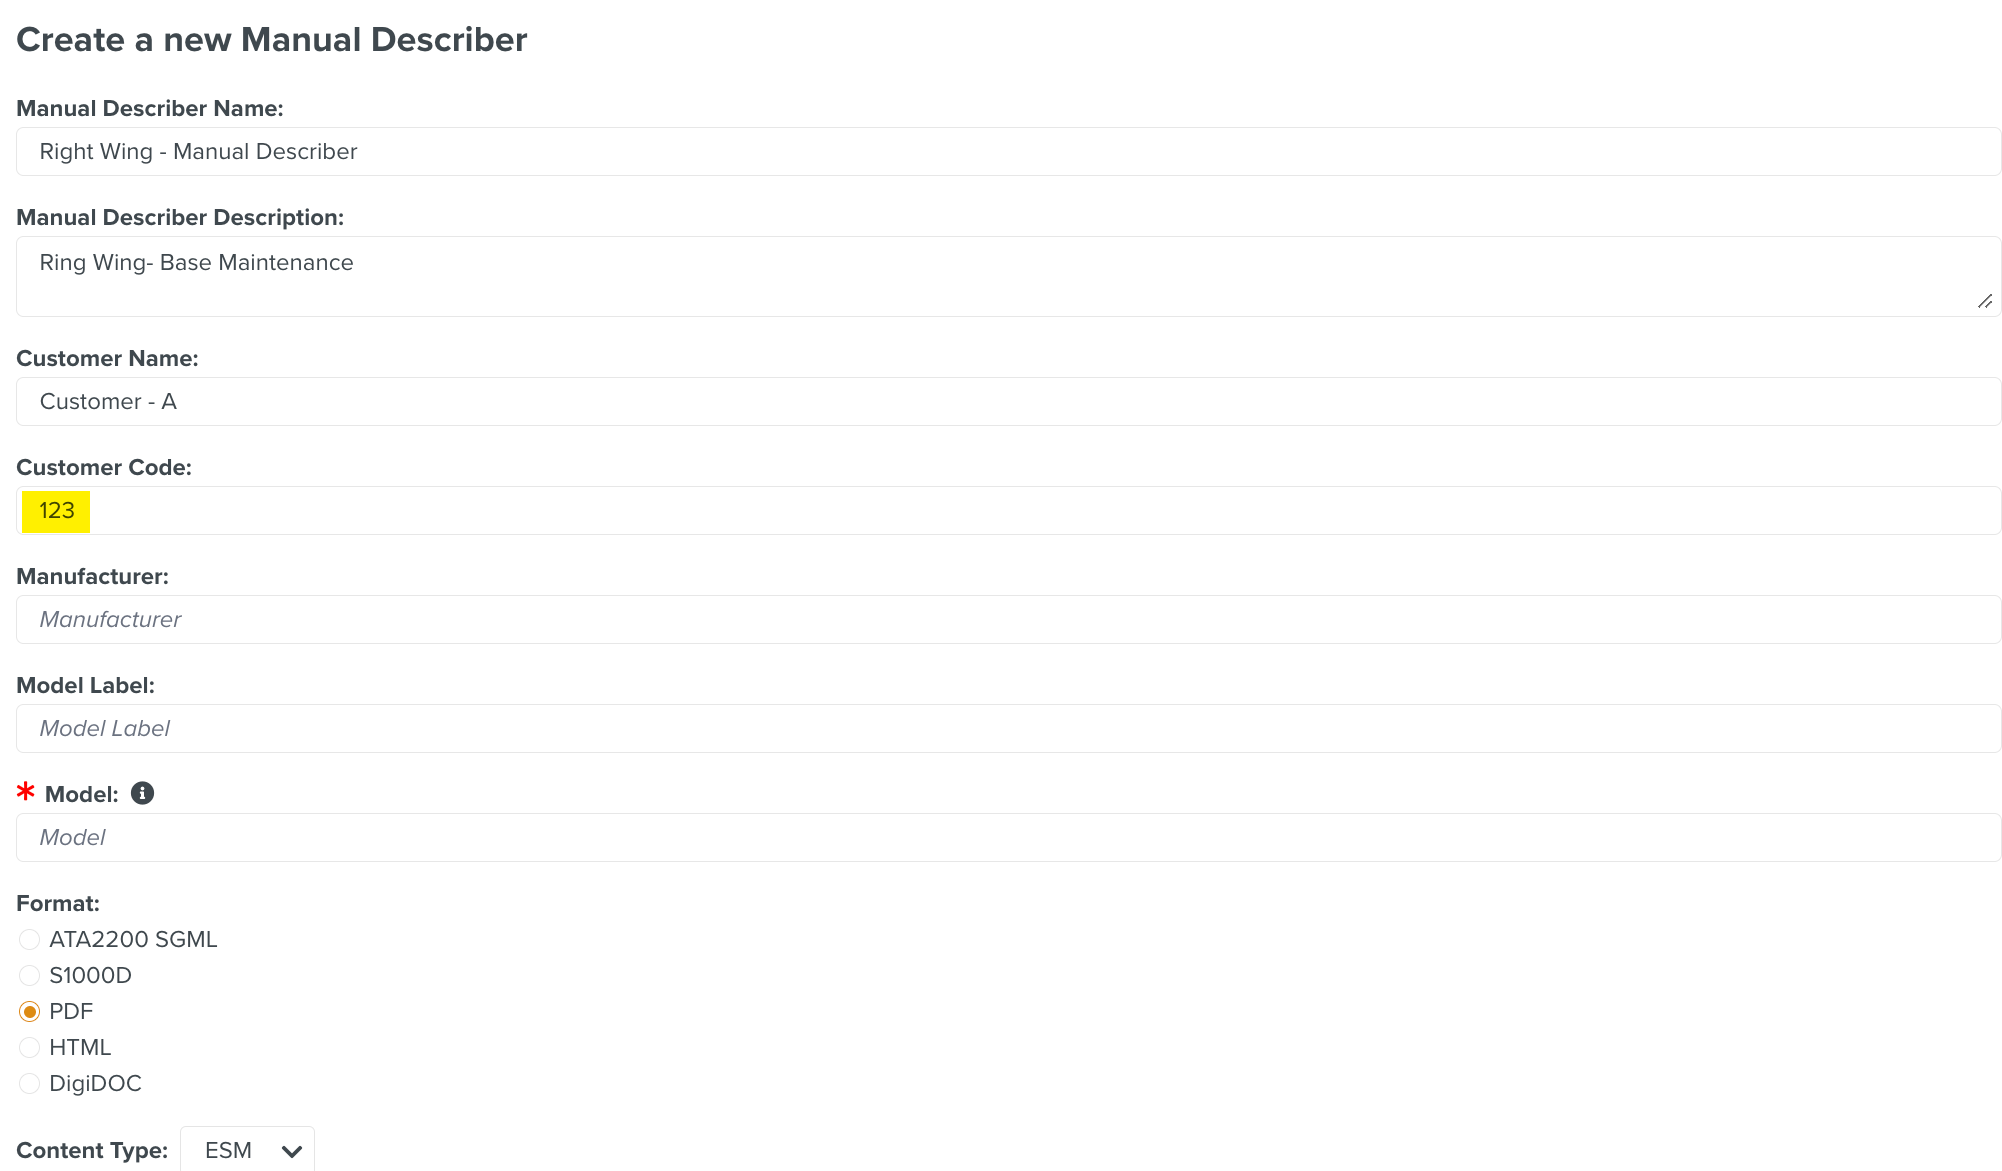
[Optional] Enter Customer Code. You can find the Customer Code in the Manual.
[Optional] Enter Manufacturer name. You can find the Manufacturer name in the Manual.
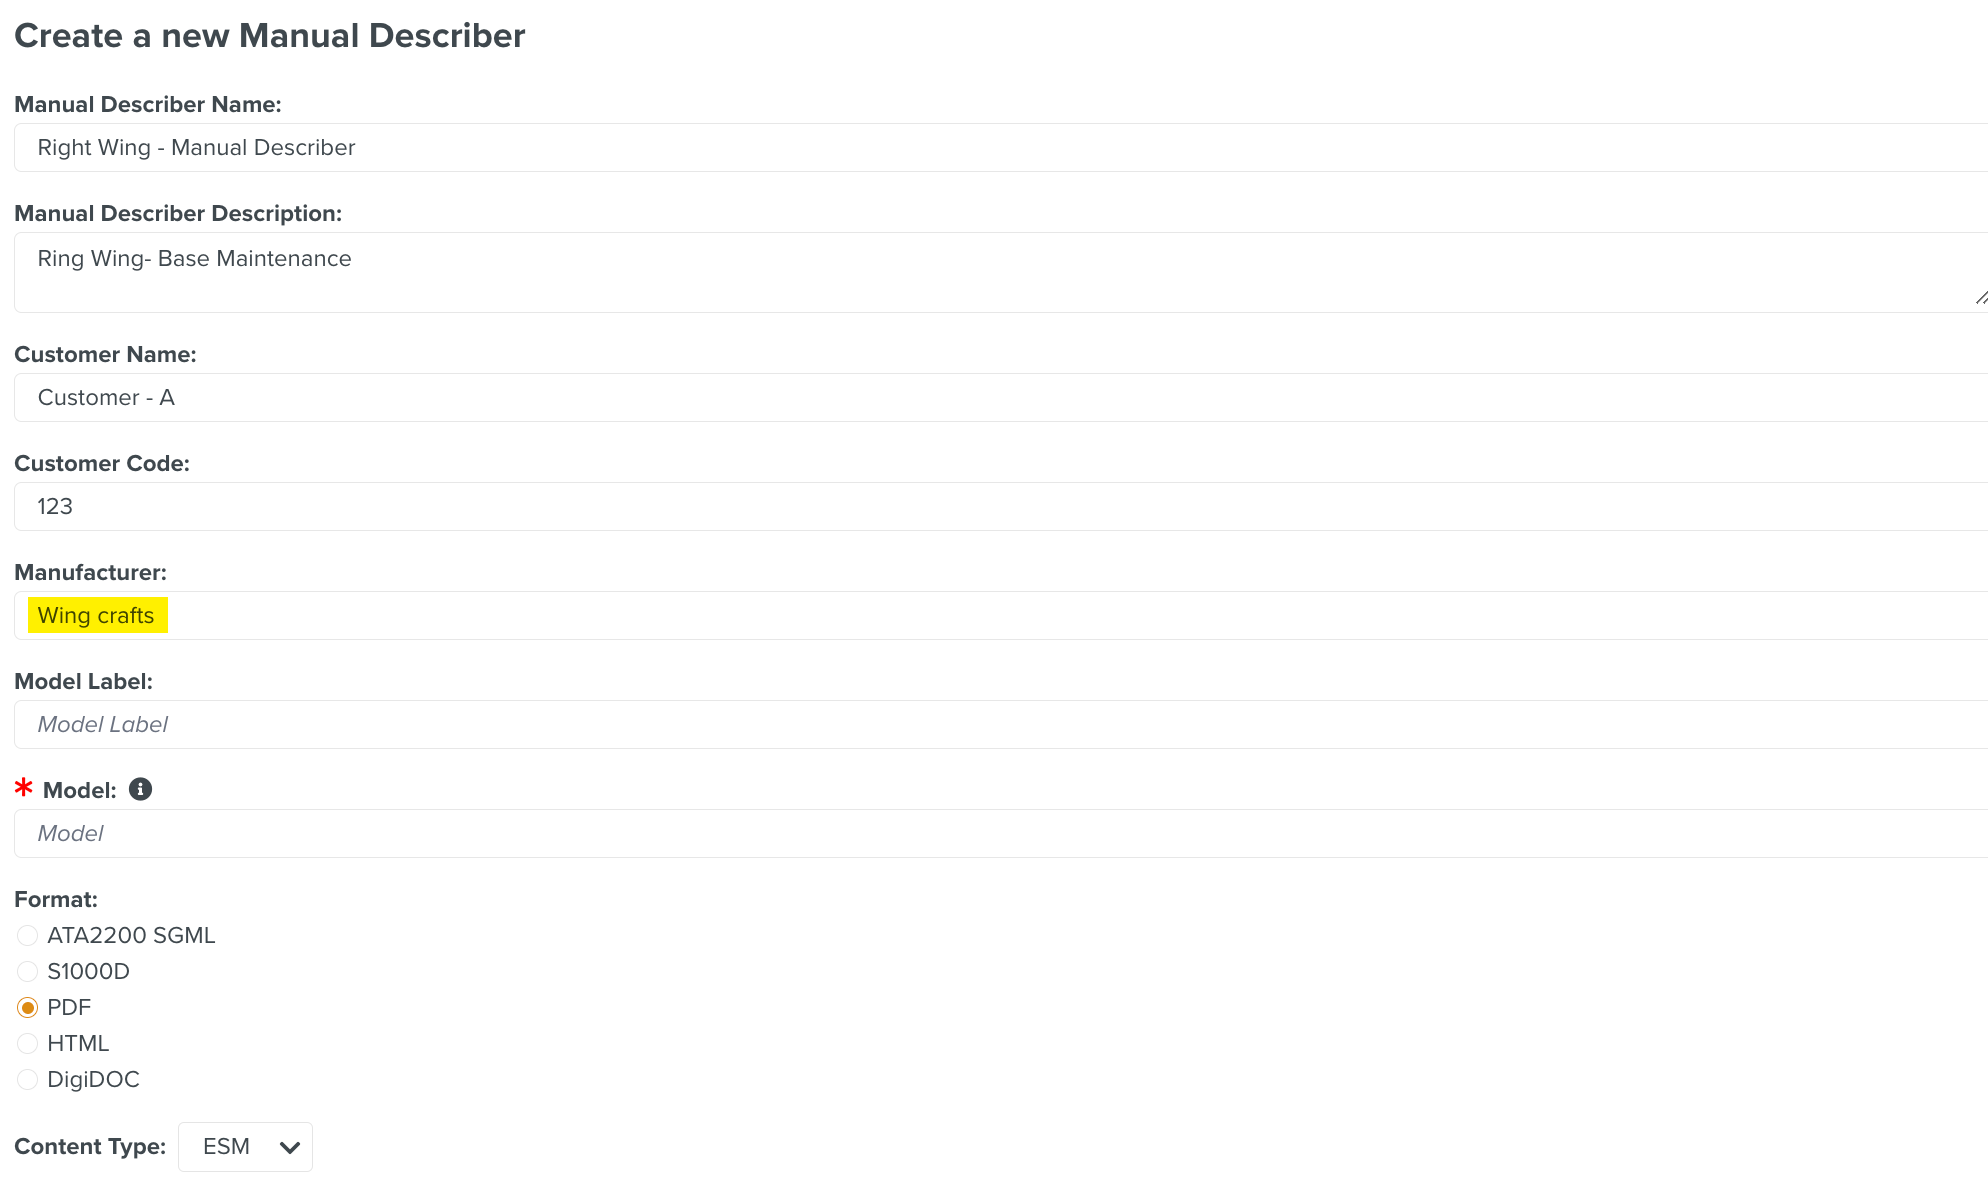
Enter the value for Model Label.
Note
Model is a mandatory field.
If the Manual is in SGML format, open it in an editor. Search for the tag model.

[Mandatory] Enter the Model.
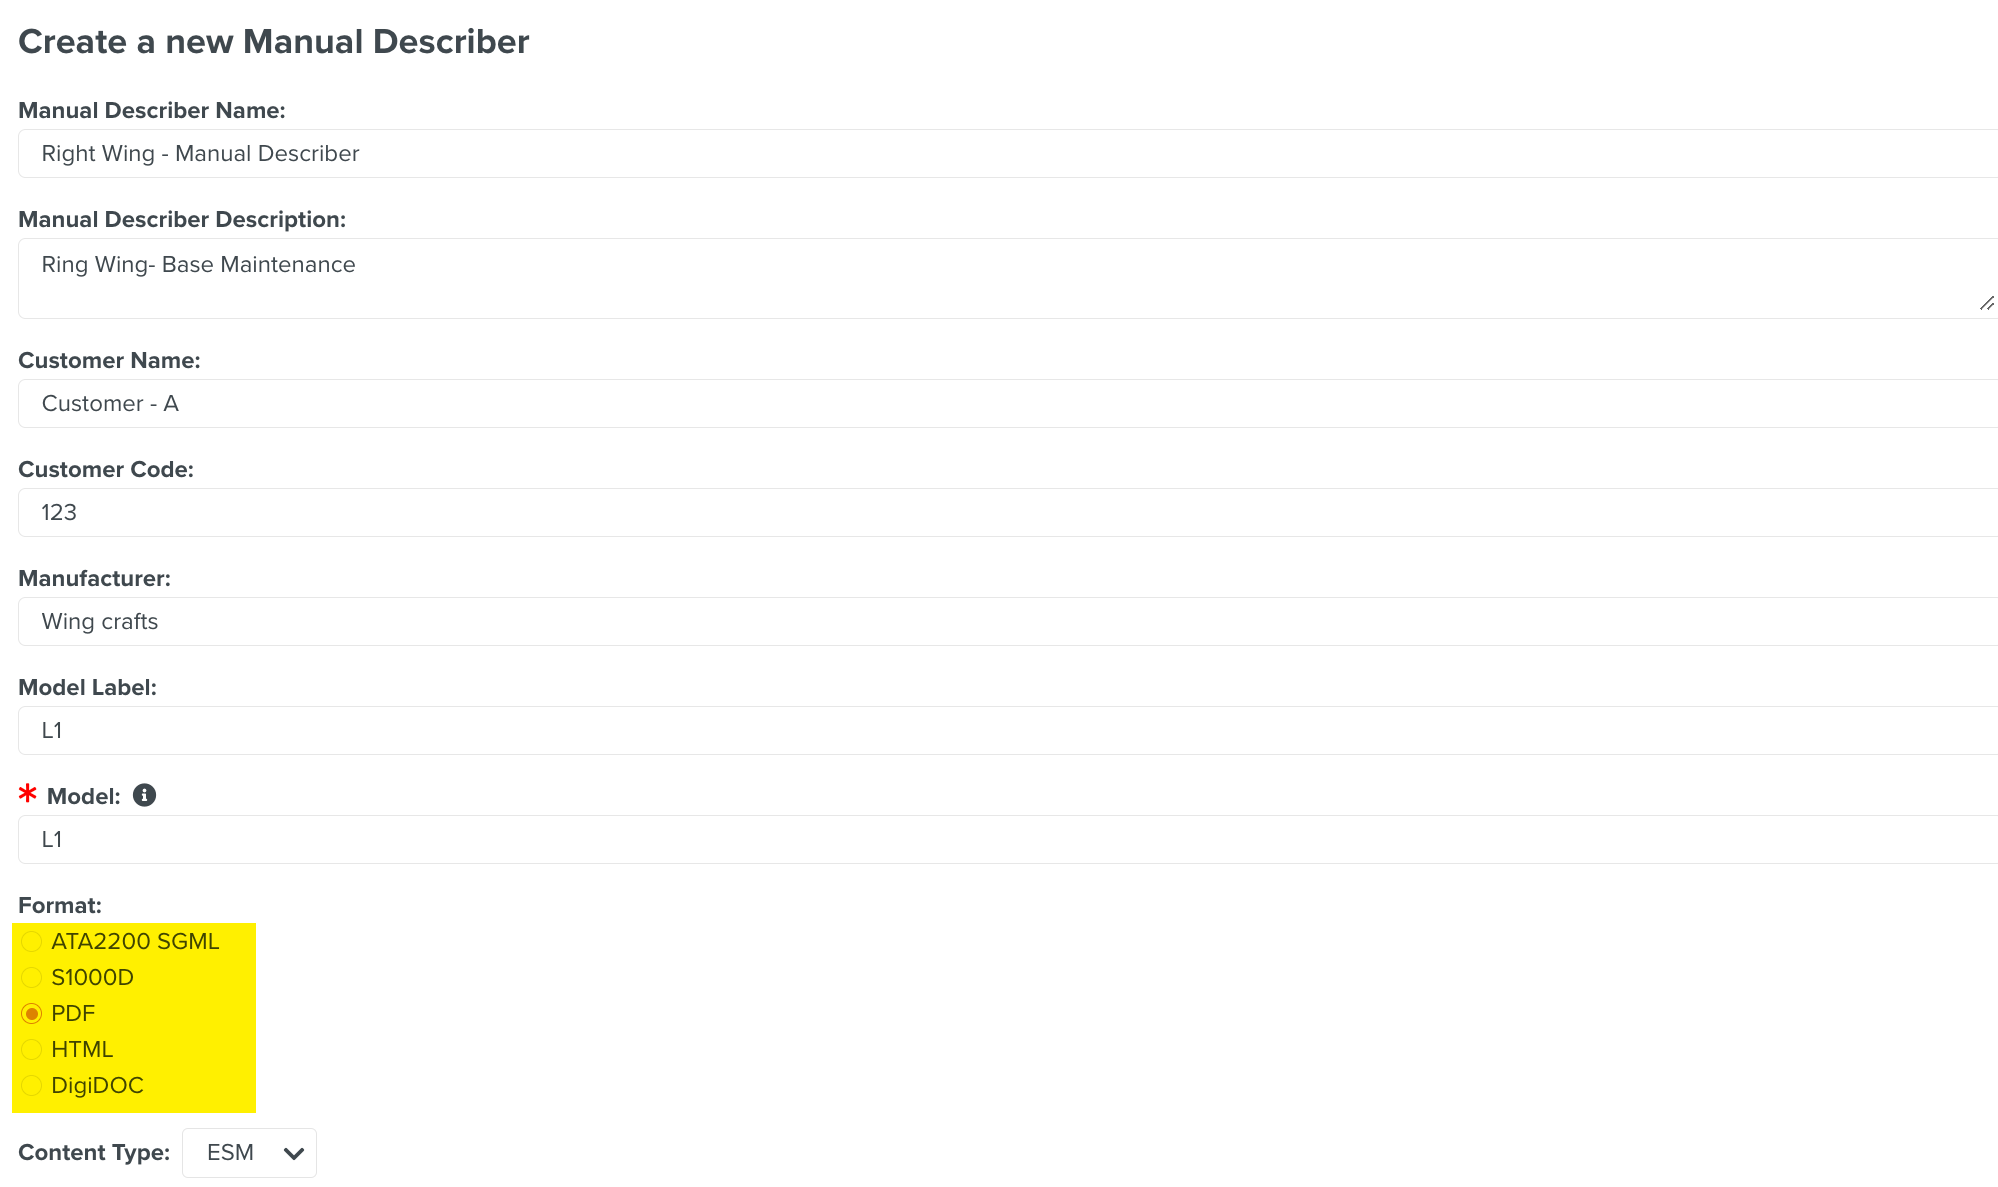
[Mandatory] Select the required Format from the options as shown below.
[Mandatory] Select the that the manual falls under.
The following Content Types are available:
Content Type
Description
ESM
Engine Shop Manual
AMM
Aircraft Maintenance Manual
EIPC
Engine Illustrated Parts Catalog
AIPC
Aircraft Illustrated Parts Catalog
AIS
Assembly Instruction Sheet
ALM
Airworthiness Limitation Manual
APM
Airport Planning Manual
AWL
Airworthiness Limitations
CIR
Cleaning, Inspection & Repair Manual
CMM
Component Maintenance Manual
CPM
Consumable Products Manual
CRM
Component Repair Manual
DDG
Dispatch Deviation Guide
EM
Engine Manual
EMM
Engine Maintenance Manual
ESPM
Electrical/Electronic Components - Standard Practices Manual
FIM
Fault Isolation Manual
IC
Incremental Change
ITEM
Illustrated Tools and Equipment Manual
MFEPM
Maintenance Facilities Equipment Planning Manual
MPD
Maintenance Planning Document
MPM
Manufacture Program Manual
MRM
Maintenance Requirements Manual
MTCM
Maintenance Task Card Manual
NDTM
Non Destructive Testing Manual
OMAT
Overhaul Material Manual
PPBM
Power Plant Buildup Manual
PPGRM
Power Plant Ground Run Manual
RDH
Refuel and Defuel Handbook
SB
Service Bulletin
SDS
Systems Description Section
SETM
Shop Engine Test Manual
SOPM
Standard Overhaul Practices Manual
SP
Standard Practice
SPM
Standard Practices Manual
SRM
Structural Repair Manual
SSM
System Schematic Manual
SWPM
Standard Wiring Practices Manual
TDS
Technical Data Sheet
TLM
Task List Manual
TV
Technical Variance
WBM
Weight and Balance Manual
WDM
Wiring Diagram Manual
PDF
Portable Document Format
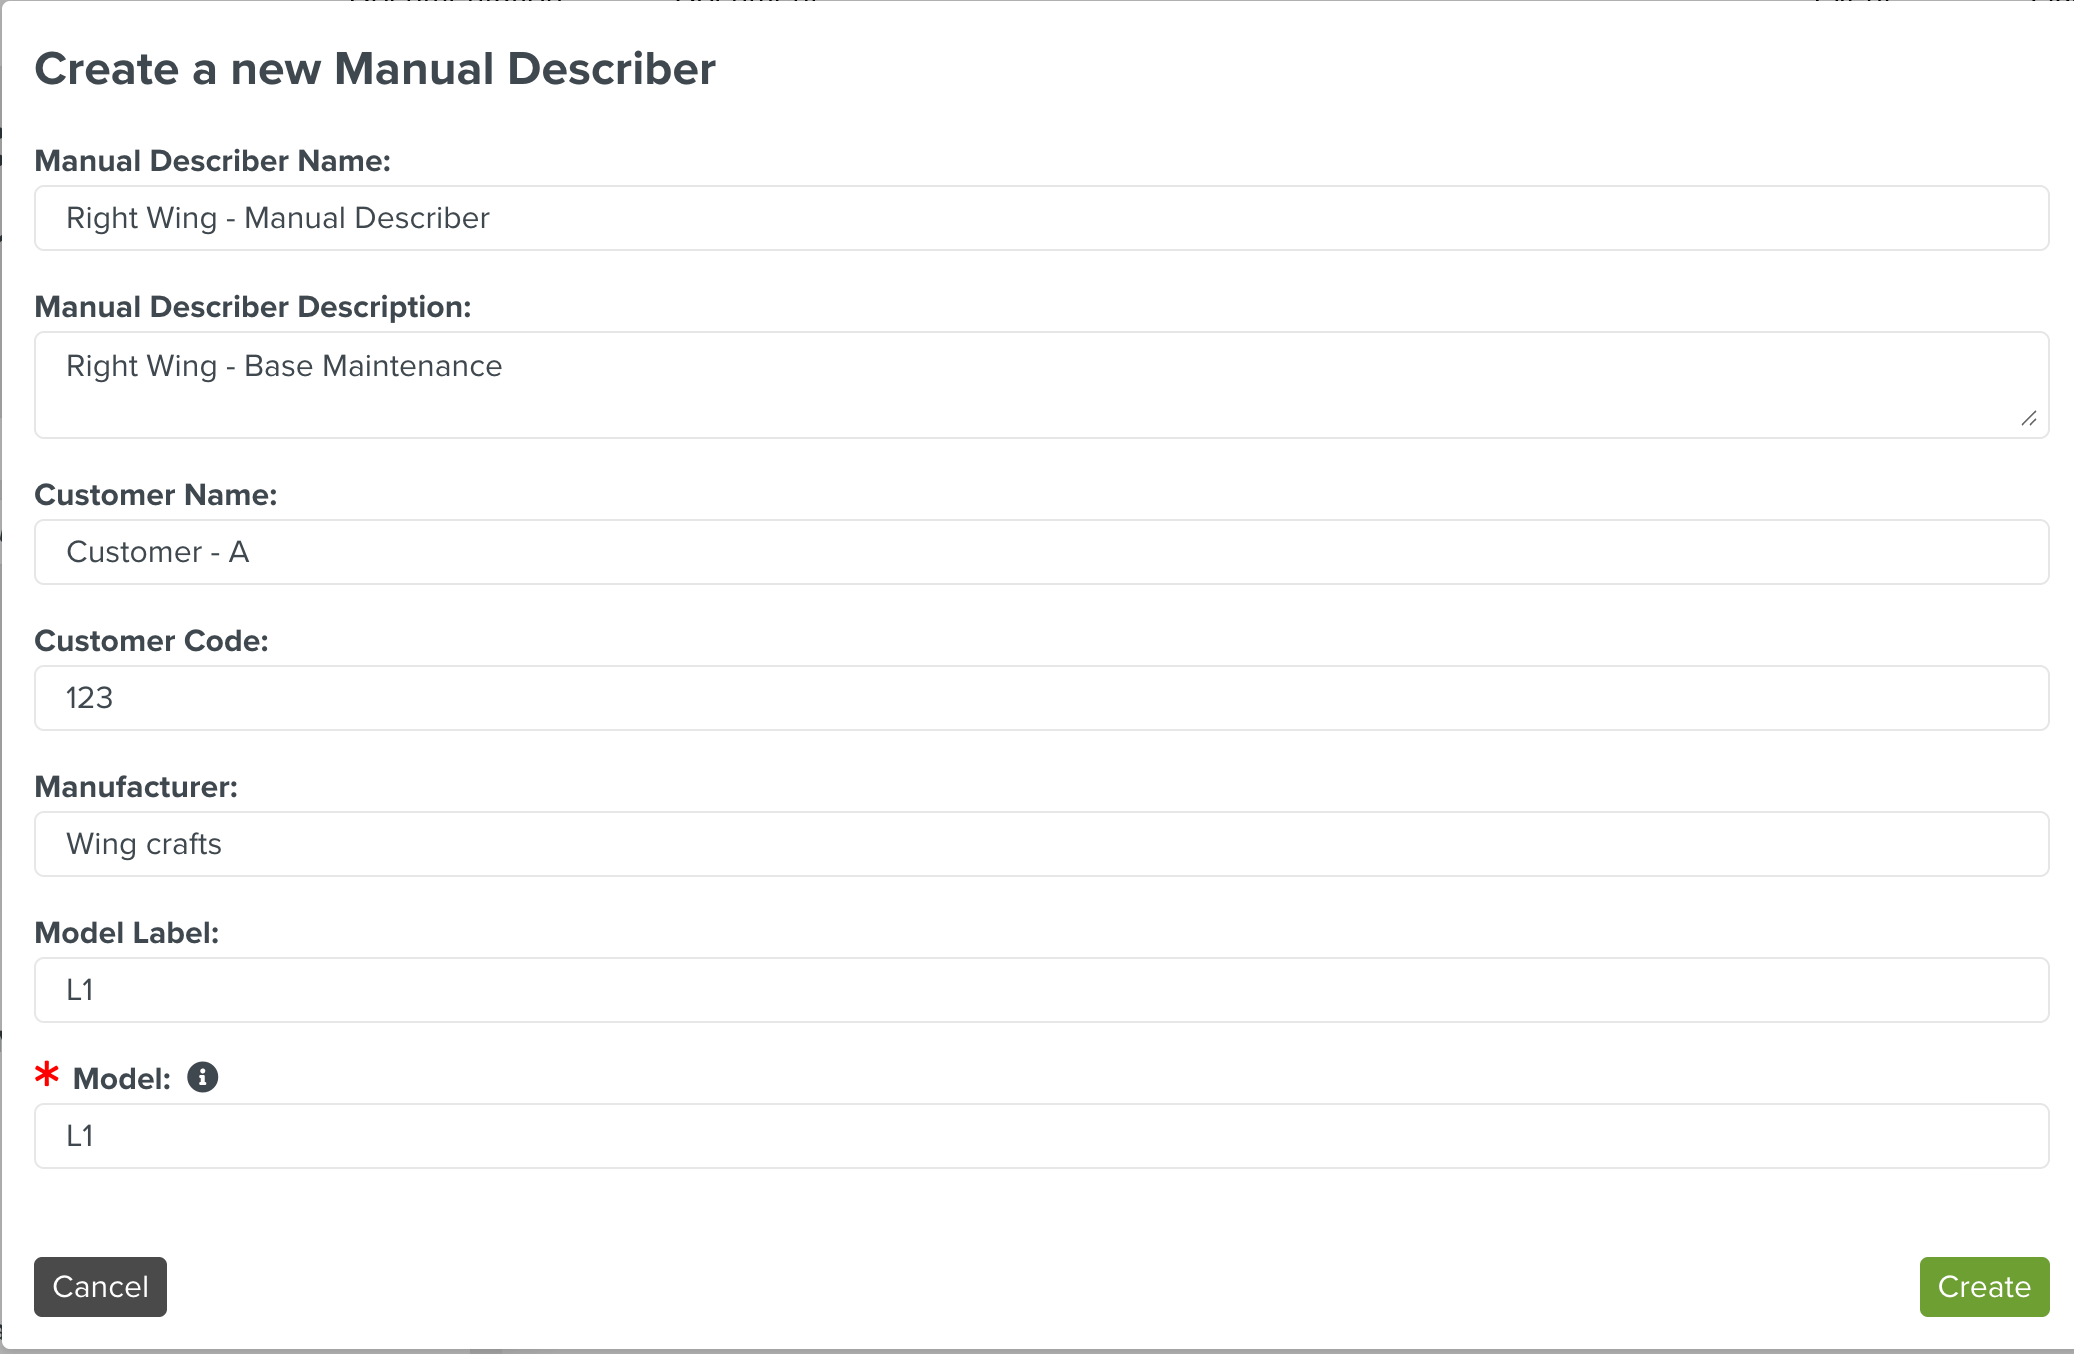
Click .
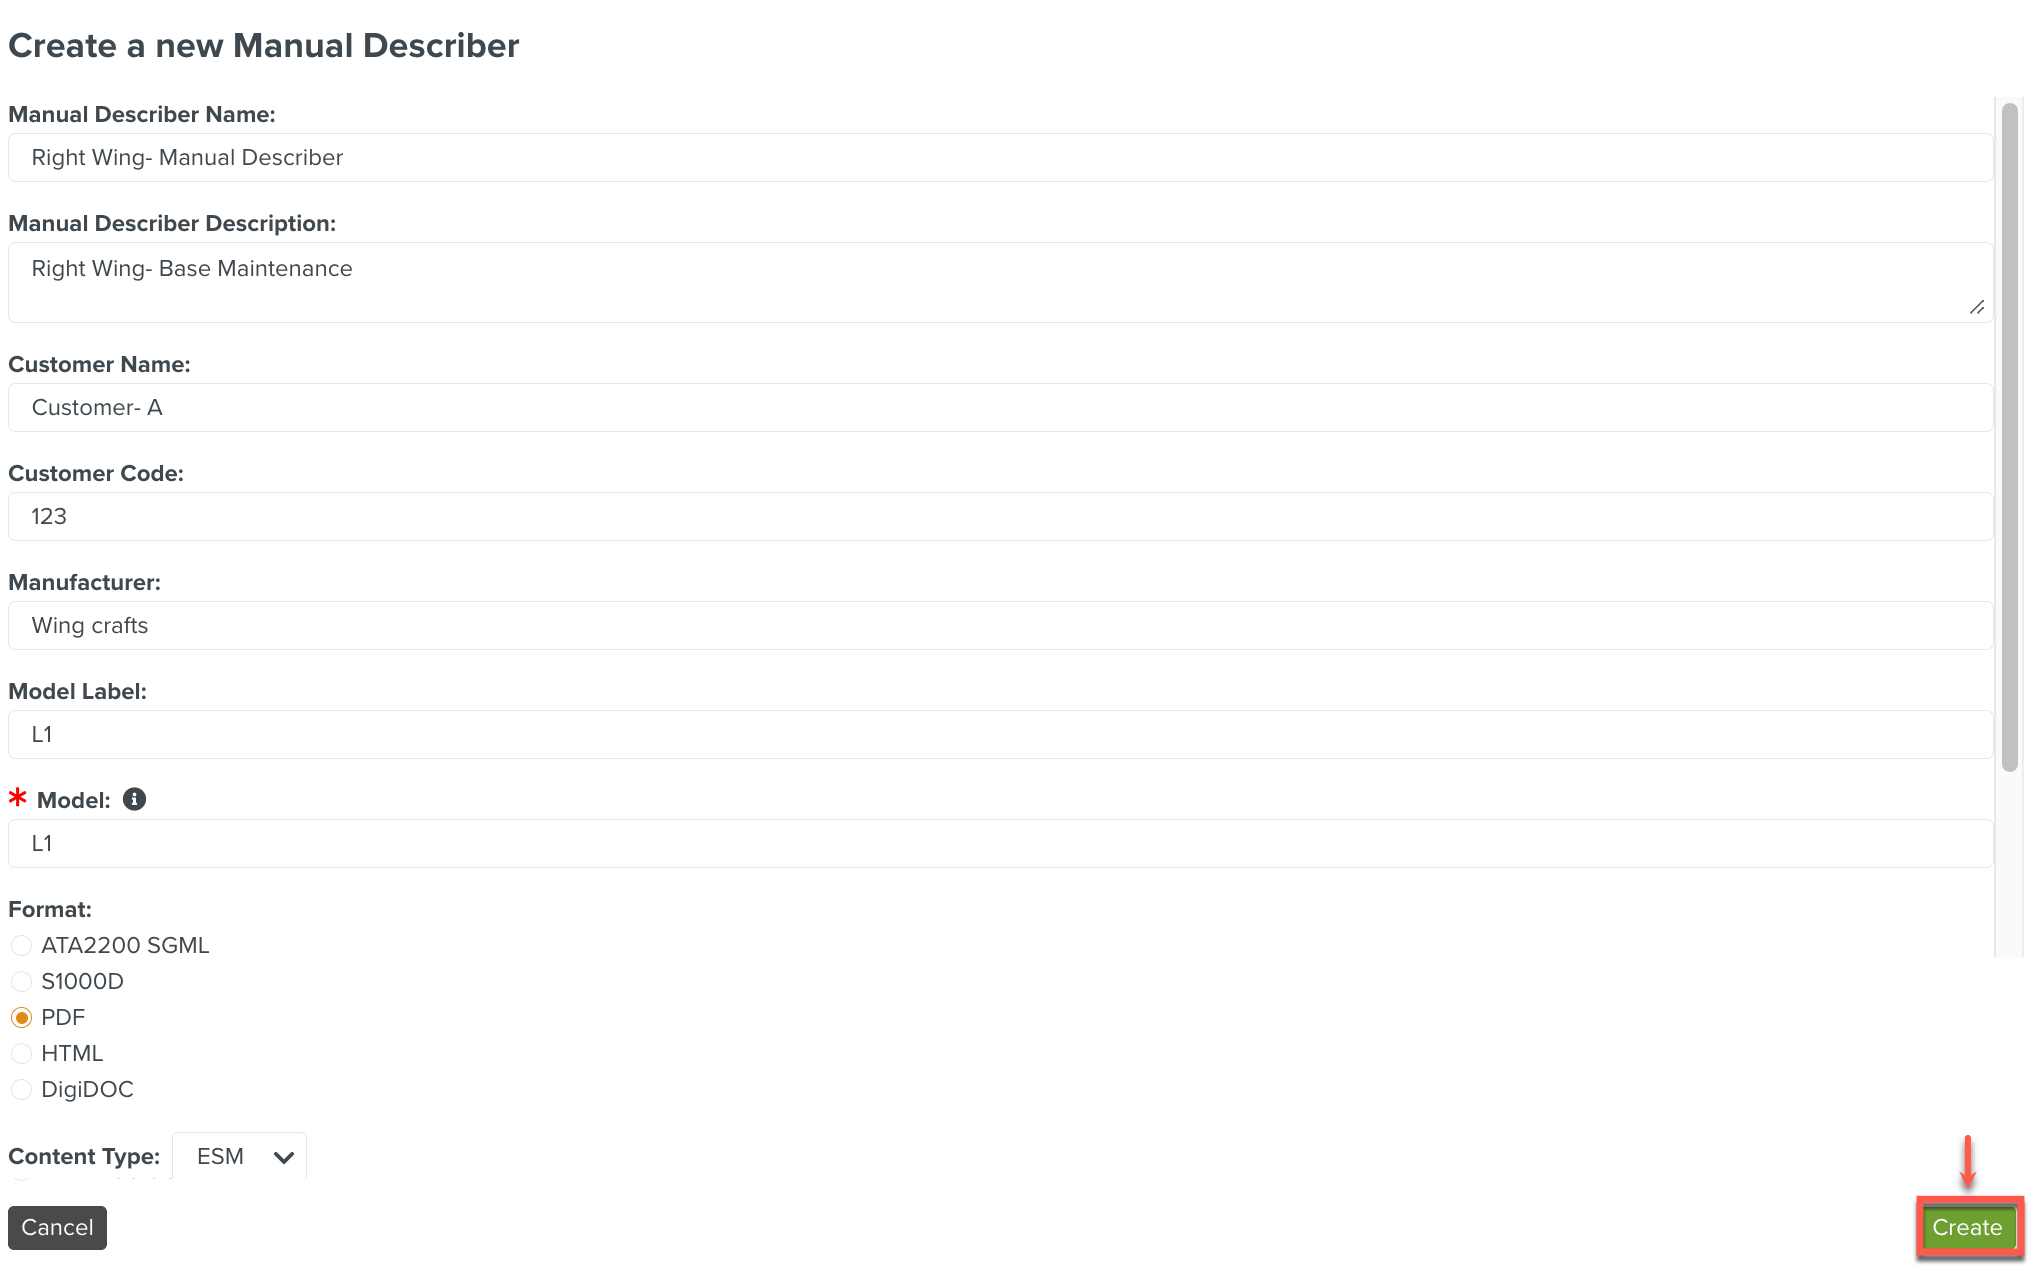
The button is enabled only when the mandatory fields are entered.
The Manual Describer is in Draft status when created.

[Optional] Click if you want to delete the draft Manual Describer.
Note
Only Manual Describers in Draft status can be deleted.
Select Active from the Status dropdown list and click to make the Manual Describer Active.
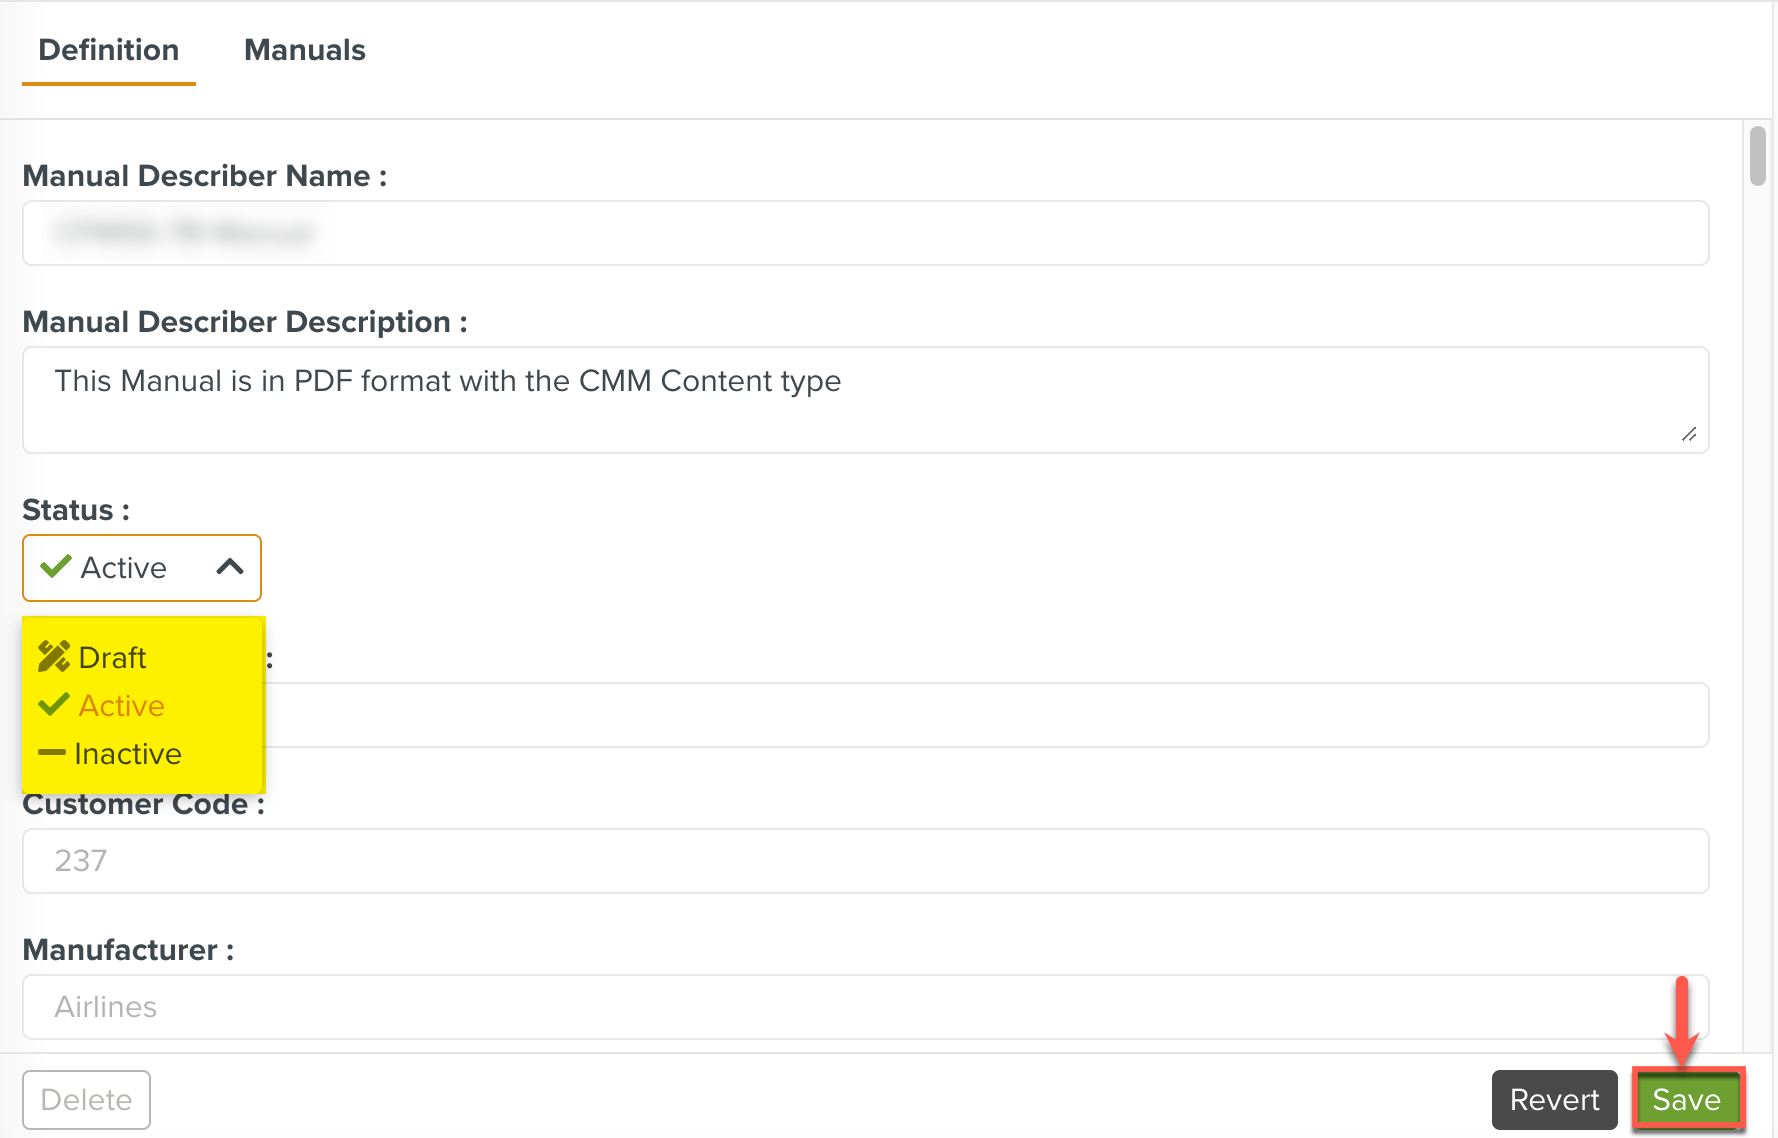
The Manual Describer definition is now active and you can upload Manuals using the Tab.
Note
A Manual Describer can't be deleted after activation. You can only deactivate the Manual Describer.
The Manual Describer tab has more content visible on scrolling down.
[Optional] Enter the Copyright information from the manual in the field. Open the Manual in an editor or viewer and search for the term legal to identify the Copyright Information.
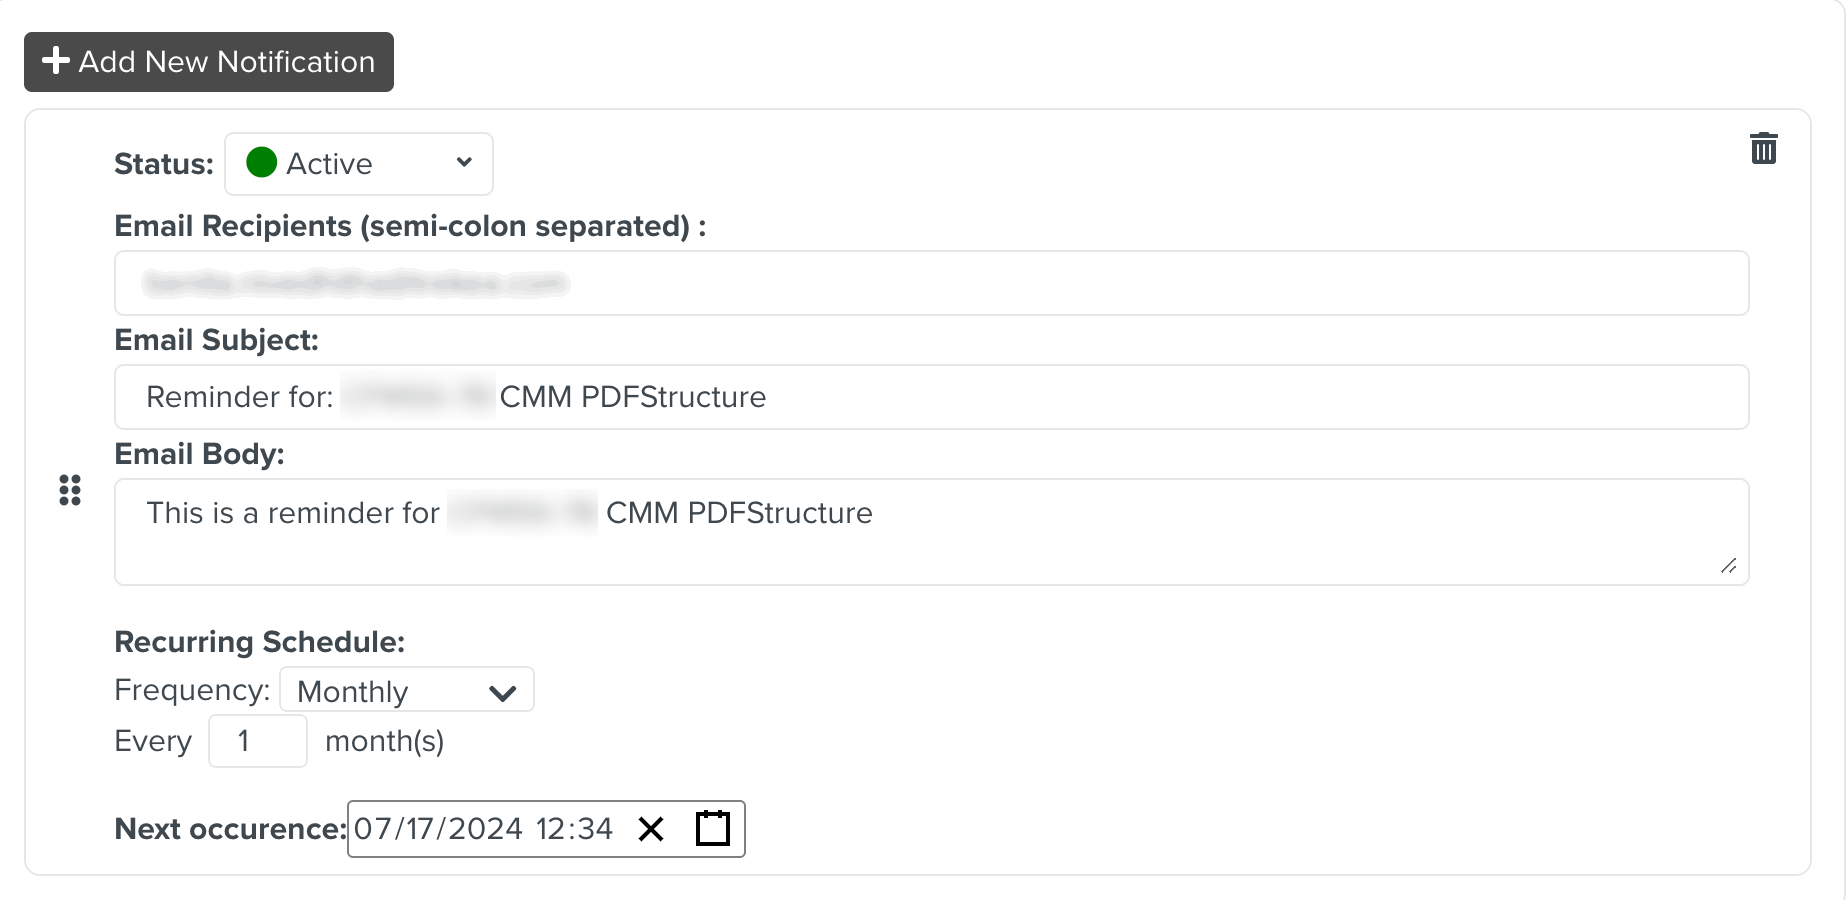
[Optional] In the section Notifications, click to set up email notifications.

The email notifications are sent out to the list of recipients at specified intervals as shown below. You can add multiple email notifications.
Add details in the fields as needed.
Field and Icons
Description
Status
Select Active to activate the email notification. To switch off the email notification, select Inactive.
Email Recipients (semi-colon separated)
Enter the recipient email ID.
Note
For more than one recipient, separate the email IDs with a semi colon.
Email Subject
The email subject is auto-populated. You can also edit the email subject.
Email Body
Enter the email message.
Recurring Schedule
Set how frequently you want to send the email notification.
To set the Recurring Schedule:
In the Frequency field, select an option from the list as shown below:
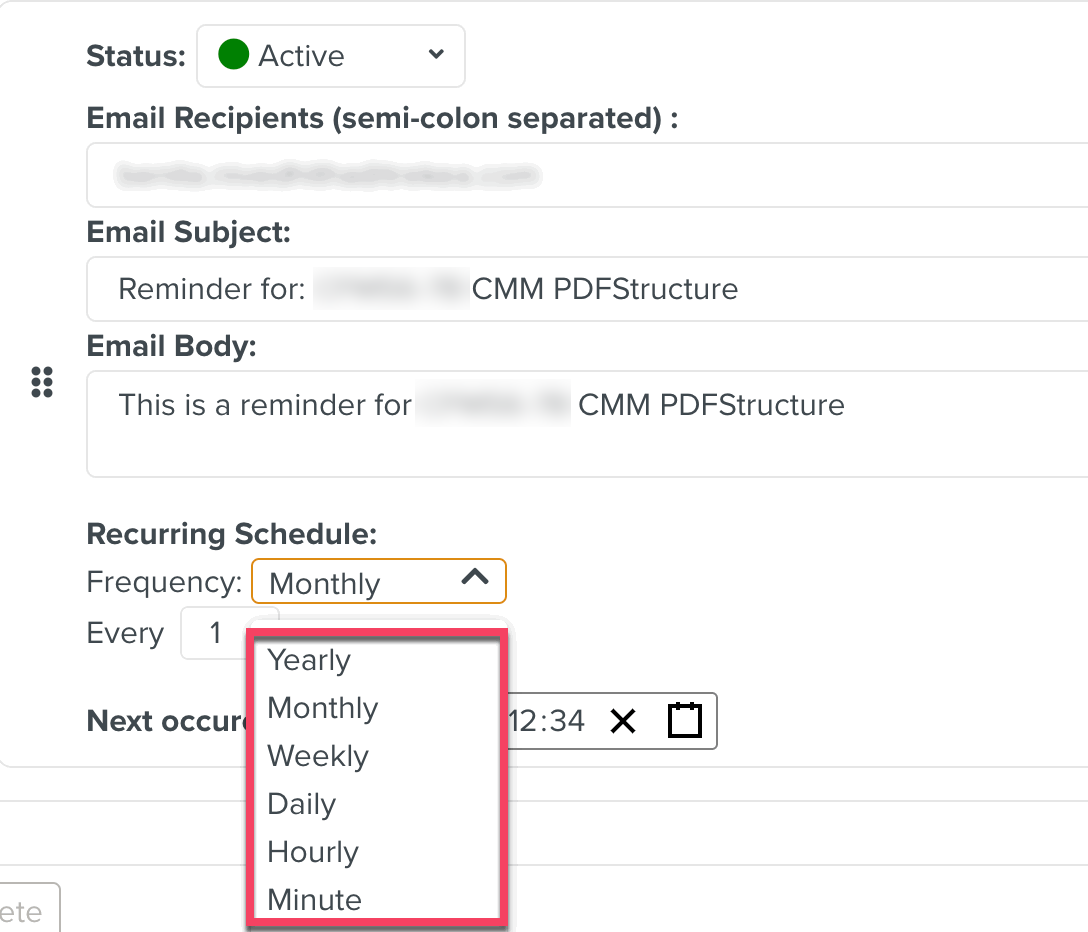
Yearly
Monthly
Weekly
Daily
Hourly
Minute
In the Every field, set the number.
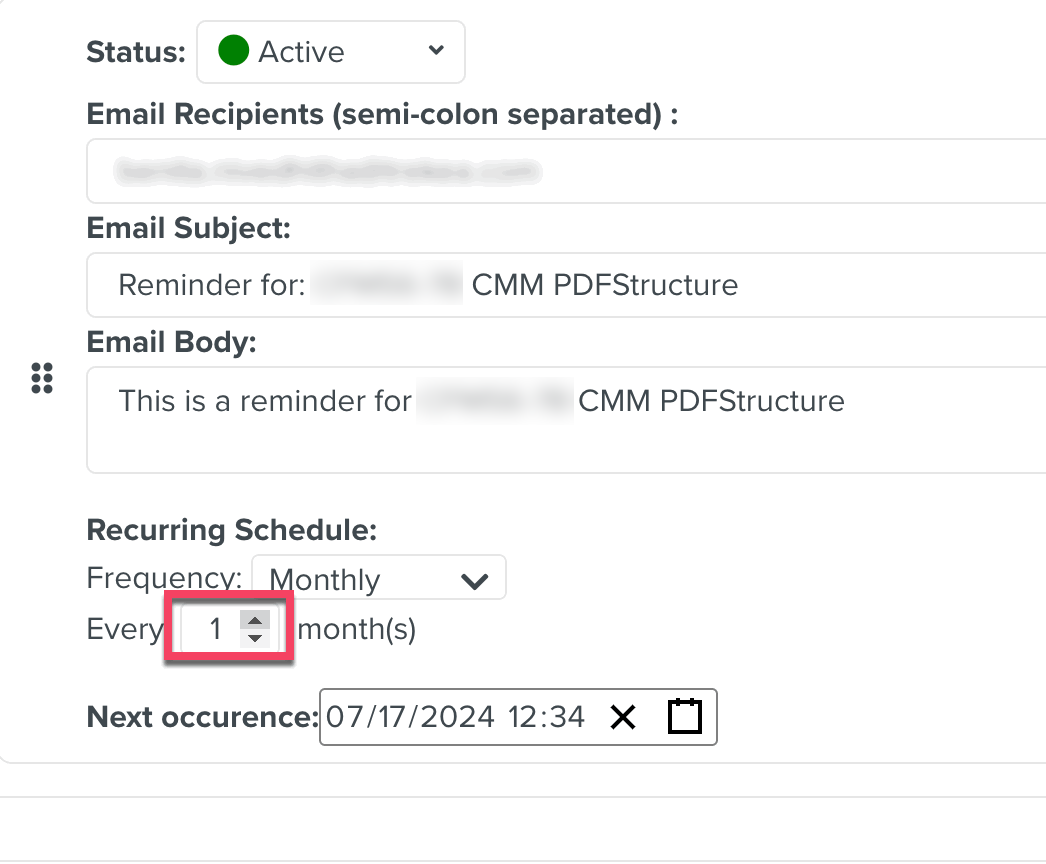
For example, the recurring schedule can be set as Monthly and Every 1 month(s). So, the email notification is sent out once every month.
Next occurrence
Select the date and time for the next occurrence of the notification.


Click to delete the email notification.
[Optional] Click the button to activate notifications.
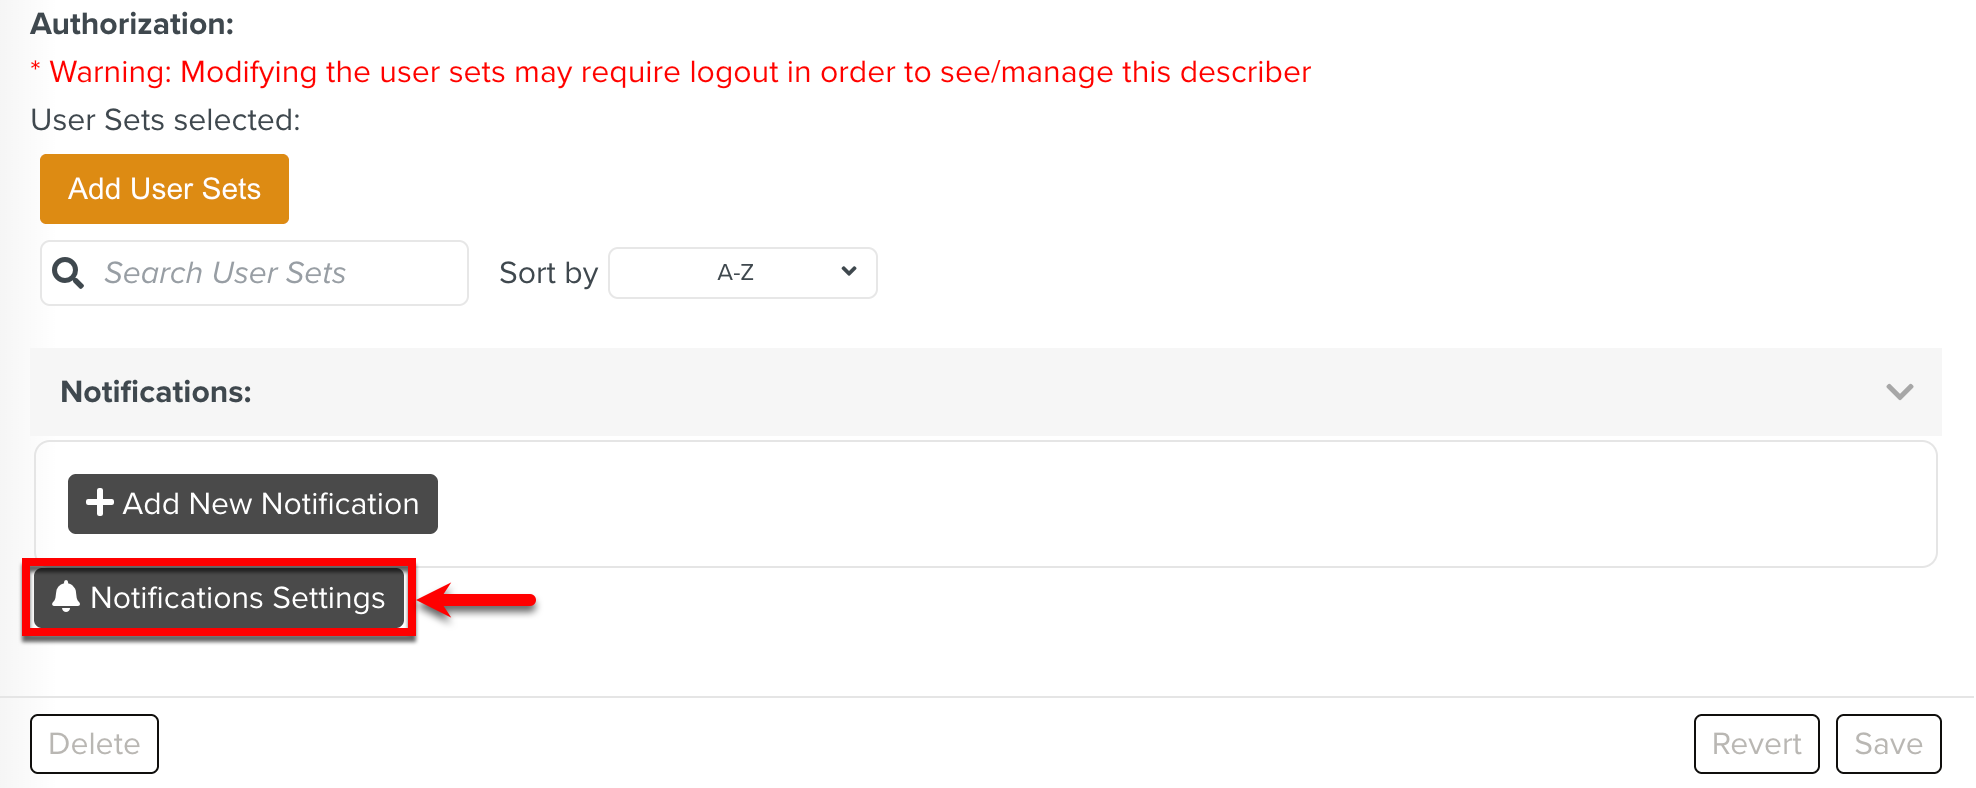
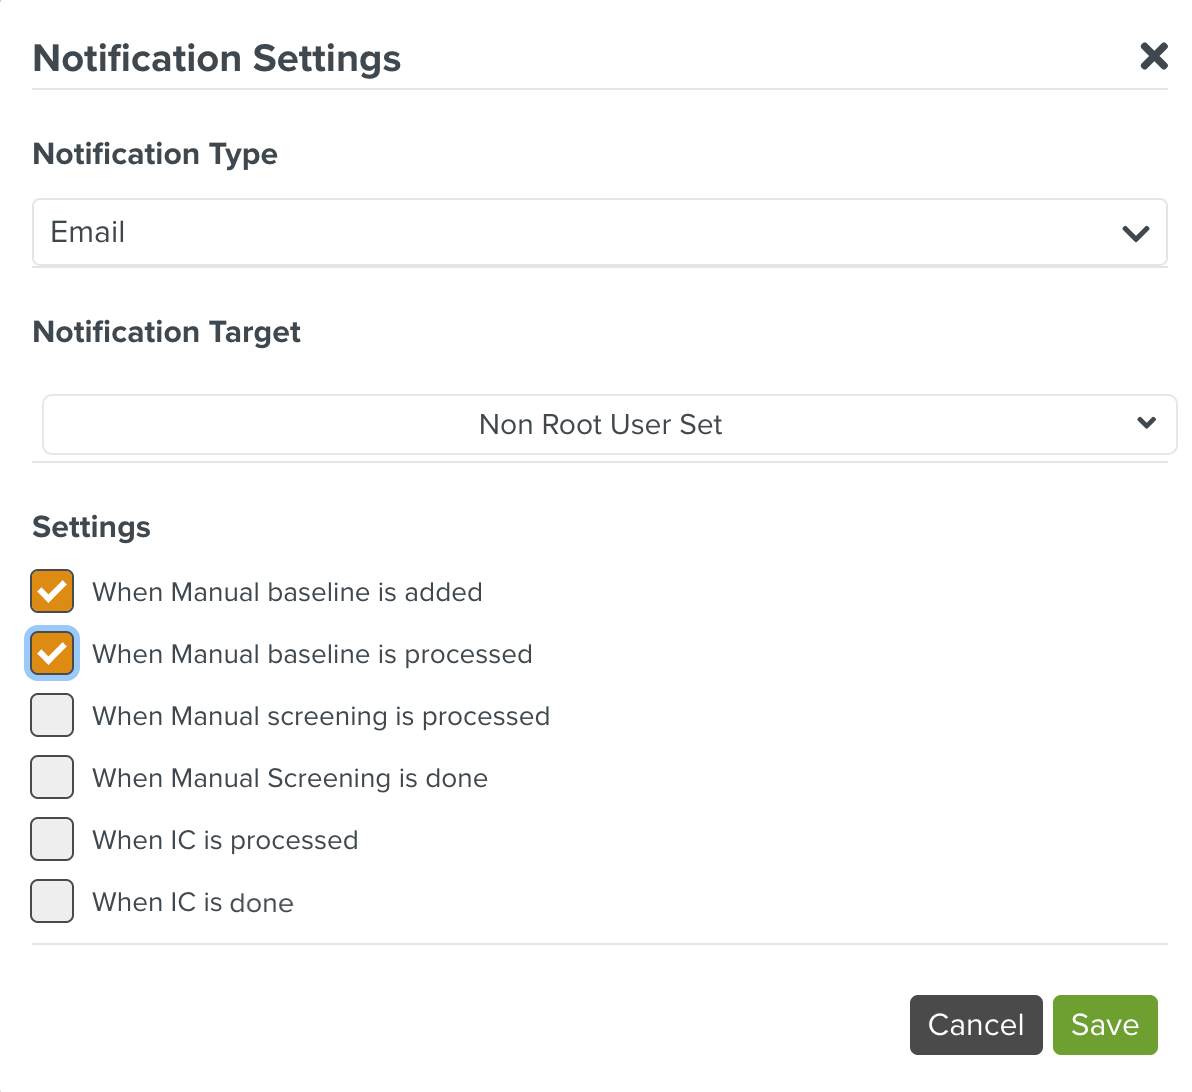
Select the following details in the dialog Notification Settings and click :
Notification Type: The type of notification to be sent - Email or In-App.
The email IDs used are taken from the corresponding User Sets. Please ensure valid email IDs are used there.
Notification Target: The User Set to which the notification should be sent.
Settings: The event trigger for the notification.
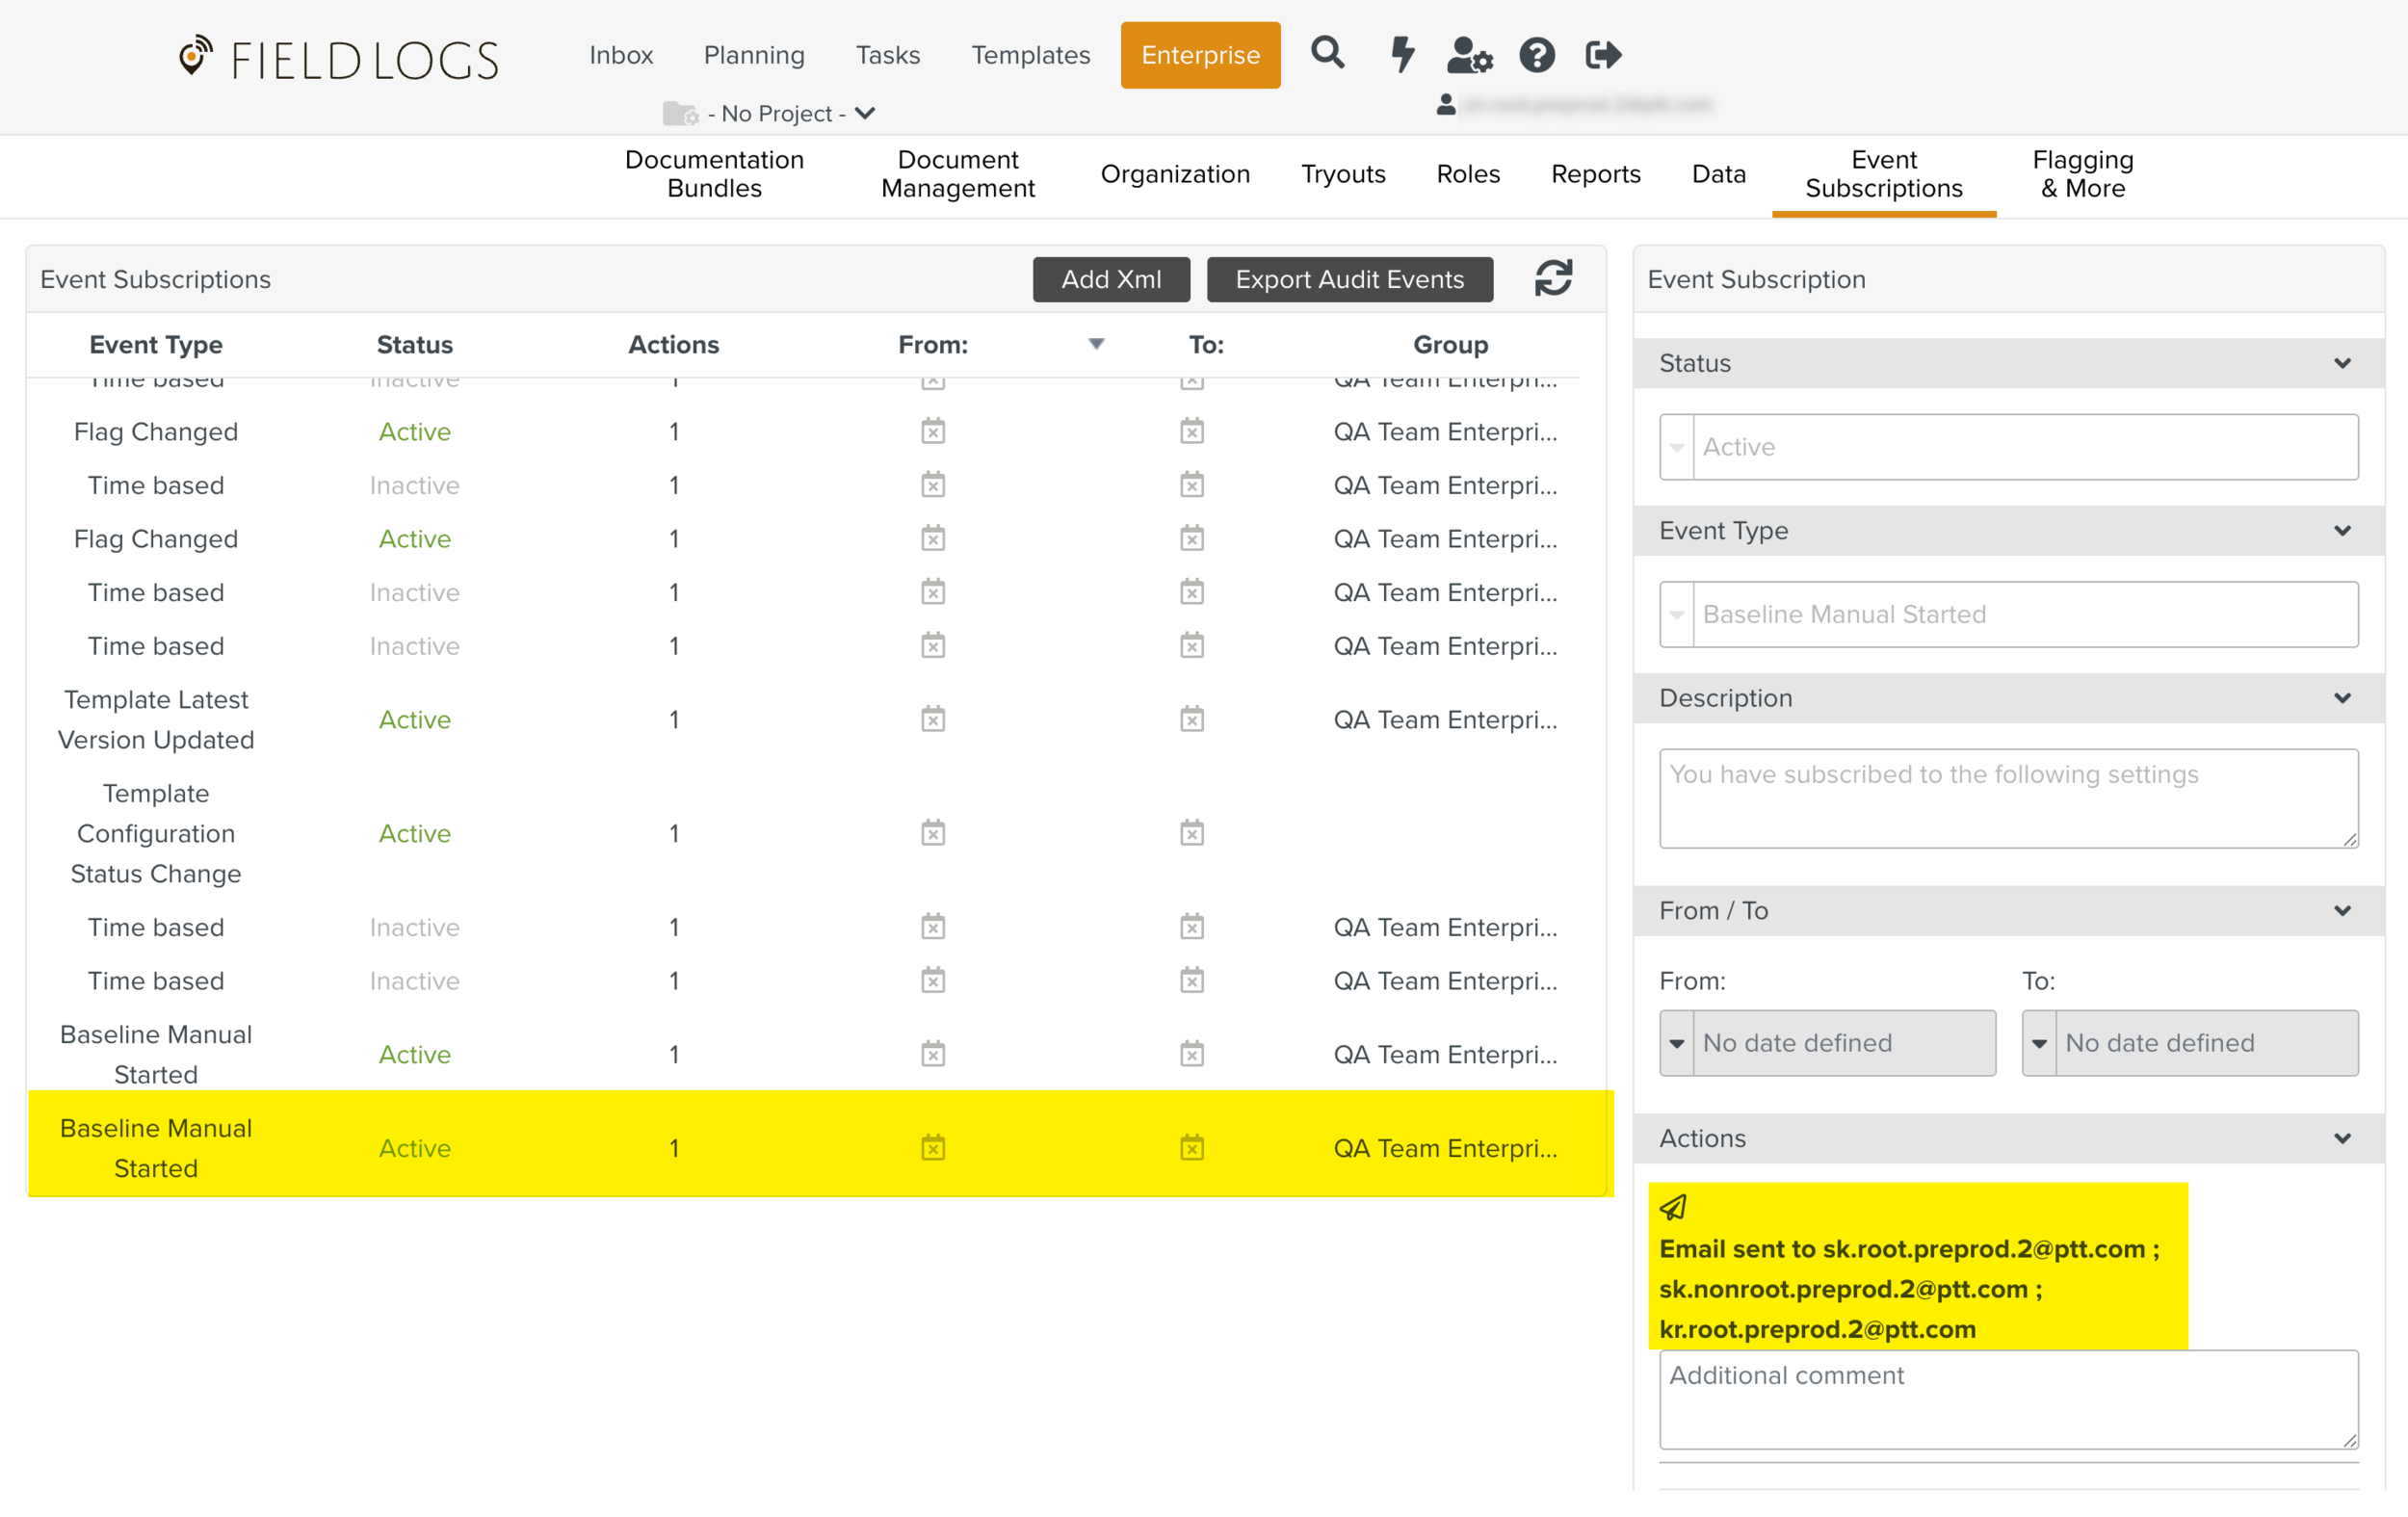
When a Notification is set up, an Event Subscription is added. This notifies the target users whenever the event occurs in the system.
[Optional] Expand the Advanced Options section by clicking
 as shown below.
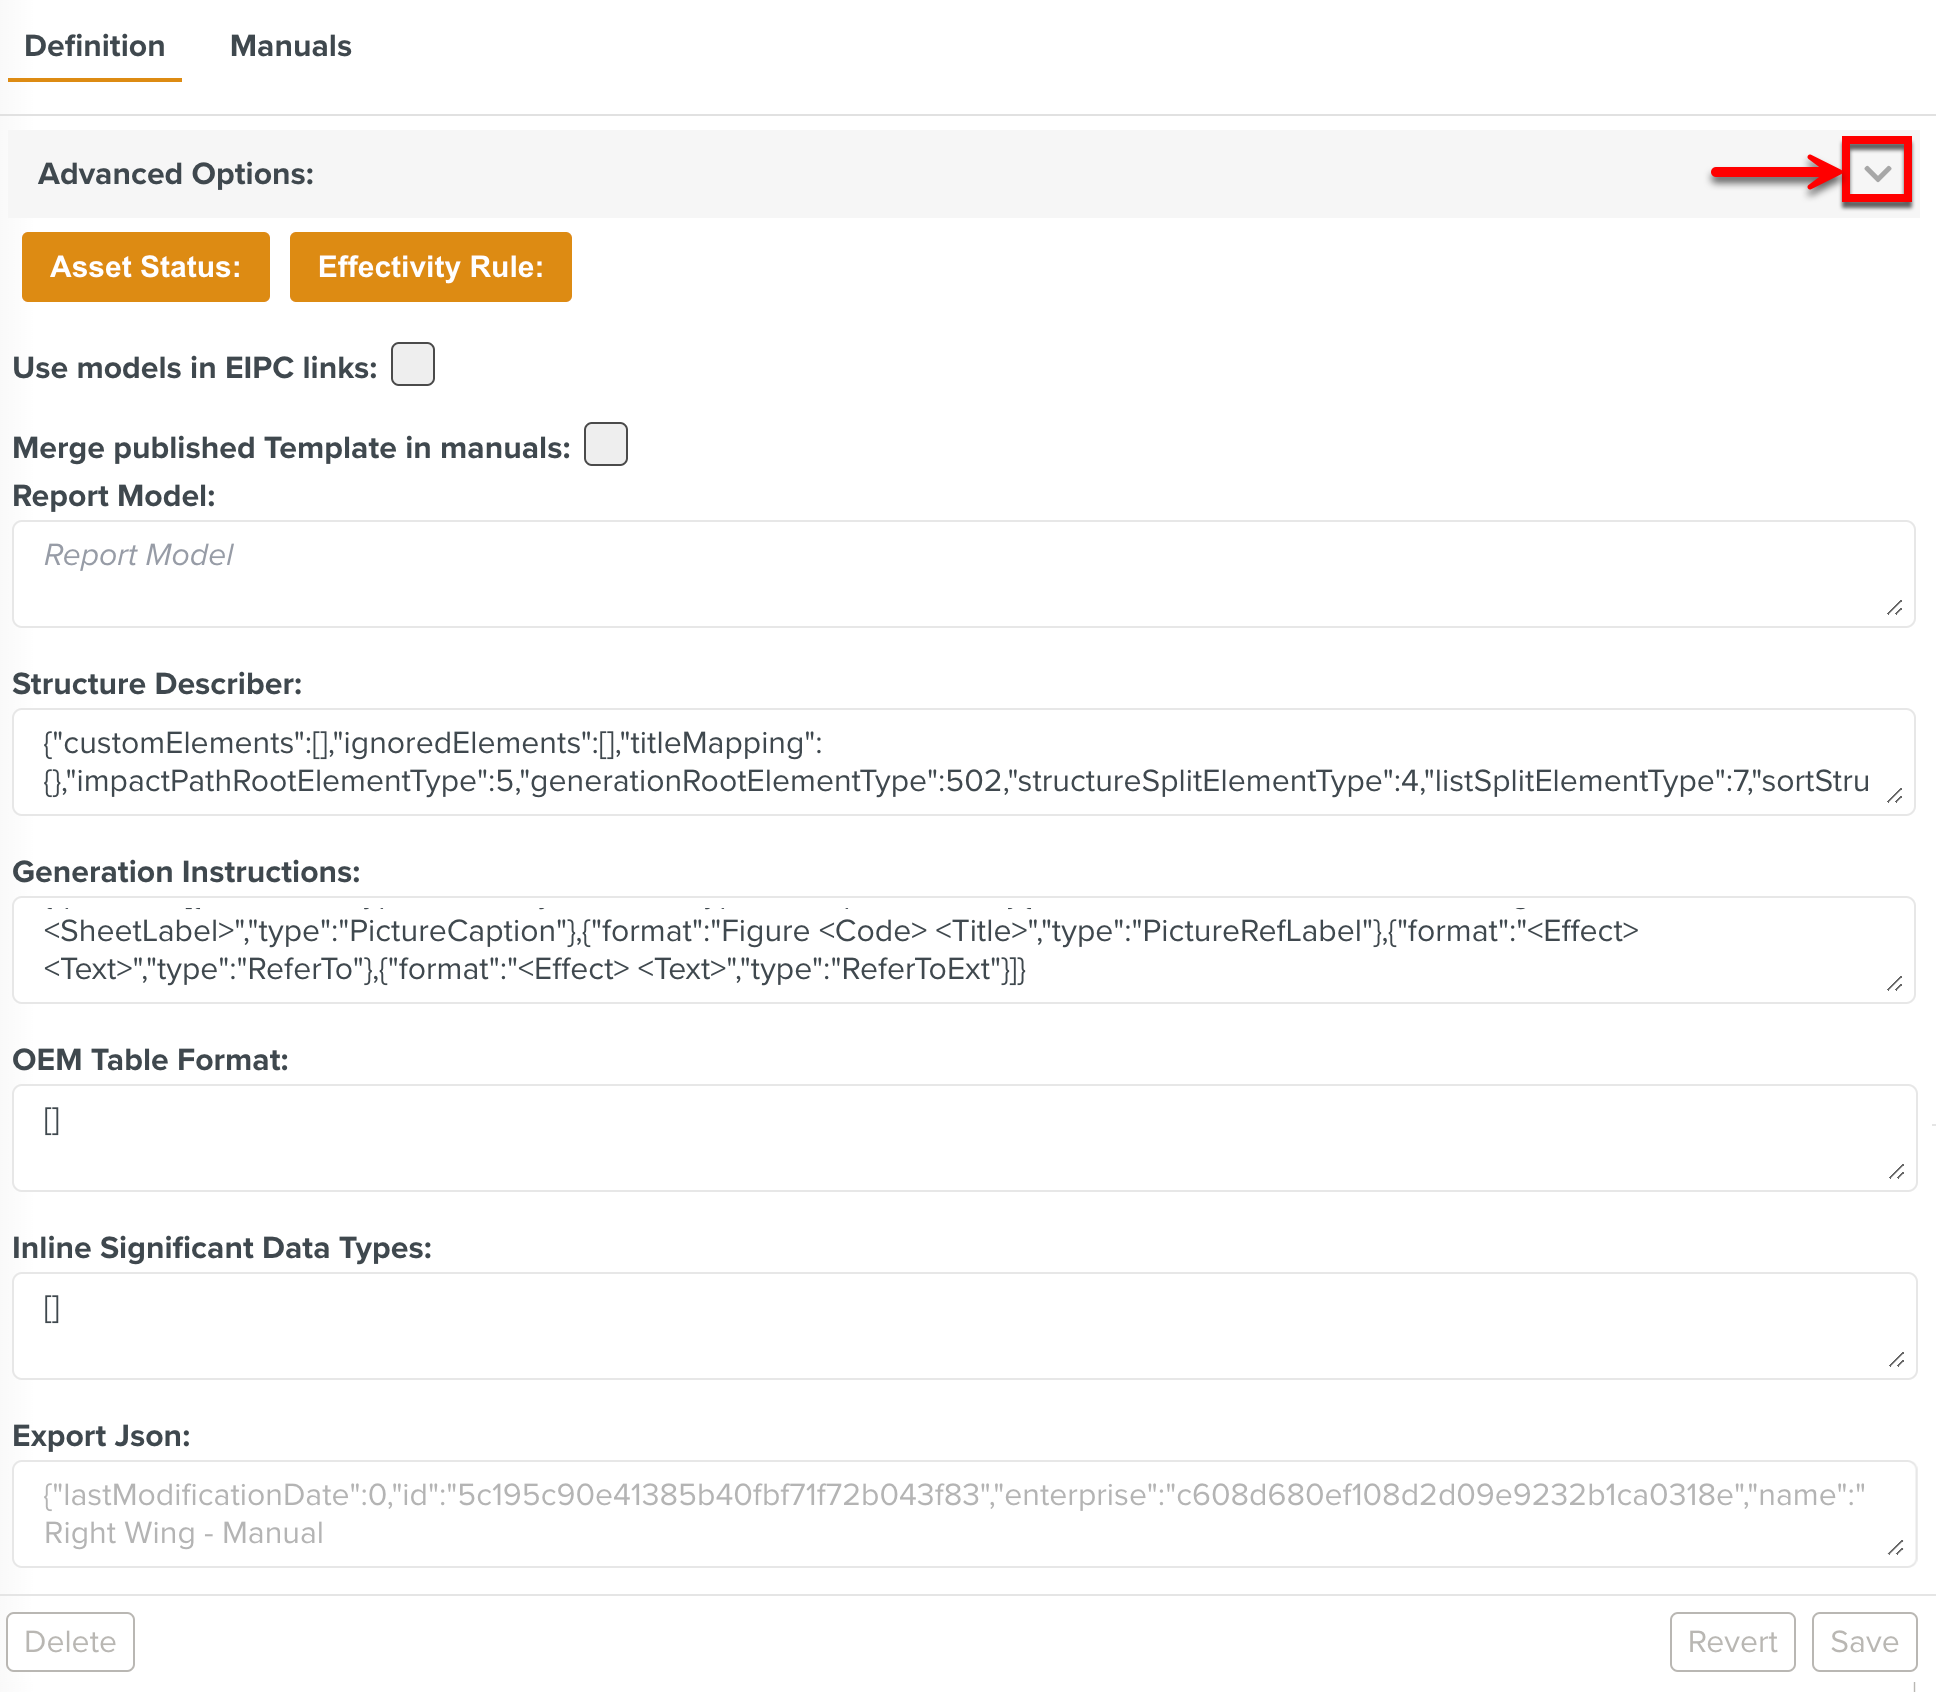
Note
Only an administrator can access the Advanced Options.
This section pertains to the structure of the manual and Screening algorithms. These fields are provided for customization.
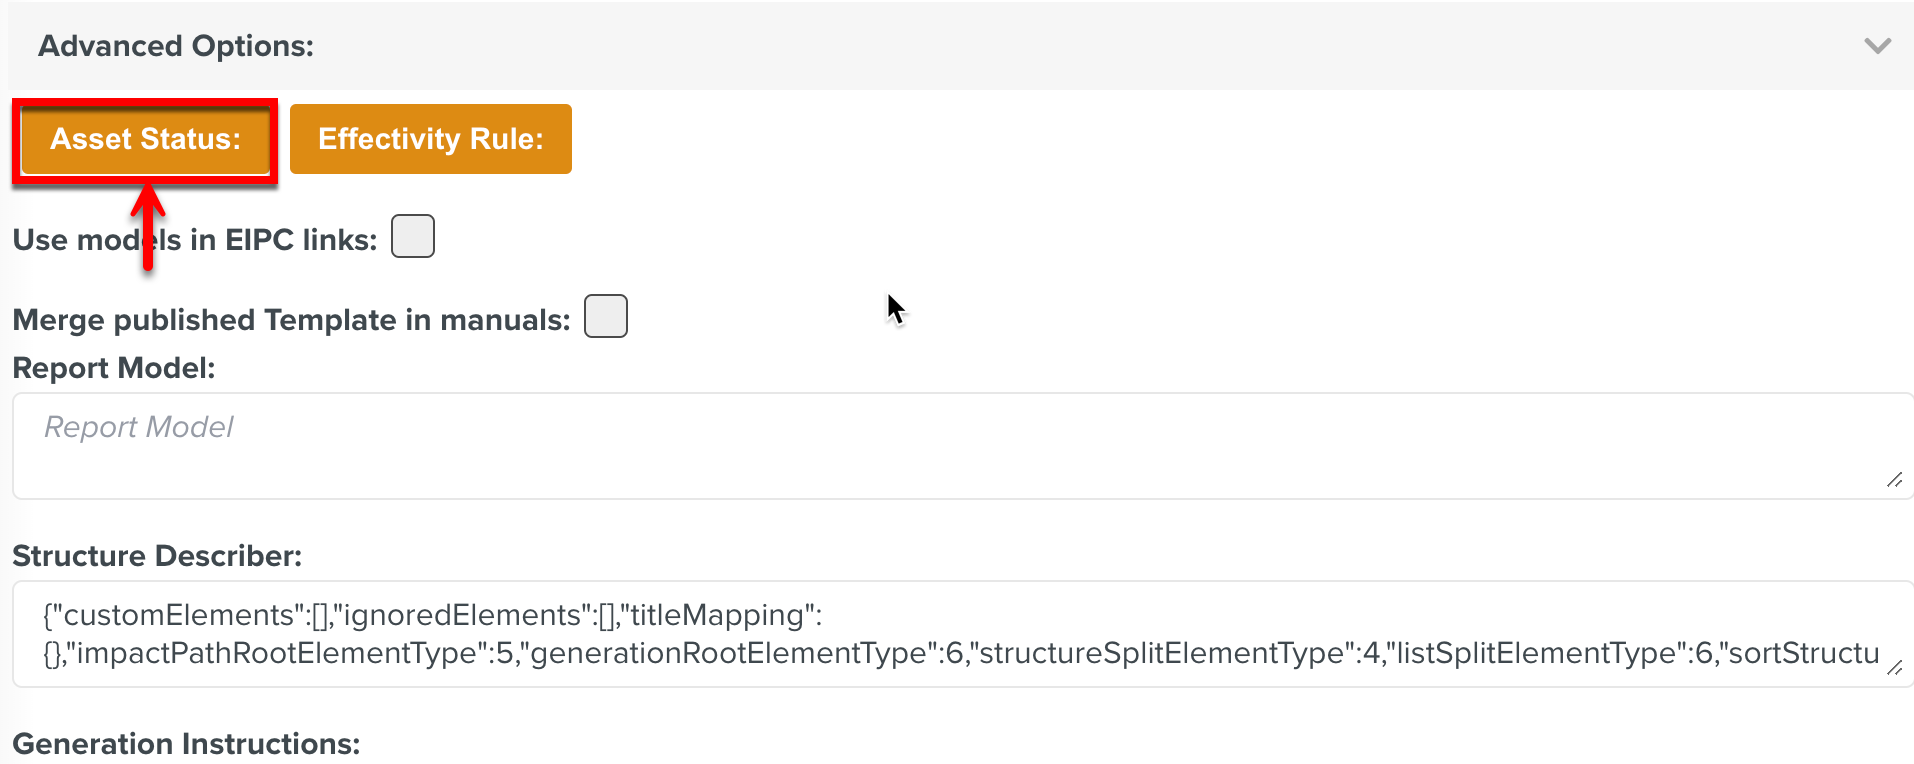
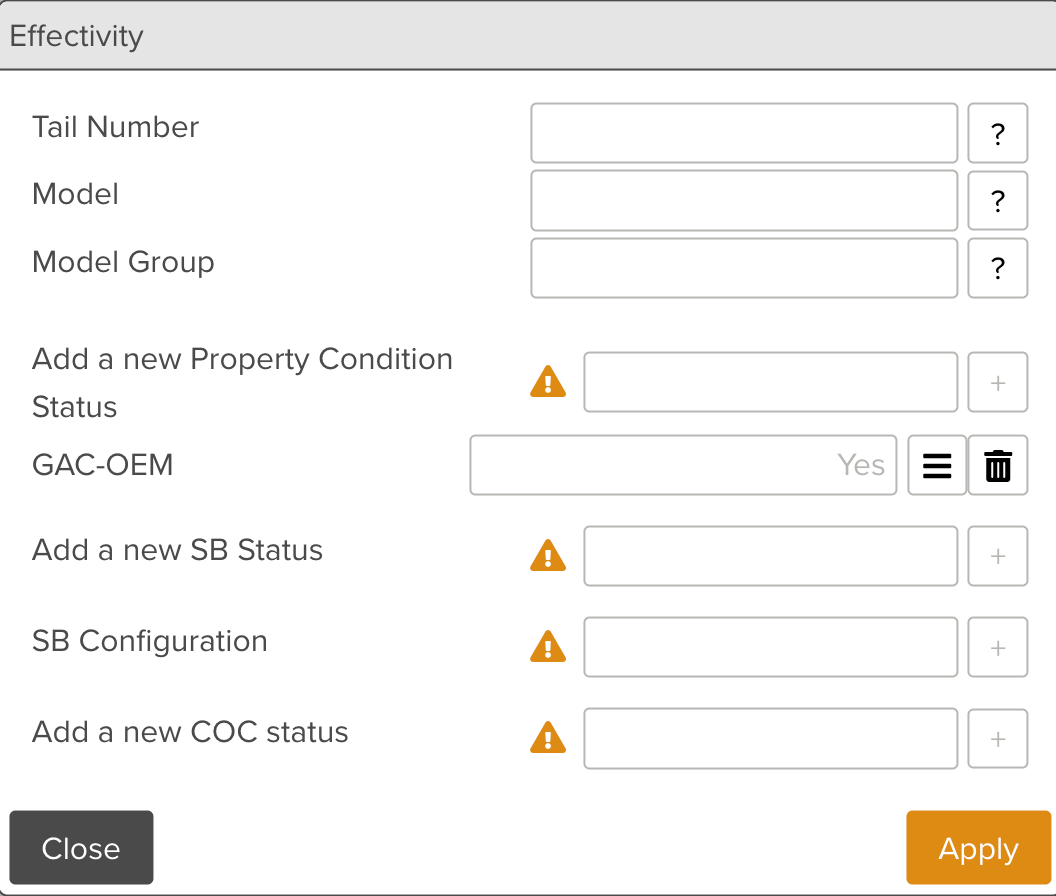
The button allows you to set Asset Status to a Manual Describer as shown below.
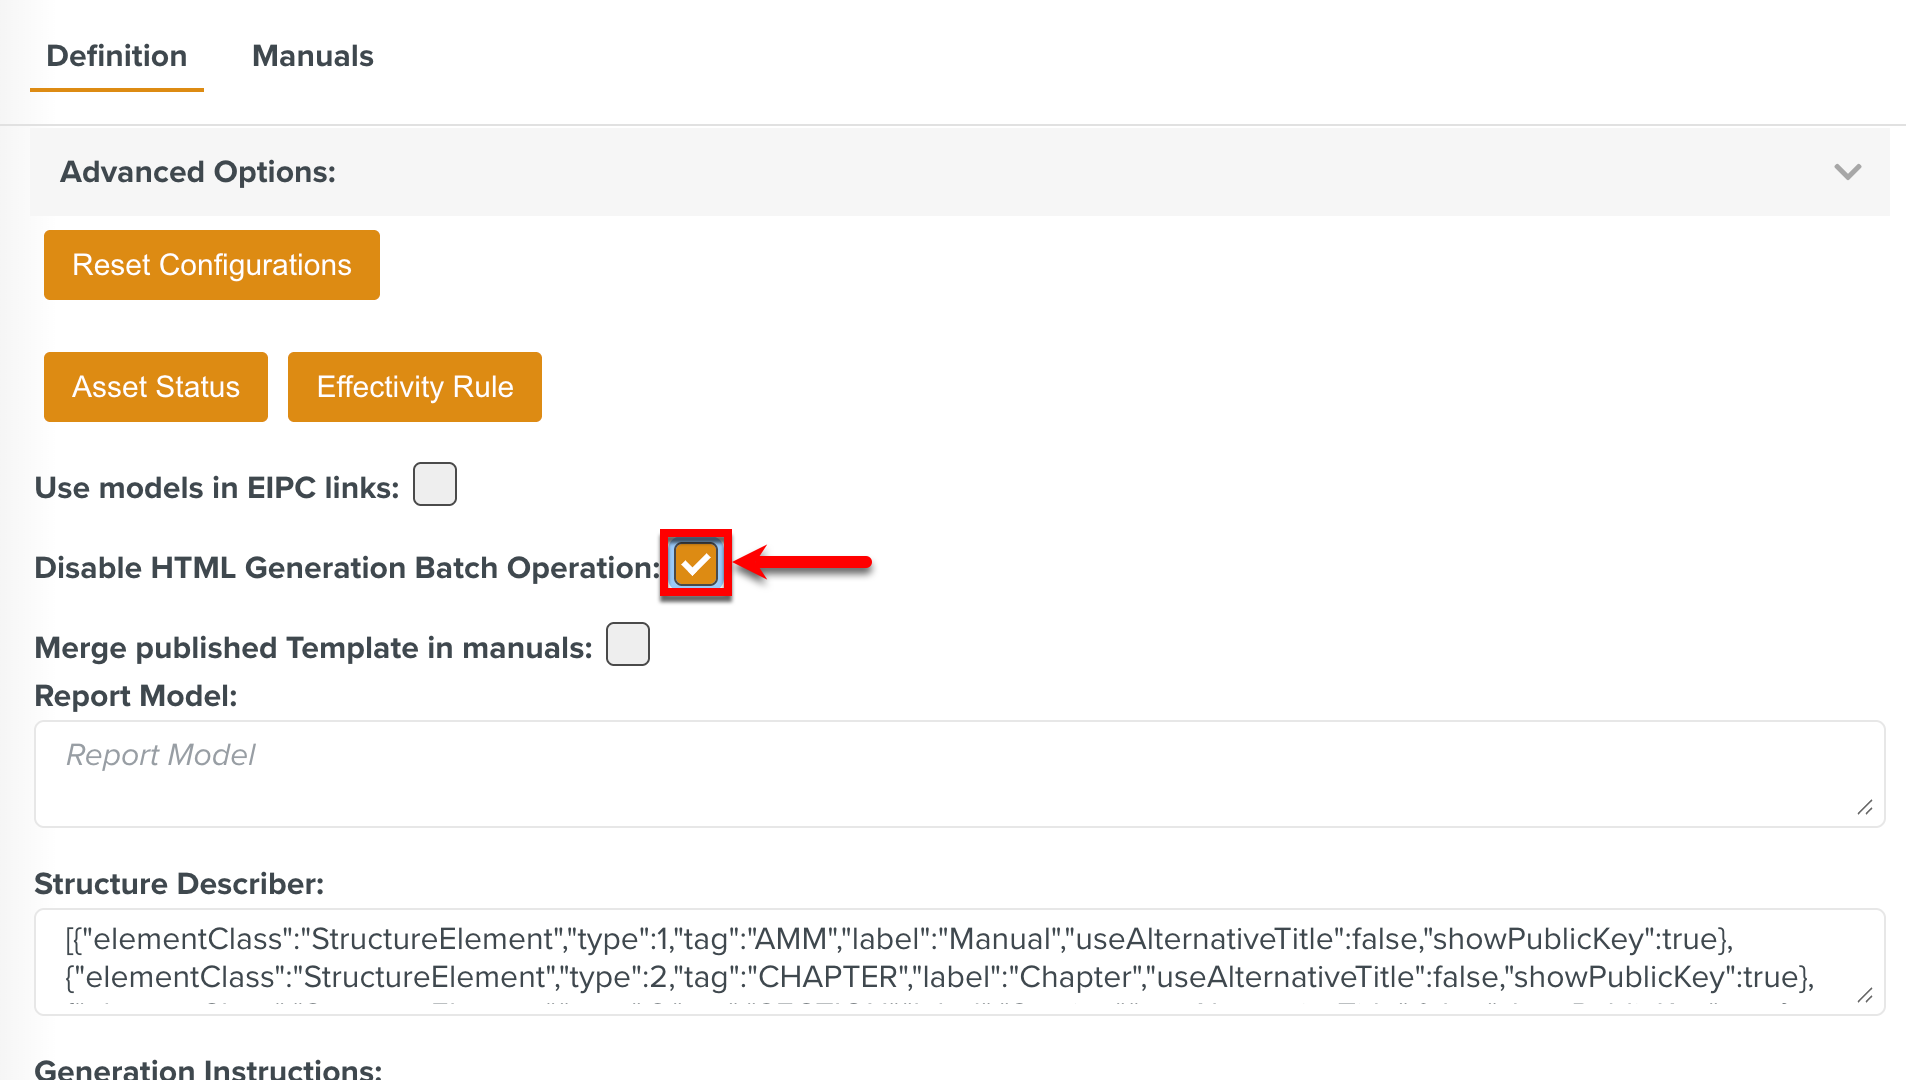
The HTML conversion of the Manuals can be disabled if the HTML view is not required. Checking the Disable HTML Generation Batch Operation option disables the HTML conversion in the associated Batch operation.
The following fields allow you to customize the HTML view of the OEM Manual.
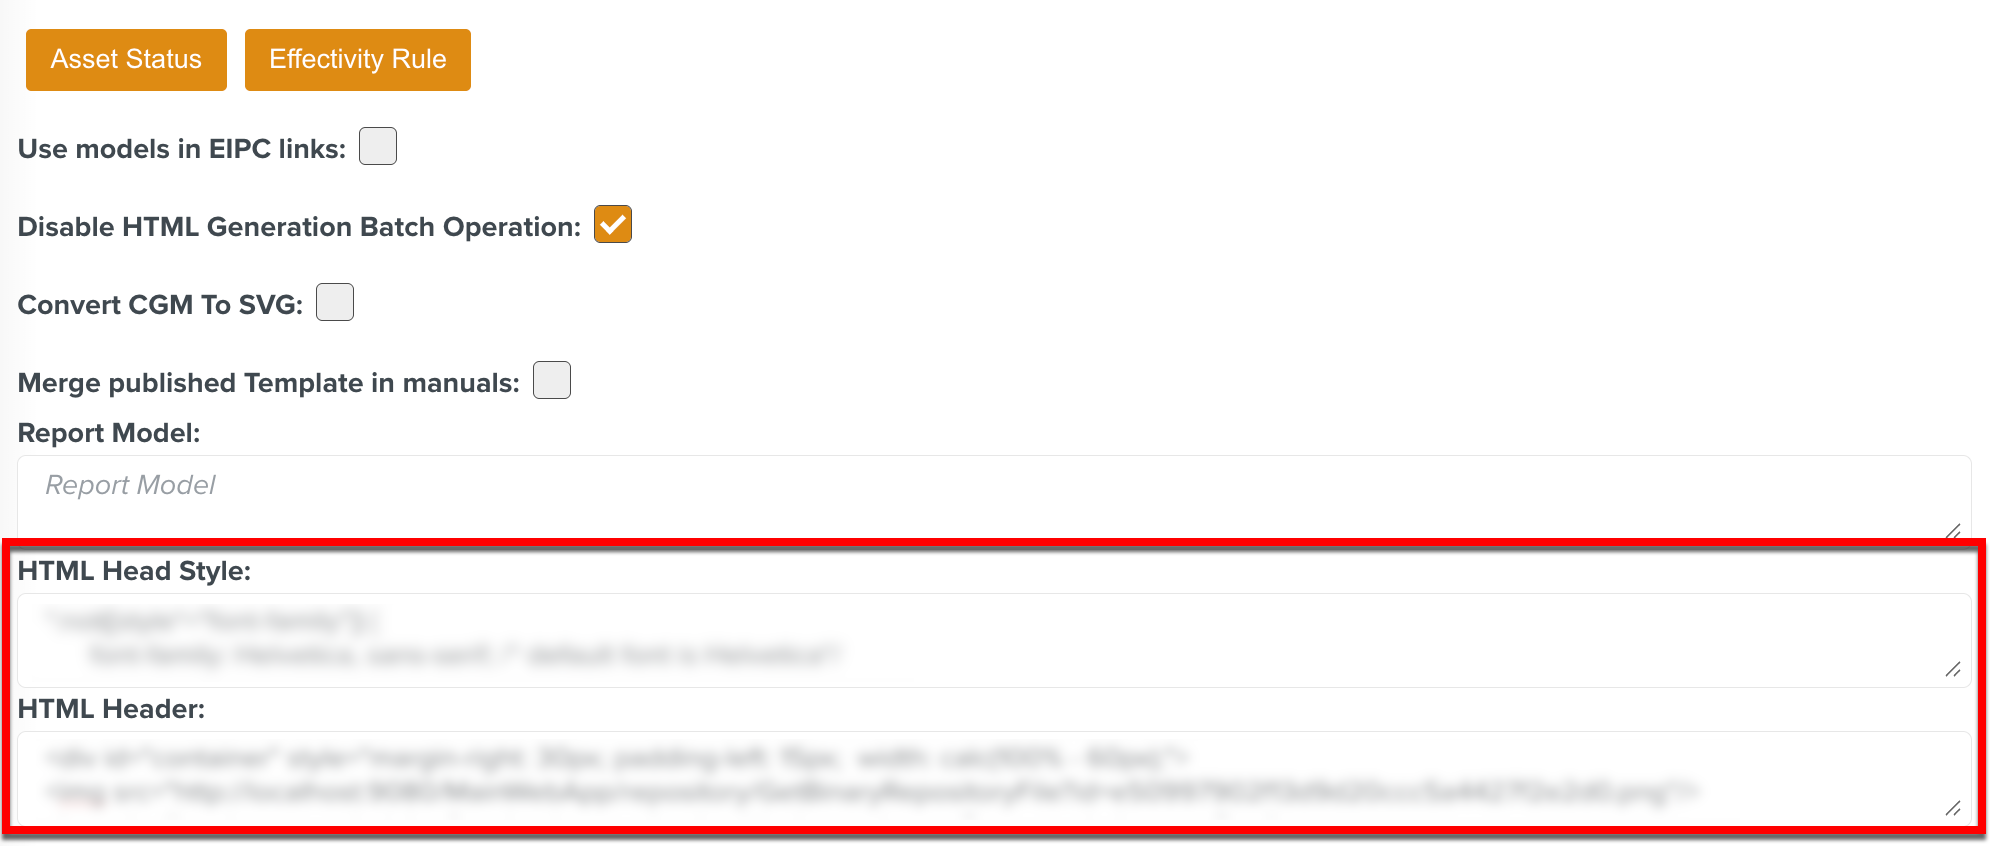
HTML Head Style: You can define some css style that will be applied in the HTML view of the OEM Manual in this Describer.
HTML Header: You can define some HTML that will be inserted into the header at the start of the HTML view of the Manual.
Note
The changes in the HTML view are reflected in the Tech Pubs page after a browser refresh.
Click .
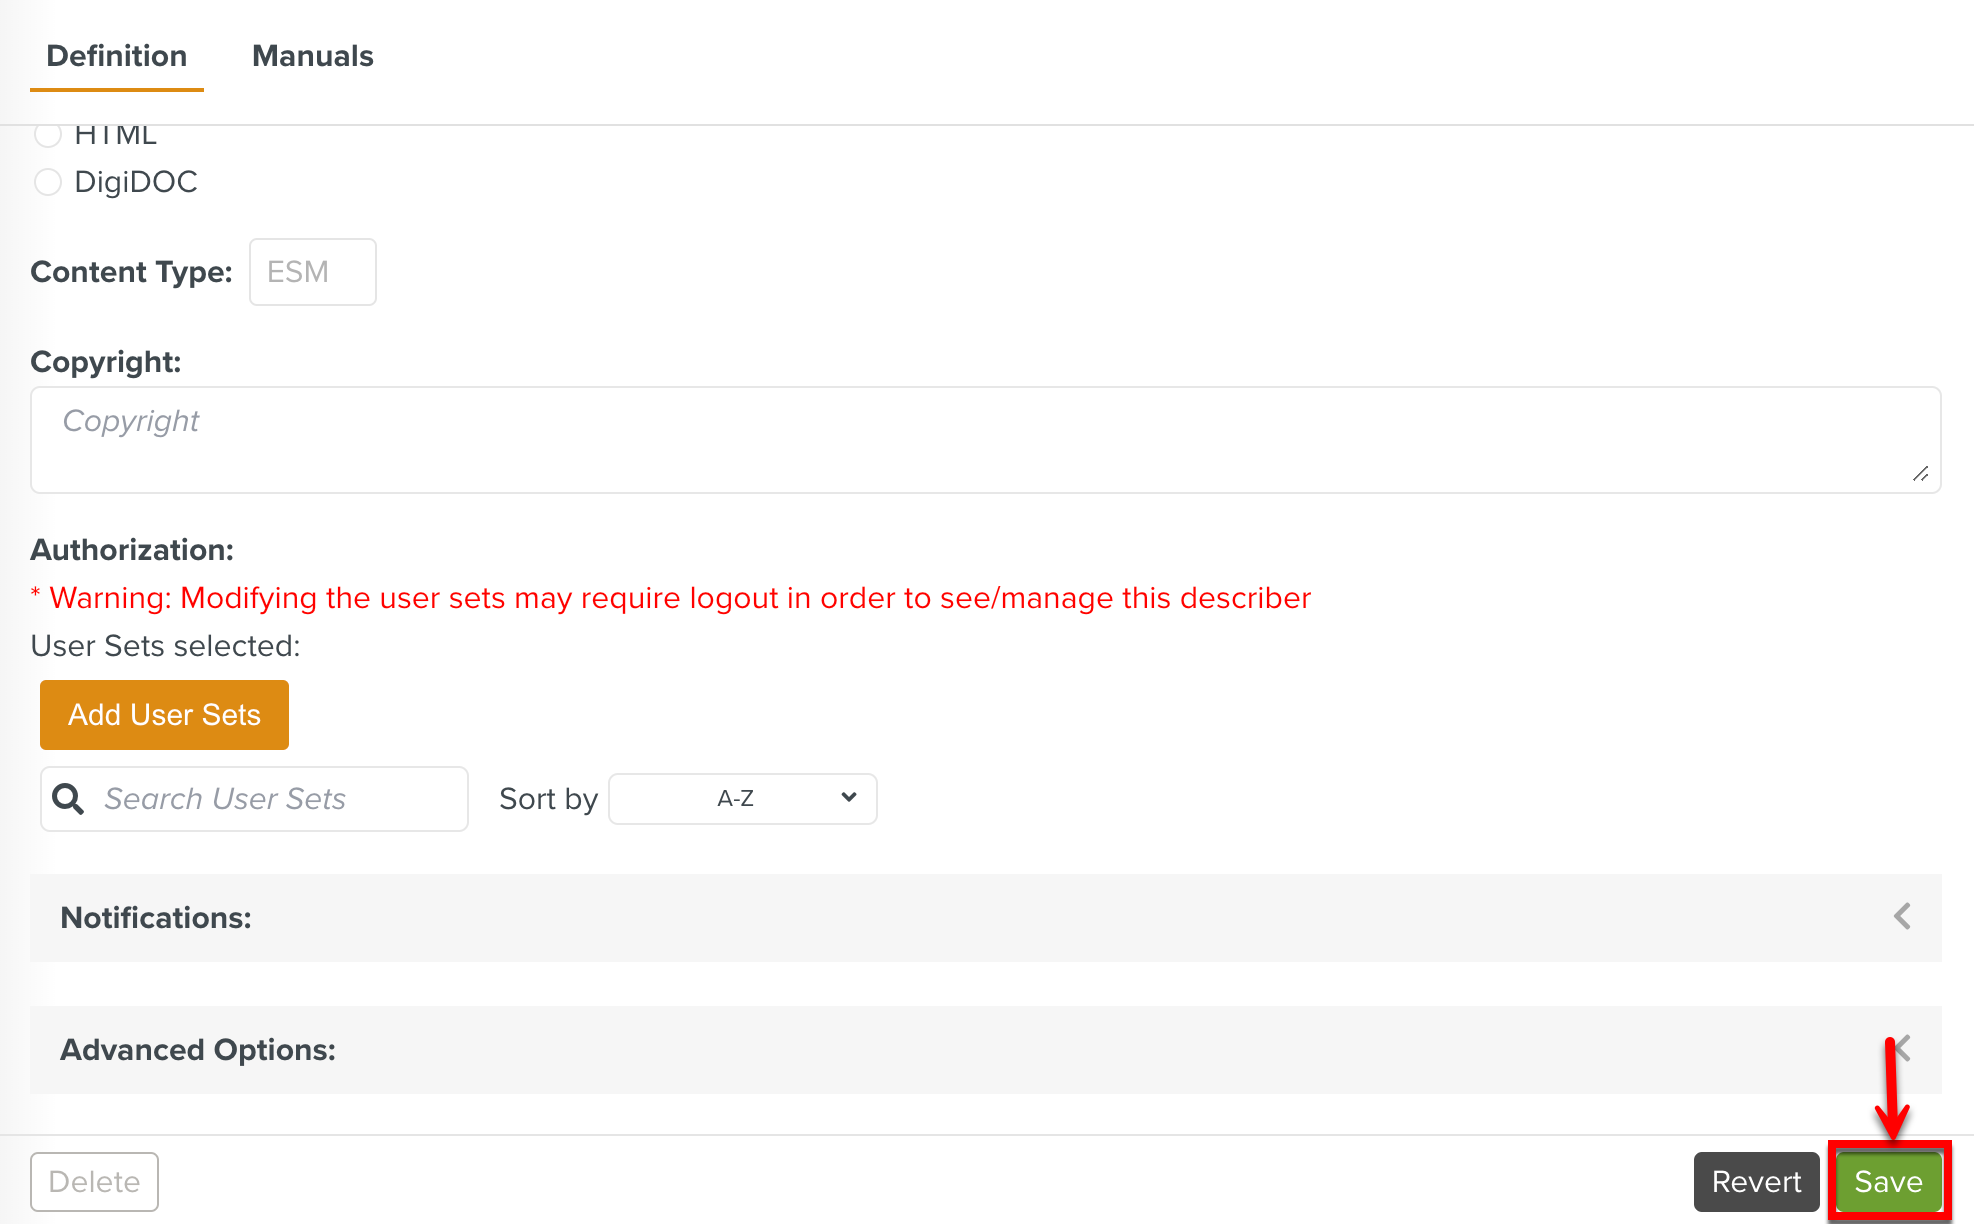
Note
If you want to undo the changes made, click before saving the Manual Describer.
You can now upload the Manual using the Manuals tab.
 |
After you upload the required Manuals, you can generate Templates from it.
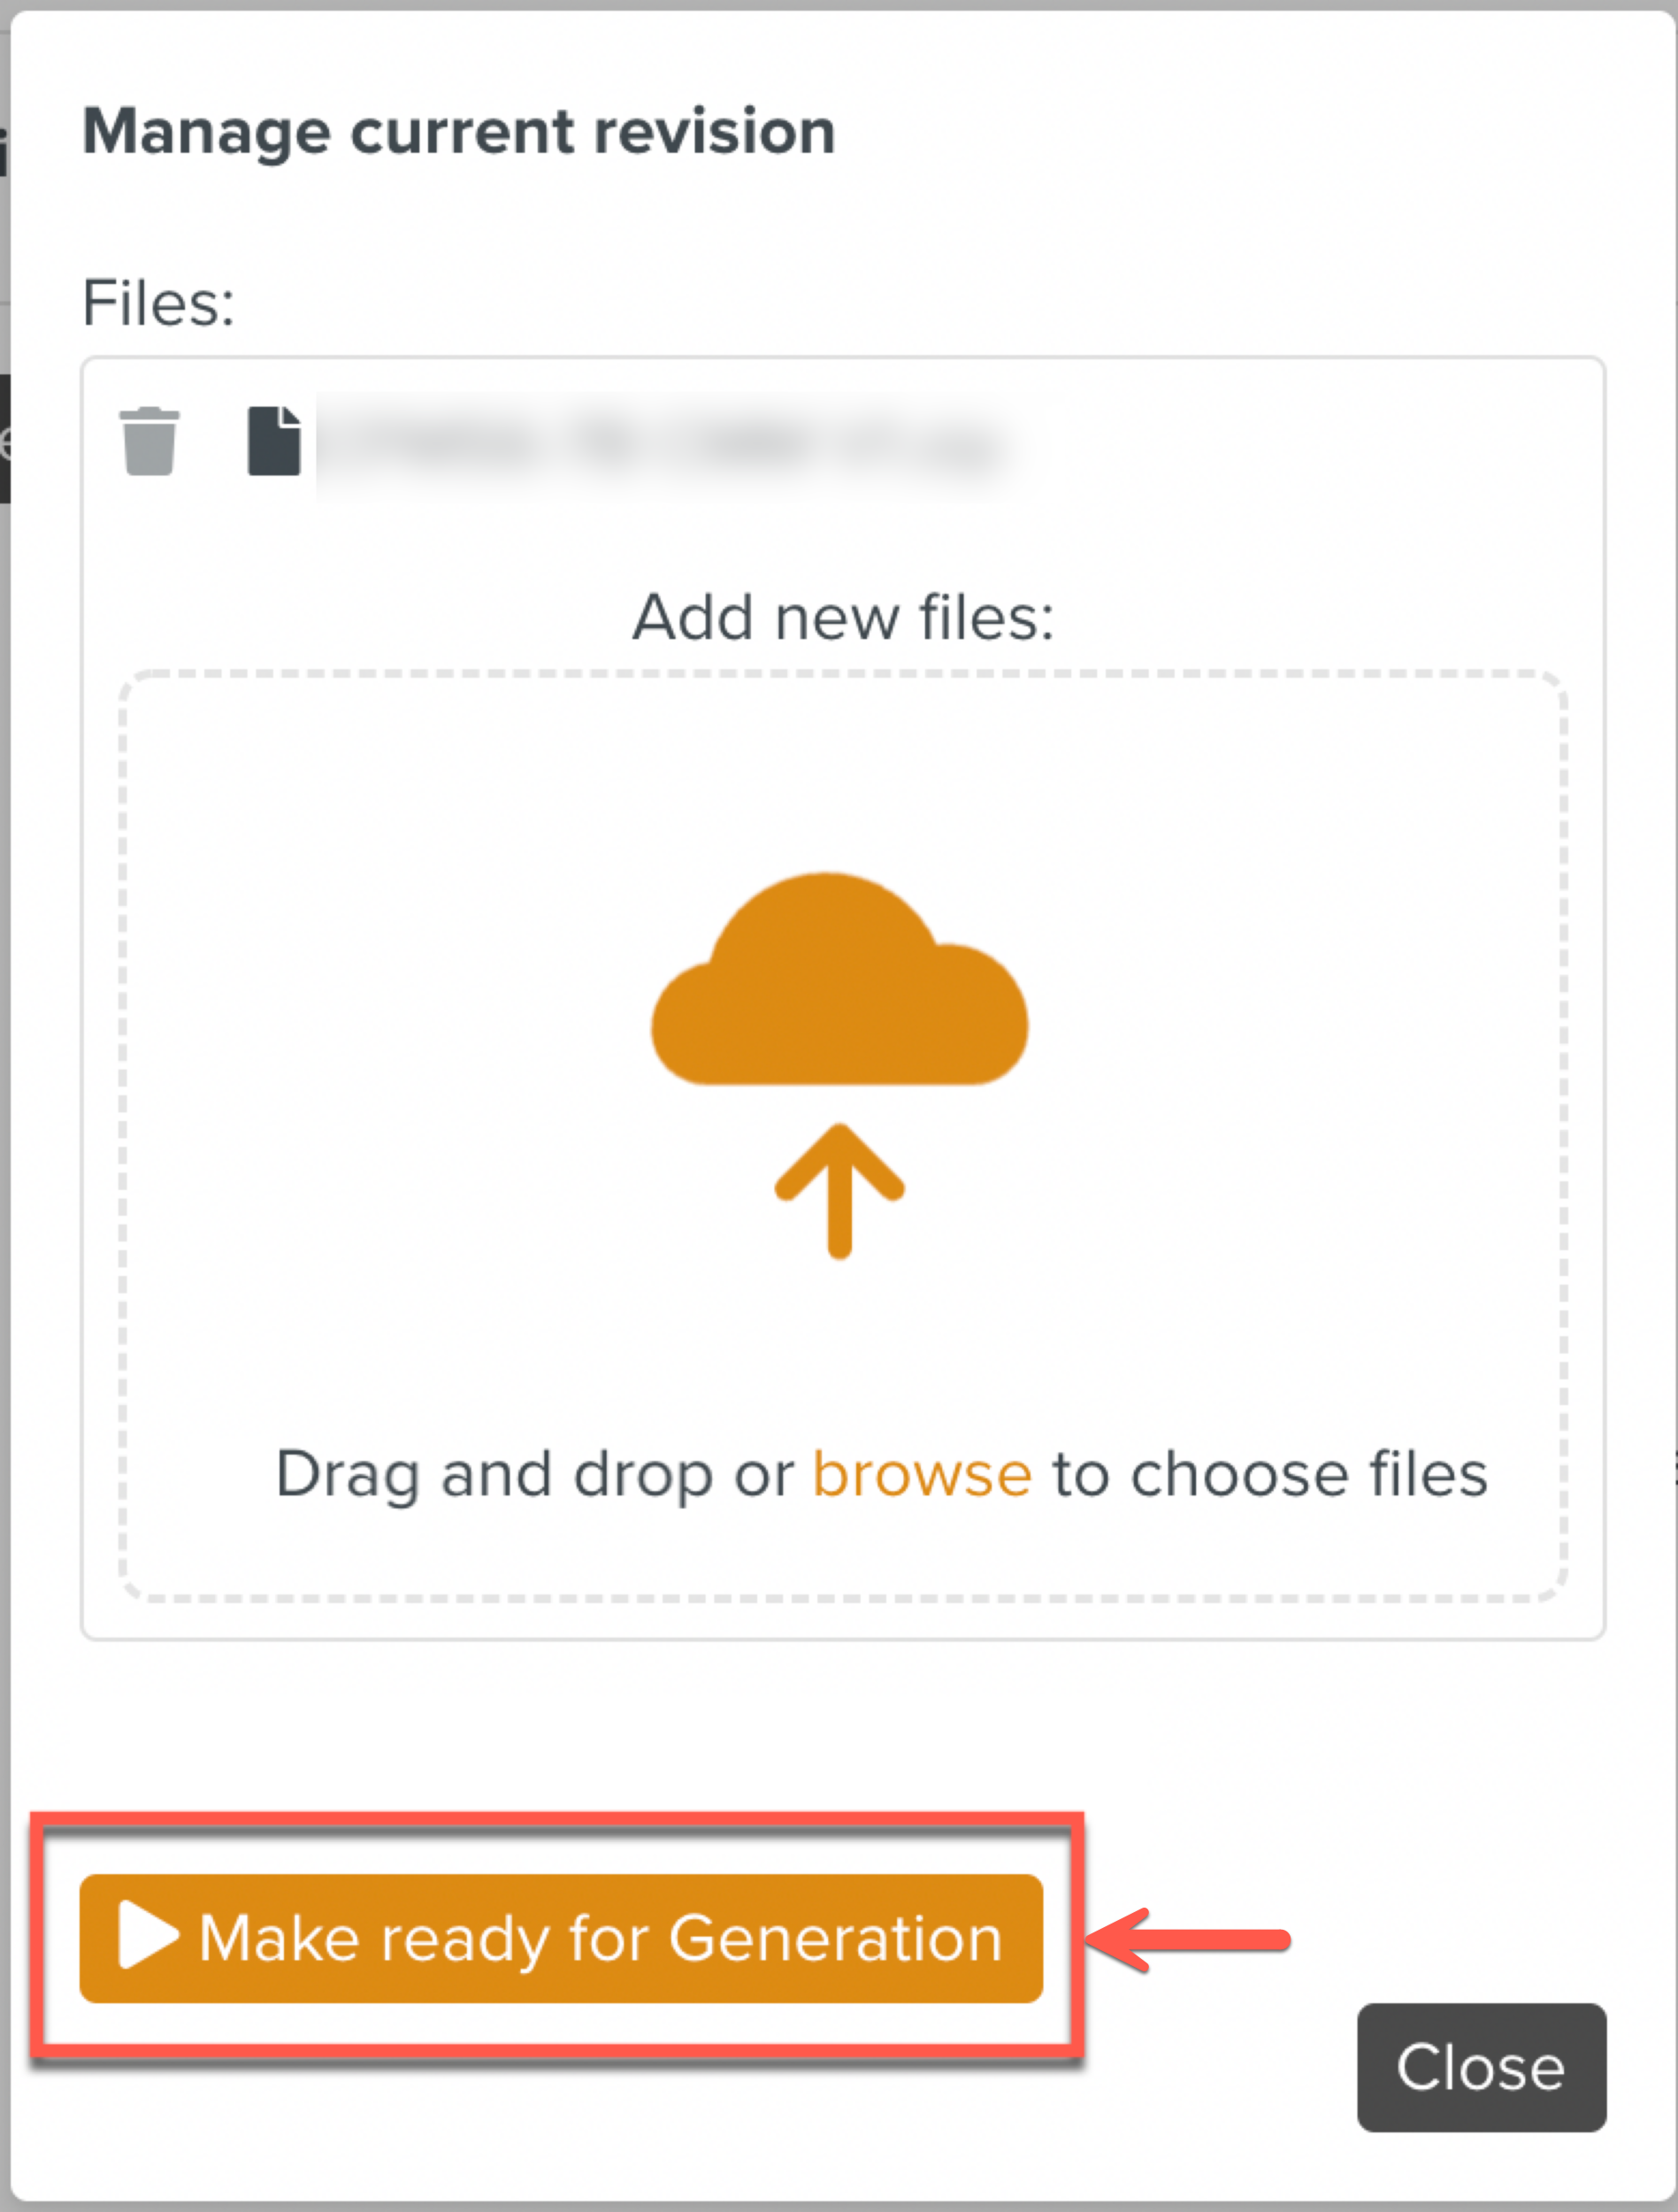
To upload a new Manual to the system:
Open the tab of the selected Manual Describer.

Click the . A dialog to select the Manual files is displayed.
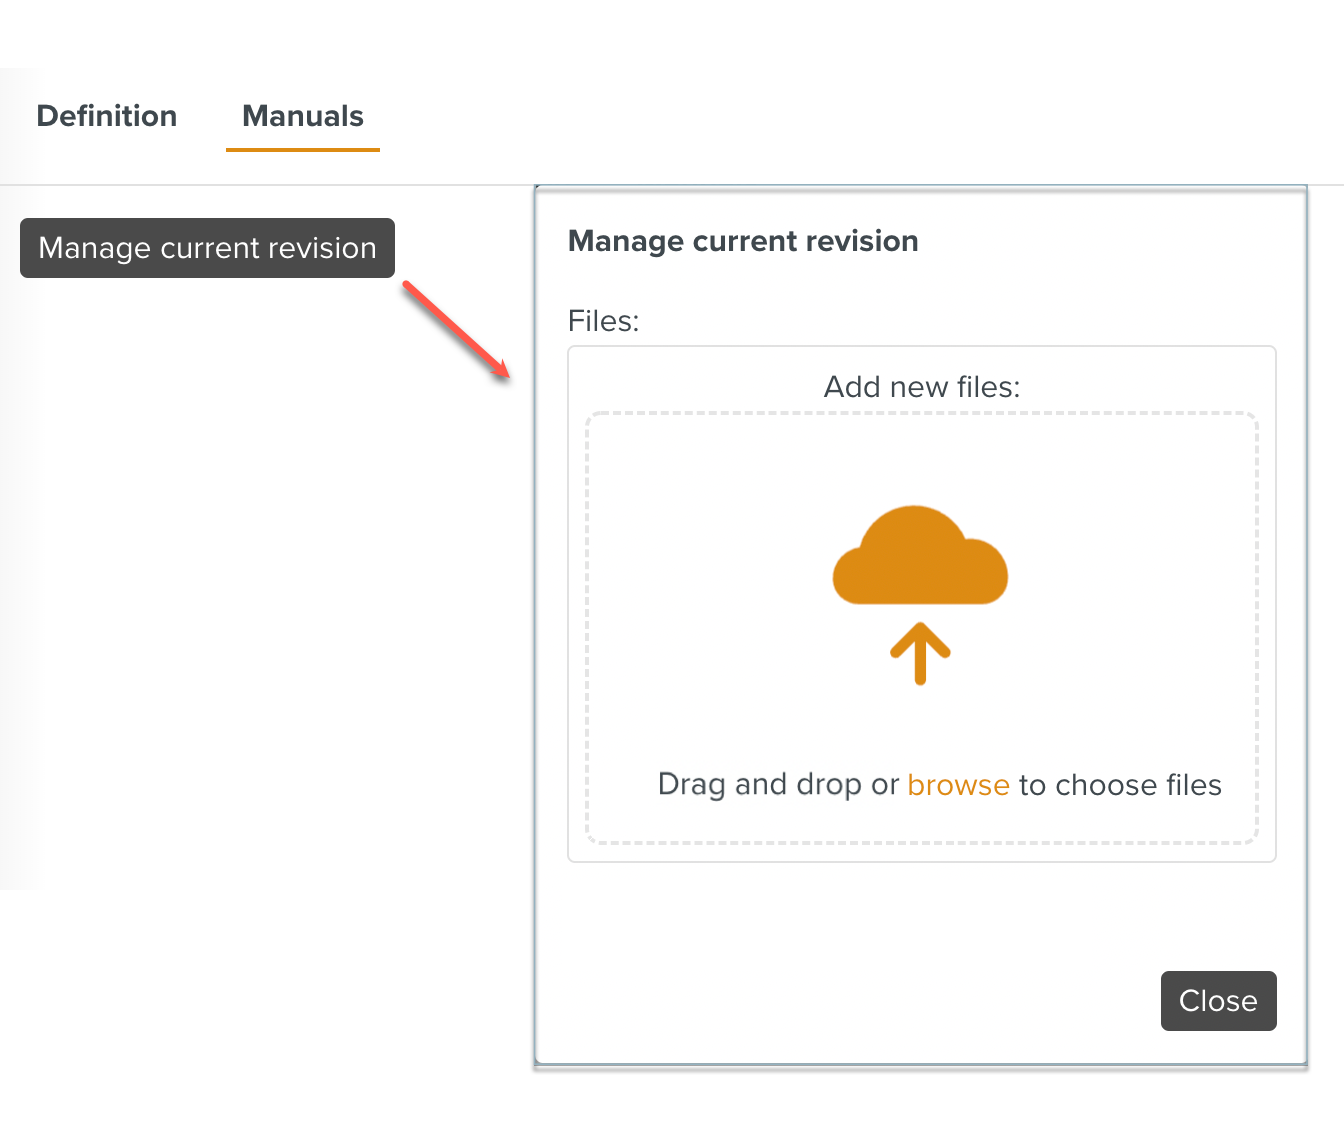
Select the file and click .
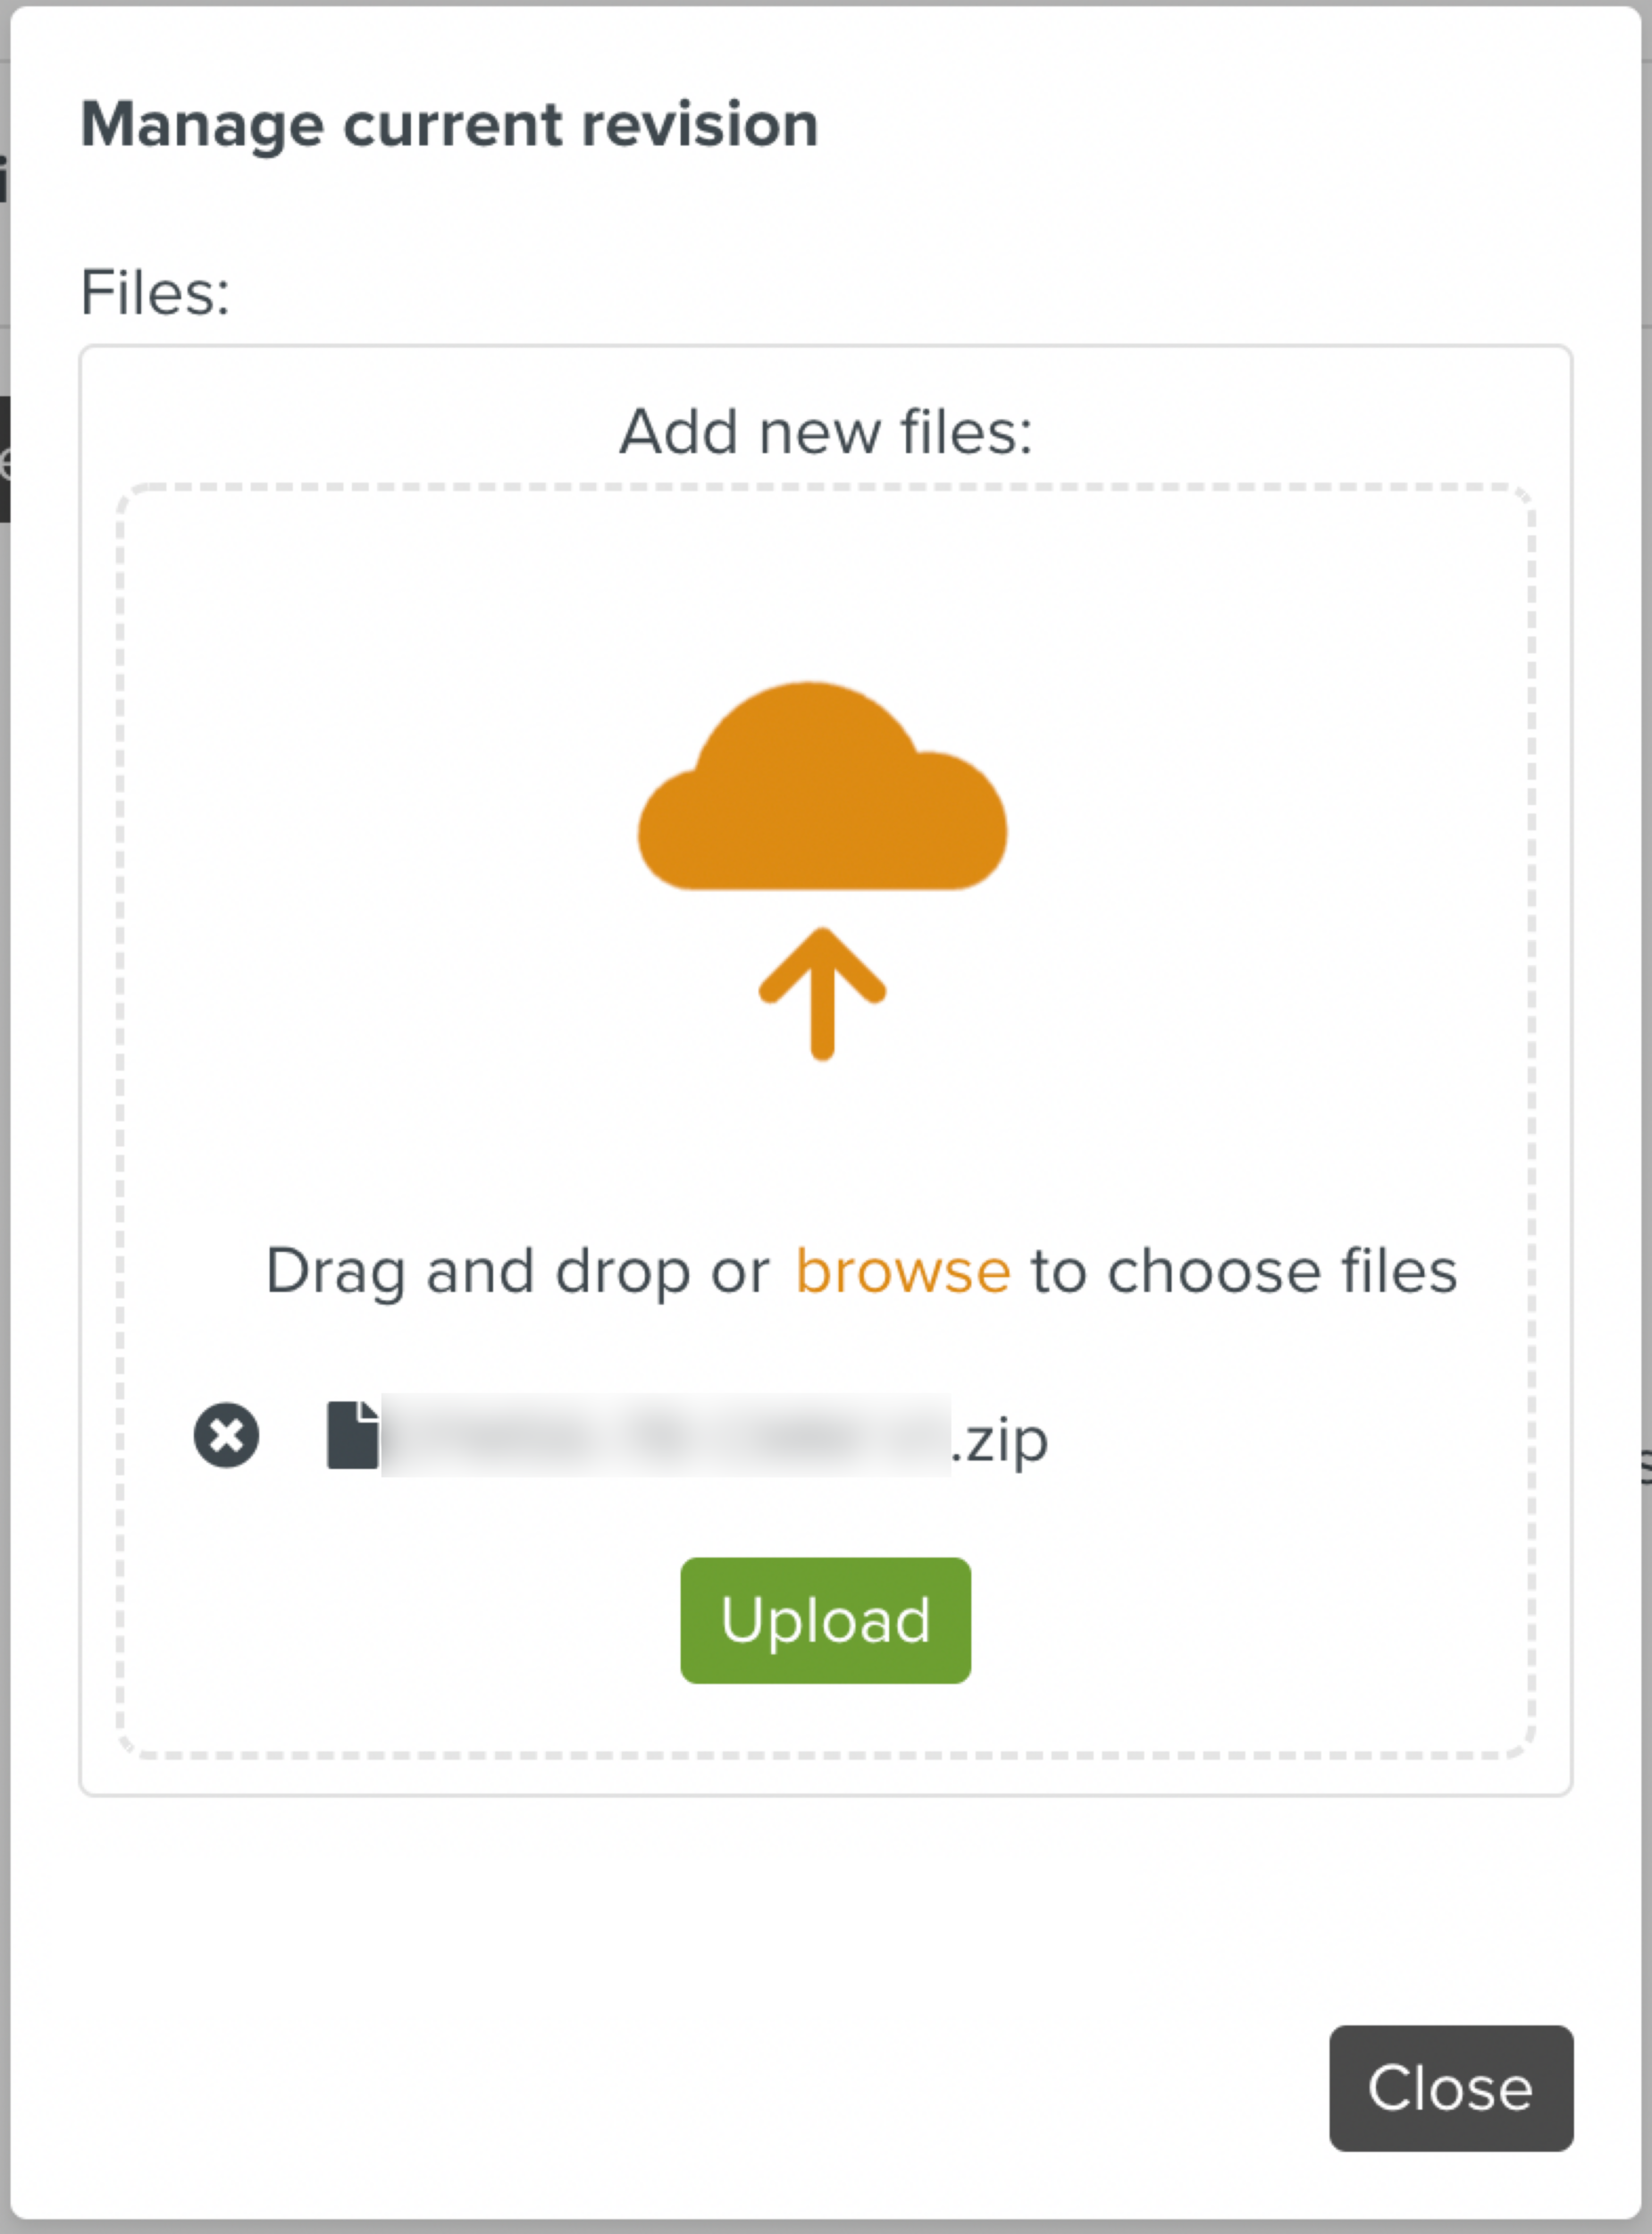
Very large manuals can also be uploaded.
A button is displayed when the file is uploaded.
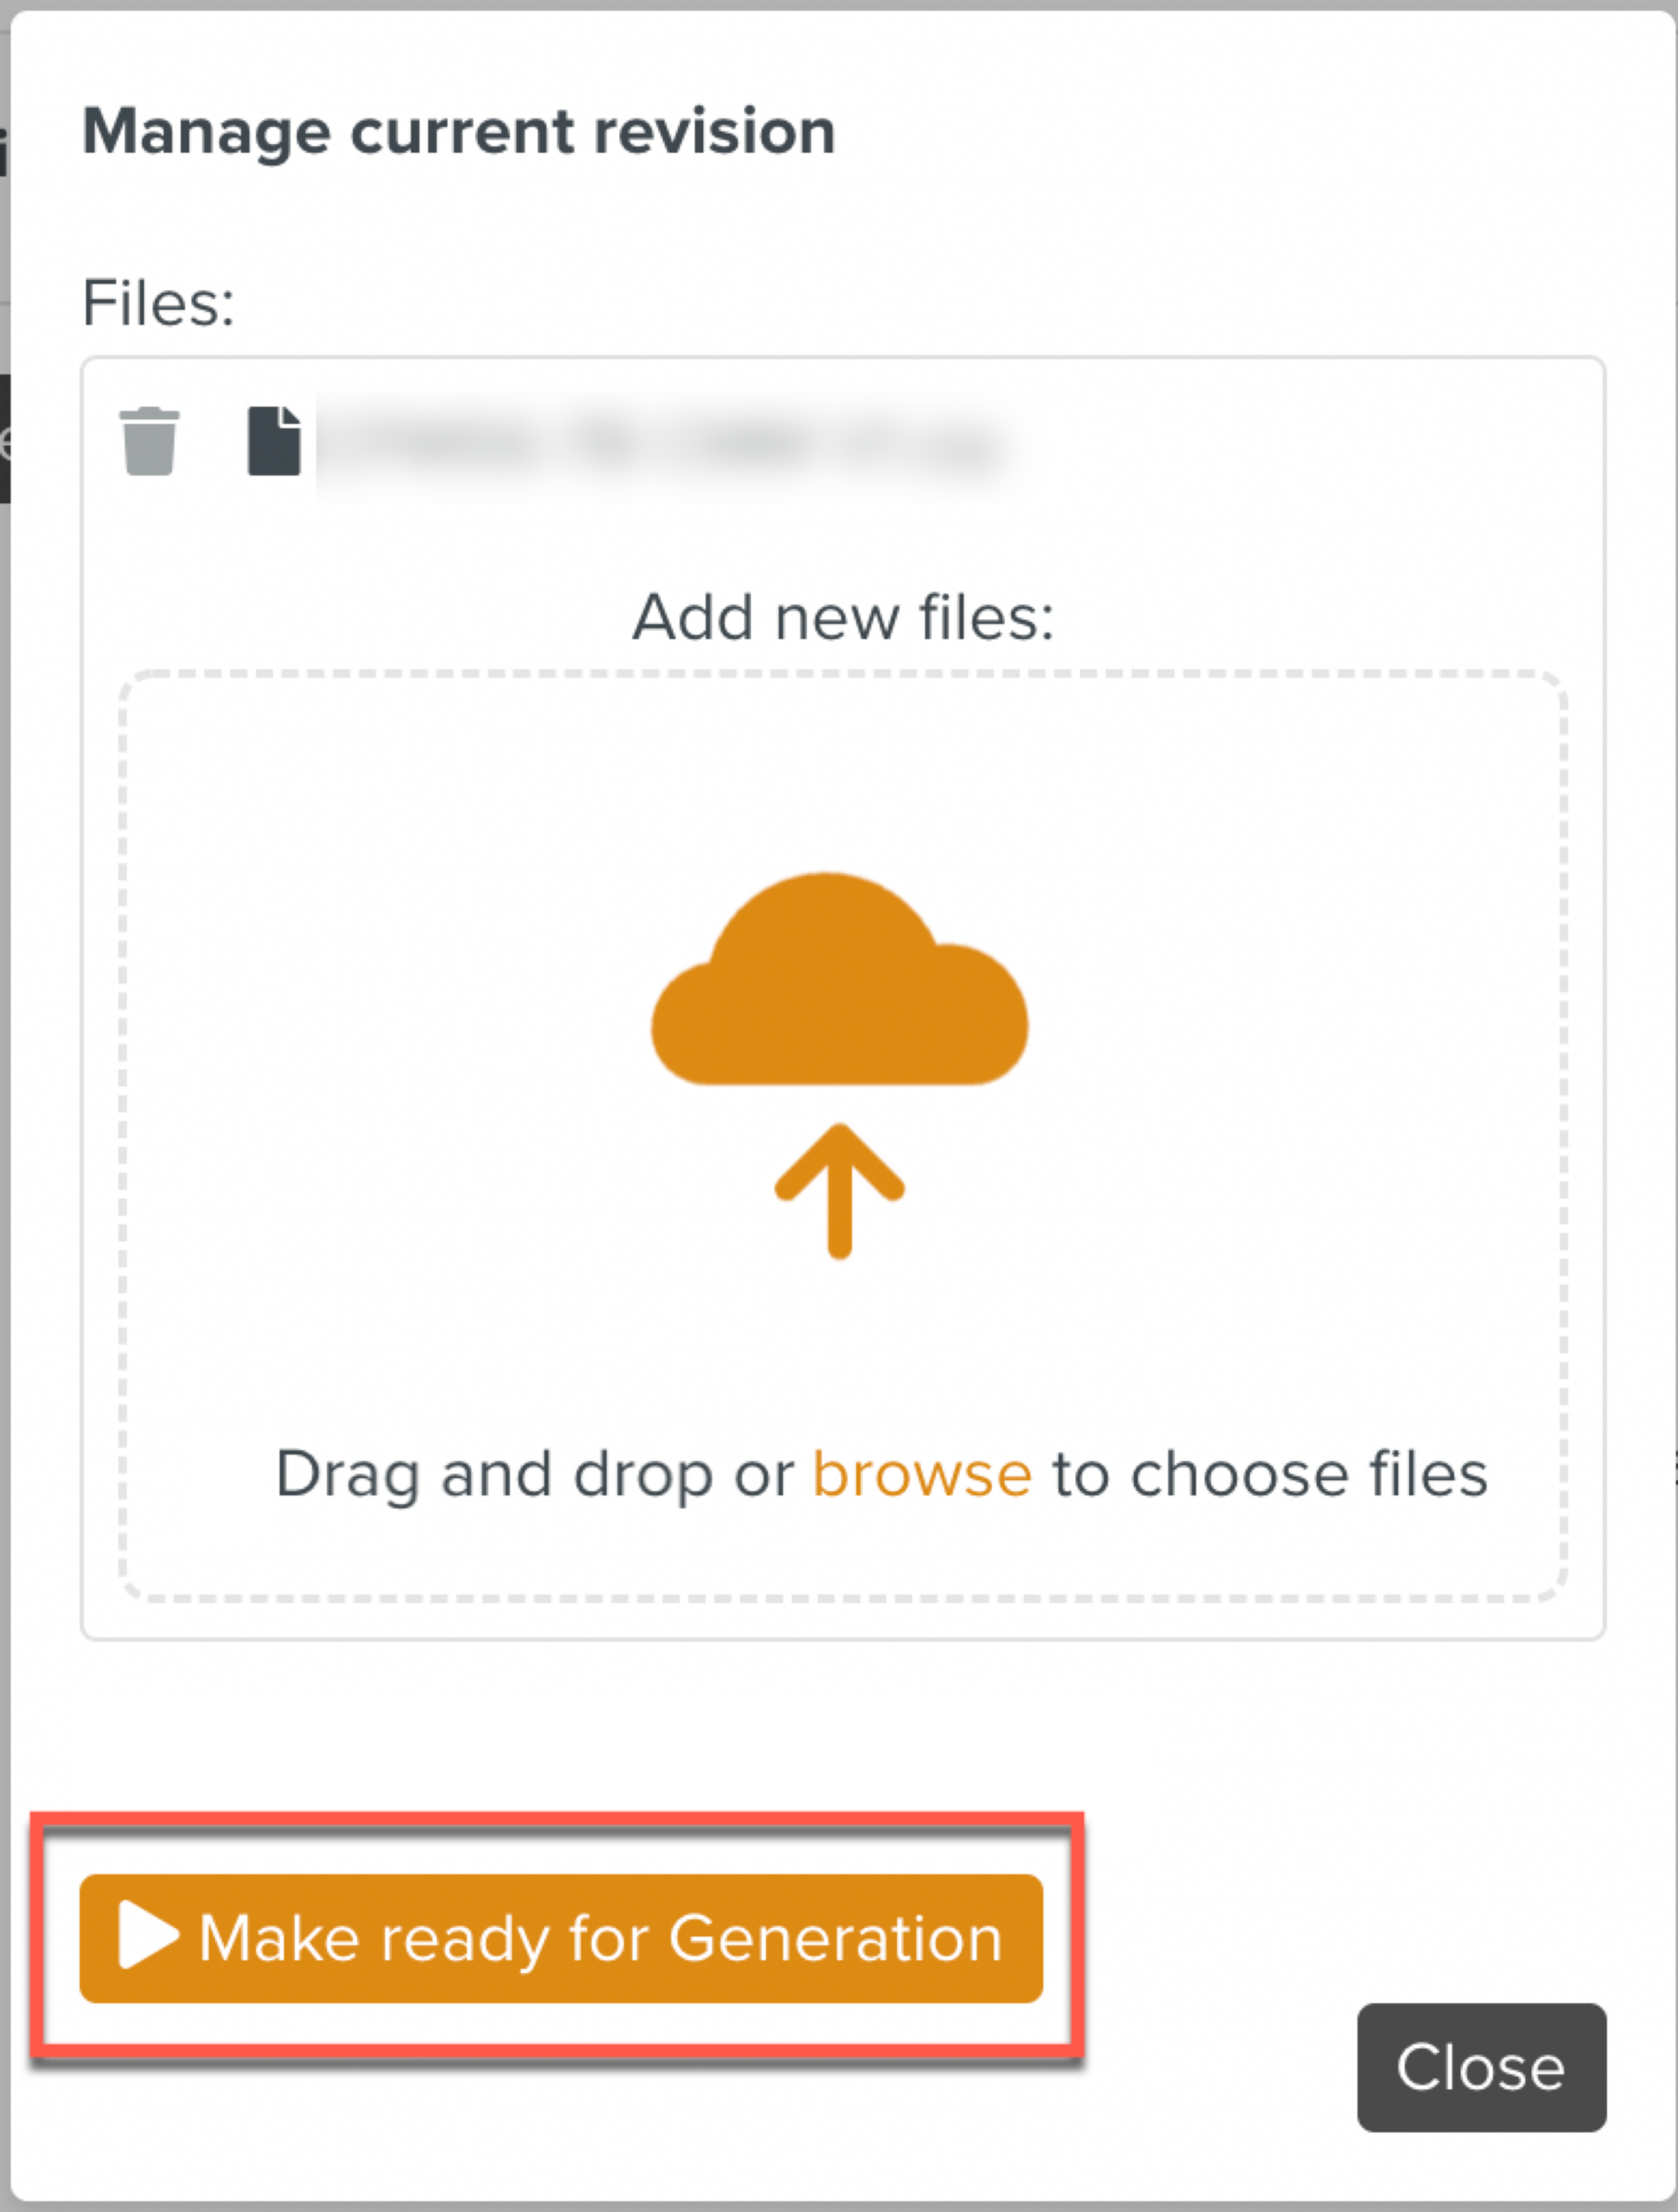
Click .
A message box informing that a batch operation has started is displayed. It also offers the choice to , as displayed below.
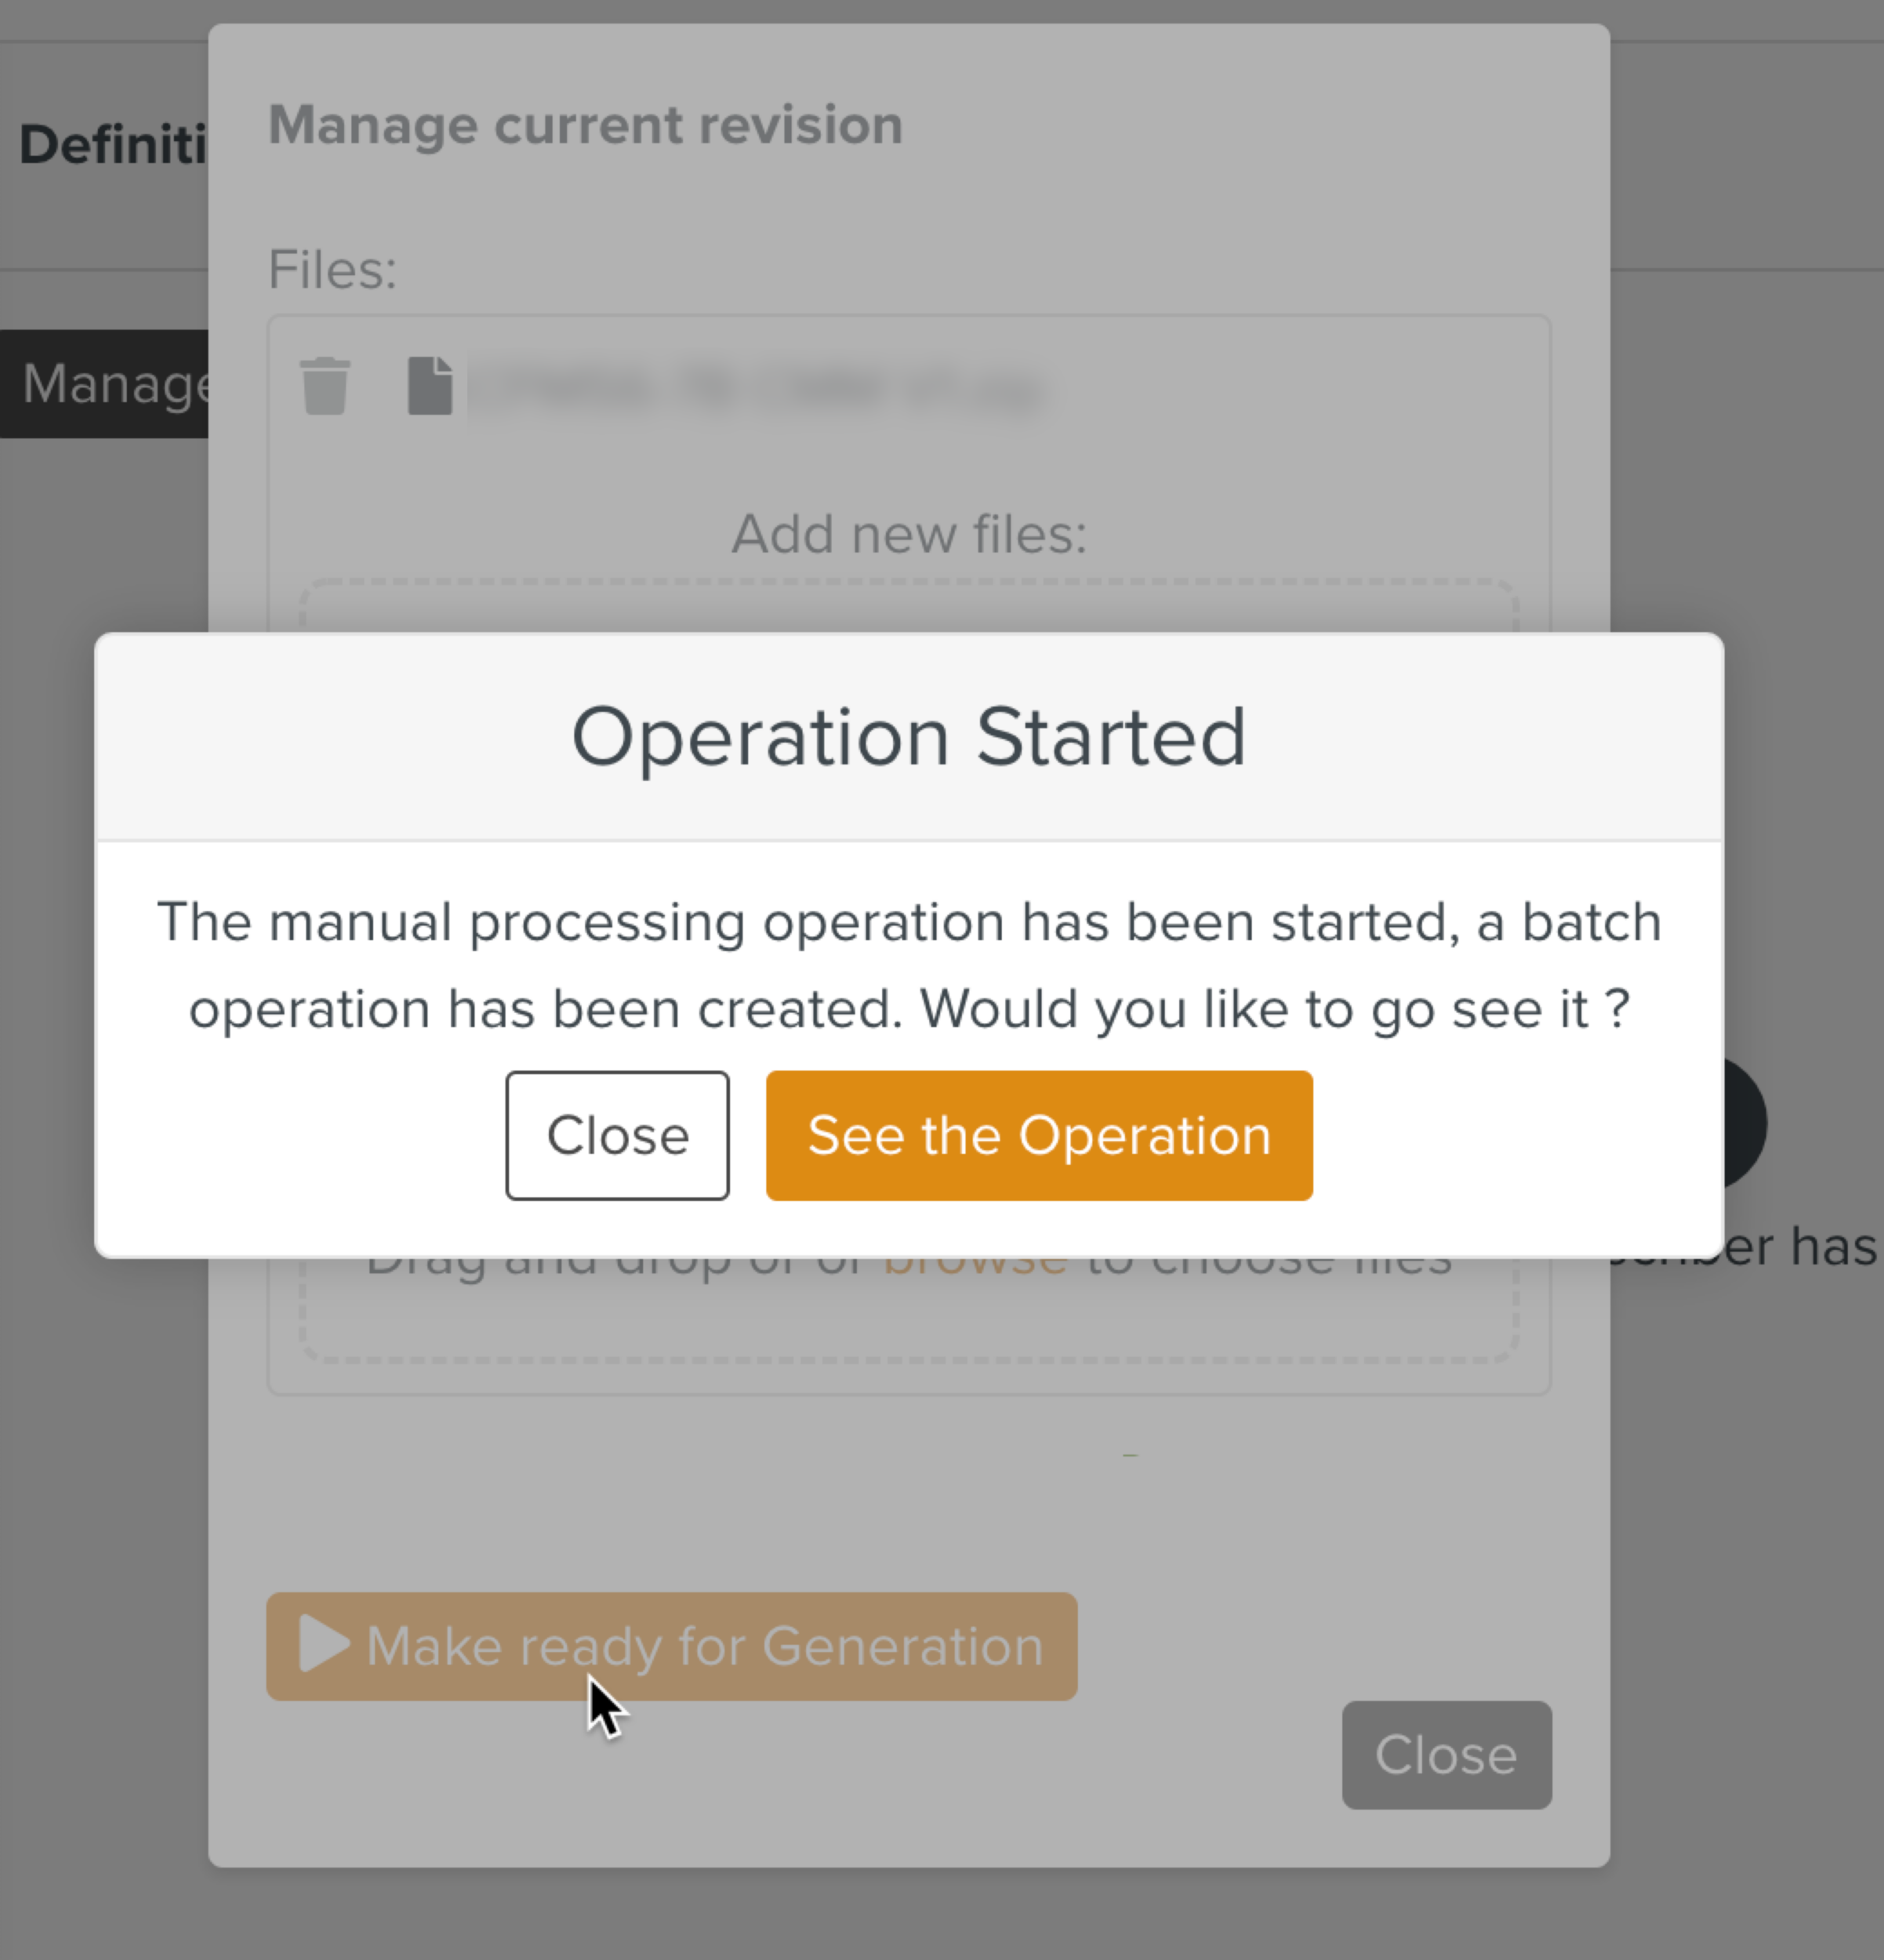
When you click , the page is displayed. It shows the status and progress of the Batch Operation.
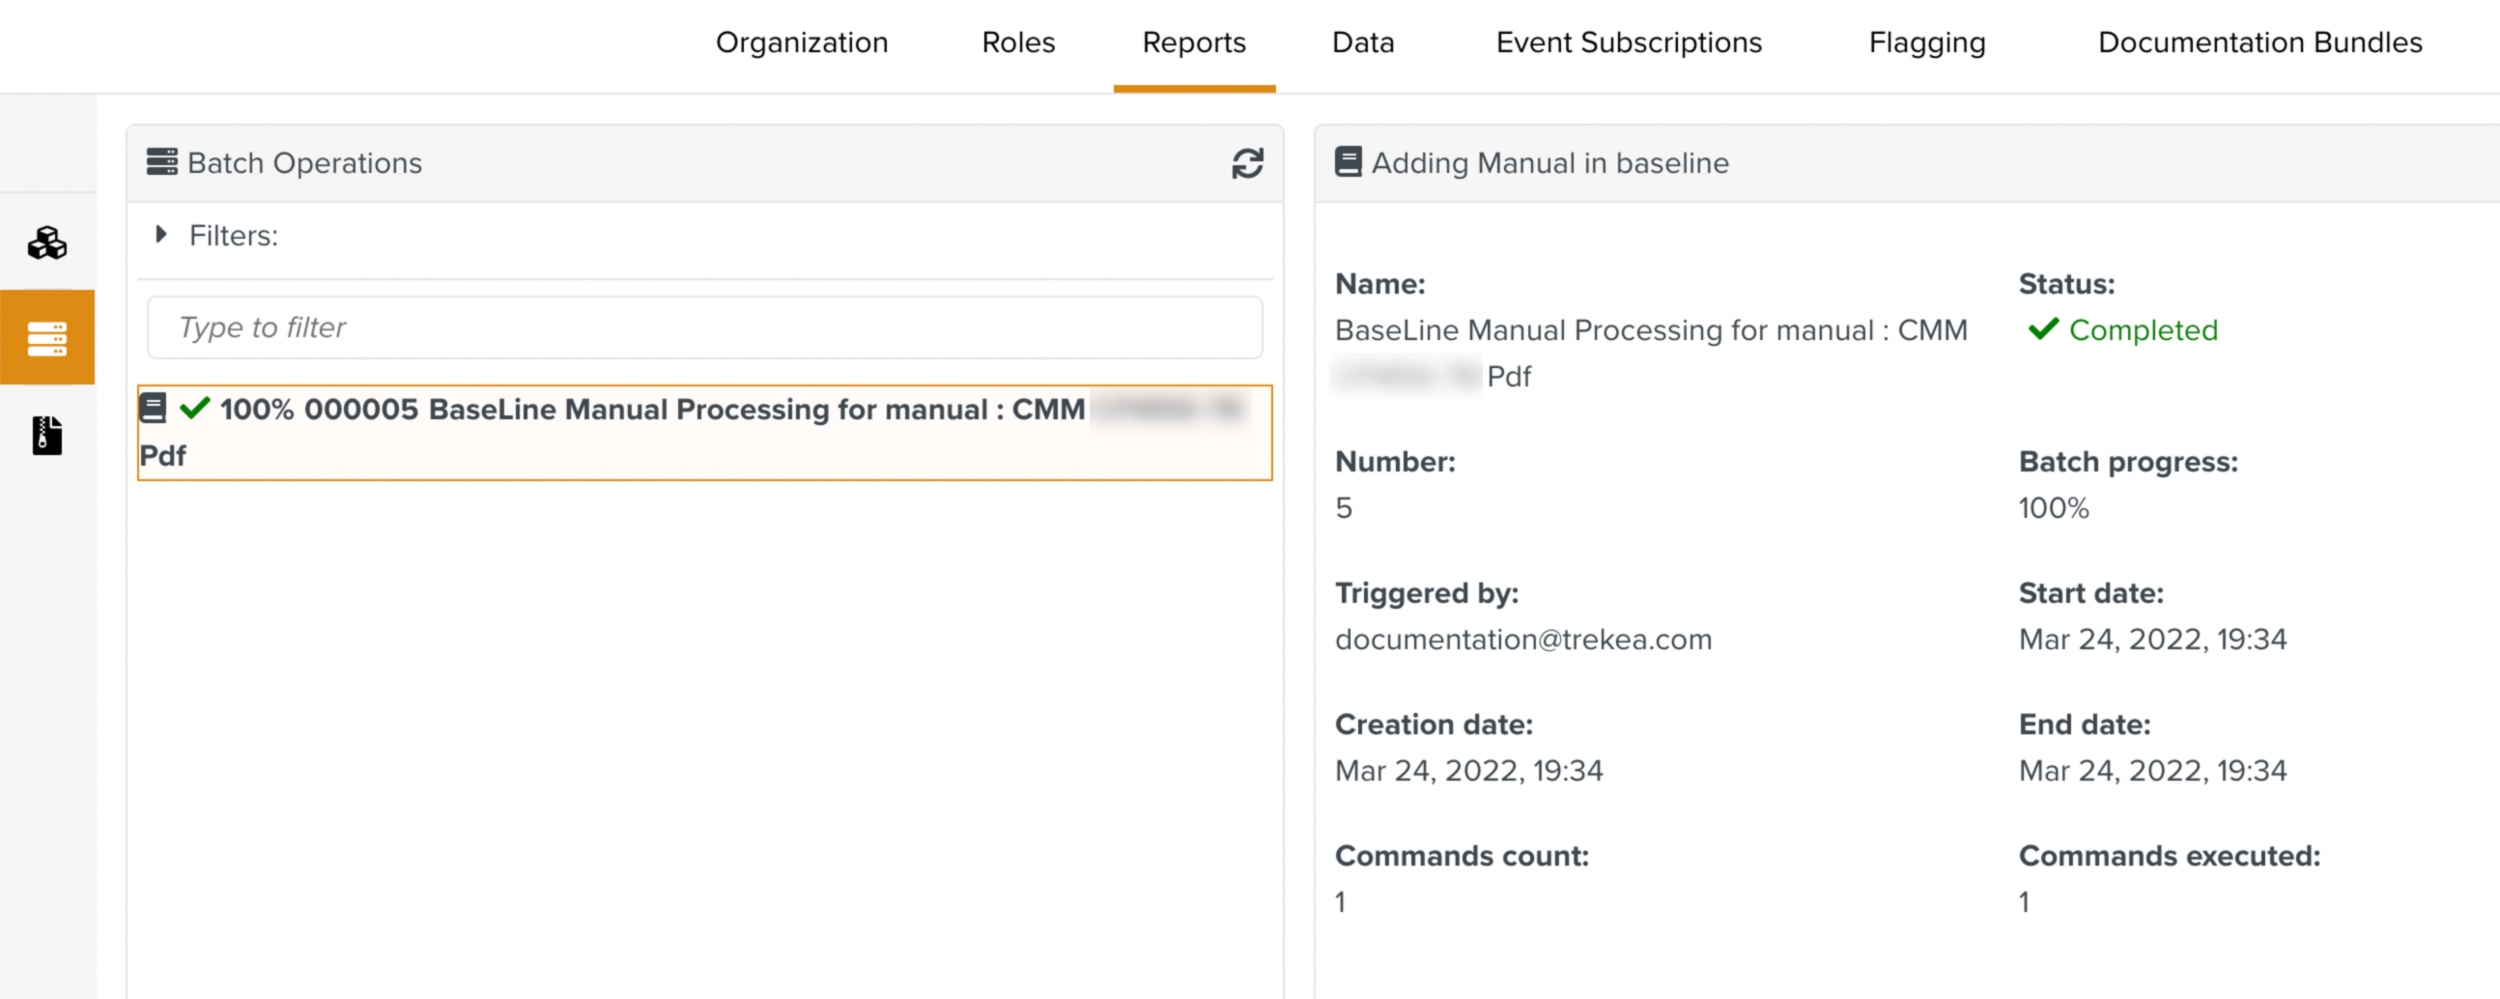
Here, the Batch Operation is complete and the Manual has been added.
Note
If Disable HTML Generation Batch Operation checkbox is selected in the Manual Describer definition, the HTML conversion of the Baseline version is not generated.
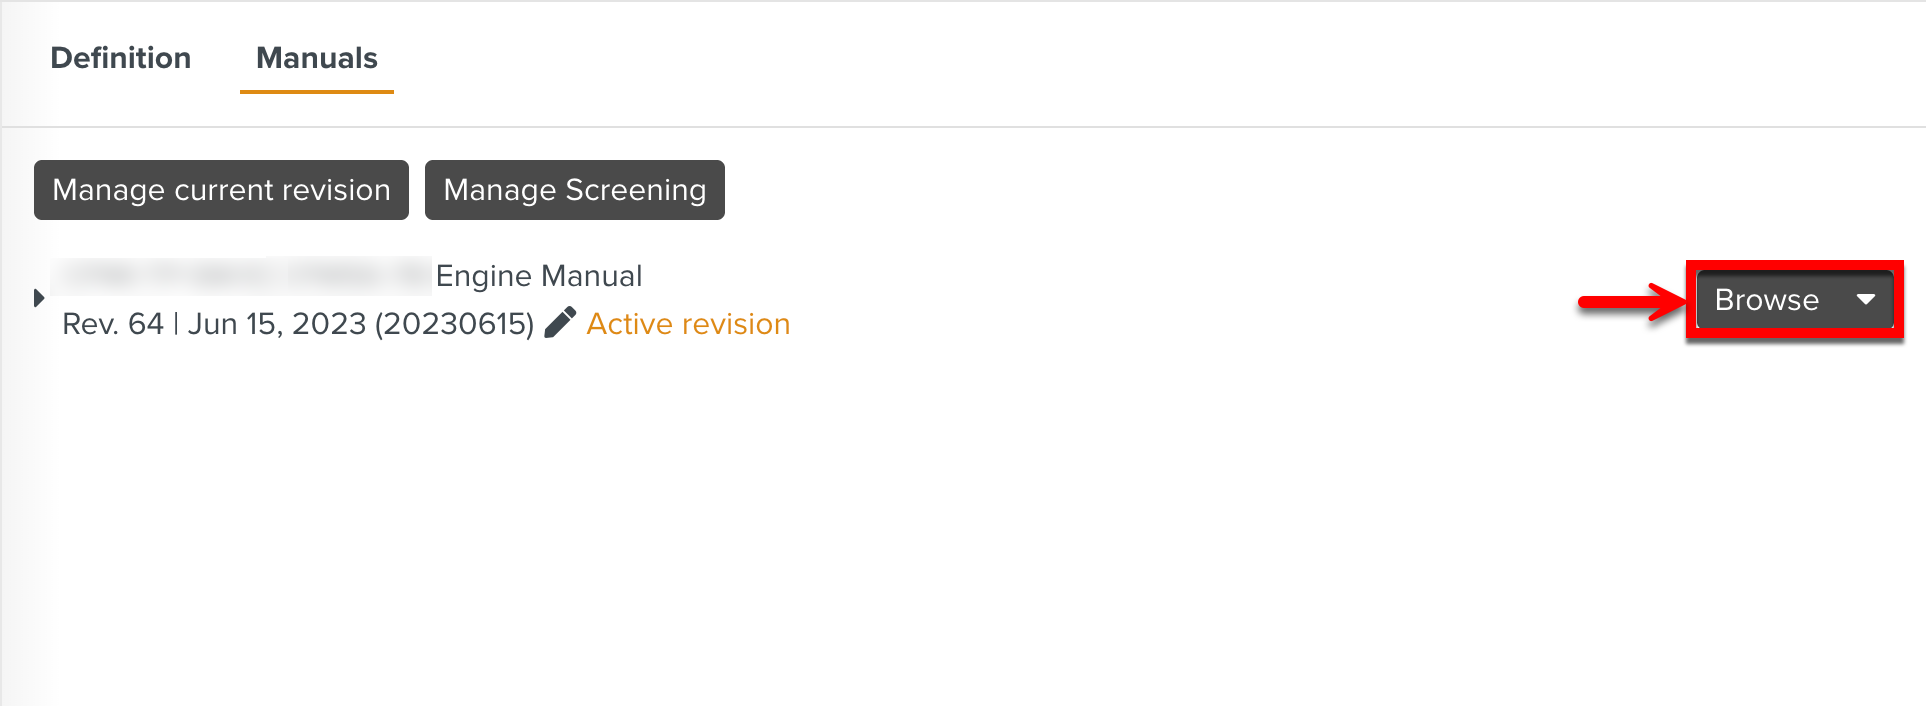
The Manual has been added to FieldLogs. This copy that is uploaded first is the Baseline version. In the Manuals tab, the uploaded manual is displayed. It is marked as the Active revision, and it is indicated as the Revision 64 as seen below.
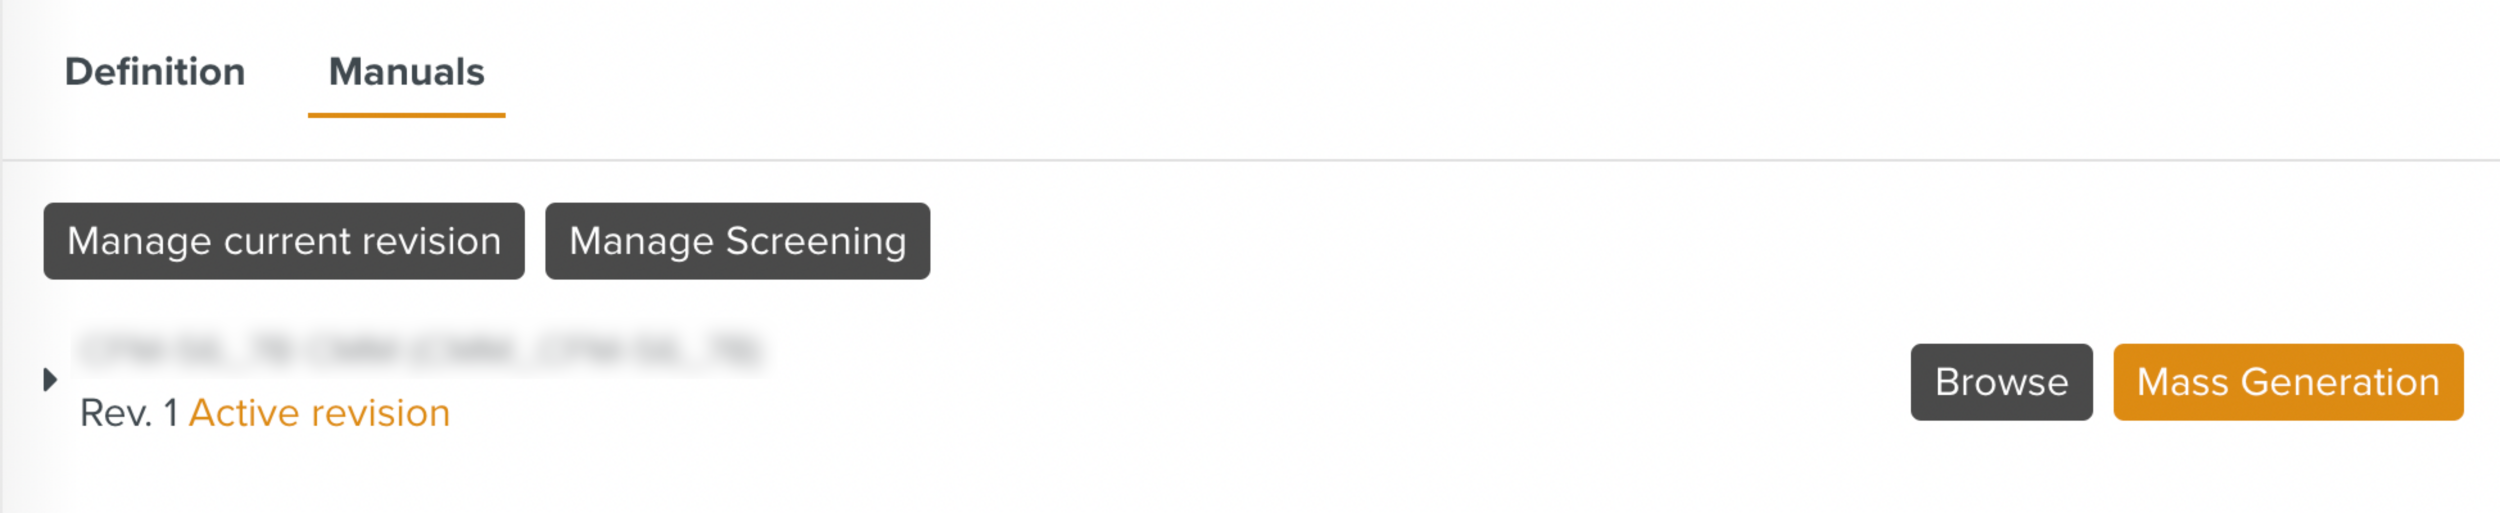
Click to view the contents of the uploaded manual.