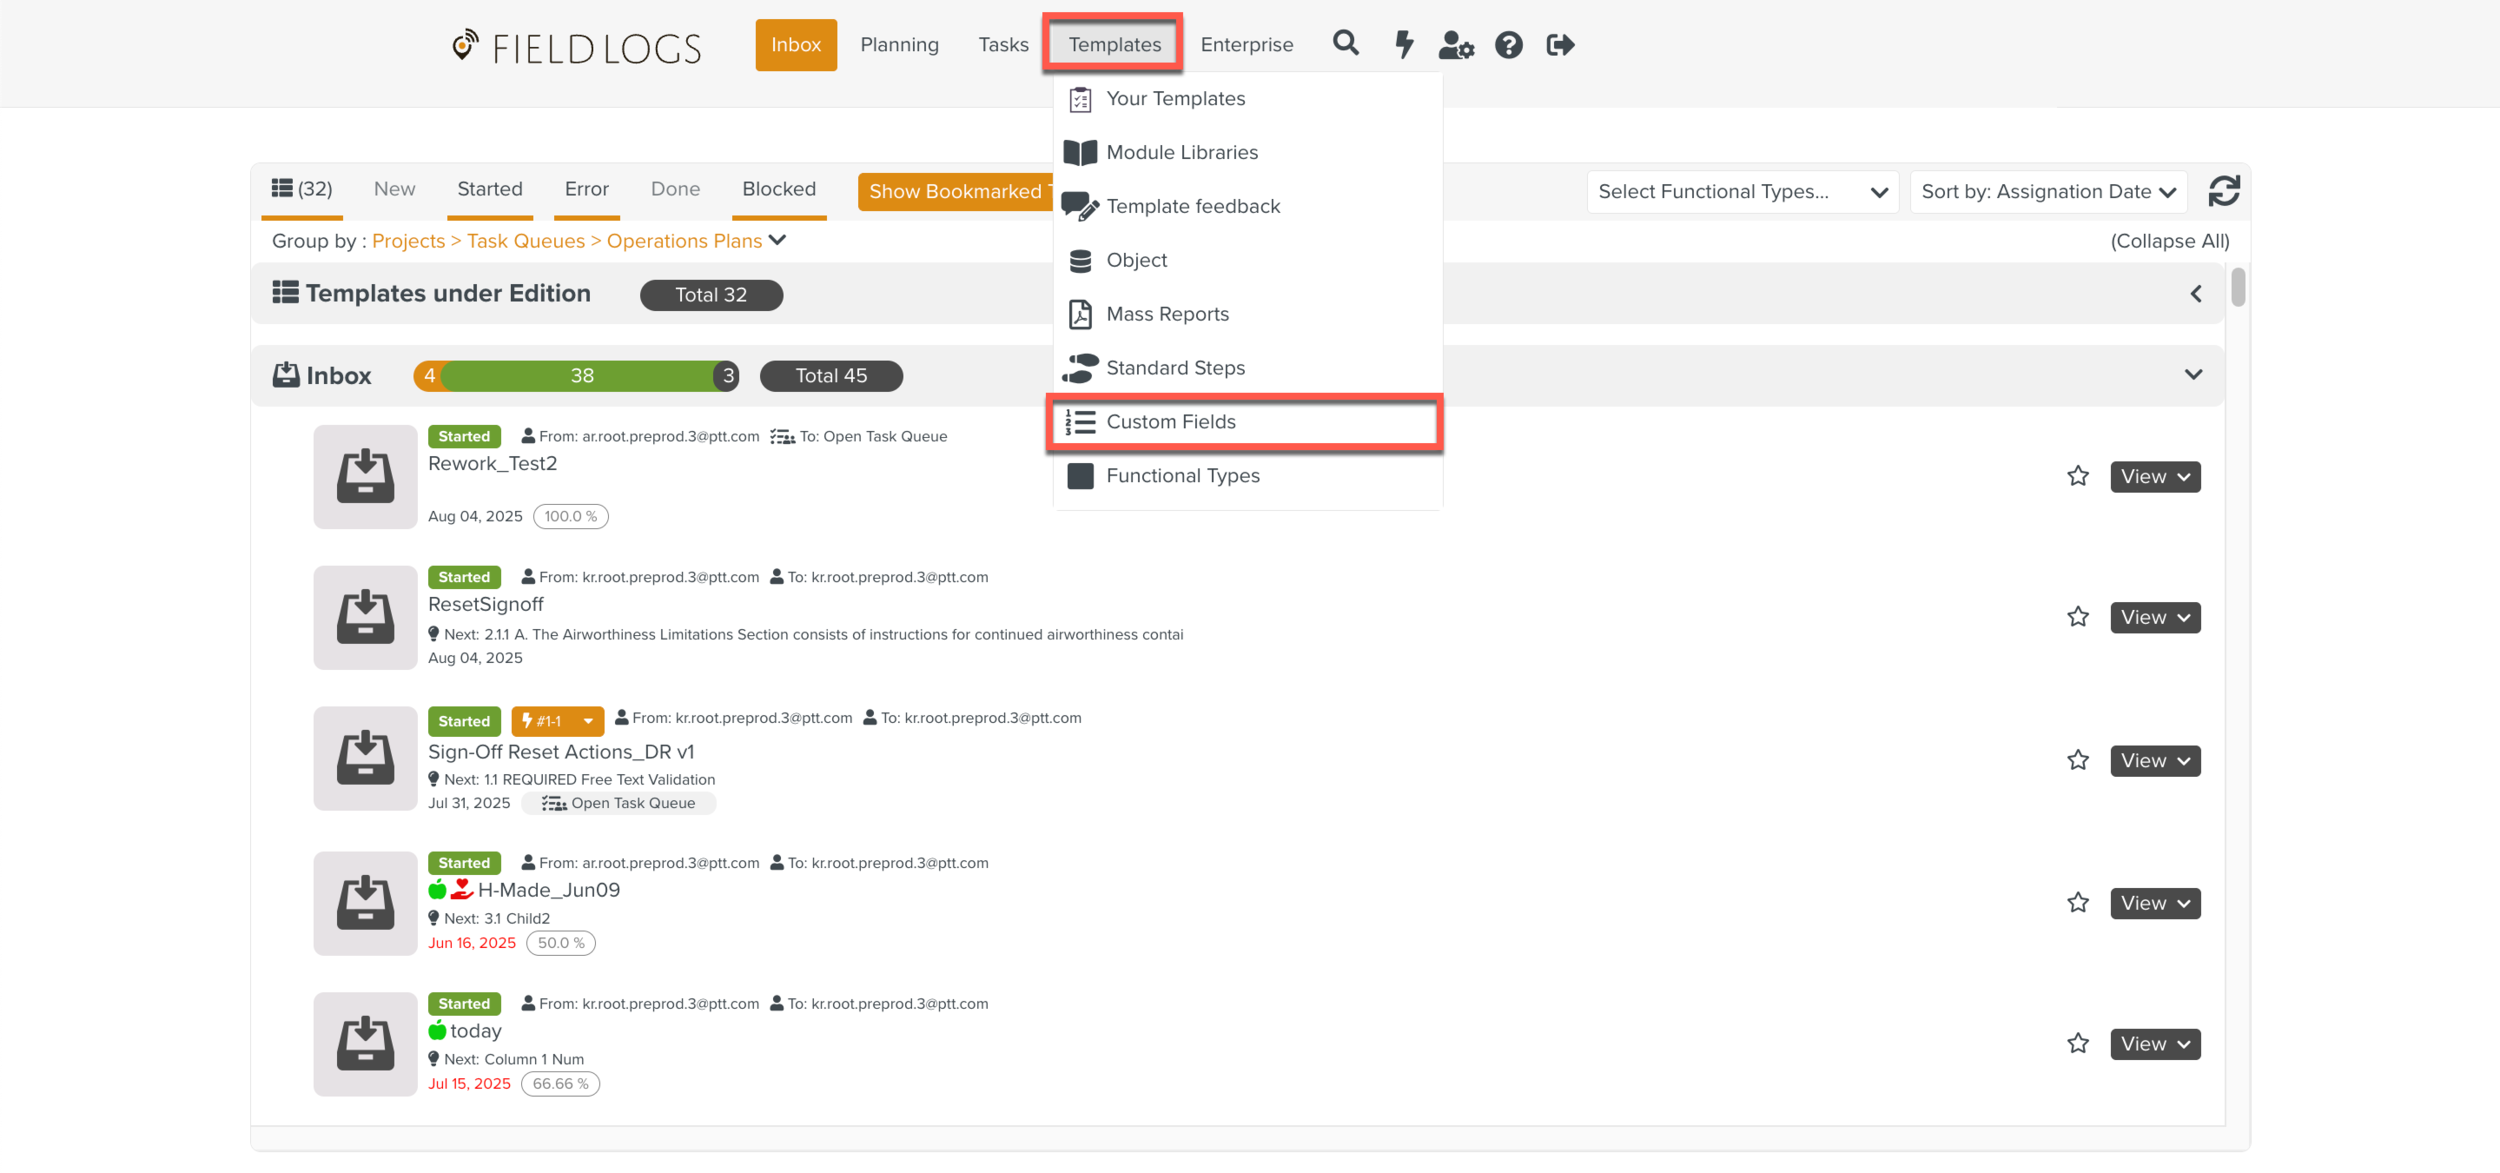
Defining Custom Fields
Custom Fields are user-defined properties that can be used in Templates.
While setting up the Template or Steps, you can add values to these Custom Fields.
Custom Fields can also be used in Configuration matrices, Incident Management System and Document Management System.
To create a Custom Field:
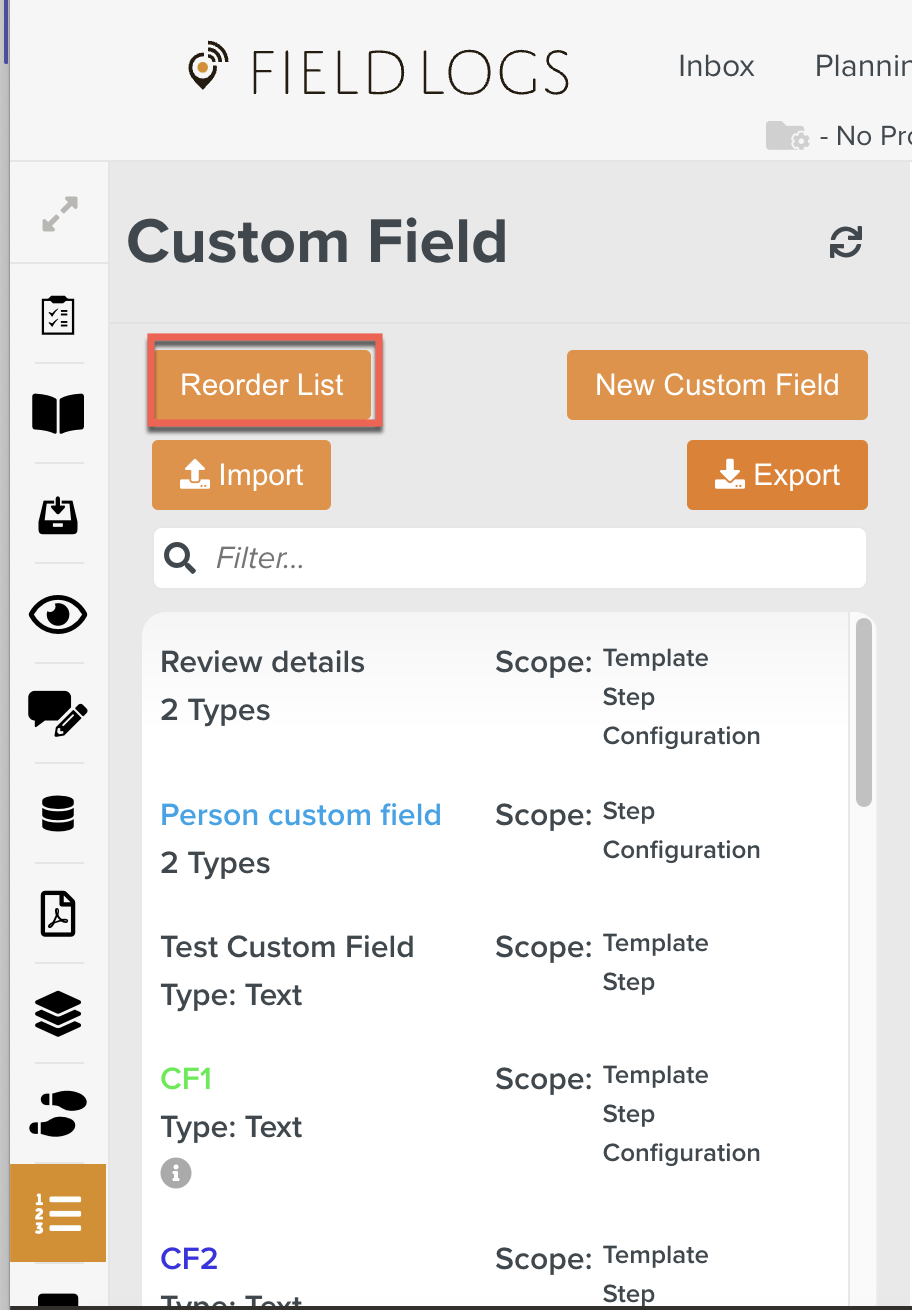
On the main menu, go to Templates > Custom Fields.
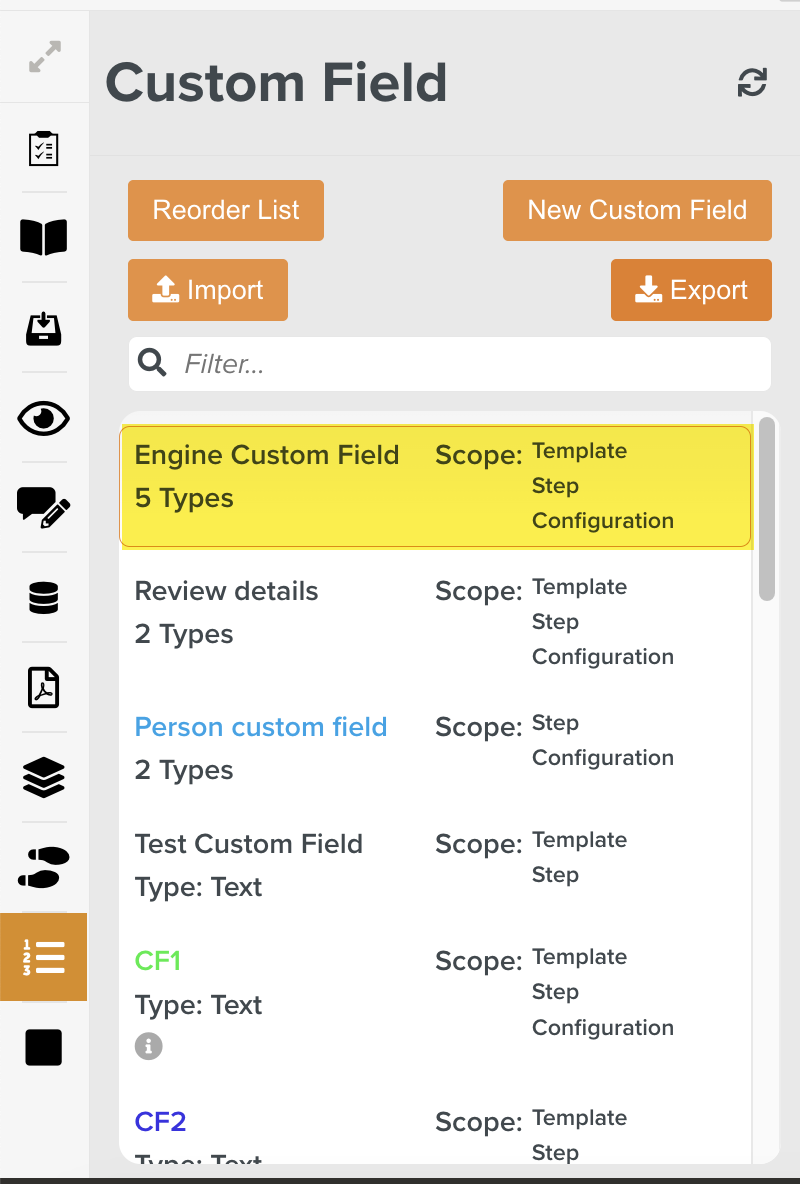
The page Custom Field opens. The list of all the available Custom Fields is displayed.
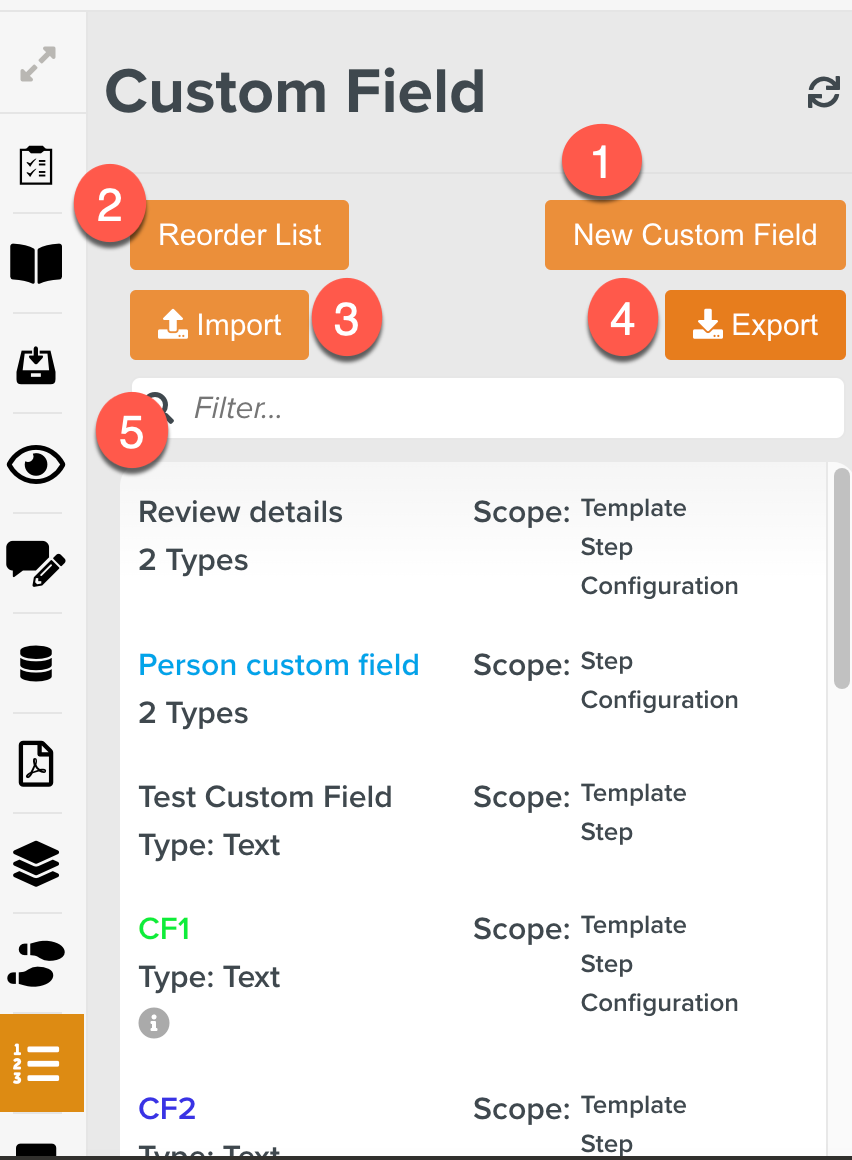
The following operations can be performed using the buttons numbered above.
S.no
Option
Description
1
New Custom Field
This option is used to create a new Custom Field.
2
Reorder list
This option is used to reorder the list of Custom Fields.
3
Import
This option is used to Import the Custom Fields.
4
Export
This option is used to Export the Custom Fields.
5
Filter
This option is used to filter the Custom Fields by name.
Click .

A new Custom Field is added.
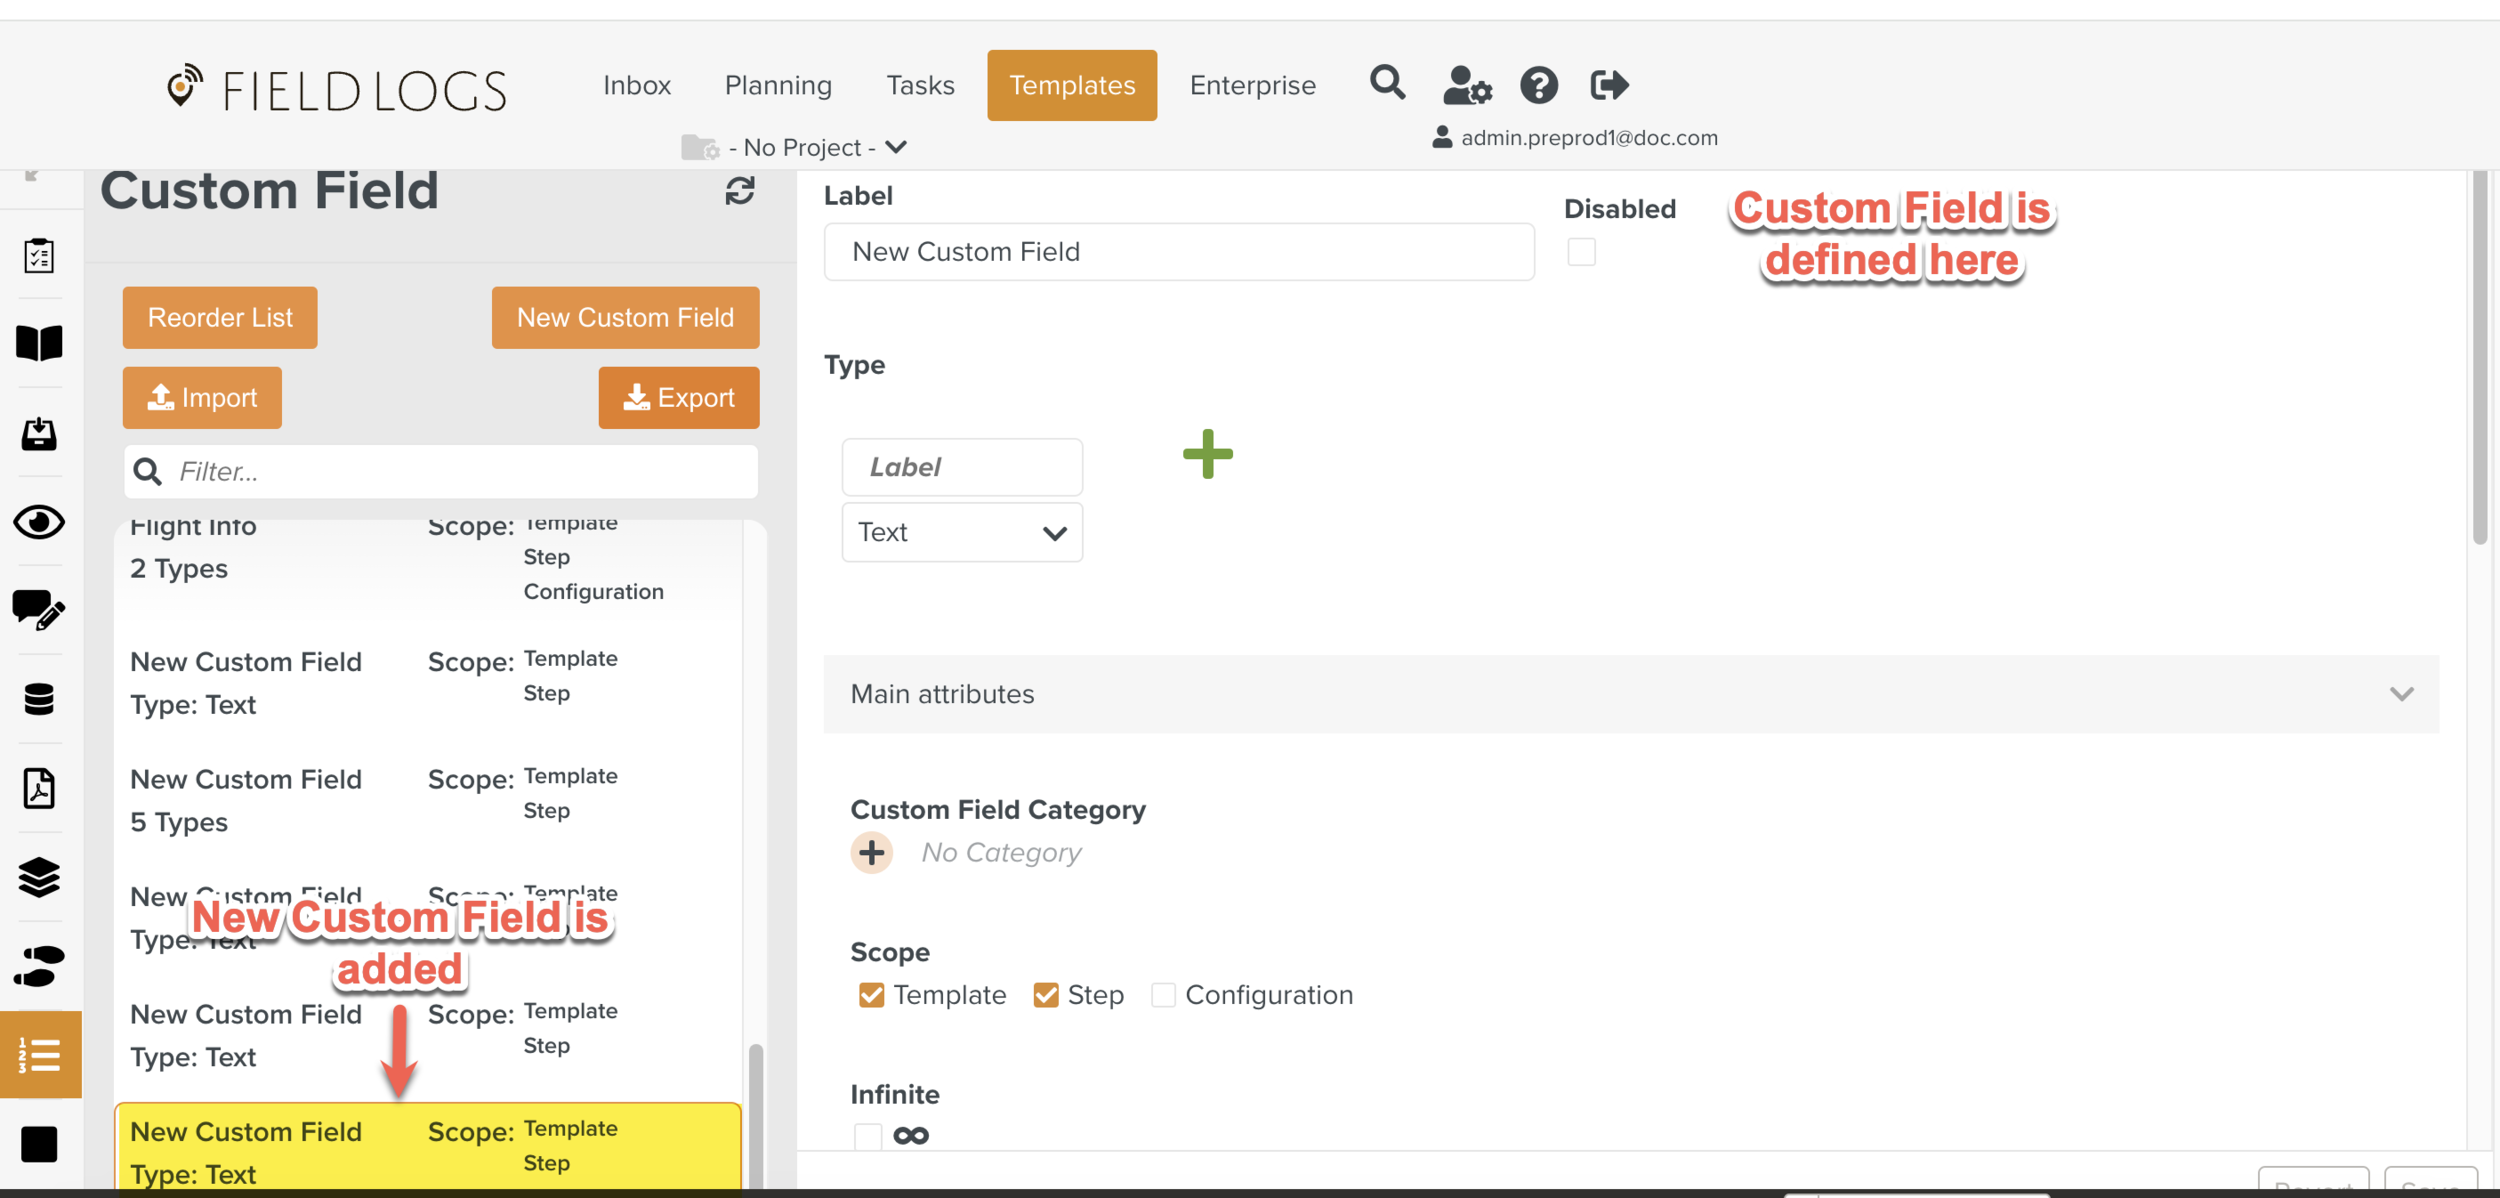
Add the following details in the fields as needed.
Field
Description
Label
Provide a label for the Custom Field. By default, the label is displayed.
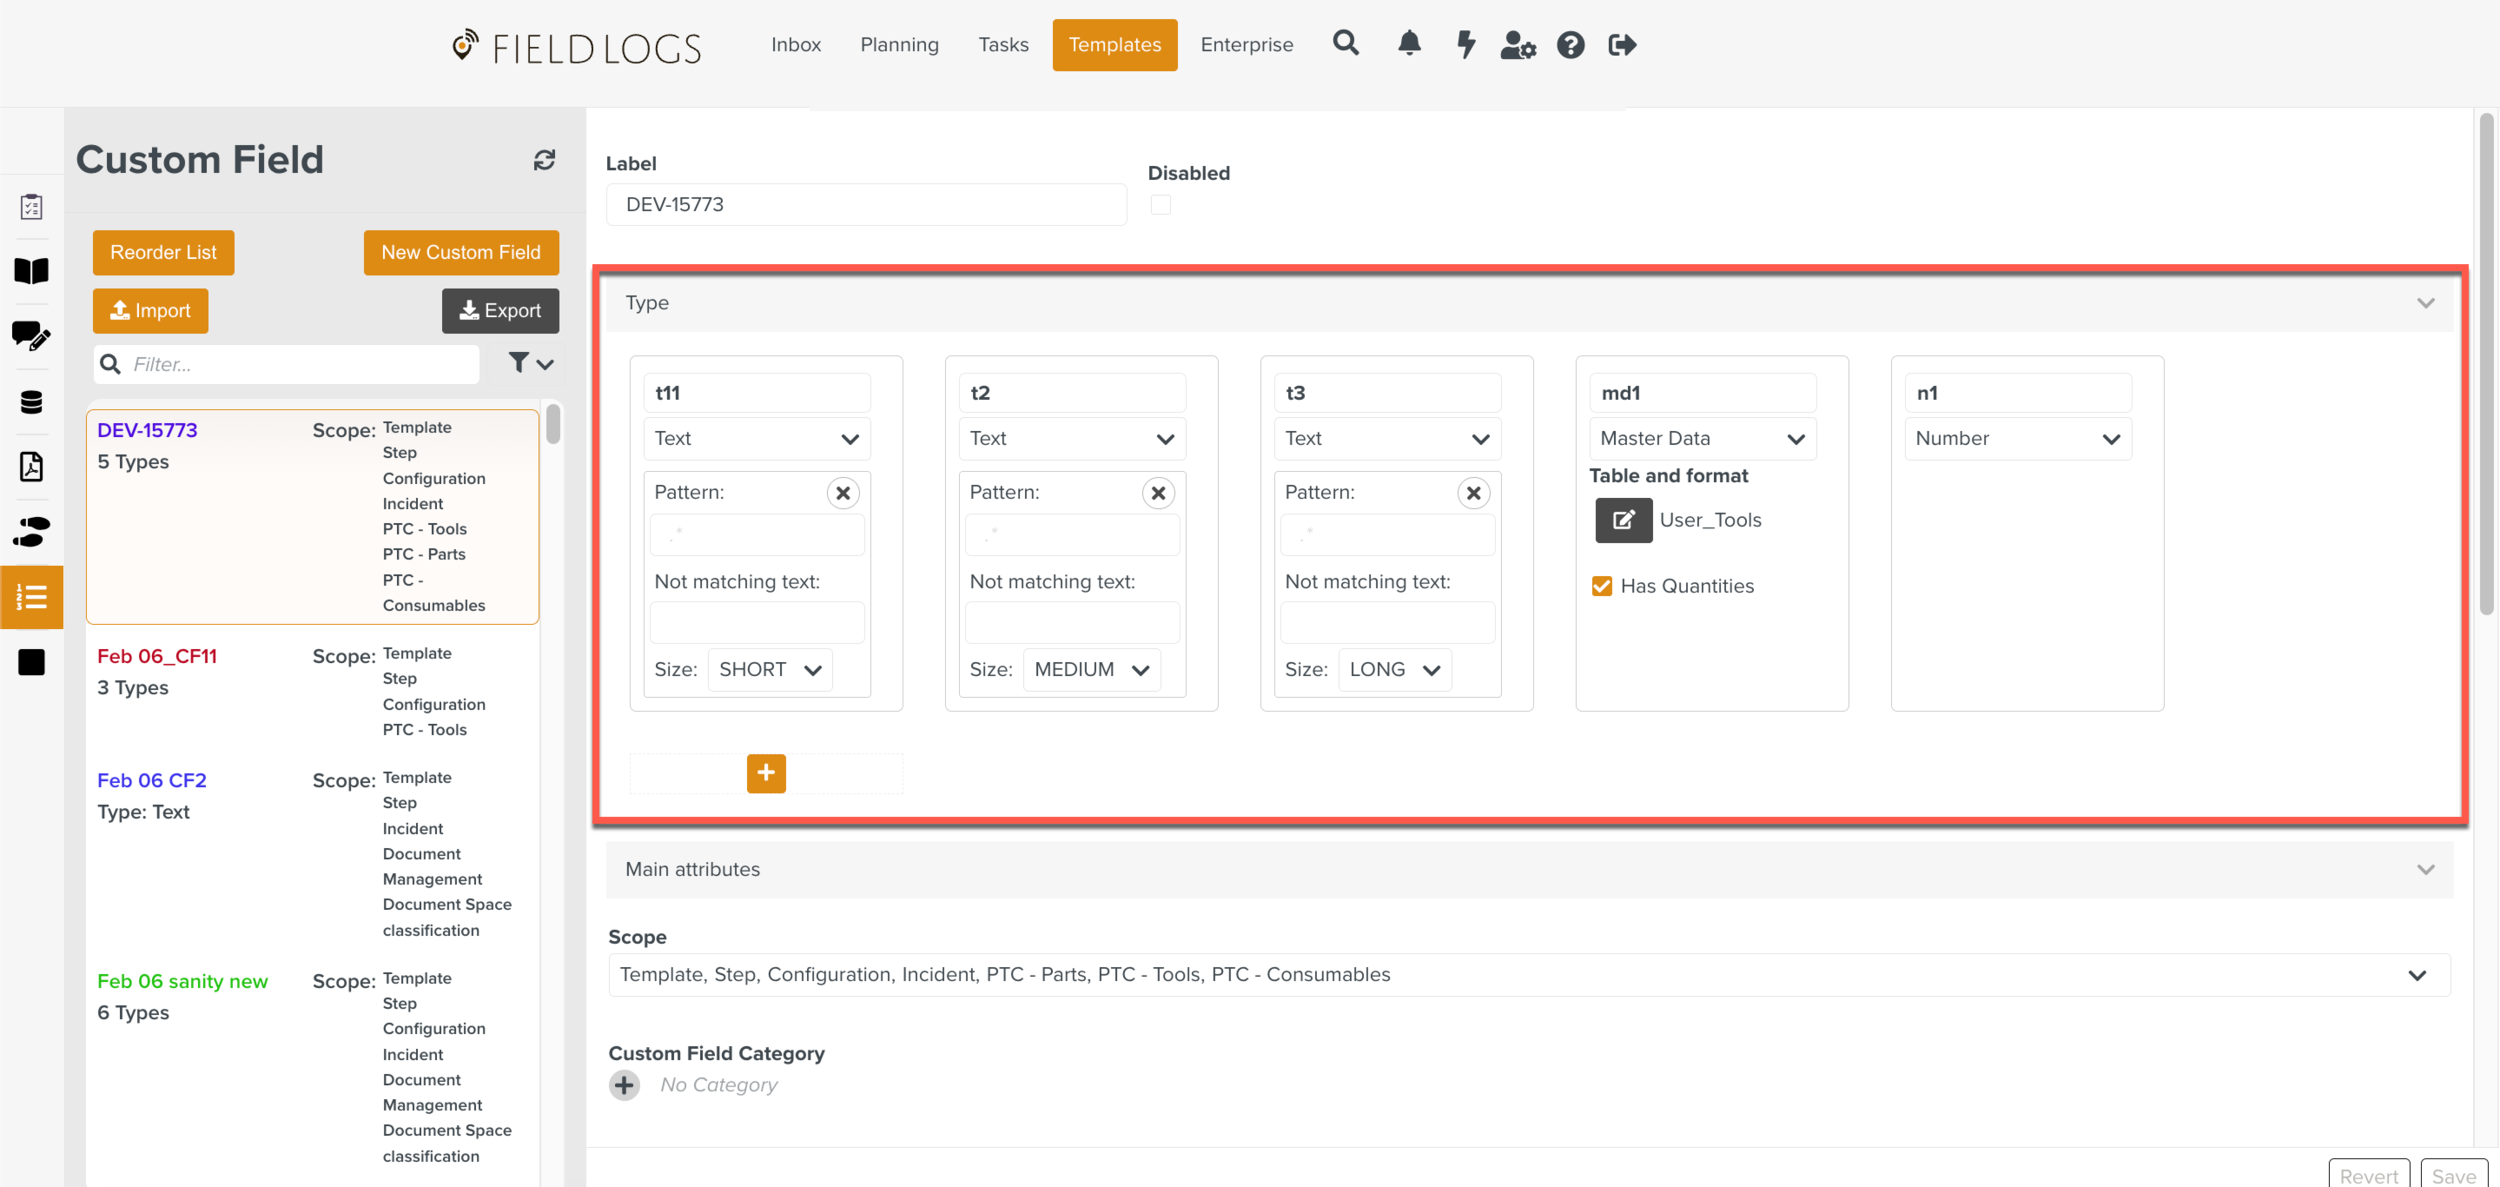
Type
Choose the field type from the dropdown list. The type can be:
Text - Allows you to enter numbers, letters, and special characters.
Number - Allows you to enter only numerical values.
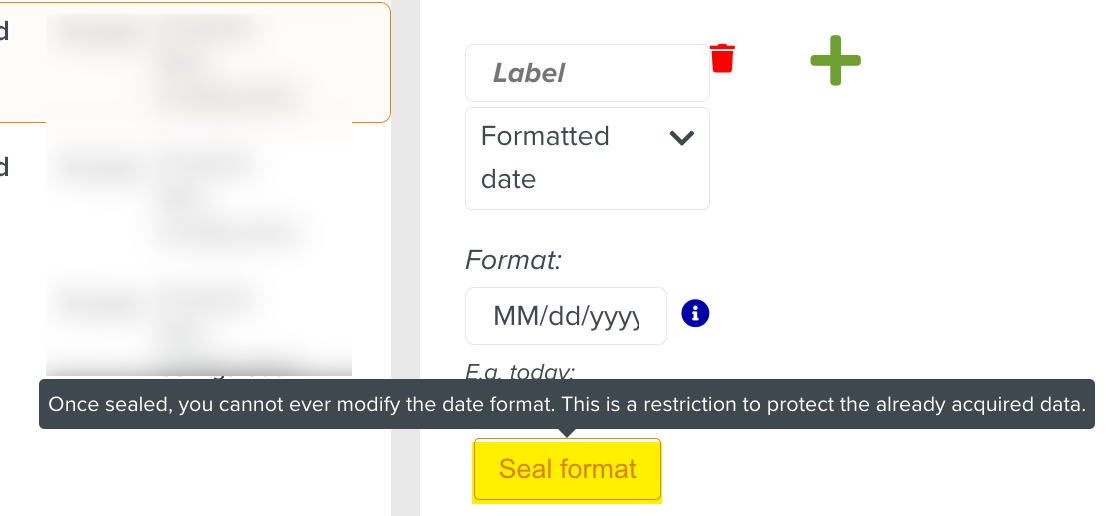
Date - Allows you to specify a date.
Formatted Date - Allows you to seal the format as MM/dd/yyyy.
If Seal Format is clicked, the date format cannot be modified anymore.
 - Adds another type to the Custom Field.
Boolean - Displays a checkbox.
Master Data - Fetches data stored in Objects.
Hyperlink - Allows you to add links.
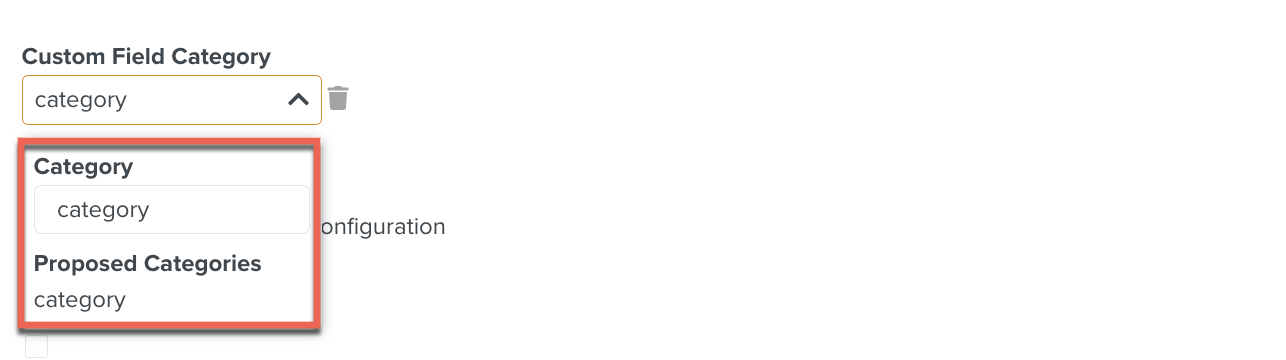
Custom Field Category
Select a Category or Proposed Category from the list as shown below.
Previously created Categories appear under Proposed Categories.
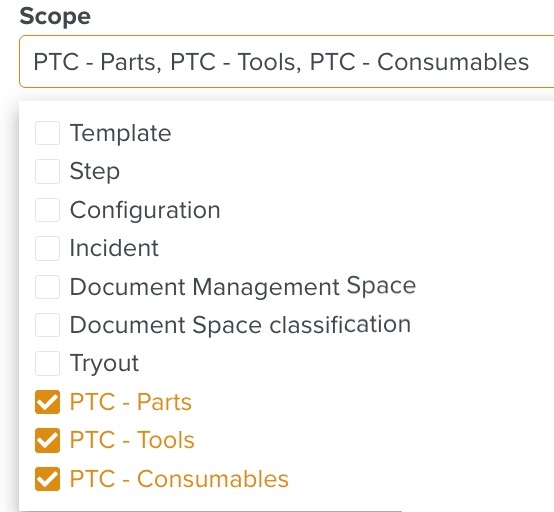
Scope
Check the required options to specify where the Custom Field is to be used.
Infinite
Checking this option enables the user to add multiple lines or rows of values to the Custom Fields when added to the Template.
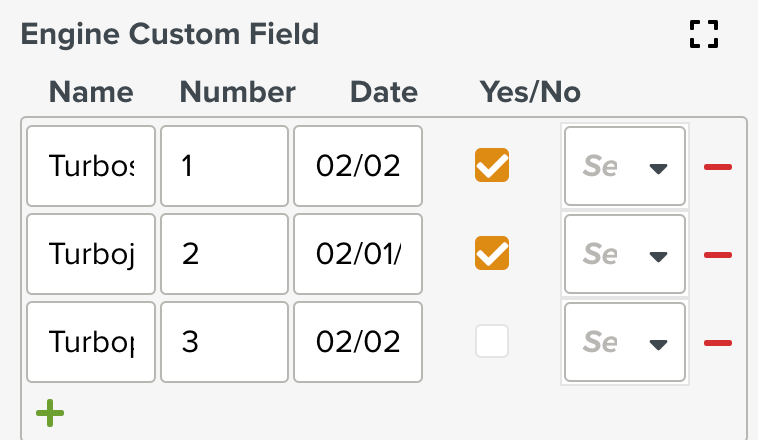
In the following example, a Custom Field has three lines of values.

Mandatory
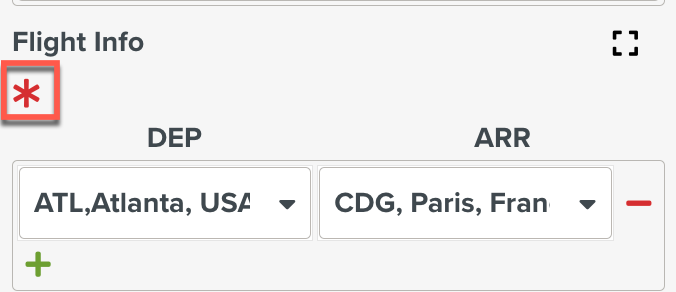
When you select the checkbox, it indicates that Custom Field is mandatory at Step/Template.
Display on Standard Steps
Select the checkbox if you want the Custom Field to be displayed on Standard Steps.
This option will be enabled only when the Custom Field has Step as scope.

Auto managed
Select the checkbox if you do not want the Custom Field to be editable. This will make the Custom Field Read-Only.
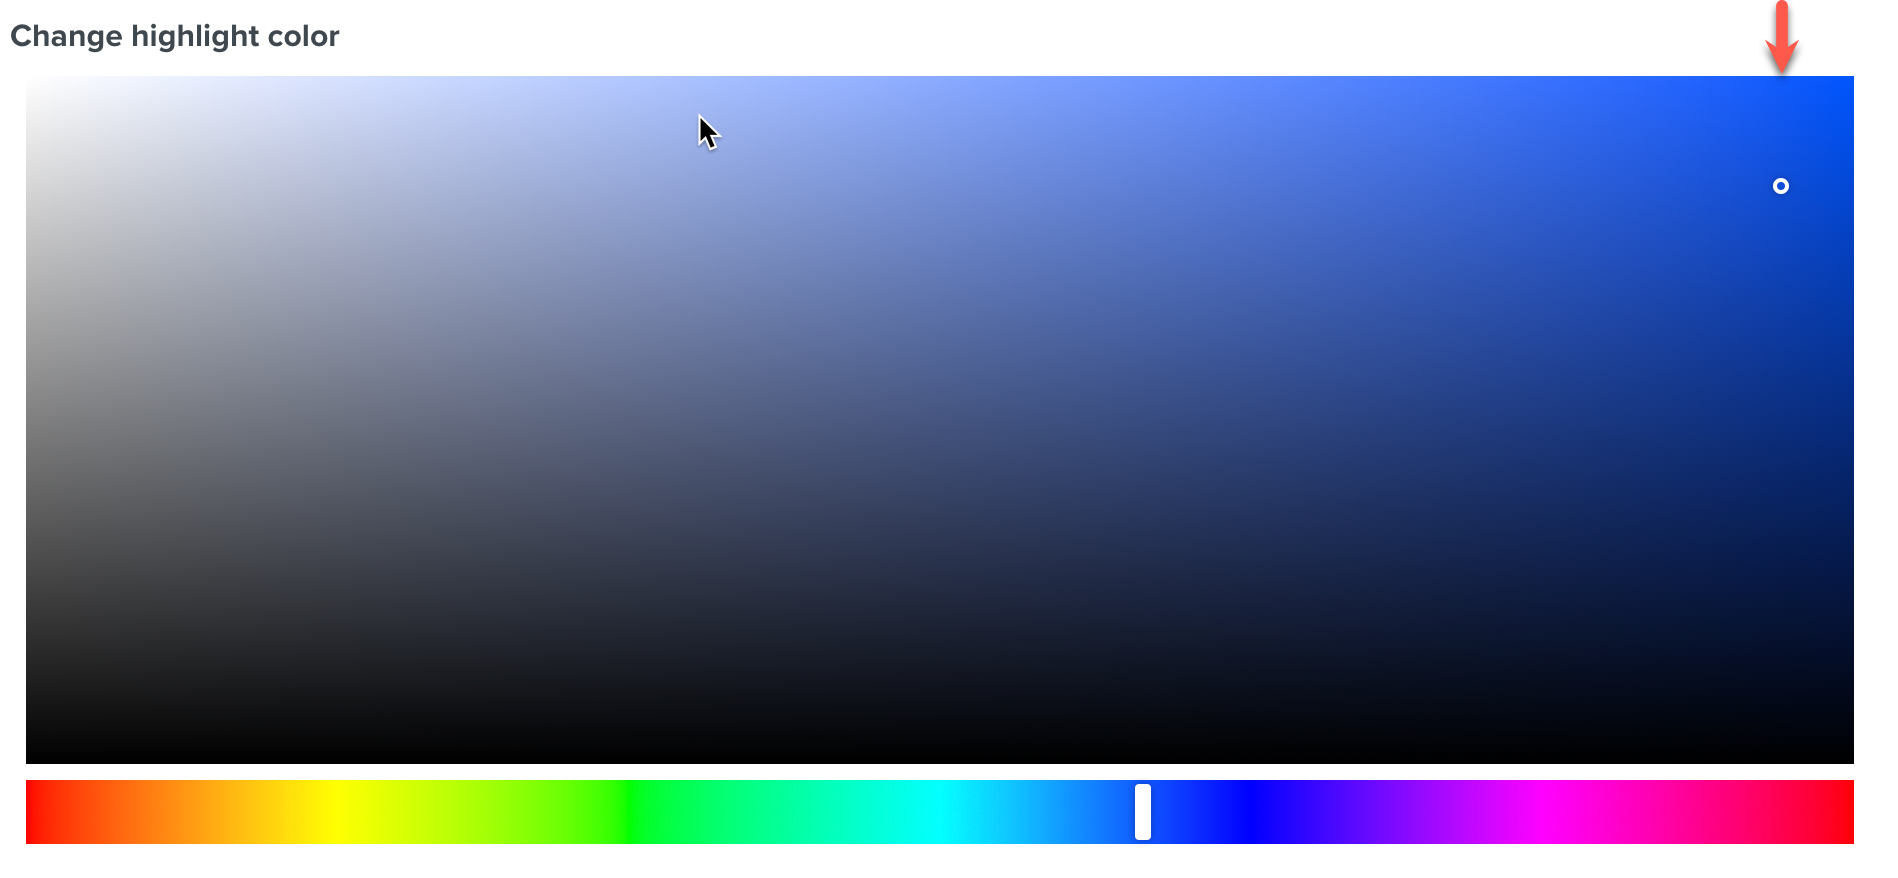
Change highlight color
Add a Color Property/Picker to the Custom Field definition to display a highlighted color on the Editor screen.
Click .
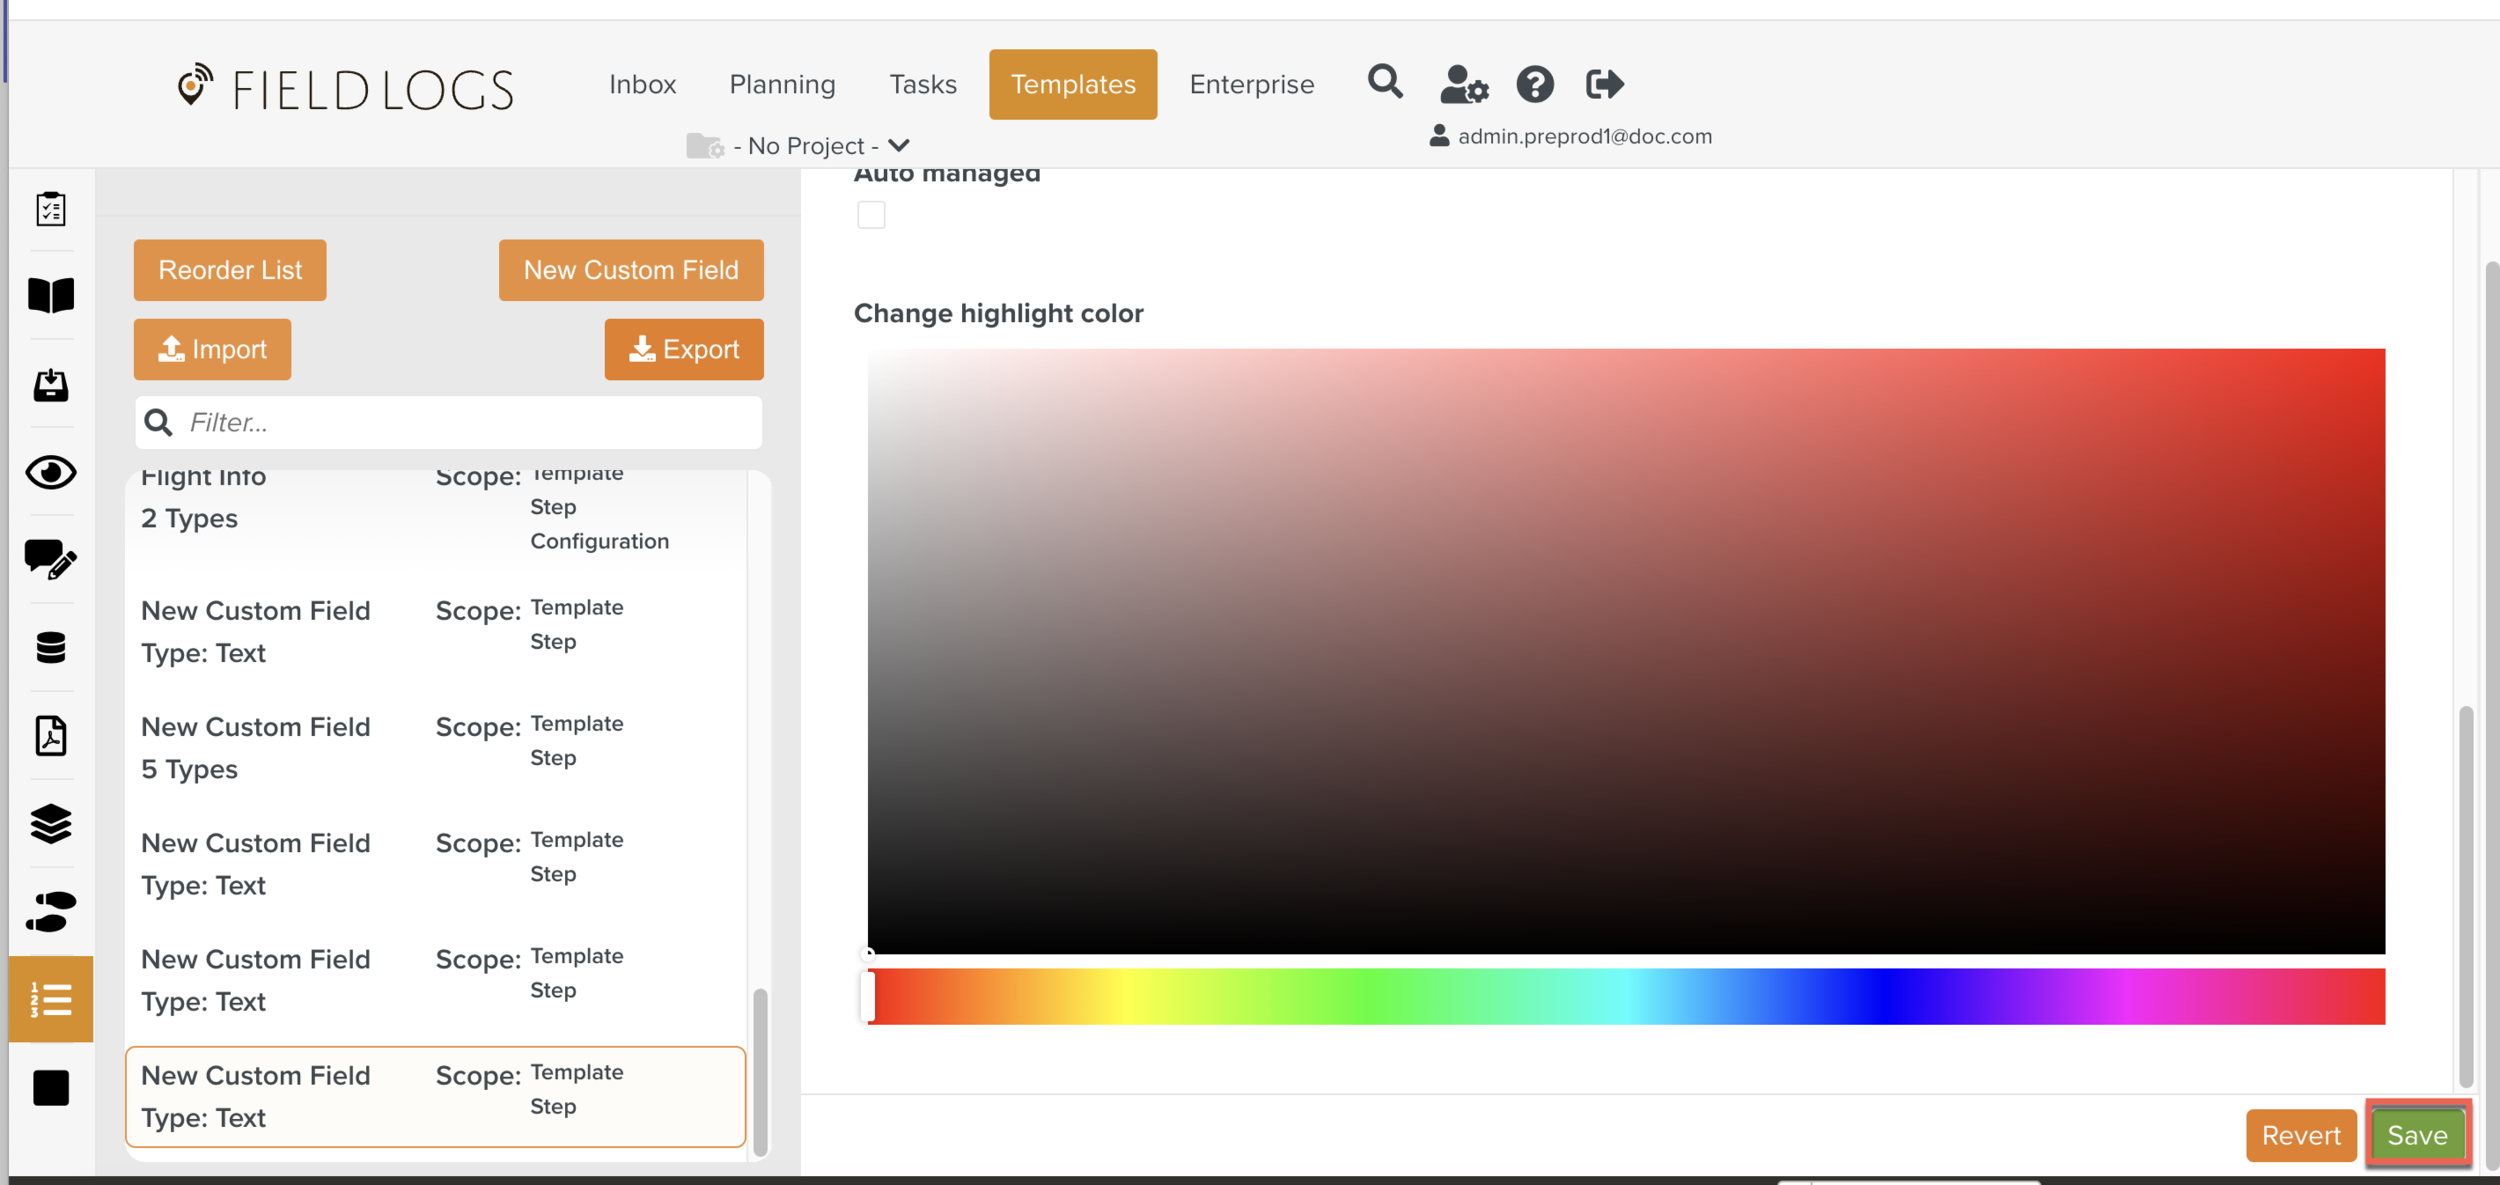
The Custom Field is created and is visible in all the Templates.

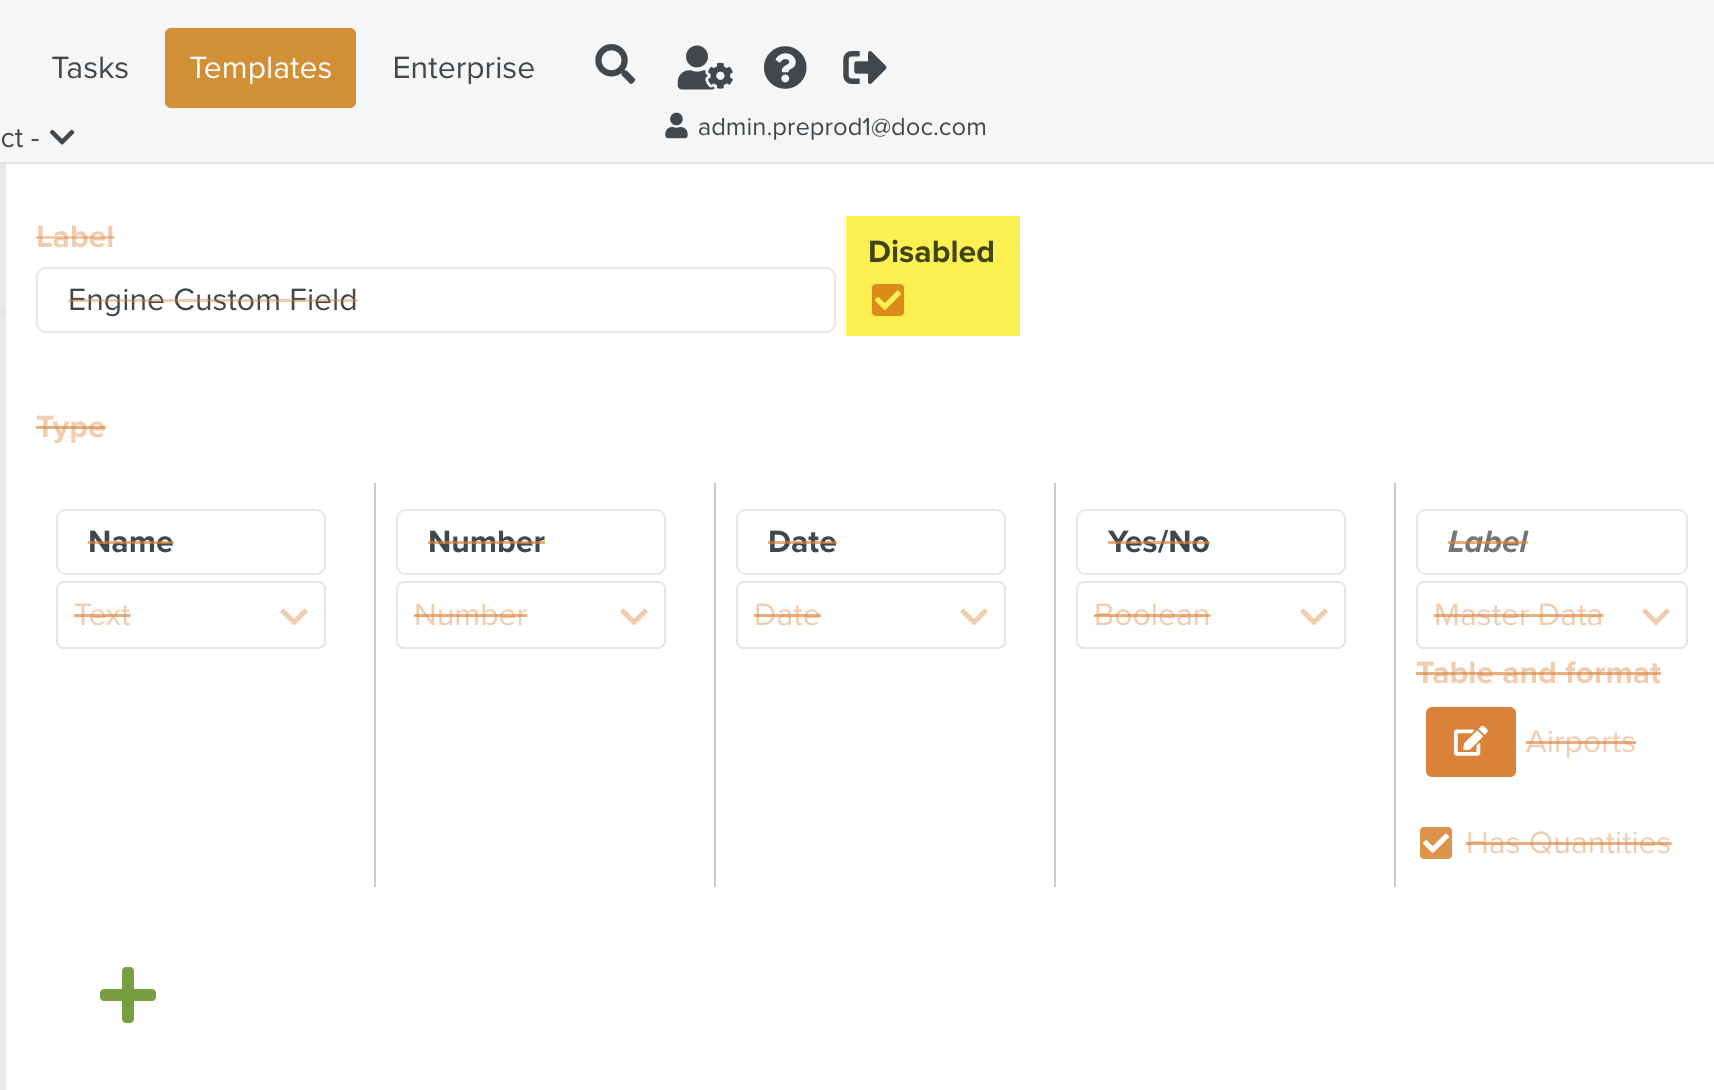
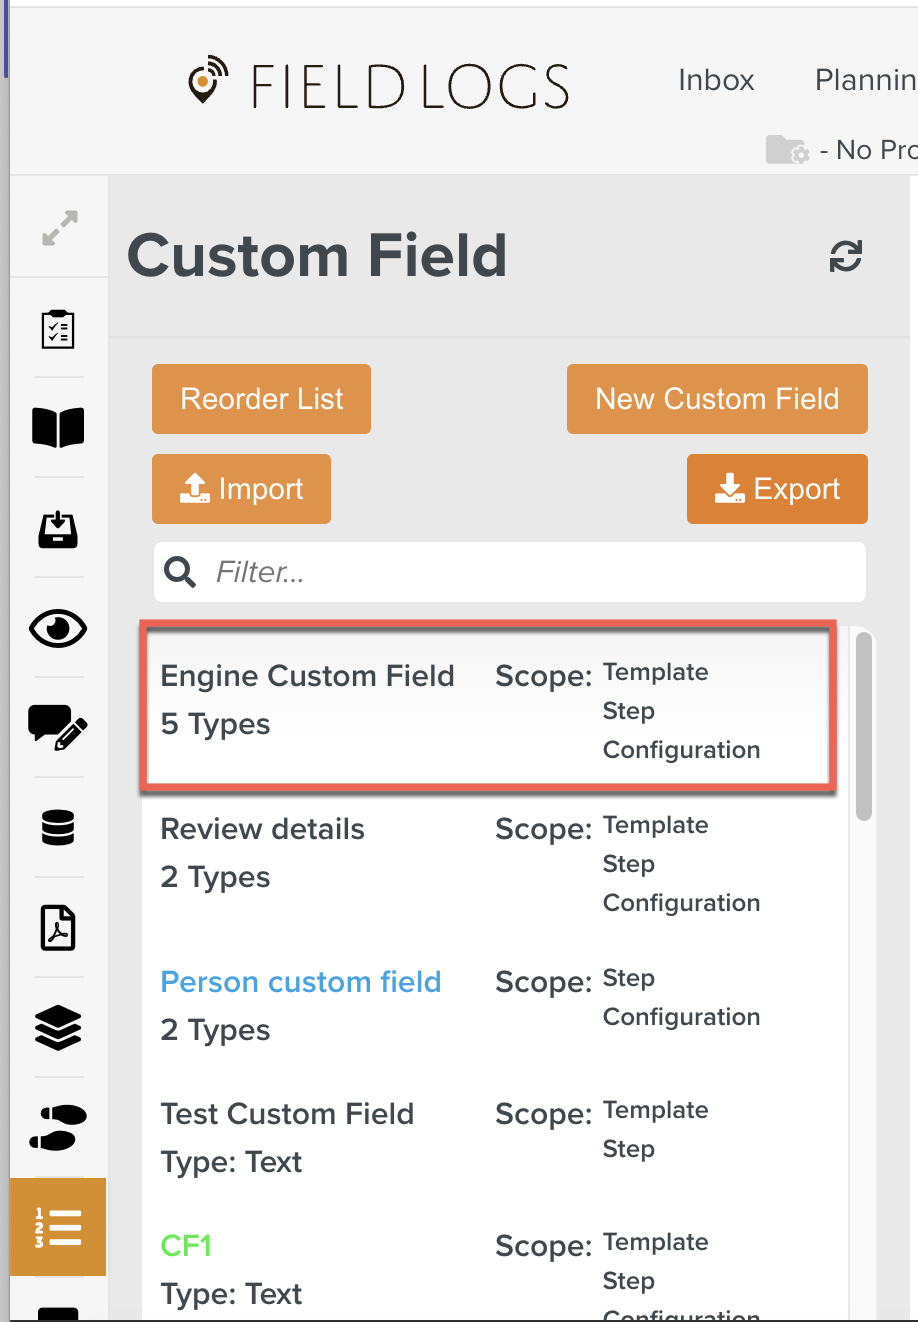
Check if the Custom Field is no longer required. Once disabled, the Custom Field will no longer appear in the Template Properties.
In the following example, the Engine Custom Field has been disabled and is removed from the list of Custom Fields available to all Templates.
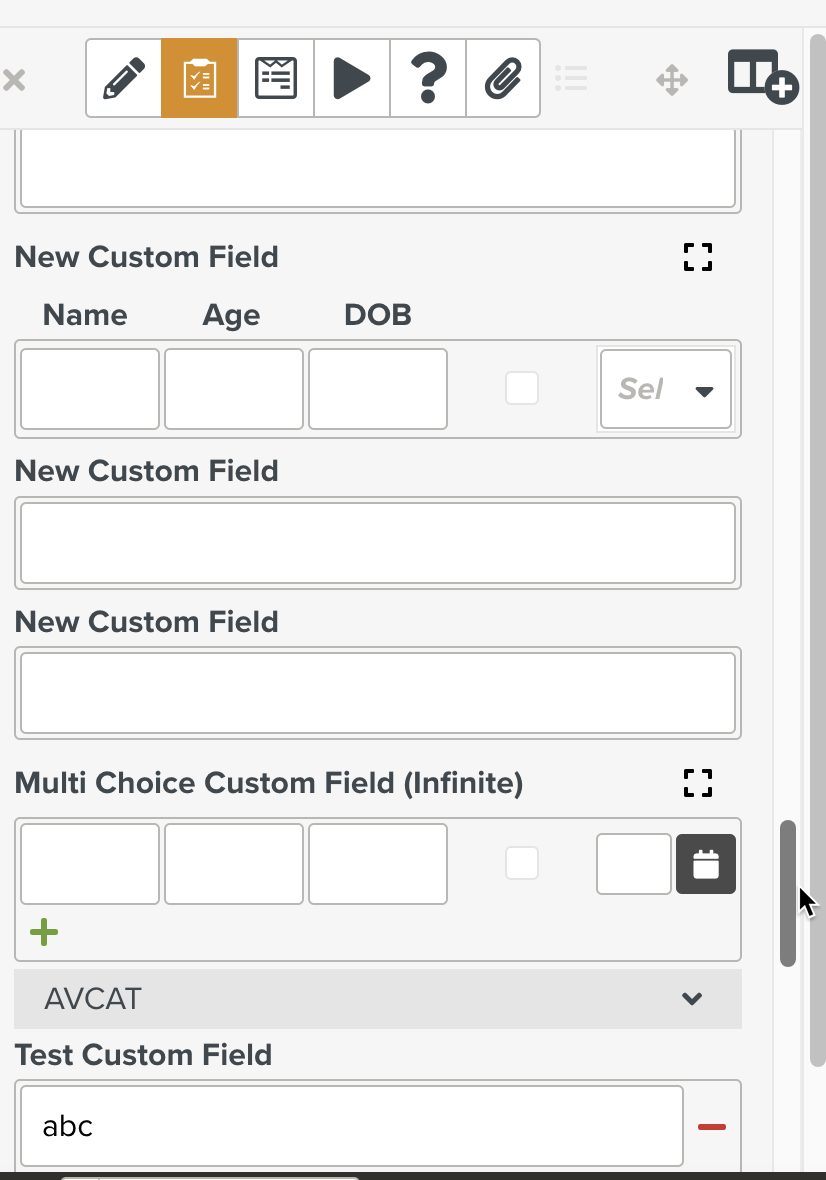
You can create Custom Fields that contain multiple data types.
 |
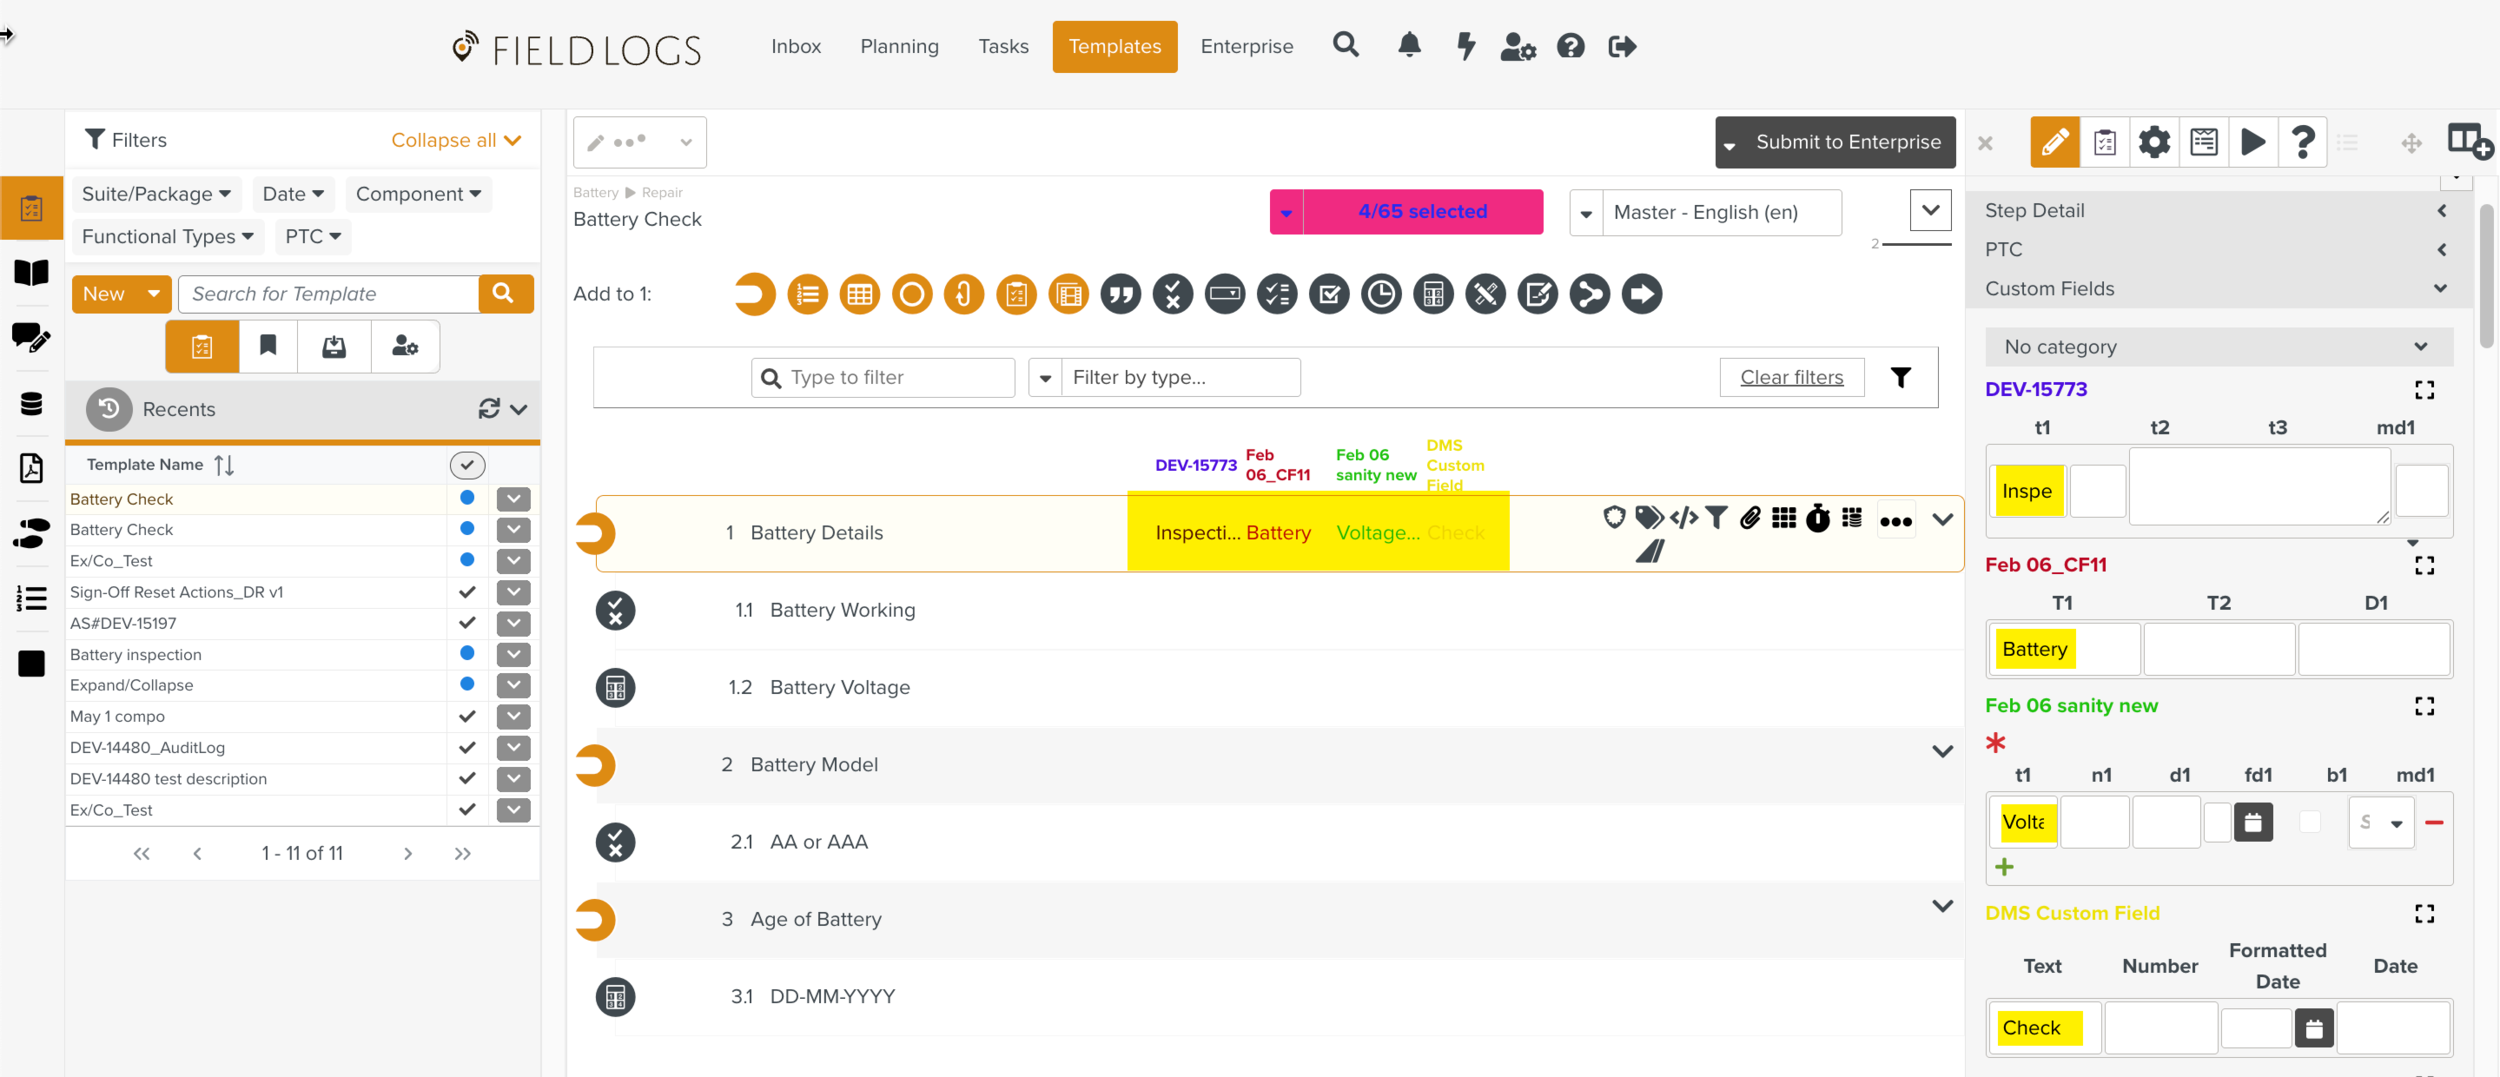
Custom Fields are added at the Step level during Template creation.
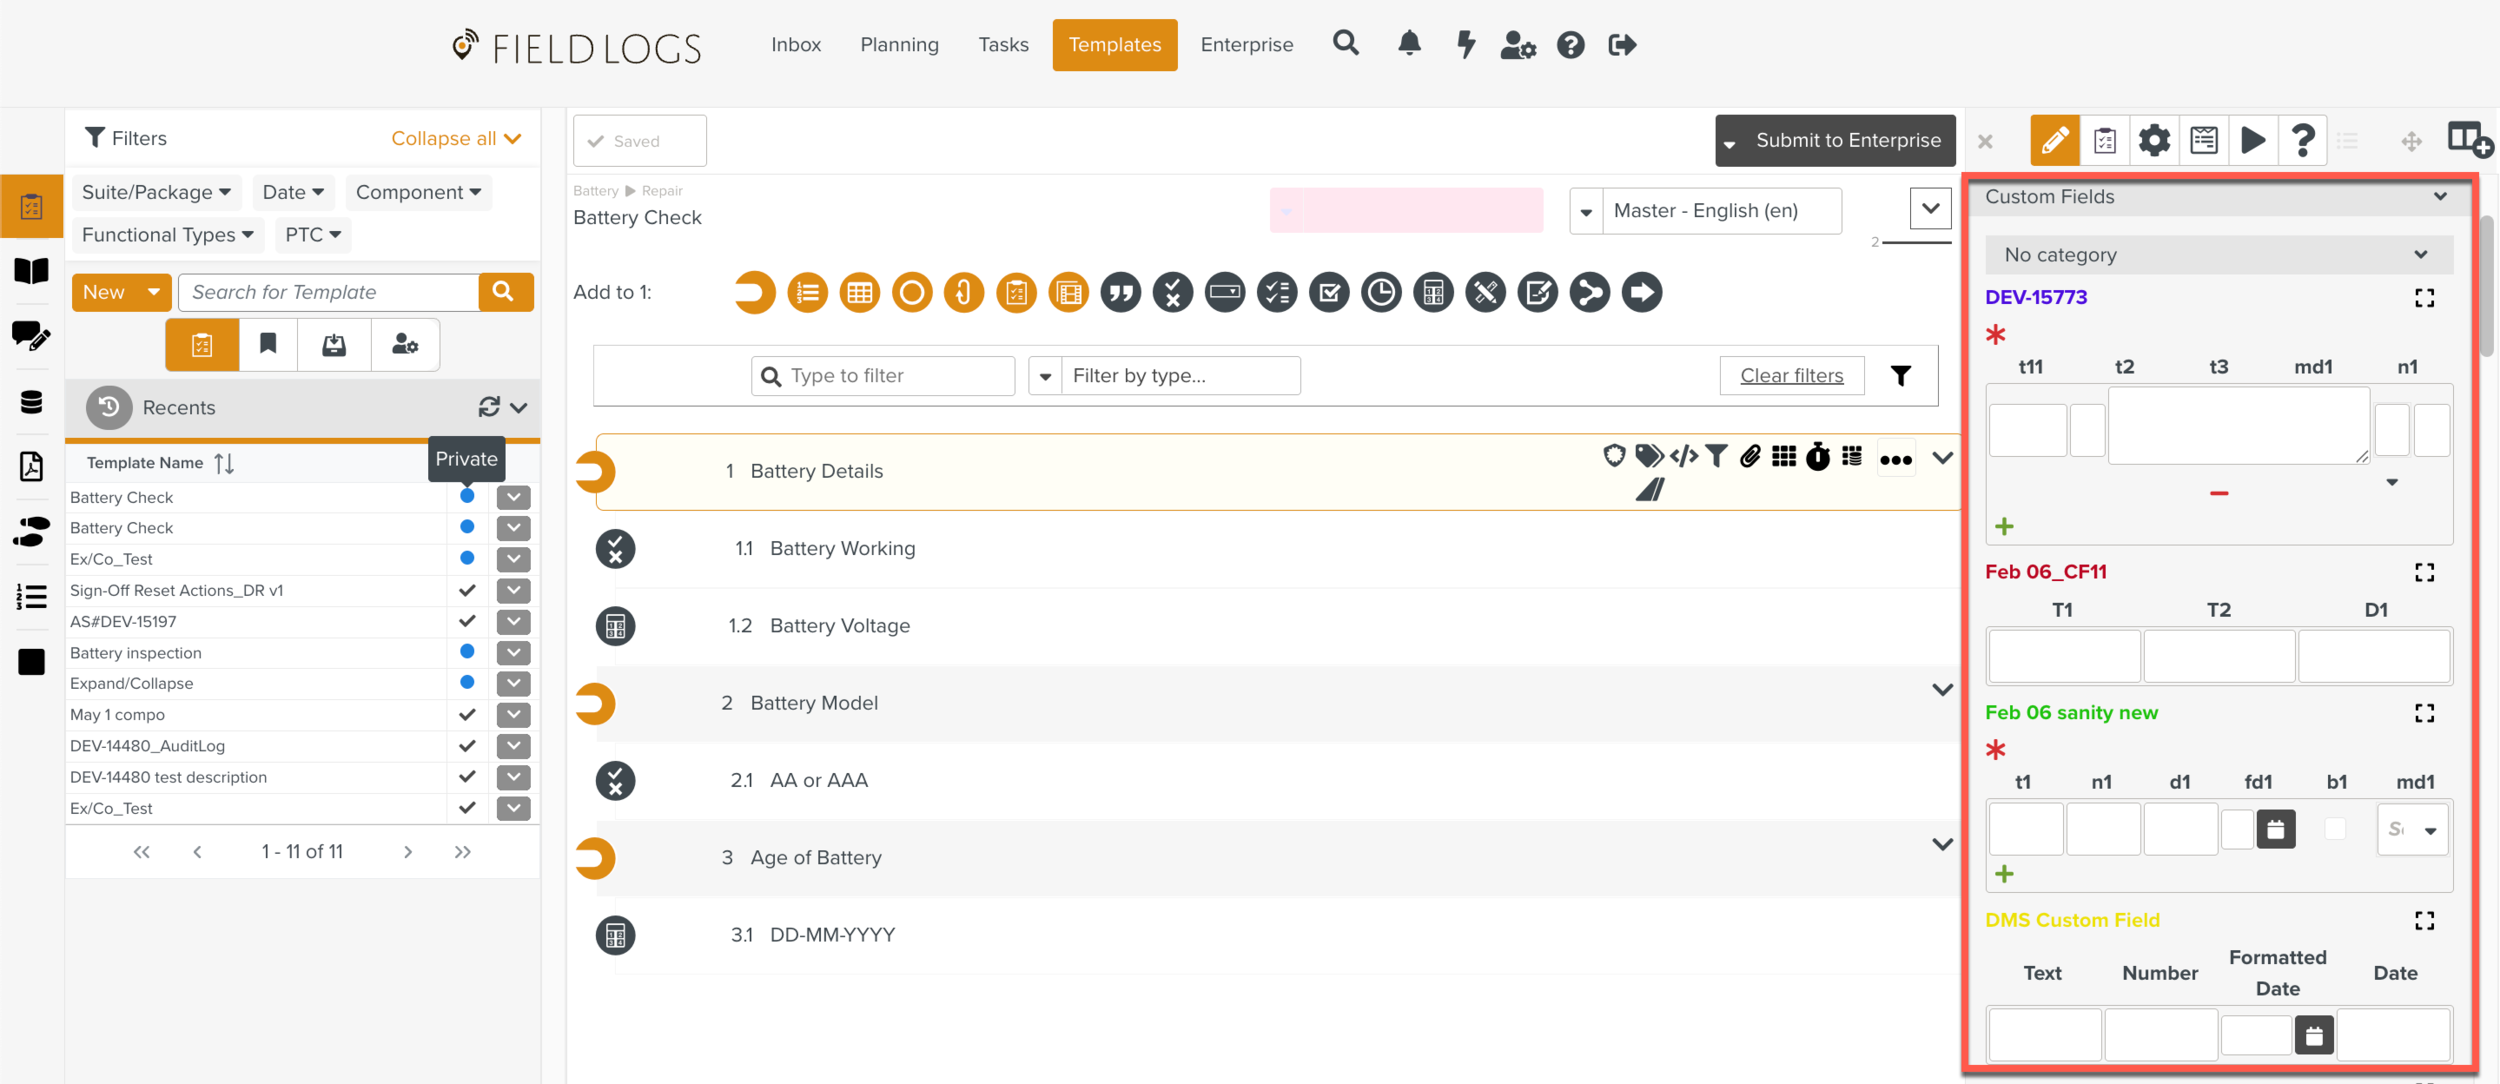 |
The Custom Fields added to the Step are displayed.
 |
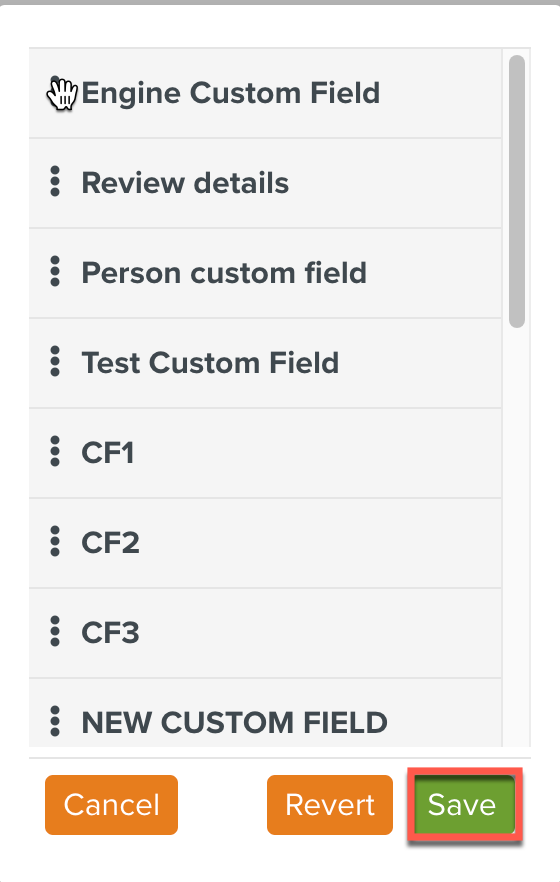
If you have more than one Custom Field defined, you can choose the order in which you want them to be displayed in a Template/Step.
Click .
 |
A dialog box is displayed.
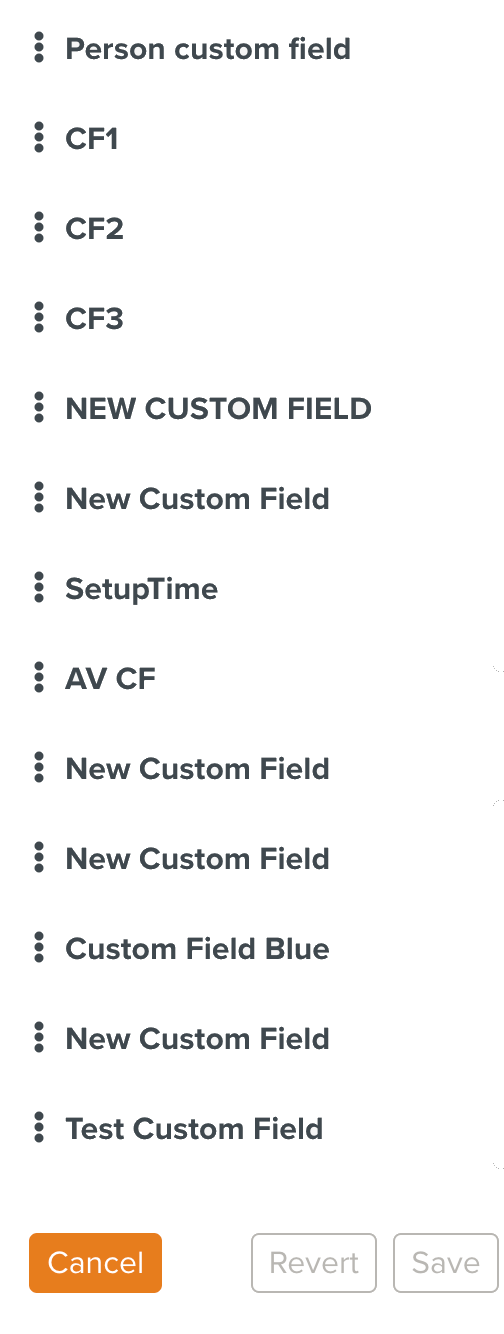 |
Place the cursor as shown below and drag it into the field as required.
 |
Click .
 |
Note
To cancel the reordering, click .
To return to the existing order, click .
The list gets reordered.
 |
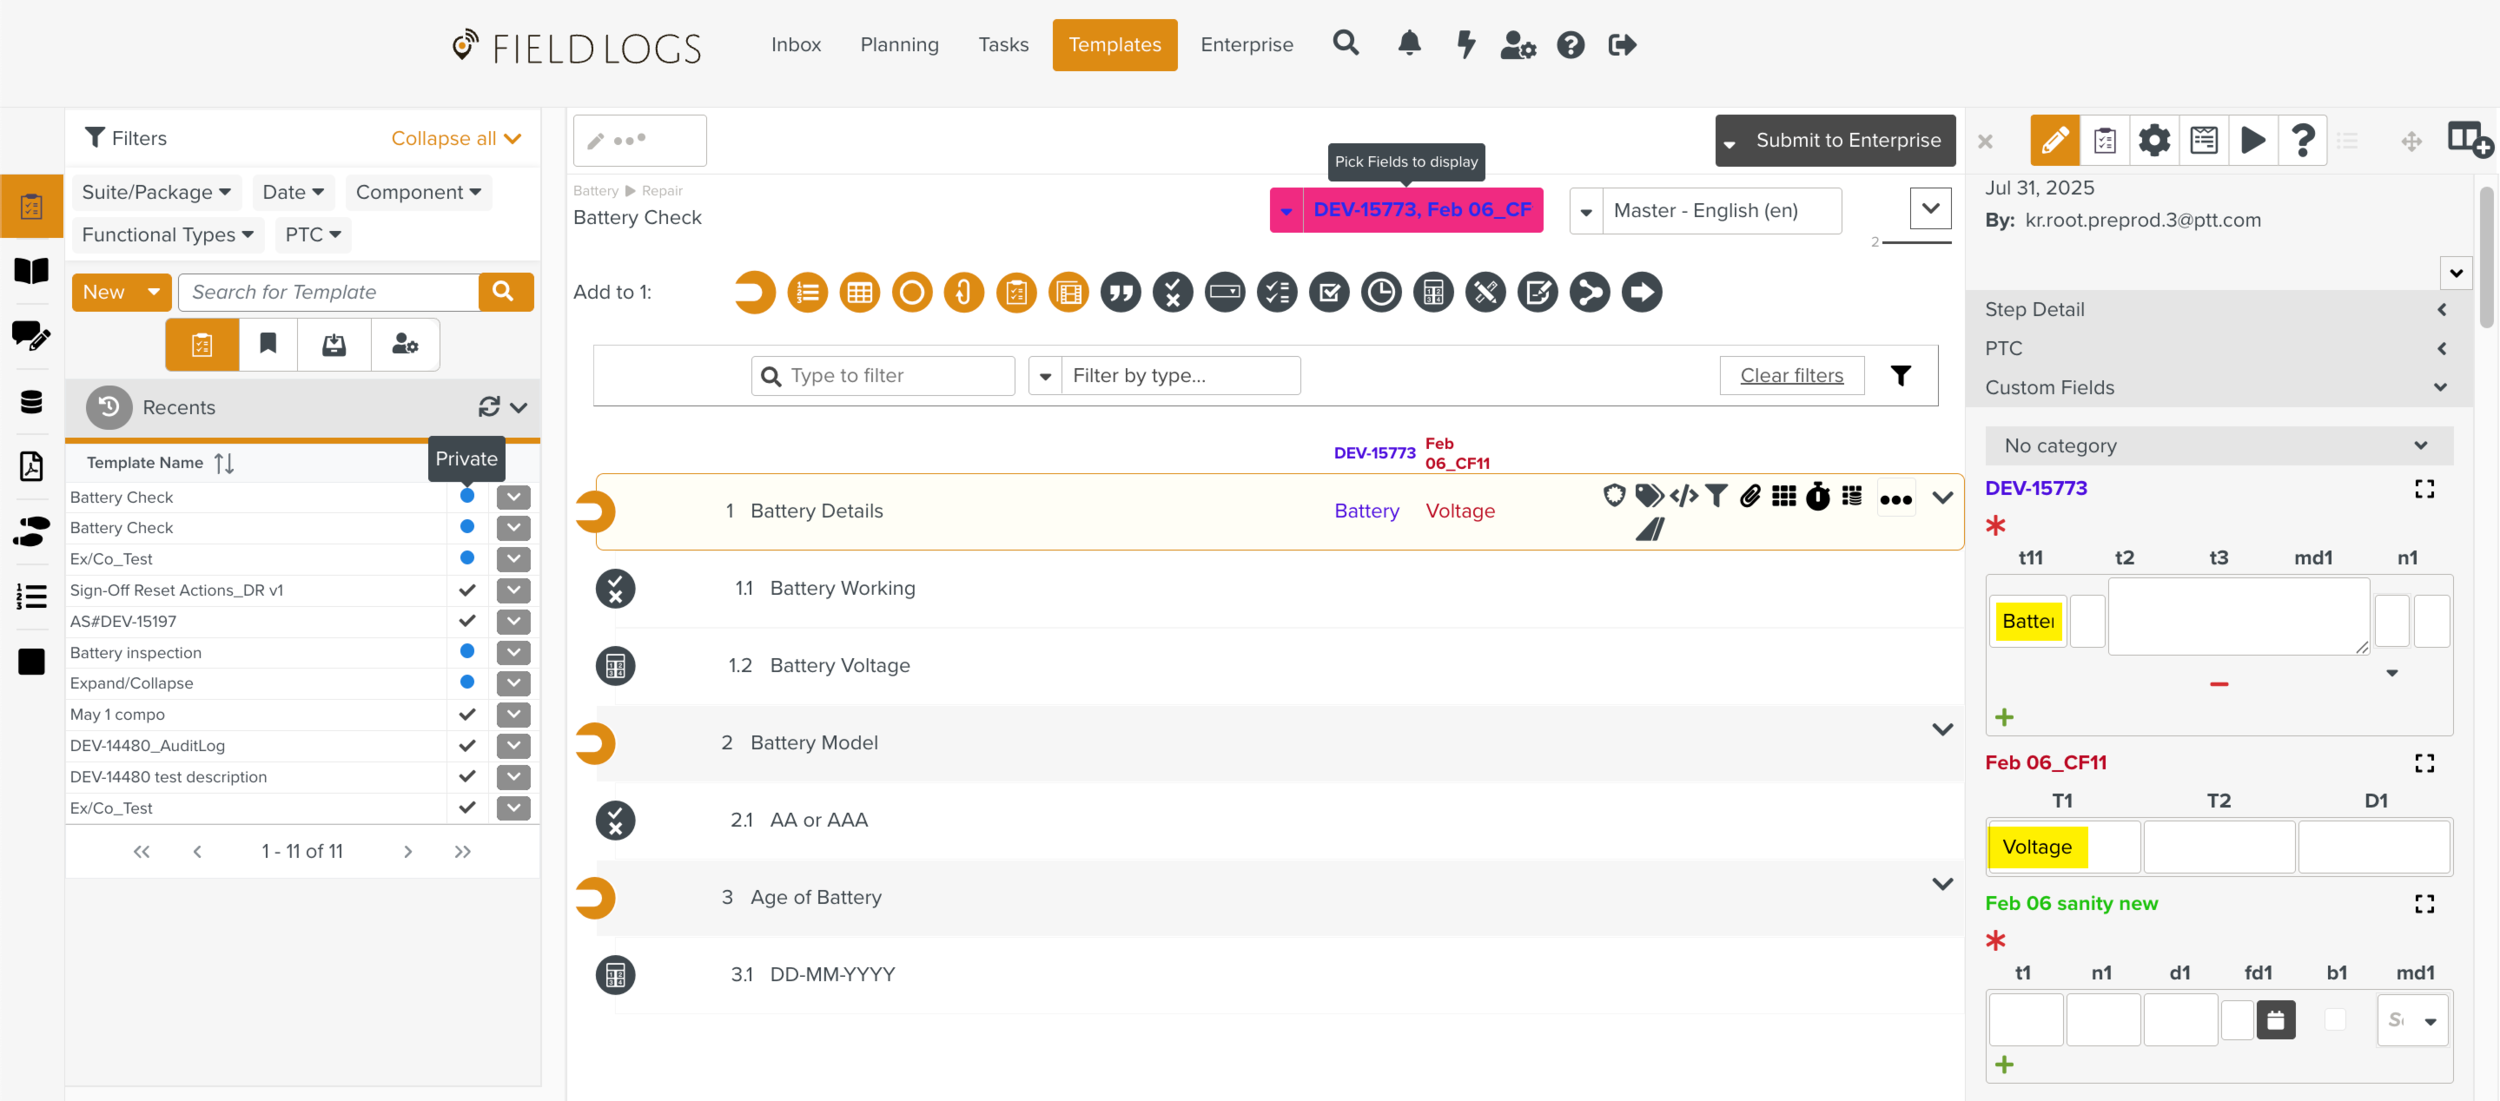
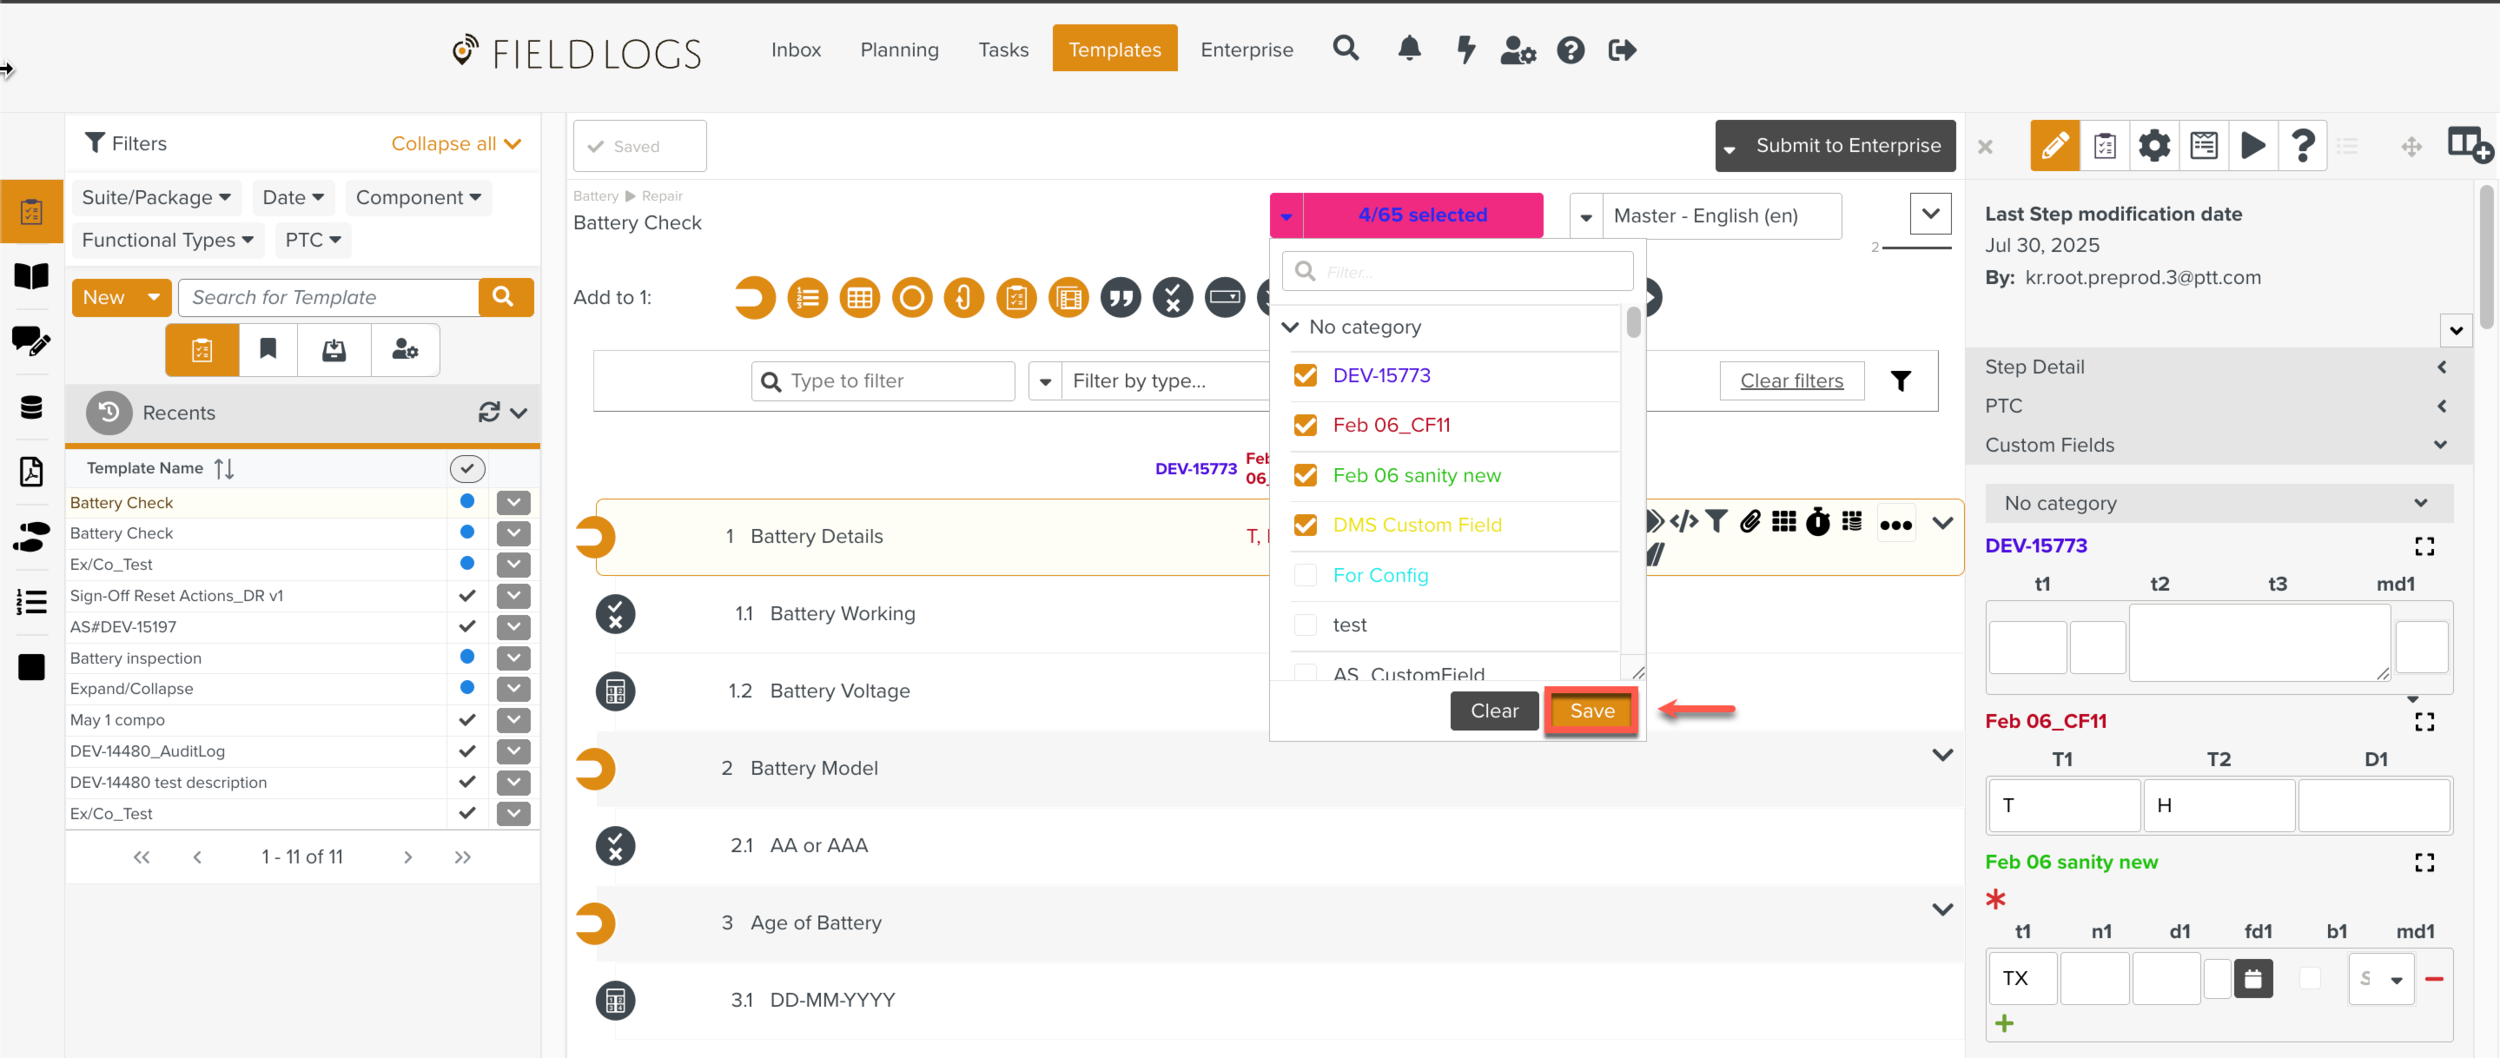
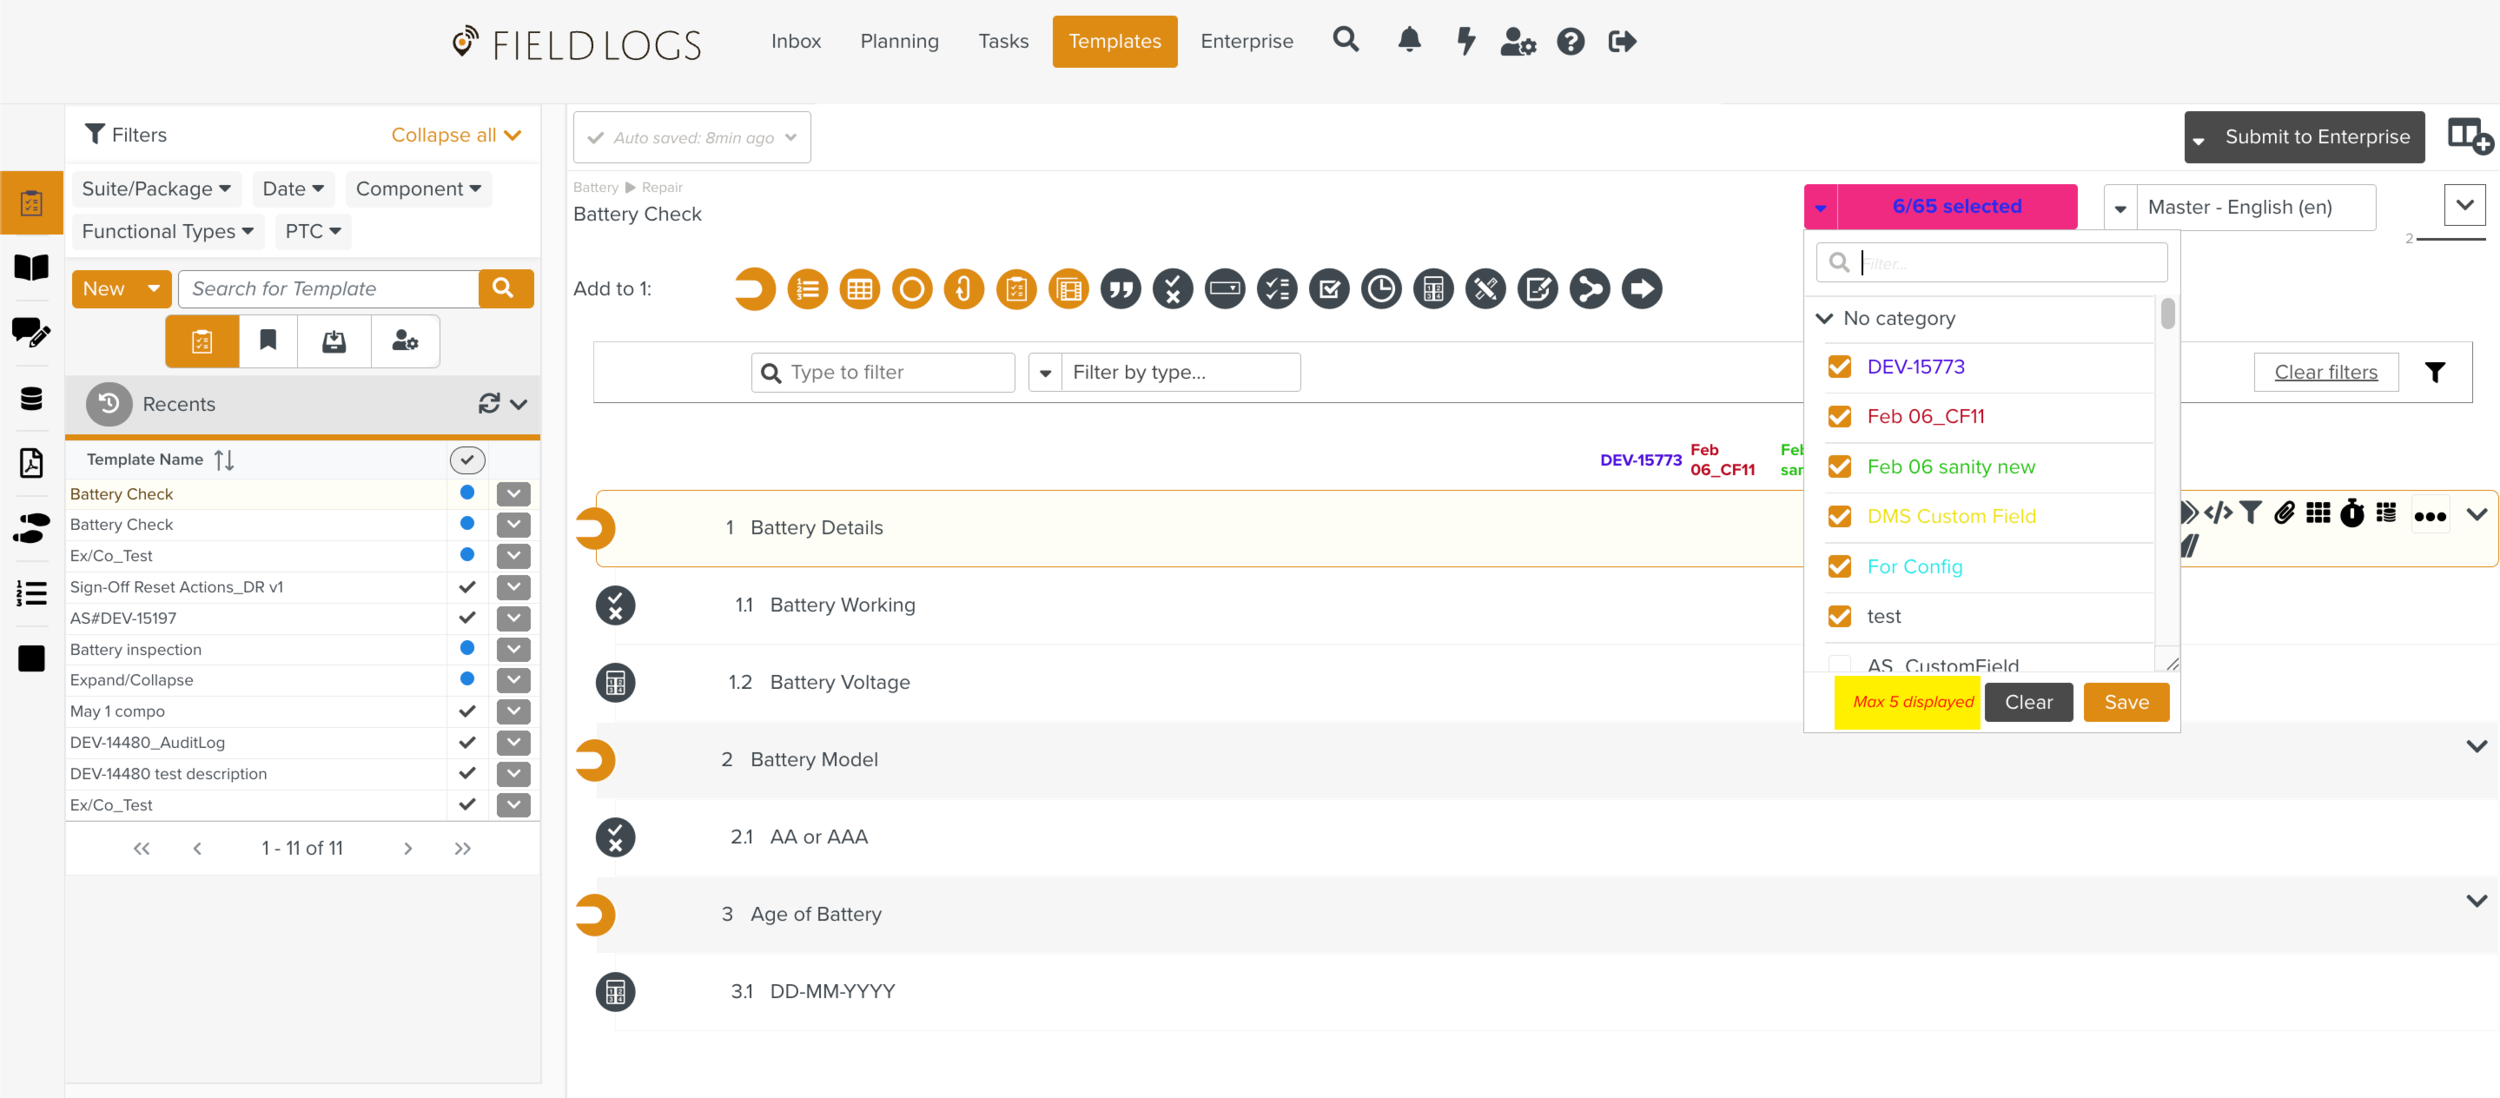
Custom Fields can be selected from the dropdown list available in the Workspace pane.
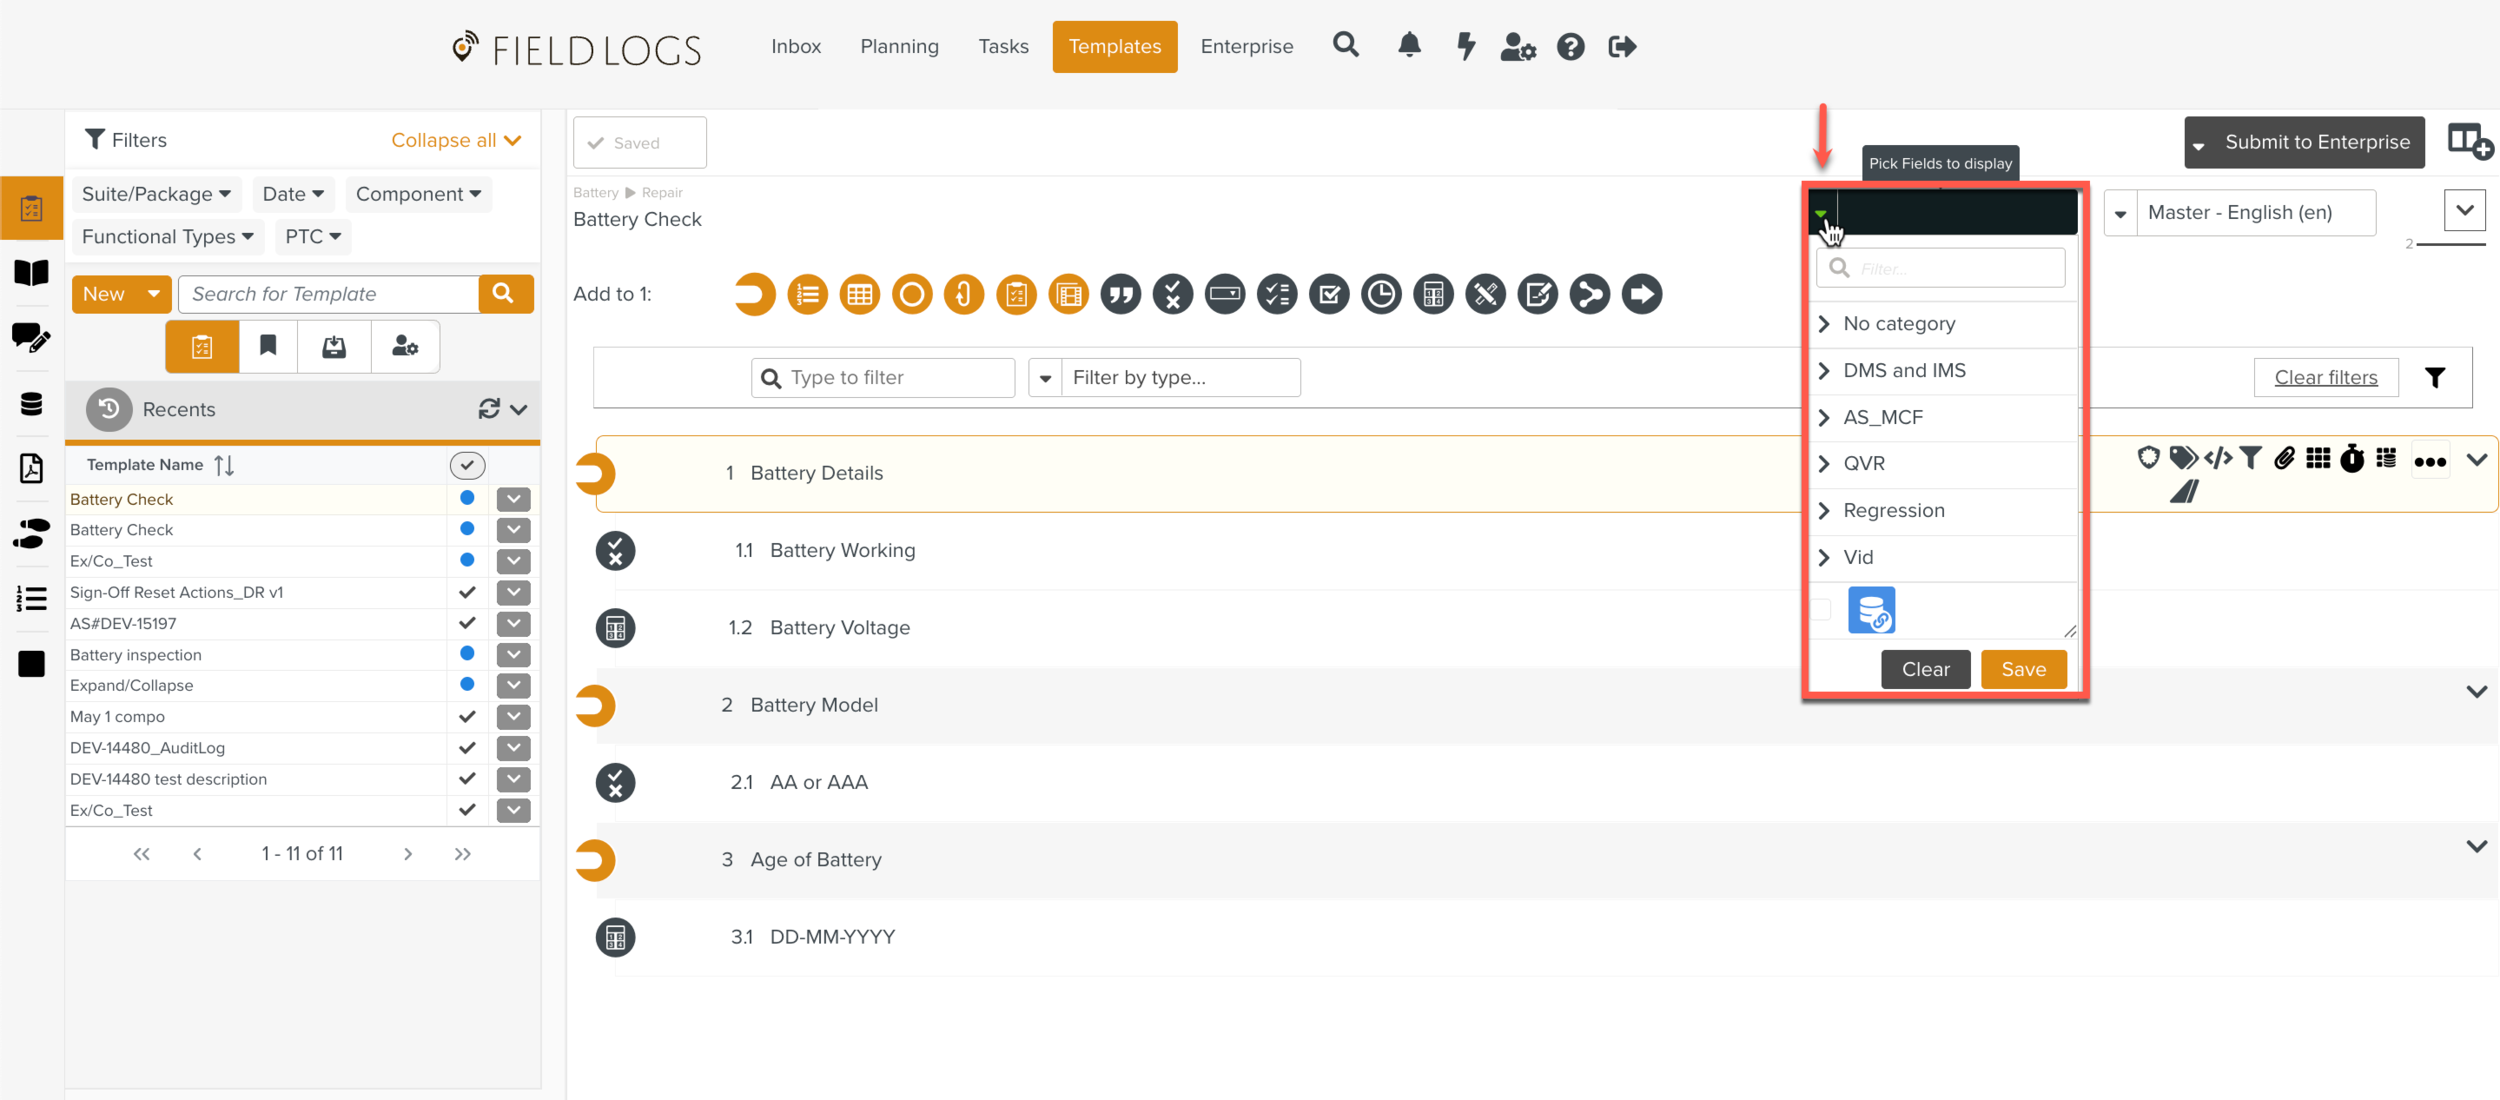 |
Select the desired Custom Fields and click Save.
 |
To remove all selected fields, click Clear.
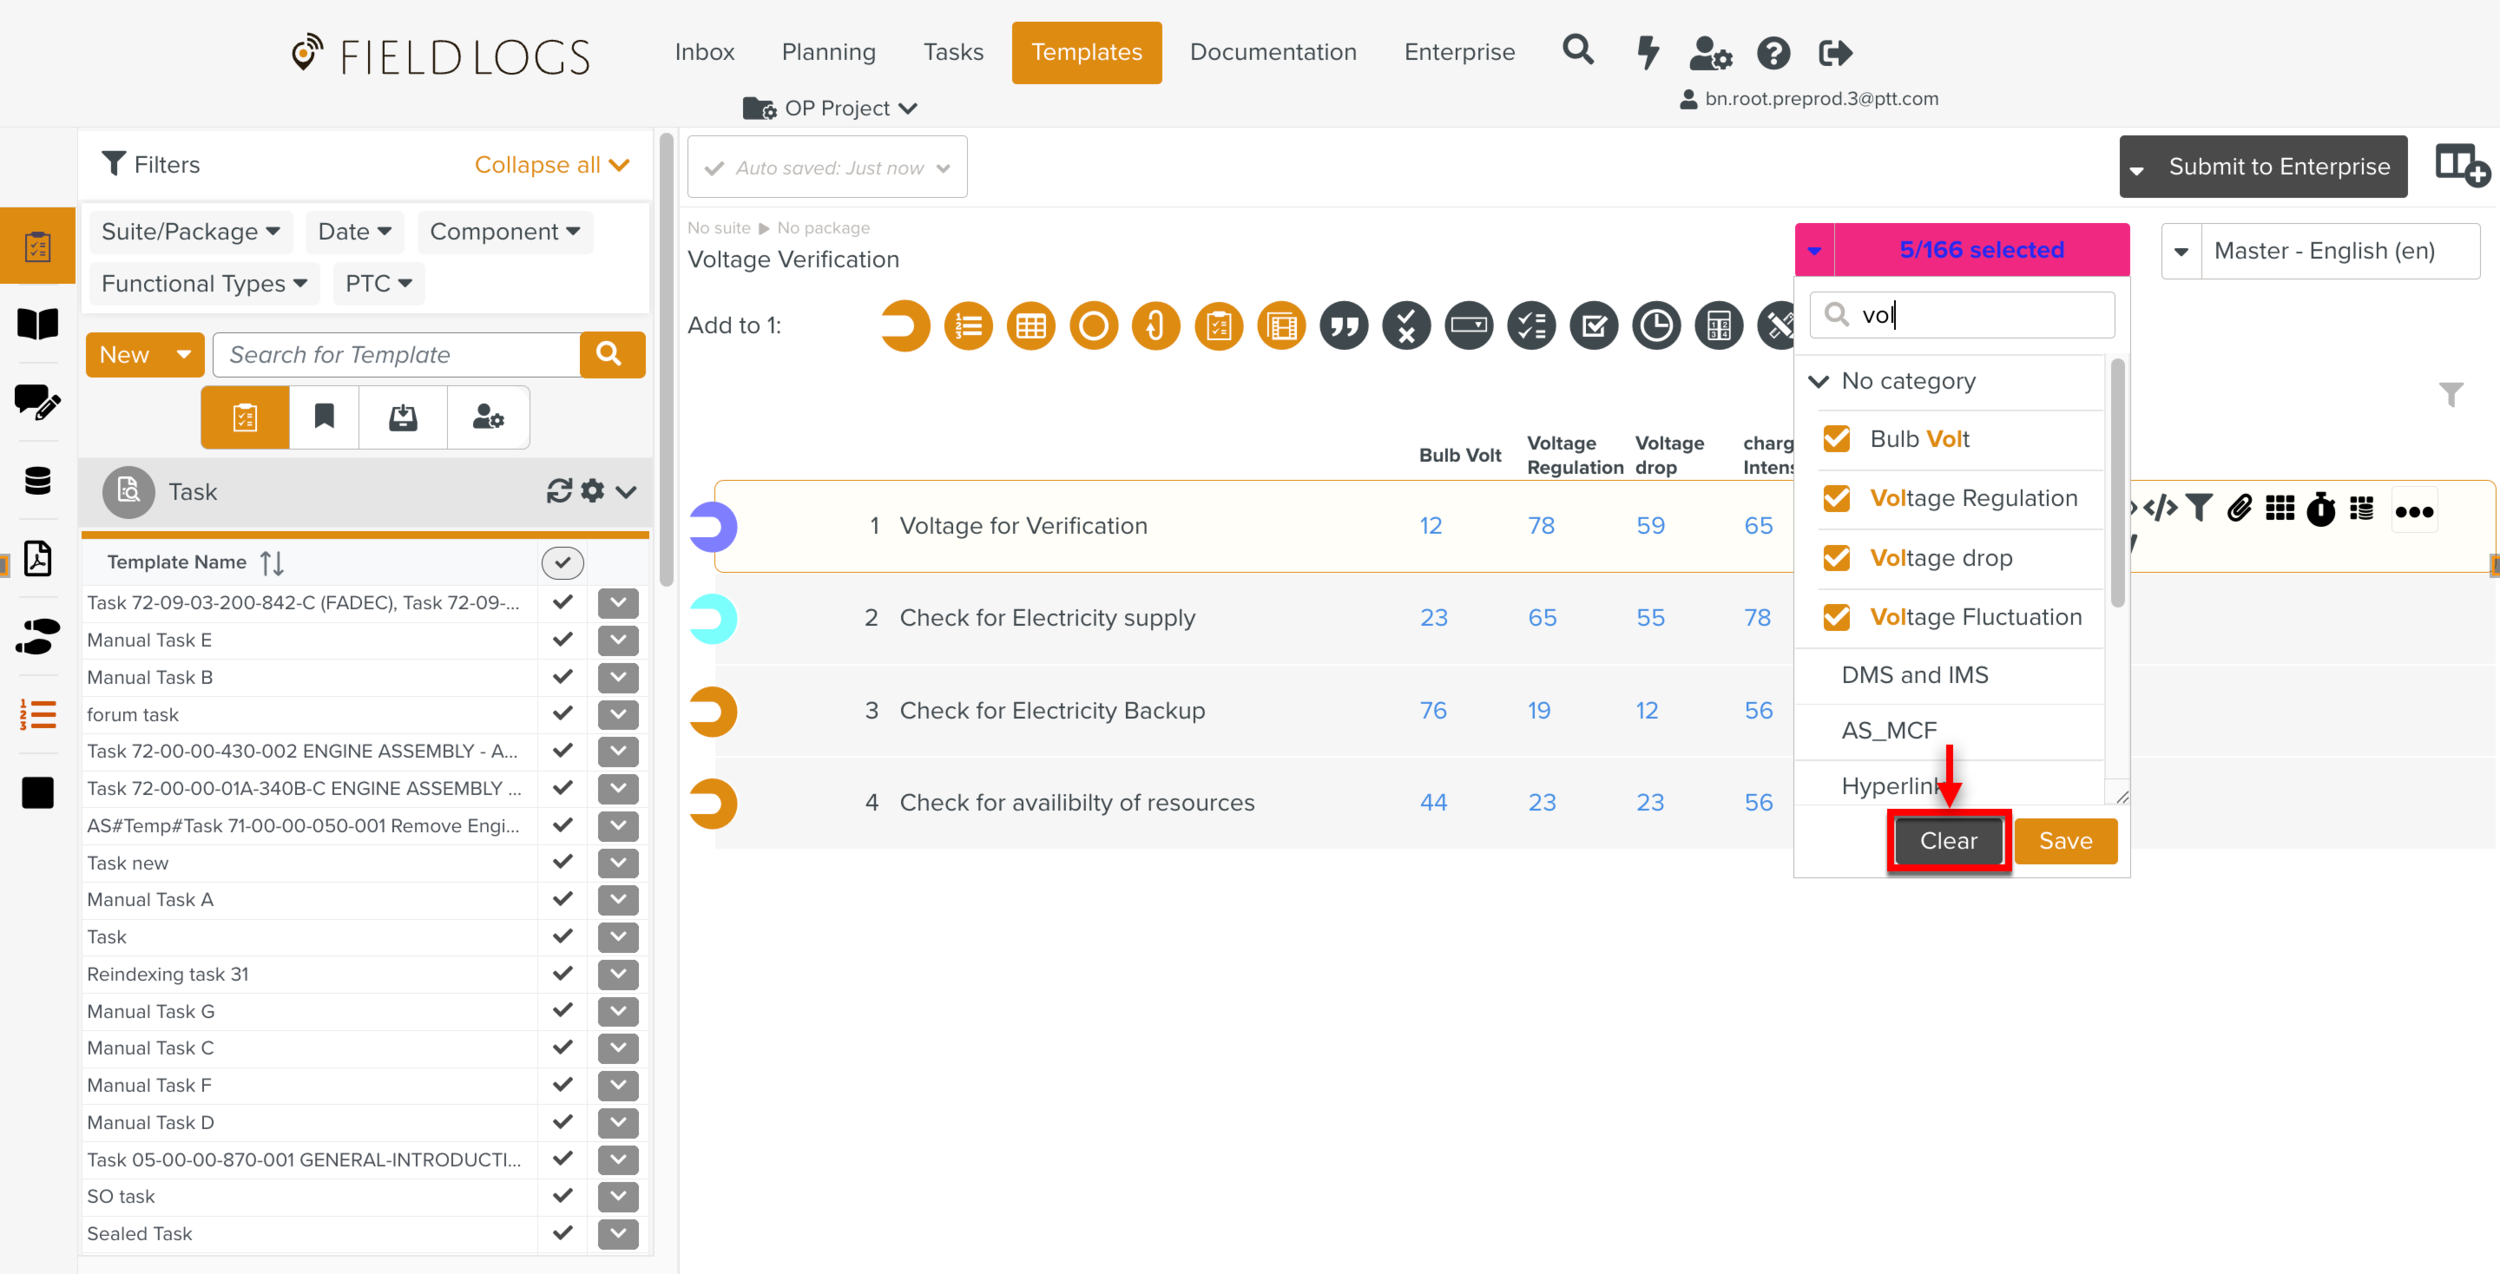 |
The selected Custom Fields appear as columns in the table view, titled by their field names.
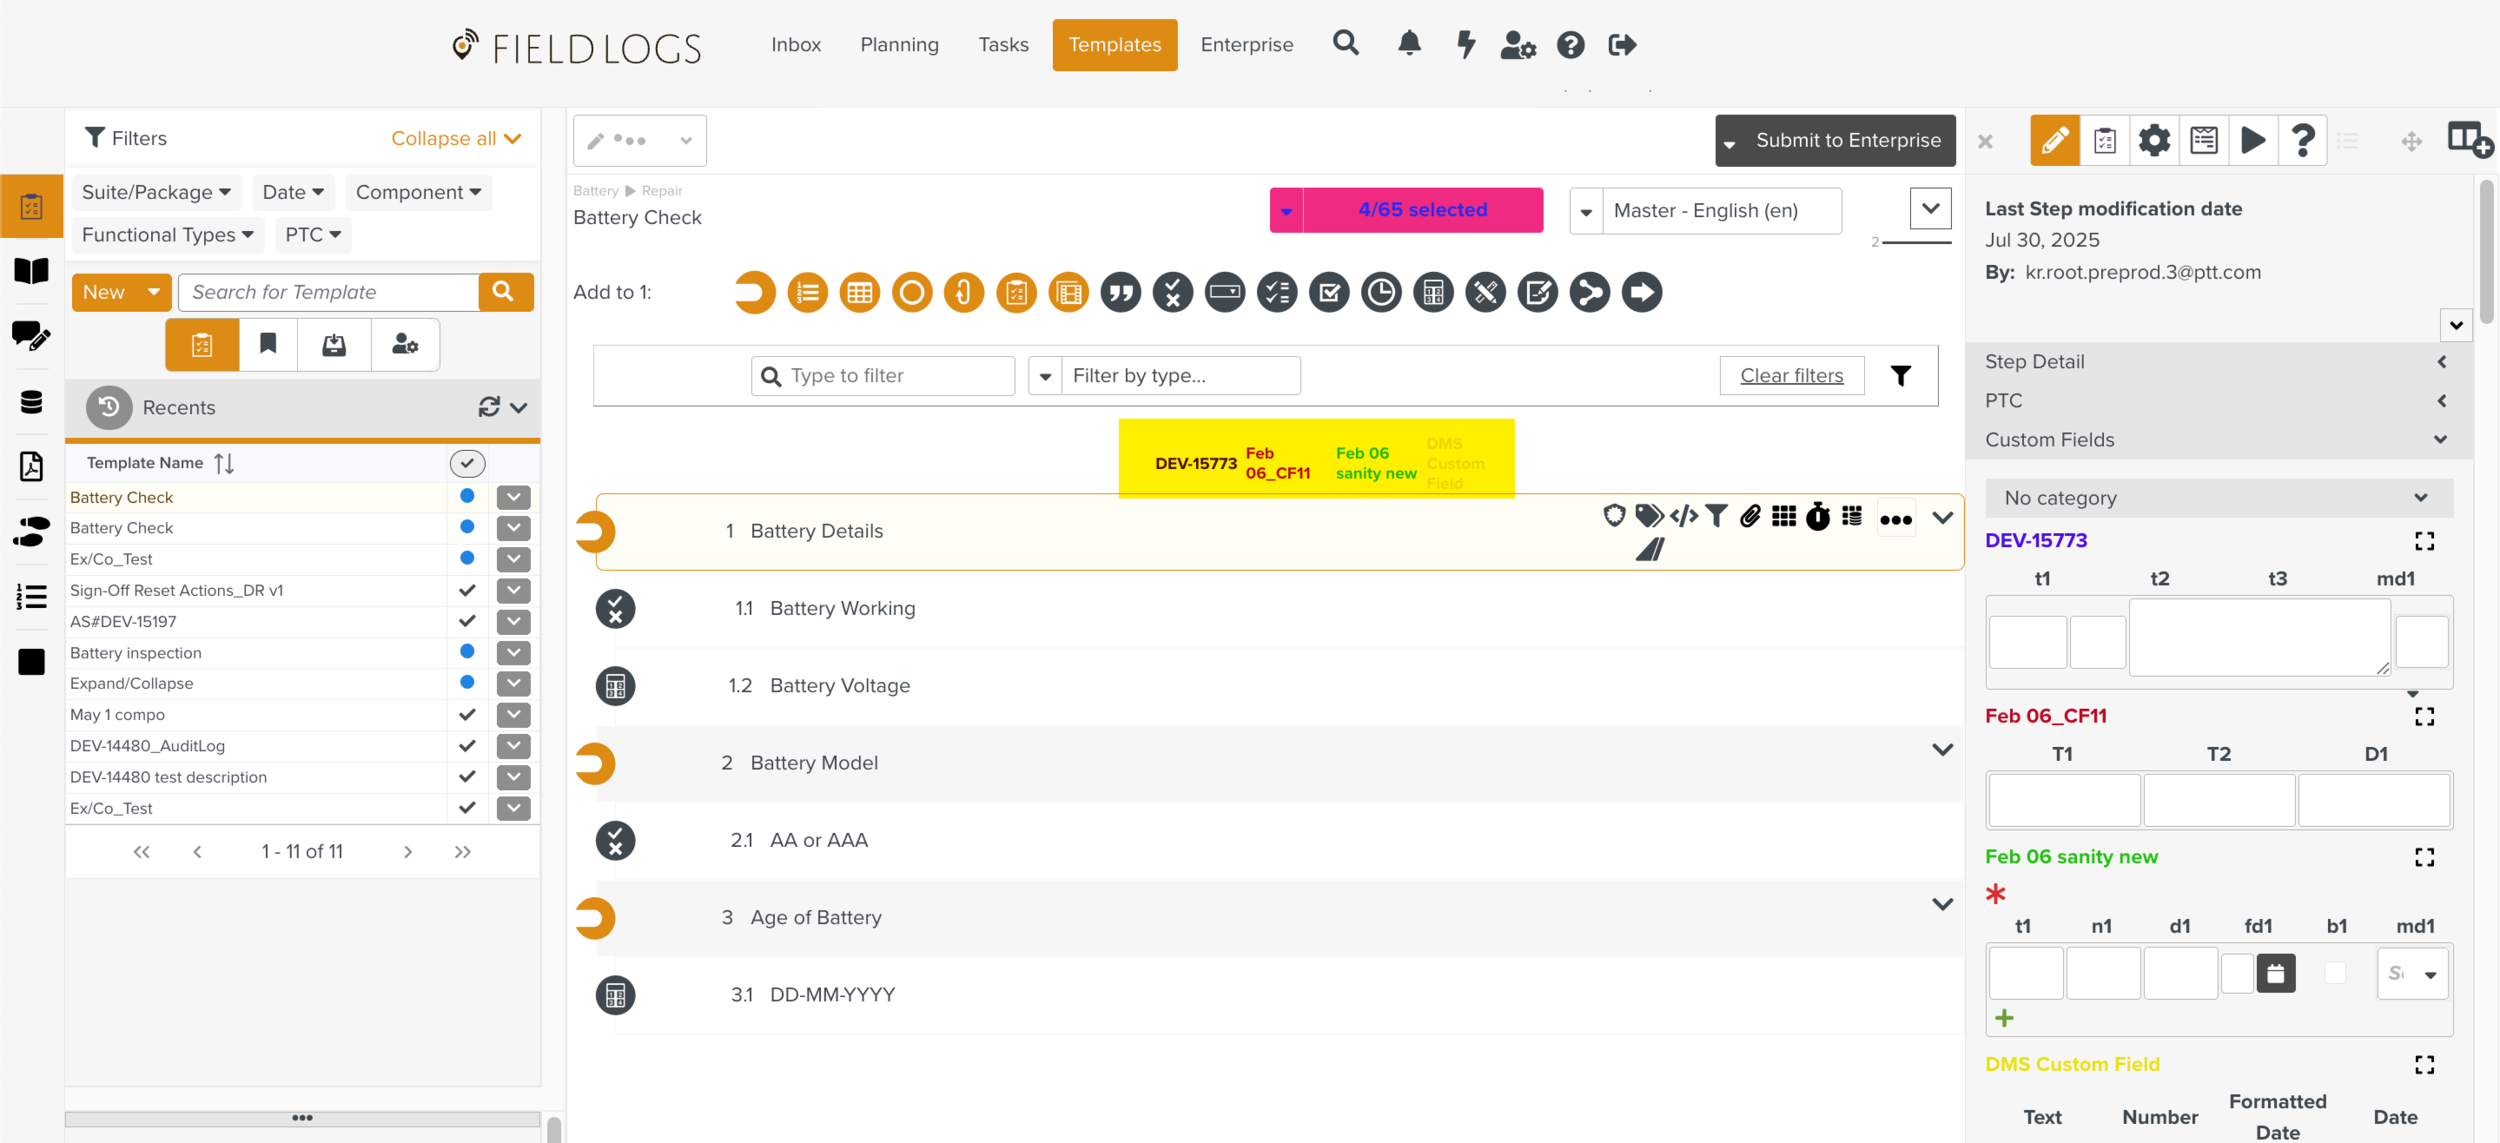 |
The Custom Field values are visible at the Step level.
 |
You can add values to the Custom Fields or bind them to a Template Variable using the Variabilize checkbox.
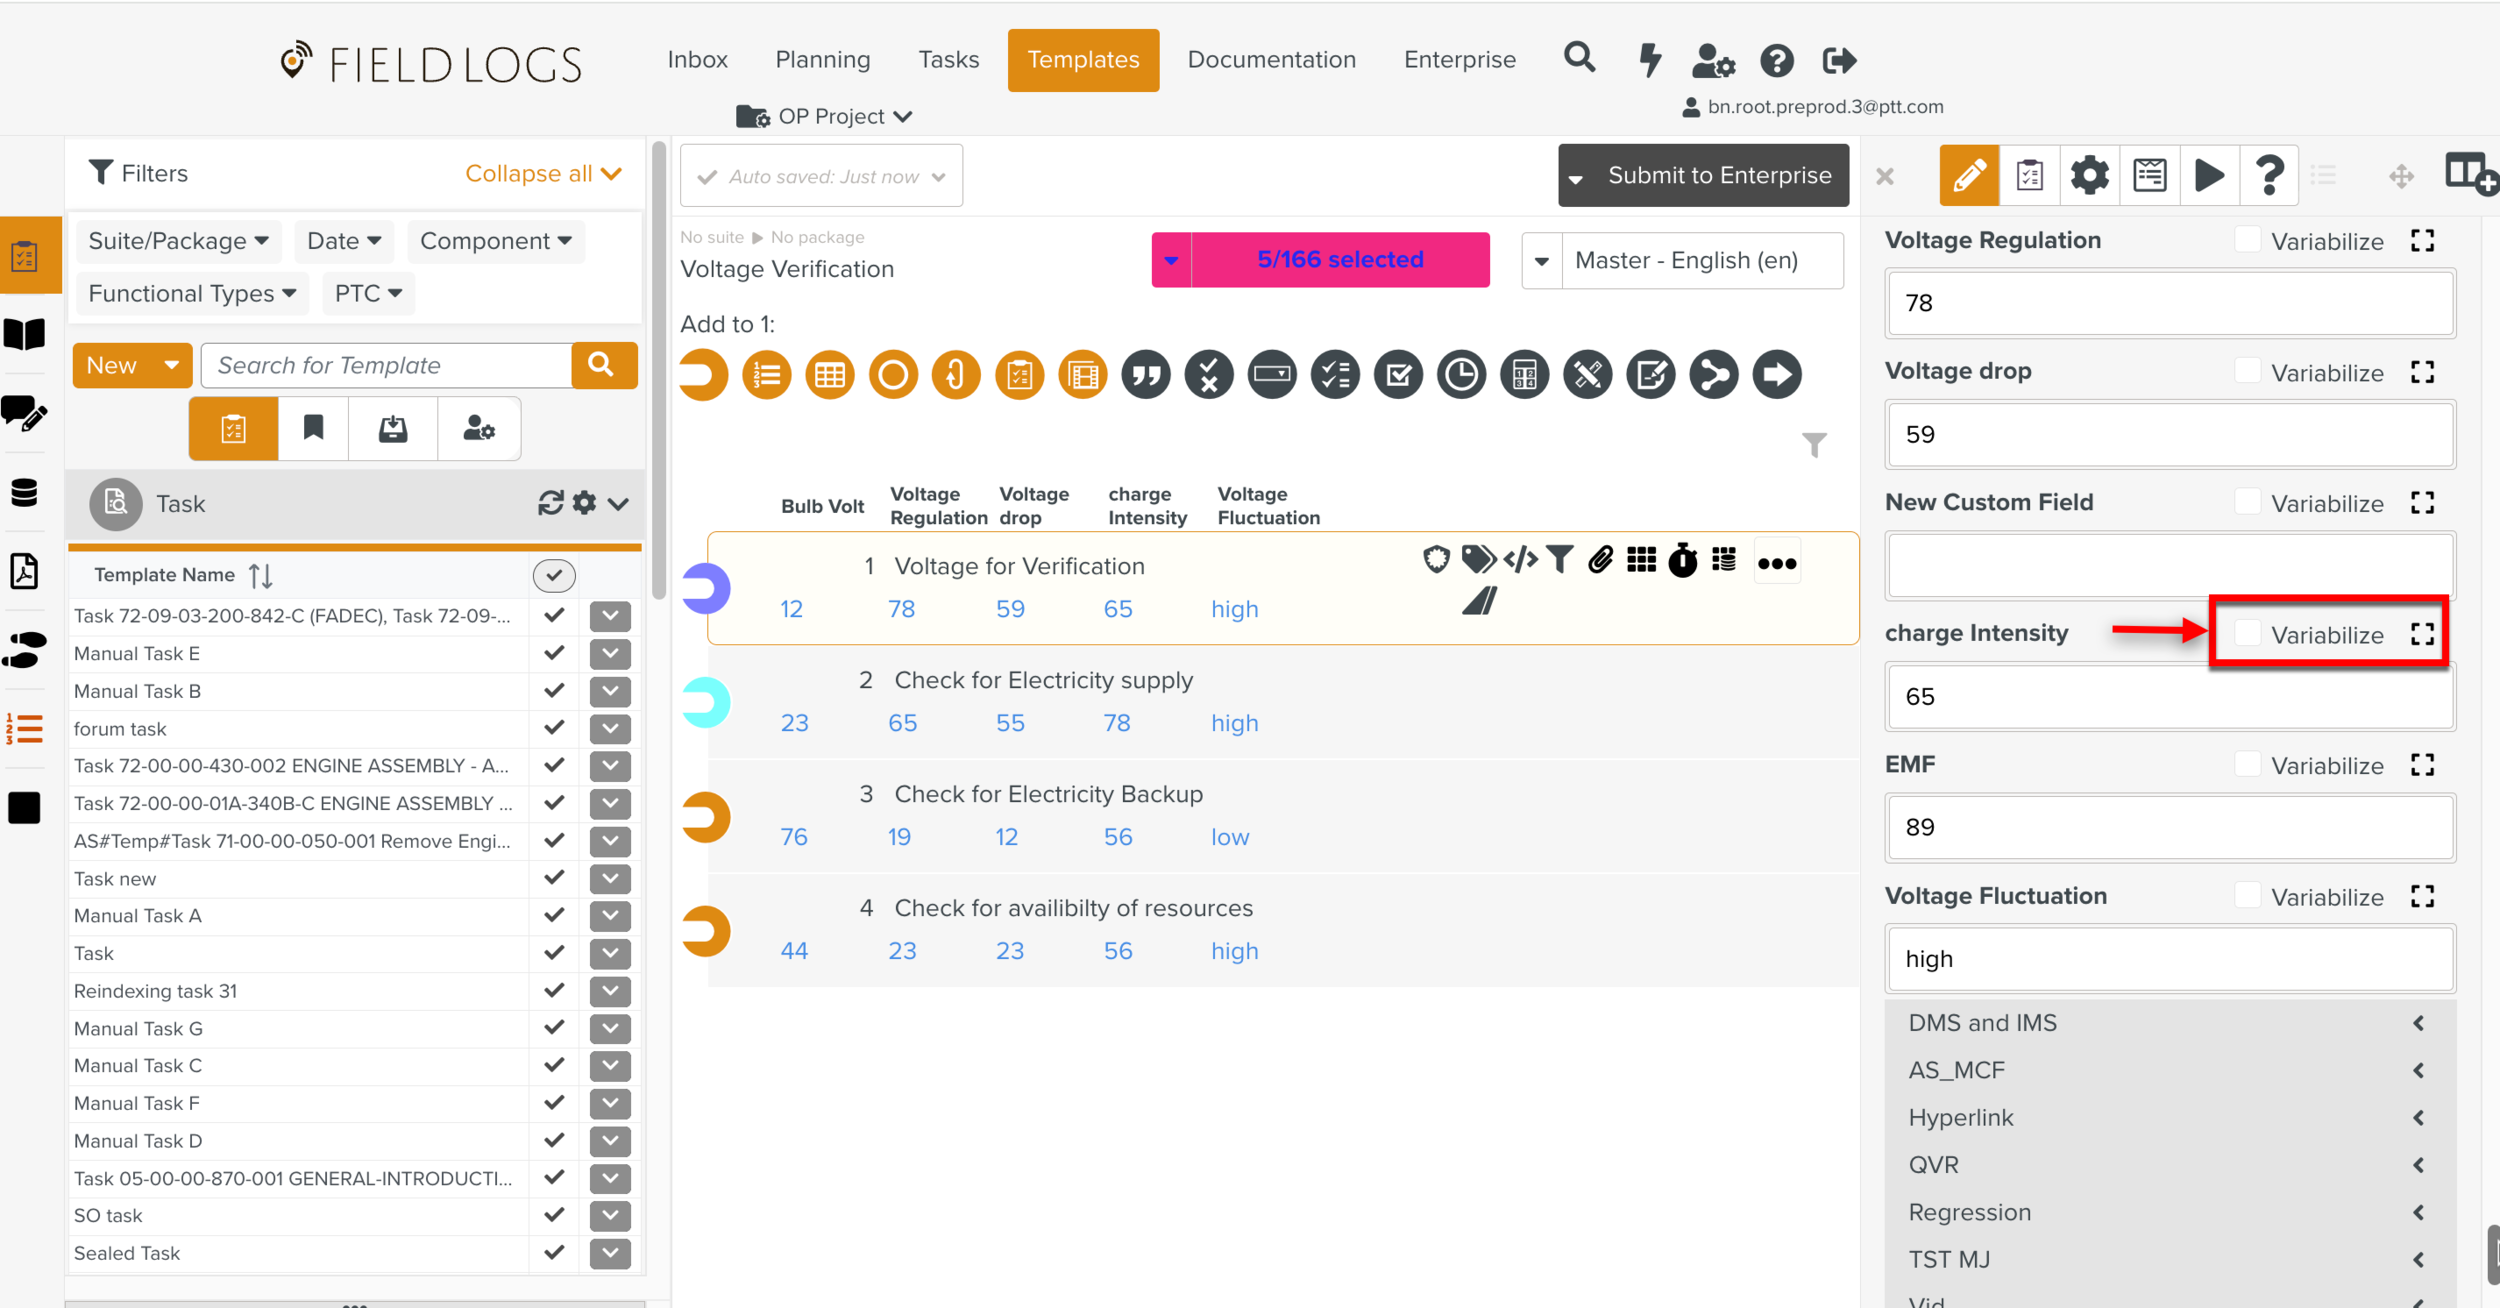 |
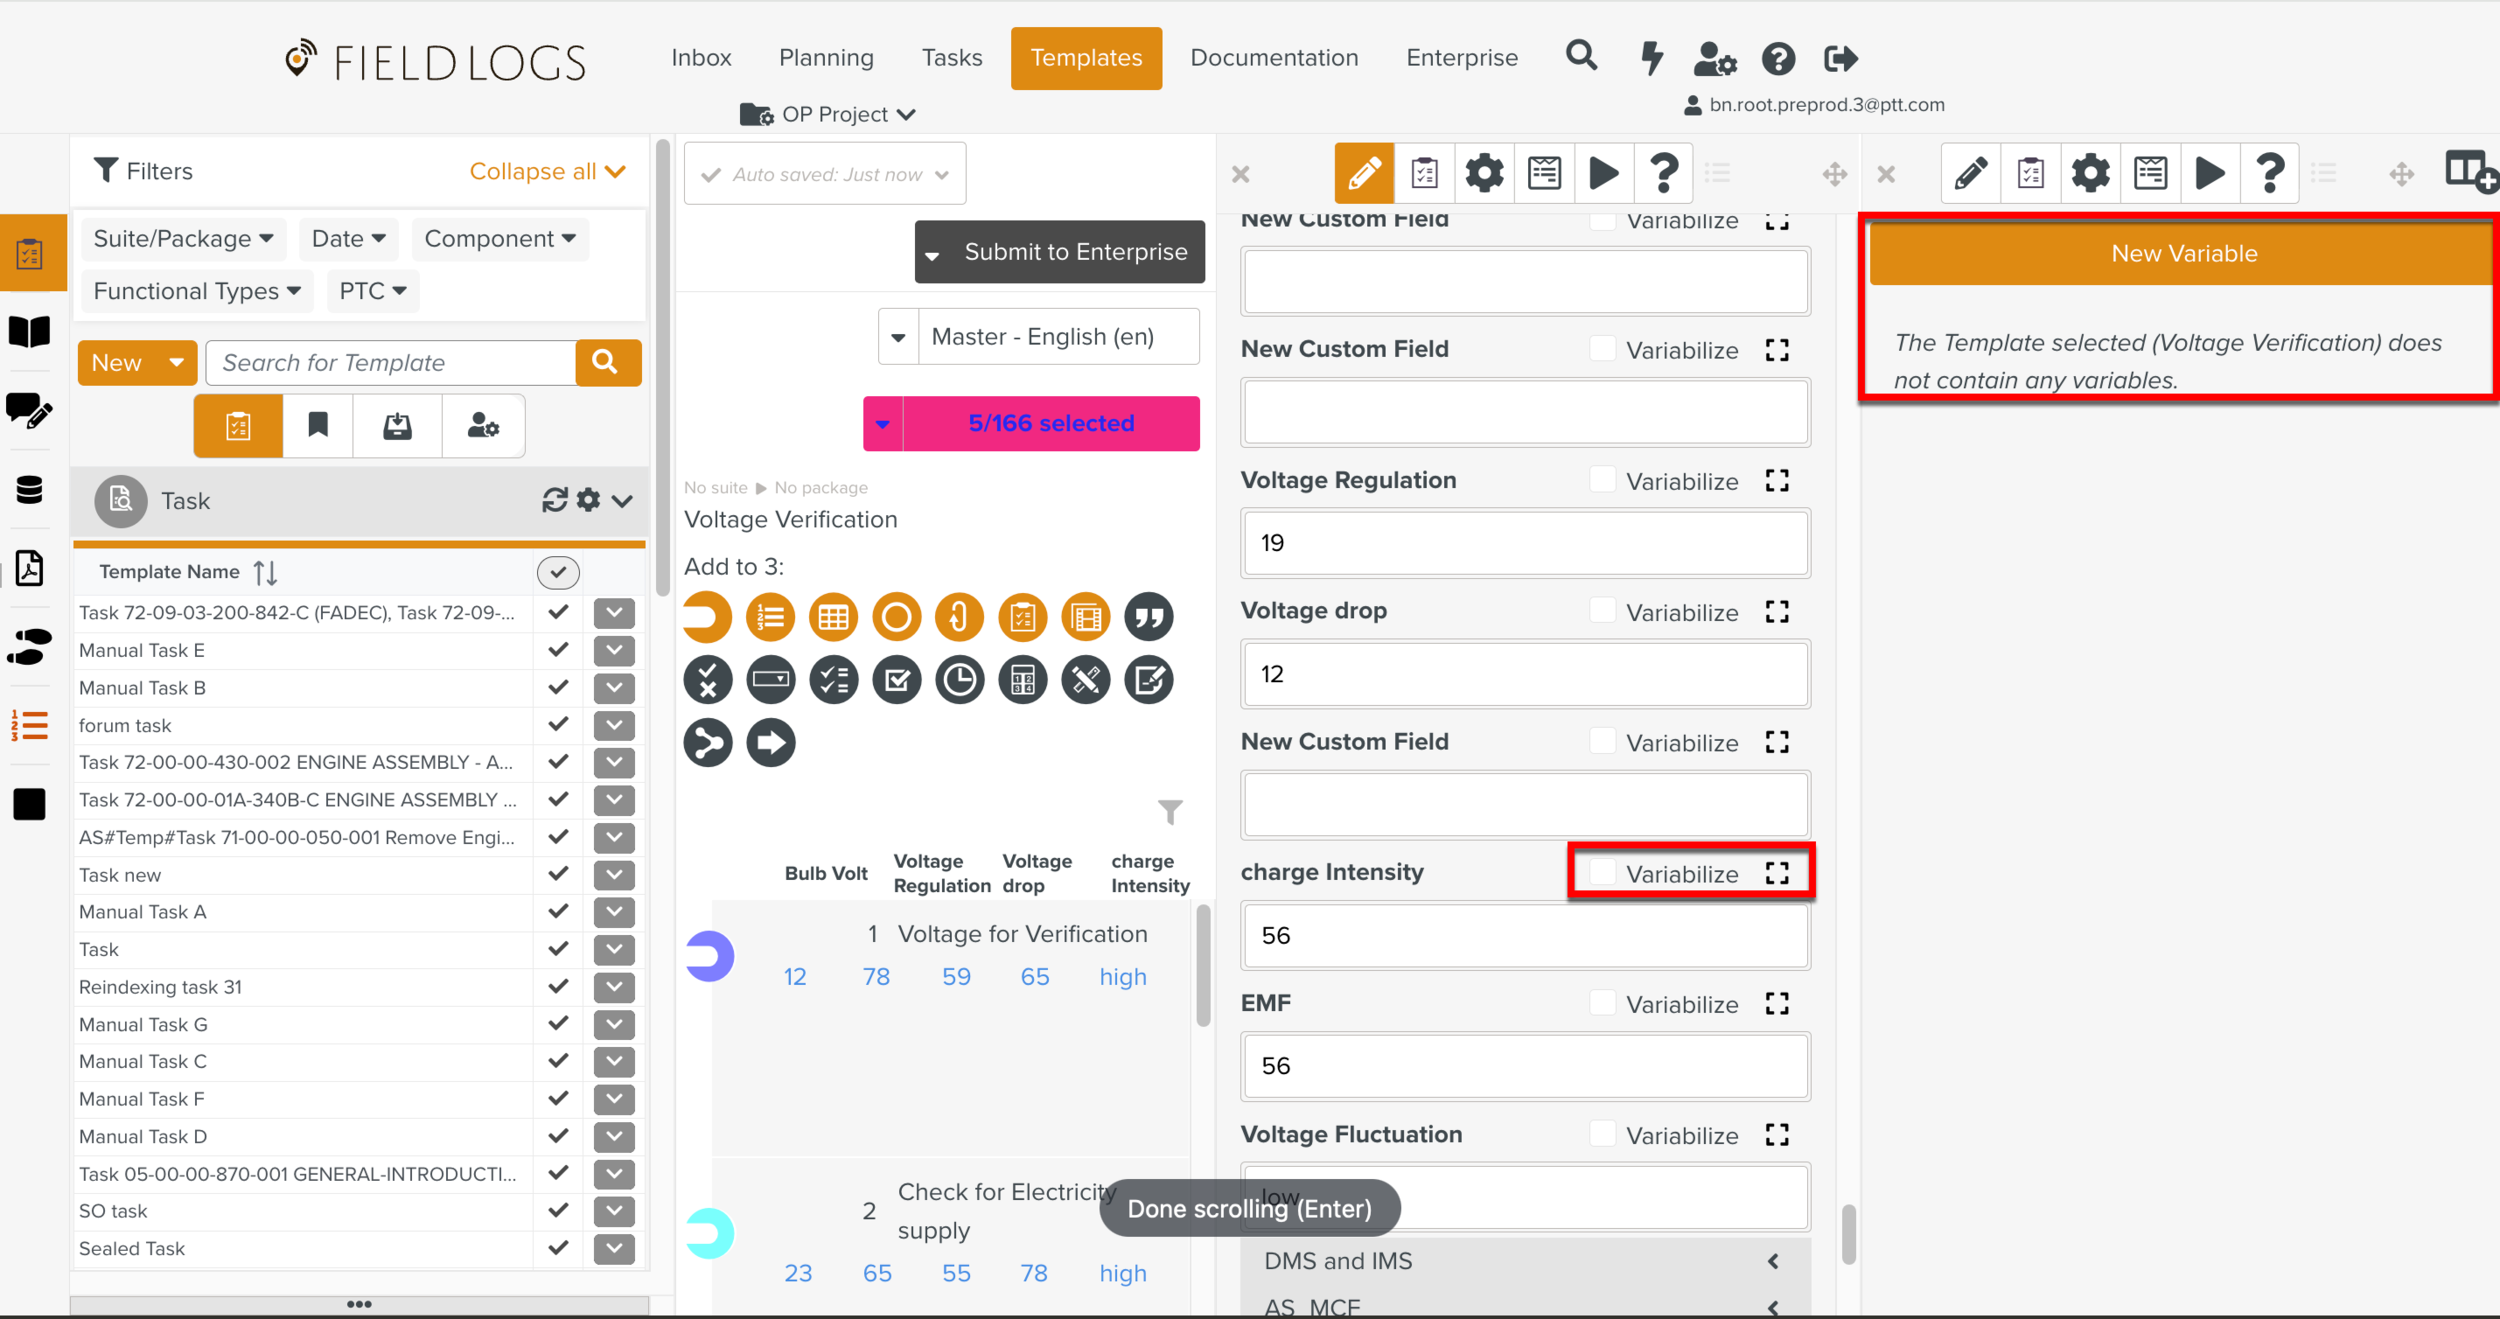
The Variabilize checkbox is available only for Step-level Custom Fields.
When Variabilize is checked.
A new template variable is created in a format that is compatible with the custom field type.
The variable is bound to the custom field associated with the step.
The generated variables are displayed under the variables icon in
 in the property pane.
Caution
When Variabilize is unchecked, the Template Variable that was created is deleted.
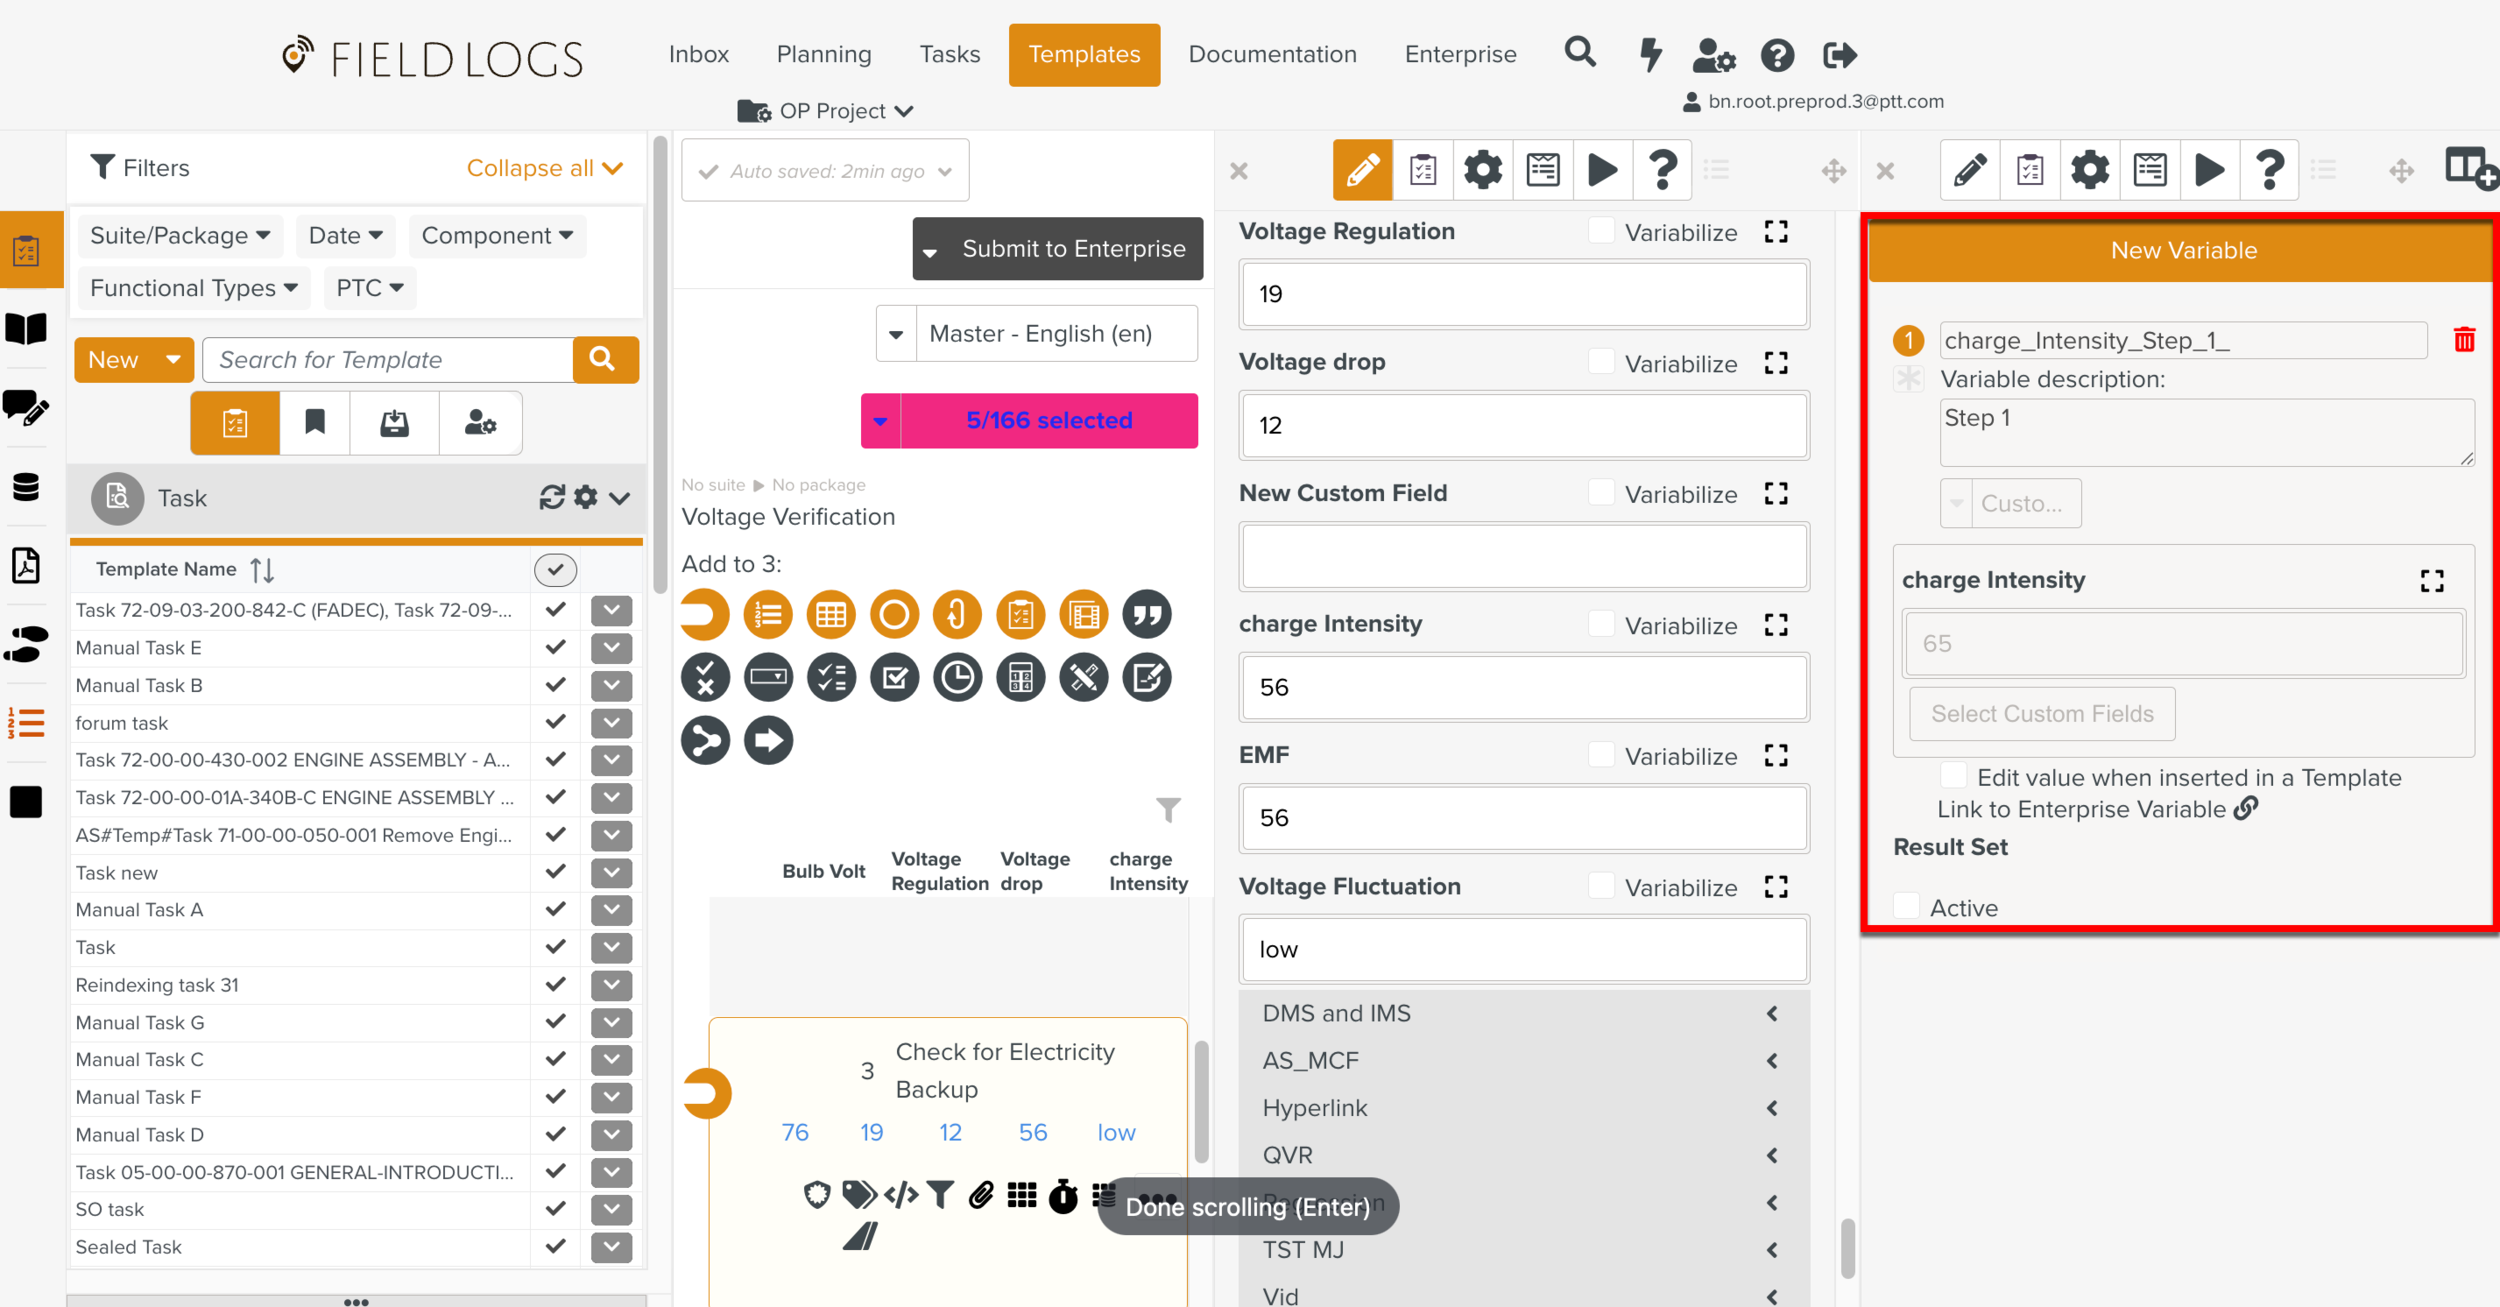 |
Created variables are read-only. Any values entered after selecting Variabilise are reflected in the Template Variables section, ensuring synchronization between the Custom Field and the Template Variable.
Similarly deleting a variable, unchecks the variabilized button on associated Custom field.
 |
Note
You can select up to five Custom Fields. An error message is displayed if the limit is exceeded.
 |
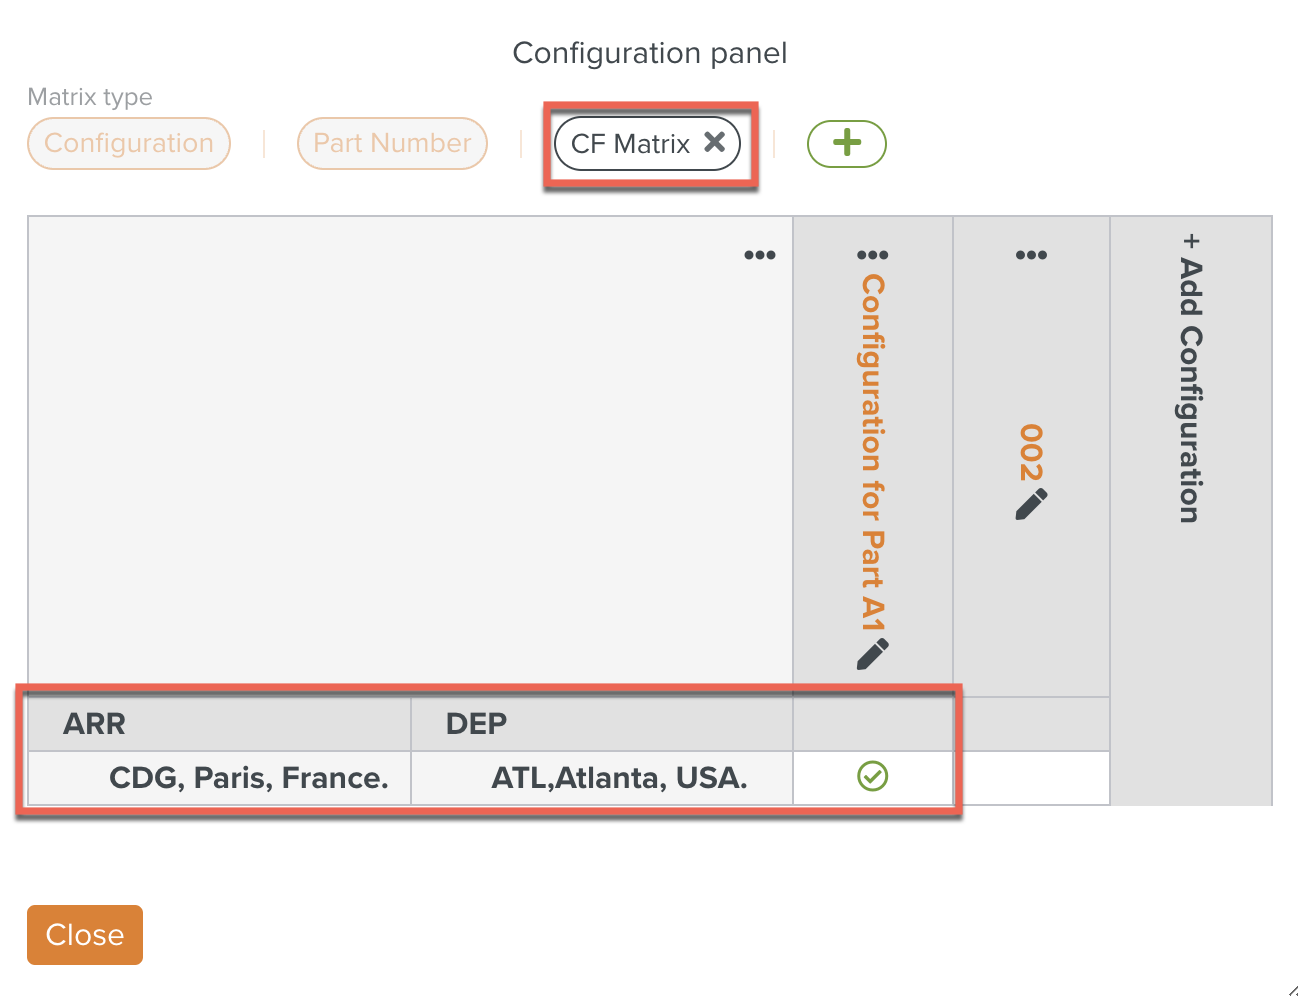
When the Custom Matrix is added in the Configuration, the selected Custom Field values will be displayed.
 |
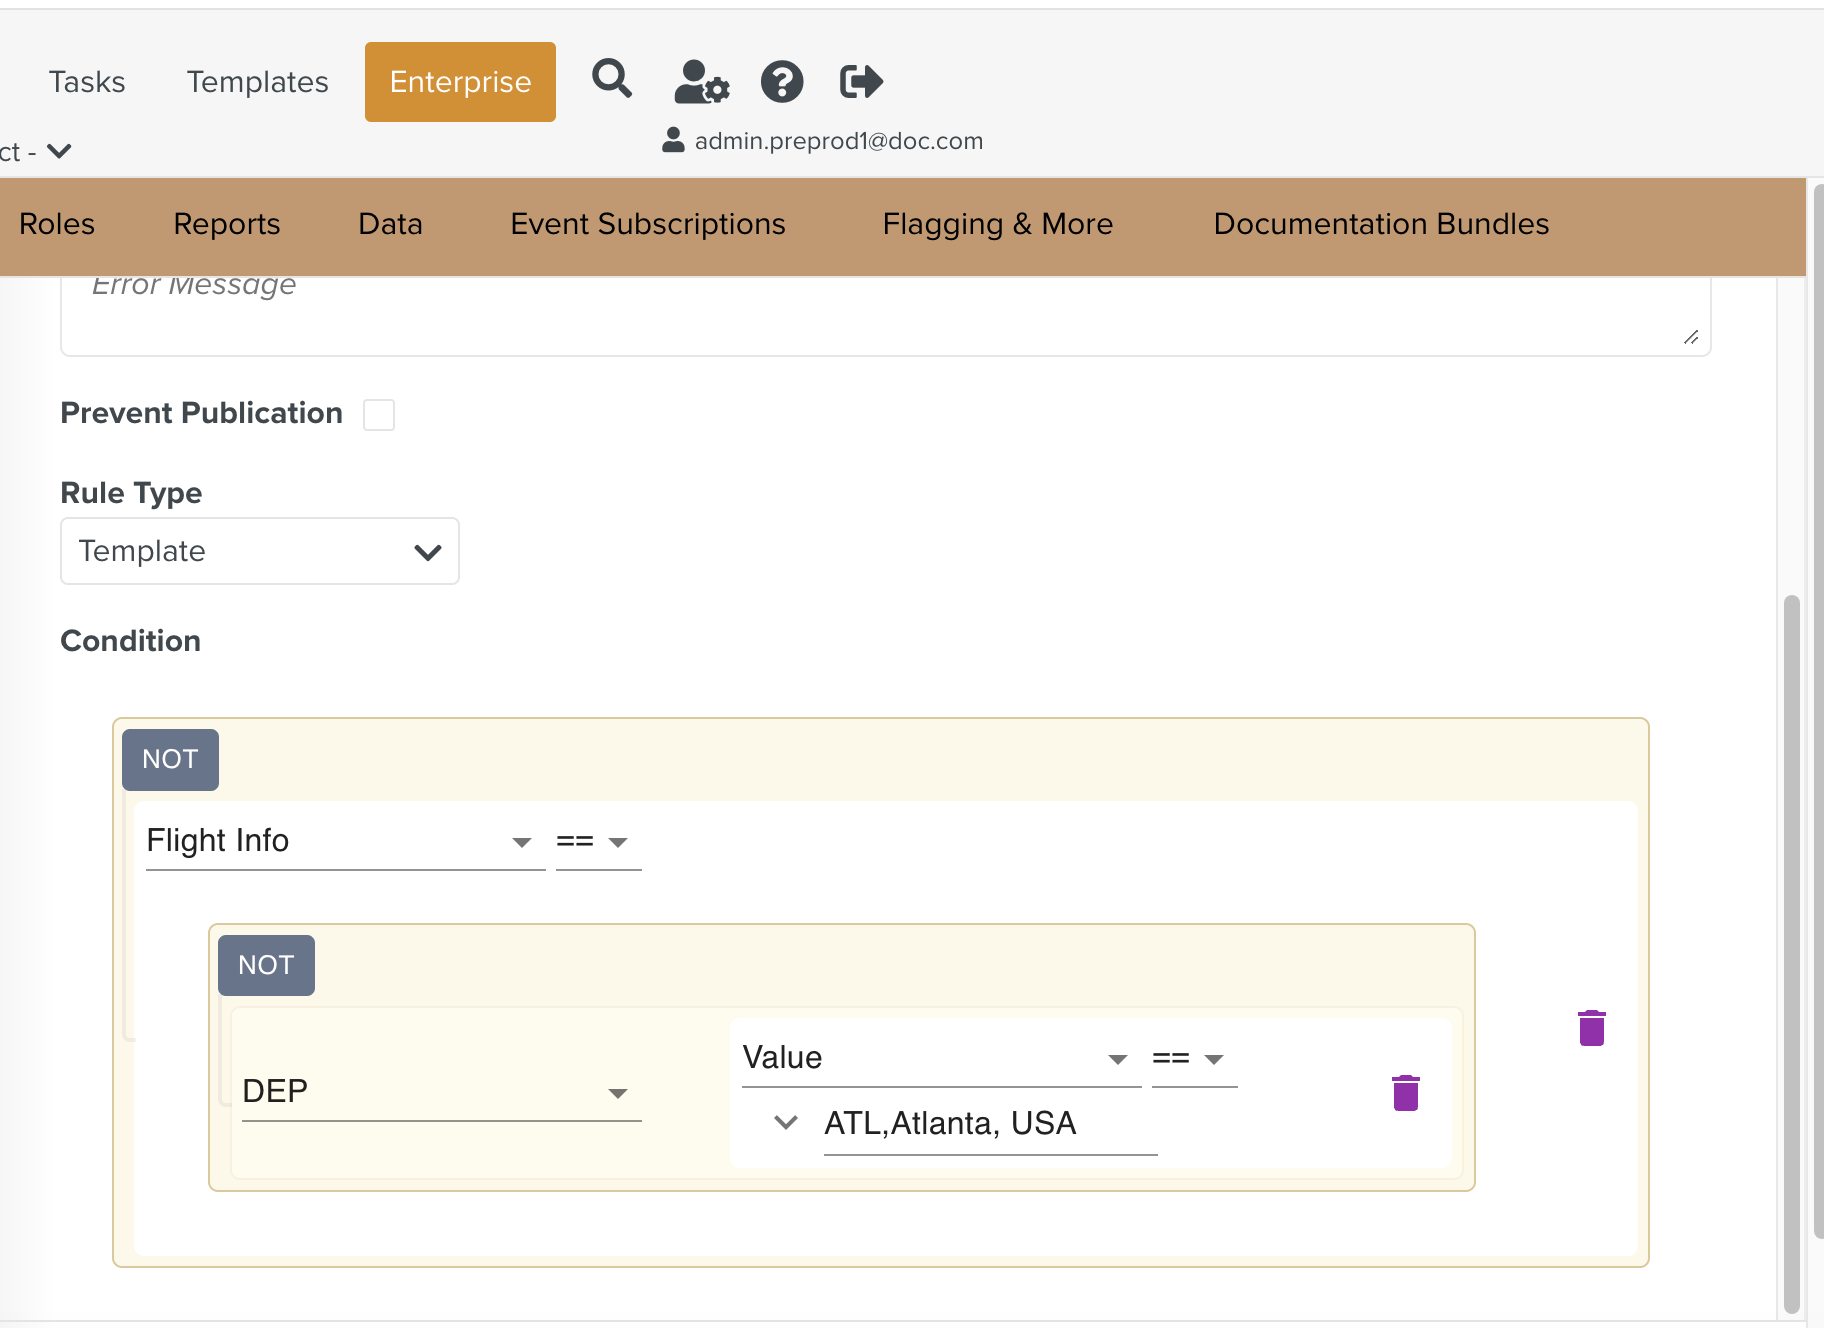
The Custom Field can also be added to the Quality Validation Rule and Validate a Template.
 |
You can use Custom Fields to specify additional fields to be part of the Parts, Tools, and Consumables information in Templates and Steps.
To use a Custom Field in the PTC section, the scope of the Custom Field must include the following options.
|
The example below shows a Custom Field PTC Custom Field defined with four fields.
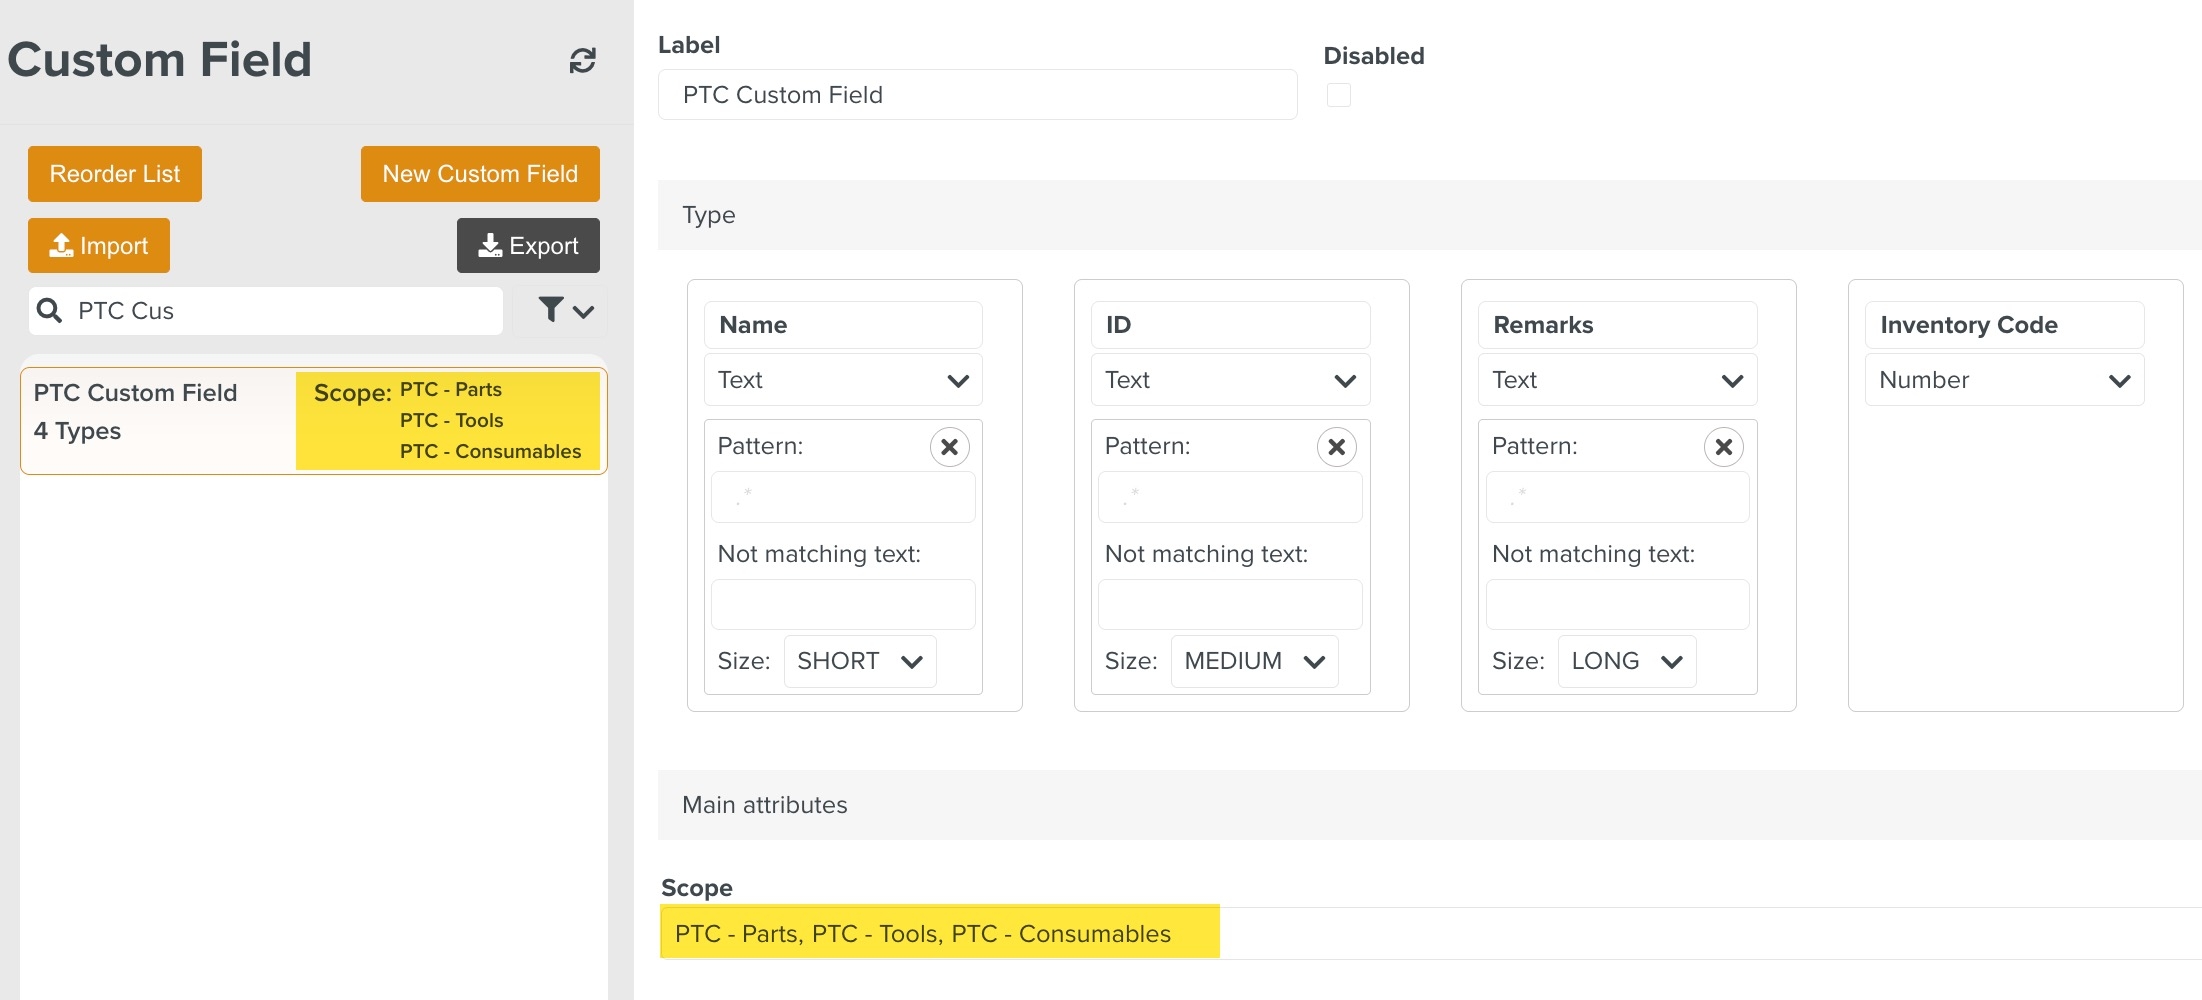 |
This Custom Field appears under the PTC section as shown below.
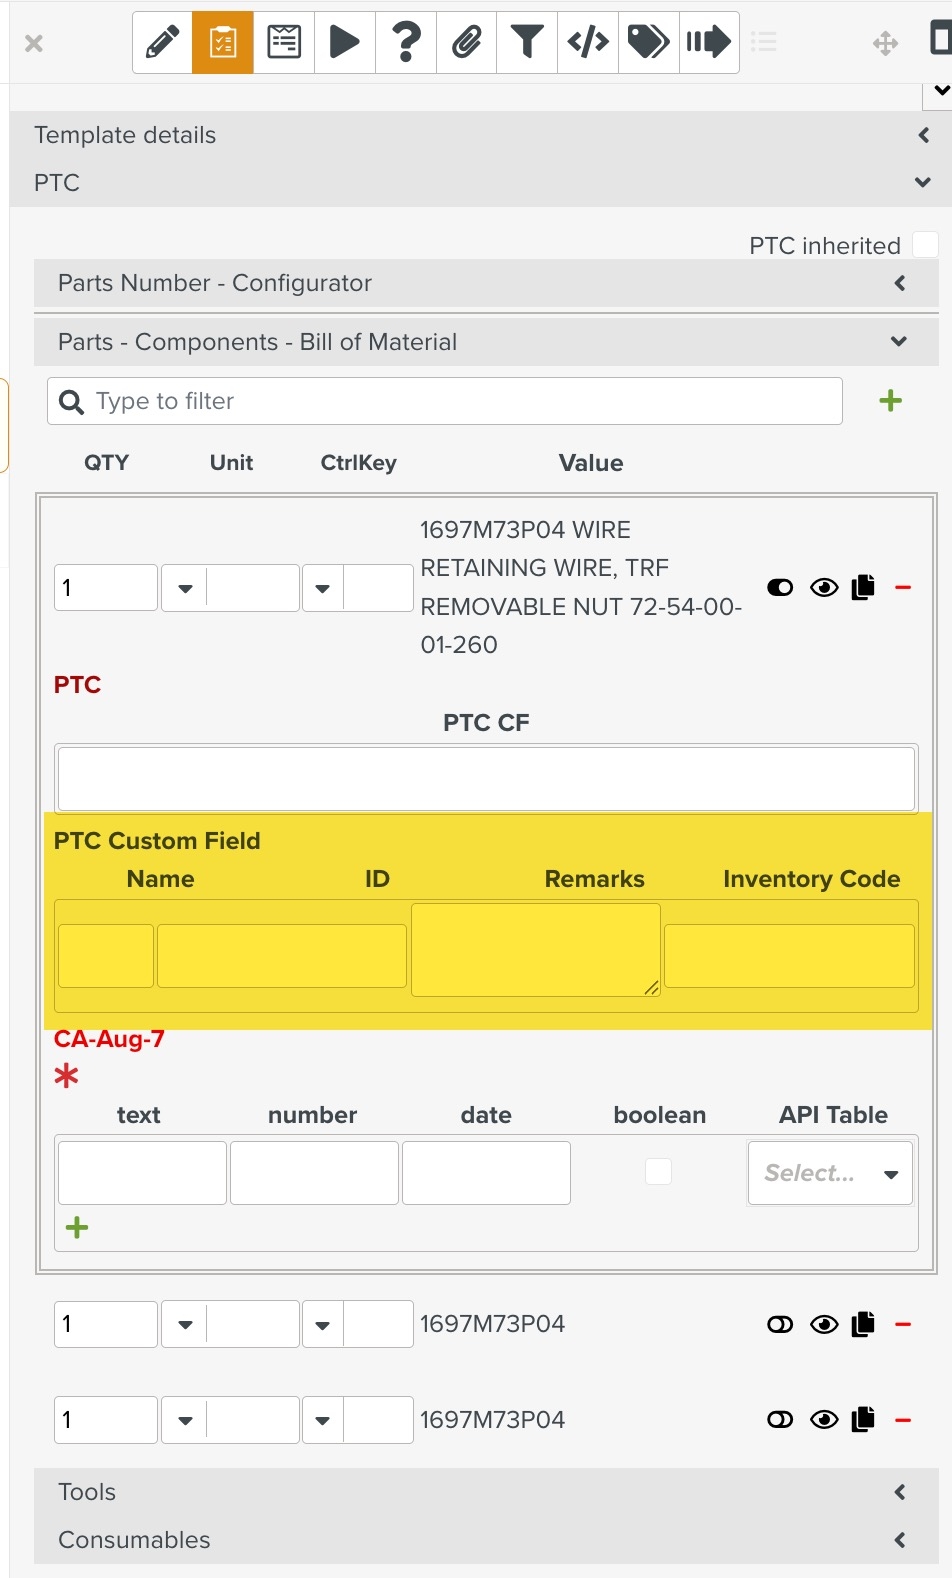 |
When you decommission a Custom Field type, it cannot be used in the Template. A decommissioned Custom Field type can be restored if required.
When restored, the Custom Field type is visible again. All the data that was associated with it before decommissioning is intact.
To decommission a Custom Field type:
Click decommission
 to delete the Custom Field type.
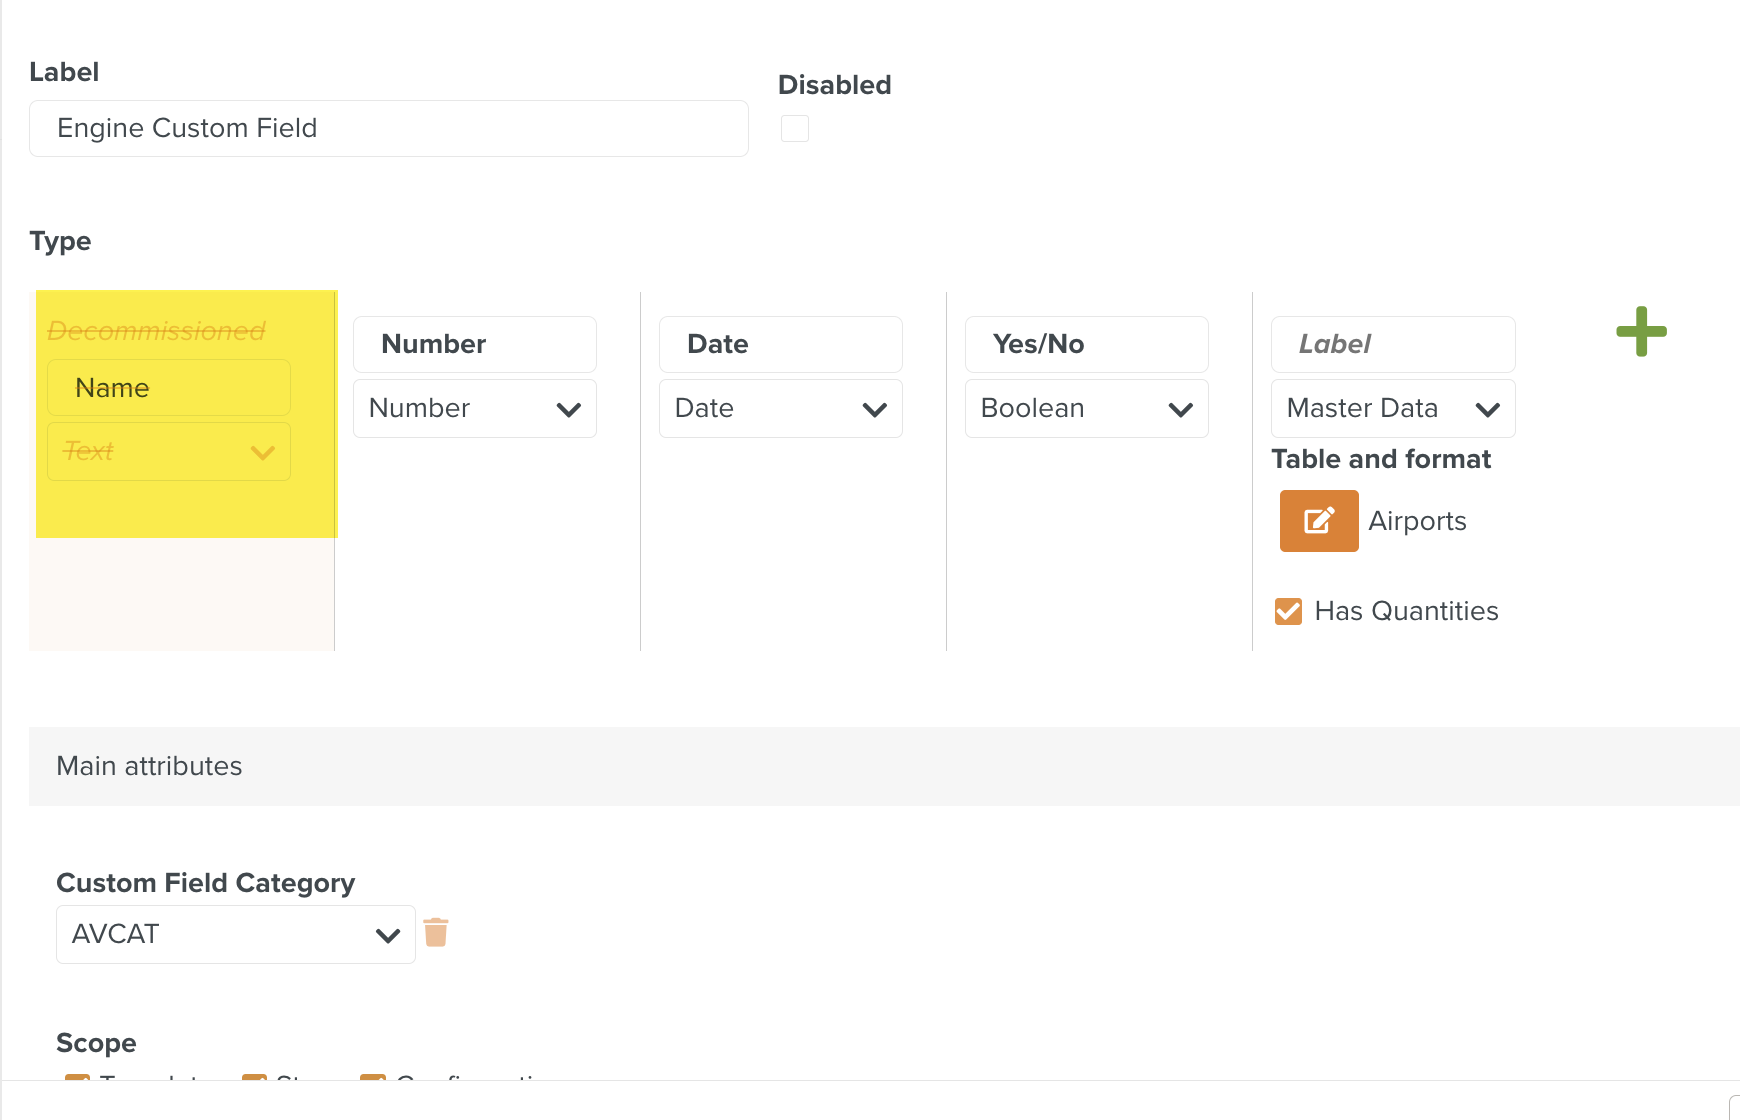
In the following example, the type Name of the Engine Custom Field is decommissioned.
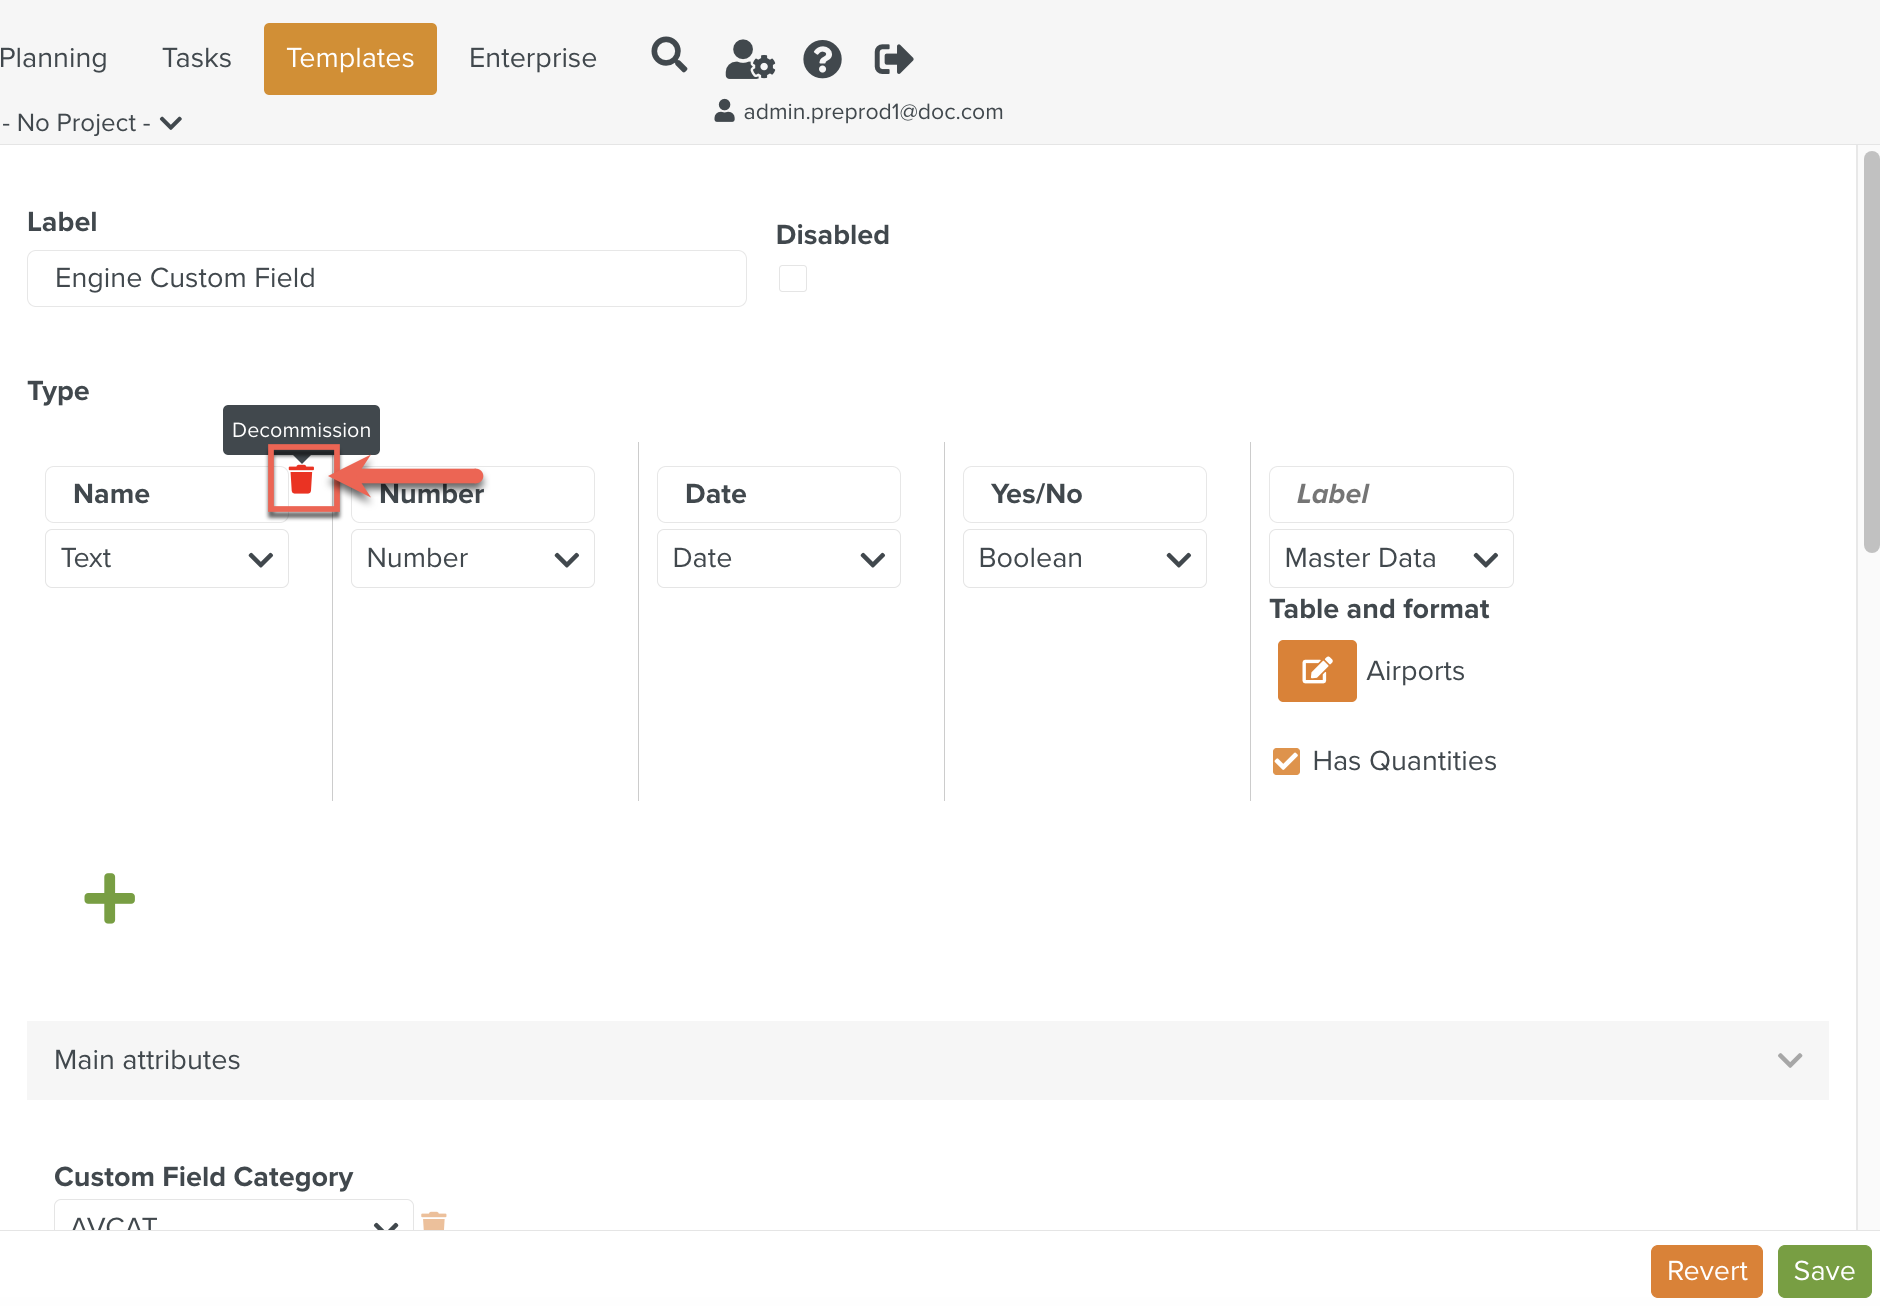
A confirmation window is displayed.
Click .

The Custom Field type Name is decommissioned.
Click
 to restore the Custom Field type.
A confirmation message is displayed.
Click .
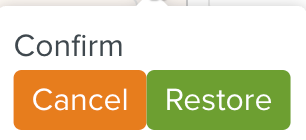
The Custom Field type Name is restored.
Note
Once a custom field is created, it can only be decommissioned or modified for reuse, it cannot be deleted. Therefore, create a new custom field only when necessary, or consider reusing an existing decommissioned one.