Raising an Incident
You can raise an Incident to report an event that hinders the completion of a Task or an action.
Incidents can be raised in the following three contexts:
Context | Description | Example | Available in | |||
|---|---|---|---|---|---|---|
Task | To report an event while viewing a Task, you can raise a Task Context Incident. | Materials or parts missing to complete a task. | Tasks
Inbox
Planning
| |||
Runtime Step | To report an event while viewing or executing a Step in a Task, you can raise a Runtime Step Context Incident. | Tools required to complete a Step of a Task are broken. | Runtime Step
| |||
Global | To report an event that is not related to the Task directly, but blocks it, you can raise a Global Context Incident. | Oil spillage in the work zone, making it impossible to carry out Tasks in the location. | Main Menu
| |||
Project | To report an event that pauses a specific Shop Visit (Project), you can raise a Project Context Incident. | Lack of critical components, such as raw materials or specialized parts can halt repairs. | Main Menu
| |||
Operation Plan | To report an event on a Shop Order, you can raise an Operation Plan Incident. | Lack of critical components, such as raw materials or specialized parts can halt repairs. | Inbox, Planning, and Tasks
|
Note
You must have the appropriate access rights to raise an Incident.
From Tasks, you can raise Task Context Incidents and Global Incidents.
To raise an Incident from Tasks:
On the main menu, go to Tasks>Task.
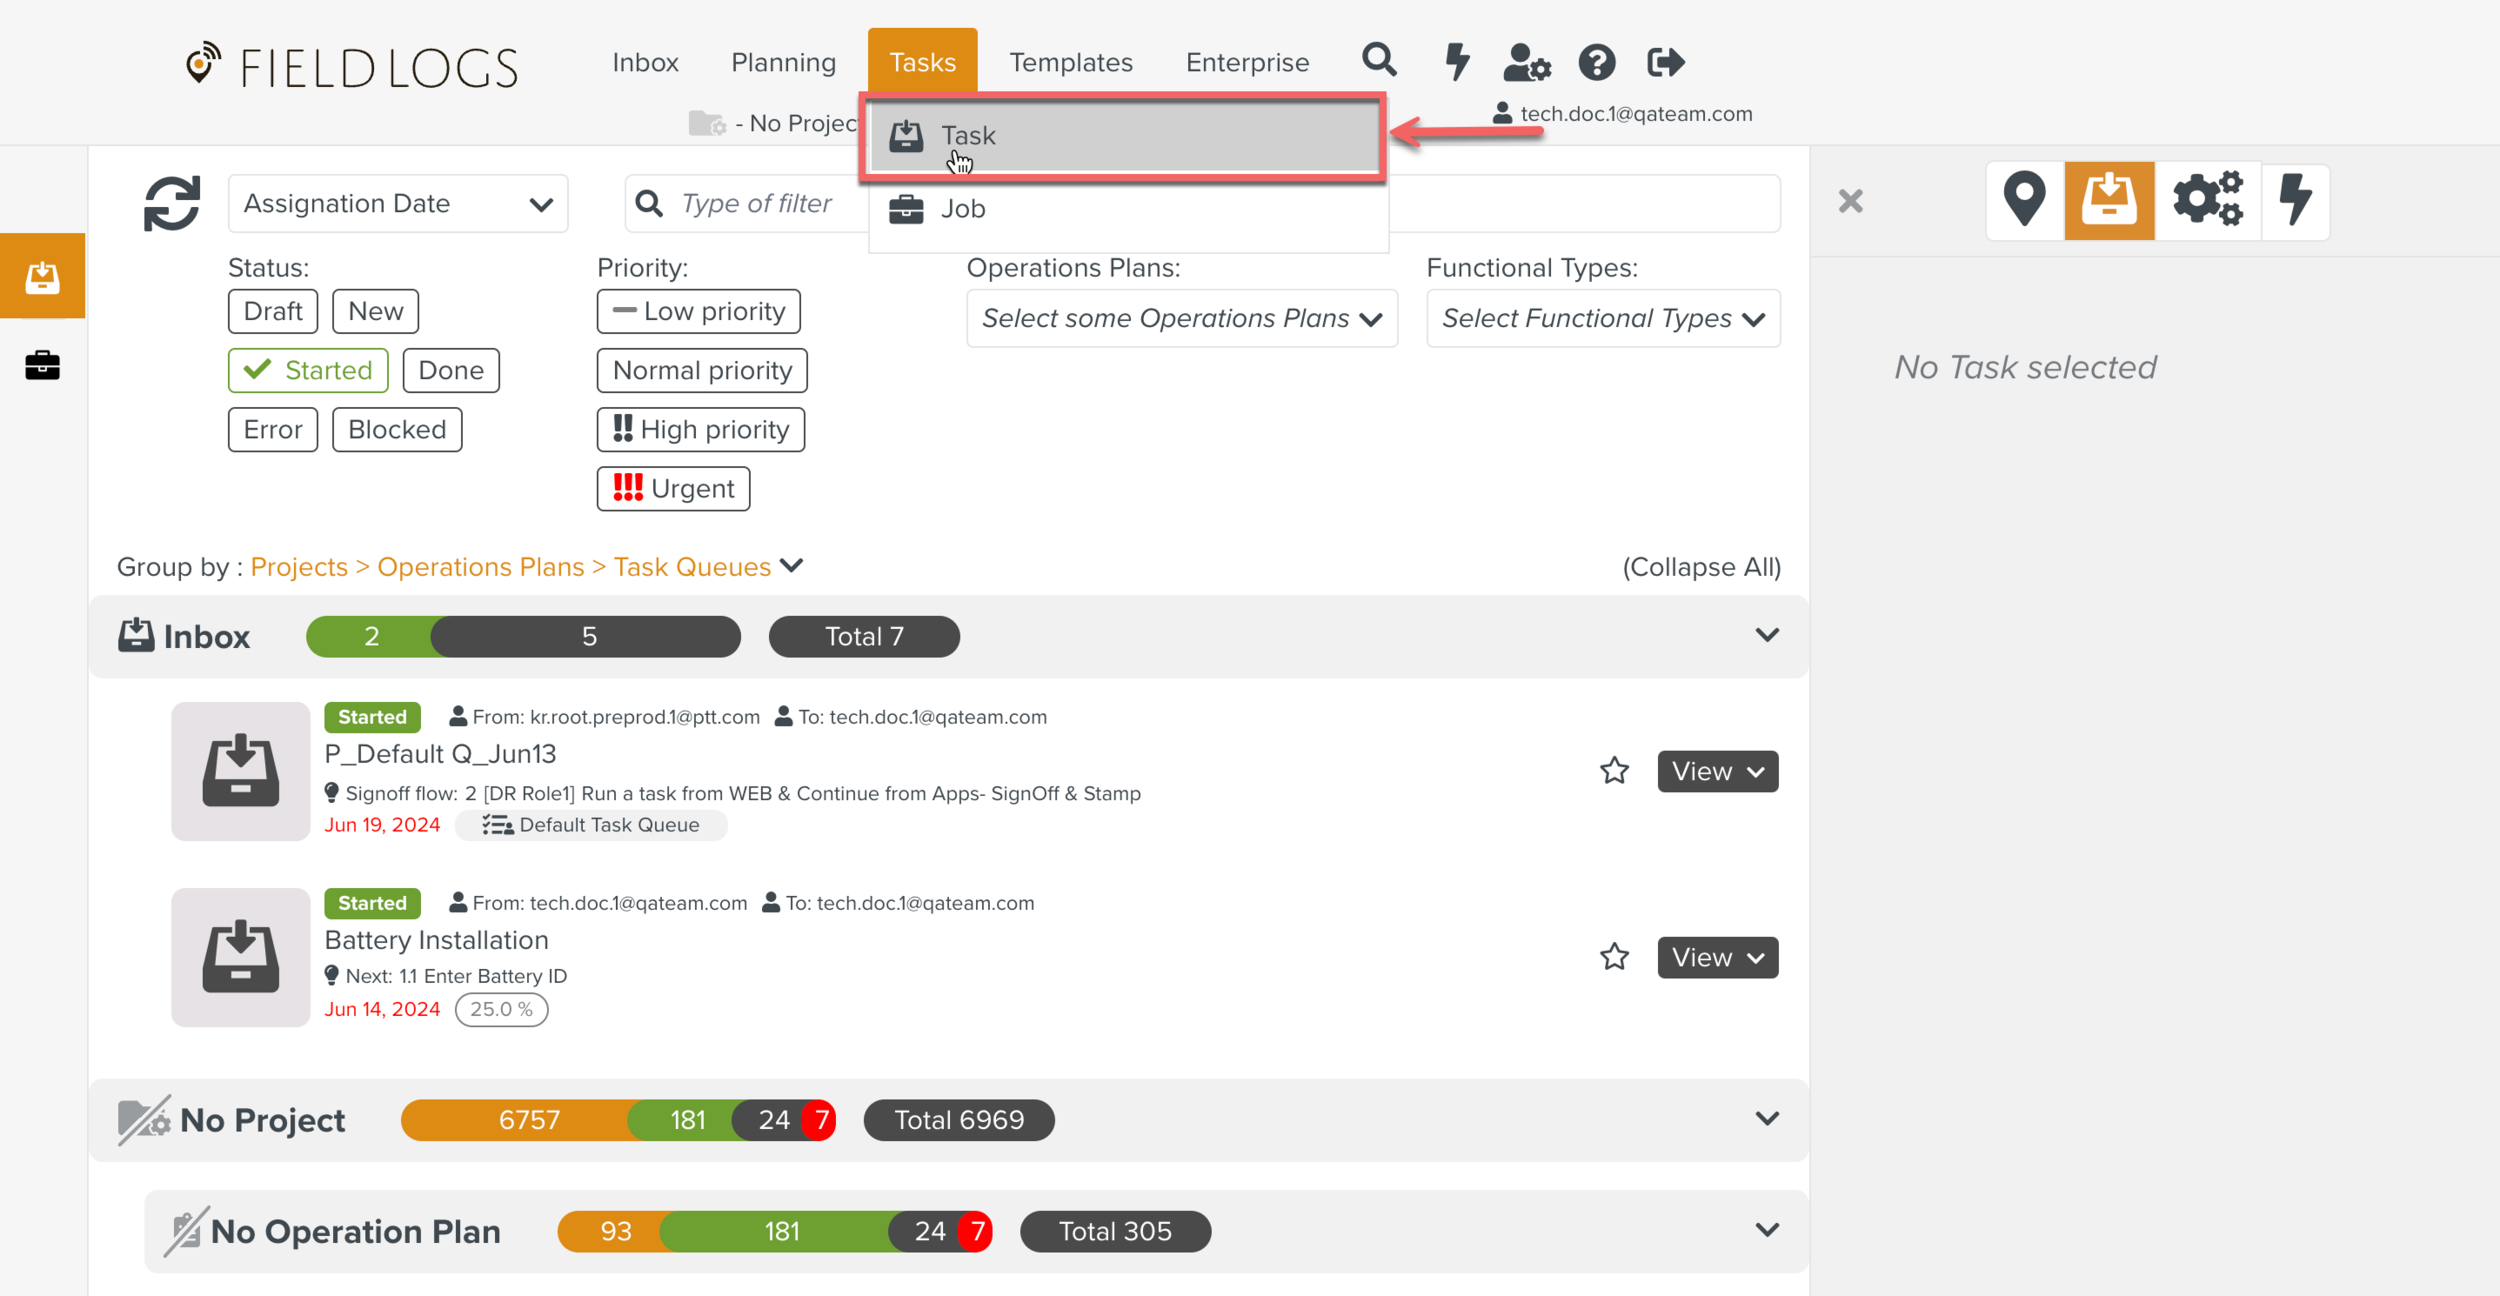
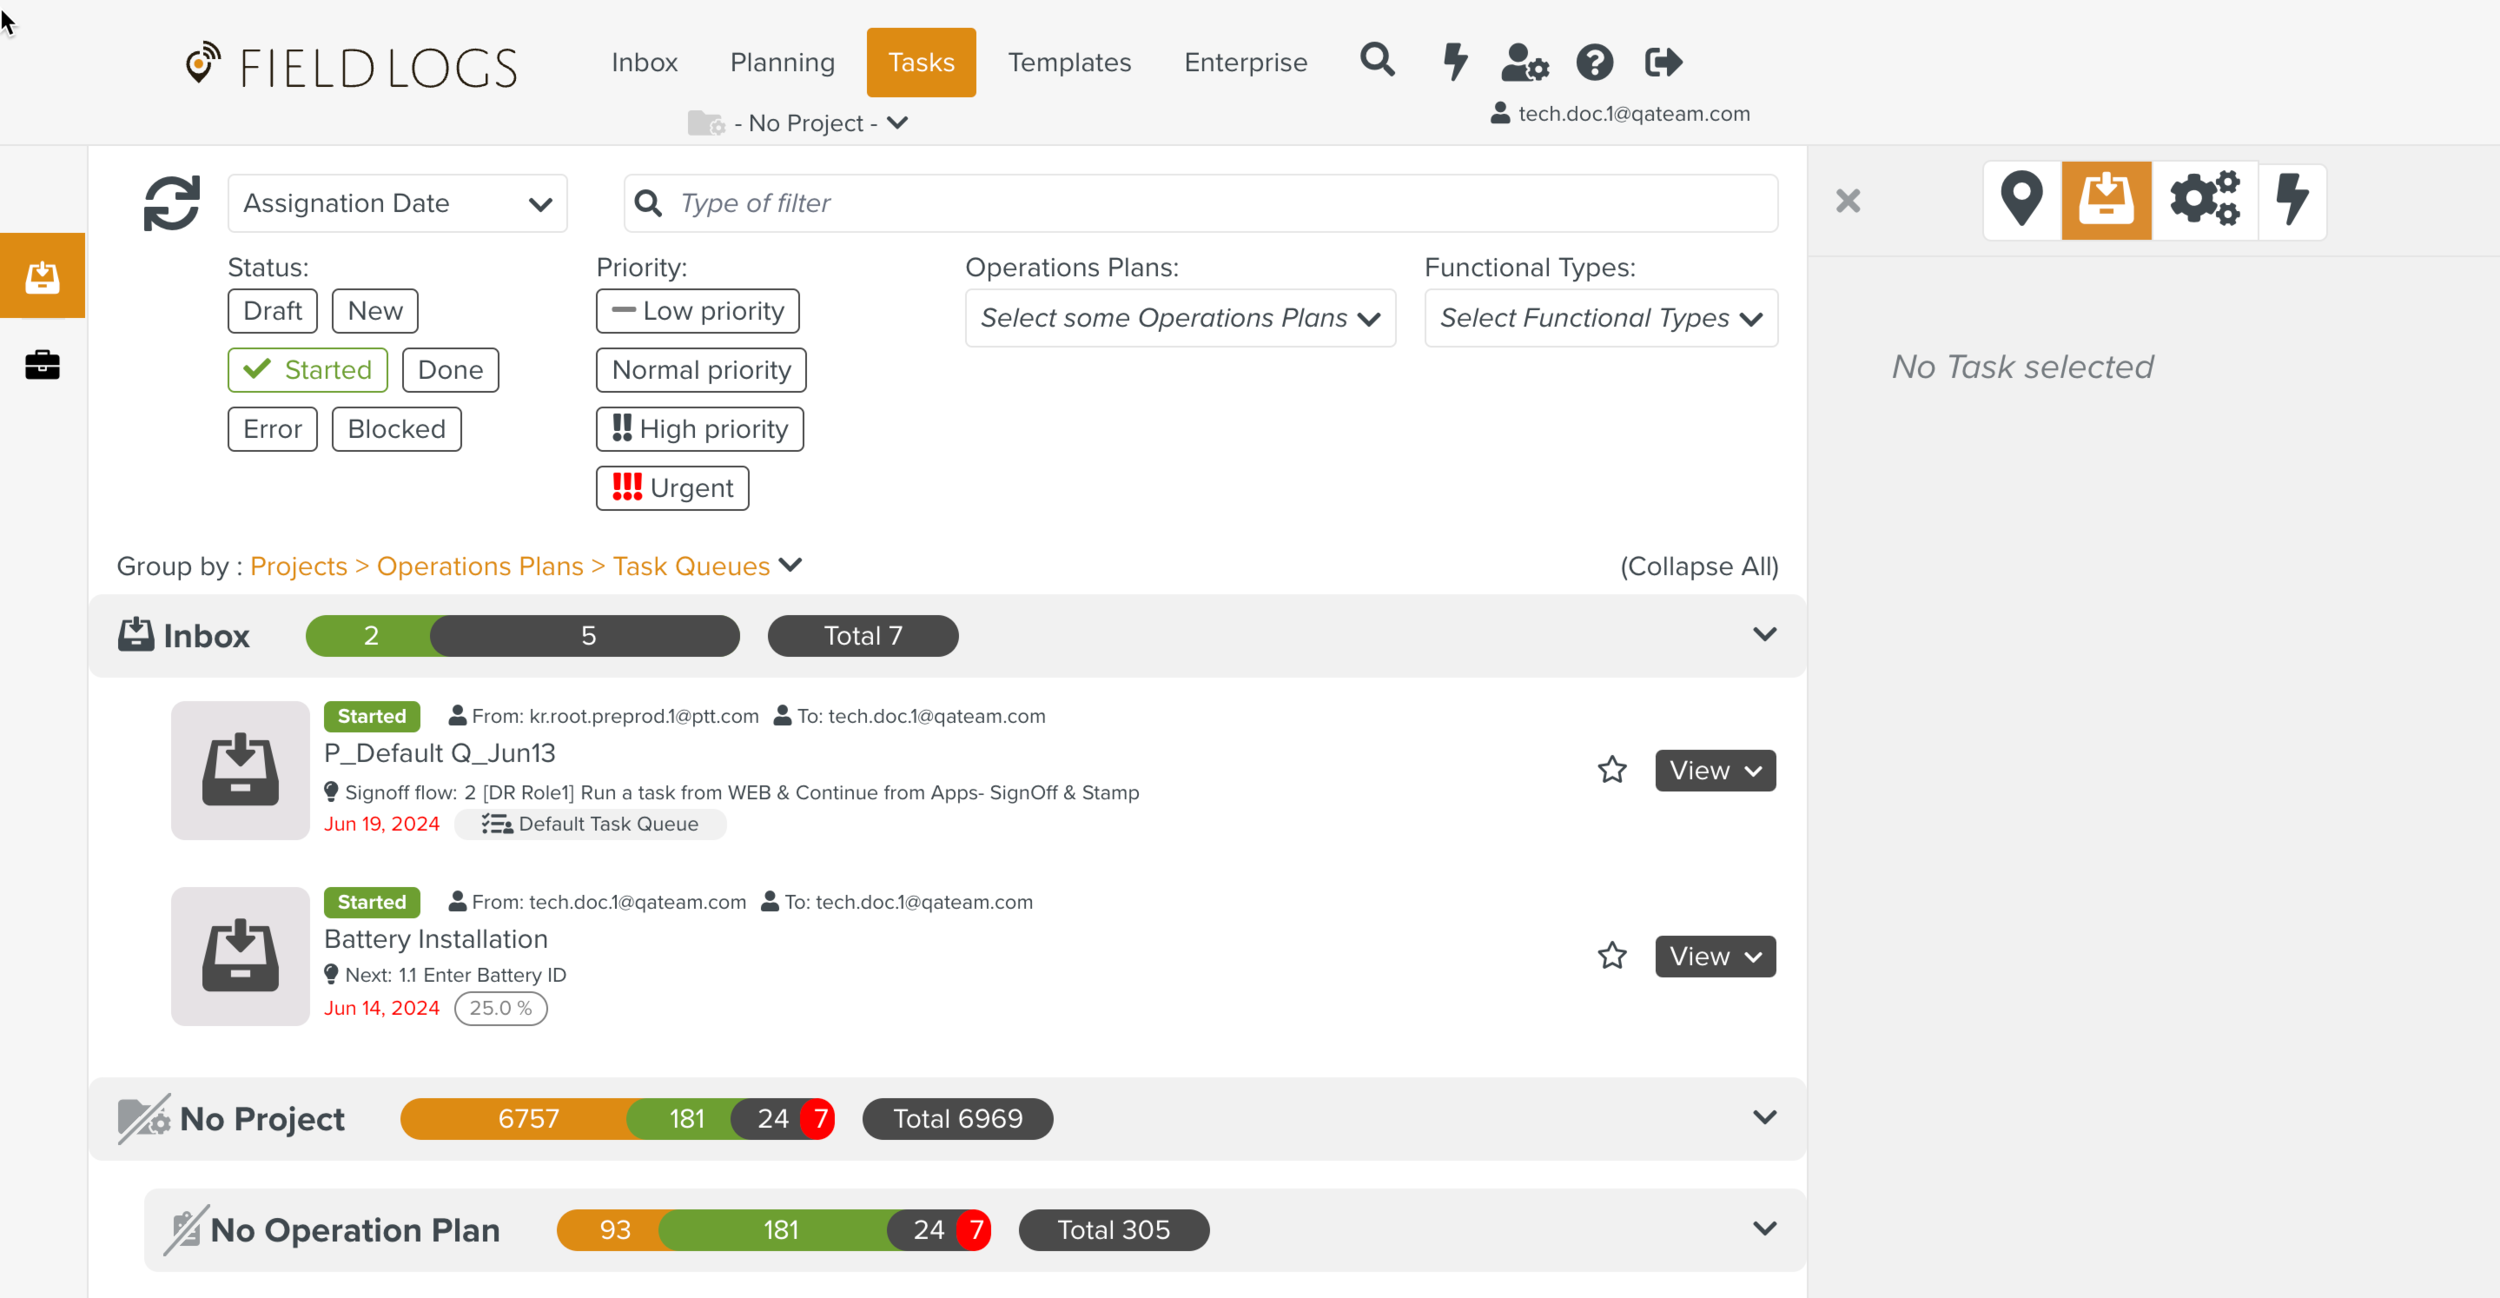
The screen Tasks appears.
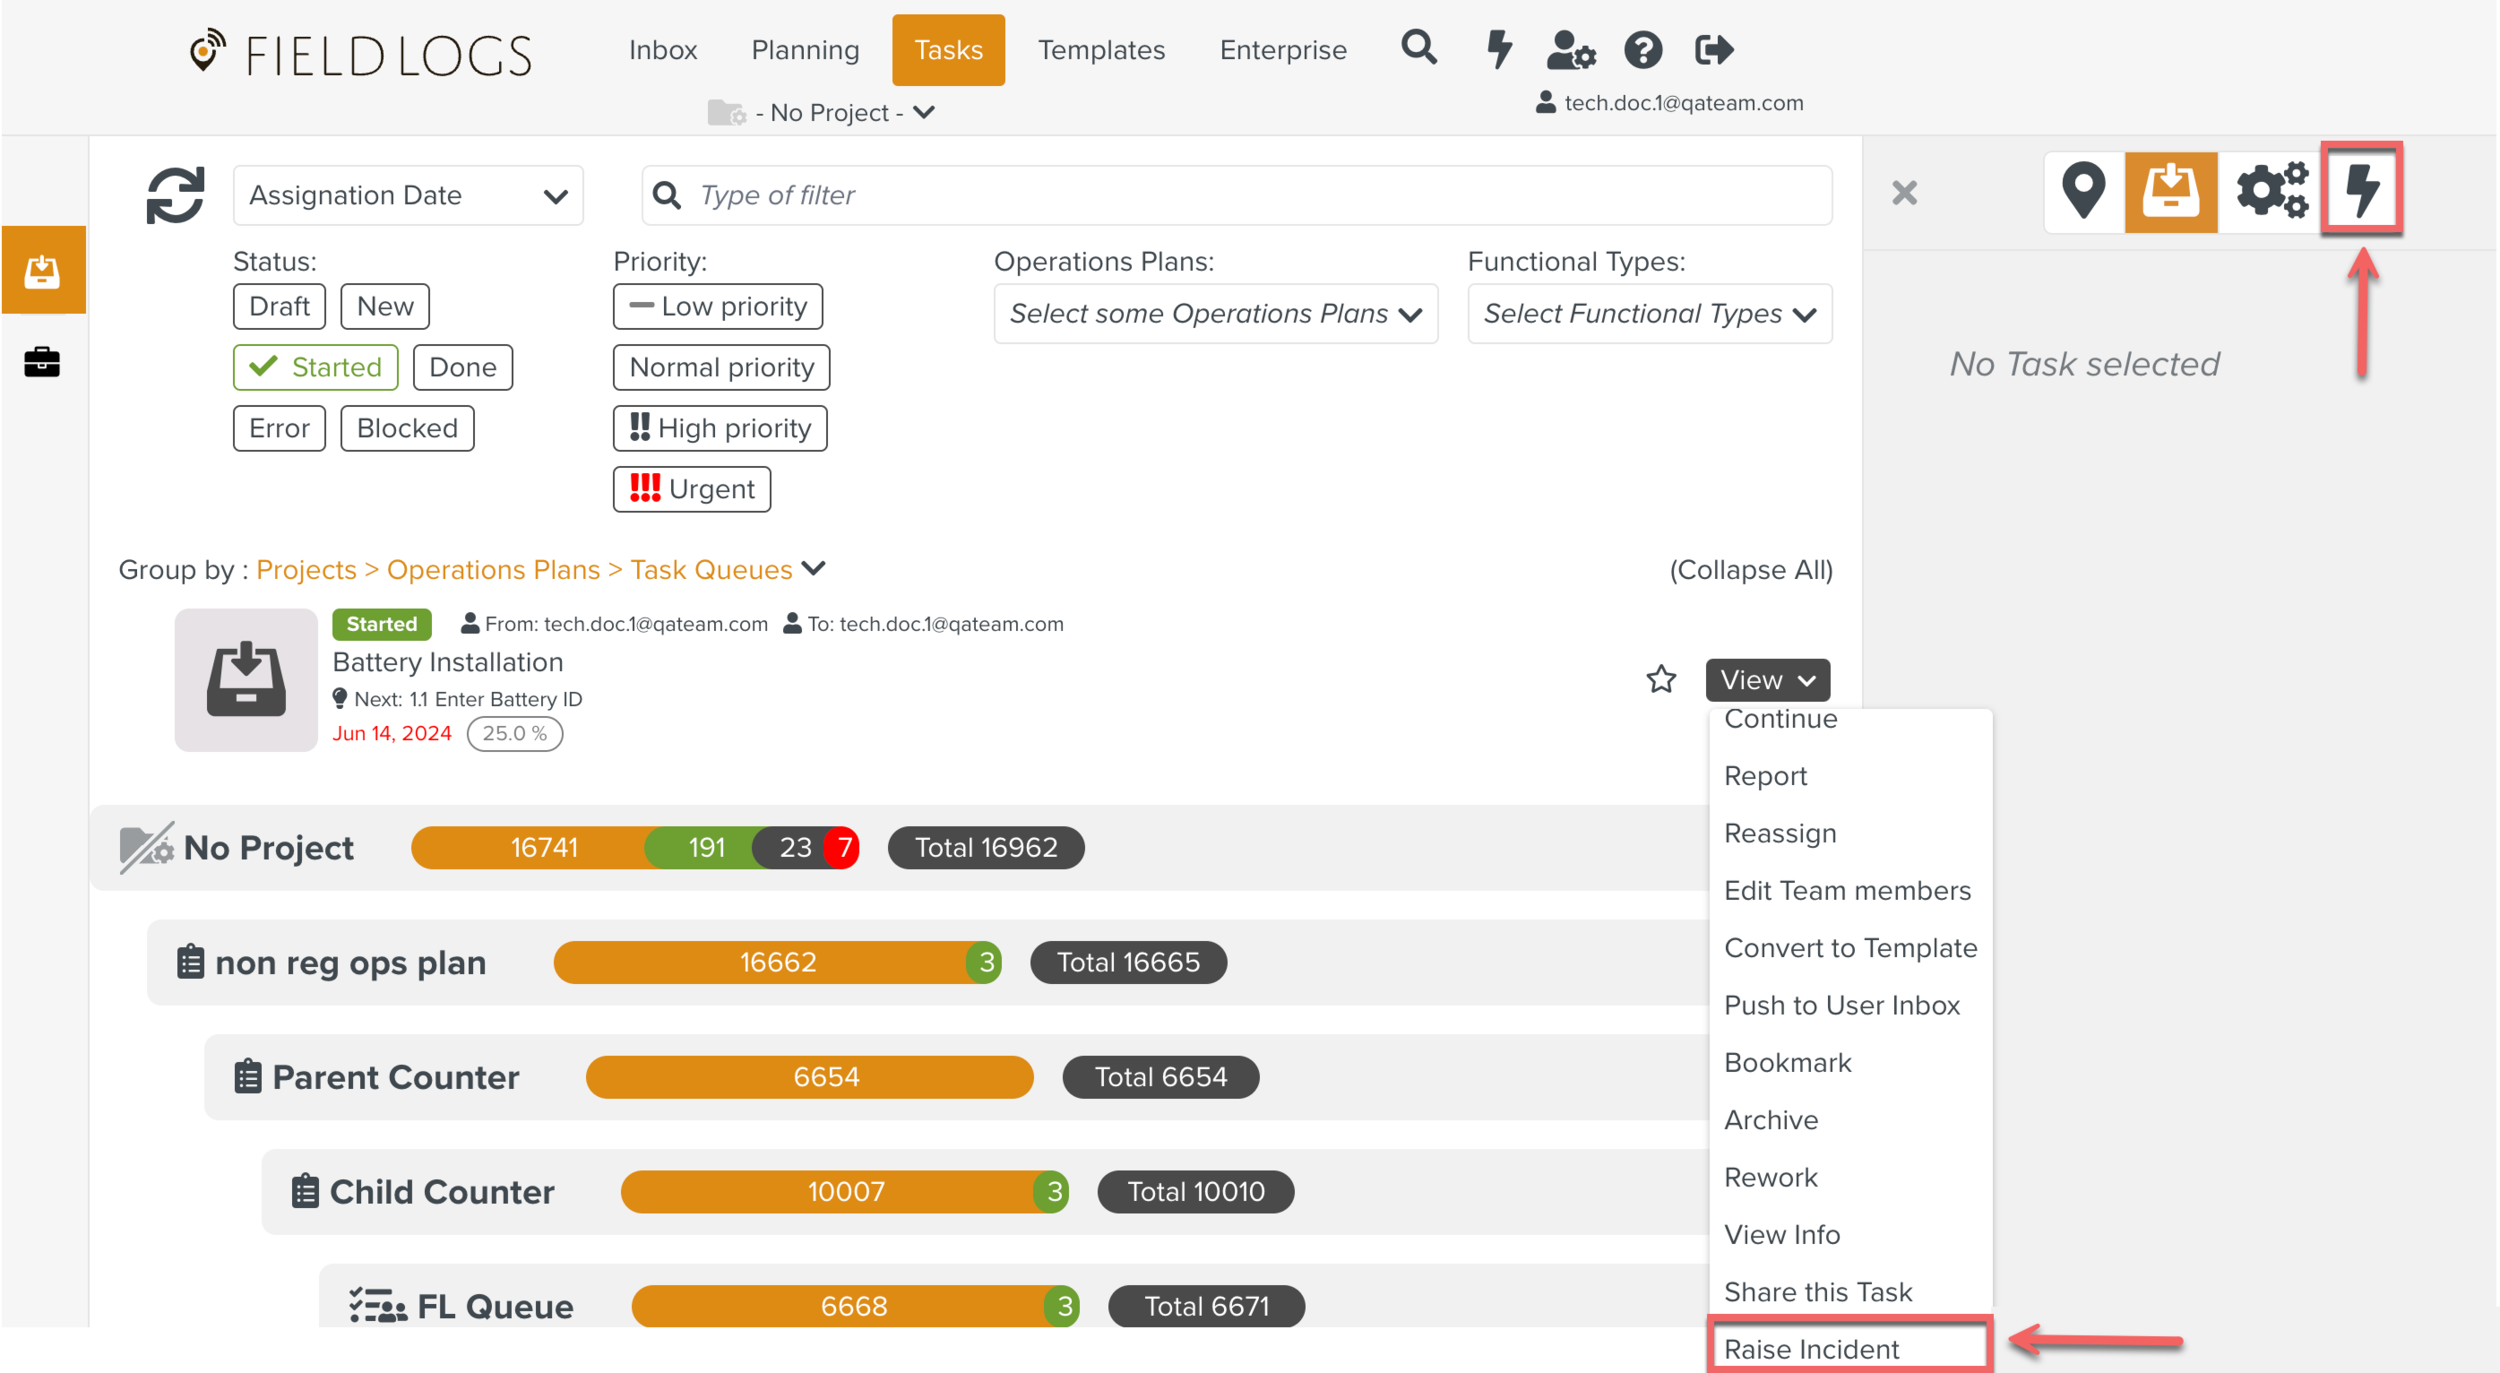
Expand the button on the required Task and click Raise Incident.
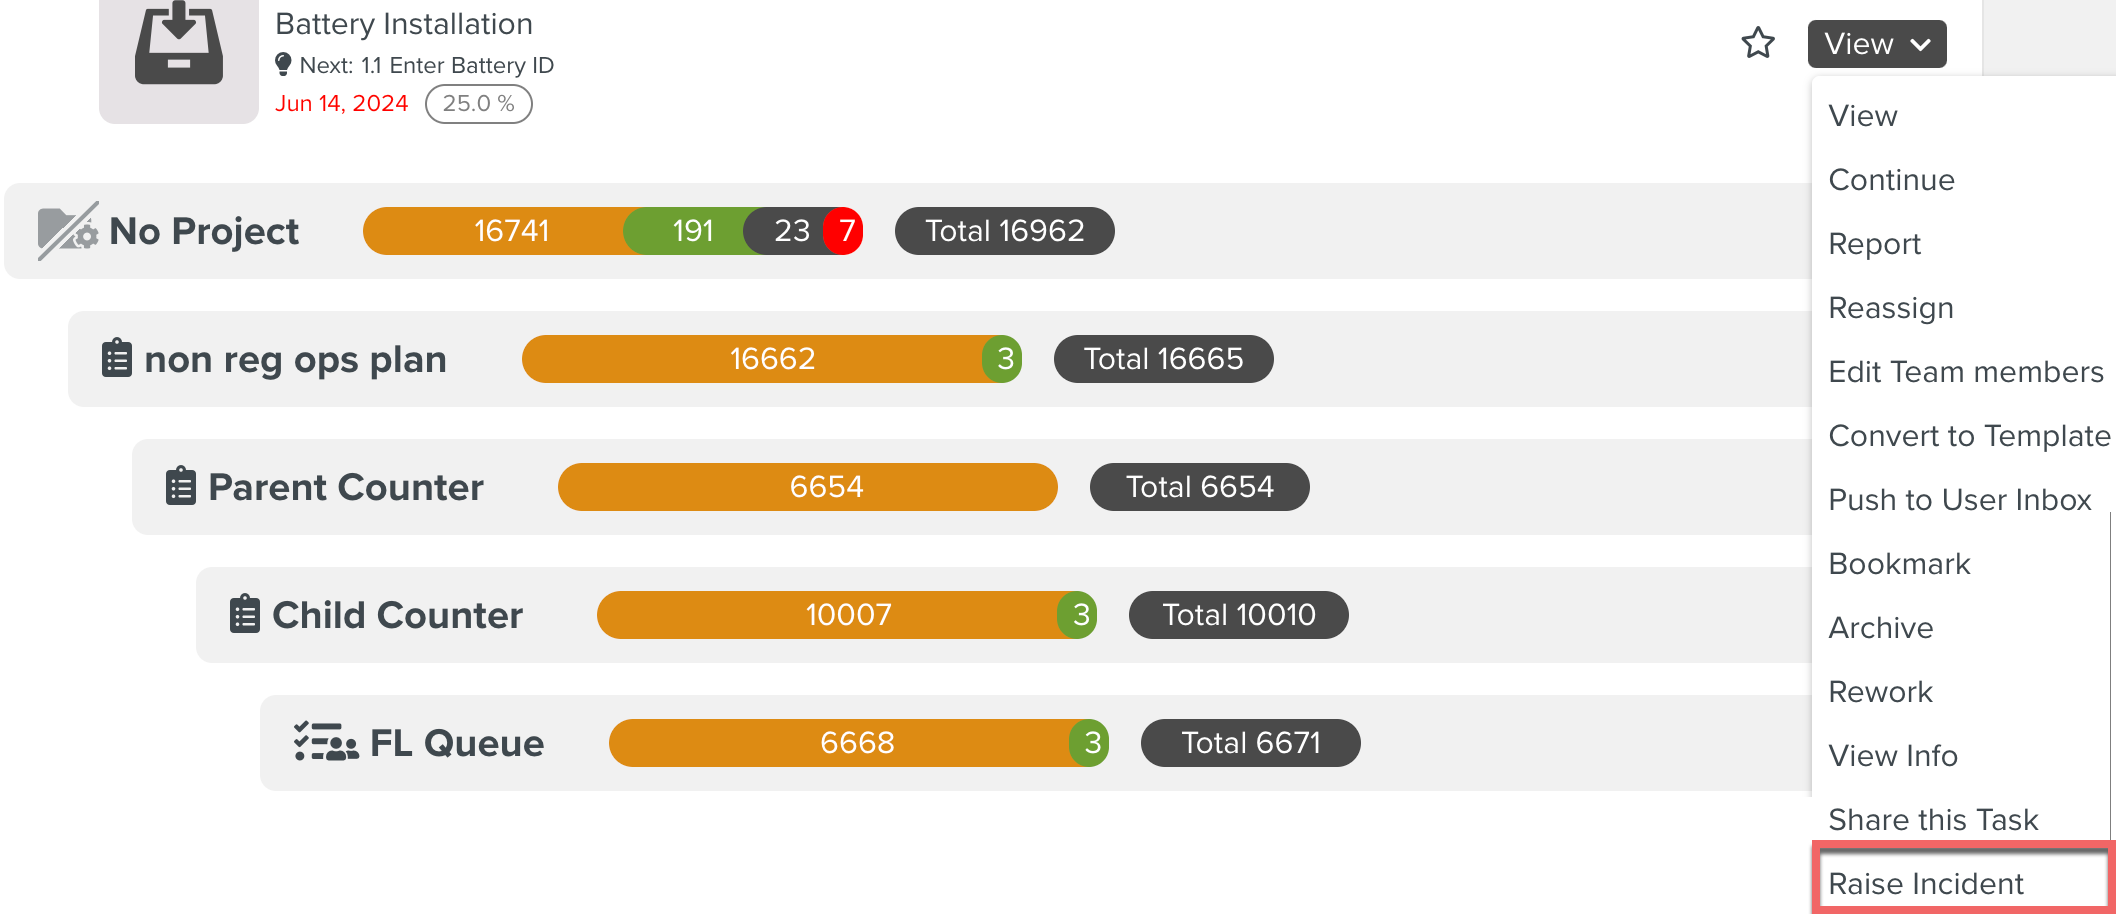
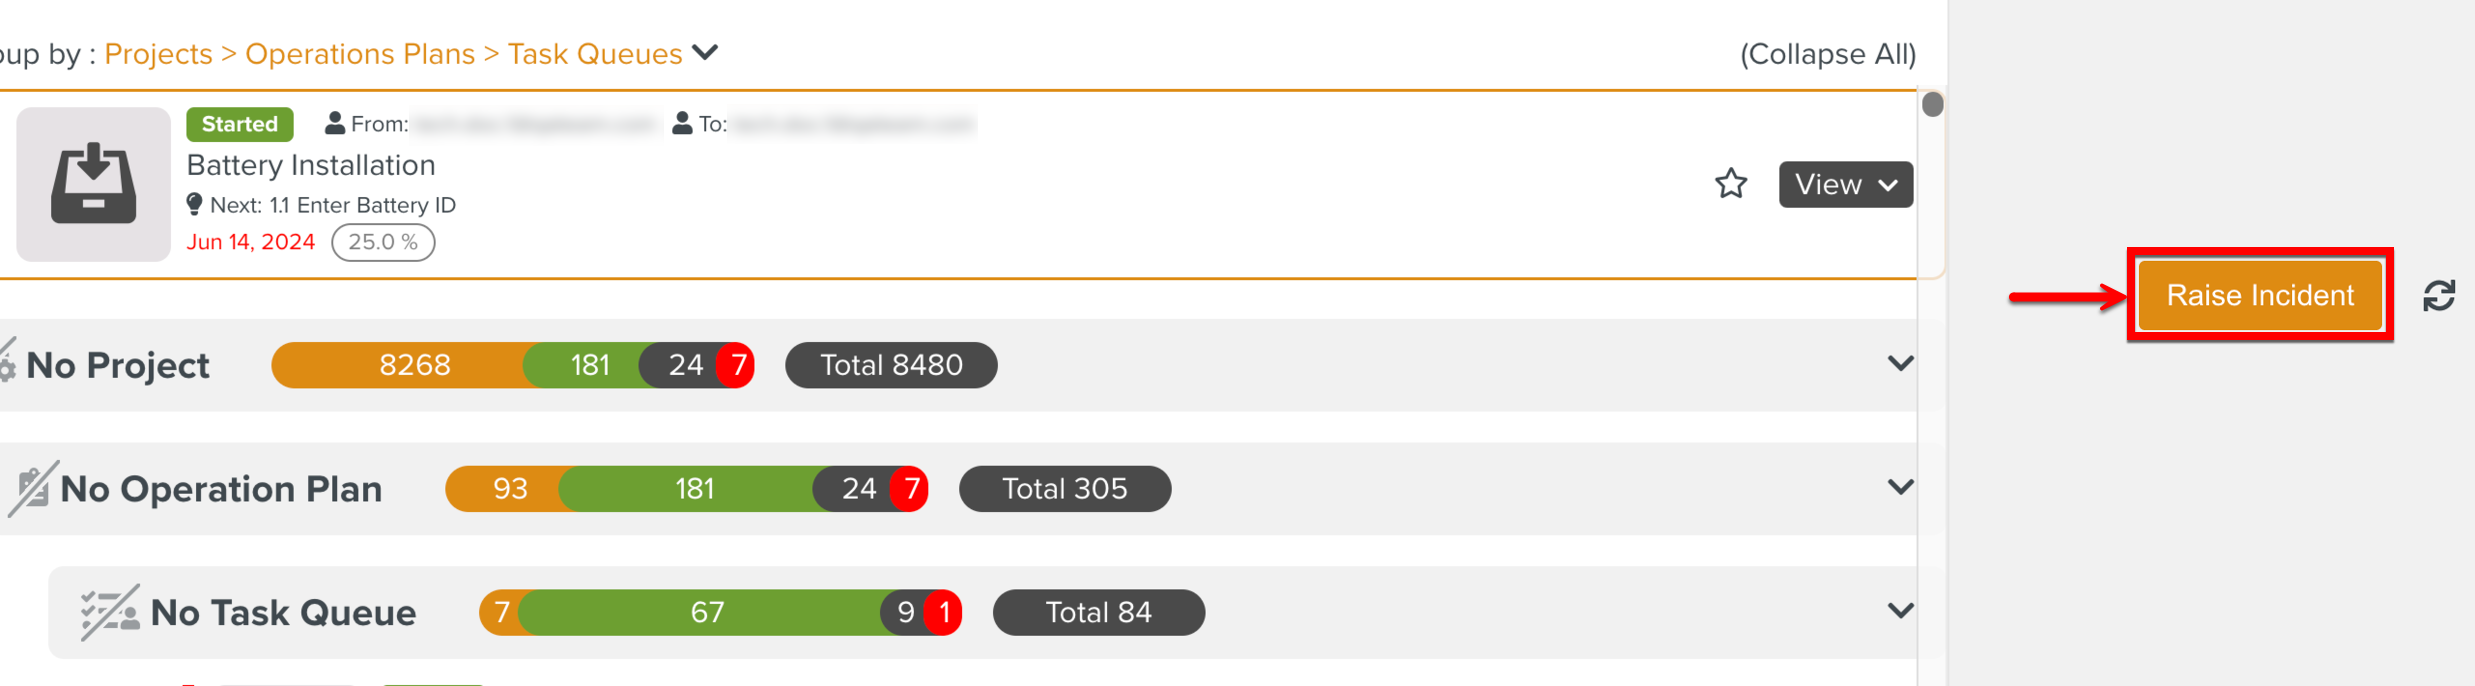
You can also select the Task and click
 on the right pane to raise an Incident as shown below.
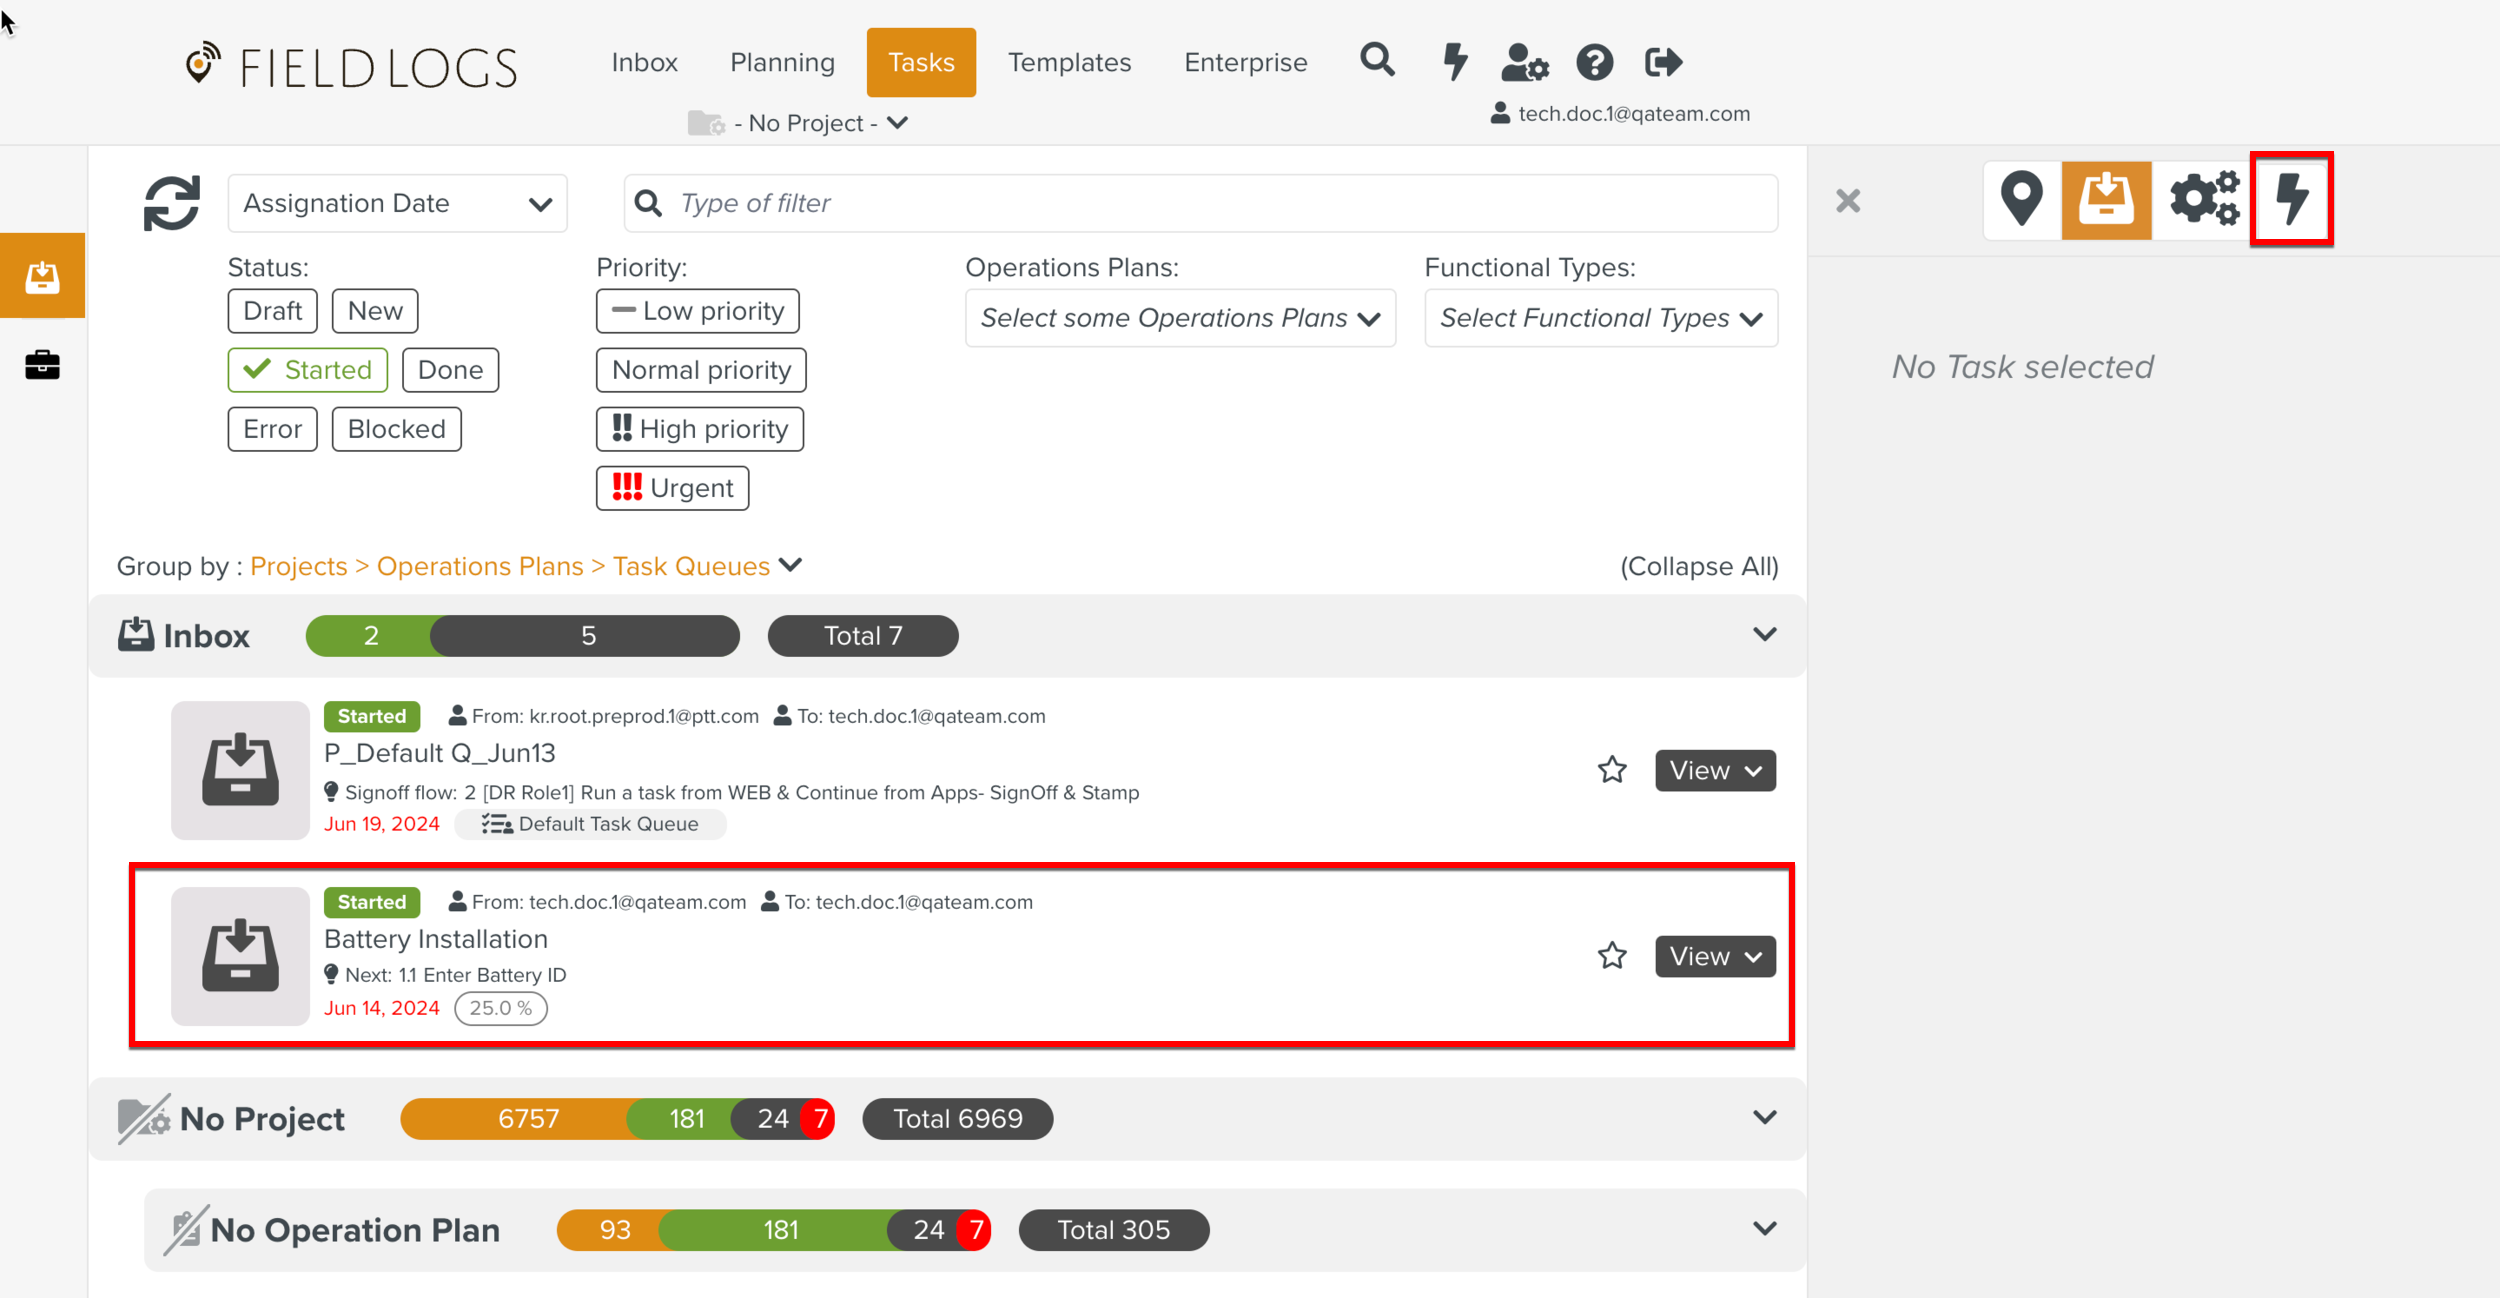
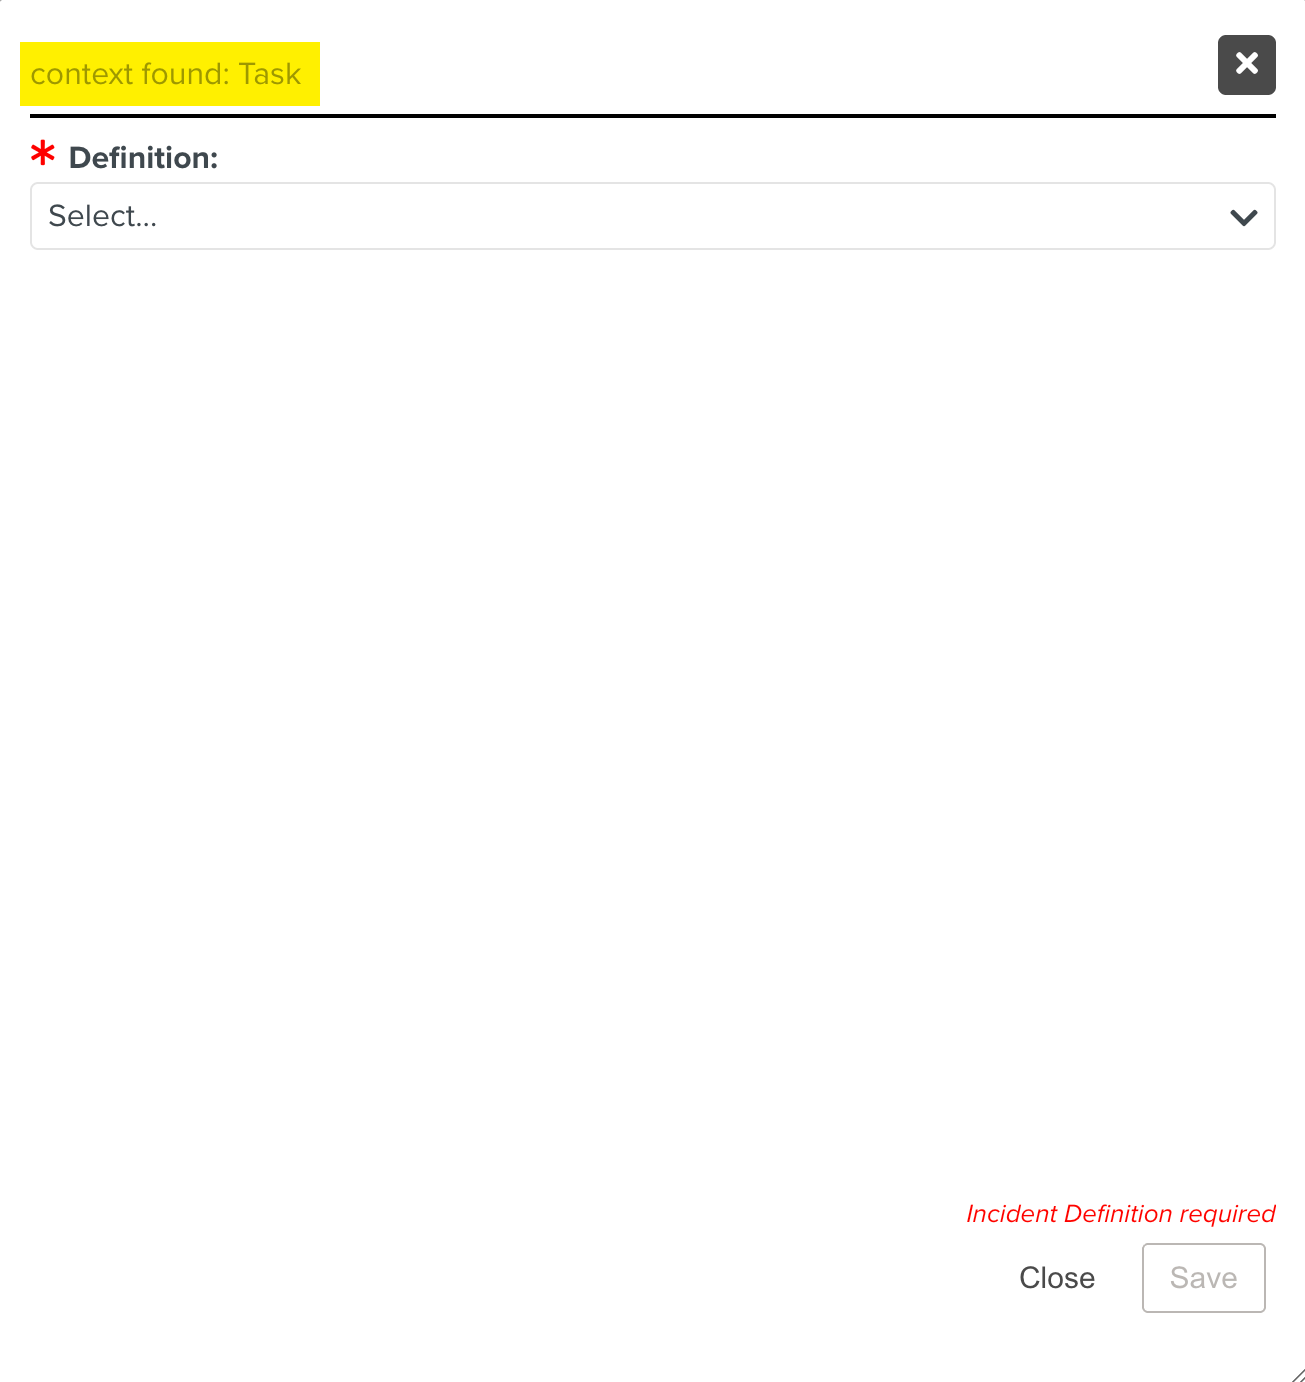
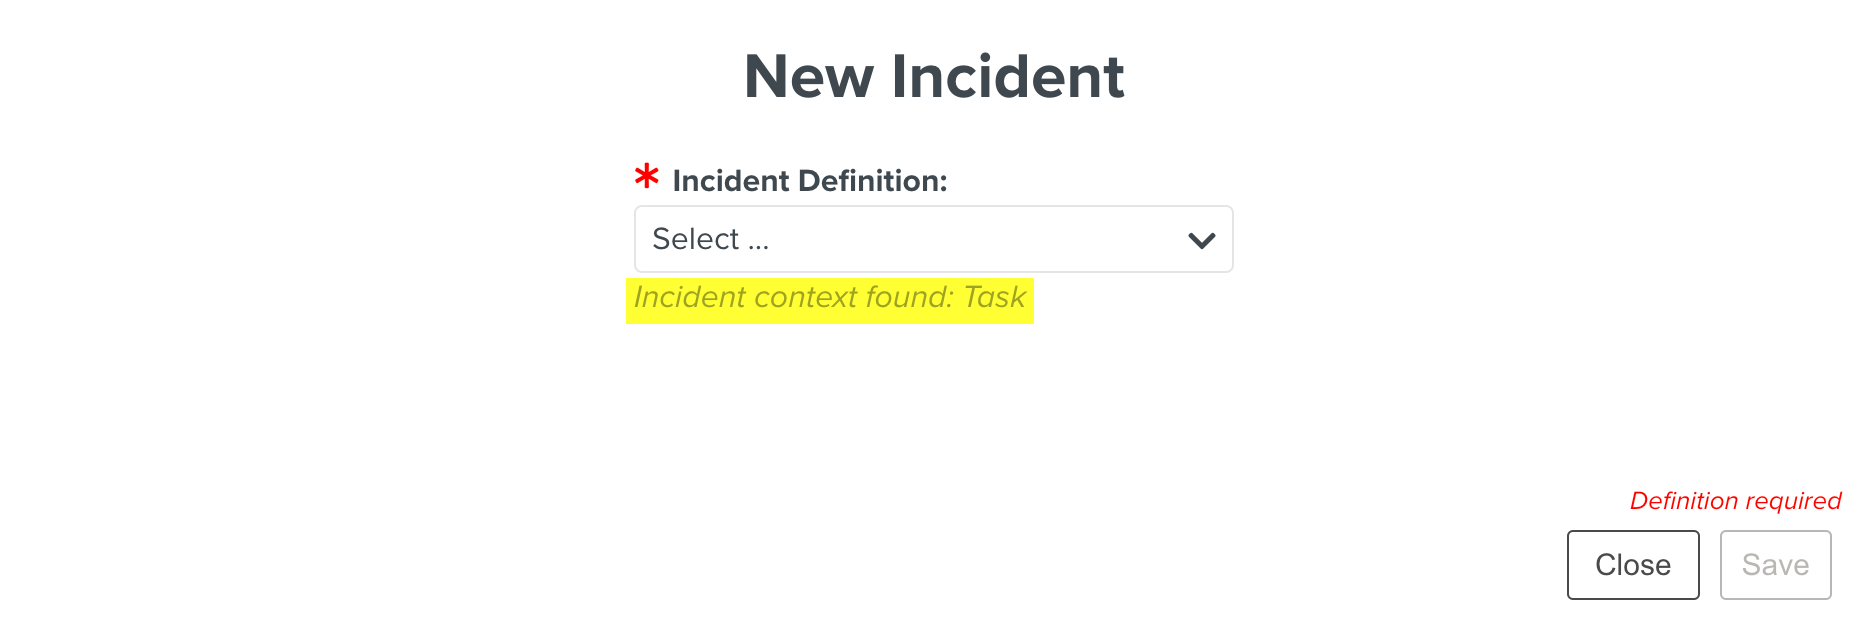
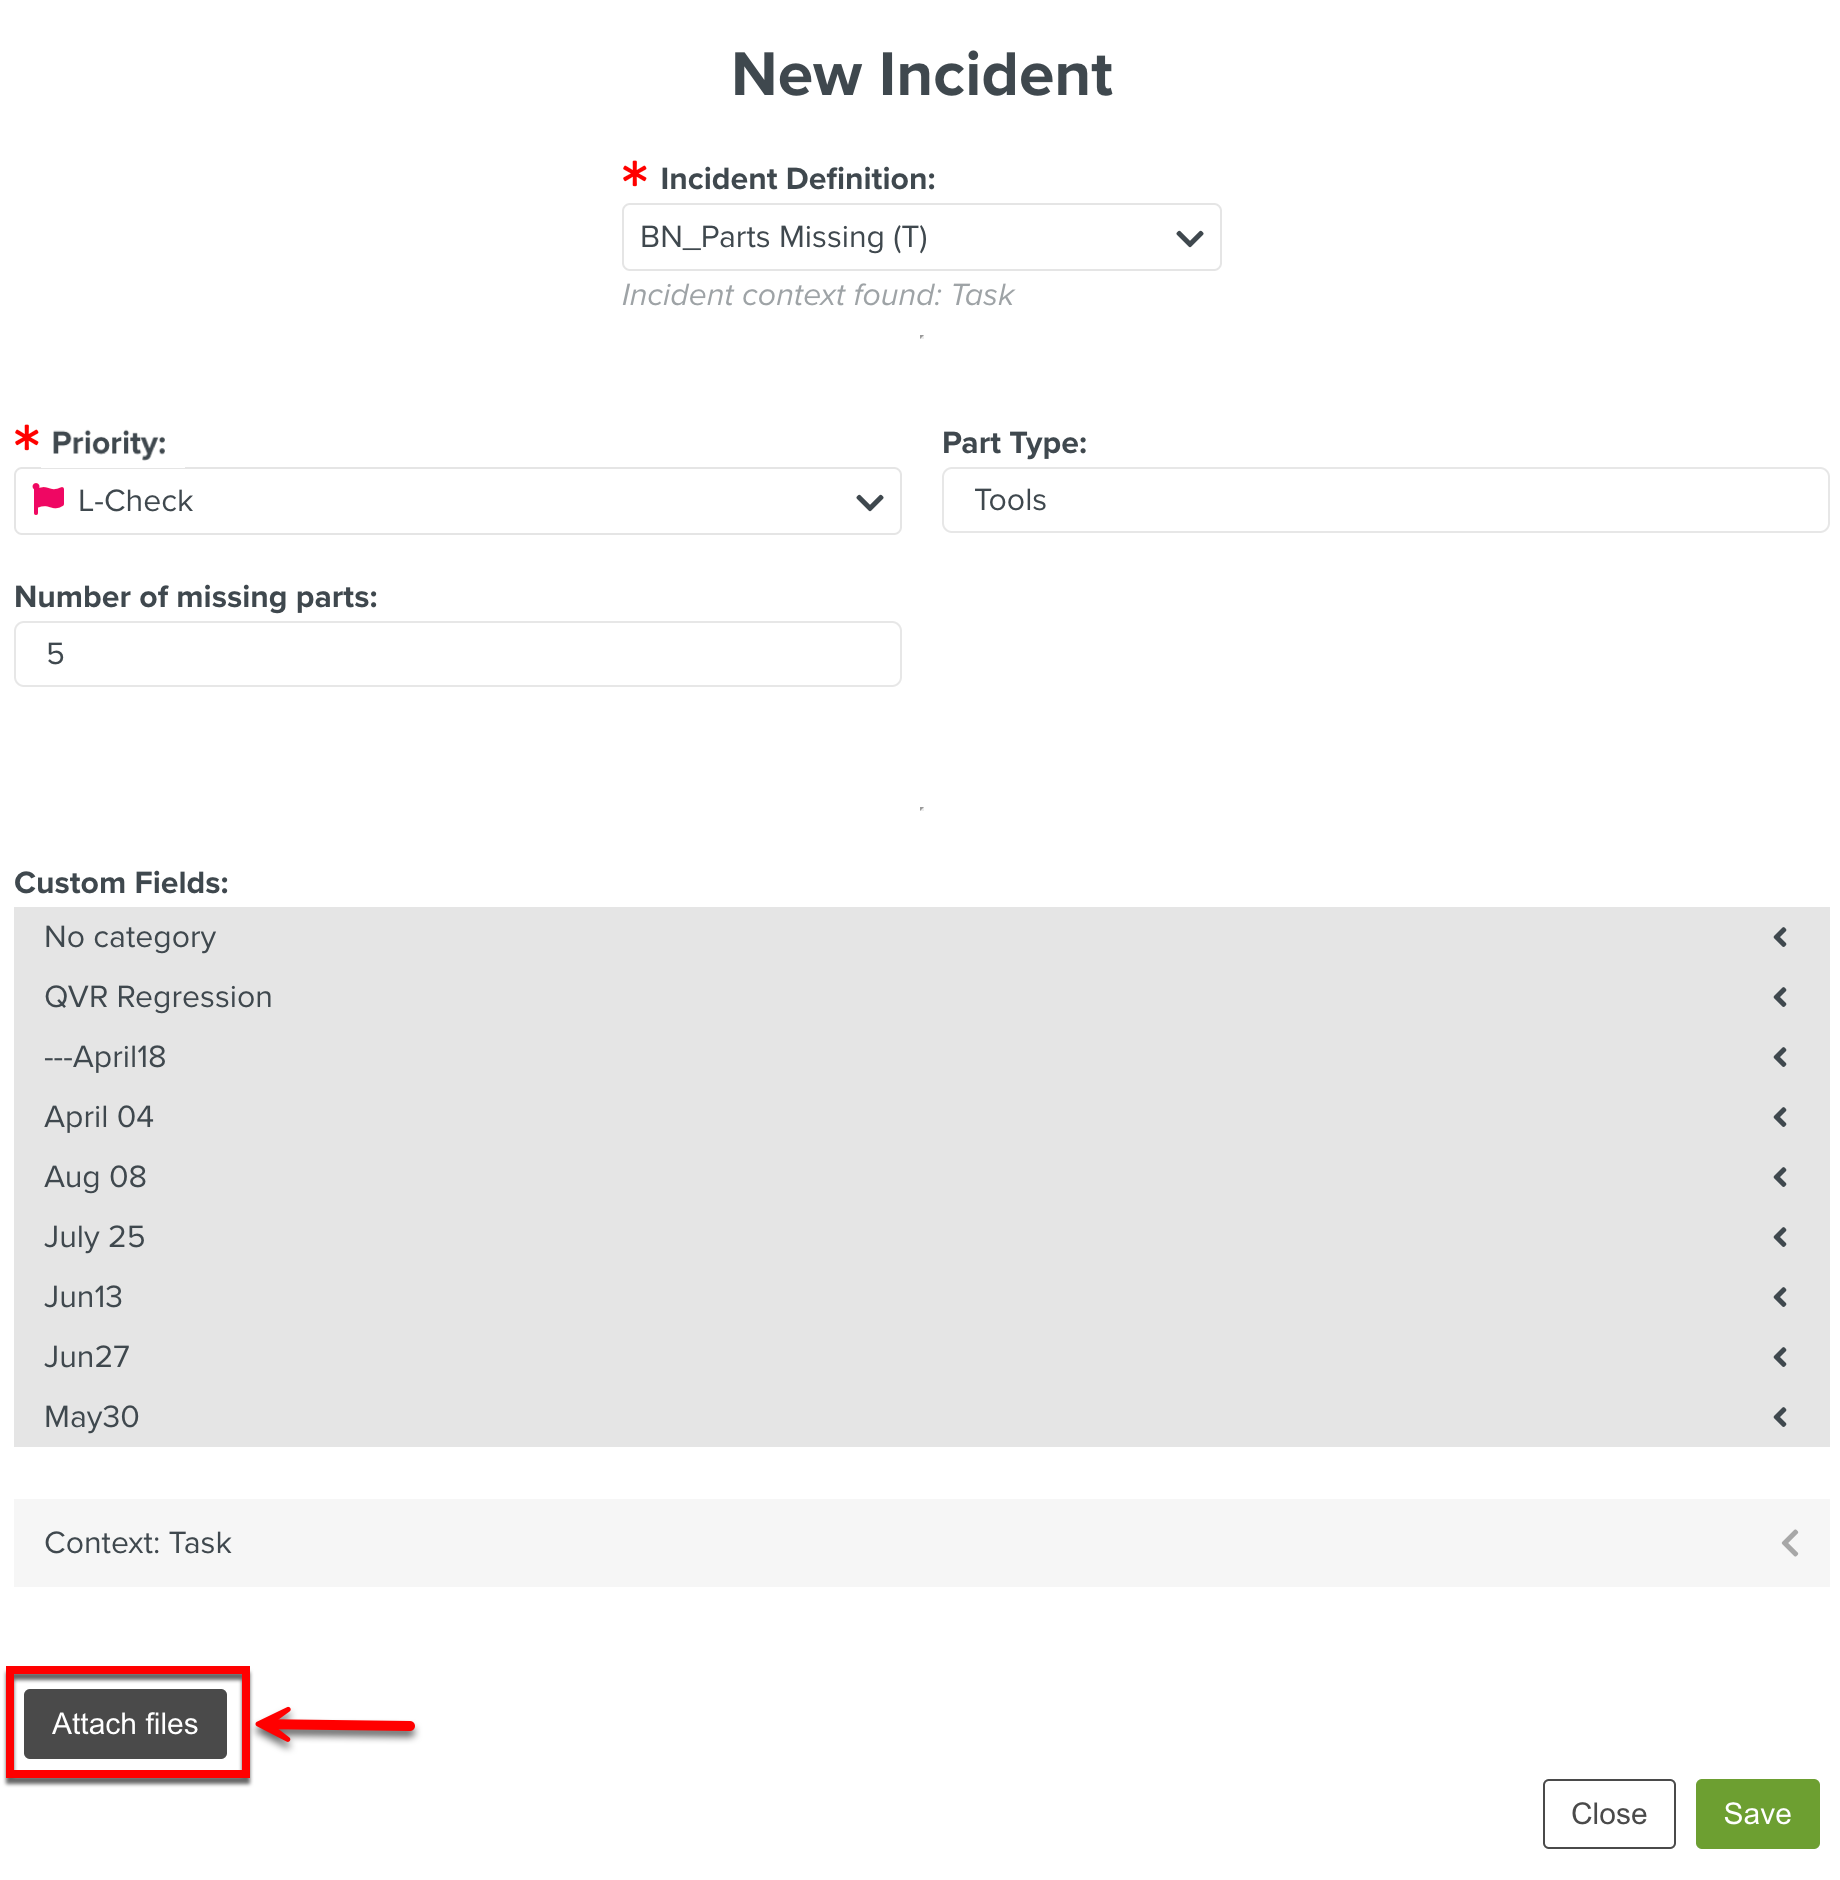
A dialog appears as shown below.

The Incident Context is displayed as Task.
Note
The dialog is resizable and can be moved anywhere around the screen.
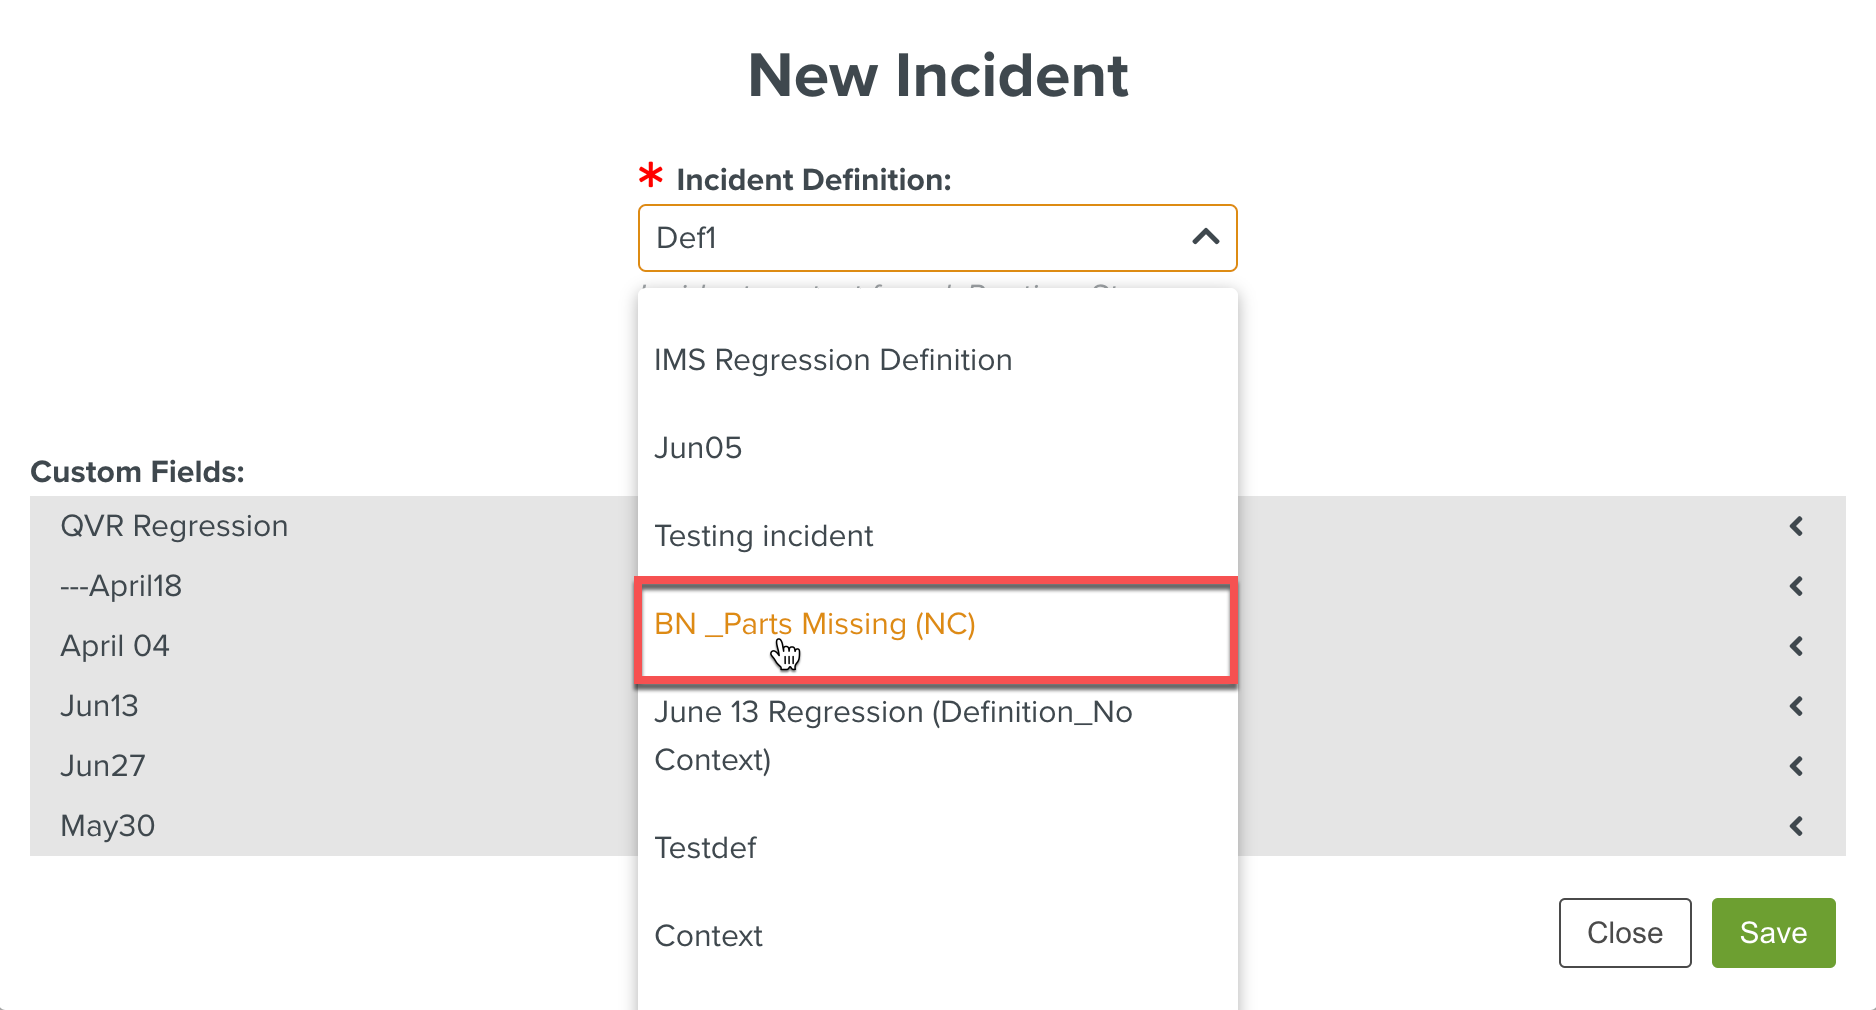
From the Incident Definition dropdown, select the required Incident. The Incidents are displayed under their respective Incident Groups in a hierarchical structure.

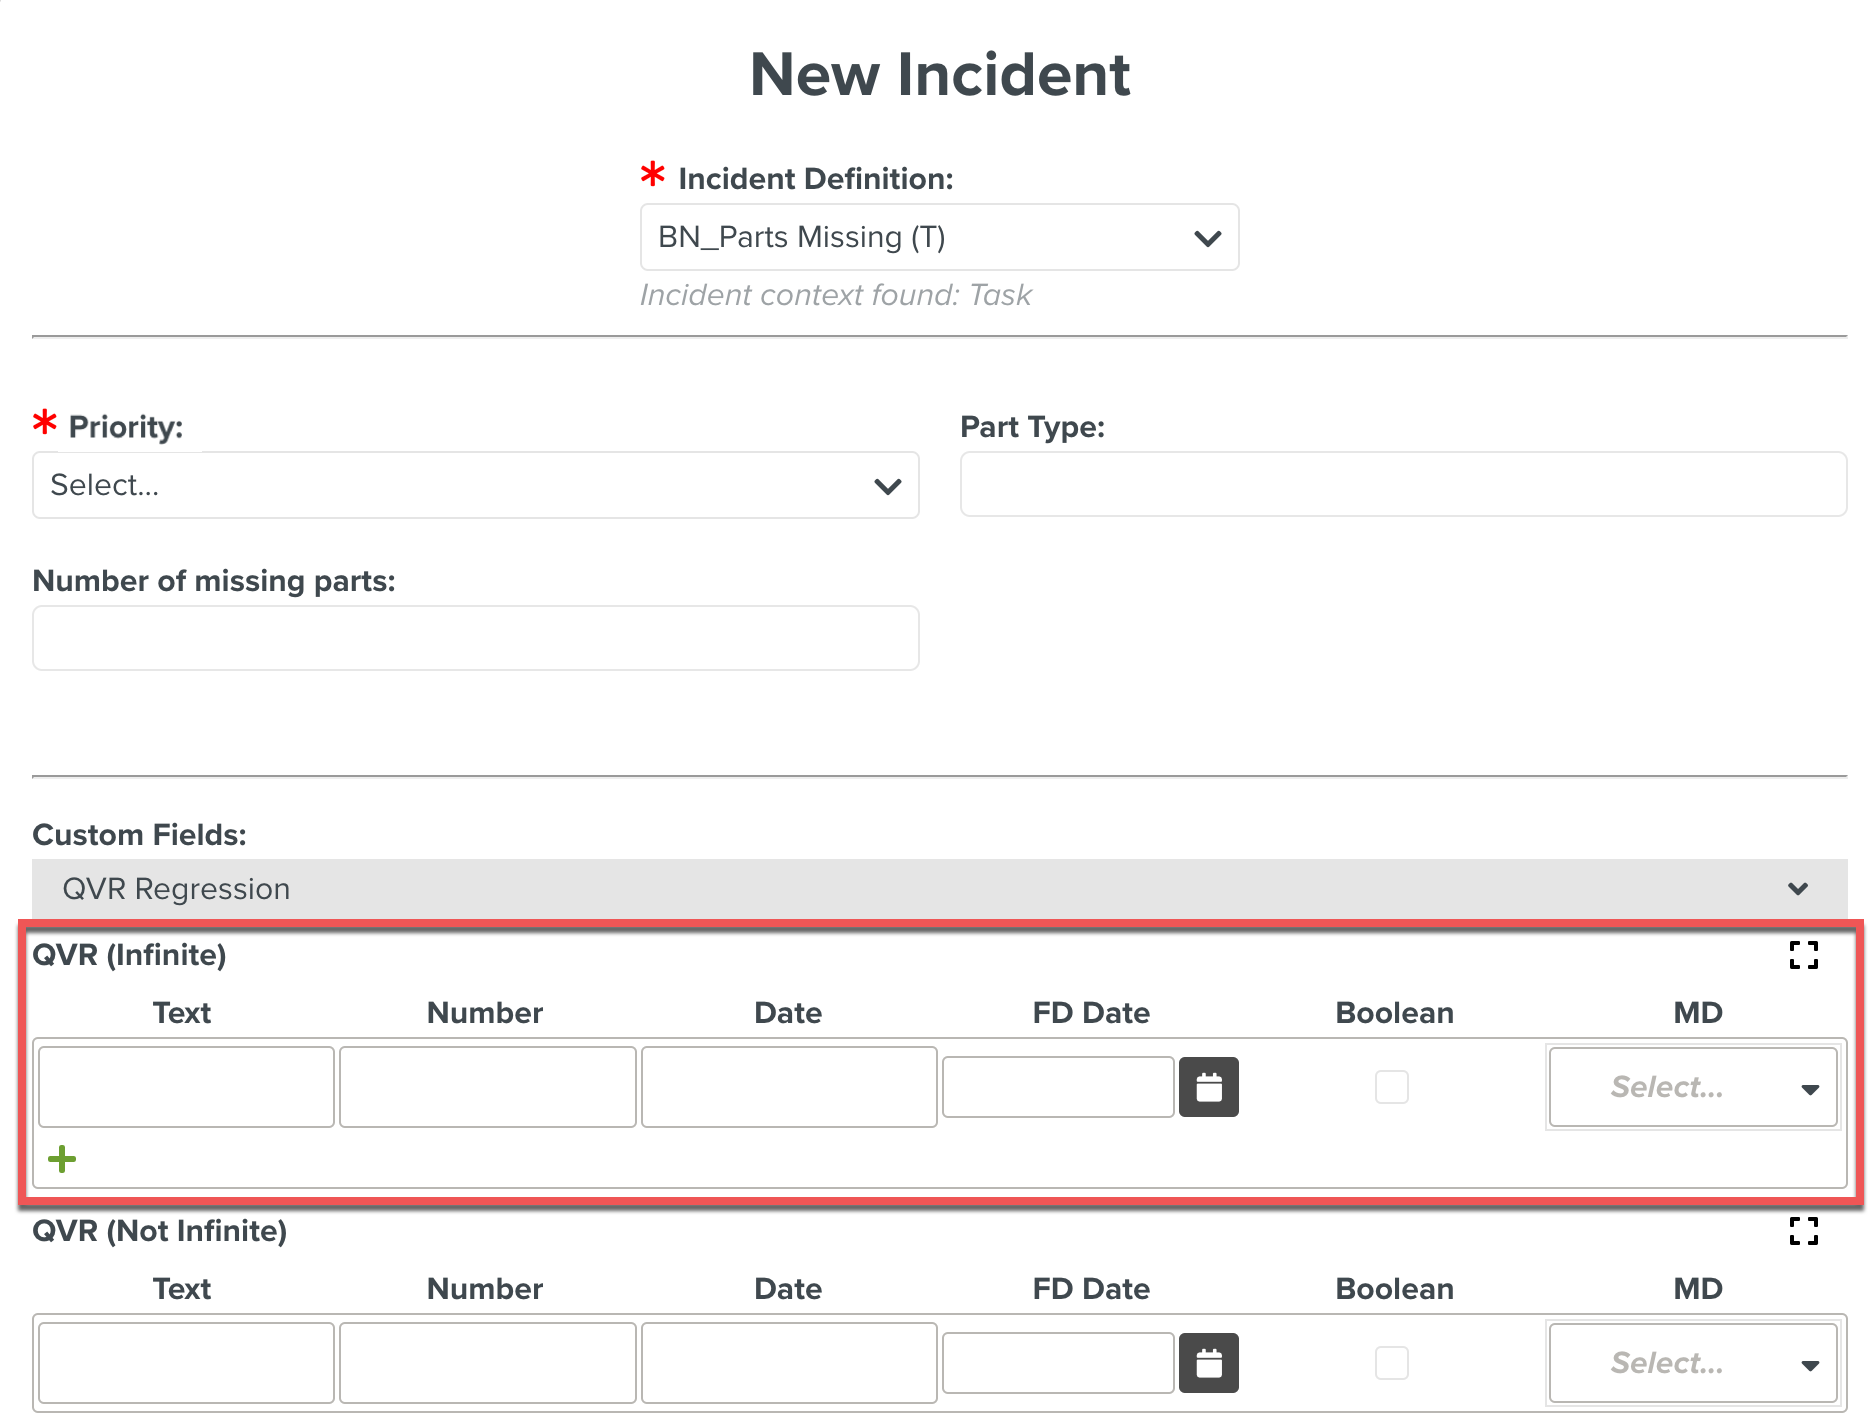
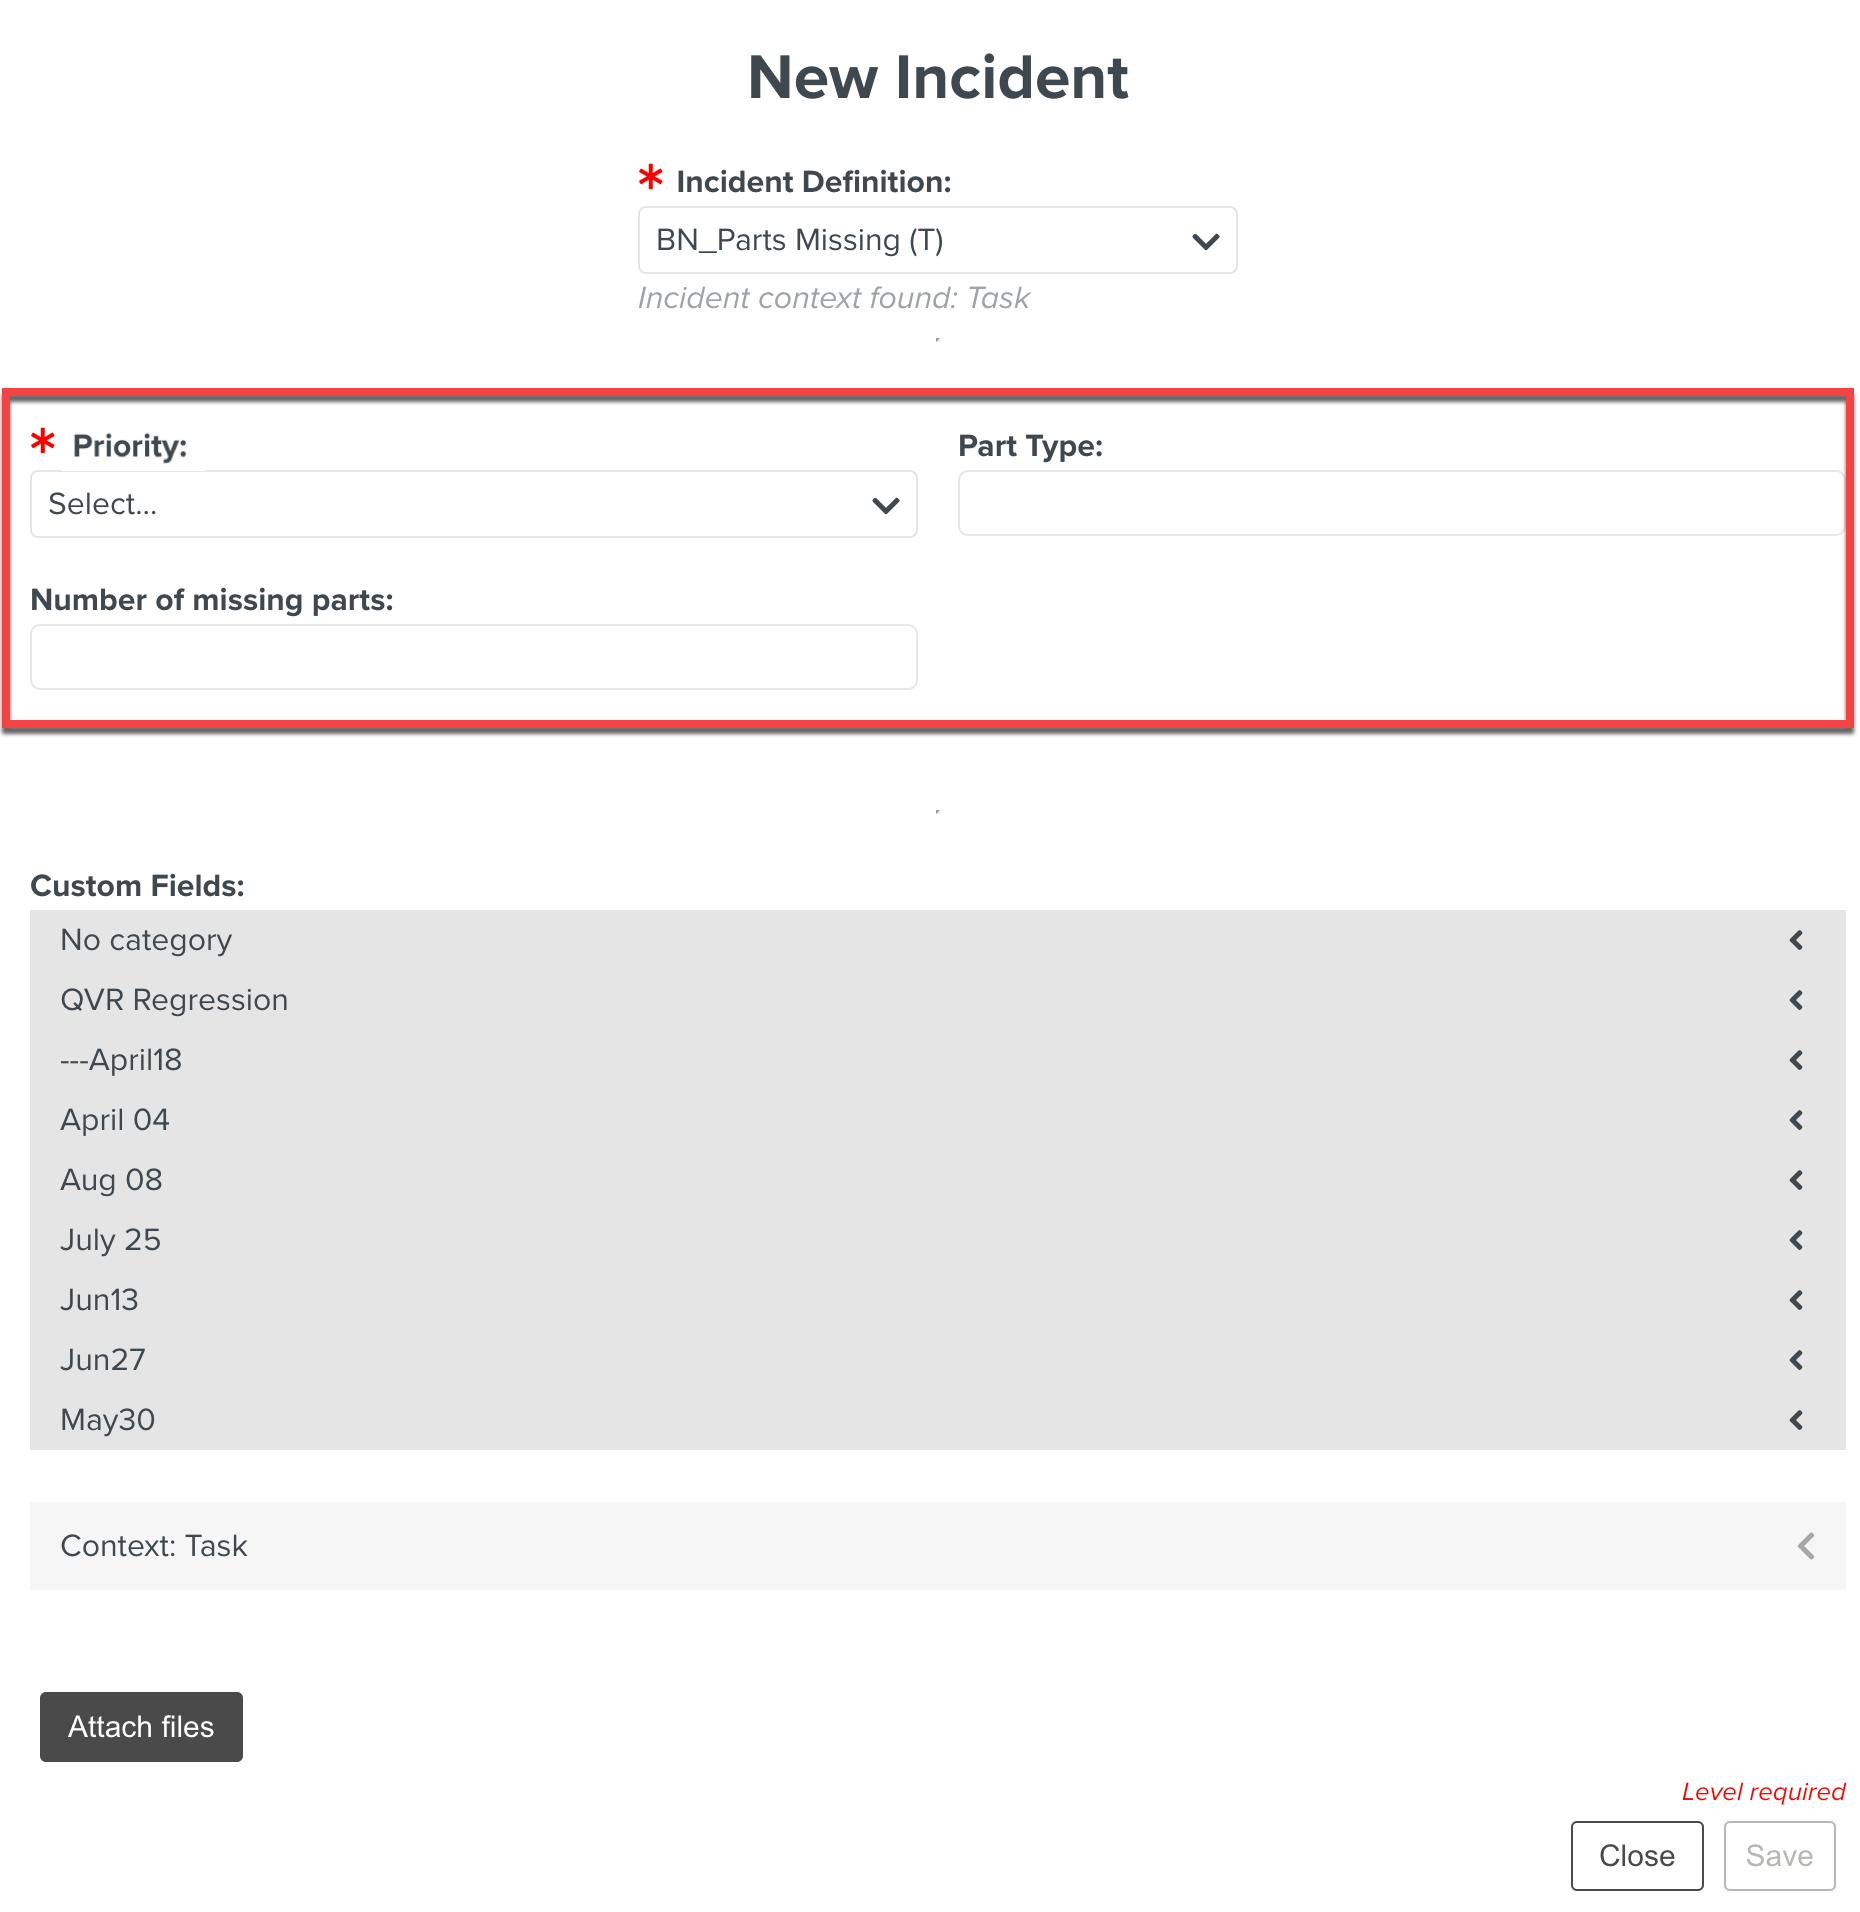
The Fields that are configured for the Incident are displayed.

Add the details in the following Fields as shown below:
Priority: Select an option to set the severity level of the Incident.
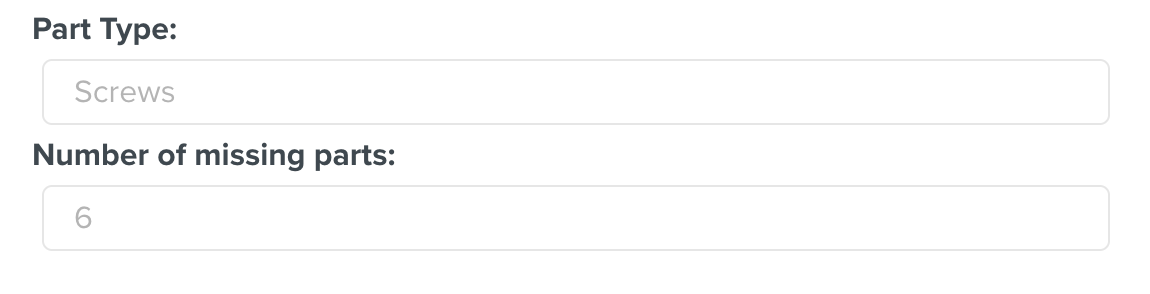
Part Type: Enter the type of missing parts.
Number of missing parts: Enter or set the number of missing parts. You can use
 to increase or
  to decrease the number.
Note
For each Incident, the displayed Fields may vary based on the Incident Definition.
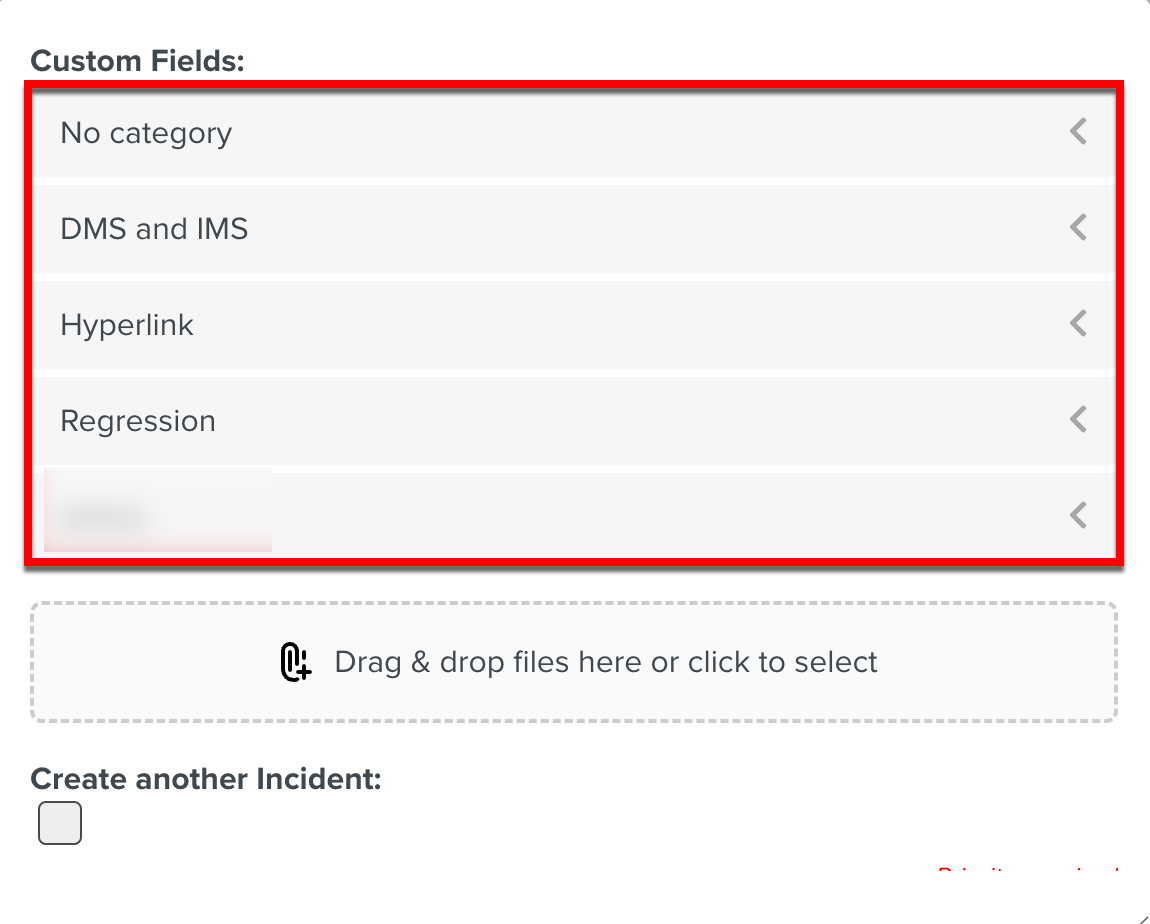
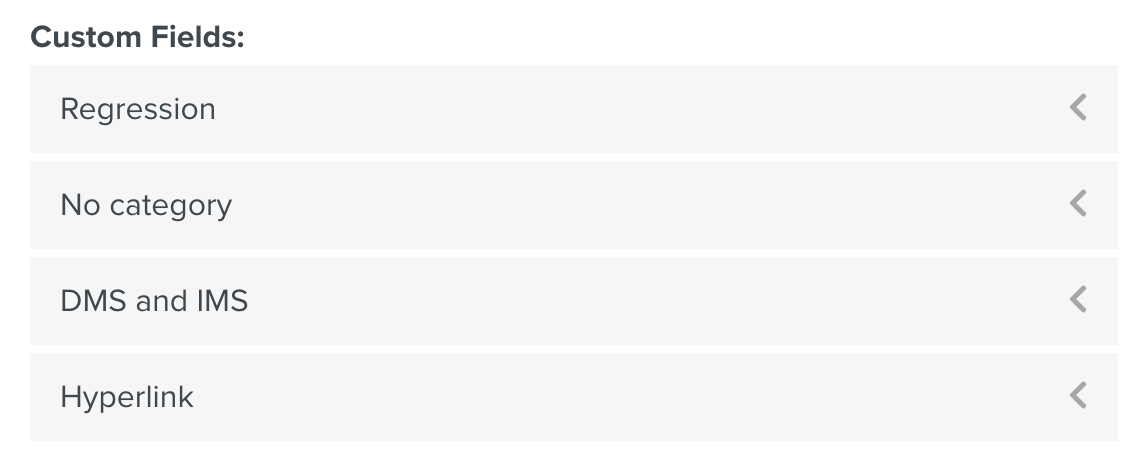
[Optional] In the section Custom Fields , select a Custom Field from a category and fill in the values for the Custom Fields.


Note
All the Custom Fields that are defined for Incidents are displayed.
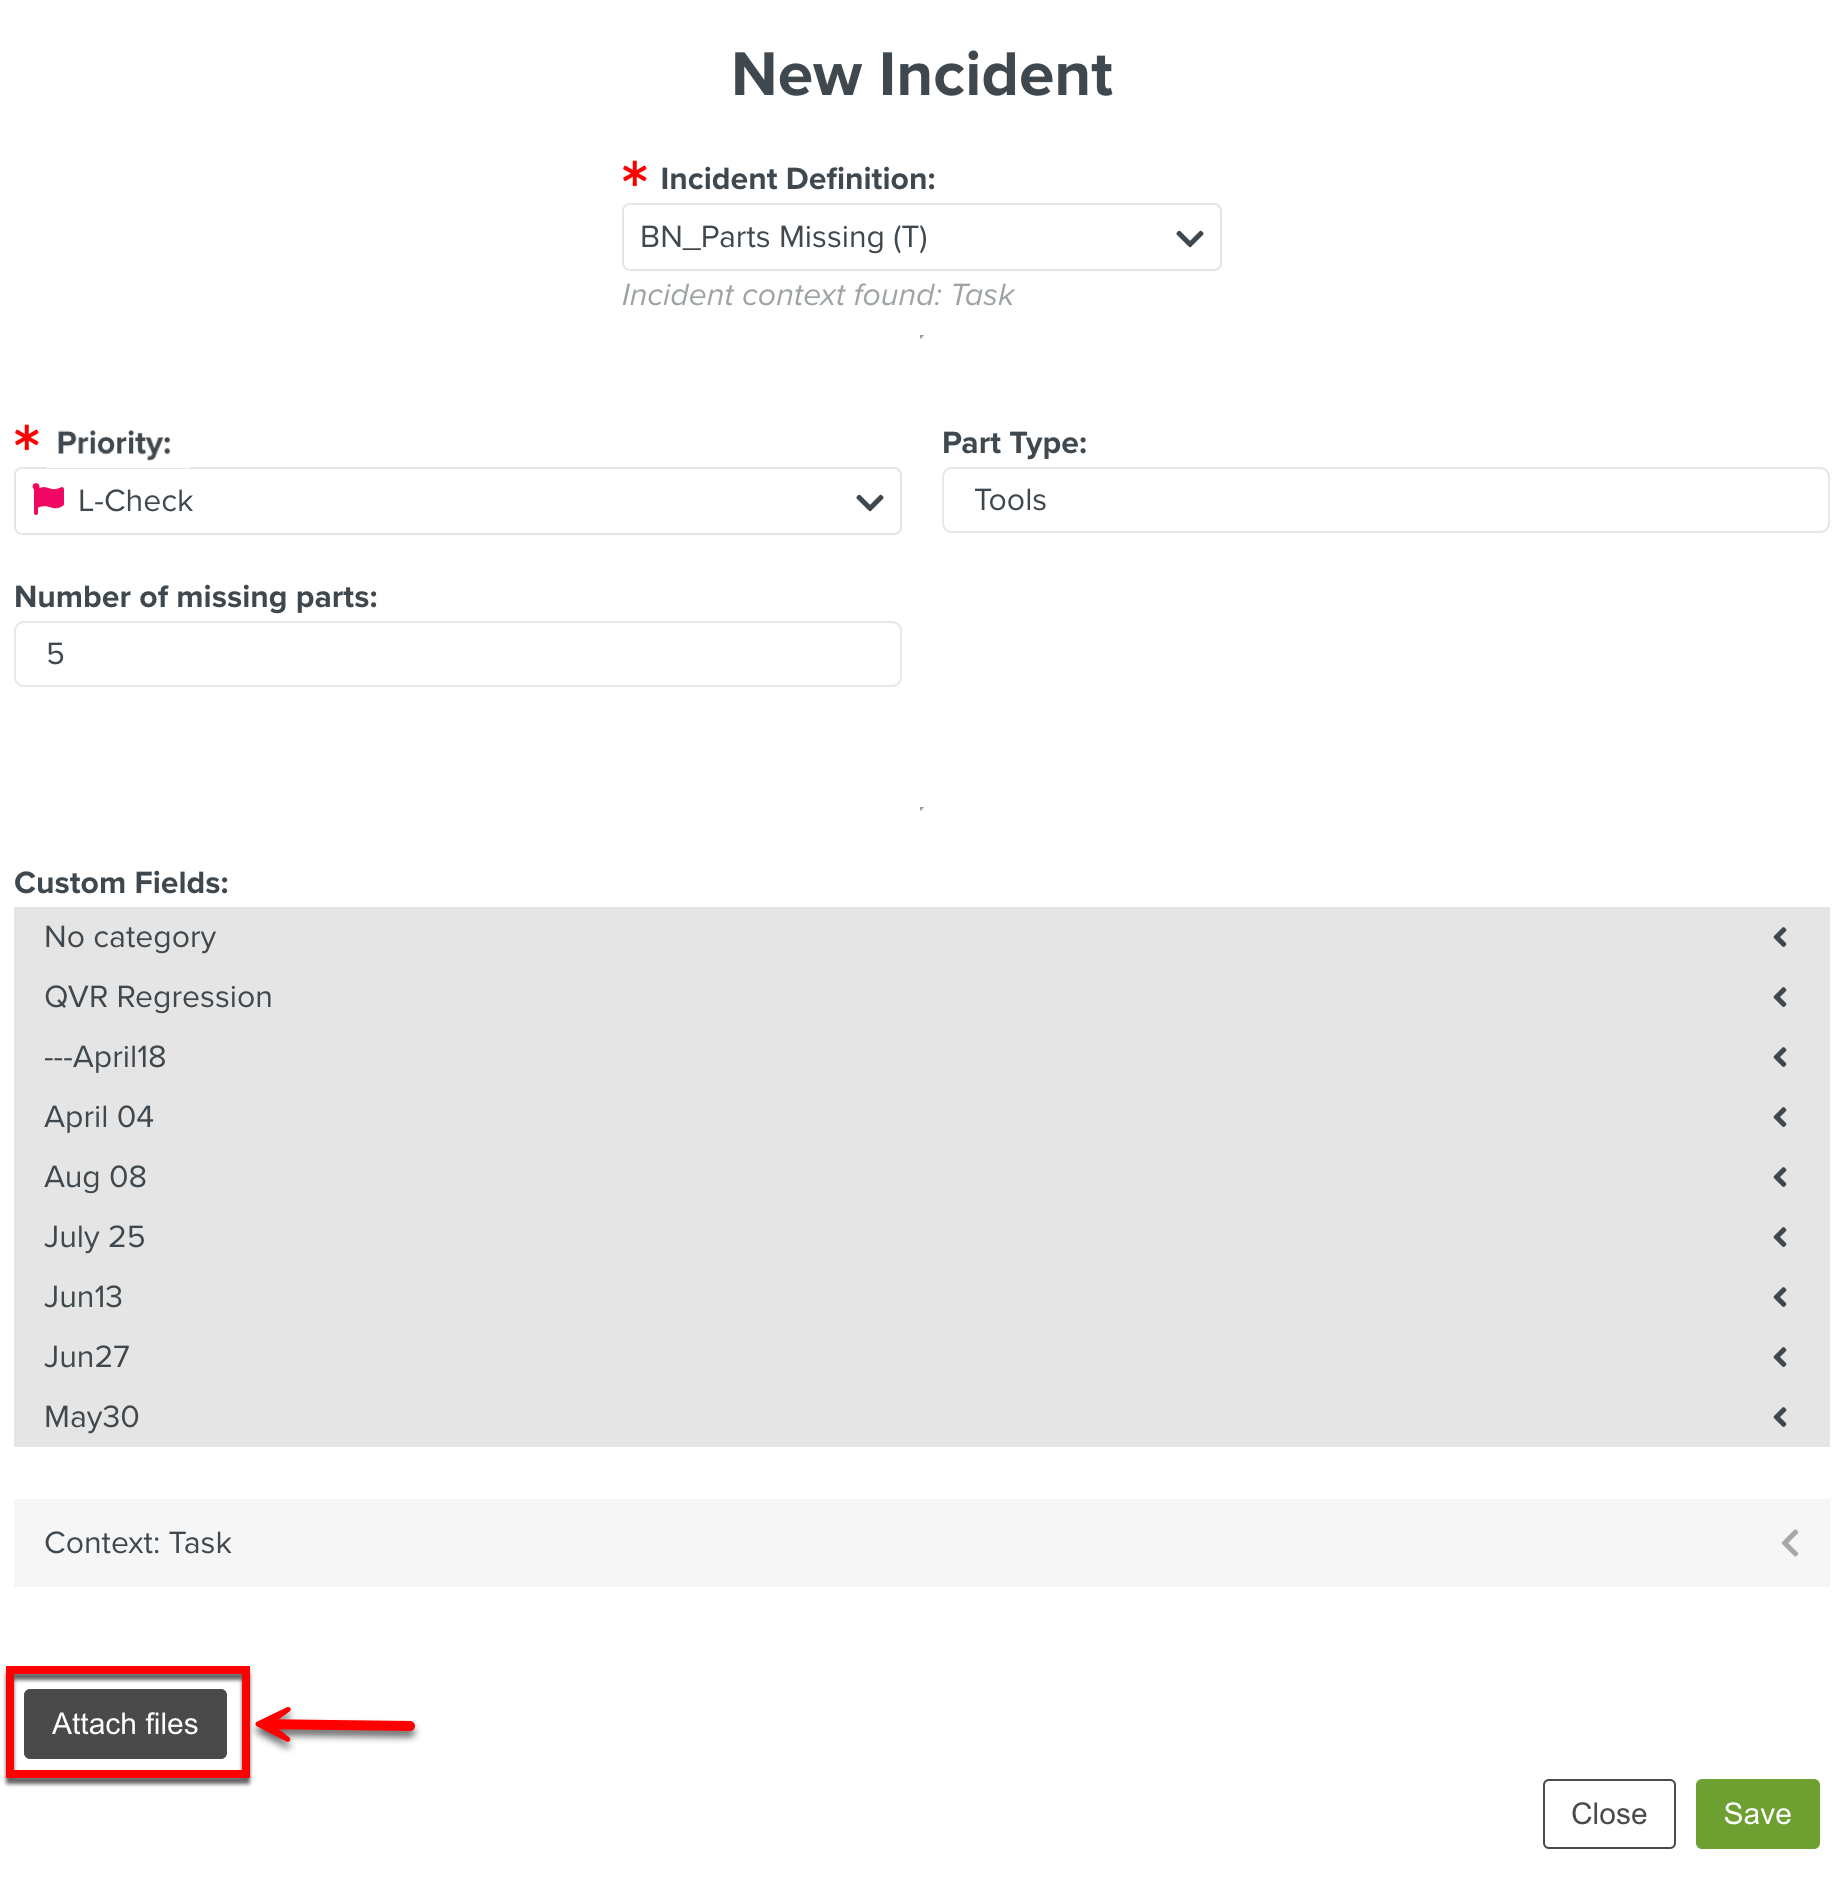
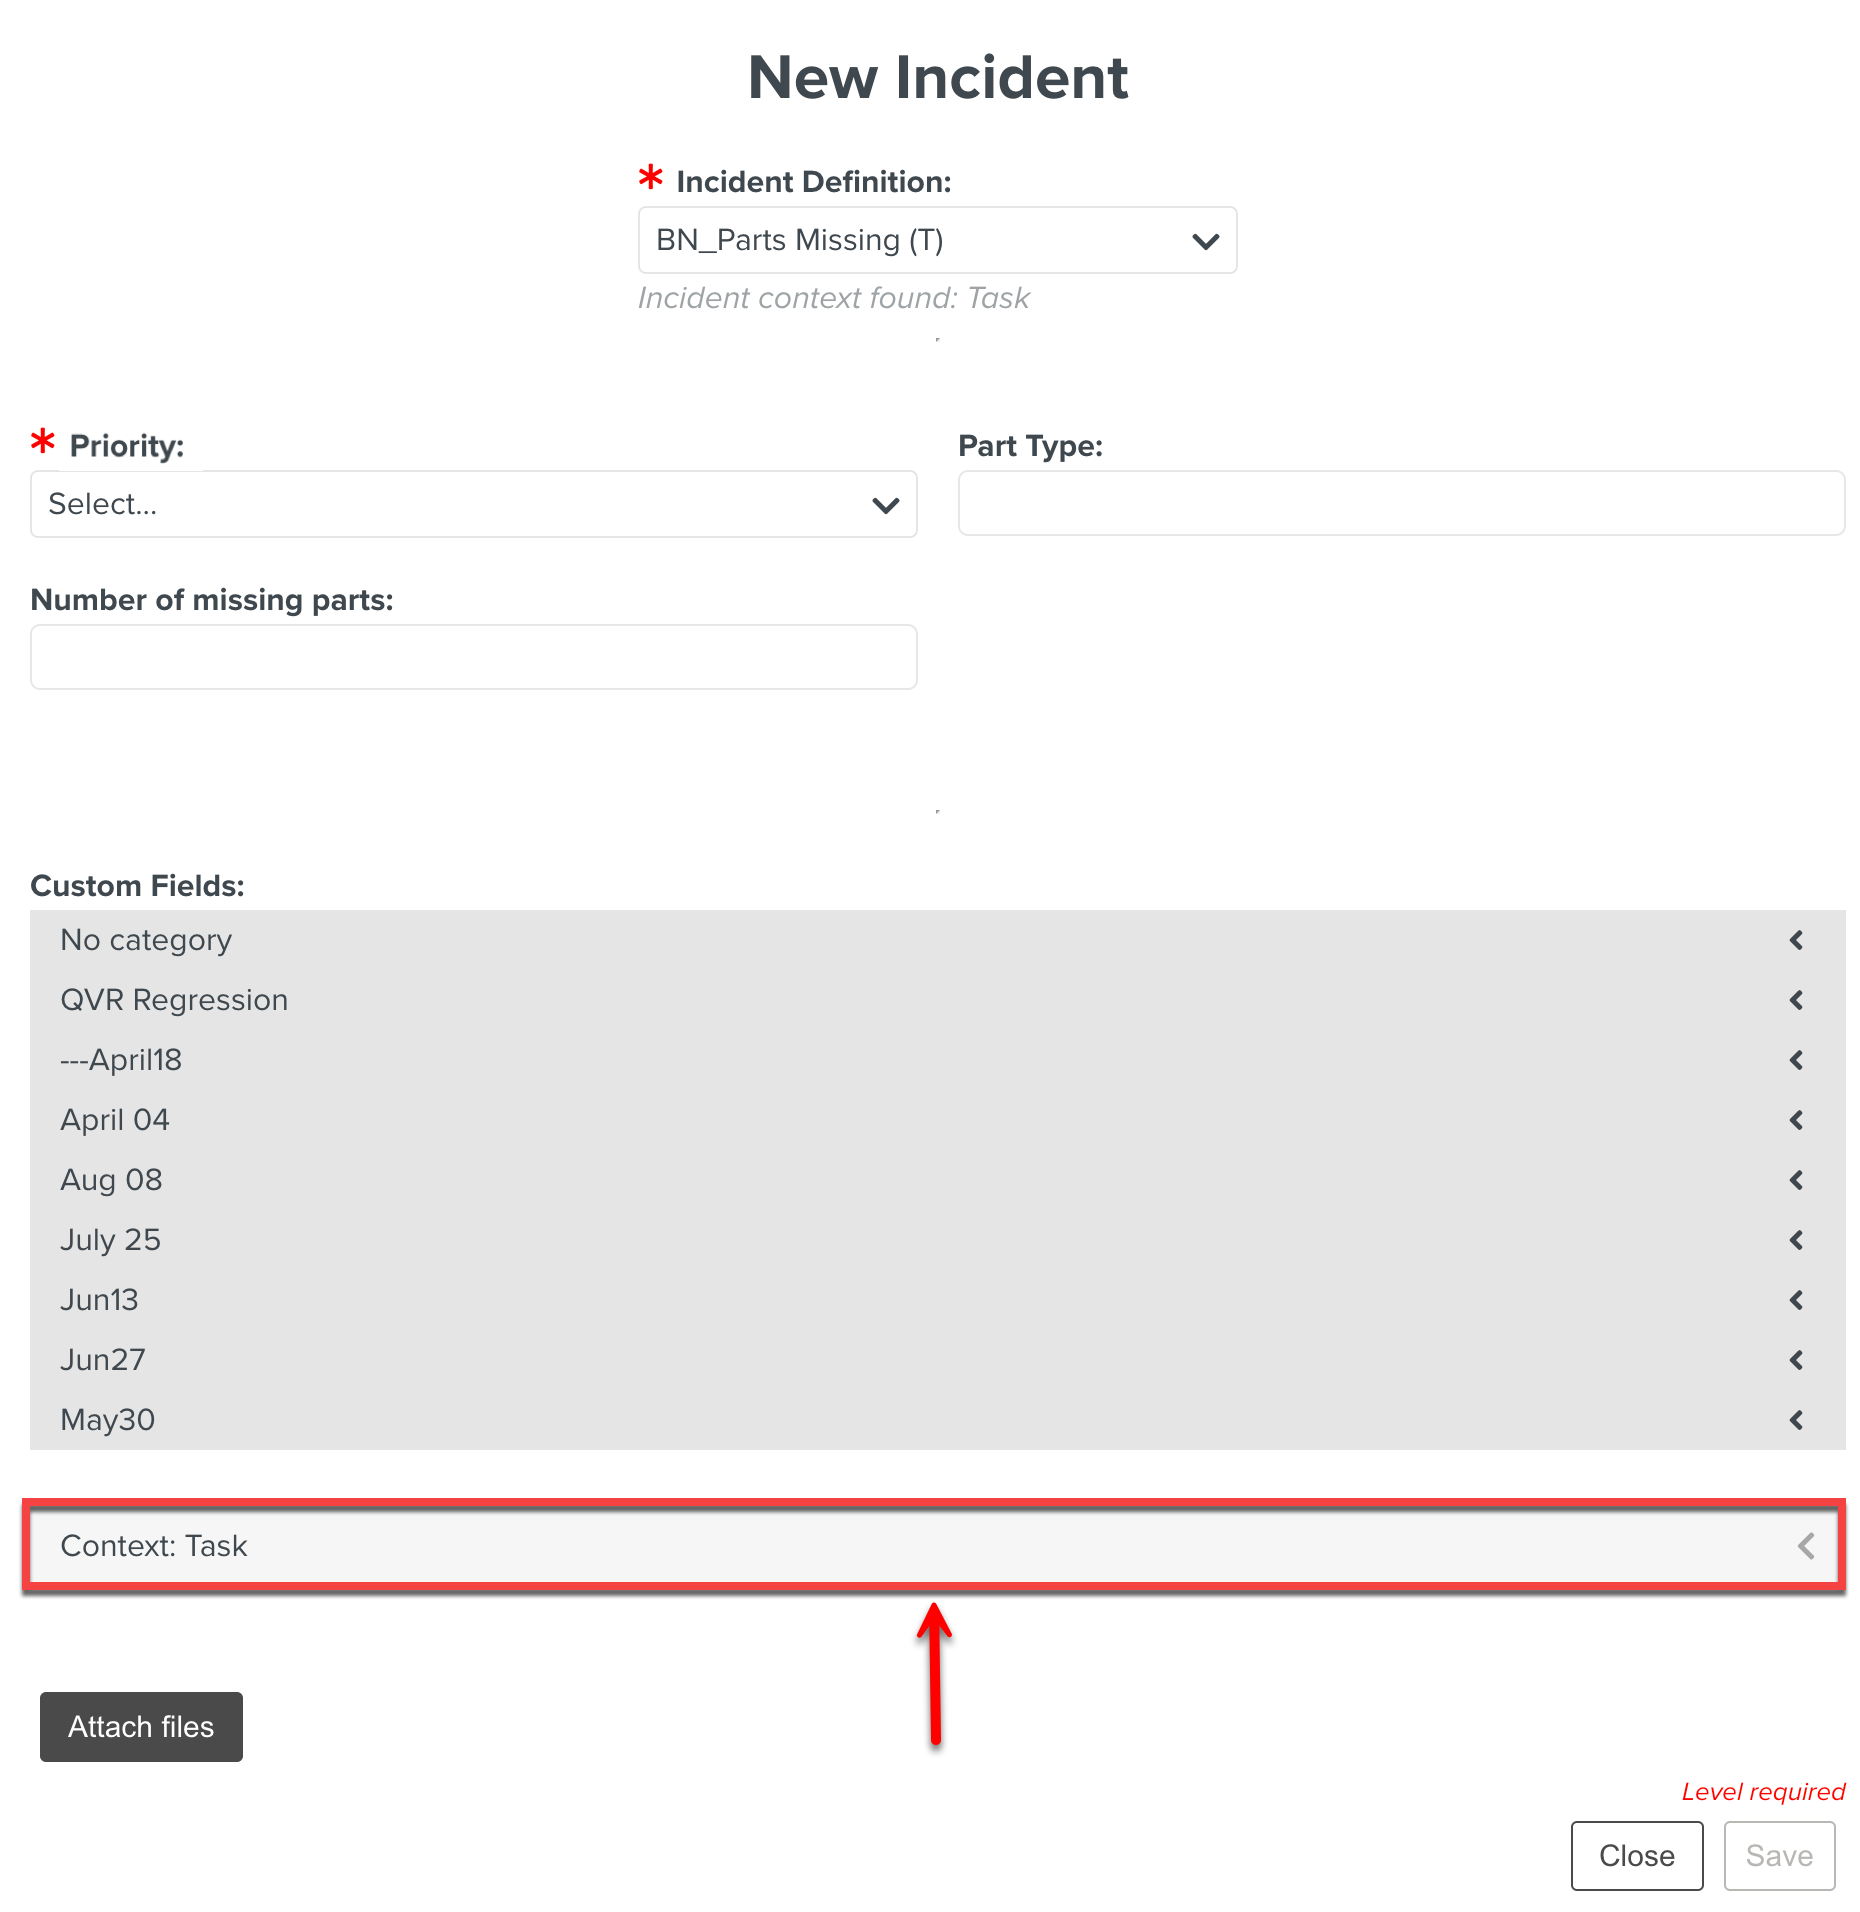
Click Context: Task to view the task details.

The details of the Task are displayed.
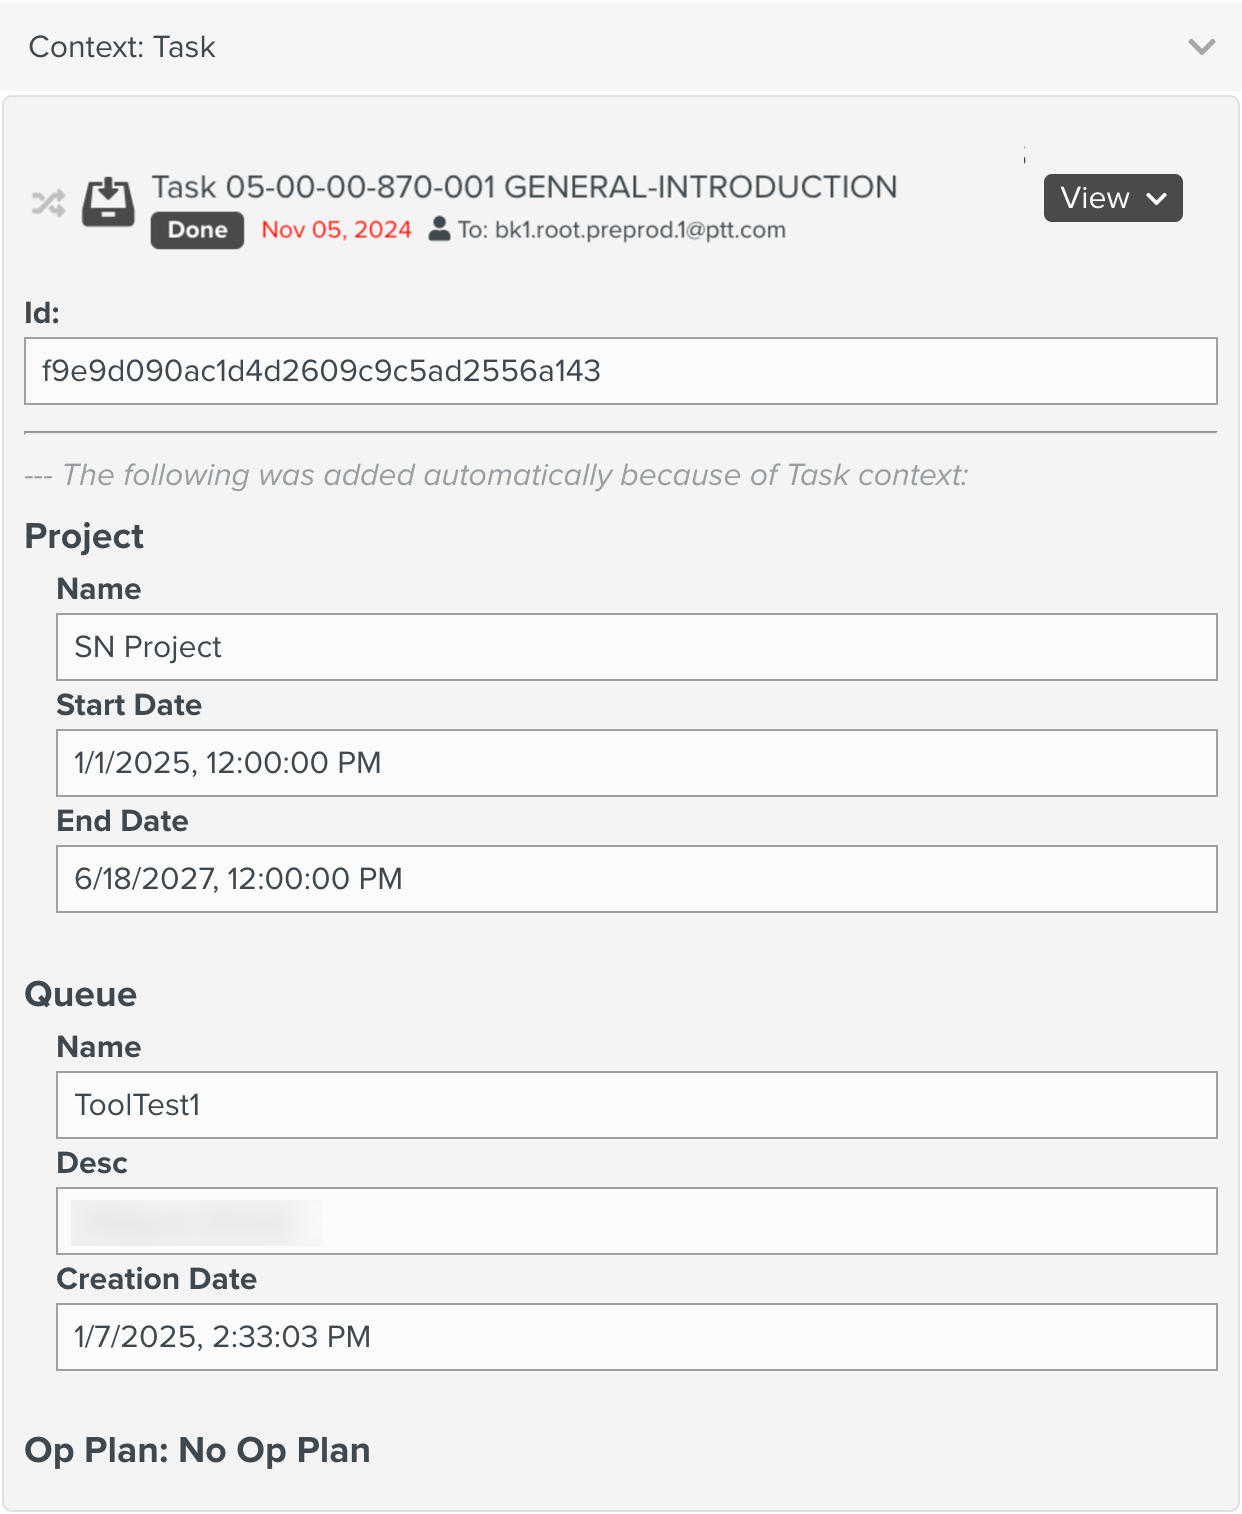
The Context Fields selected for the Task Context Incident during Incident Definition are displayed in the section Context: Task.
When changes are made to the Task properties after raising an Incident, the following Context Field values get updated dynamically:
Last Modification Date
Assignee
Some details of the Task that are automatically displayed for Task Context Incidents are listed below:
Project: The Project Details such as Name, Start Date, and End Date are displayed.
Queue: The Task Queue details such as Name, Description, and Creation Date are displayed.
Op Plan: The Operation Plan details such as Name, Creation Date, Time Zone, and Assigner are displayed.
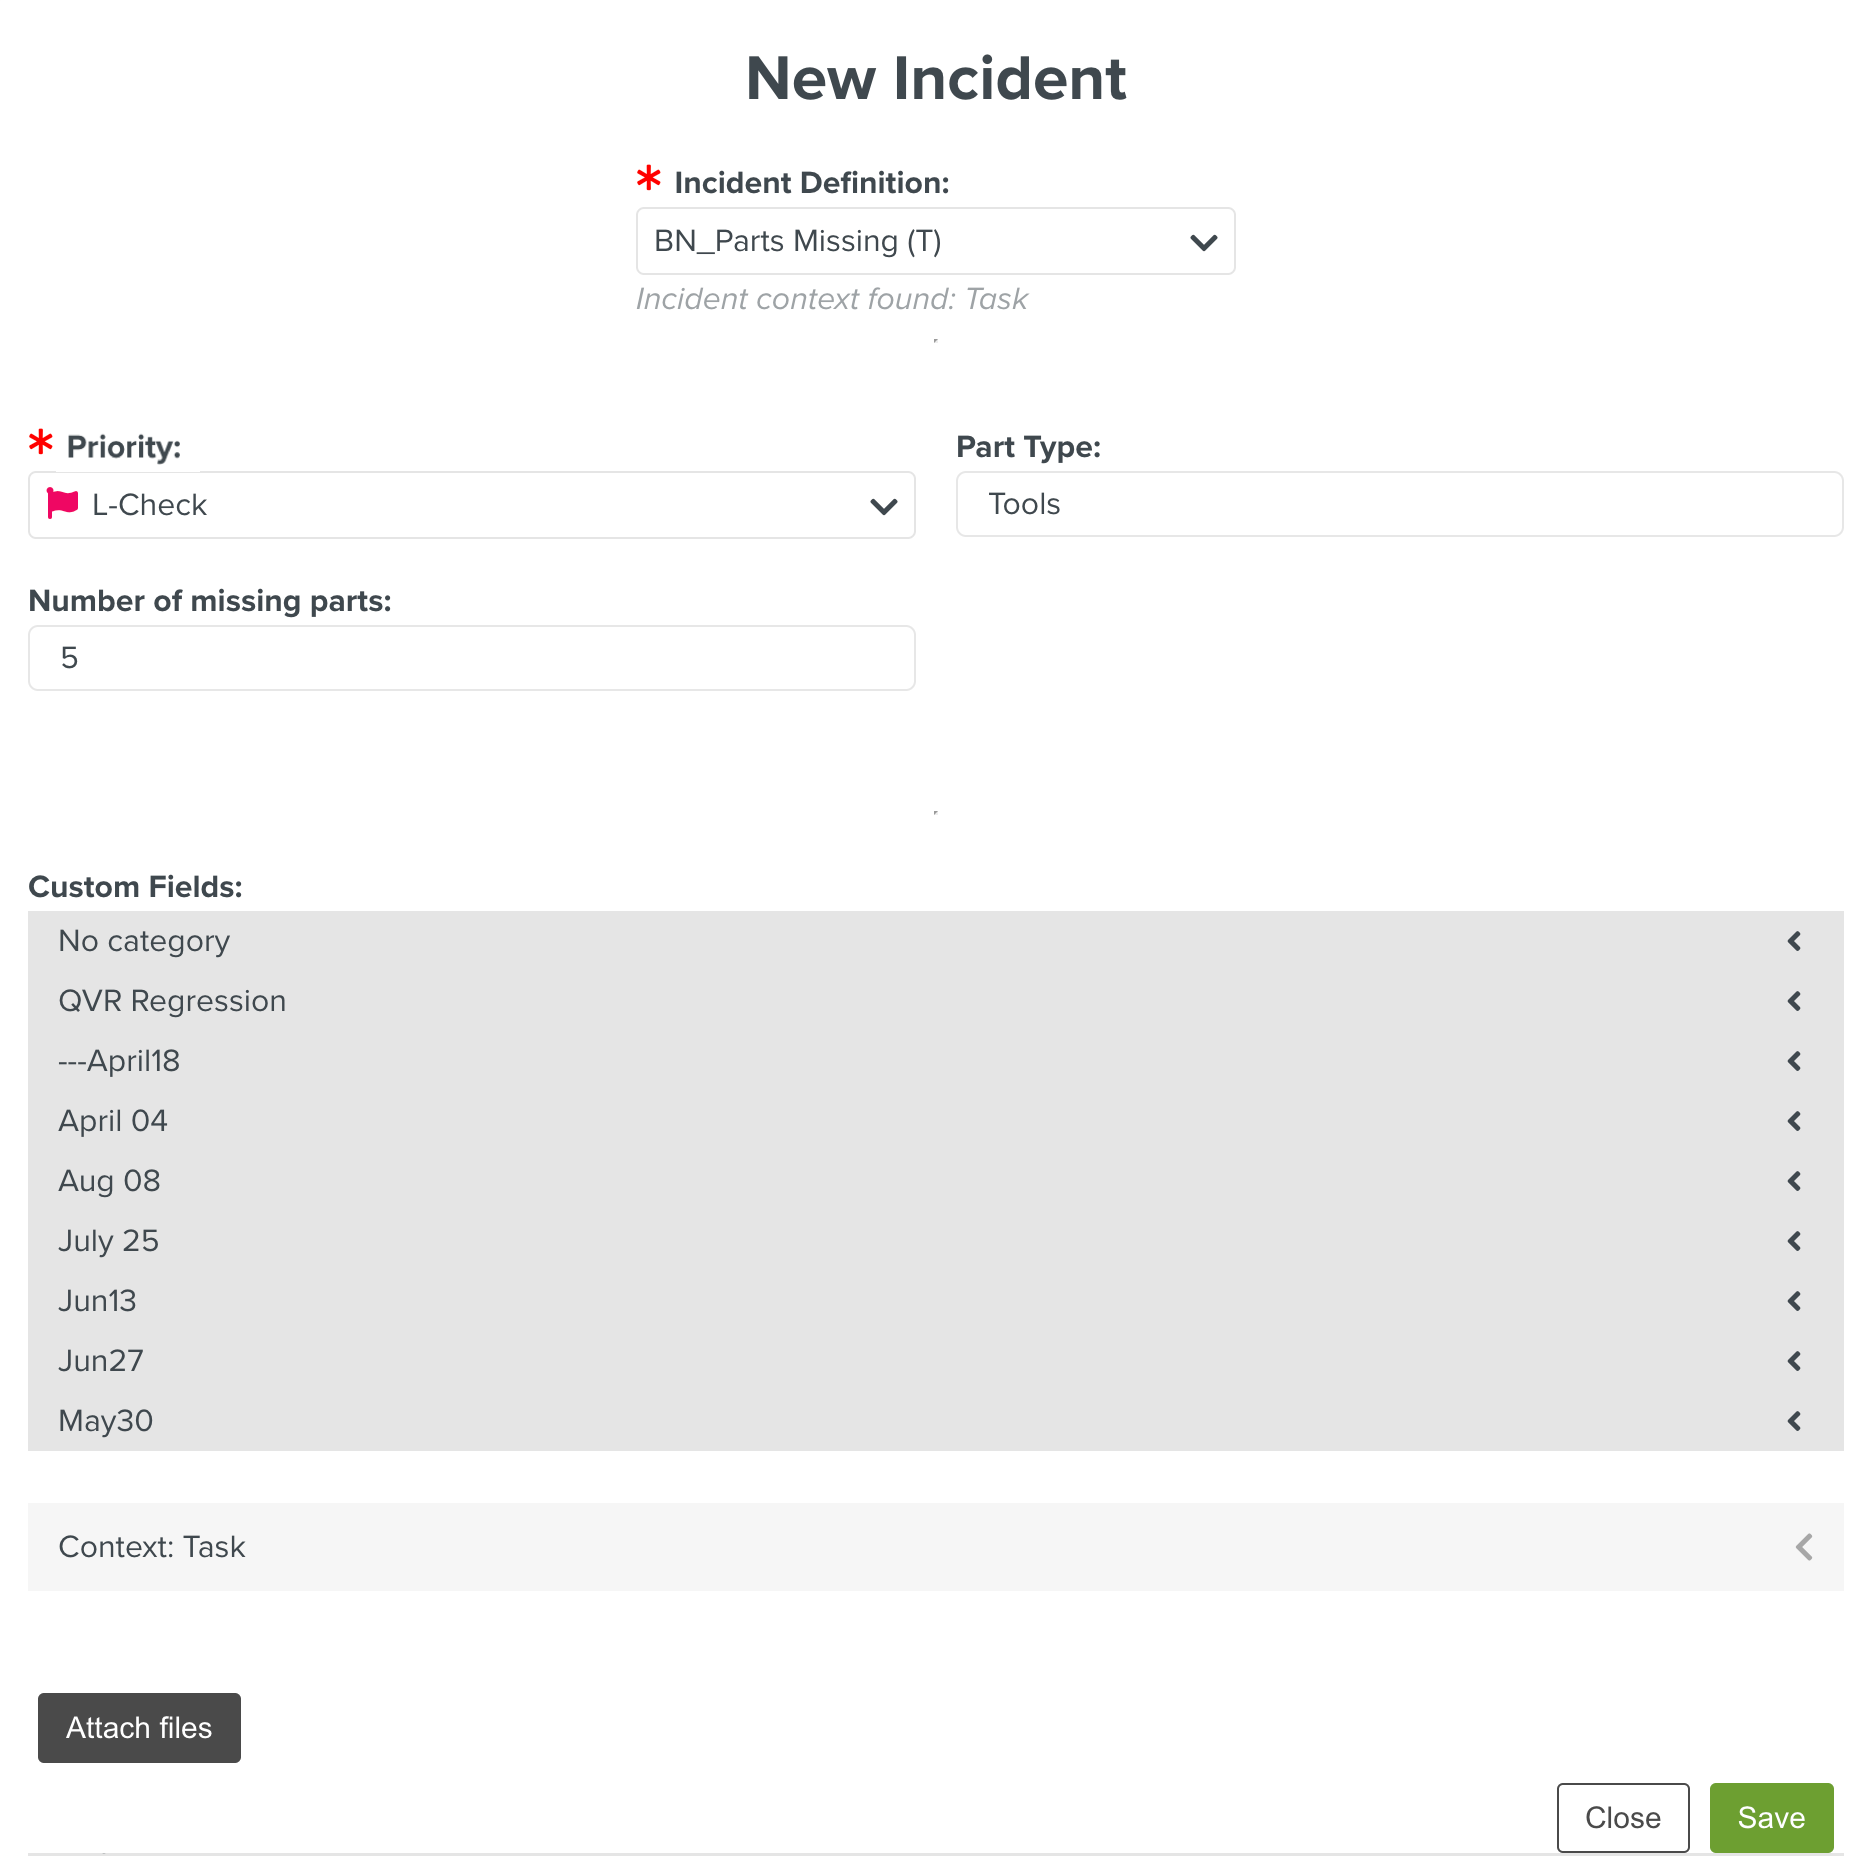
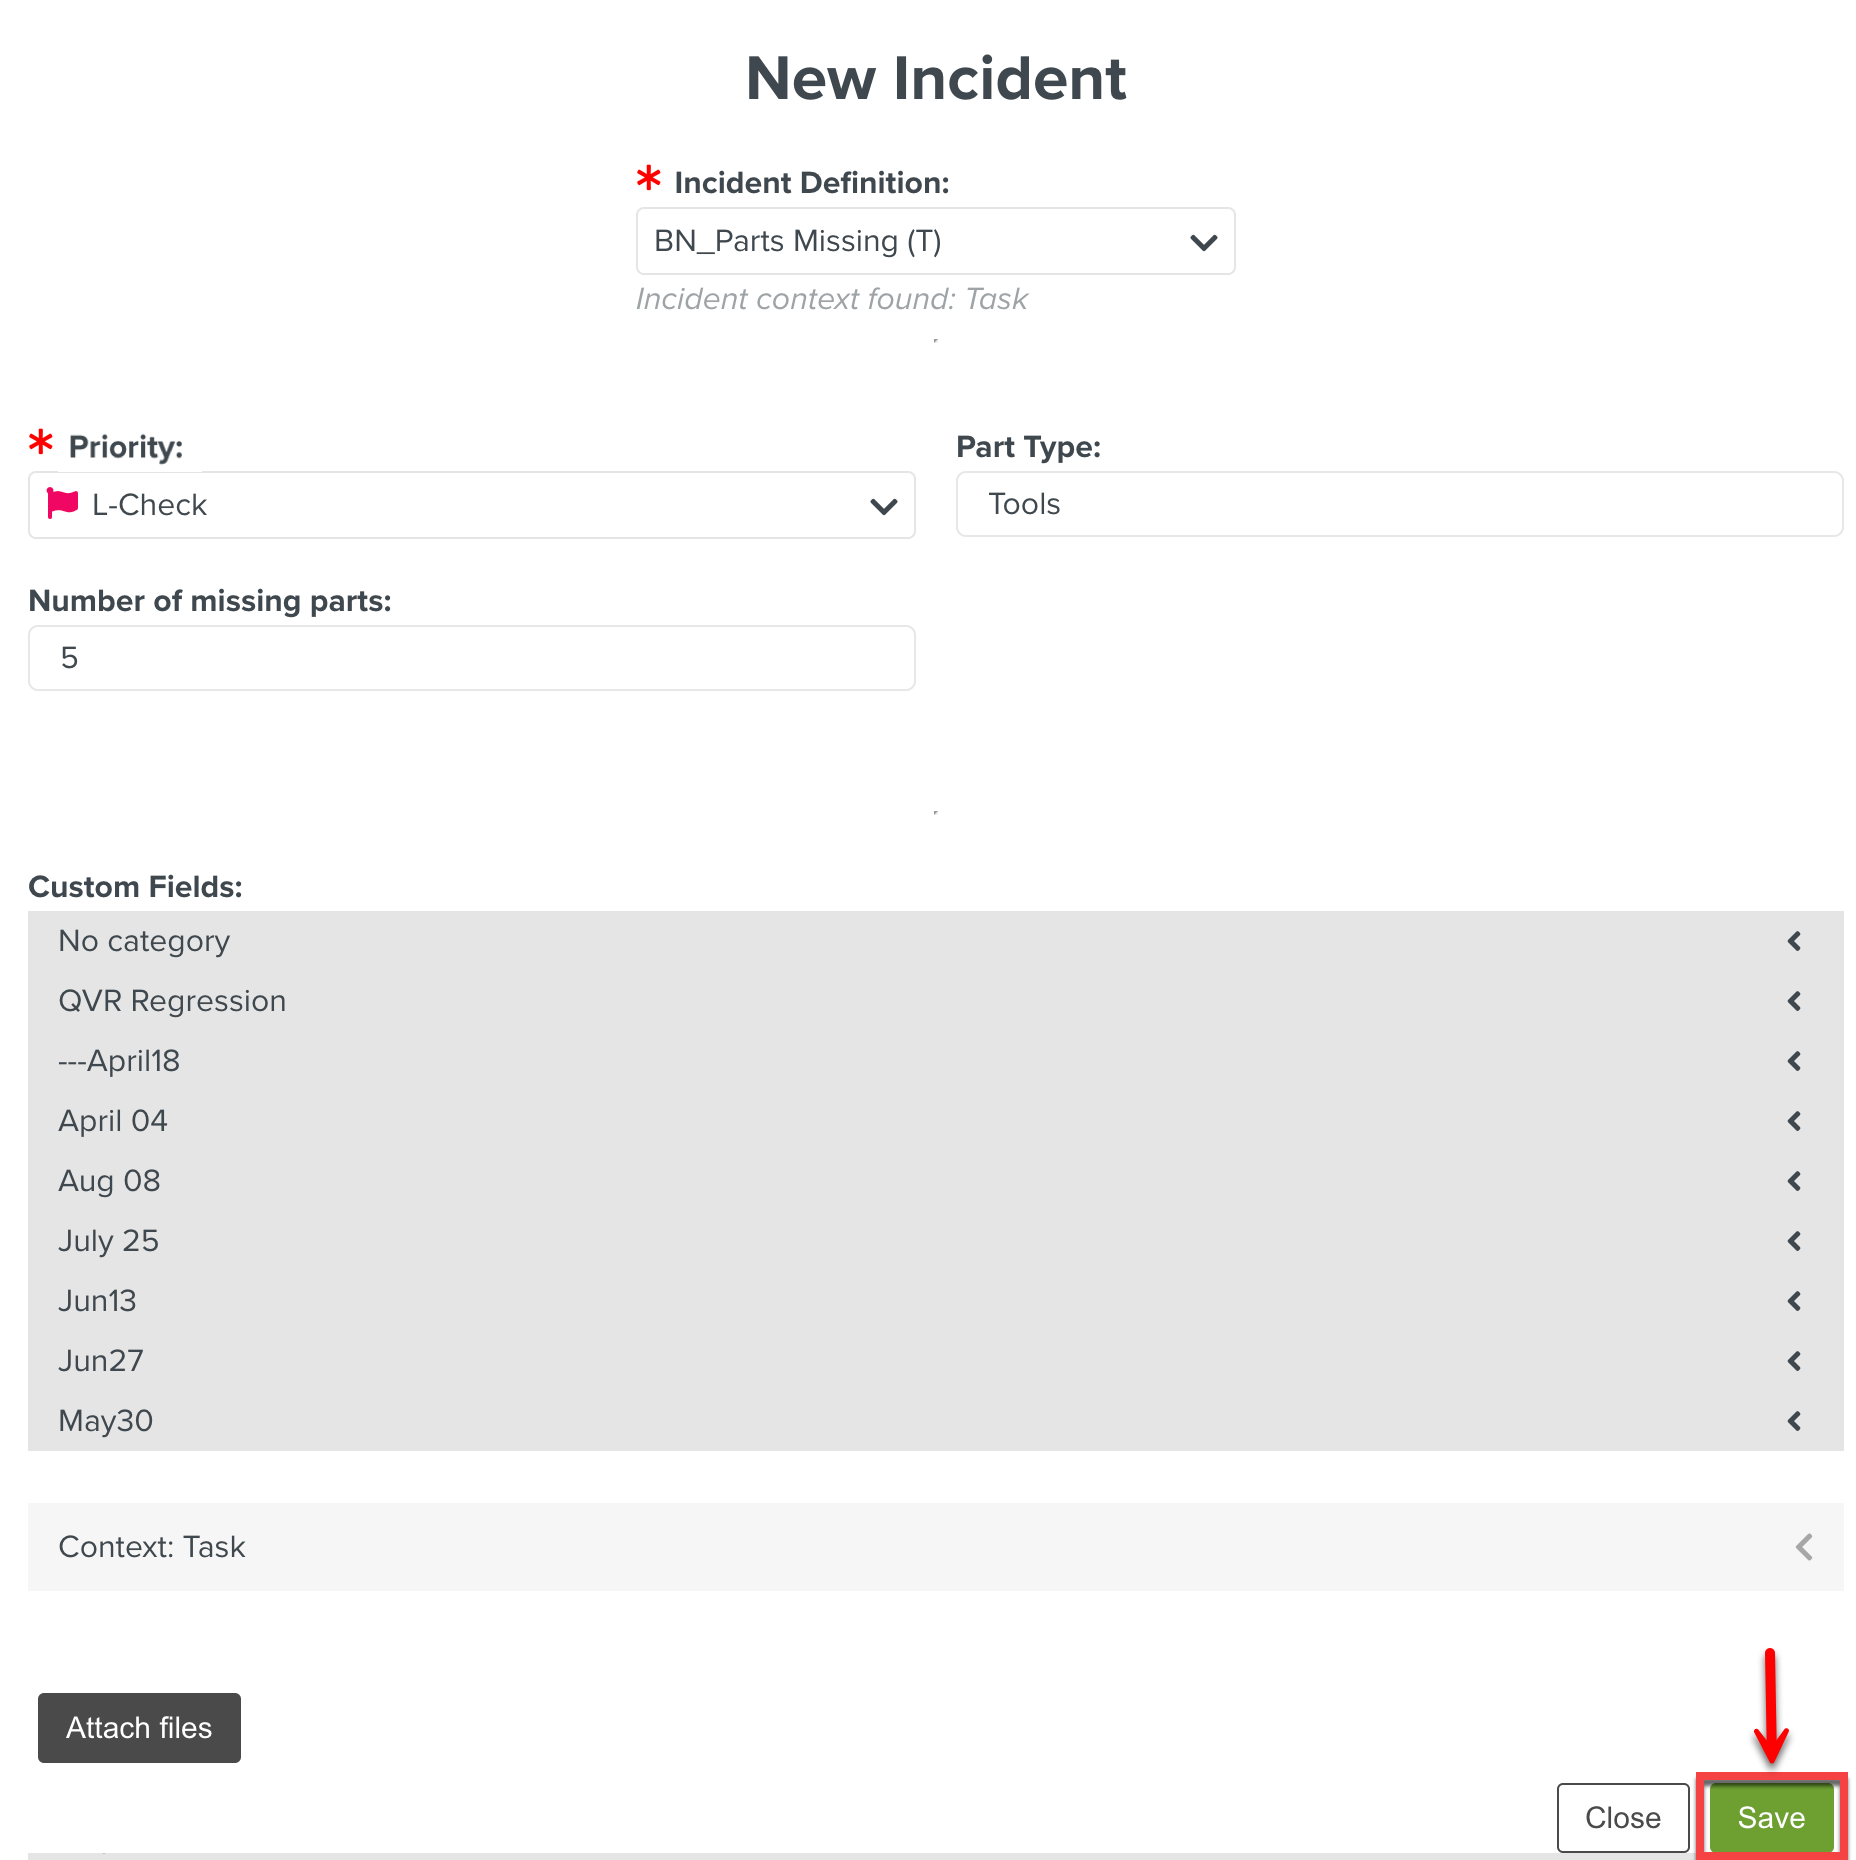
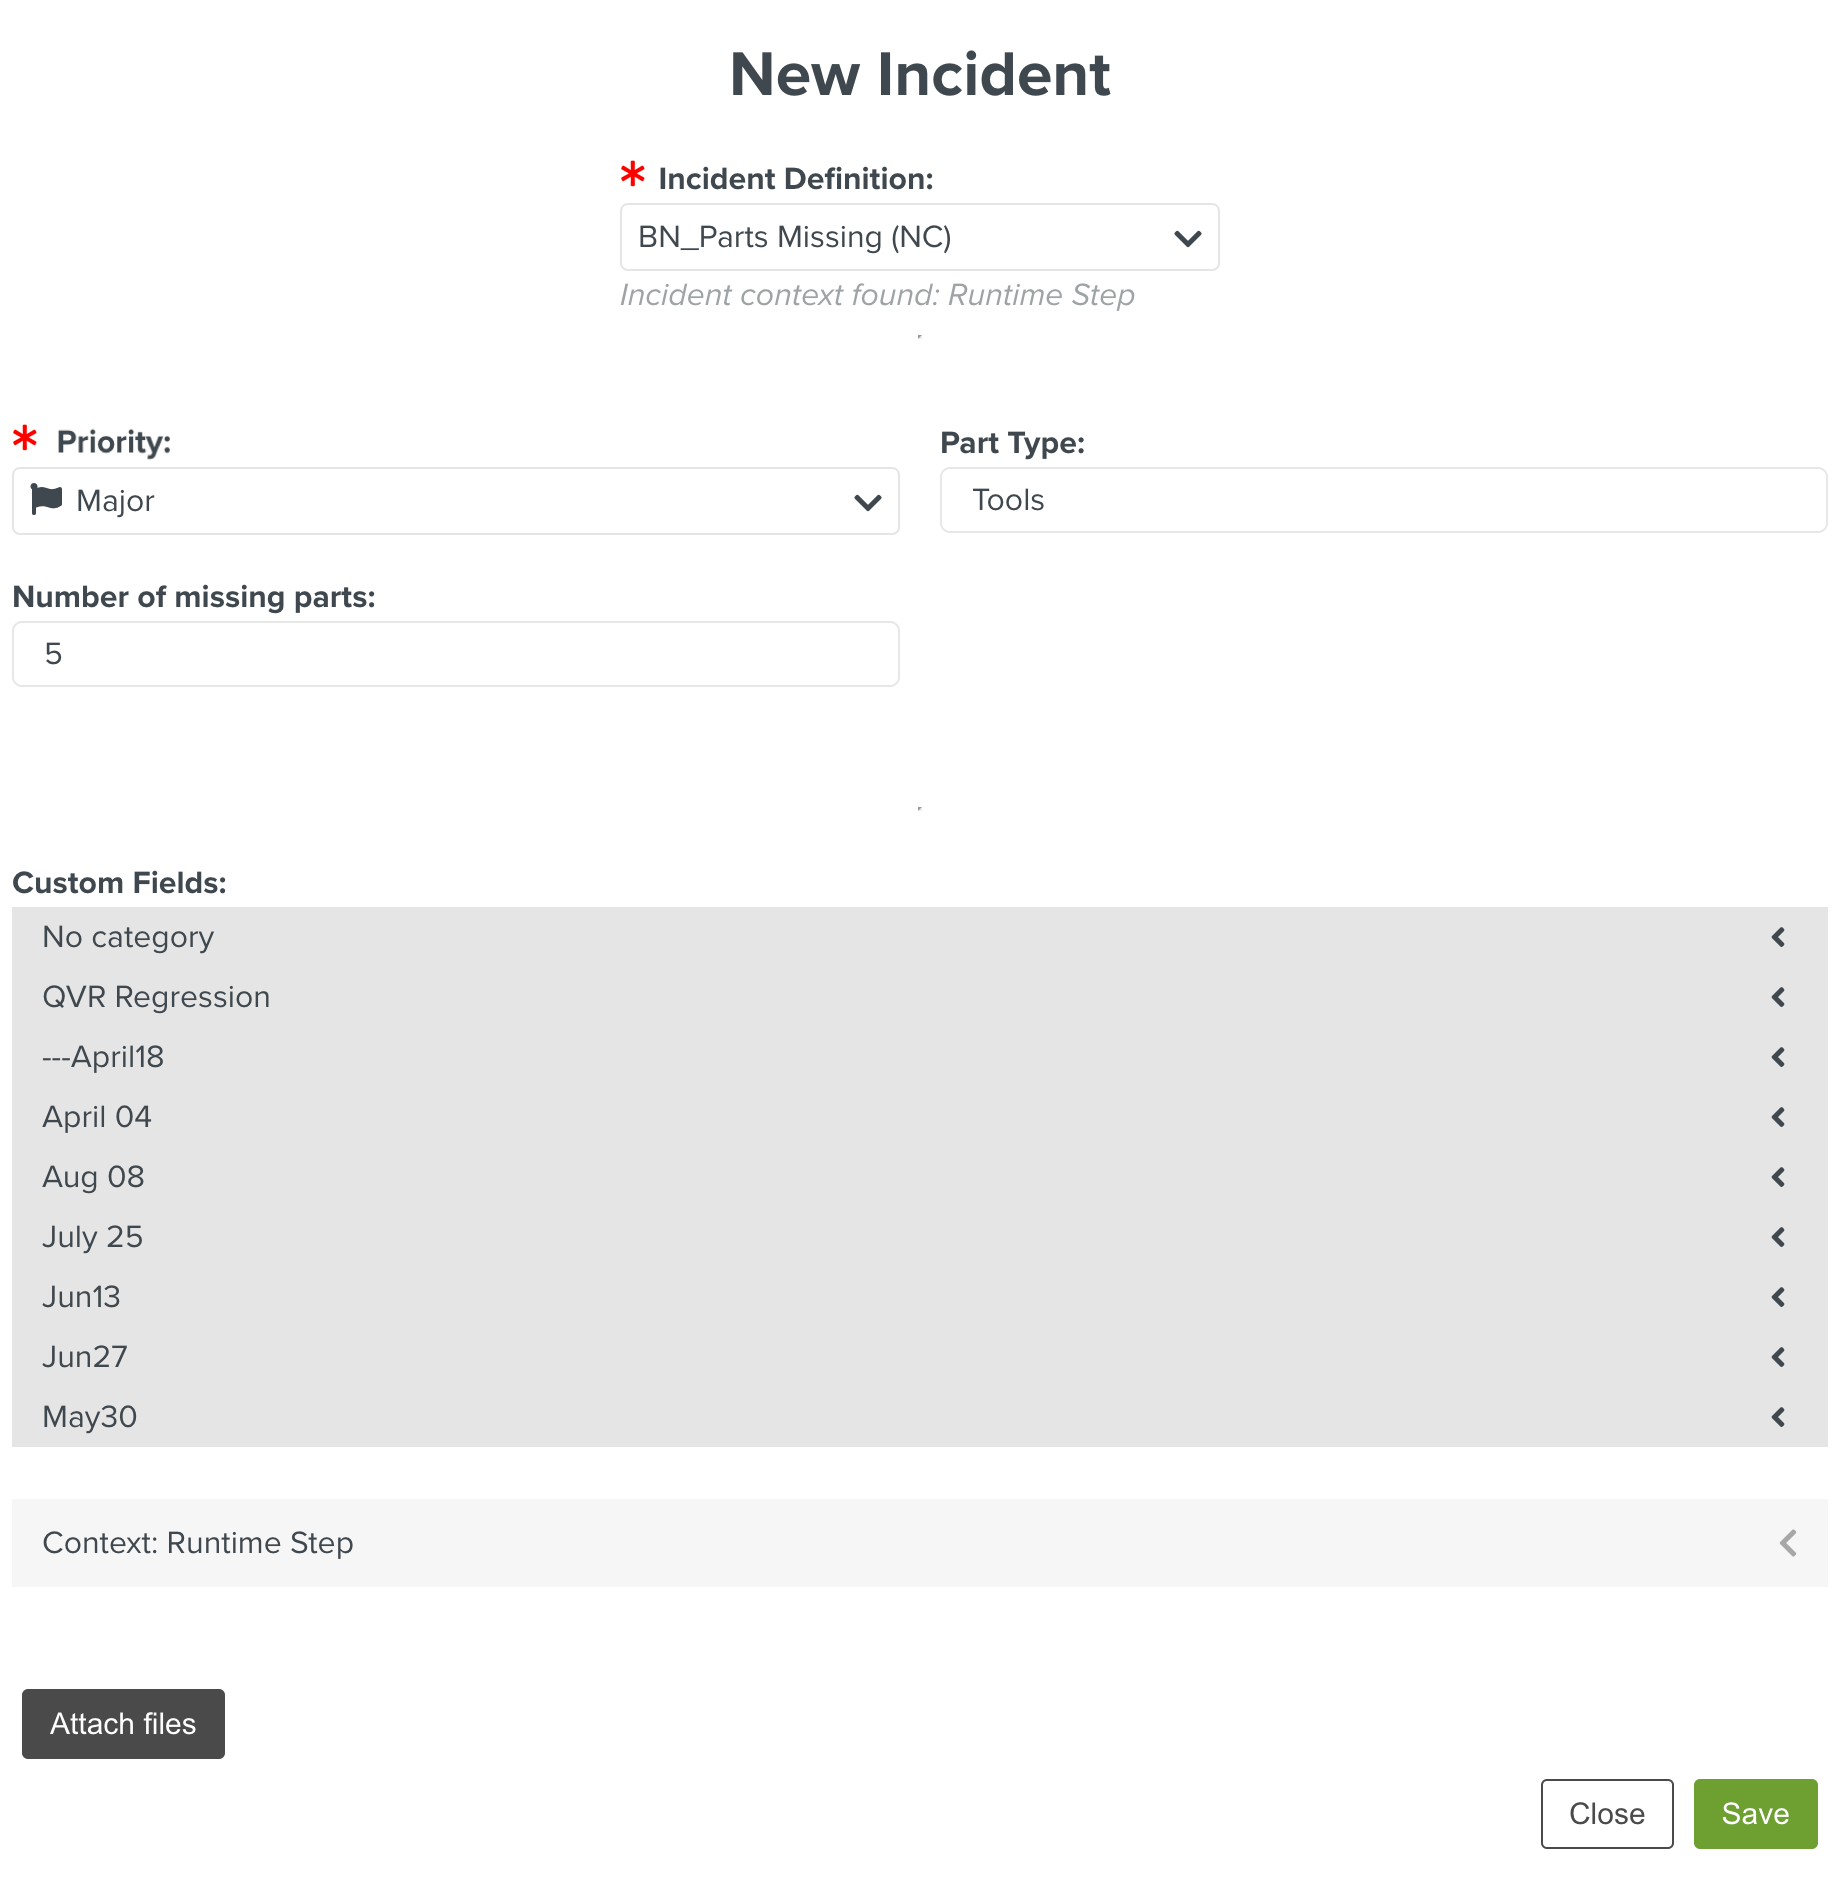
The dialog New Incident with all the details filled is shown below.

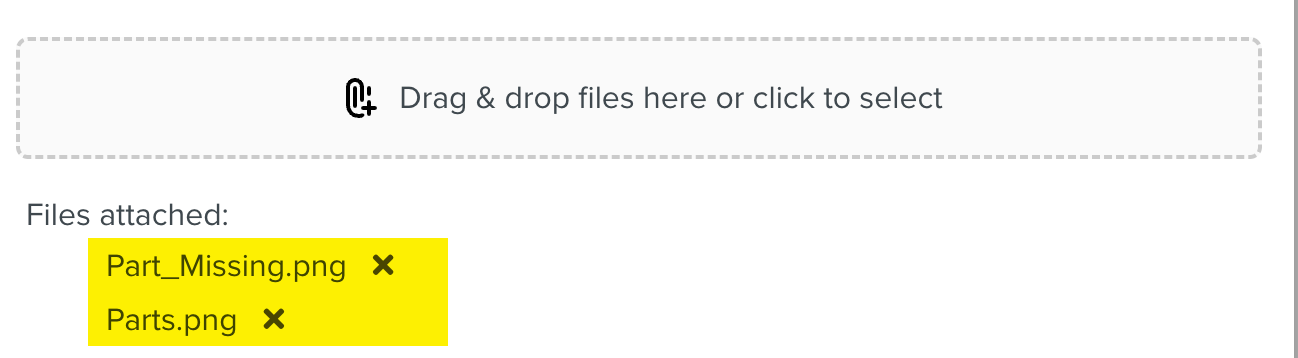
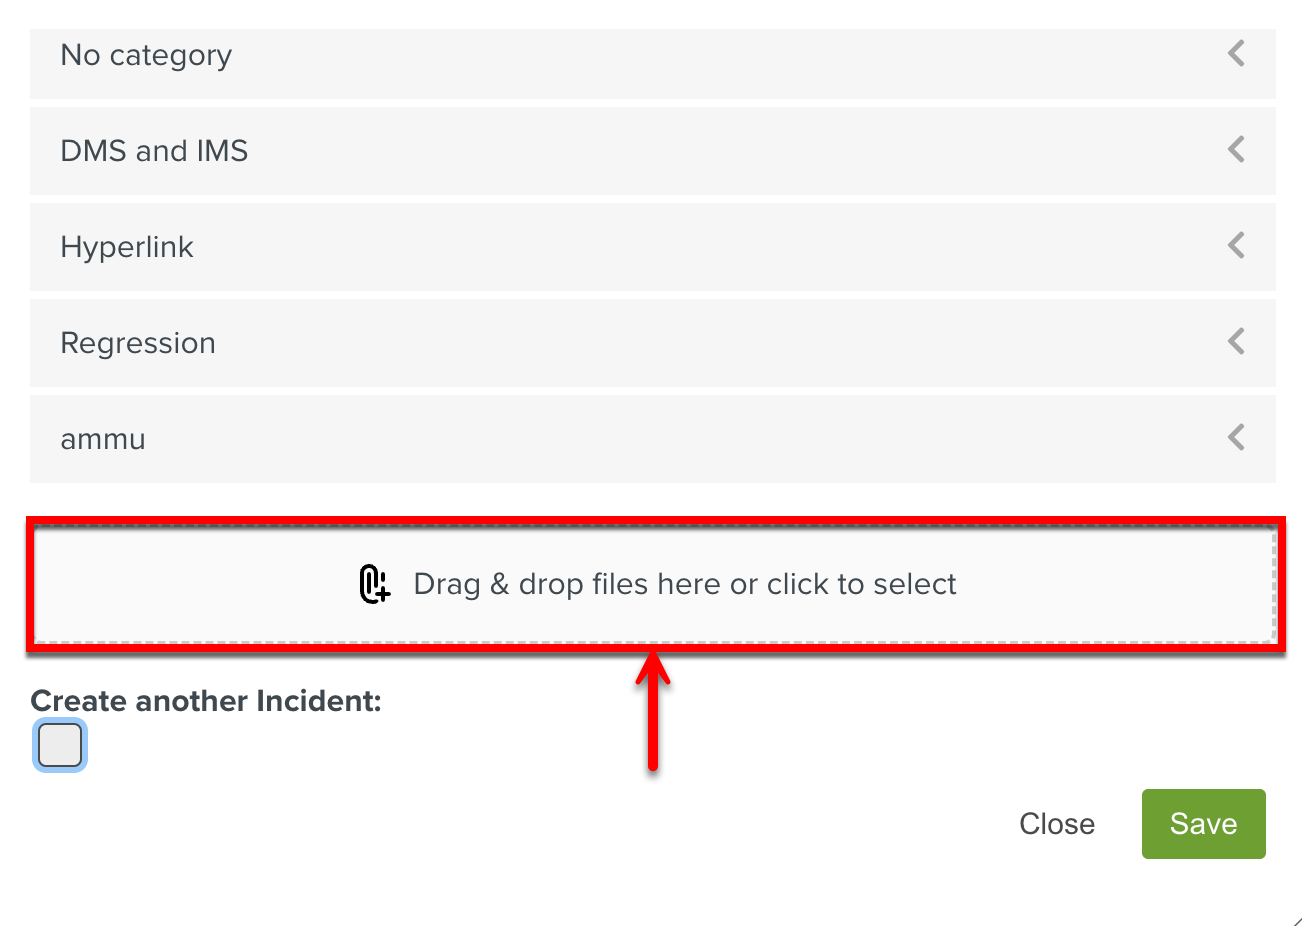
[Optional] Click the Drag & drop files here or click to select option to add the images or files. You can also drag and drop the files. Multiple files can be added as shown below.

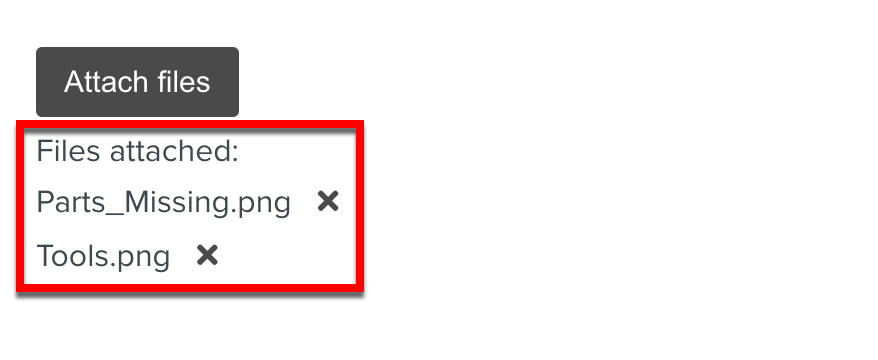
To remove a file, click
 and Yes, Remove.
Note
All types of documents and media file formats of size under 30 MB are supported.
Click Save.
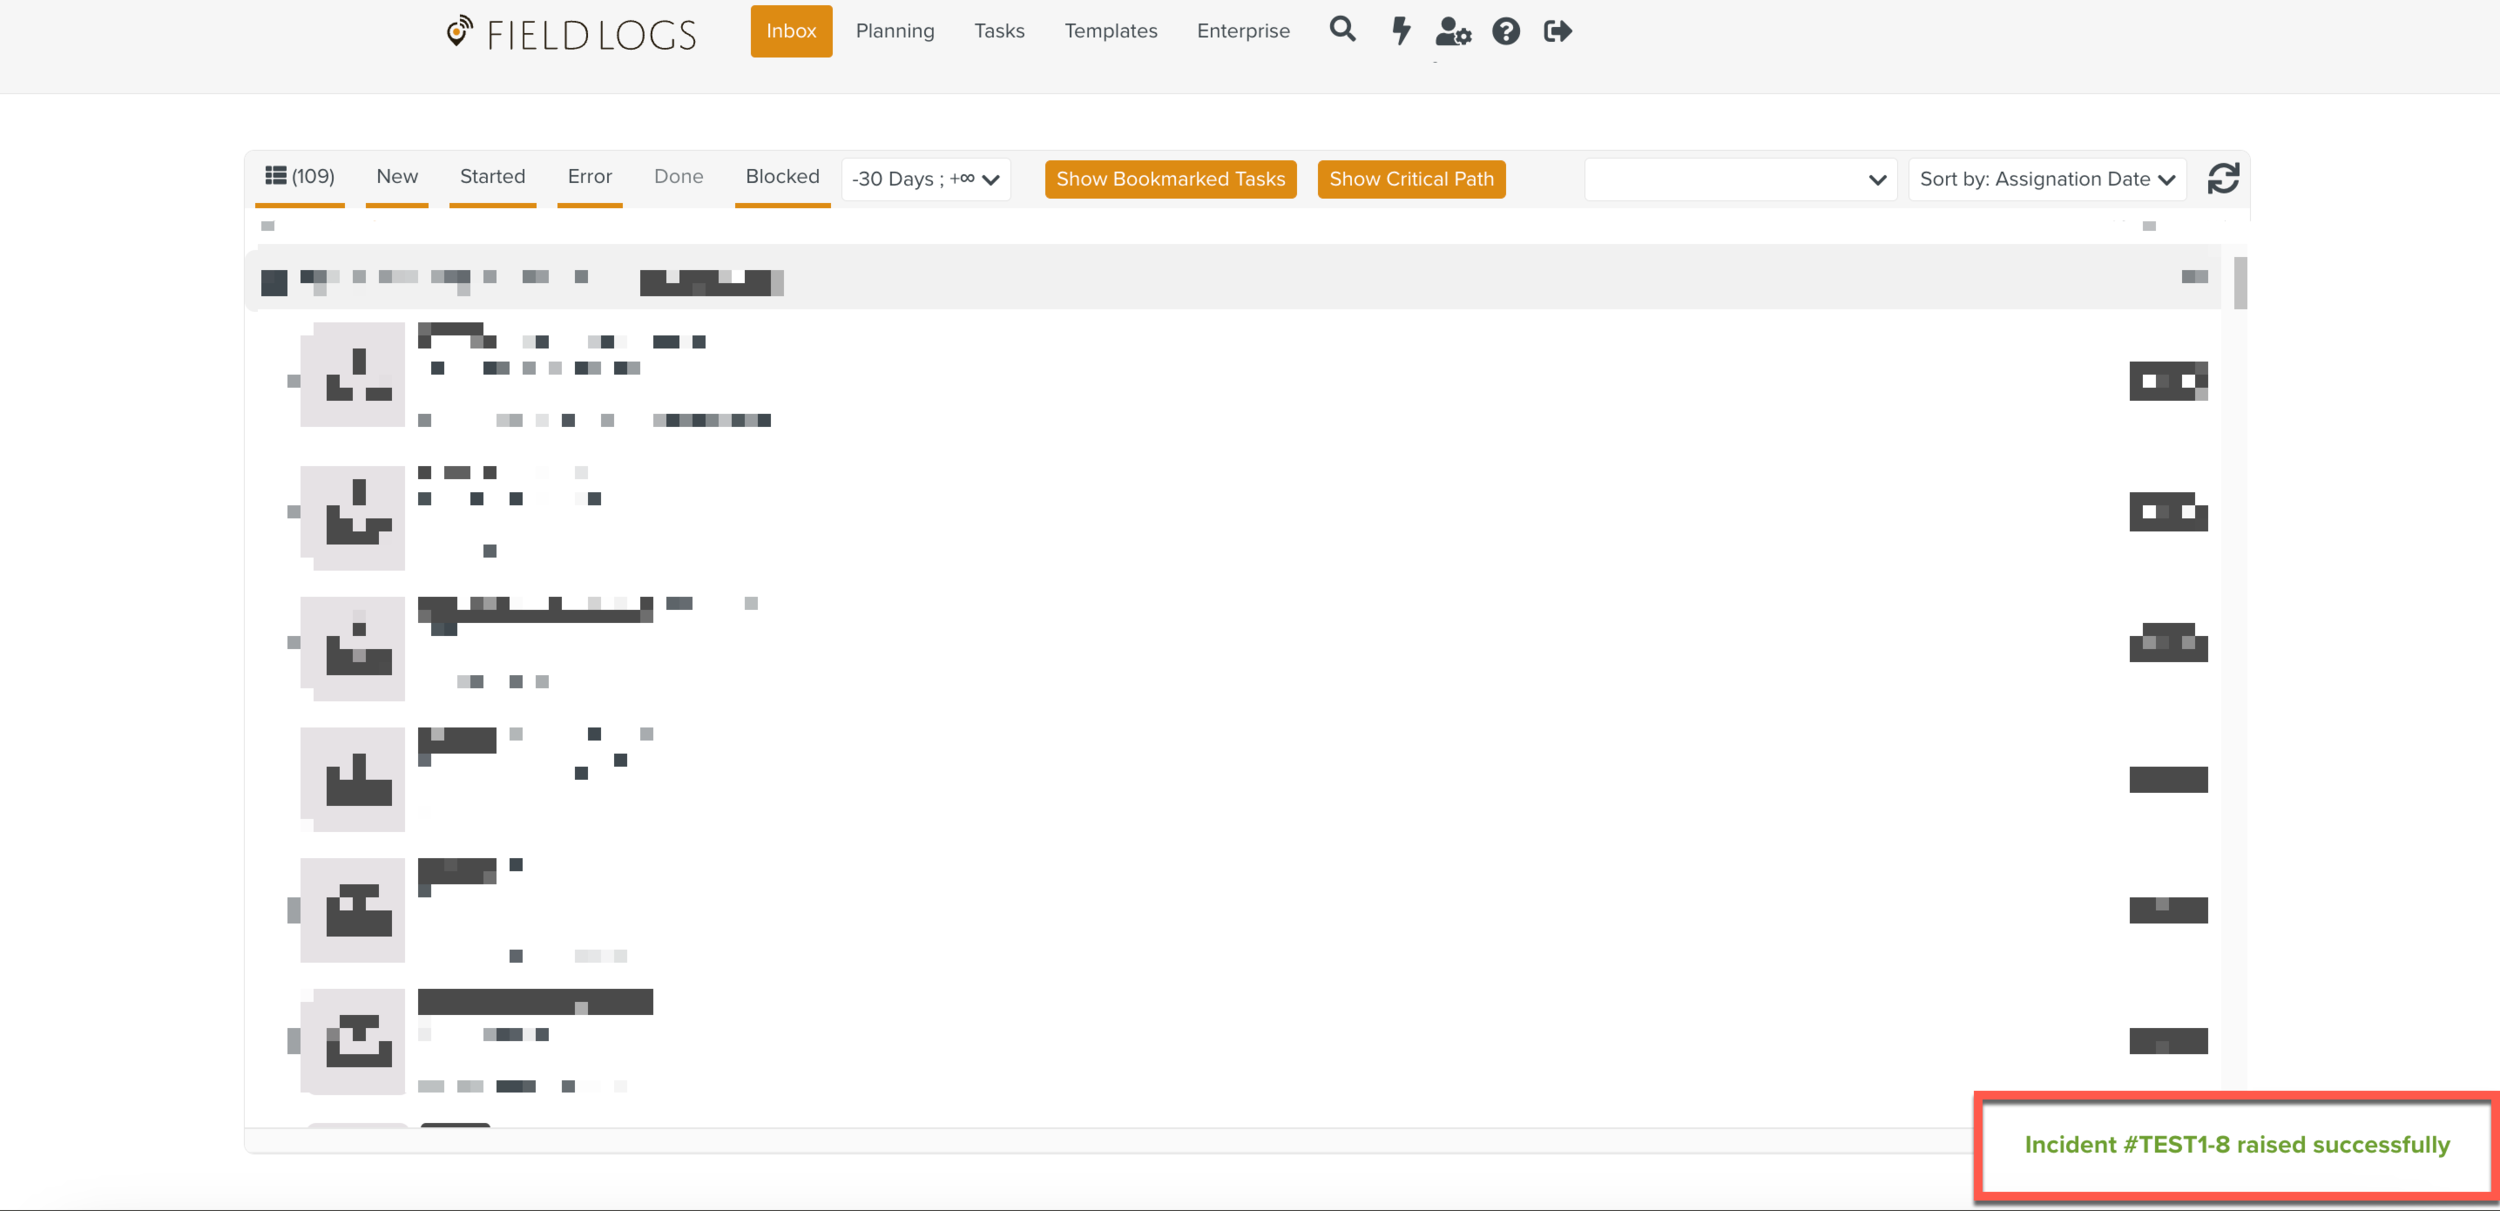
The Incident is raised.
A pop up message is displayed when an Incident is raised.
If a Task has Incidents linked to it, they can be viewed from the Incident Indicator.
Click  to view the list of Incidents.
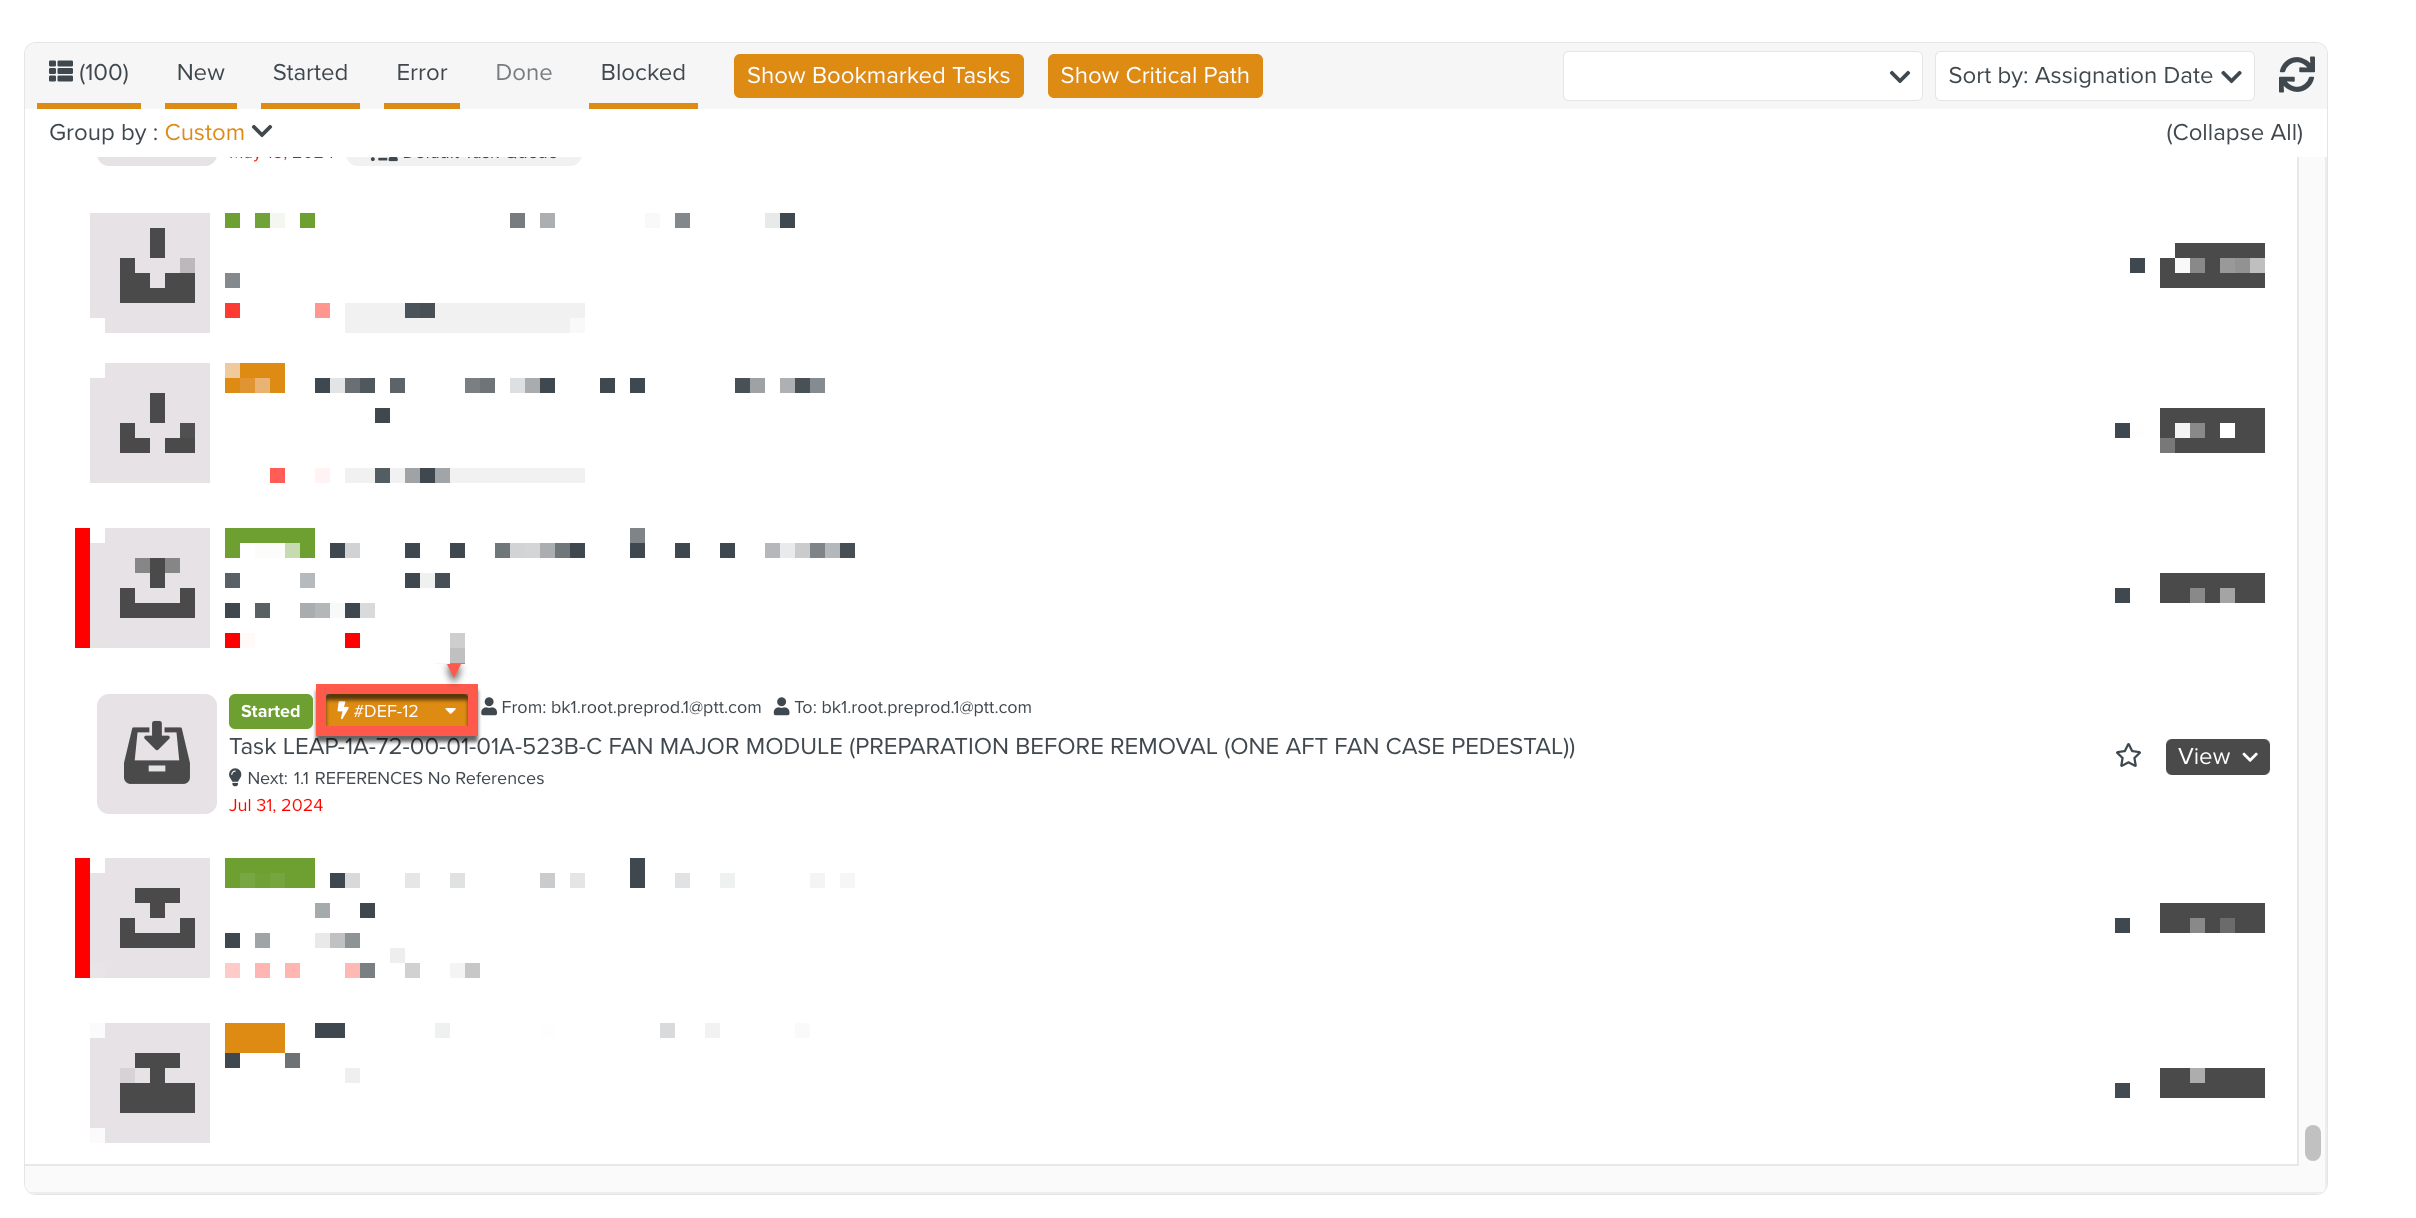 |
In the example below, the Incidents raised in the Task are highlighted.
 |
On selecting an Incident, the Incident Details dialog will be displayed.
 |
In the example below, #DEF-10 Incident Details dialog is displayed.
 |
Note
When an Incident is resolved or closed, it does not get reflected in the Incident Indicator.
From the Inbox, you can raise Task Context Incidents and Global Incidents.
To raise an Incident from the Inbox:
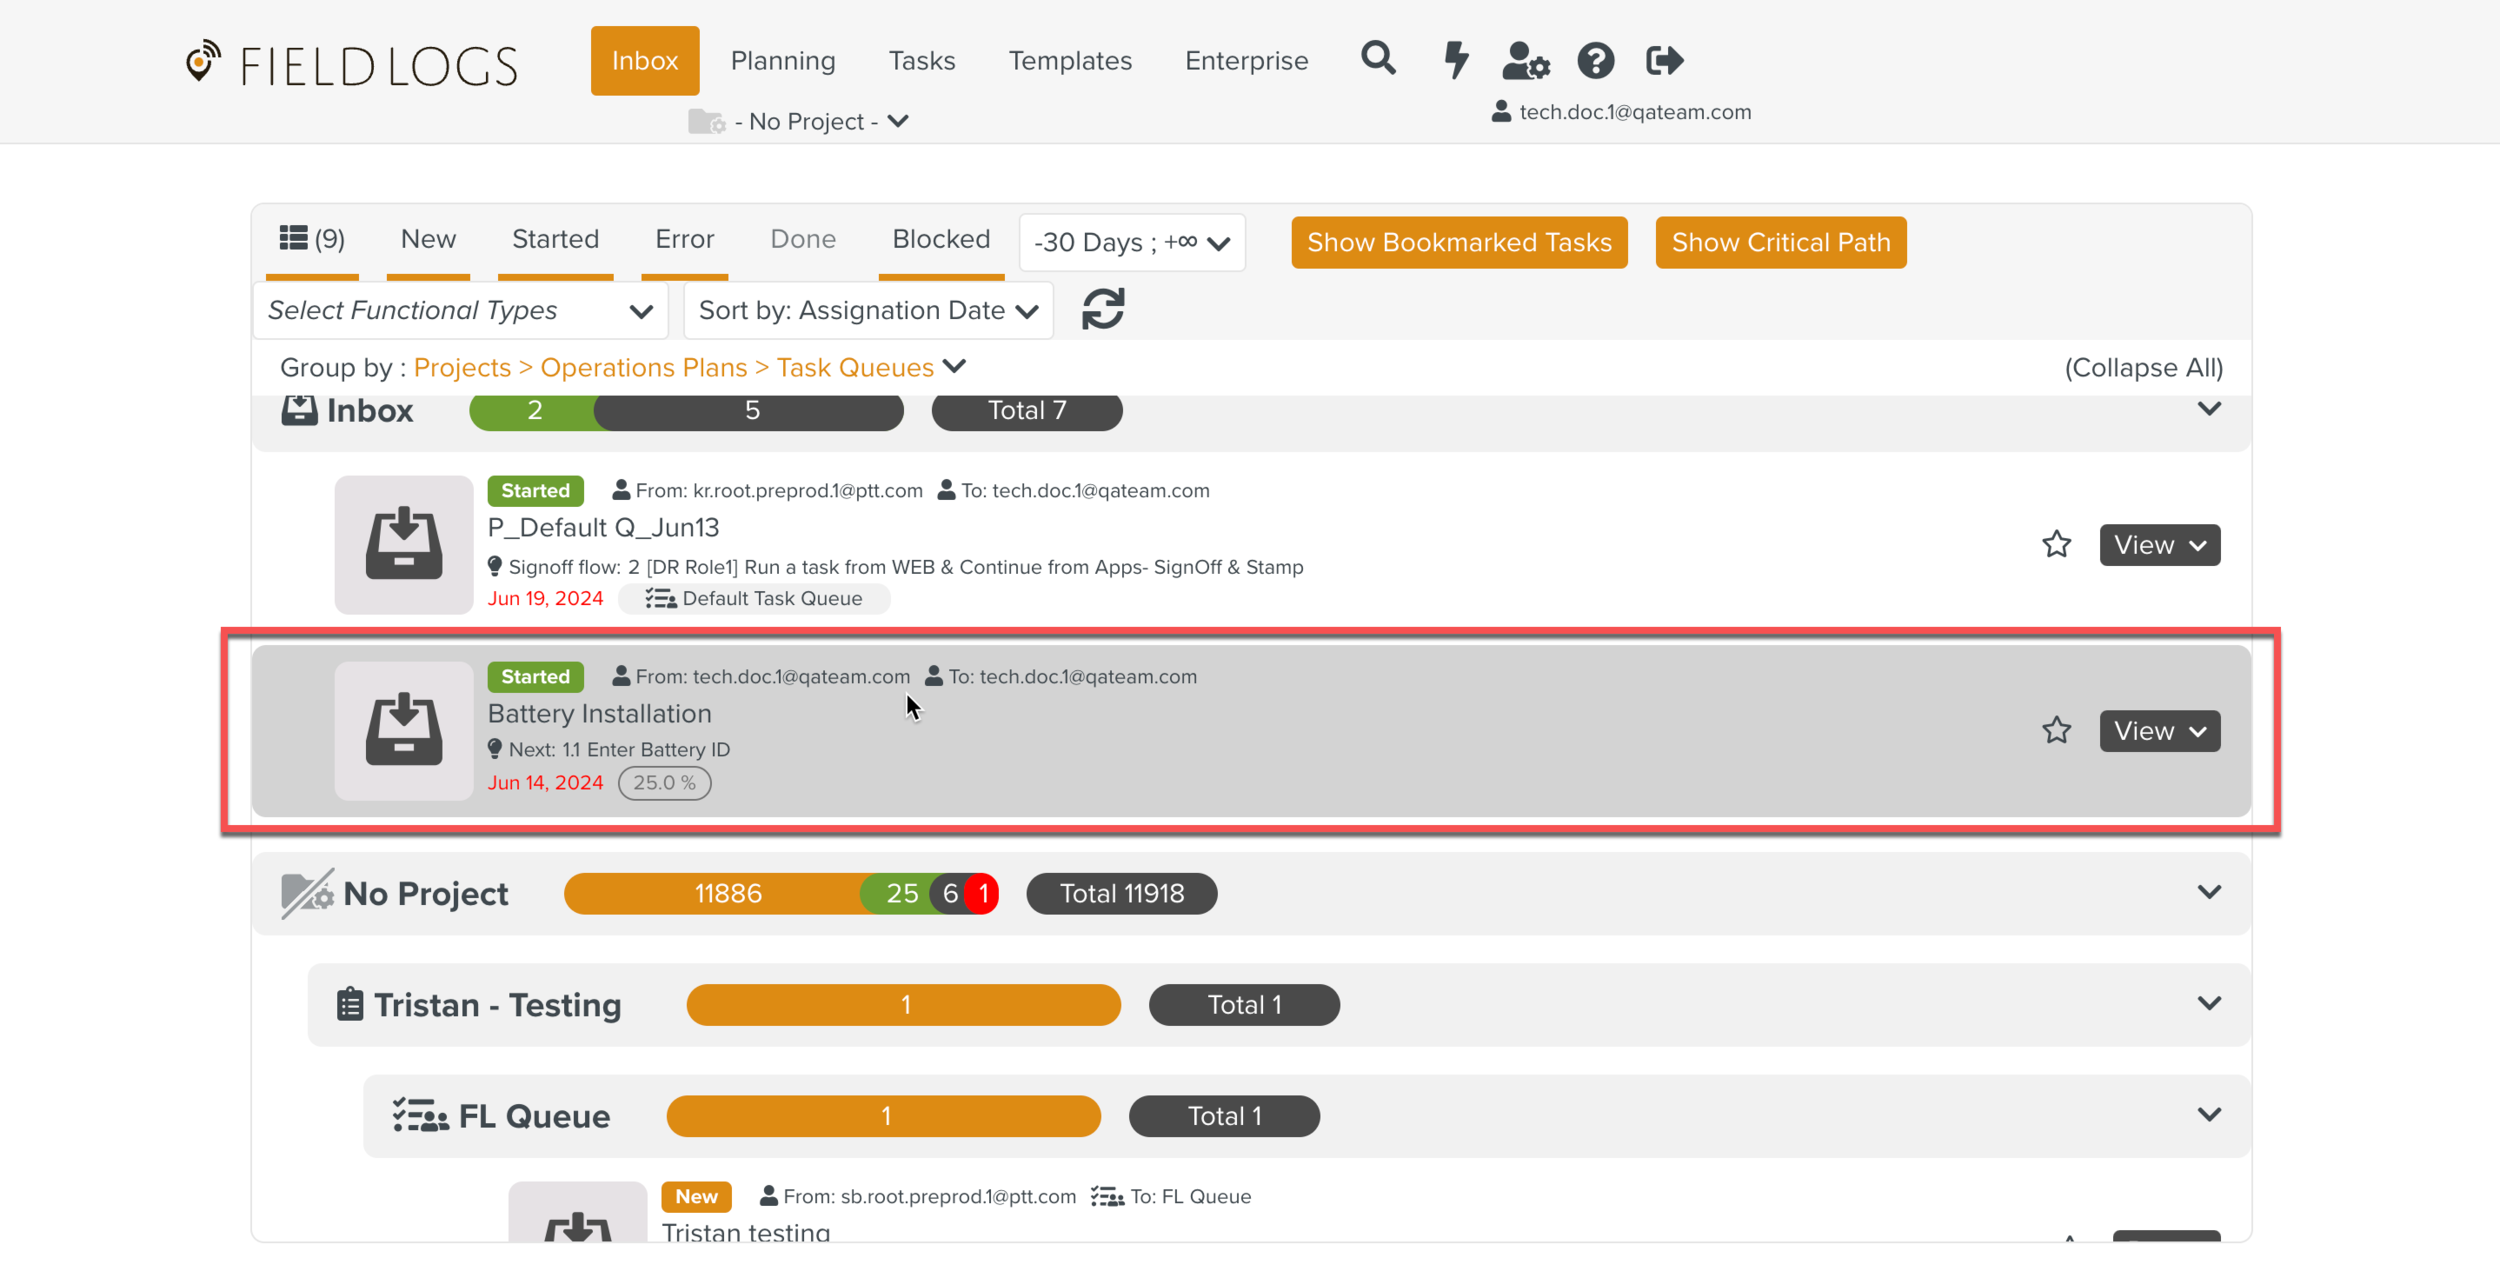
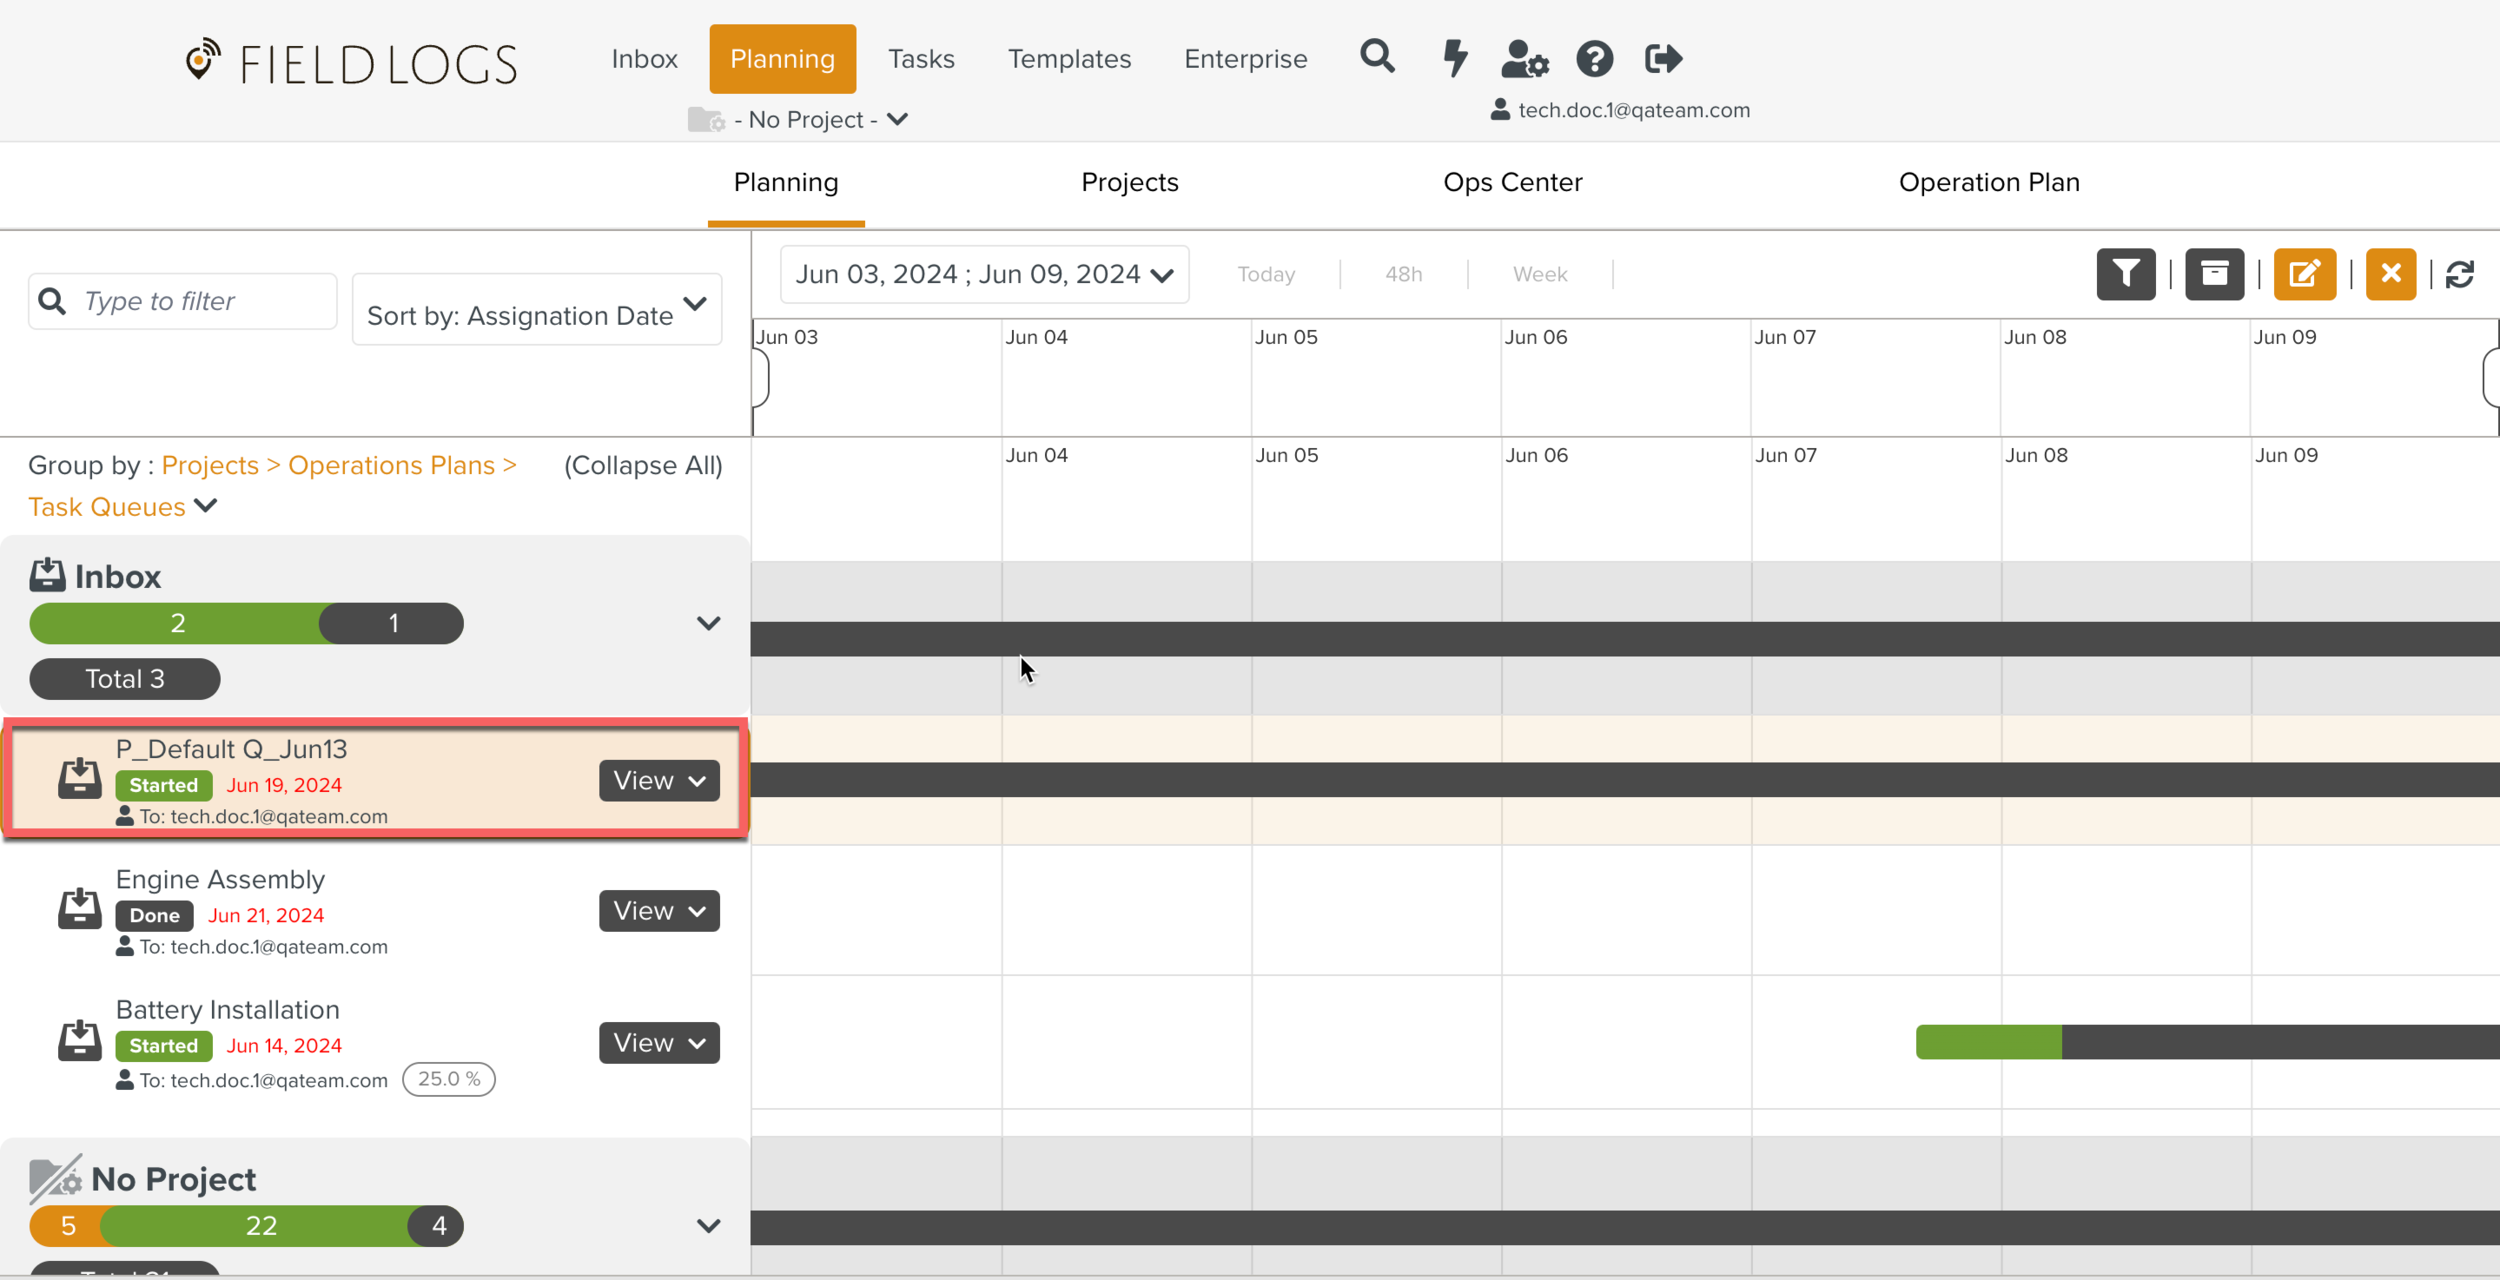
On the main menu, click Inbox.
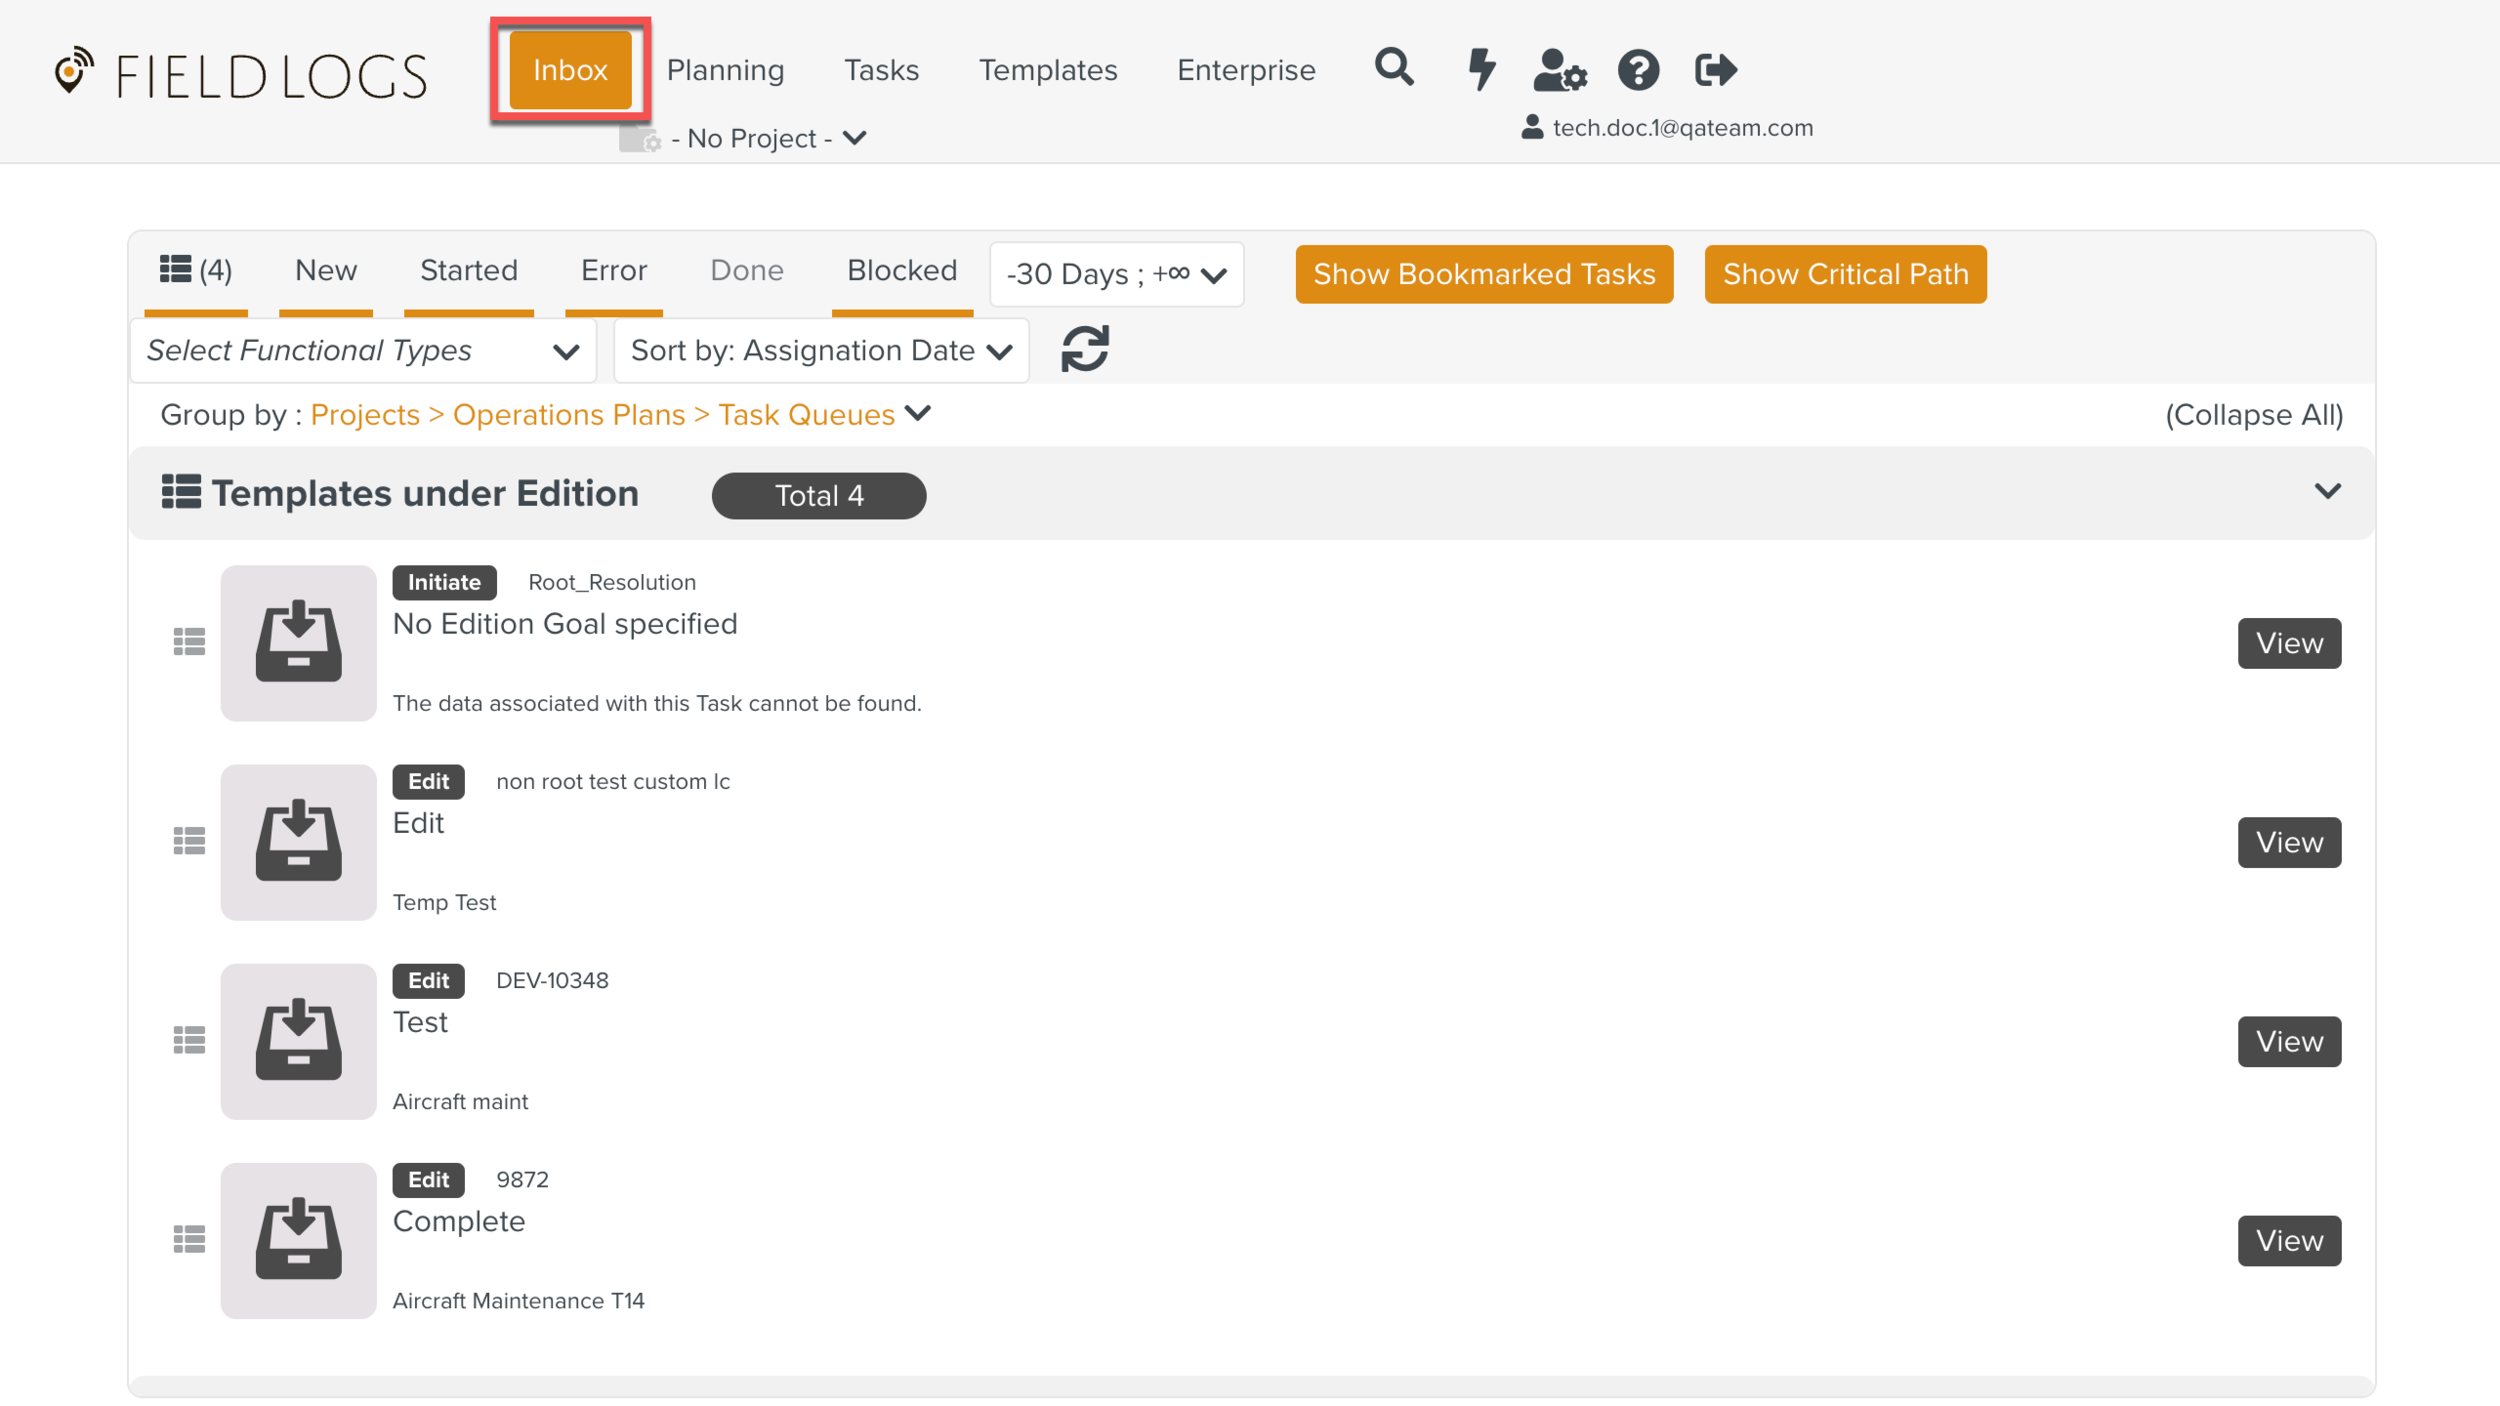
The screen Inbox appears.
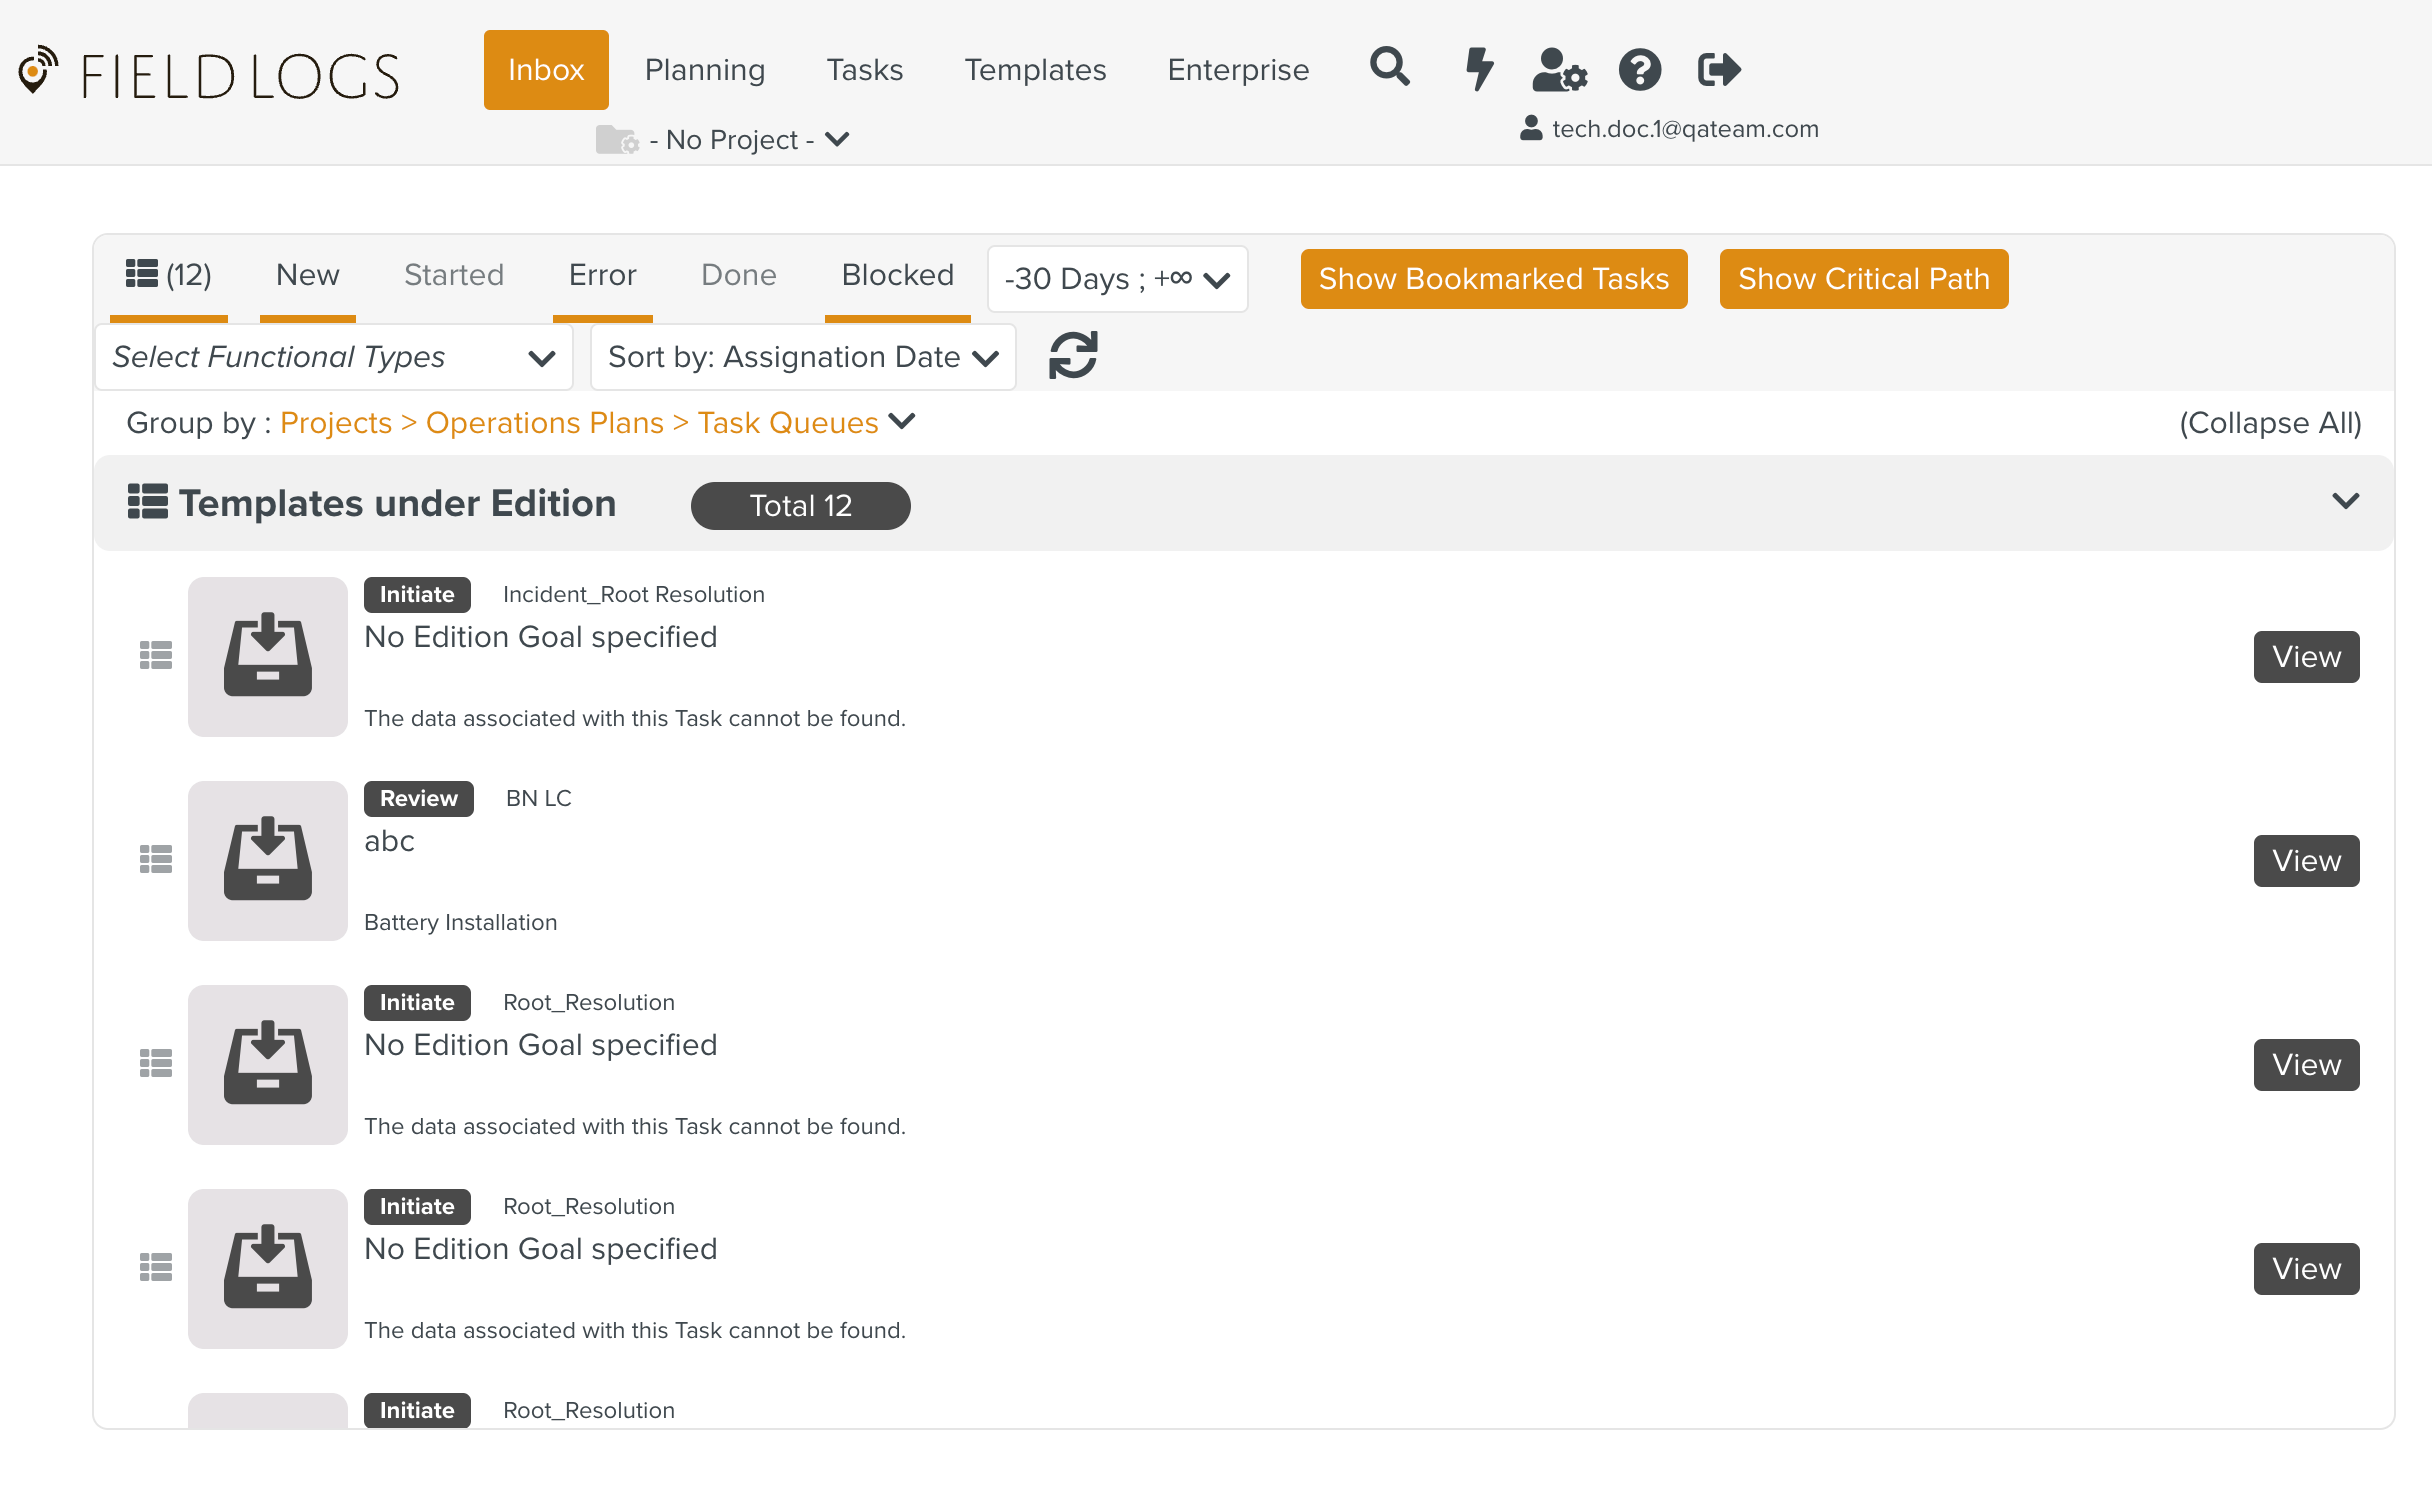
Select a Task for which you want to raise an Incident.
Click
 to display the list of options.
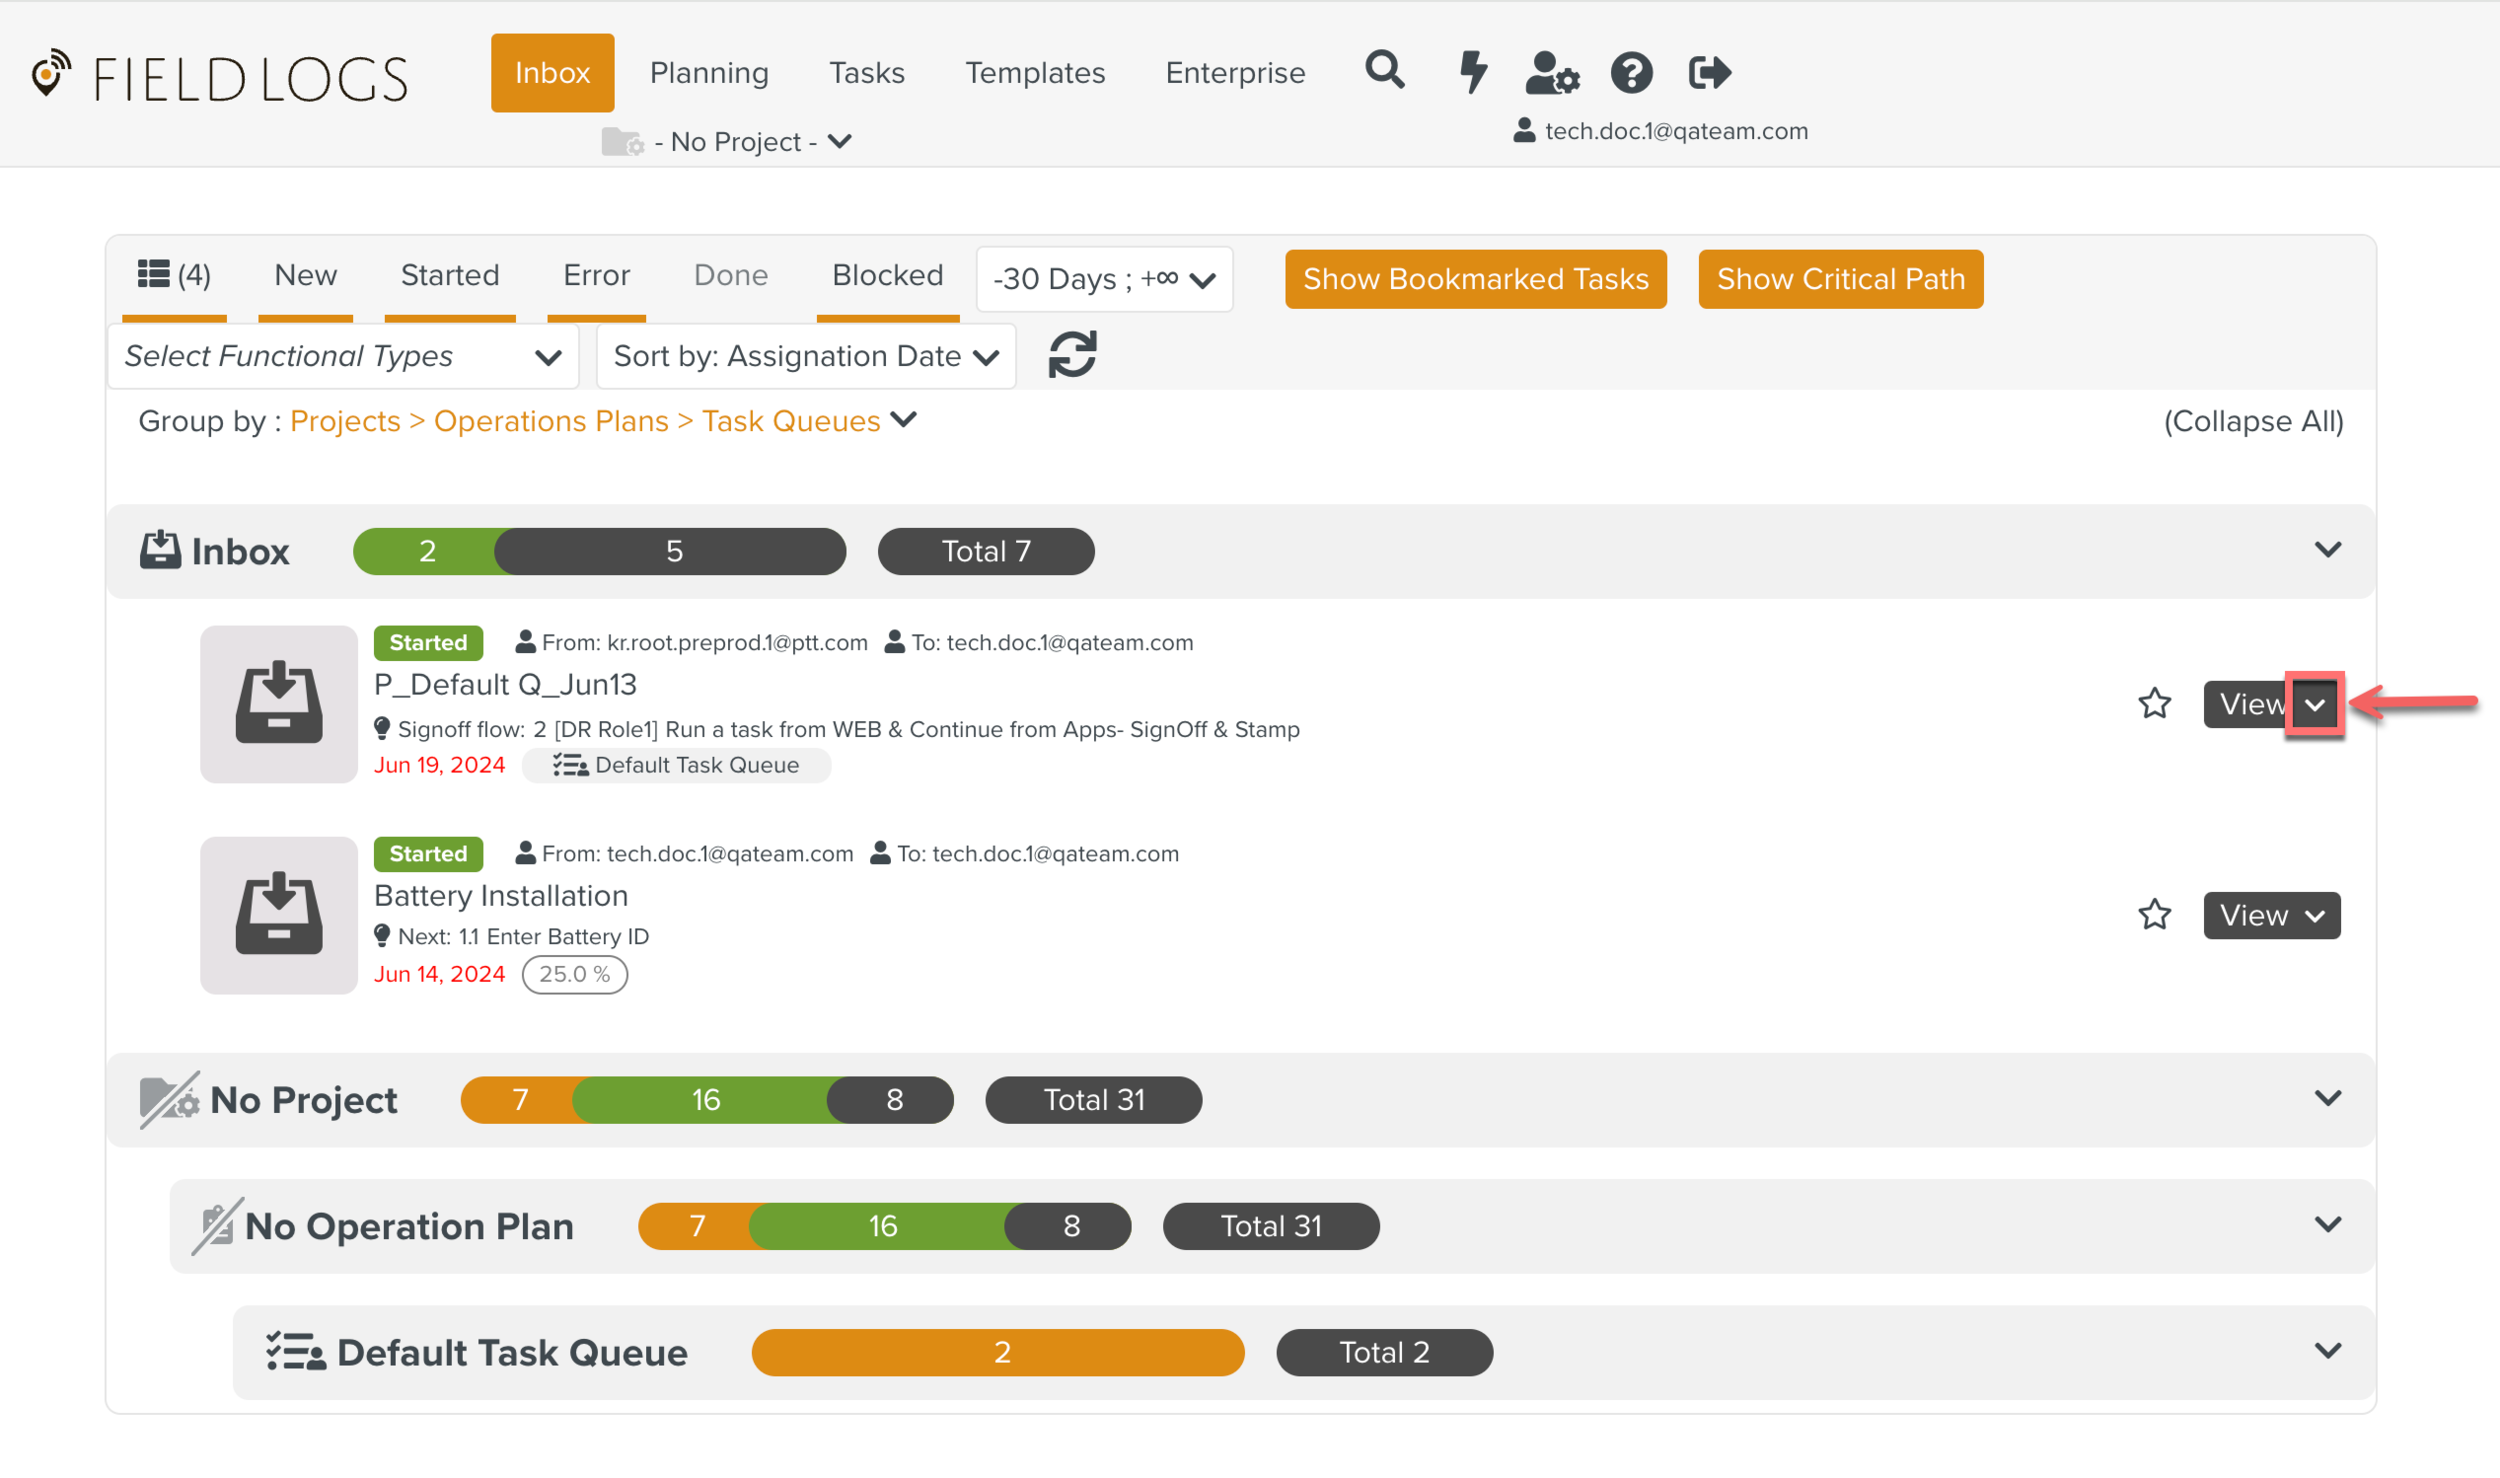
Click Raise Incident.
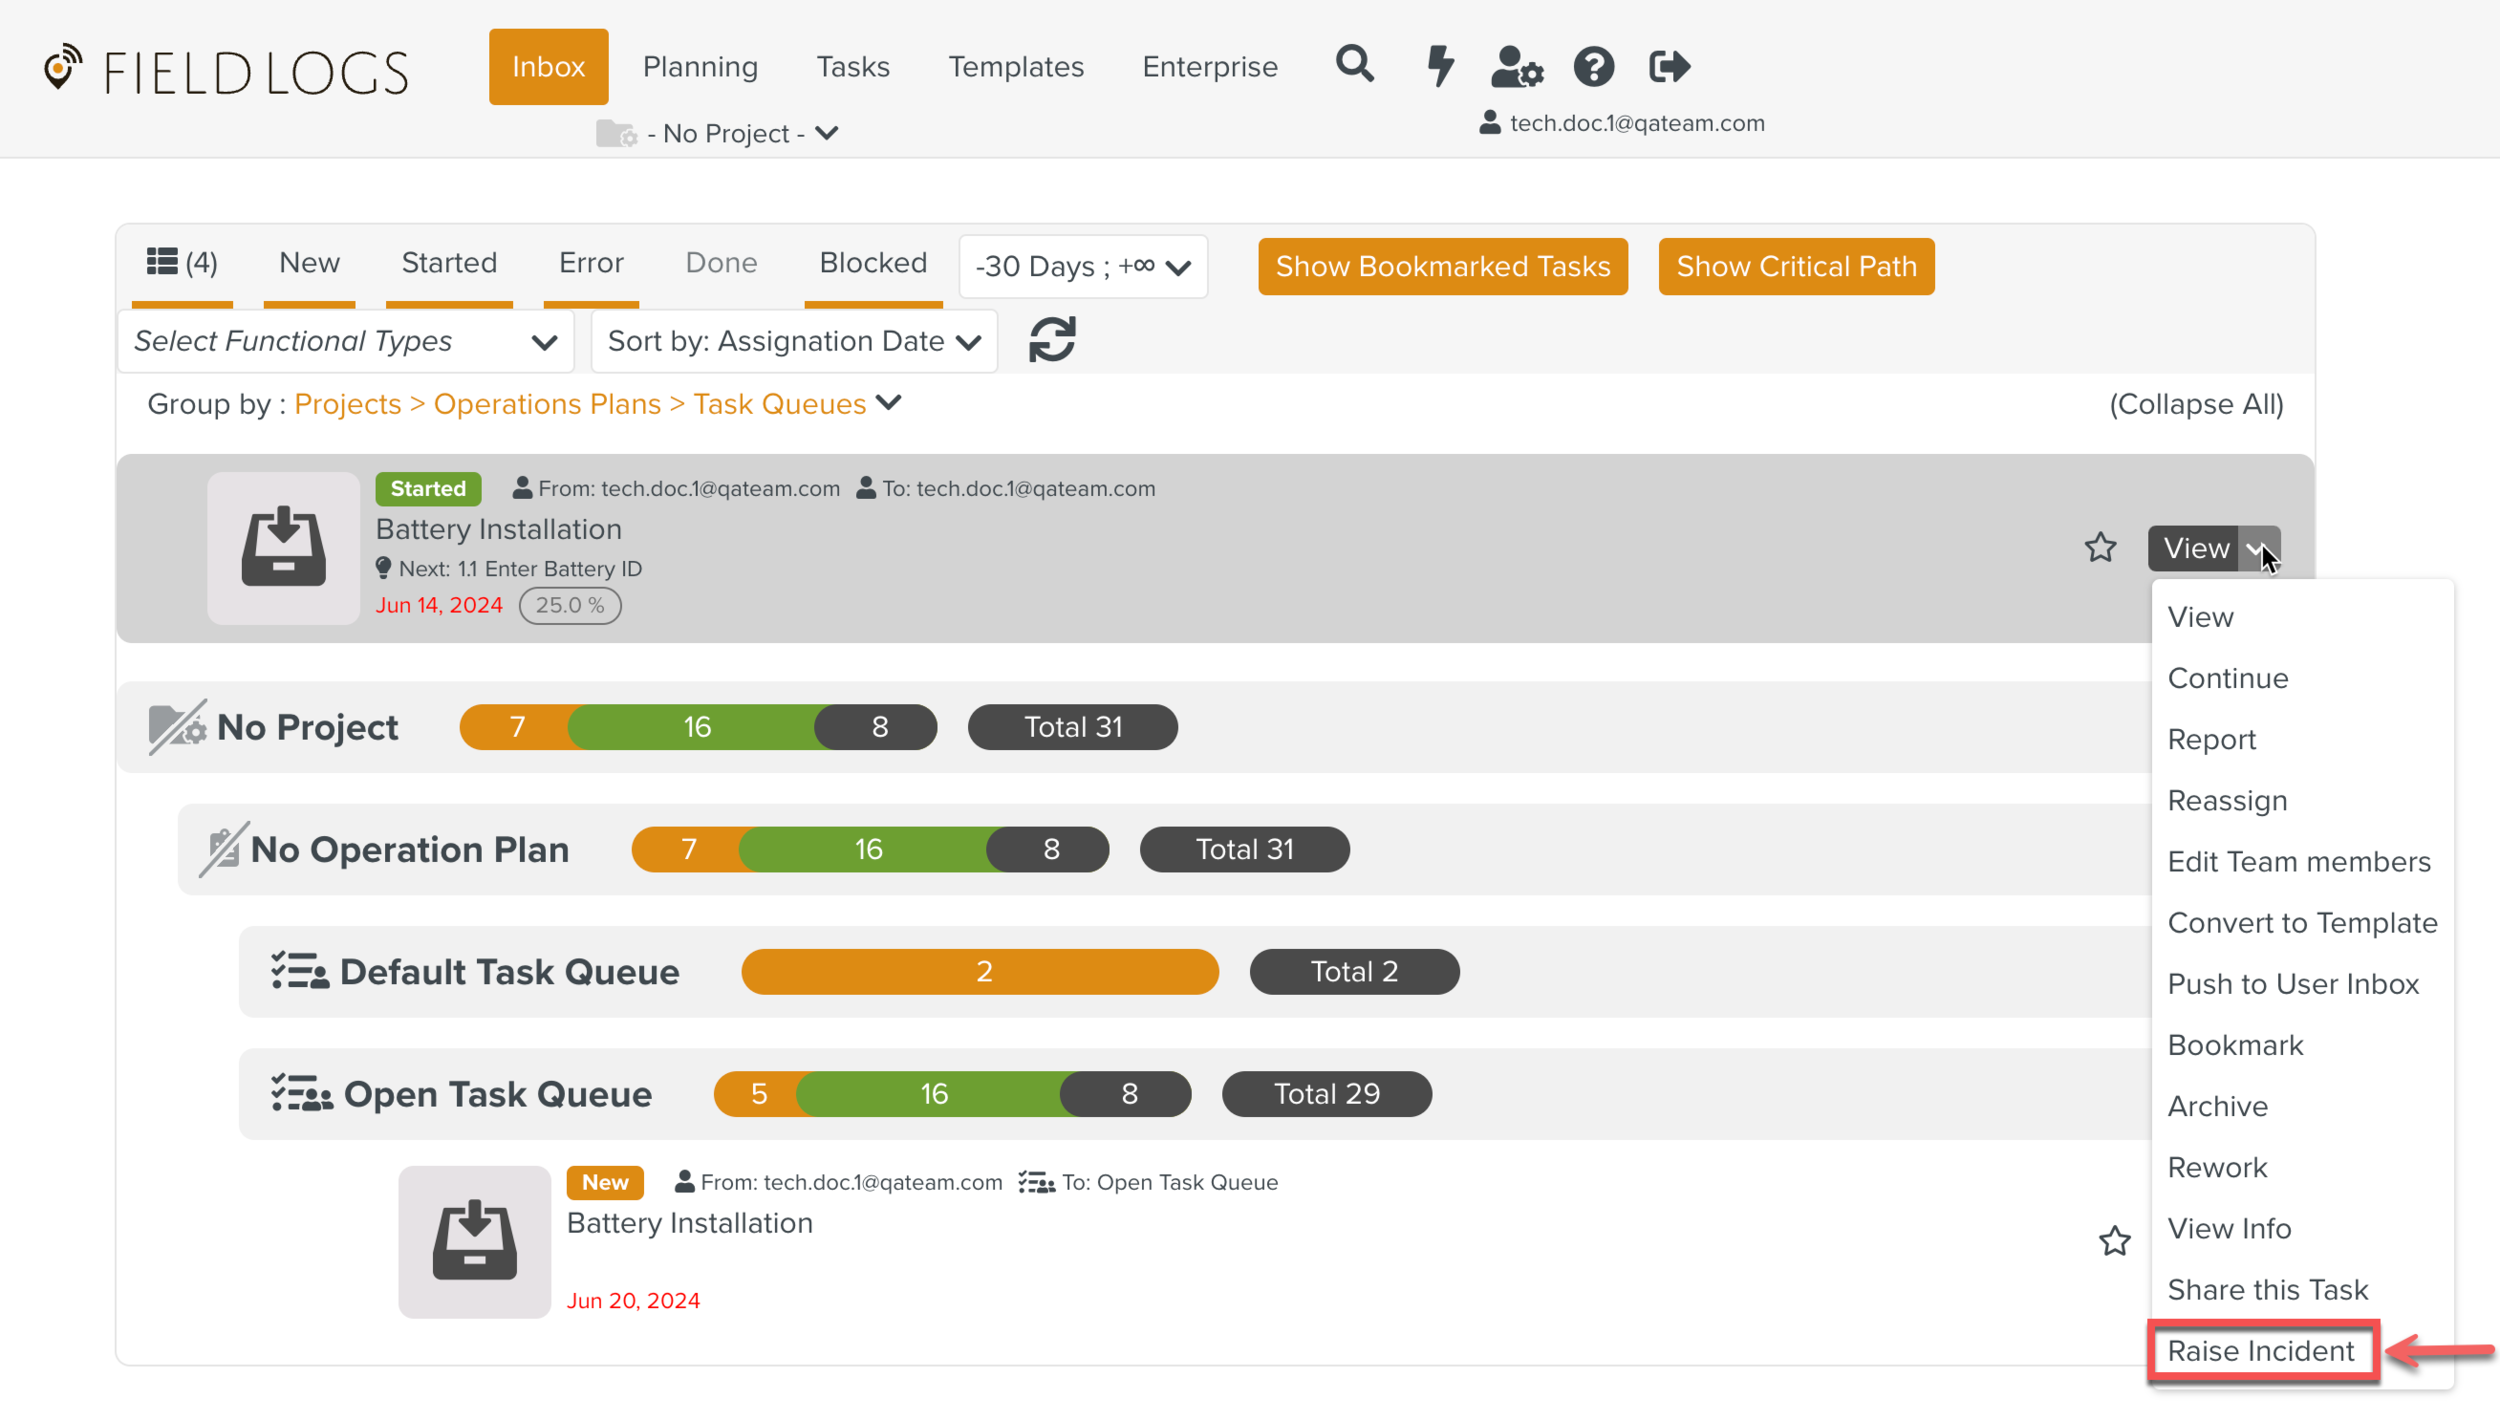
A dialog appears as shown below.

Note
The dialog is resizable and can be moved anywhere around the screen.
The Incident Context is displayed as Task.
From the Incident Definition dropdown, select the required Incident. The Incidents are displayed under their respective Incident Groups in a hierarchical structure.

The fields configured for the selected Incident are displayed.
Add the details in the following fields as shown below.
Priority: Select an option to set the severity level of the incident.
Part Type: Enter the type of missing parts.
Number of missing parts: Enter or set the number of missing parts. You can use
to increase or to decrease the numberNote
For each Incident, the displayed fields may vary based on the Incident Definition.
[Optional] In the section Custom Fields , select a Custom Field from a category and fill in the values for the Custom Fields.

Note
All the Custom Fields that are defined for Incidents are displayed.
[Optional] Click the button to add images or files to the Incident. You can add multiple files as shown below.

To remove a file, click
and Yes, Remove.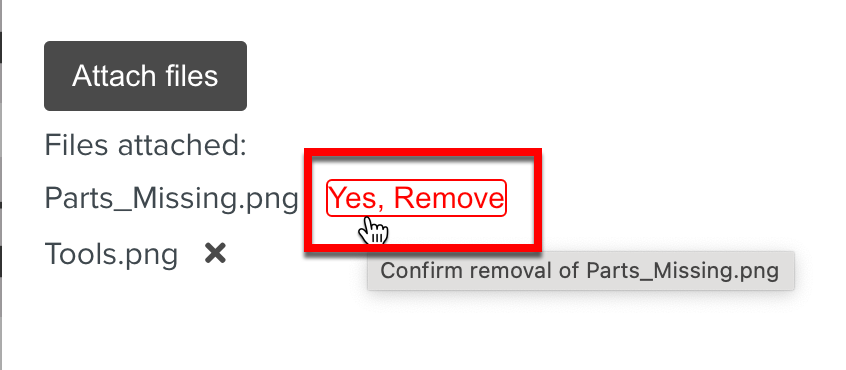
Note
All types of documents and media file formats of size under 30 MB are supported.
Click Save.

The Incident is raised.
From Planning, you can raise Task Context Incidents and Global Incidents.
To raise an Incident from Planning:
On the main menu, go to Planning>Planning.
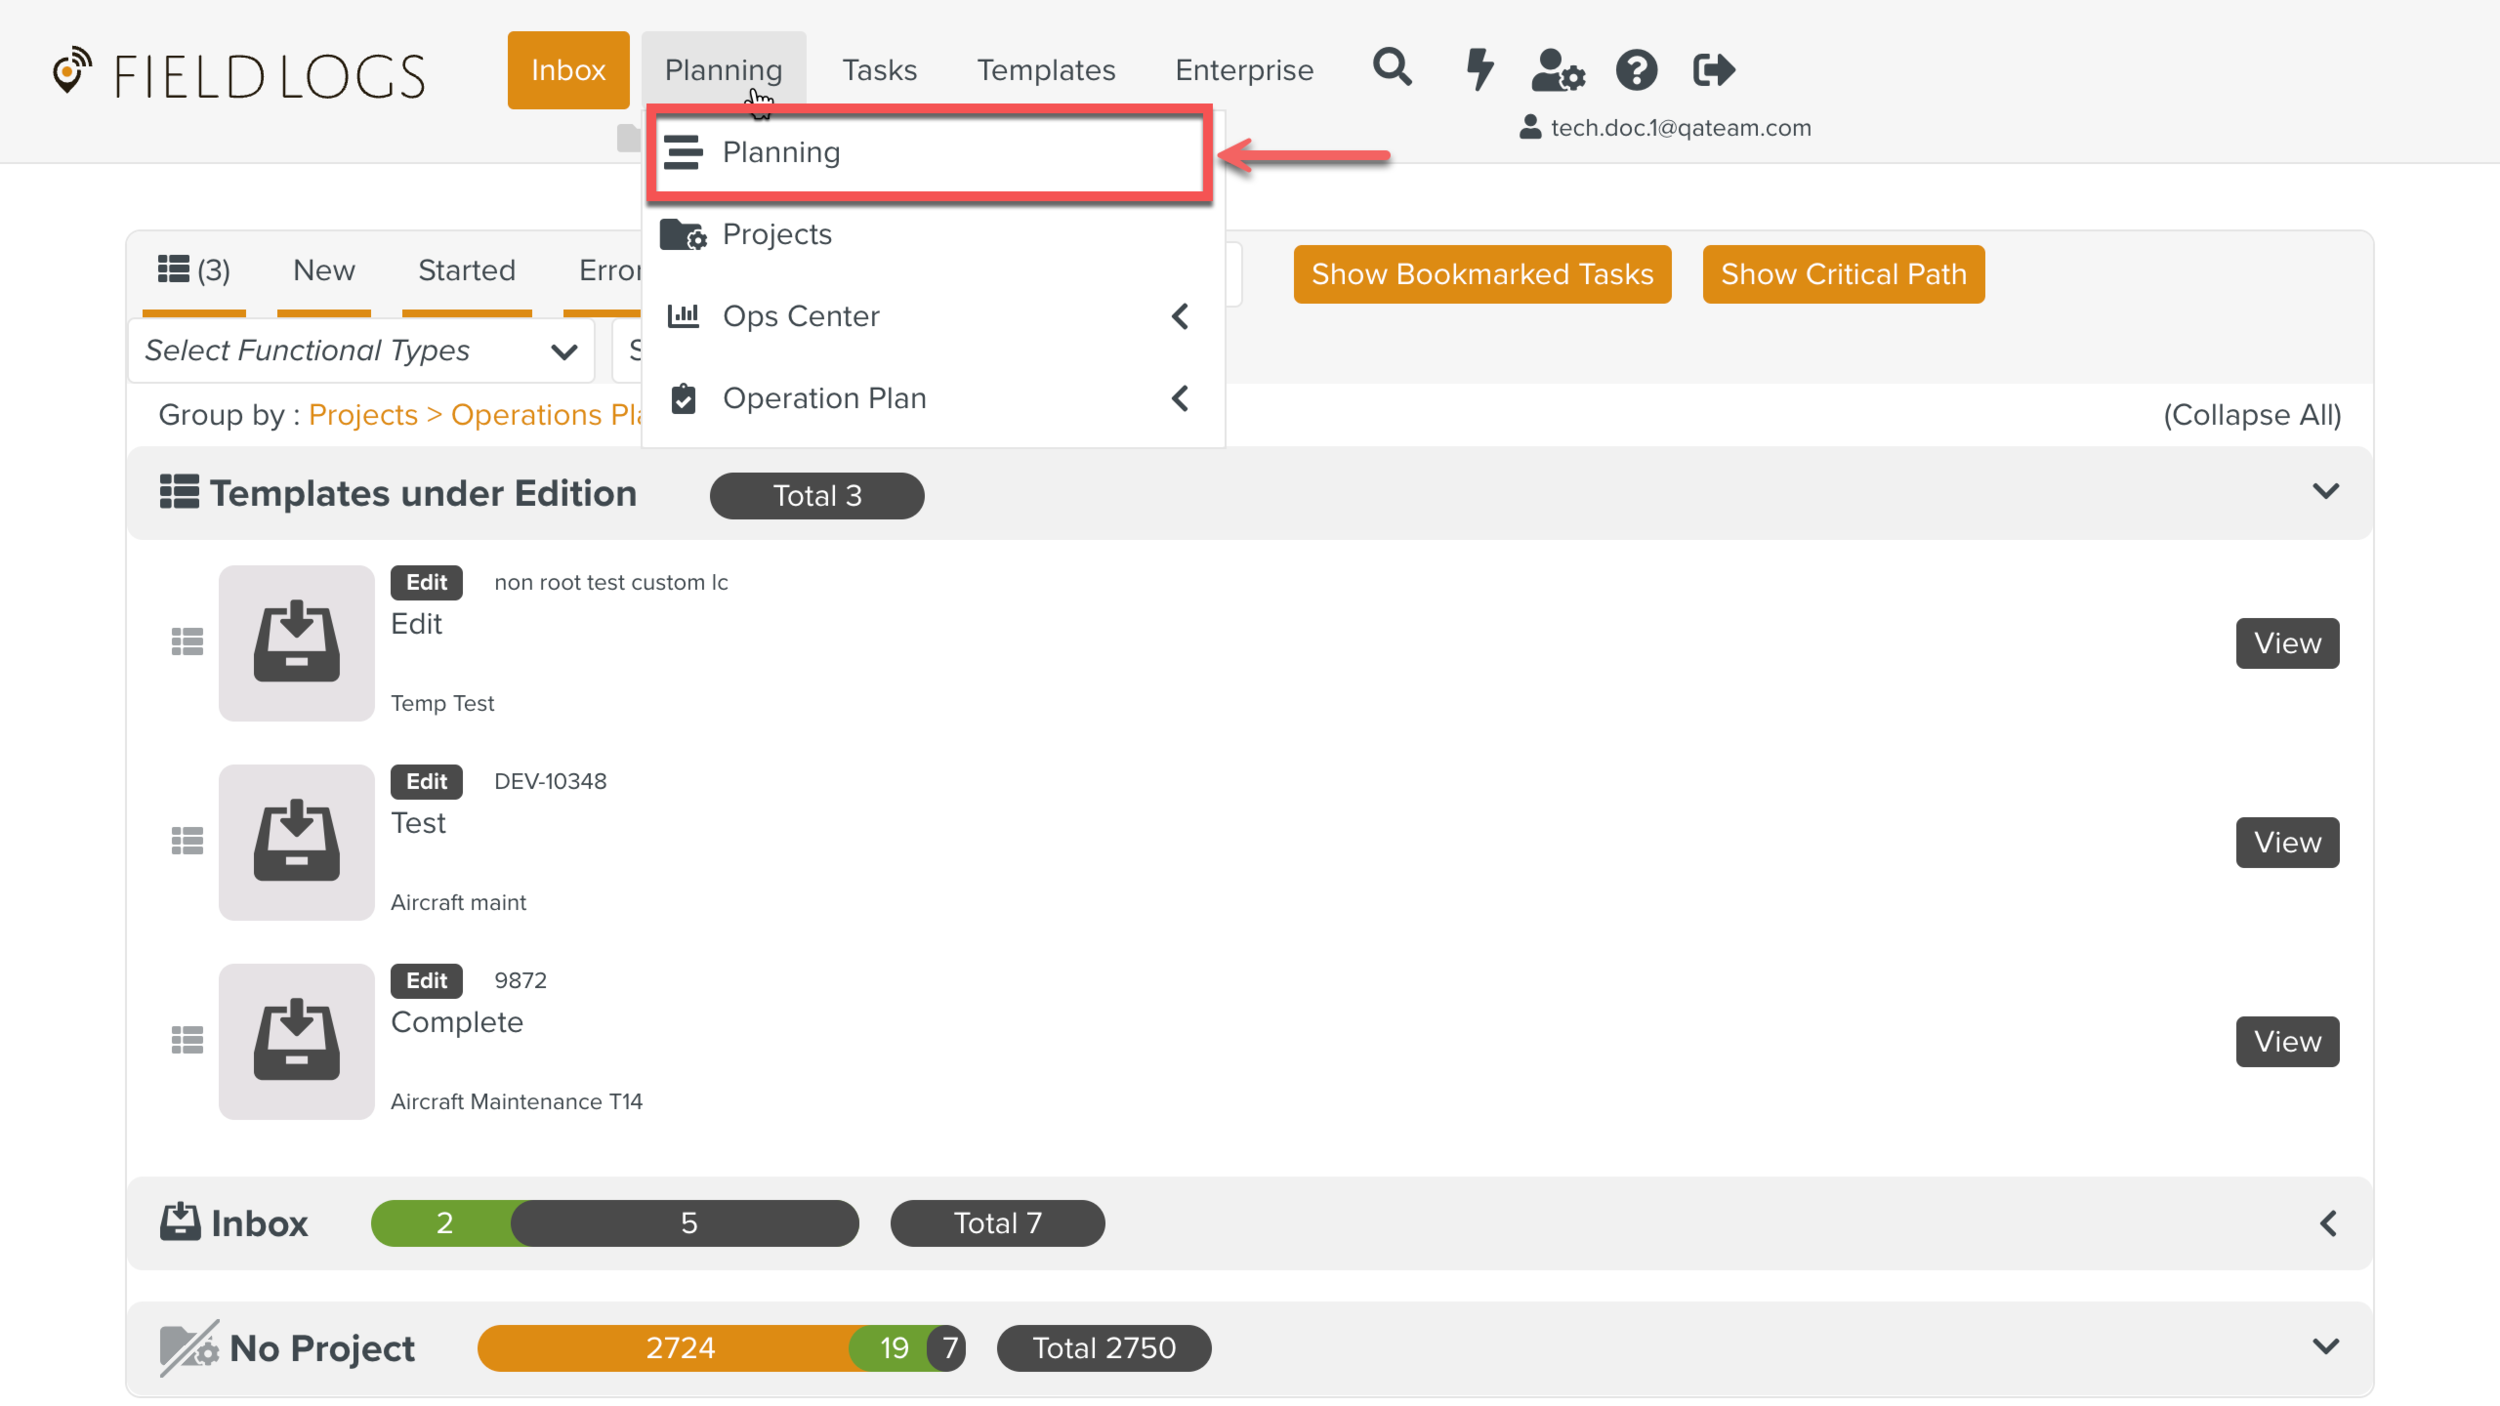
The screen Planning appears.
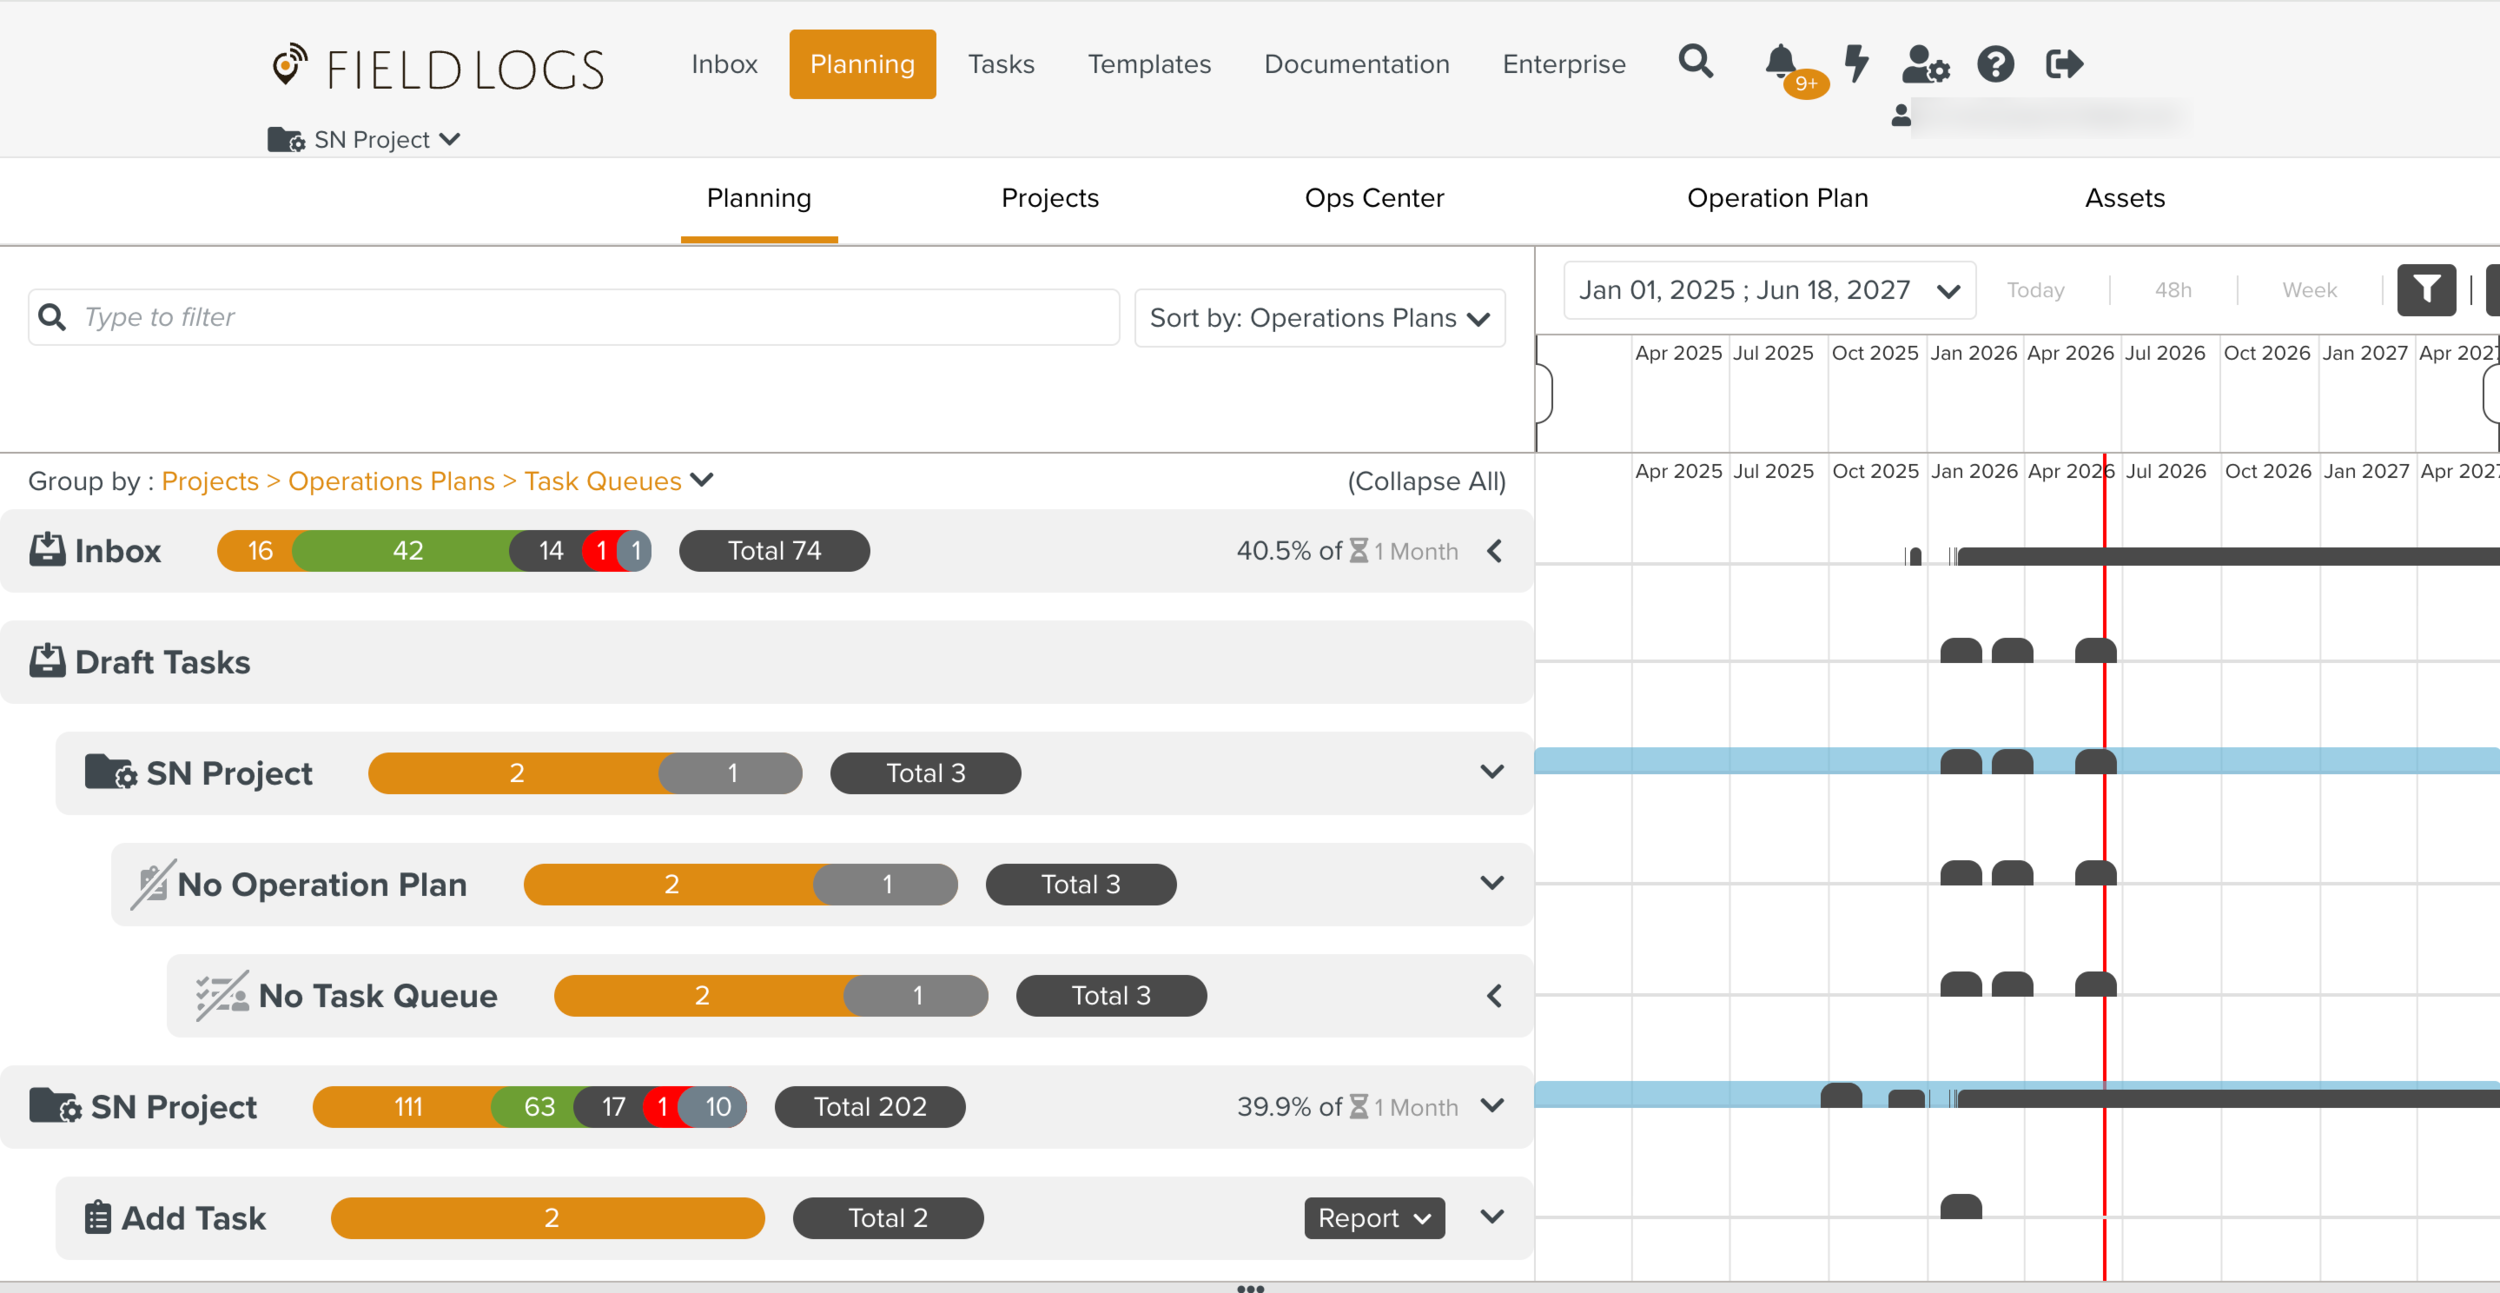
Select the Task for which you want to raise an Incident.
Click
 to display the list of options.
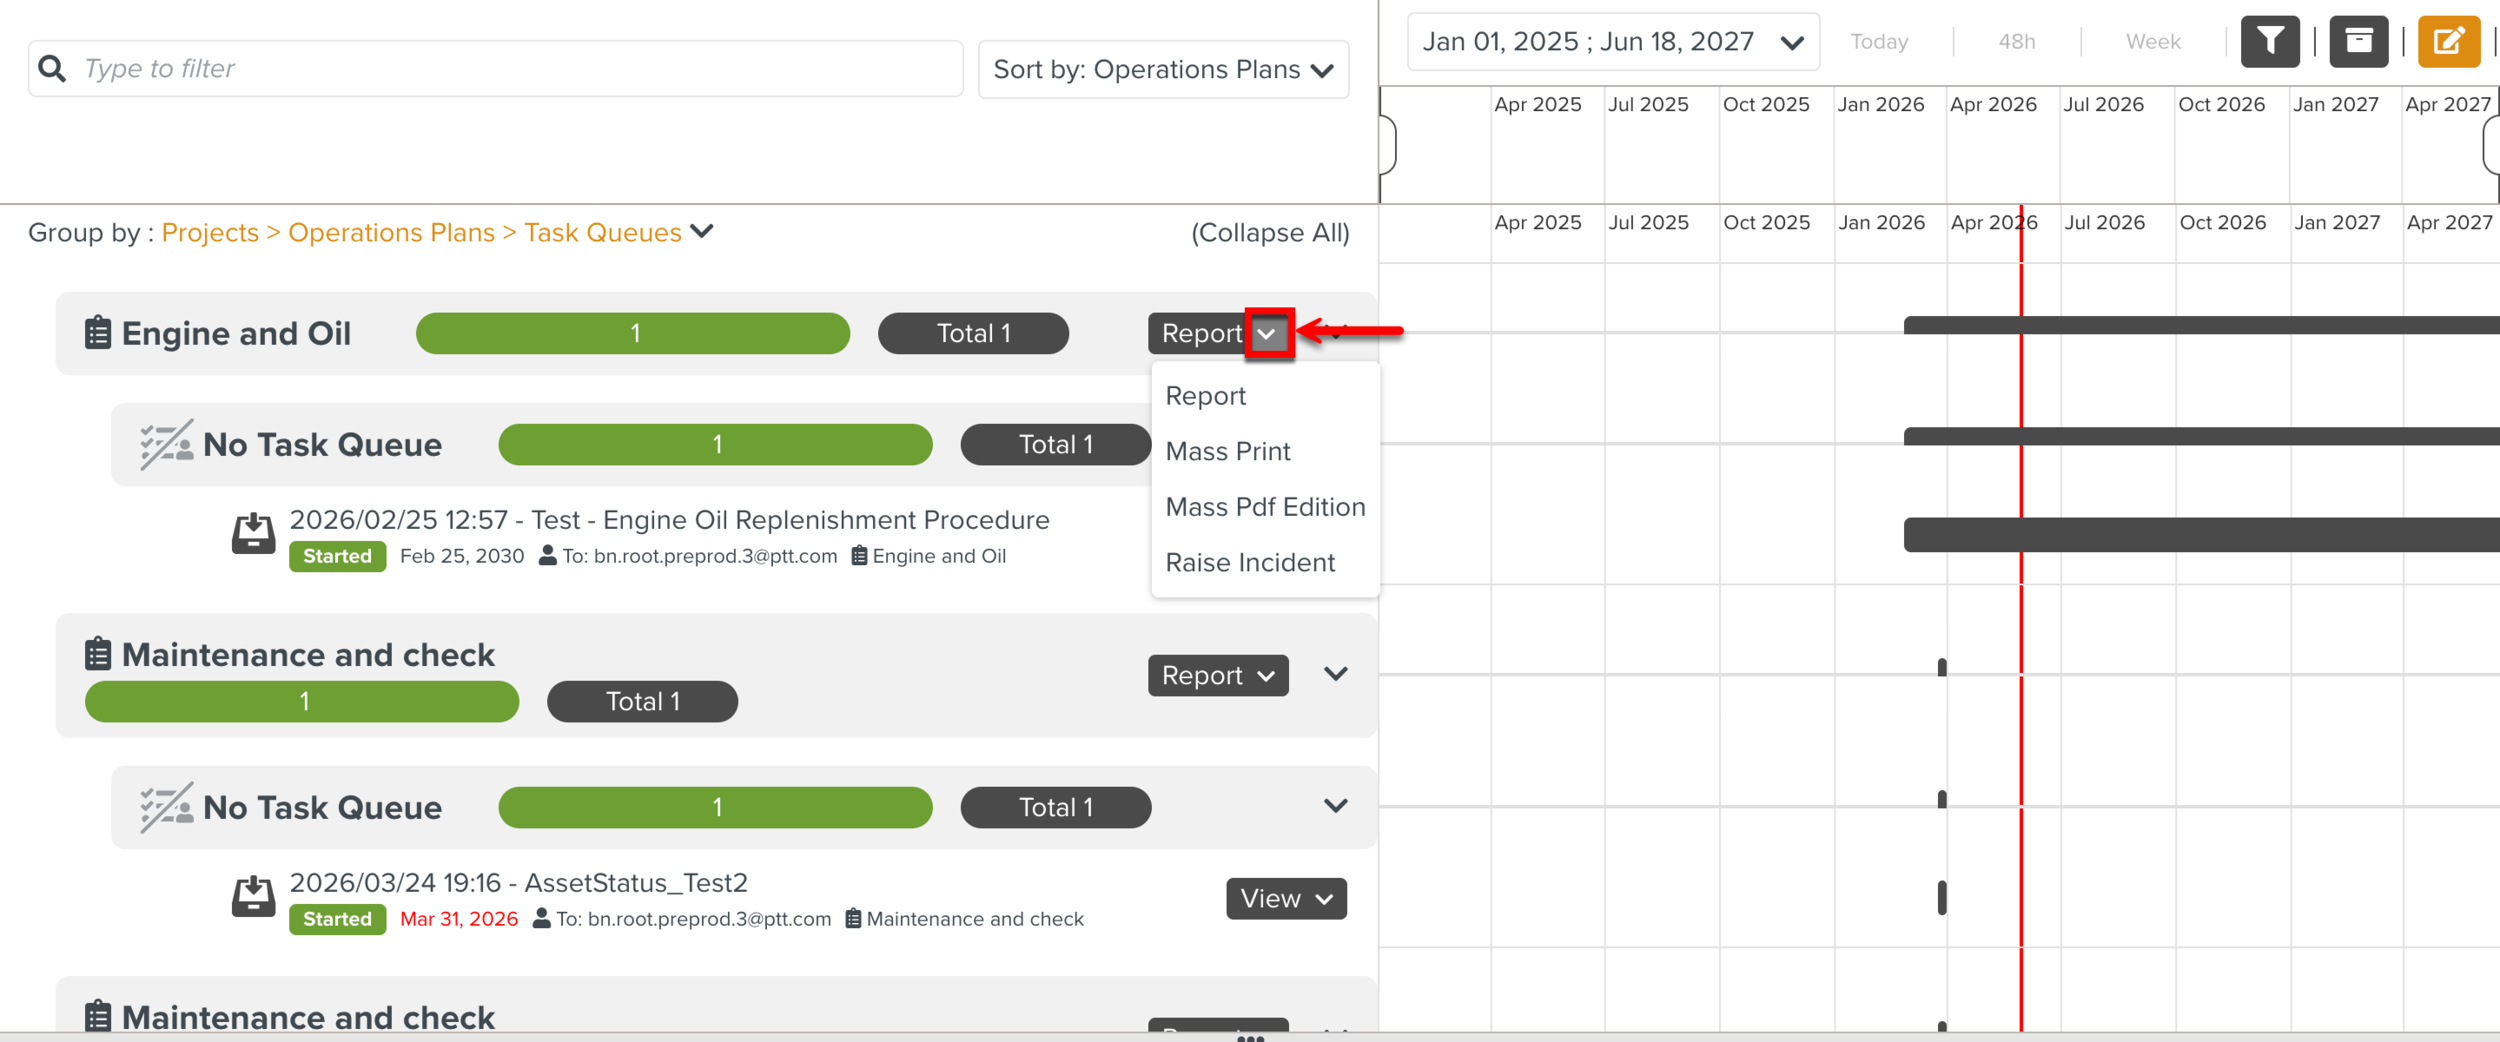
Click Raise Incident.
A dialog appears as shown below.
Note
The dialog is resizable and can be moved anywhere around the screen.
The Incident Context is displayed as Task.
From the Incident Definition dropdown, select the required Incident. The Incidents are displayed under their respective Incident Groups in a hierarchical structure.

The fields that are configured for the Incident are displayed.
Add the details in the following fields as shown below:
Priority: Select an option to set the severity level of the Incident.
Part Type: Enter the type of missing parts.
Number of missing parts: Enter or set the number of missing parts. You can use
to increase or to decrease the number.Note
For each Incident, the displayed fields may vary based on the Incident Definition.
[Optional] In the section Custom Fields , select a Custom Field from a category and fill in the values for the Custom Fields.


Note
All the Custom Fields that are defined for Incidents are displayed.
Click Context: Task to view the Task details.
The details of the Task are displayed.
The Context Fields selected for the Task Context Incident during Incident Definition are displayed in the section Context: Task.
When changes are made to the Task properties after raising an Incident, the following Context Field values get updated dynamically:
Last Modification Date
Assignee
Some details of the Task that are automatically displayed for Task Context Incidents are listed below:
Project: The Project details such as Name, Start Date, and End Date are displayed.
Queue: The Task Queue details such as Name, Description, and Creation Date are displayed.
Op Plan: The Operation Plan details such as Name, Creation Date, Time Zone, and Assigner are displayed.
The dialog New Incident with all the details filled is shown below.
[Optional] Click the button to add images or files to the Incident. You can add multiple files as shown below.
To remove a file, click
and Yes, Remove.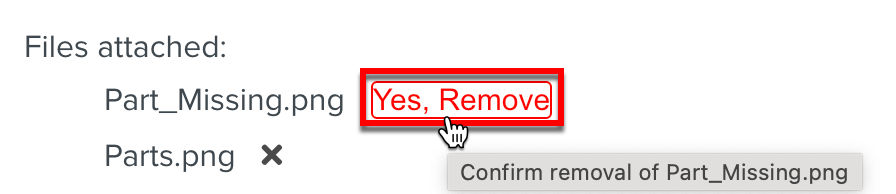
Note
All types of documents and media file formats of size under 30 MB are supported.
Click Save.
The Incident is raised.
From a Runtime Step, you can raise Runtime Step Context Incidents and Global Incidents.
Note
You can also raise a Runtime Step Context Incident while viewing a Step of a Task in the screens Tasks, Inbox, and Planning.
To raise an Incident from a Runtime Step:
Select a Runtime Step.
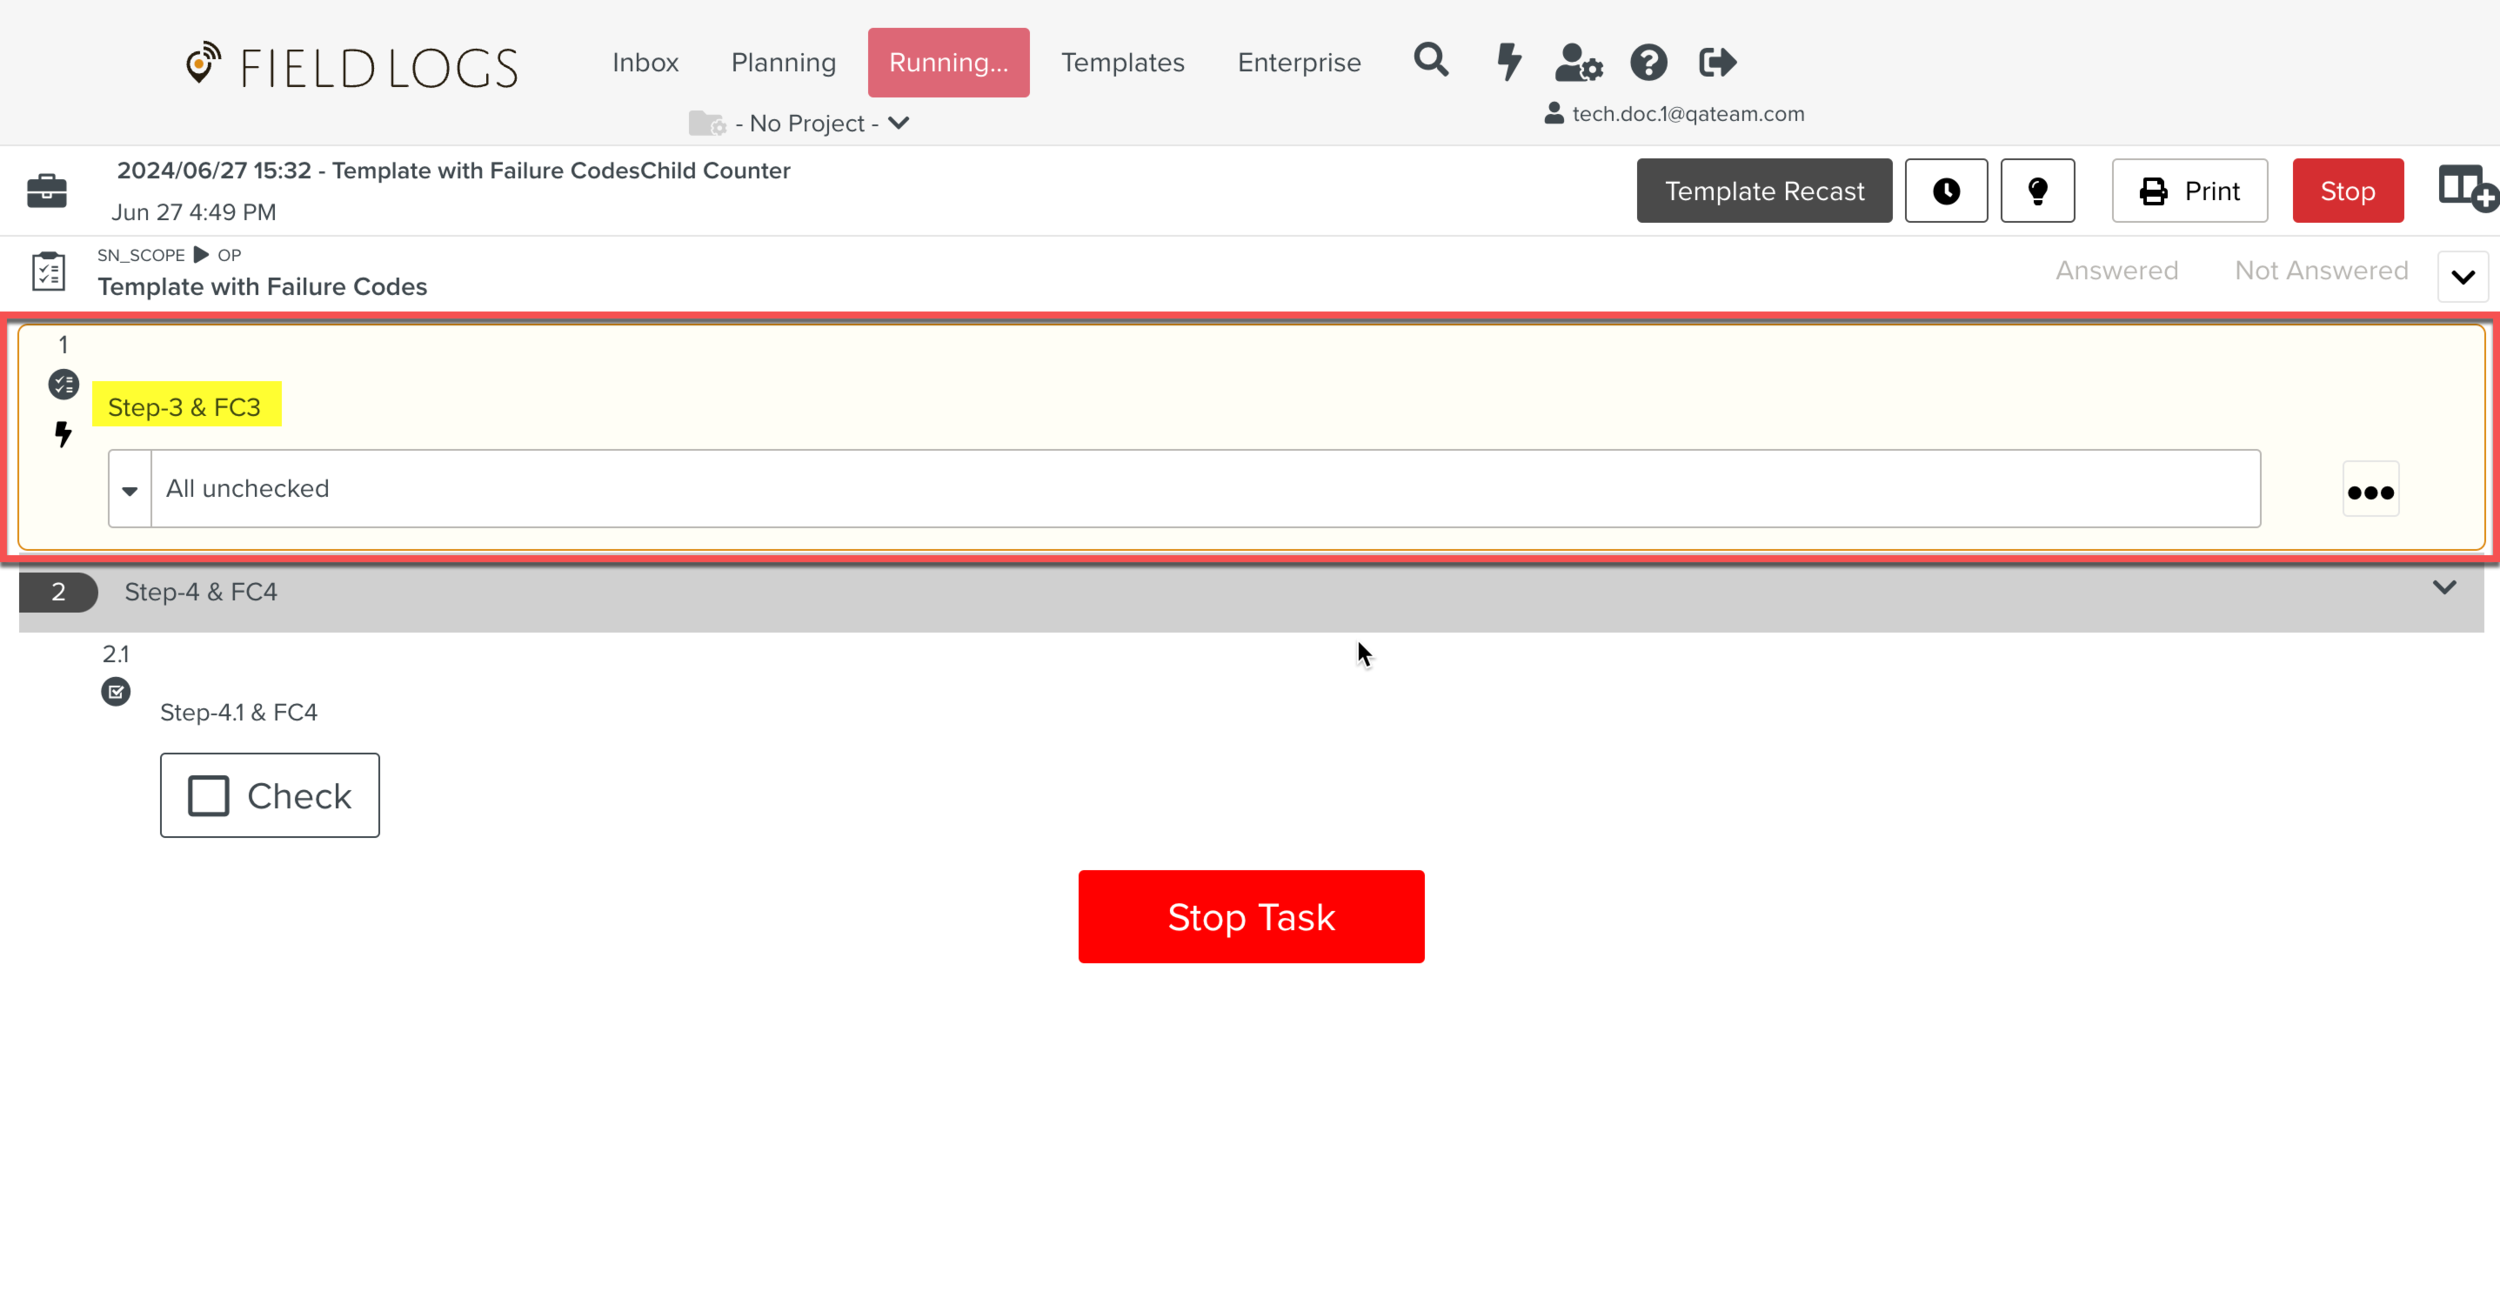
Click
 to raise an Incident.
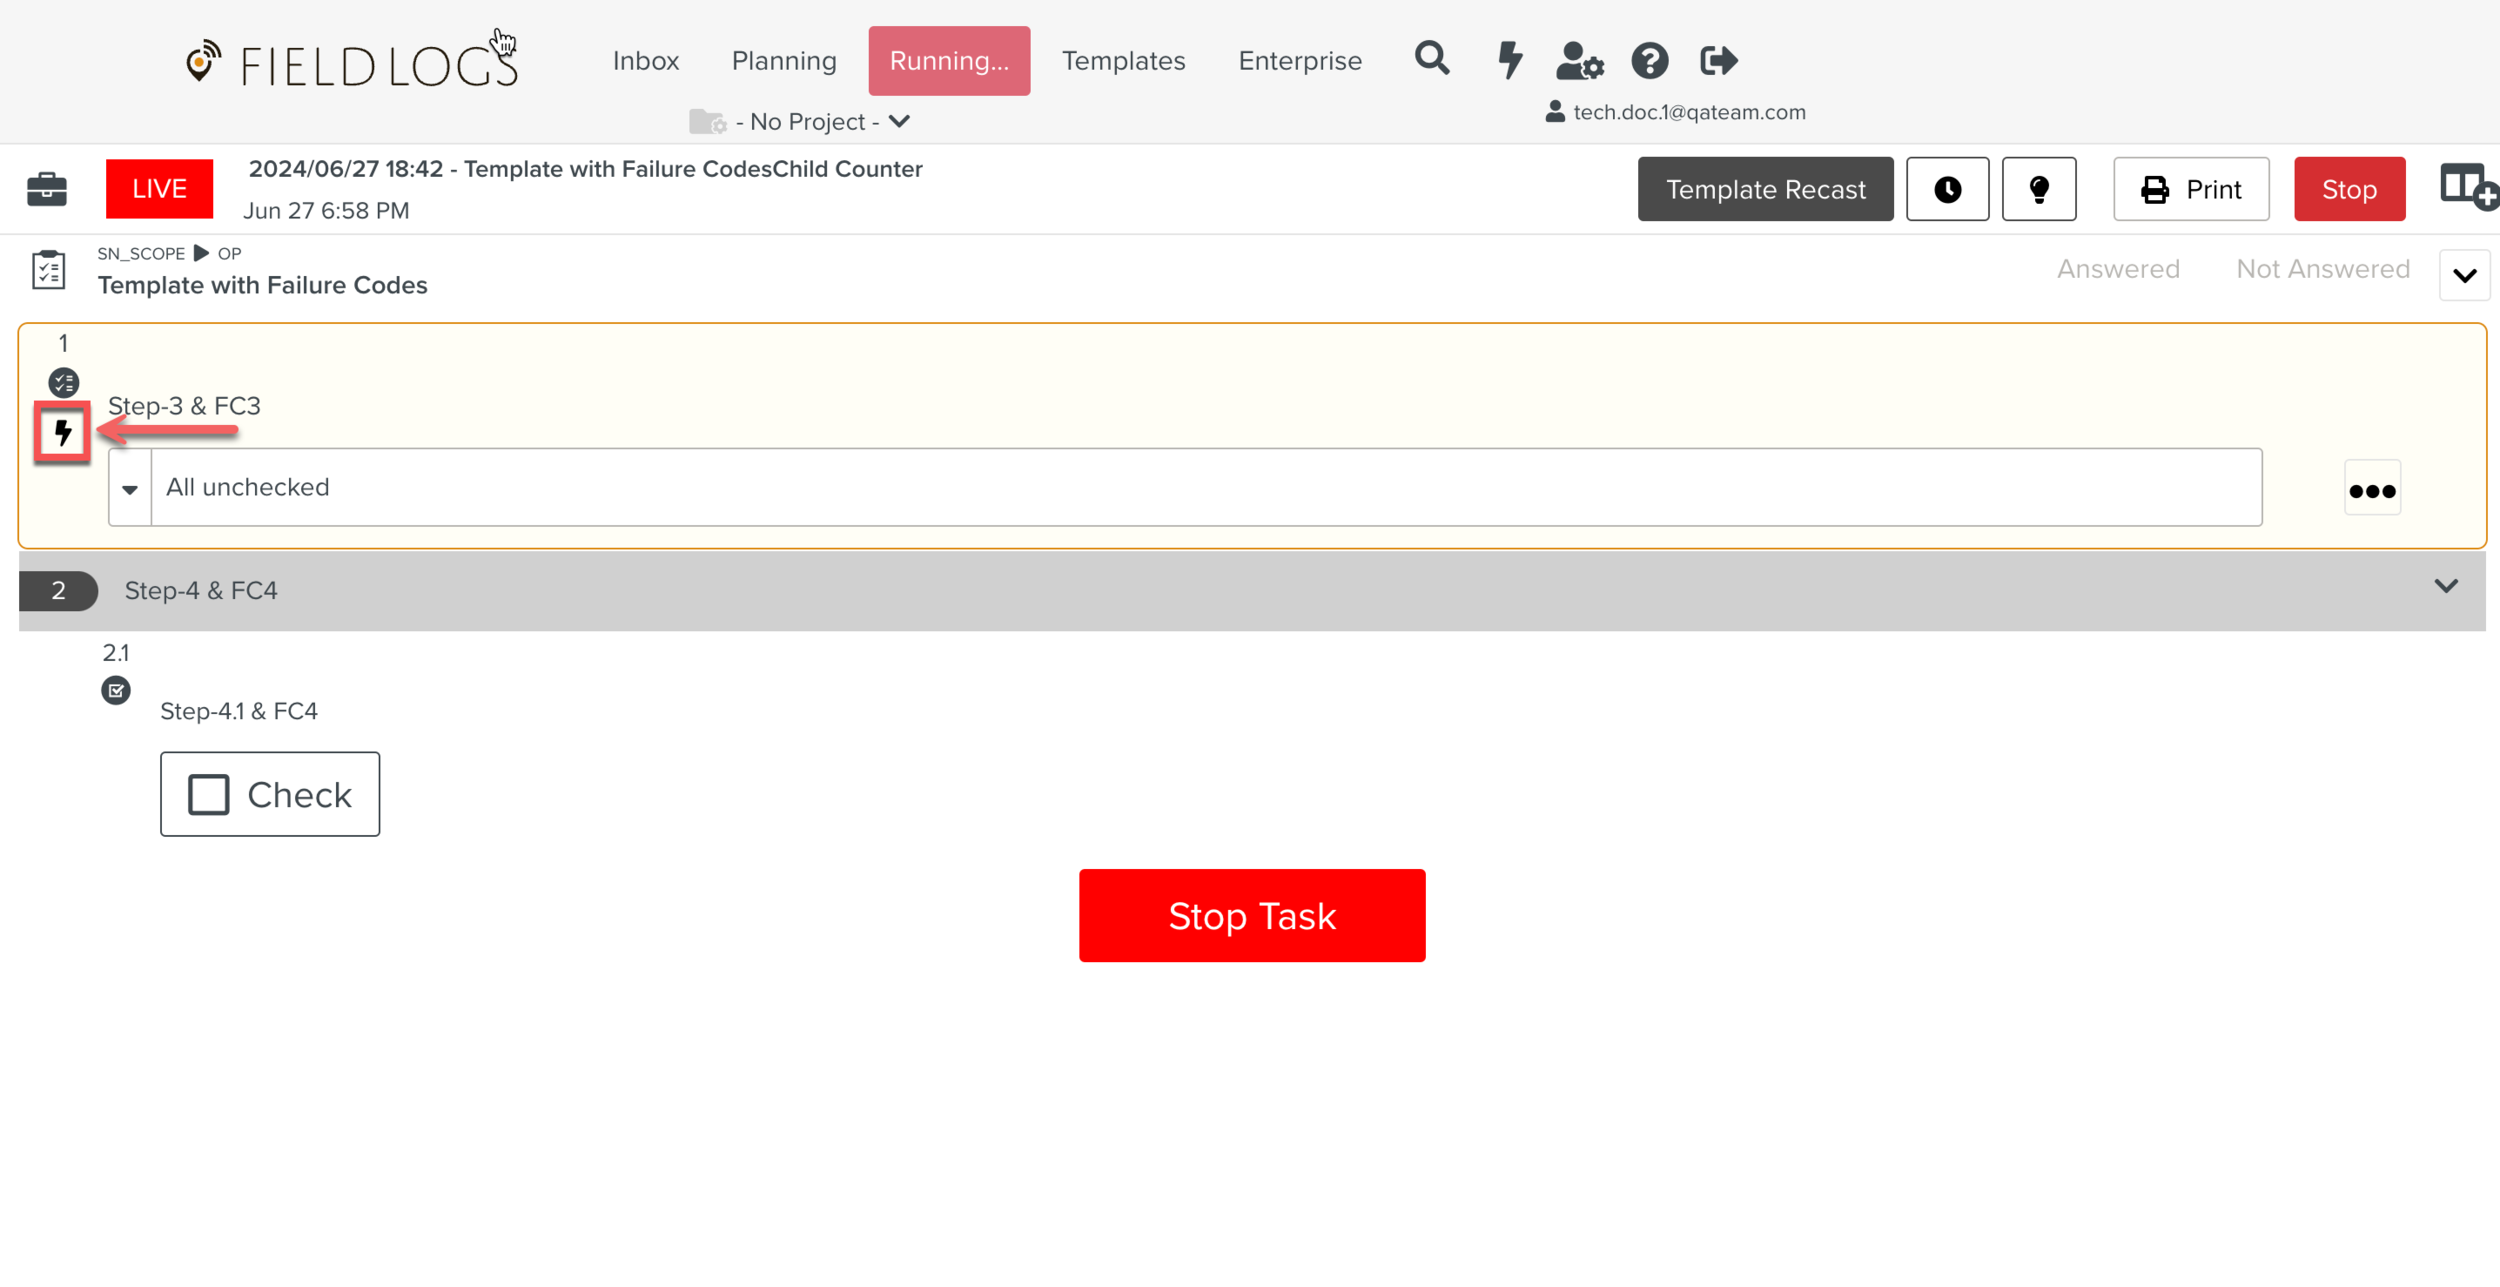
The dialog New Incident appears.
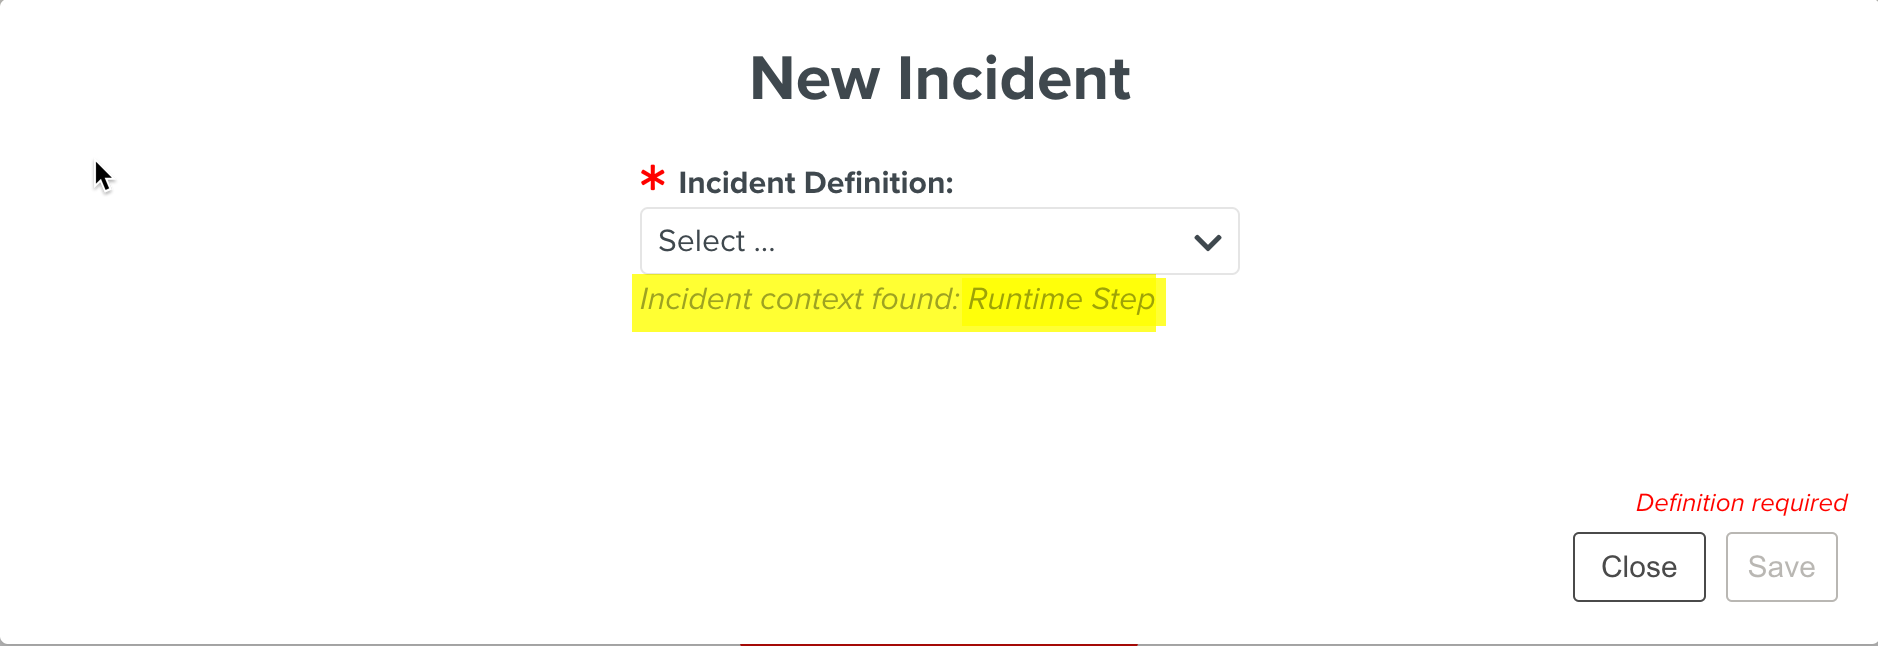
Note
The New Incident dialog is resizable and can be moved anywhere around the screen.
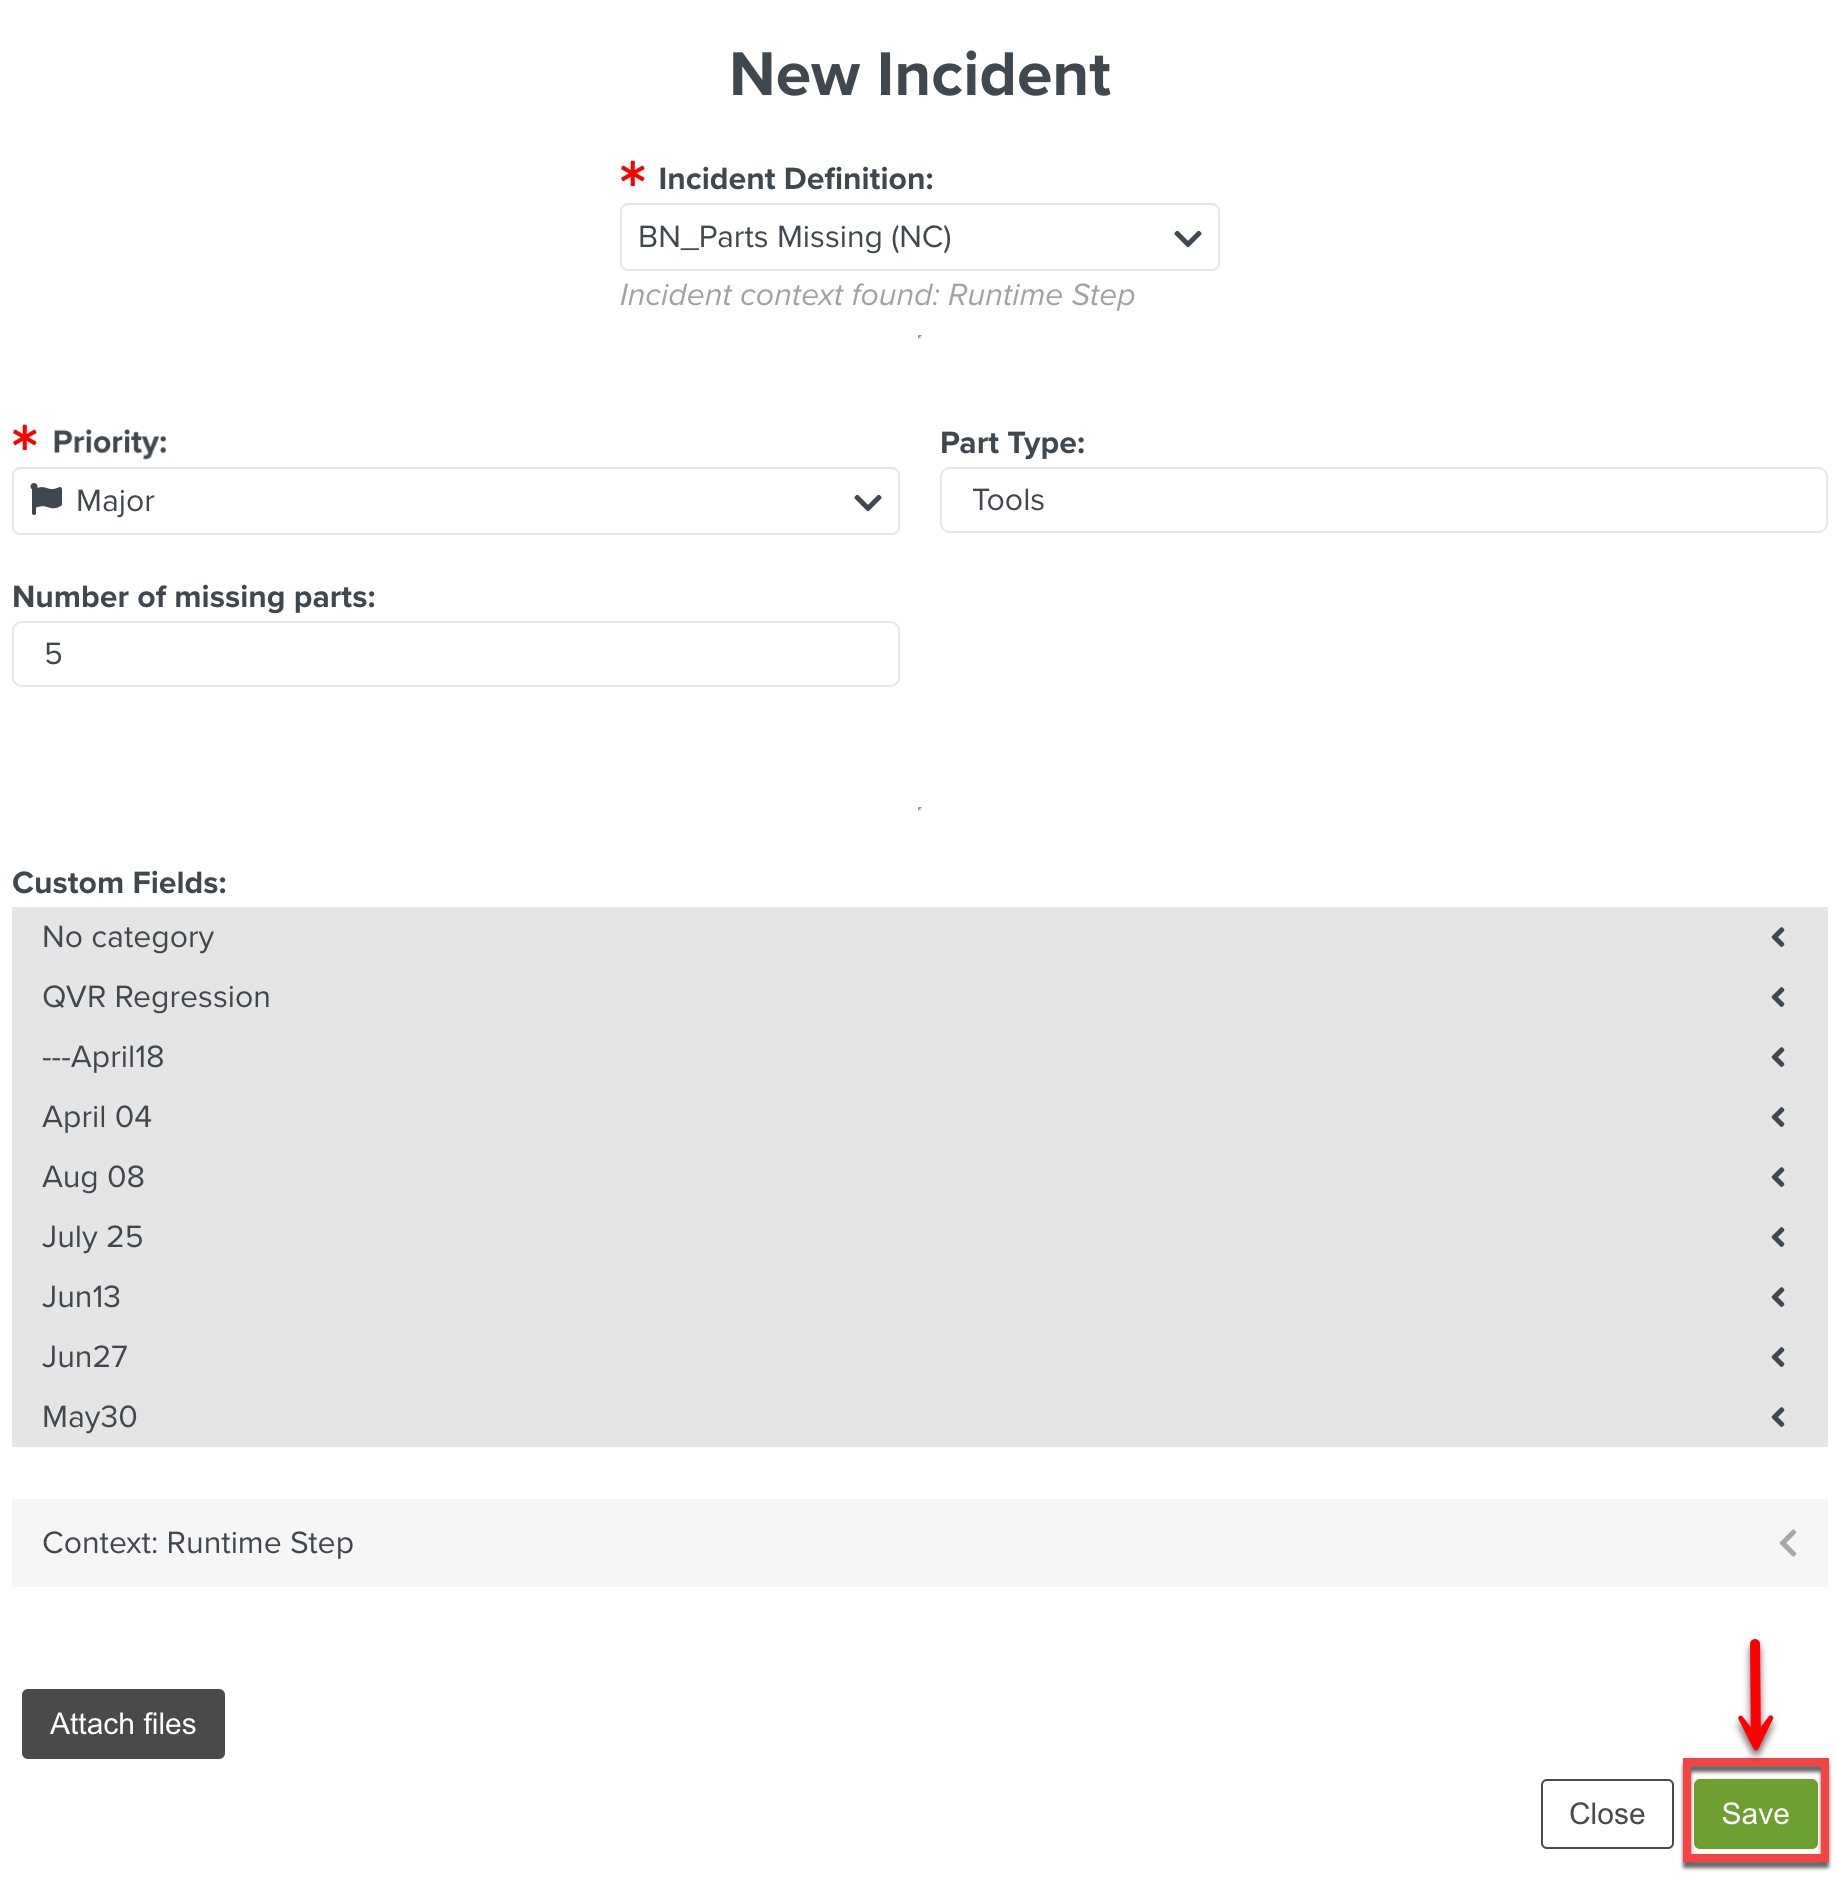
The Incident Context is displayed as Runtime Step.
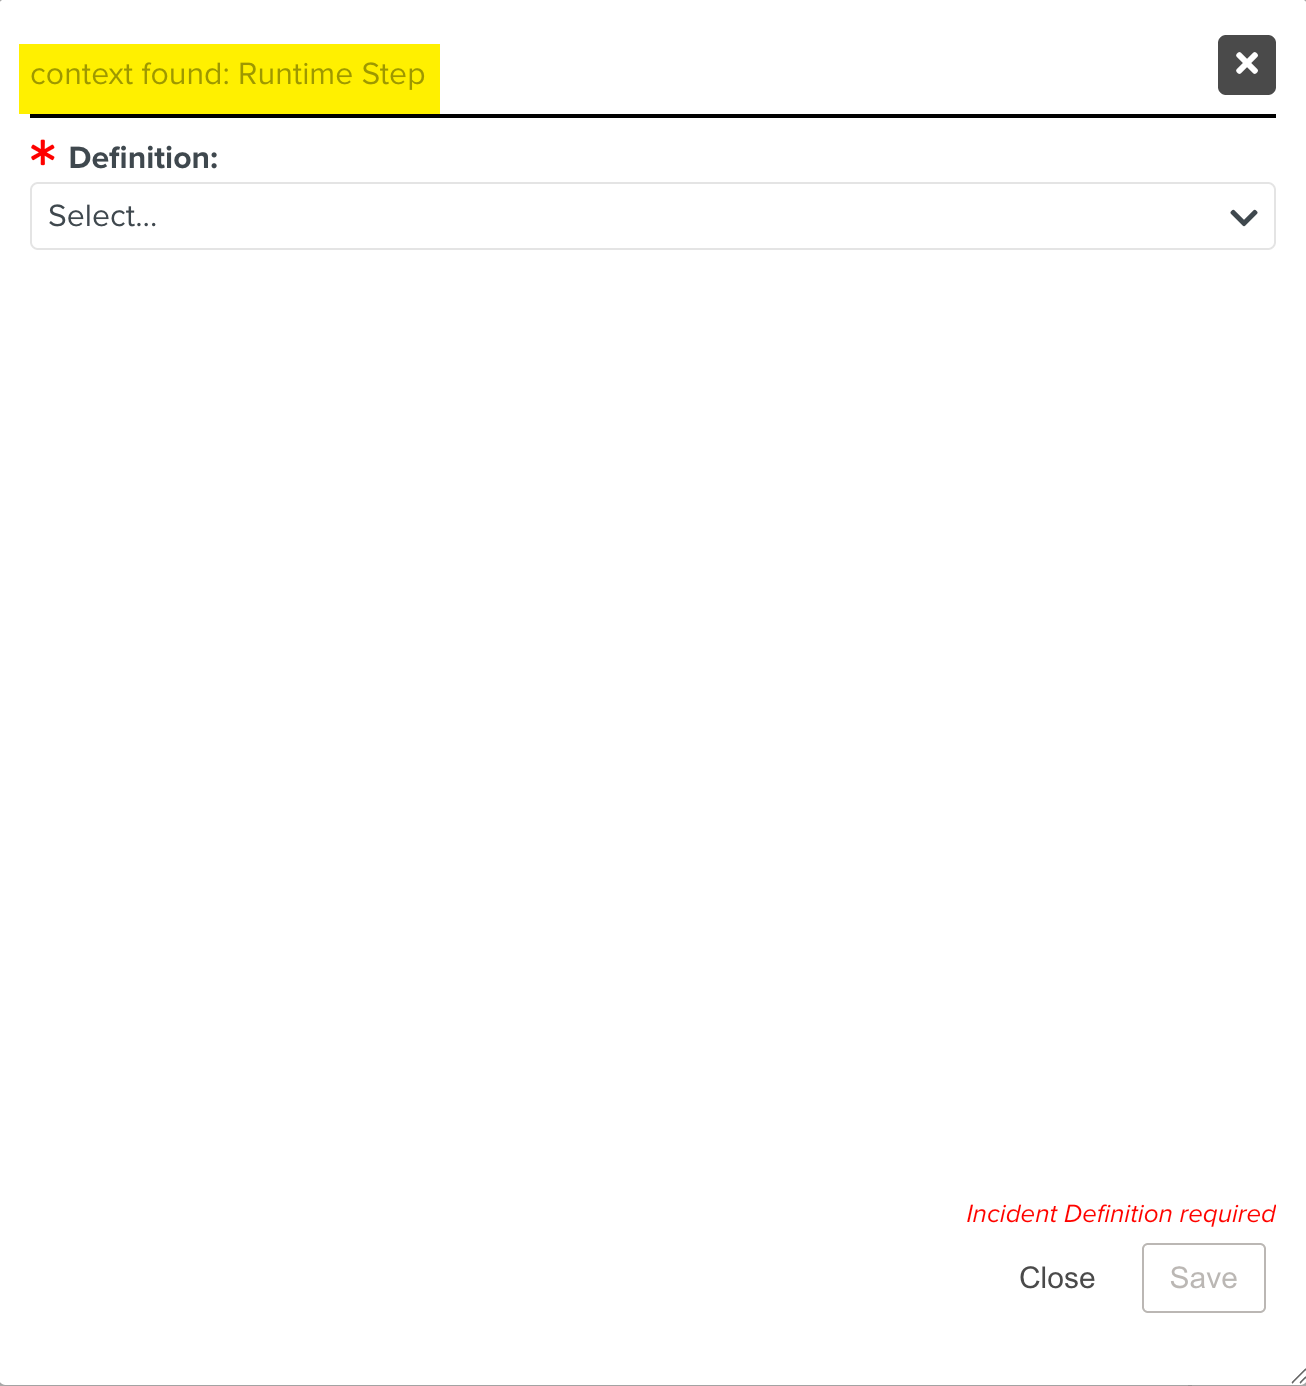
From the Incident Definition dropdown, select the required Incident. The Incidents are displayed under their respective Incident Groups in a hierarchical structure.
The fields that are configured for the Incident are displayed.
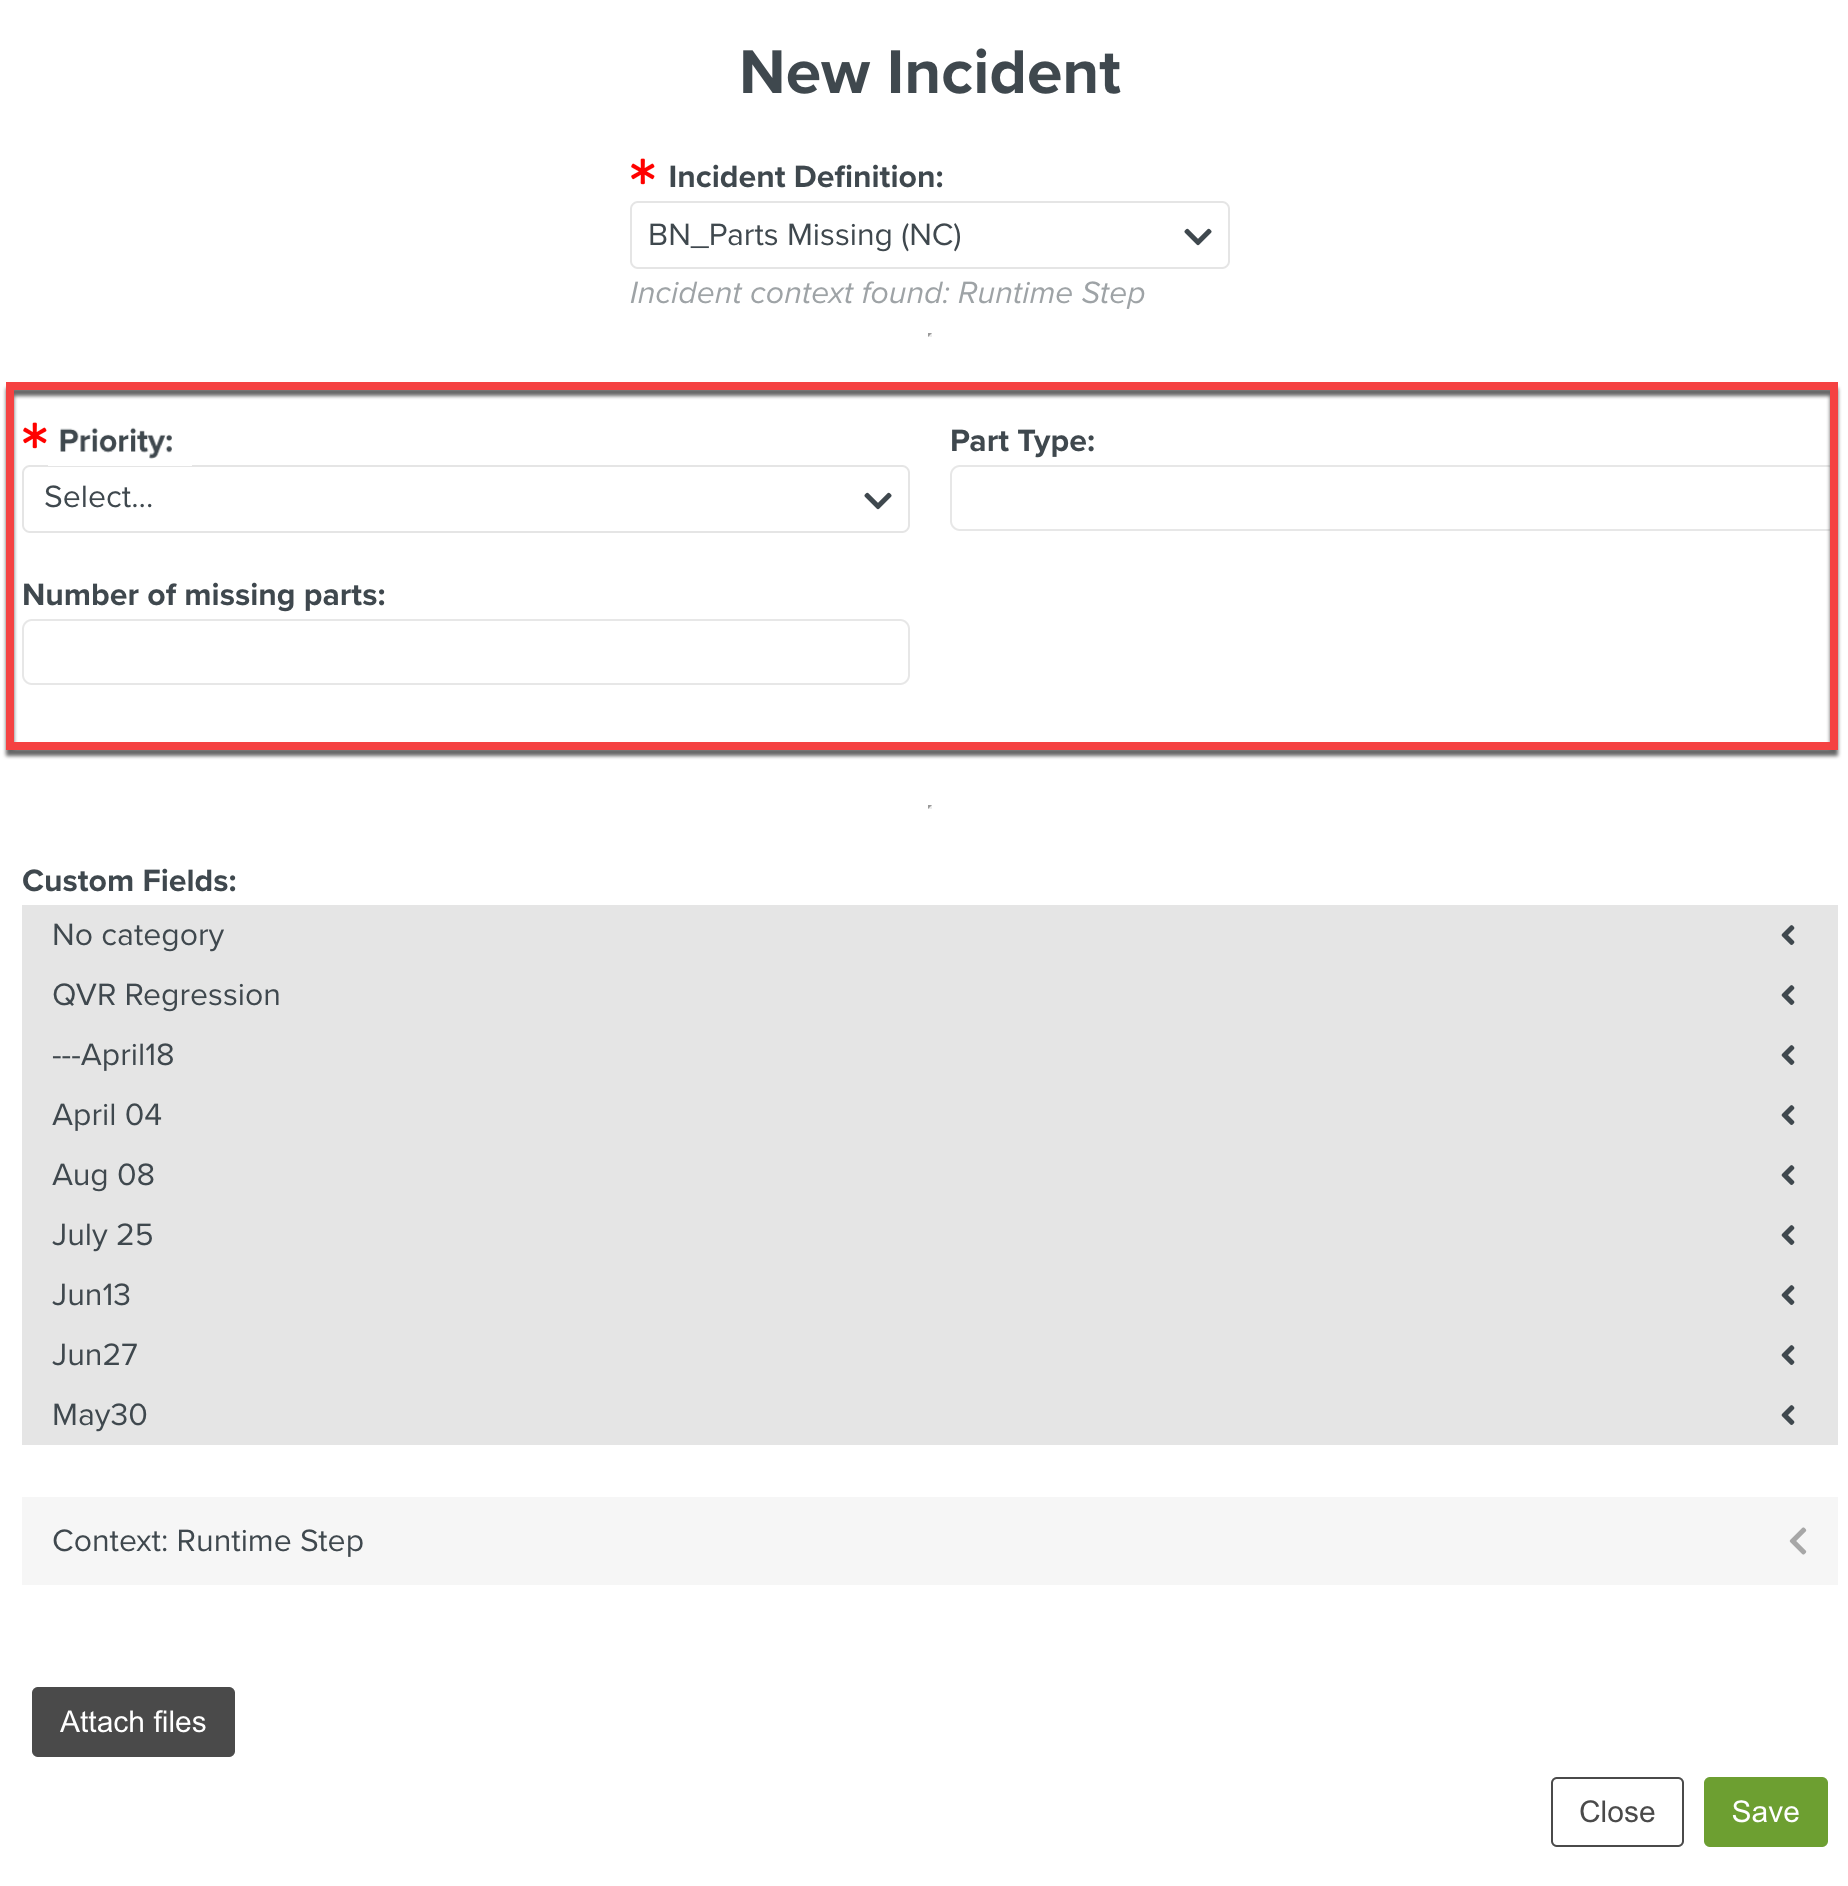
Add the details in the following Fields as shown below.
Priority: Select an option to set the severity level of the Incident.
Part Type: Enter the type of missing parts.
Number of missing parts: Enter or set the number of missing parts. You can use
to increase or to decrease the number.
Note
For each Incident, the displayed fields may vary based on the Incident Definition.
[Optional] In the section Custom Fields , select a Custom Field from a category and fill in the values for the Custom Fields.

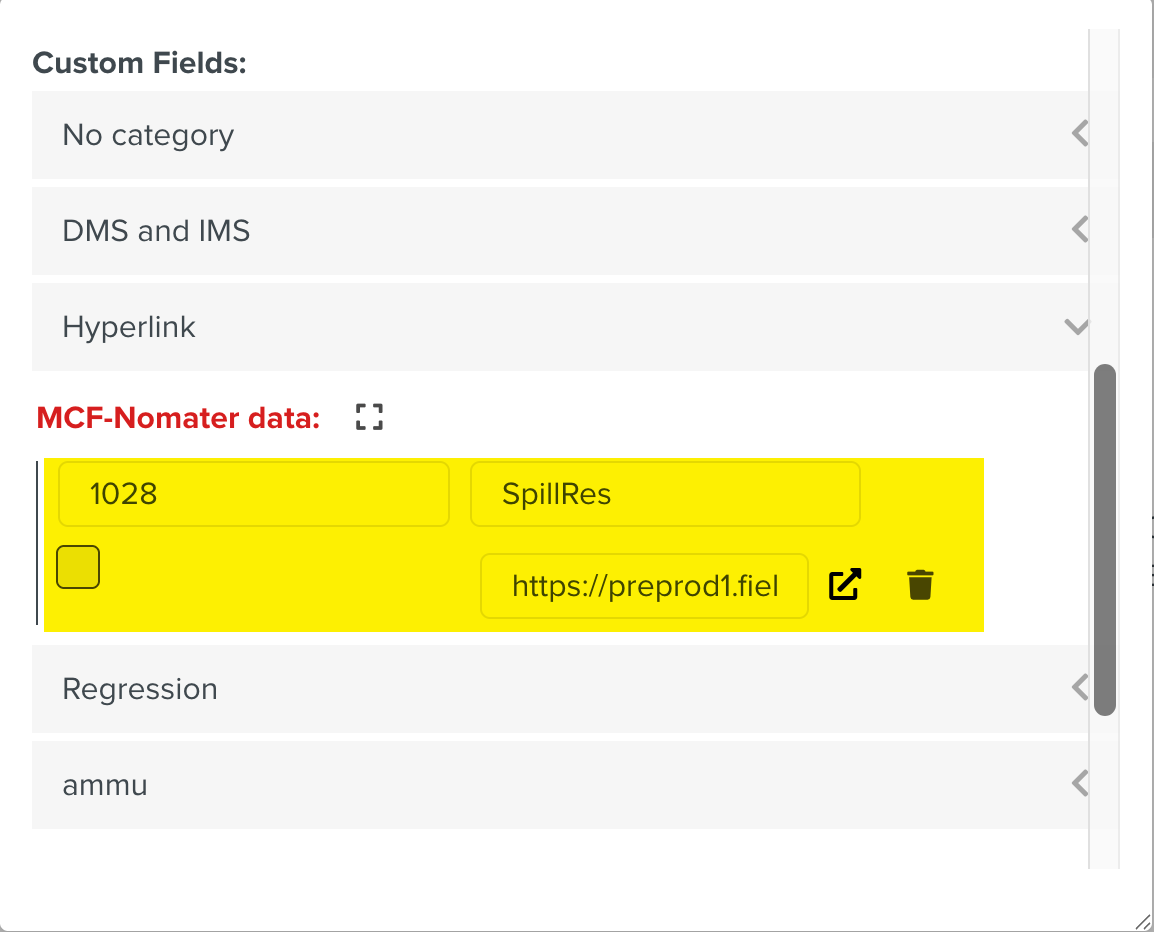
Note
All the Custom Fields that are defined for Incidents are displayed.
The dialog New Incident with all the details filled is shown below.

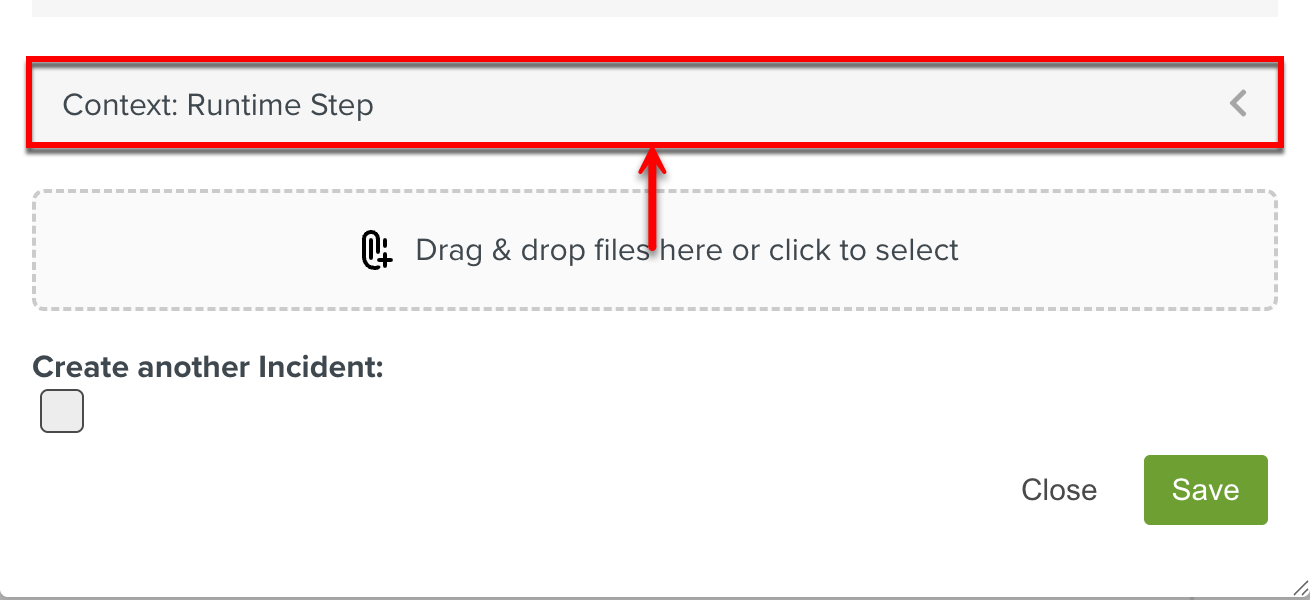
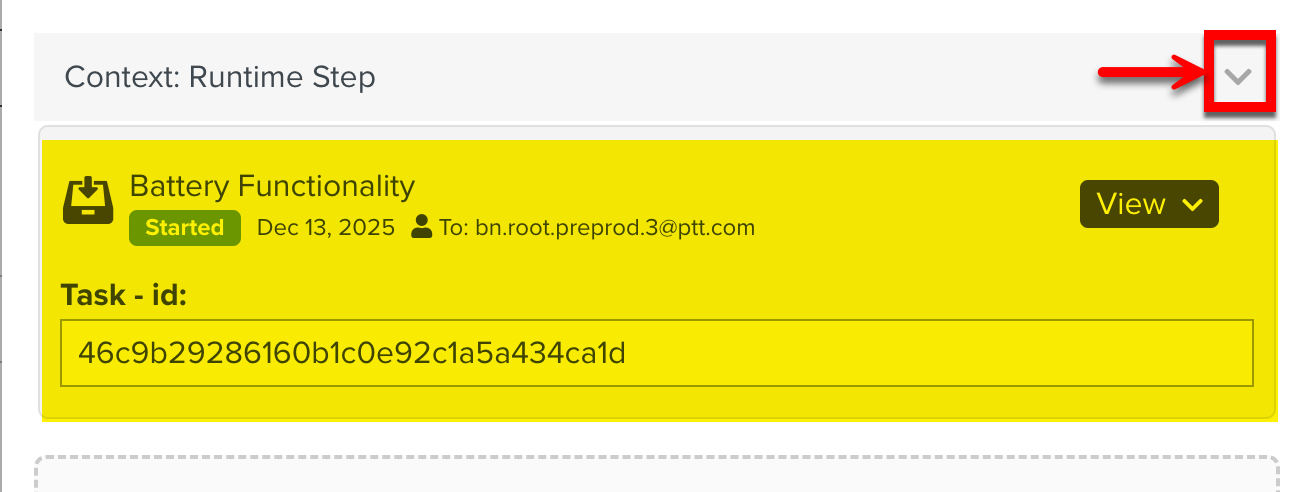
Click Context: Runtime Step to view the task details.
The details of the Task are displayed.
The dialog New Incident with all the details filled is shown below.
[Optional] Click the button to add images or files to the Incident. You can add multiple files as shown below.

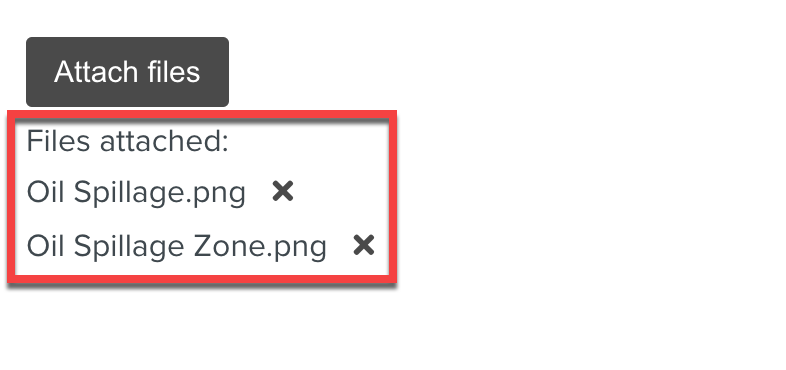
To remove a file, click
and Yes, Remove.
Note
All types of documents and media file formats of size under 30 MB are supported.
Click Save.
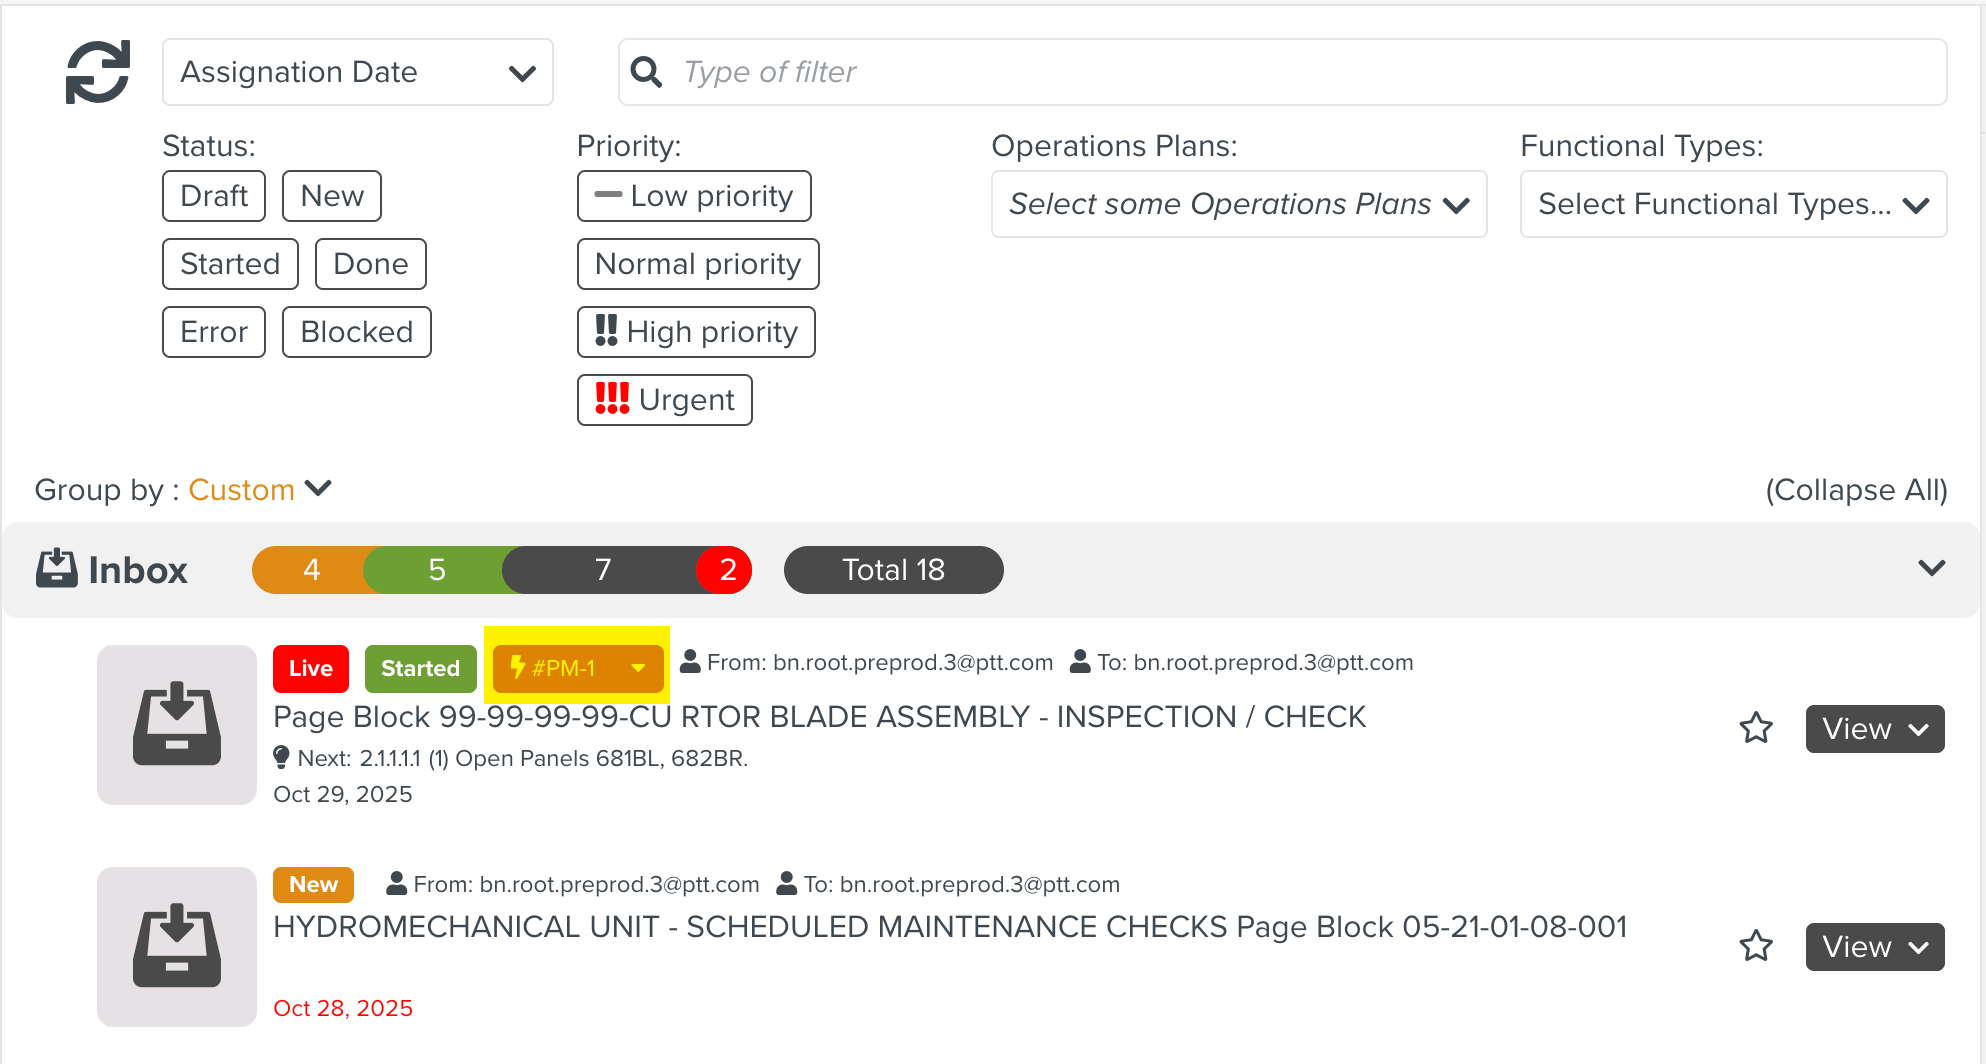
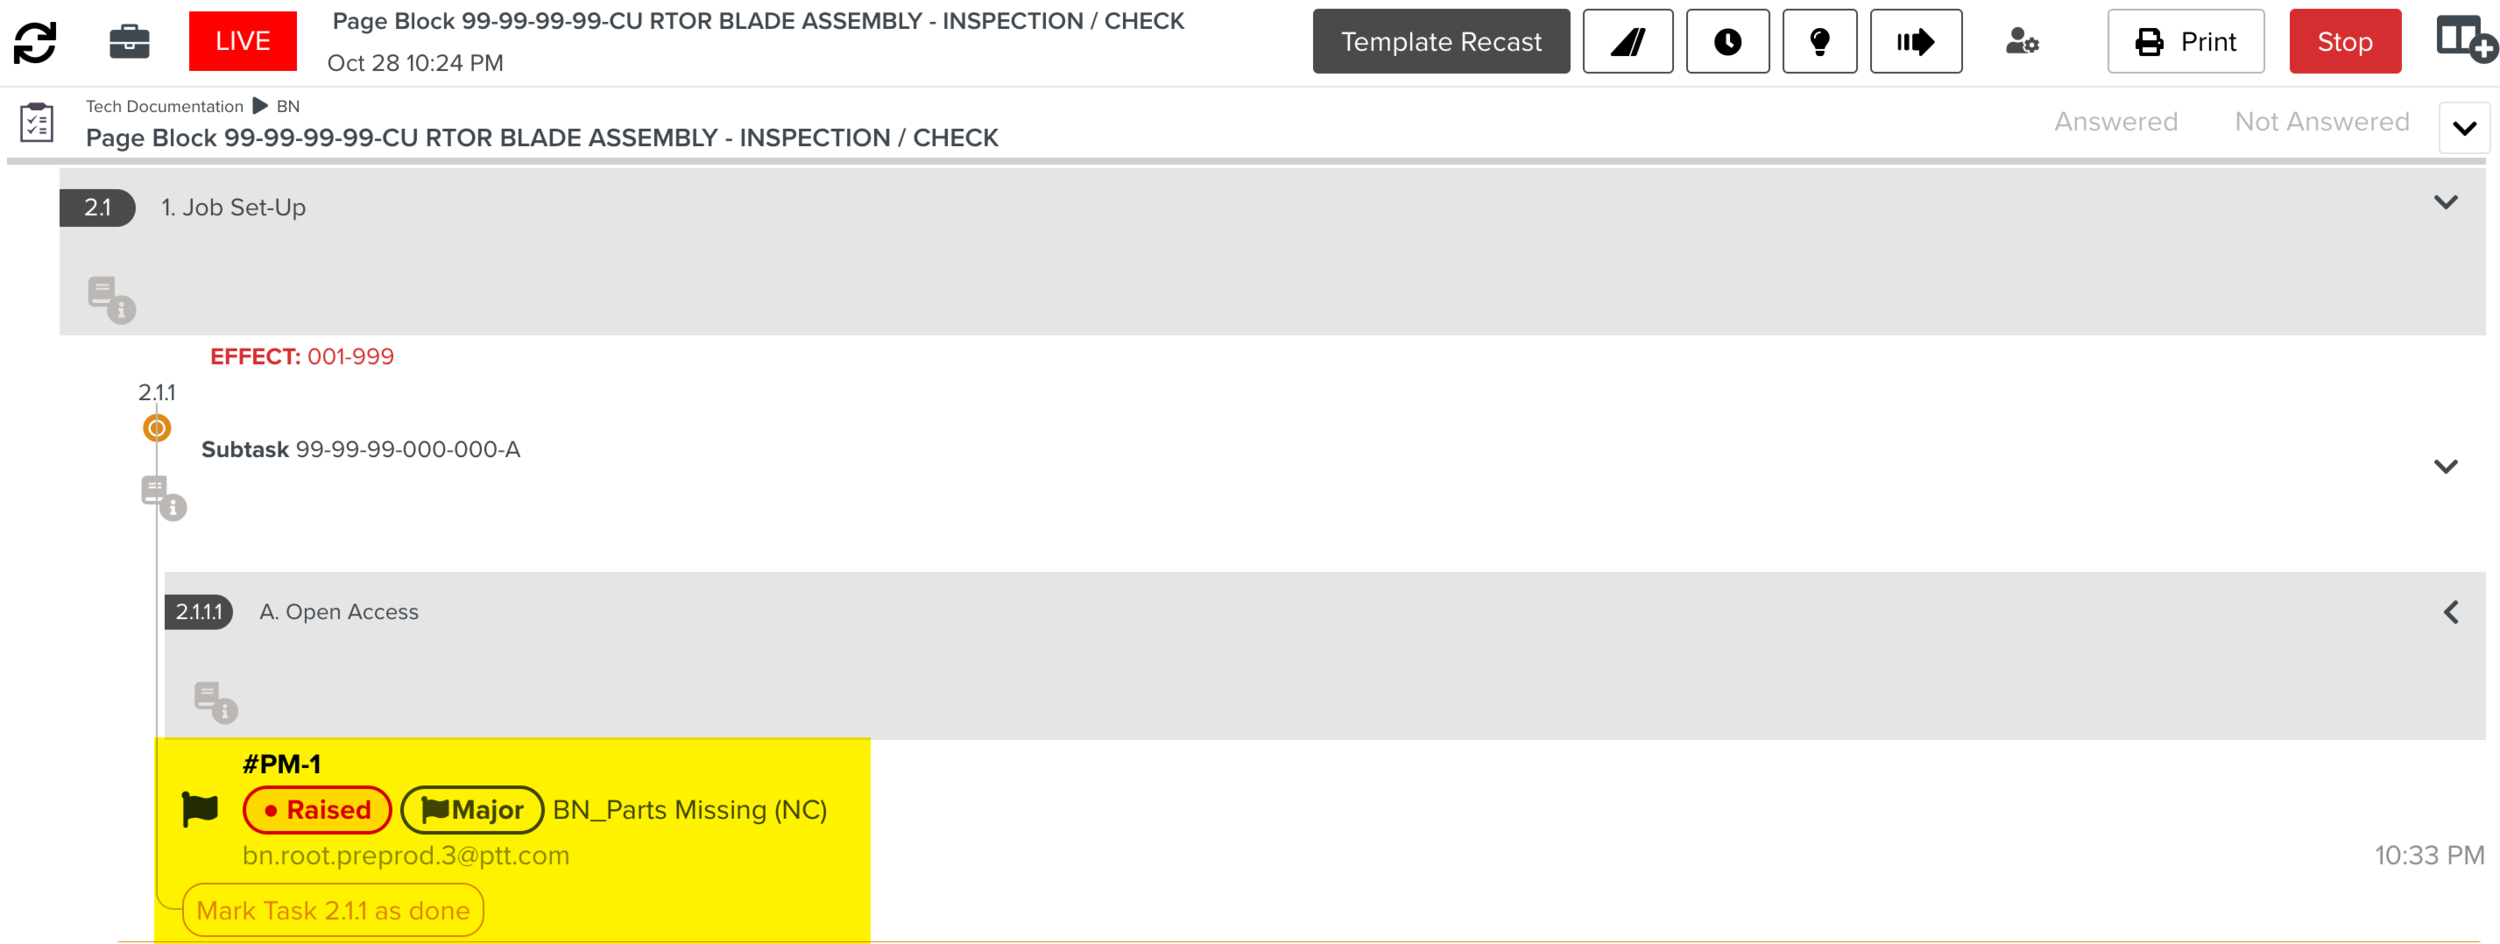
The Incident is raised. The raised Incident is displayed under the respective Step of the Task as shown below.
From the main menu, you can raise Global Incidents.
To raise an Incident from the main menu:
On the main menu, click
 .
.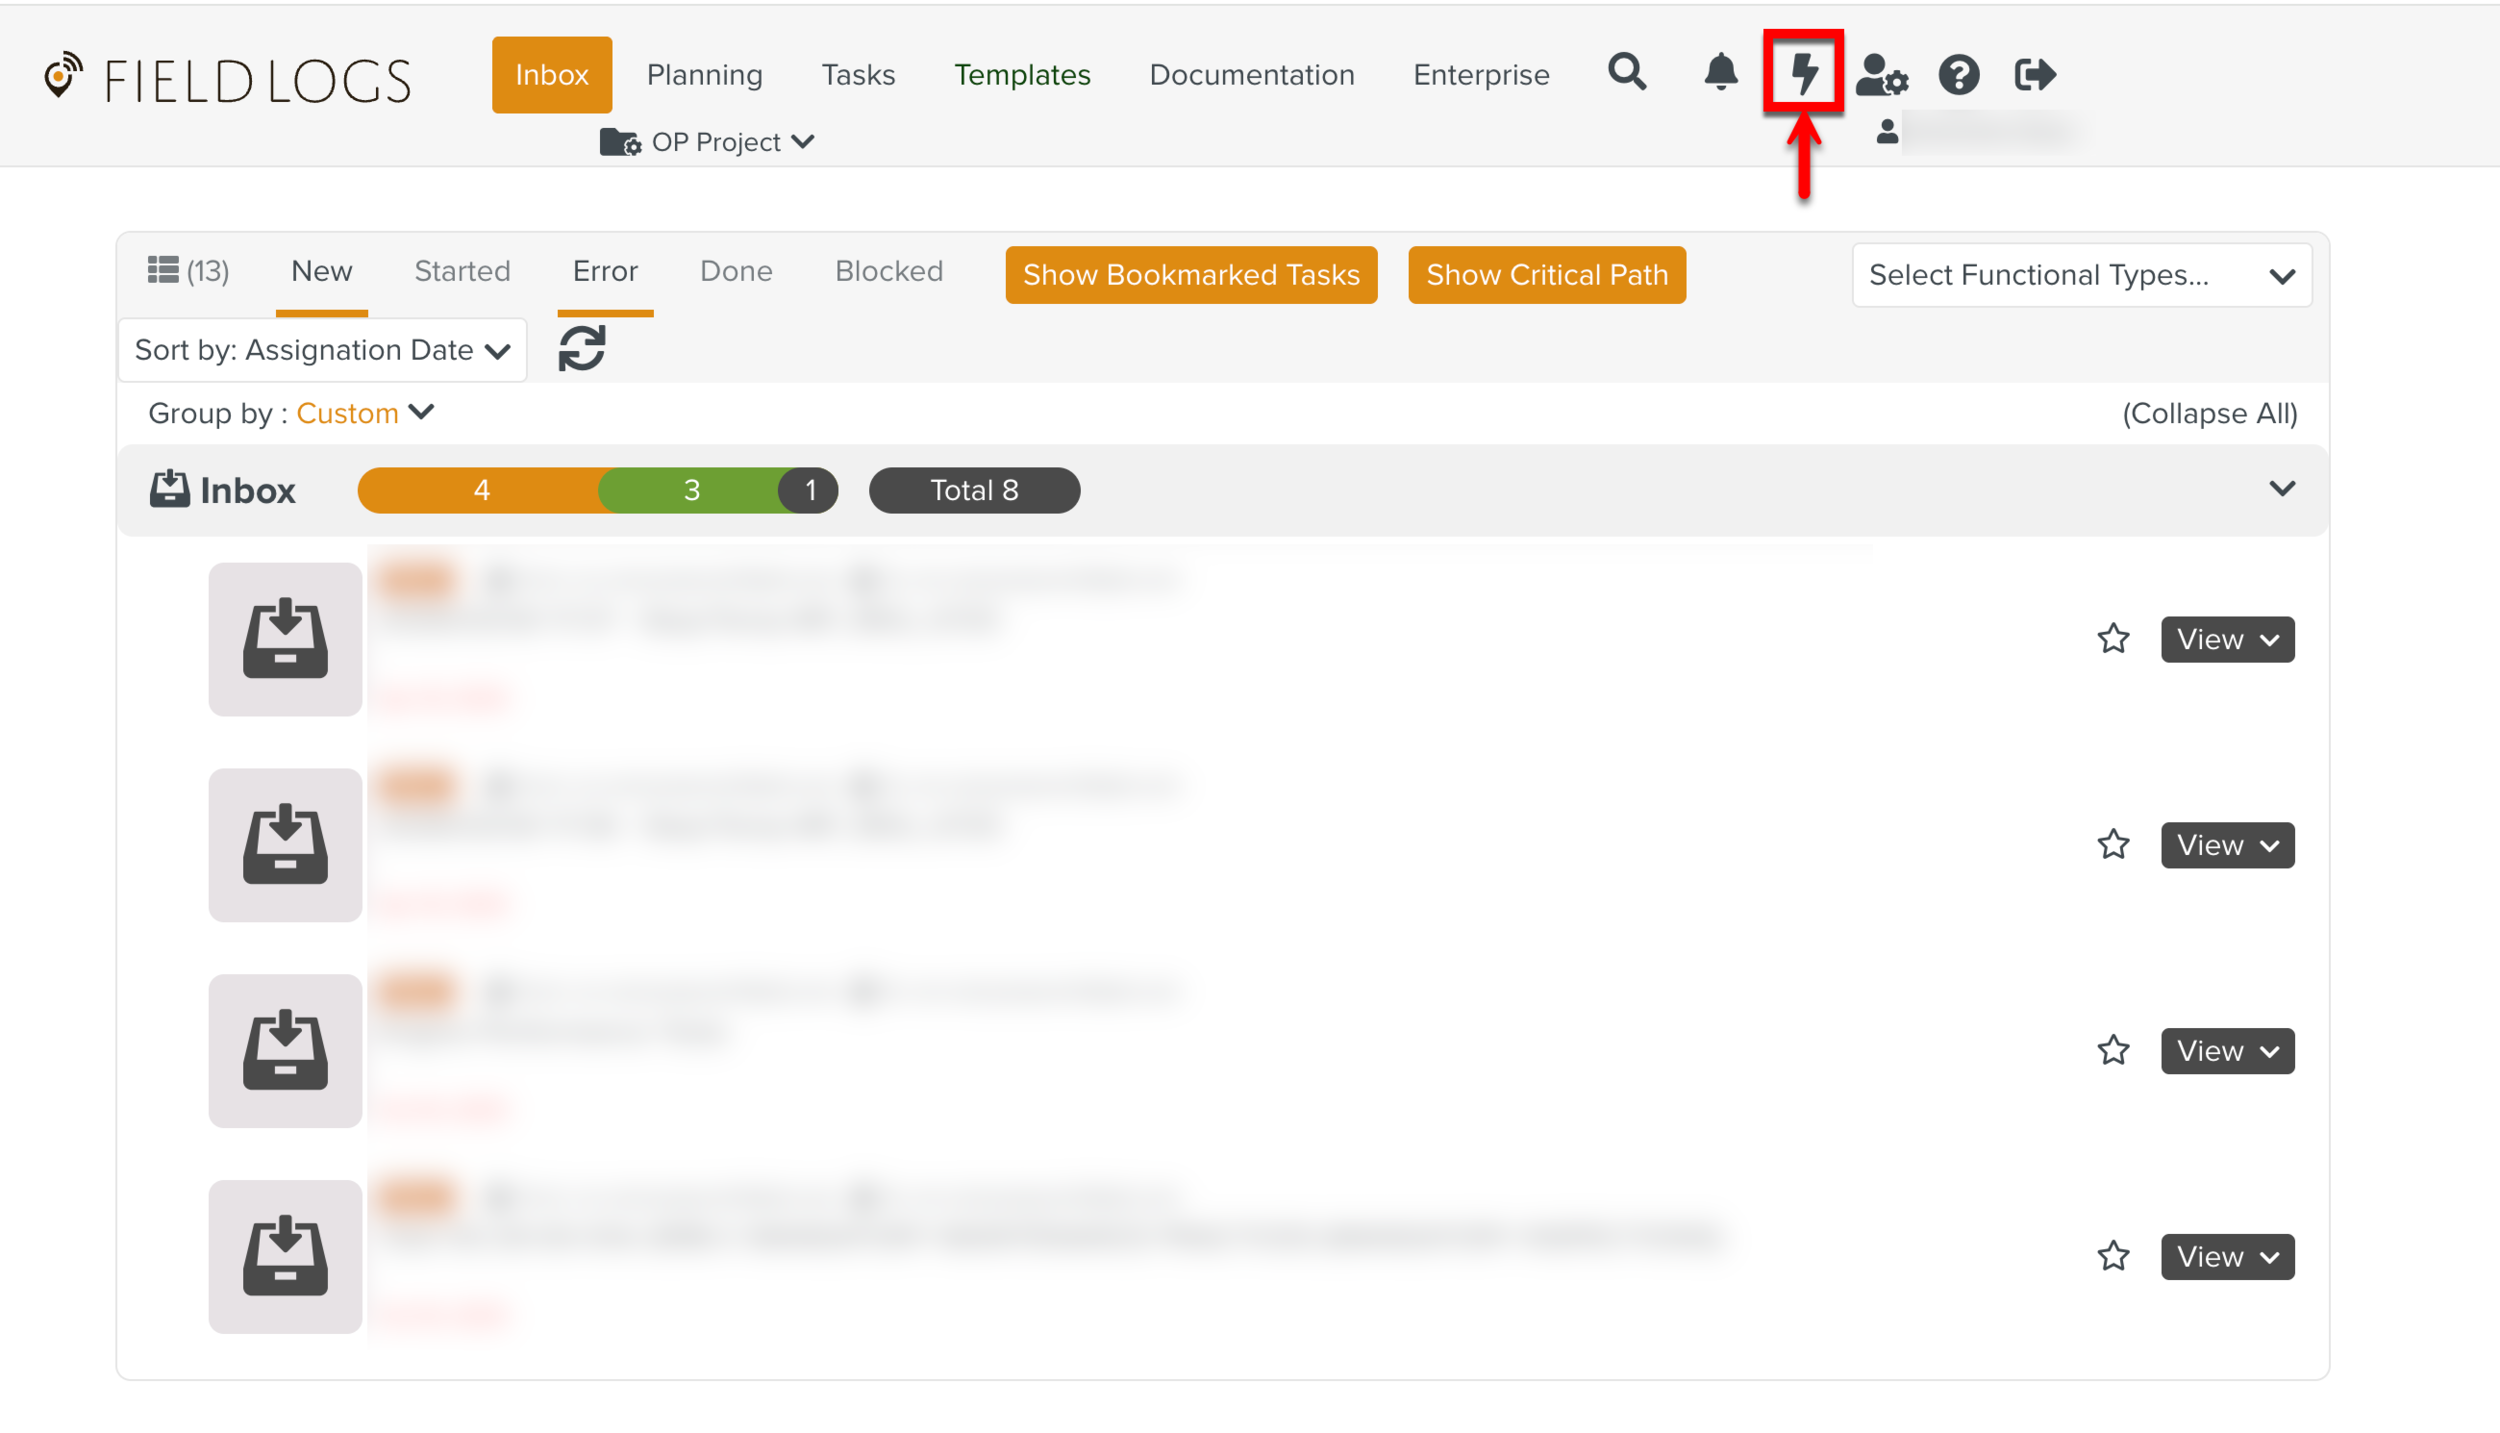
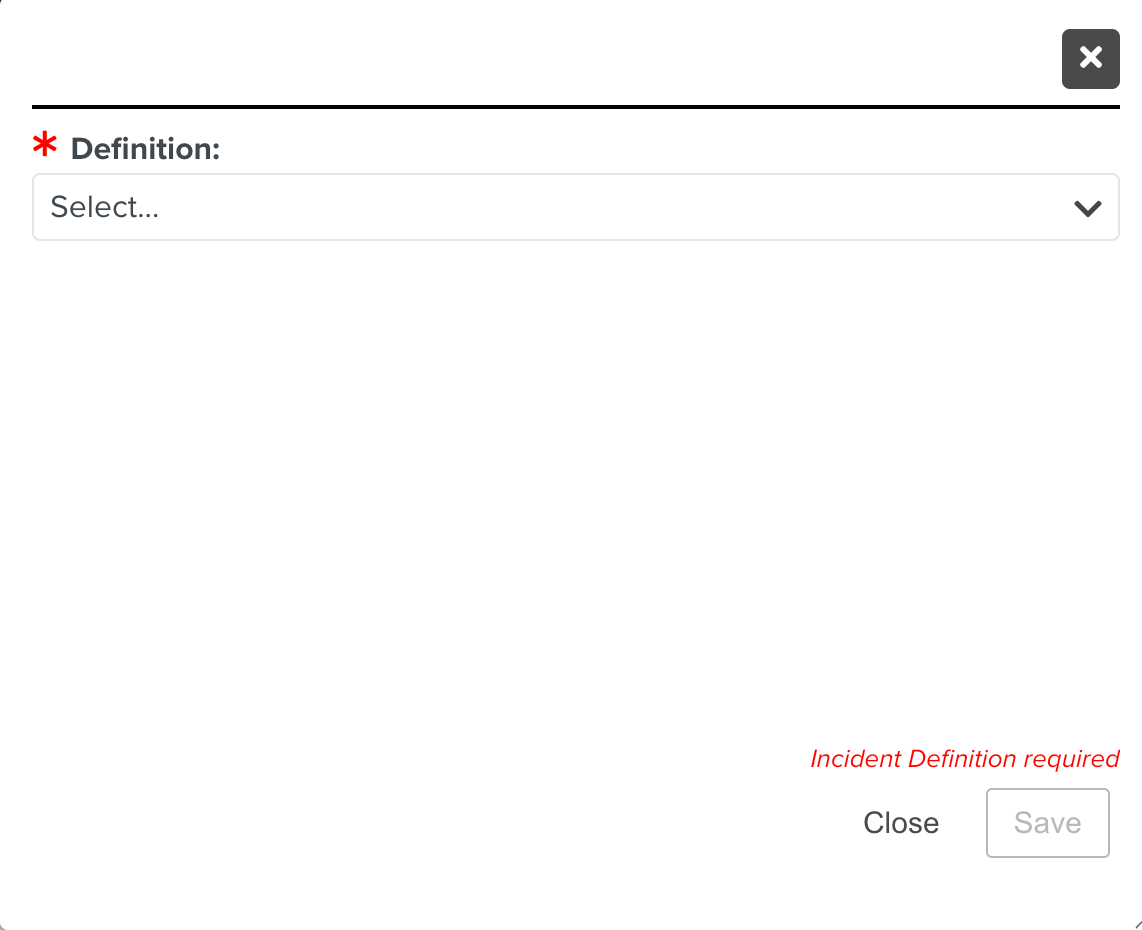
A dialog appears as shown.

Note
The dialog is resizable and can be moved anywhere around the screen.
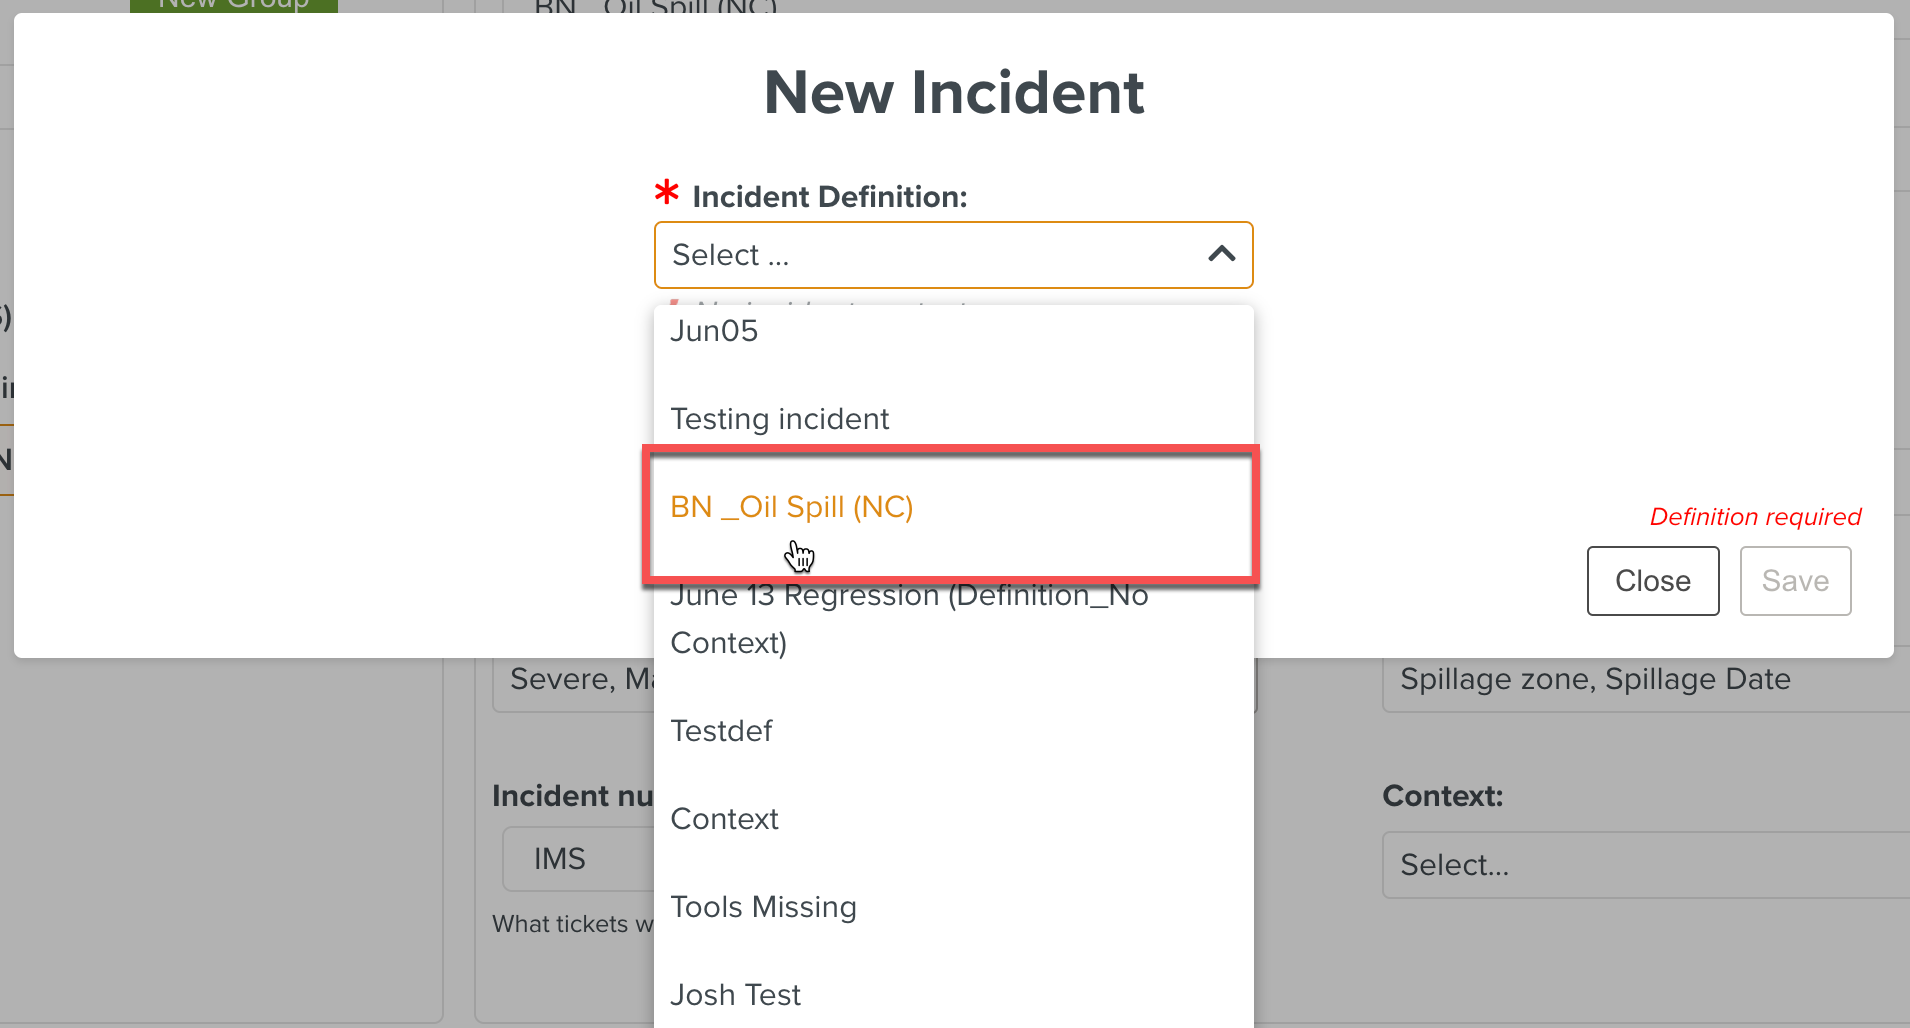
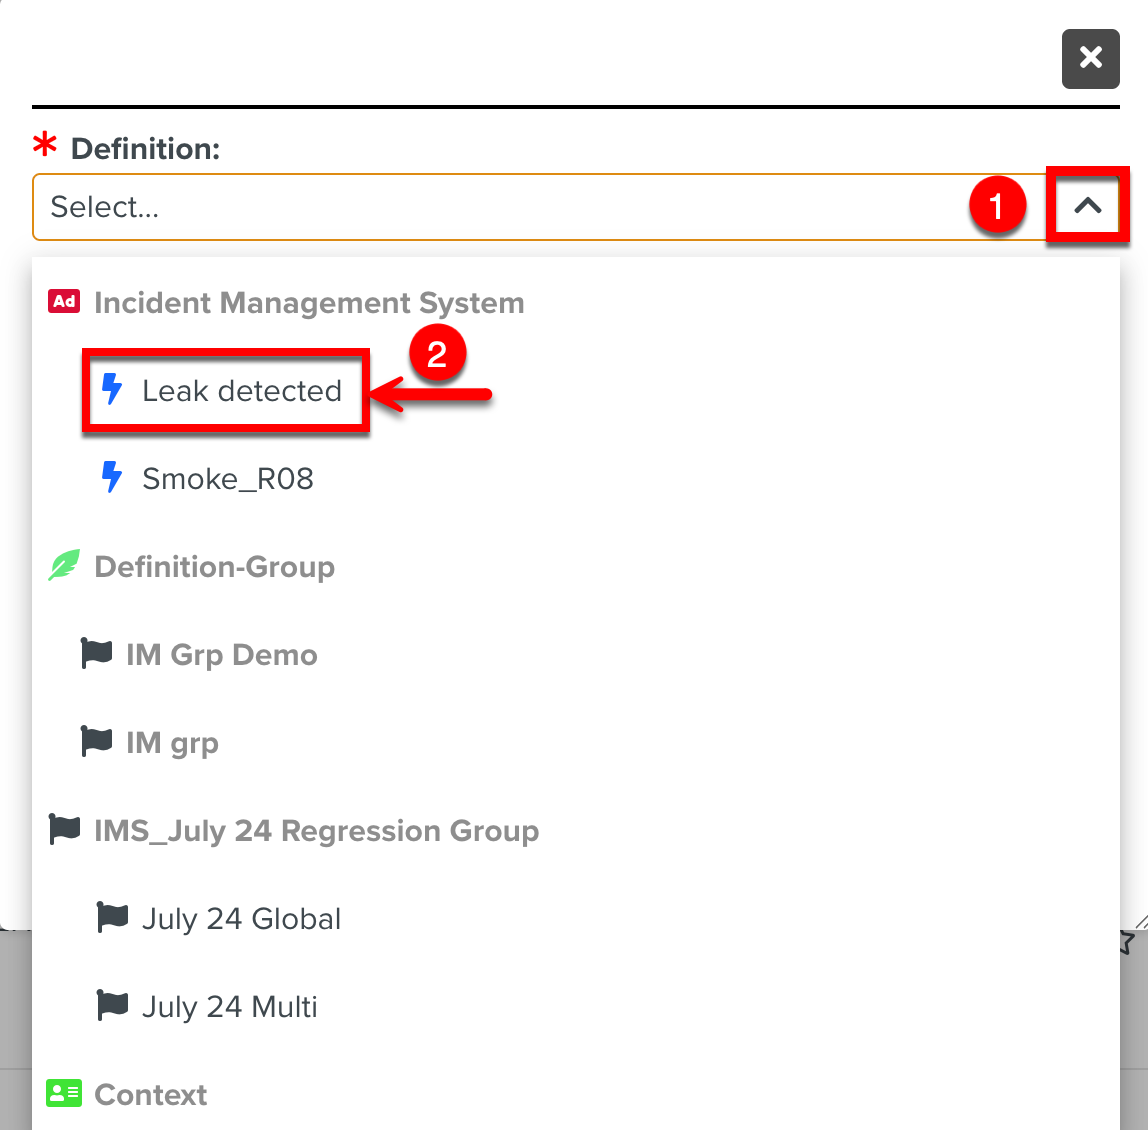
Select the required Incident from the Incident Definition dropdown. The Global Context Incidents are displayed in the dropdown under their respective Incident Groups in a hierarchical structure.
The fields configured for the selected Incident are displayed.
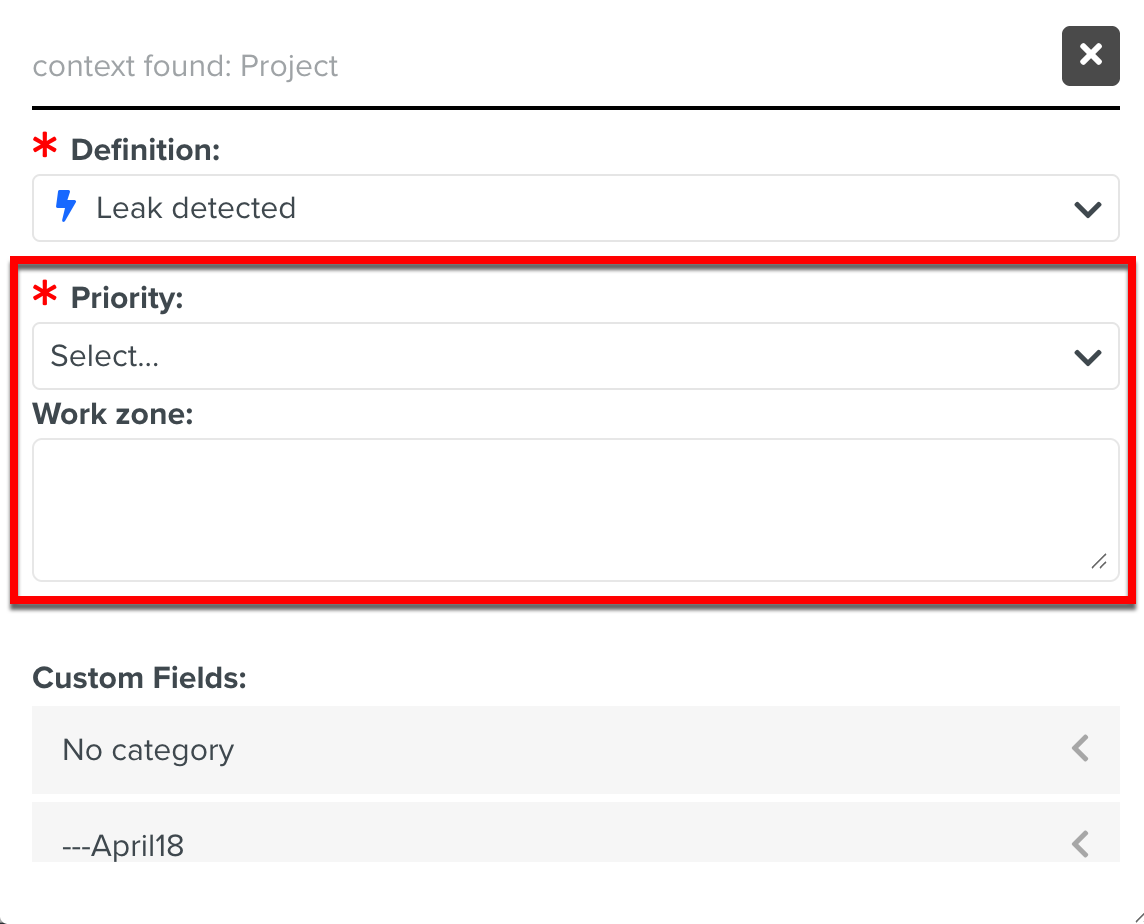
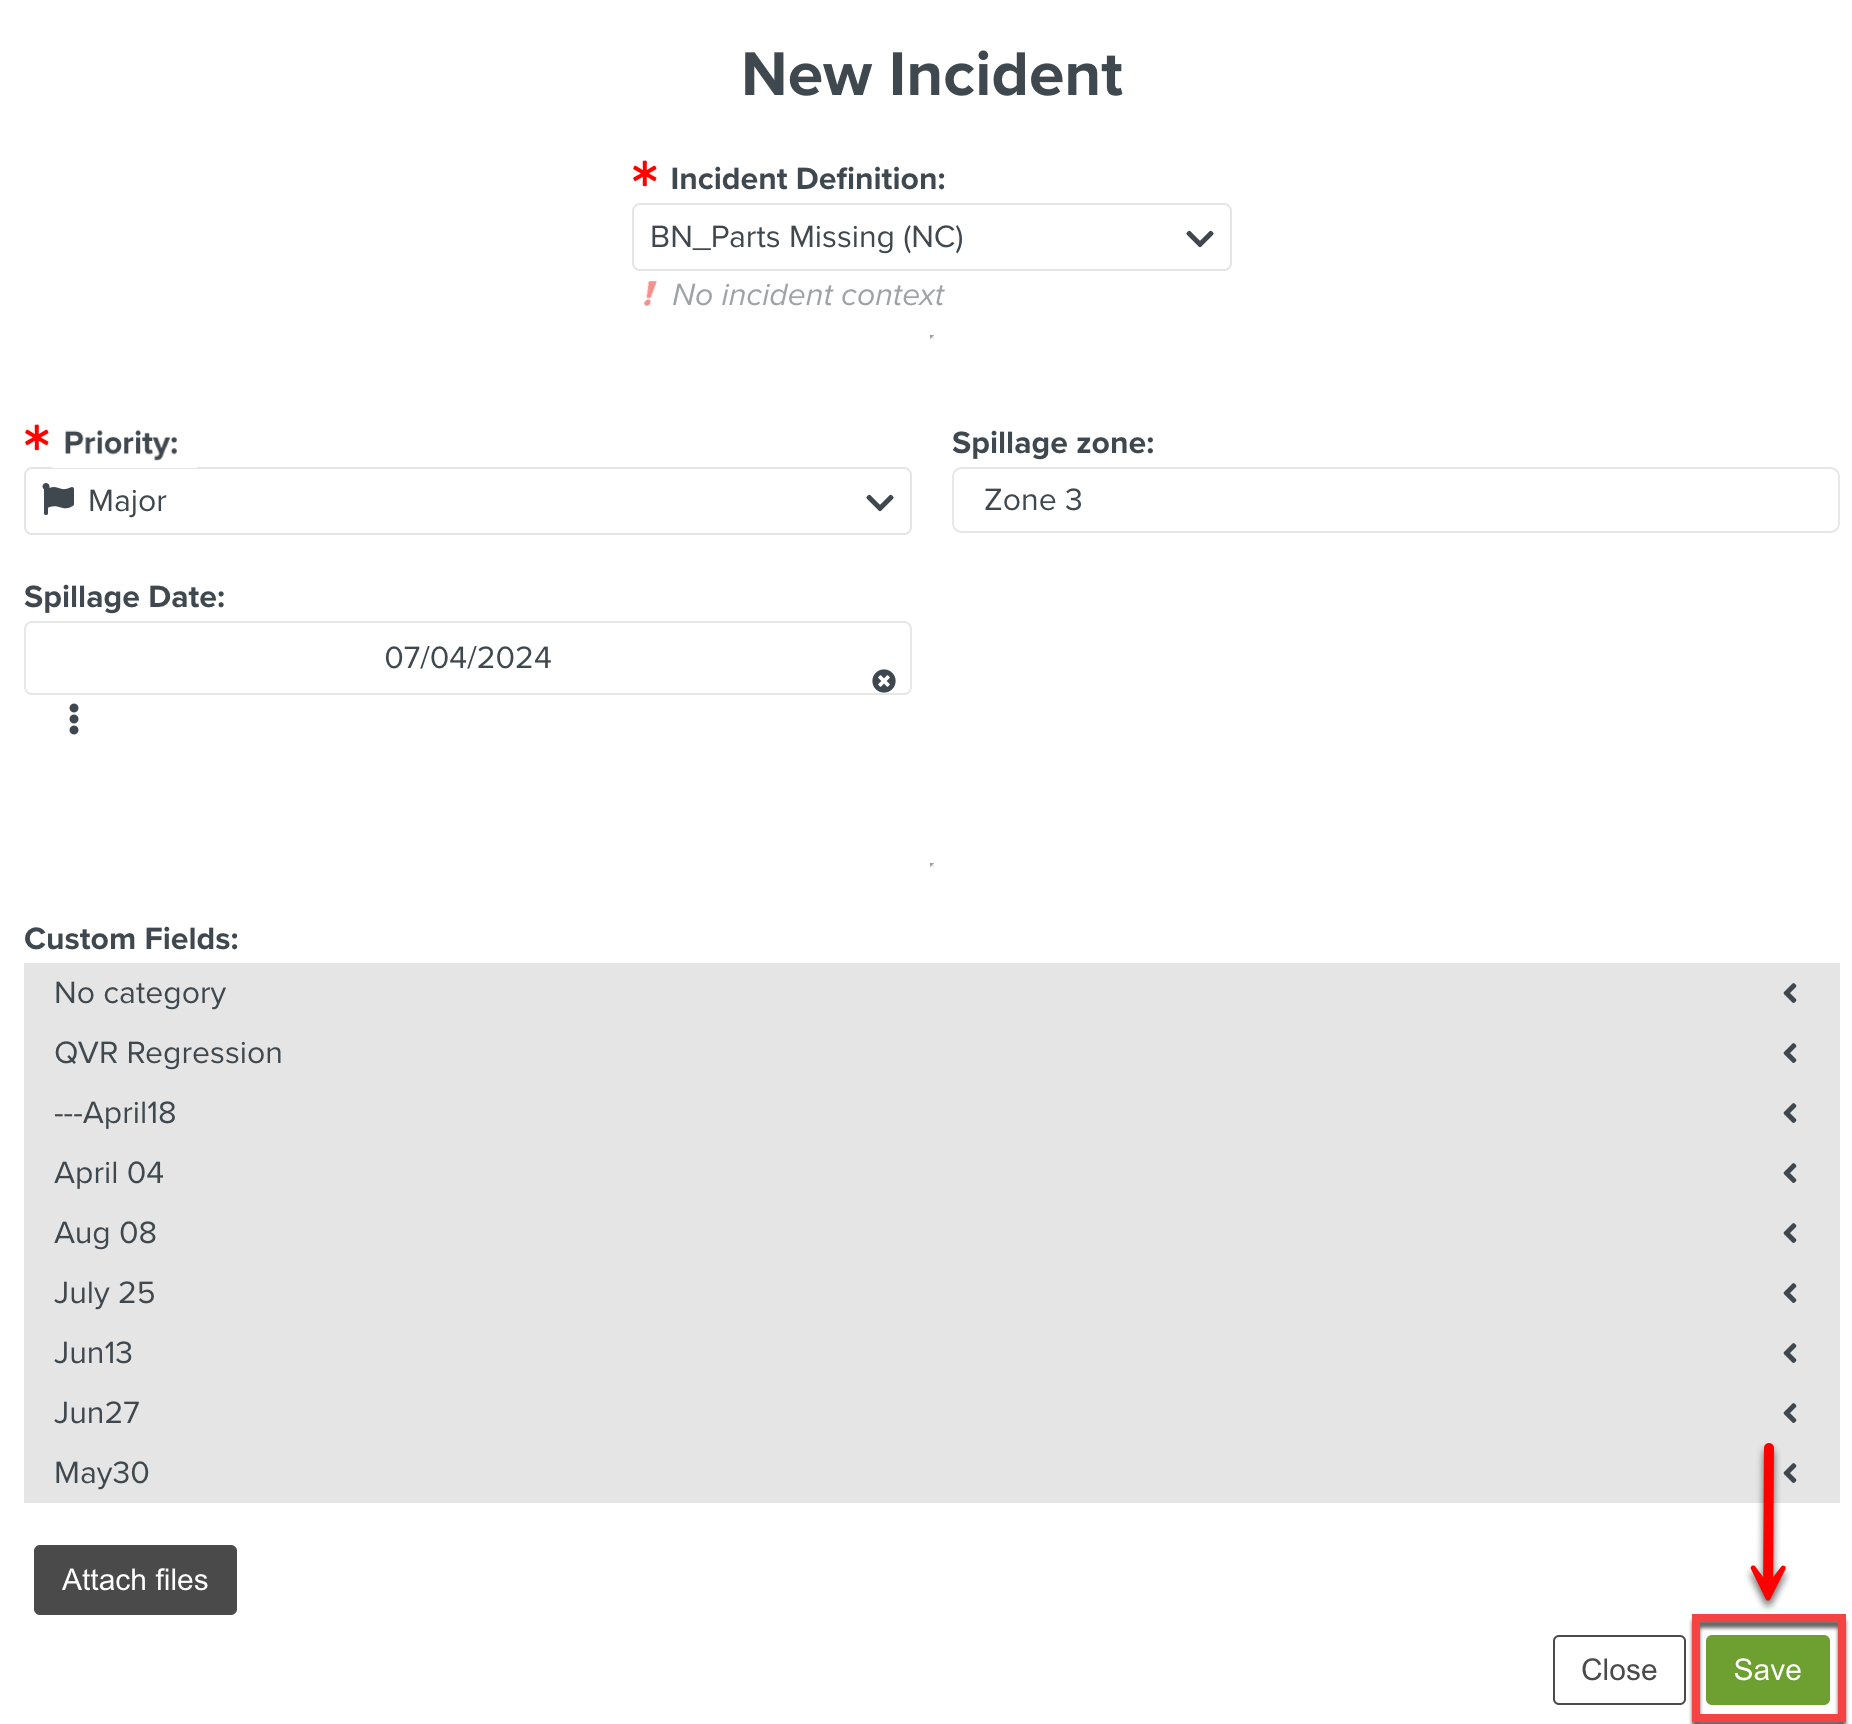
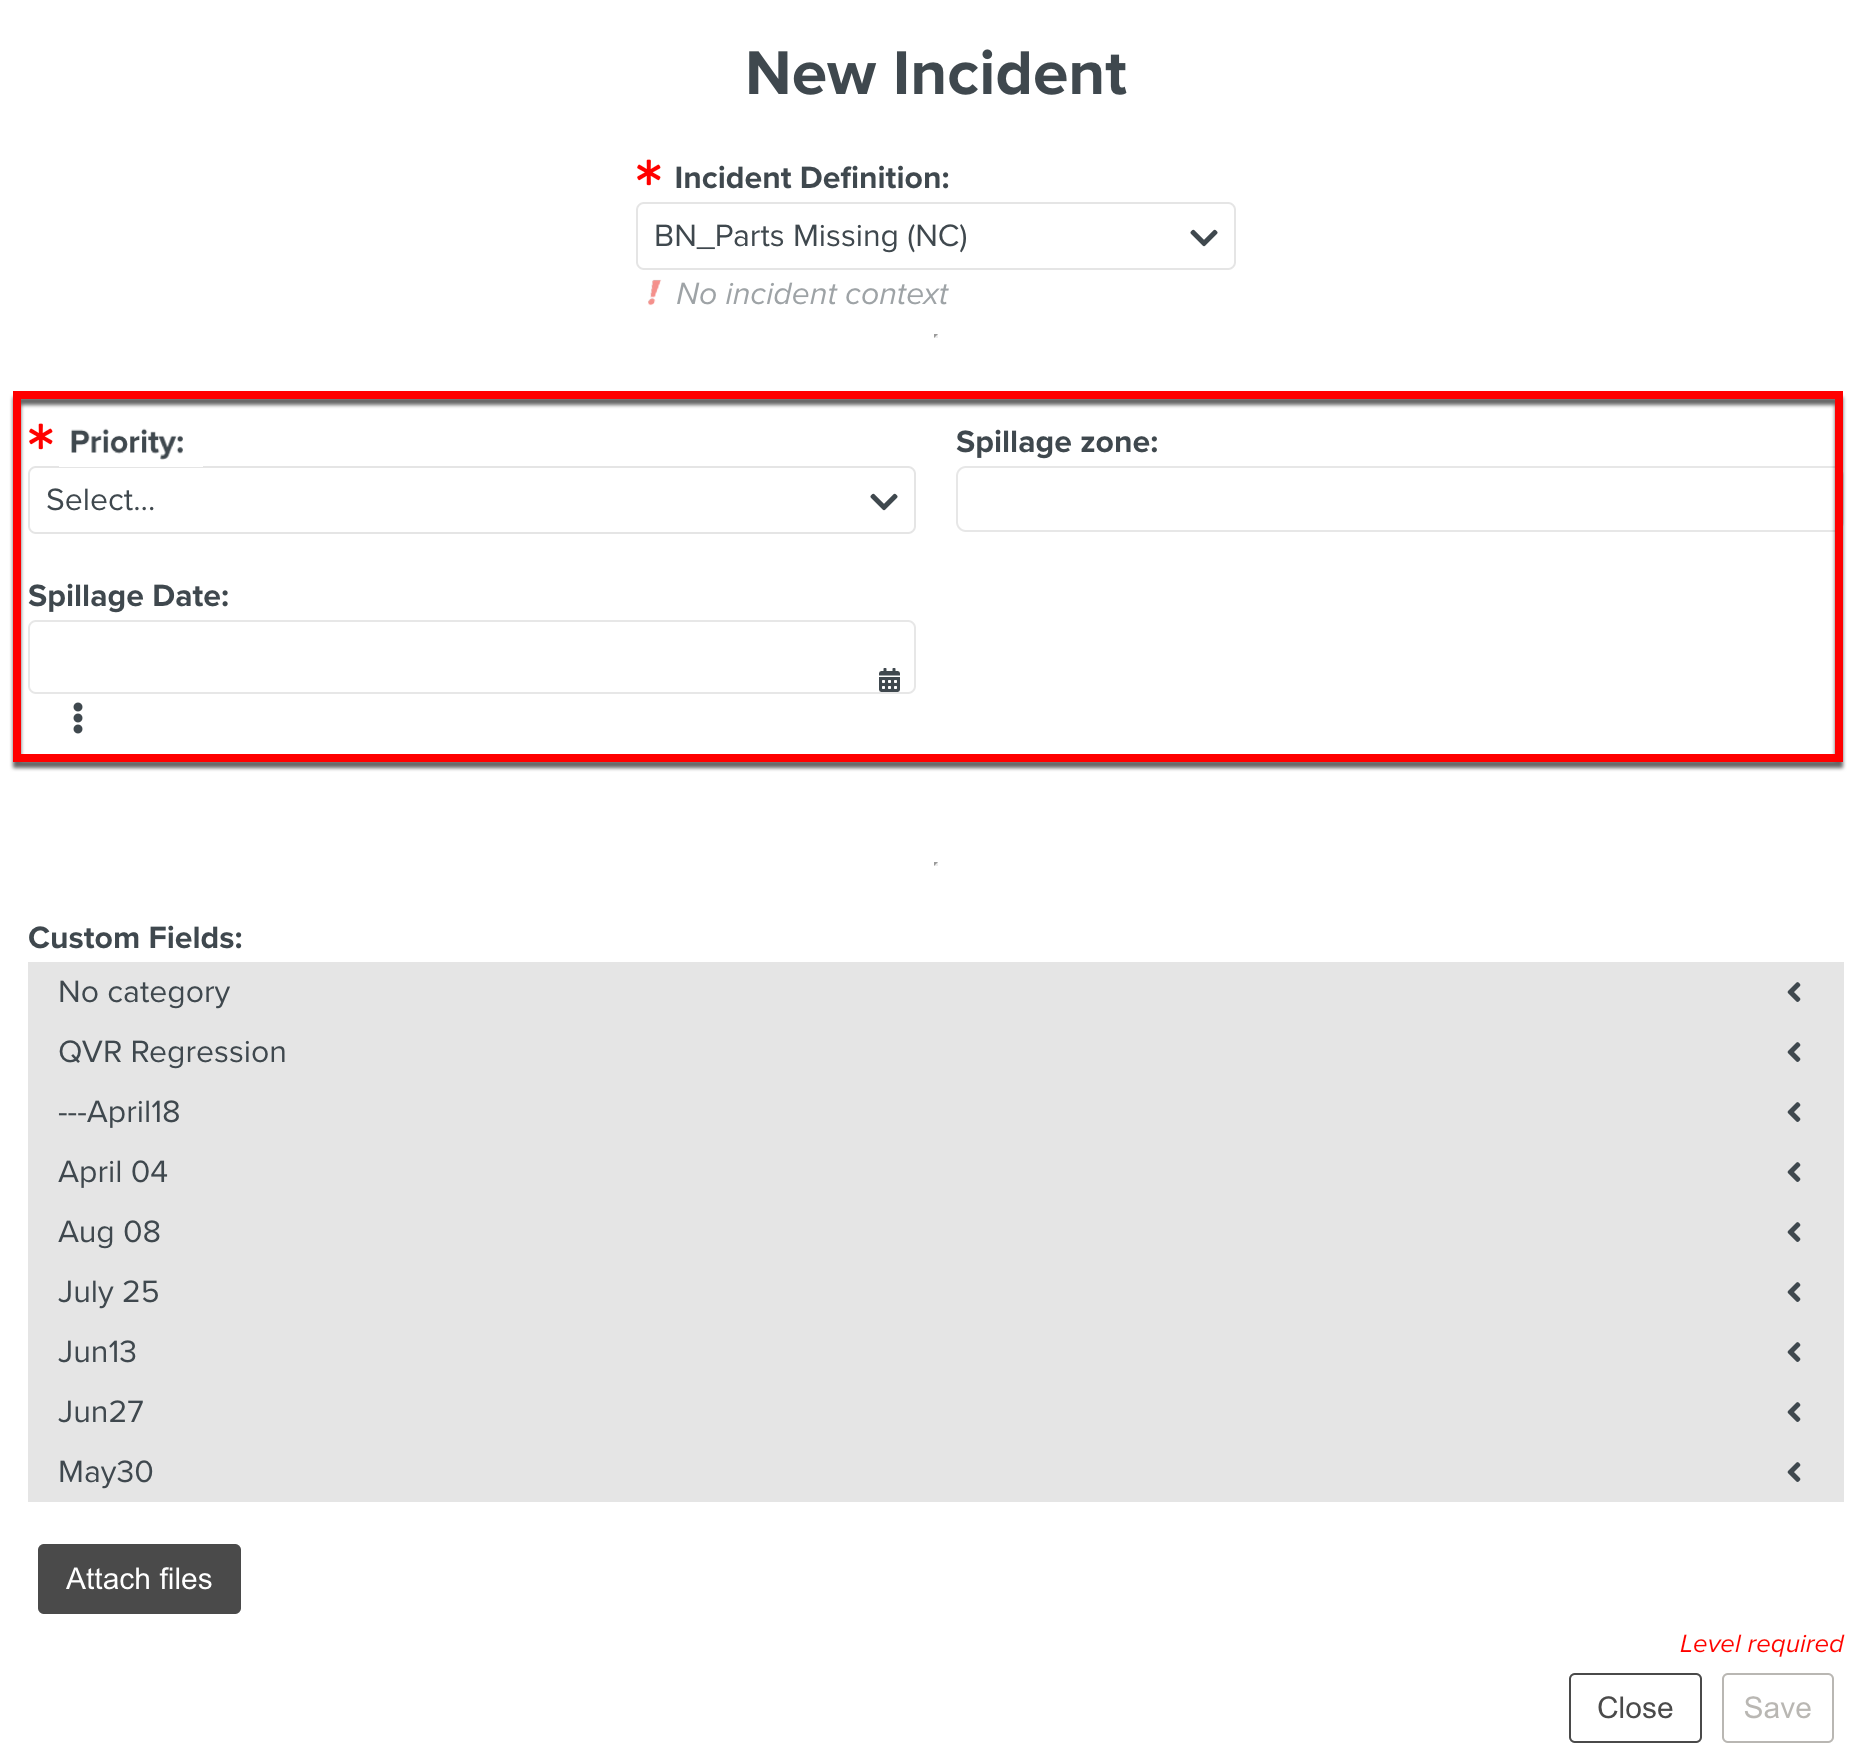
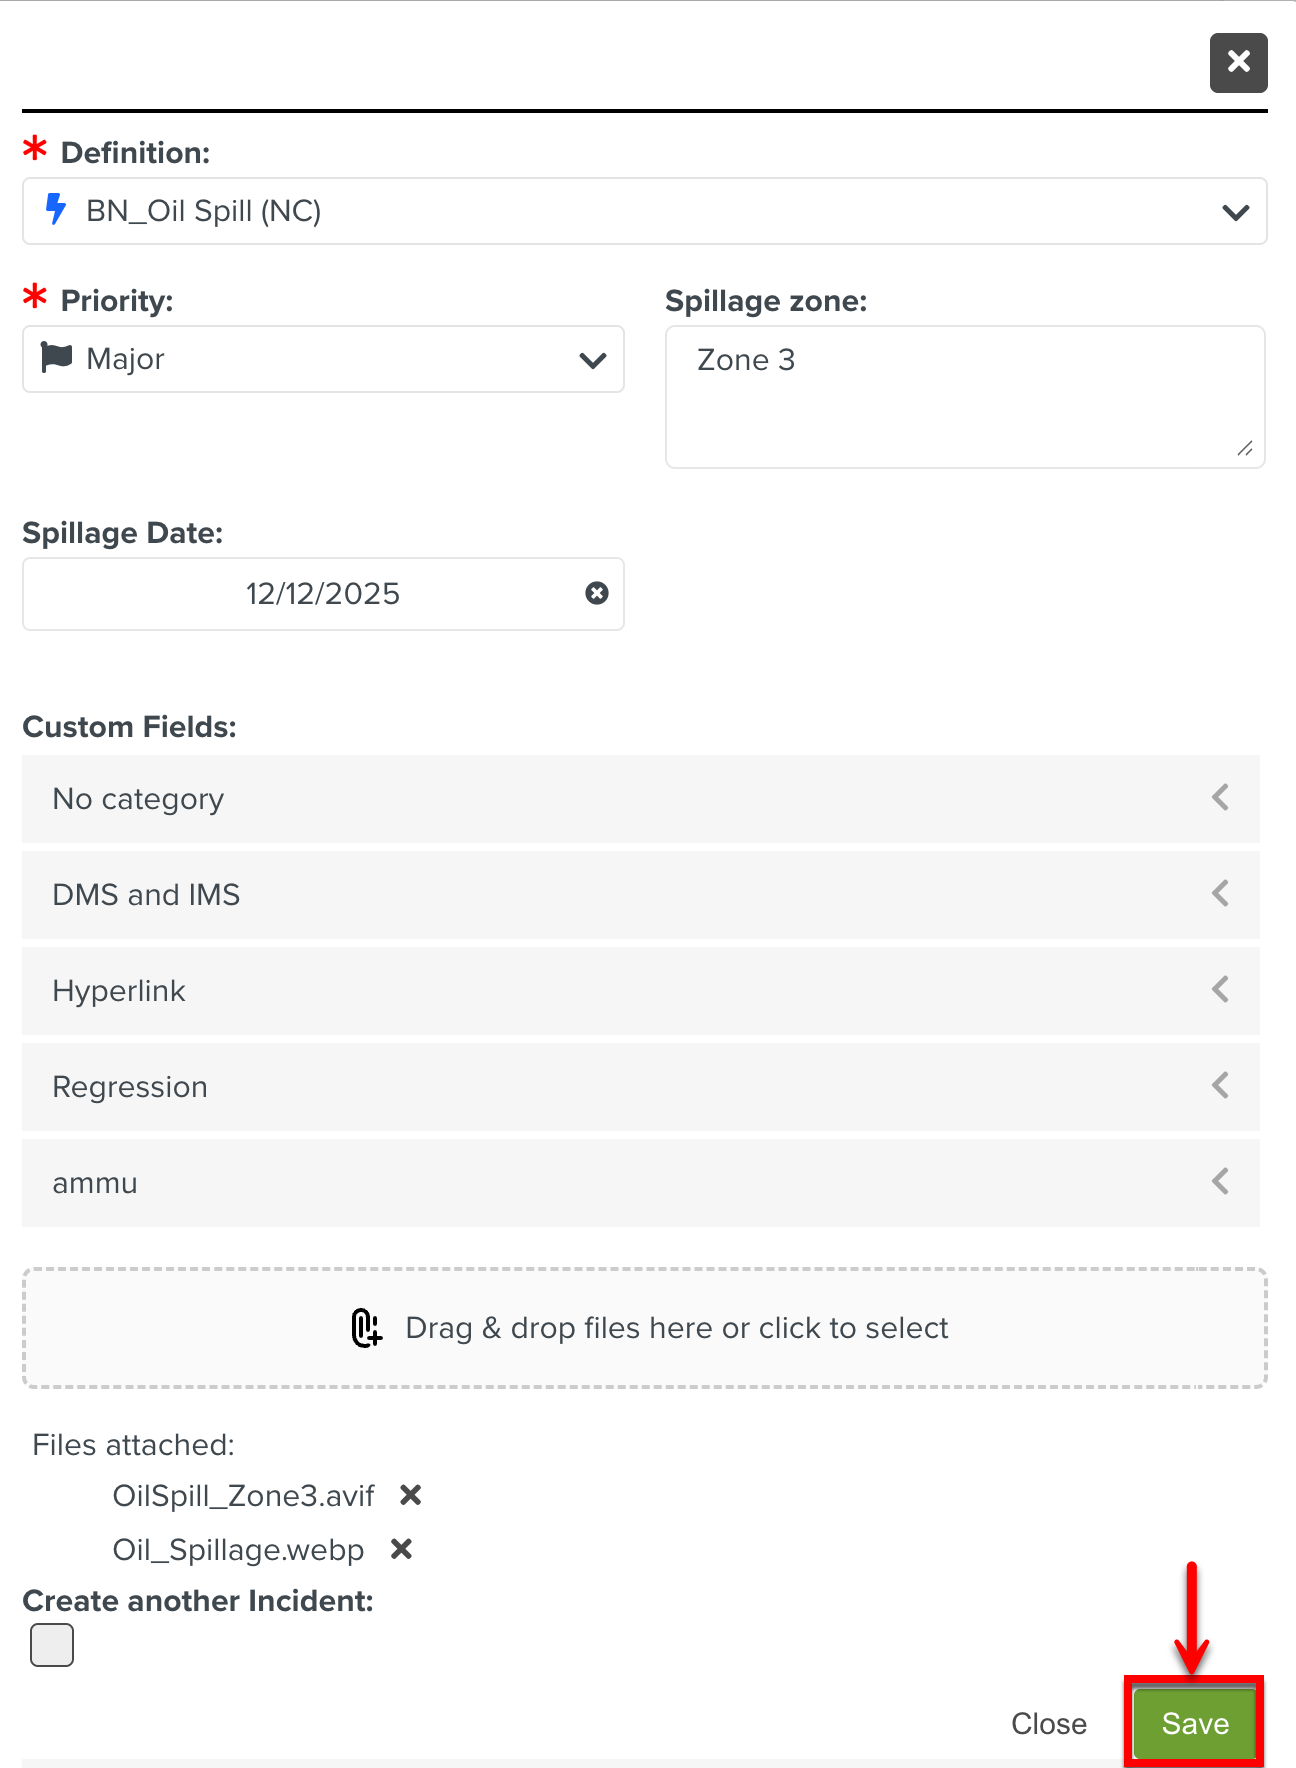
Add the details in the following fields as shown below:
Priority: Select an option to set the severity level of the Incident.
Spillage zone: Enter the zone of spillage.
Spillage Date: Select the date of spillage.
Note
For each Incident, the displayed fields may vary based on the Incident Definition.
[Optional] In the Custom Fields section, select a Custom Field from a category and enter the values.

Note
All the Custom Fields that are defined for Incidents are displayed.
The dialog with all the details filled is shown below.
[Optional] Click the Drag & drop files here or click to select option to add the images or files. You can also drag and drop the files. Multiple files can be added as shown below.

To remove a file, click
and Yes, Remove.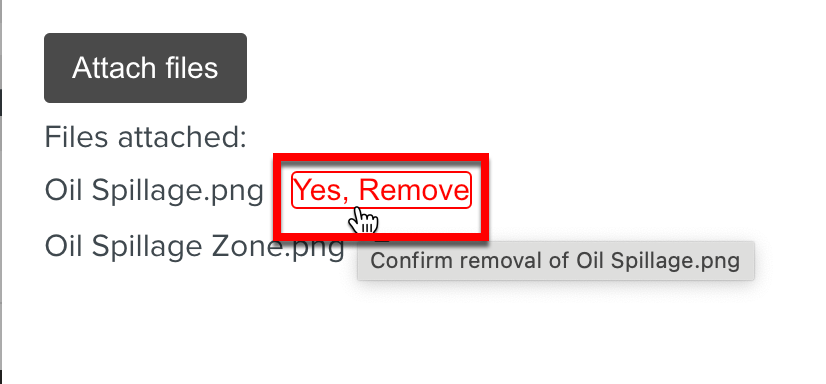
Note
All types of documents and media file formats of size under 30 MB are supported.
Click .
The Global Incident is raised.
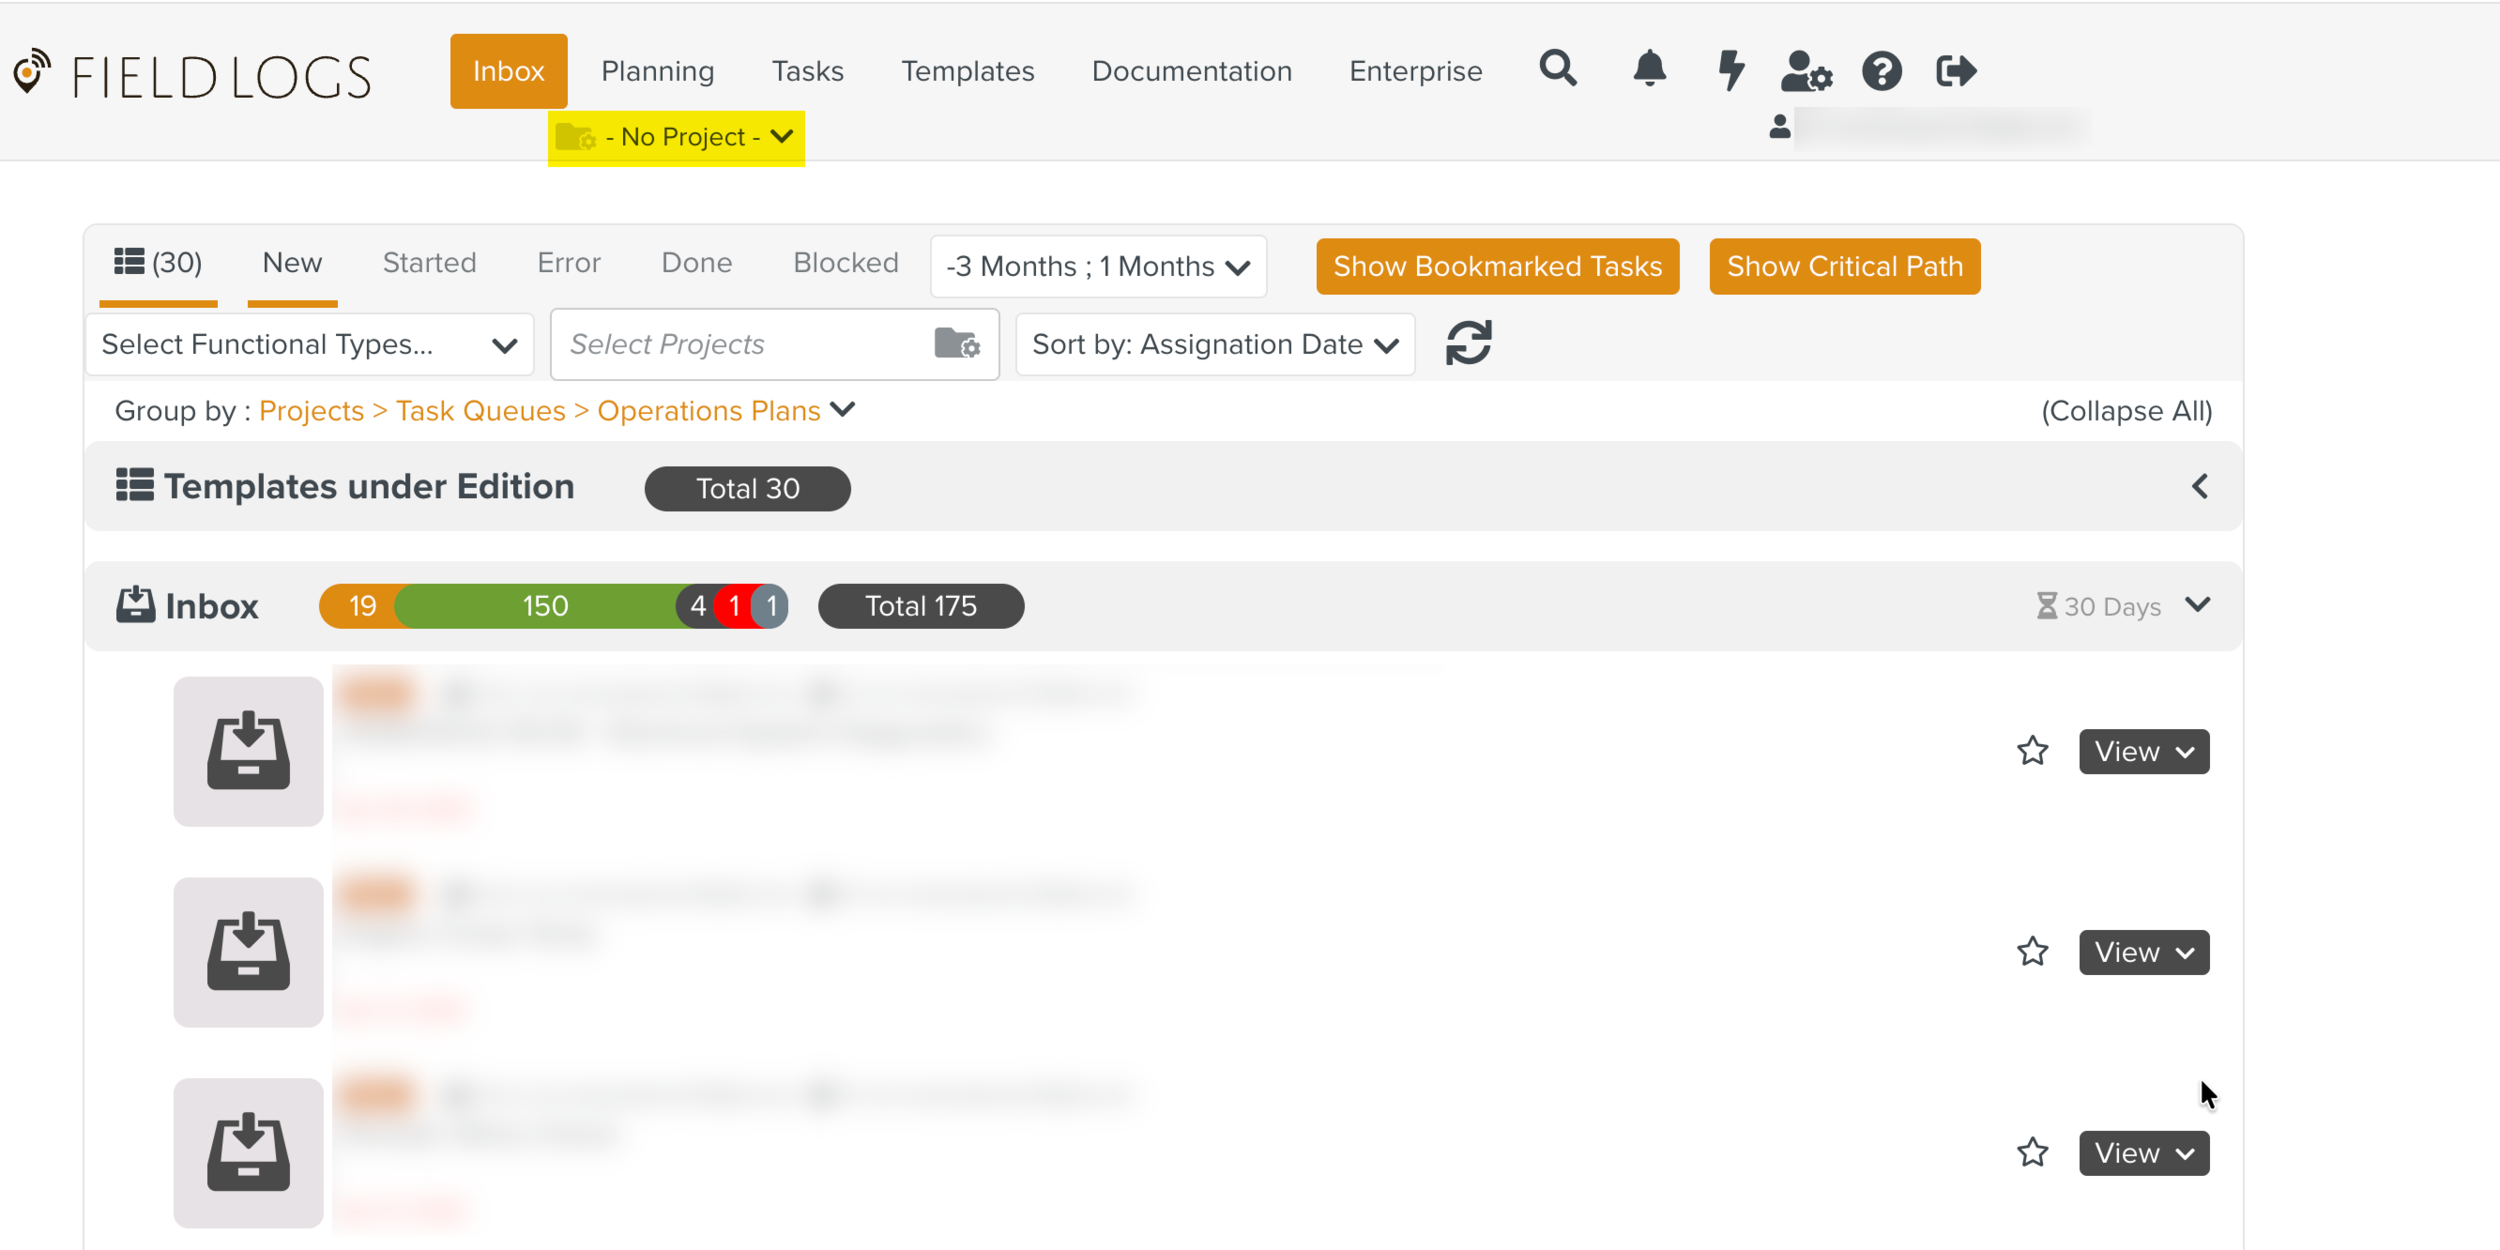
You can raise Project context Incidents if you have selected a Project.
Warning
You cannot raise a Project context Incident when you are in No Project. Ensure that you are in a valid Project to raise a Project context Incident.
 |
To raise a Project context Incident from the main menu:
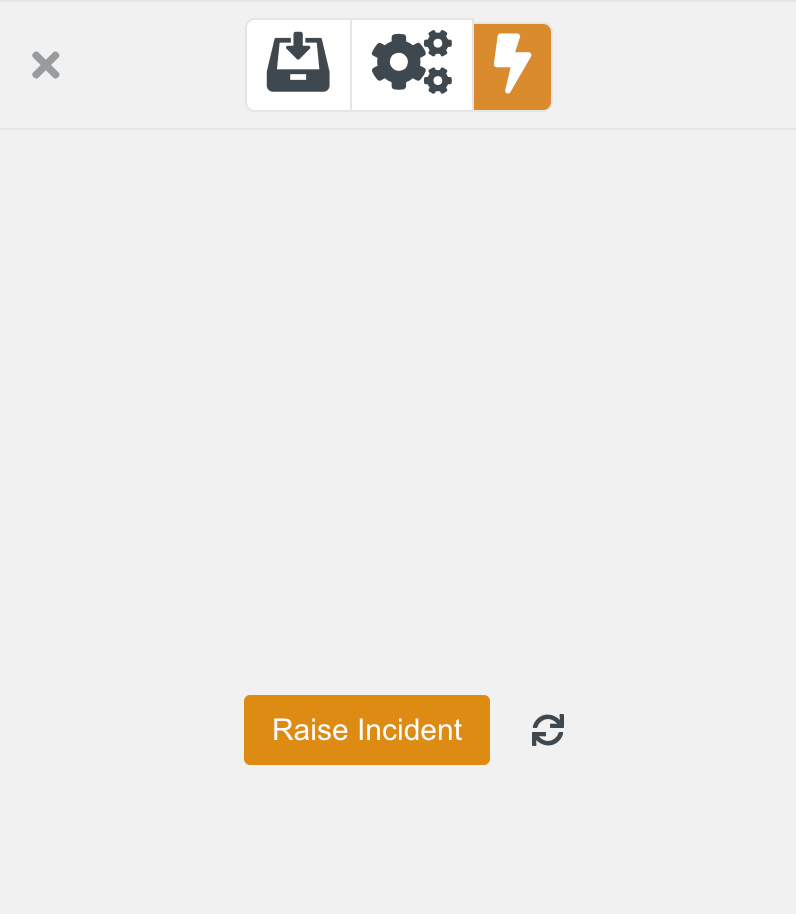
On the main menu, click
.A dialog appears as shown.
Note
The dialog is resizable and can be moved anywhere around the screen.
Select the required Incident from the Incident Definition dropdown. The Project Context Incidents are displayed in the dropdown under their respective Incident Groups in a hierarchical structure.
The fields configured for the selected Incident are displayed.

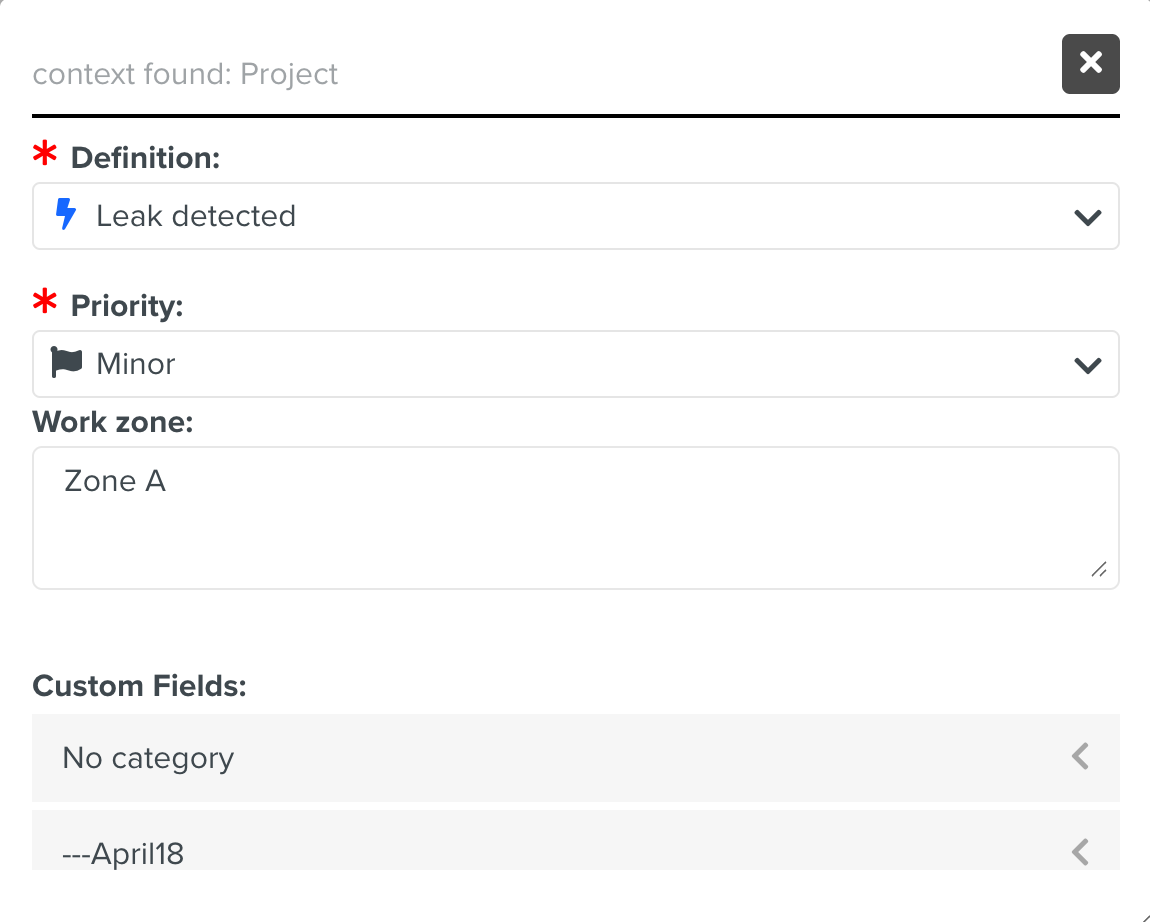
Add the details in the fields as shown below.
Note
For each Incident, the displayed fields may vary based on the Incident Definition.
[Optional] In the Custom Fields section, select a Custom Field from a category and enter the values.
Note
All the Custom Fields that are defined for Incidents are displayed.
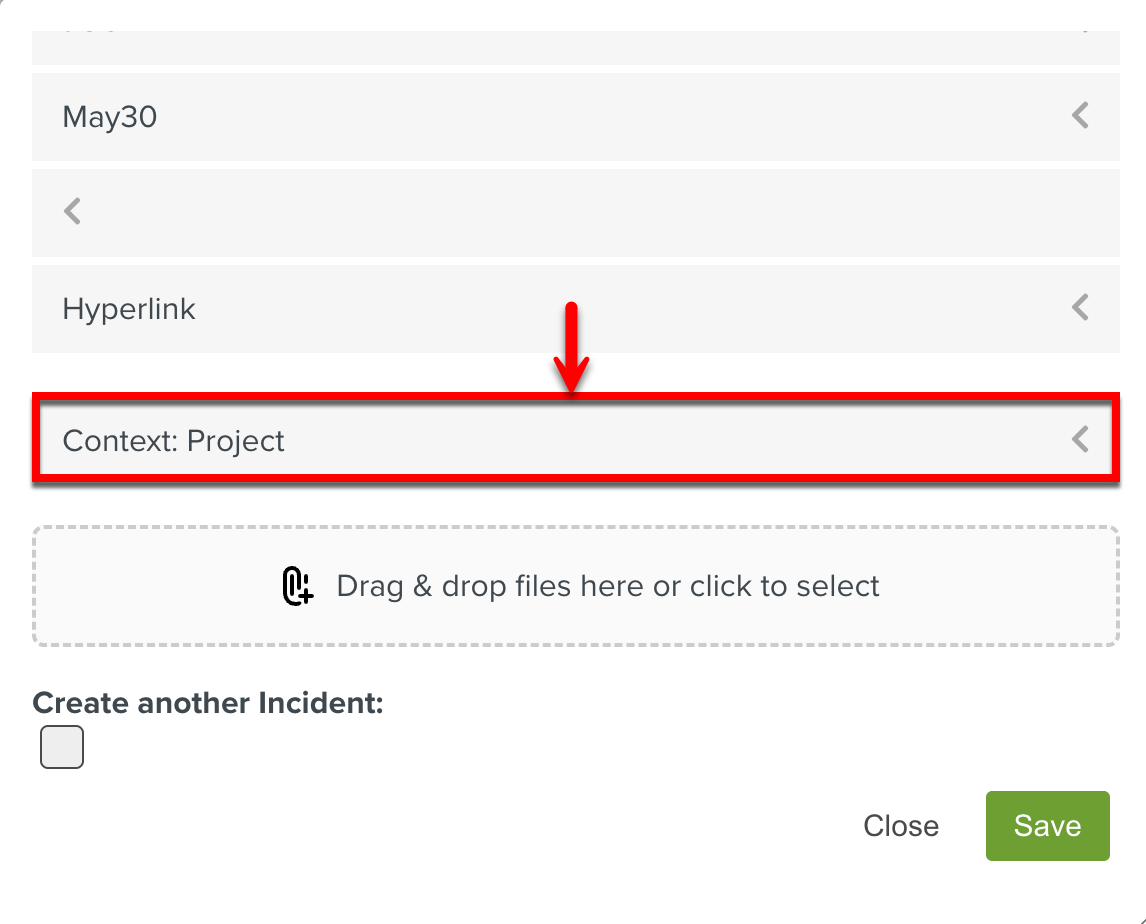
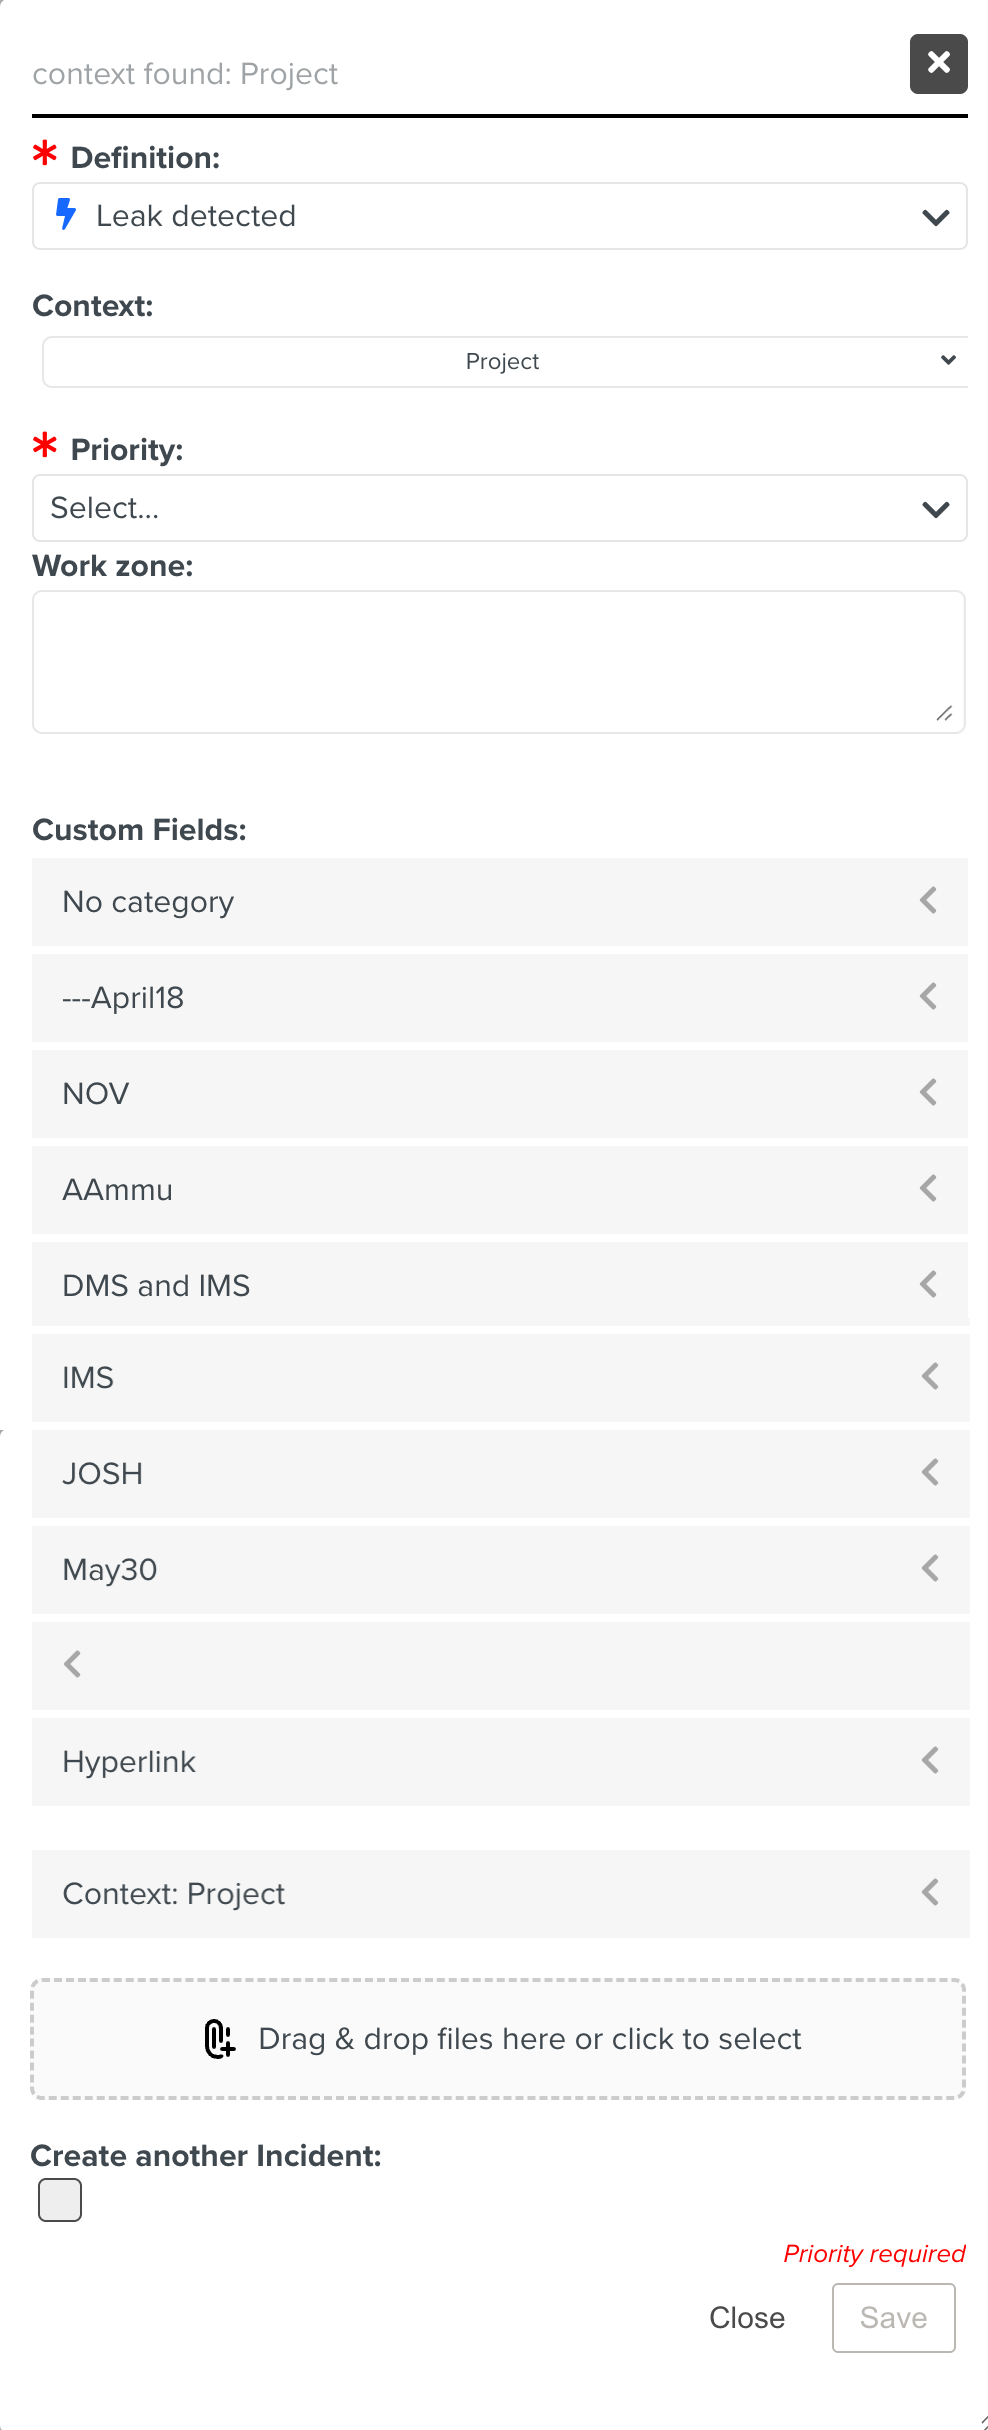
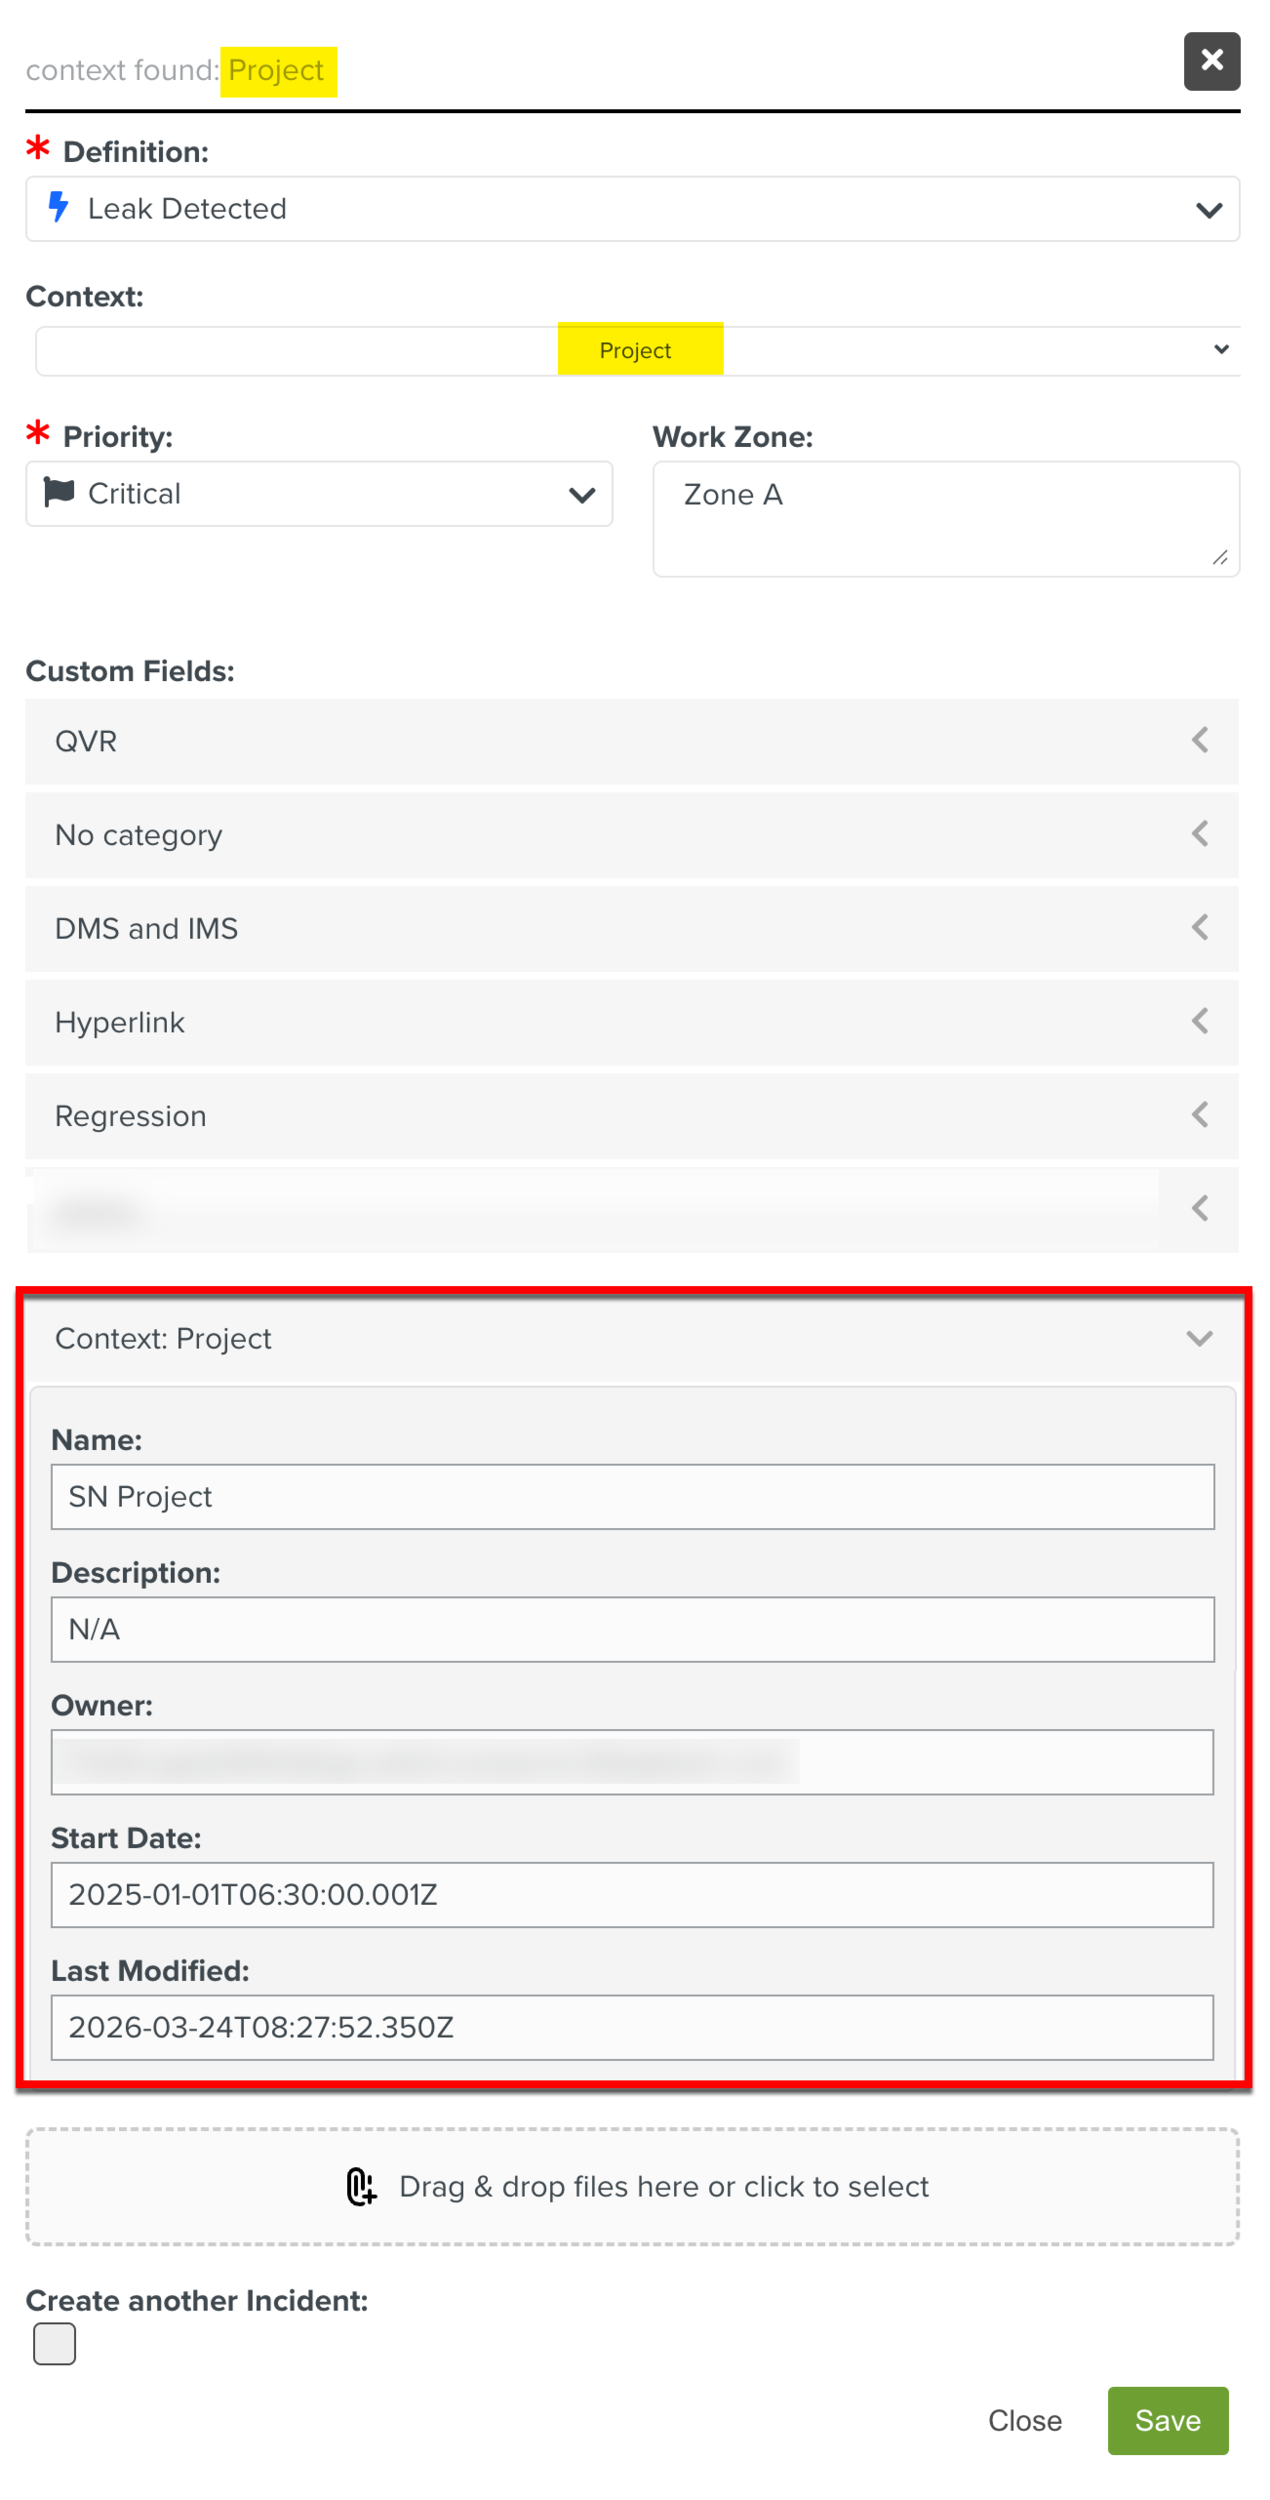
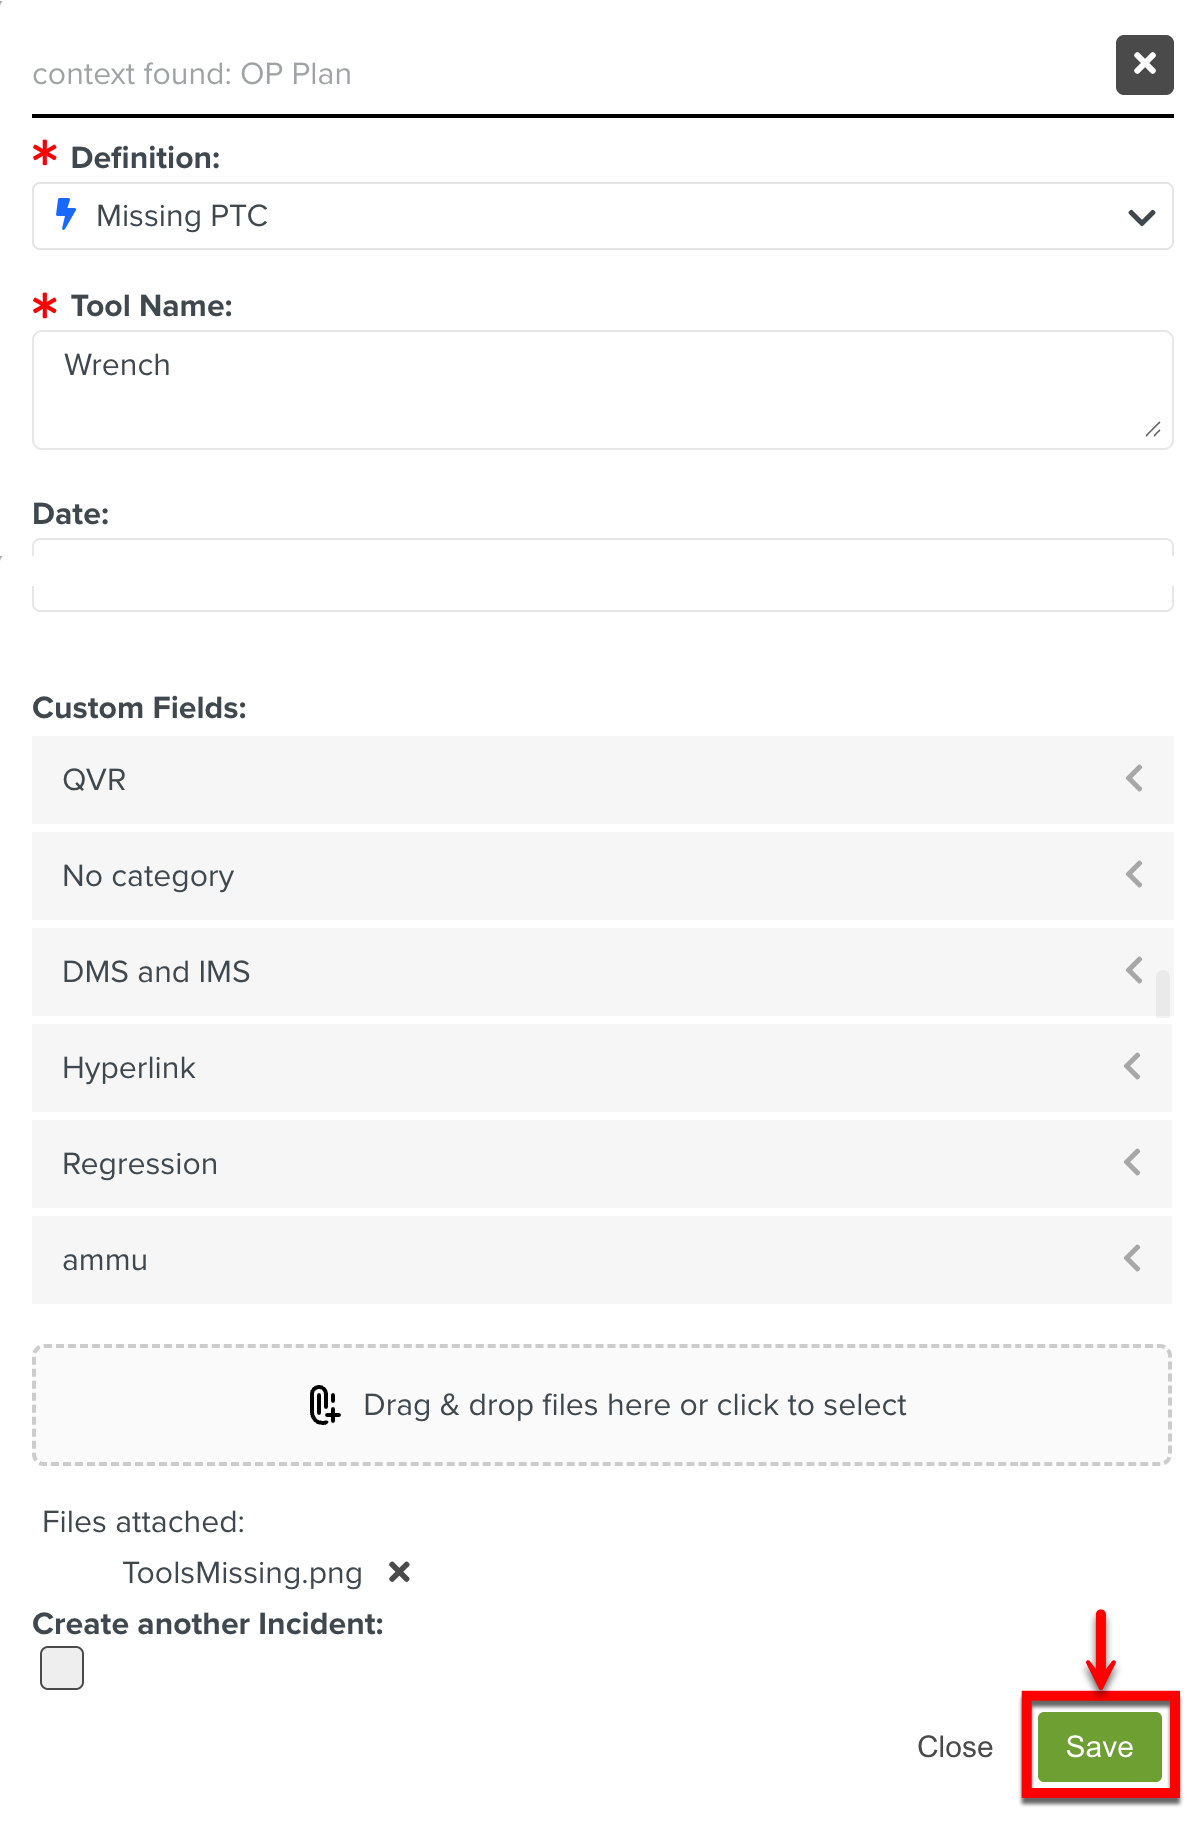
The dialog with all the details filled is shown below.

Click Context: Project to view the current Project details.
The details of the Project are displayed as shown.
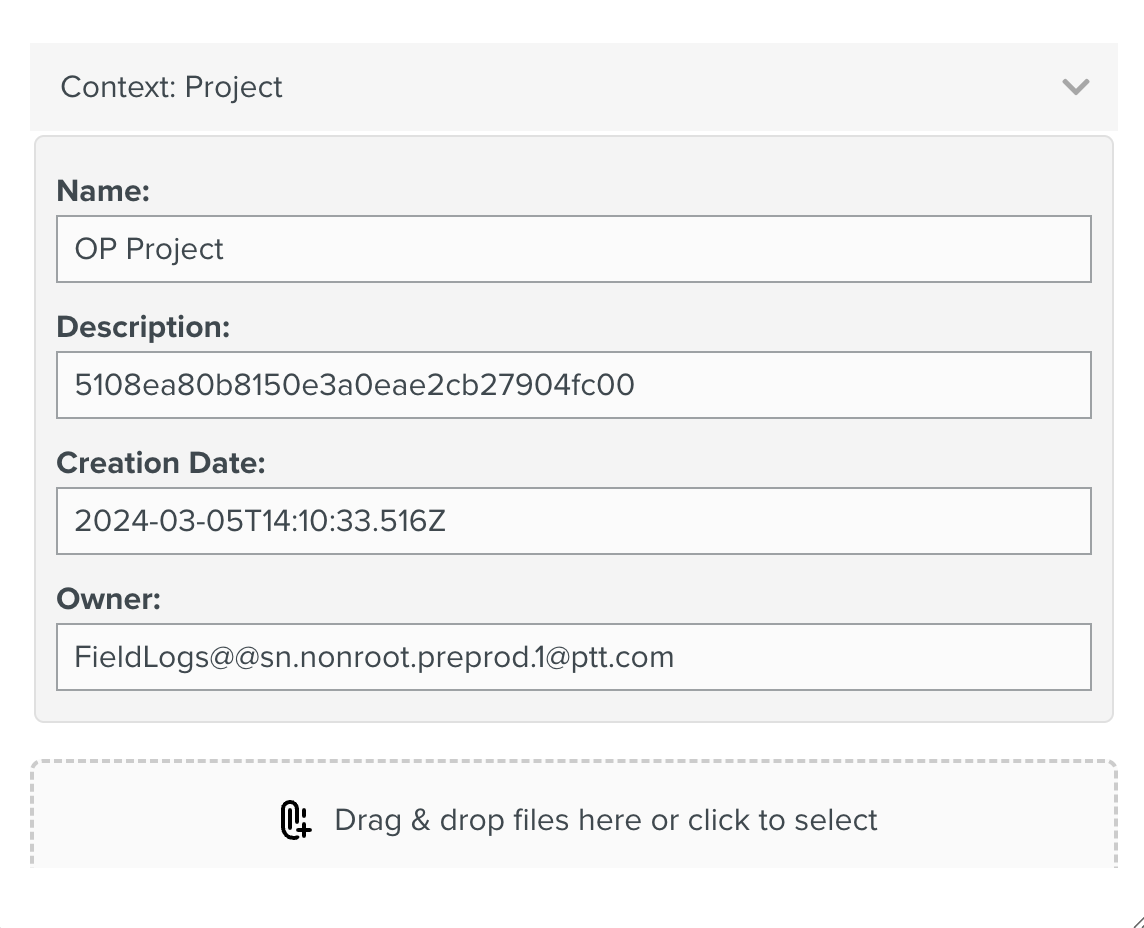
The details in the fields are auto-populated and the values are dynamically updated.
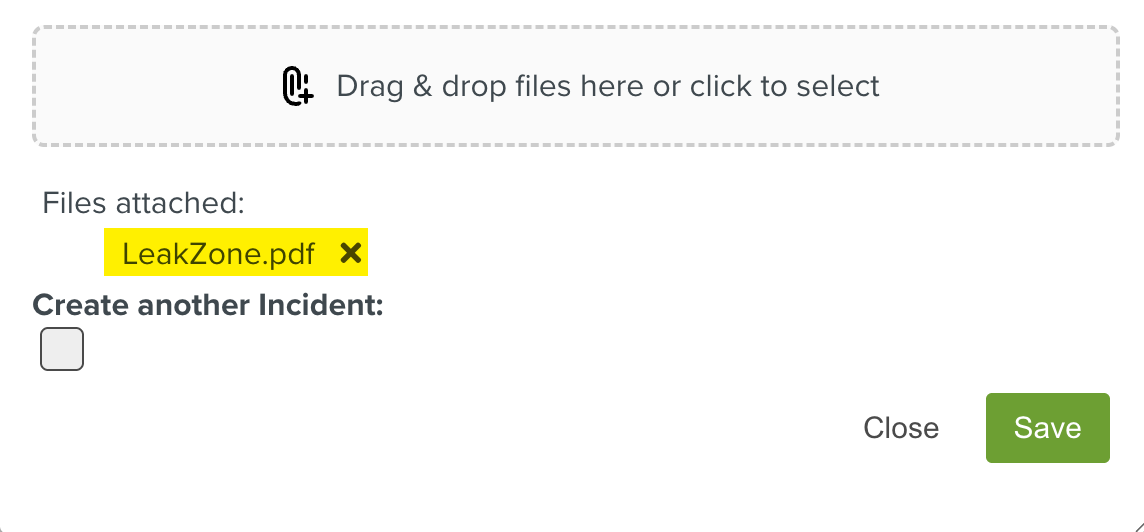
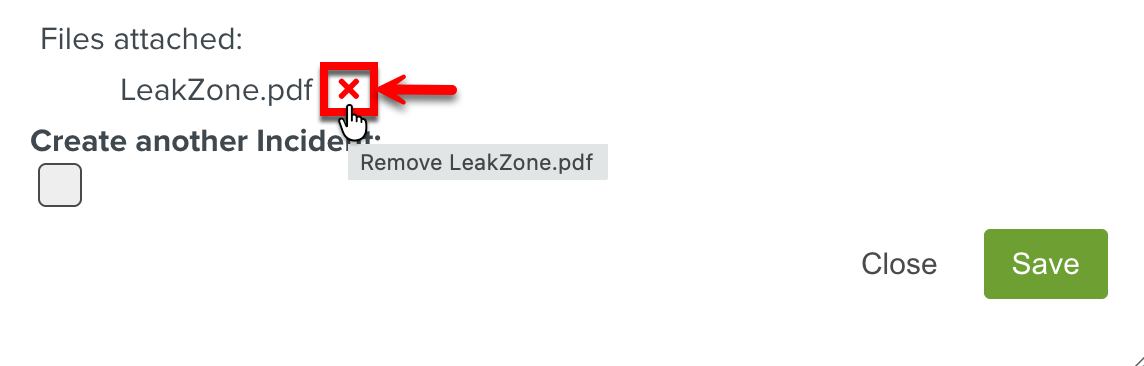
[Optional] Click the Drag & drop files here or click to select option to add the images or files. You can also drag and drop the files. Multiple files can be added.
To remove a file, click
.
Note
All types of documents and media file formats of size under 30 MB are supported.
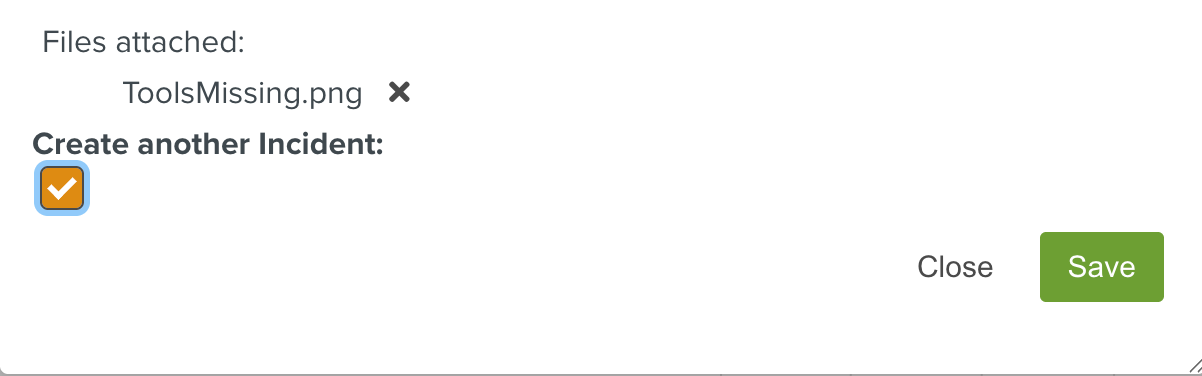
[Optional] Click Create another Incident to raise the same Incident again.
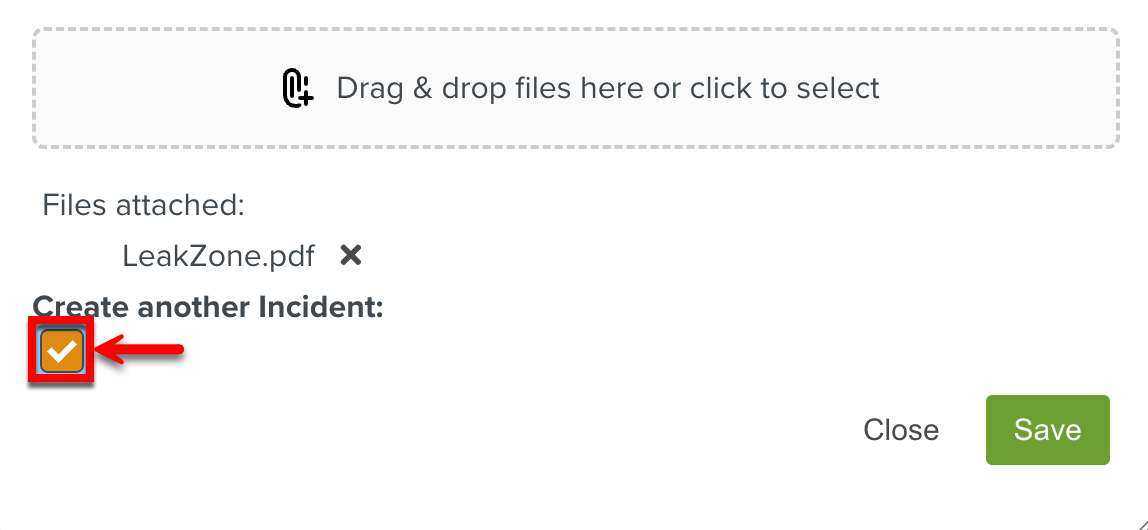
Selecting this option opens an Incident dialog with the same definition selected for creating another Incident.
Click .
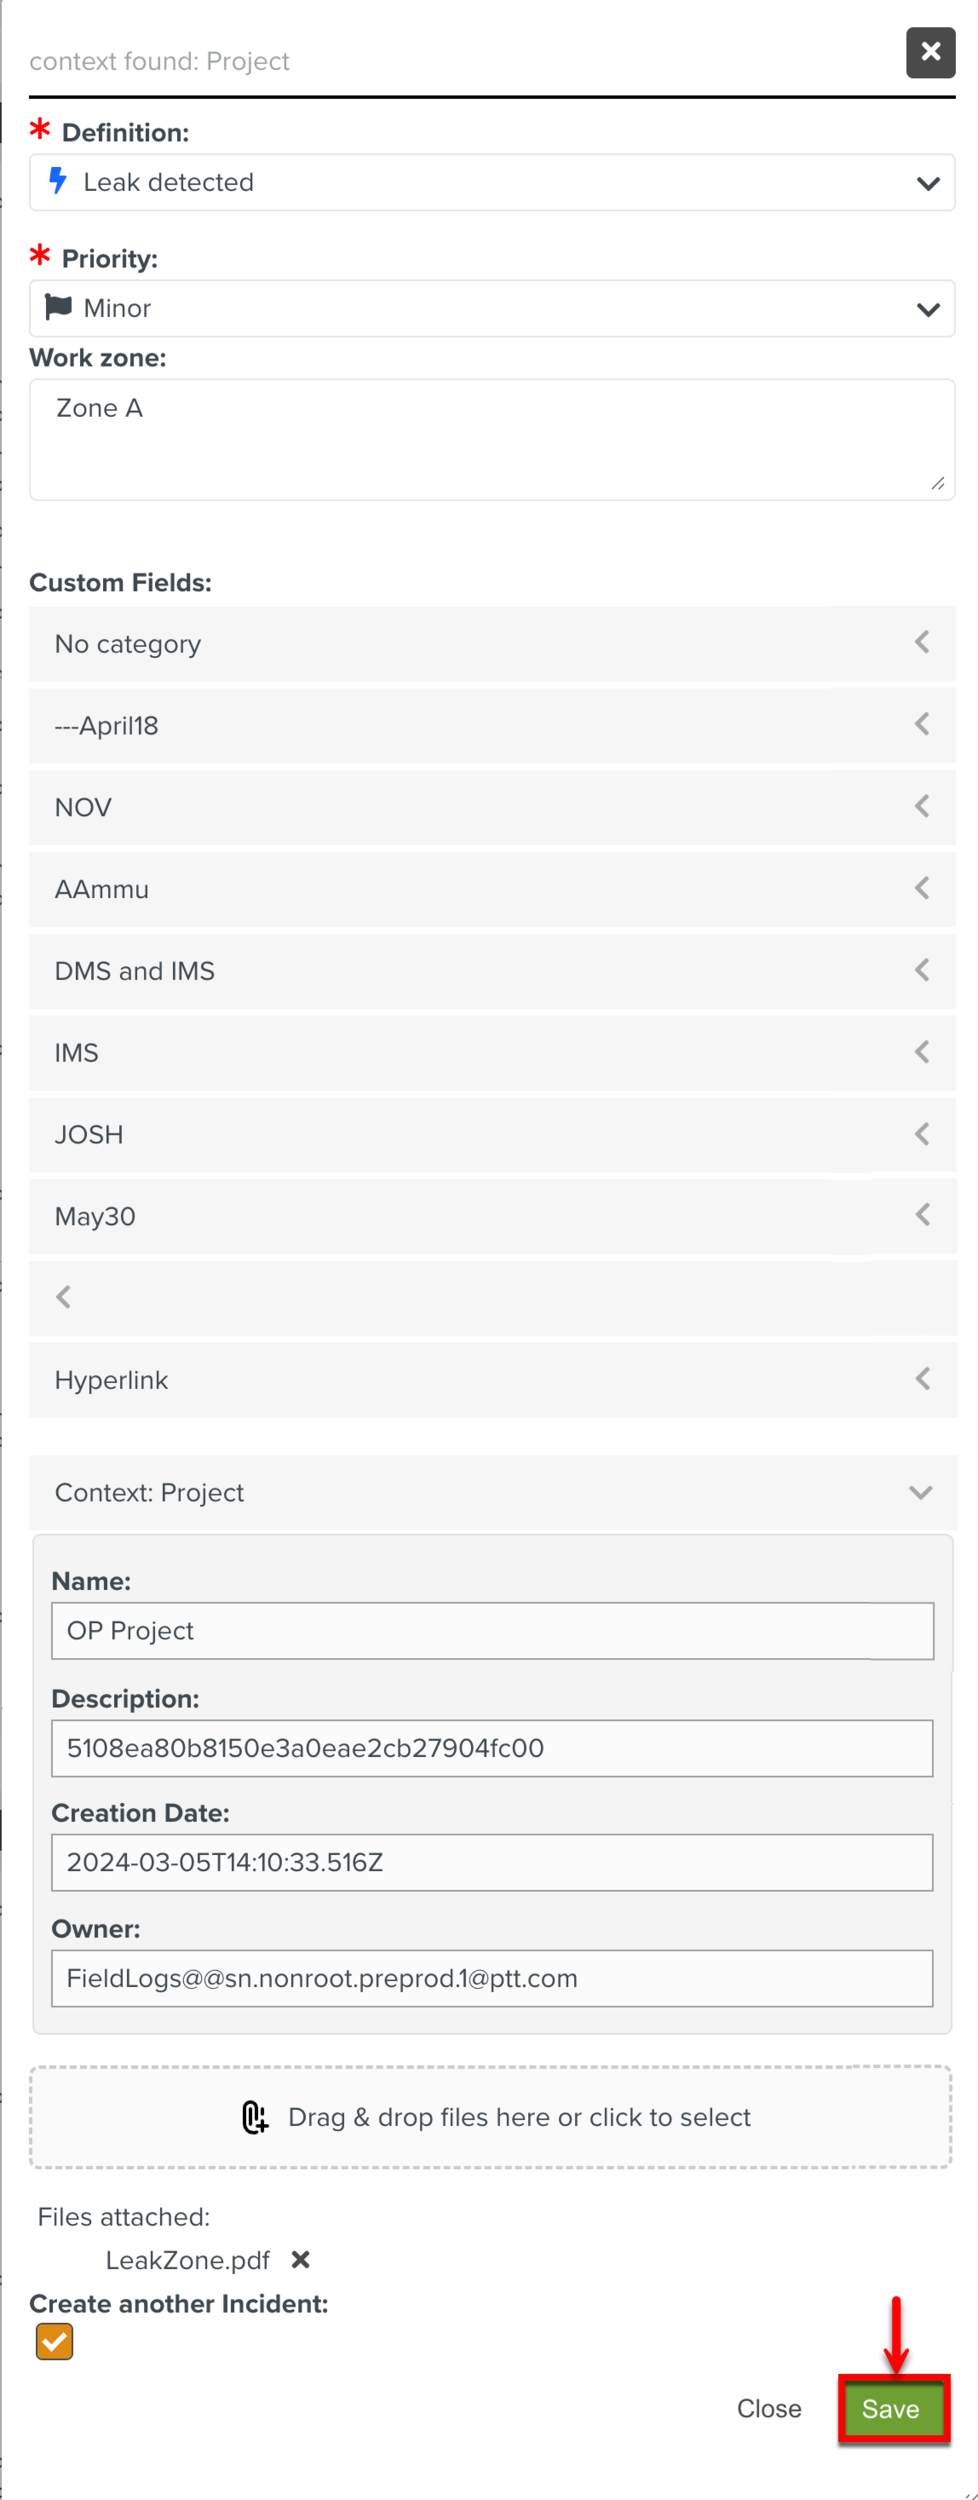
The Project Context Incident is raised.
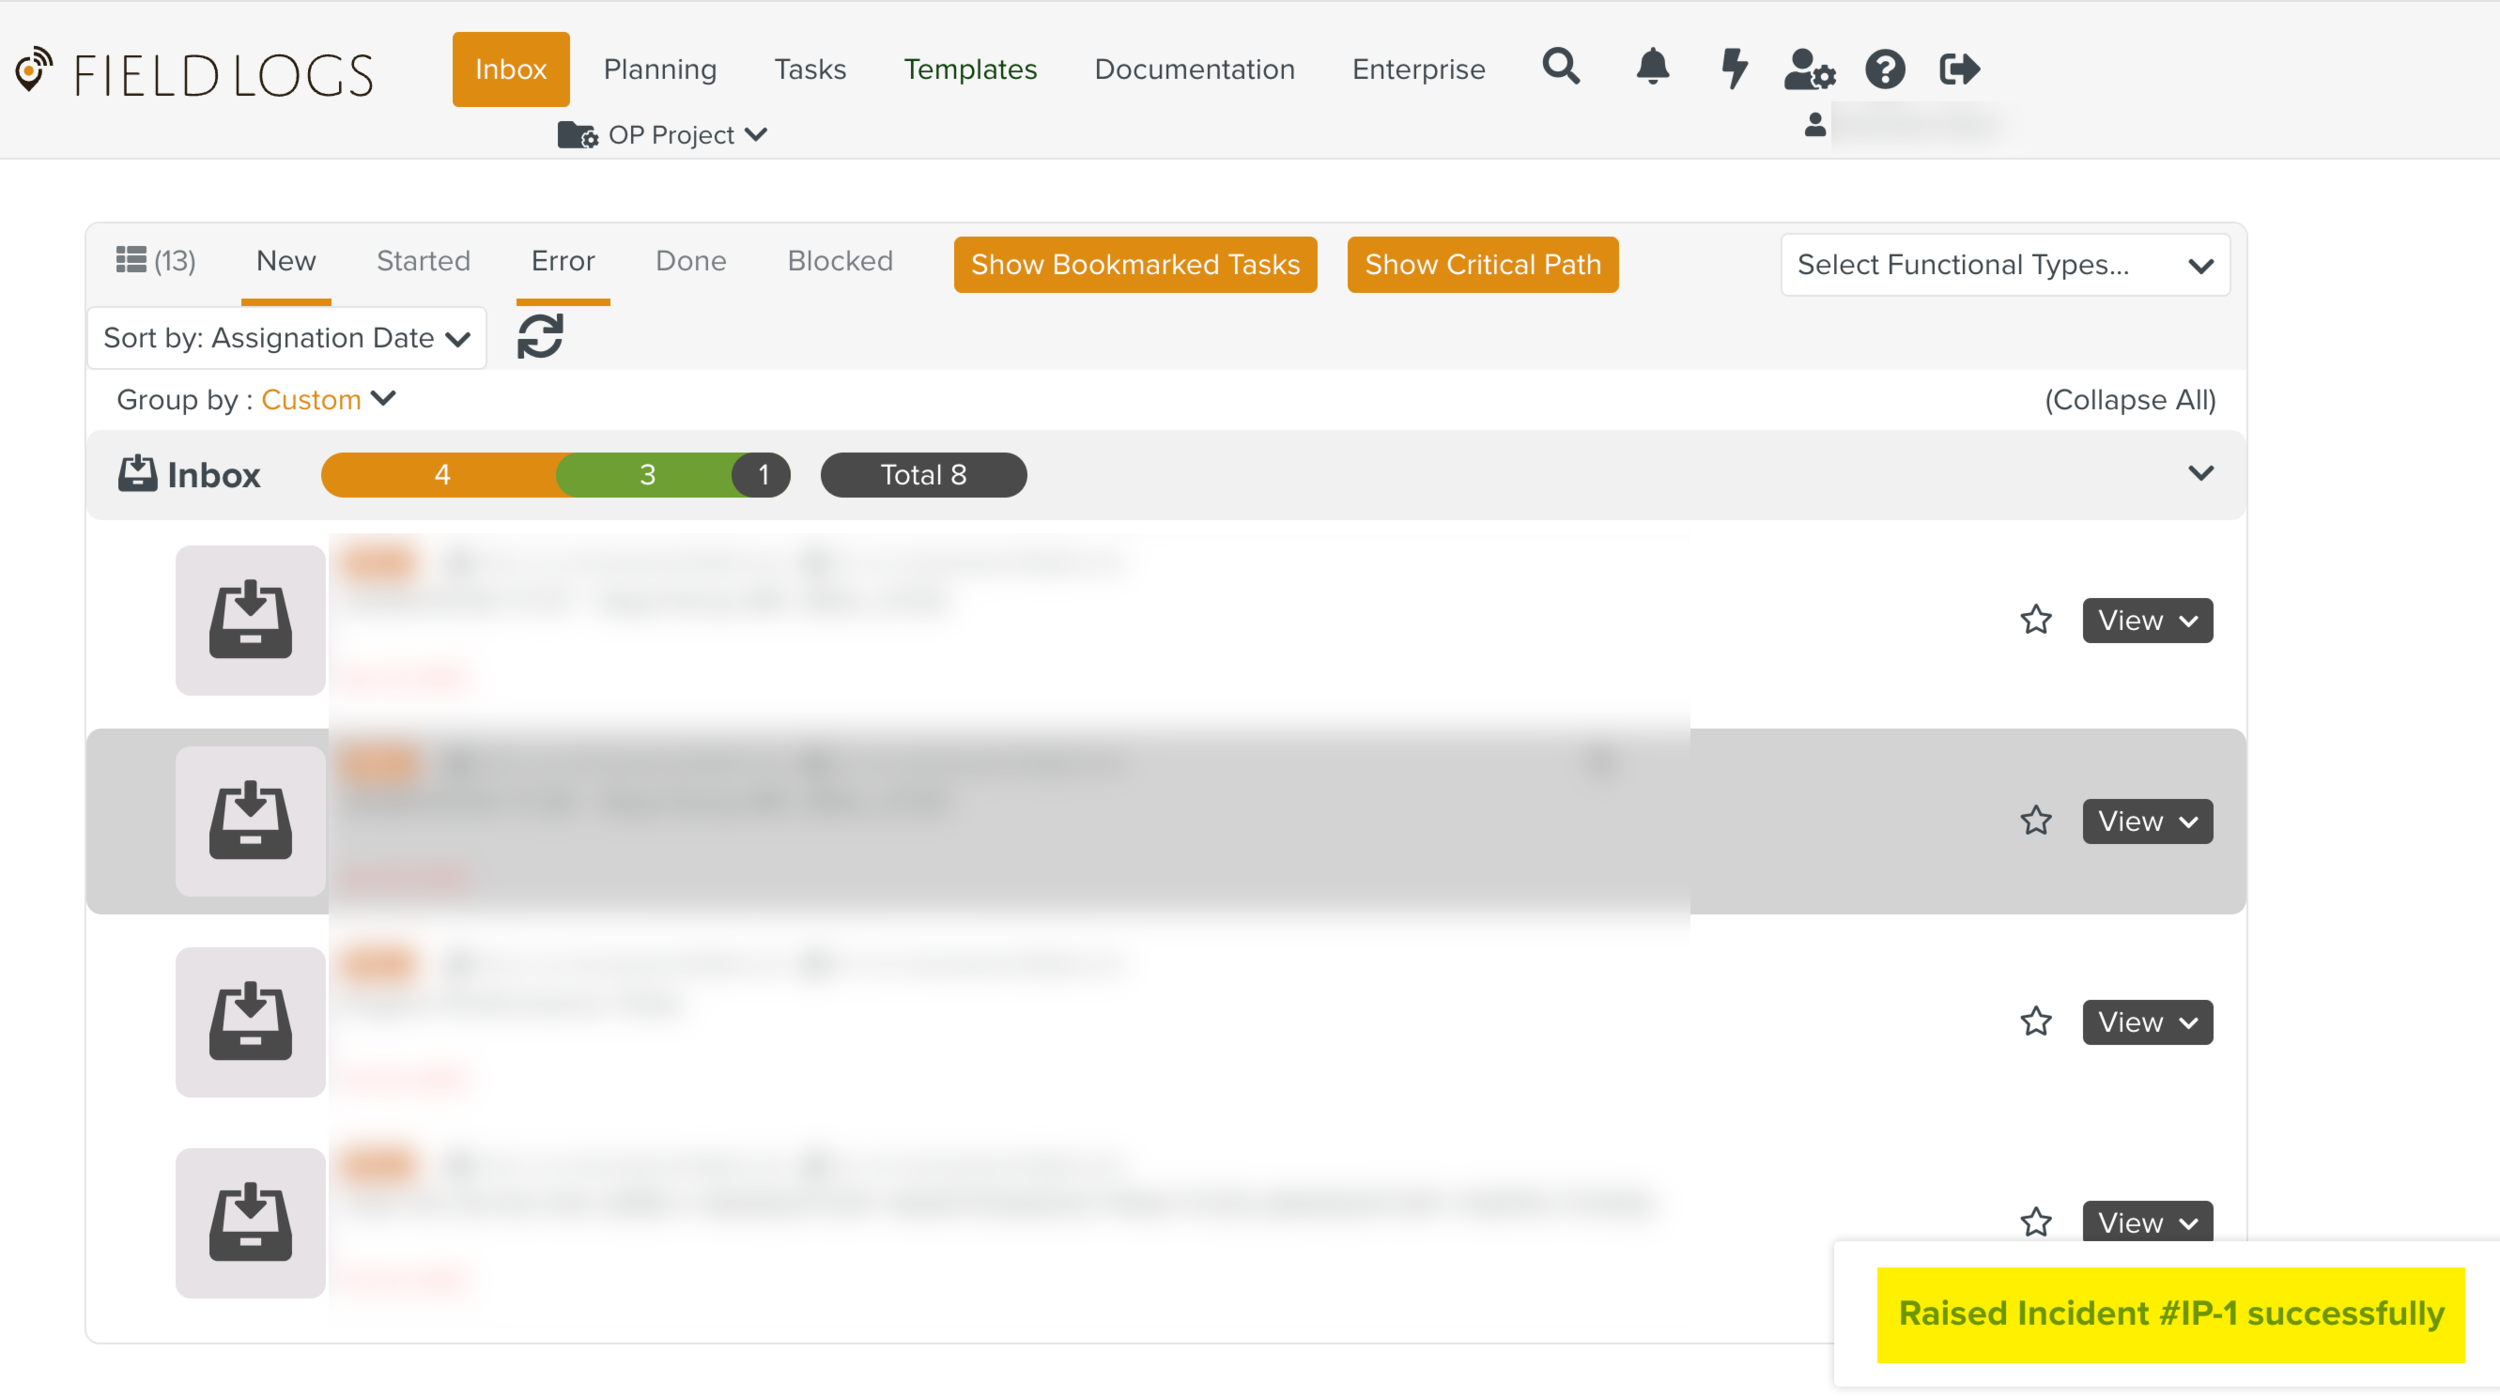
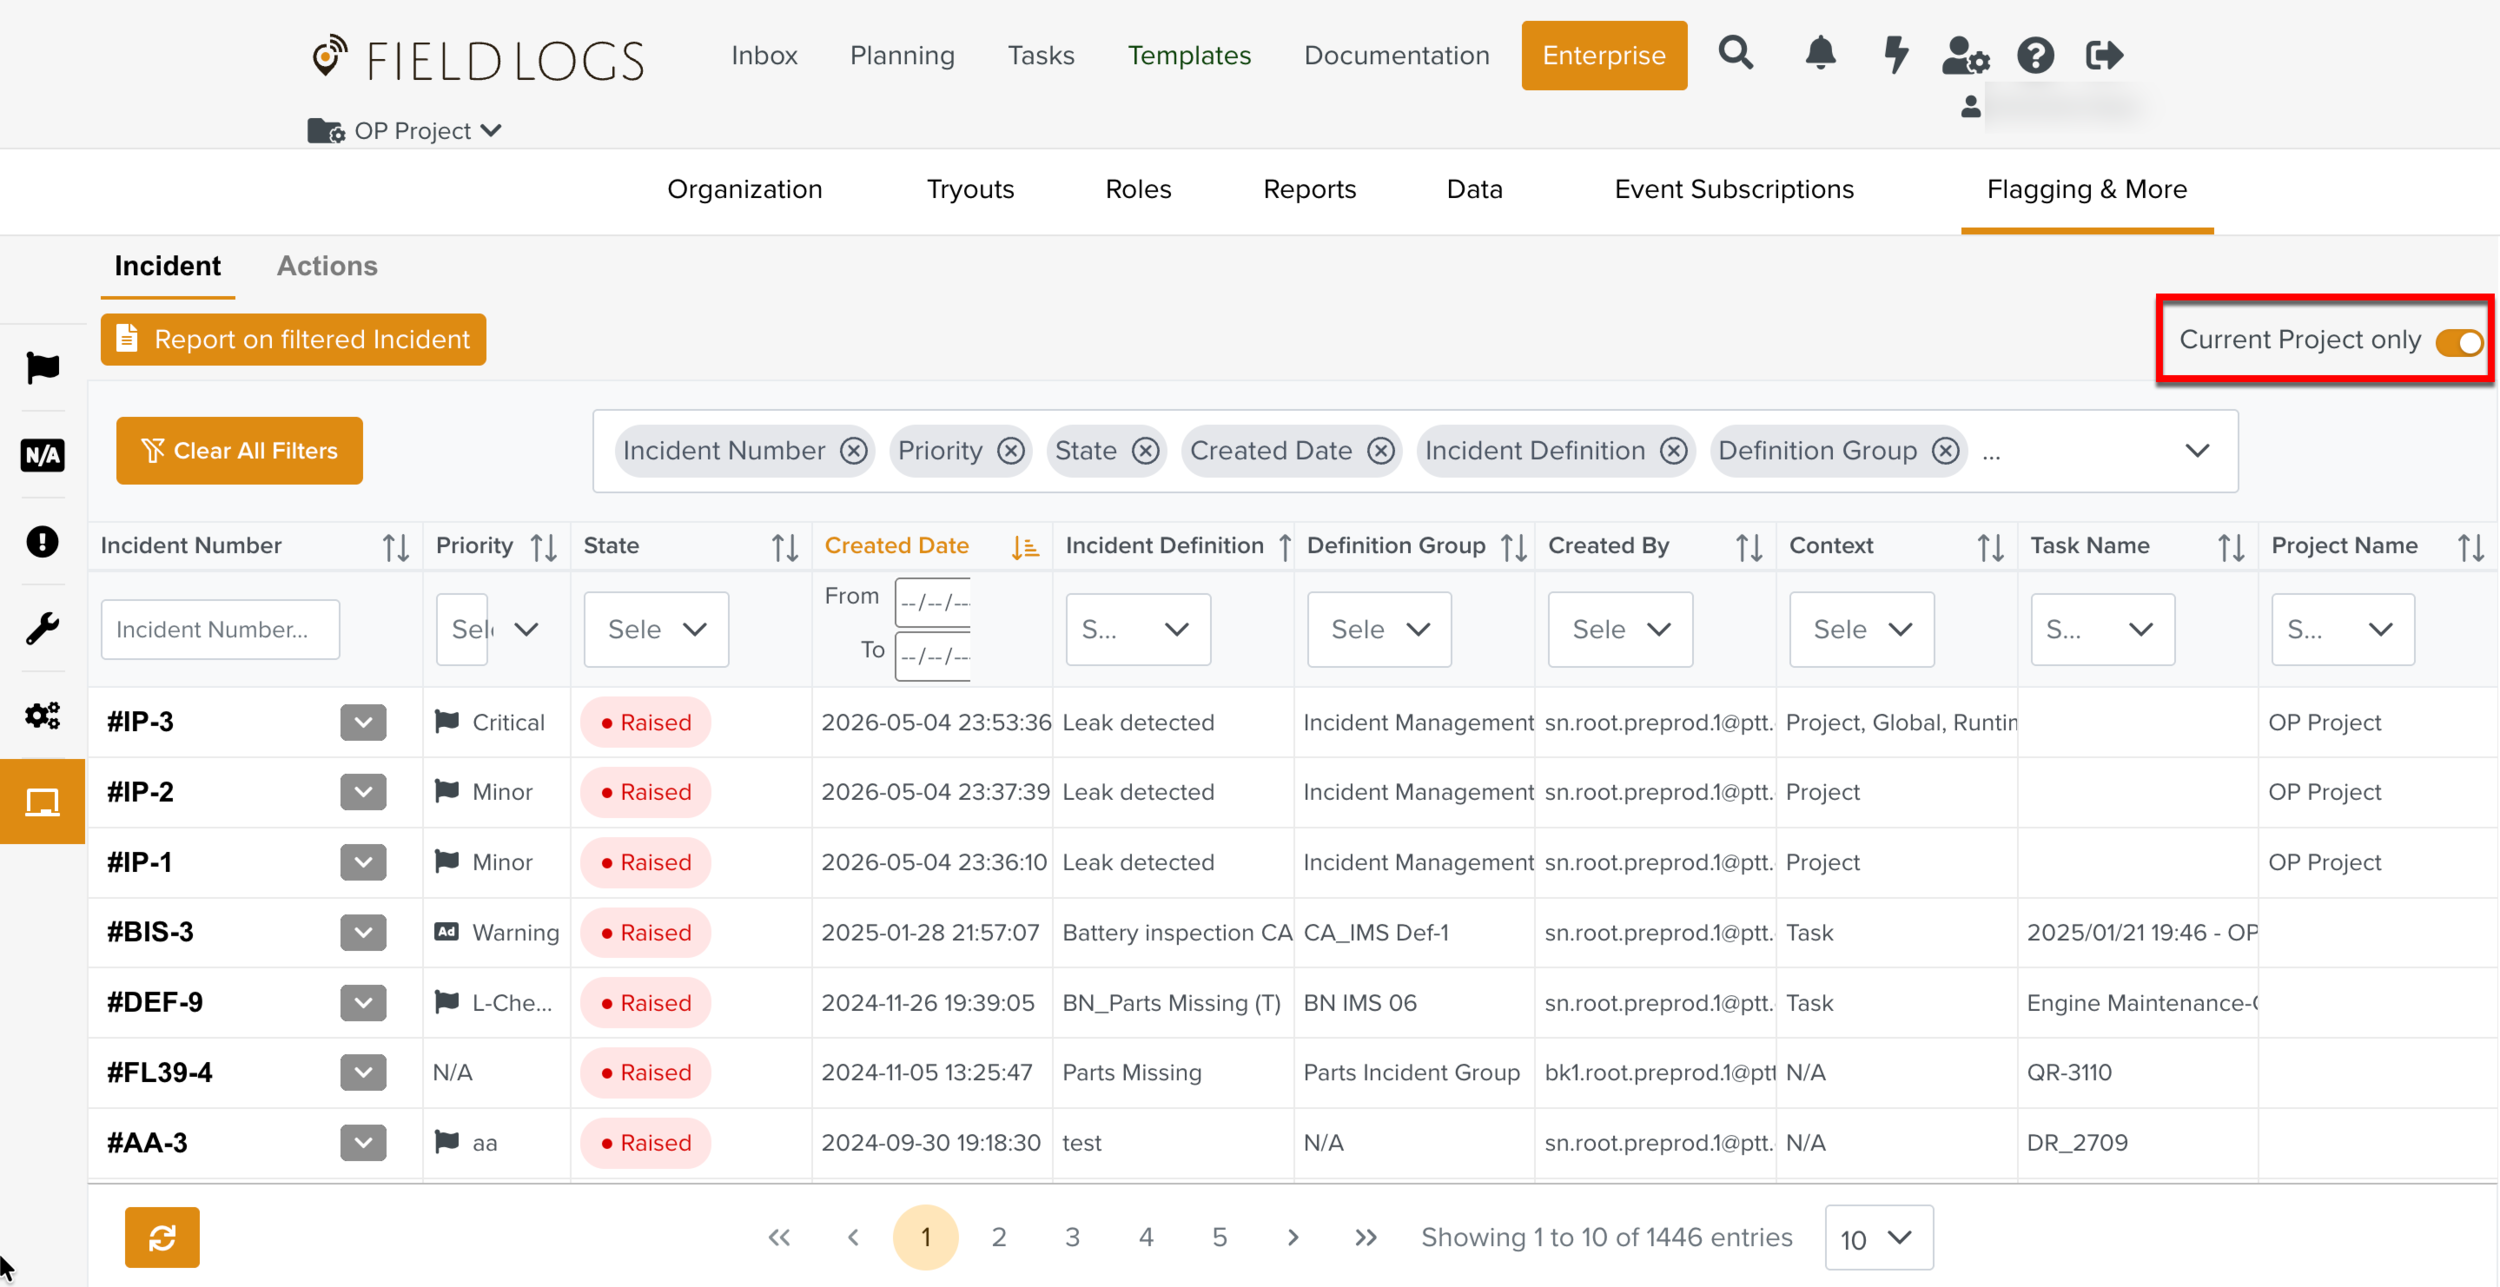
You can view the Project Context Incident in the Incident Dashboard.
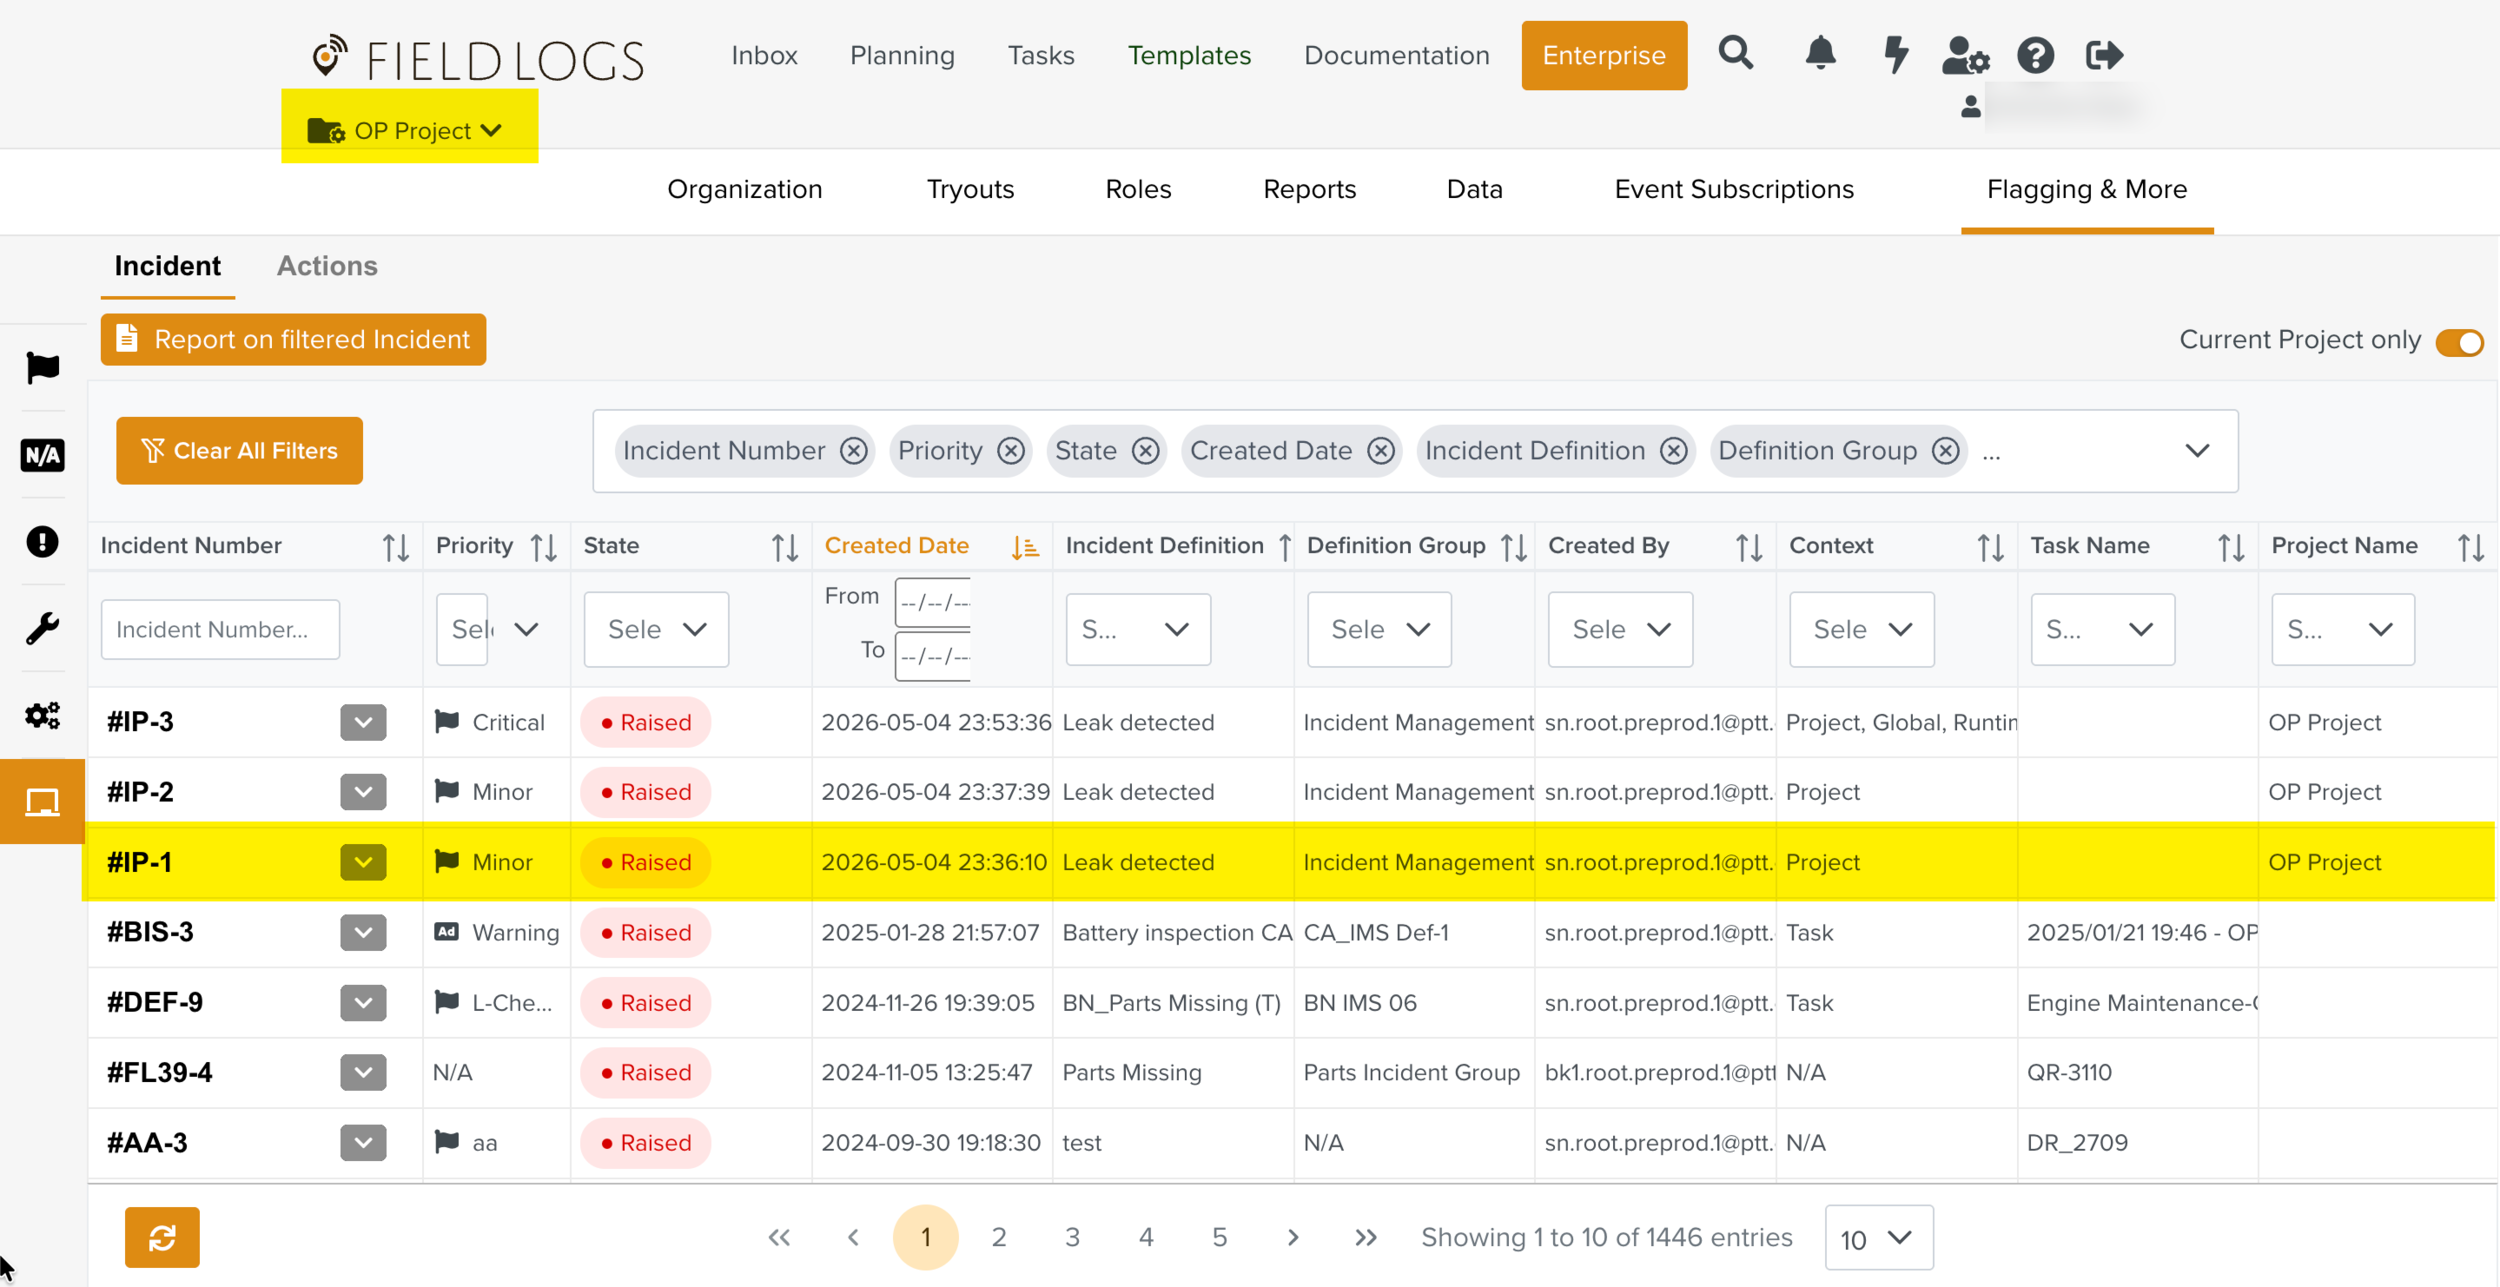
Enabling the Current Project only toggle displays only the Incidents raised from the current Project. In the below example the Incidents raised from the OP Project are displayed.
A multi-context Incident can be raised from different contexts - Global, Inbox, Tasks, Runtime Step, and Project. Depending on the Incident definition, these Incidents may be available in more than one Context.
To raise a multi-context Incident from the main menu, follow the similar procedure as raising a Project context Incident.
 |
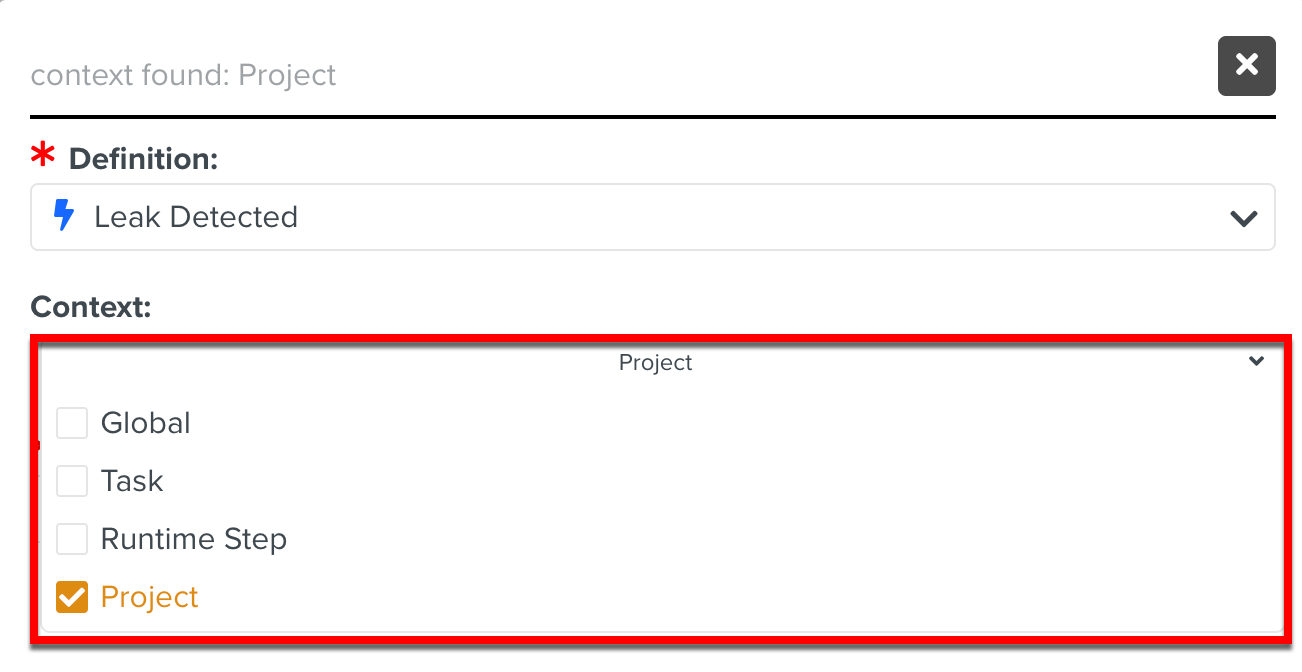
While raising a multi-context Incident from the main menu, you can select the appropriate context from the Context dropdown as shown below.
 |
Note
By default, Global context is selected.
The Context section is displayed only for Project context Incidents raised from the main menu. The Project details are highlighted as shown below. It is not displayed for Task or Runtime Step Incidents.
 |
You can raise Incidents from an Operation Plan in the Planning section.
To raise an Incident from an Operation Plan:
On the main menu, go to Planning > Planning.
The screen Planning appears.
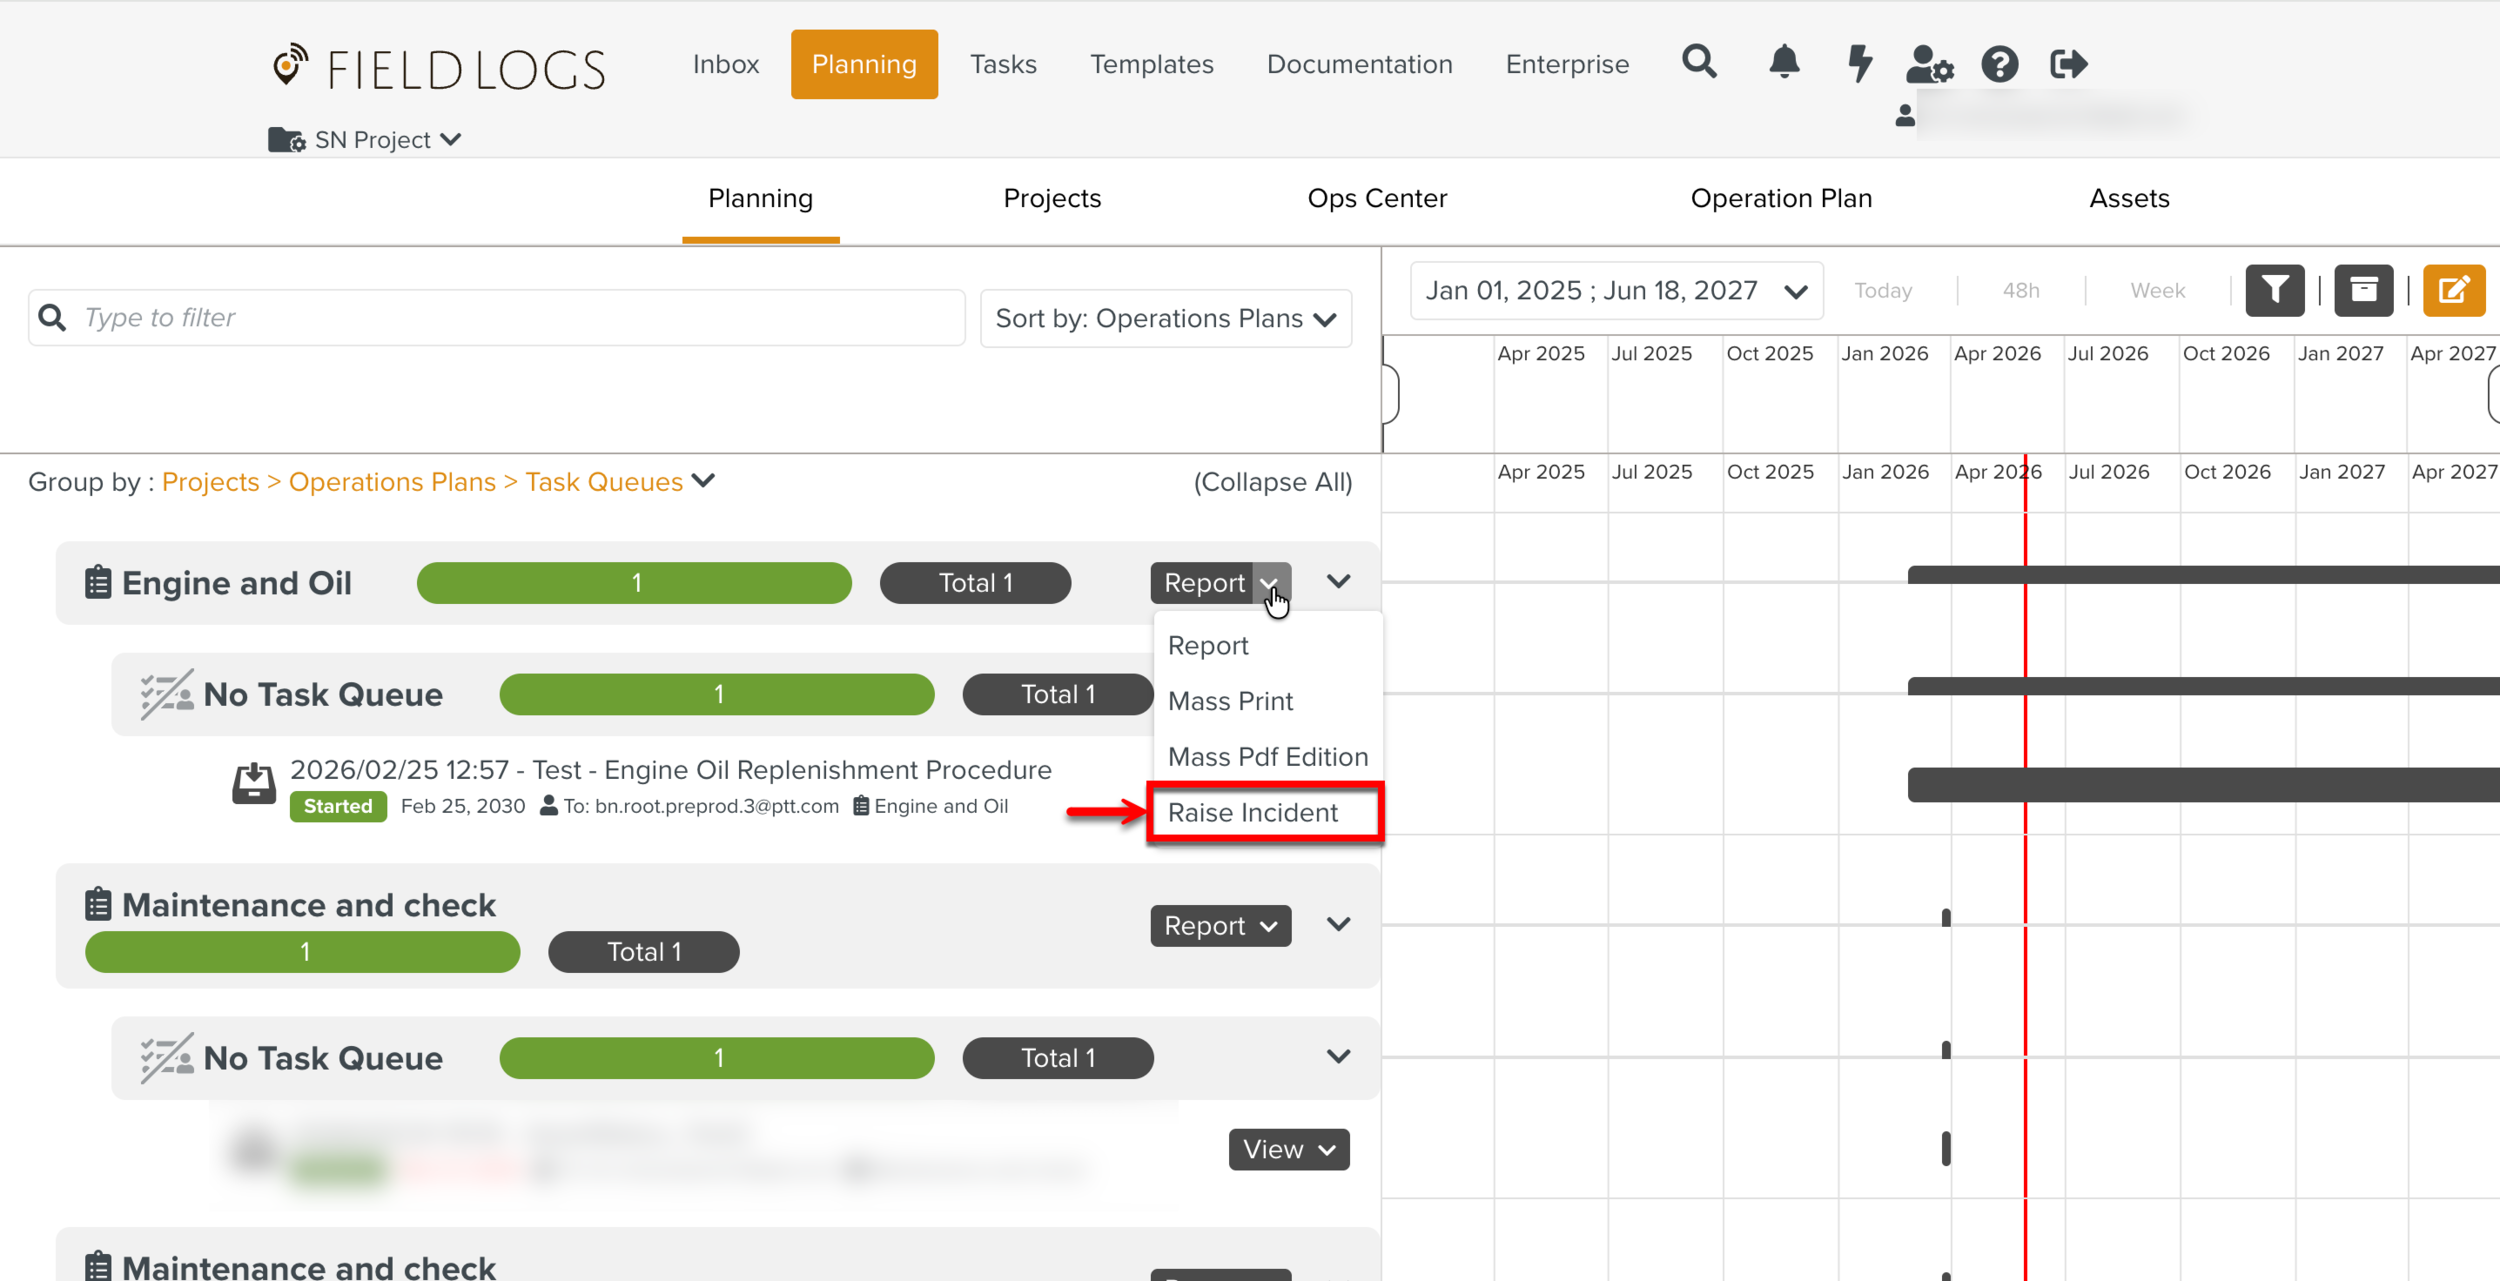
On the required Operation Plan, expand the button to display the list of options.
In the example below, the Incident is to be raised from the Operation Plan Engine and Oil.
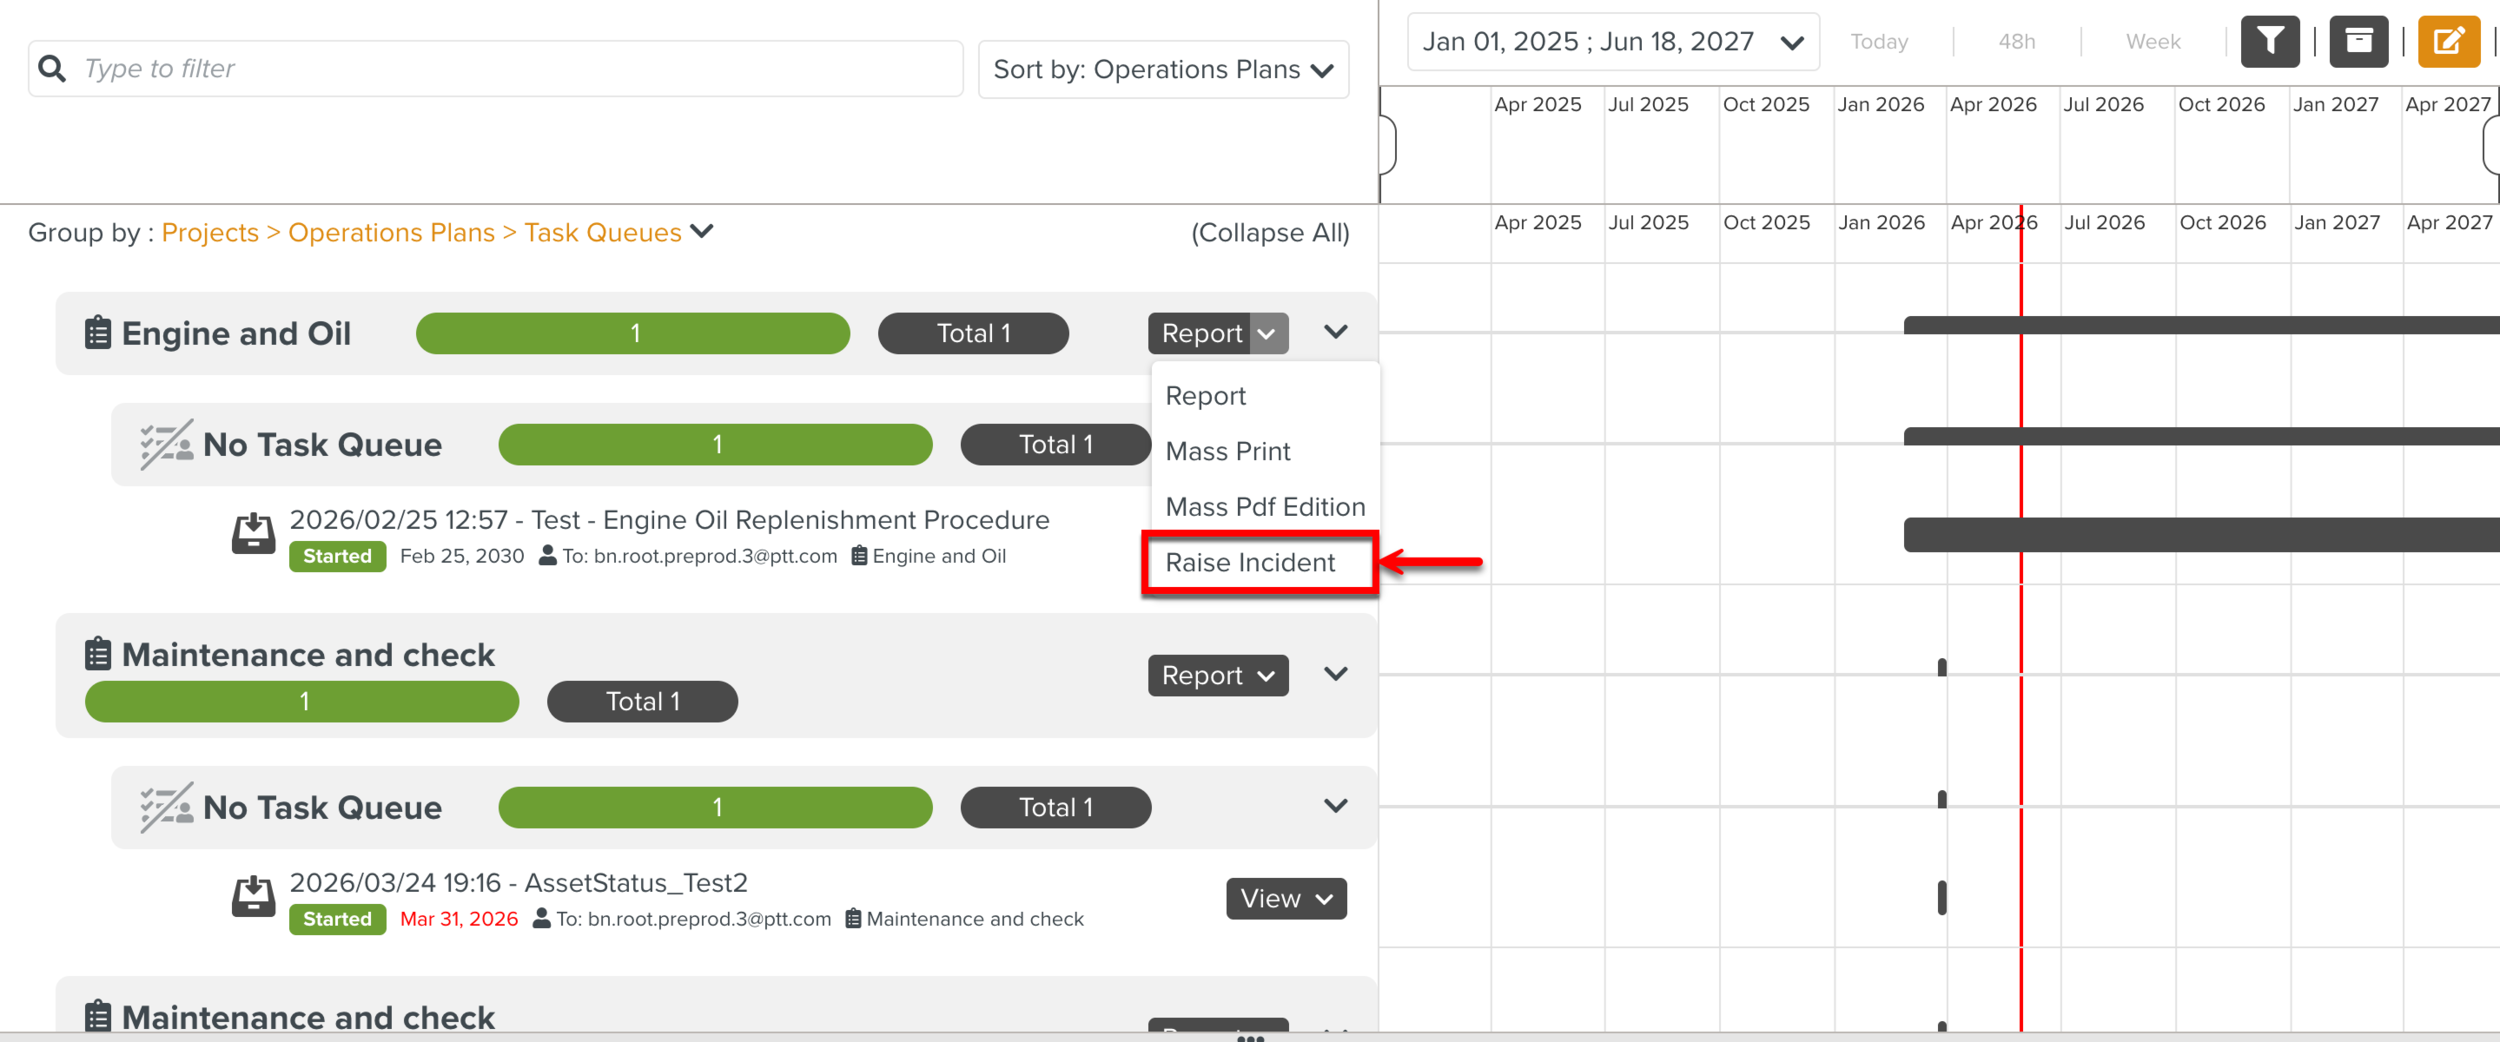
Click Raise Incident.
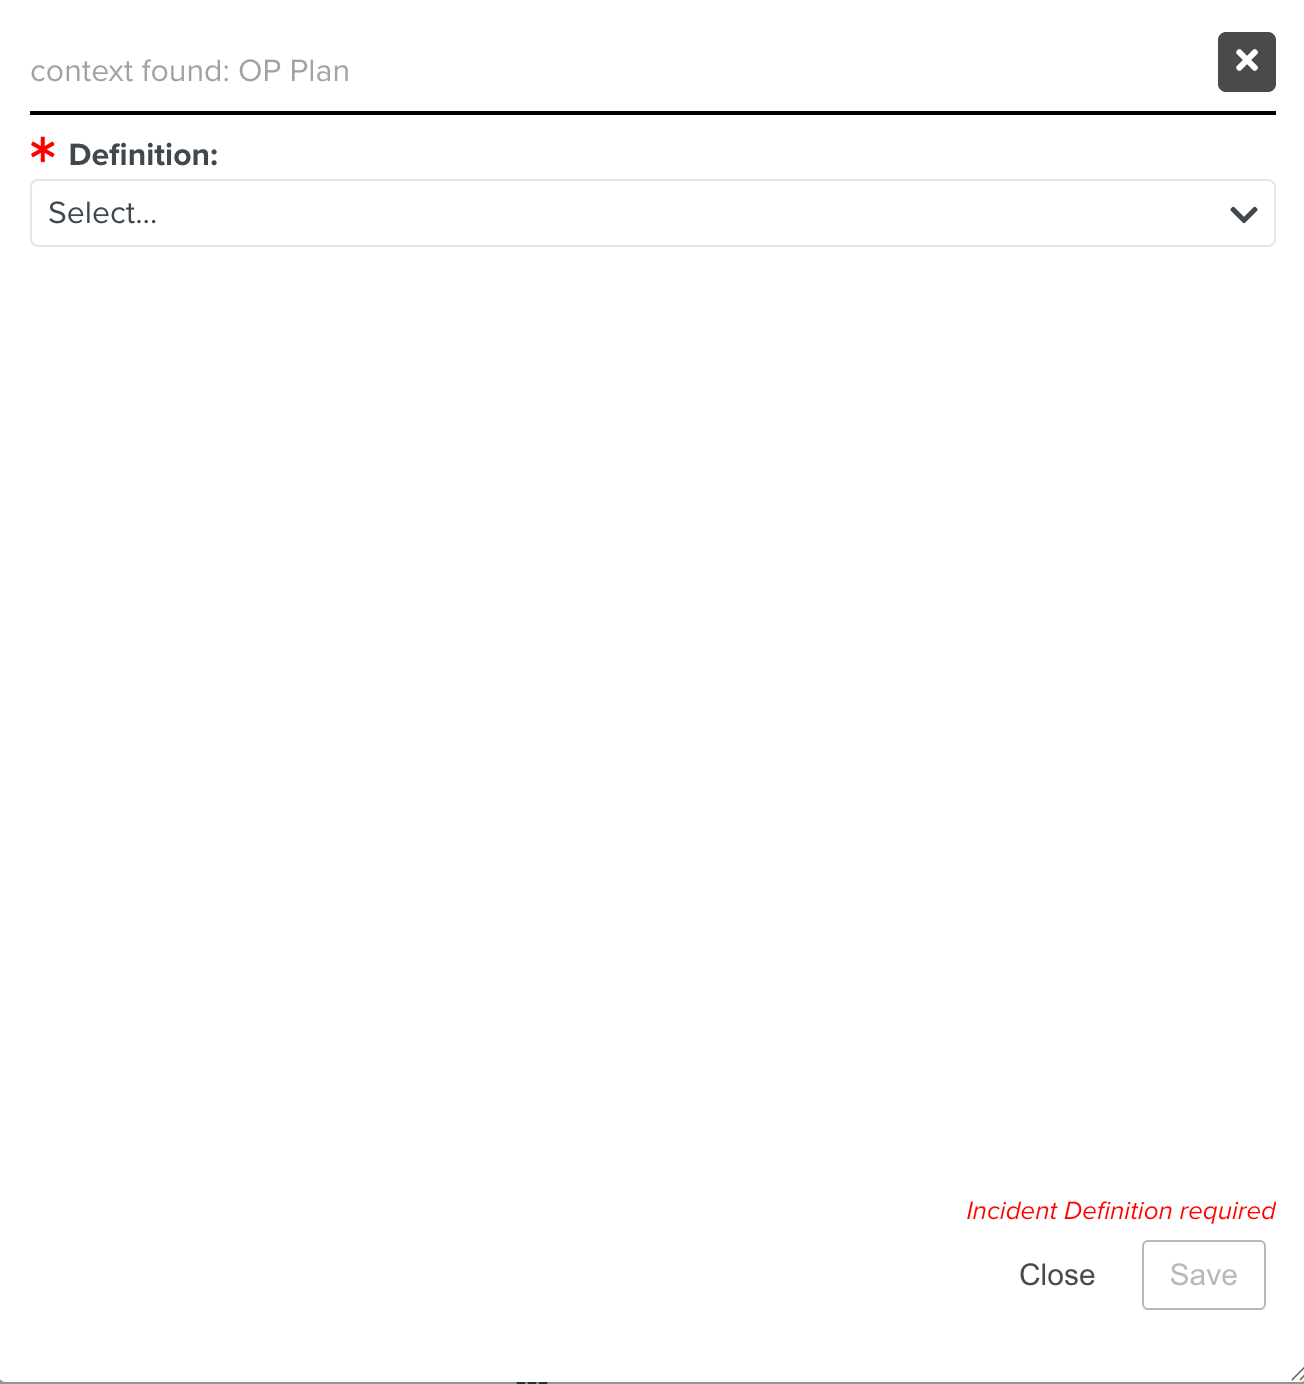
A dialog appears as shown below.
Note
The dialog is resizable and can be moved anywhere around the screen.
The Incident Context is displayed as Task.
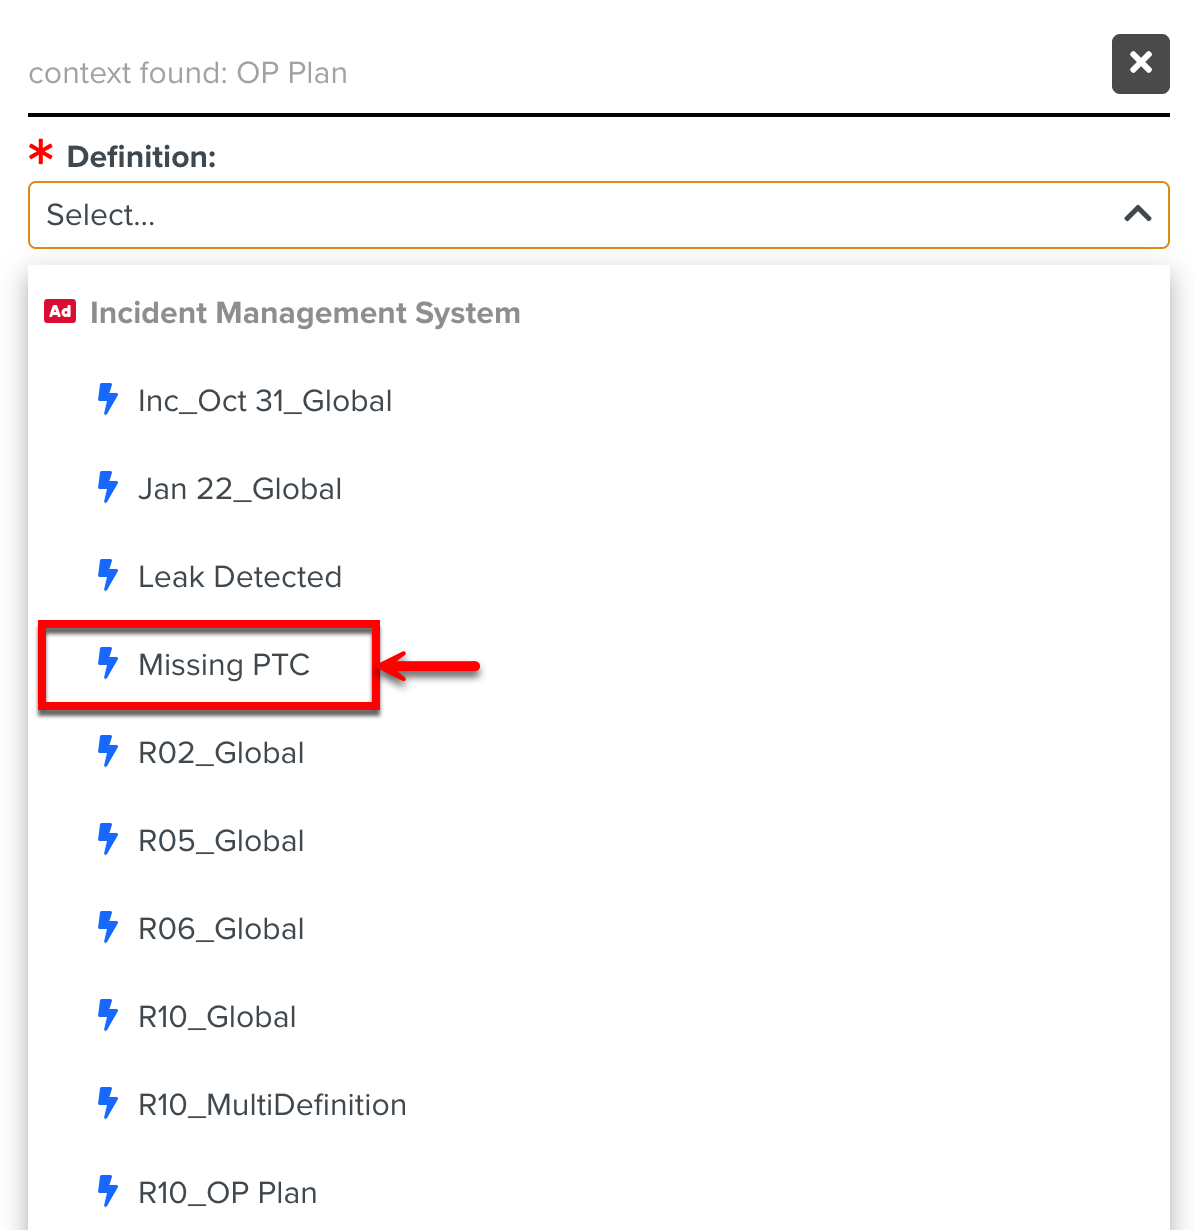
From the Incident Definition dropdown, select the required Incident. The Incidents are displayed under their respective Incident Groups in a hierarchical structure.
The fields that are configured for the Incident are displayed.
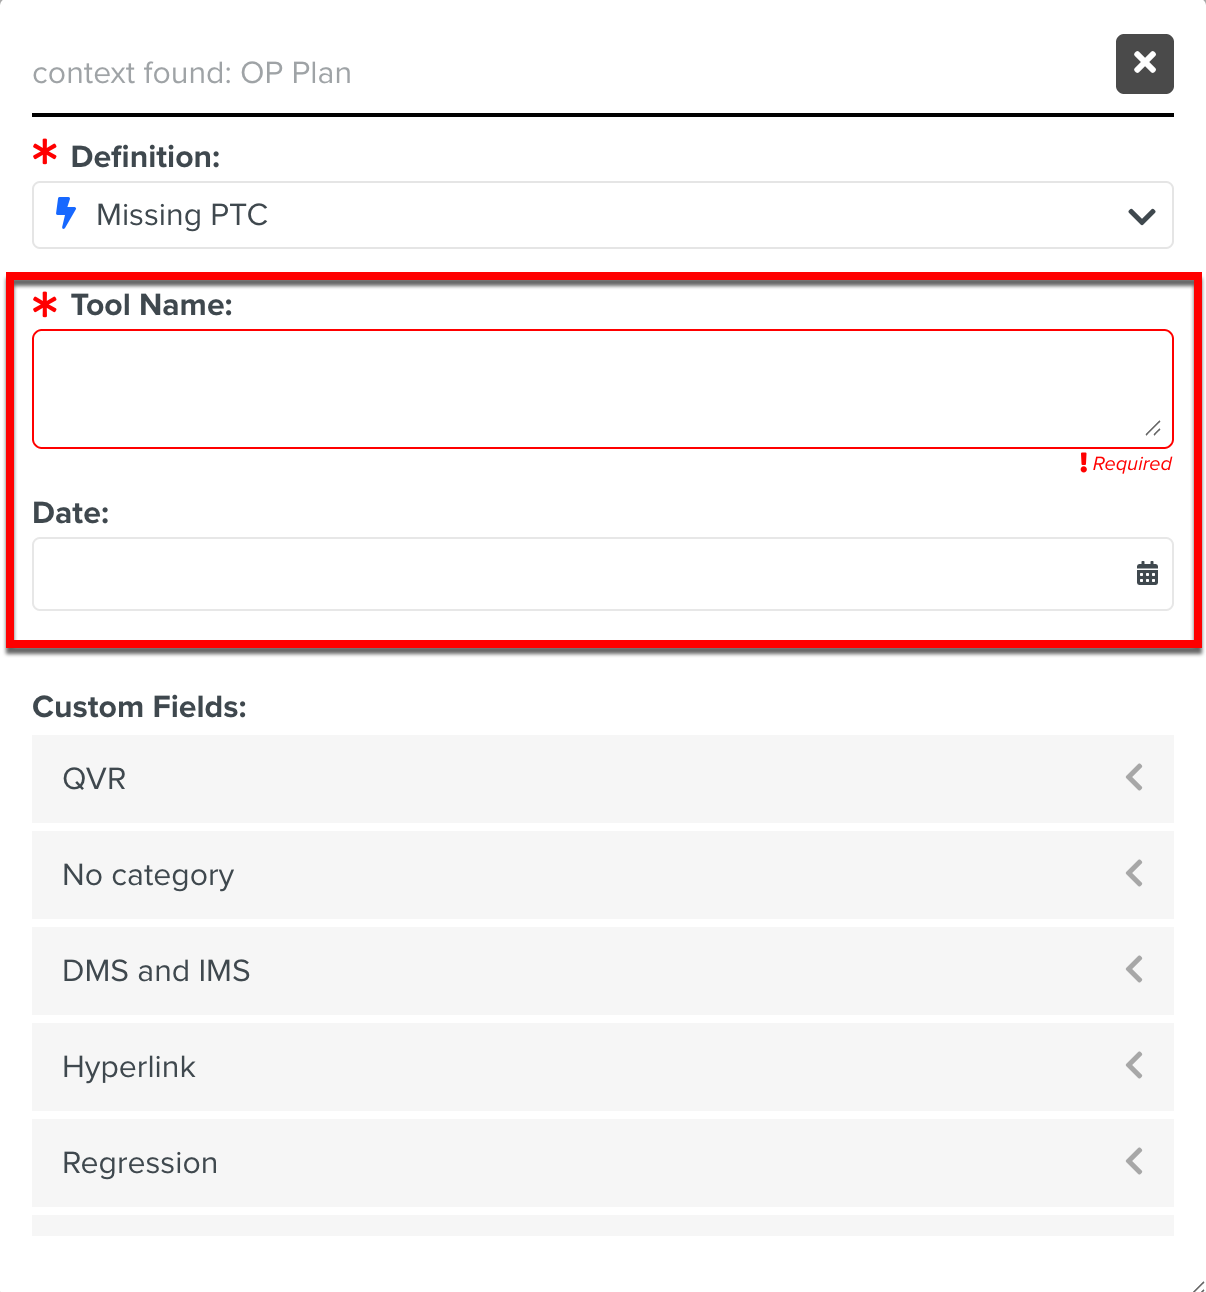
Add the details in the fields as shown below.
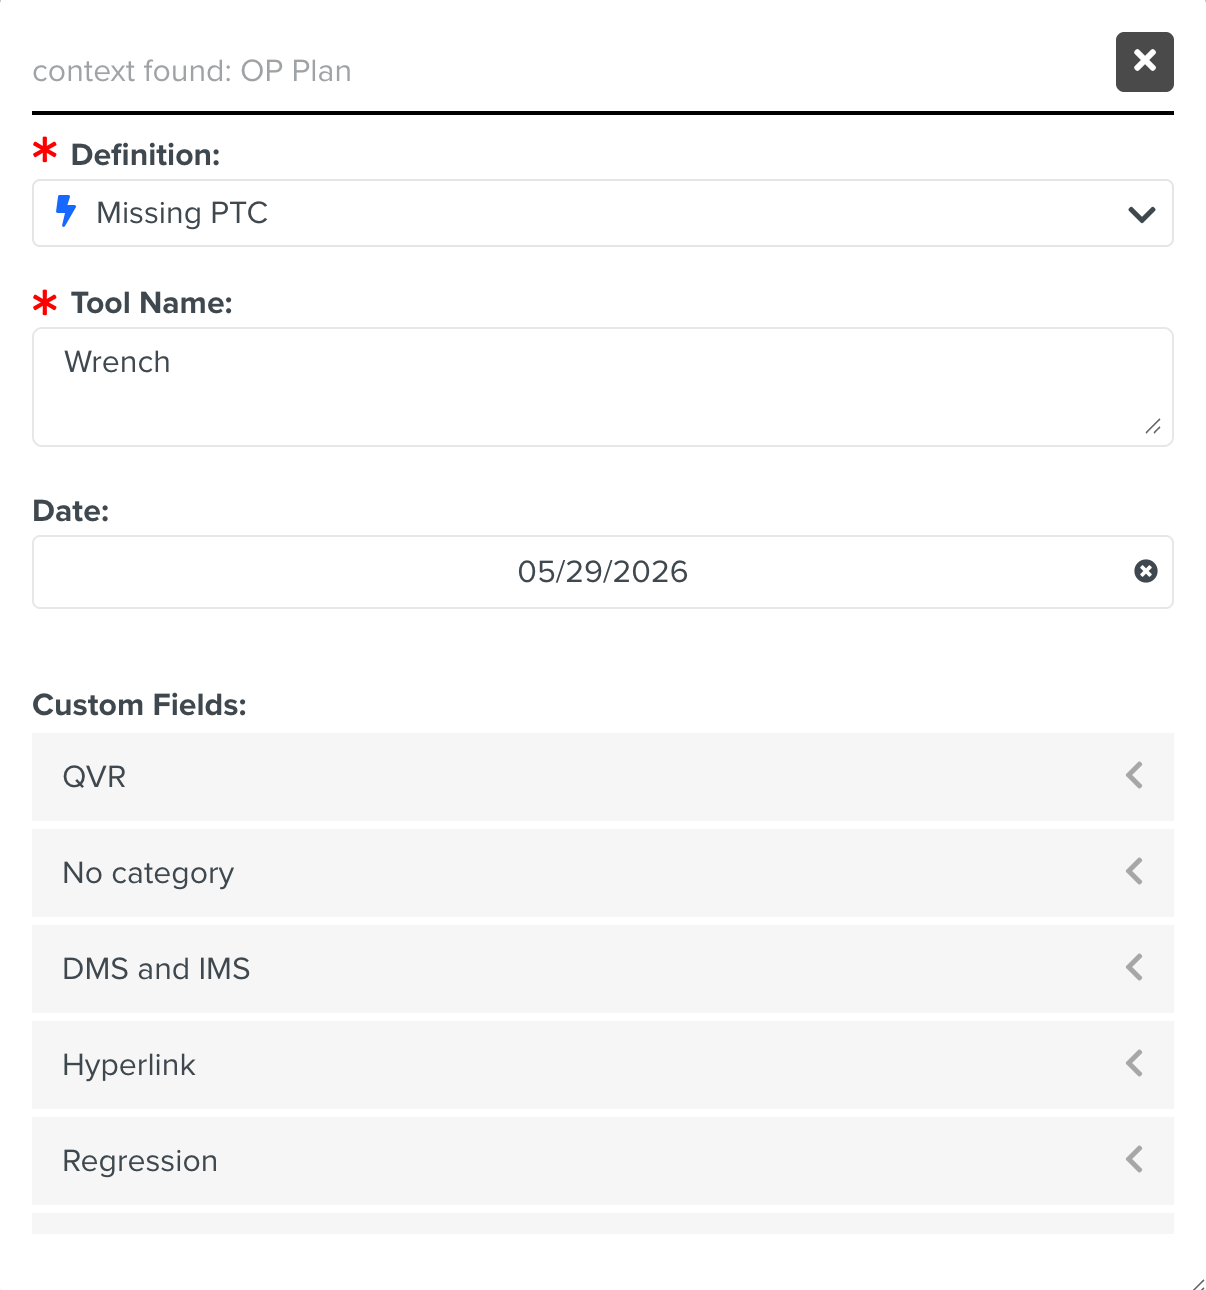
Note
For each Incident, the displayed fields may vary based on the Incident Definition.
[Optional] In the section Custom Fields , select a Custom Field from a category and fill in the values for the Custom Fields.
Note
All the Custom Fields that are defined for Incidents are displayed.
[Optional] Click the button to add images or files to the Incident. You can add multiple files as shown below.
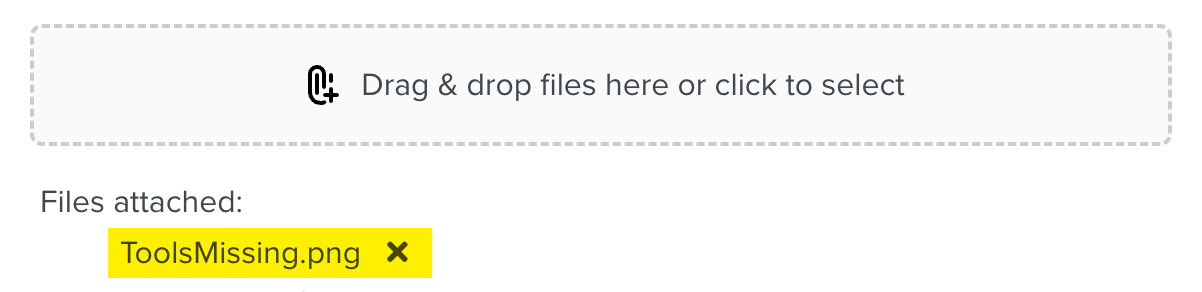
To remove a file, click
and Yes, Remove.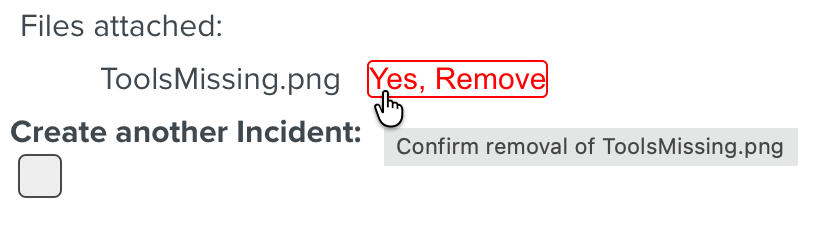
Note
All types of documents and media file formats of size under 30 MB are supported.
[Optional] Click Create another Incident to raise the same Incident again. Selecting this option opens an Incident dialog with the same definition selected for creating another Incident.
Click Save.
The Incident is raised from the selected Operation Plan.
You can view all the raised Incidents in the Incident Dashboard. However, you can view the list of raised Incidents for a selected Task in the screen Task.
To view the raised Incidents in the screen Task:
On the main menu, go to Tasks > Task.
The screen Task appears.
Select a Task with Incidents to view the Incident details.
Note
You cannot select multiple Tasks to view the raised Incidents.
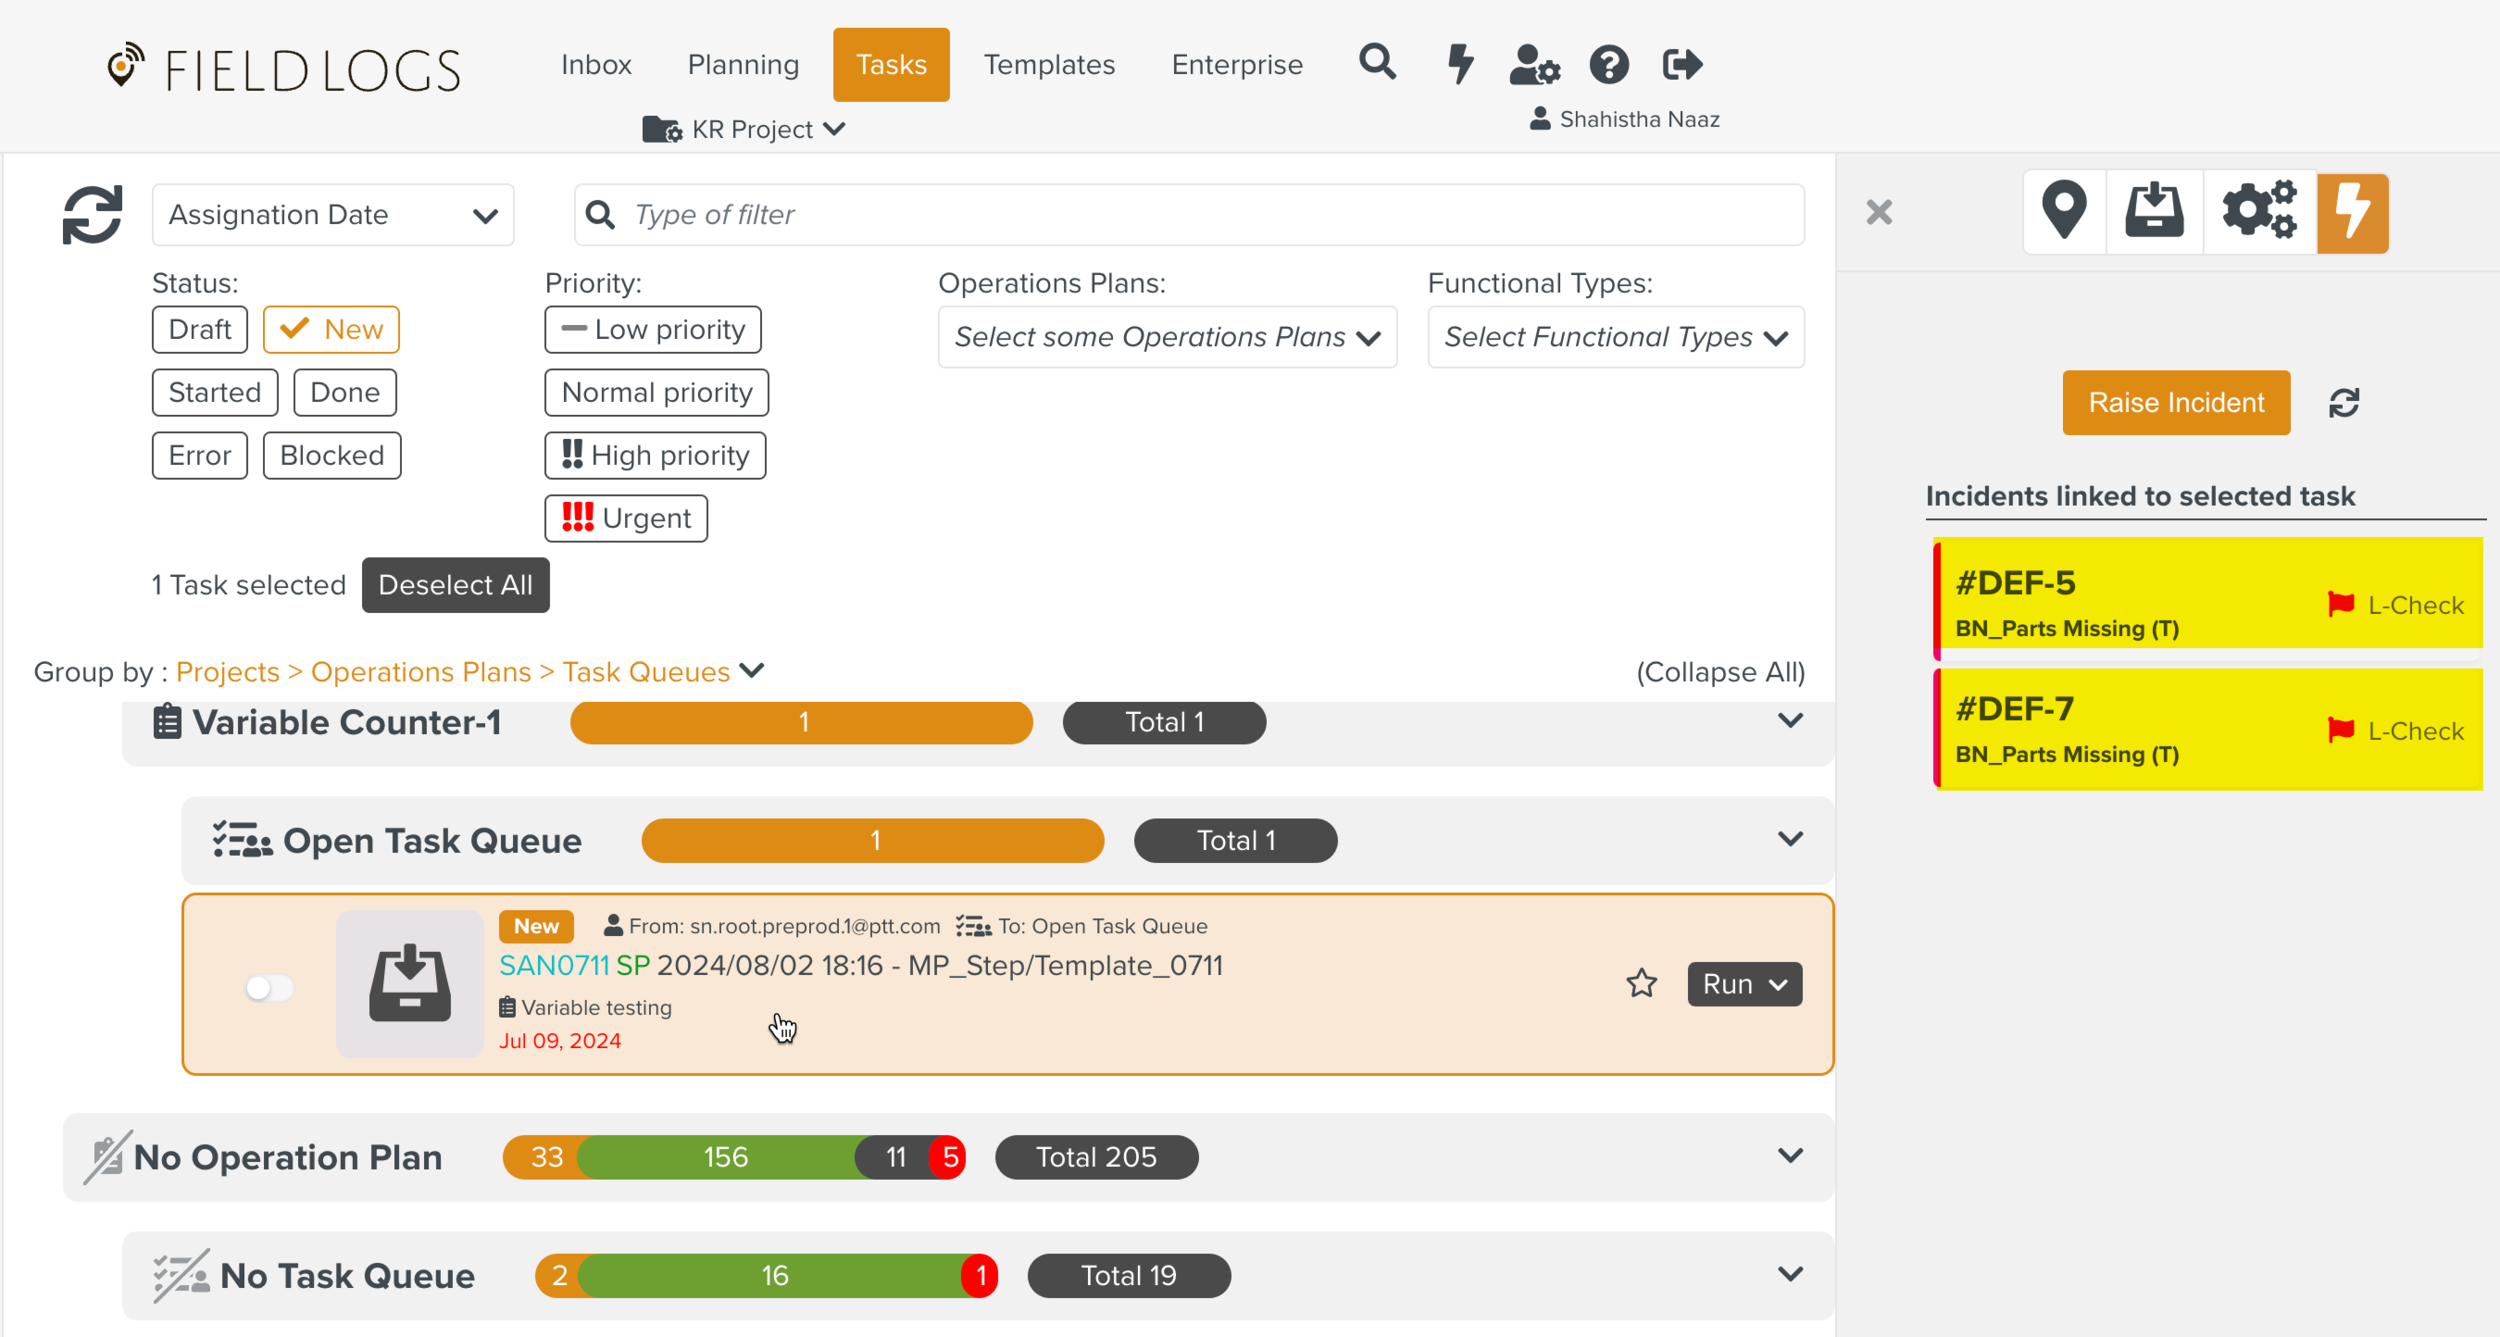
Click the
 in the right pane to view the Incidents.
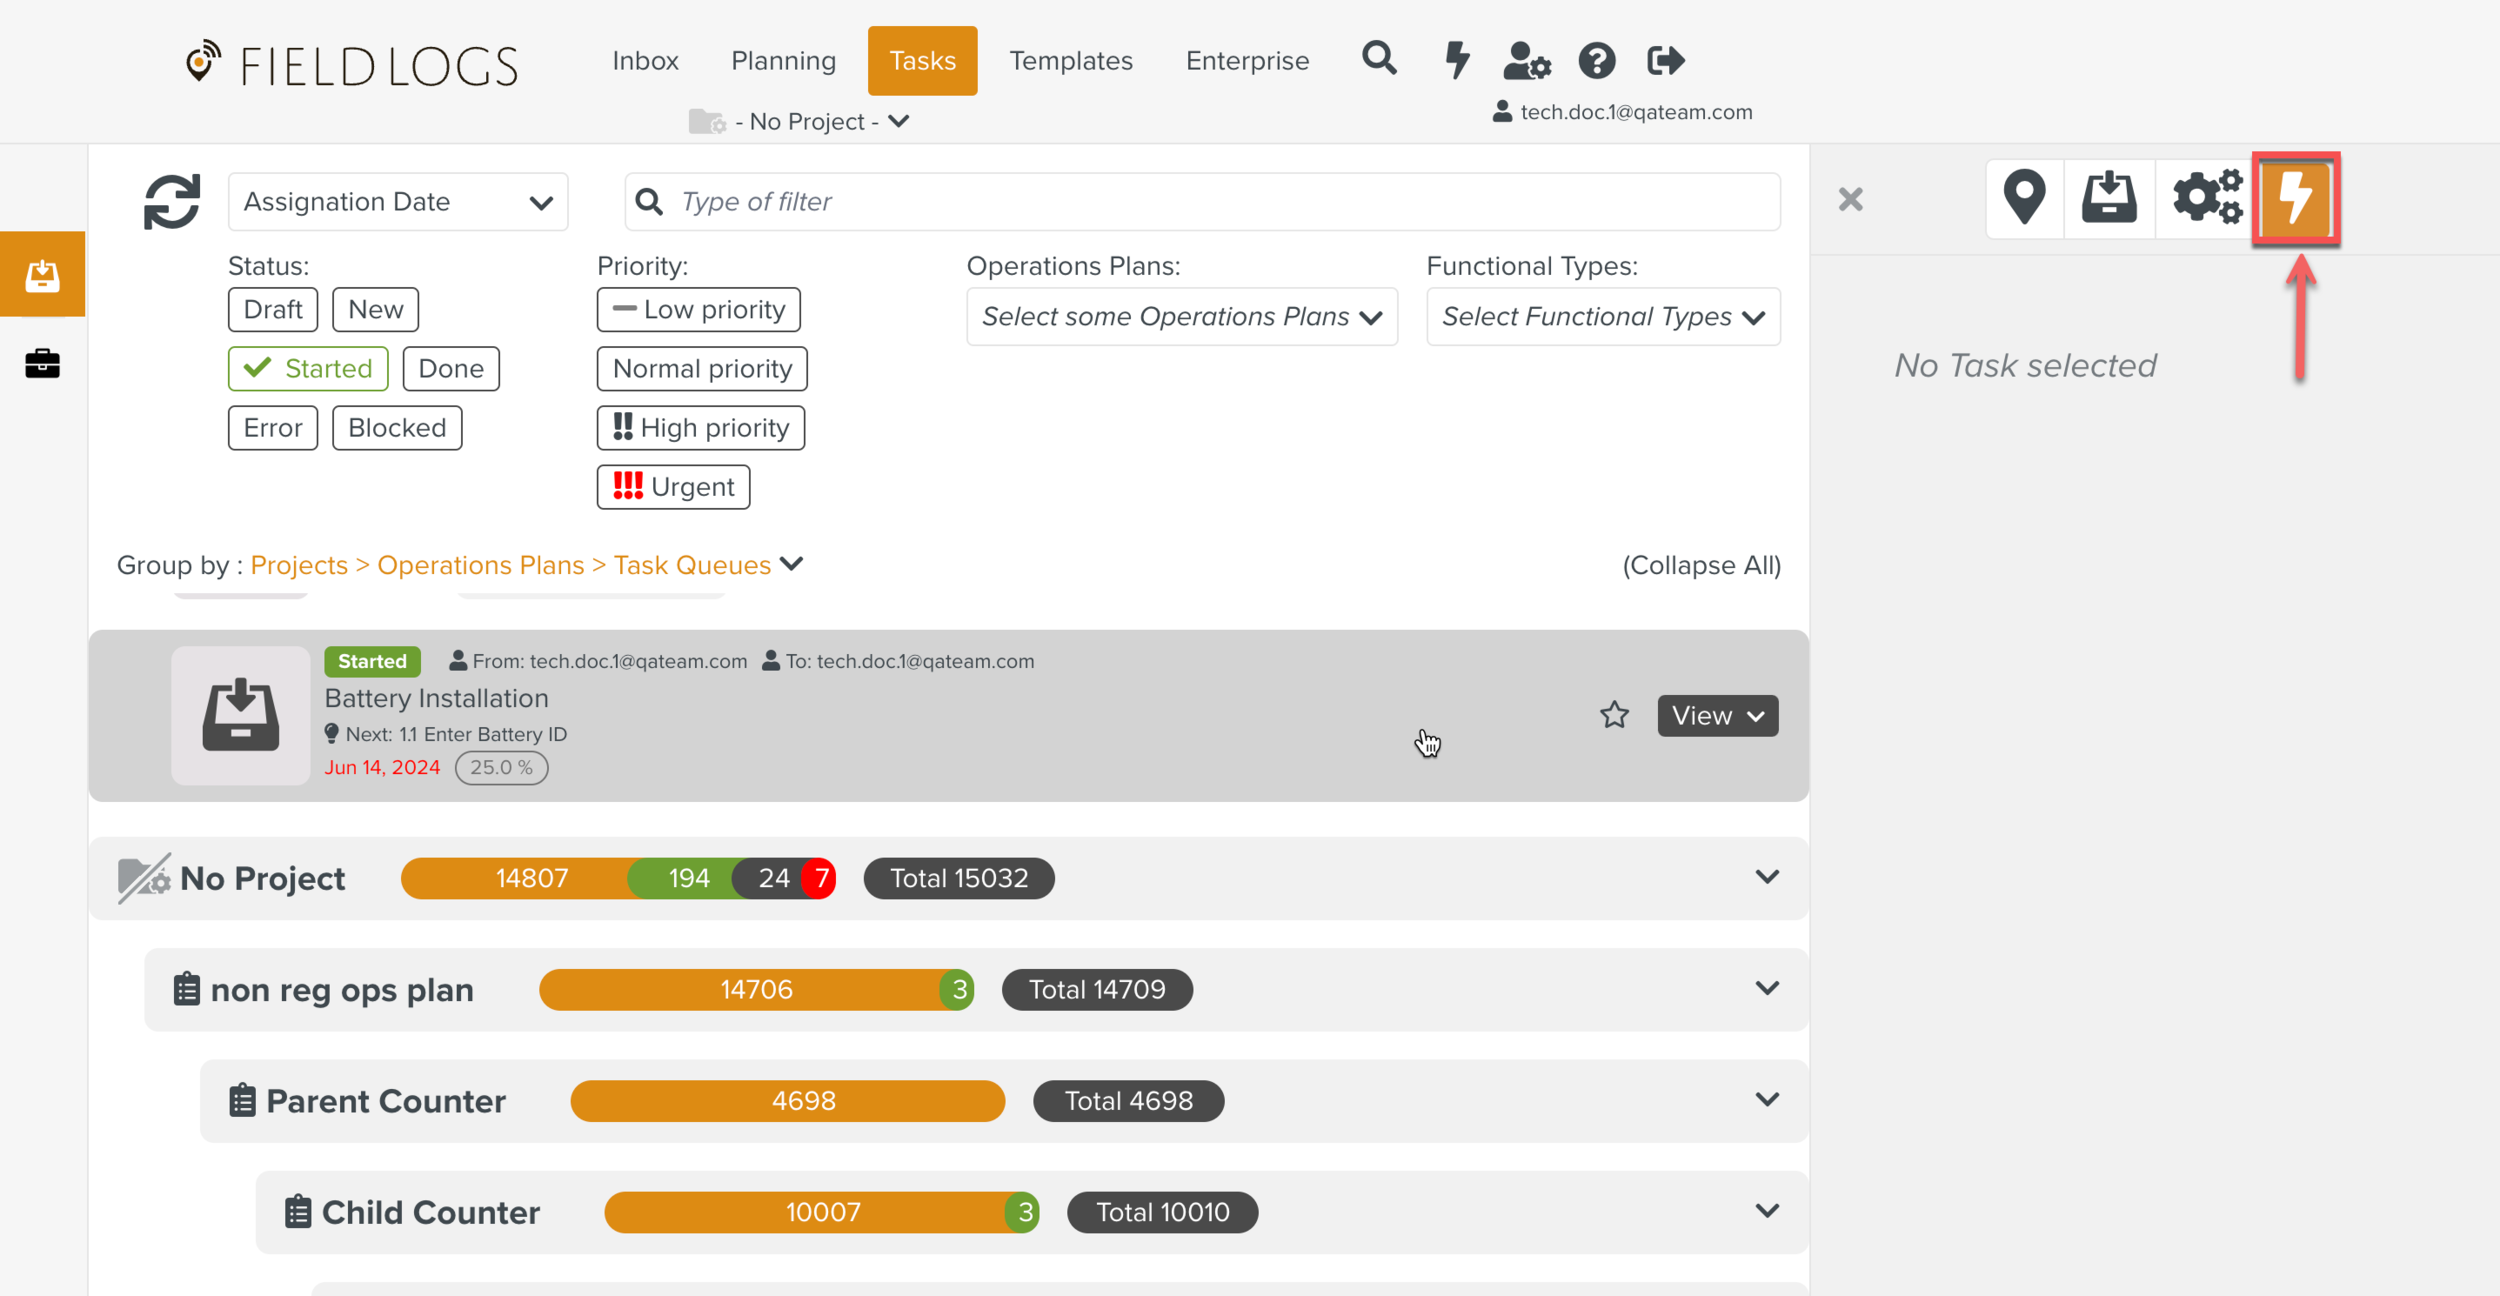
The button appears on the right pane.
Click the
 to view the raised Incidents.
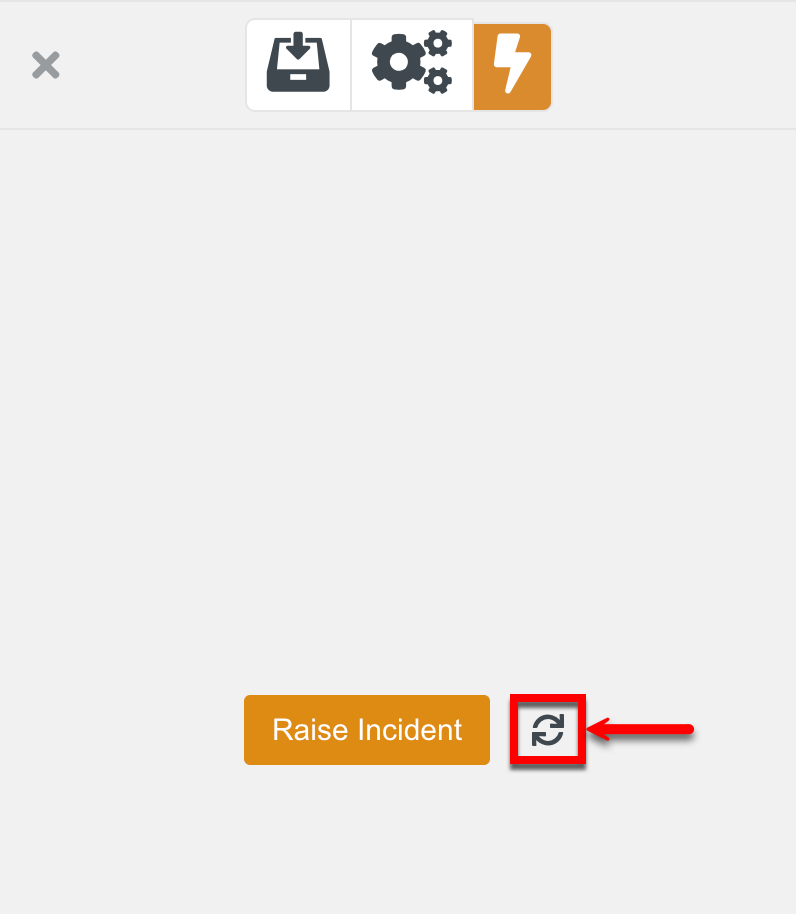
Click the required raised Incident to view its details.
Alternatively, you can view the Incident details by selecting an Incident from the Incident indicator on the Task.

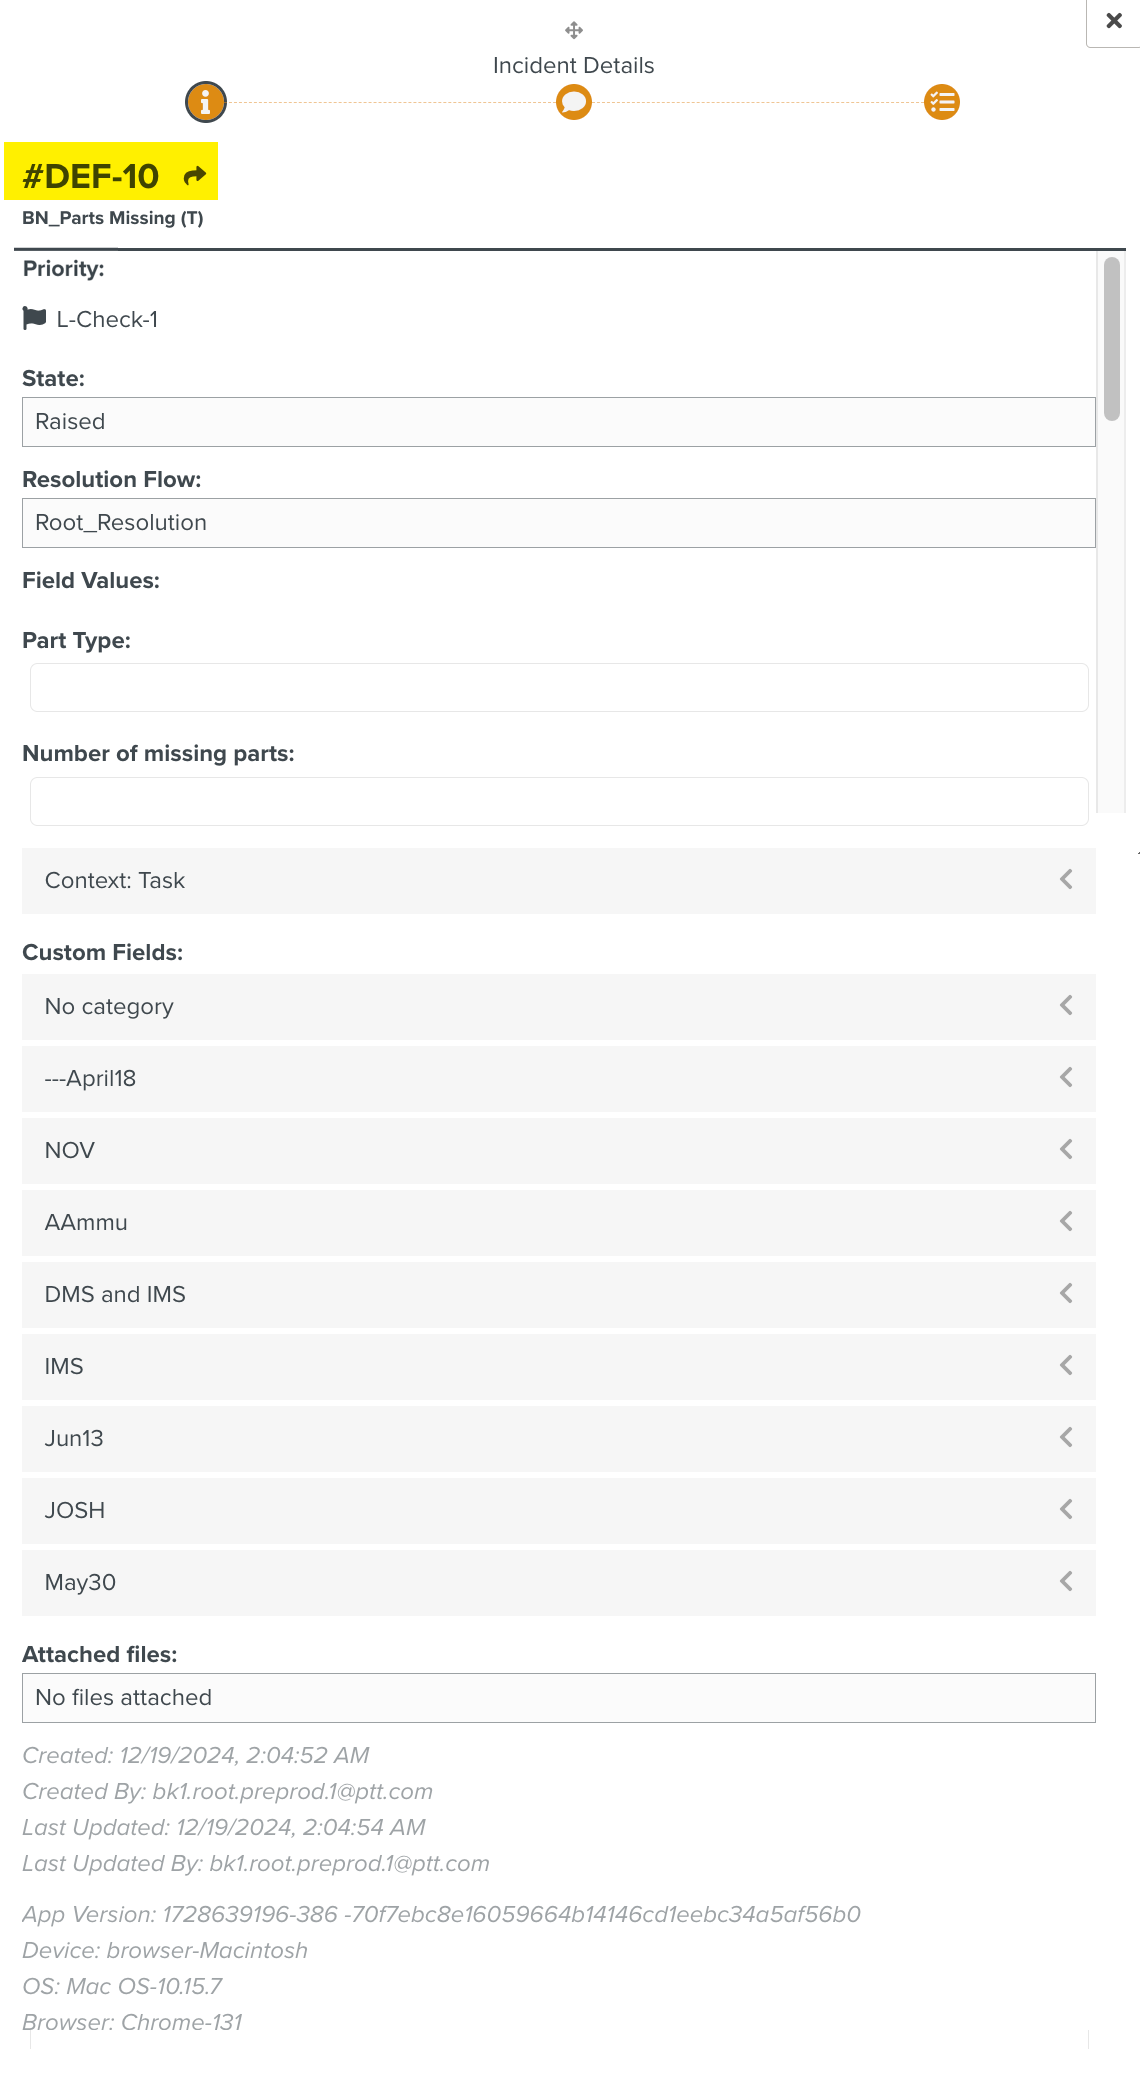
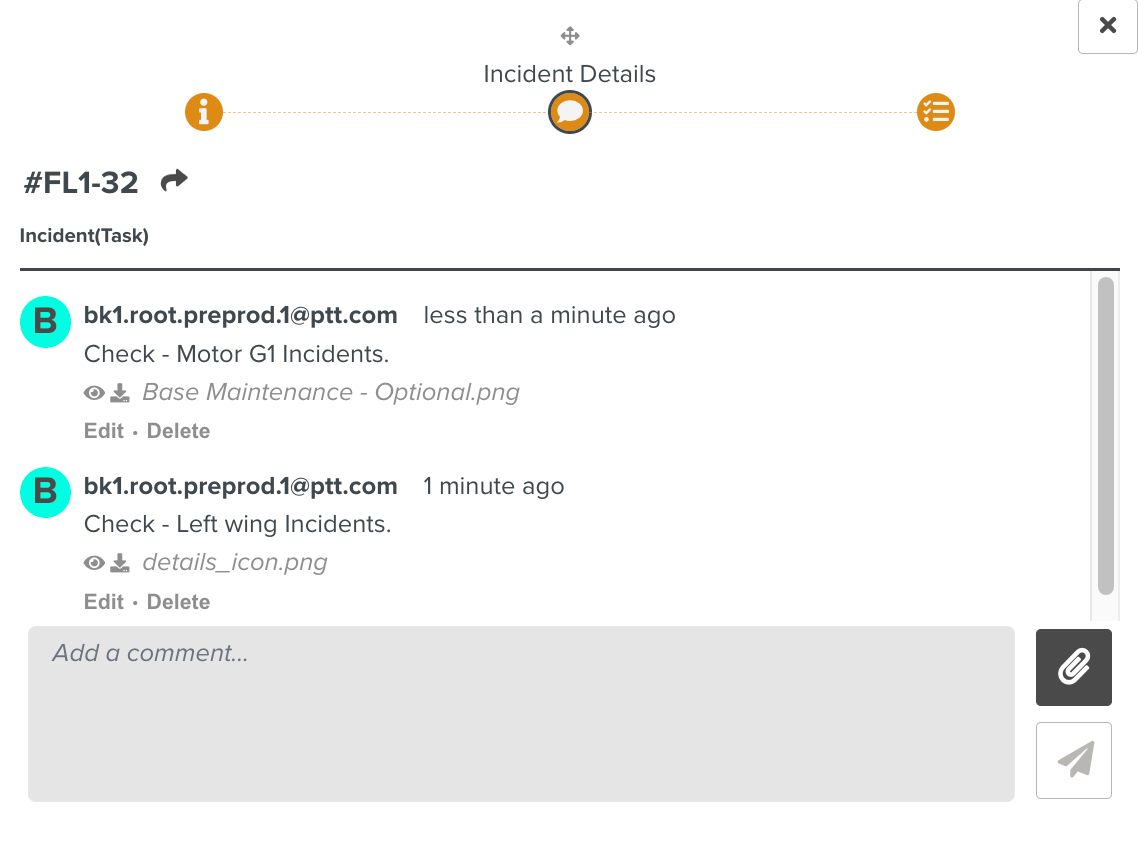
The Incident Details dialog appears.

The Incident Details dialog allows a user to view details, tasks and add/edit comments in an Incident.

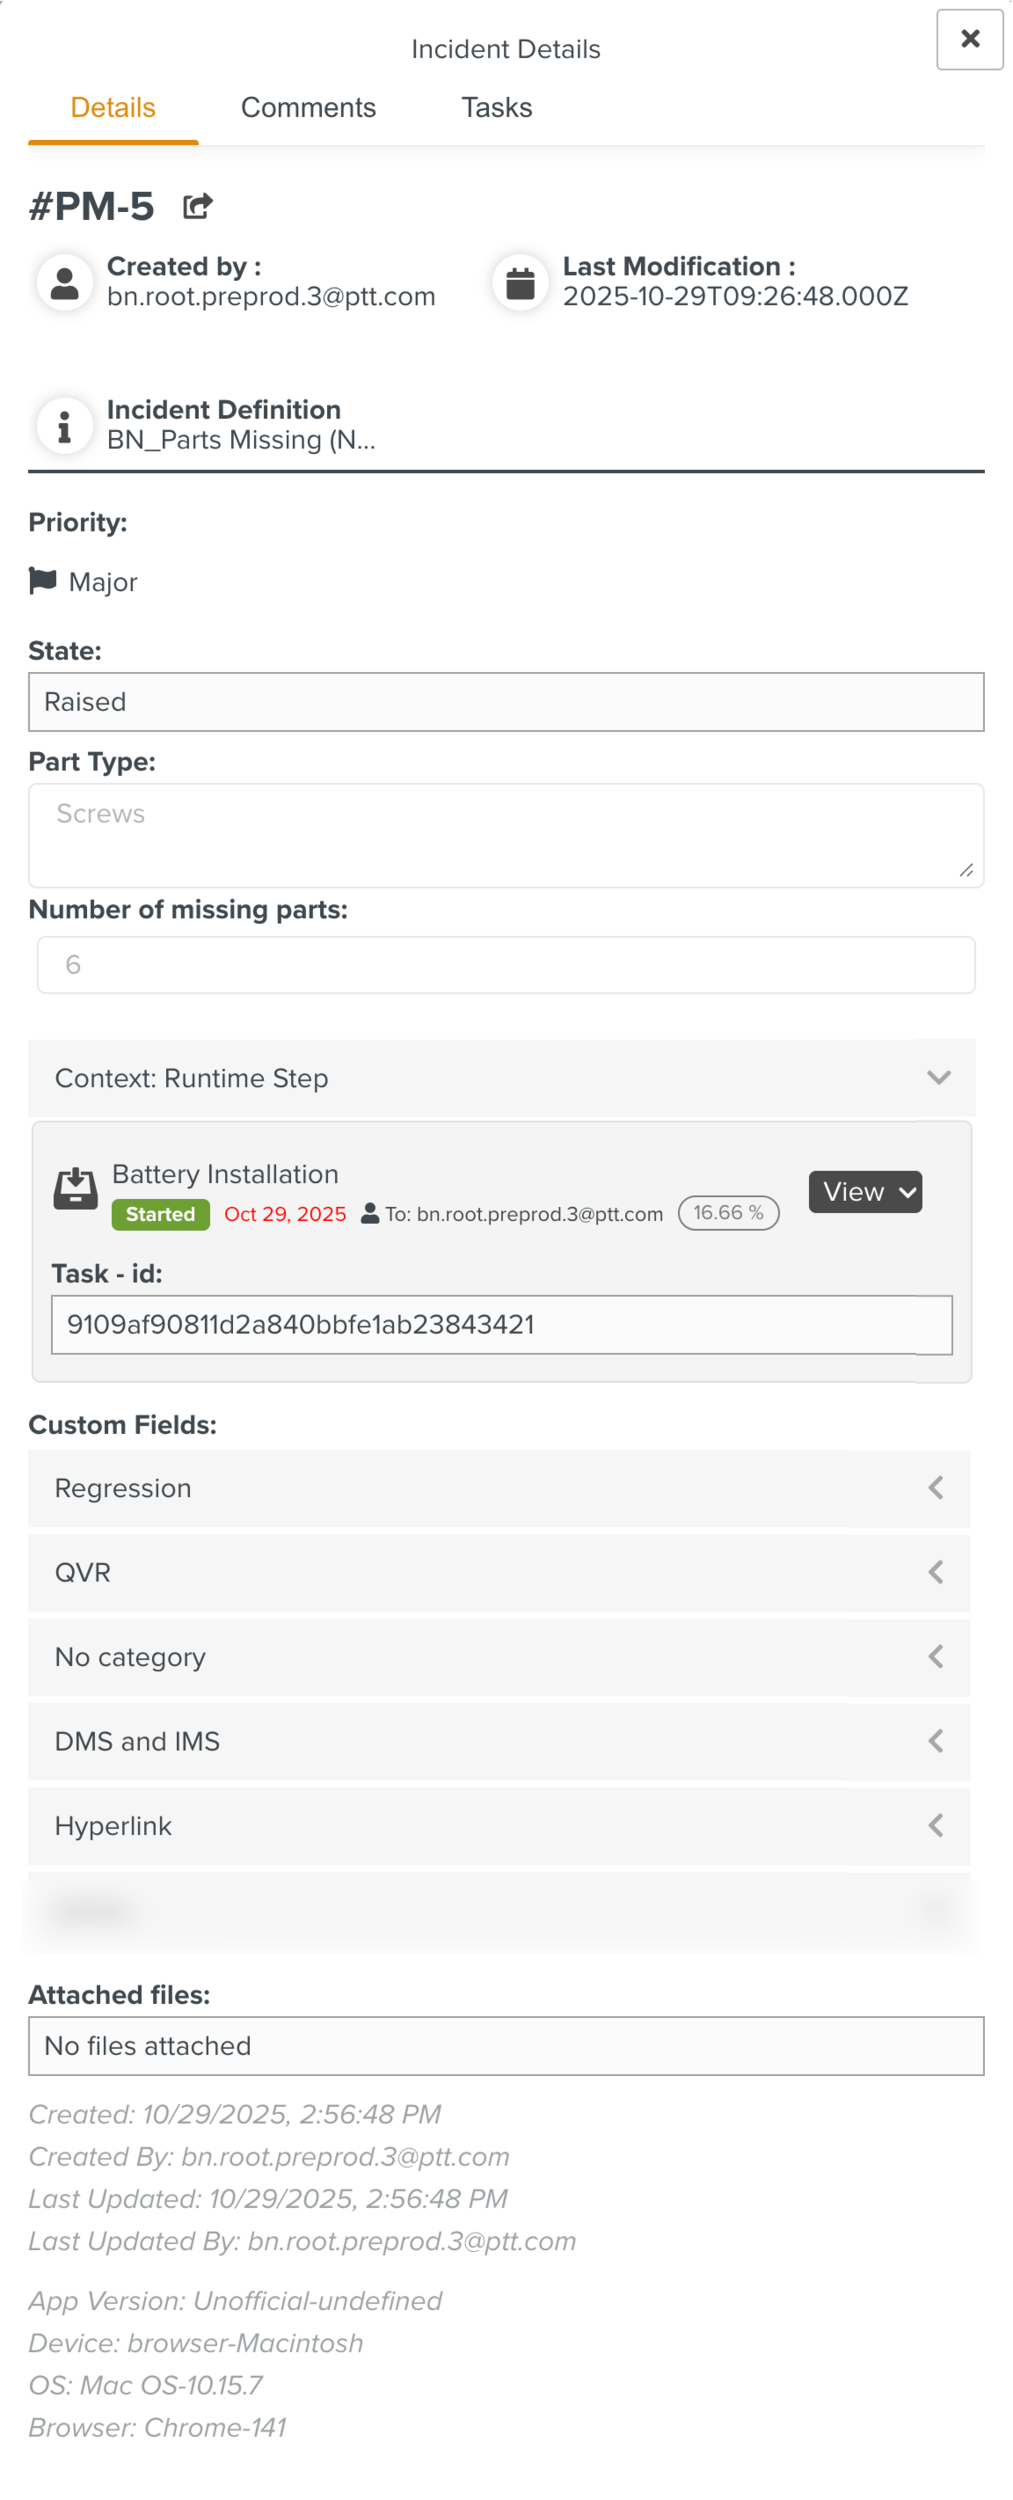
Details: Displays all the details of an Incident. The Incident Definition, the user details, the Incident fields, Context information, Custom Fields and attachments are displayed.
Note
The text boxes can be vertically resized to display the complete text entered as shown in the example below.

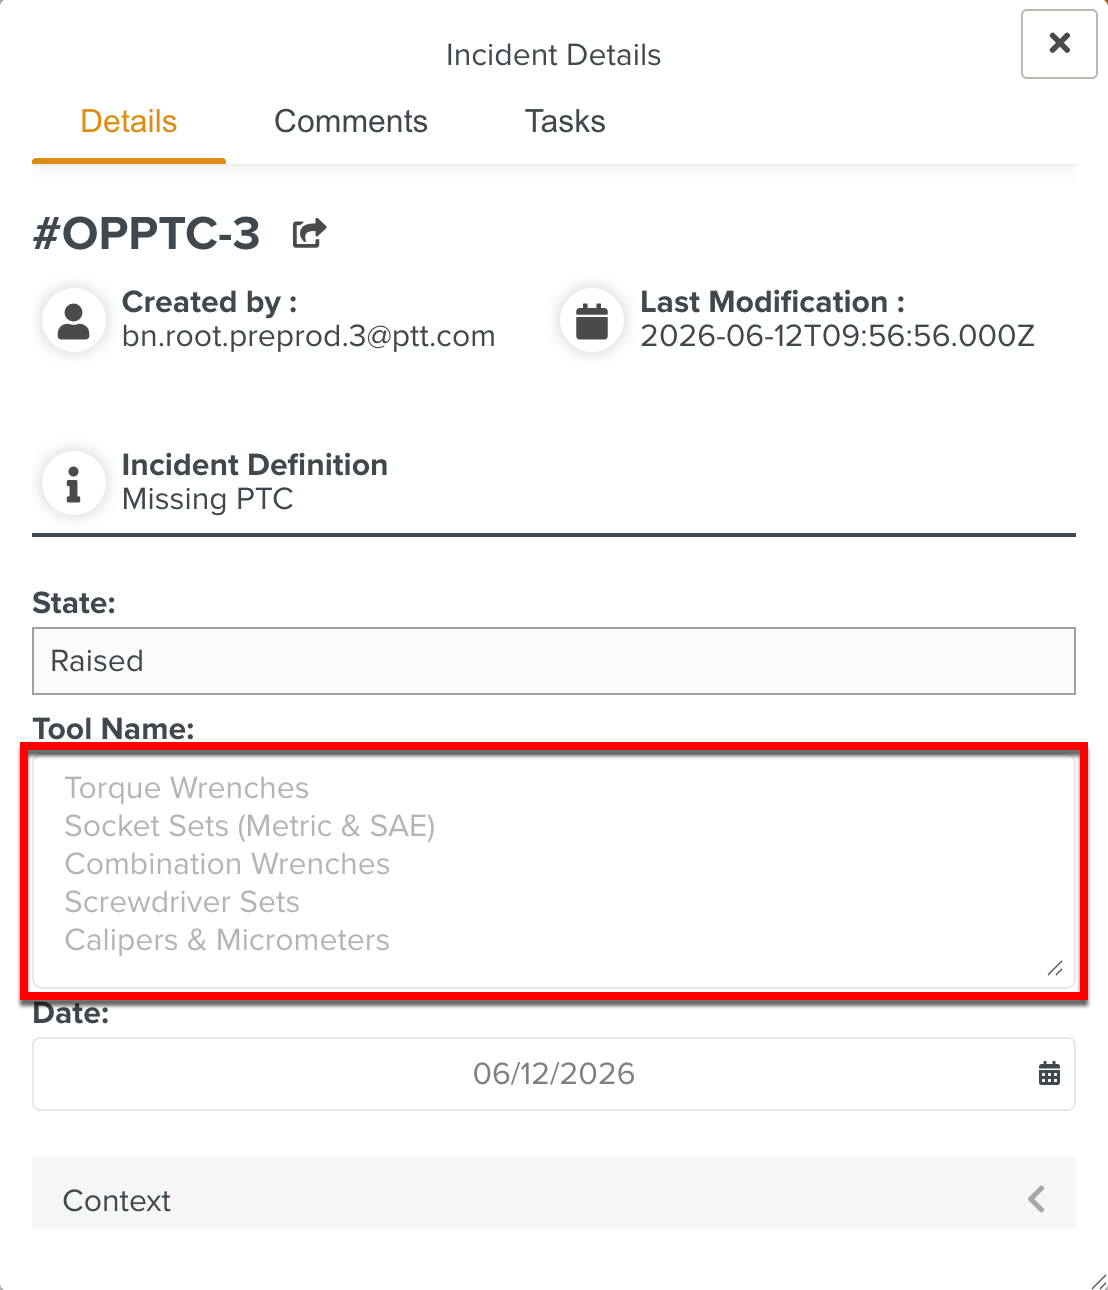
Comments: Allows you to add/edit comments in an Incident. You can also add attachments to a comment. The comment trail on the Incident can also be seen.
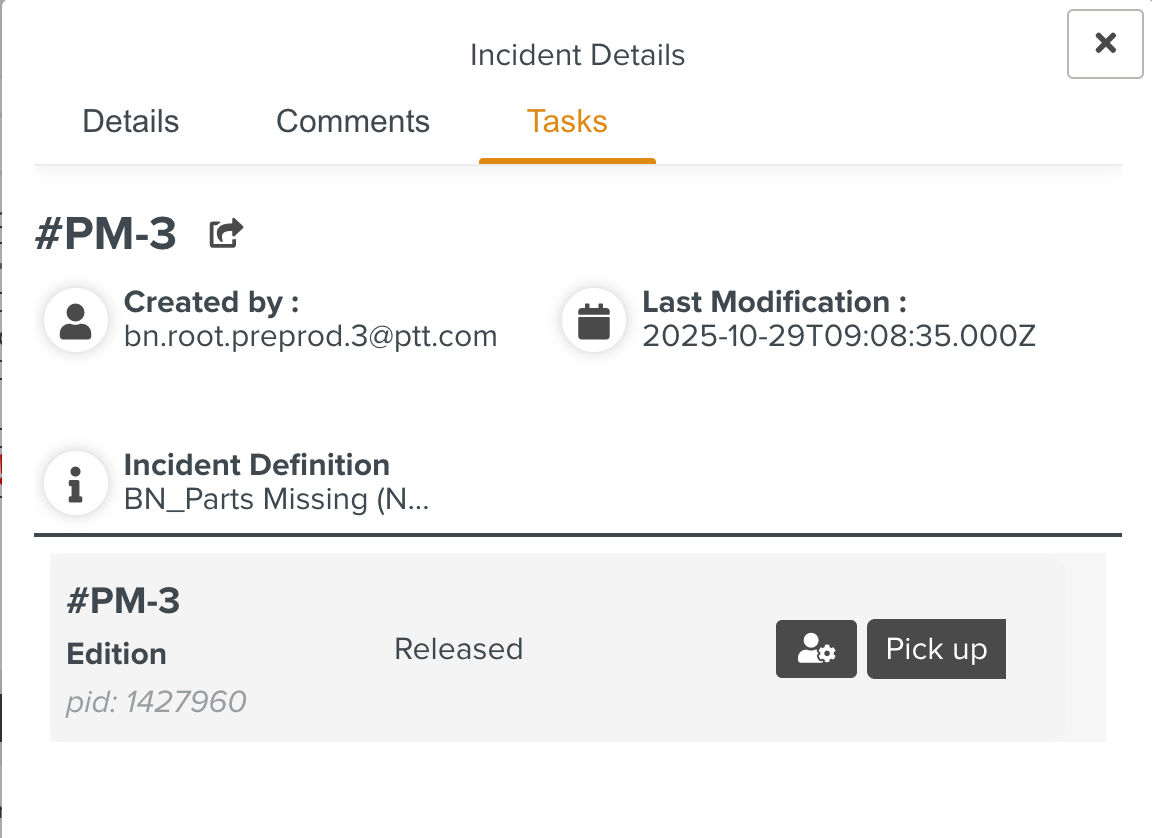
Tasks: Allows you to view tasks in the Incident.
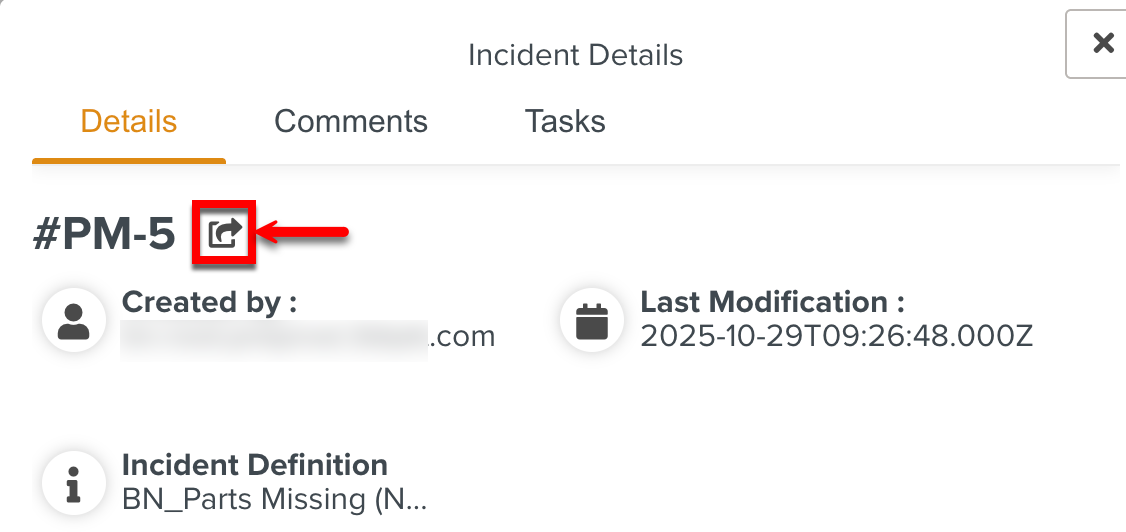
On clicking Details, the following actions and details are available.
Share Link: Allows a user to share an Incident. Only users with access to the Incident Management System can access the Incident using this link.
Created by: Displays the details of the user who raised the Incident.
Last Modification: Displays the last modified date and time of the Incident.
Incident Definition: Displays the Incident definition used to raise the Incident.
State: Displays the state of the Incident as Raised. The State is auto-updated based on the resolution progress.

Field Values: Displays the fields and values entered while raising an Incident.
Context: Displays the Context fields selected for the Task Context Incident during Incident Definition.
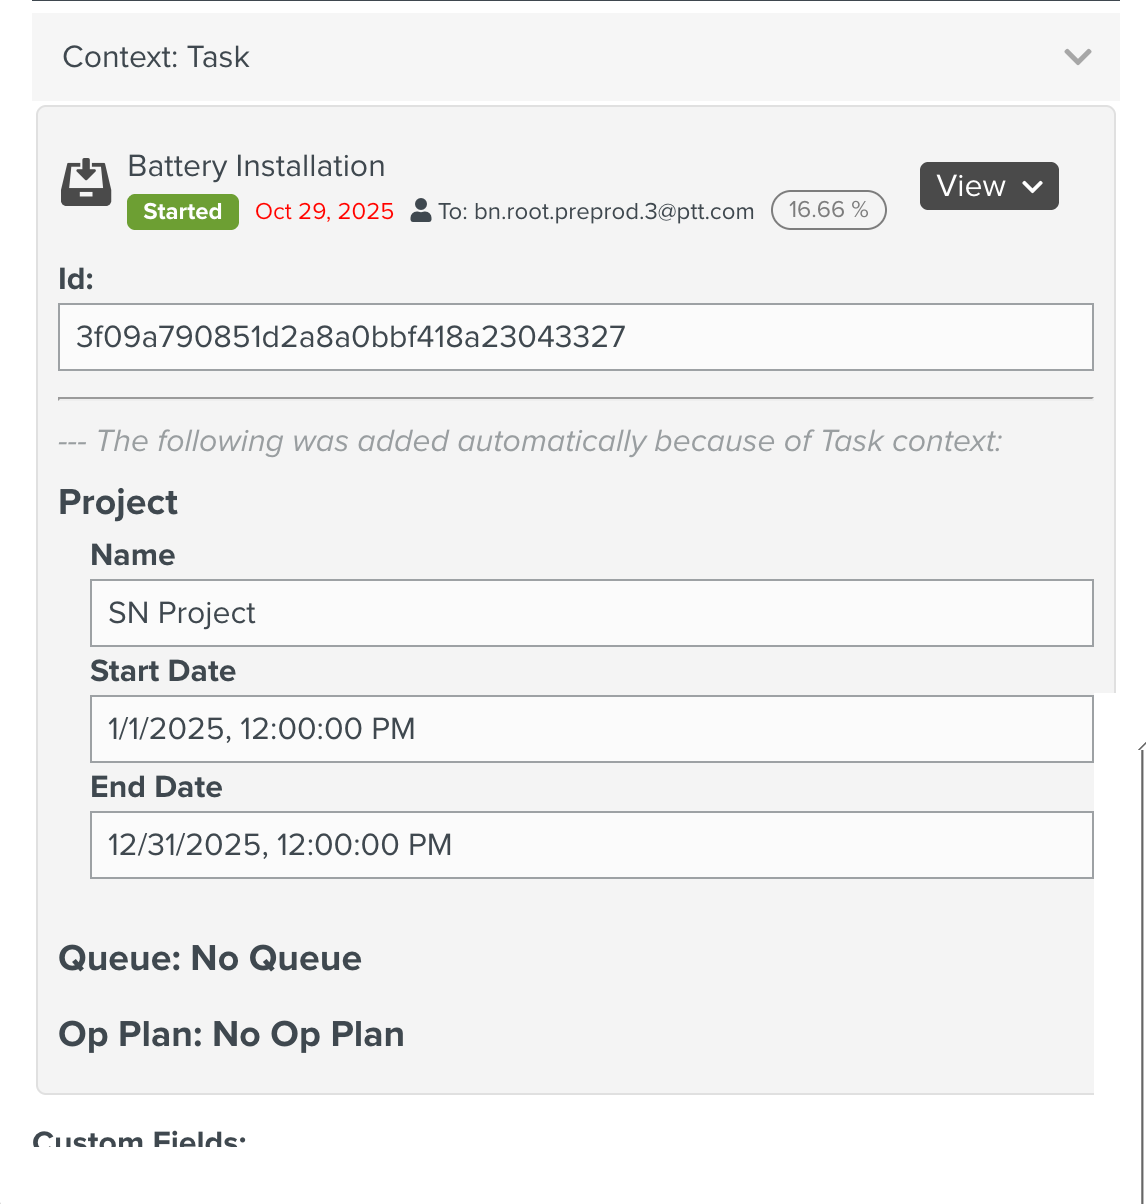
Some additional details of the Task that are automatically displayed for Task Context Incidents are listed below:
Project: The Project Details such as Name, Start Date, and End Date are displayed.
Queue: The Task Queue details such as Name, Description, and Creation Date are displayed.
Op Plan: The Operation Plan details such as Name, Creation Date, Time Zone, and Assigner are displayed.
View: If an Incident was raised from a Task or Runtime Step, its context now includes a Task Component with a button that allows you to either go to the Task or view the Task info.
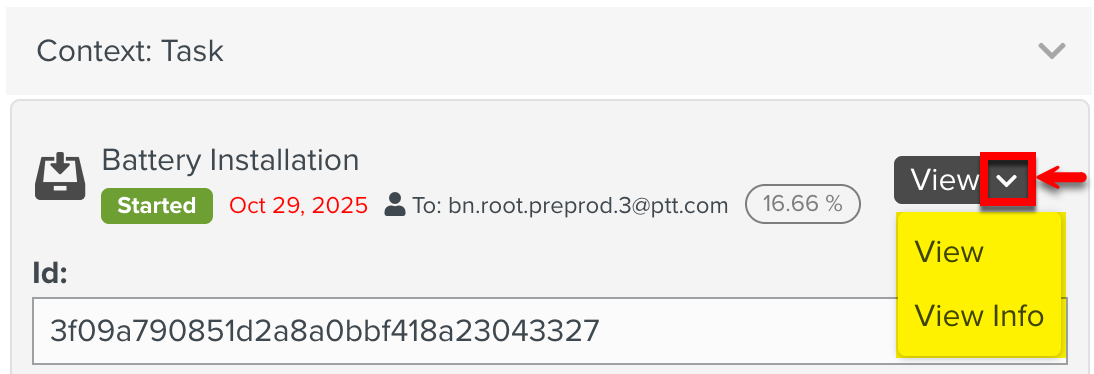
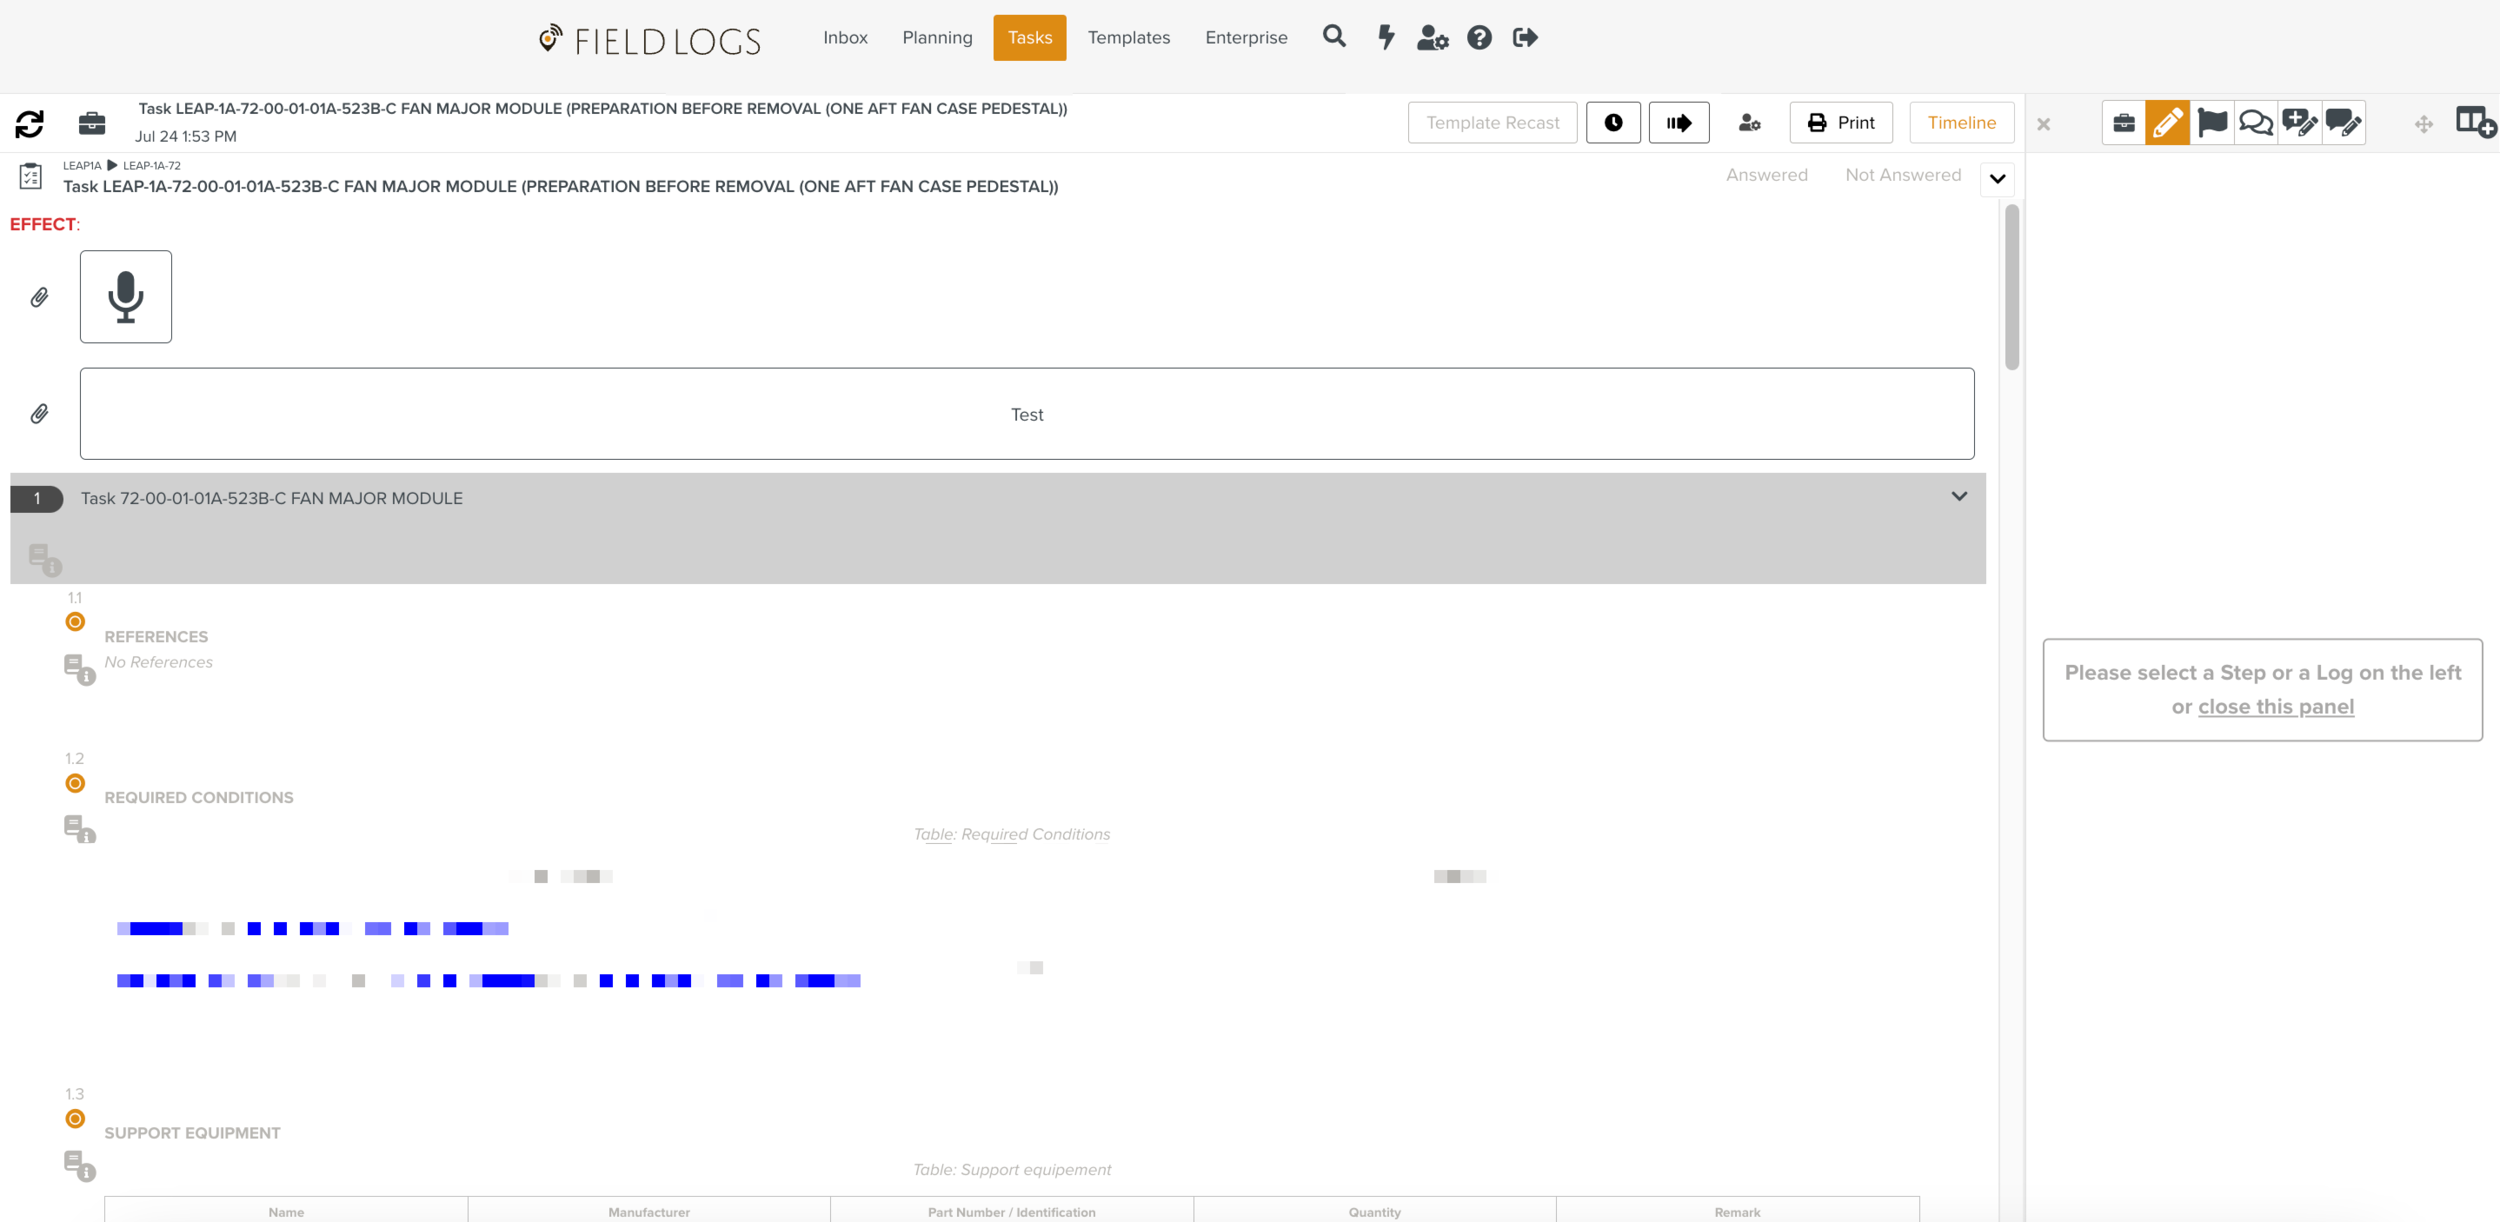
The View option takes you to the Task.
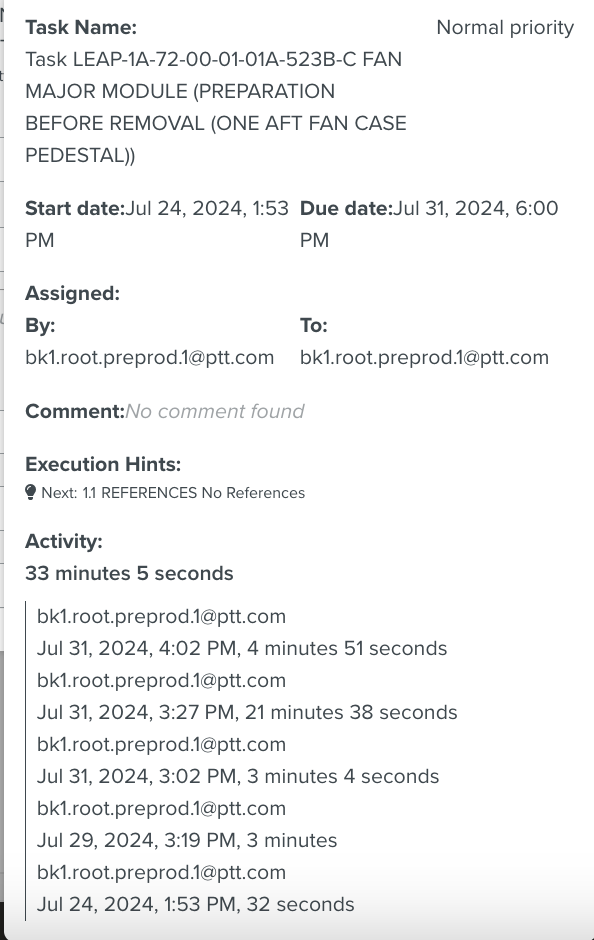
The View info option displays the information about the Task.
Custom Fields: Displays the Custom Fields available for that Incident.
Attach Files: Displays the list of files or images attached to the Incident. You can view, download, and delete the files.

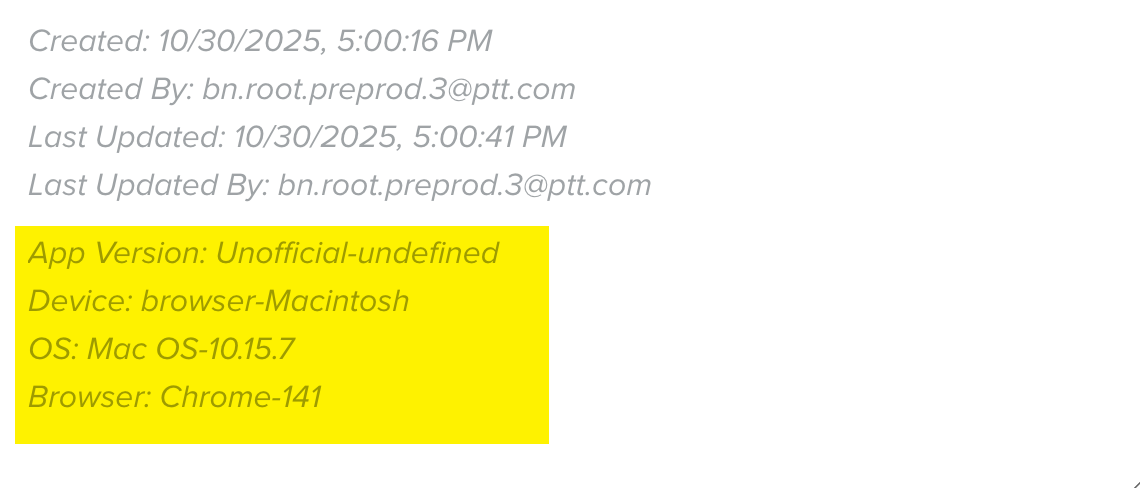
Other details that are displayed are:
Created: Displays the date and time of raising the Incident.
Created By: Displays the details of the user who raised an Incident.
Last Updated: Displays the last modified date and time of the Incident.
Last Updated By: Displays the details of the user who last modified the Incident.
App Version, Device, OS, and Browser details as shown below.
Note
The Incident Details dialog is resizable and can be moved anywhere around the screen.