Adding a Configurator Counter
A Configurator Counter adds Configurations to an Operation Plan. Using these Configurations, you can execute a subset of Actions defined in the Counter. This is useful when many Actions are defined, but only a few are needed.
The Counter contains information about the Configuration and the corresponding Action. The Action is made up of instances of one or more Templates. You can execute specific Templates based on the Configuration of an Operation Plan.
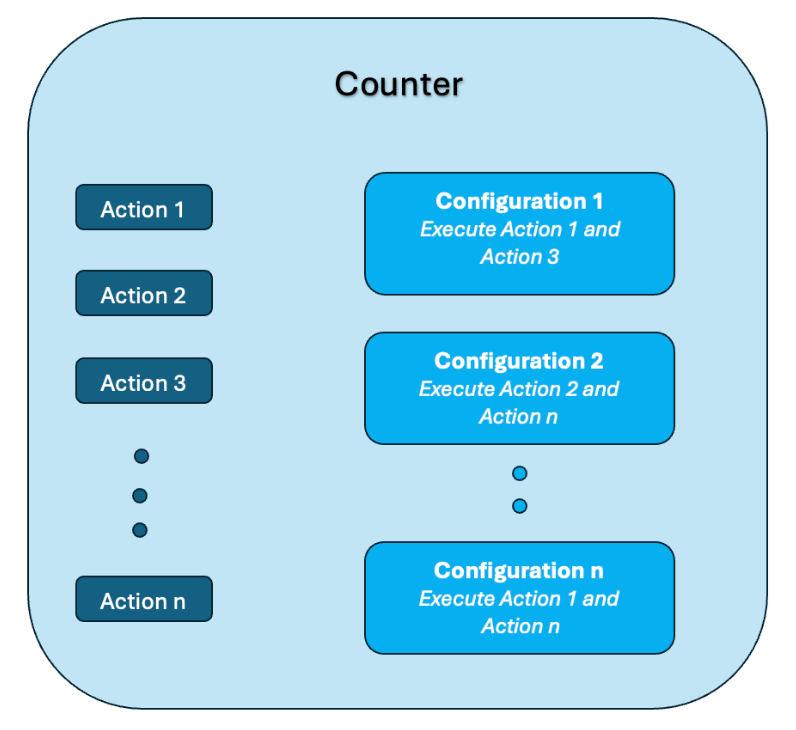 |
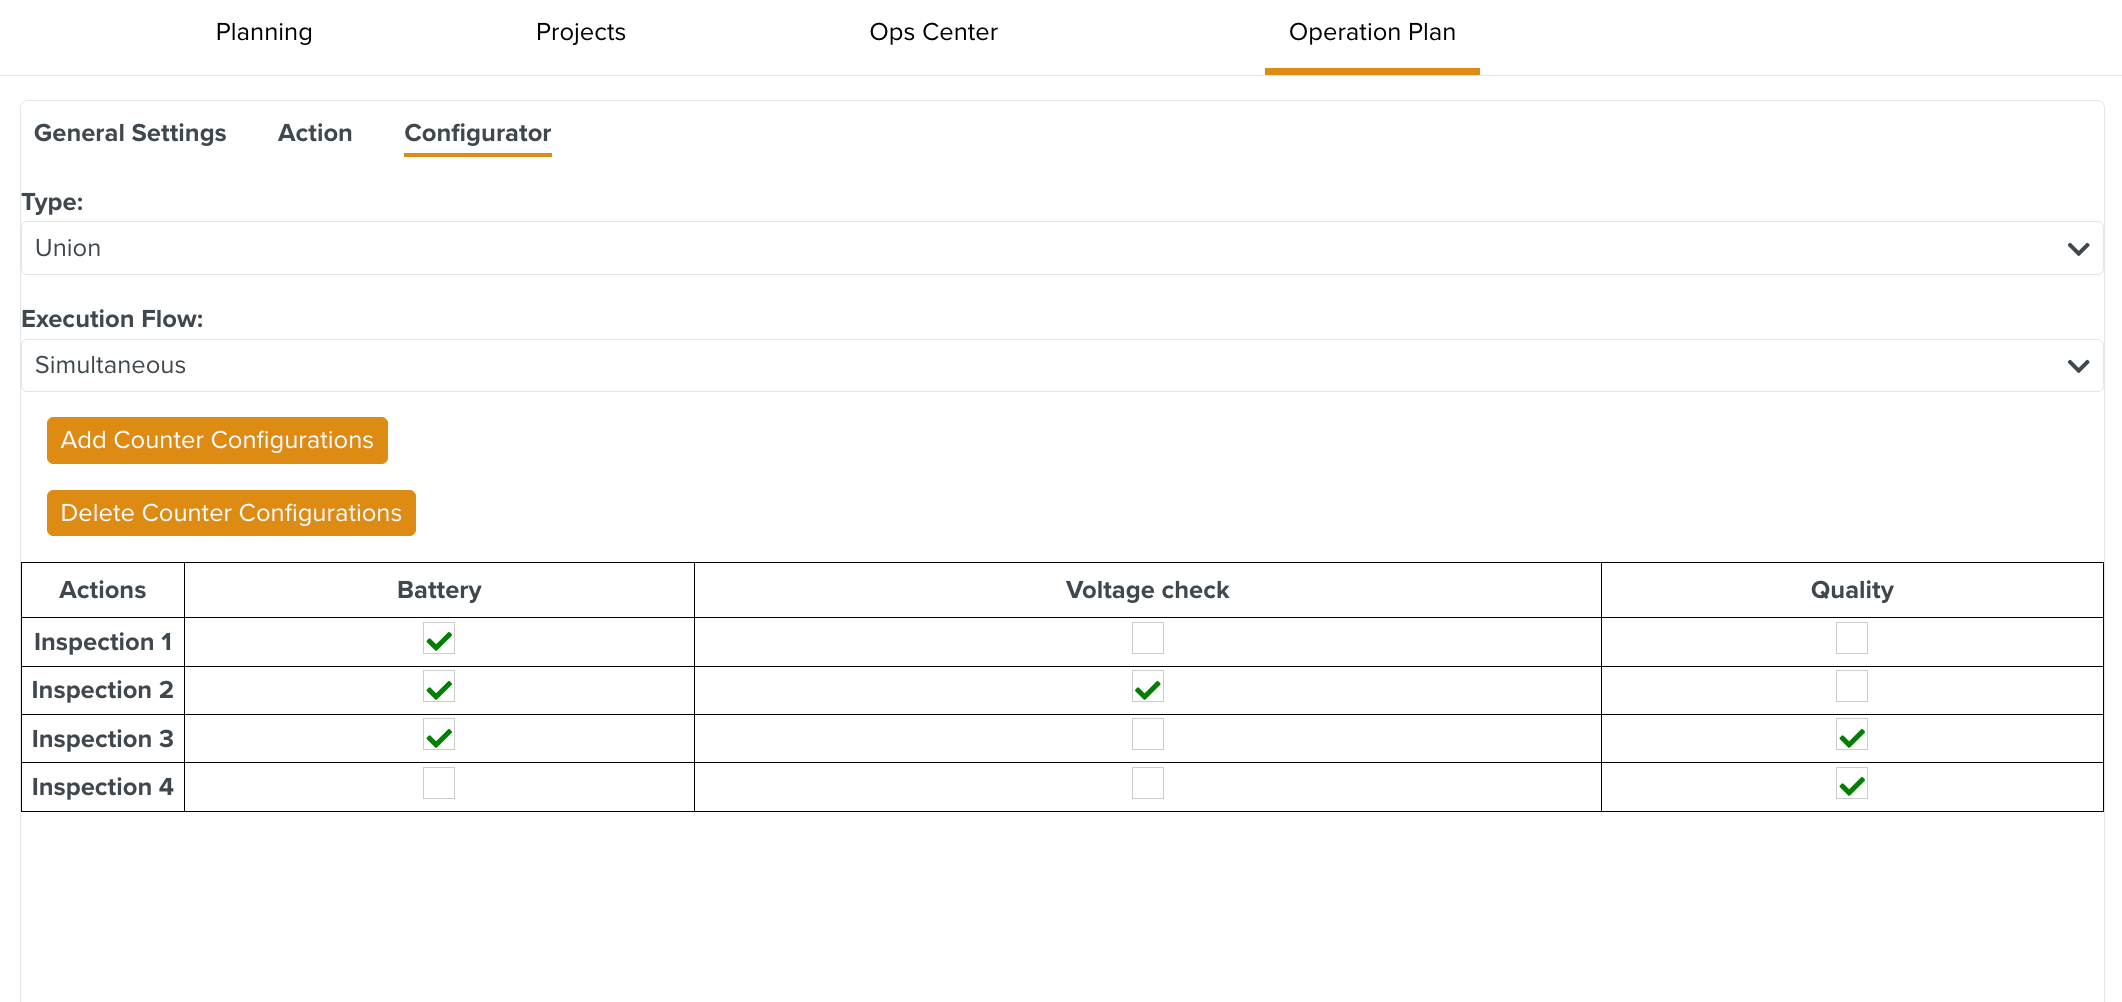
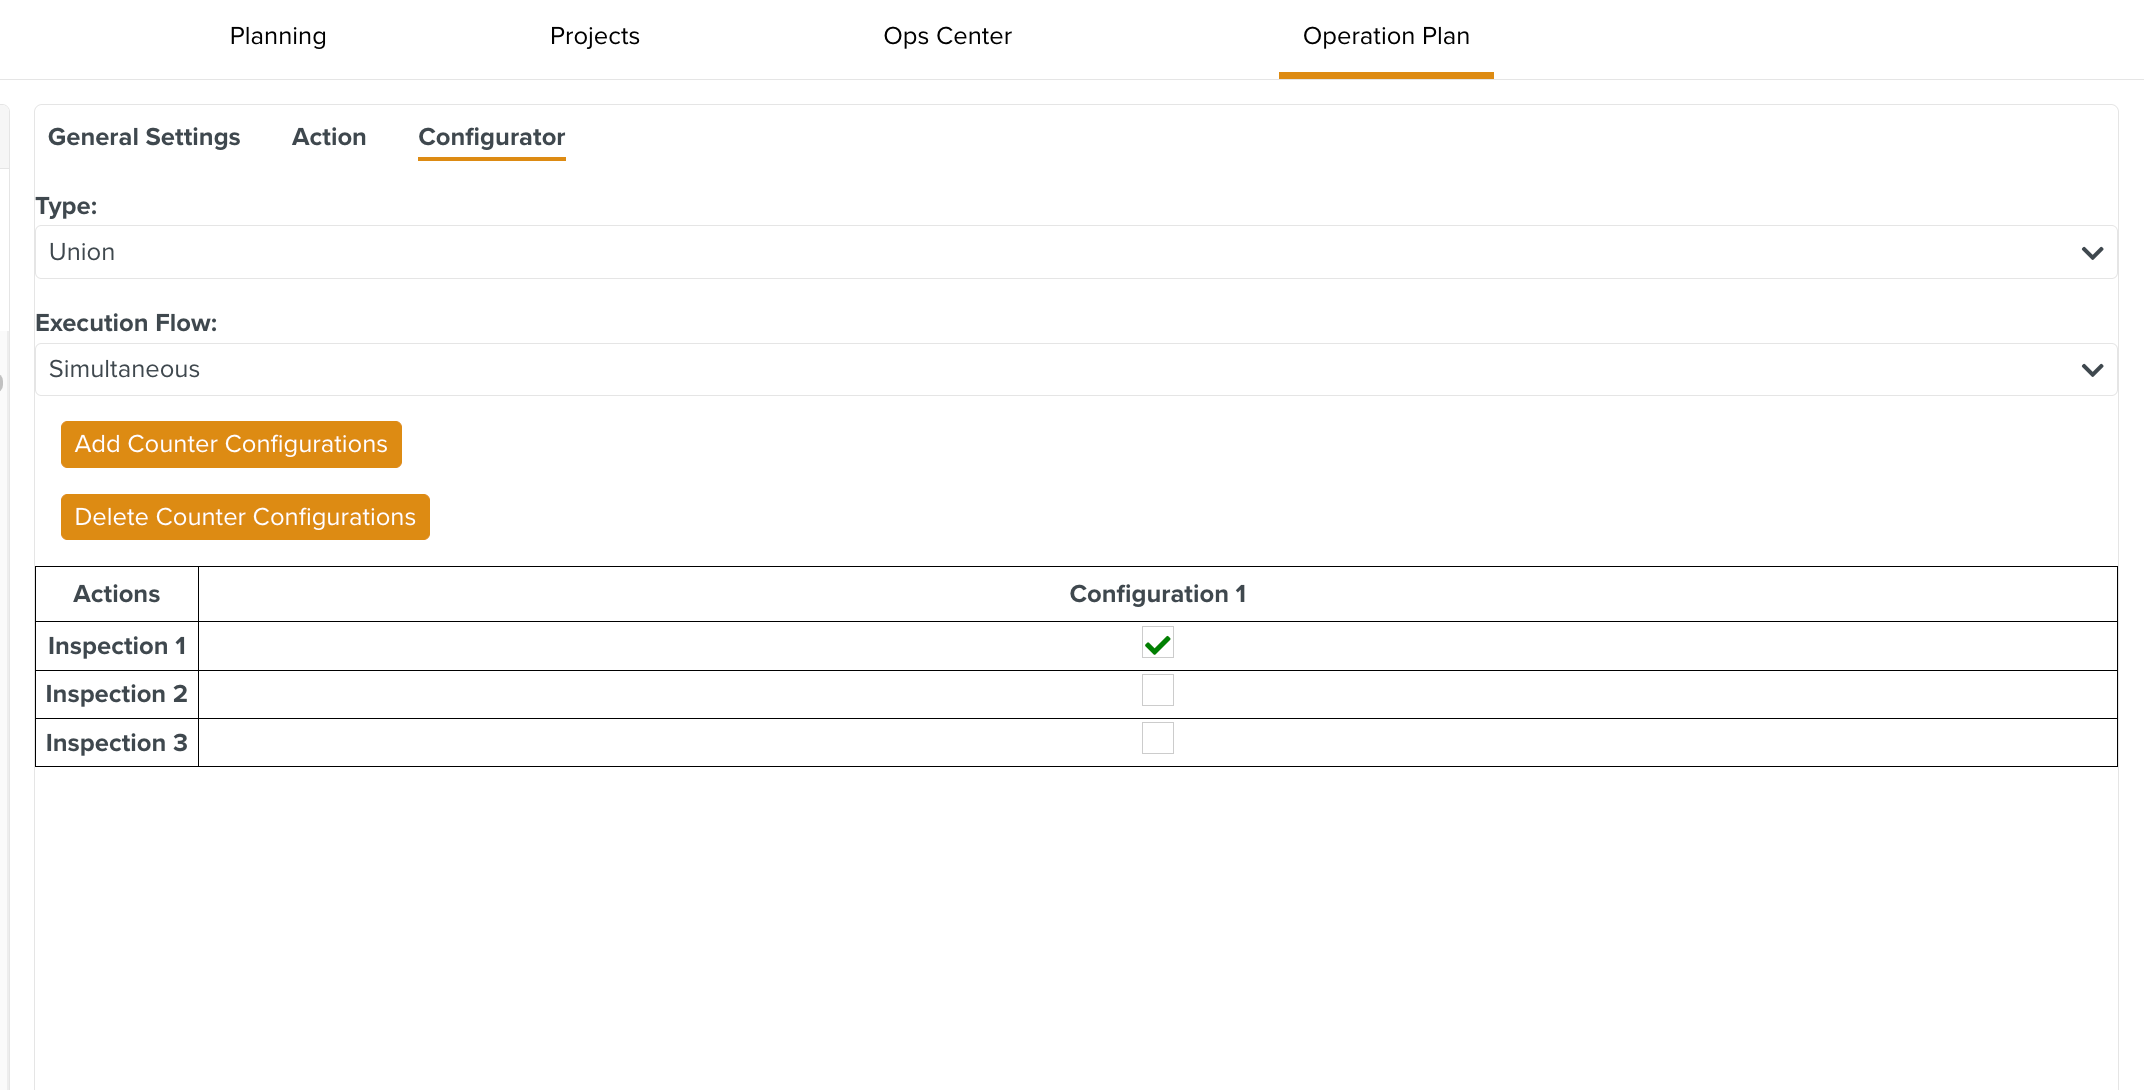
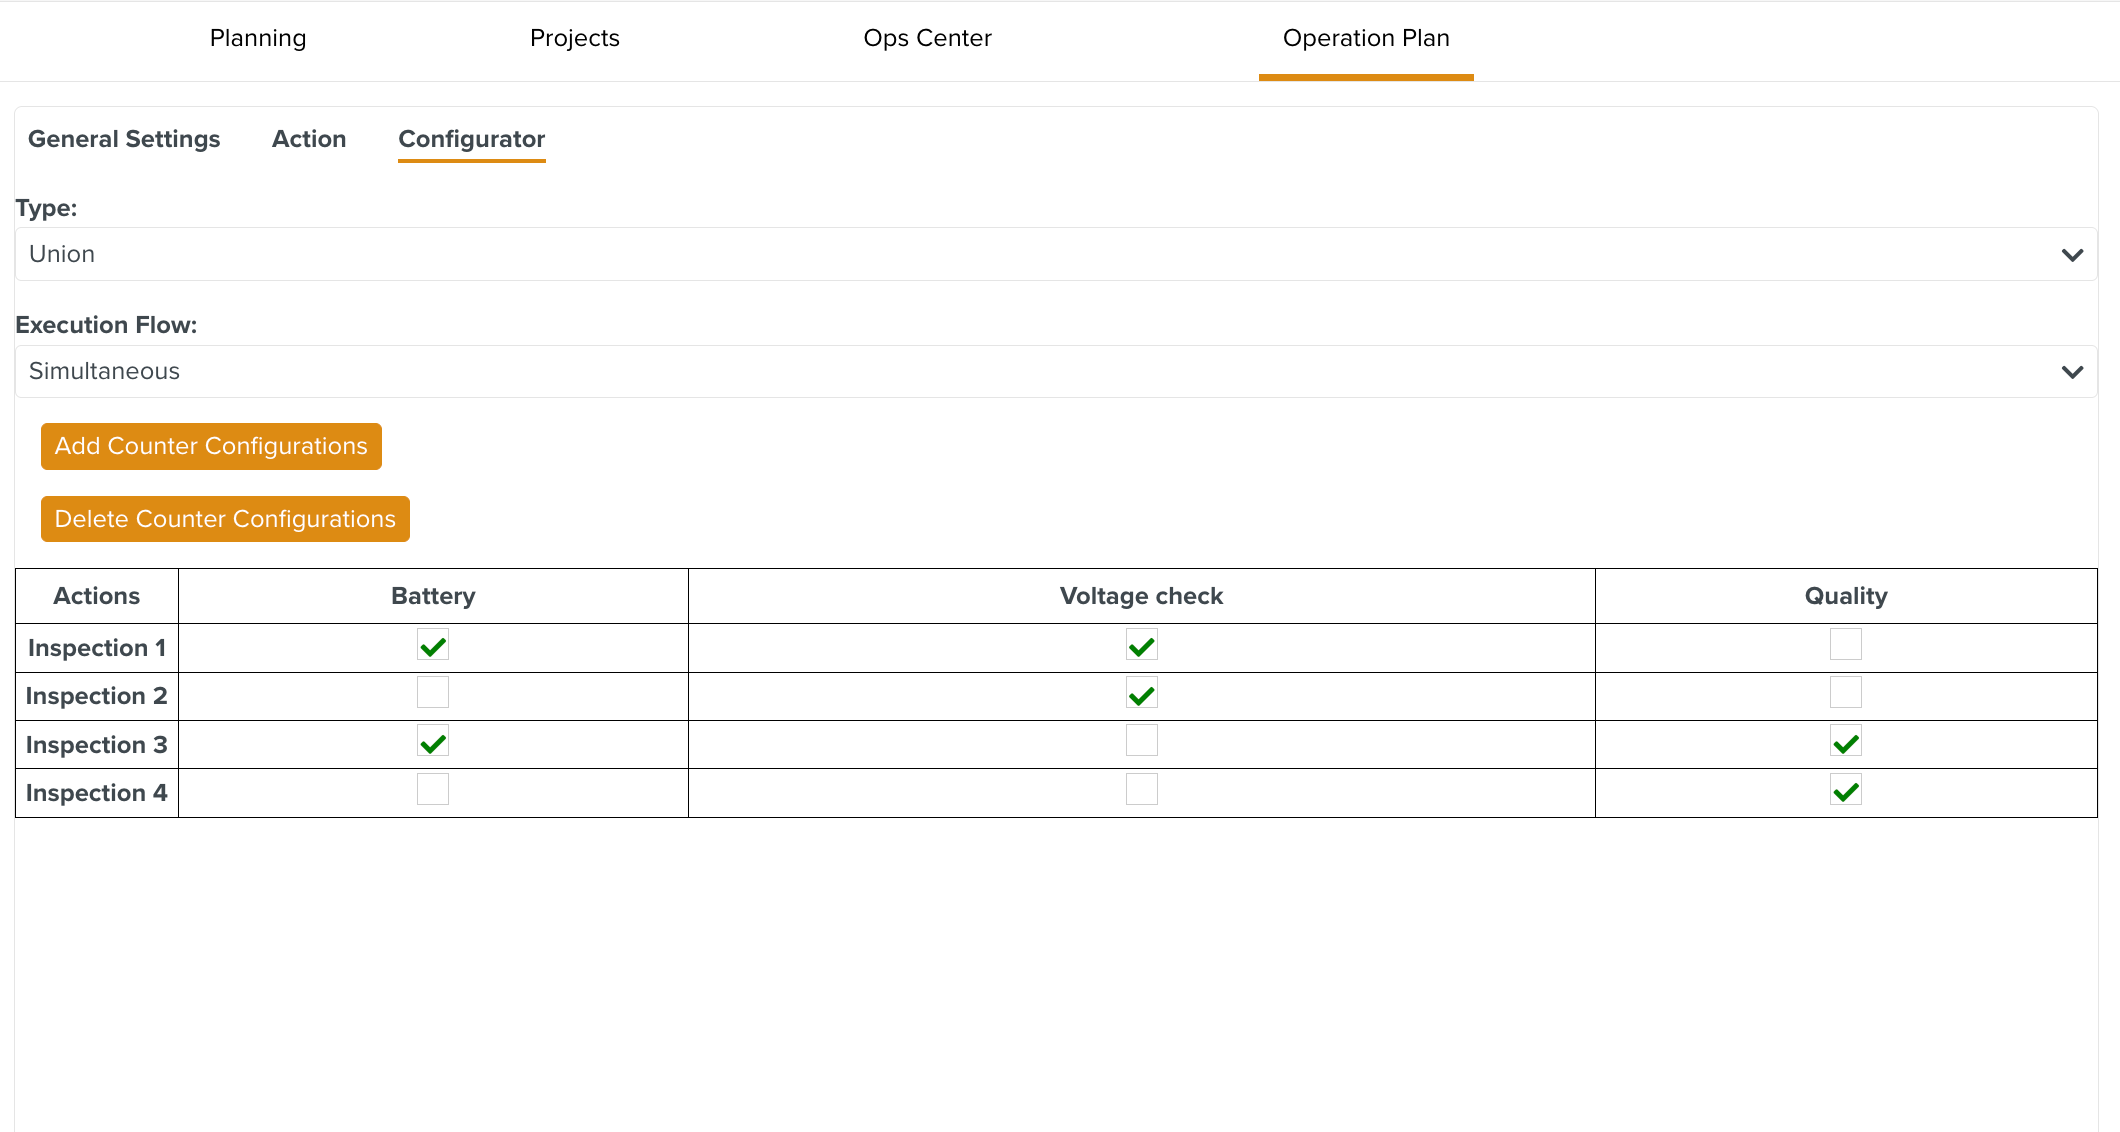
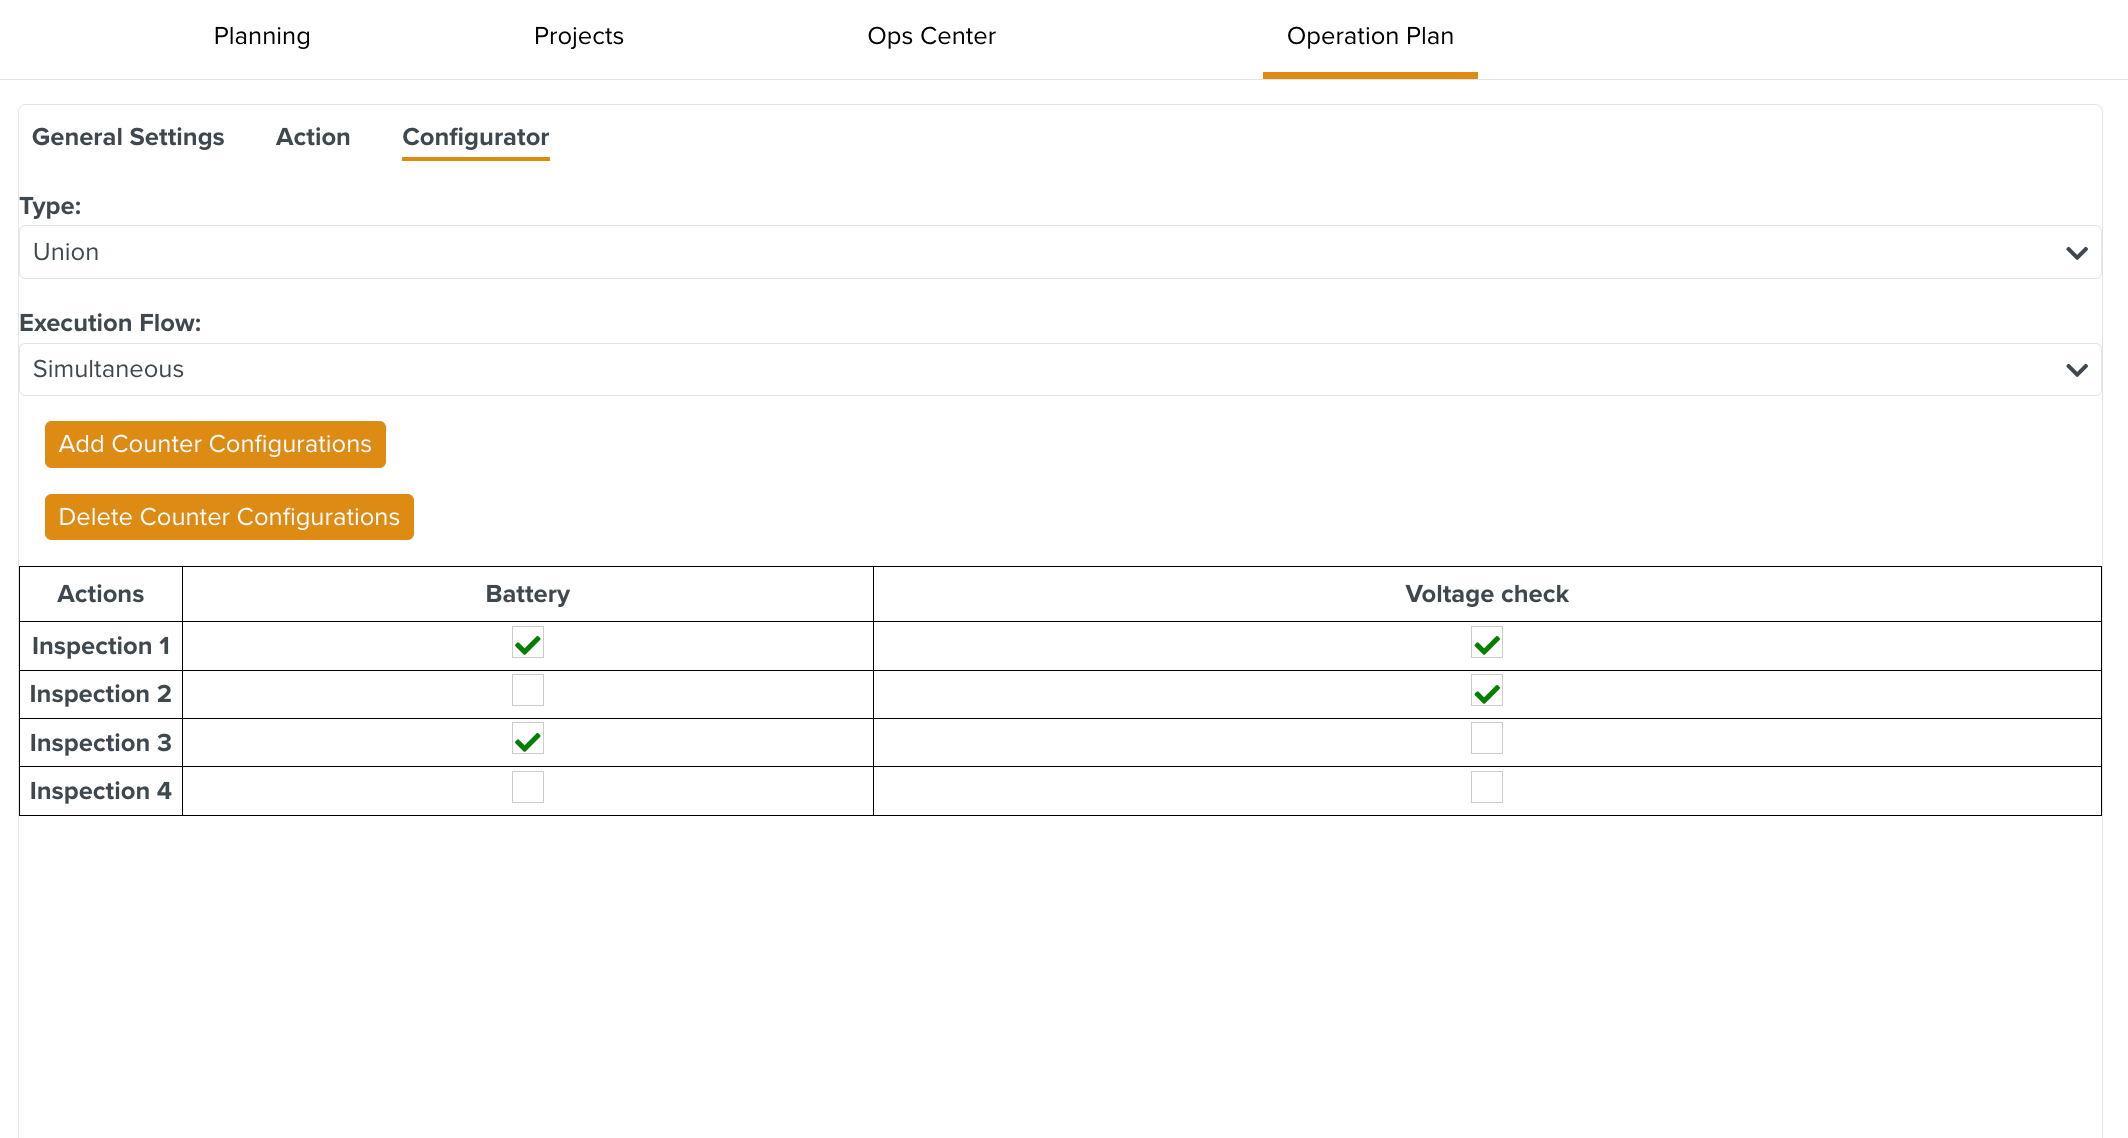
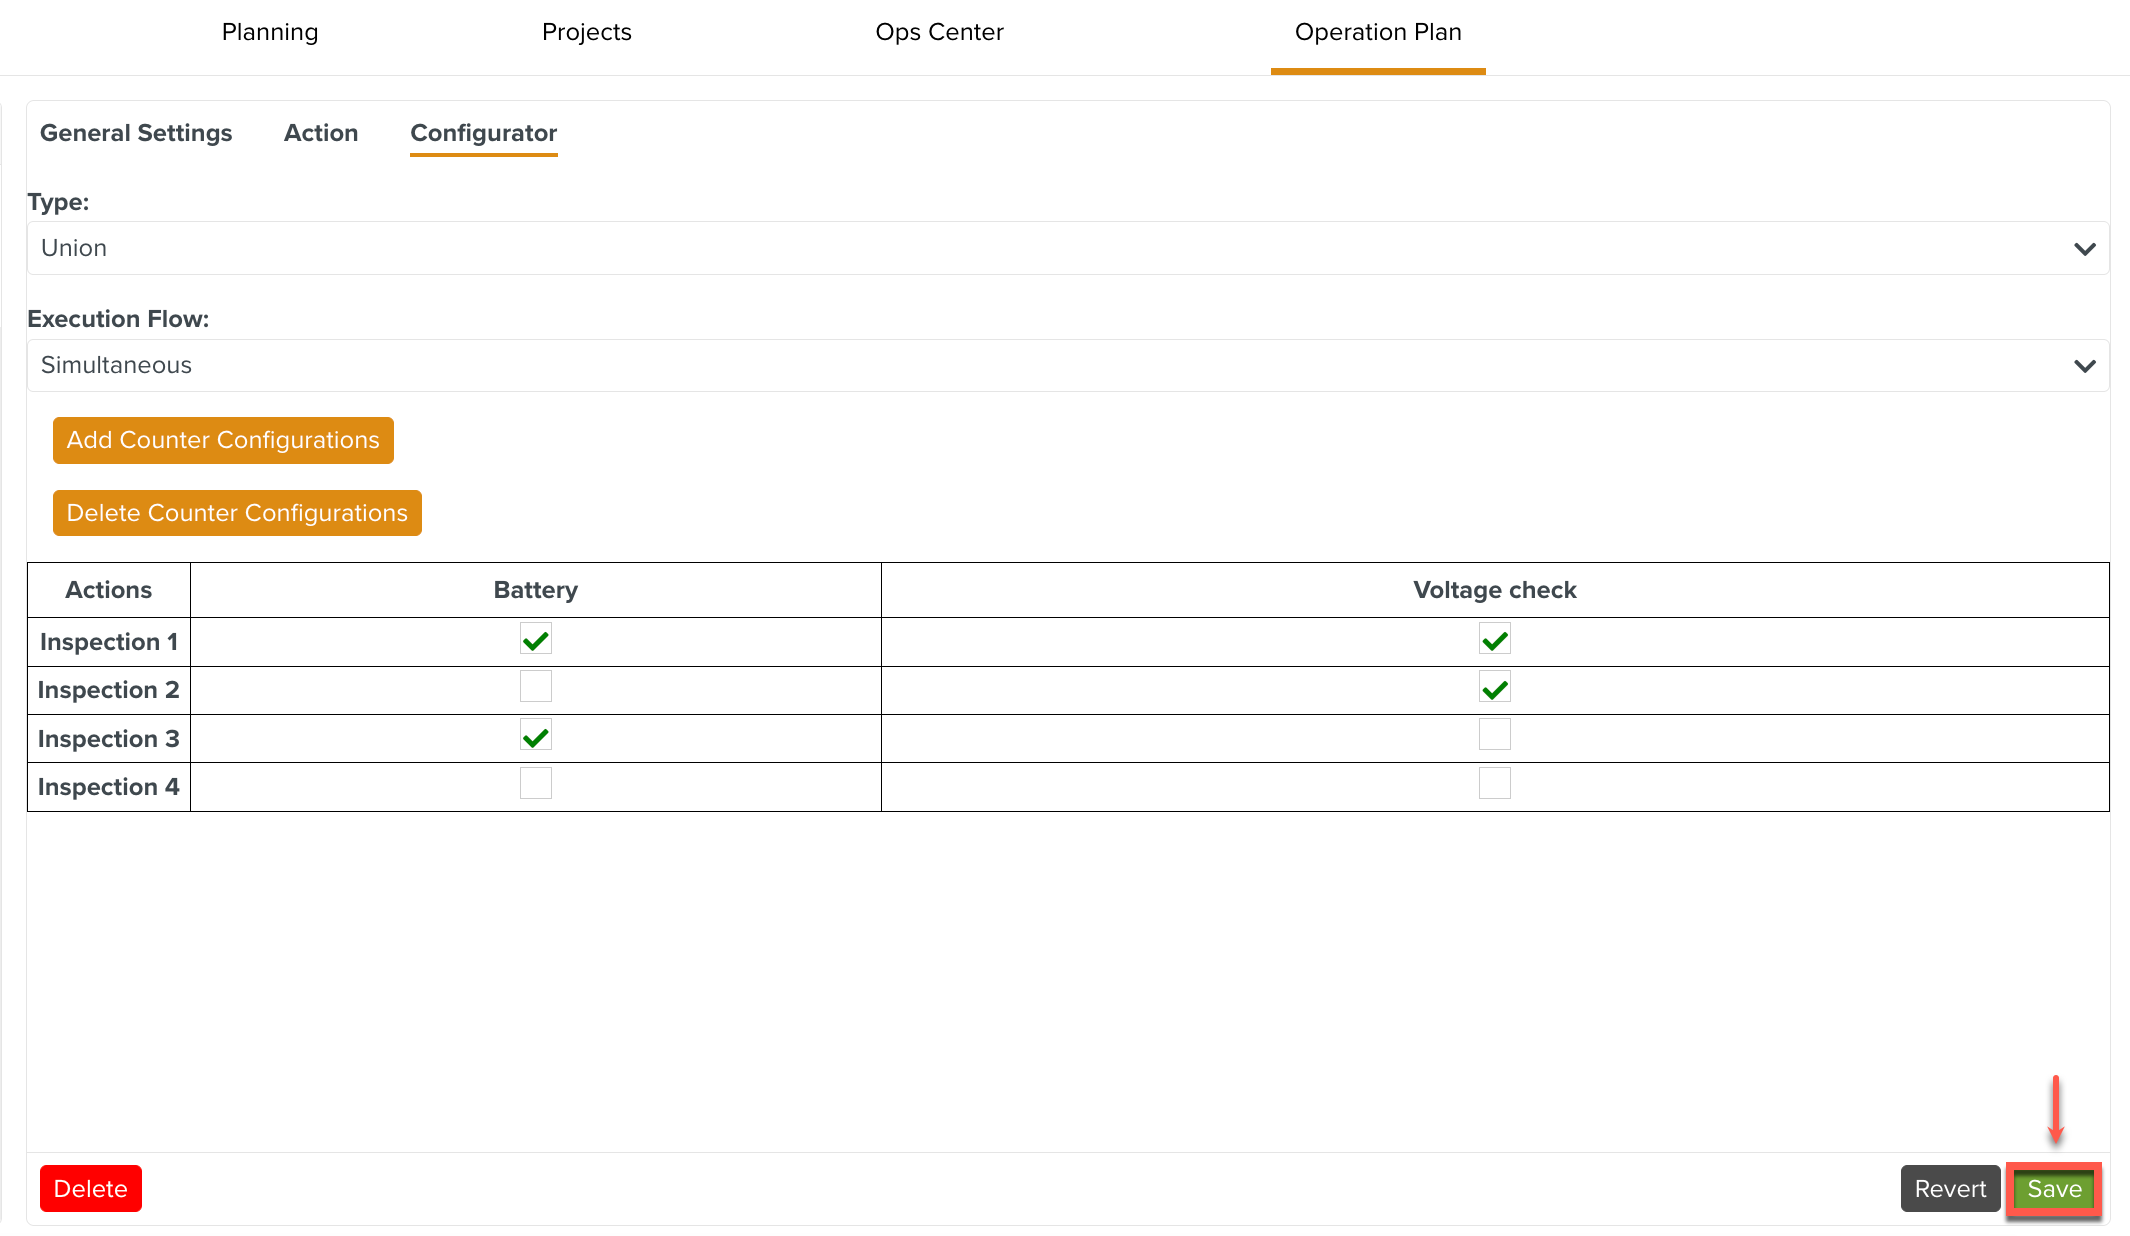
You can add Configurations that contain a subset of the Actions. In the example below, there are three Configurations namely Battery, Voltage check, and Quality. Similarly, there are three Actions namely Inspection 1, Inspection 2, and Inspection 3.
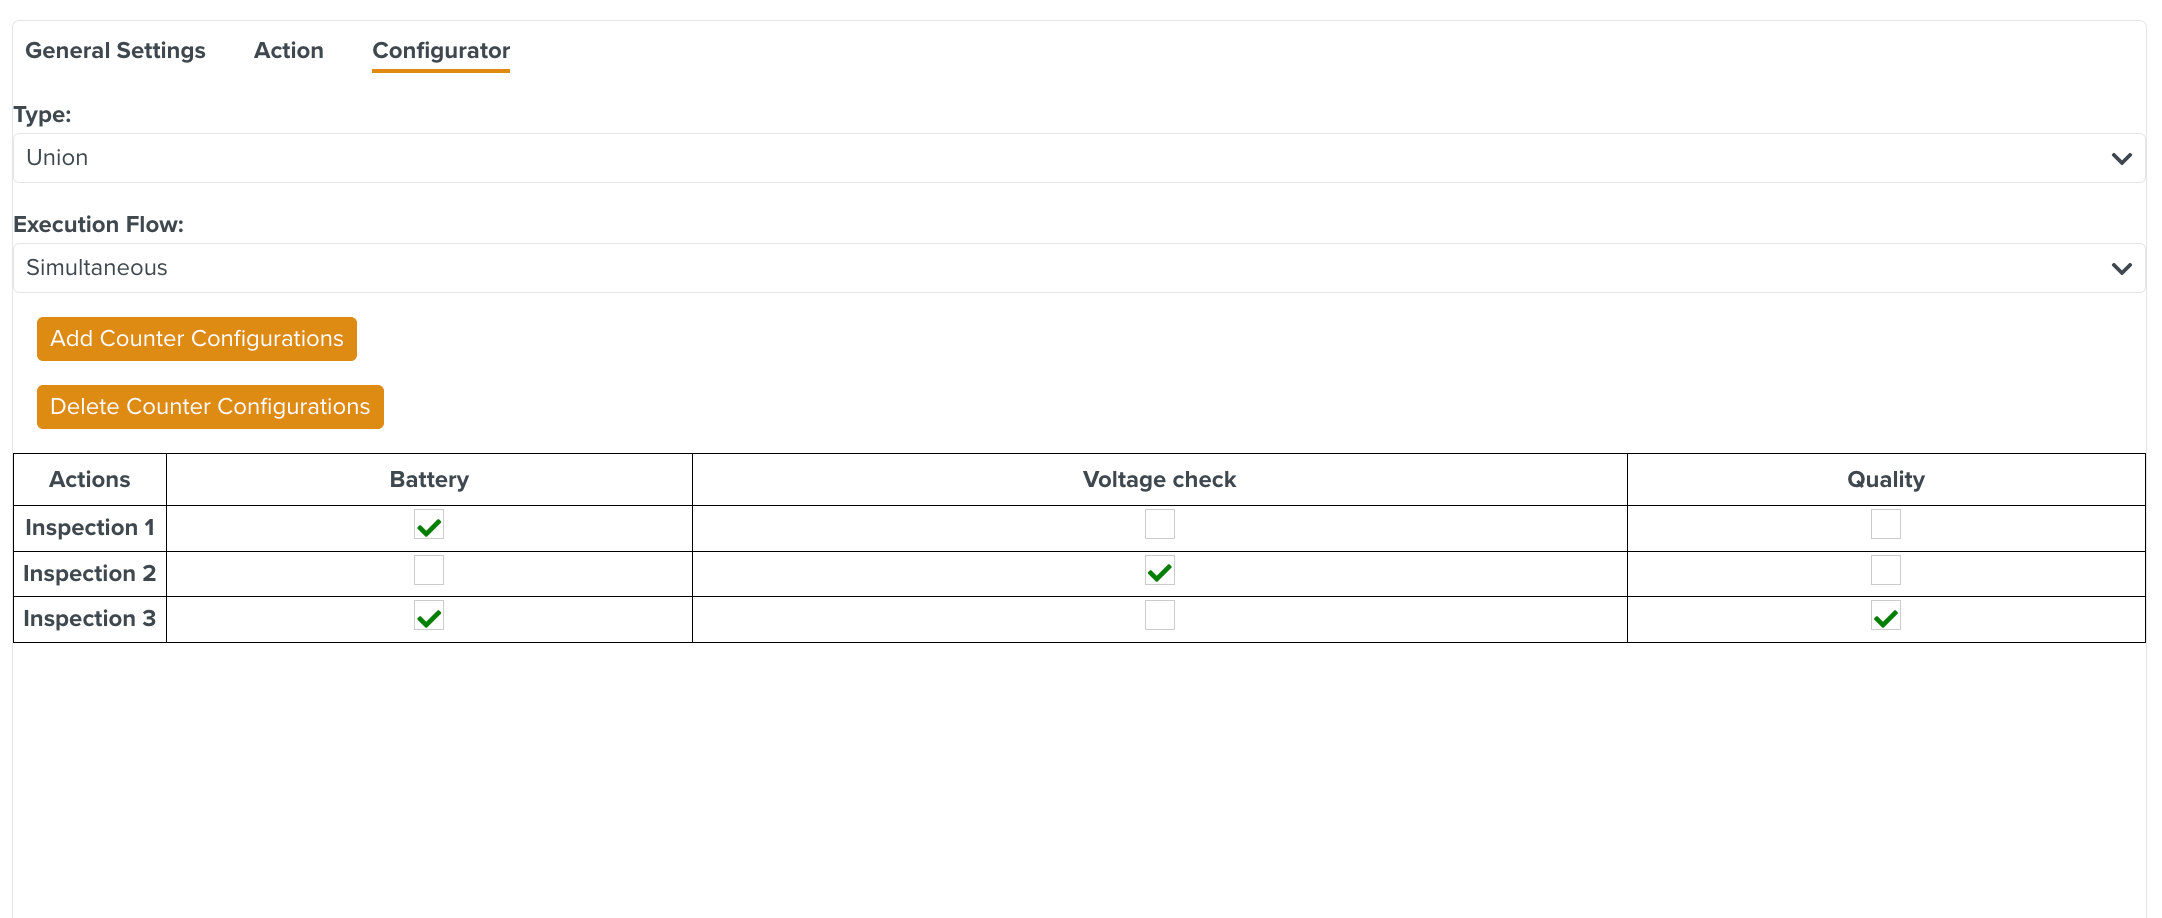 |
In the above example, the Battery Configuration will generate only the Actions Inspection 1 and Inspection 3.
To add a Configurator Counter:
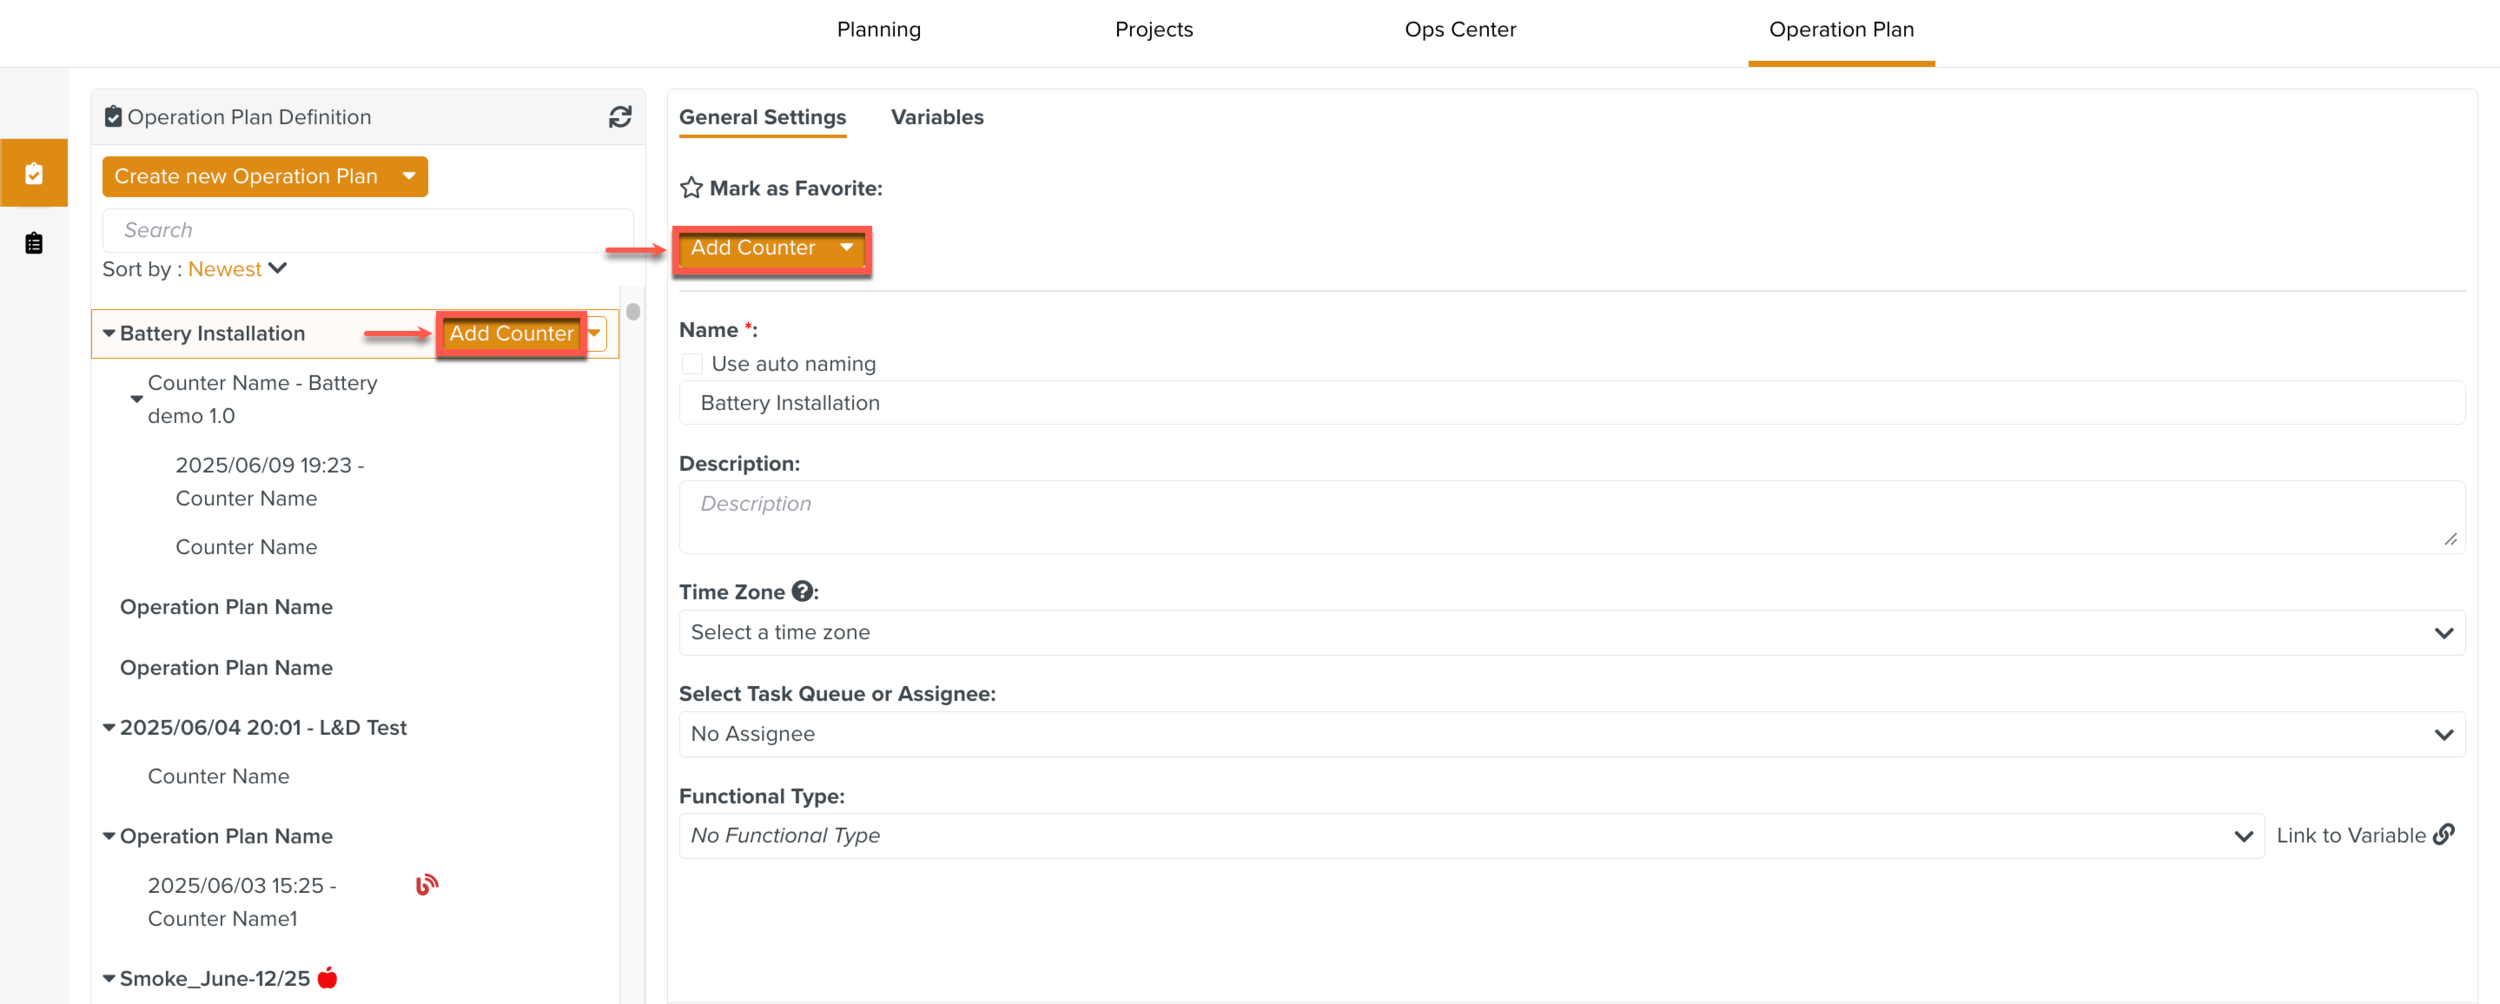
Click in the dropdown list near the name of the Operation Plan.
You can also use the dropdown list in the tab as indicated below.
When a new Counter is created, it is automatically assigned a generic name Counter Name, as shown below.
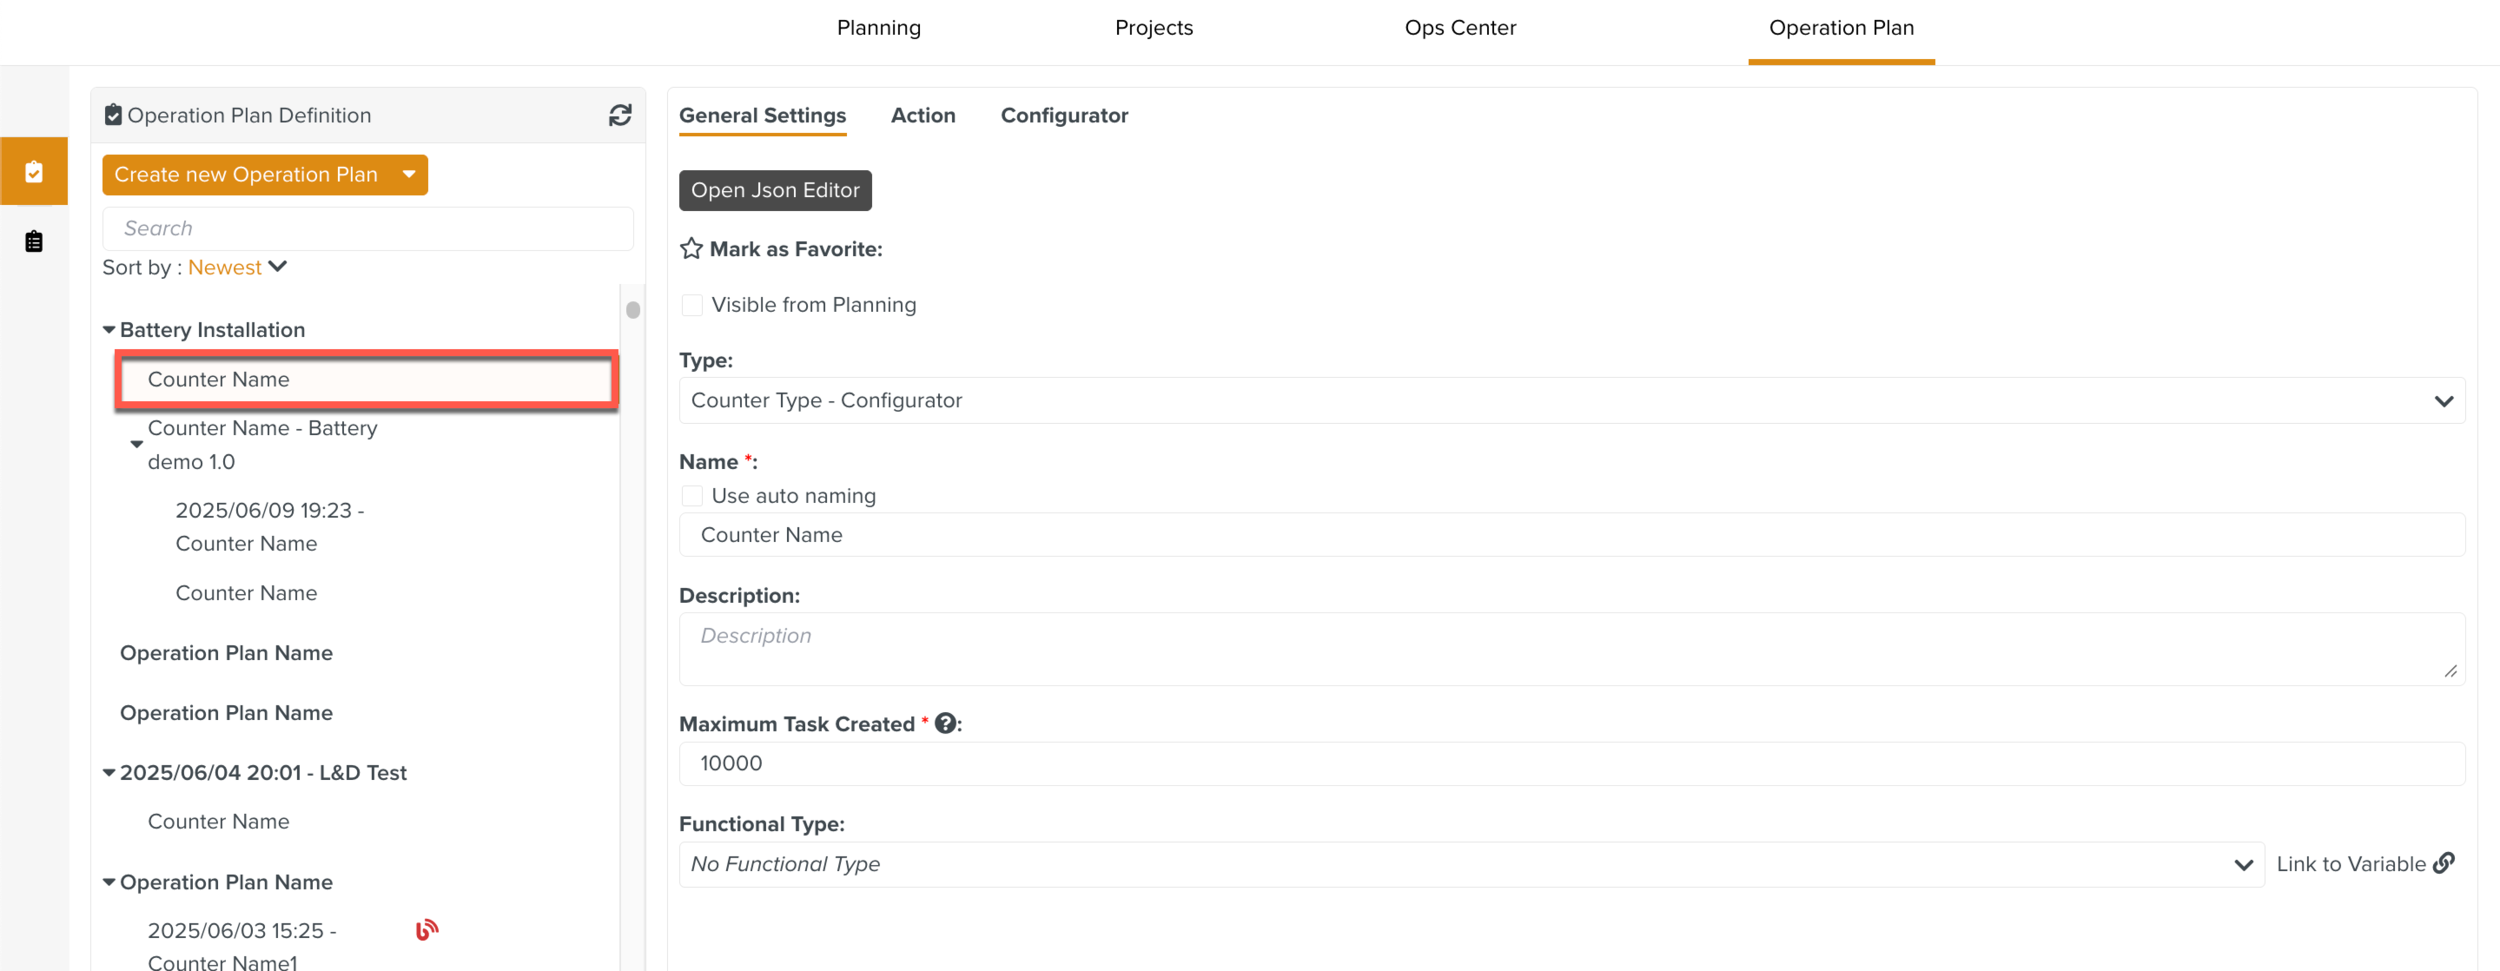
There are three tabs to define the Counter. They are:
General Settings
Action
Configurator
On every Counter, there are three buttons , and as seen below.
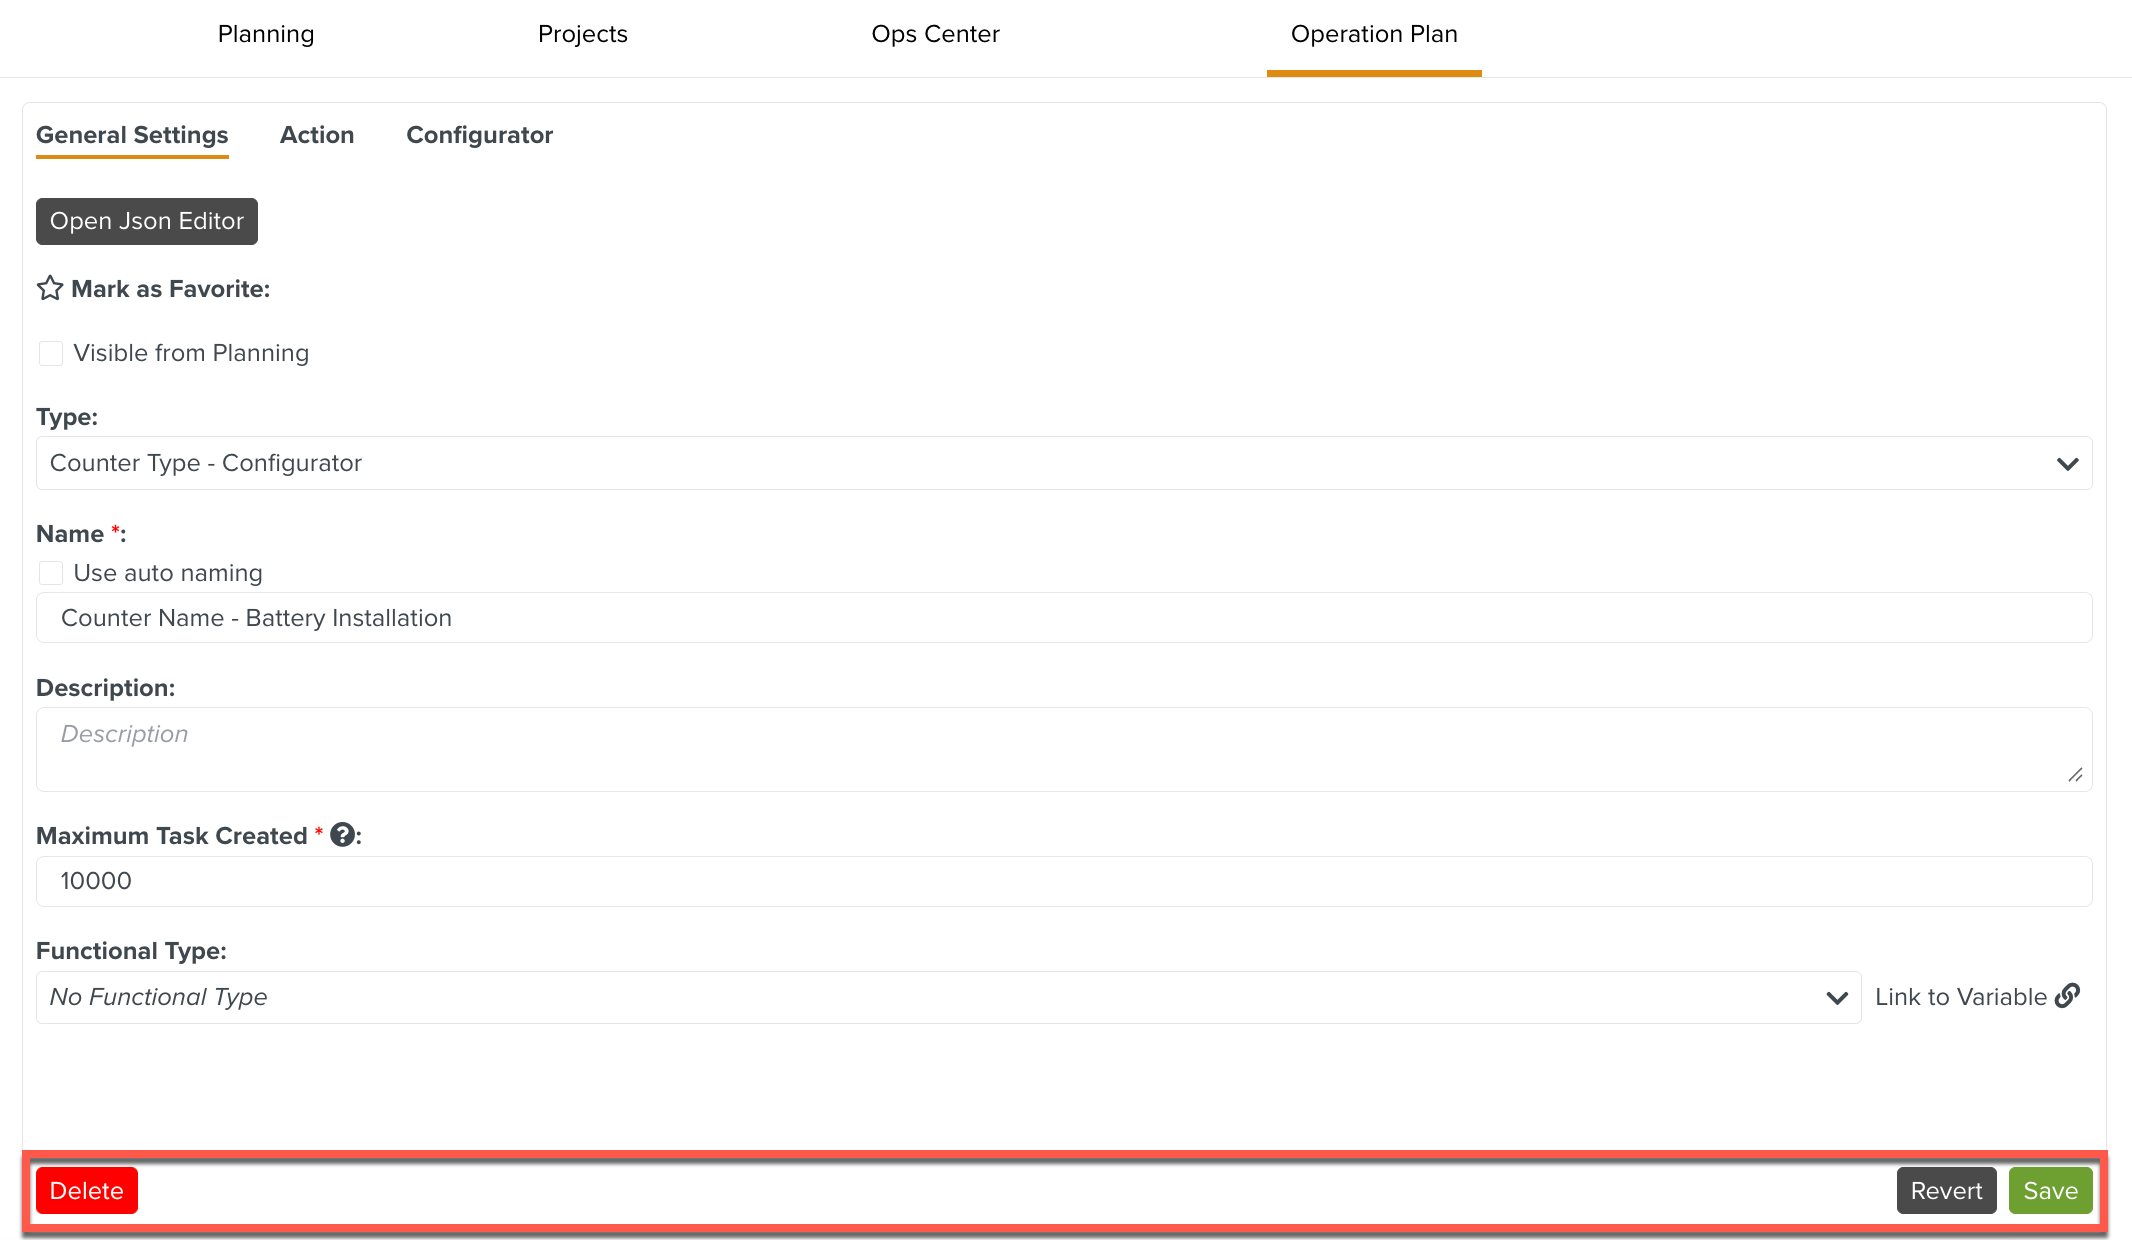 |
: Deletes the Counter.
: Undoes all the unsaved changes.
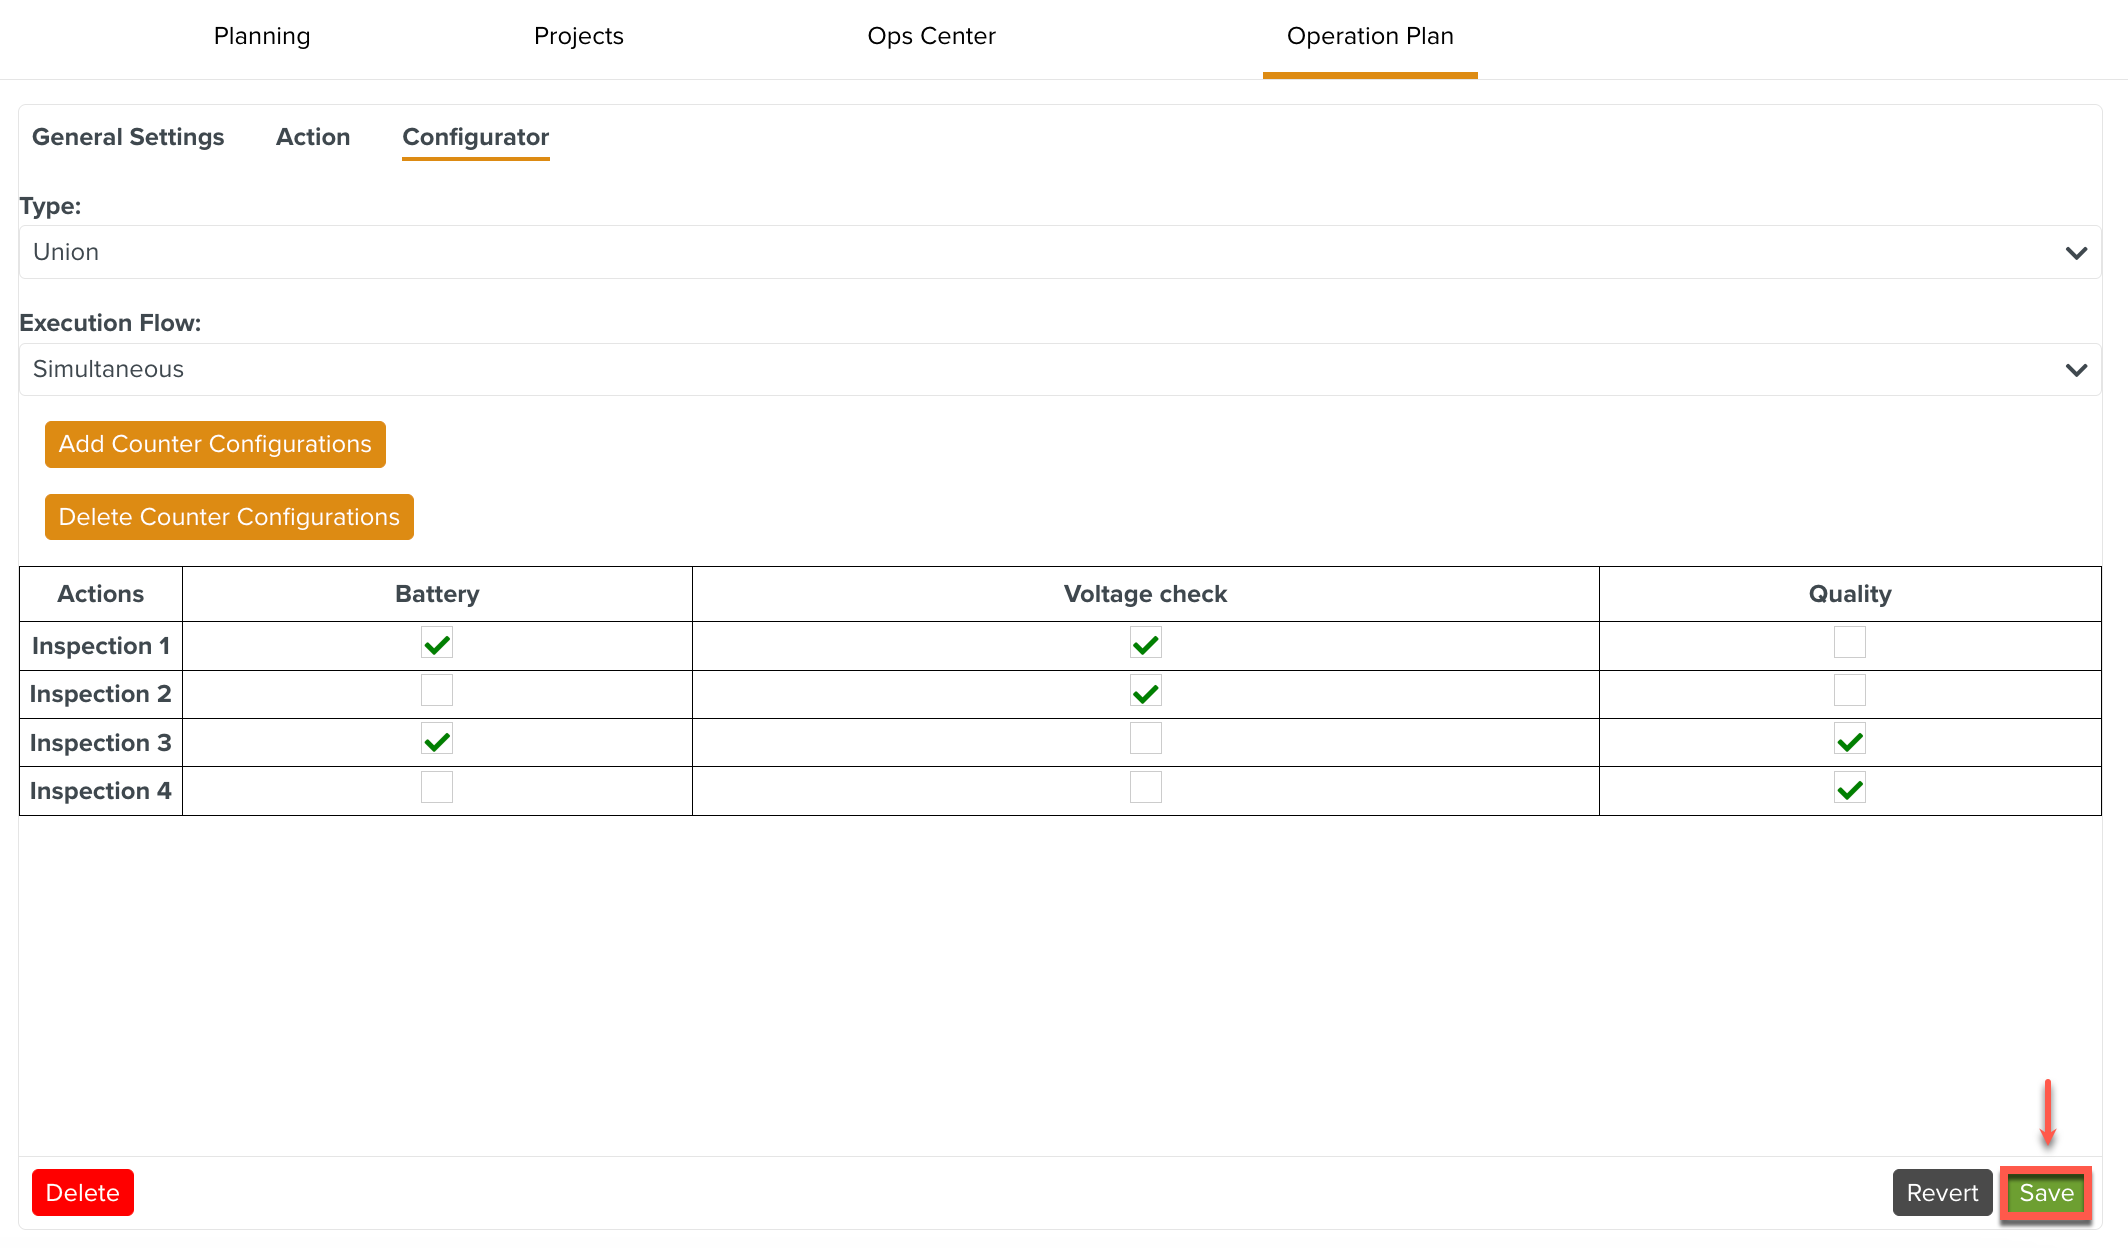
: Commits all the changes made to the Counter.
You can customize the name of the Counter in this section. Edit the placeholder text Counter Name to enter an appropriate name for your Counter.
 |
The following fields can be configured:
Type: Select the from the dropdown list.
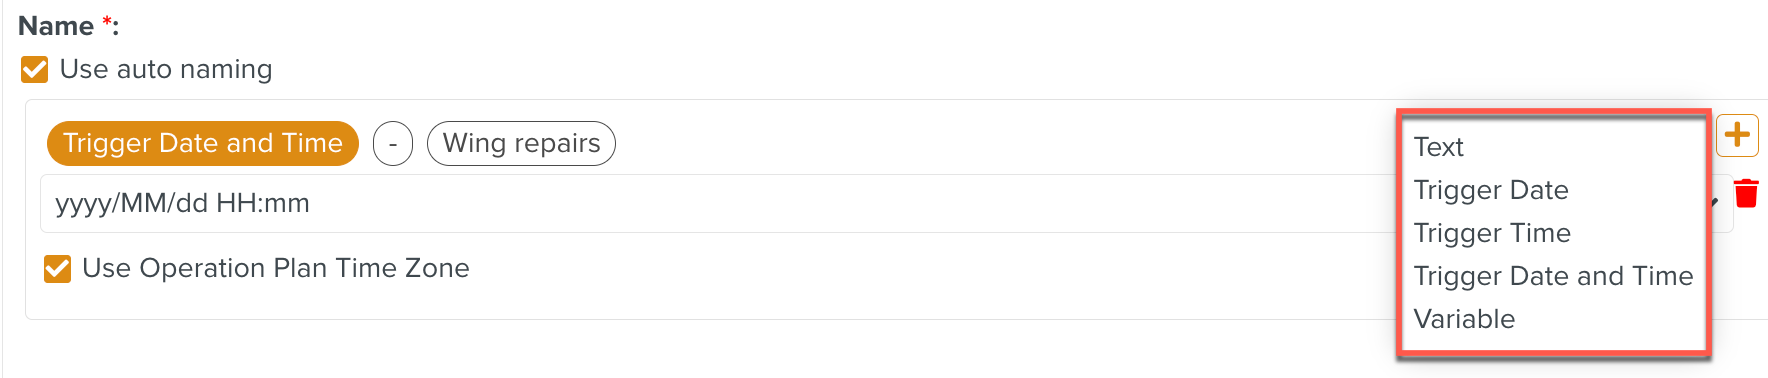
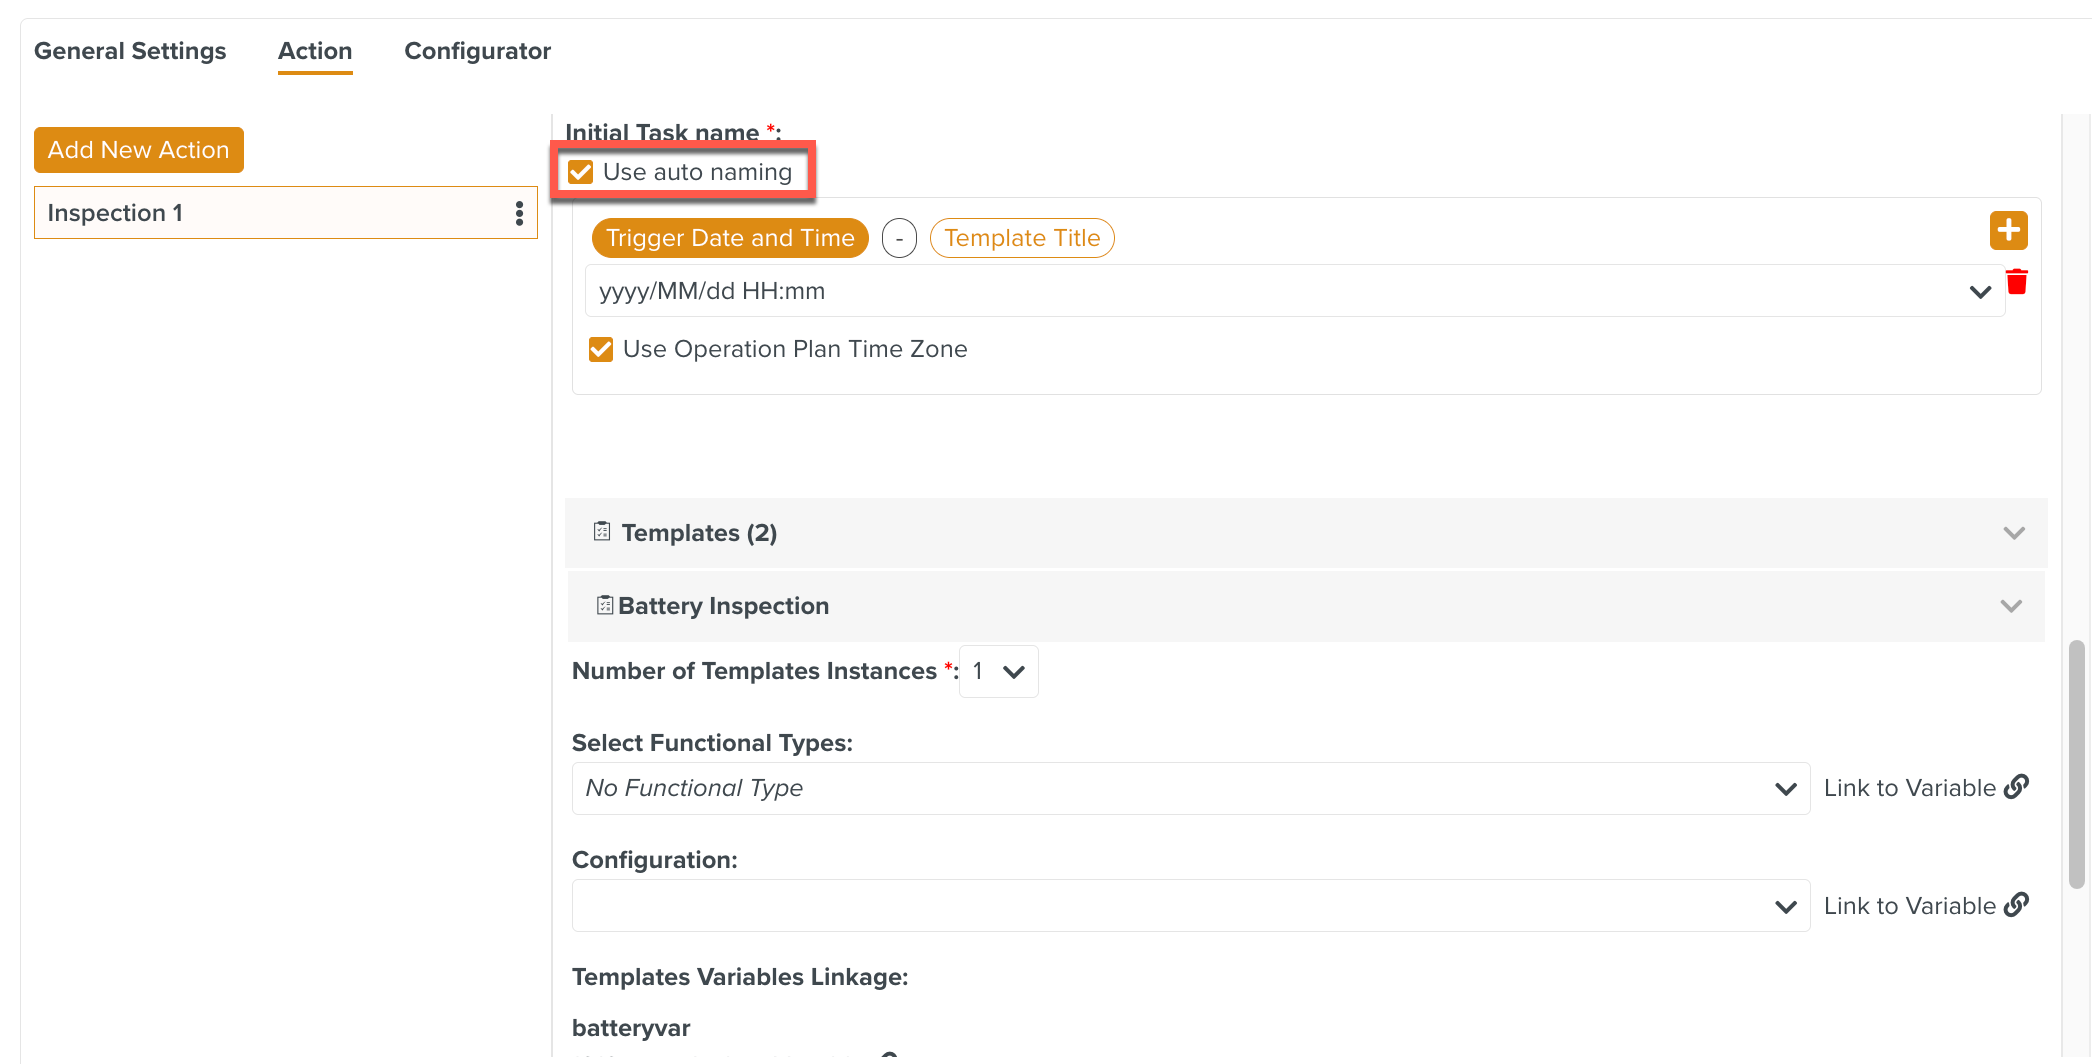
Name: Enter a name for the Counter. You can also use the auto-naming option. The auto-name format can be configured using the options highlighted below.
Description: Description of the purpose of the Counter.
Maximum Task Created: This sets the maximum number of Tasks that this Counter can create.
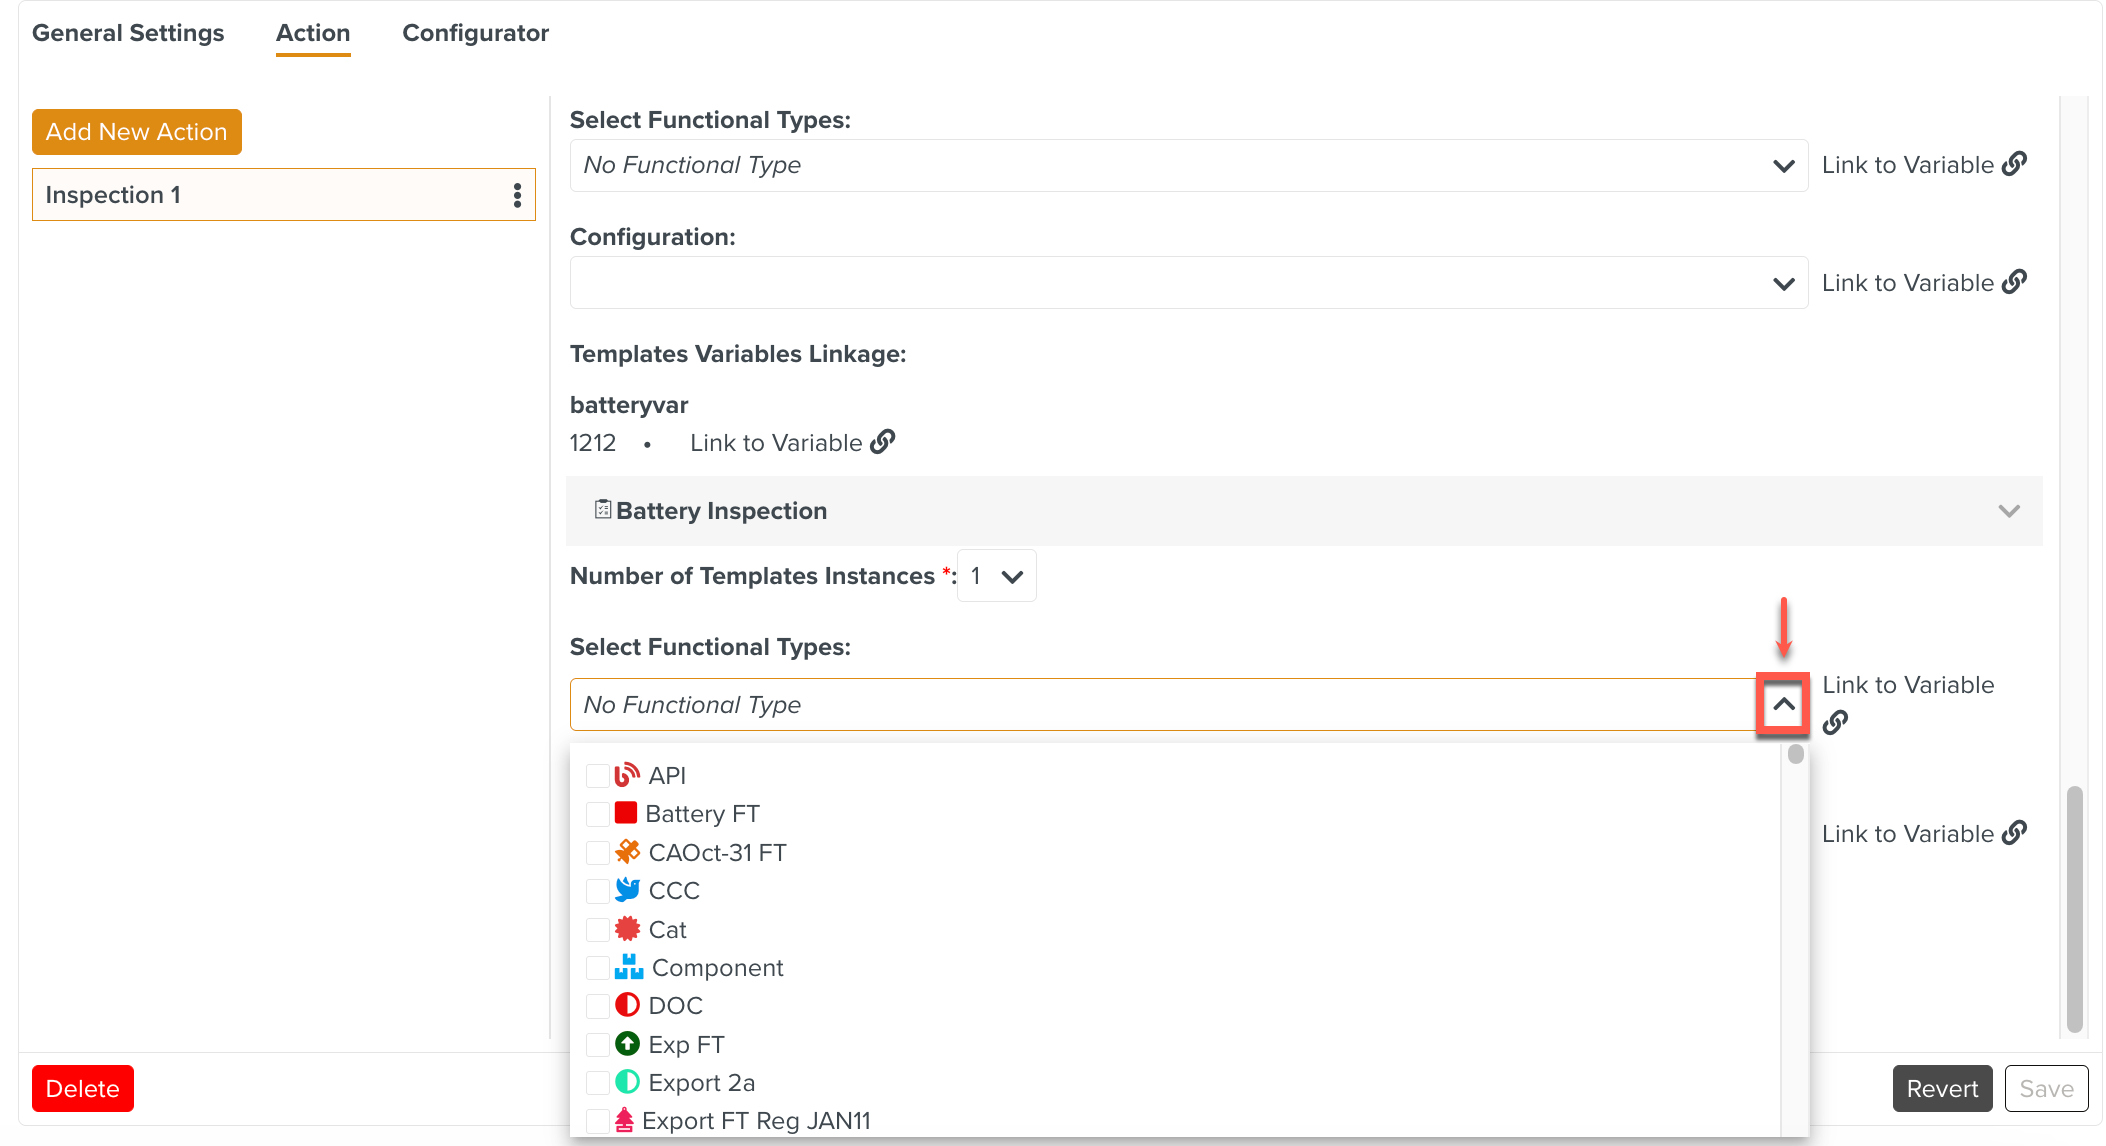
Functional Types: It is used only to visually highlight the Counter. It has no impact on the Tasks generated from the Operation Plan.
You can also use the Link to Variable option to link to a Functional Type Variable.
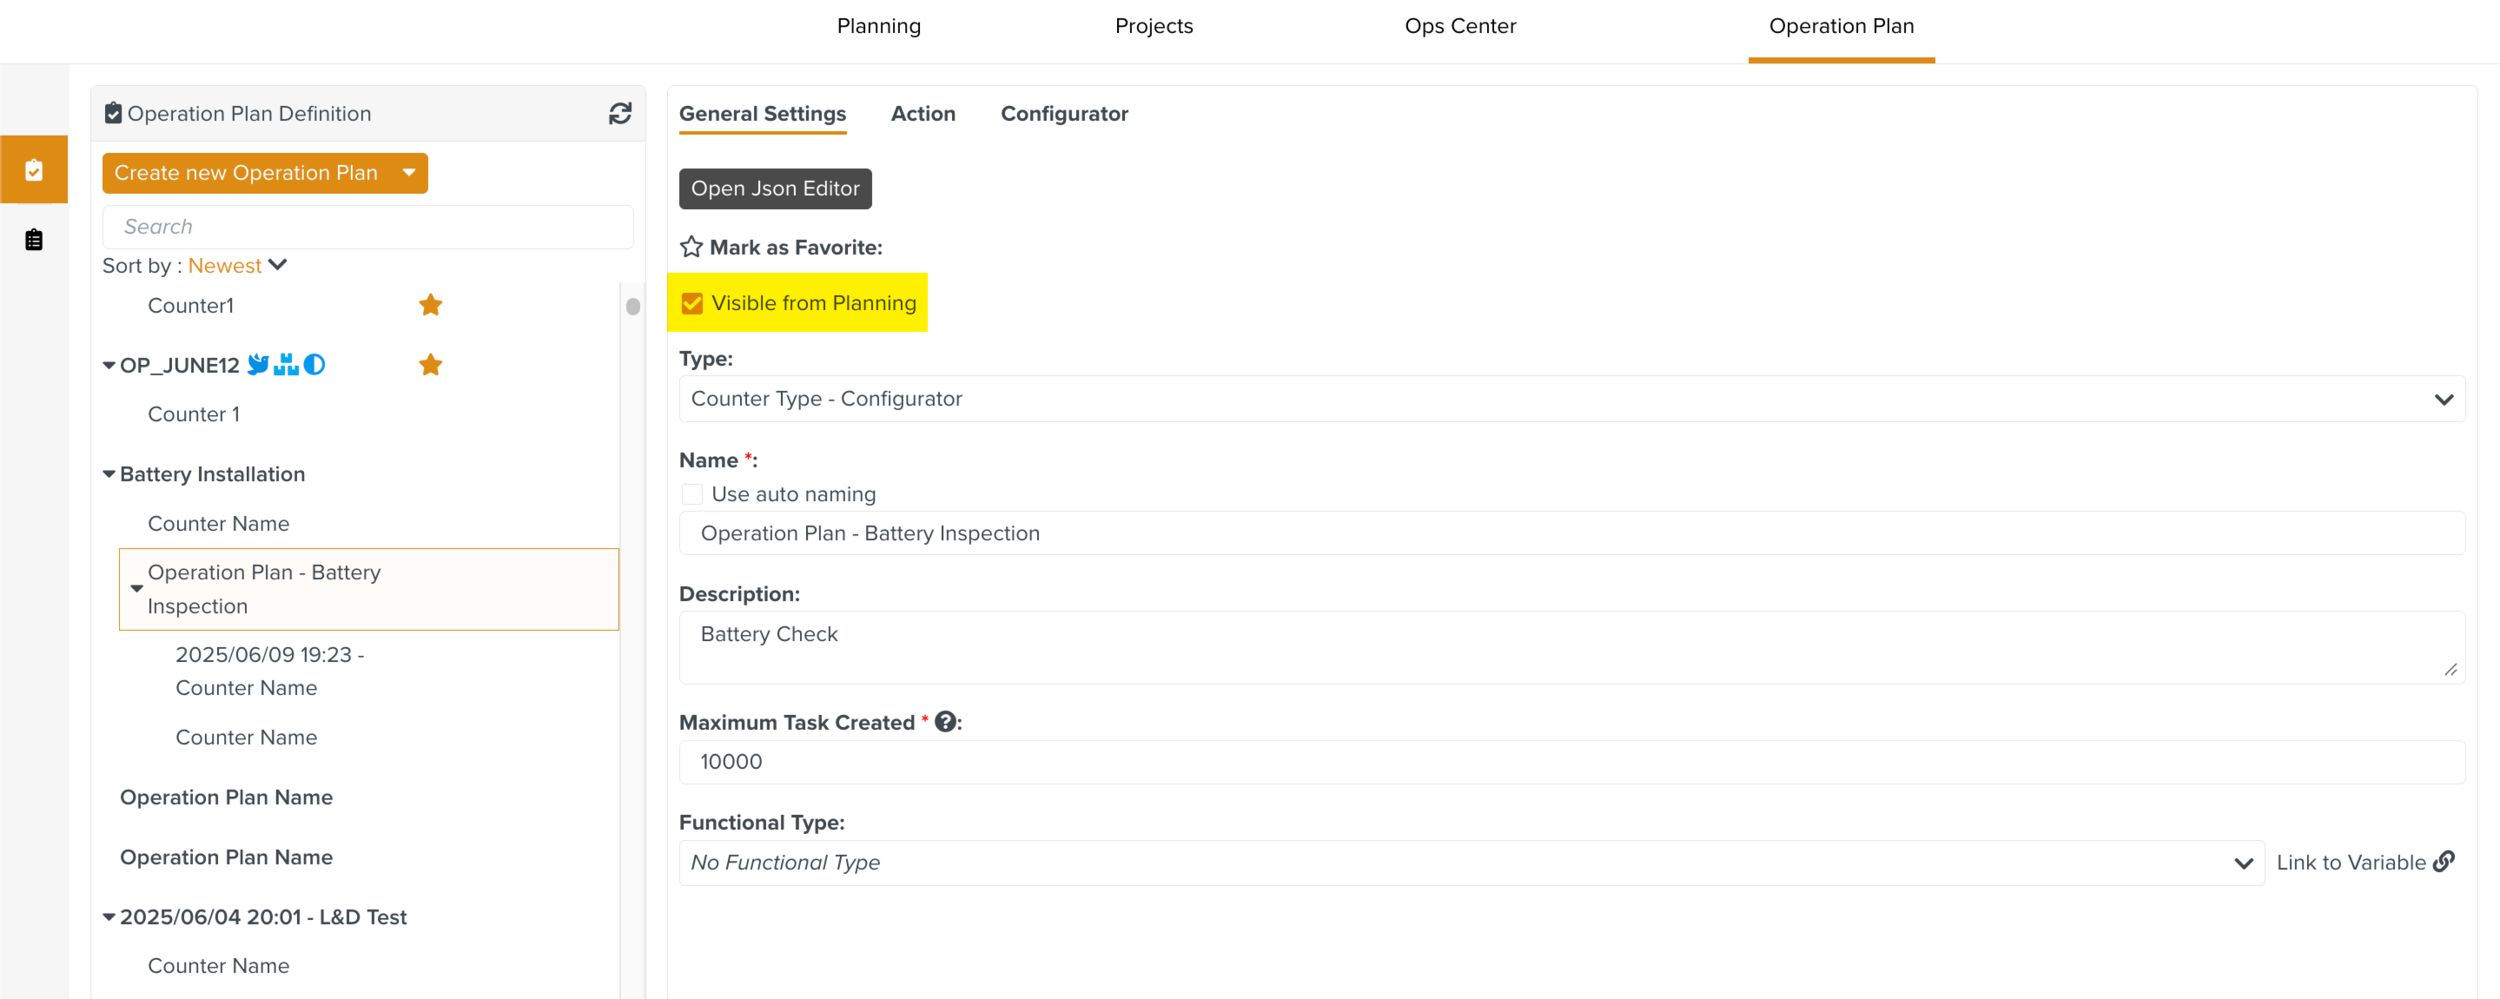
Visible from Planning: If this option is enabled, the Tasks generated are visible from Planning and Inbox section.
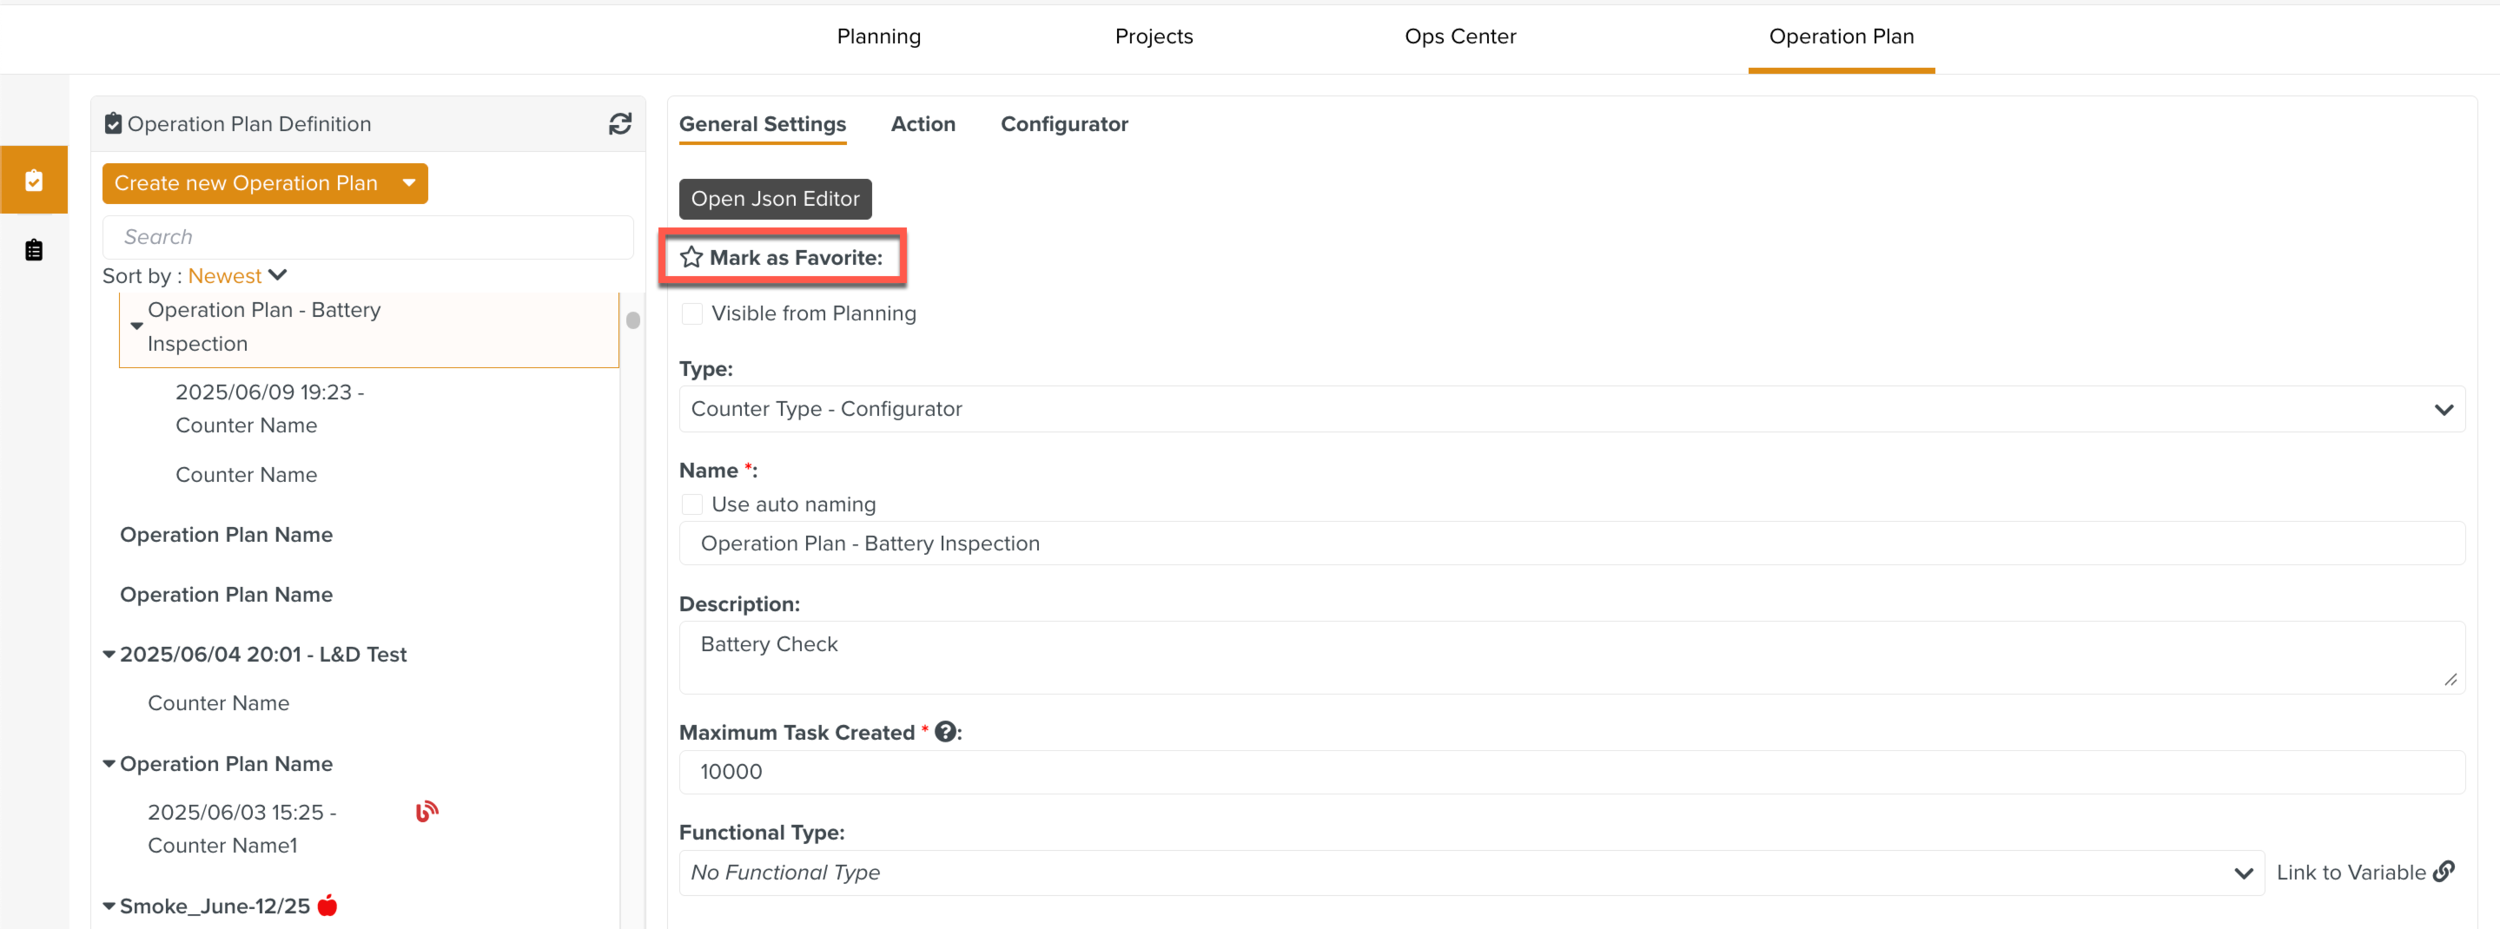
Mark as Favorite: This option enables you to bookmark an Operation Plan.
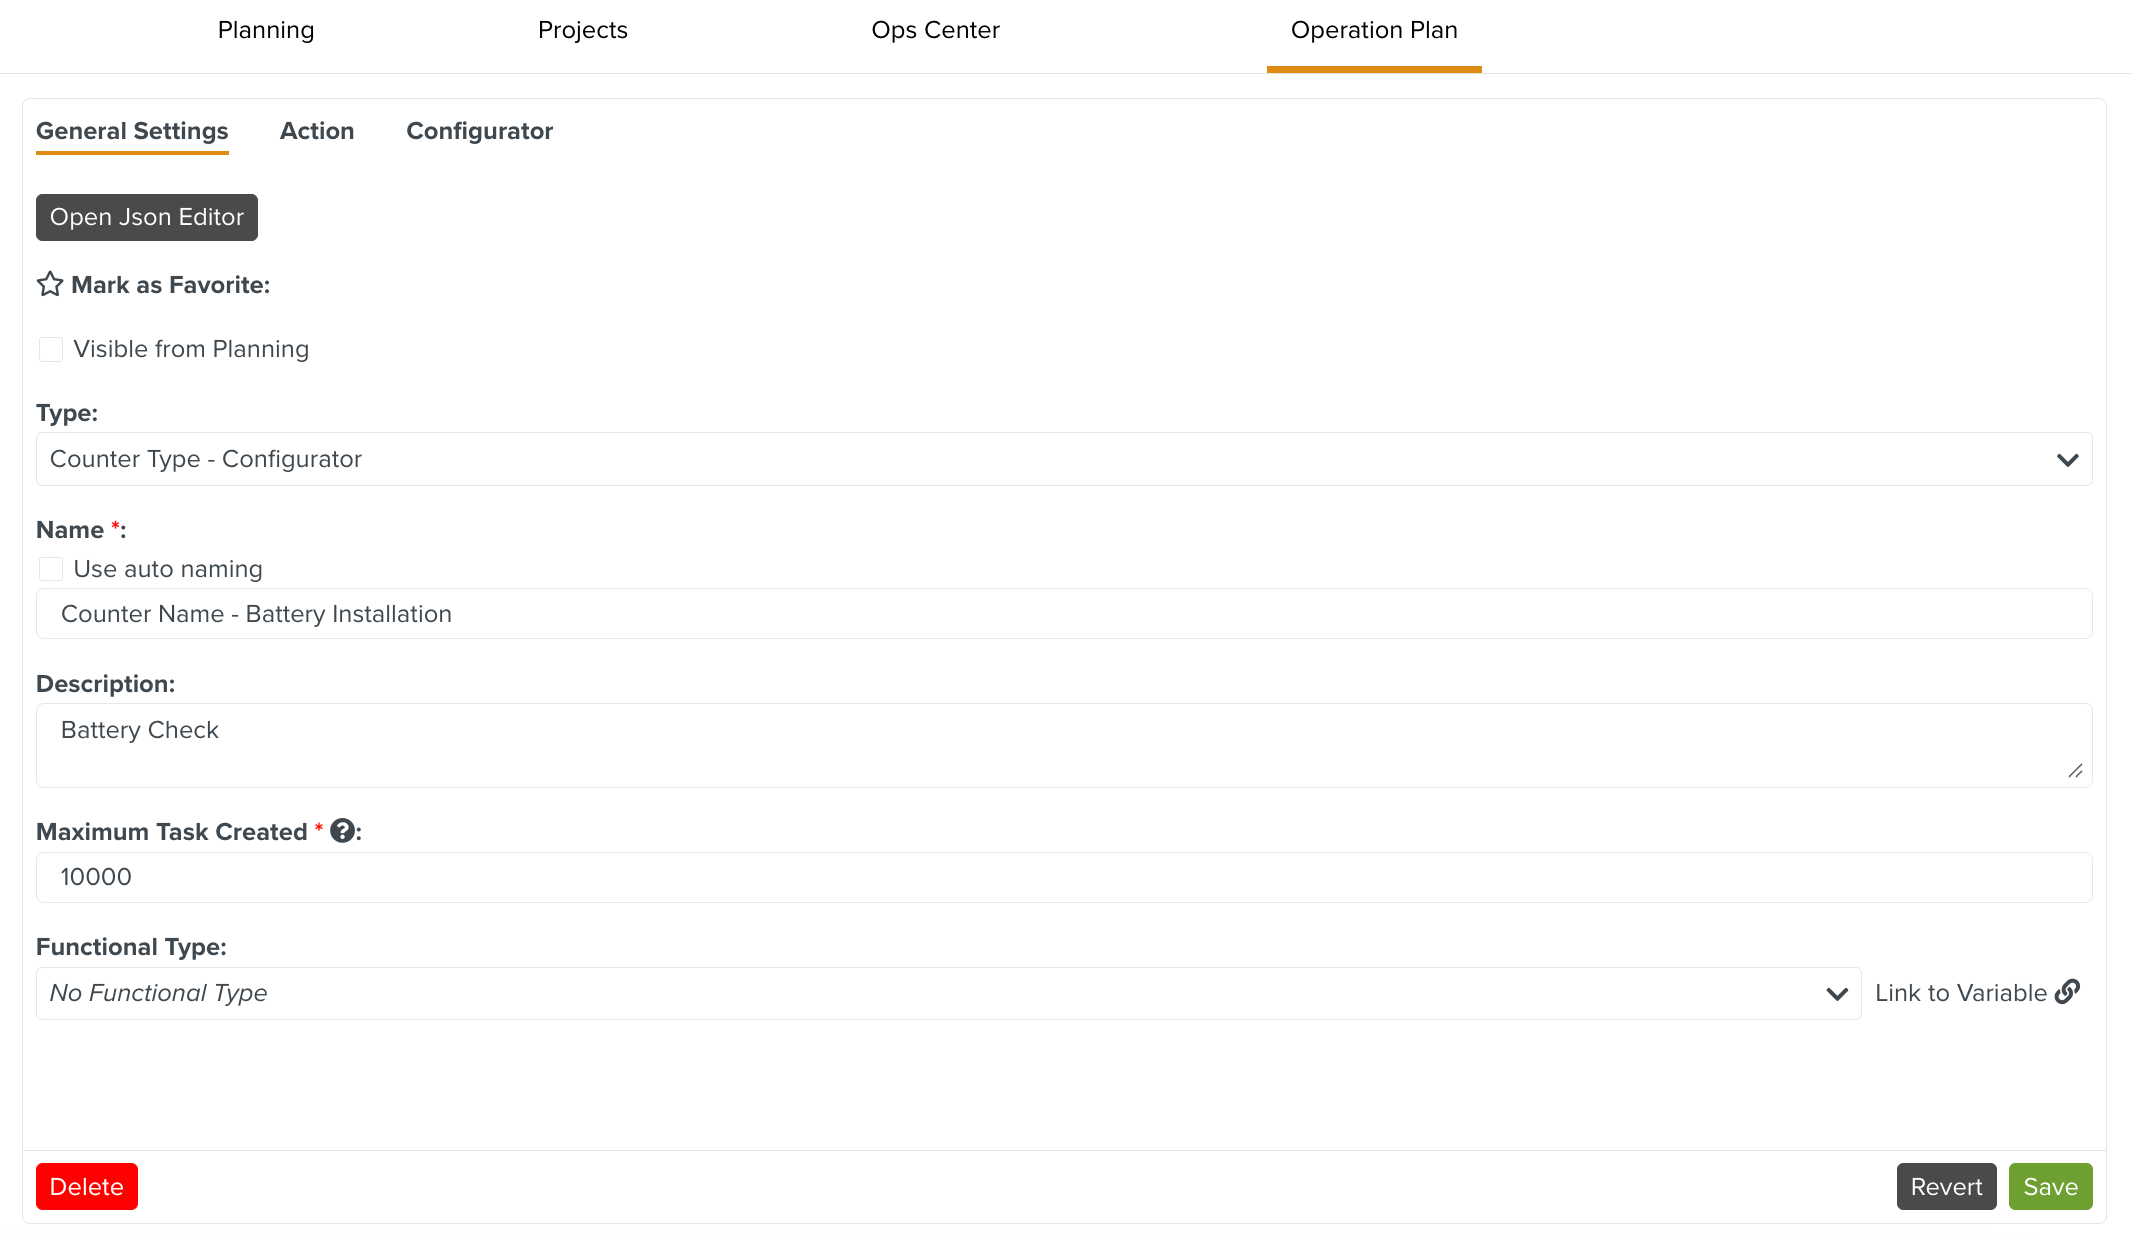
A sample Counter with its fields set is shown below.
 |
This counter can also be seen in Planning and Inbox when you select Visible from Planning.
If this option is selected, then the Tasks generated by this Counter are listed under the Counter in the Planning and Inbox sections.
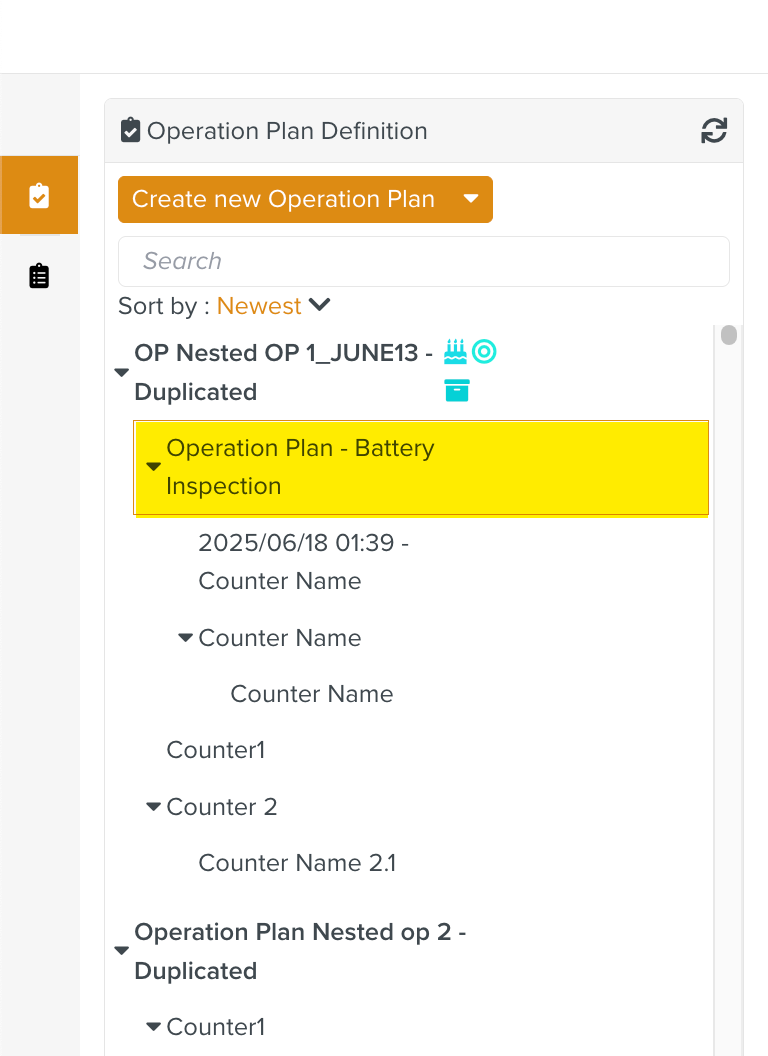
In the below example, the Visible from Planning option is enabled on the Operation Plan- Battery Inspection Counter.
 |
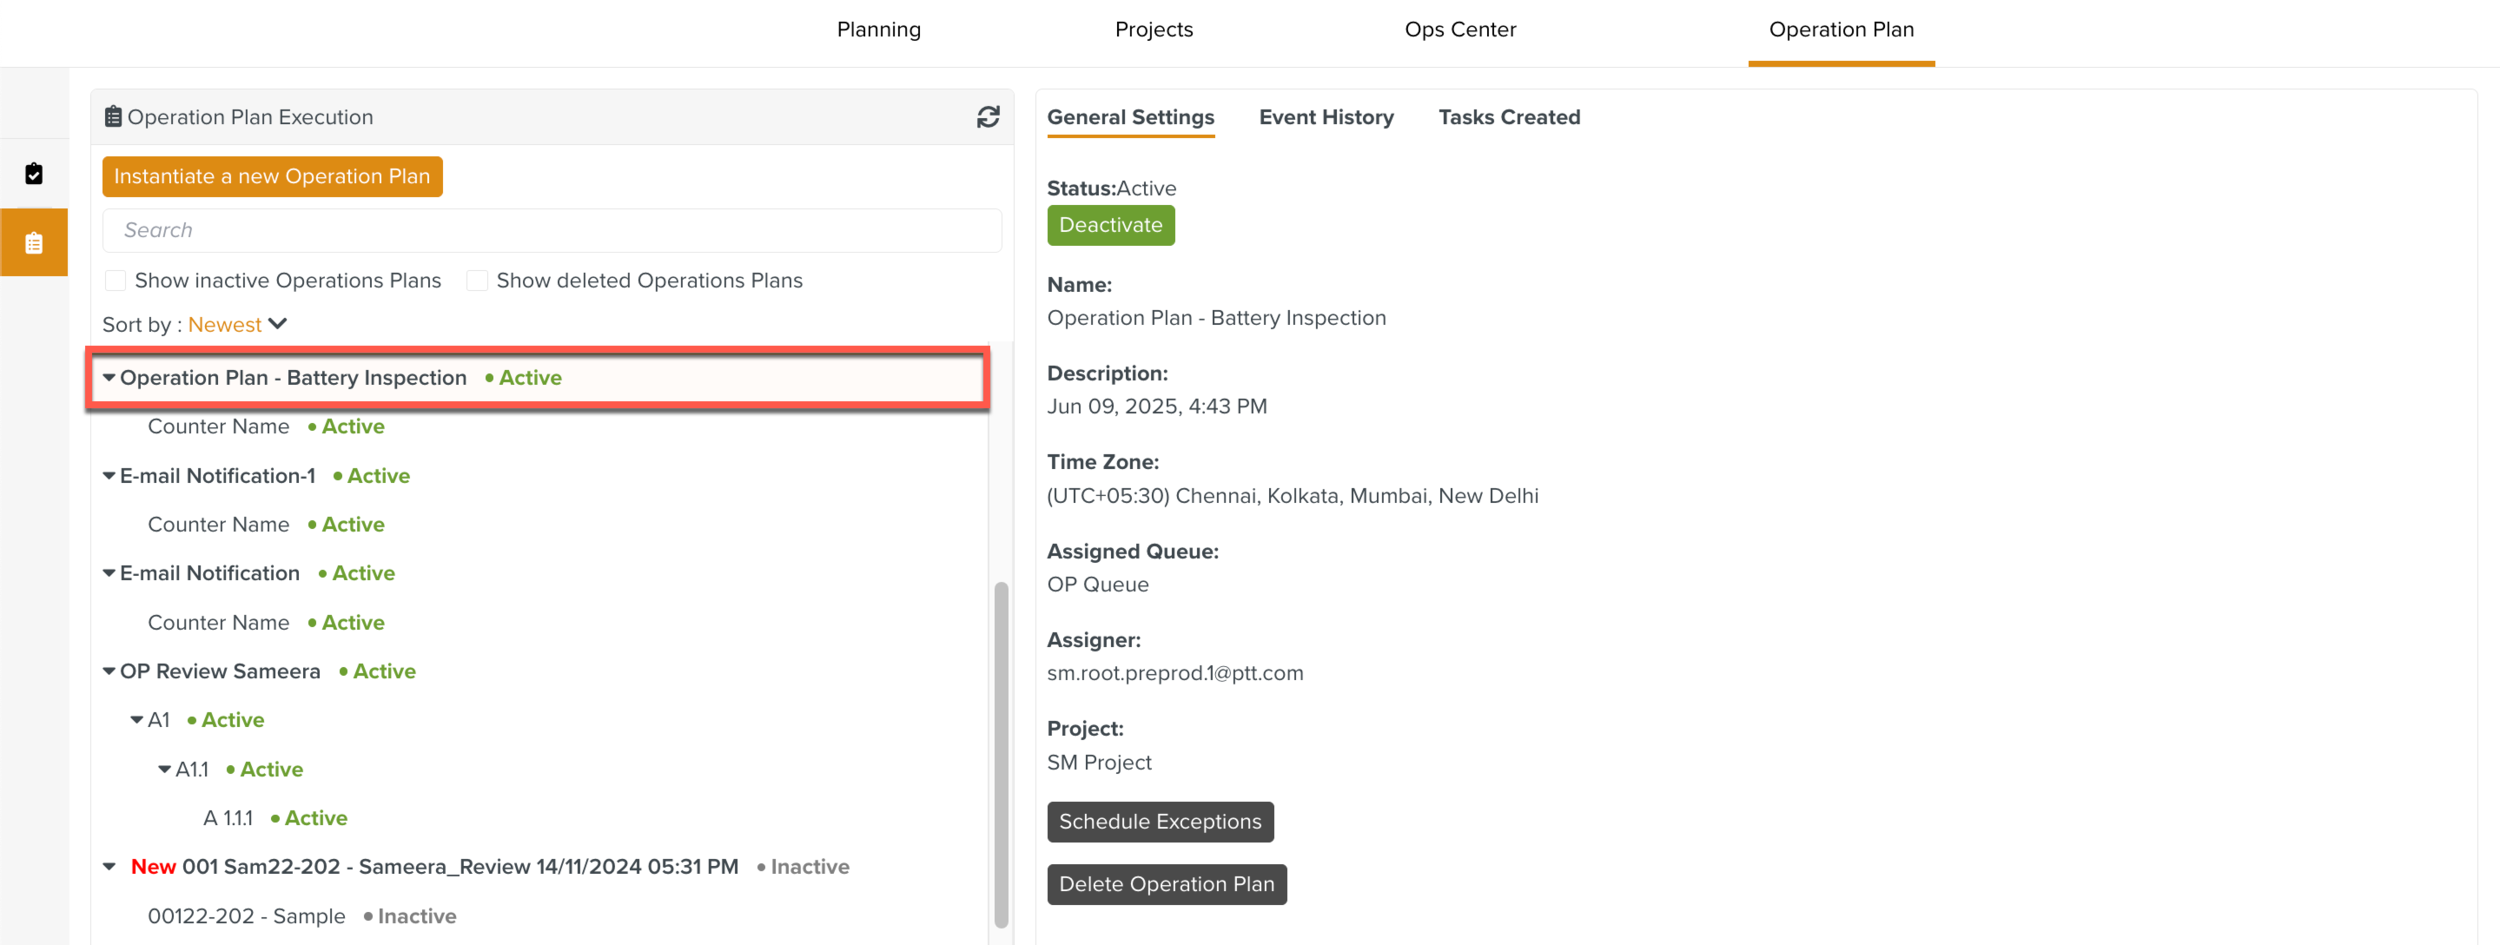 |
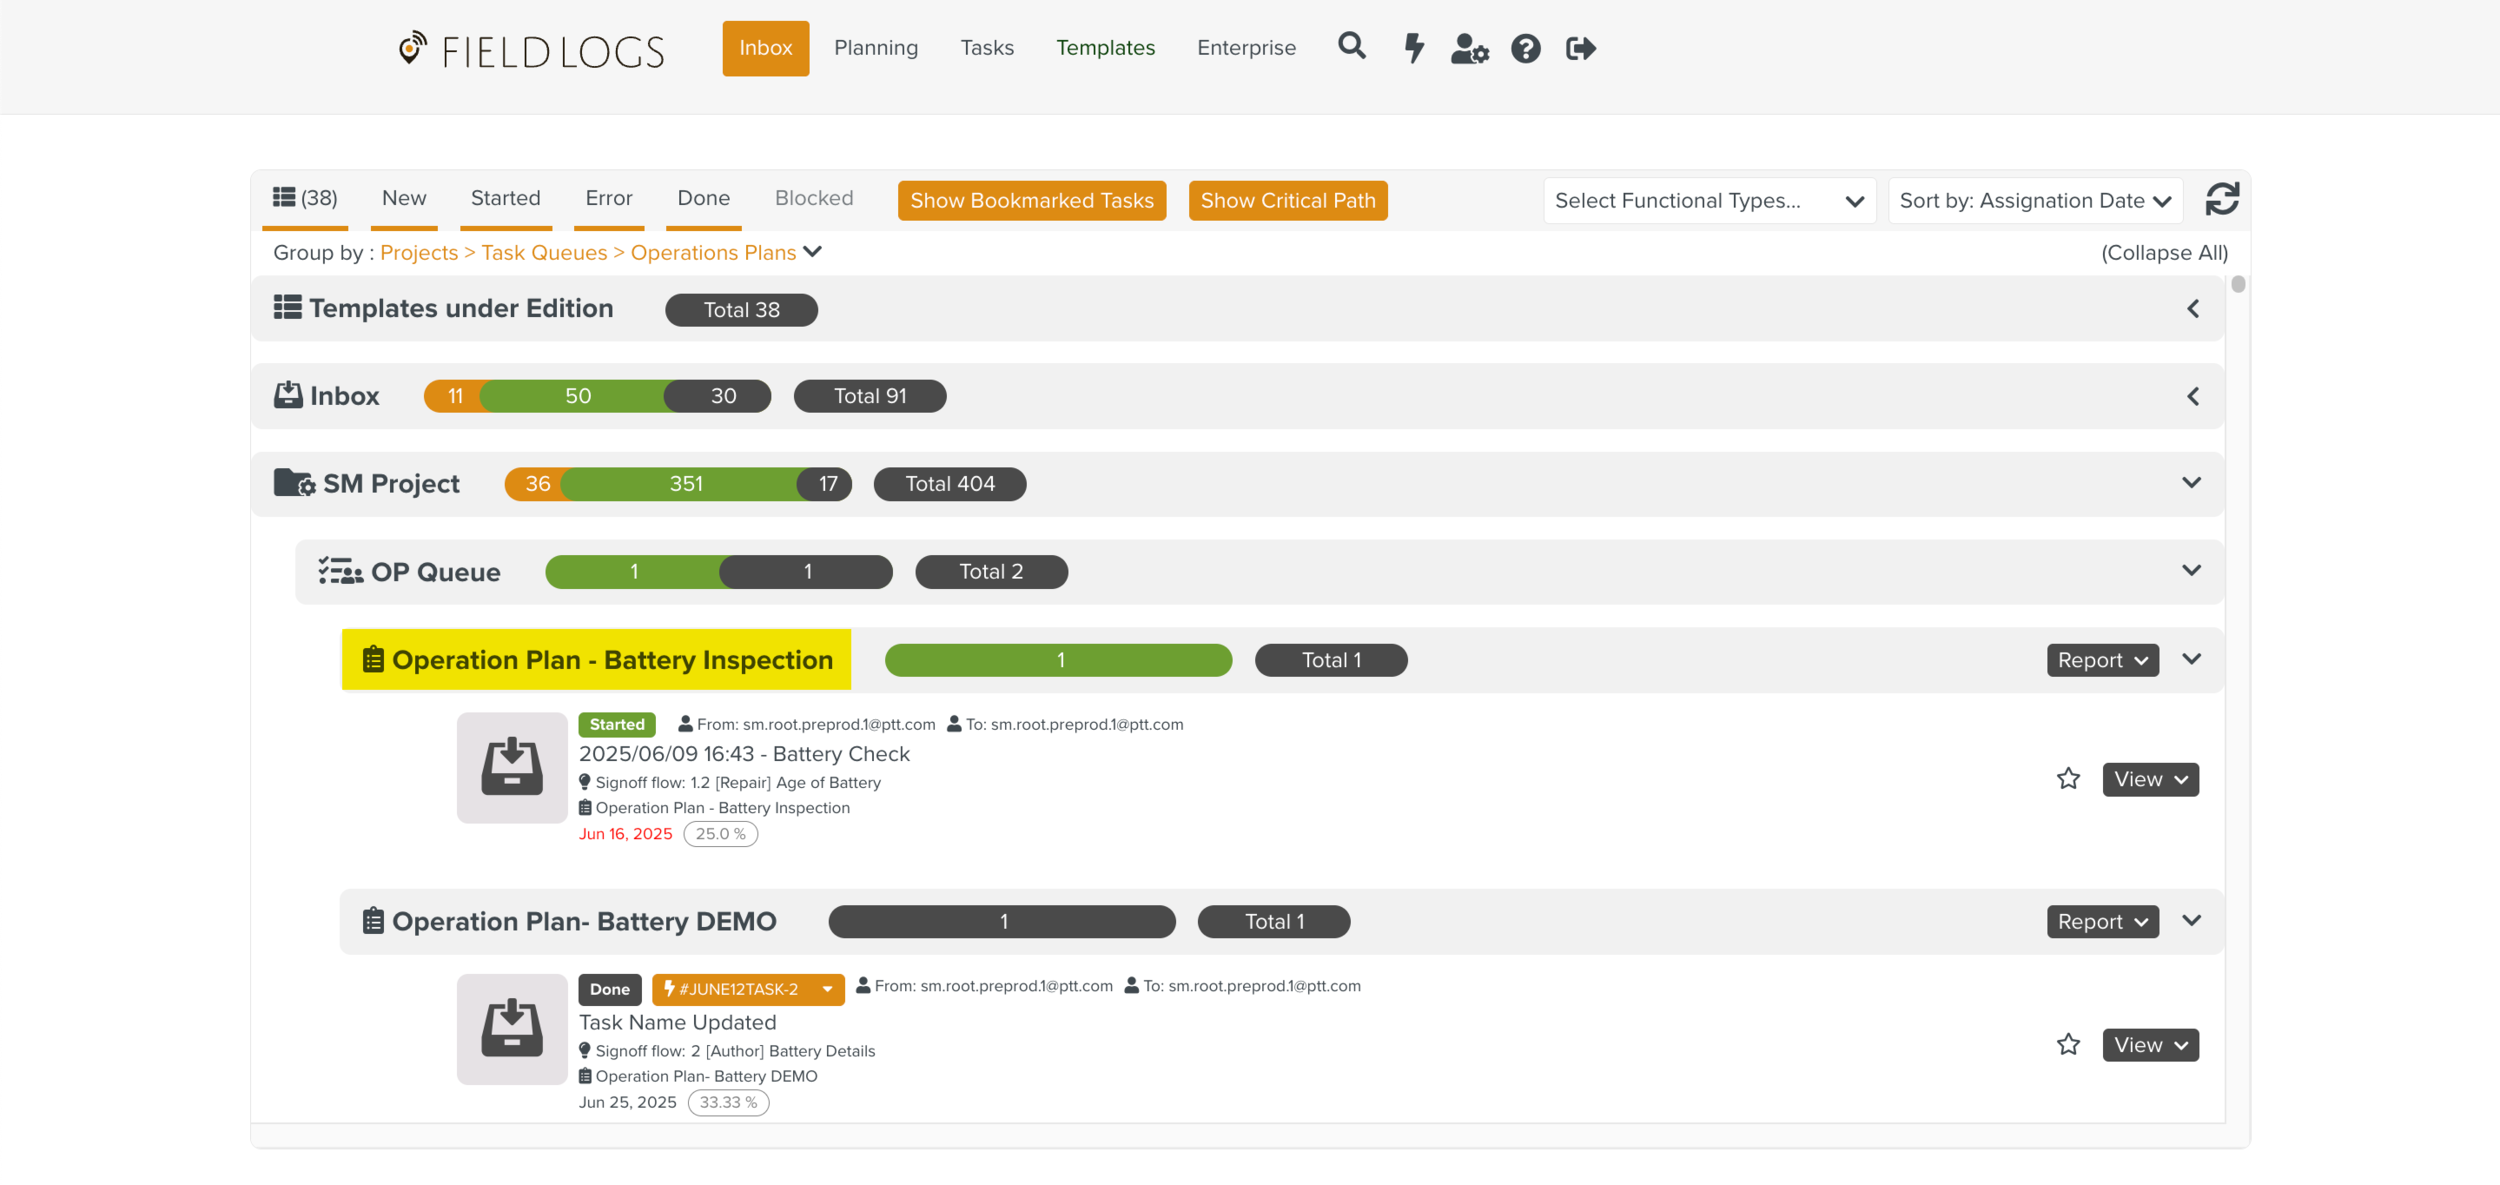
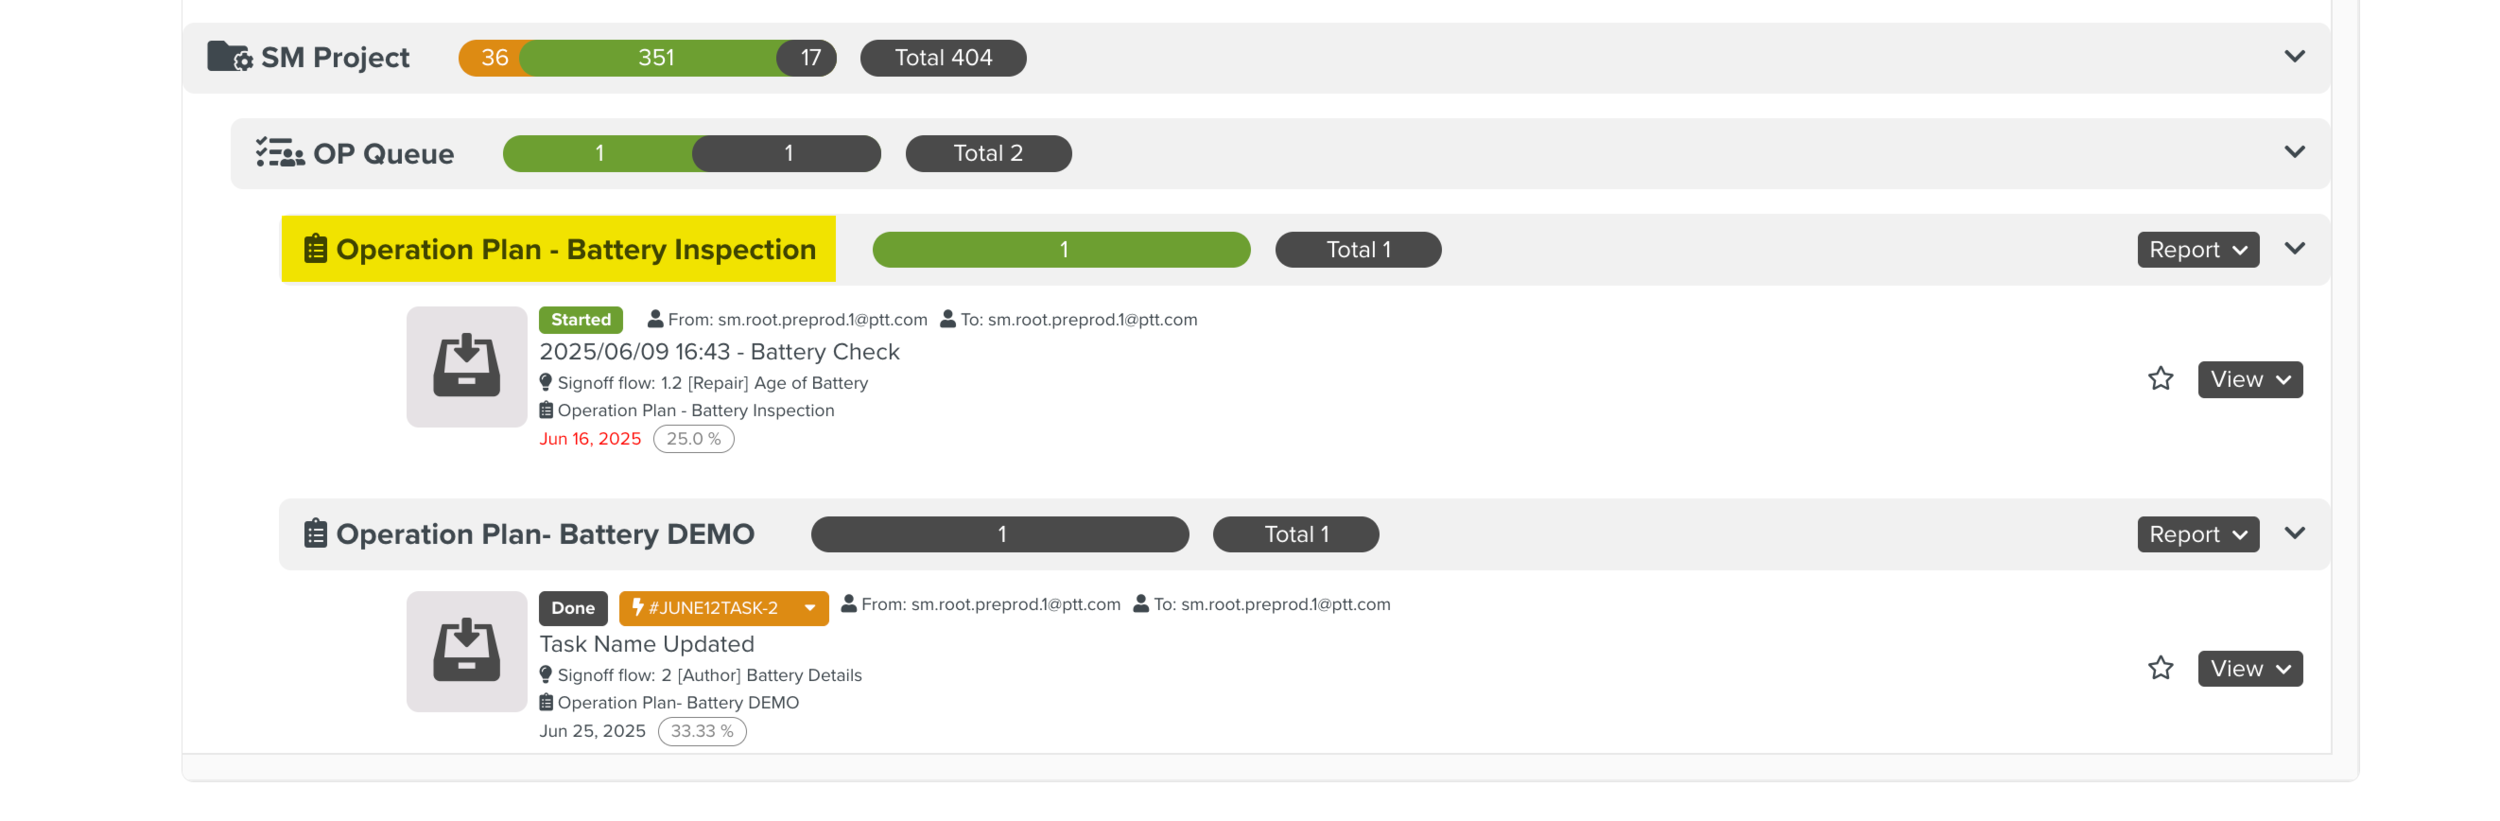
The Tasks generated by the Operation Plan- Battery Inspection Counter are grouped under the Counter name in the Inbox and Planning sections as seen below.
 |
 |
You can re-use this Counter by marking it as a favorite.
You can mark a Counter as a Favorite if you would like to re-use it in other Operation Plans.
Click the  to mark the Counter as a Favorite as shown below.
 |
The Counter is marked as a Favorite as indicated by the colored star  . Click .
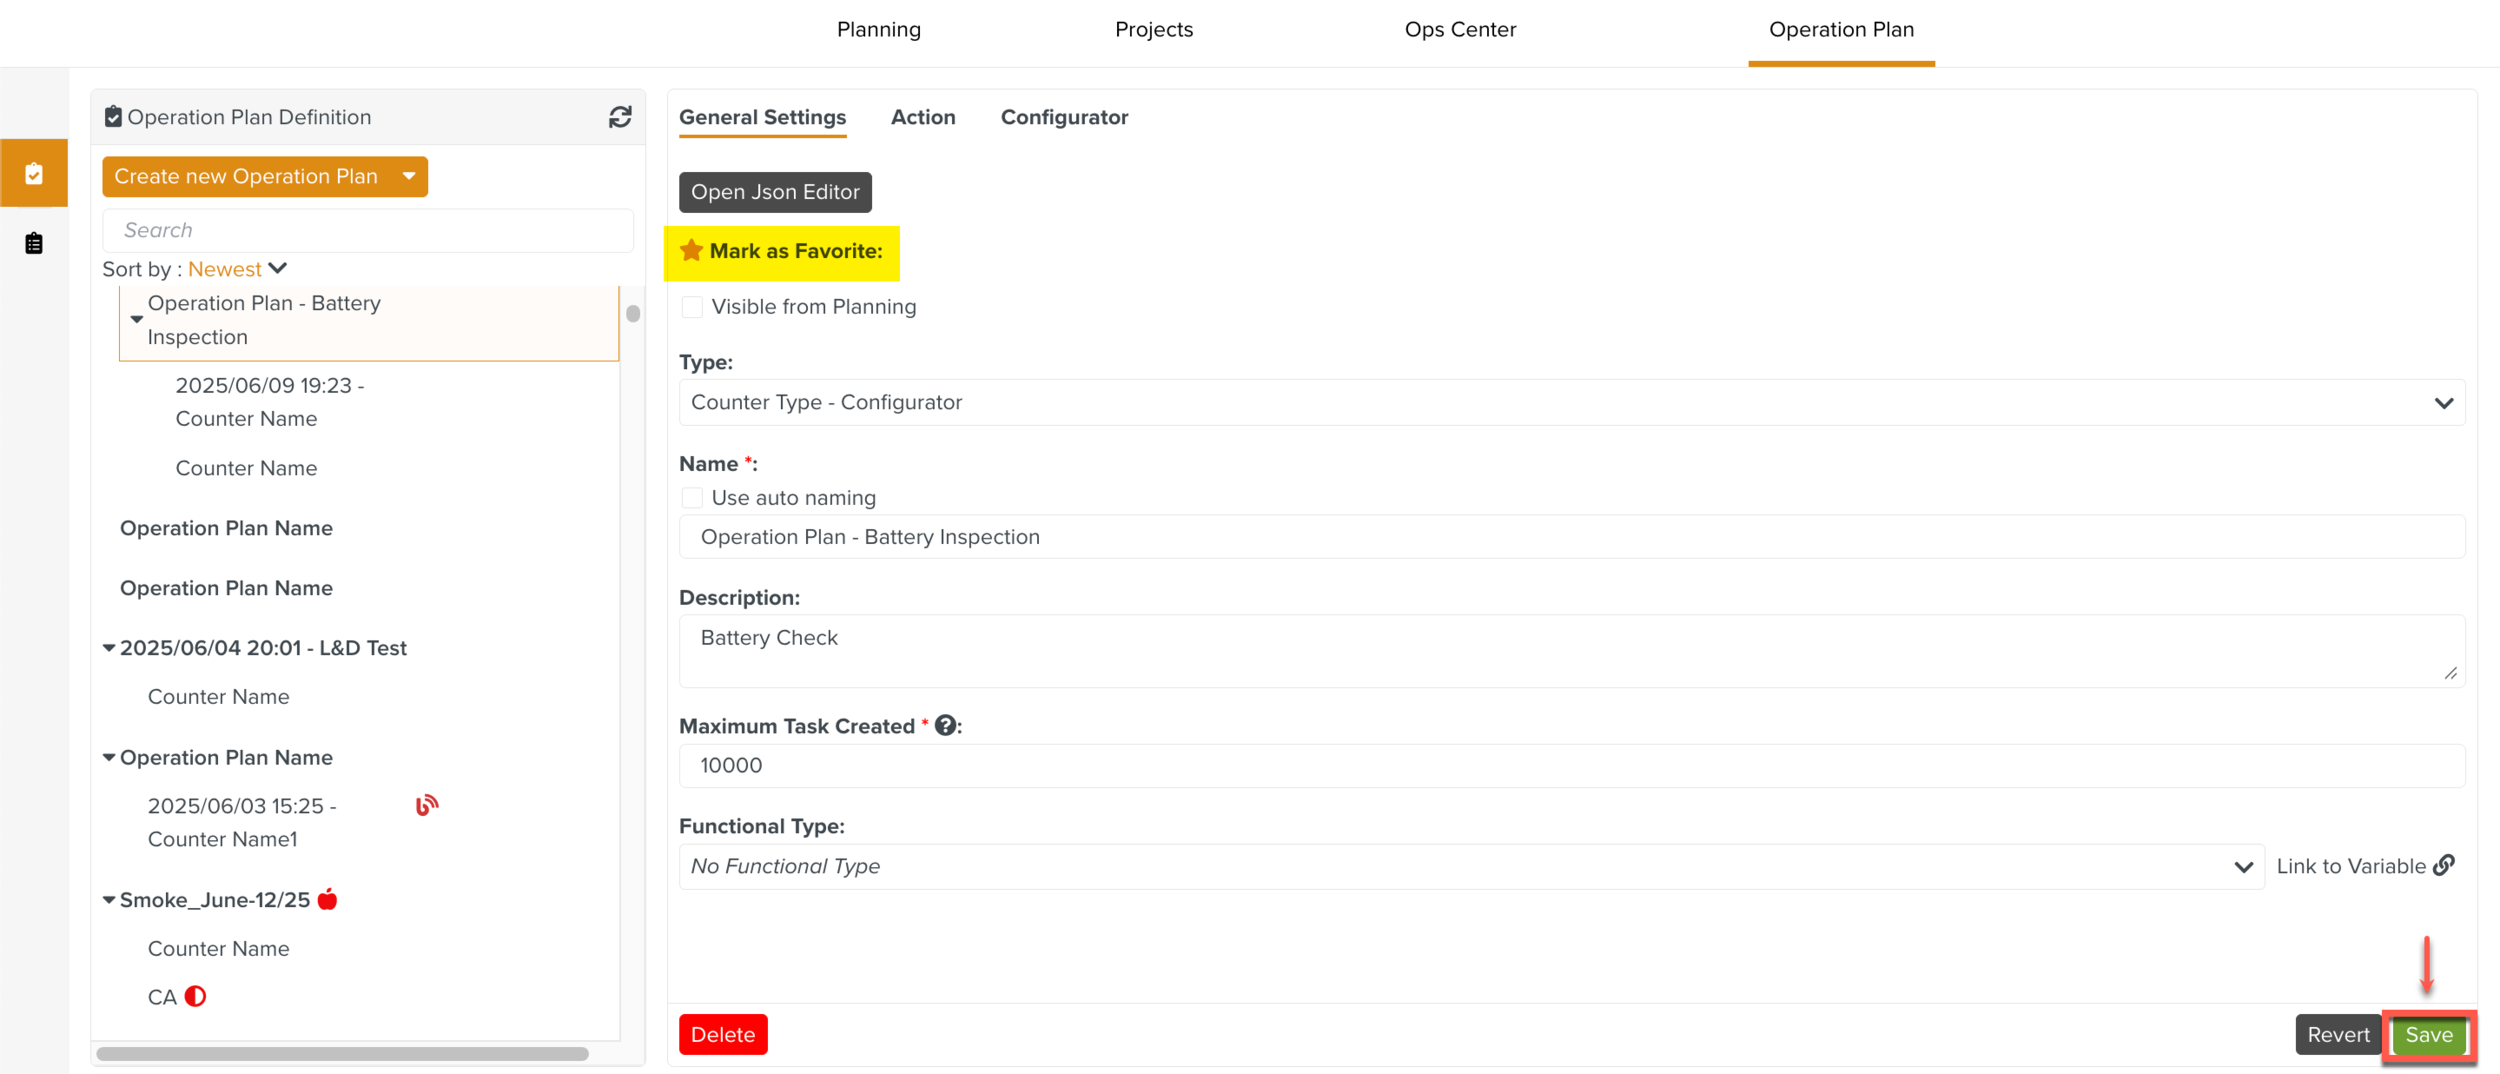 |
This Counter can now be re-used in other Operation Plans.
To re-use this Counter in a different Operation Plan:
Select in the Operation Plan as shown below.
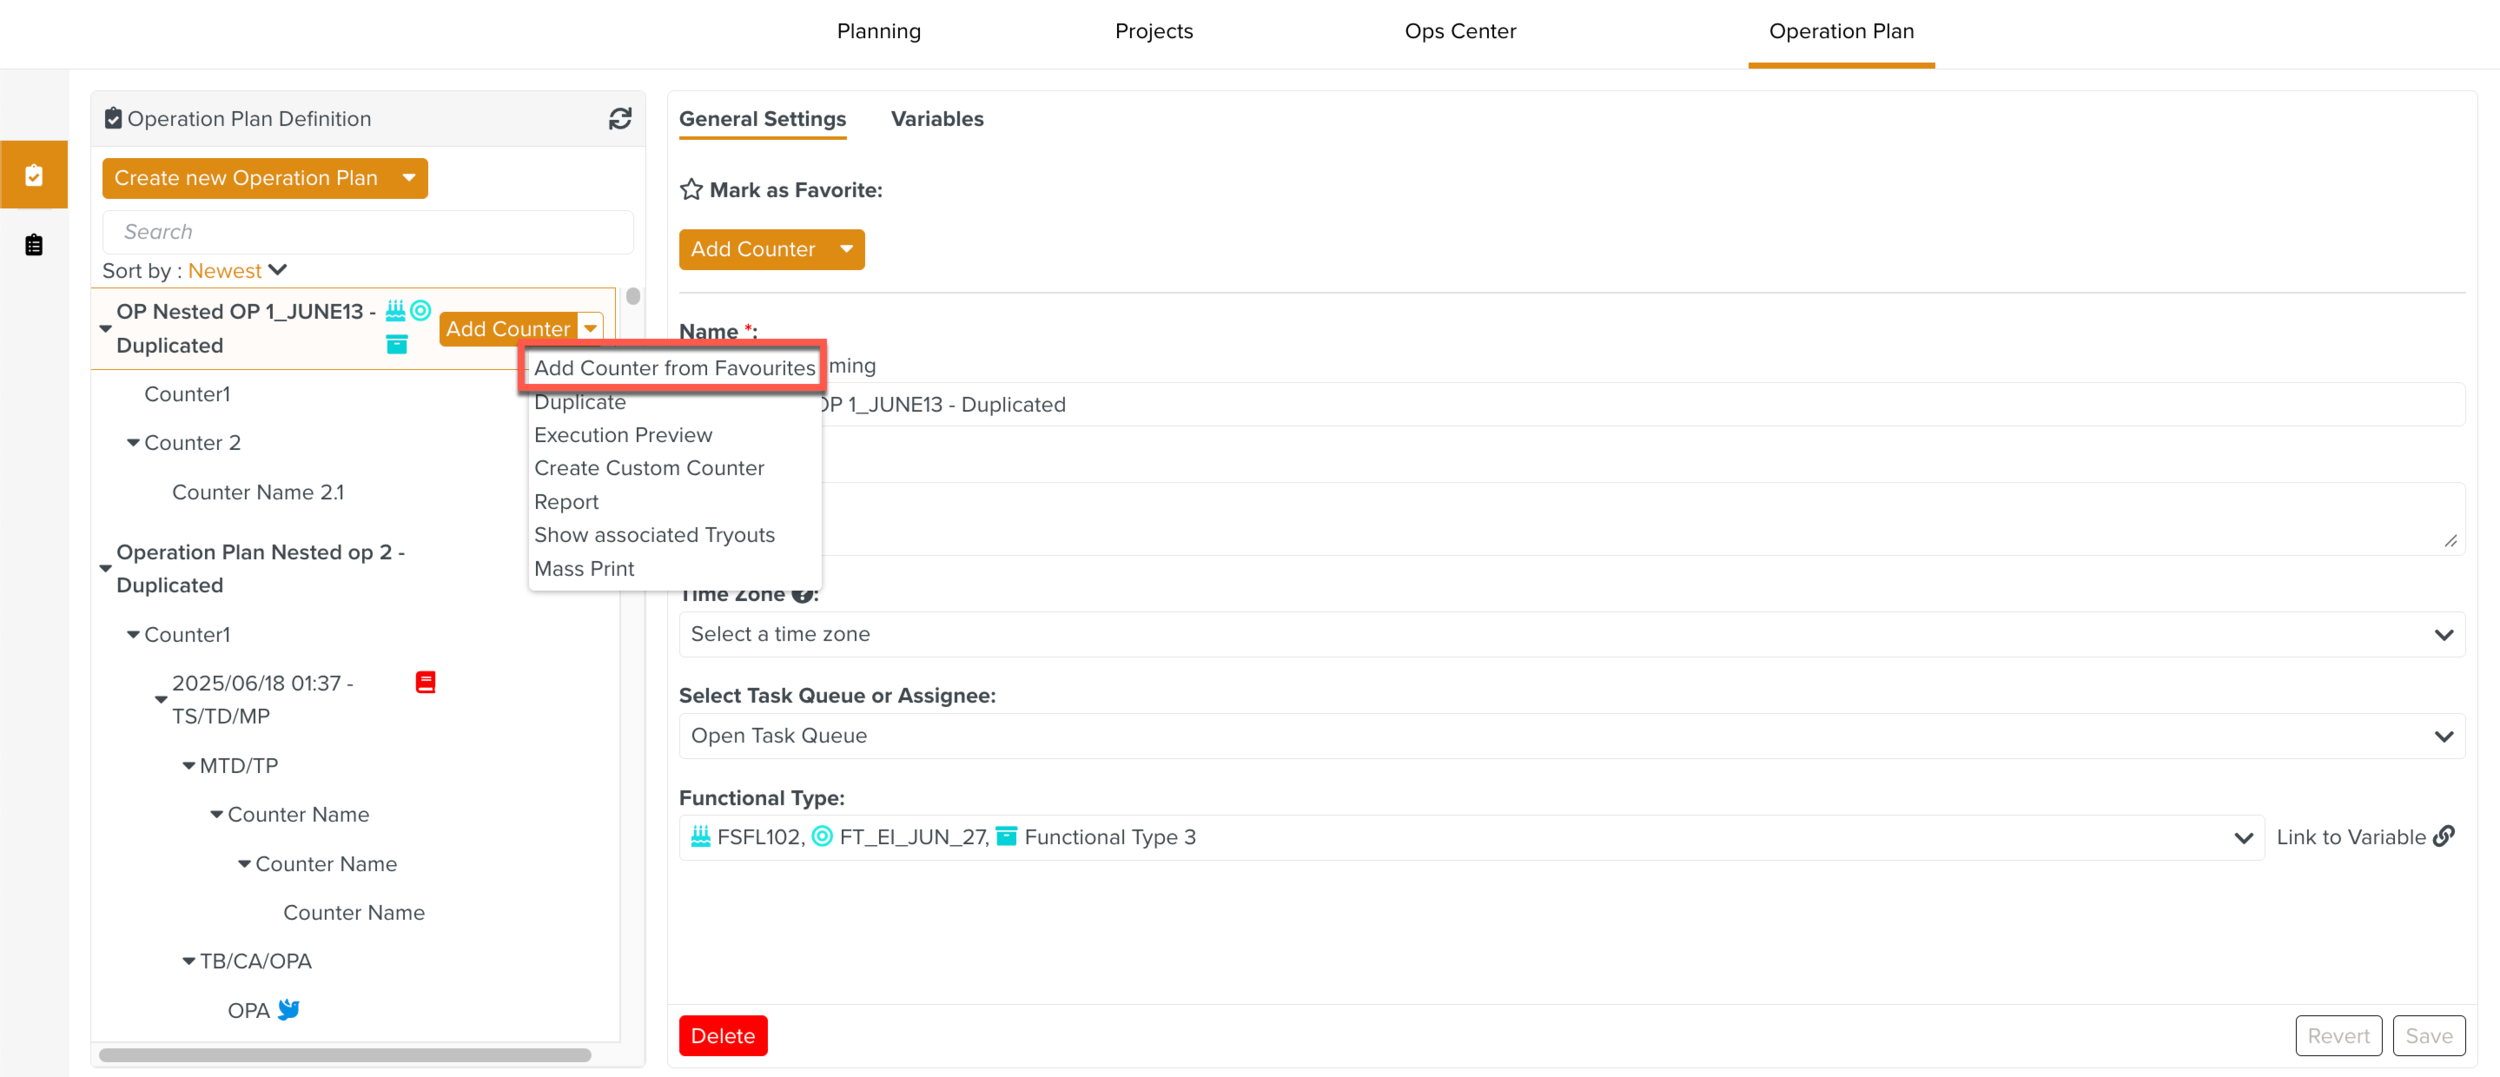
The list of Counters that have been marked as Favorite are displayed.
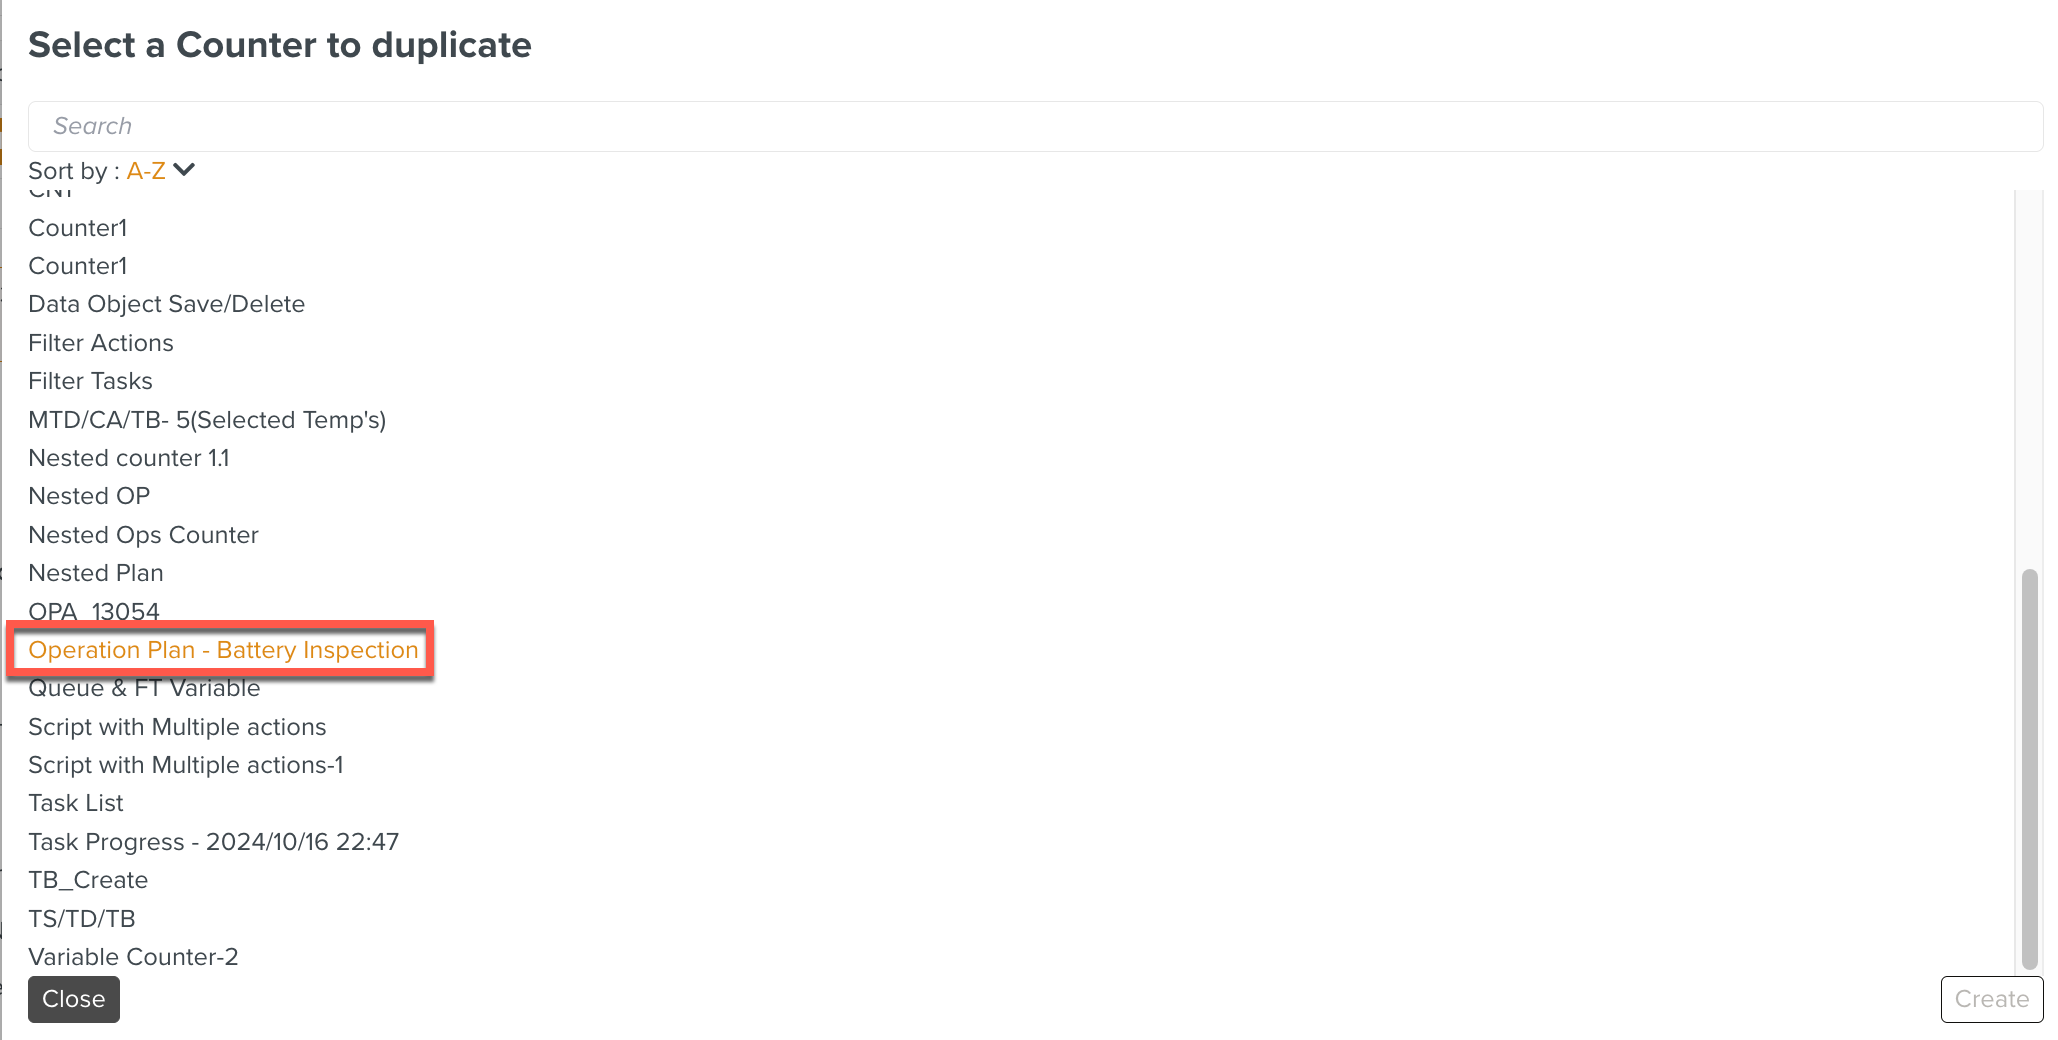
Select the desired Counter to add to your Operation Plan and click .
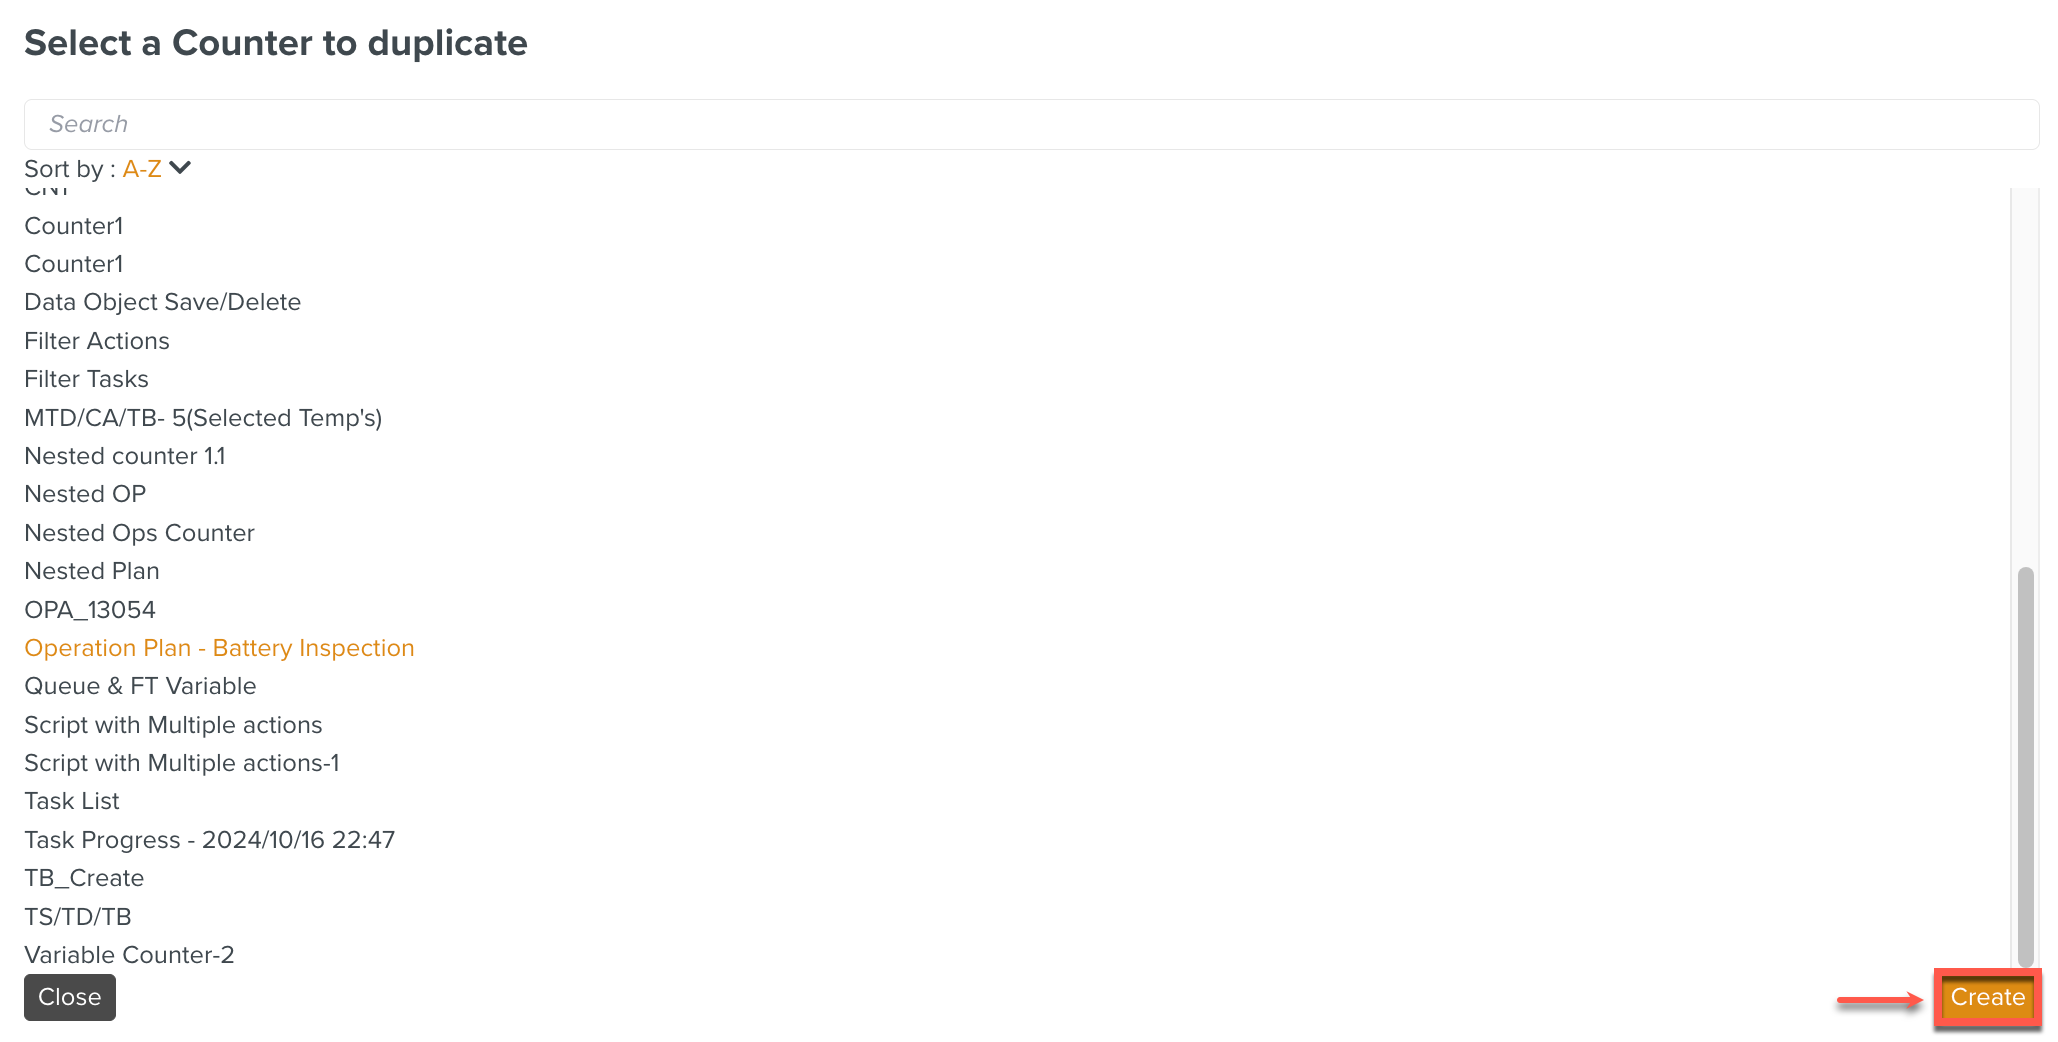
The selected Counter is added to the Operation Plan.
The Action (Create a Task, Update a Task and Email notification) is made up of instances of one or more Templates.
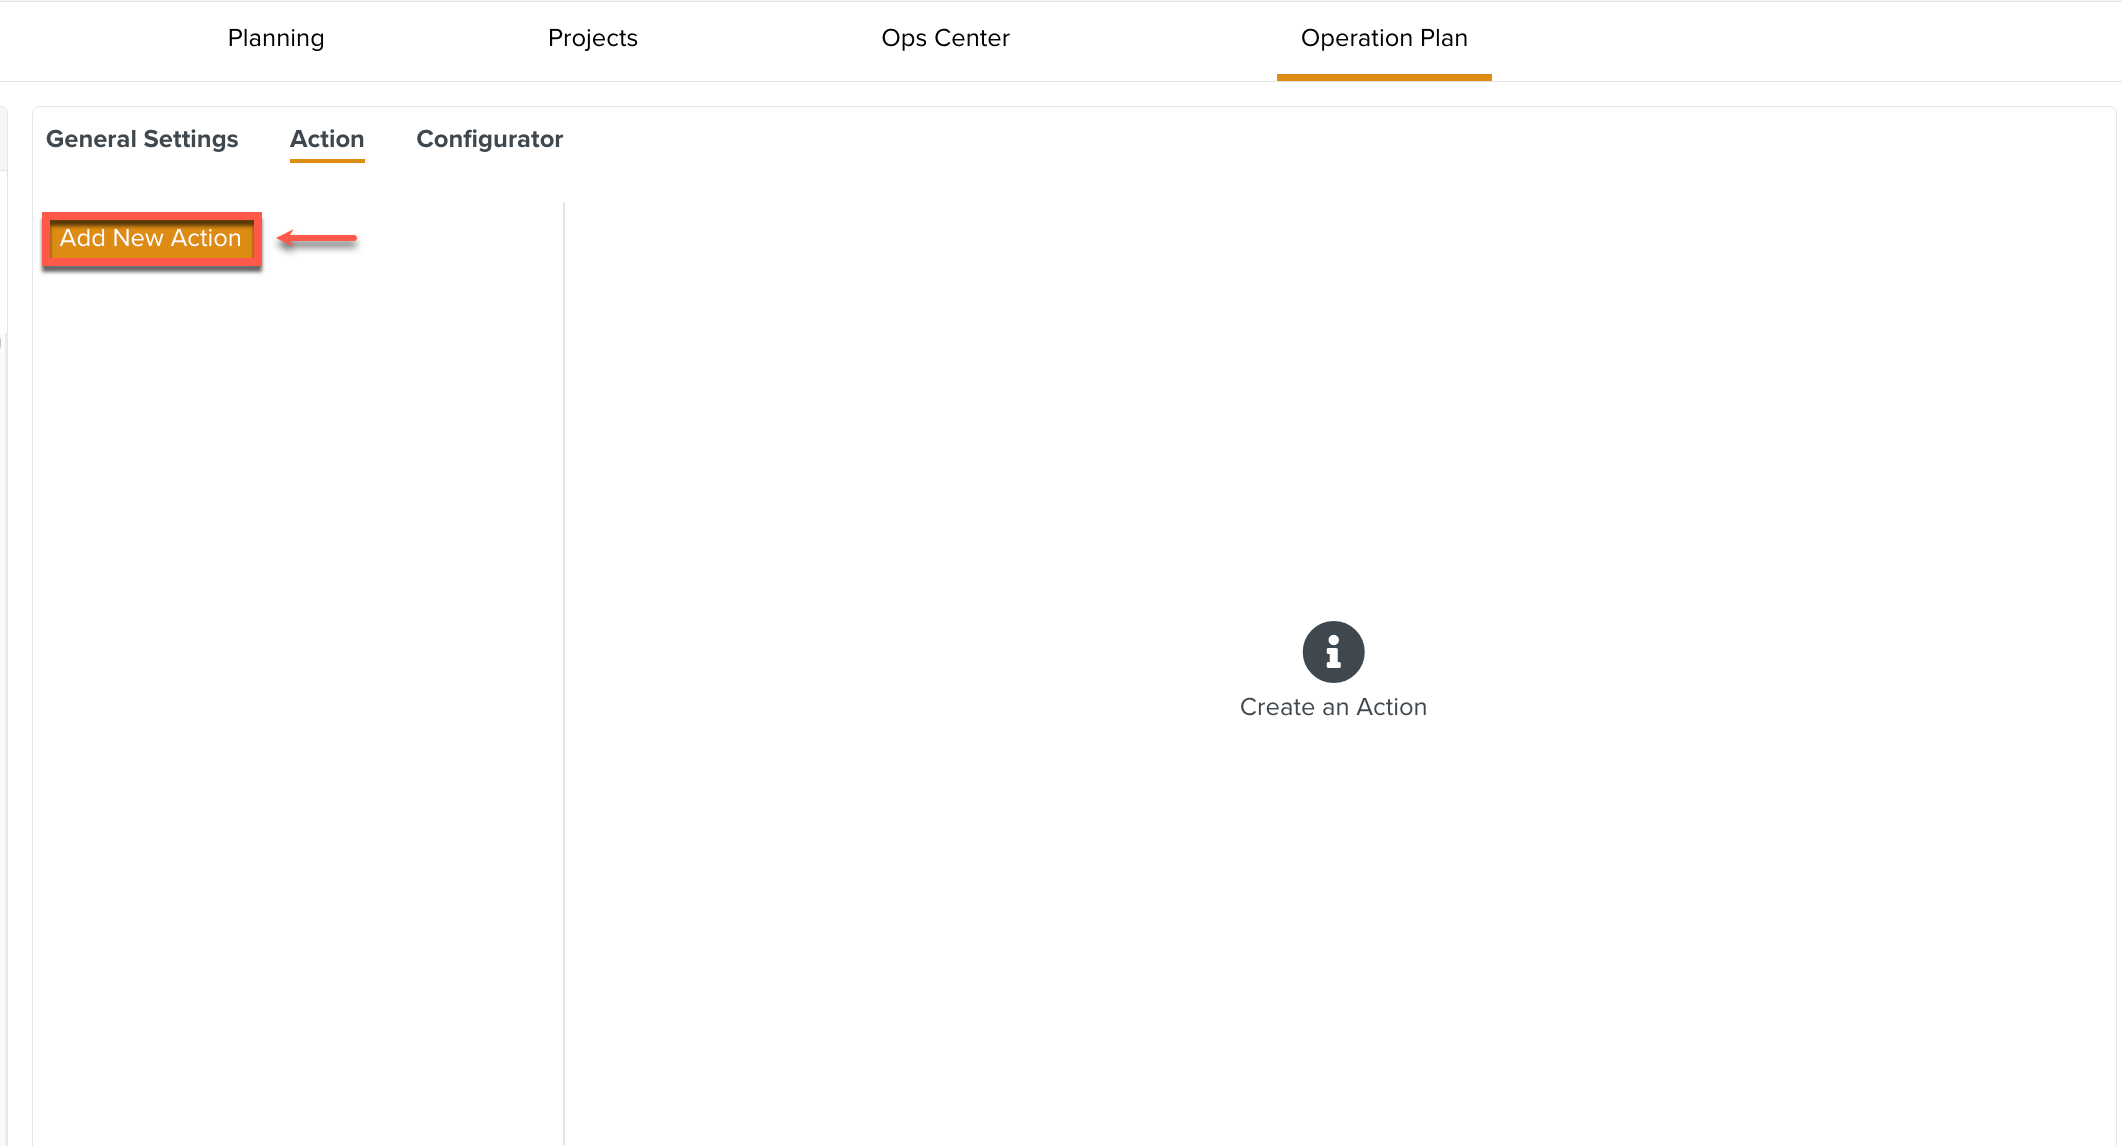
To add an Action to a Counter:
Click in the Action tab as shown below.
A new Action appears with an auto-generated ID as shown below.
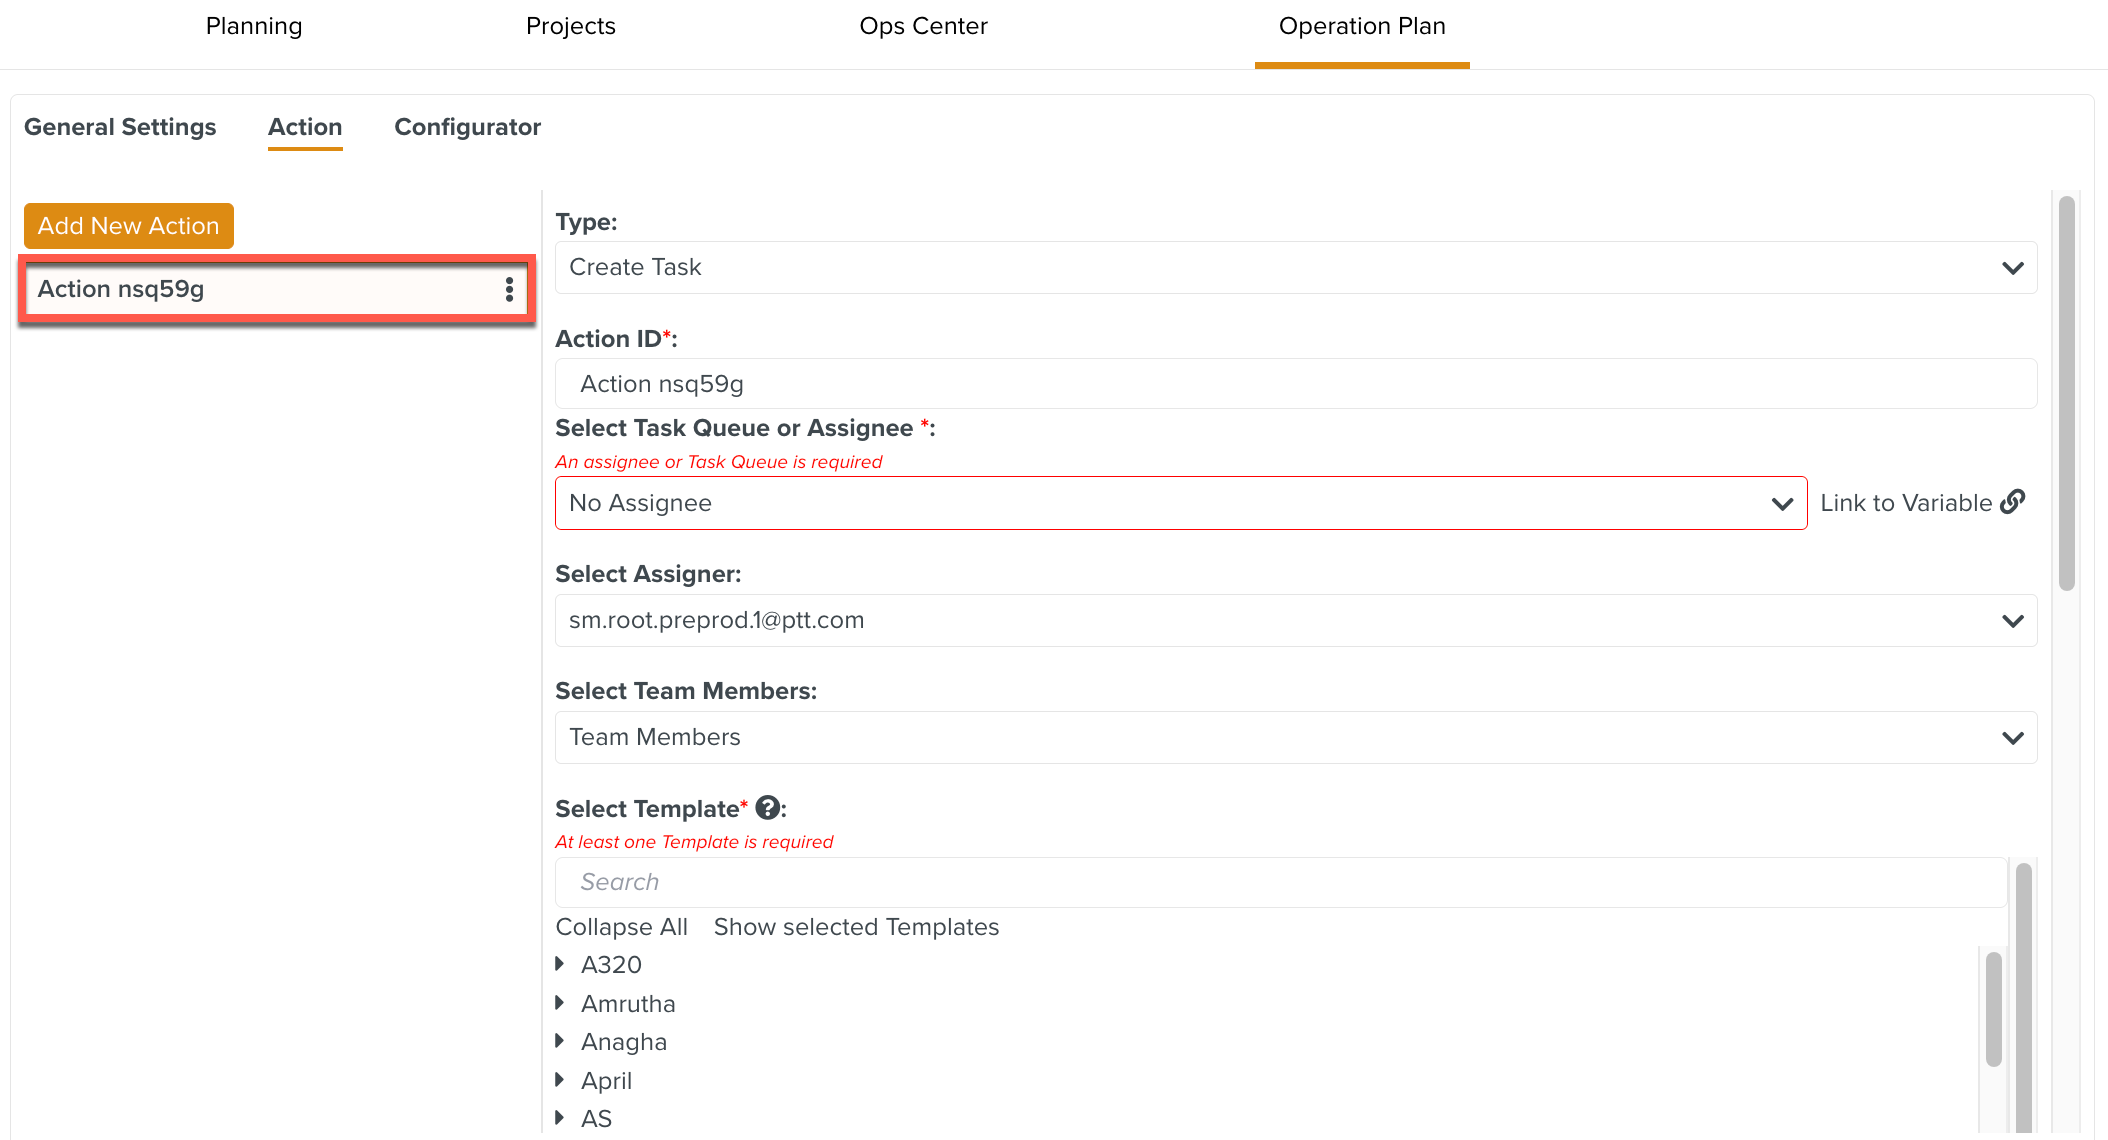
The details of the selected Action appear.
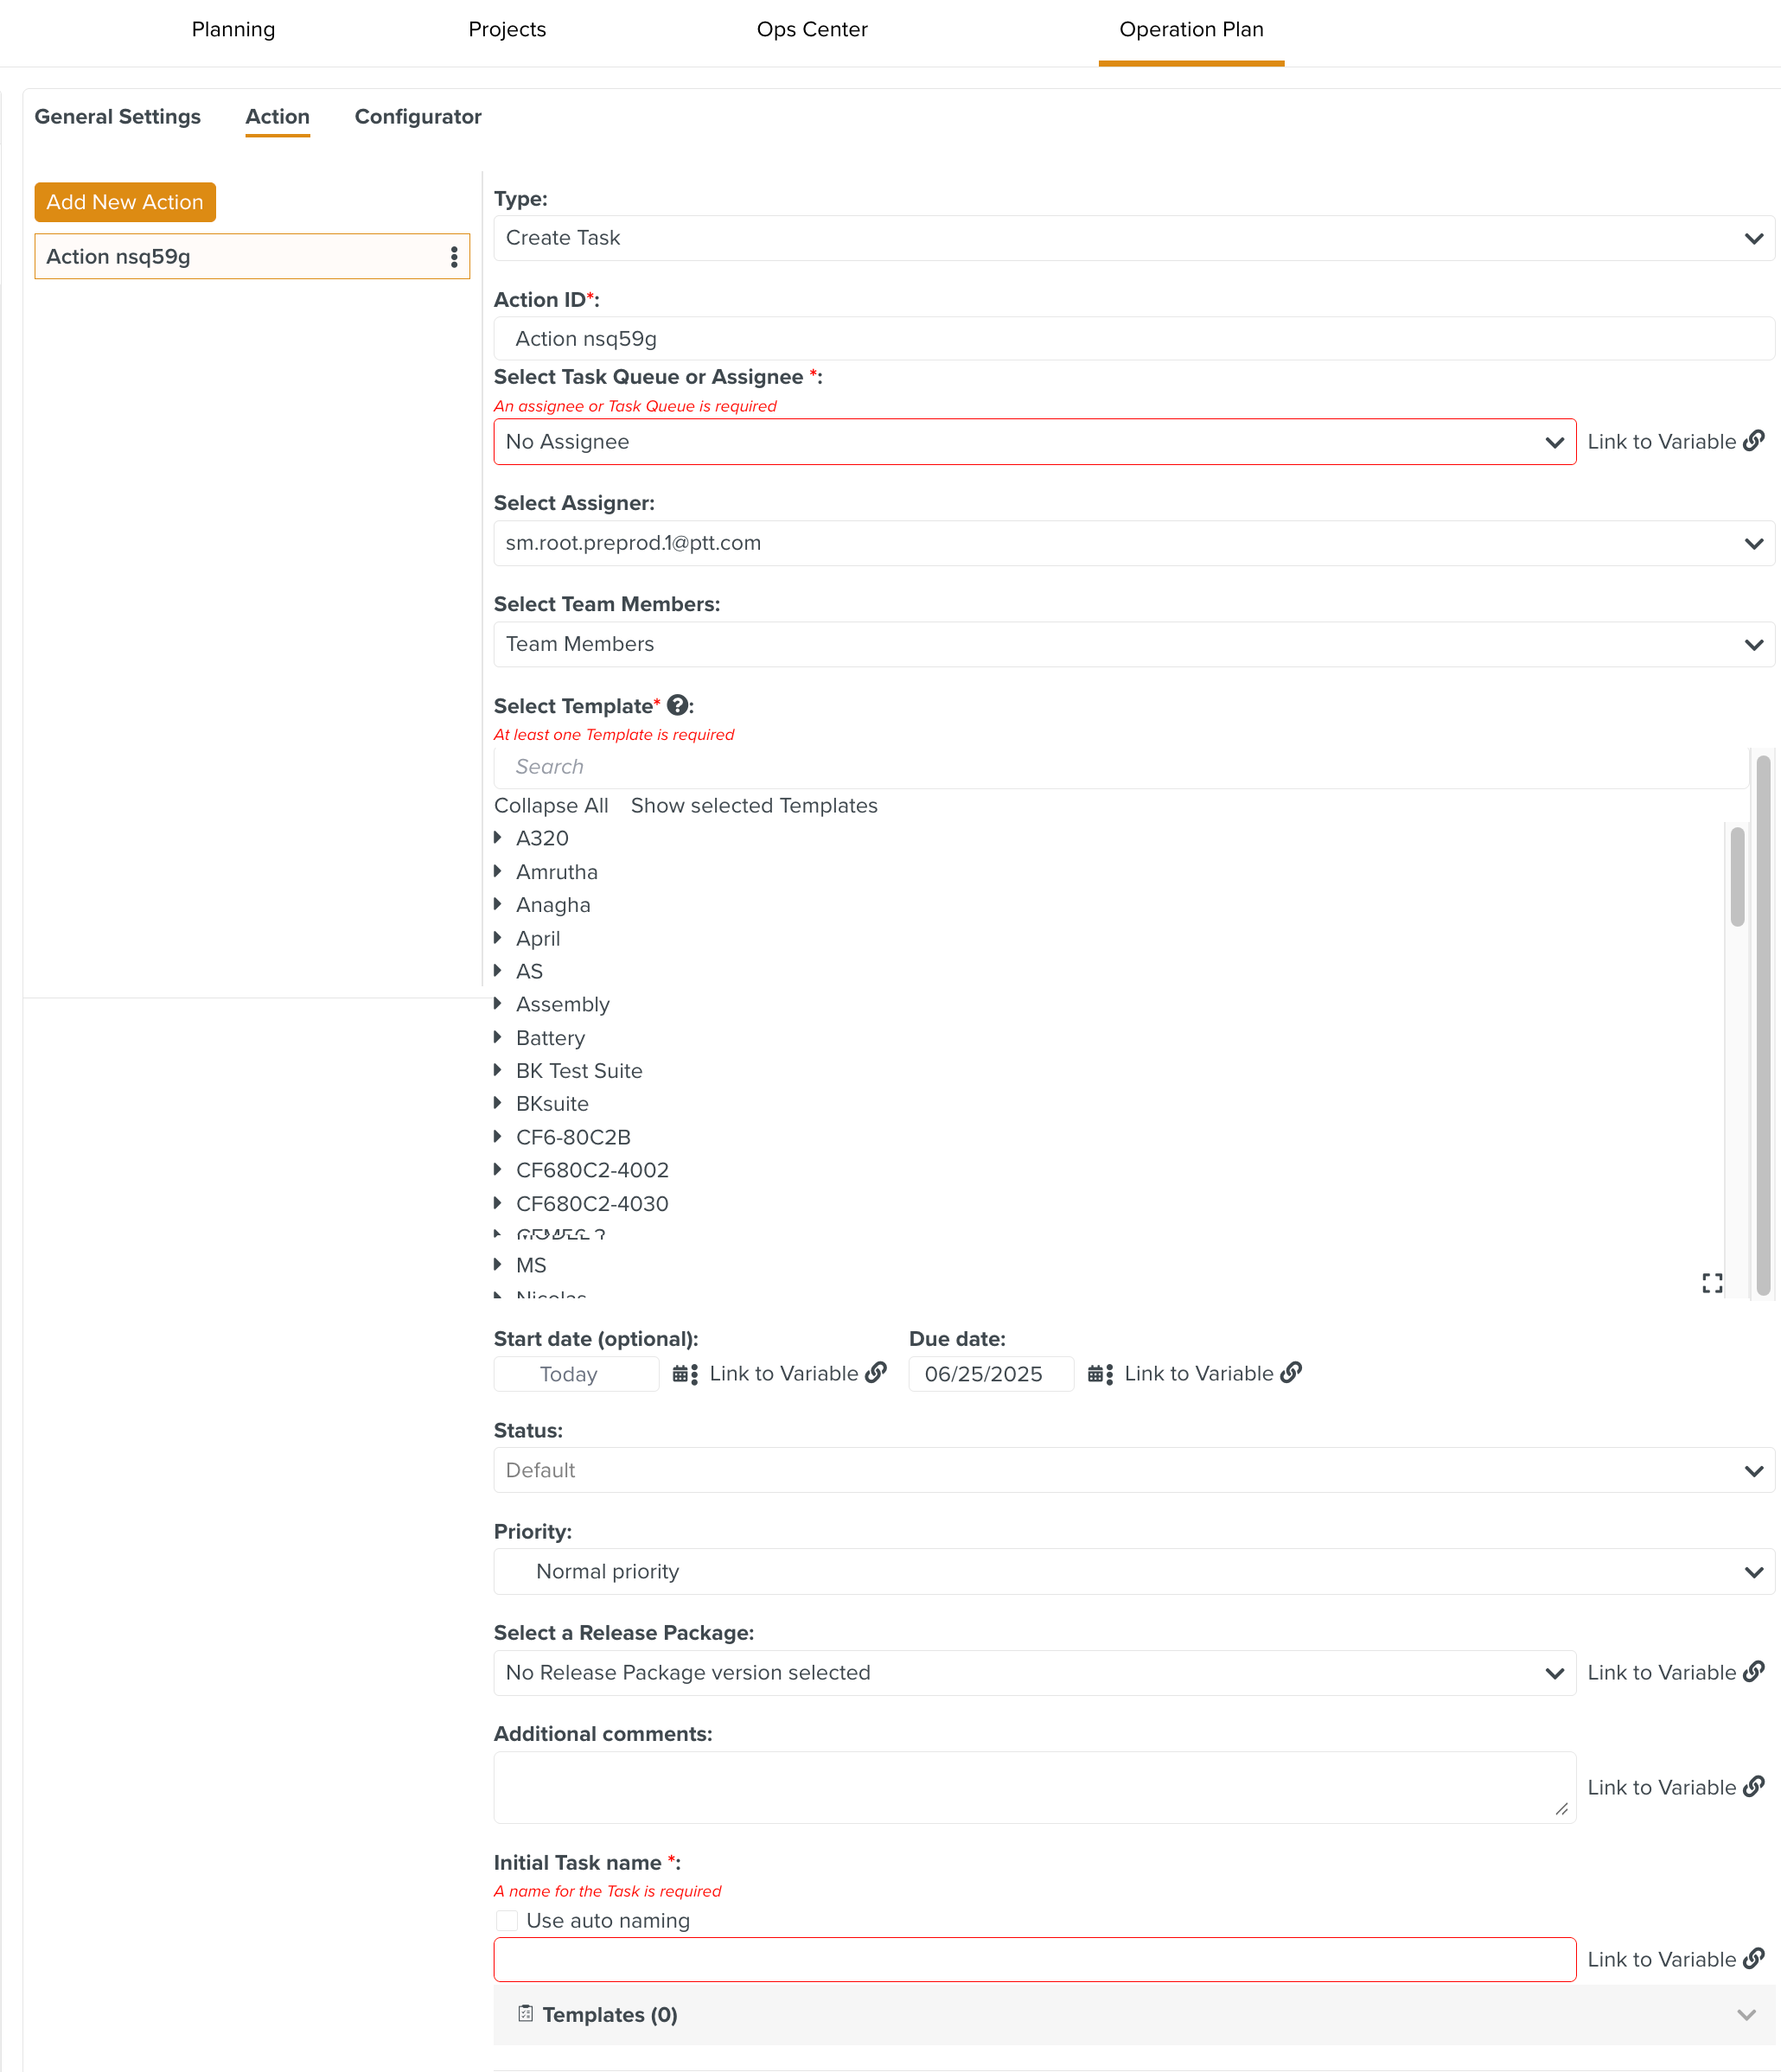
Select the required Action type from the dropdown list as shown below.
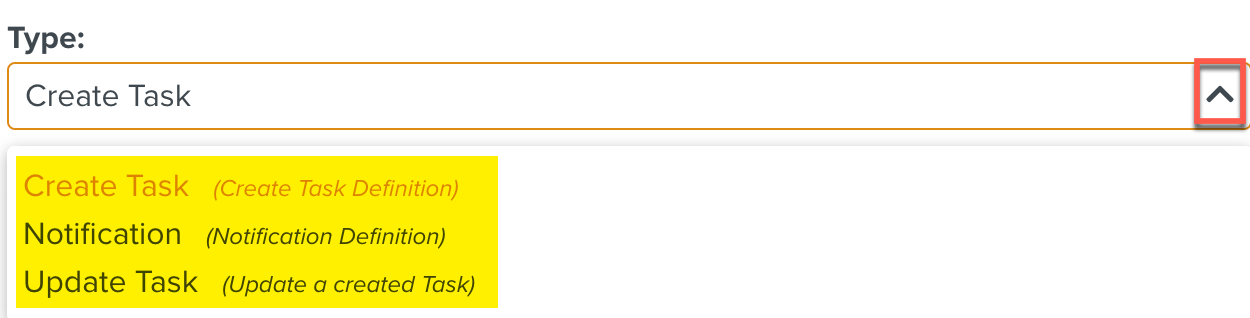
The three action types are as follows:
[Optional] You can rename the .
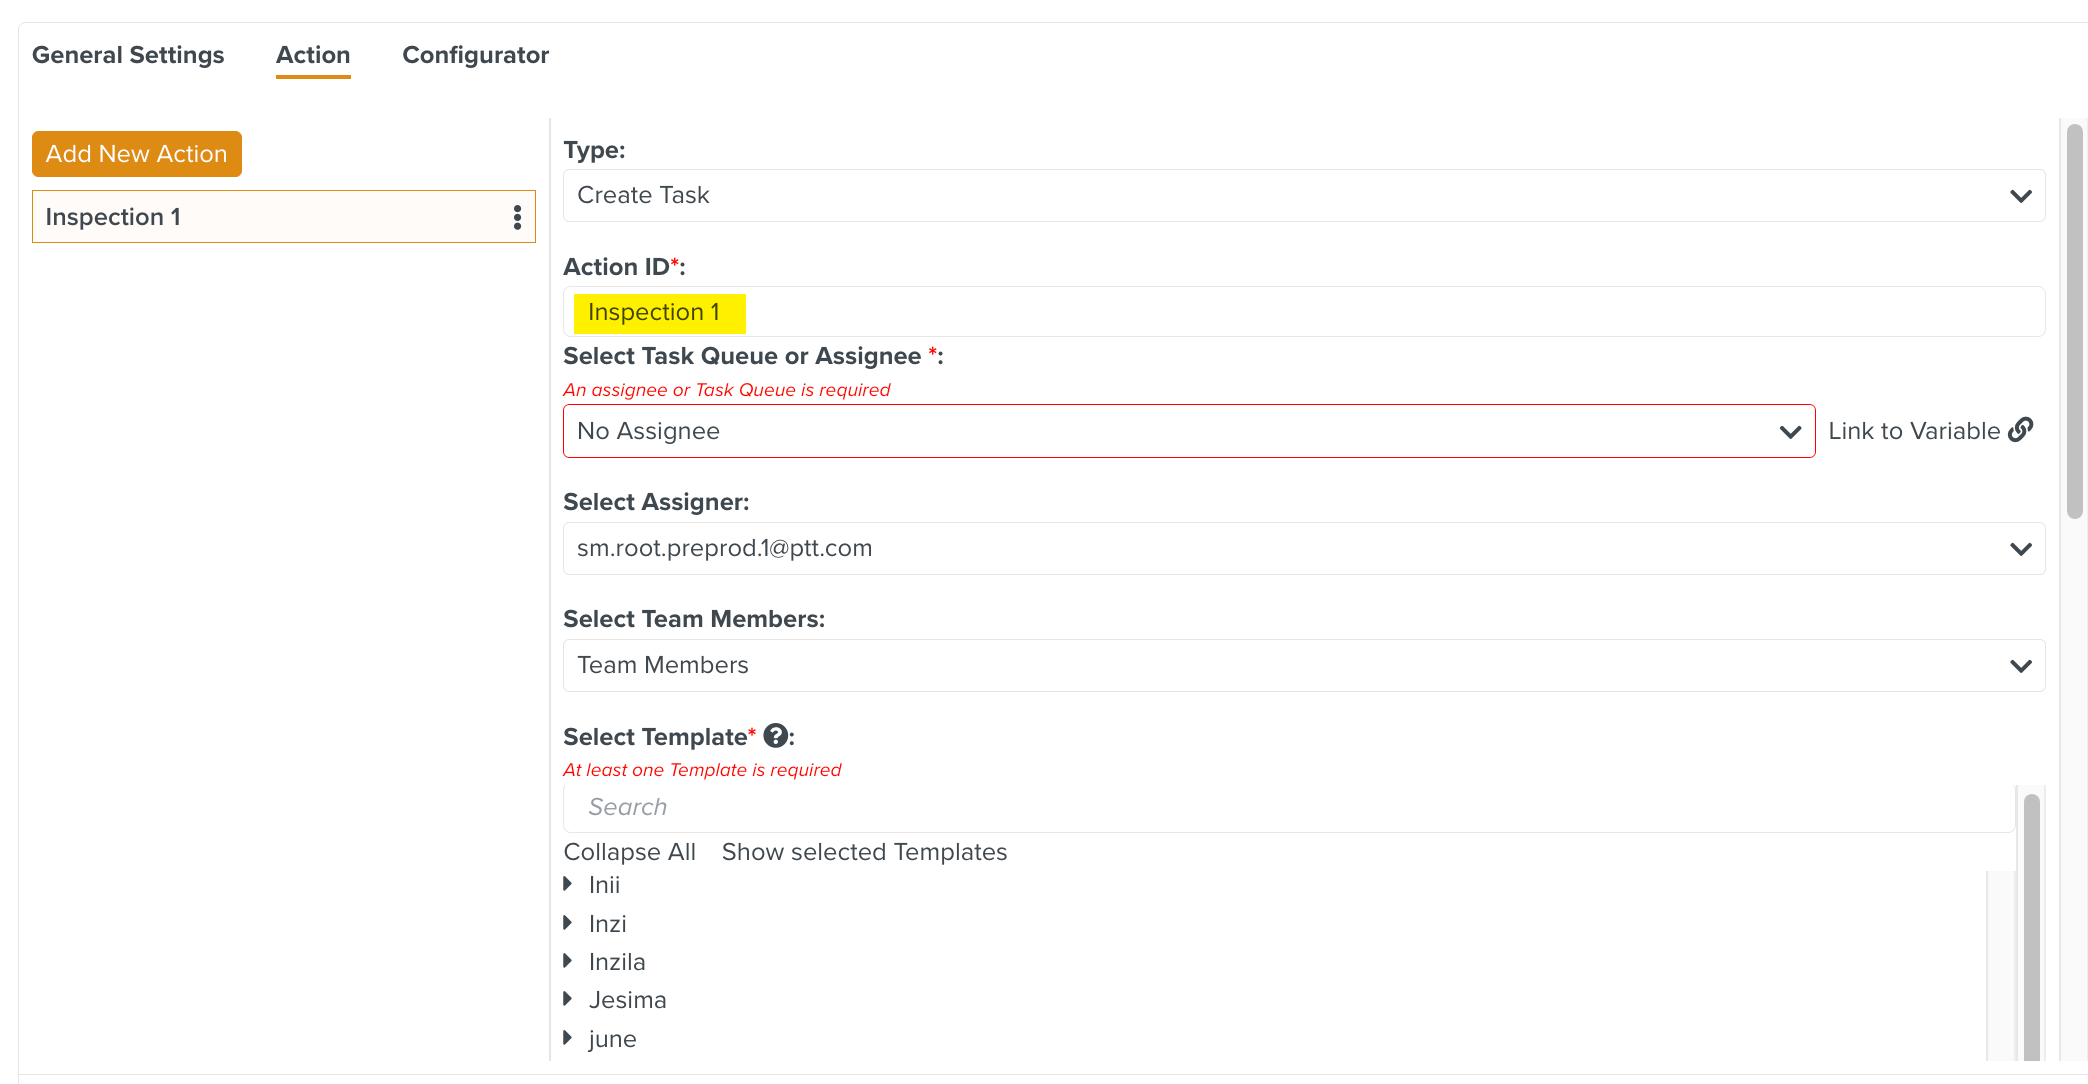
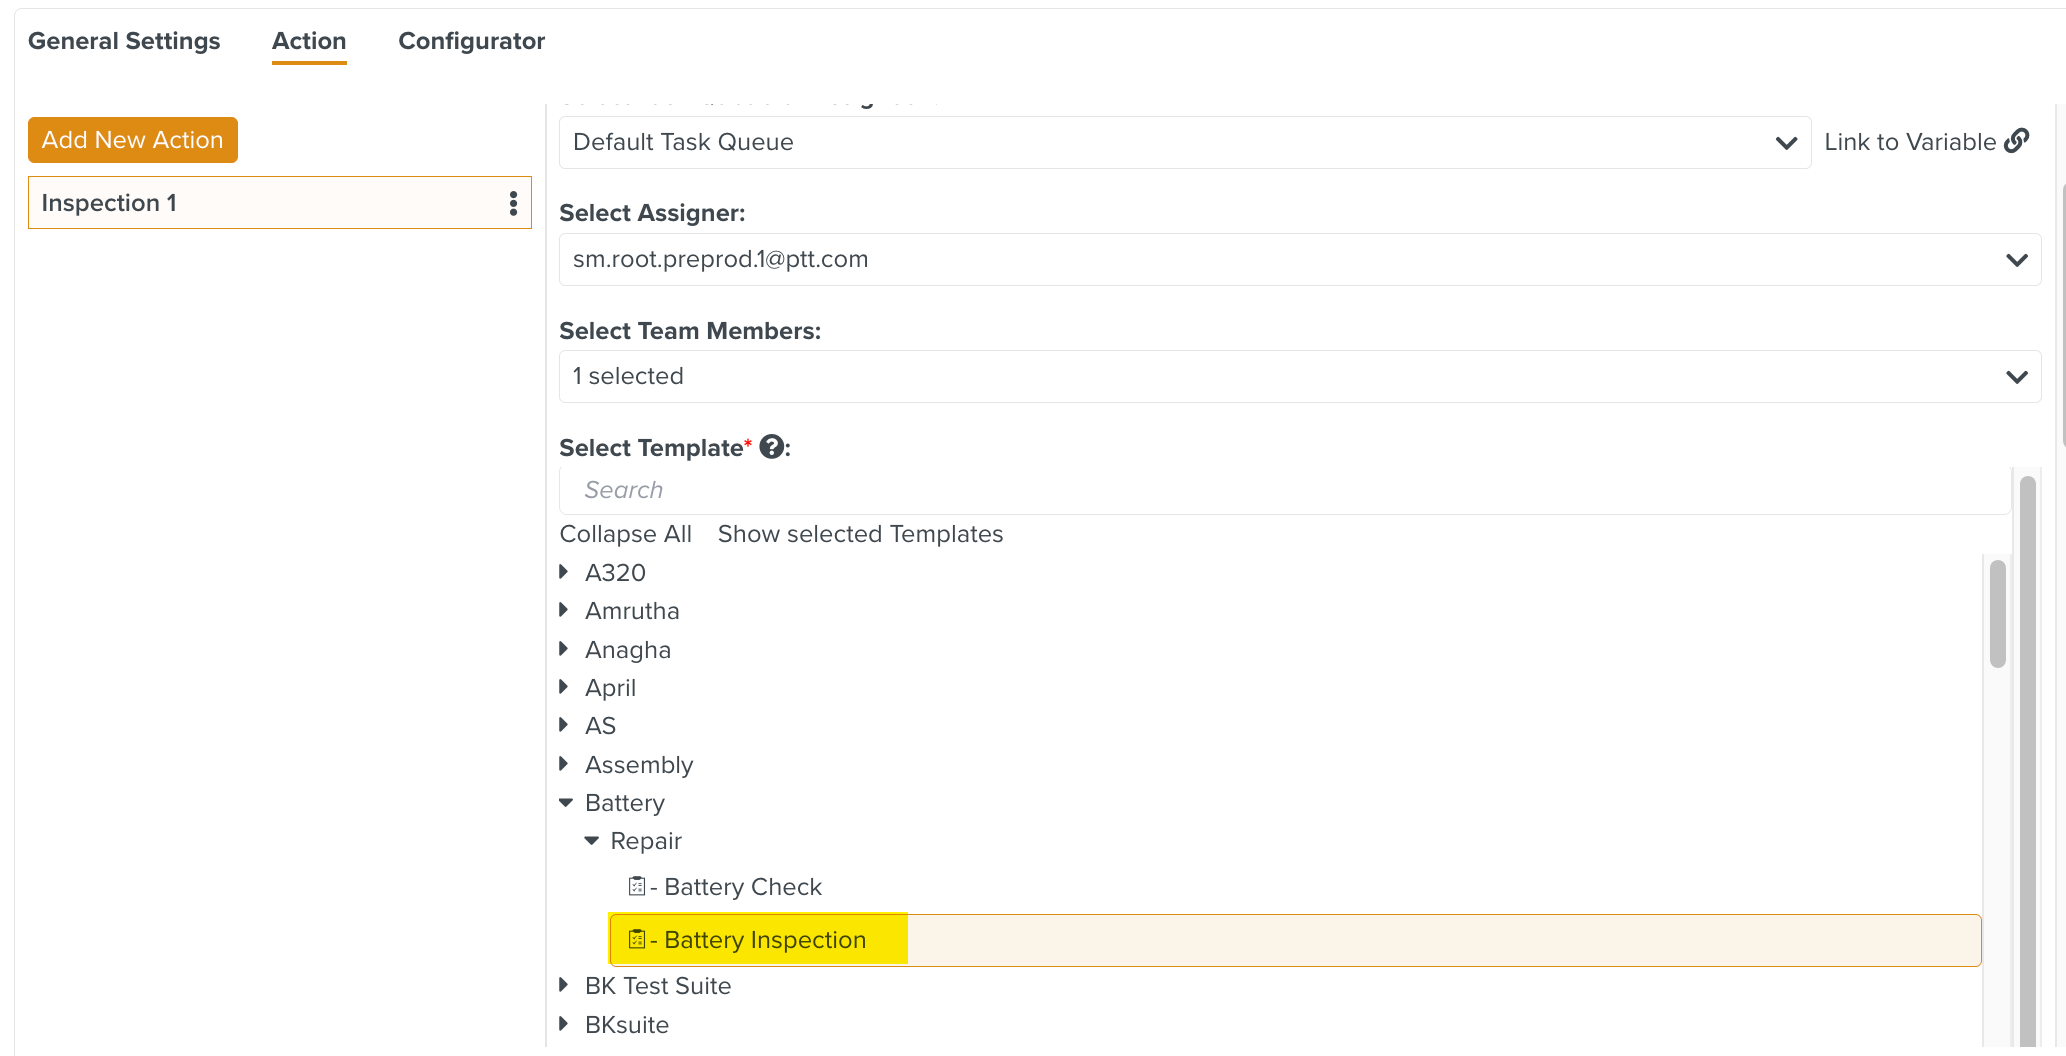
[Mandatory] Select a Task Queue or an Assignee from the dropdown.

You can also link this field to a variable of type Queue or Member. Linking multiple members to the field is not supported.
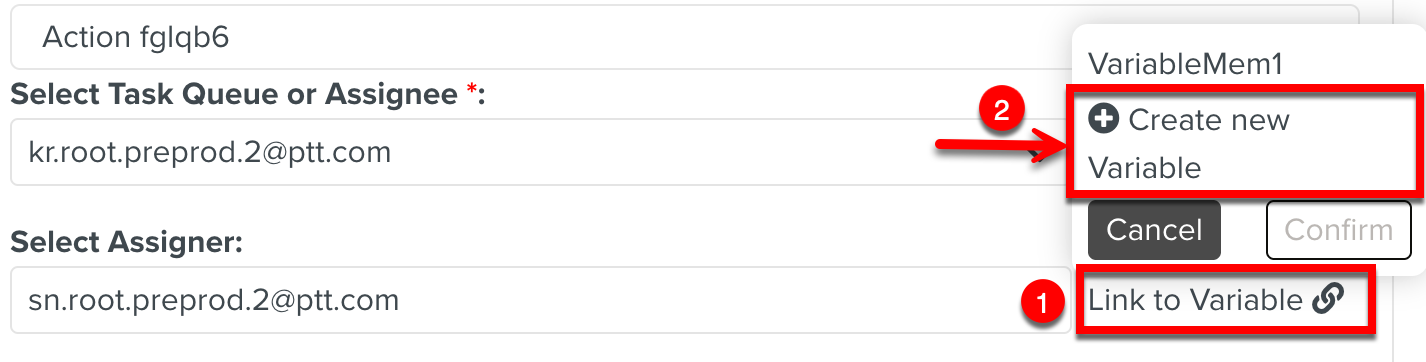
[Optional] Select an Assigner from the dropdown.
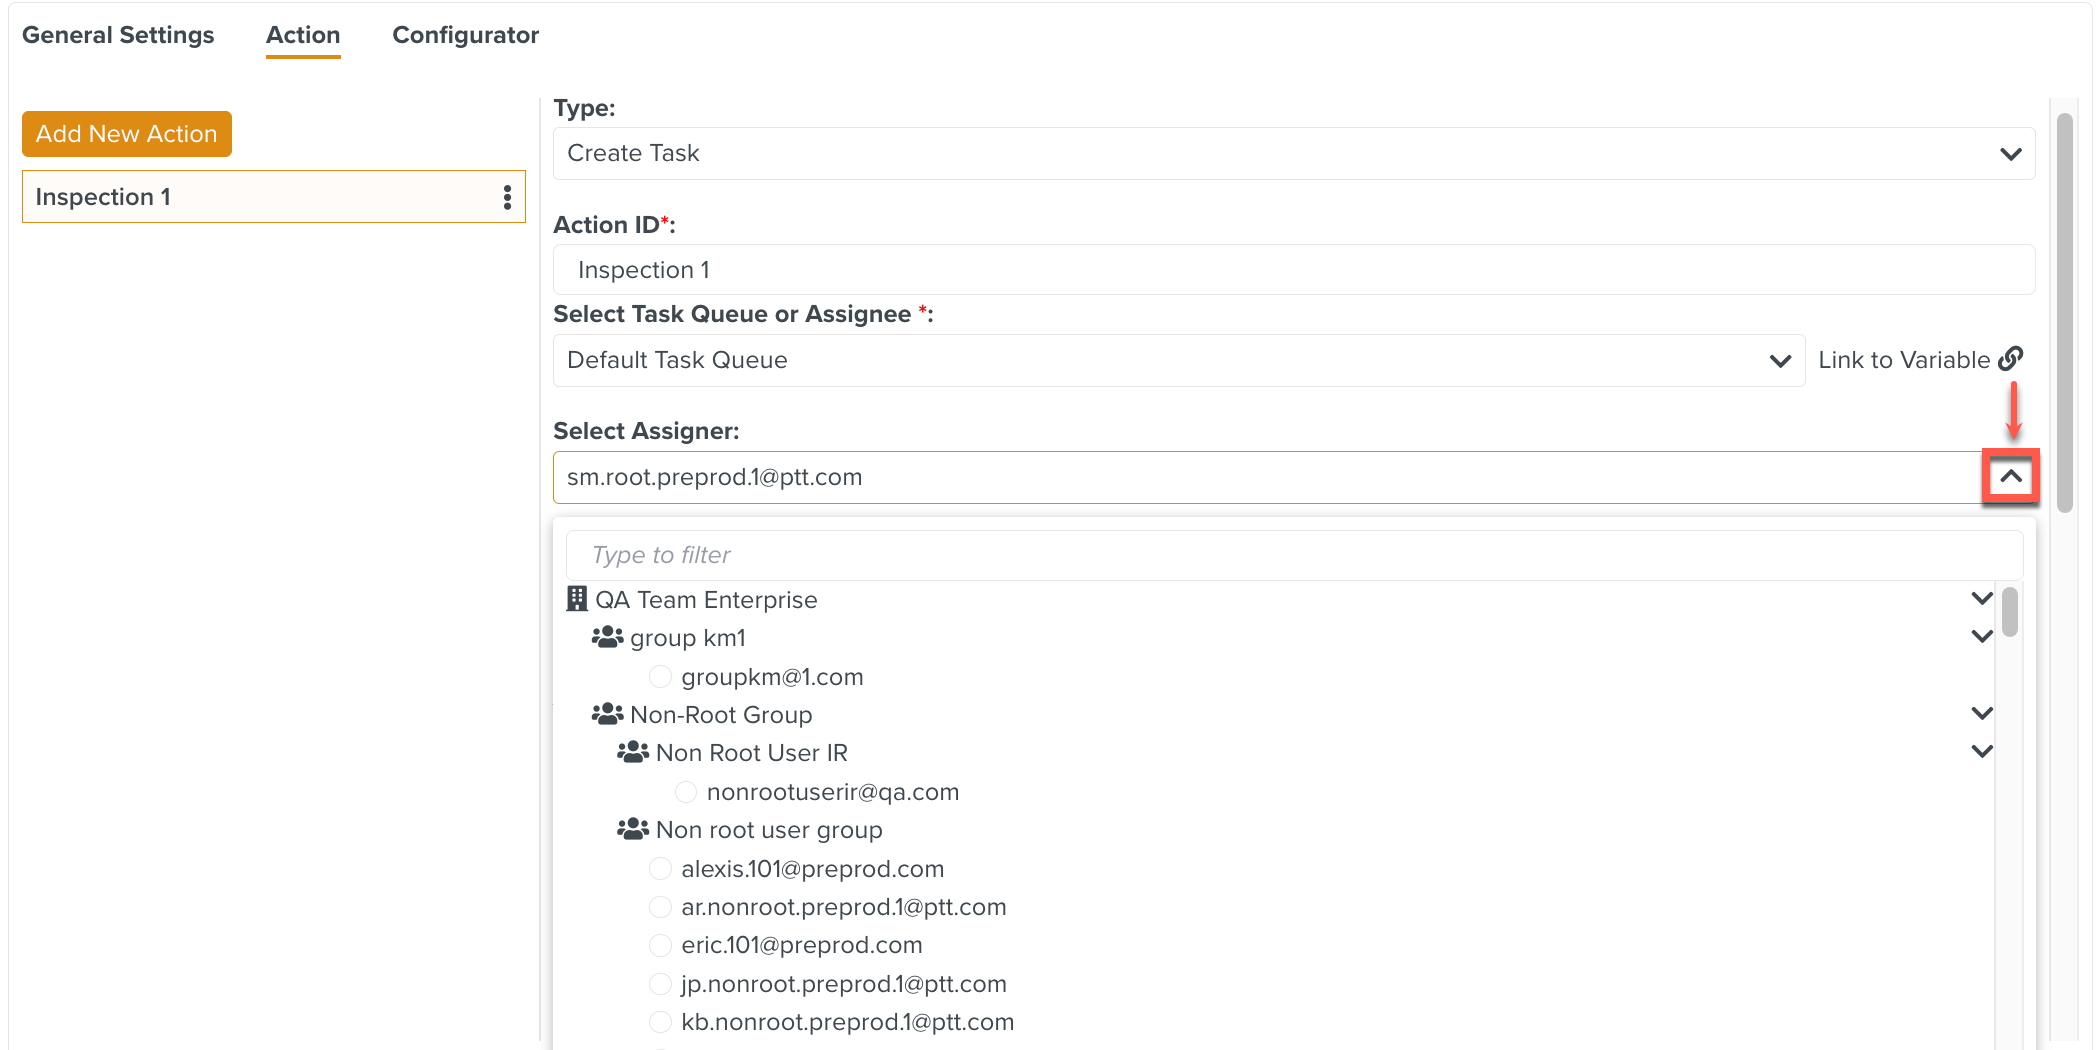
To set the Operation Plan Instantiator as the Assigner, select the Operation Plan Instantiator option as shown below. When this option is used, the Assigner will vary for every Instance of the Operation Plan.
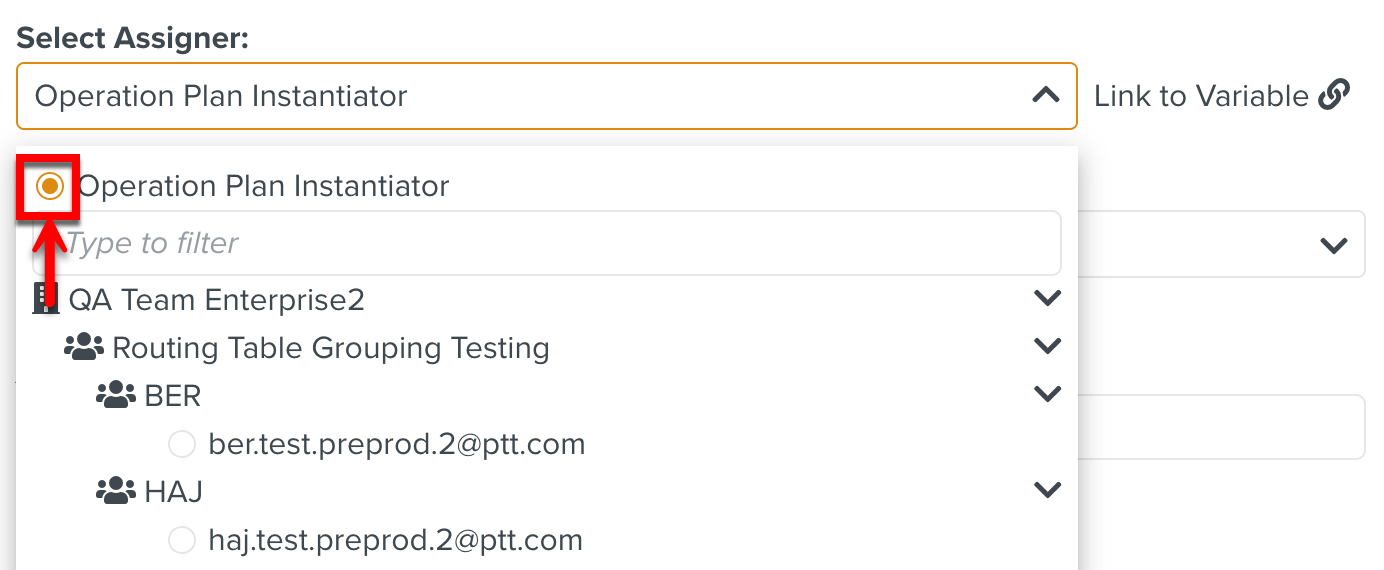
The Task appears in the Inbox of the Assignee with the selected user ID or the Operation Plan Instantiator ID as the Assigner.
You can also link this field to a variable of type Member. Linking multiple members to the field is not supported.

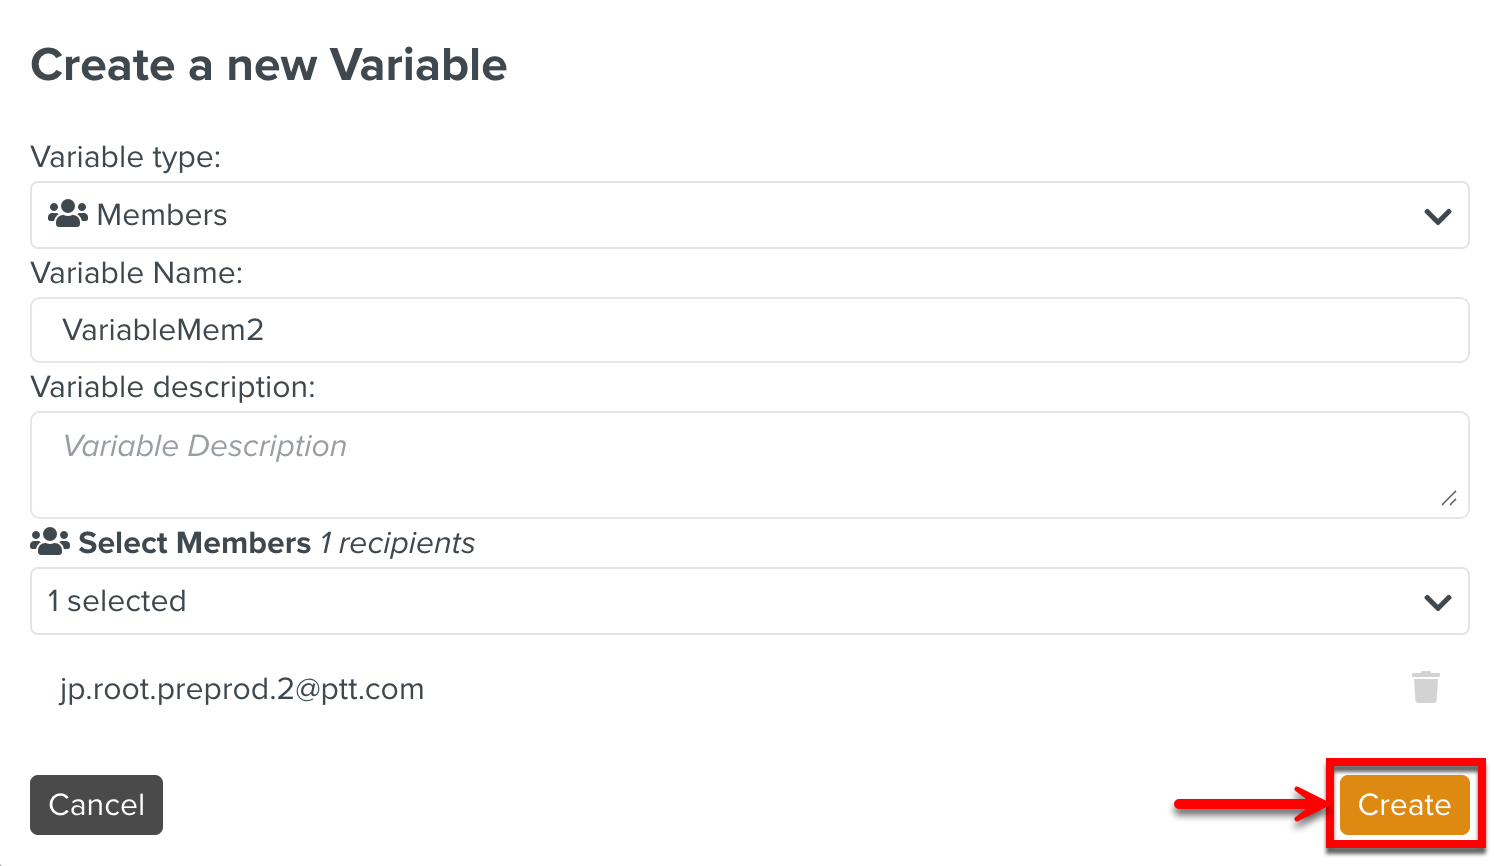
New variables can also be created as shown below.
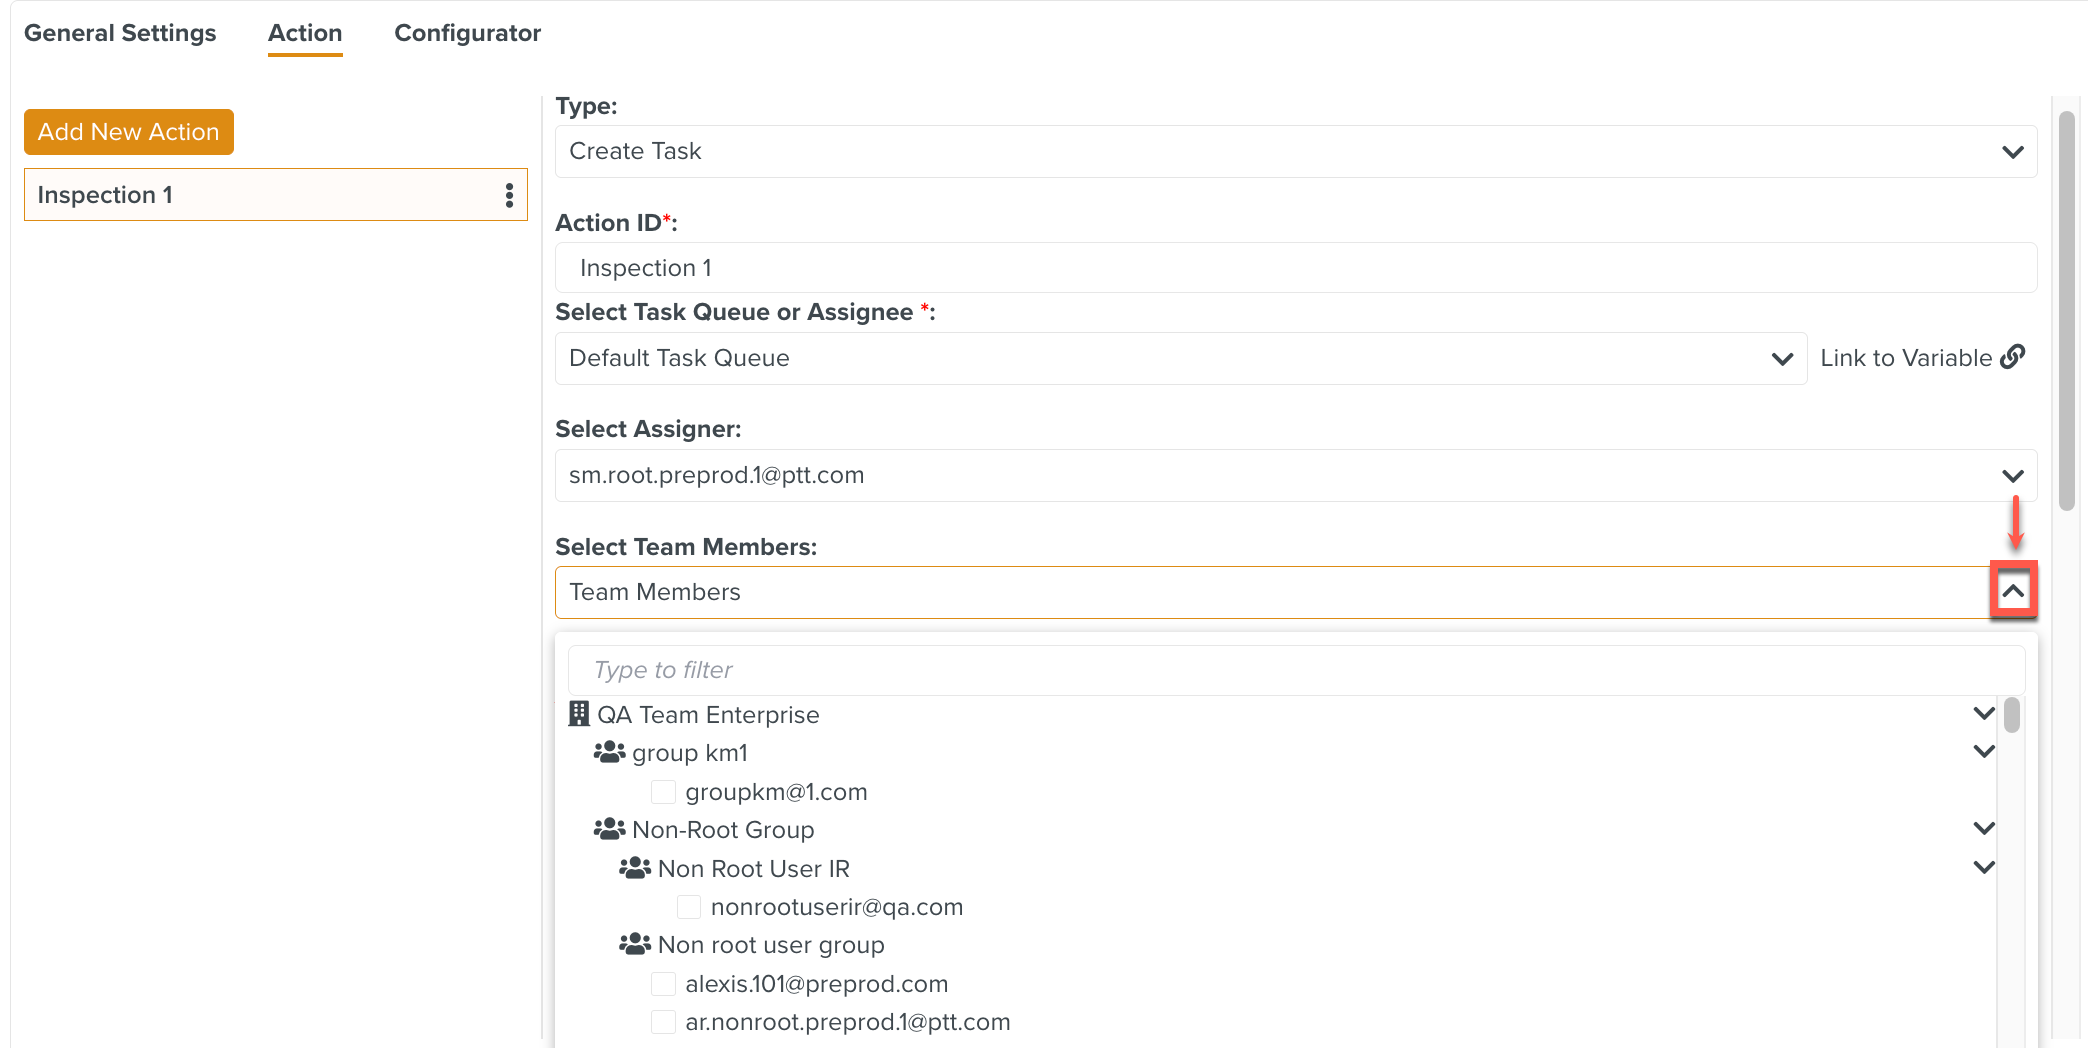
[Optional] Select team members from the dropdown.
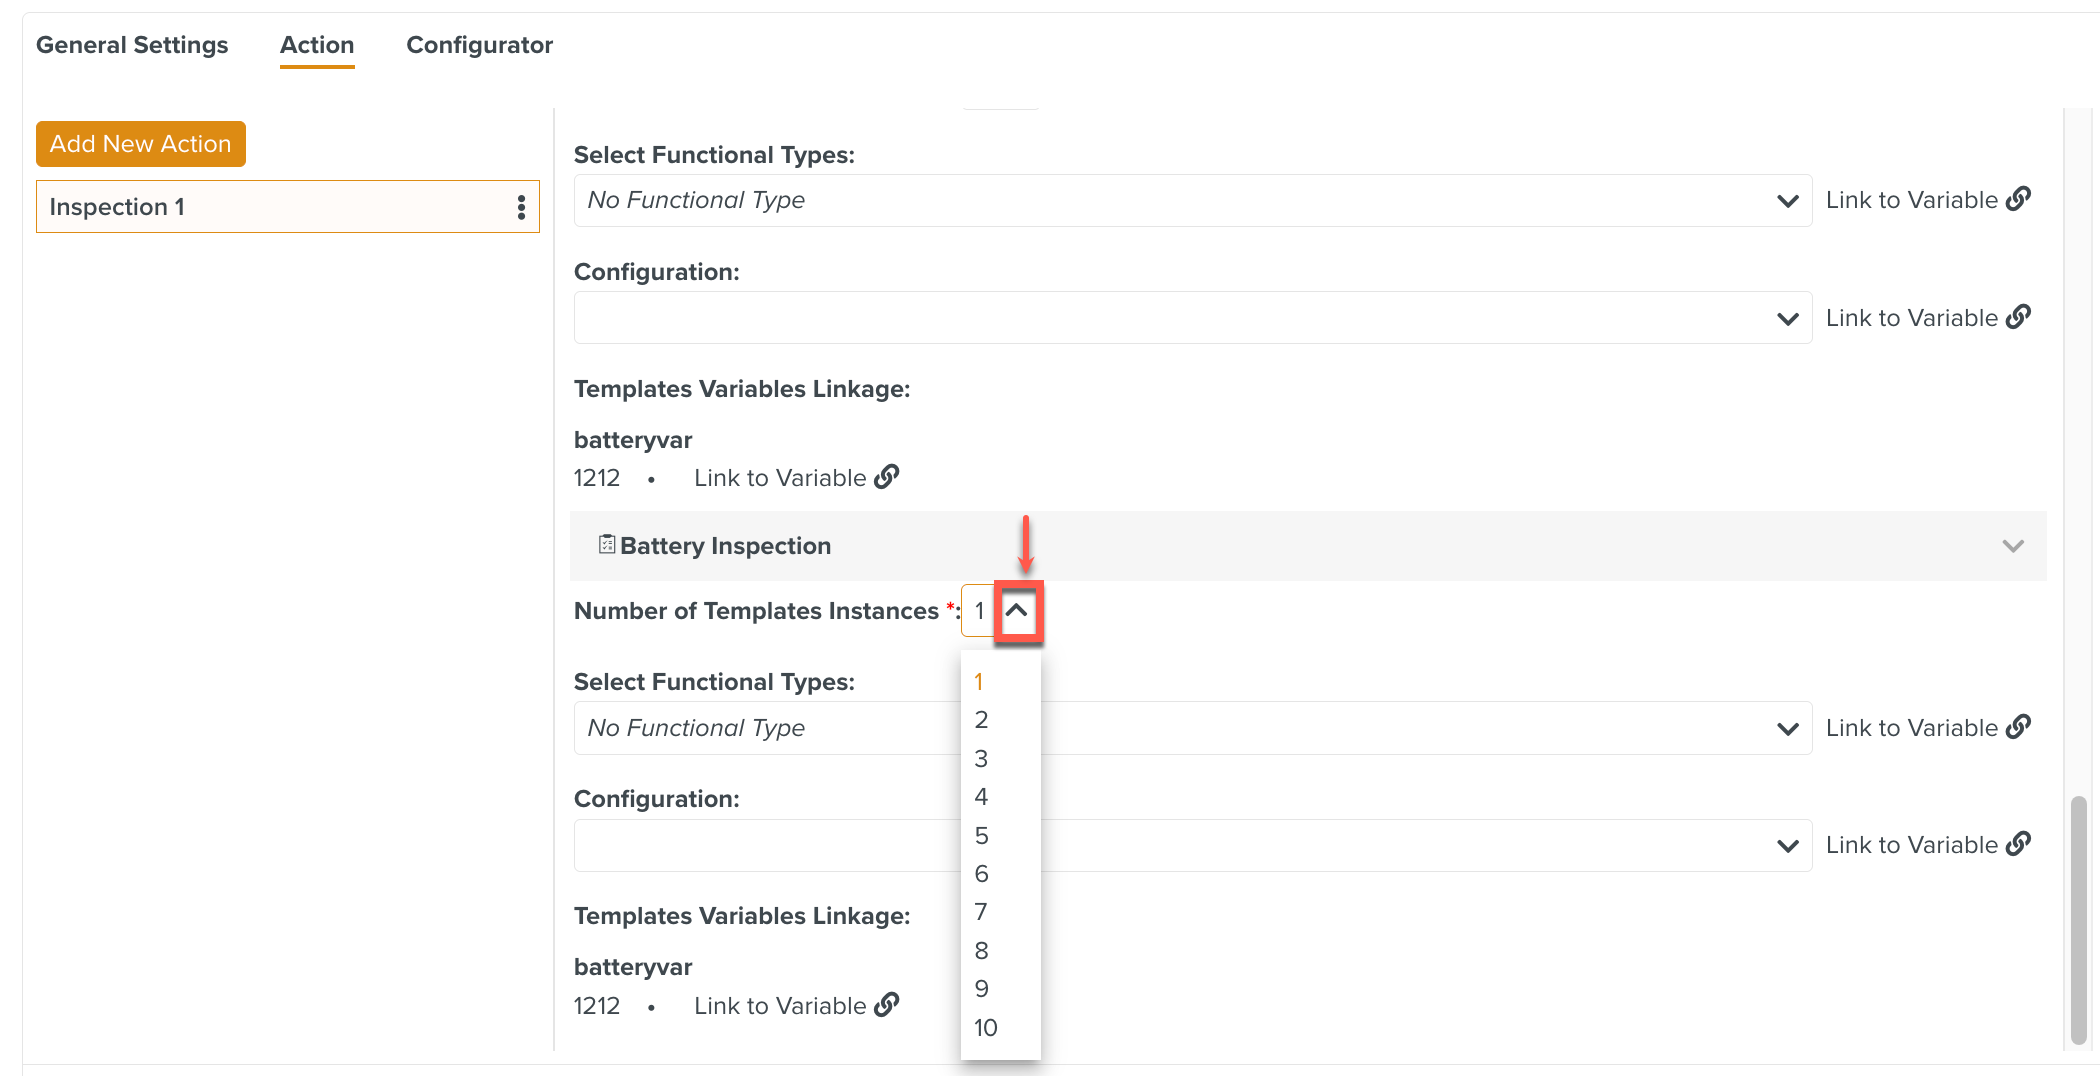
[Mandatory] Select a Template.
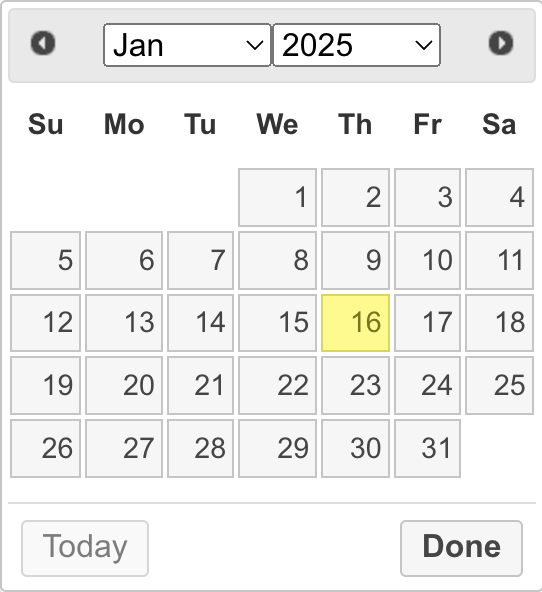
[Optional] Specify a Start and Due date for the Tasks. You can link these fields to a variable of type Date. To know more about linking to variables, see Variables in an Operation Plan.

Click the date as shown below to use the date picker.
You can use the Use due date offset option. When the Operation Plan is initiated, the due date is calculated based on this offset. Due Date = Date of Instantiation + Offset.

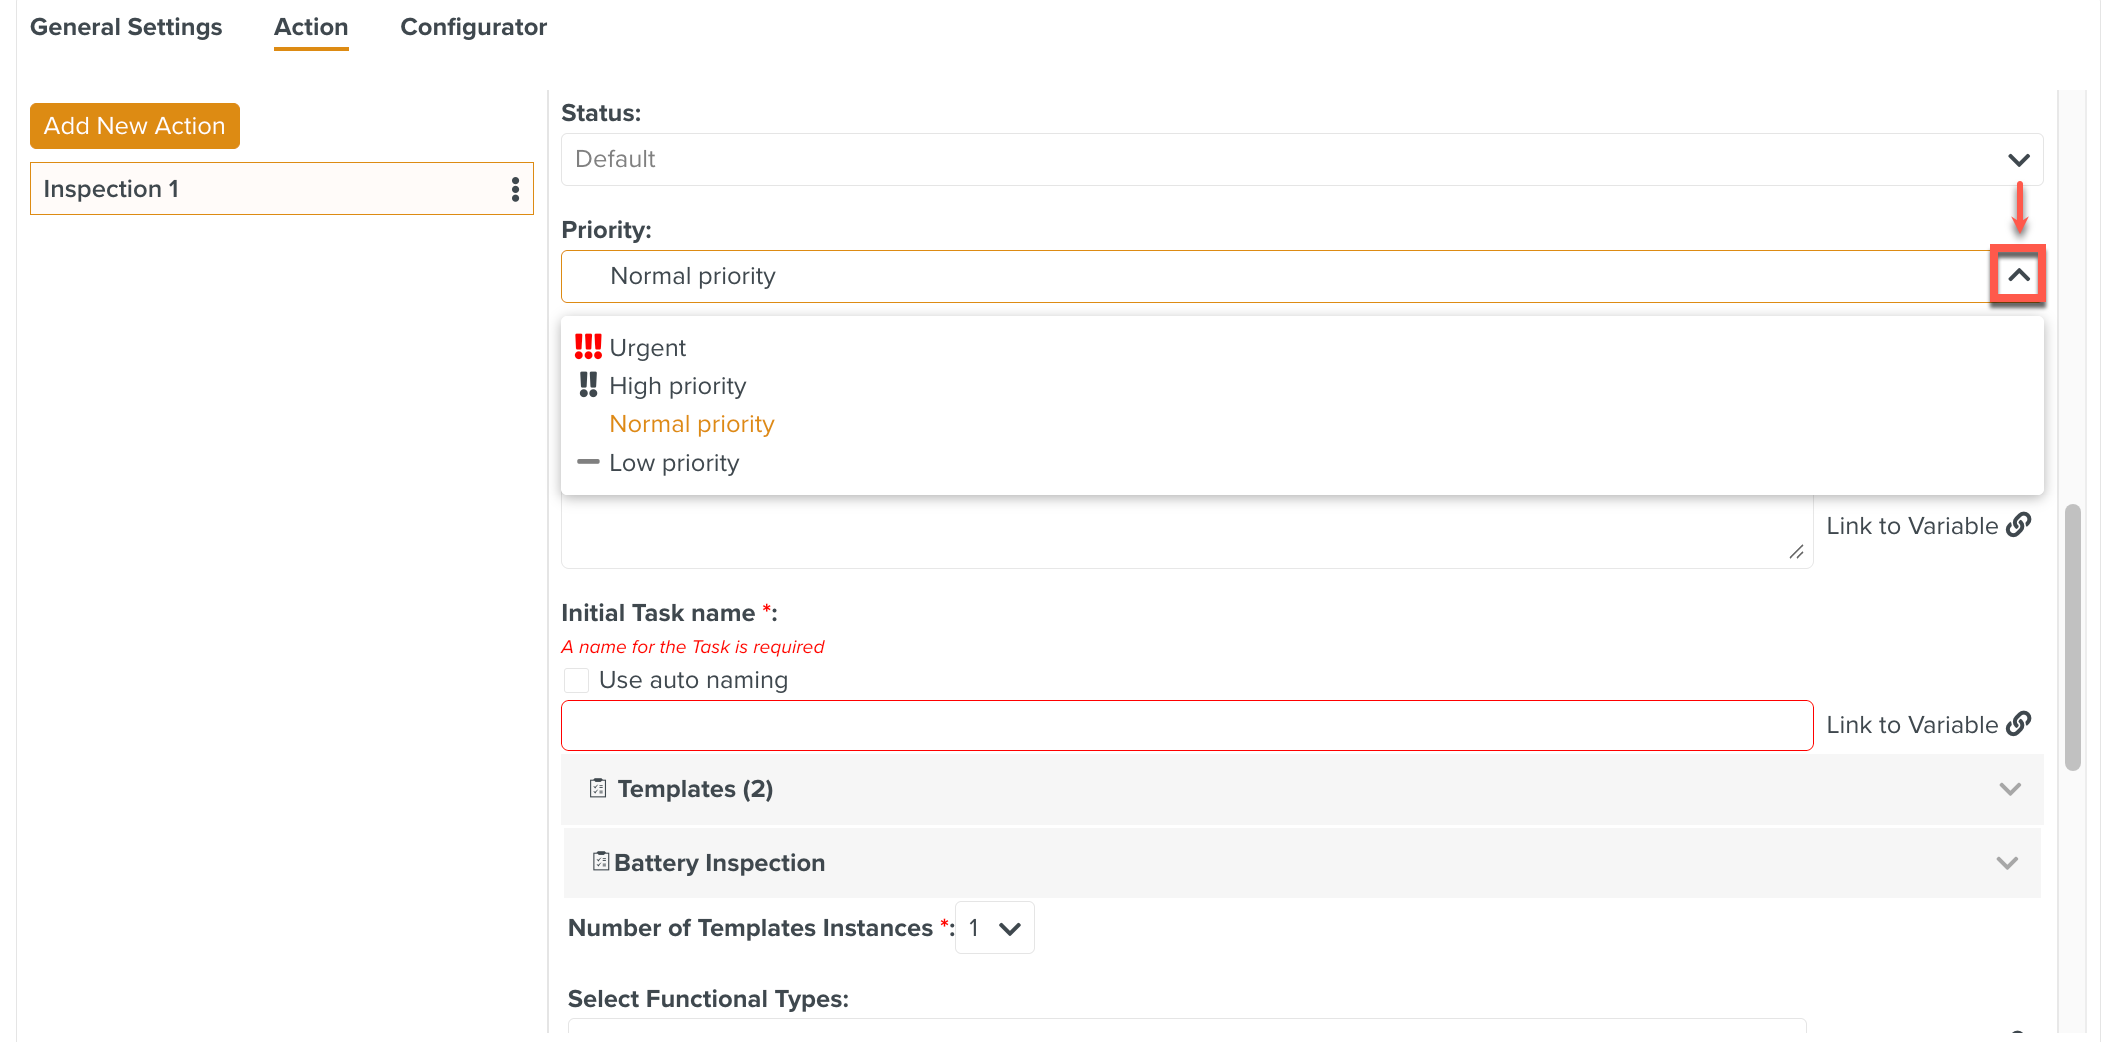
[Optional] Select a Status from the dropdown.
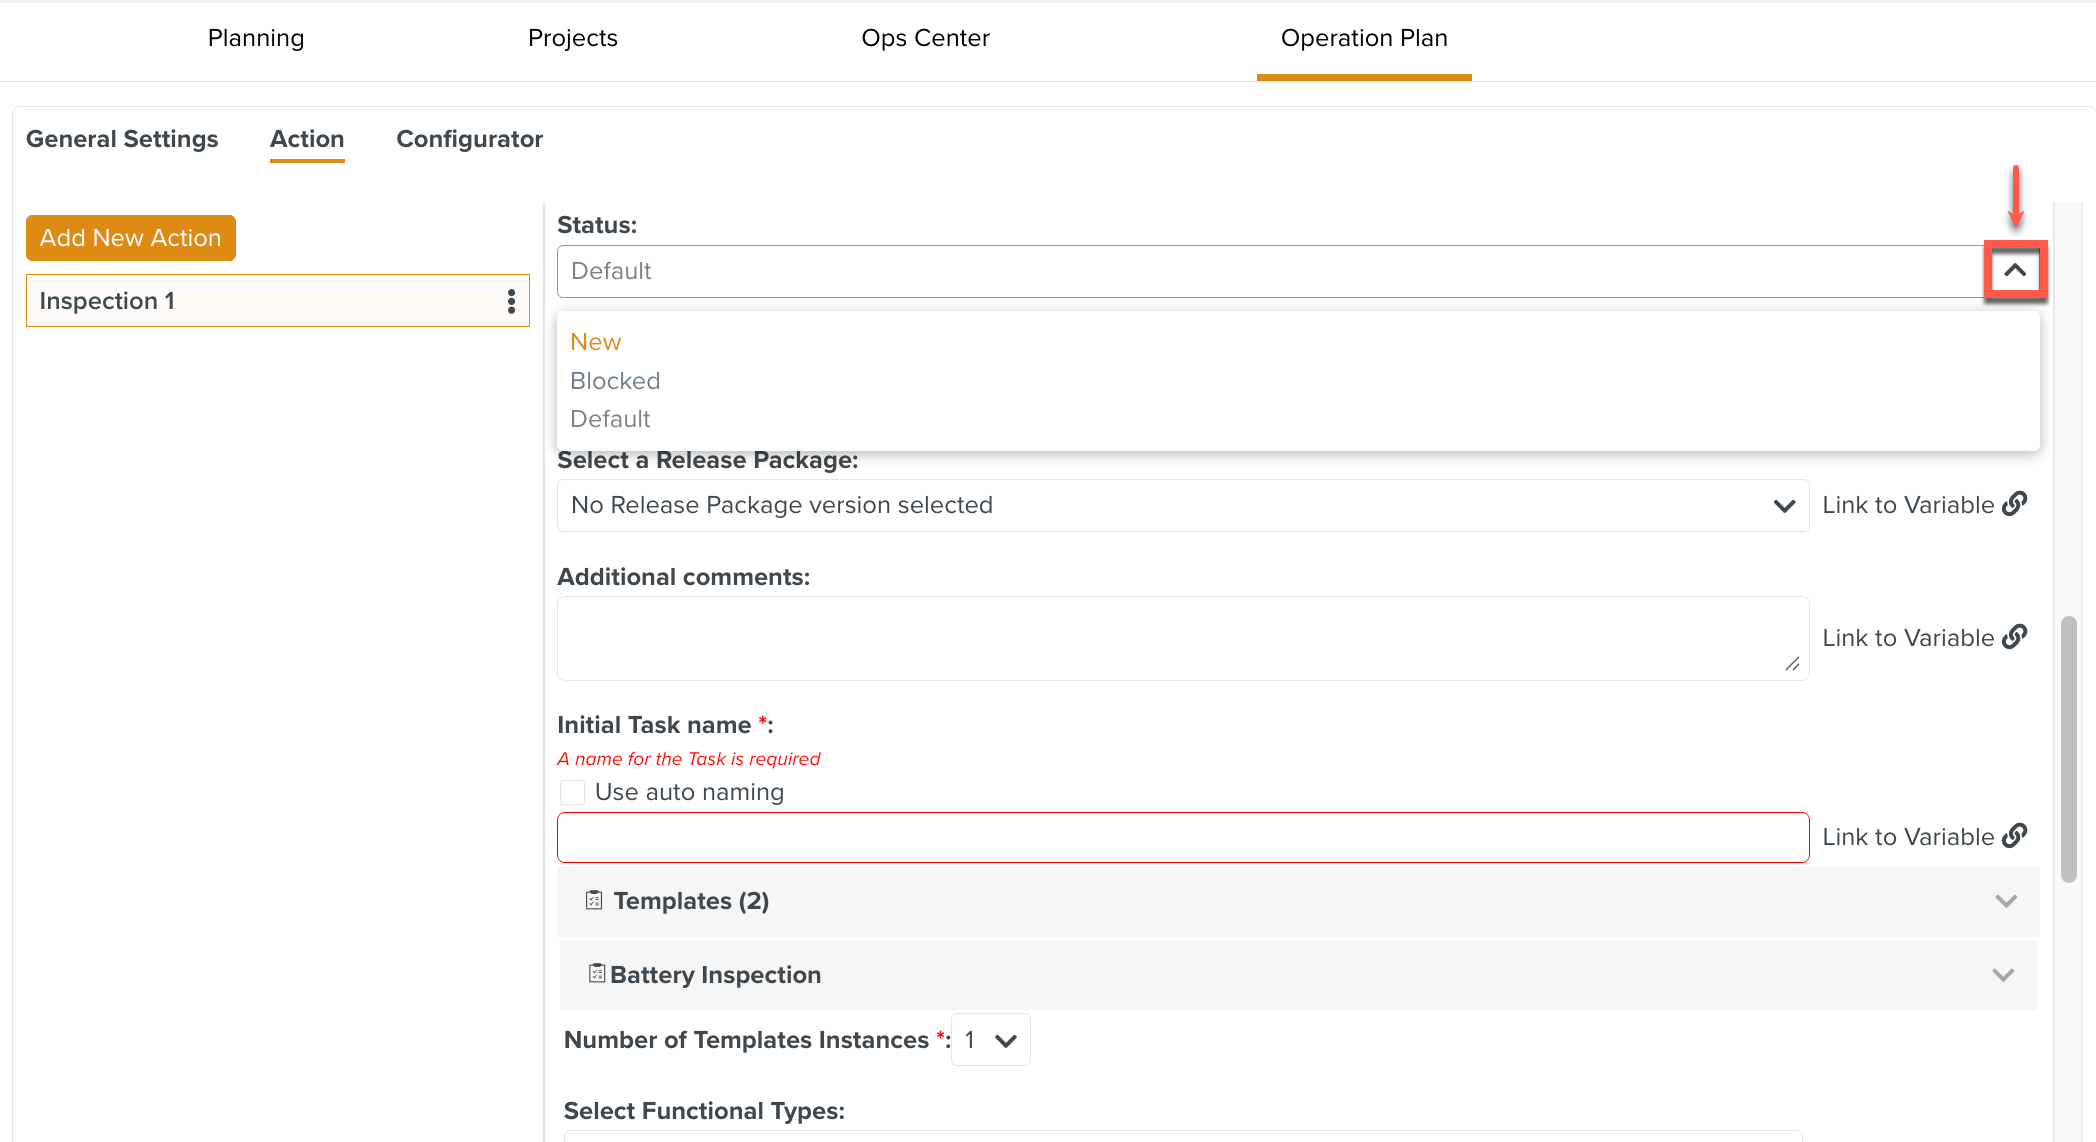
New
Blocked
Default
[Optional] Select a .
[Optional] Expand the dropdown. The Release Packages and versioned Technical Manual Indexes (TMIs) are available for selection.

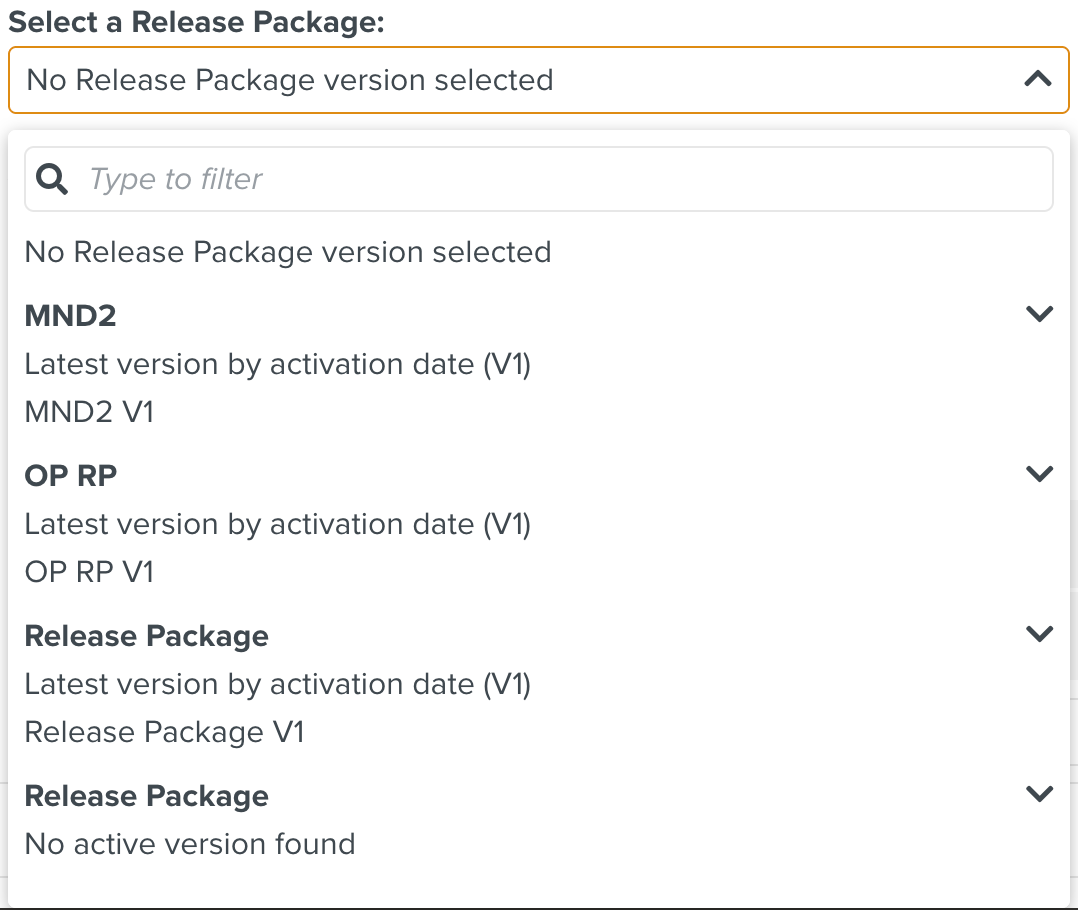
You can select a specific version of the Release Packages or the latest version.
In the example below, the Latest version by activation date (V1) of the OP RP Release Package is selected.
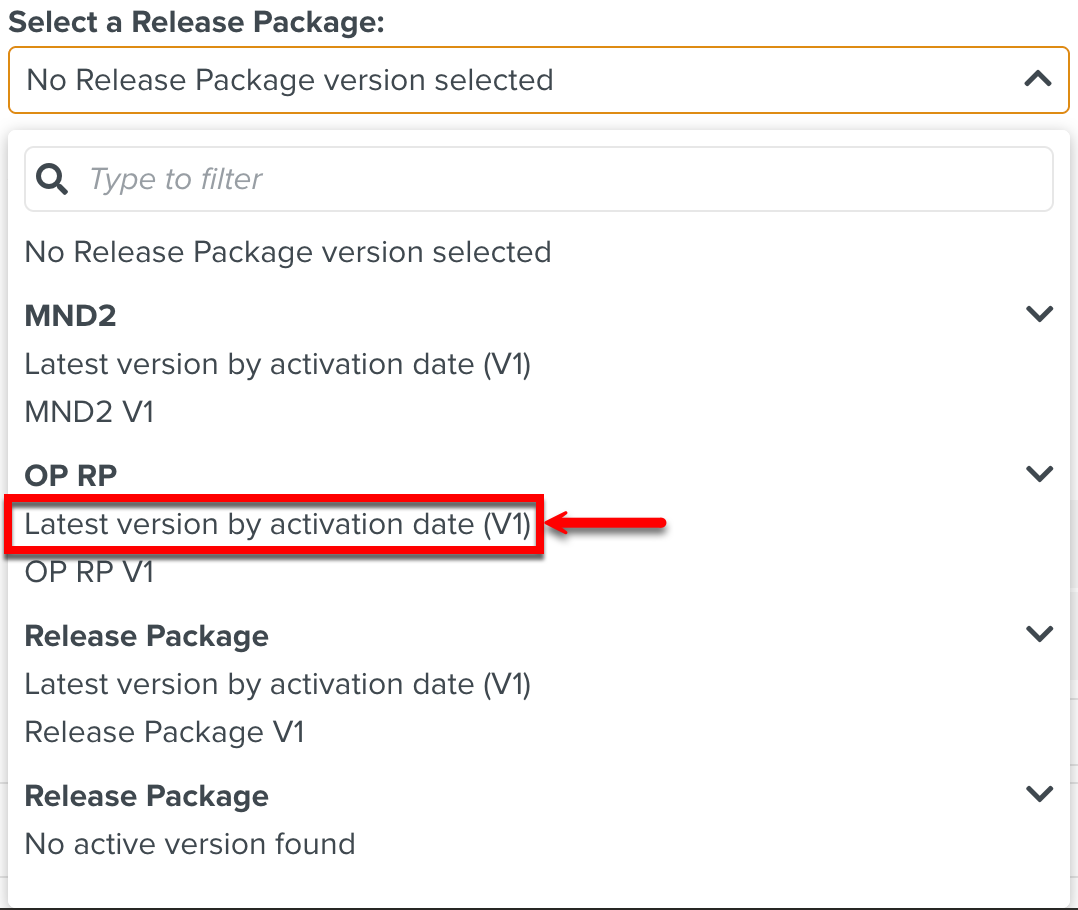
Whenever this Operation Plan is activated, the latest version of the Release Package (OP RP) is automatically selected during the execution of the respective Task that belongs to this Operation Plan.
[Optional] Add additional comments.
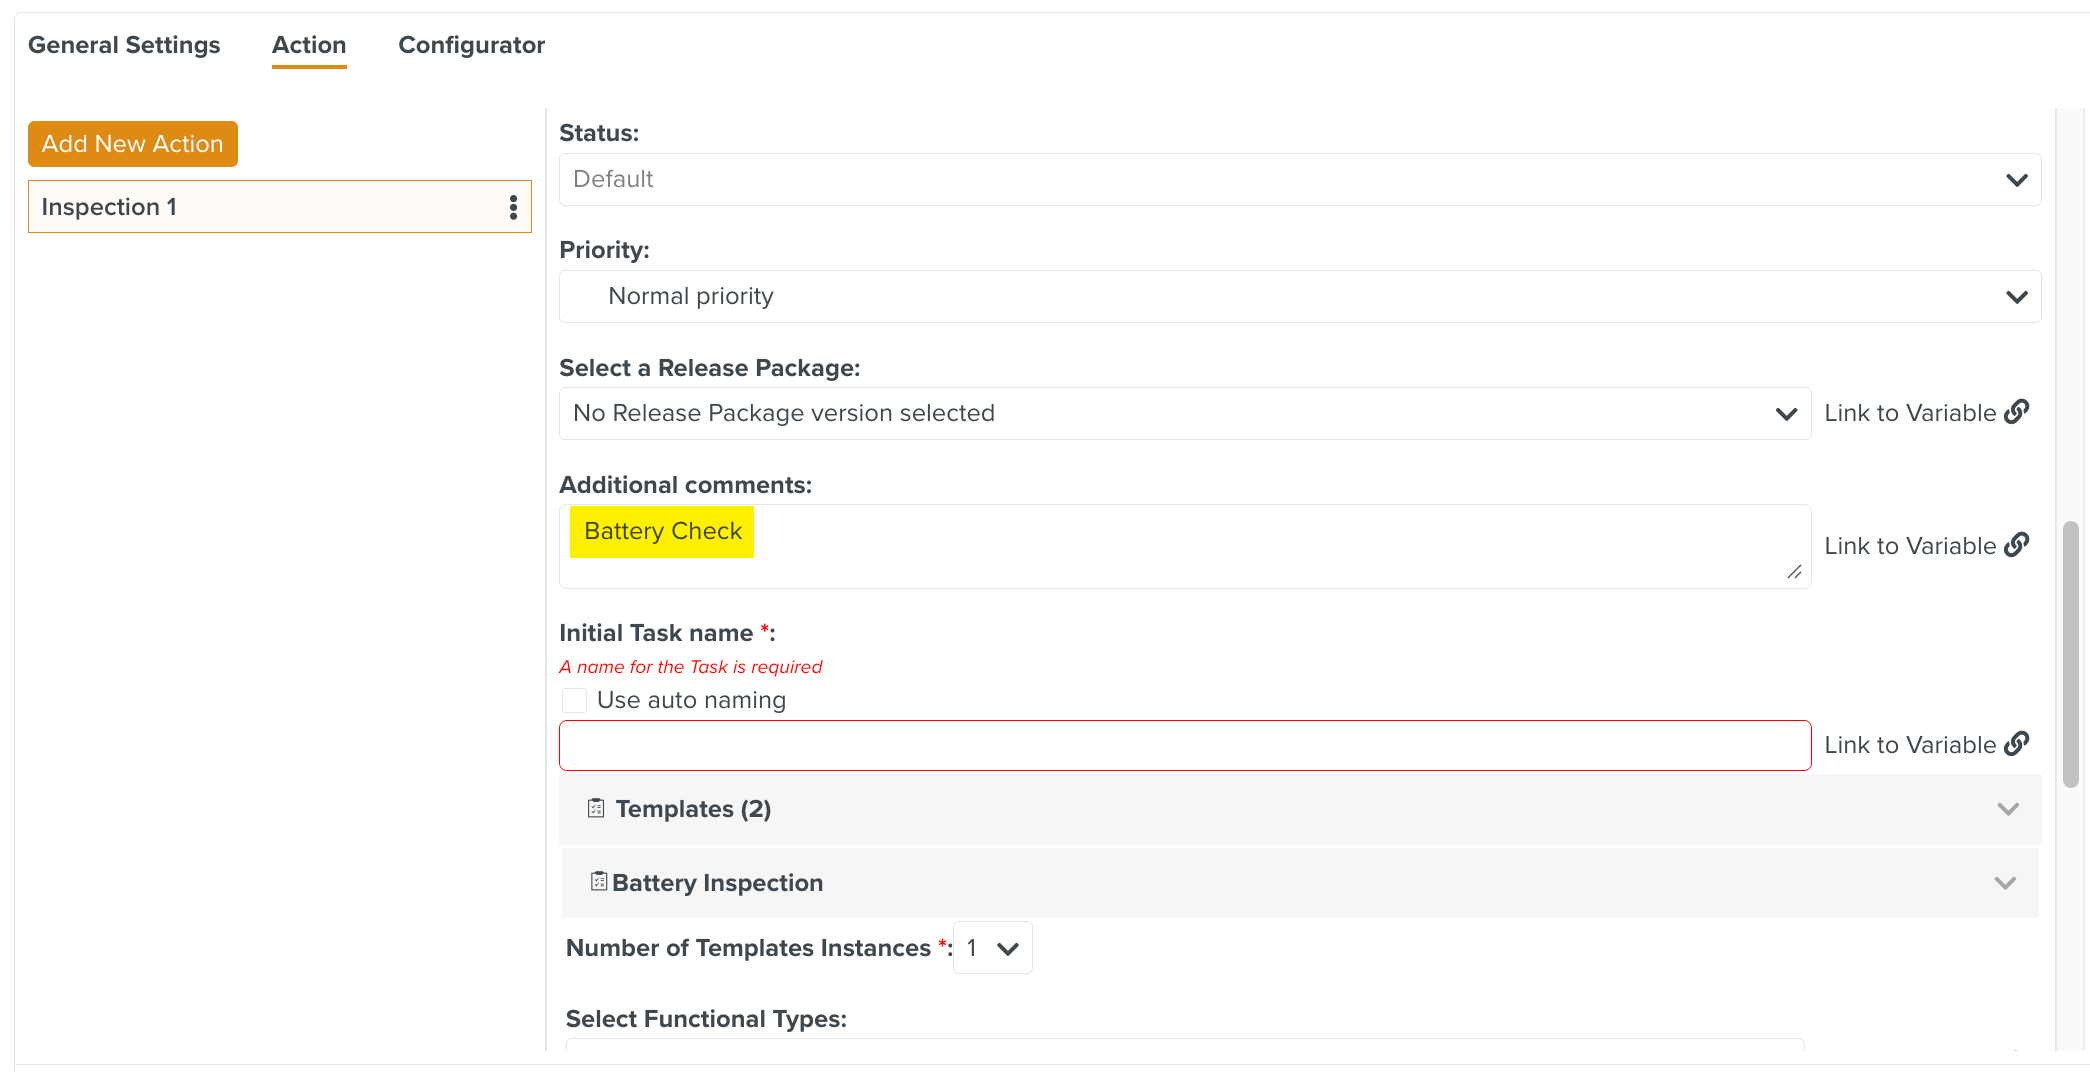
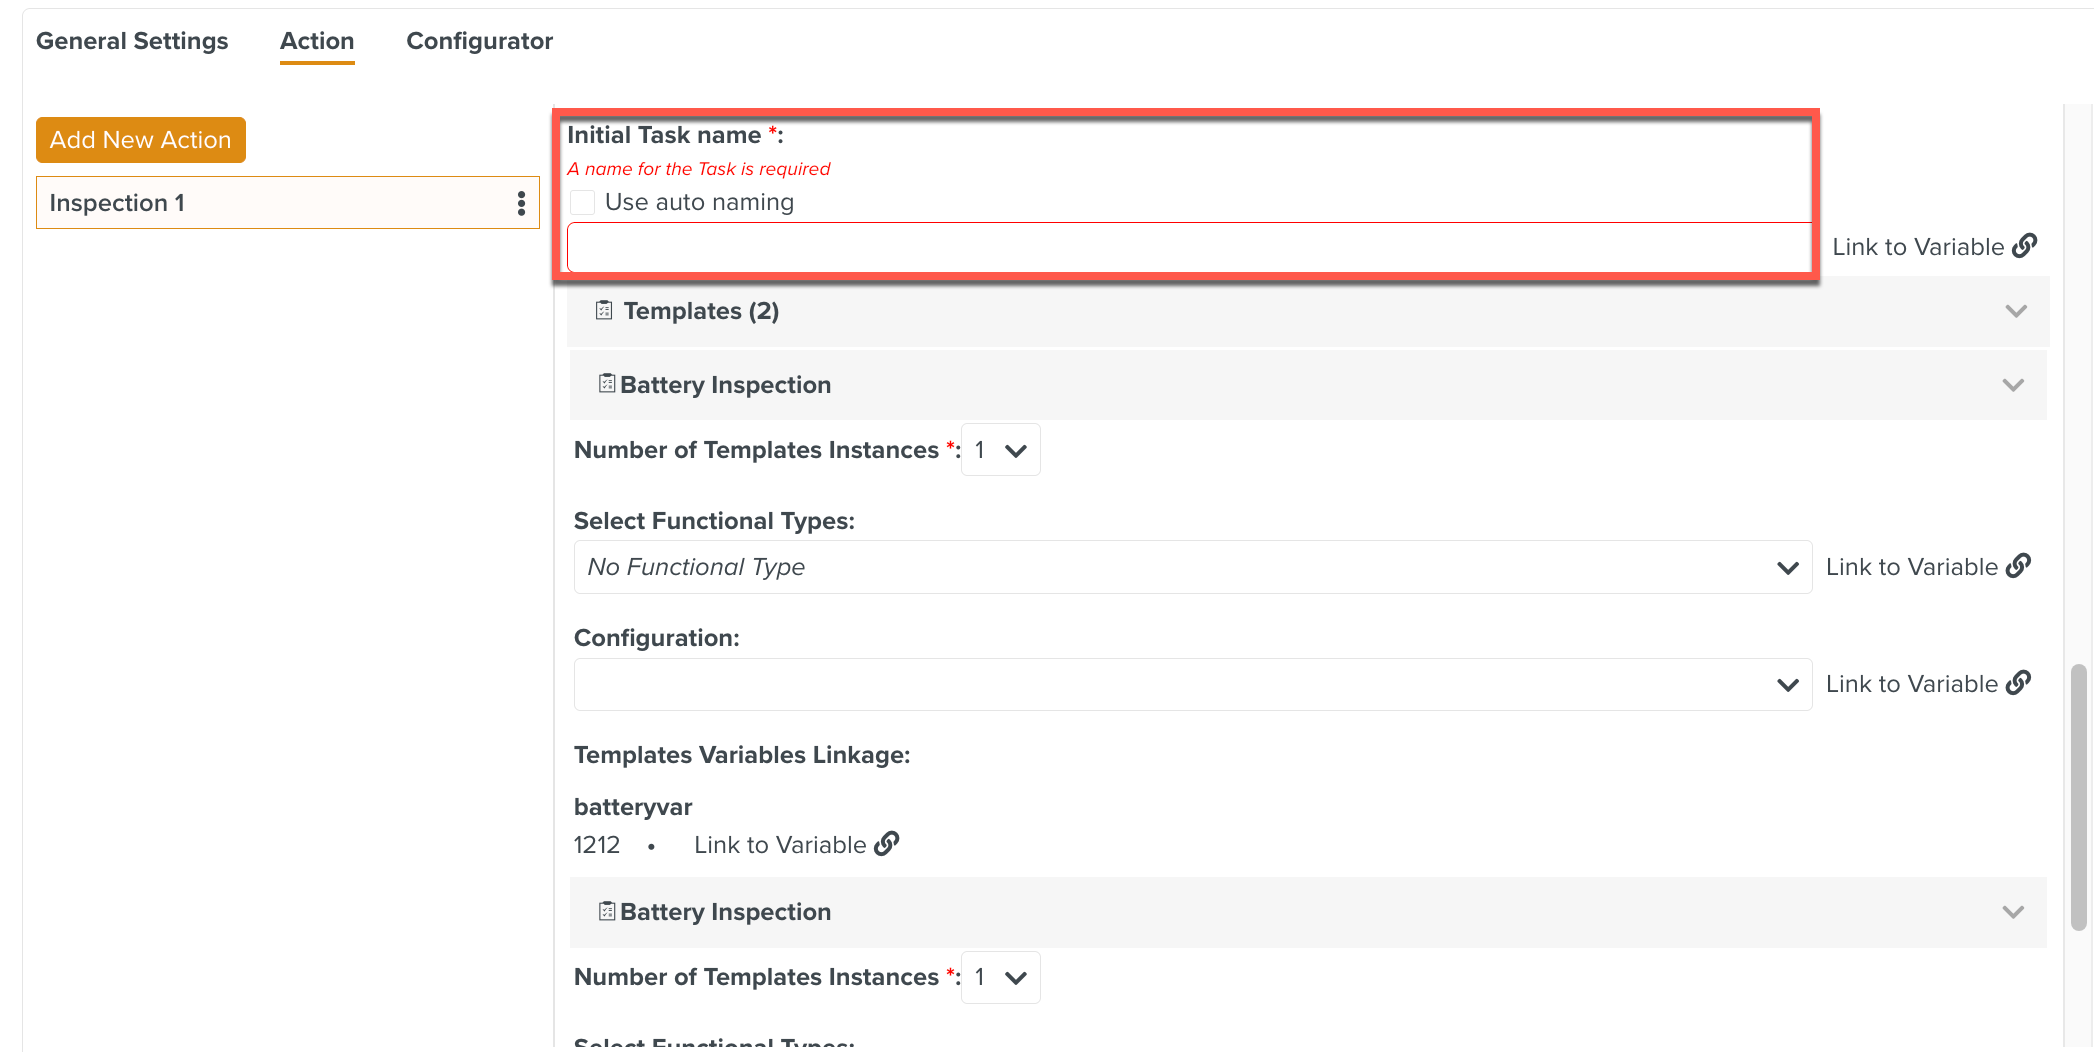
[Mandatory] Enter Task name.
Click to auto-generate a name for the Task.
[Mandatory] Choose the .
[Optional] Select a to link the Task to the Functional Type.
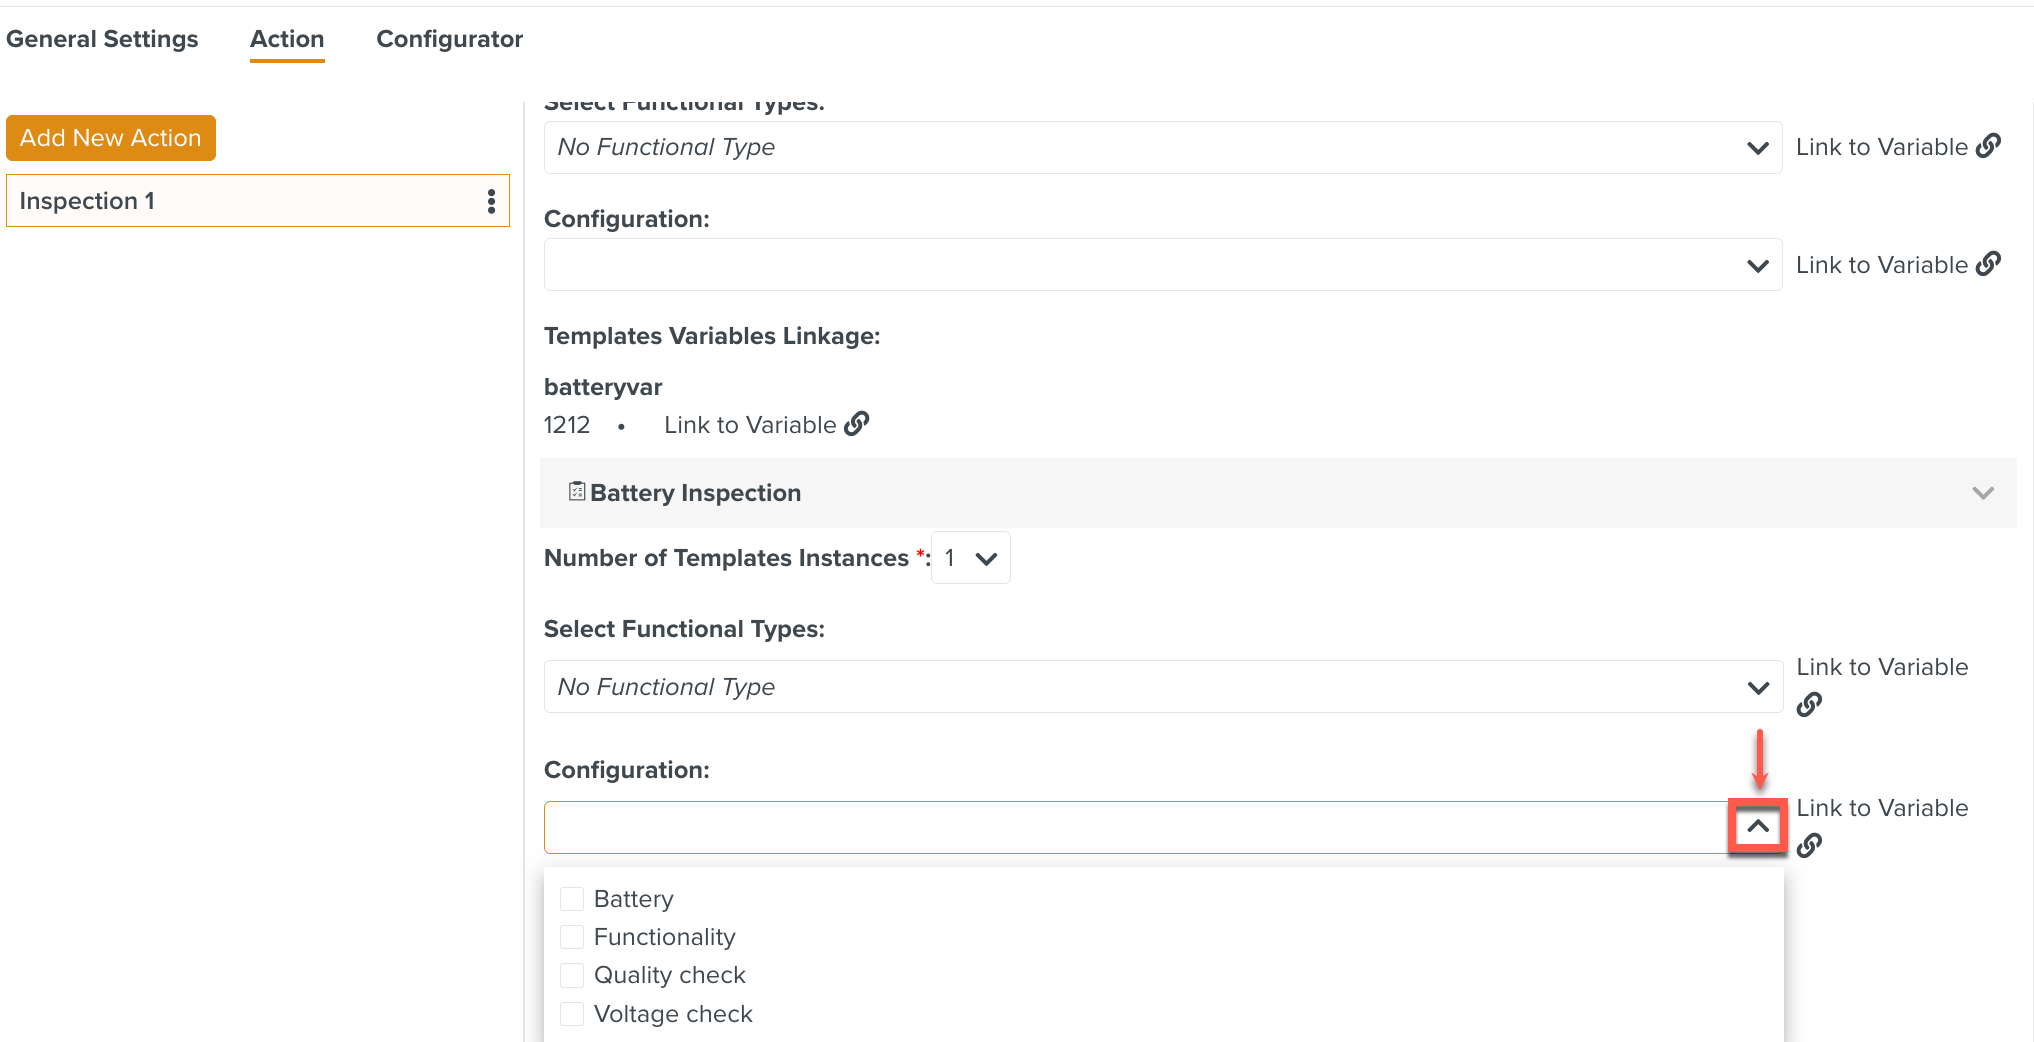
[Optional] Select a Configuration.


A Configurator allows you to execute specific Templates depending on the Configuration enabled in an Operation Plan. It enables you to select a subset of Actions relevant to a particular Configuration.
 |
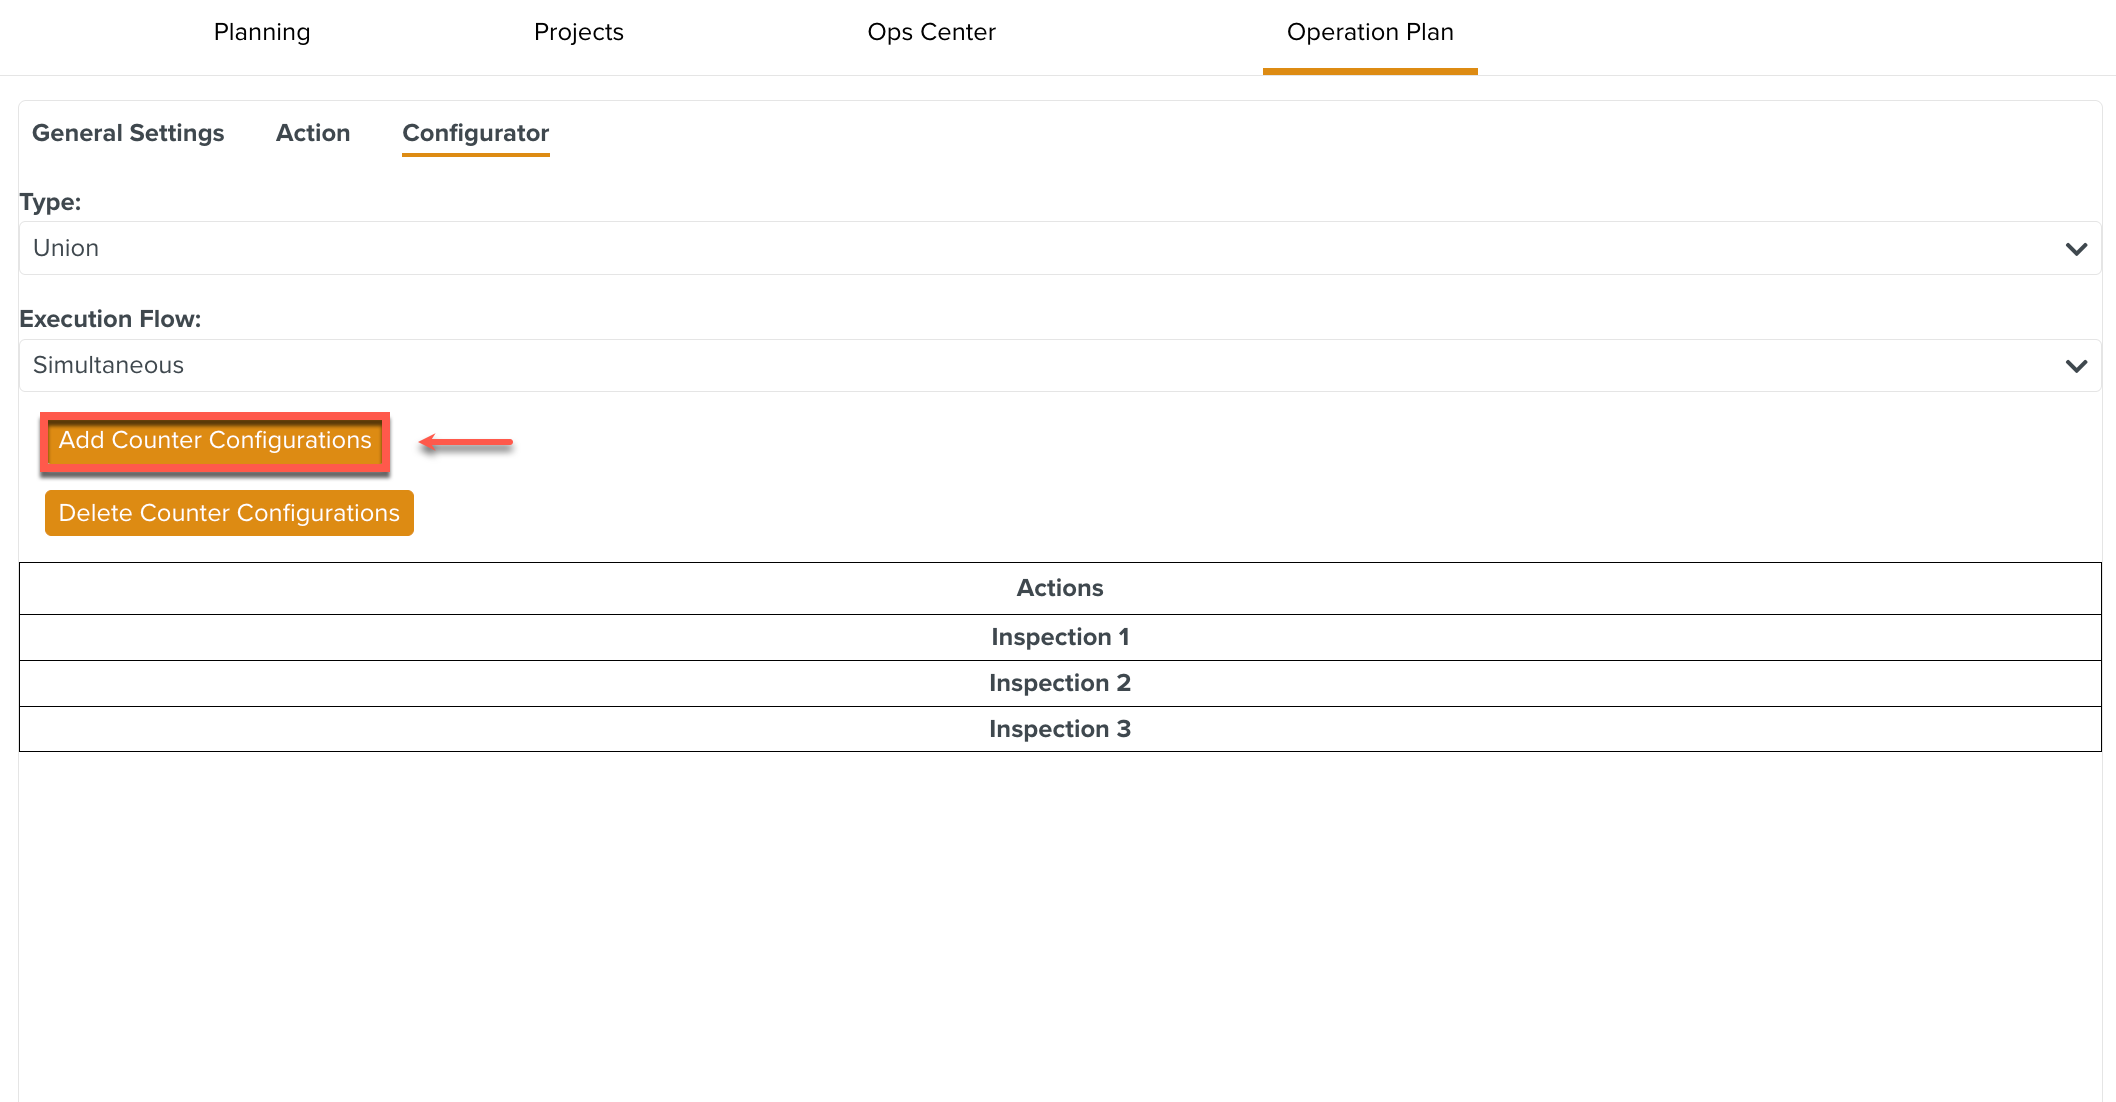
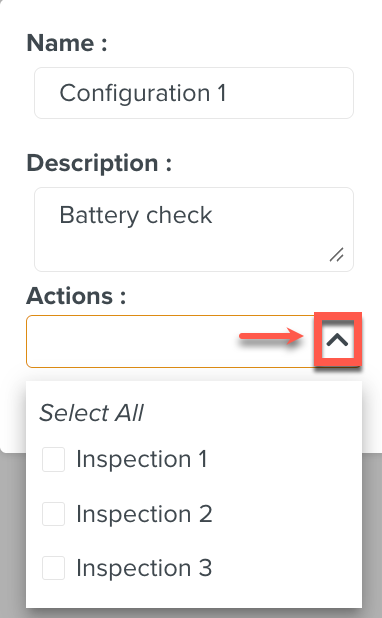
To add Counter Configurations:
Click .
A dialog is displayed.
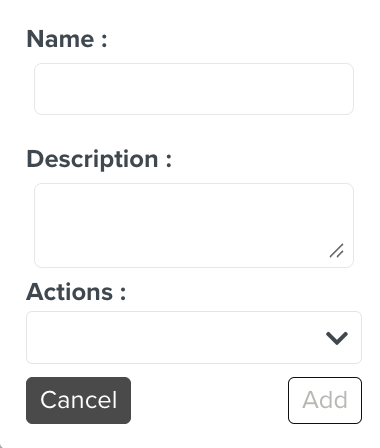
Enter the required details.
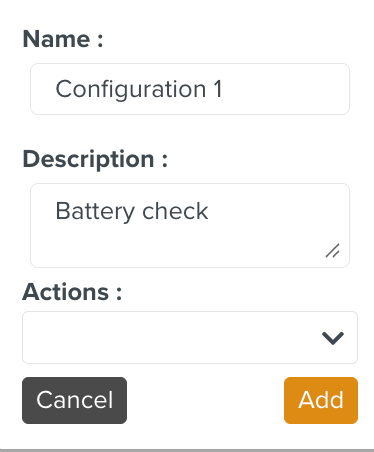
Select an Action from the dropdown. A list of all the Actions are displayed, allowing you to select one or more based on the Configuration requirements.
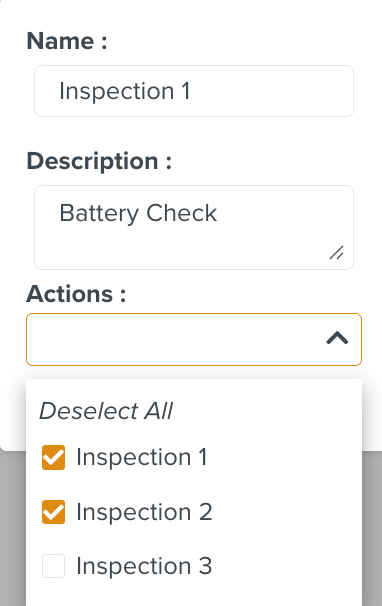
Click .
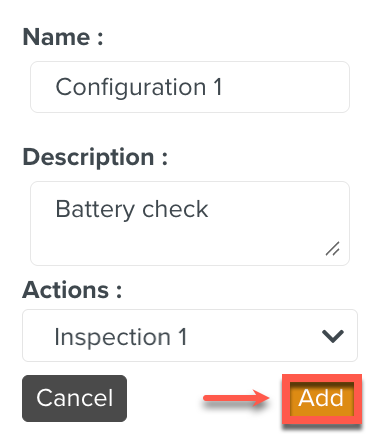
The Action is added to the Configuration.
Multiple Configurations can be created with the corresponding Actions added to the matrix.
Click the dropdown.
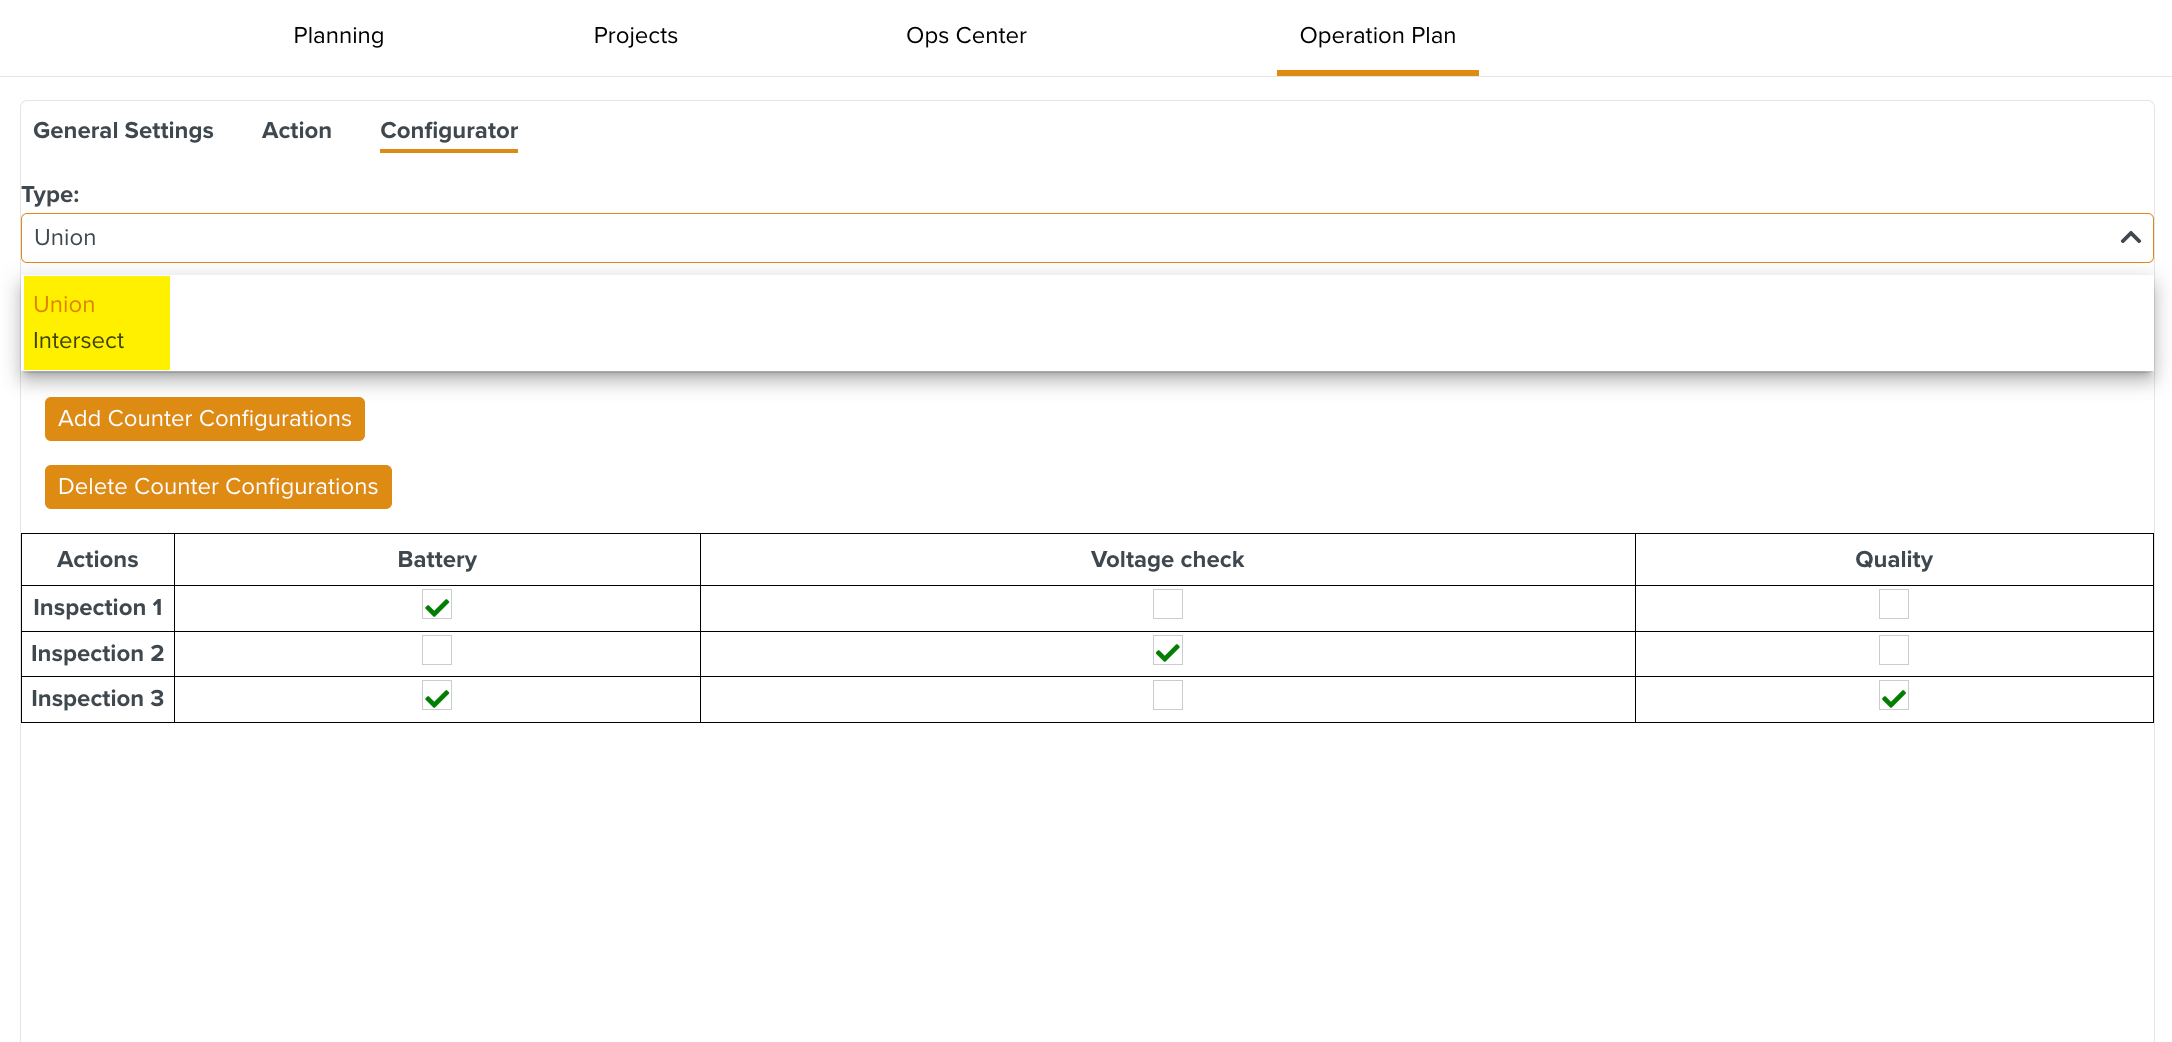
The Configuration supports two types of rule execution namely:
: The Union Type creates Tasks for Actions that are part of at least one active Configuration.
Note
Active Configurations are triggered only when the Configuration is activated during instantiation. If a Configuration is not activated, the associated Actions remain inactive and are not executed.
: The Intersect Type creates Tasks for Actions that are present in all of the active Configurations.
The Execution Flow is set to , by default.
Click .
To delete a Configuration:
Click .
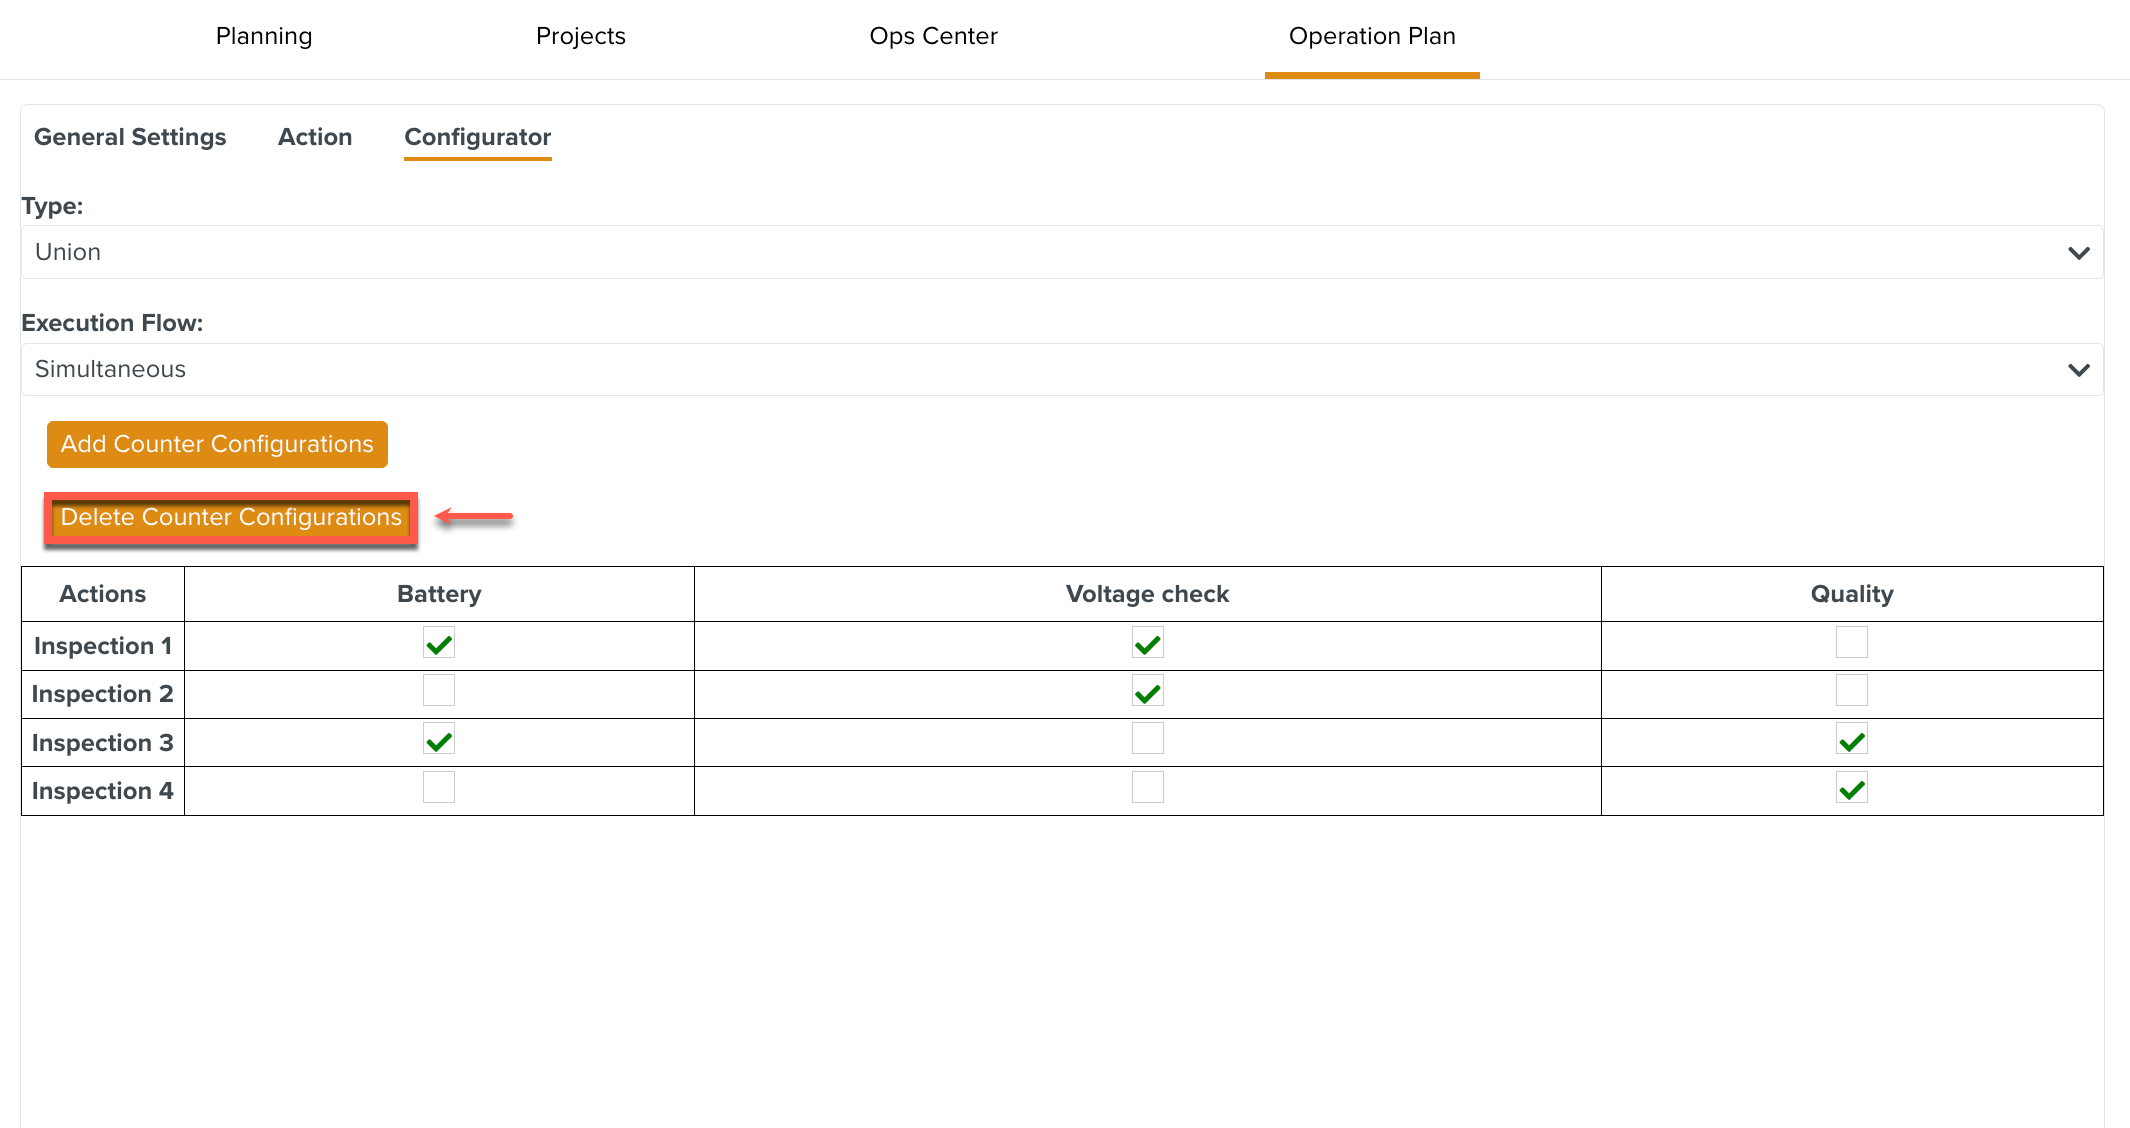
A dialog is displayed.
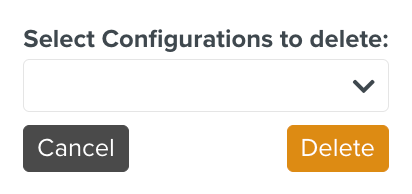
Select a Configuration from the dropdown.
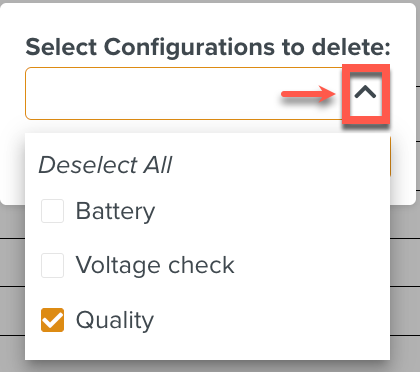
Click .
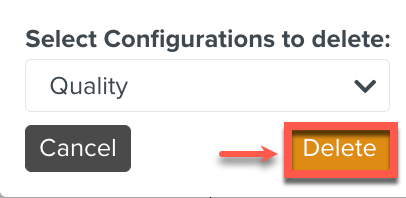
The Configuration is deleted.
Click .
The Configuration is created.