Graphical Elements in the Custom Lifecycle
The Custom Lifecycle is modeled as a standard BPMN (Business Process Modeling Notation) diagram. The UI elements are used to build the Custom Lifecycle.
The graphical elements required to model the workflow can be dragged and configured on the canvas.
1. Start Event 
A Start Event marks the beginning of the Custom Lifecycle. All Custom Lifecycles must have a Start Event.
2. End Event 
An End Event marks the end of the Custom Lifecycle. All Custom Lifecycles must have an End Event.
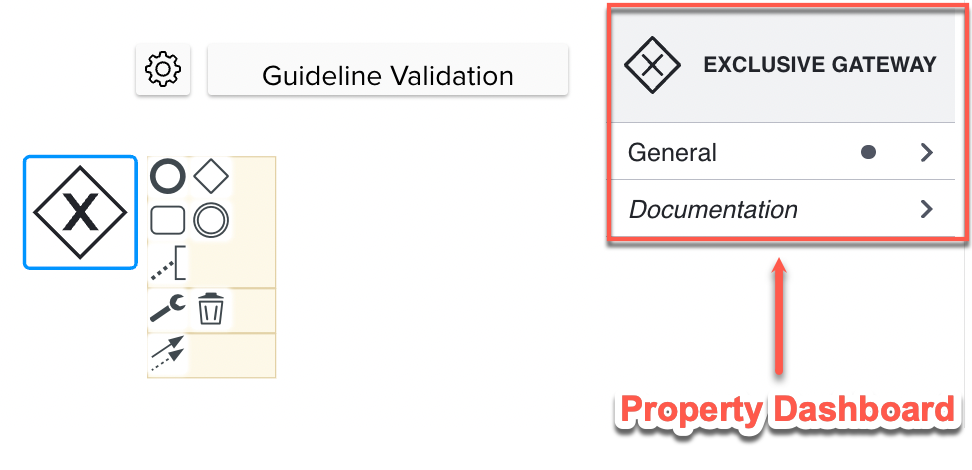
3. Gateway 
A Gateway Element marks a decision gateway that controls the sequence flow.
When a Gateway element is included in the canvas, a Property Dashboard appears as shown below.
 |
The various types of Gateways are described in detail here.
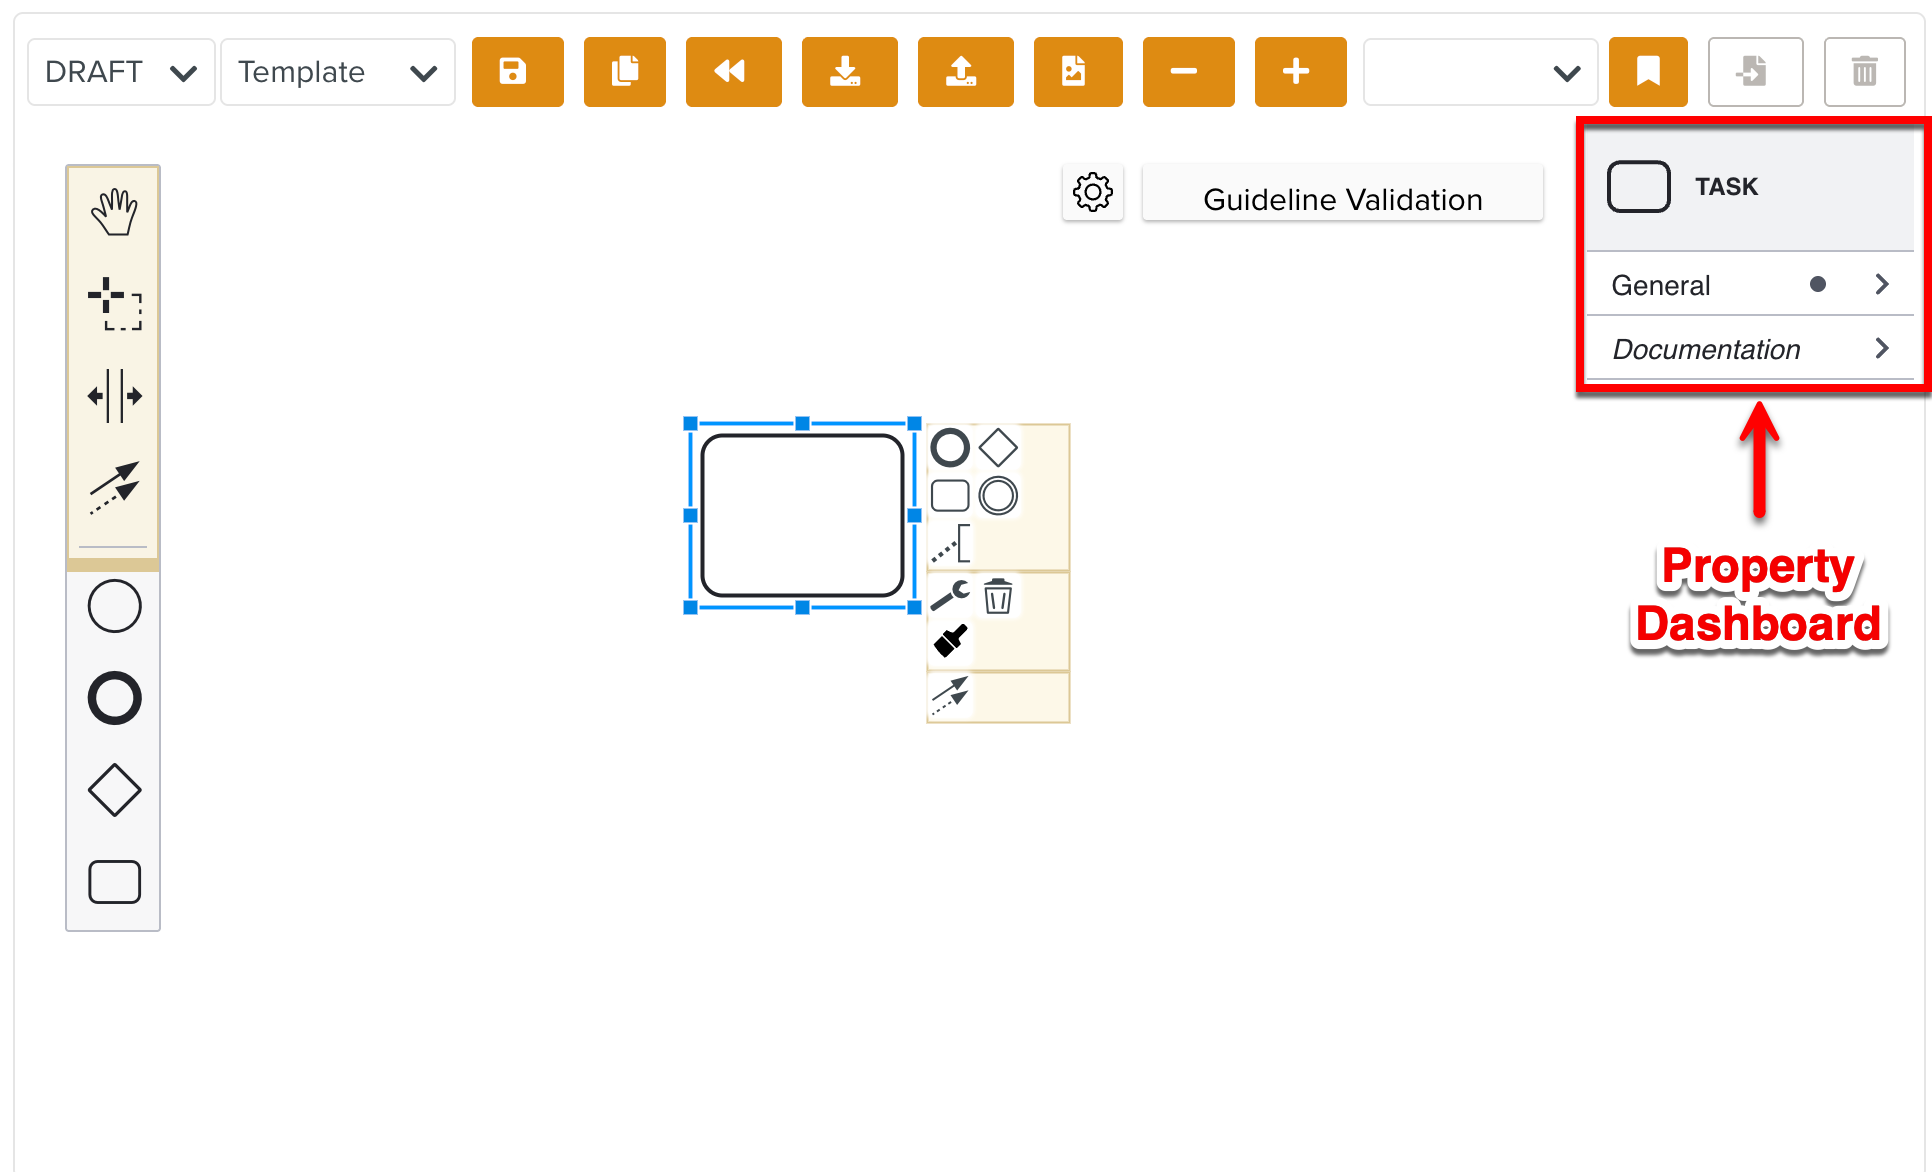
4. Task 
The Task element denotes a task that needs to be performed.
When a Task element is included in the canvas, a Property Dashboard appears as shown below.
 |
The various types of Tasks are described in detail here.
You can add a Task Form in a User Task to collect information from the user during the Template Edition process.
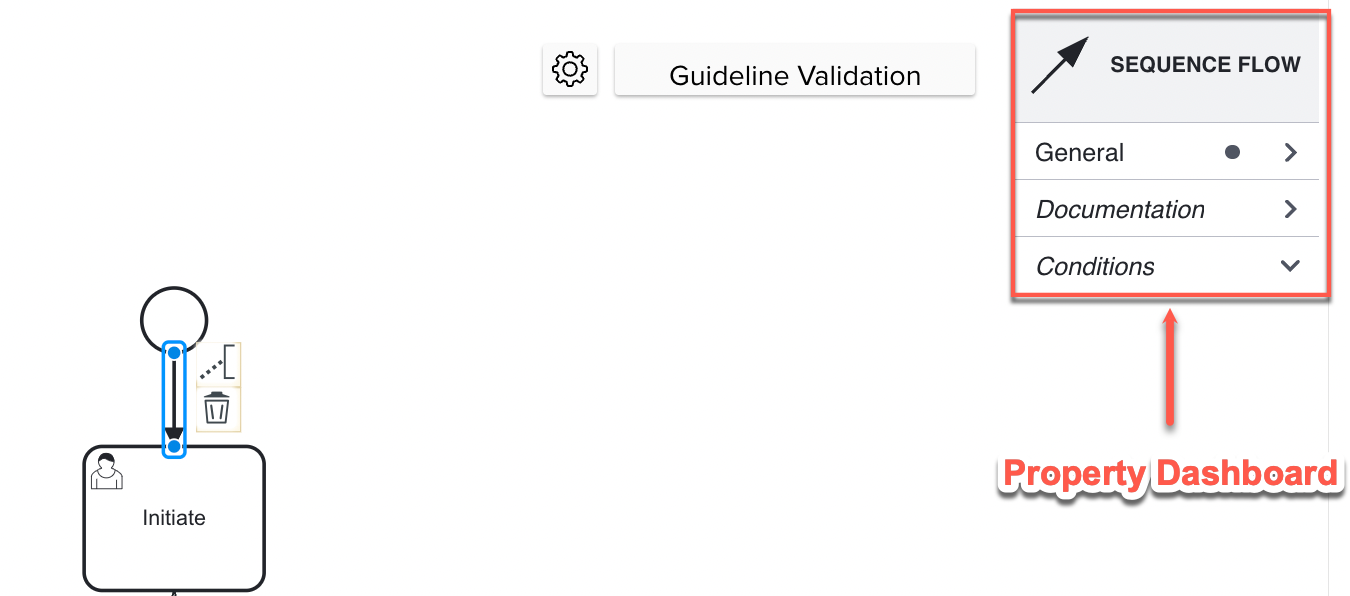
5. Global Connect 
The Global Connect element is used to denote a sequence flow. This element links two elements together, indicating the sequence flow from one point in the workflow to another.
The Sequence Flow shows an unconditional flow from one point to another in the workflow as shown below.
 |
The Conditional Flow shows a flow from one point to another only if the condition associated with the flow evaluates to TRUE. This is shown below.
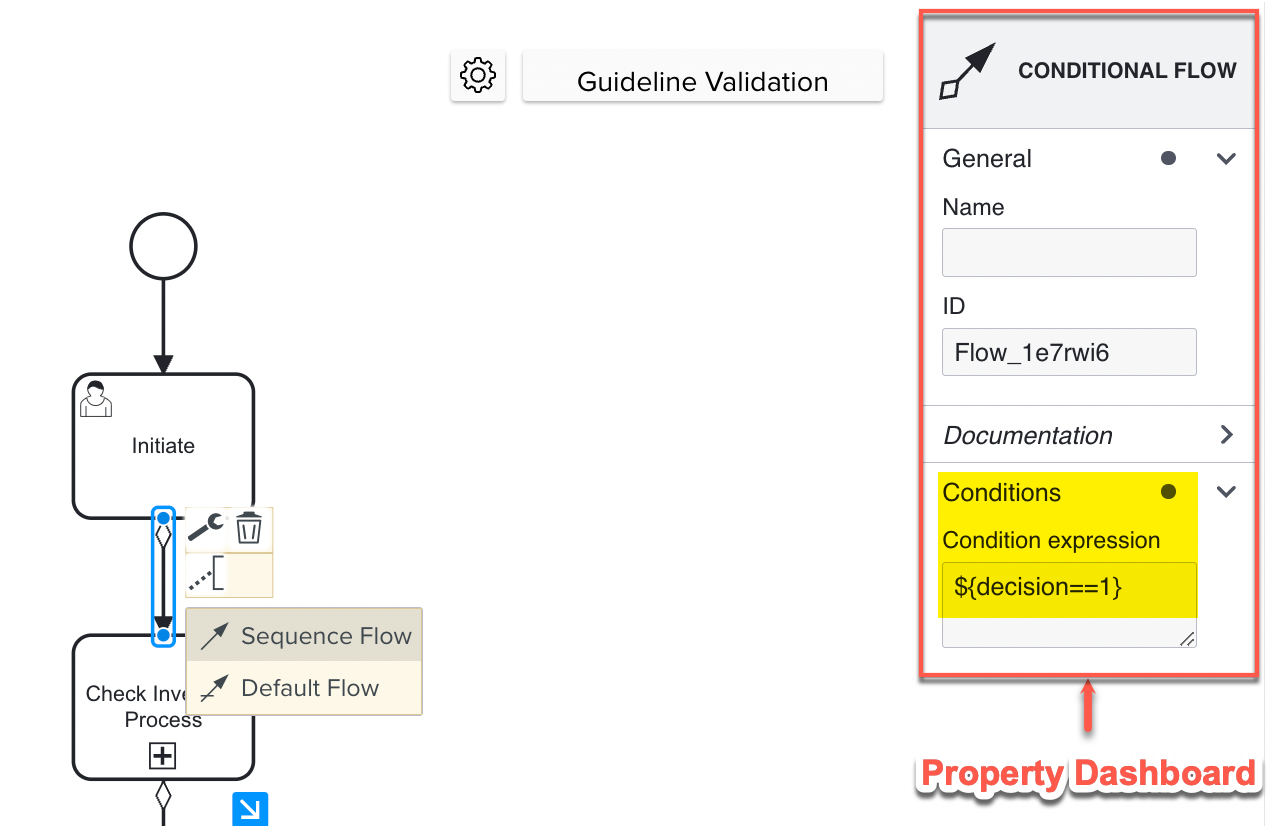 |
Tip
${decision==1} evaluates to TRUE always. Conditions can also be built based on the user input to the Task Forms.
Consider that a Task Form with code Parts is used. It has a property with code Proceed and if the user input is Yes to this field, the workflow should move to the next stage. To achieve this, you can build your condition using the format FormCodeFieldCode == 'String'. In this example, the condition would be ${decision==1 and PartsProceed == 'Yes' }.