Viewing the Execution Preview of an Operation Plan
The Execution Preview feature allows you to preview the running of your Operation Plan Definition by triggering mock events and checking the behavior of the Operation Plan.
The Execution Preview can be run on the Operation Plan Definition. You need not create an instance and activate it to perform an Execution Preview.
No actual data is downloaded to perform the Execution Preview.
To run an Execution Preview on an Operation Plan Definition:
On the main menu, go to > > .
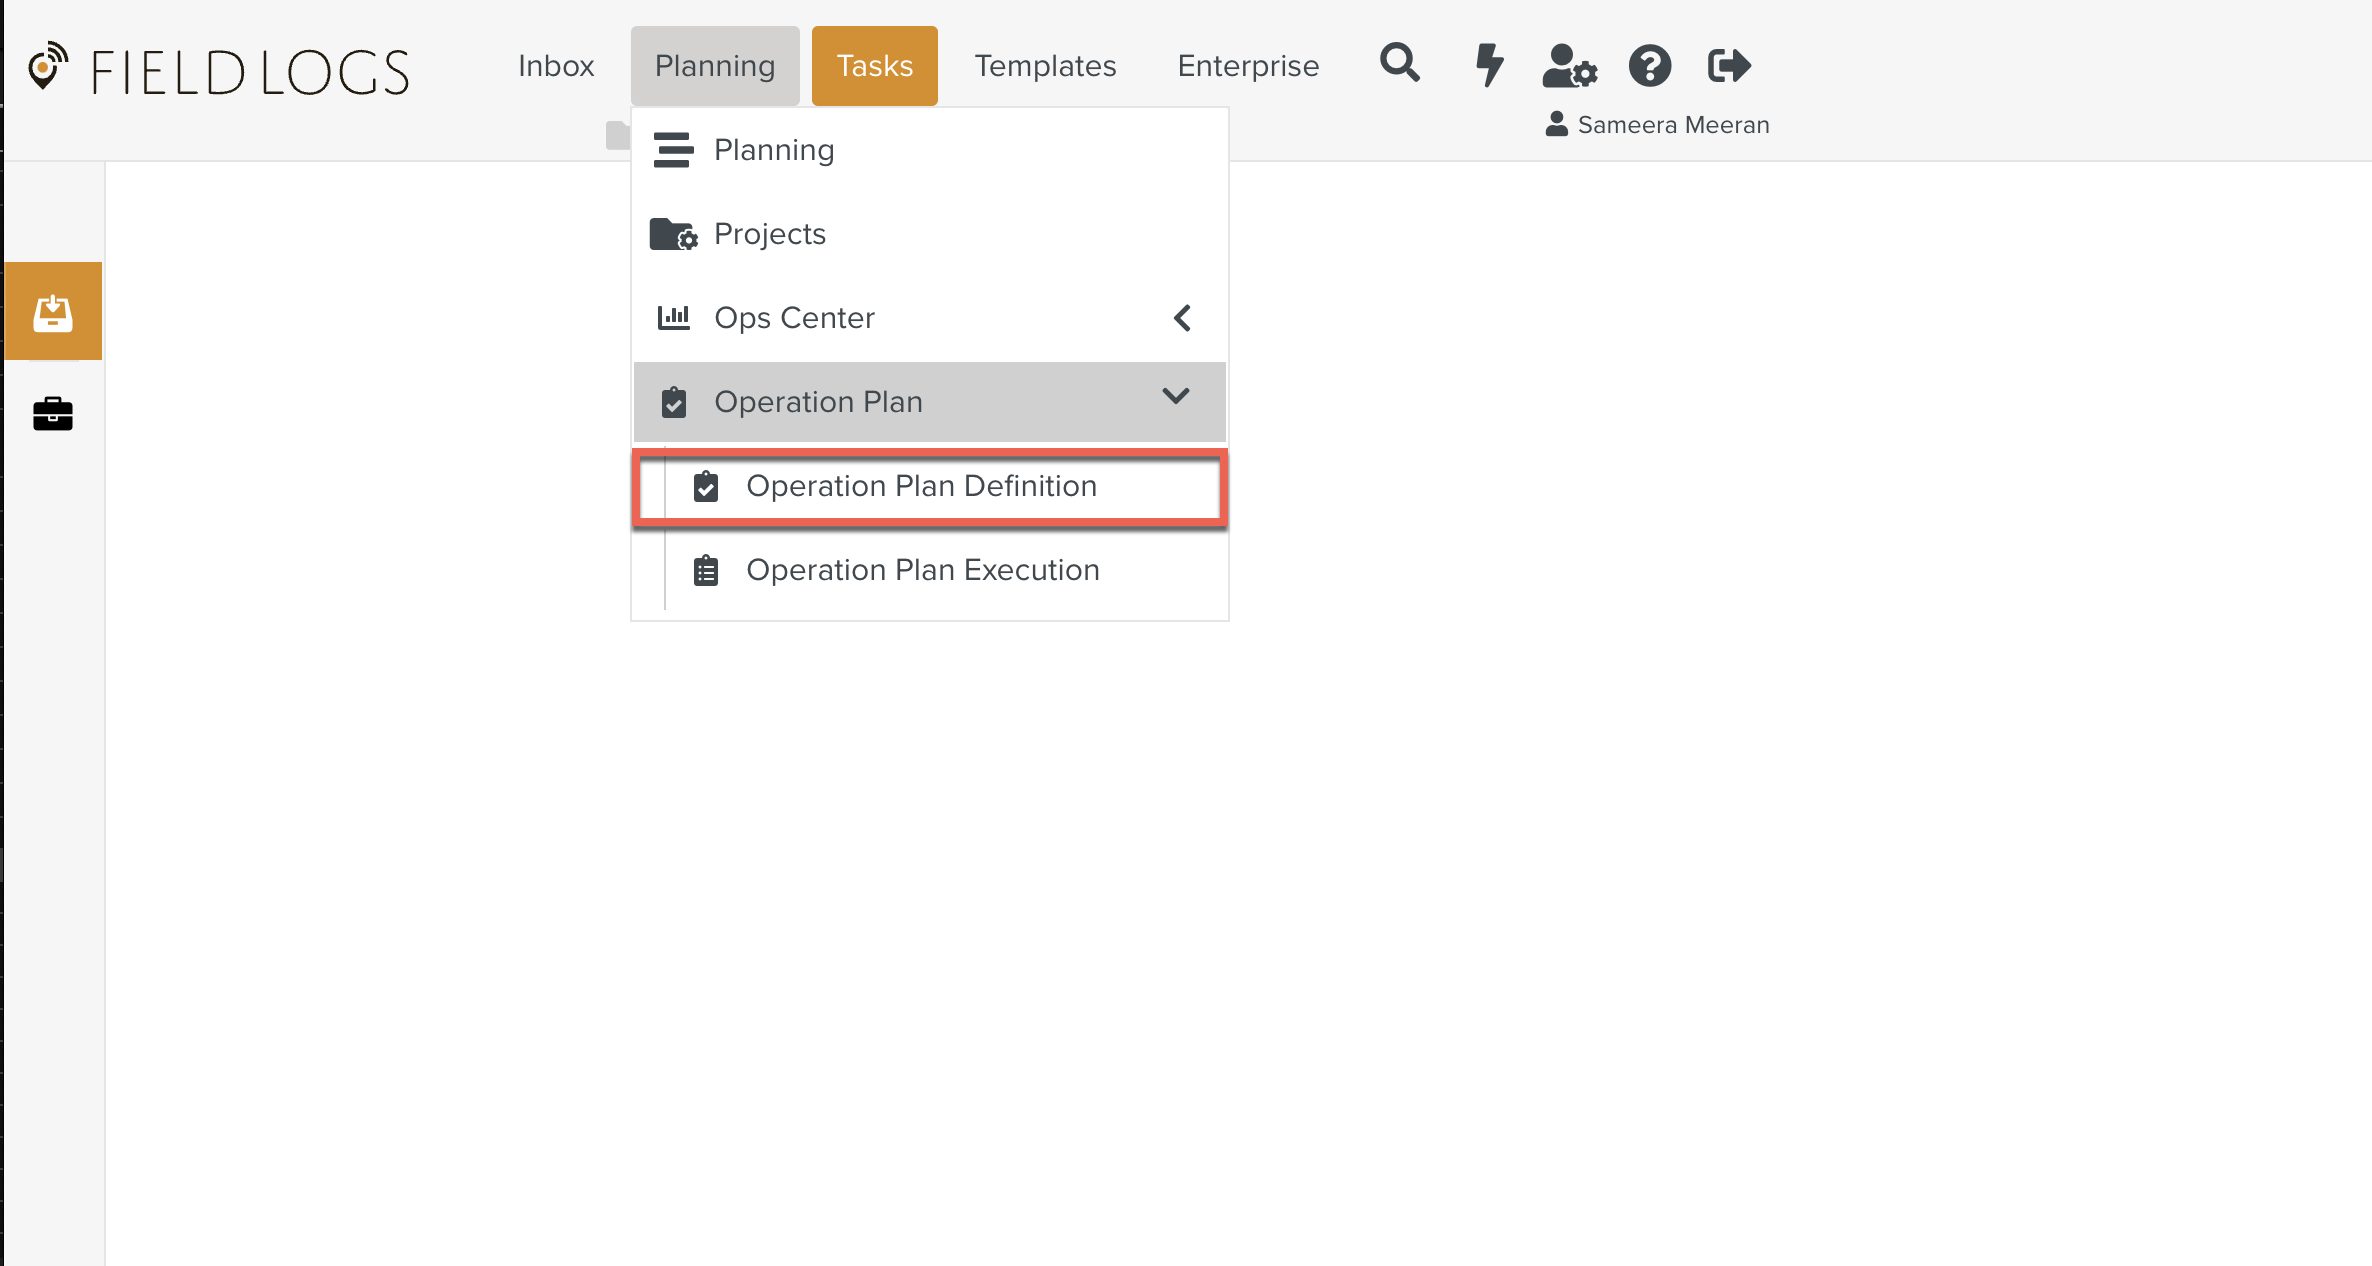
The page appears.
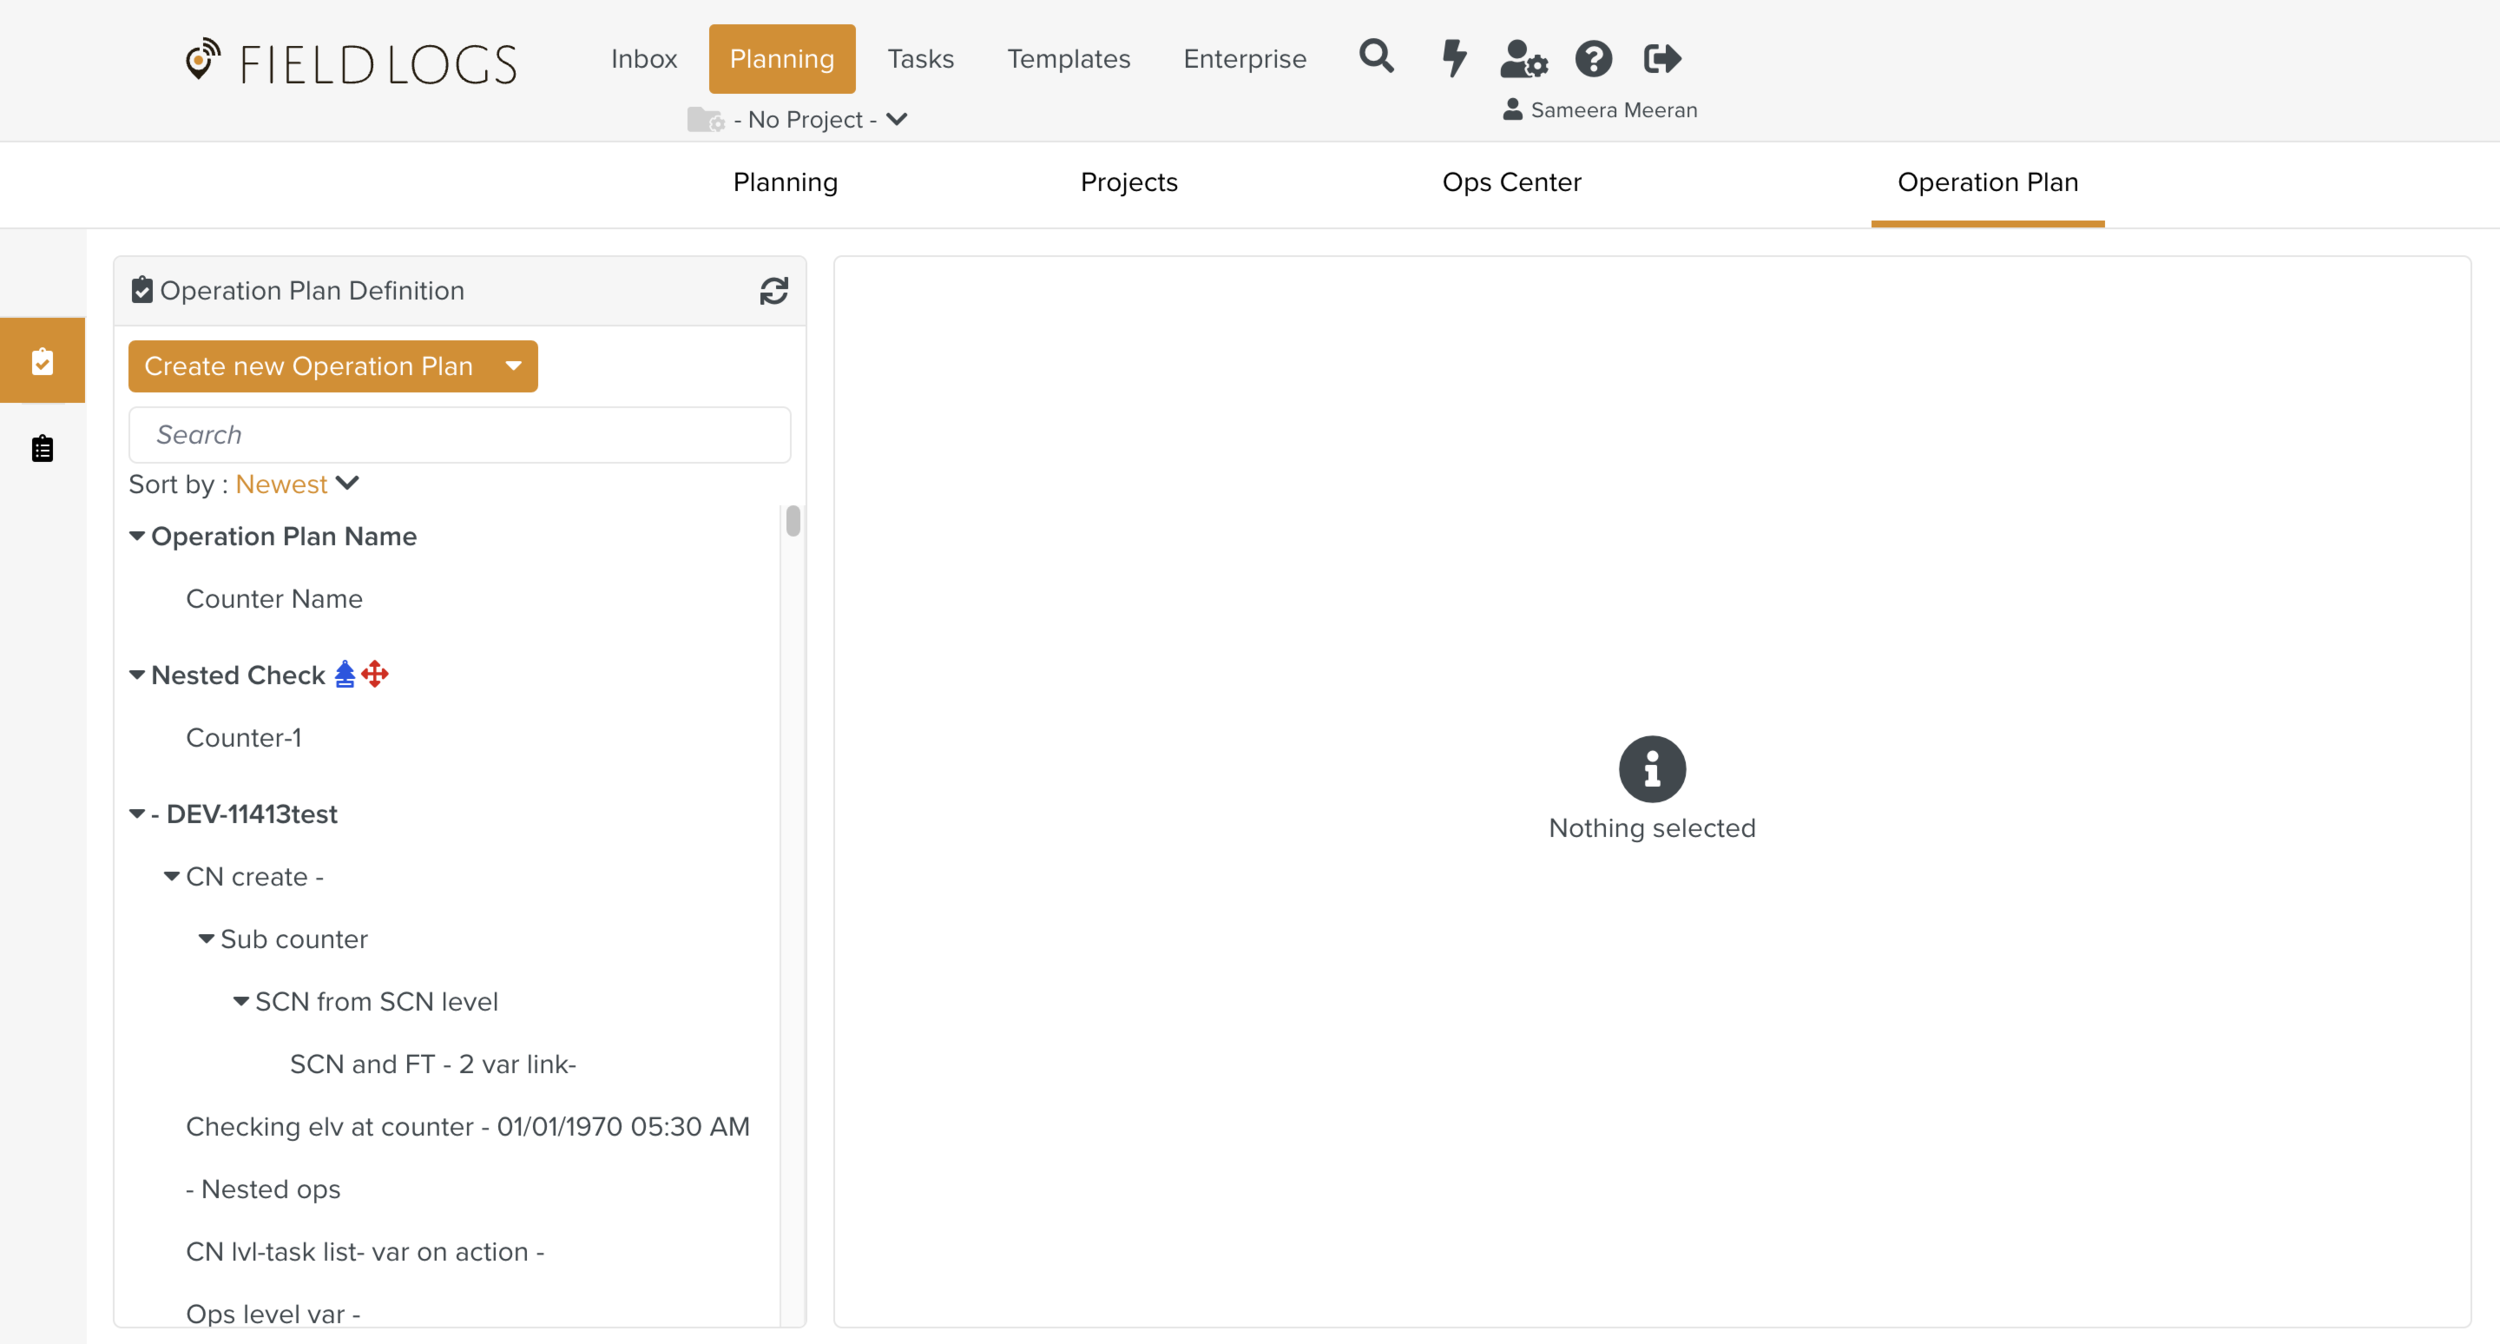
Select from the options in the dropdown of the Operation Plan for which you need to run the Execution Preview.
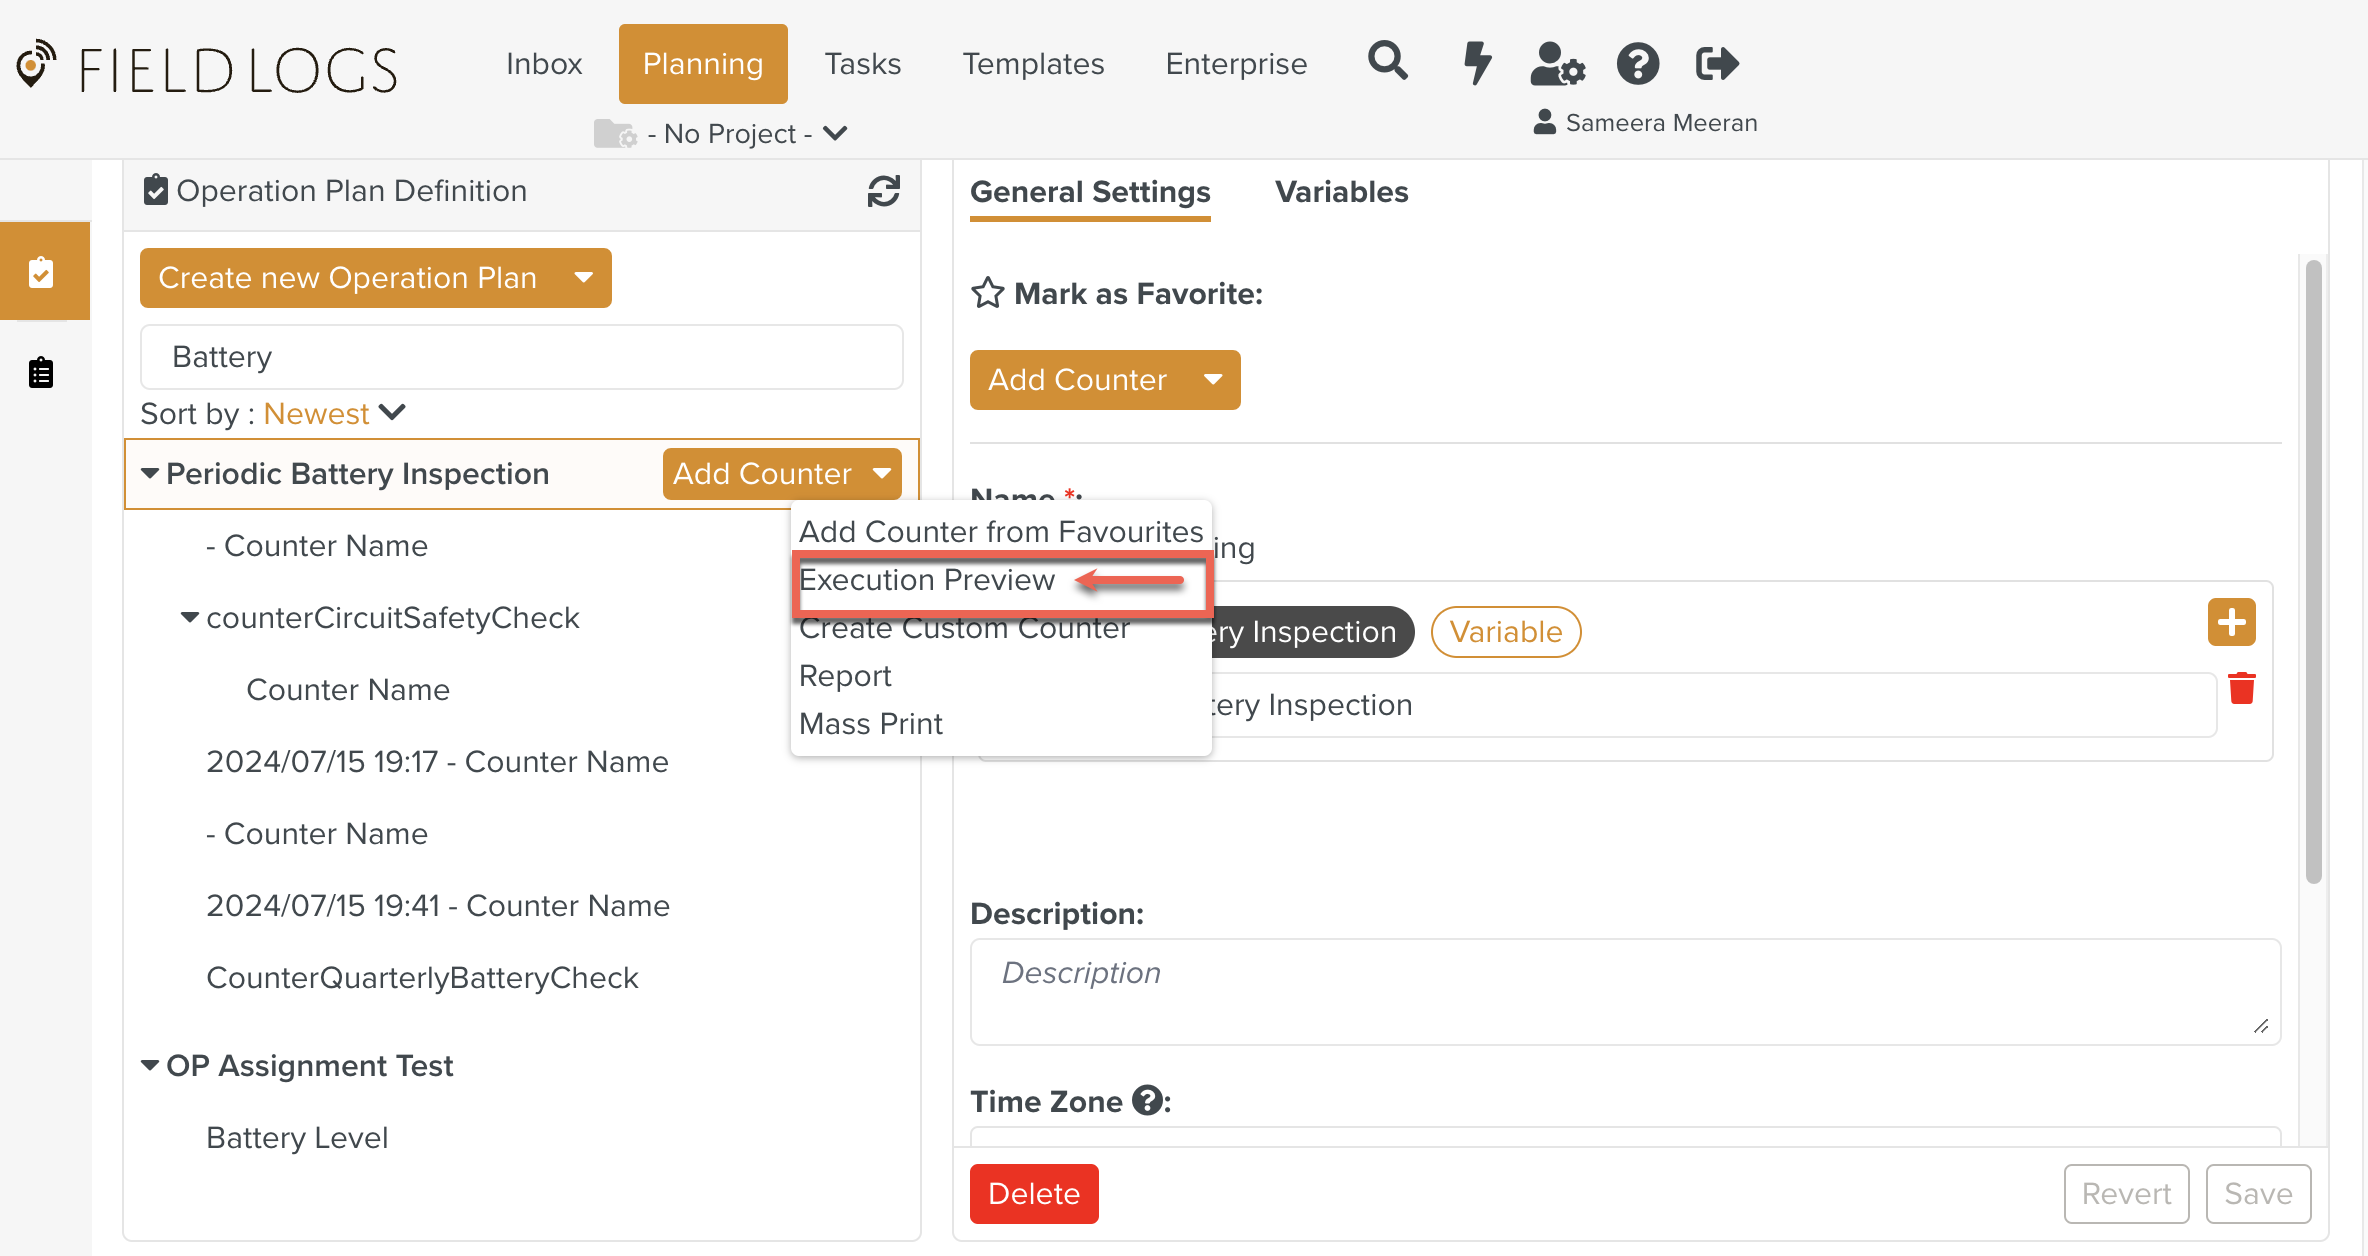
The Execution Preview dialog appears.
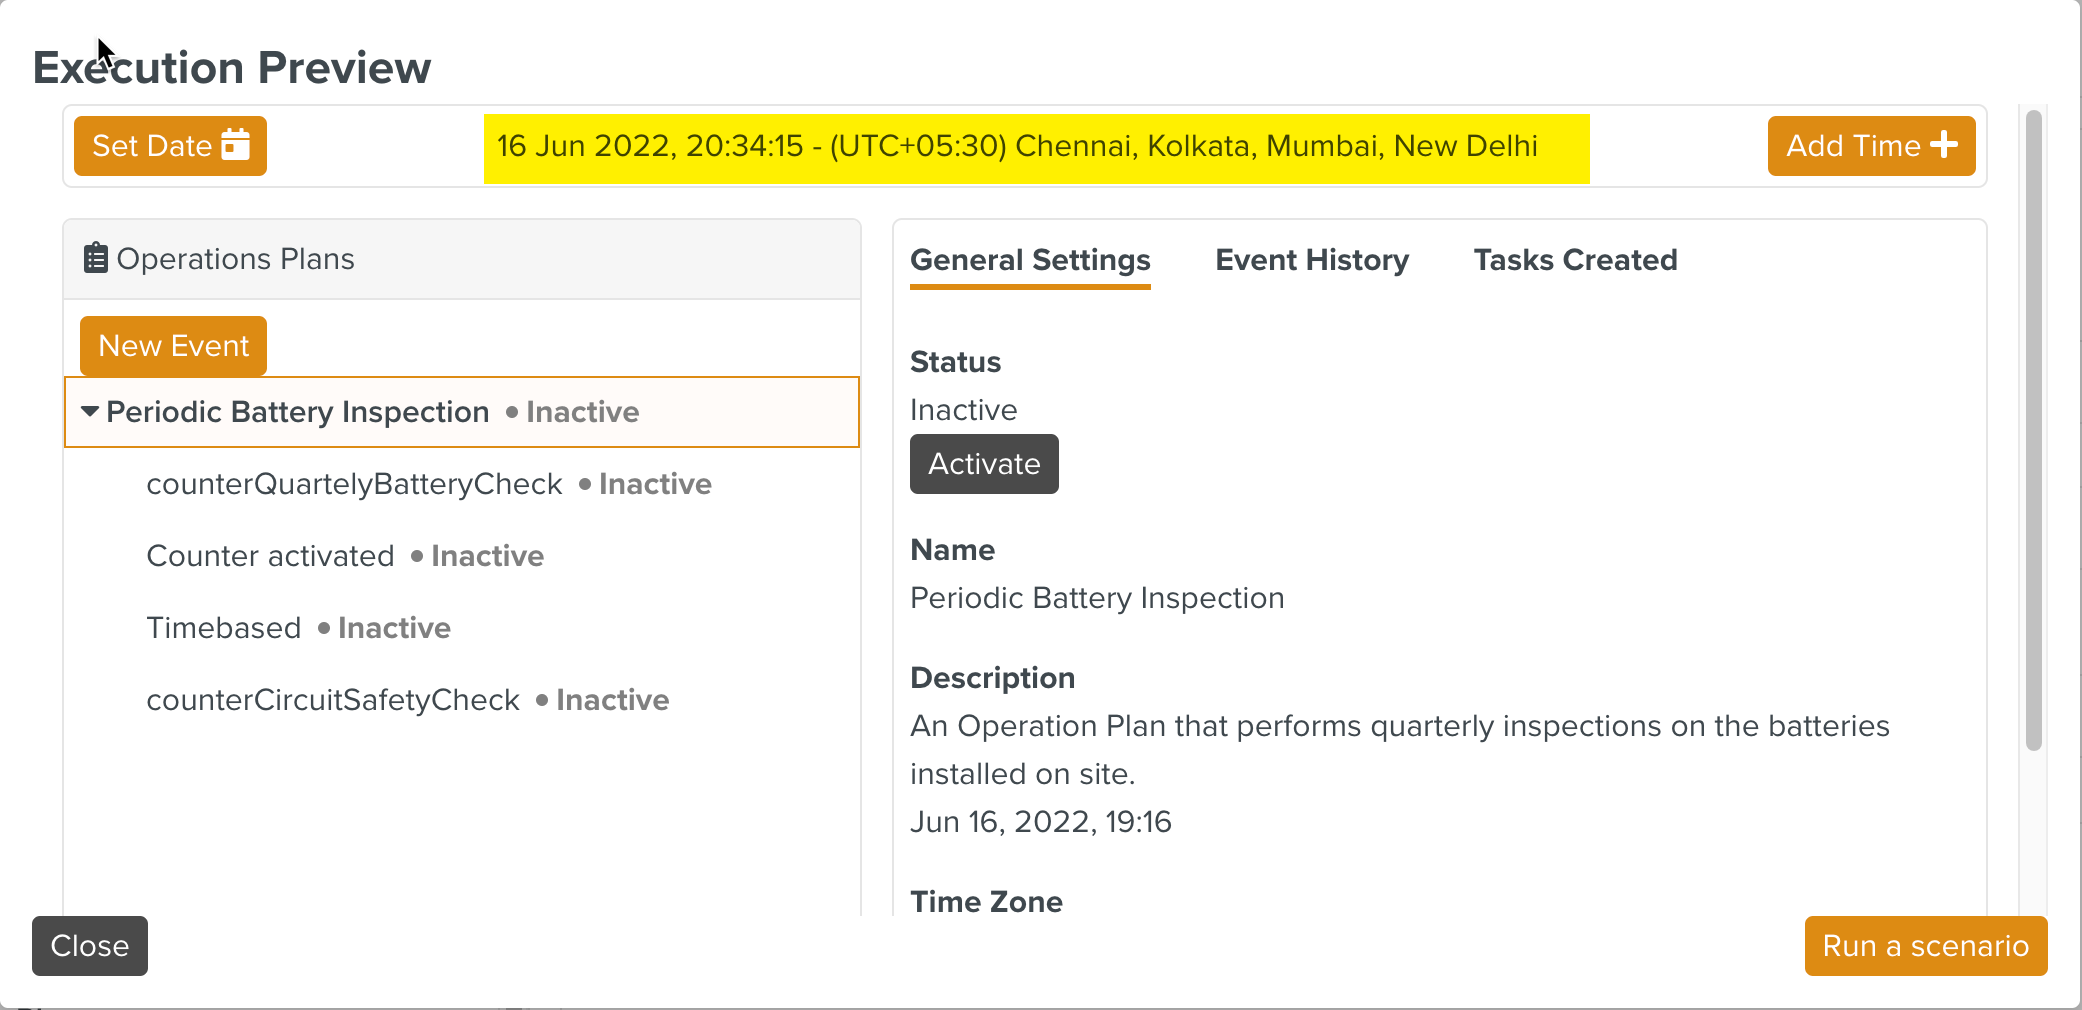
By default, the current system date and time are displayed as highlighted above.
You can change the date and time to simulate a different date and time to preview time-based triggers.
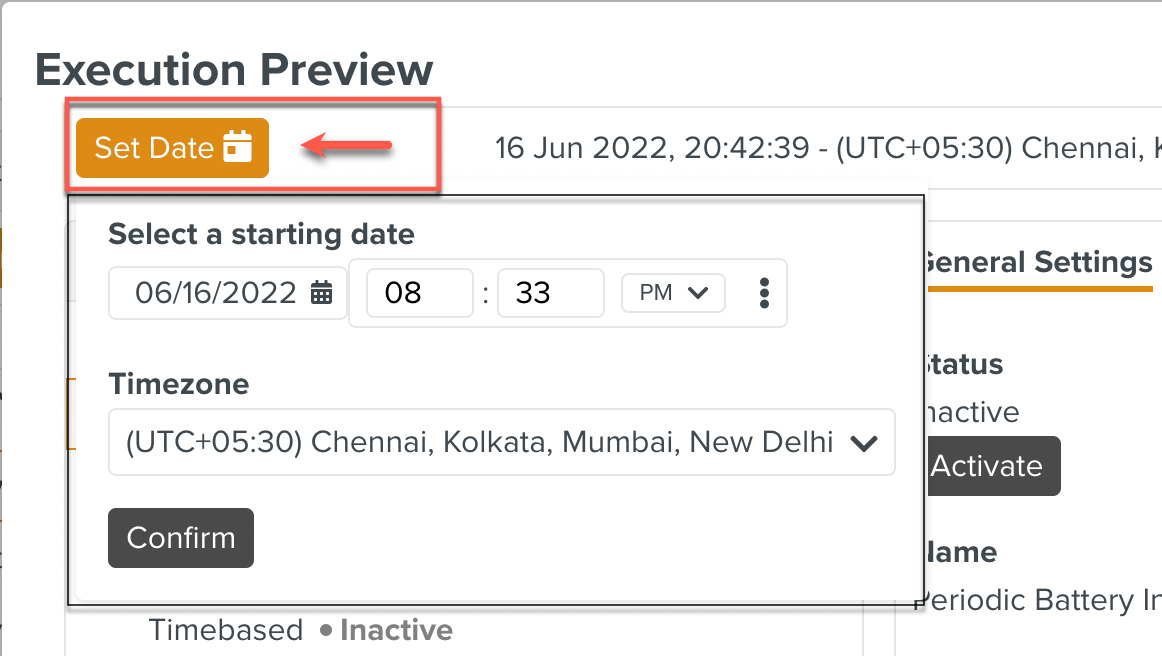
To change the date and time:
Click to set a date for the Execution Preview. You can select a Timezone and a starting date to simulate the required date. Click to set the date.
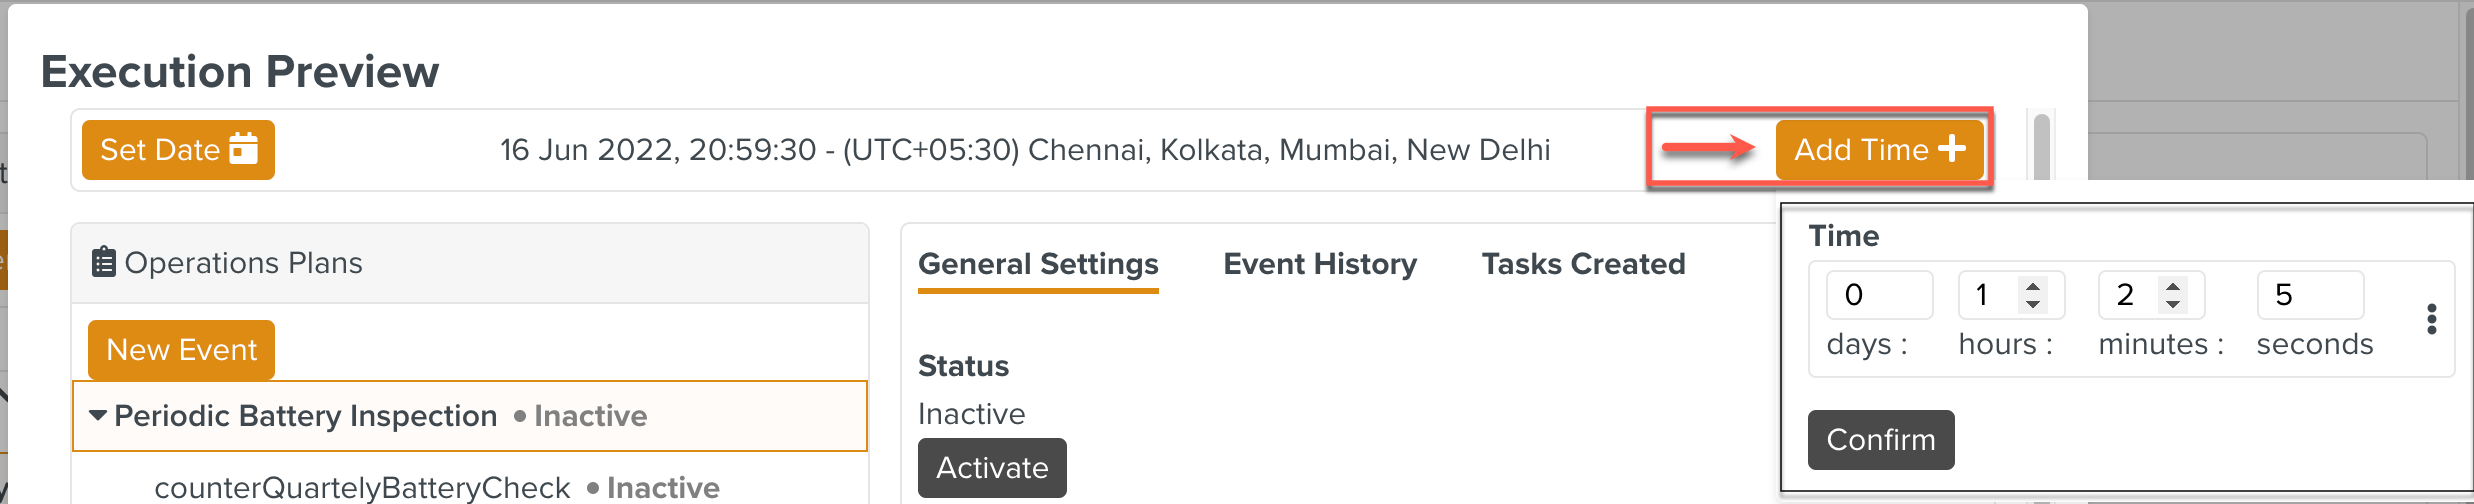
Click to add hours, minutes and seconds. You can use this option to check Operation Plans that are set to run at a particular time. Click to add time to the set date.
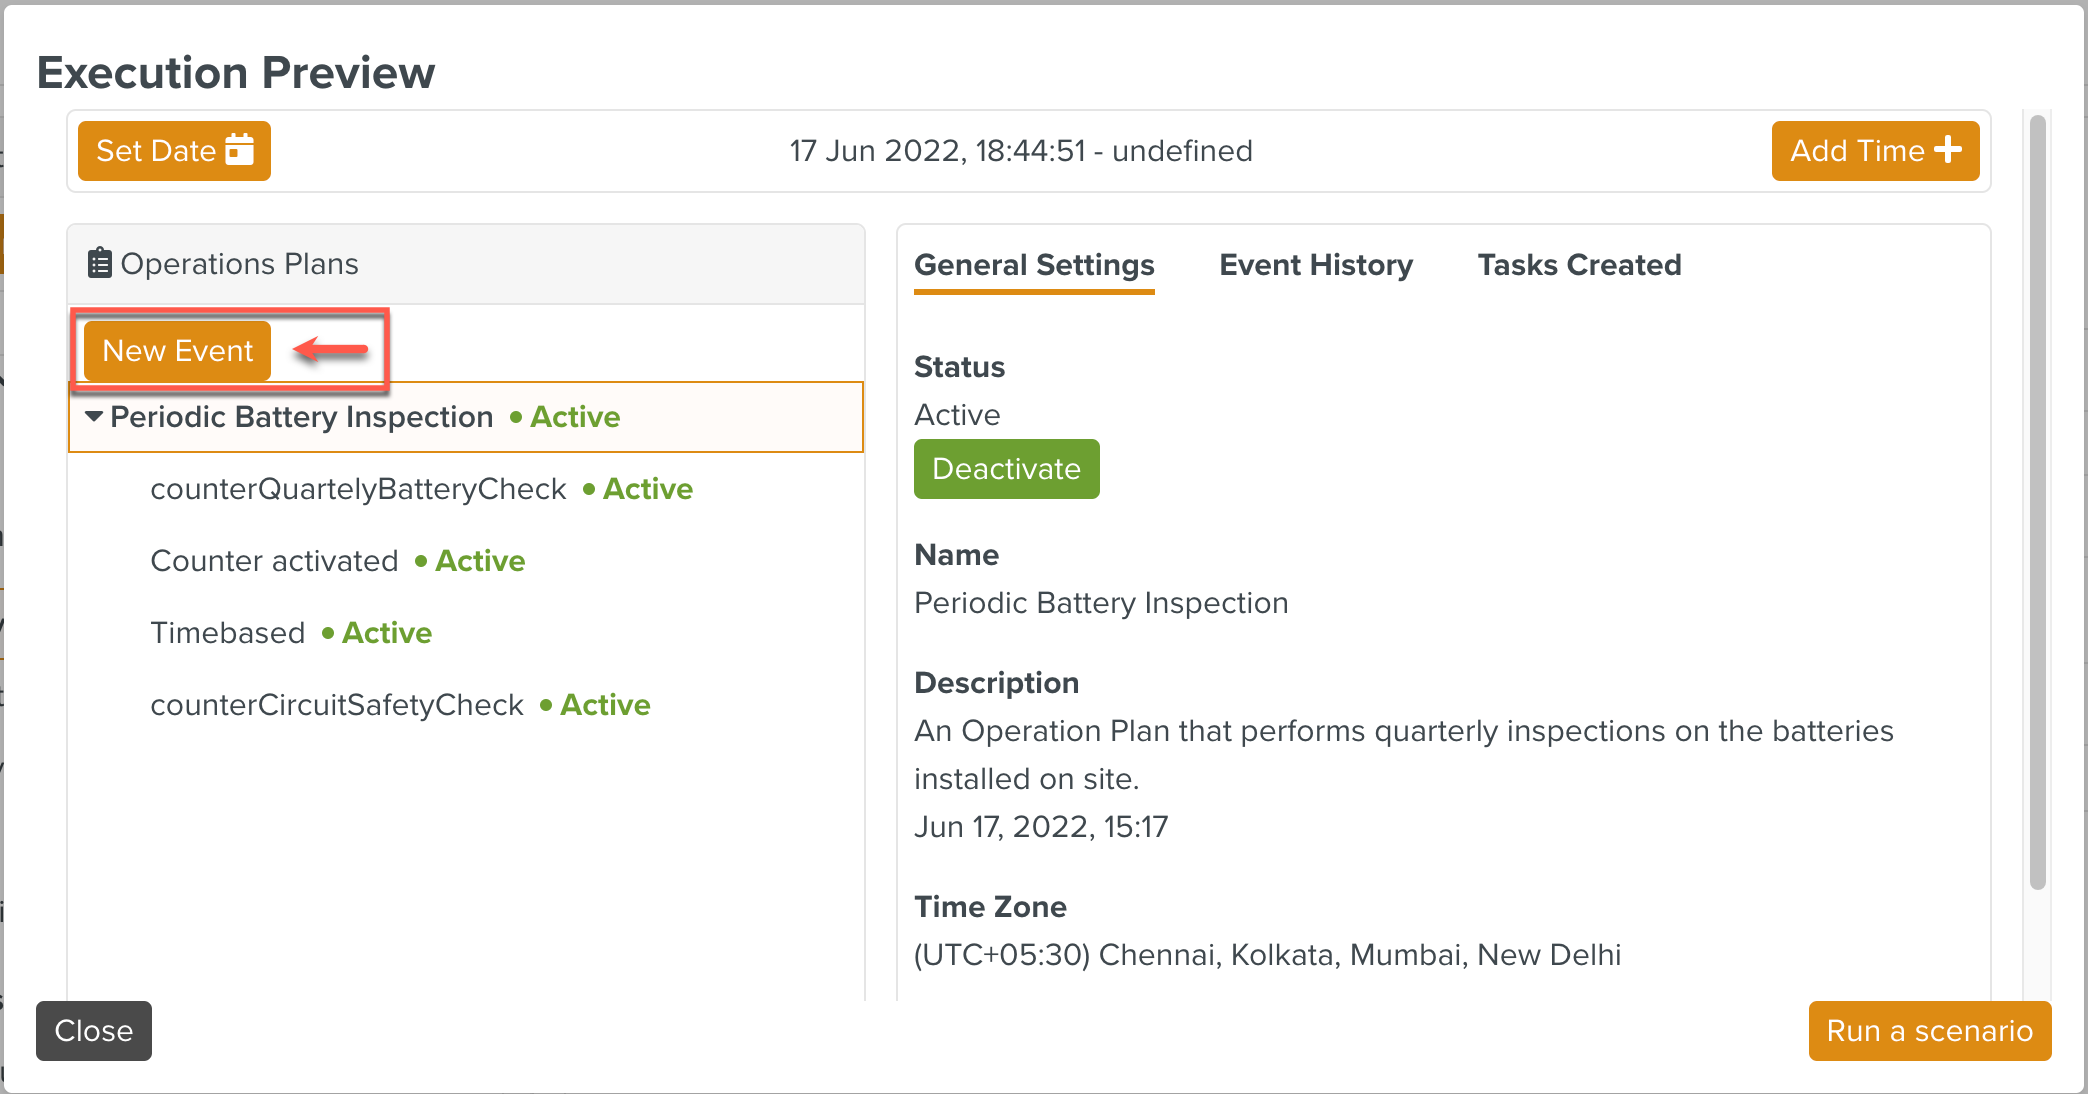
Click in the tab of the Operation Plan as shown below.
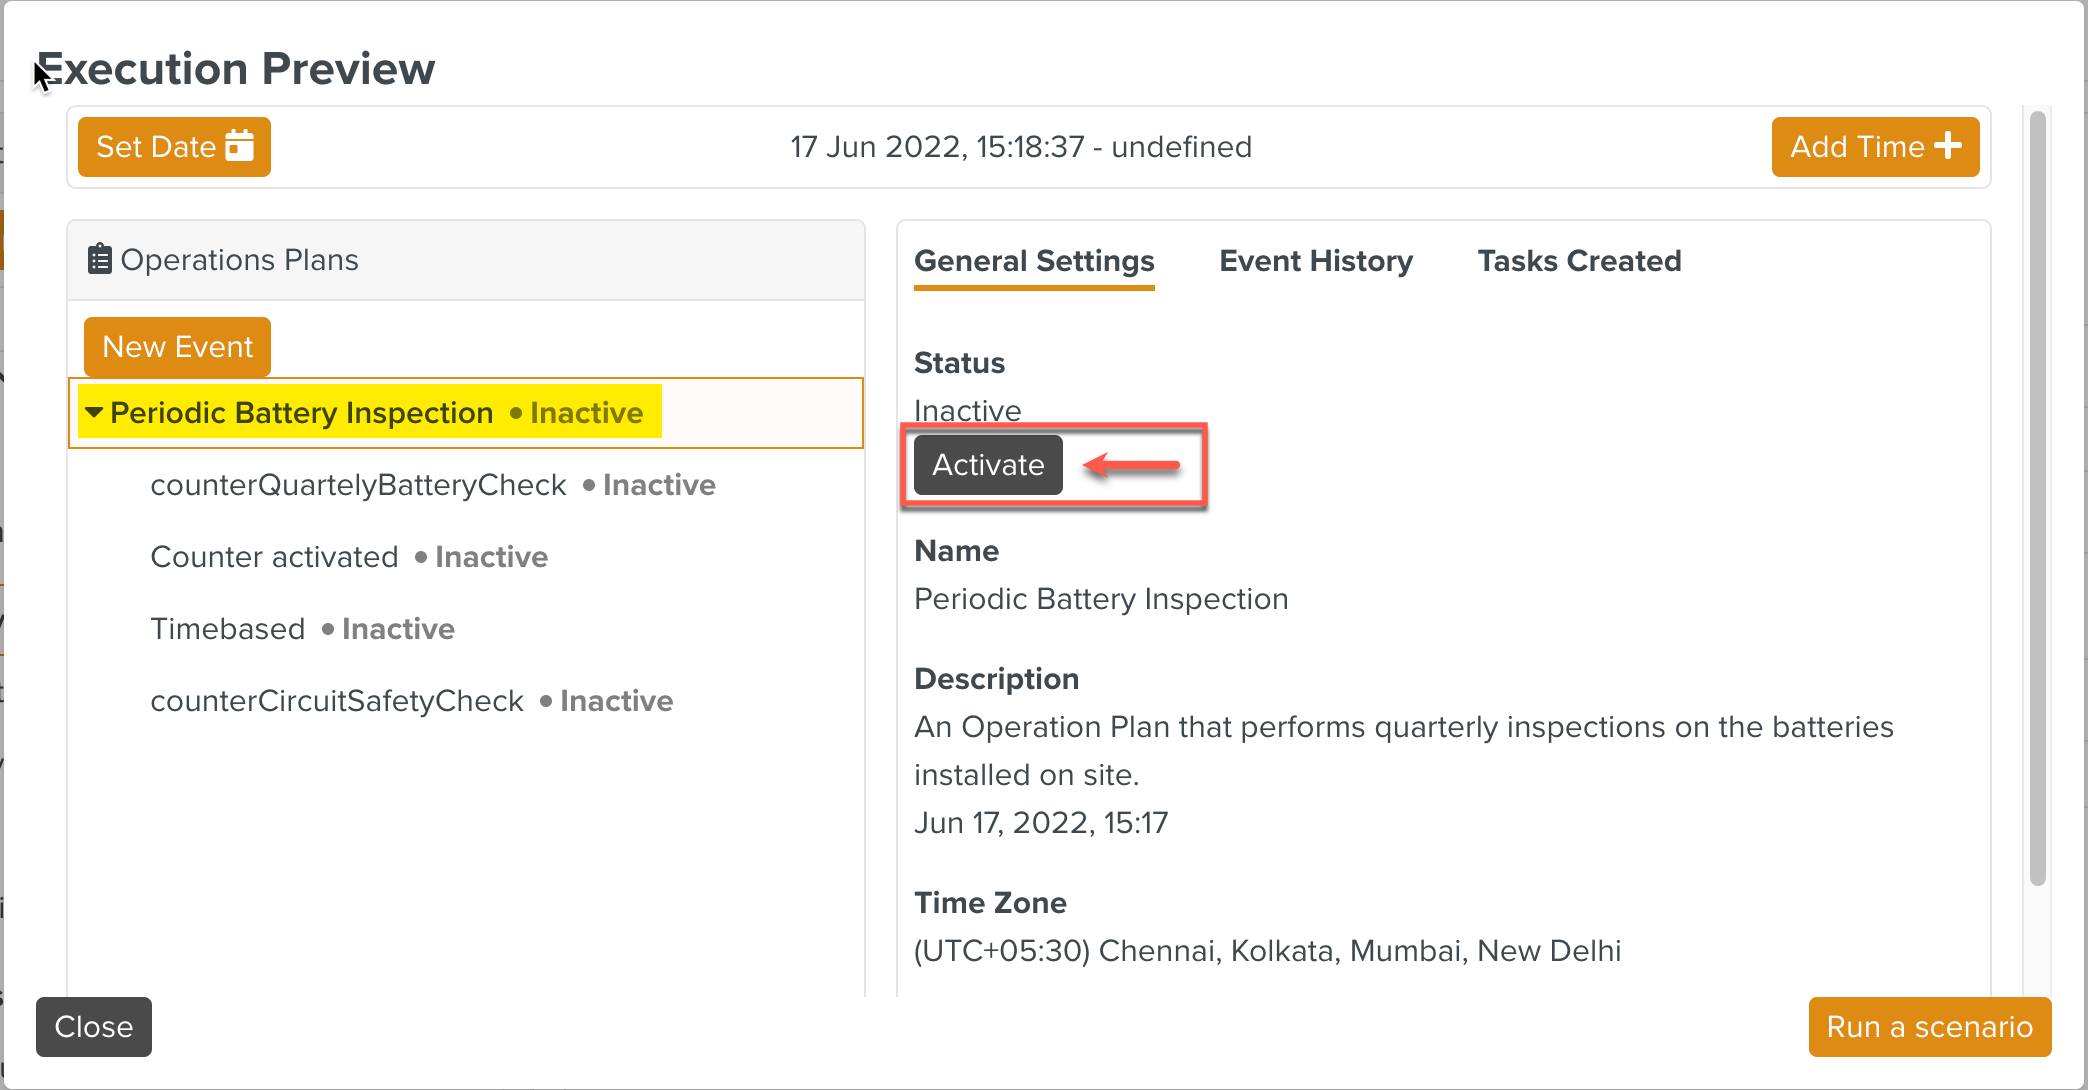
An active instance is now available for Execution Preview.
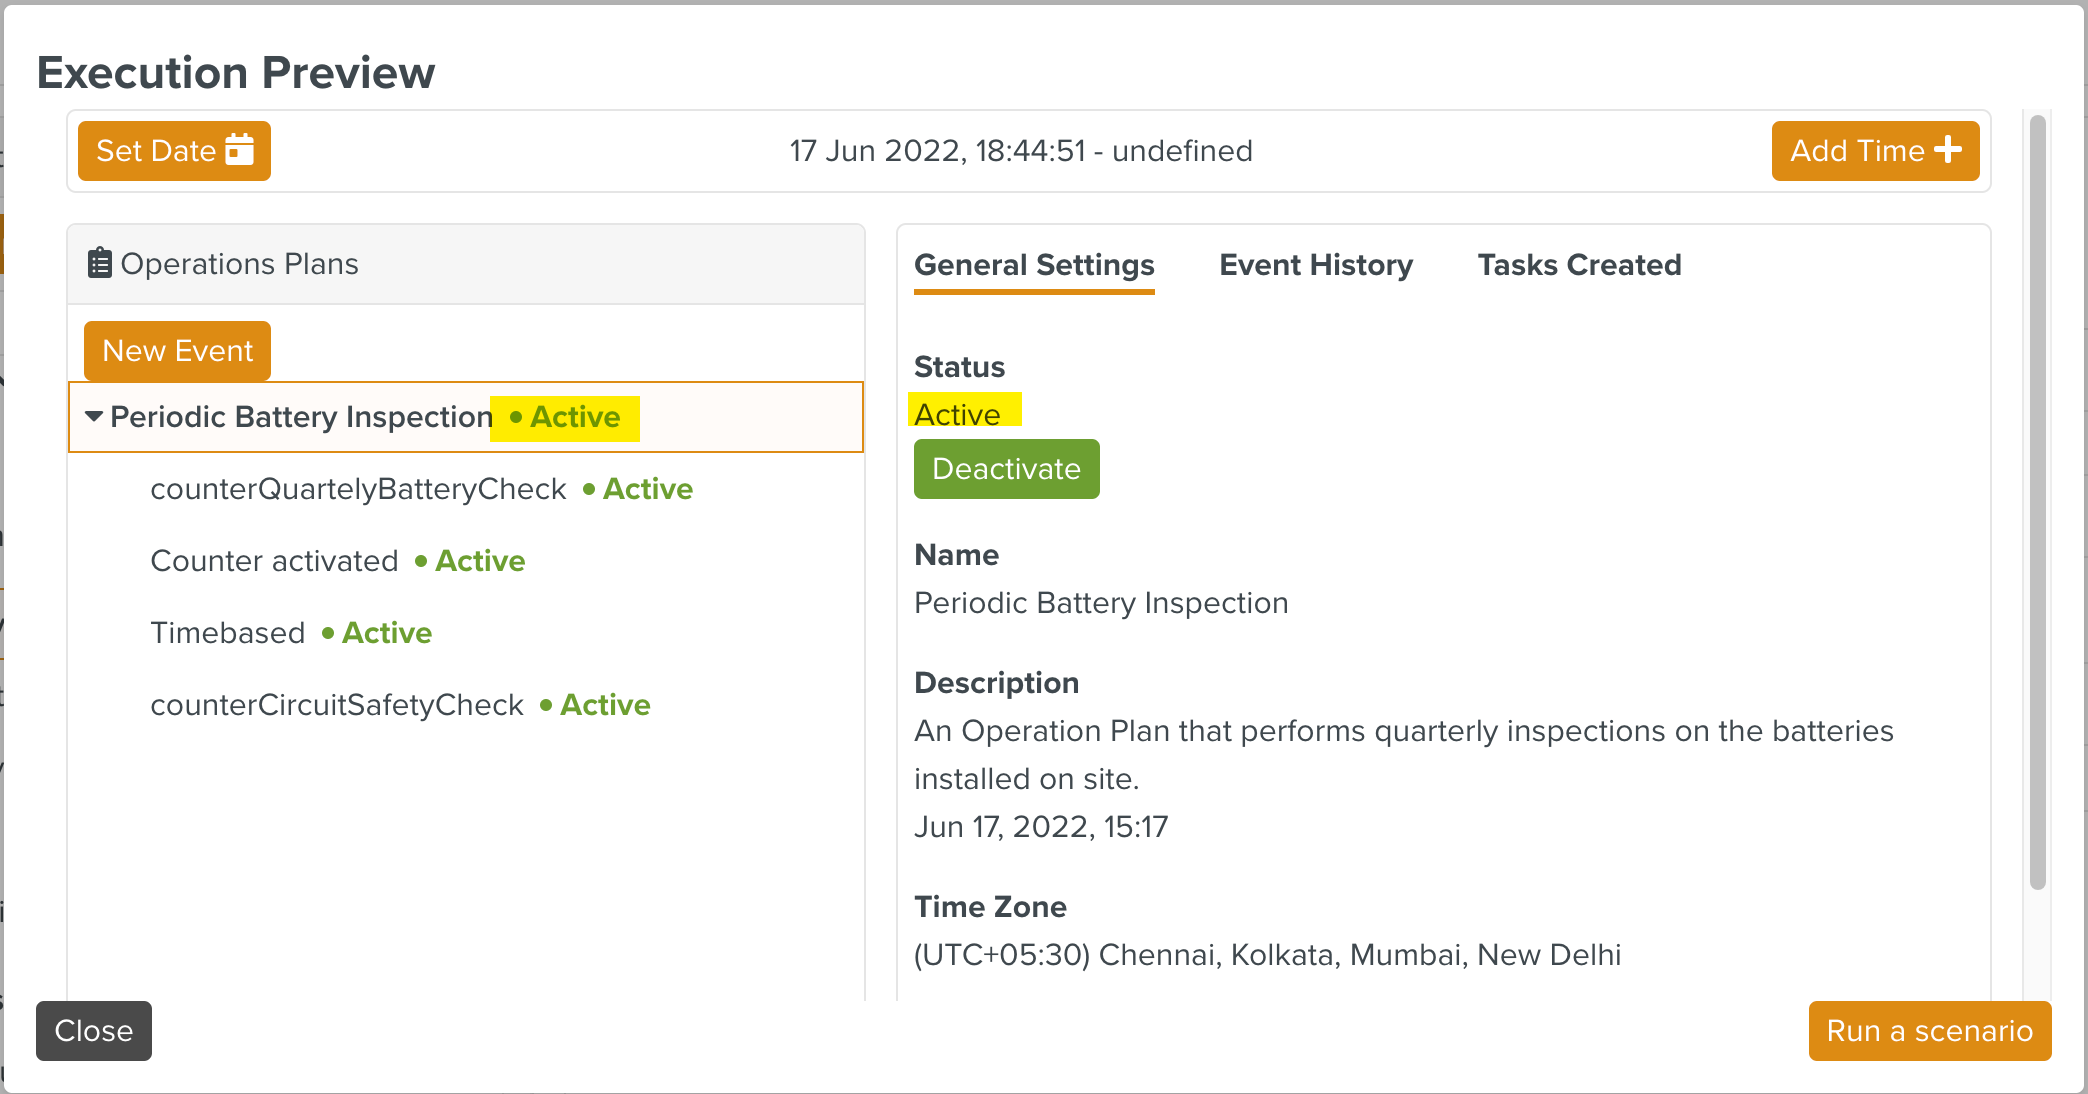
This active instance now responds to the following types of Event Triggers:
Operation Plan Activated
Counter Activated
Time-based
Note
creates an instance and activates it for the purpose of the current Execution Preview only. The scope of this instance is limited to this window. Once this window is closed, this active instance cannot be accessed again.
To simulate the remaining types of Event Triggers, click .
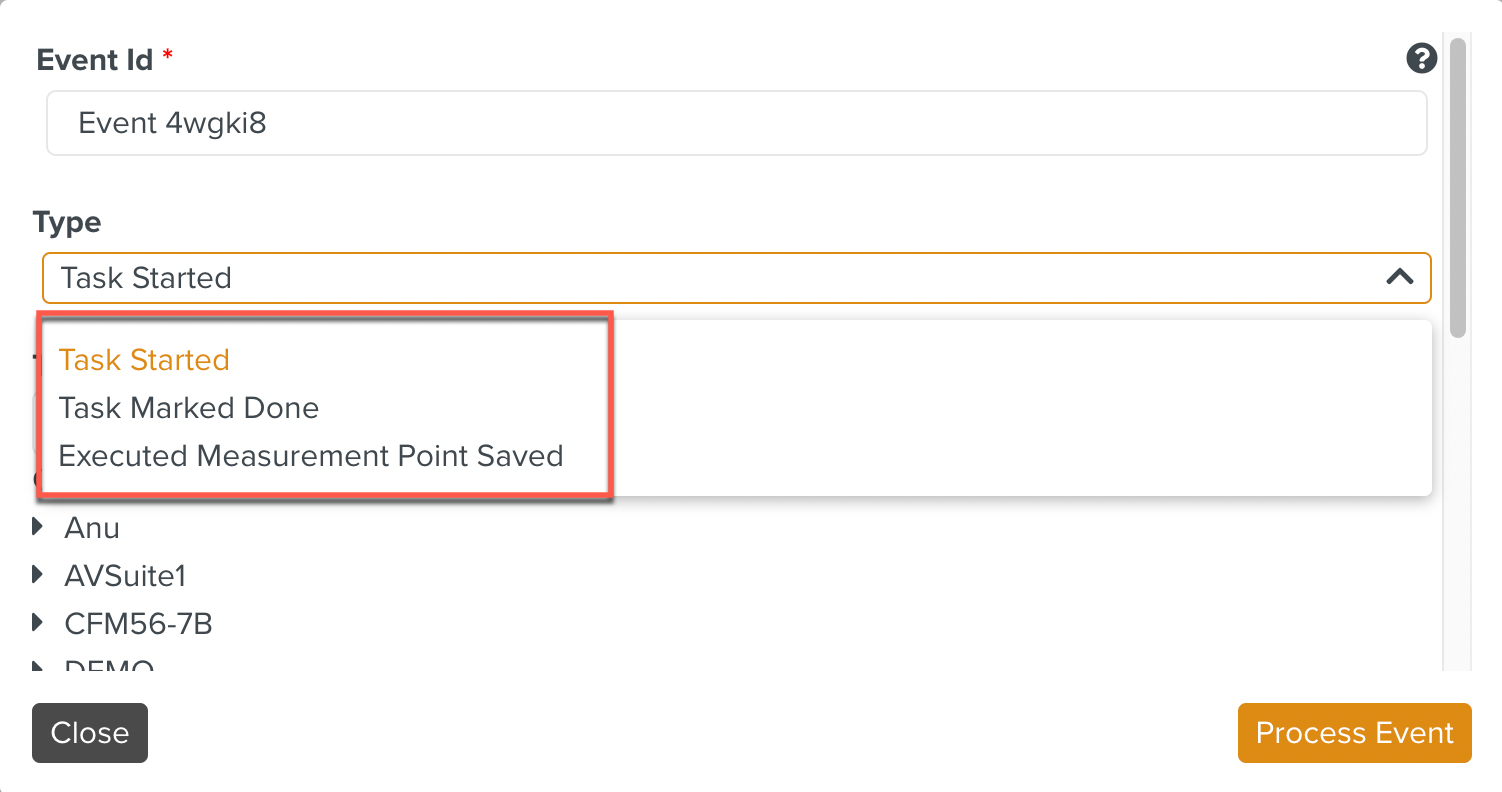
The Event dialog appears. Select the Template that is associated with the Event.
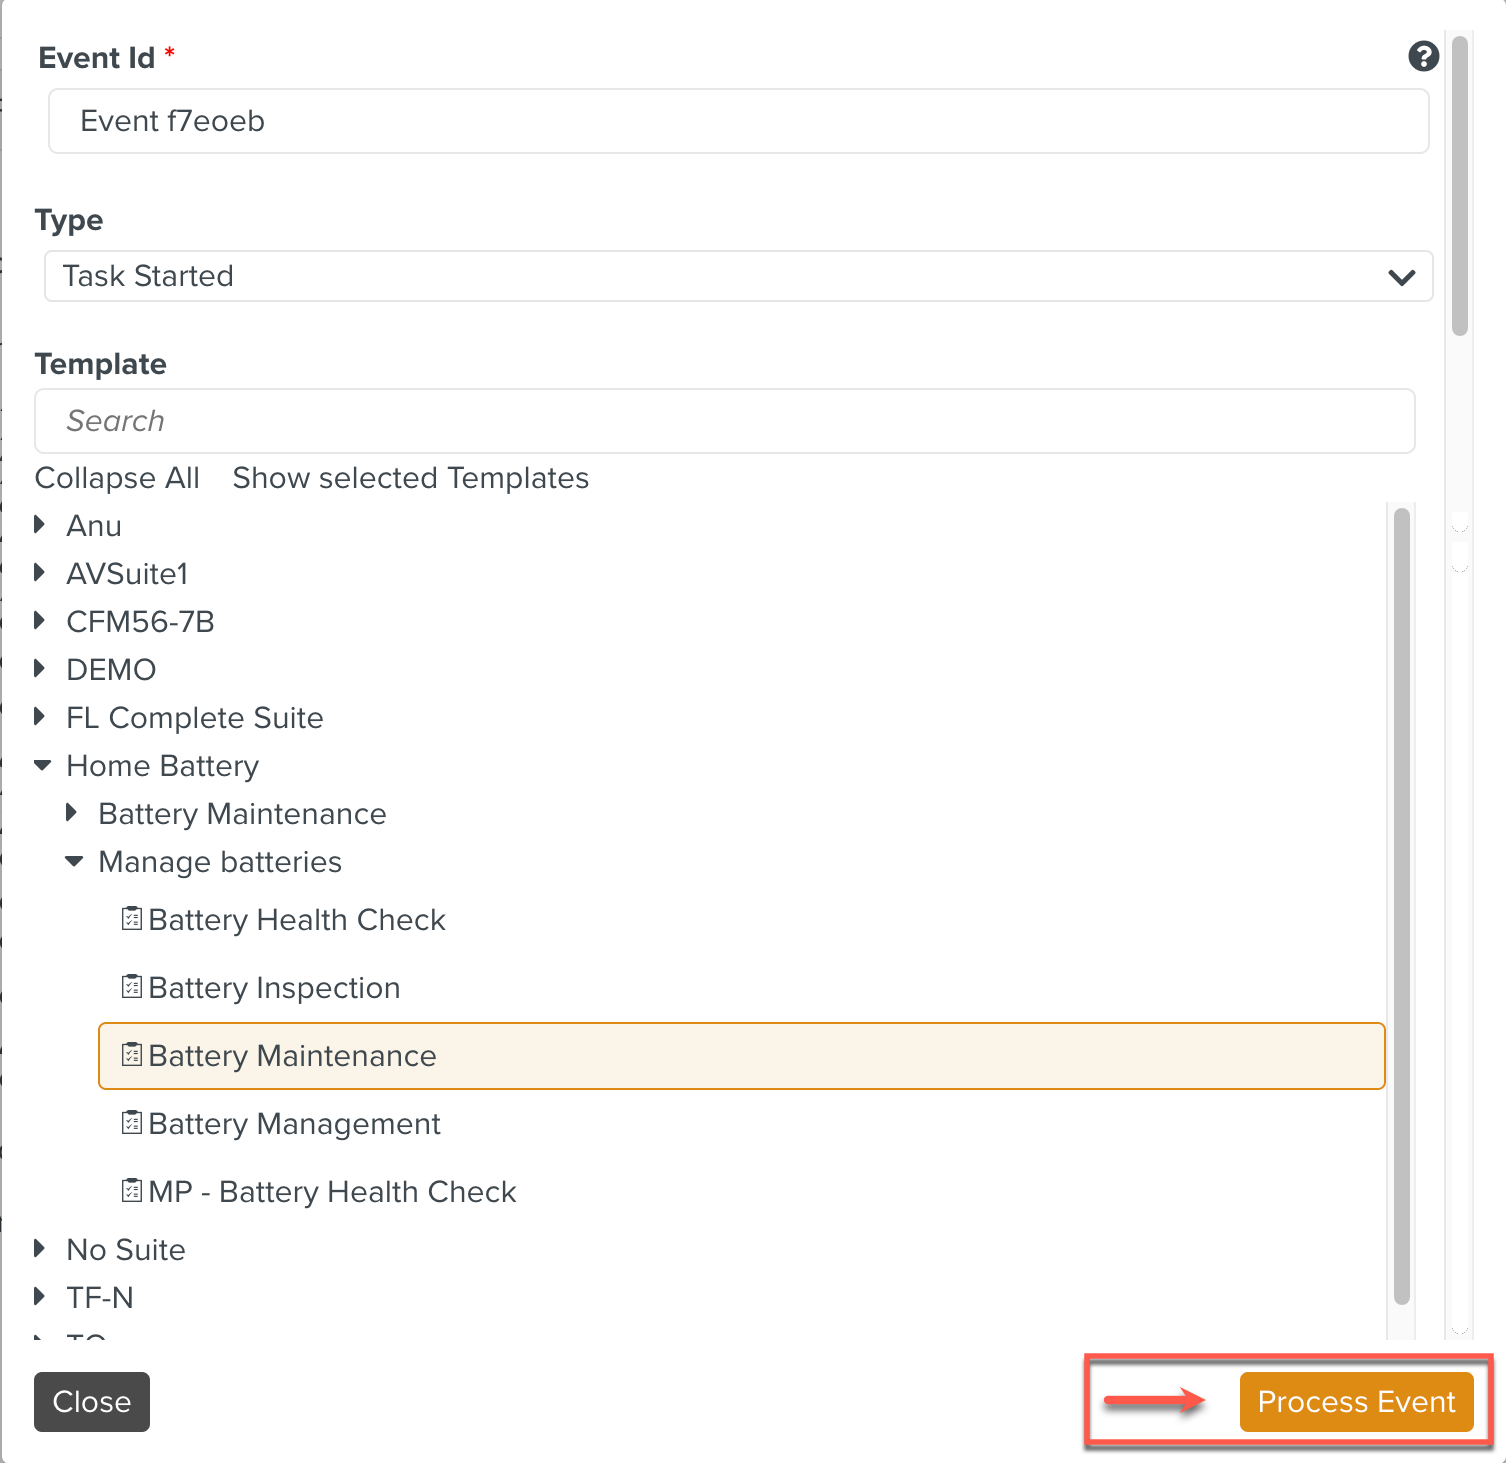
You can select from the following three types of Events:
Task Started
Task Done
Measure Point
The above in addition to those mentioned in Step 3 cover all the different types of Event Triggers.
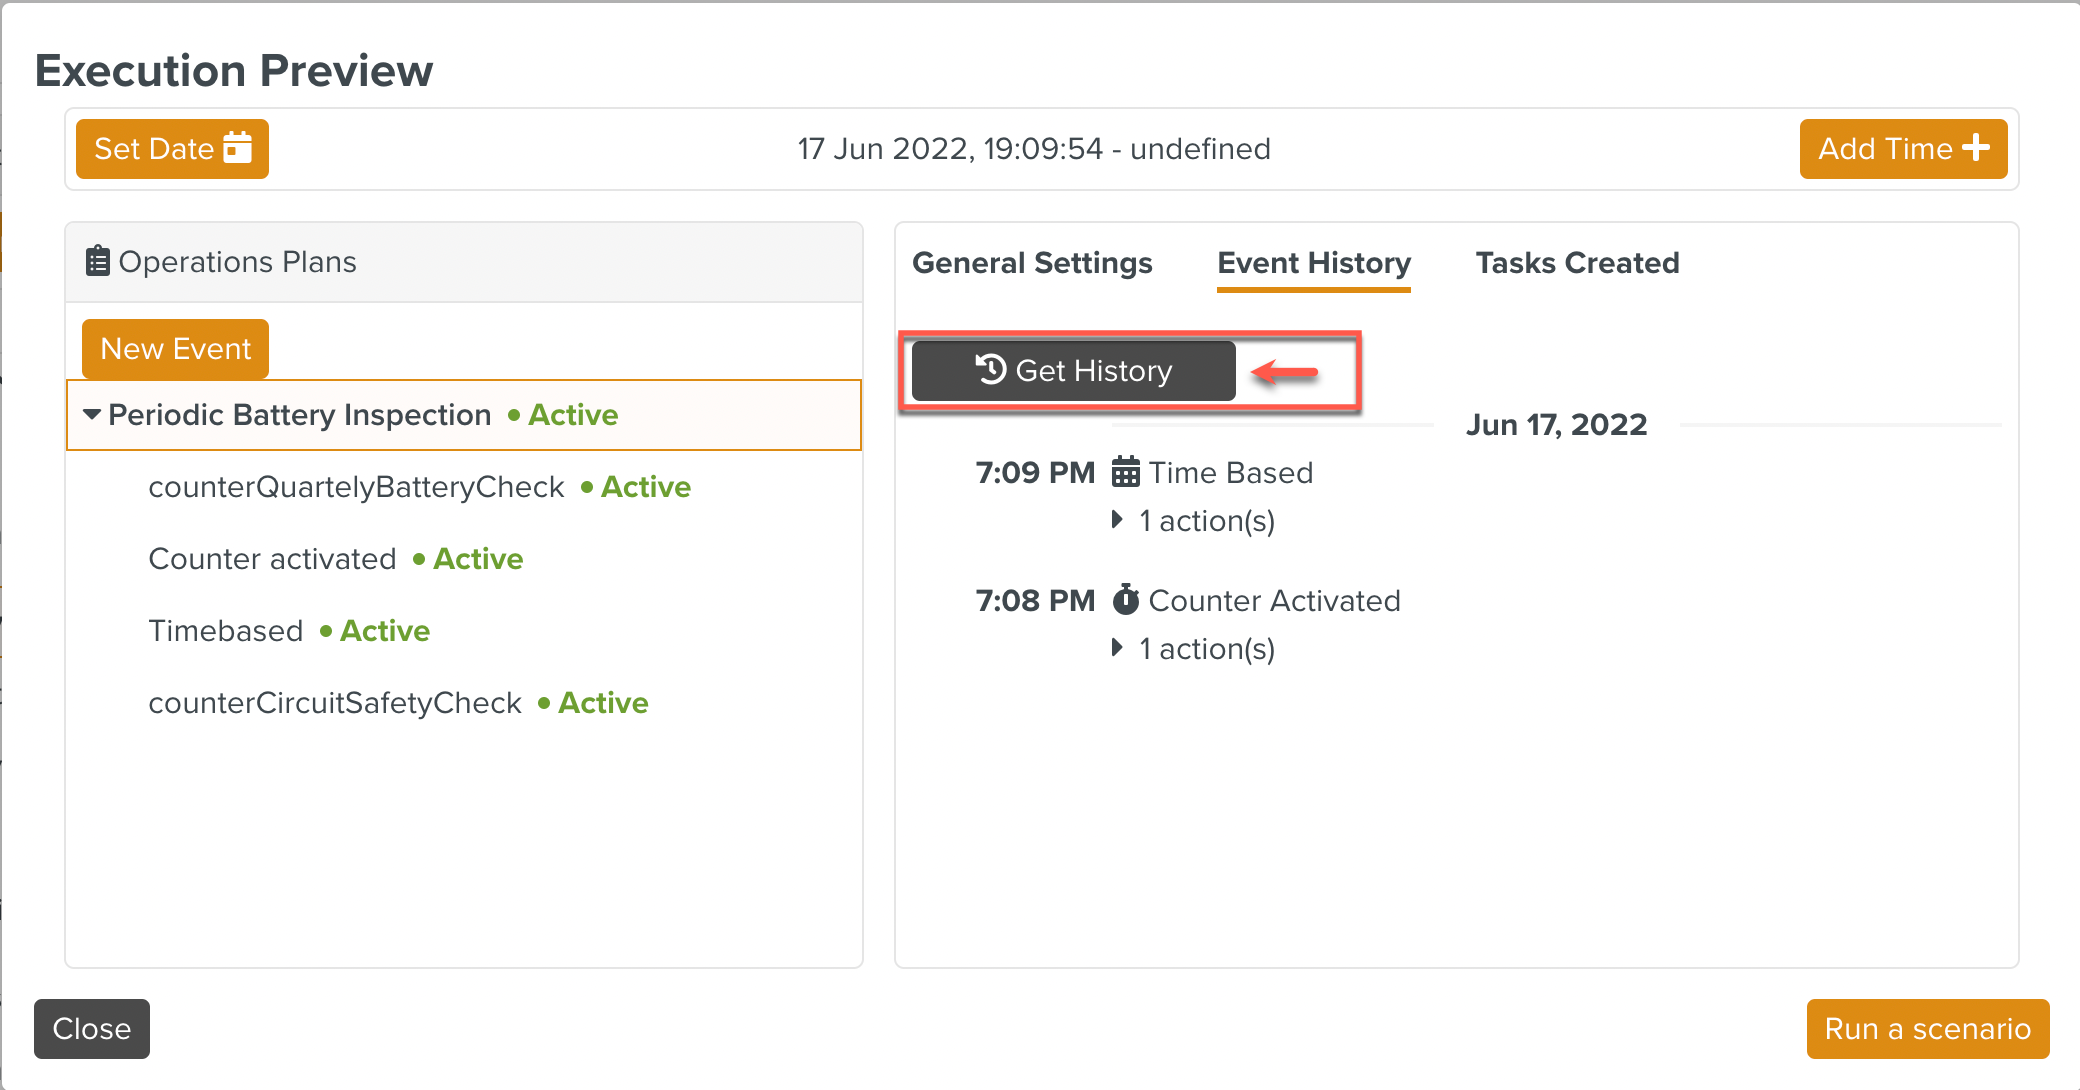
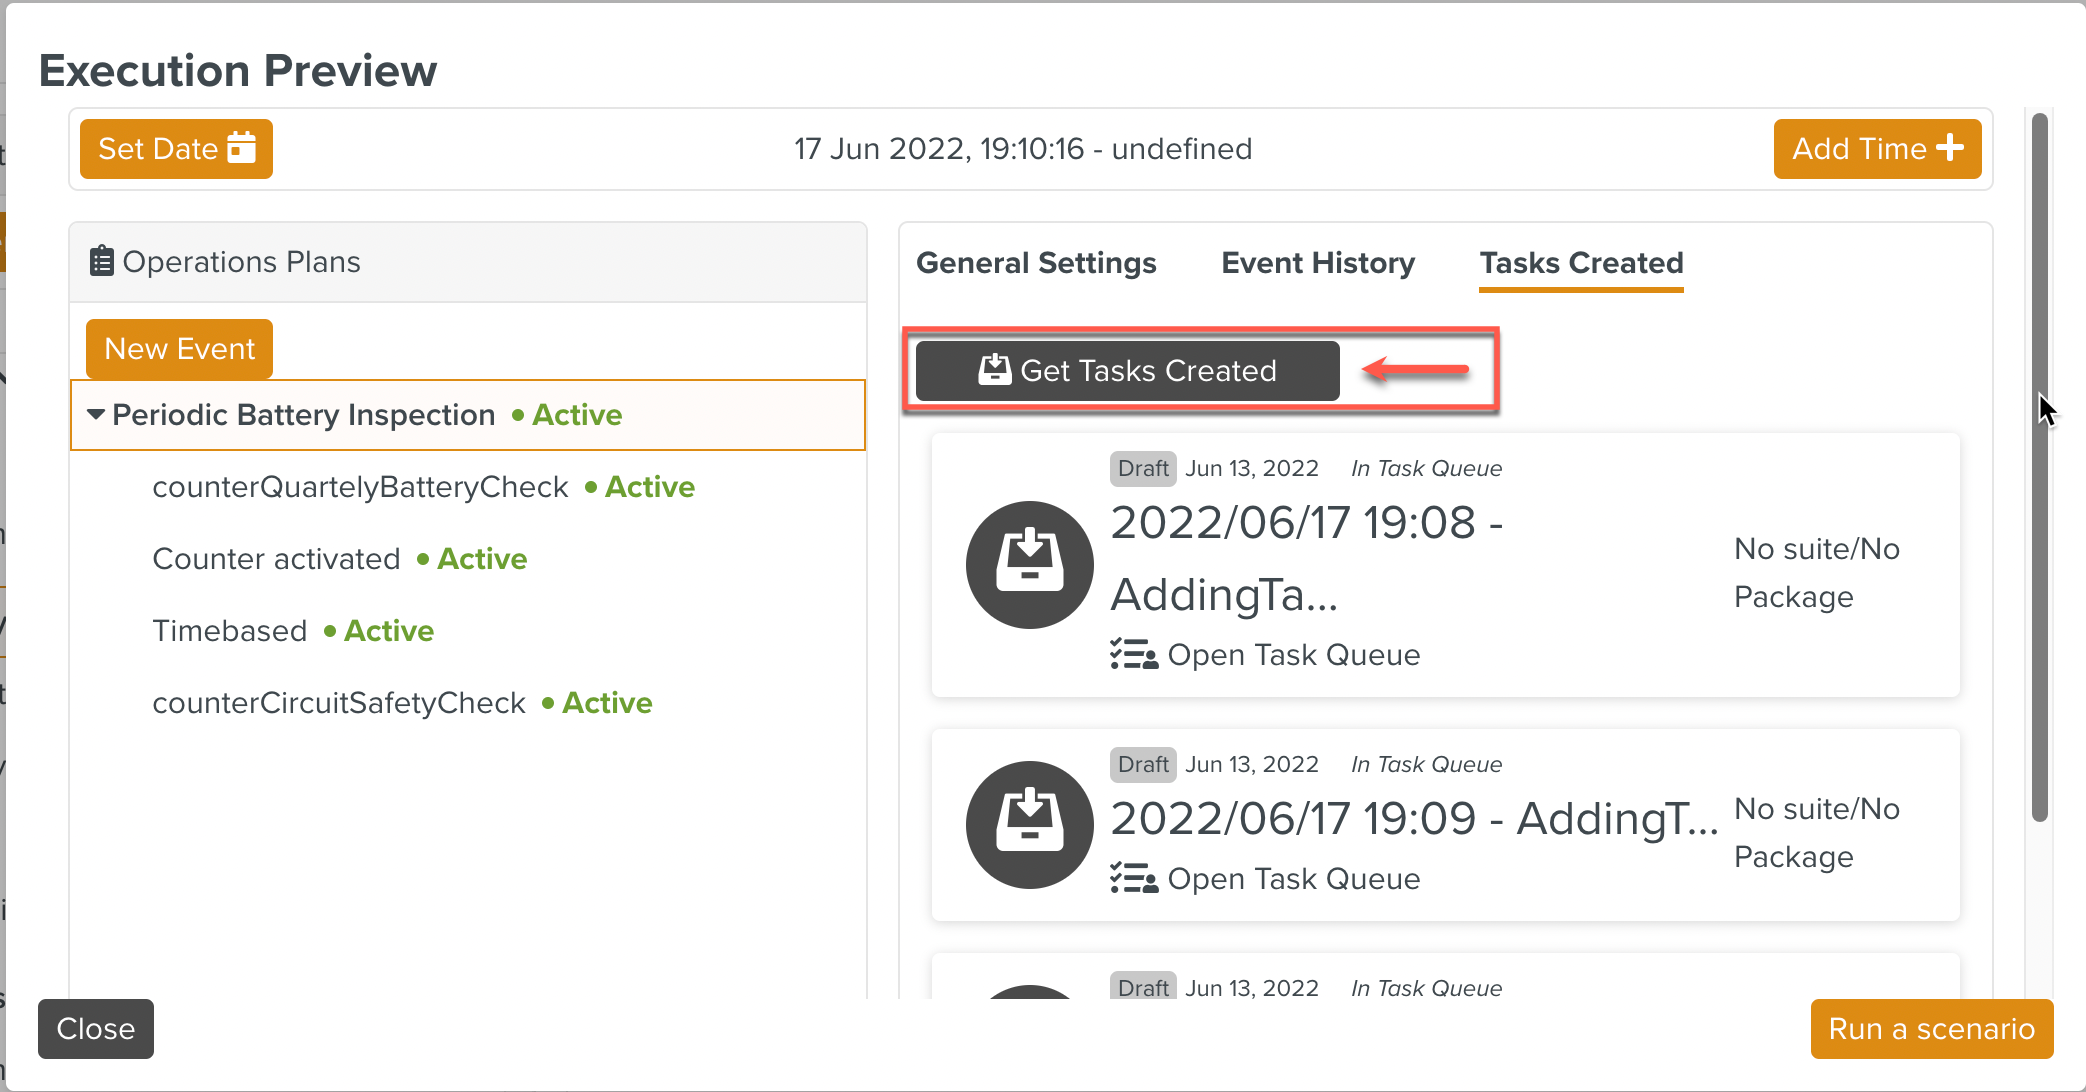
Click the and to check the events triggered and the corresponding actions performed in the Execution Preview.
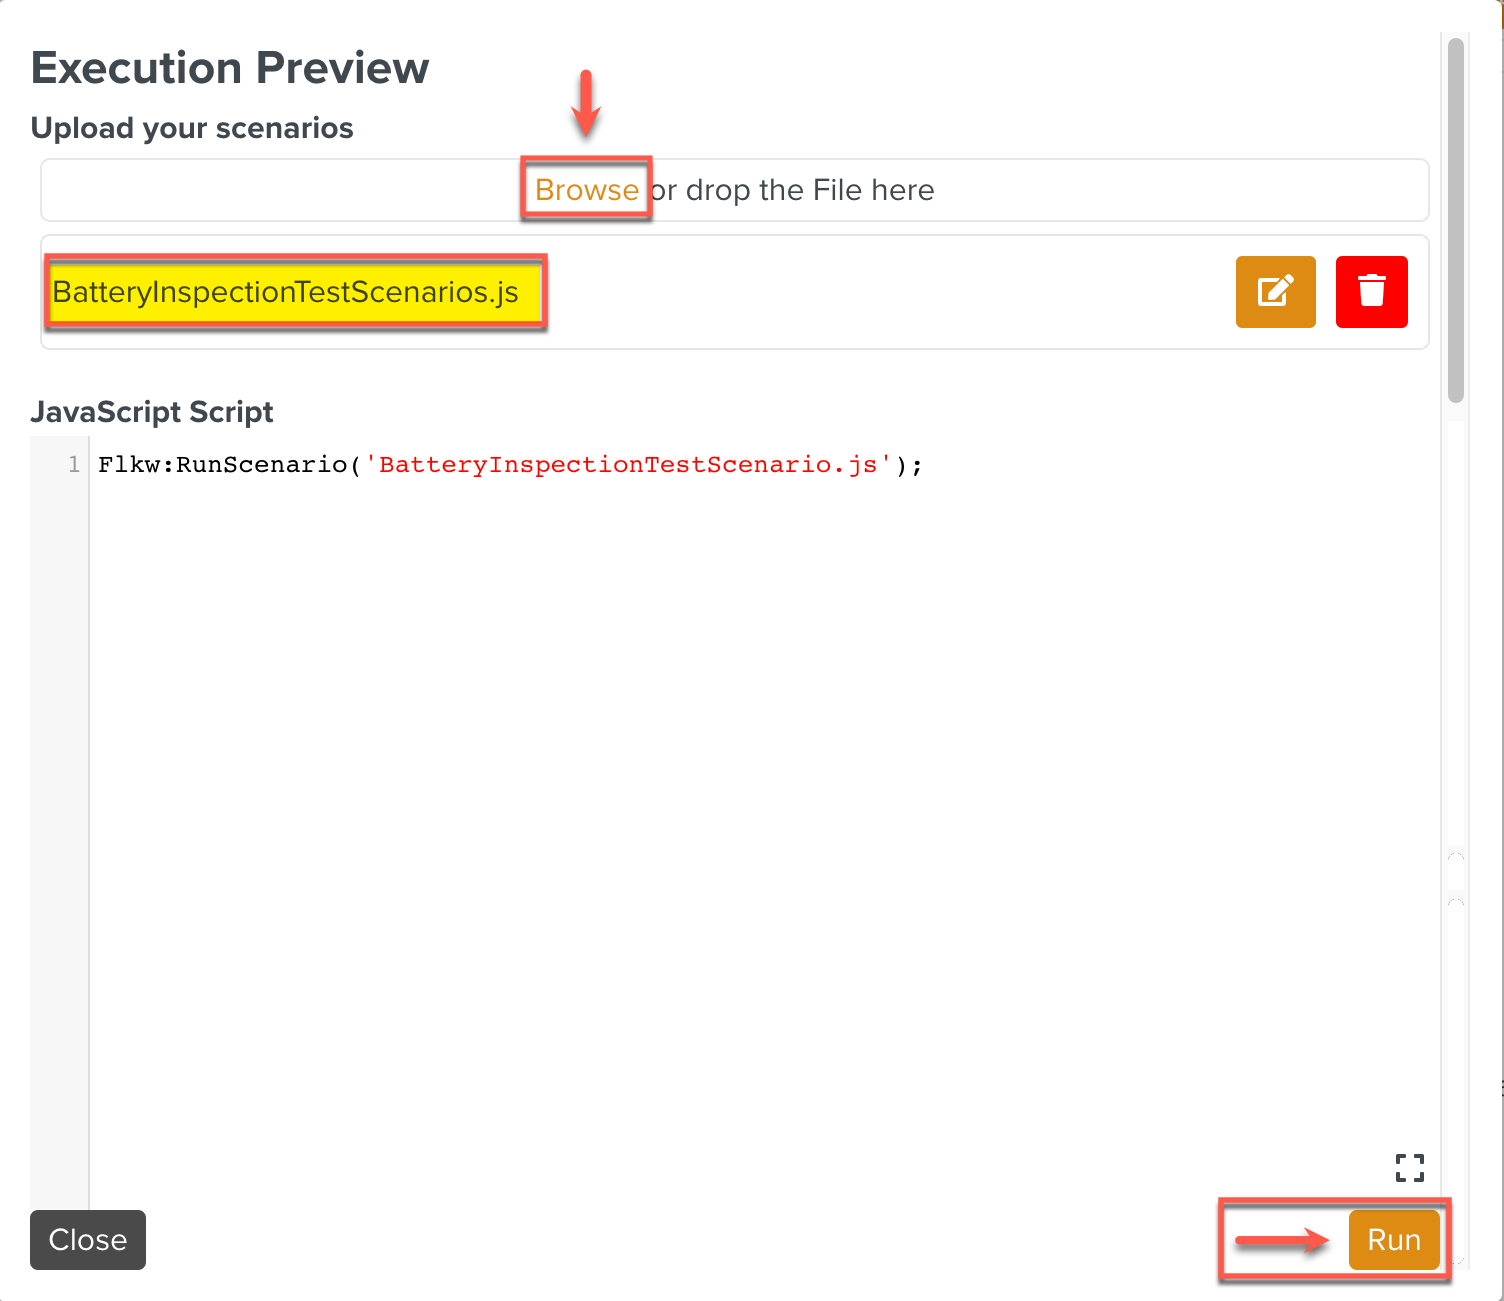
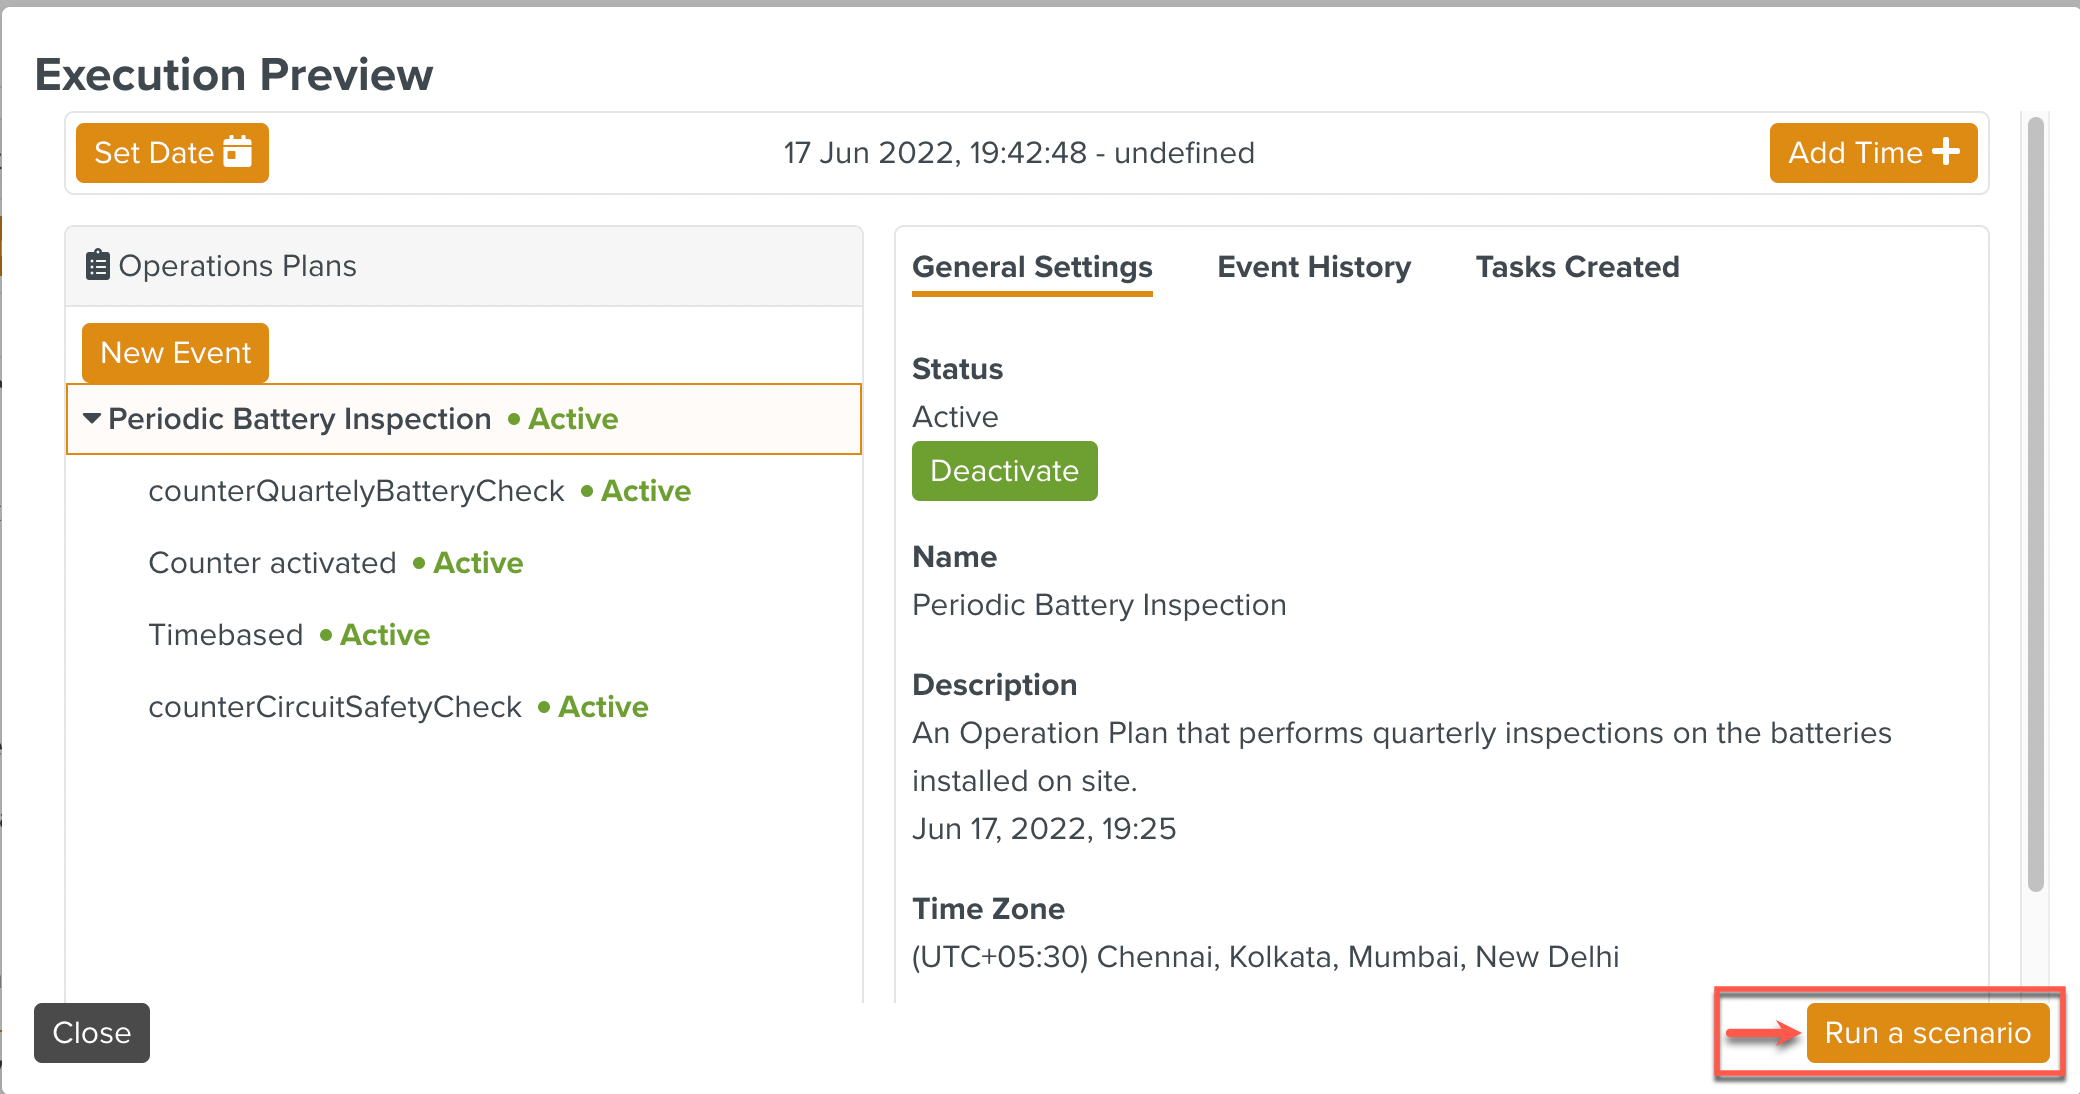
You can run JS scripts that automate scenarios for the Execution Preview.
To run a scenario using JS scripts:
Click .
Add the JS Script pertaining to the scenario. There are two alternatives to add your scripts:
Enter the JS script directly in the editor.
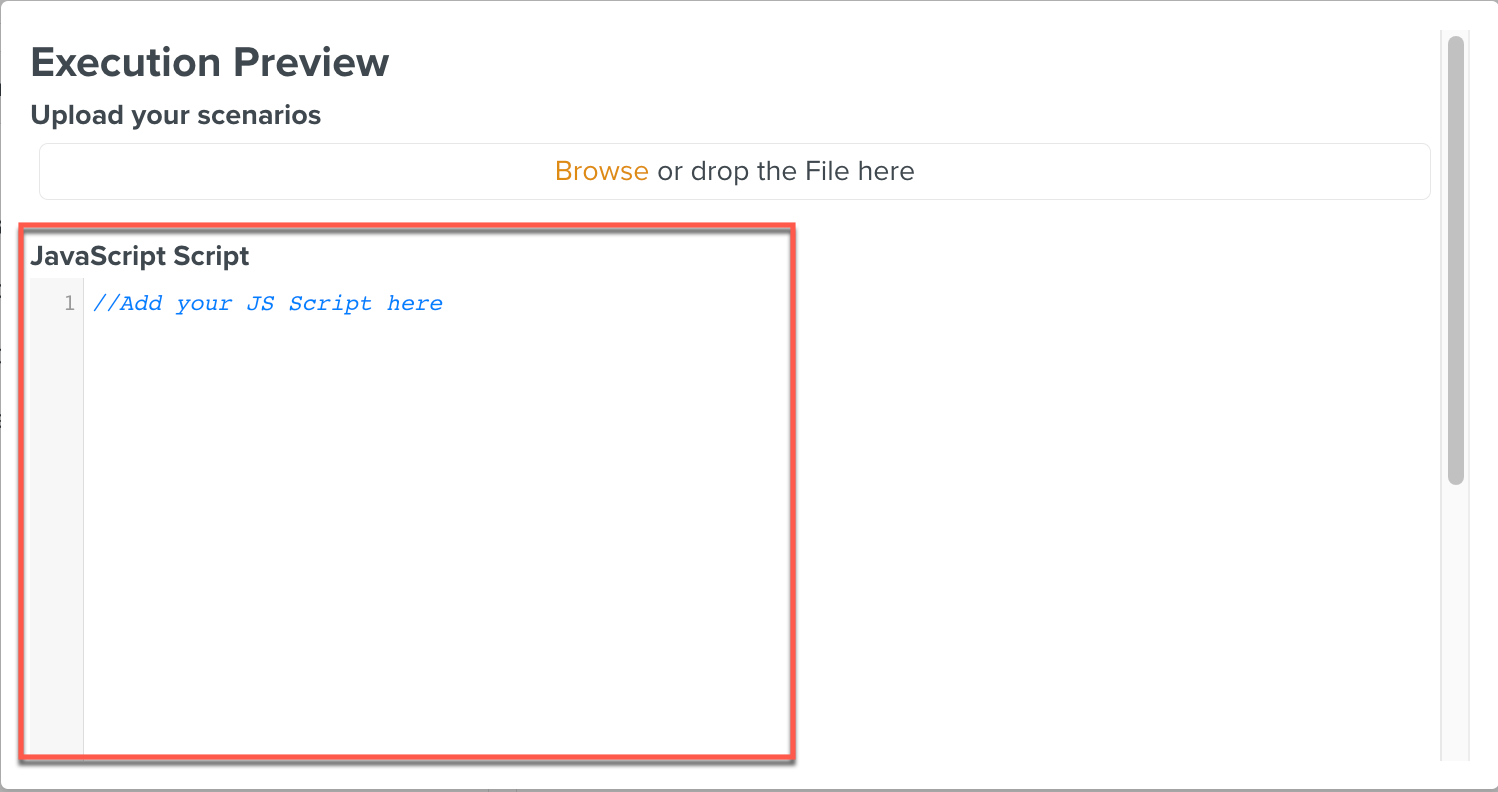
You can use the FieldLogs Keywords functions (
Flkw:functions) in the JS Script to access Operation Plan data.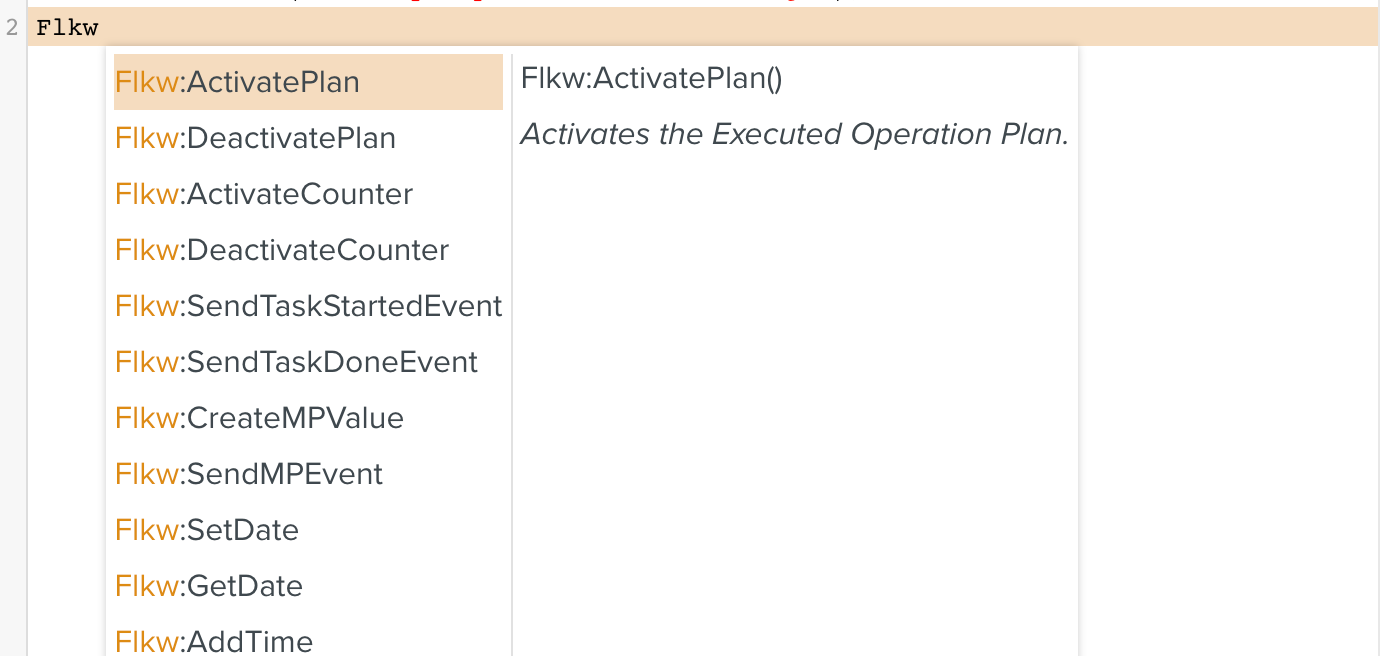
Click to upload a JS file which contains the automation scripts and use
Flkw:RunScenario()to run the script.In the example below the file BatteryInspectionTestScenarios.js is uploaded and the Flkw:RunScenario() is used to run the script.