Assigning a Task to one or more Members
Assigning a Task to a member or a Task Queue will allow the Task Assignee to view it in the and work on it.
To assign a Task to one or more members:
On the main menu, go to > .
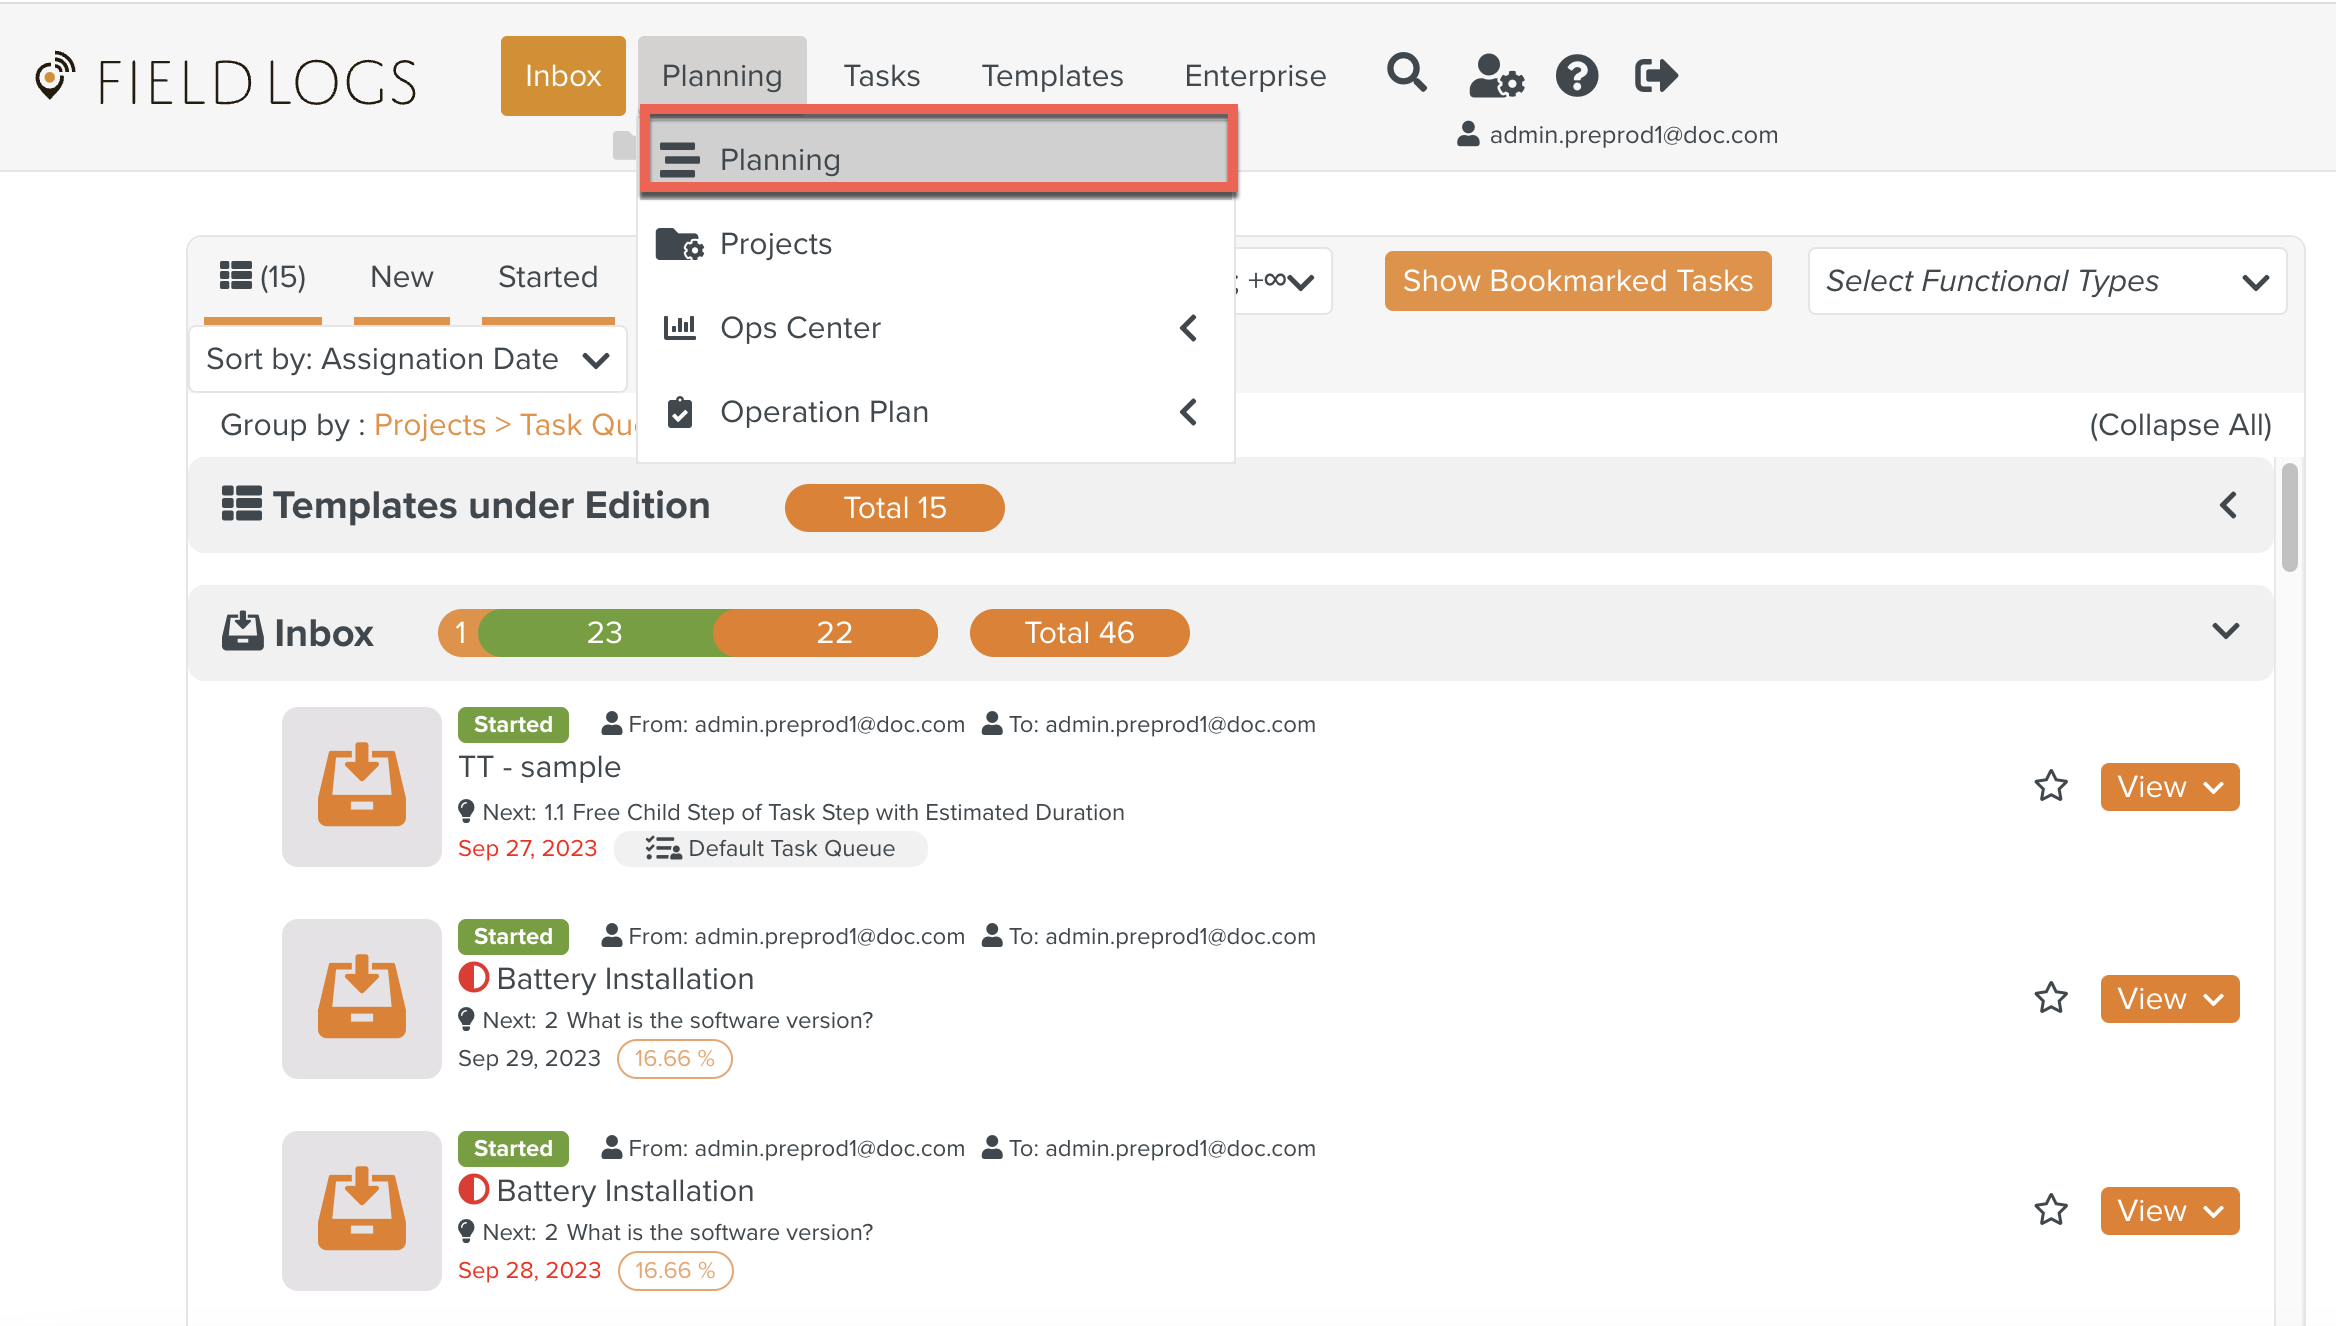
The section opens.
Click .
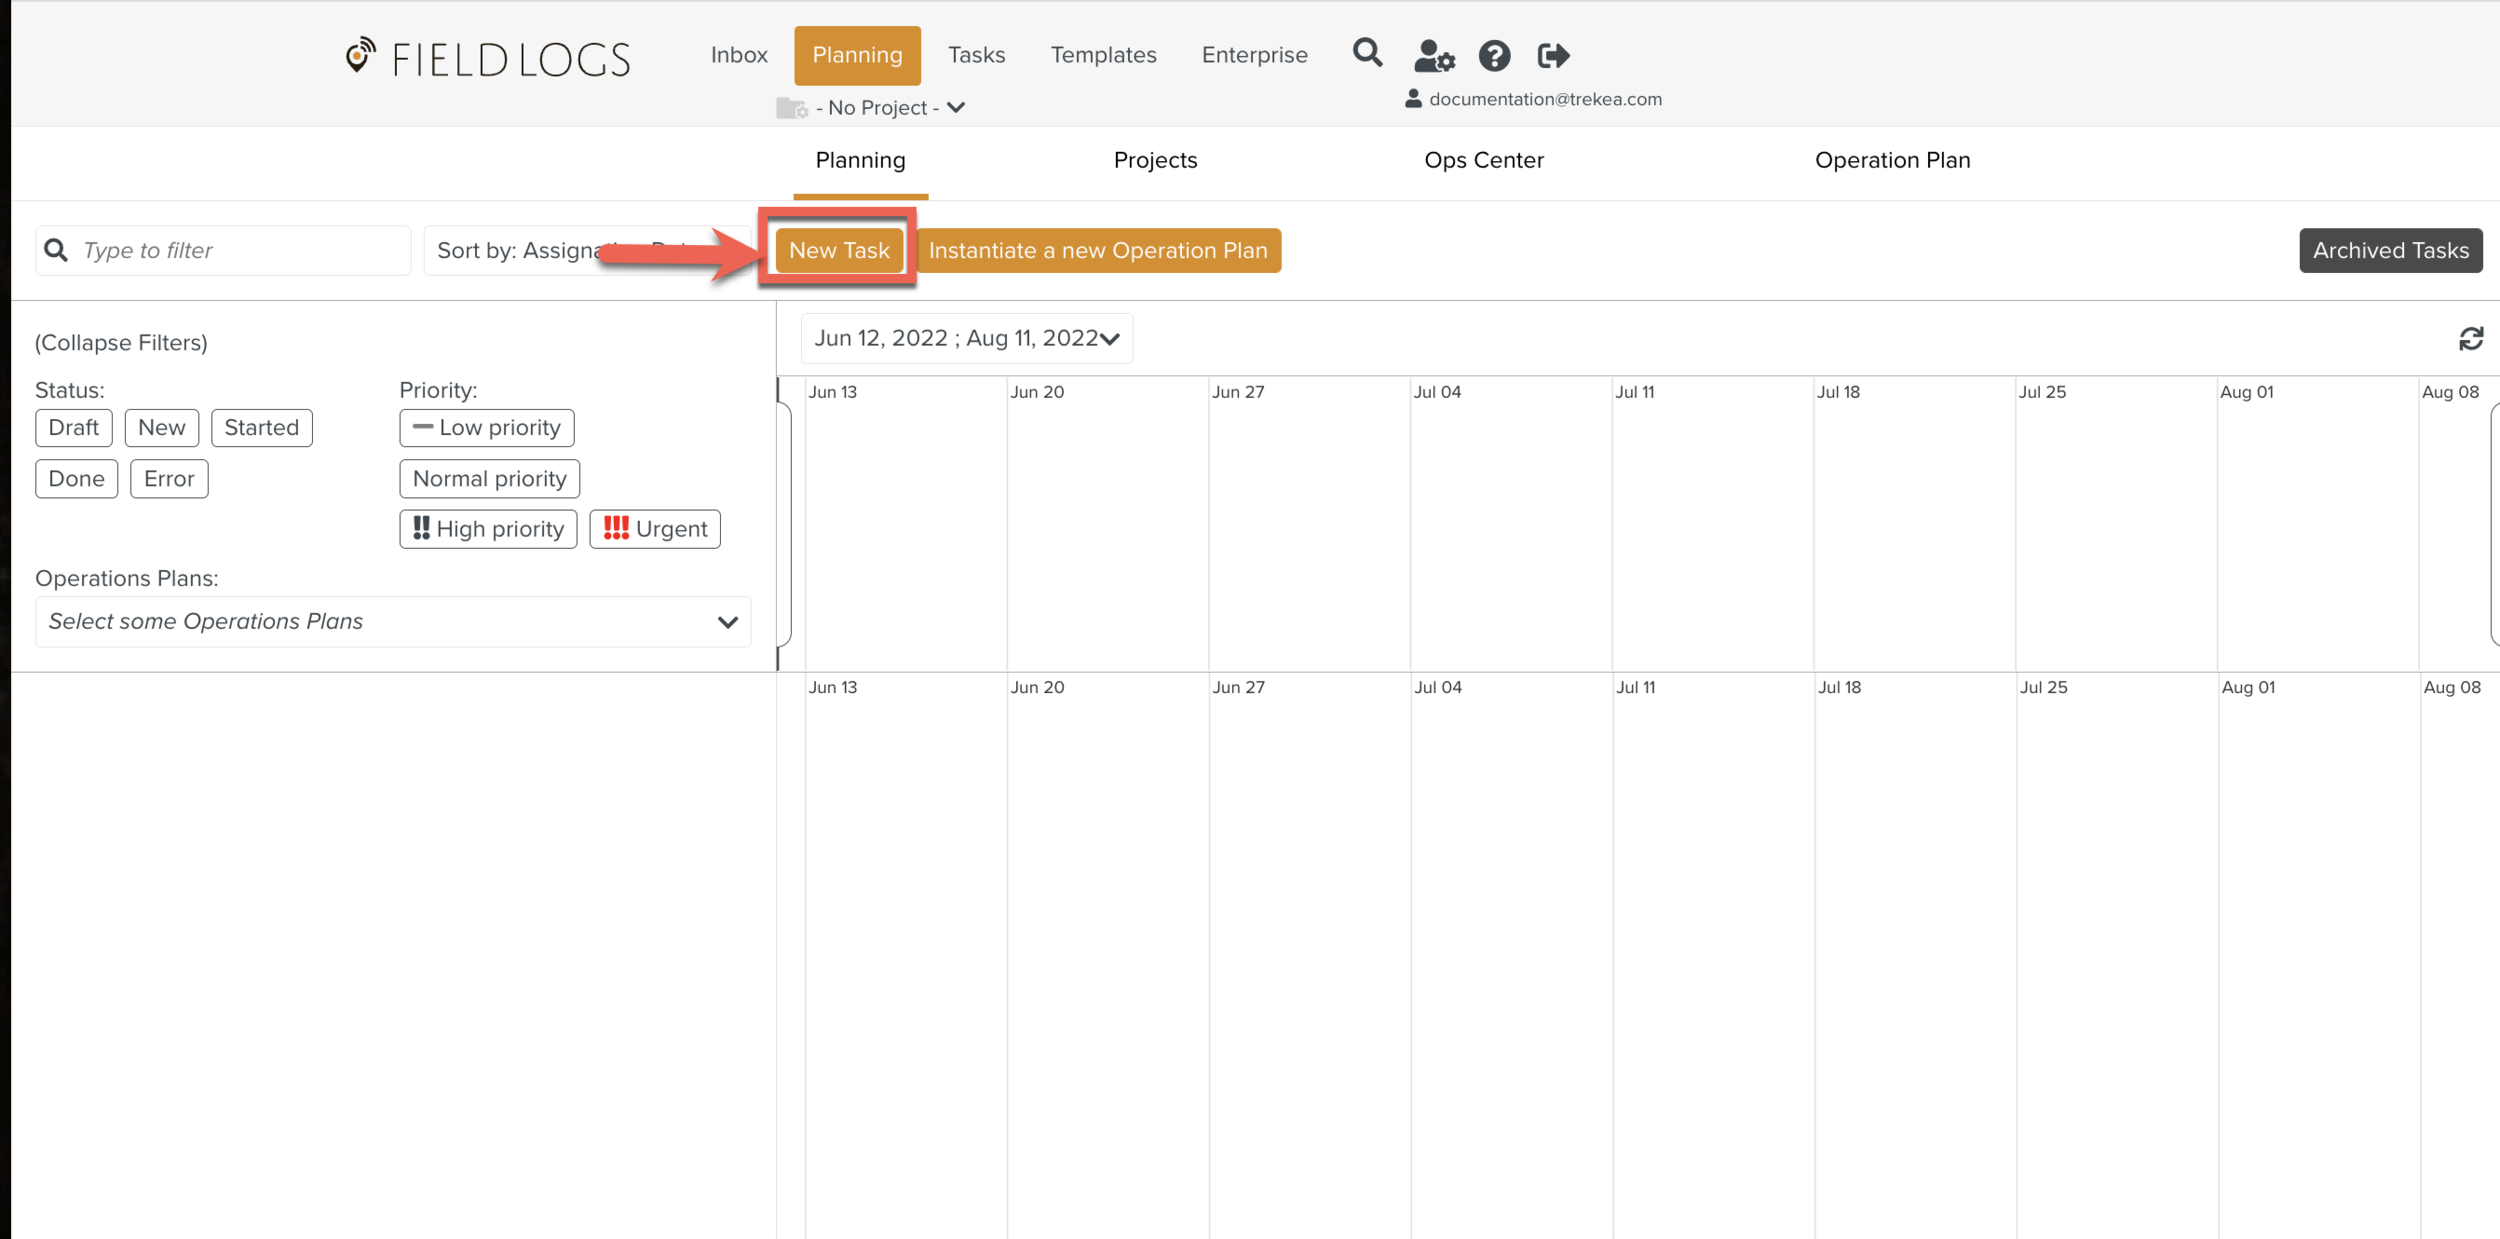
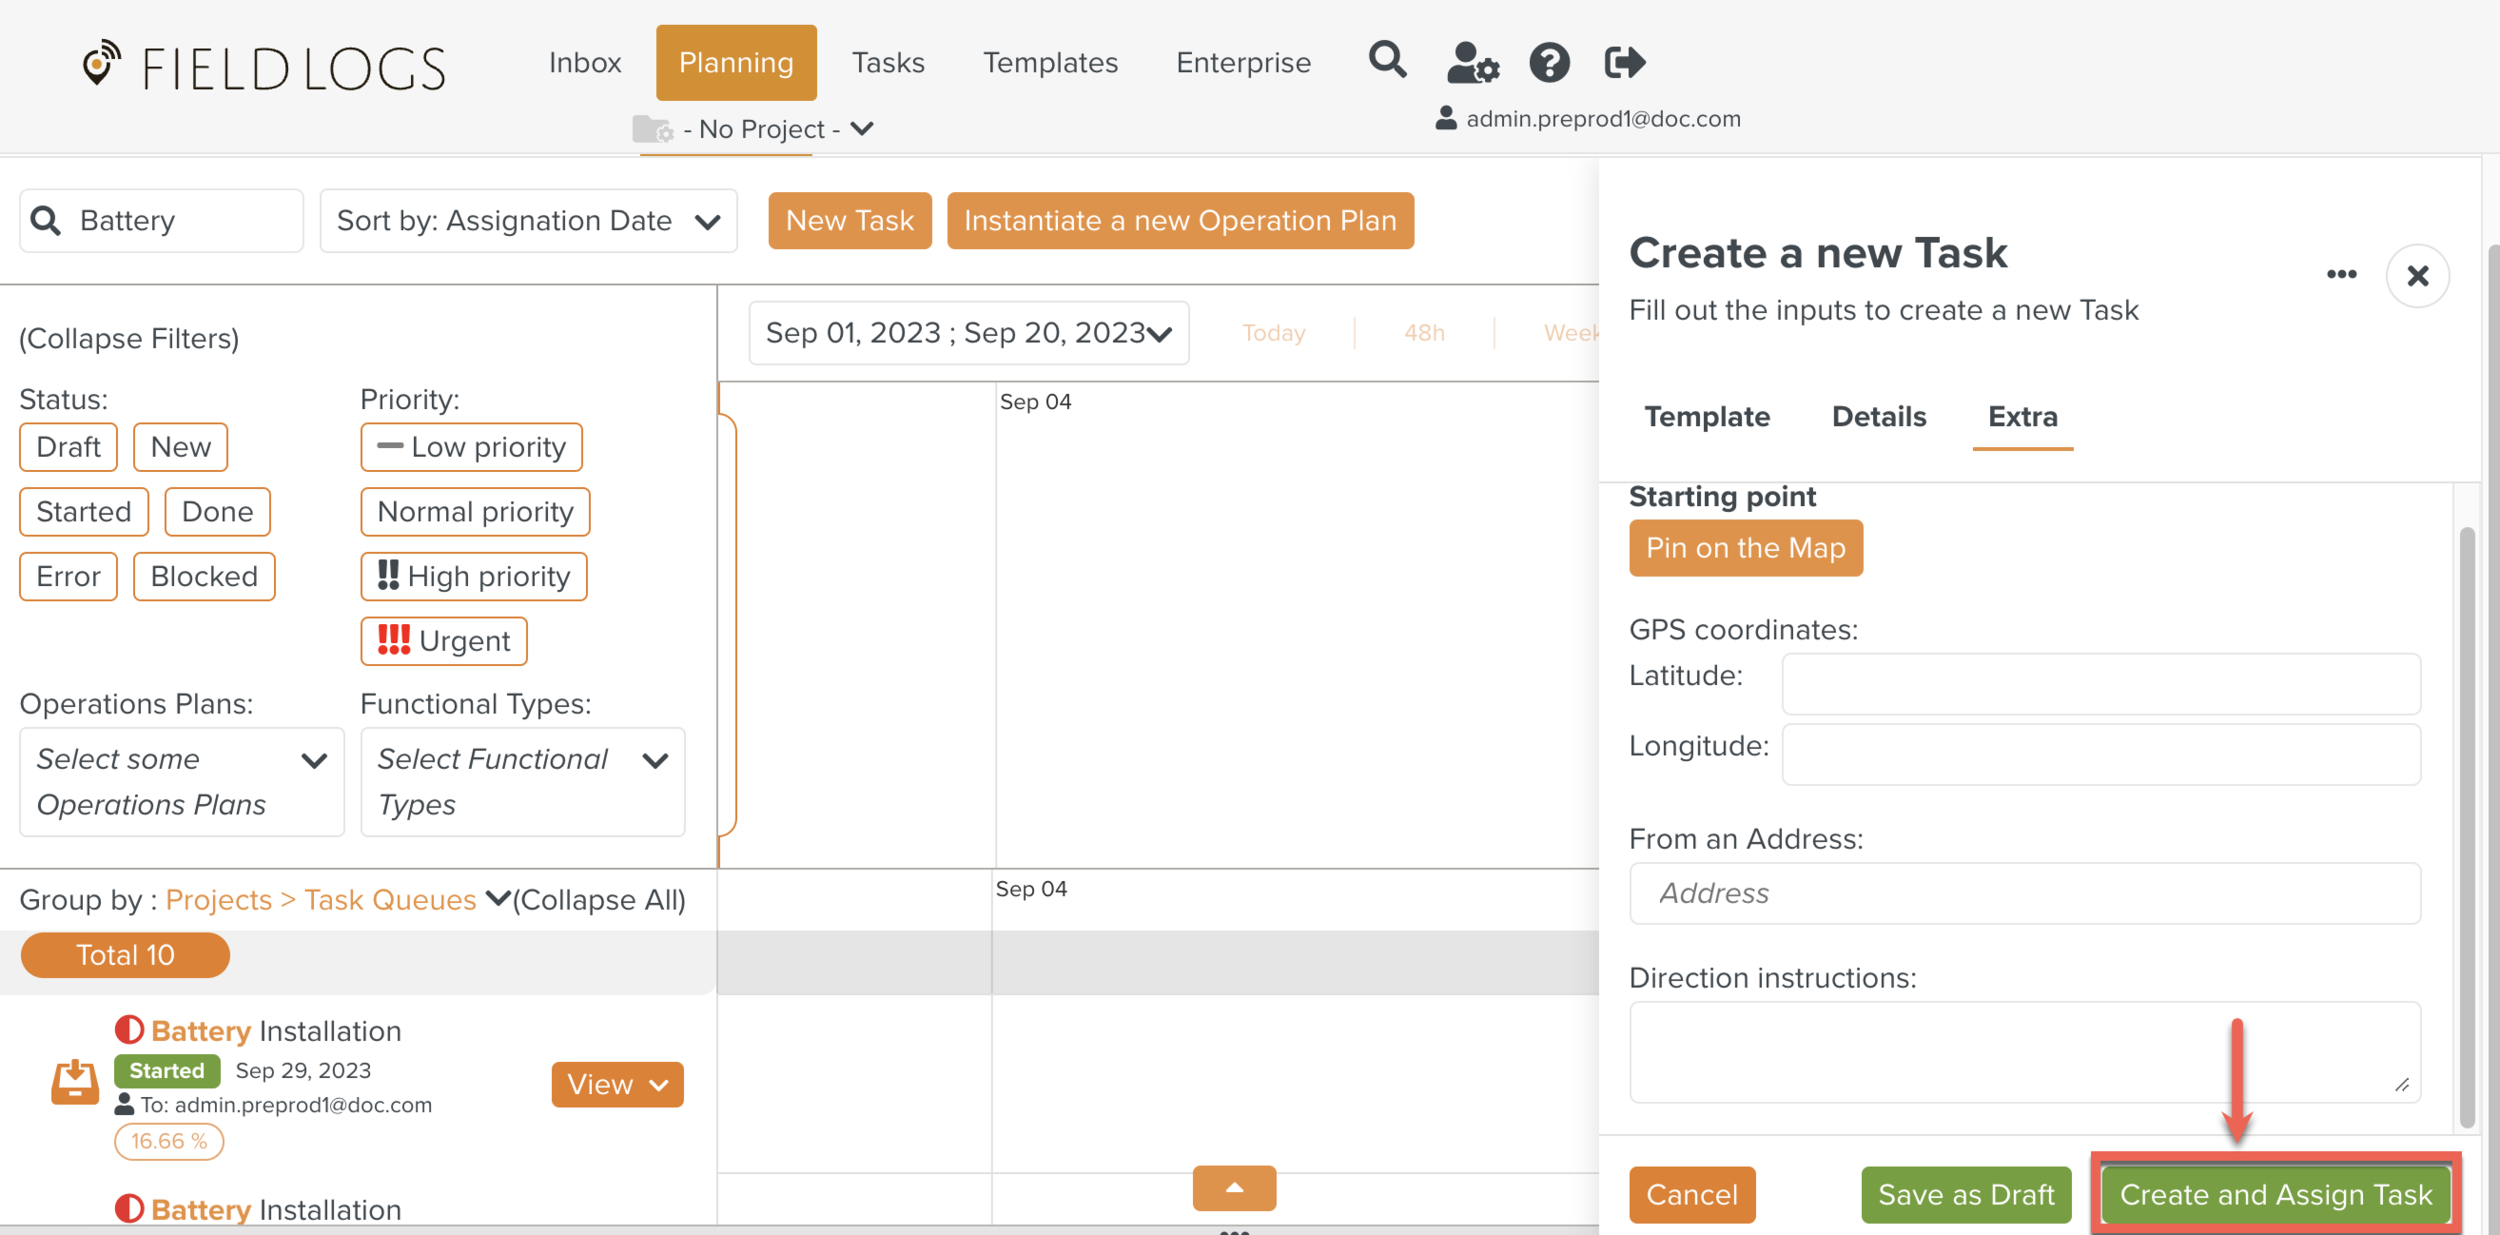
Create a new Task side panel opens.
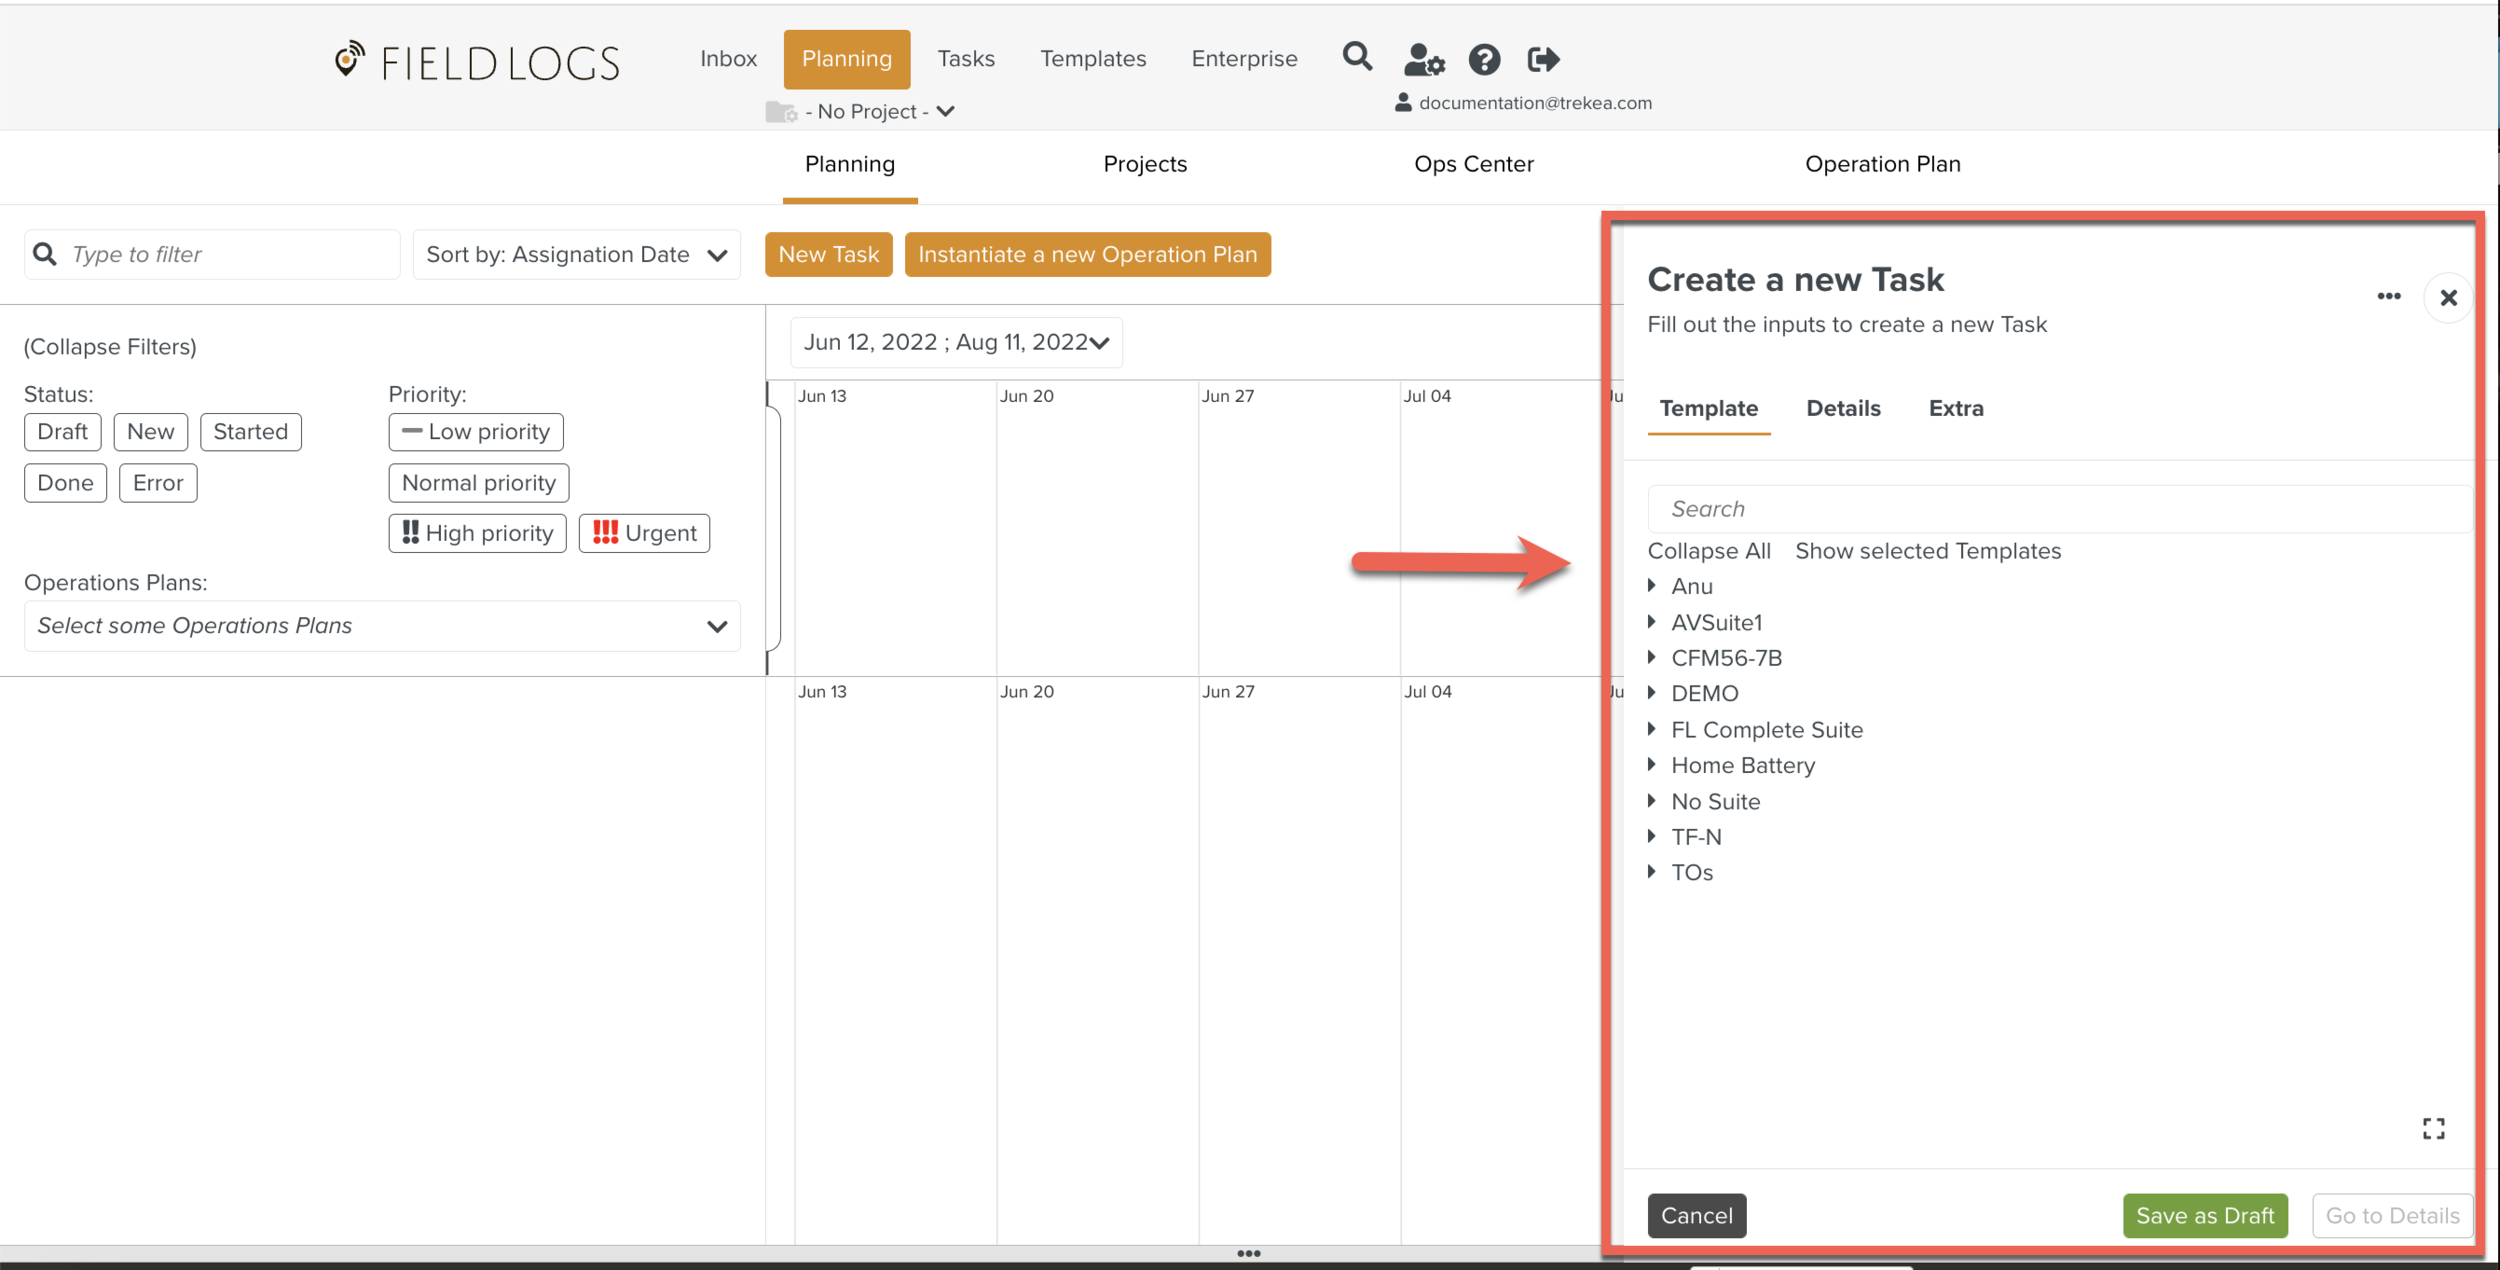
Select a Template from the list of Templates as shown below.
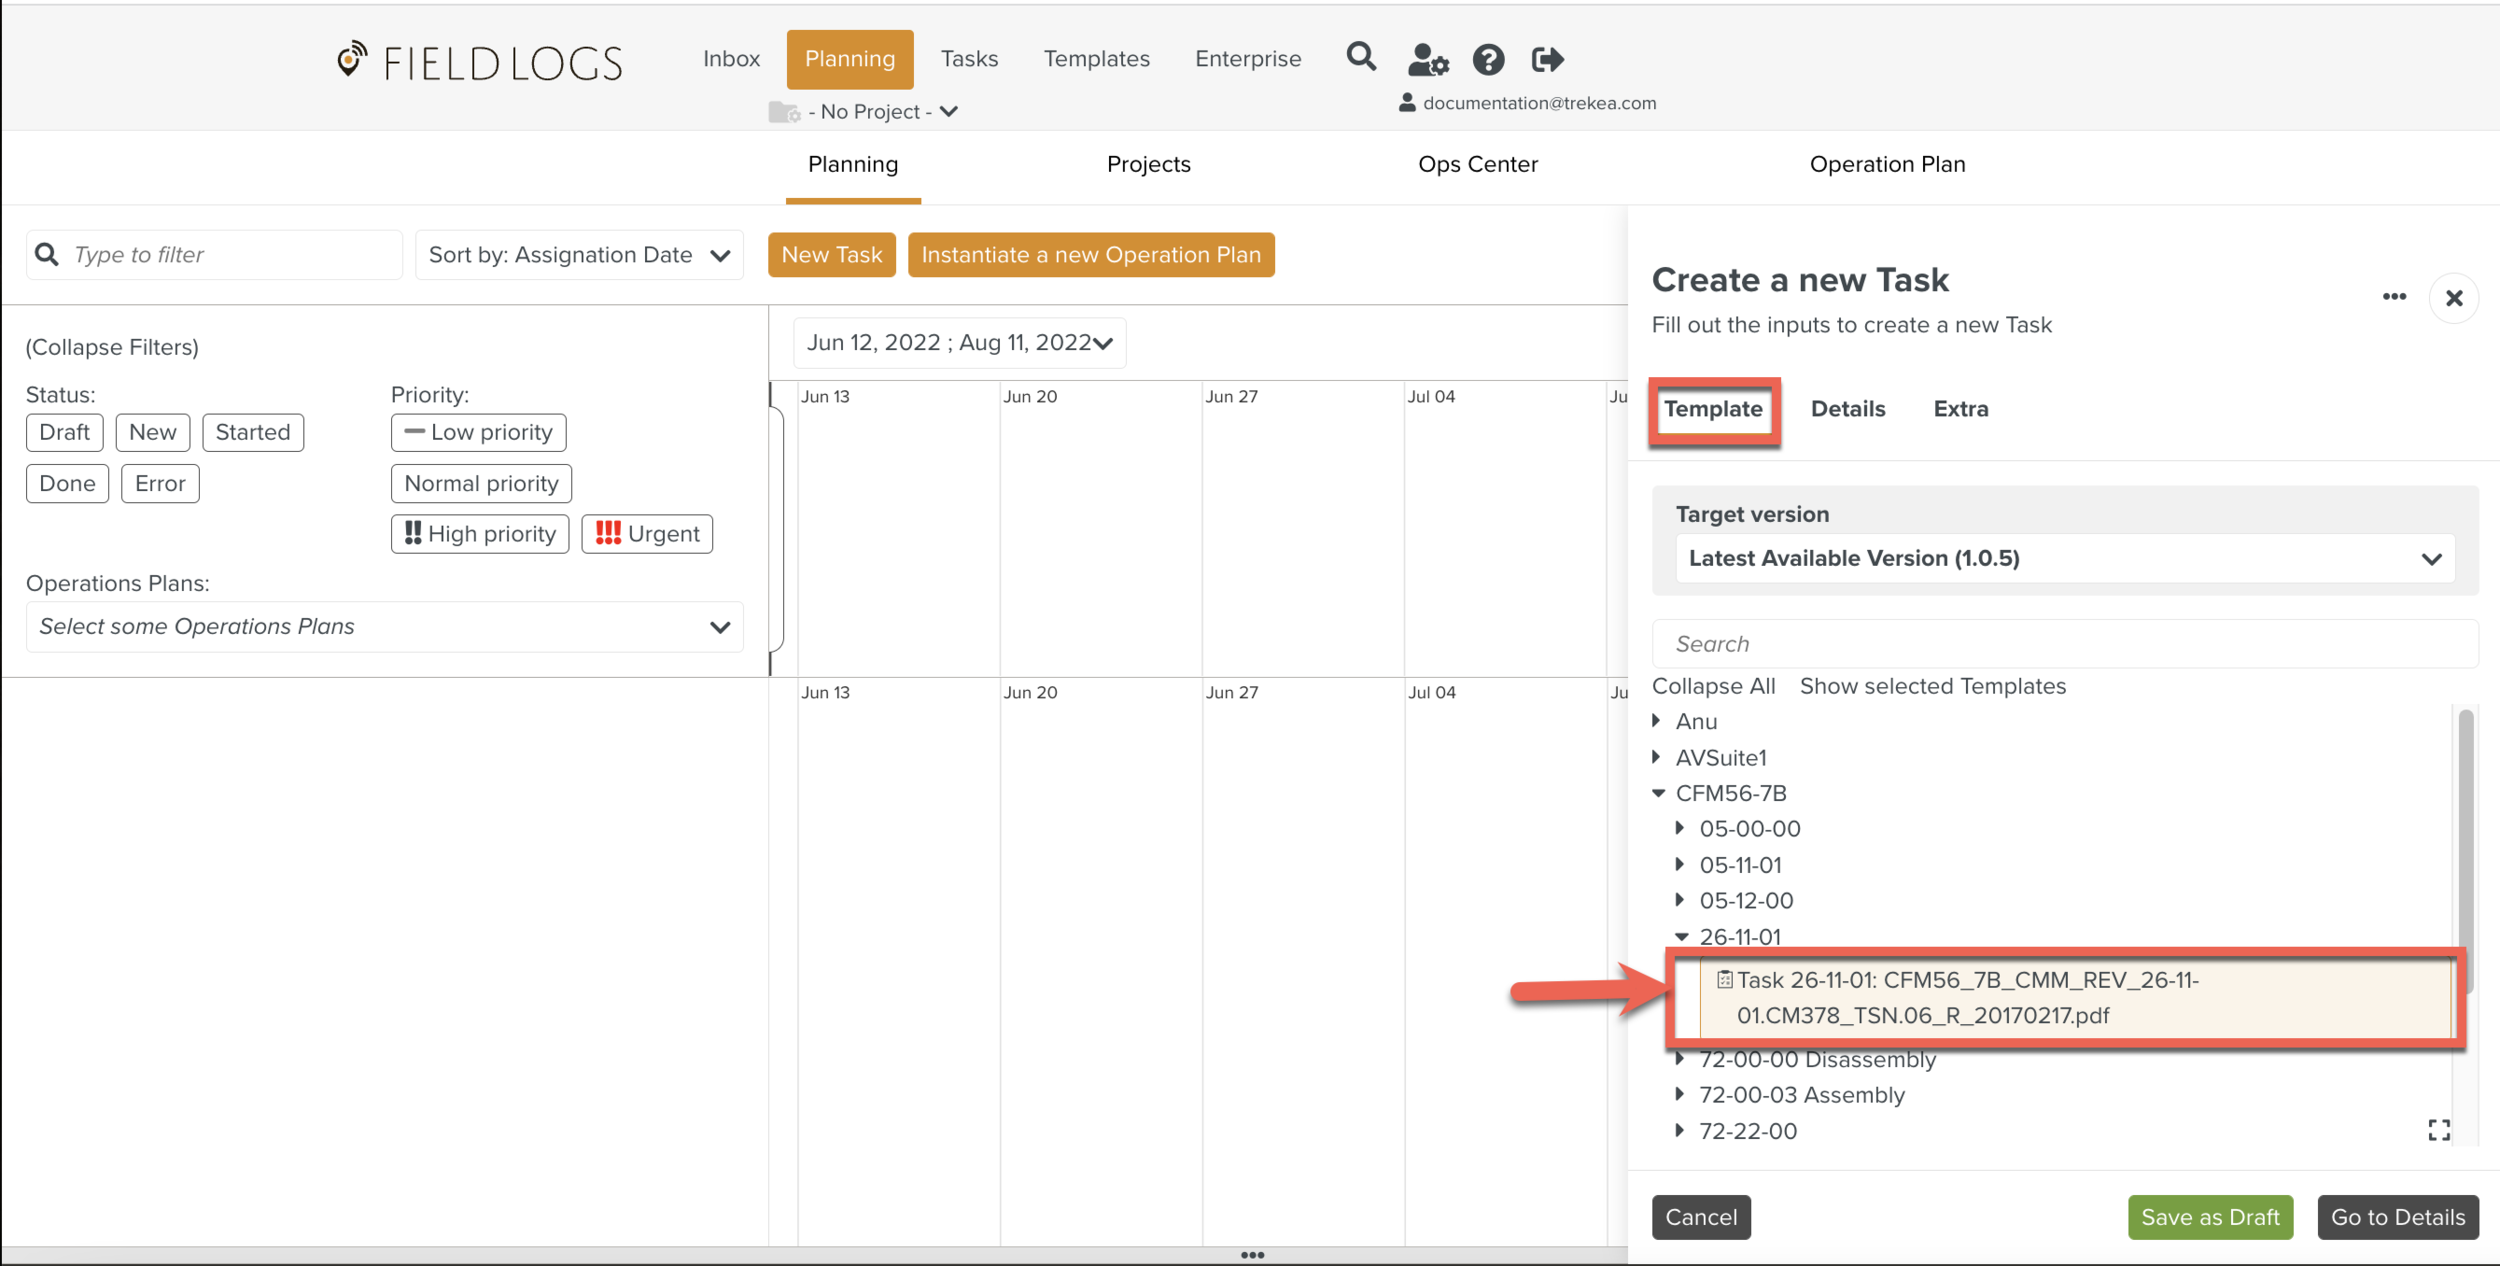
[Optional] Select the required Template version from the Target version dropdown. By default, the latest available version is selected.
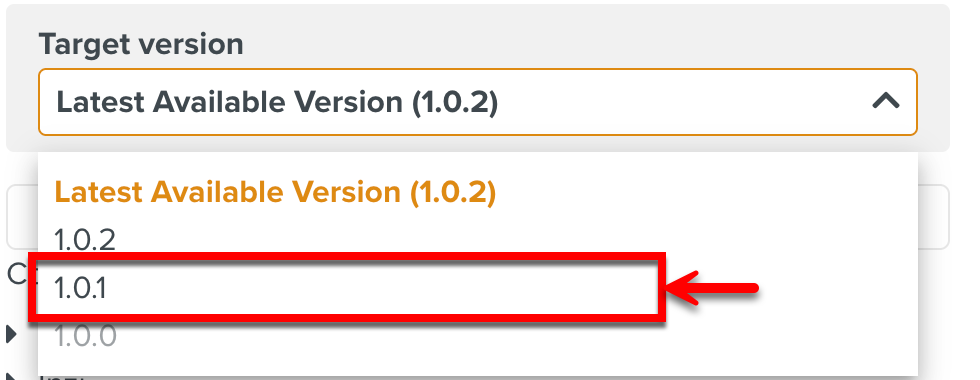
The unavailable versions of the Template are displayed and cannot be selected.
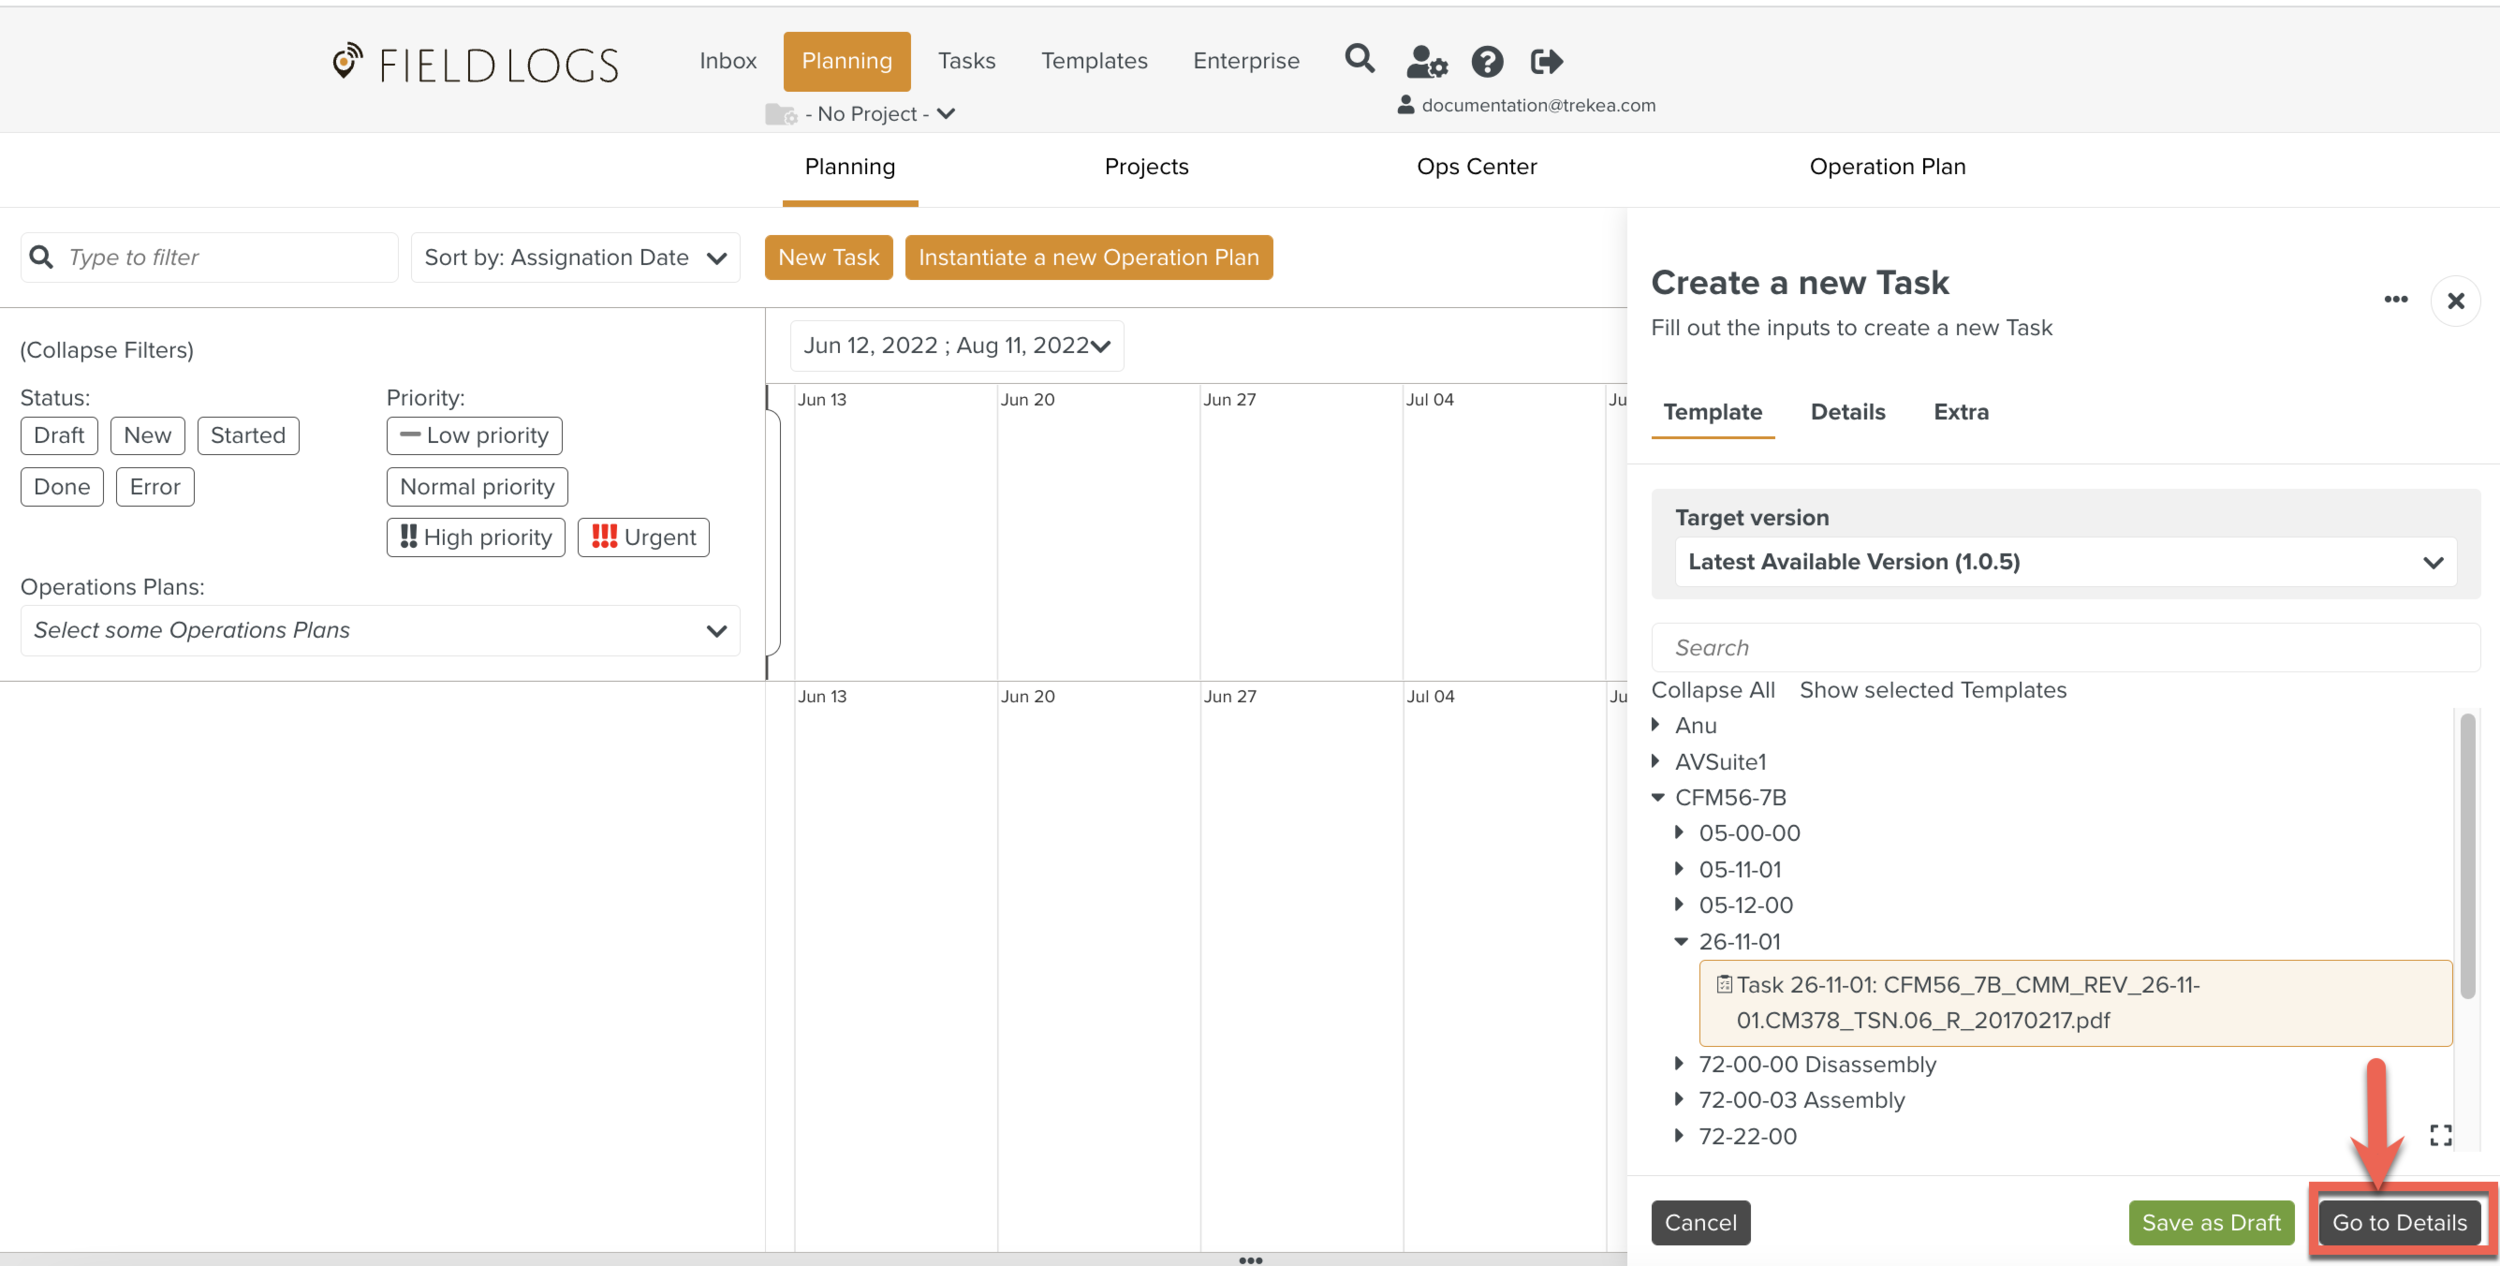
Click .
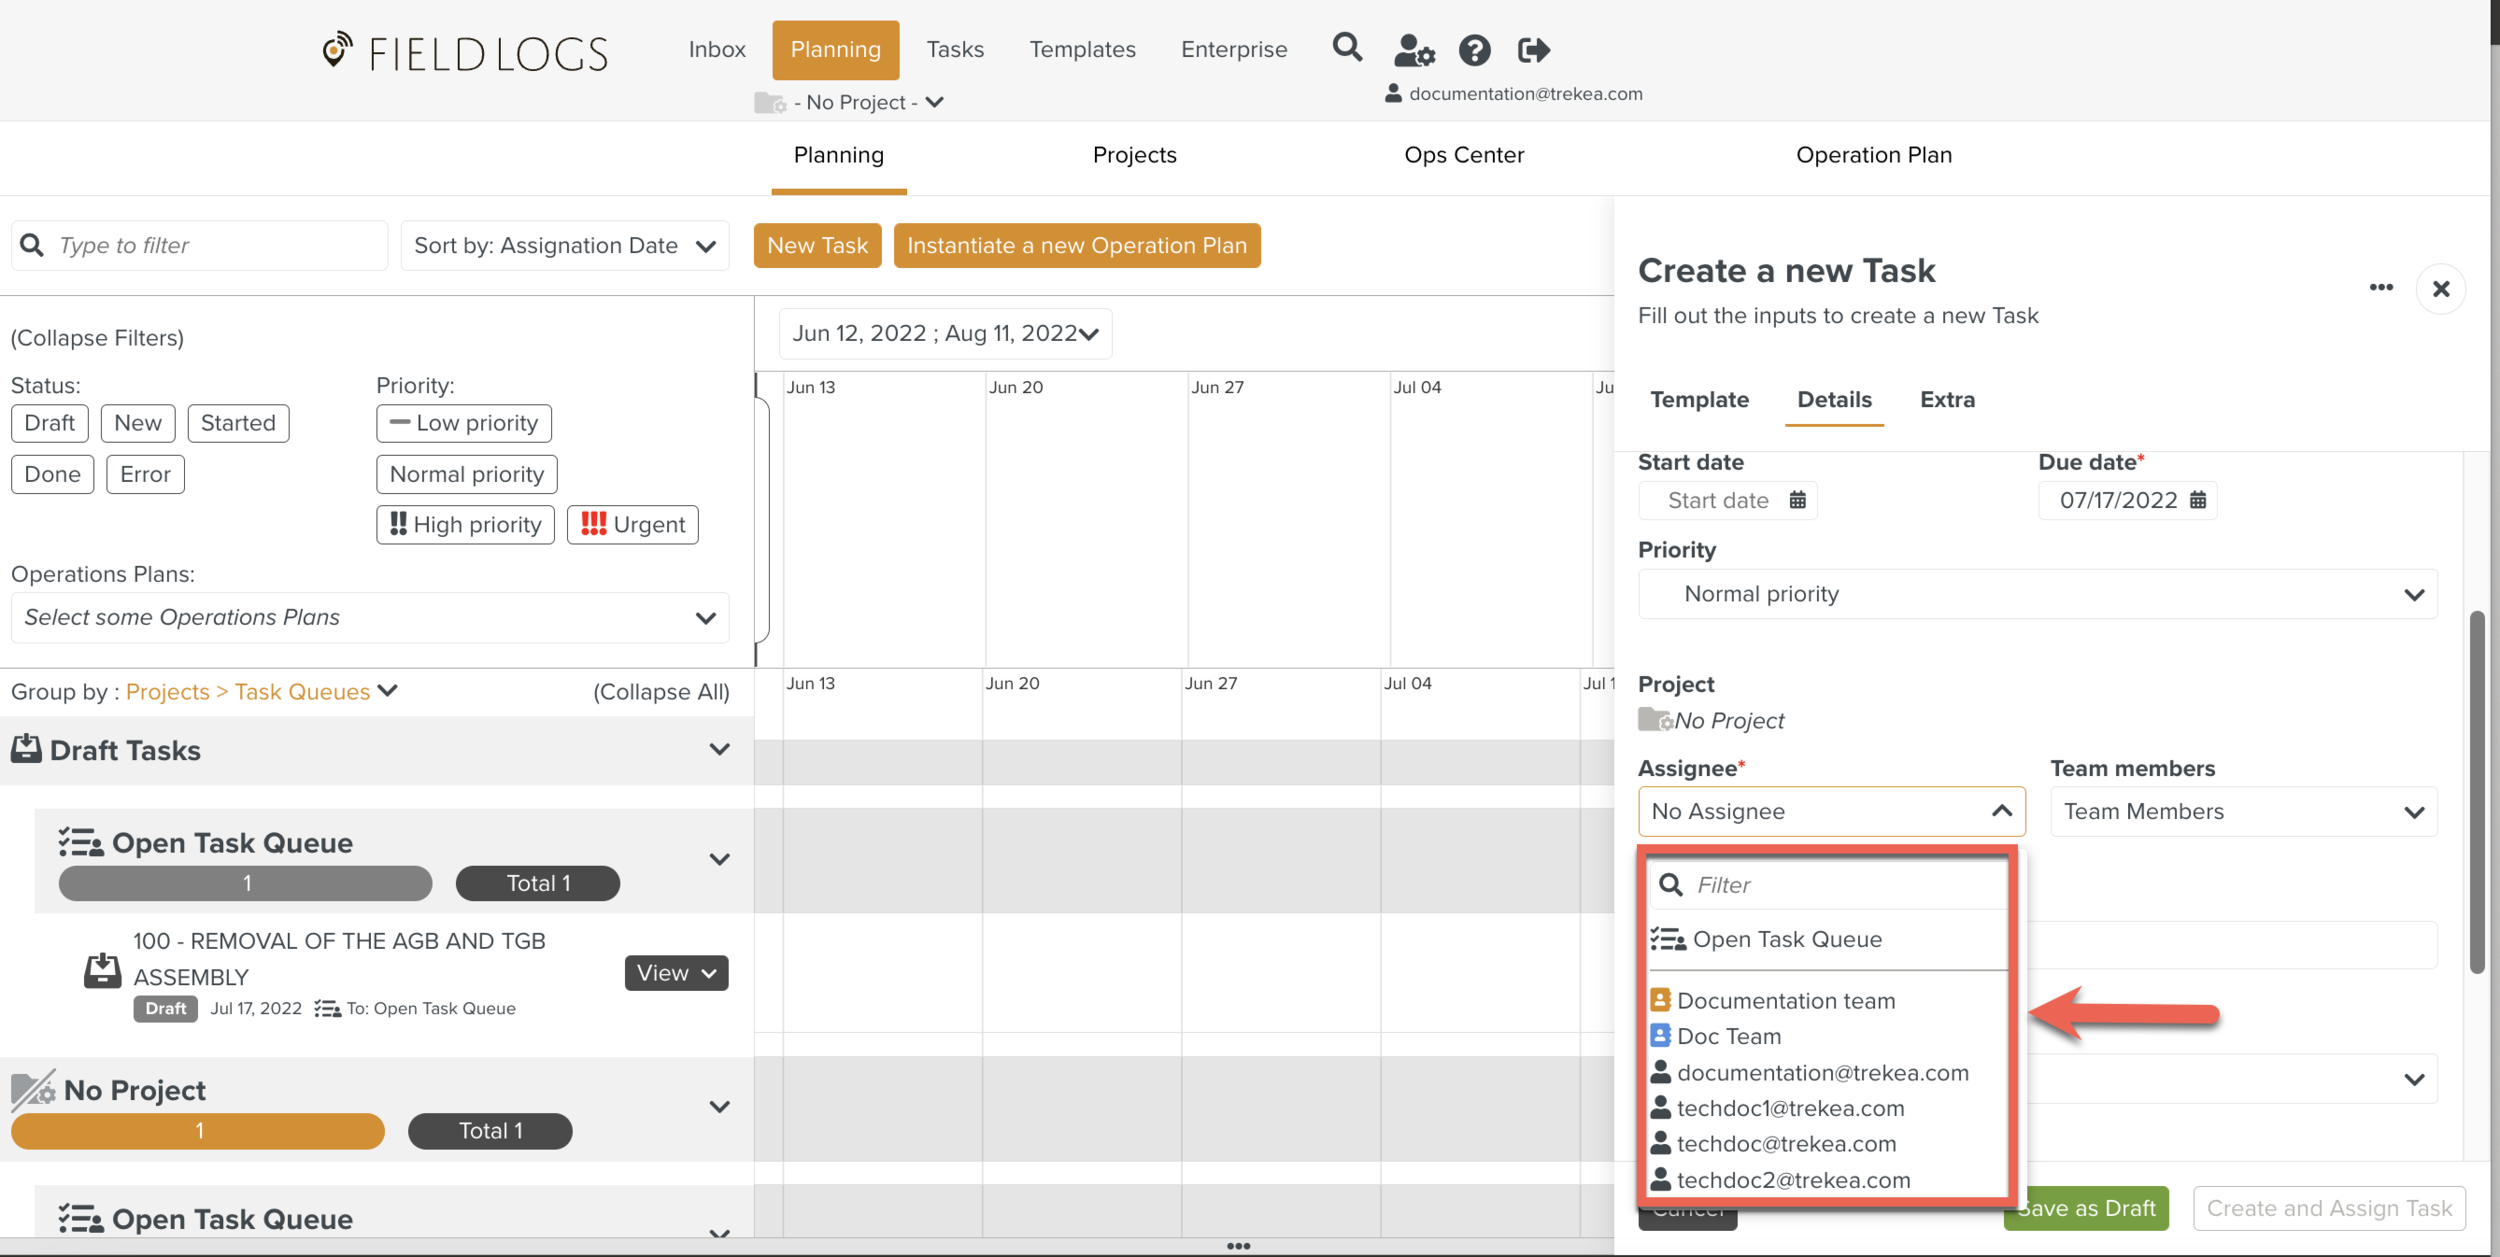
Click the Assignee dropdown to view the list of members, Task Queues and Teams as shown below.
Note
You can recognize a user by
 icon.
icon.Select a from the dropdown list. The Assignee can also be a Task Queue or a Team.
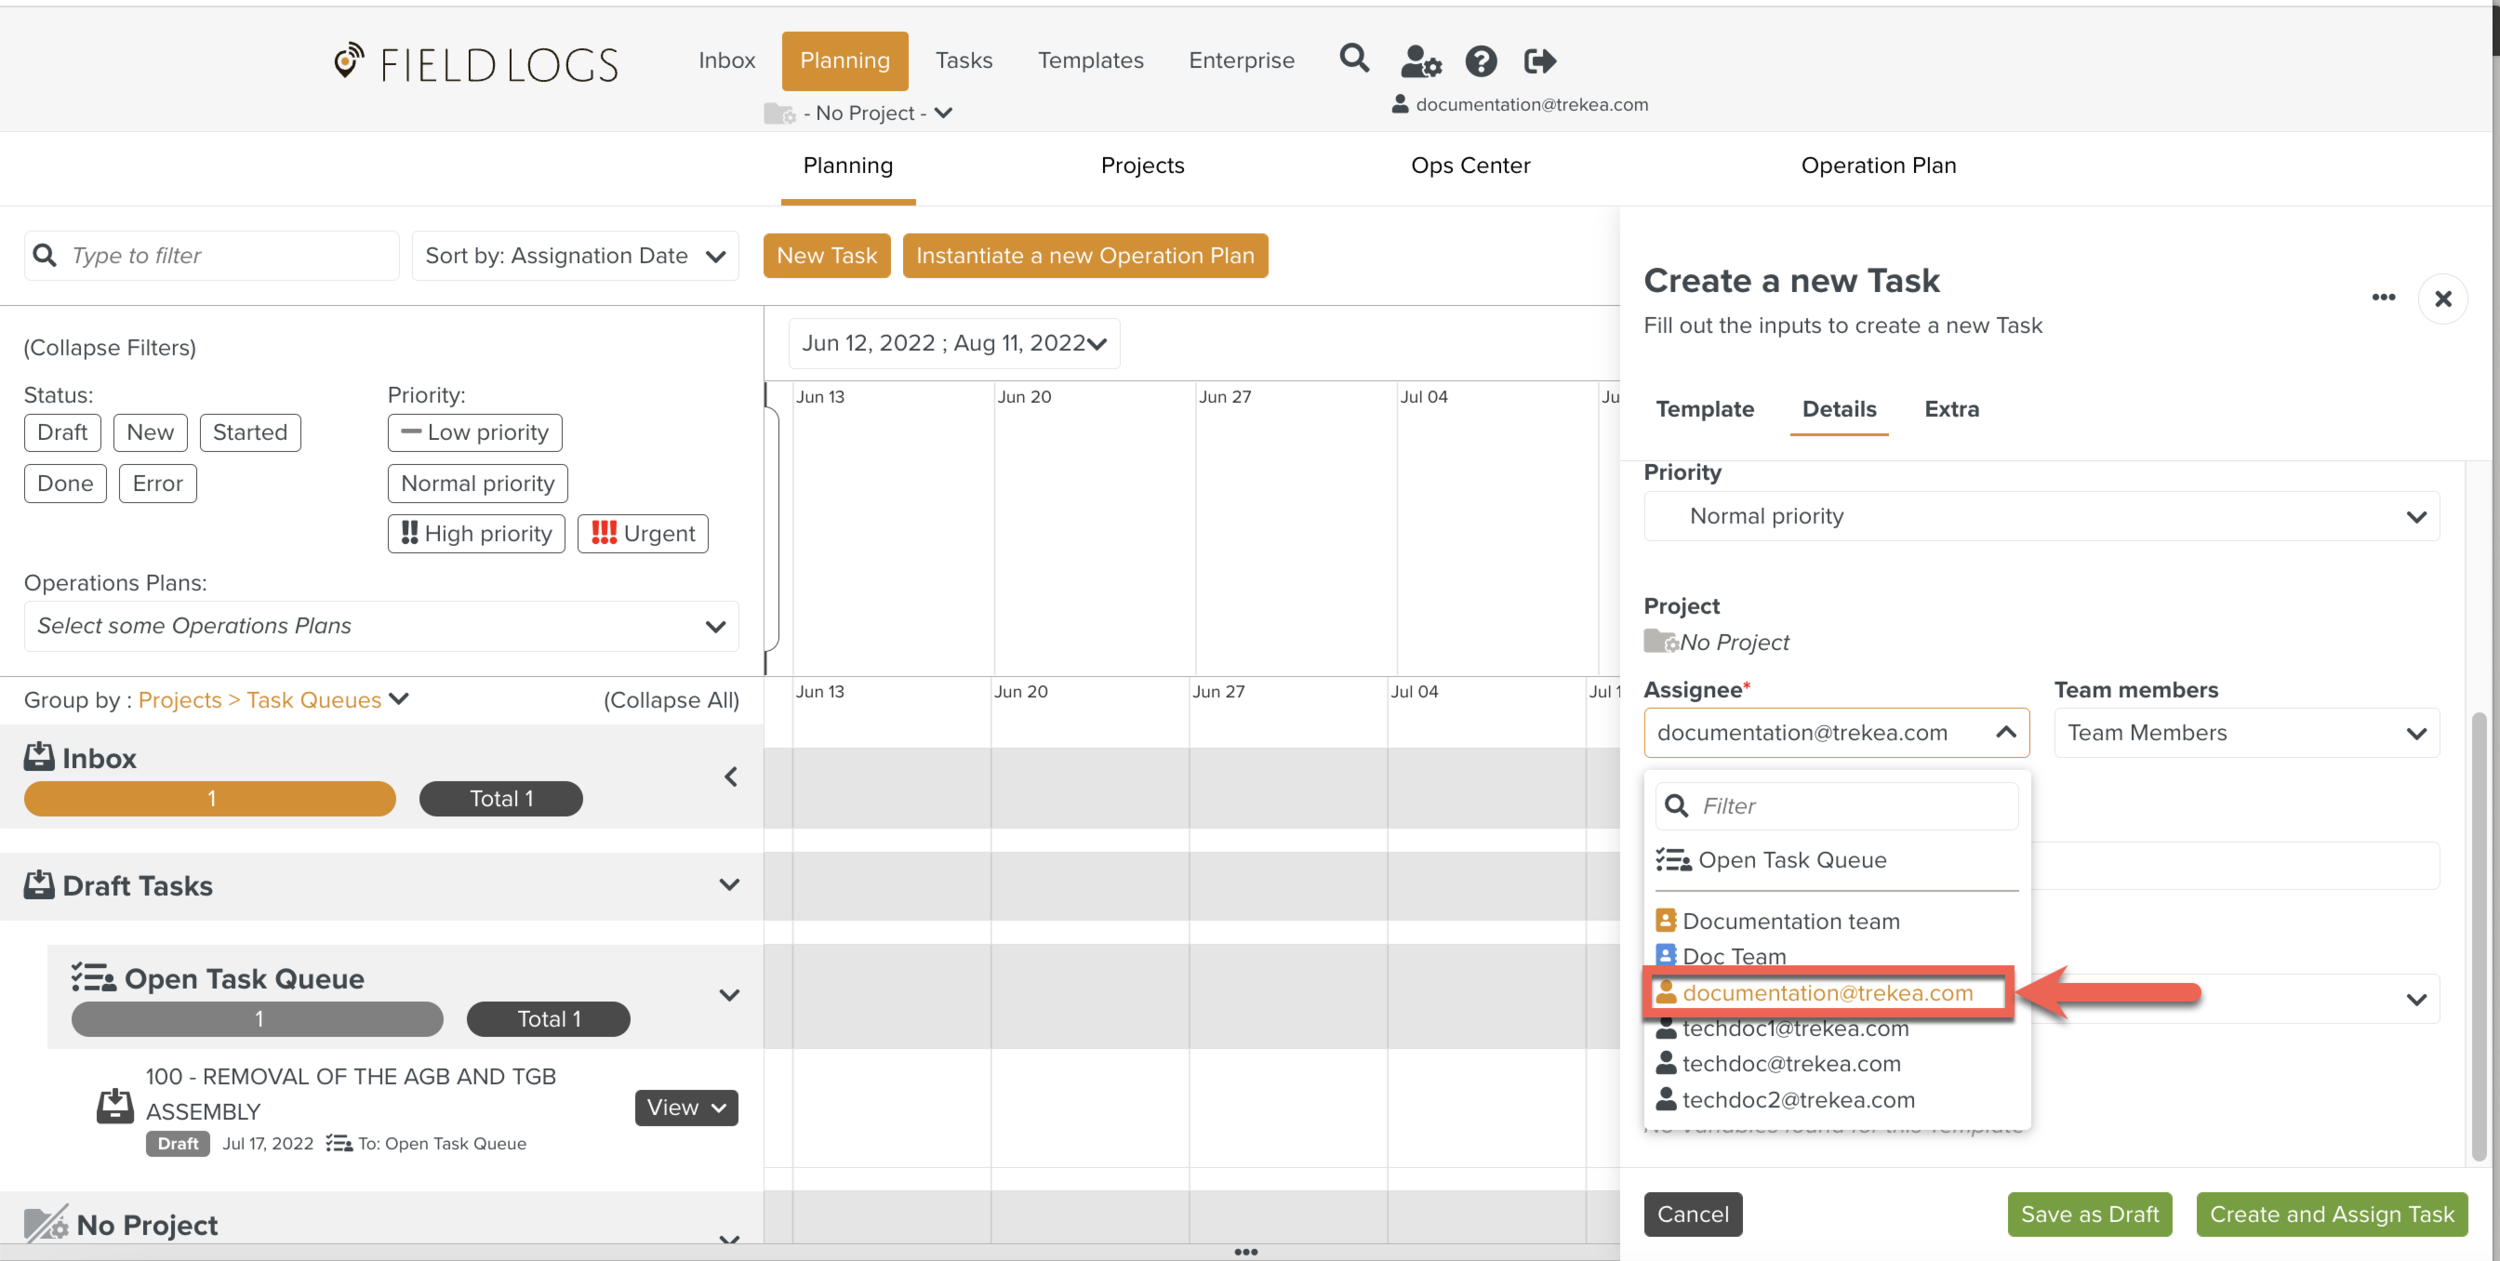
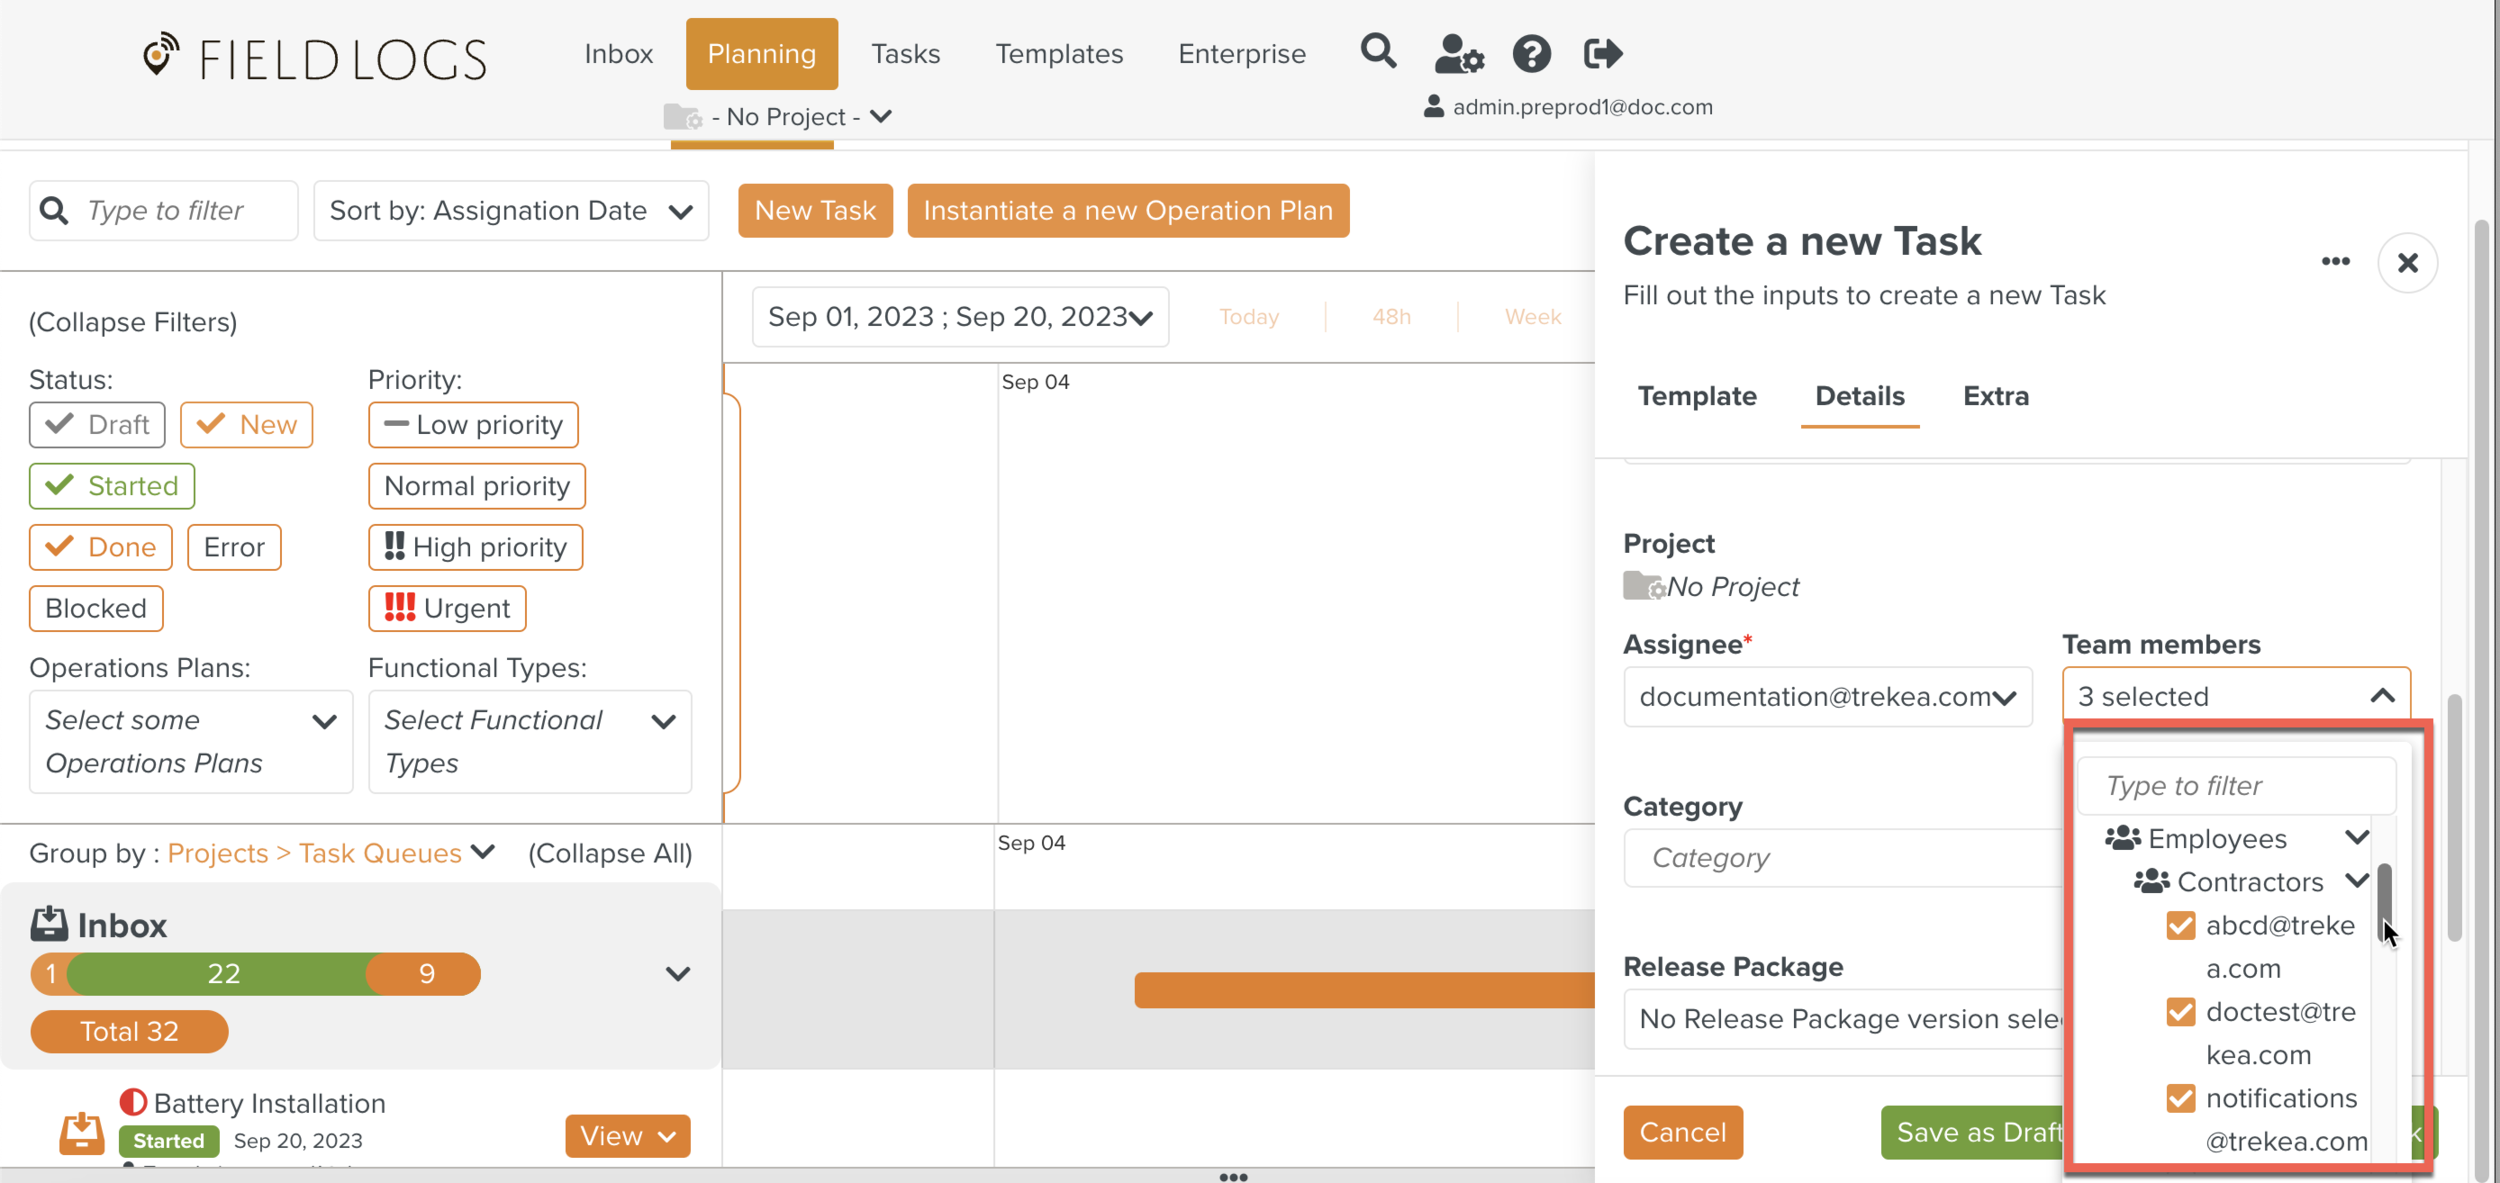
Select one or more in the dropdown list.
Note
Whenever you select a group, the Team Members associated with that group will be selected by default.
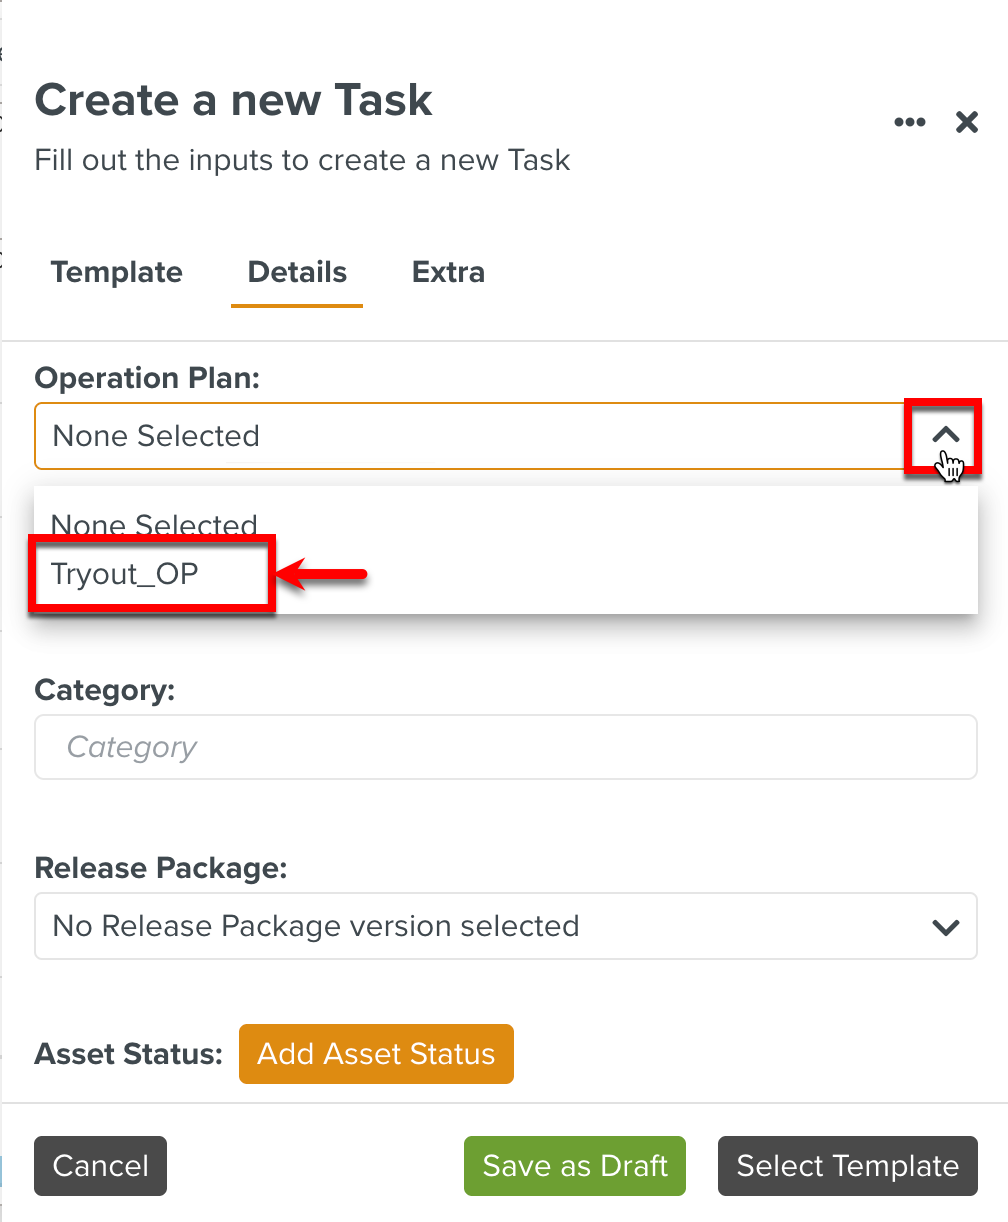
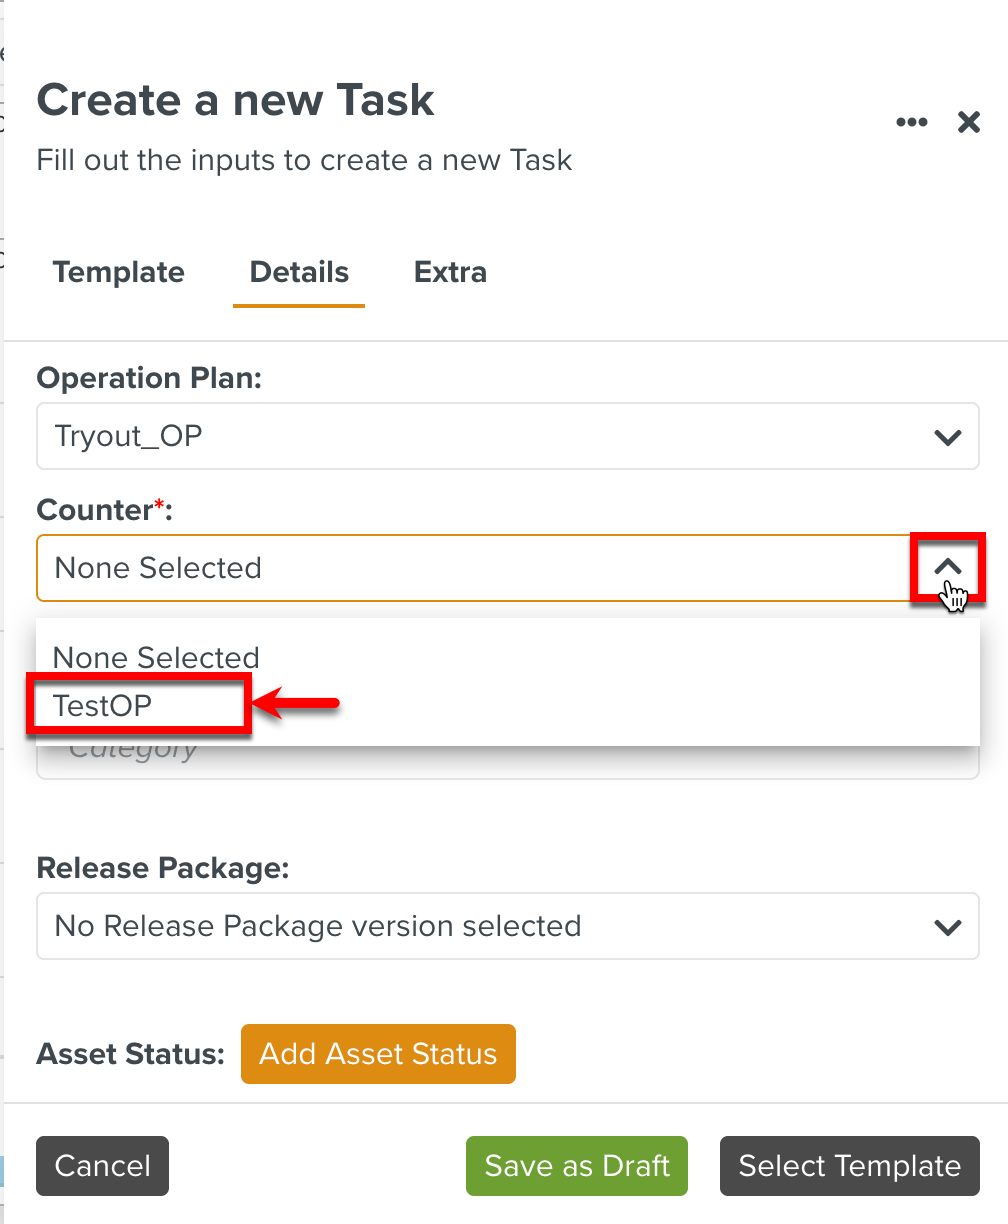
[Optional] Select an active Operation Plan and Counter to add this Task.
Warning
You cannot add Tasks to the following types of Operation Plans:
With Event Triggers of type Task Progress, Multiple Task Done, and Measure Point.
With Use JS Scripting option enabled.
[Optional] Add a category to group the Task.
[Optional] Select a version from the dropdown list.
Release packages have Reference Manual versions defined as rules. Choosing a specific Release Package version while Assigning a Task places an execution constraint that ensures that a particular Reference Manual version is used.

When the Release Package is selected, the Template version to be used is automatically selected based on the Manual linked. If the selected Template version is unavailable, the latest active version from the available versions is selected.
Note
The Release Package selection overrides the Template Target version selected in the Template section mentioned in step 4.
Click to add Effectivity Rules and save it. It is added to the Task as a variable of type FLAssetStatus.
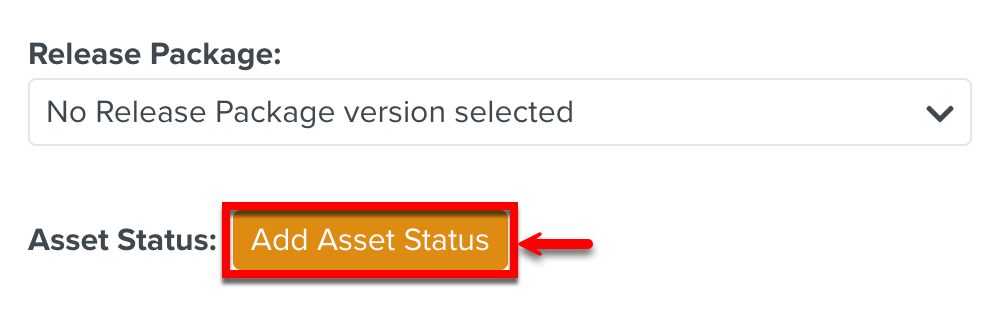
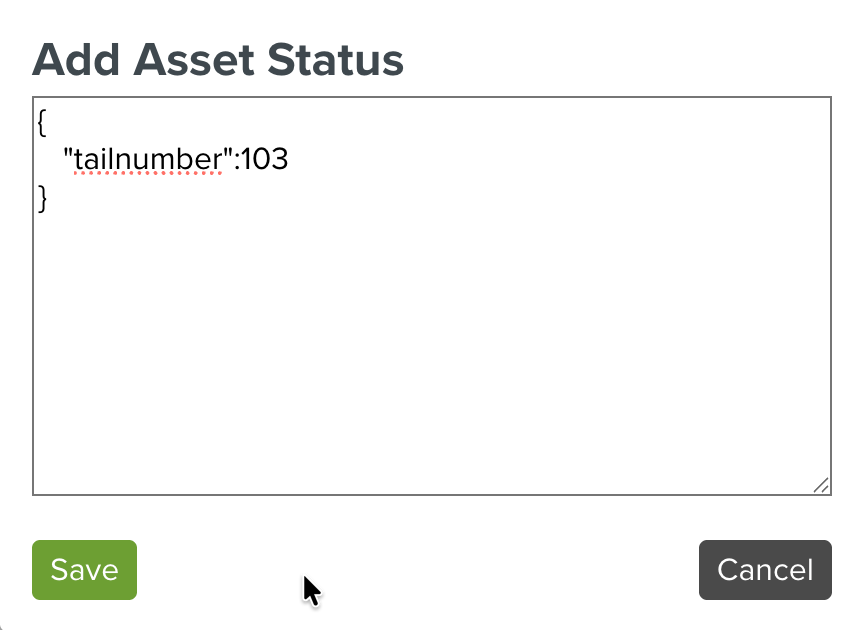
Warning
The field supports only Json format.
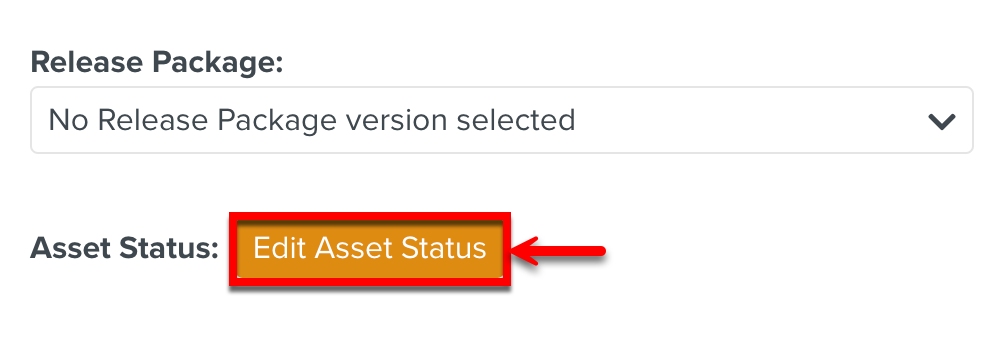
To edit the values use the button.
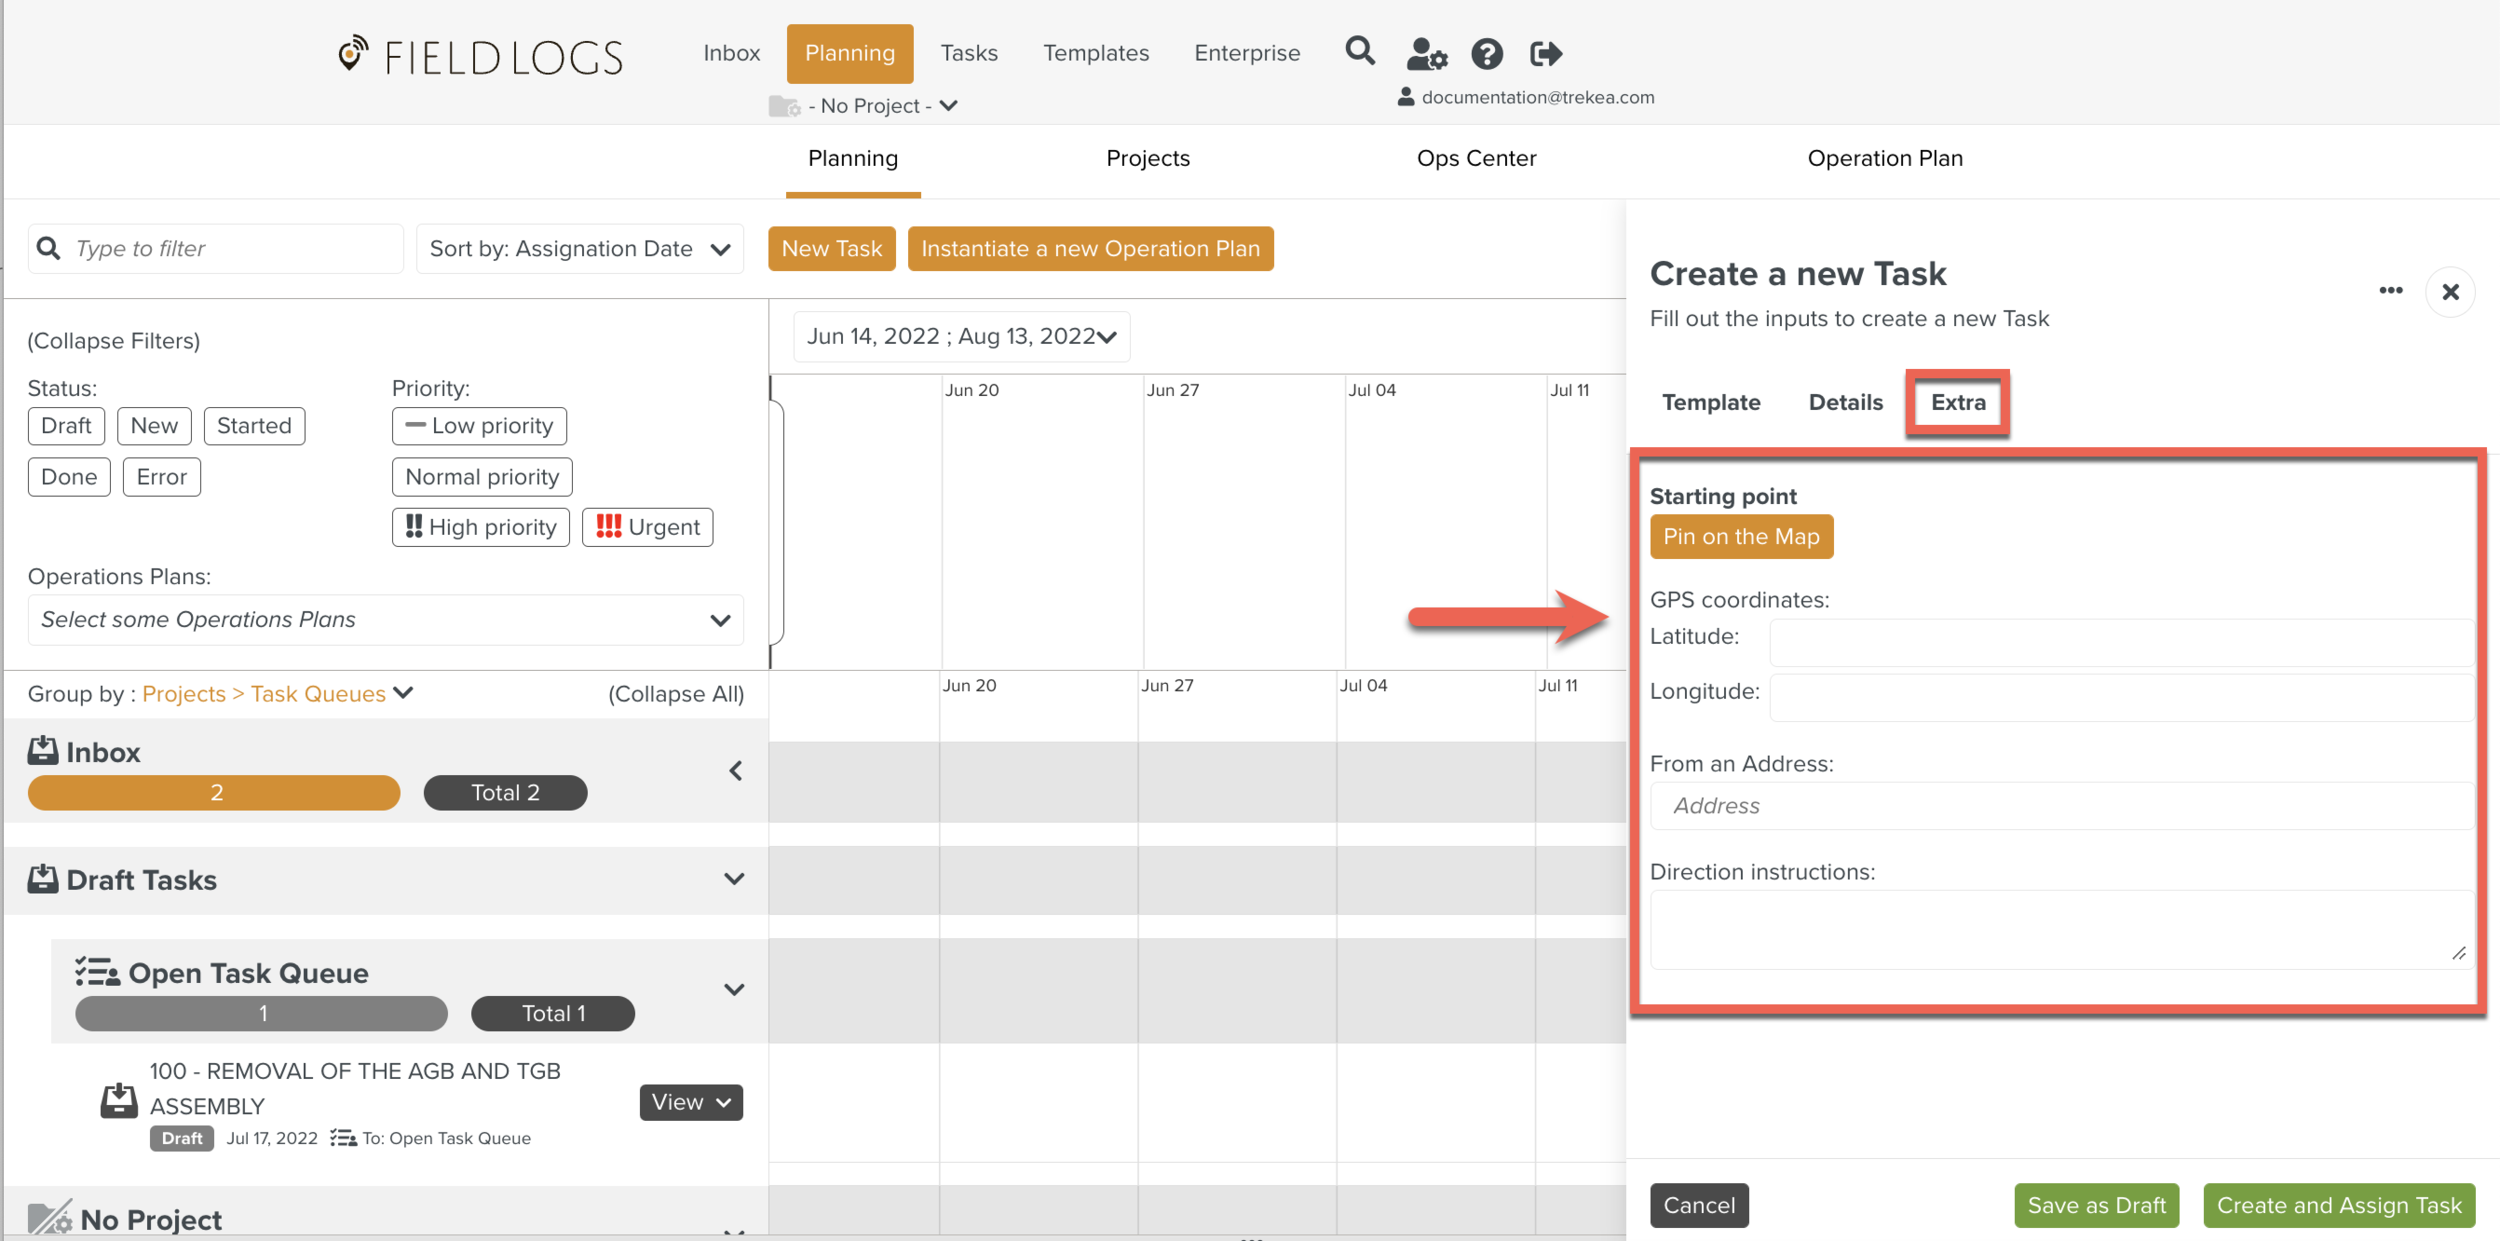
[Optional] Click to fill in the Starting point.
The Starting point shows the pin on the map for GPS purposes.
Click .
Warning
If all the versions of the selected Template are unavailable, the button is greyed out.
The Assignment is created. The Task appears in the of the selected users.
Tip
You can click to create a draft version of the assignment, or you can modify the assignment later. In this case, the status of the Task will be displayed as "Draft".
For a New Task, the status bar appears in black with a defined End date.
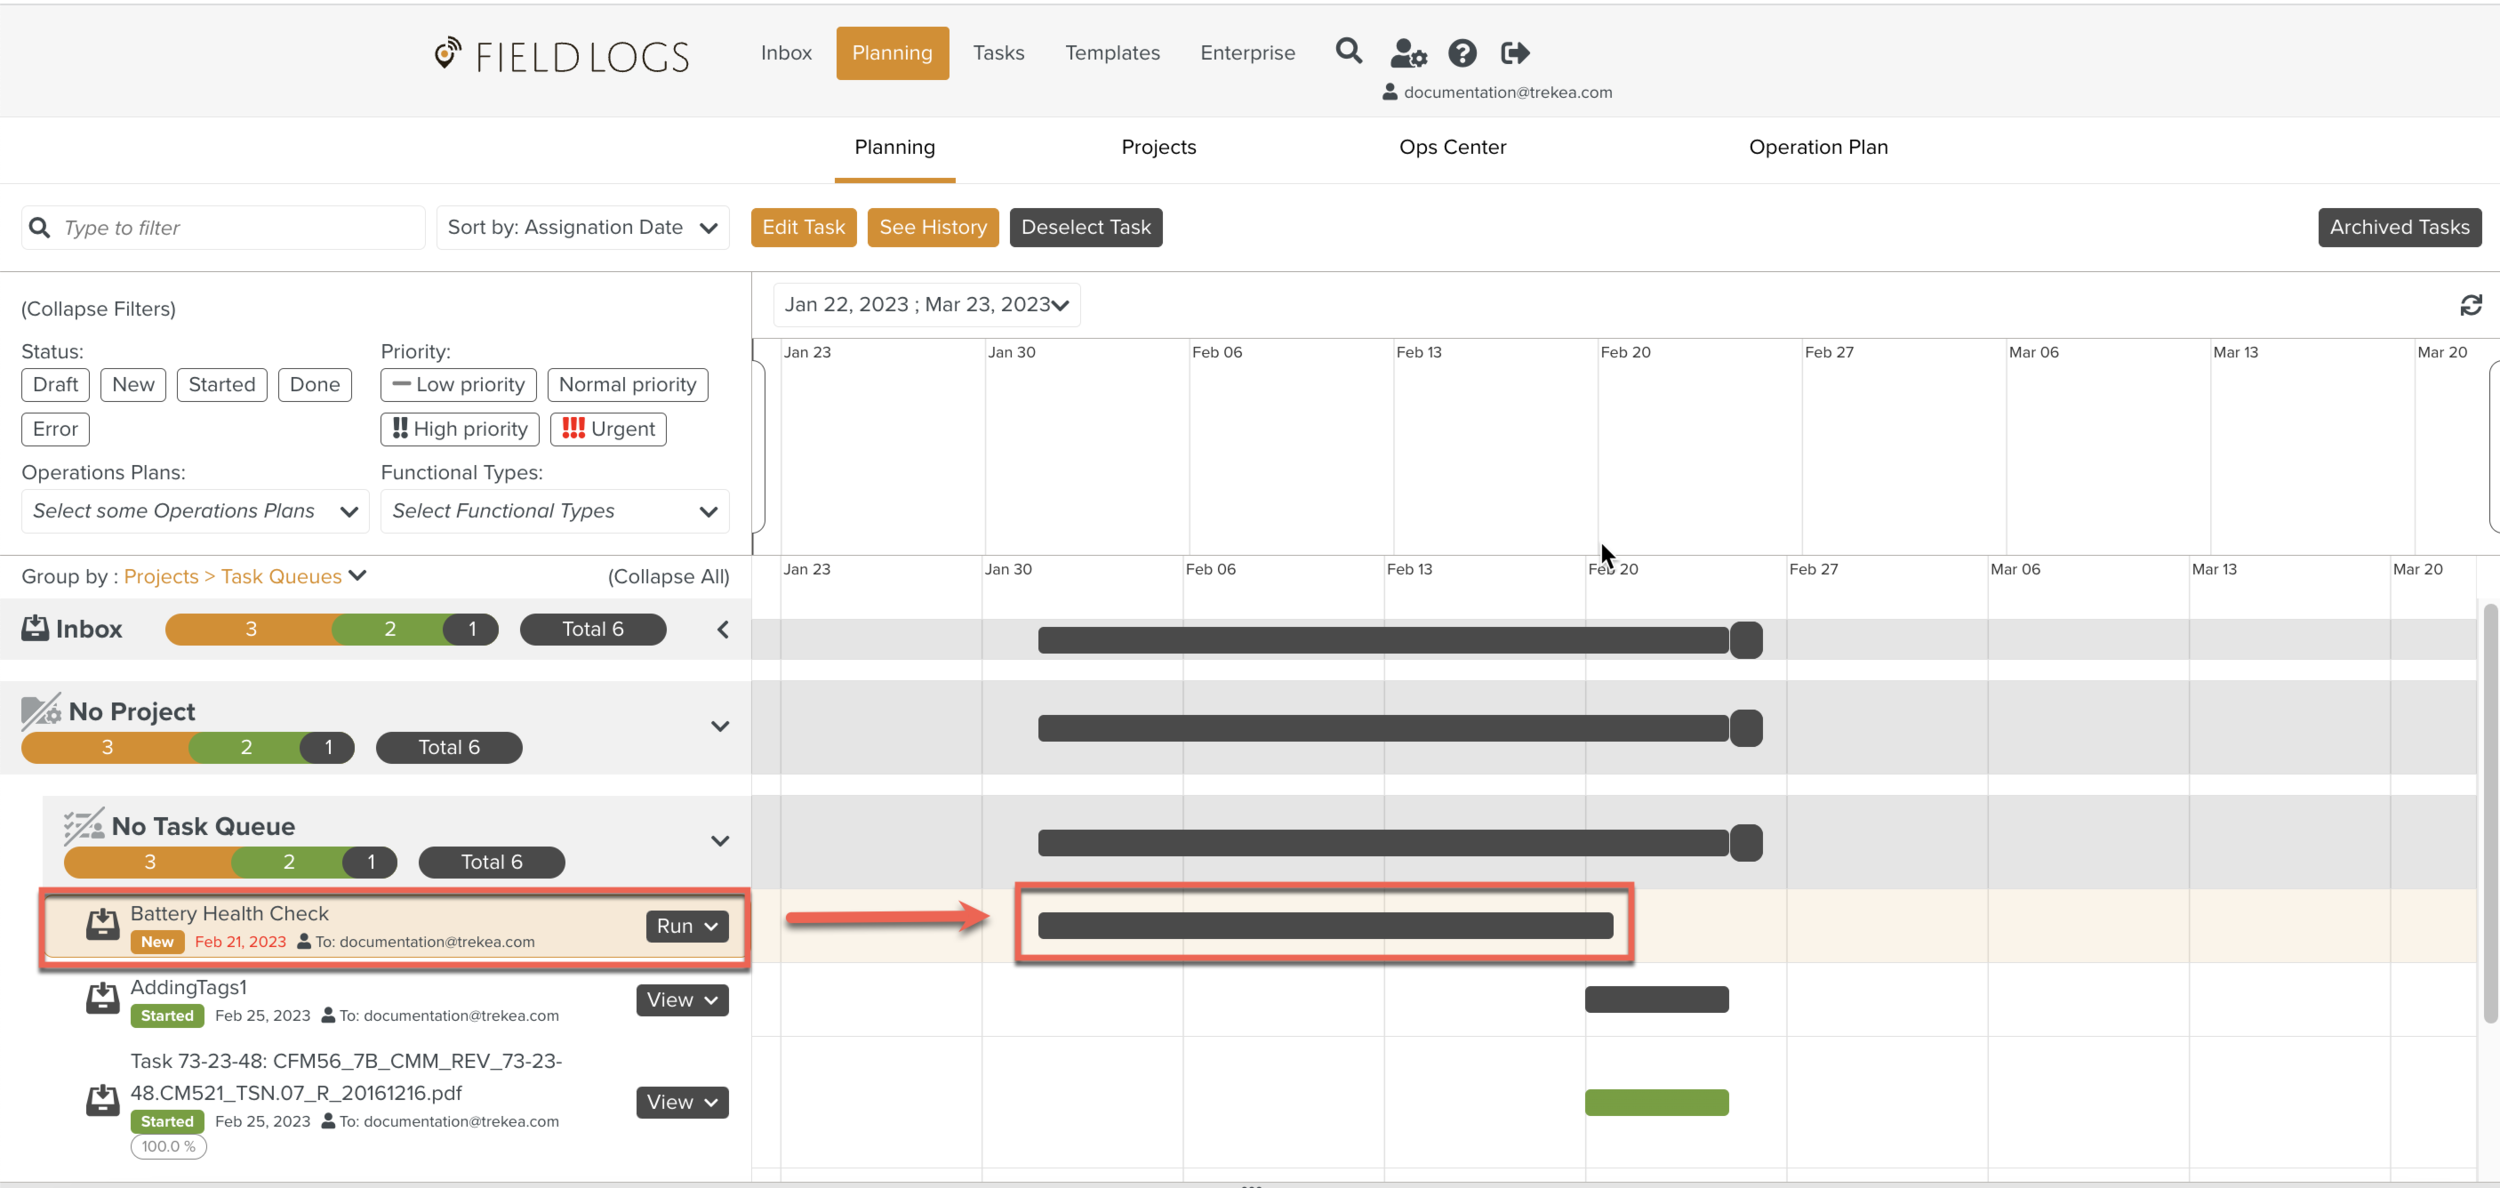 |
For a Task that has been Started, the status bar appears green to indicate the percentage completed.
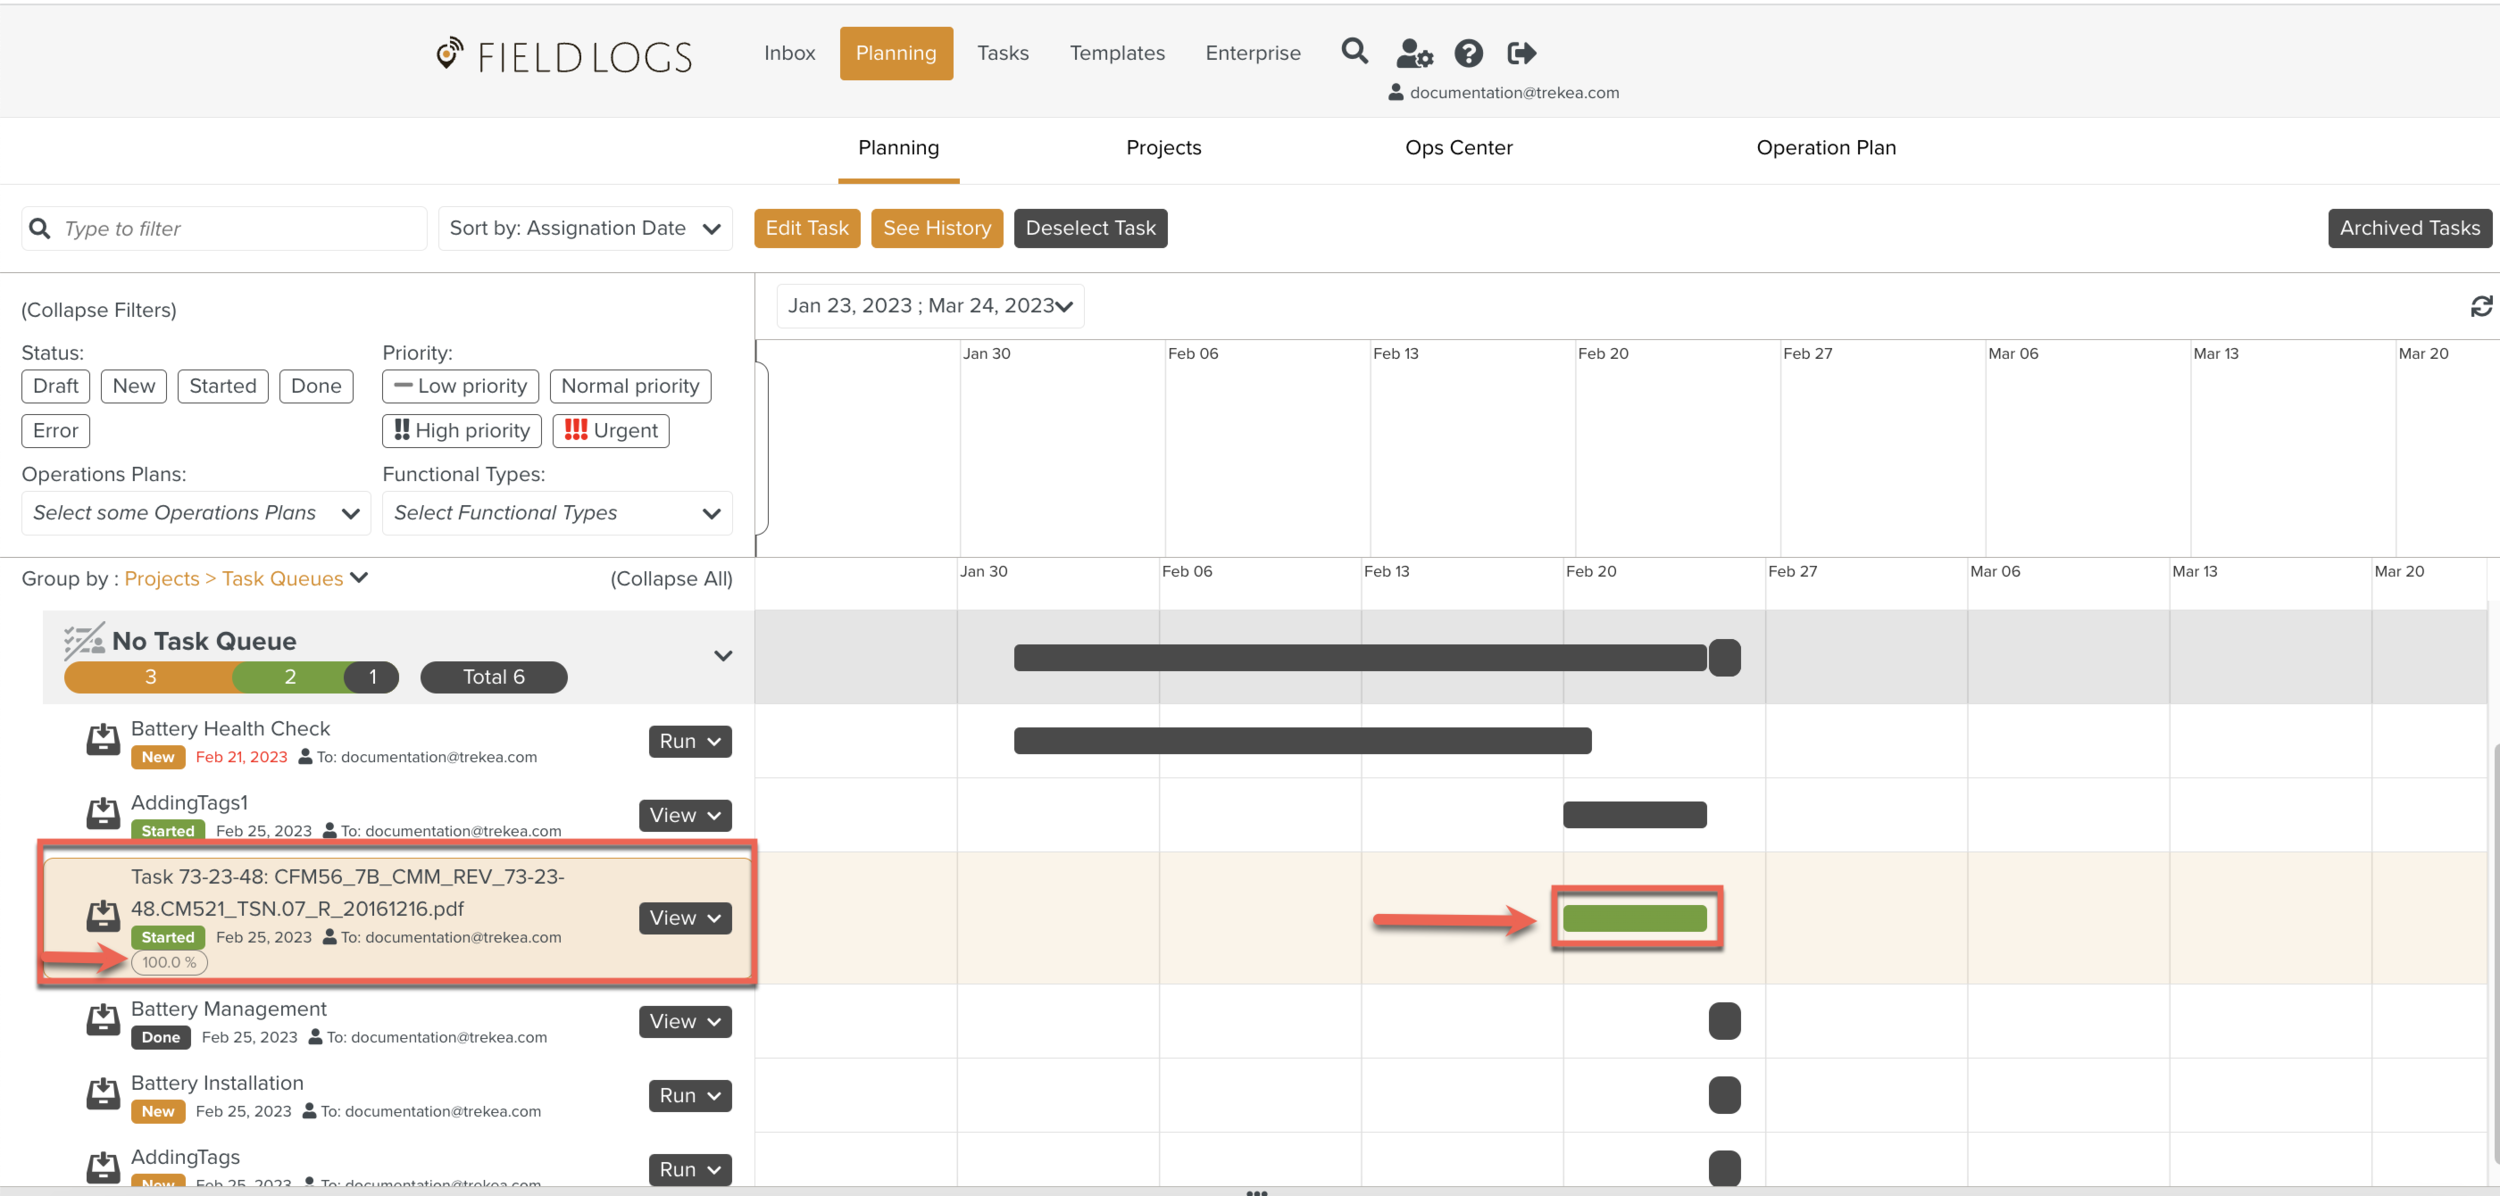 |
For a Task that has been Started and Stopped before an end date, the status bar appears green and black to indicate that some part of the Task is complete and some part of the Task is incomplete as shown below. The status bar turns green with respect to the Task progress. For example, if the Task is 50% complete, then the bar is 50% green and if the bar is 80% complete, it turns 80% green.
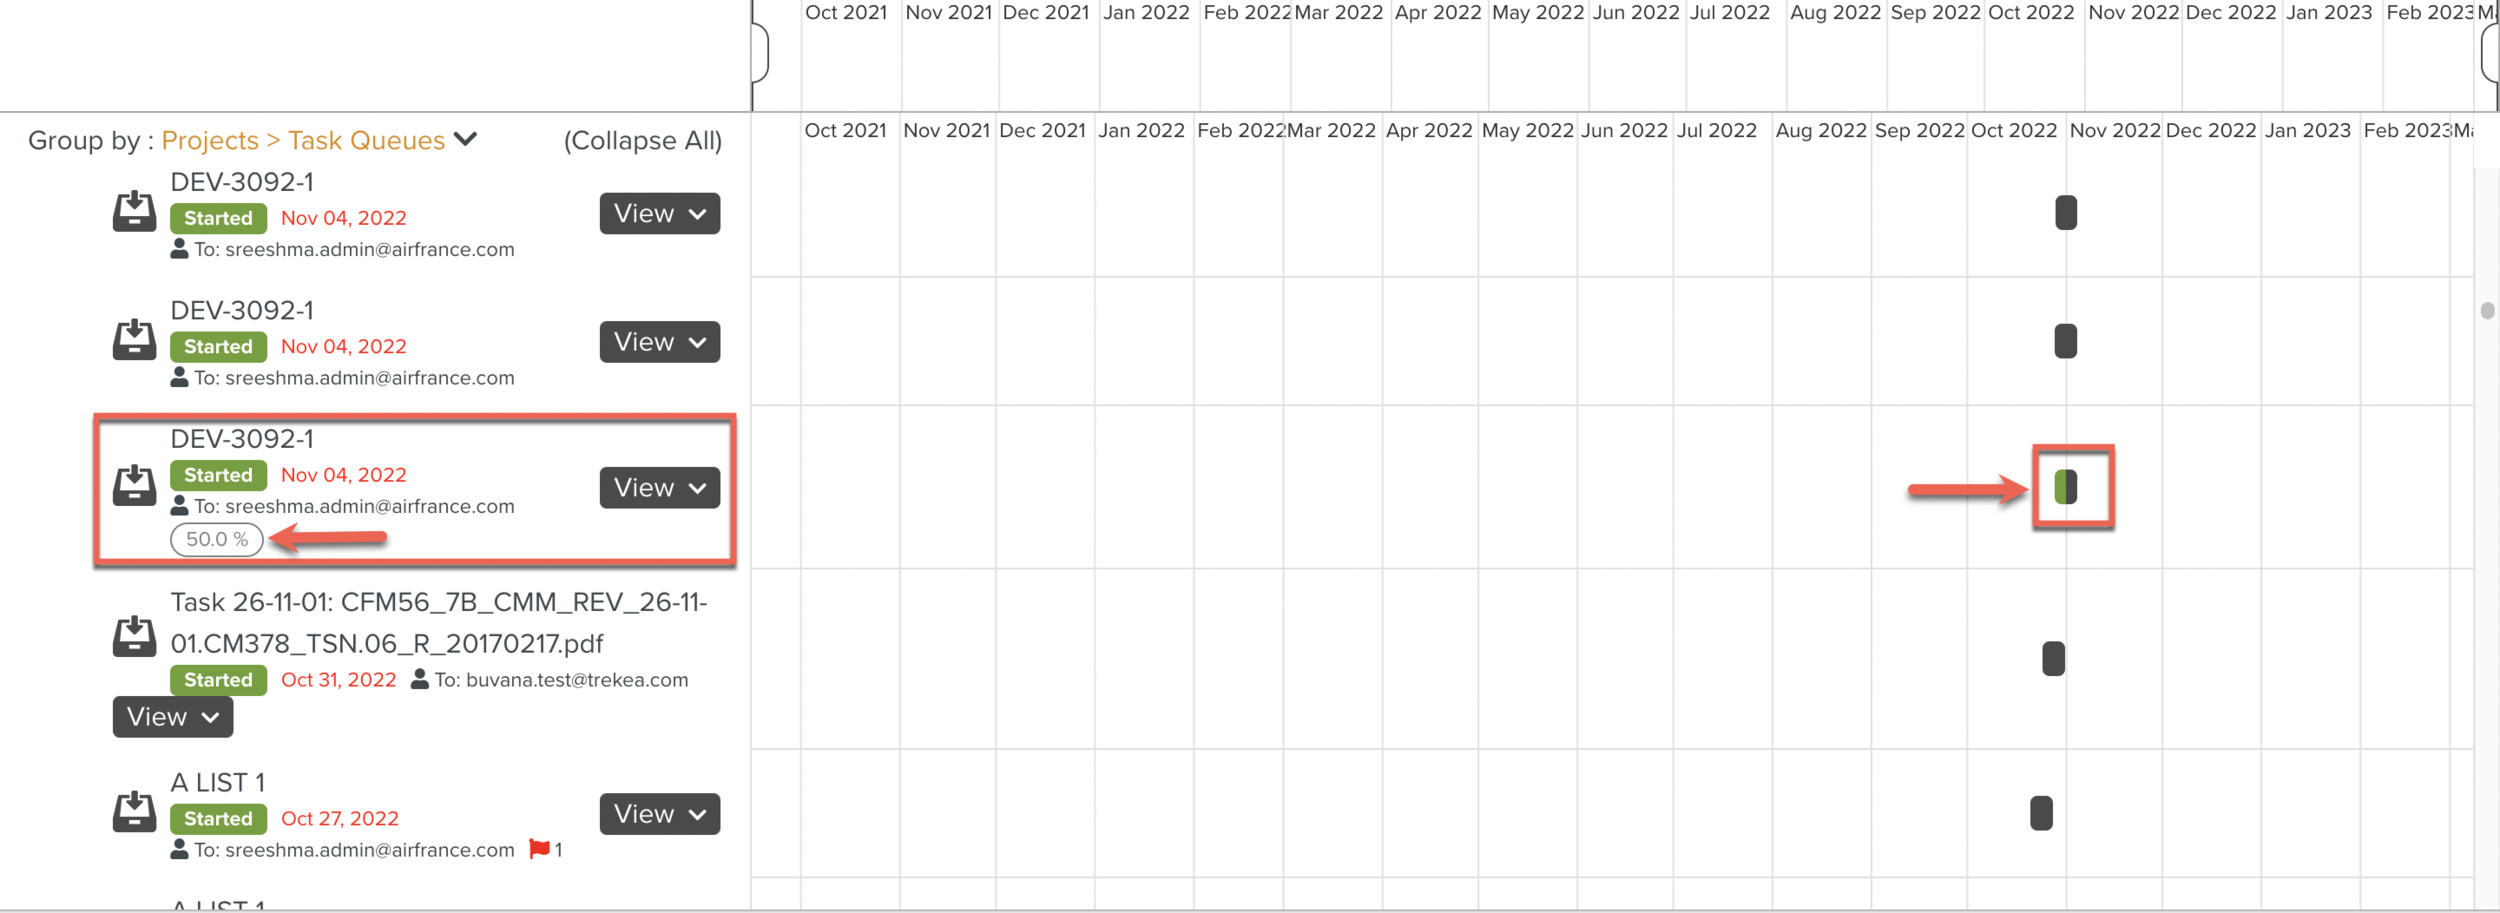 |