Performing Planning Actions
The Planner can perform actions related to Tasks and Operation Plans.
Actions available to the Planner can be classified as shown below:
General Planning Actions.
Actions when a single Task is selected.
Actions when two or more Tasks are selected.
Actions when an Operation Plan is selected.
Generating Operation Plan Execution Reports
Actions related to Tasks and Operation Plans can be performed. These options are available when no Tasks are selected.
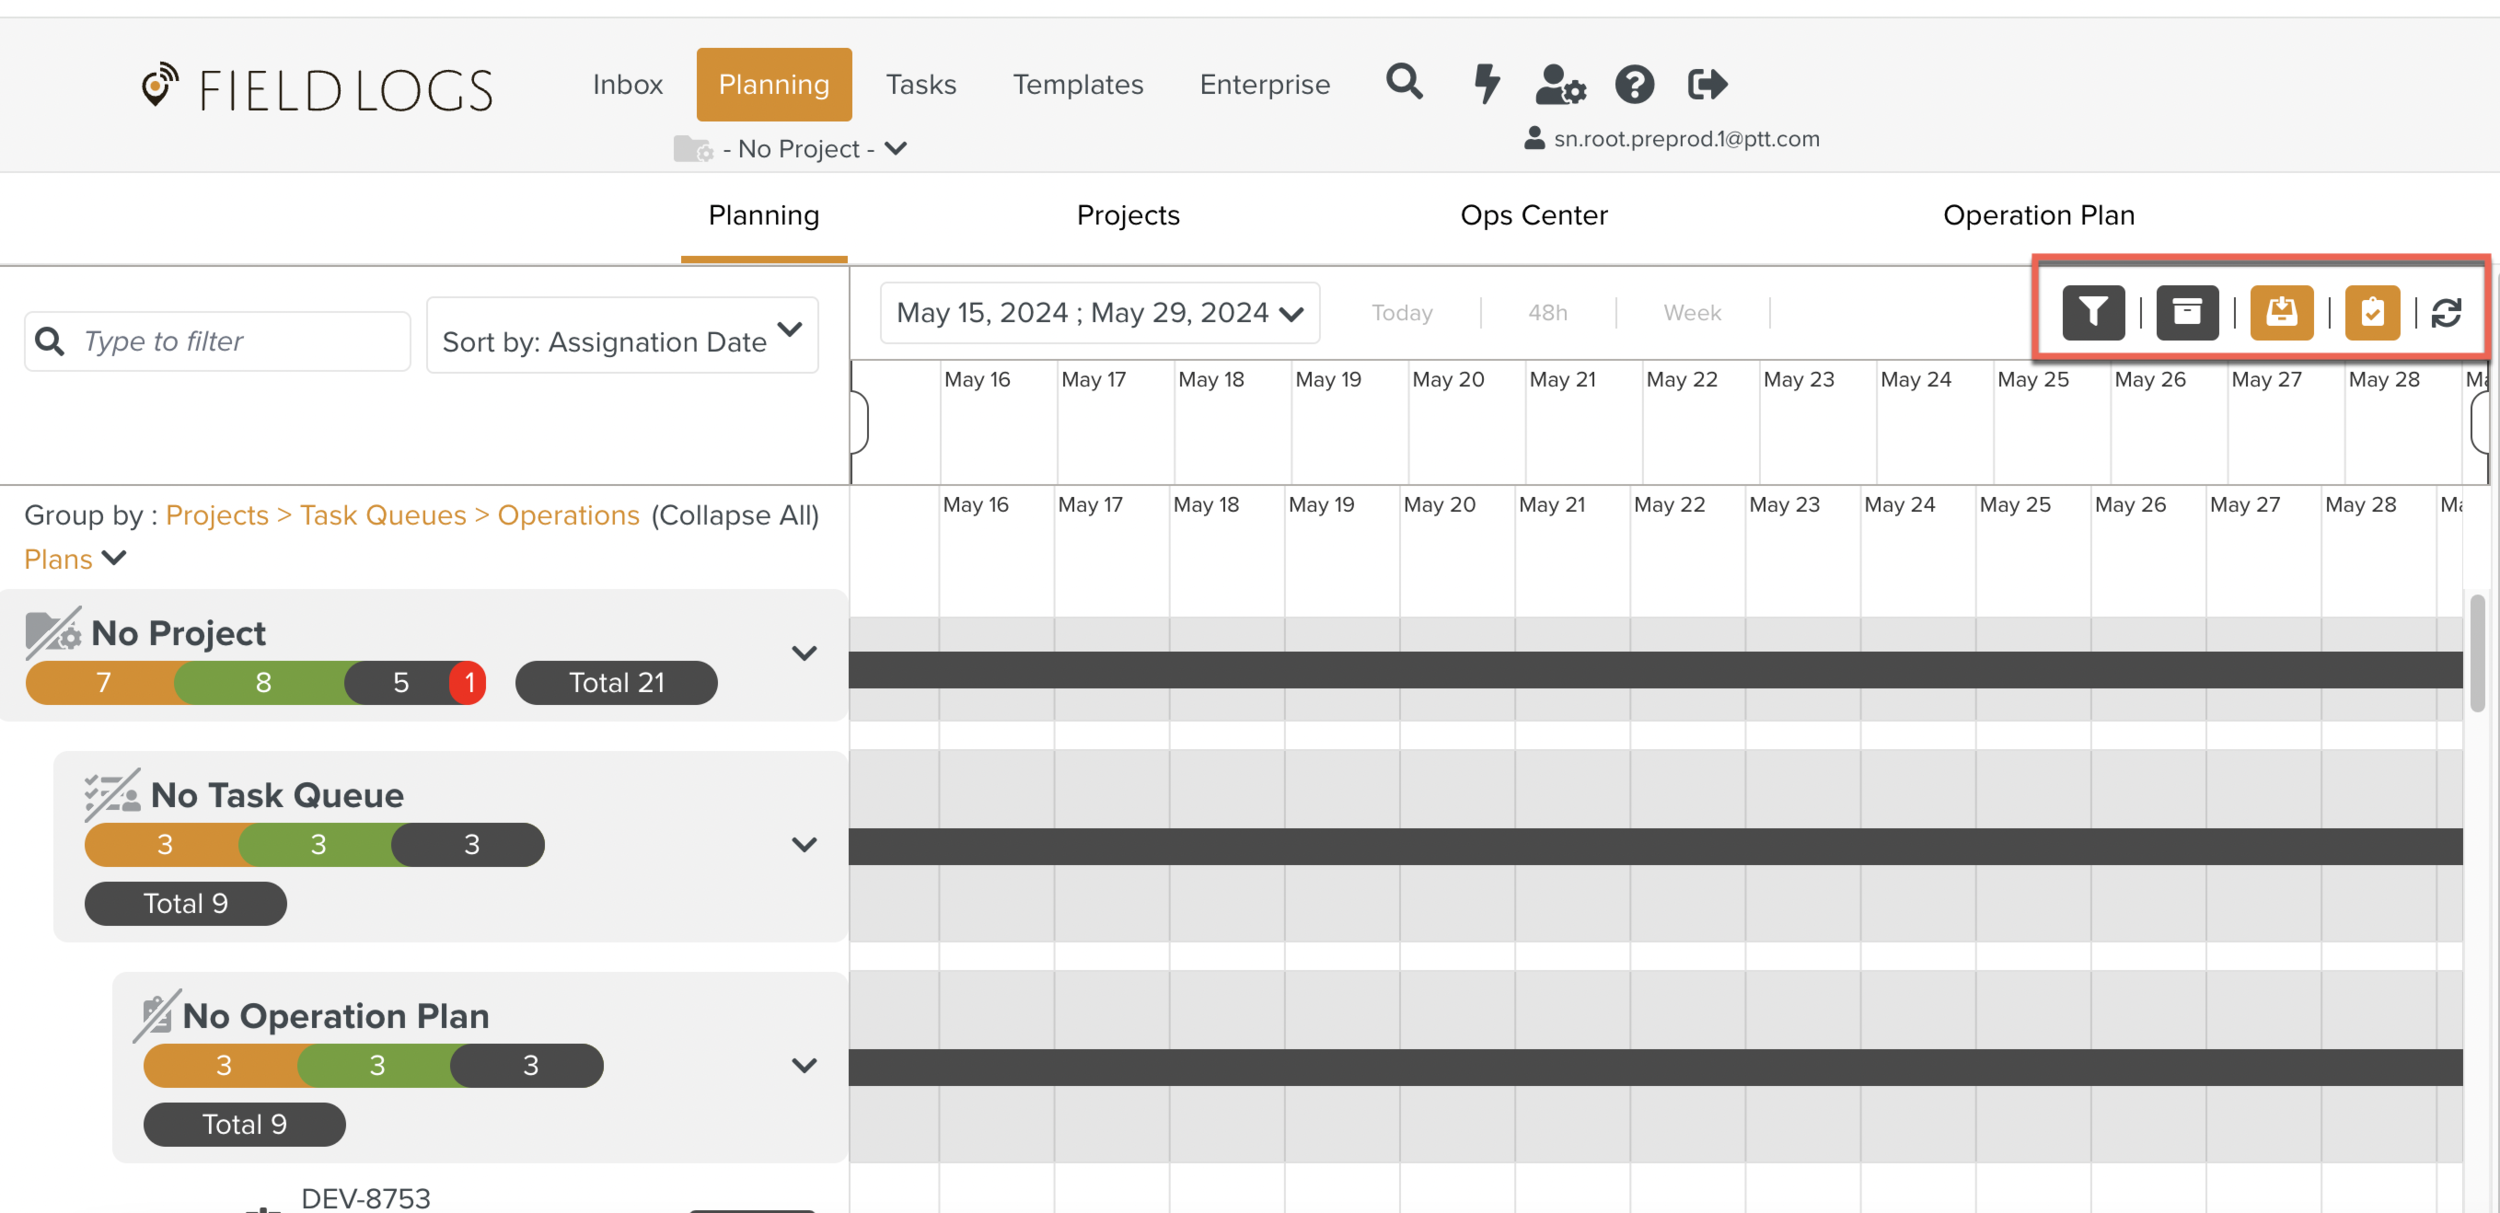
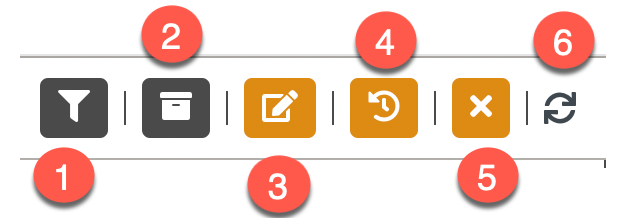
These are the general Planning actions available on the right hand side of the screen.
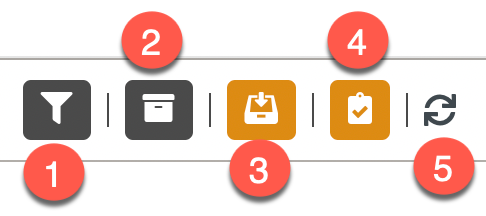 |
Task Filter Option: Allows the user to filter the Tasks based on criteria.
Archived Tasks: Allows the user to retrieve the Archived Tasks and Unarchive them.
New Task: Allows the user to create a New Task.
Instantiate a new Operation Plan: Allows the user to instantiate an Operation Plan.
Refresh: Allows the user to refresh the Planning screen.
When a Task is selected, the actions available to the Planners are highlighted as shown below.
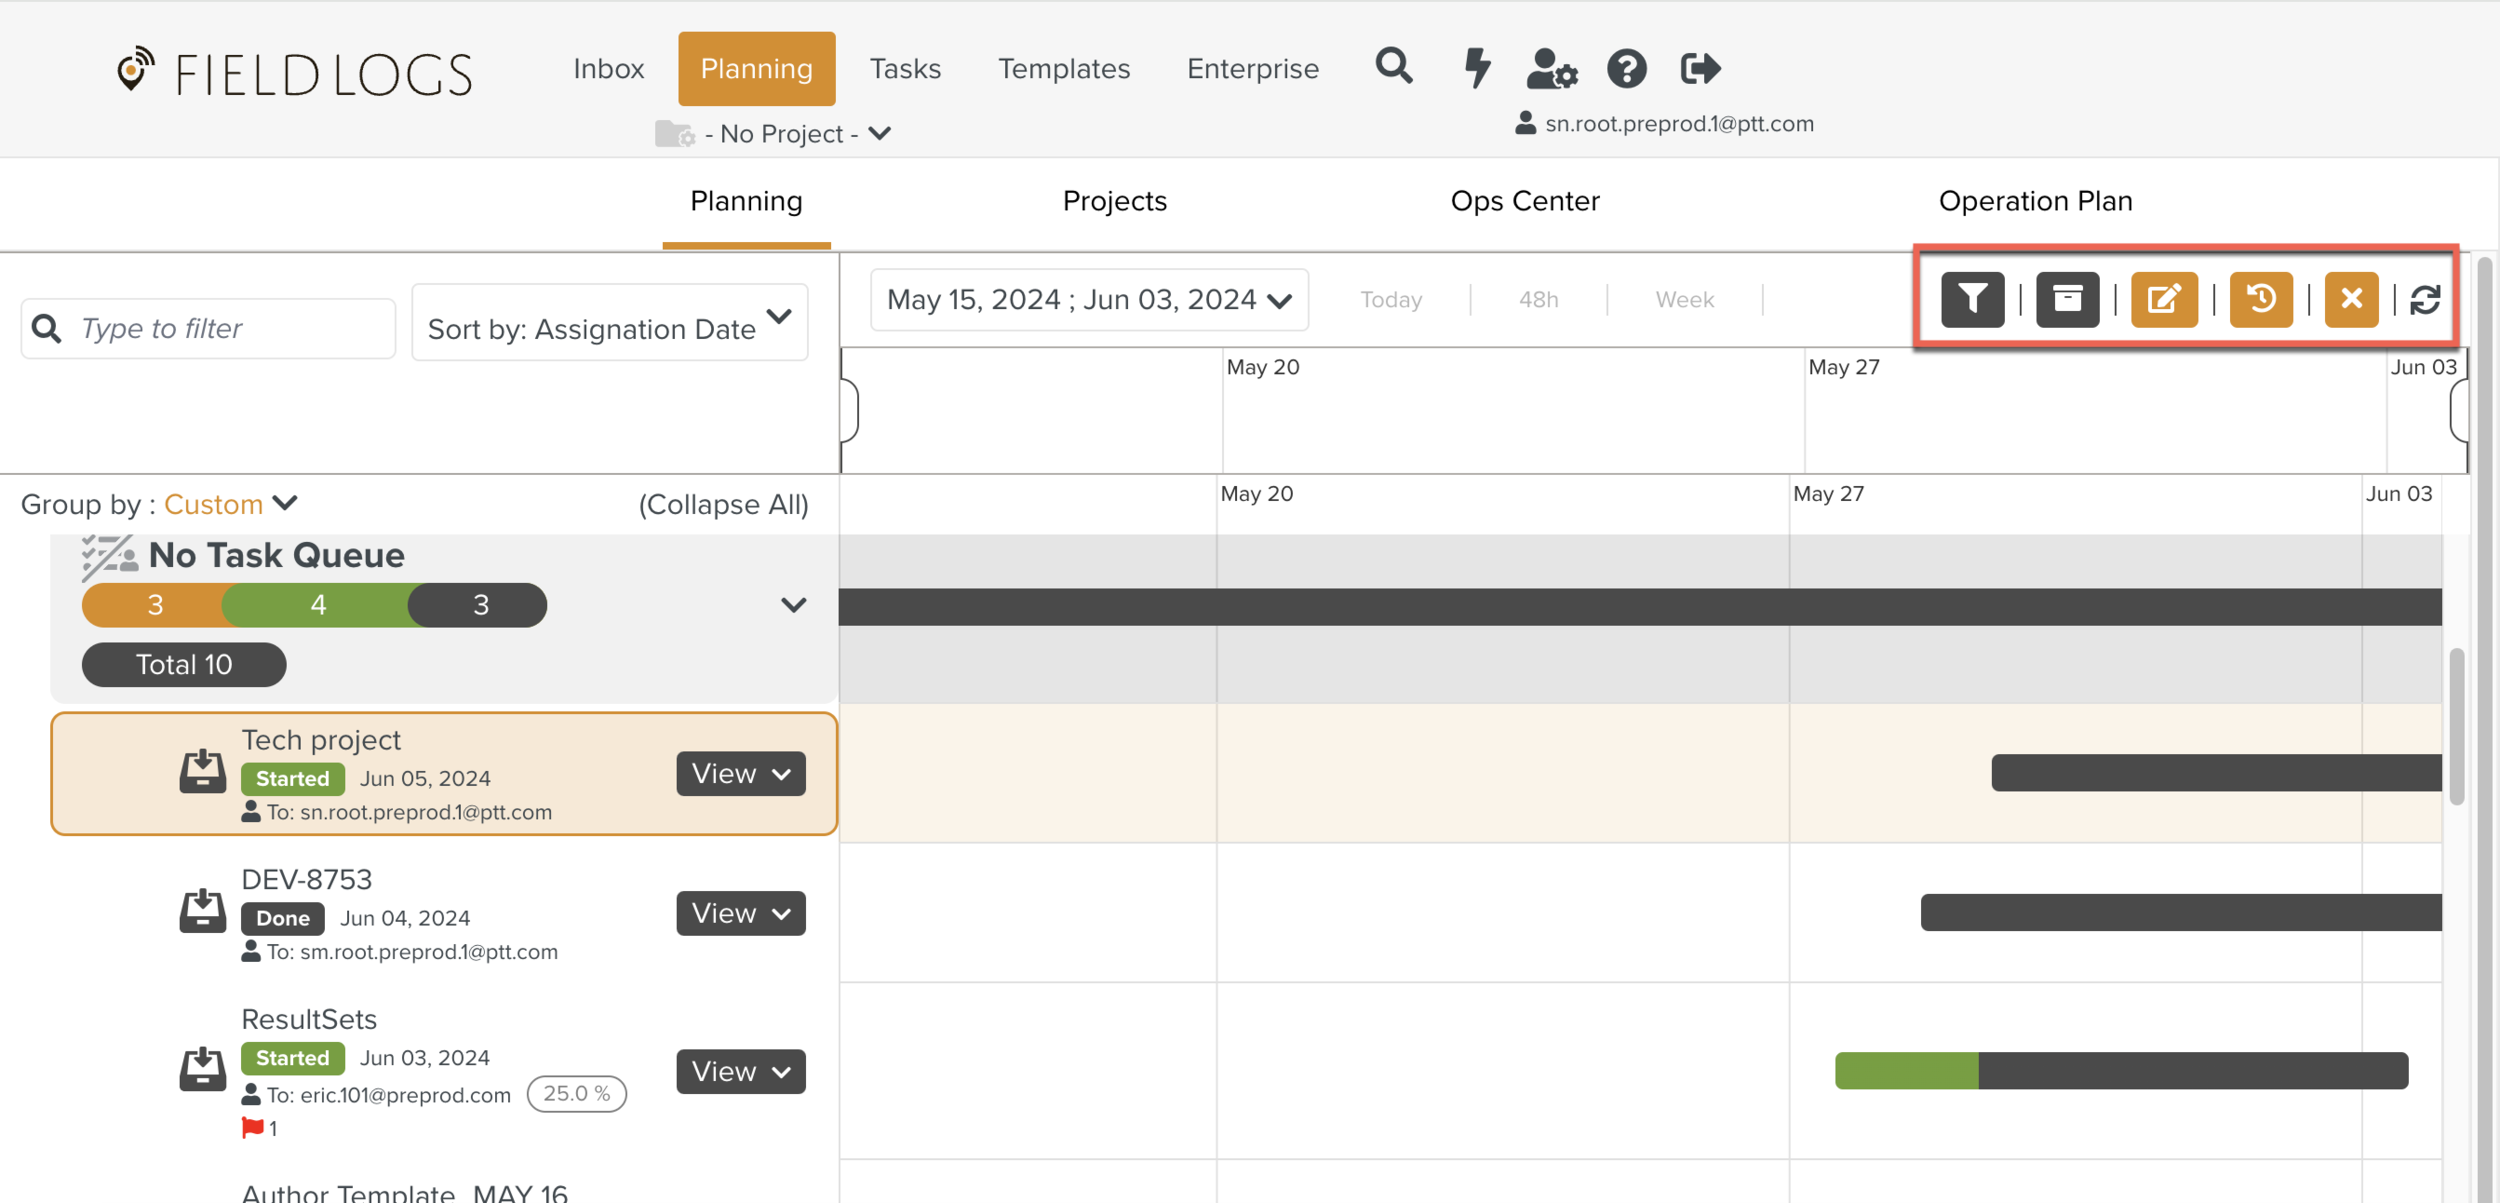
These are the Actions available on the right hand side of the screen.
 |
Task Filter Option: Allows the user to filter the Tasks based on criteria.
Archived Tasks : Allows the user to retrieve the Archived Tasks and Unarchive them.
Edit Tasks: Allows the user to edit the selected Tasks.
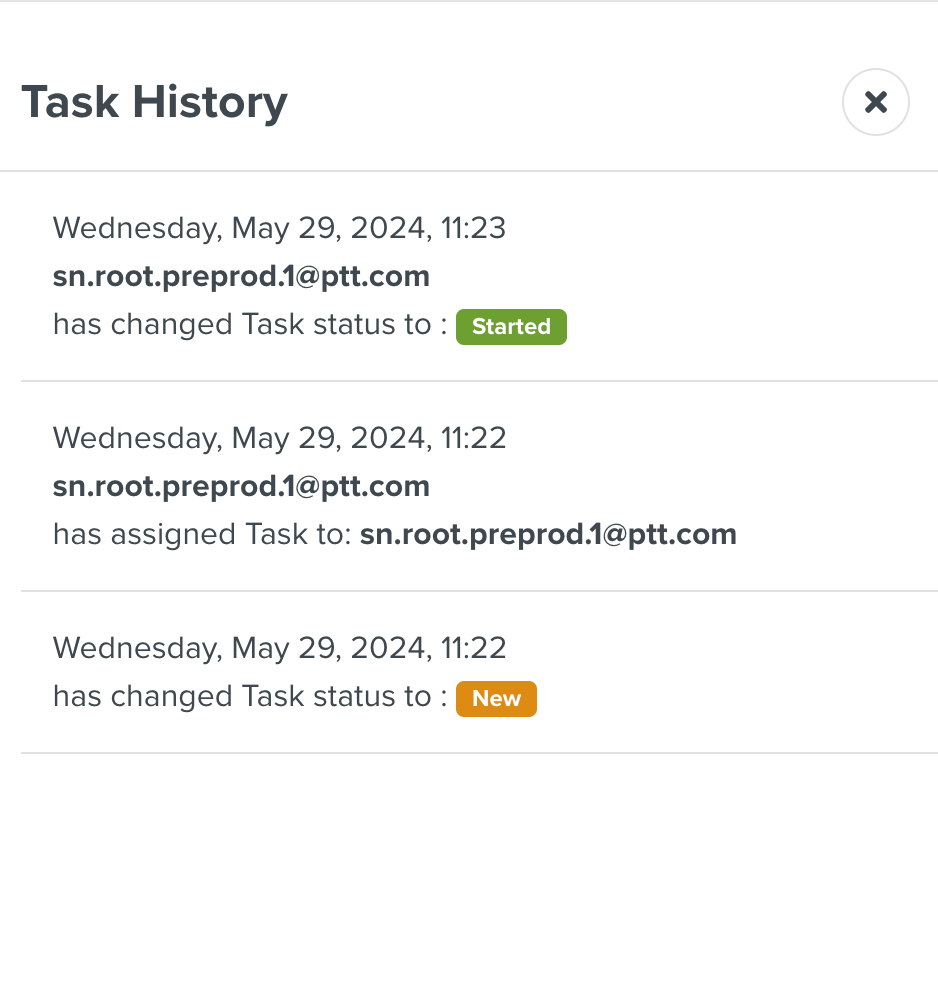
See History: Allows the user to see the Task history of the Task with the Status, Day, Assignee, Date, and Time.
Deselect Tasks: The selected Tasks can be deselected using this option.
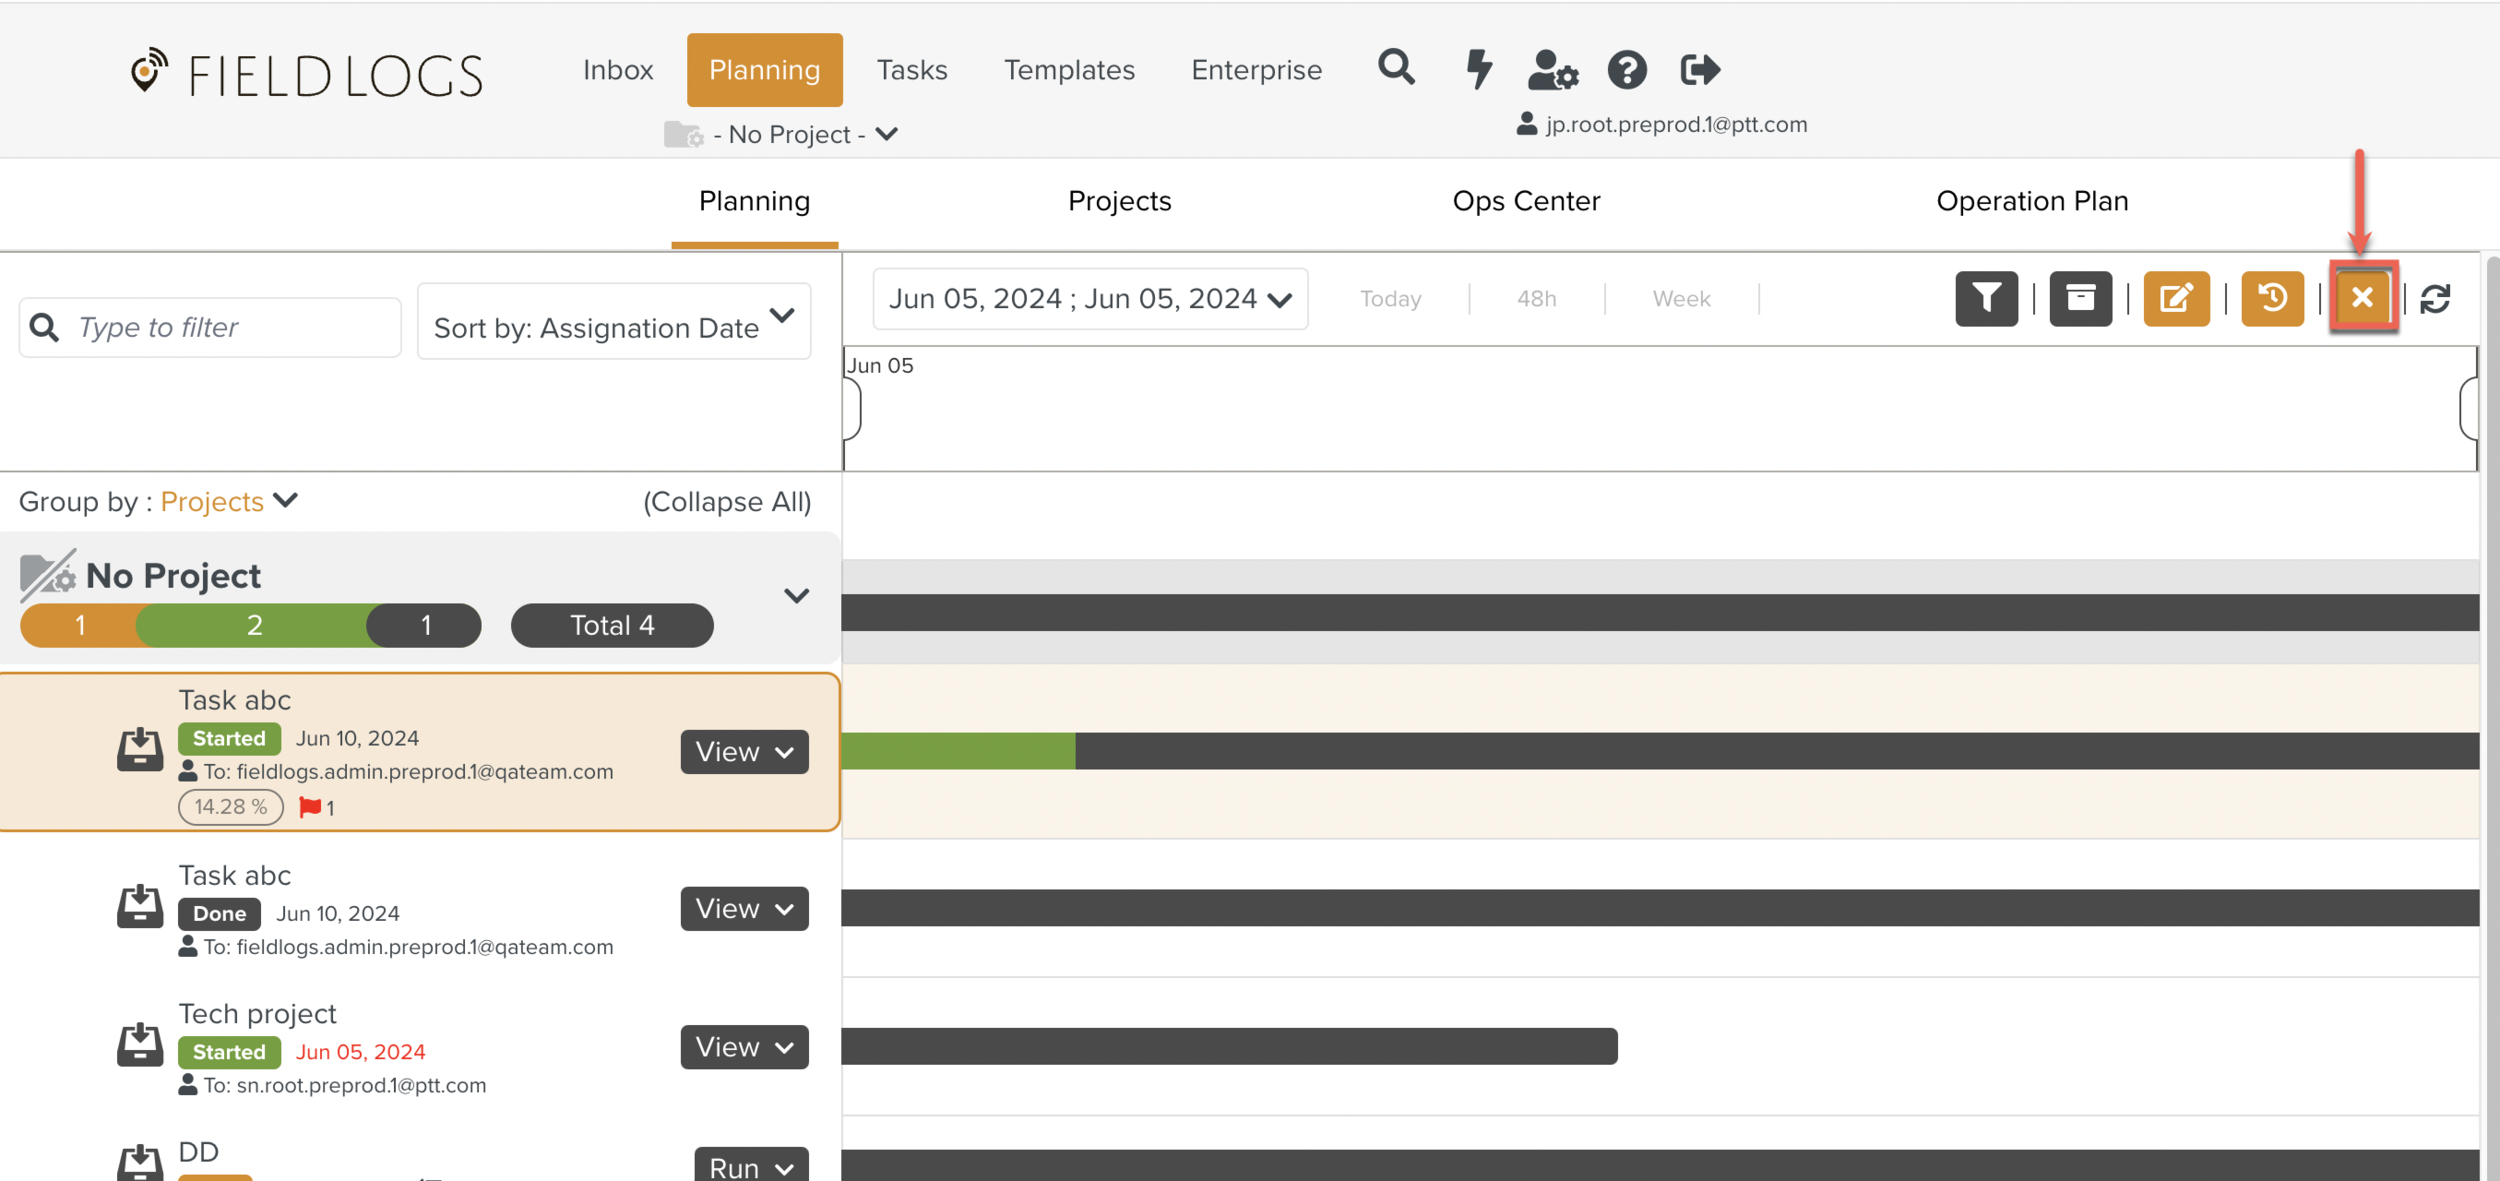
Refresh: Allows the user to refresh the Planning screen.
When two or more Tasks are selected, the actions available to the Planners are highlighted as shown below.
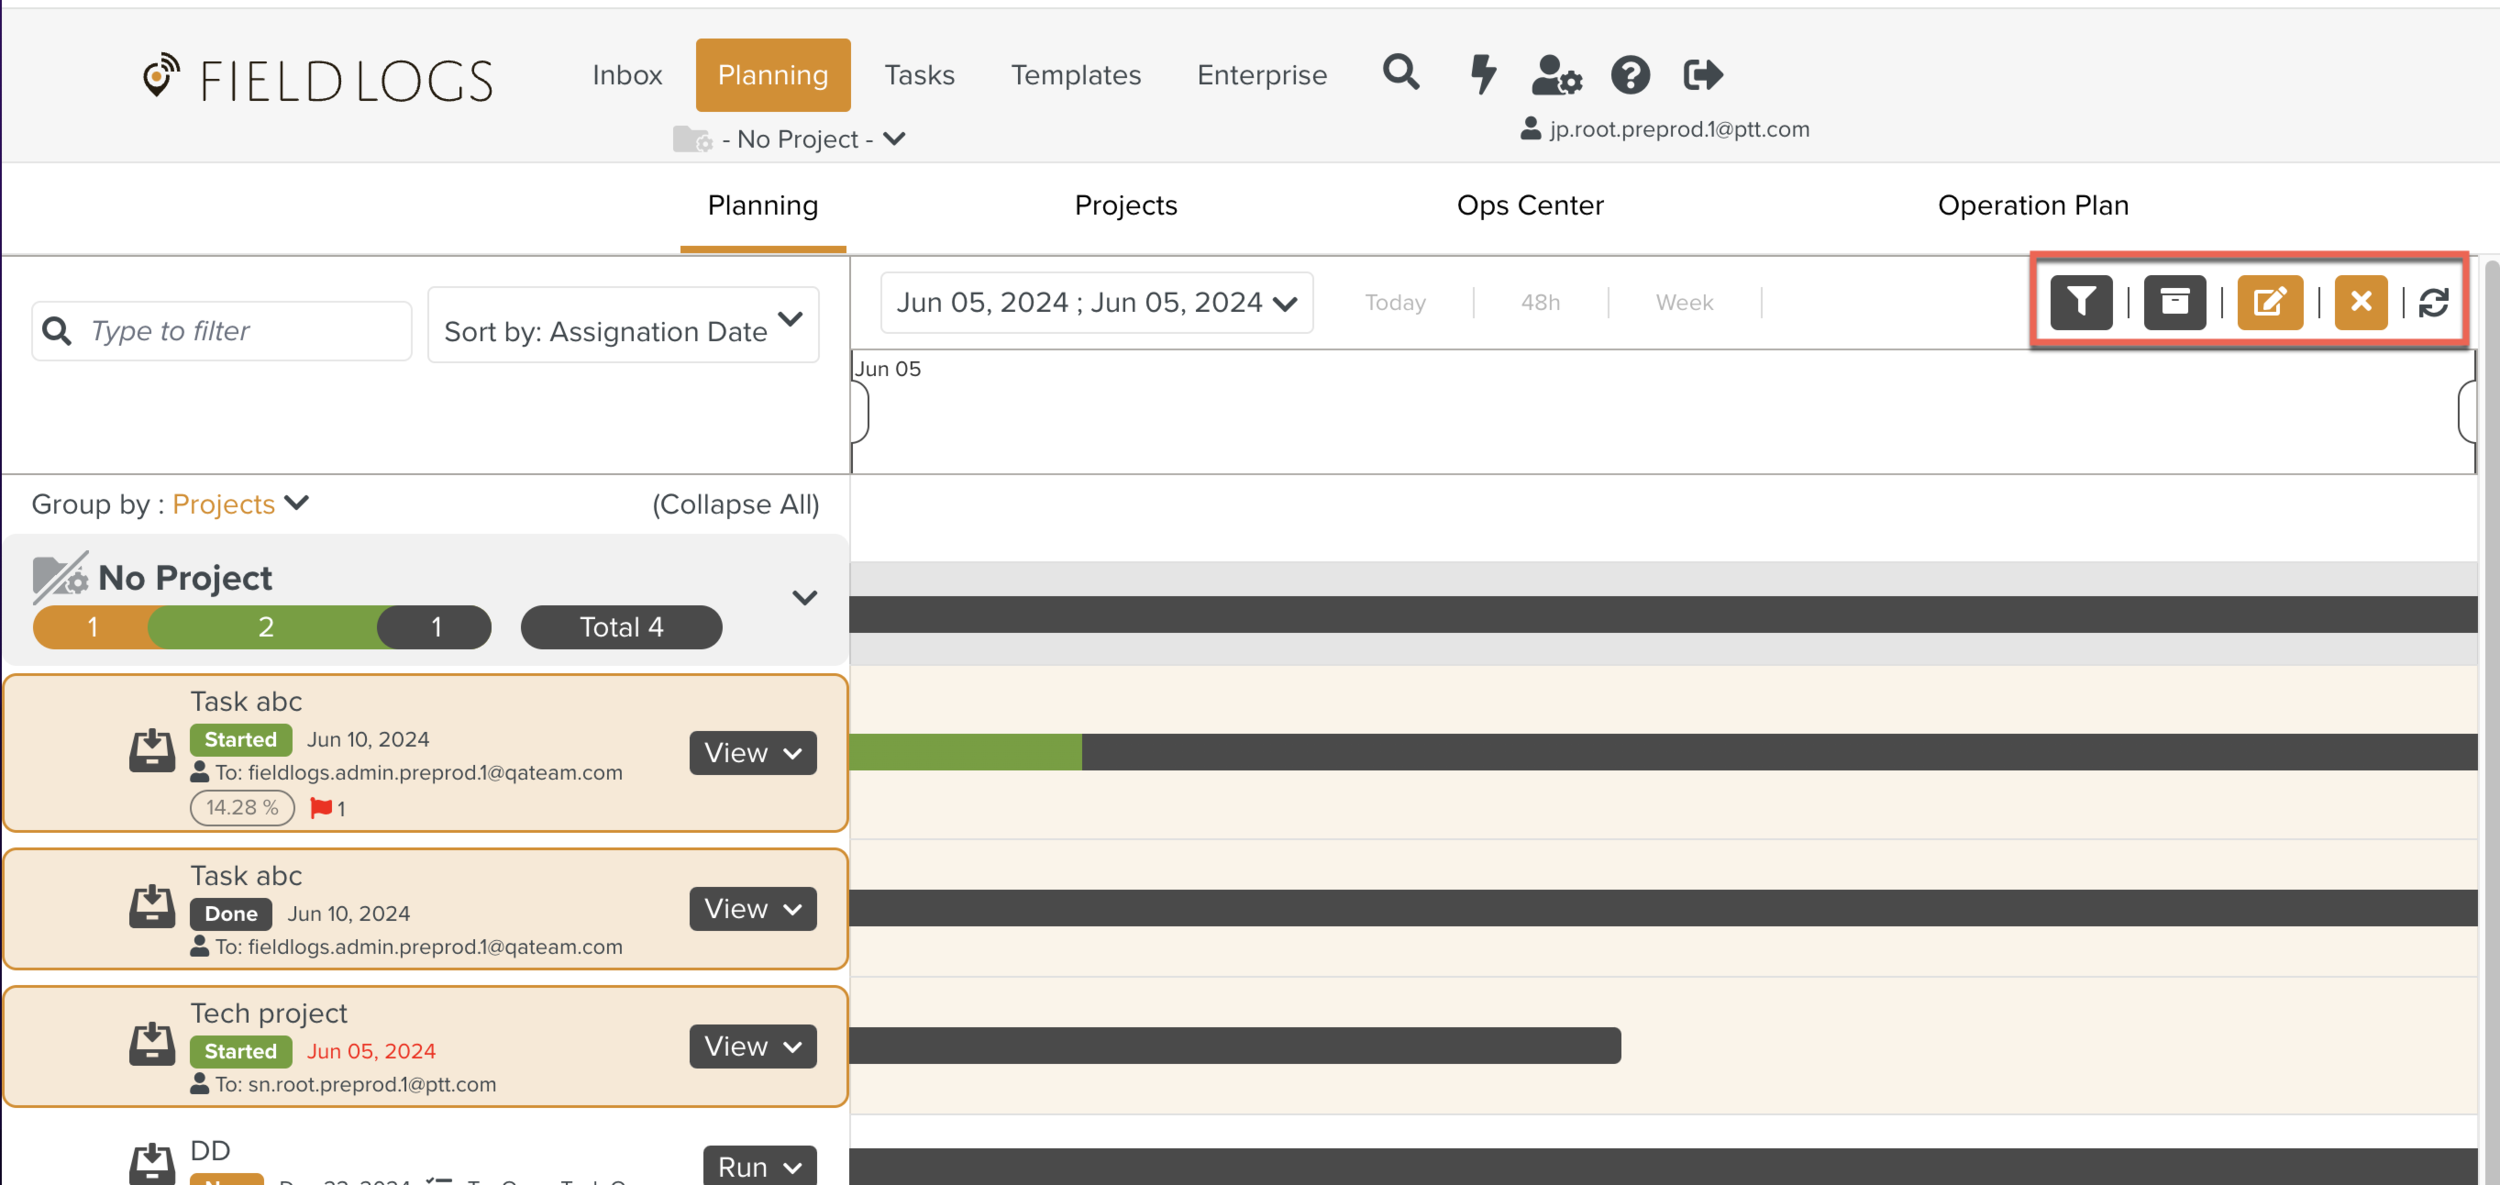
These are the actions available when two or more Tasks are selected.
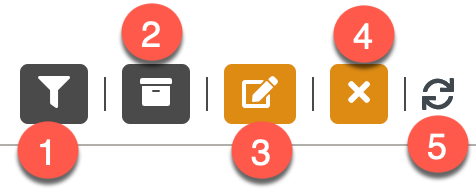 |
Task Filter Option: Allows the user to filter the Tasks based on criteria.
Archived Tasks : Allows the user to retrieve the Archived Tasks and Unarchive them.
Edit Tasks: Allows the user to edit the selected Tasks.
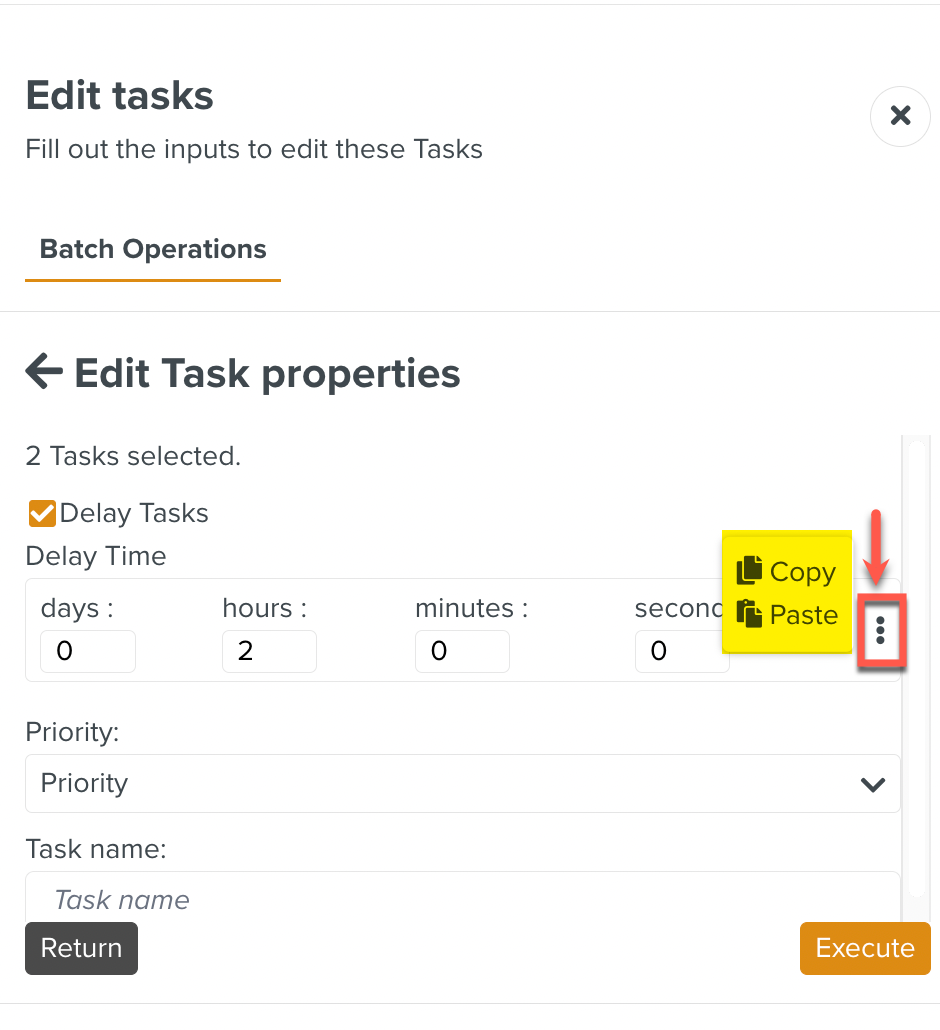
Editing Multiple Tasks is performed as a Batch Operation.
All the Batch Operations applicable to the selected Tasks are displayed.
In the below example, the three Batch Operations applicable are highlighted.
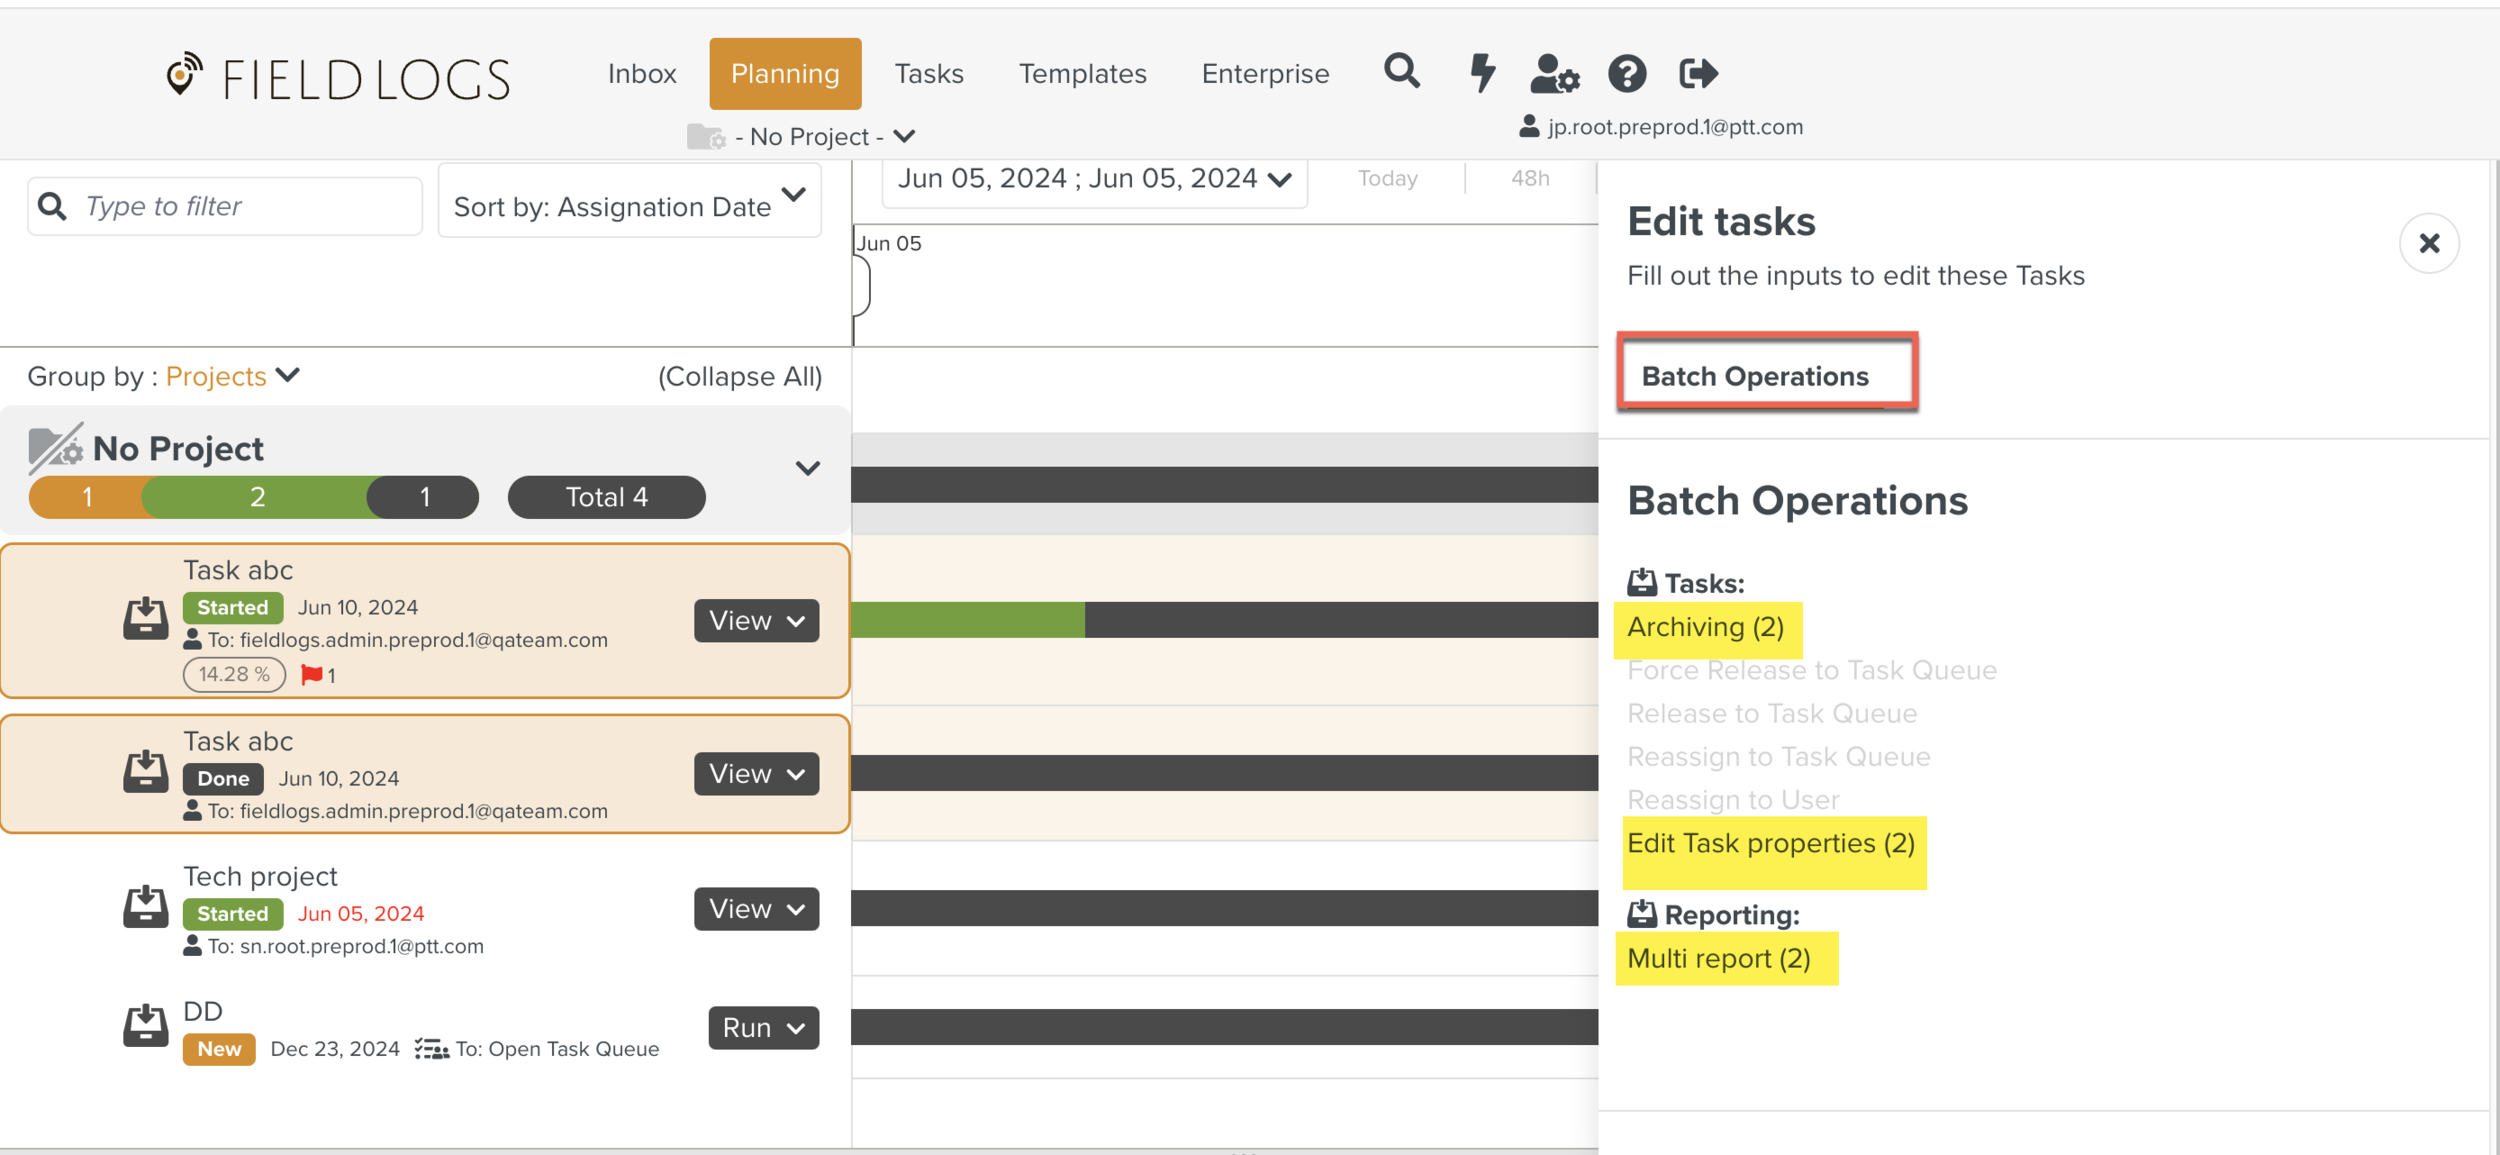
Archiving : Allows the user to archive the selected Tasks.
Edit Task properties: Allows the user to edit the following options:
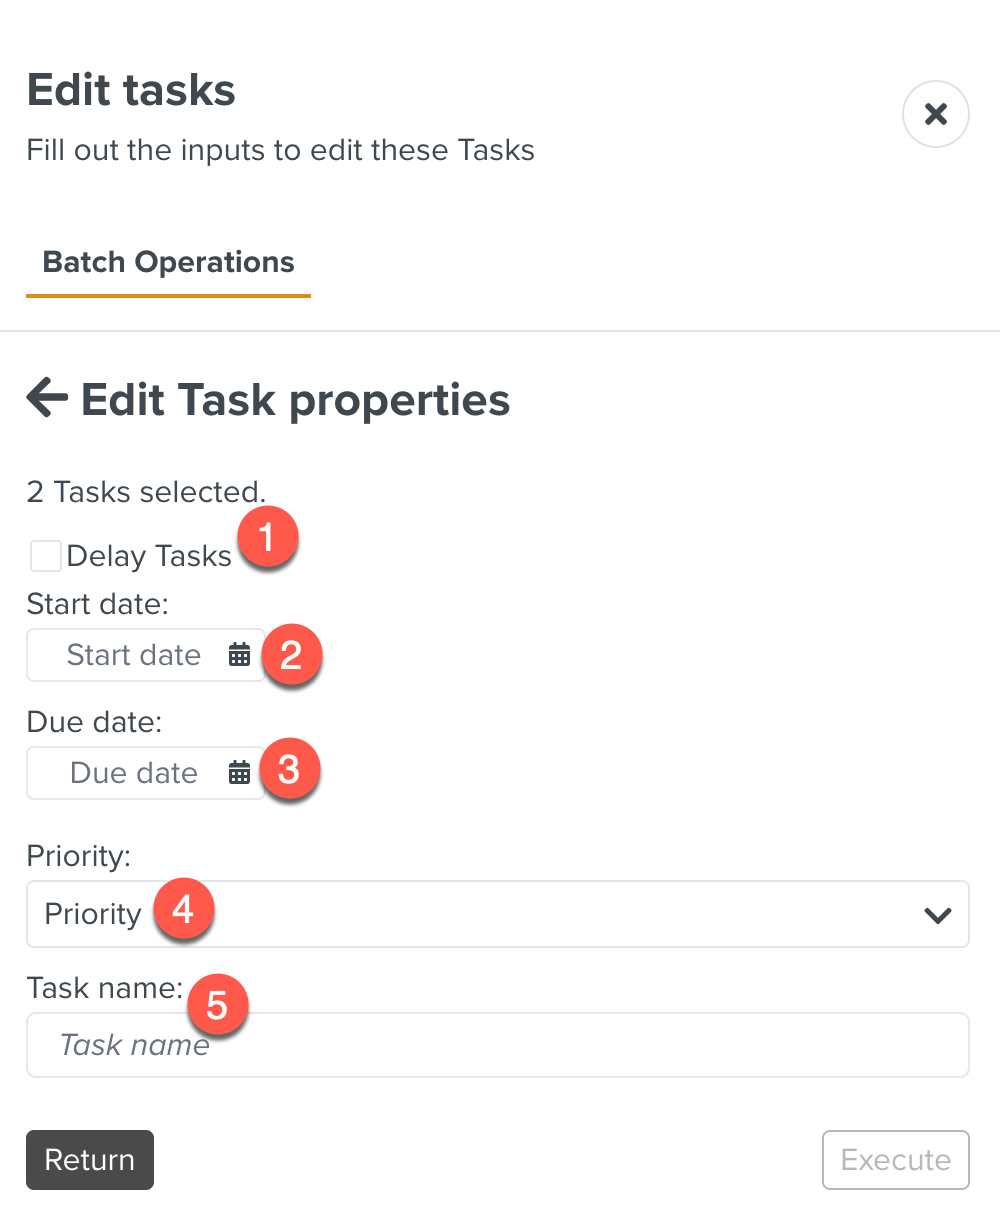
Delay Tasks: Allows the user to delay the selected Task and set the delay.
Start and Due date are offset by delay.
When the Delay Tasks option is checked, the Delay Time appears.
Delay Time: Specifies the Time Delay to be applied to the Start date.
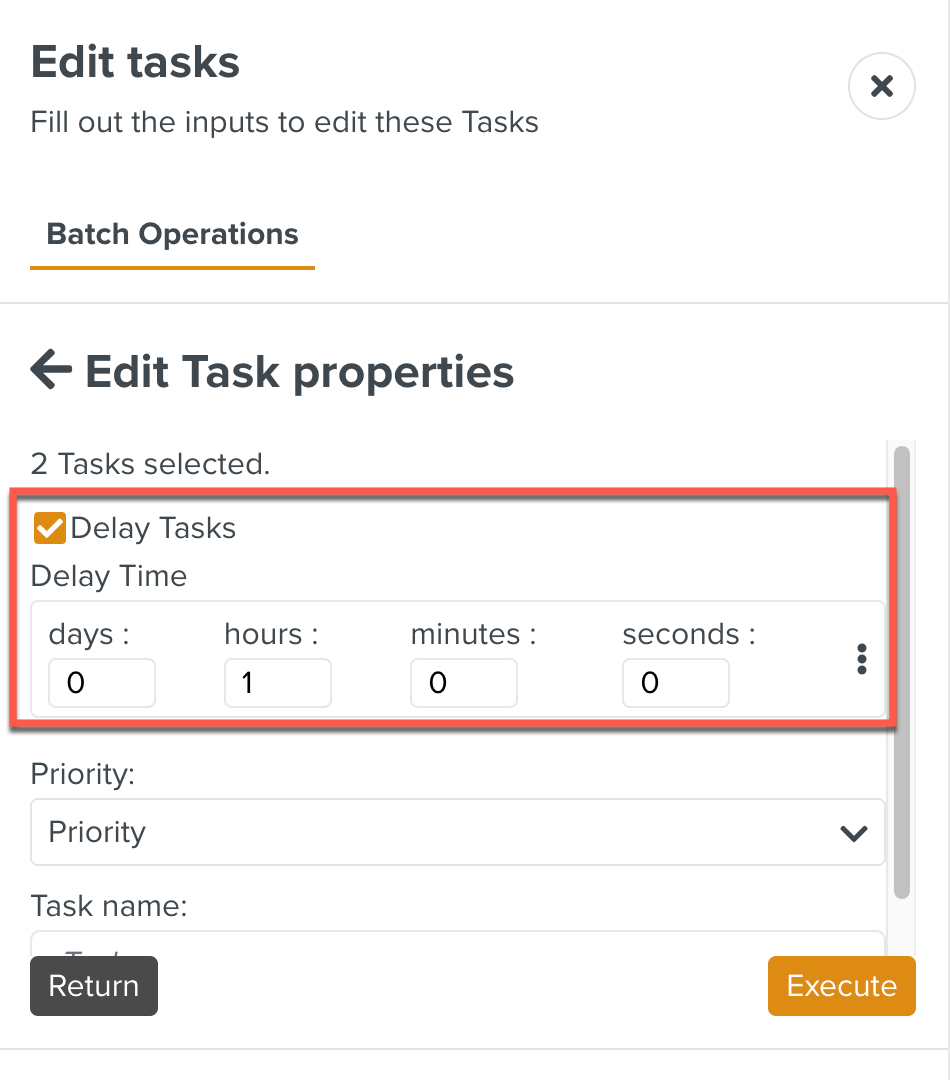
By using Copy and Paste options, you can Copy the Delay time from one Task and Paste it onto another.
Start date
Due date
Priority
Task name
Multi report: Allows the user to generate reports for the selected Tasks.
Deselect Tasks: The selected Tasks can be deselected using this option.

Refresh: Allows the user to refresh the Planning screen.
When an Operation Plan is selected, the actions available to the Planners are highlighted as shown below.
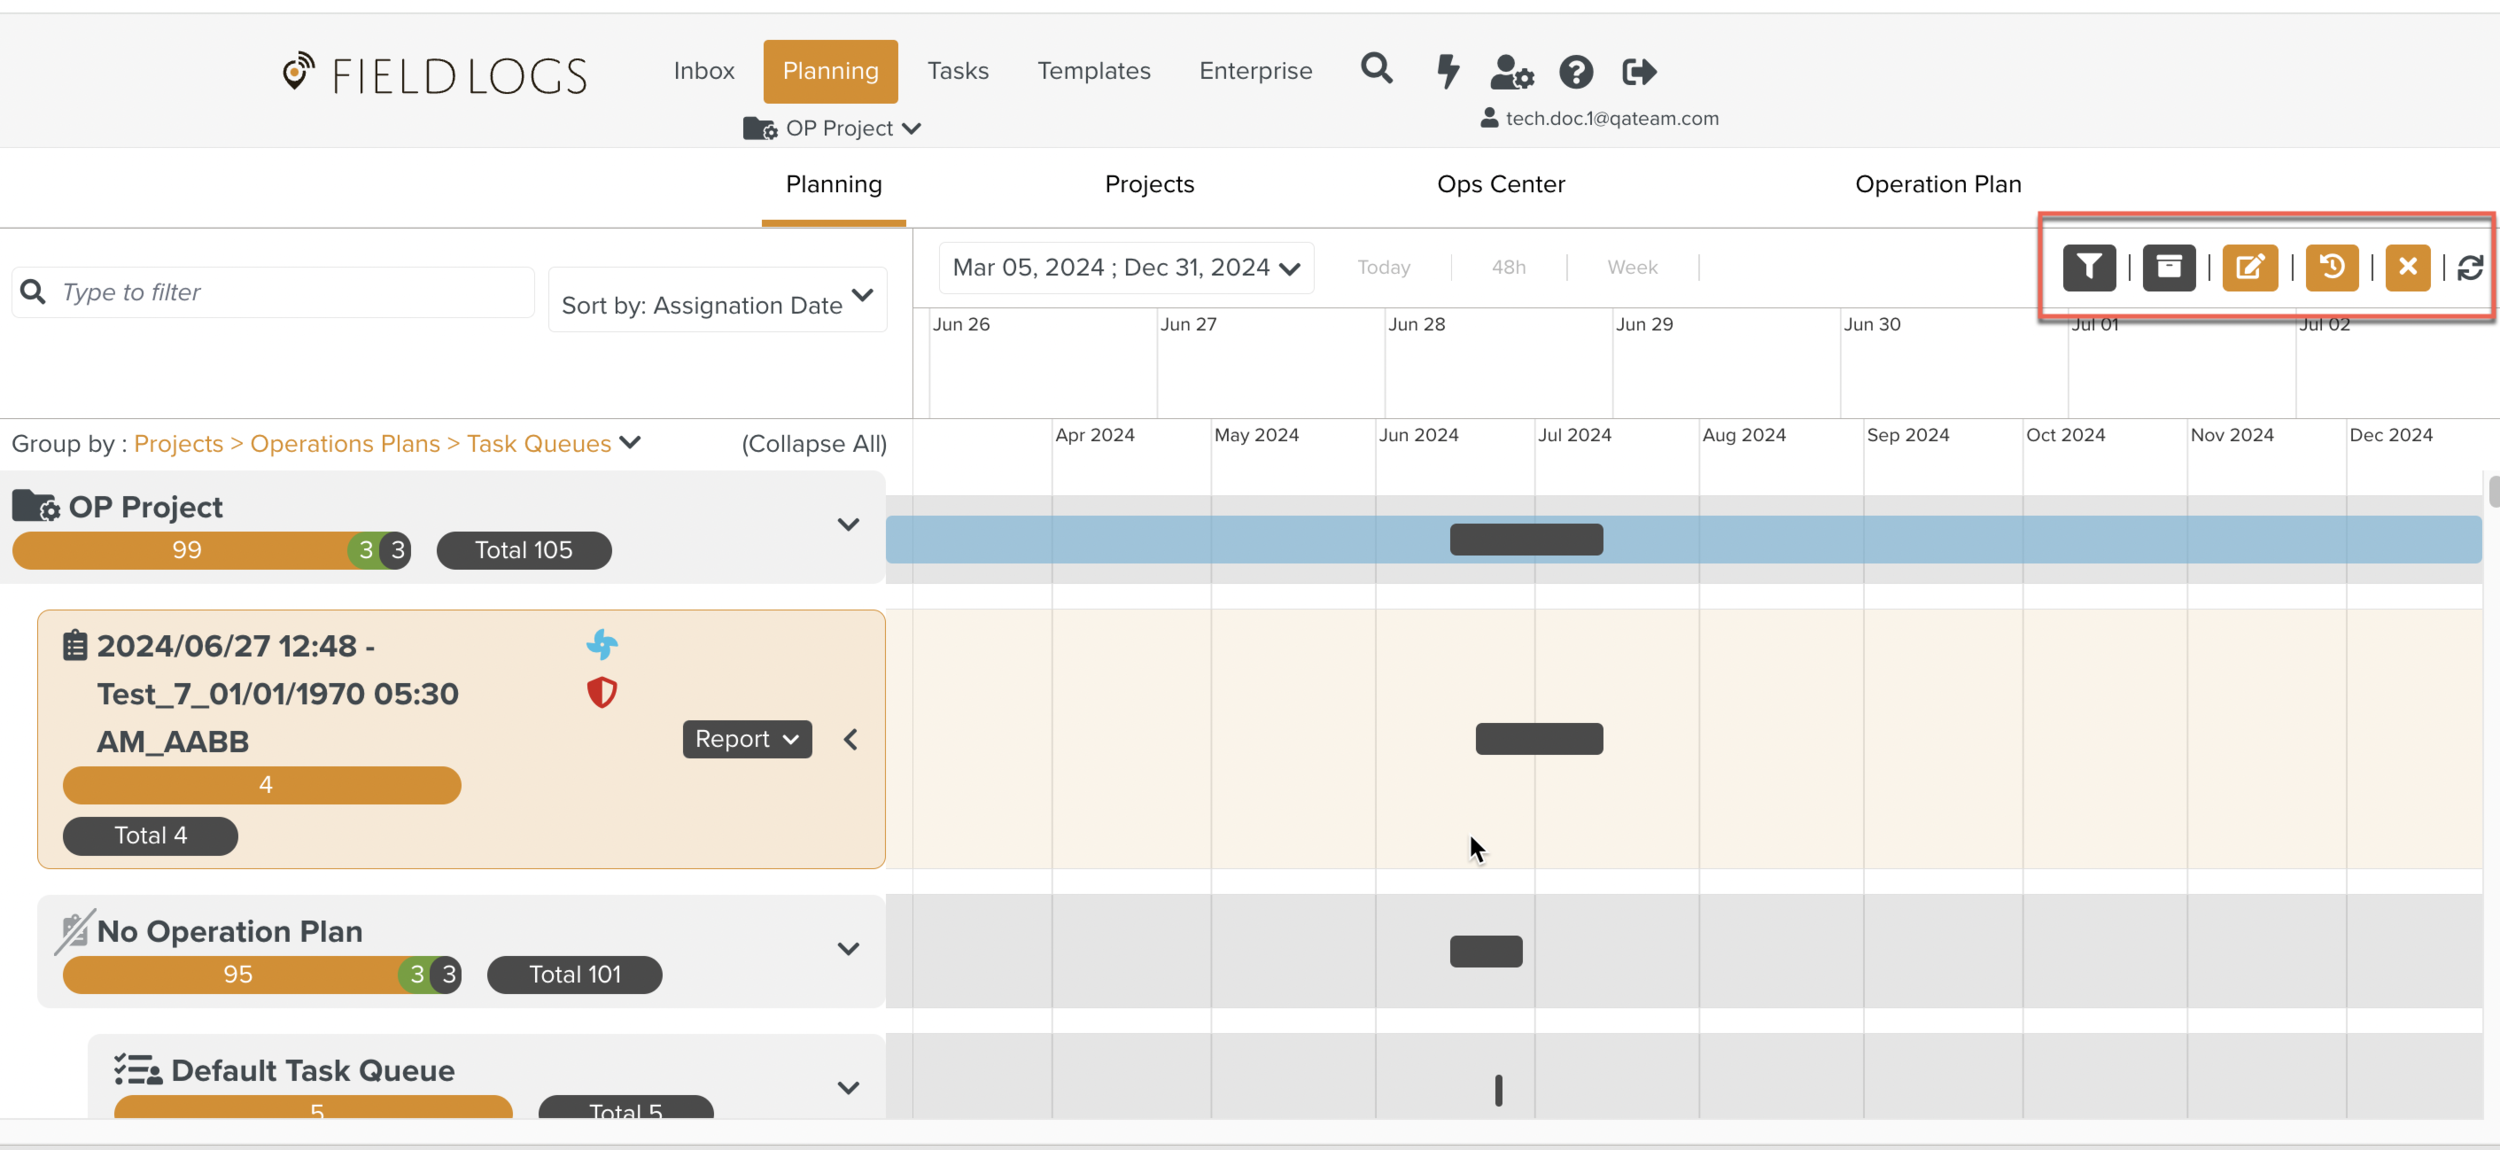
These are the options available on the right hand side of the screen.
 |
Task Filter Option: Allows the user to filter the Tasks based on criteria.
Archived Tasks : Allows the user to retrieve the Archived Tasks and Unarchive them.
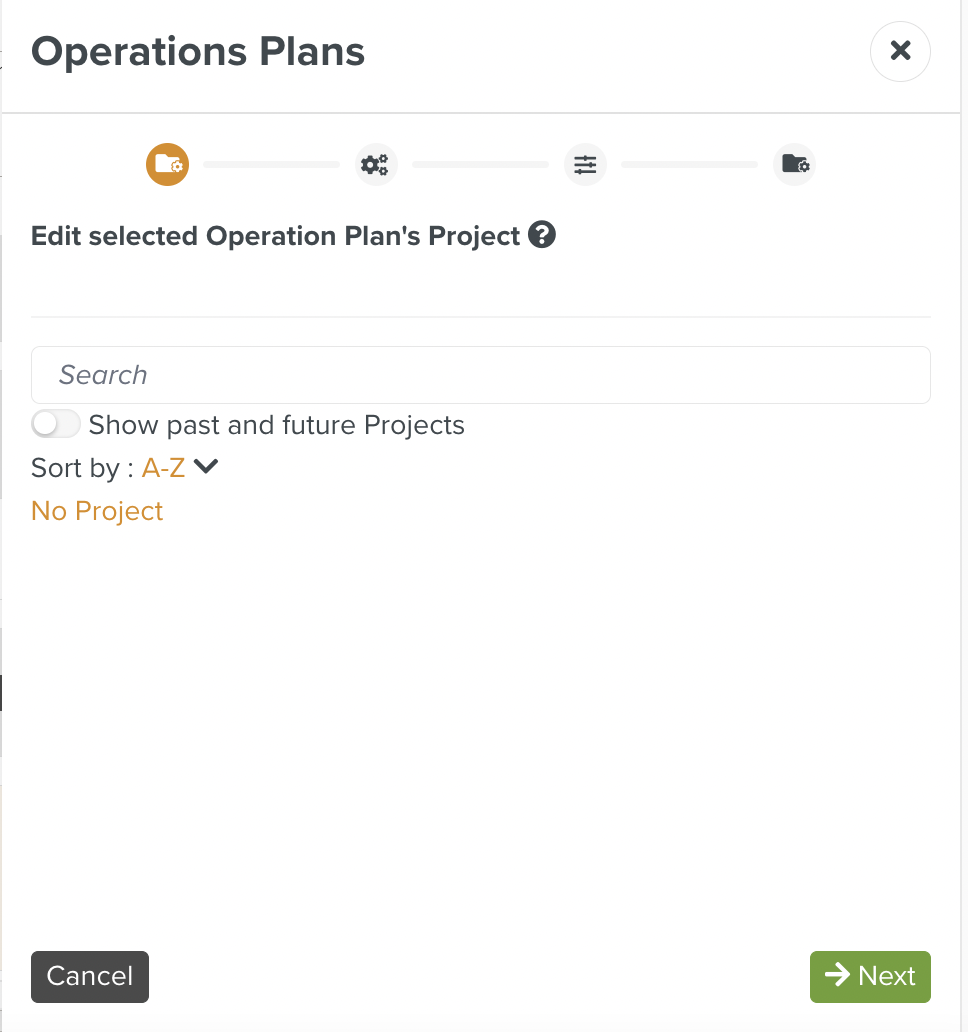
Edit an Operation Plan: Allows the user to edit the selected Operation Plan.
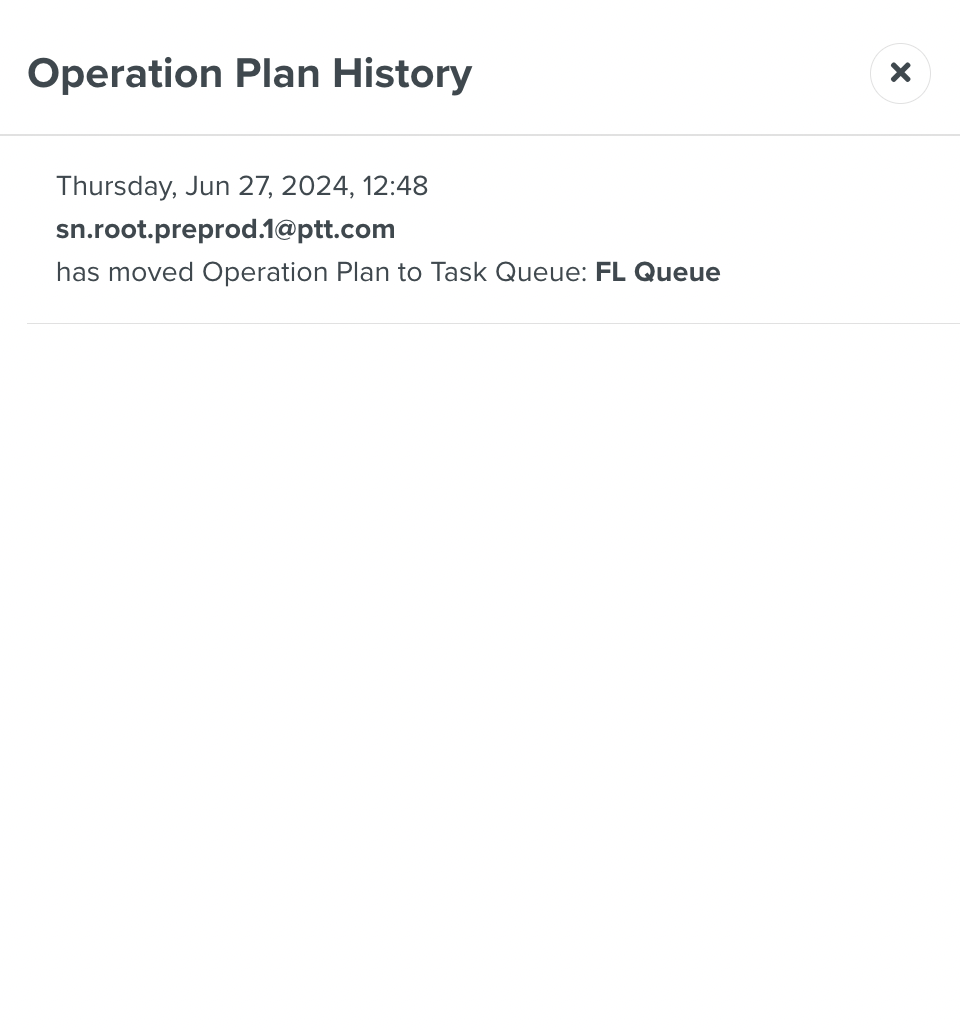
See History: Allows the user to see the history of the Operation Plan with the Day, Date,Time, Task Queue and with the user name.
Refresh: Allows the user to refresh the Planning screen.
You can also generate Reports pertaining to an Operation Plan using the button.
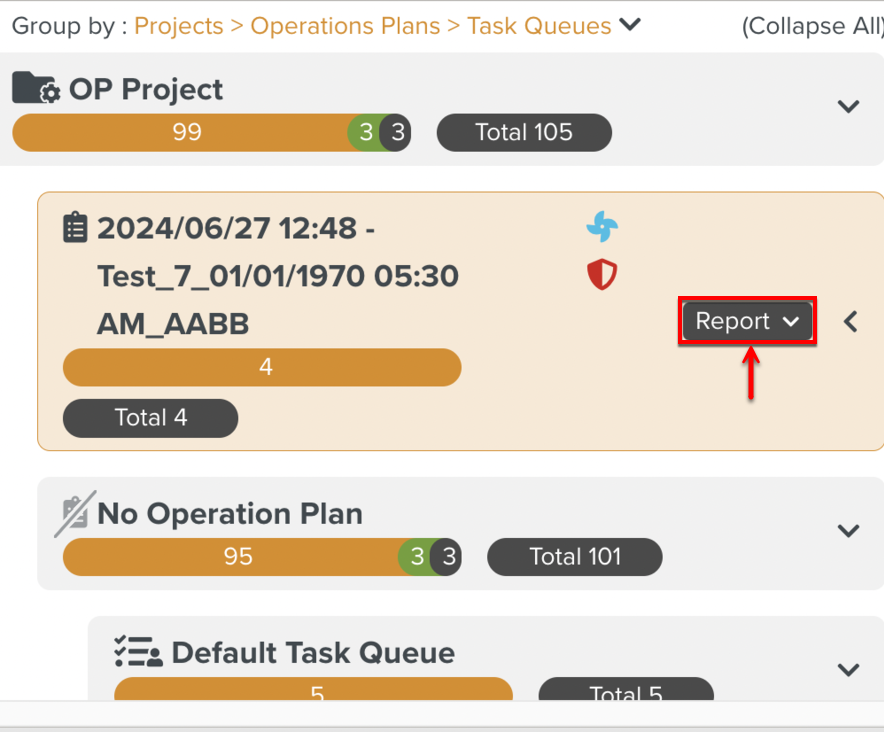 |
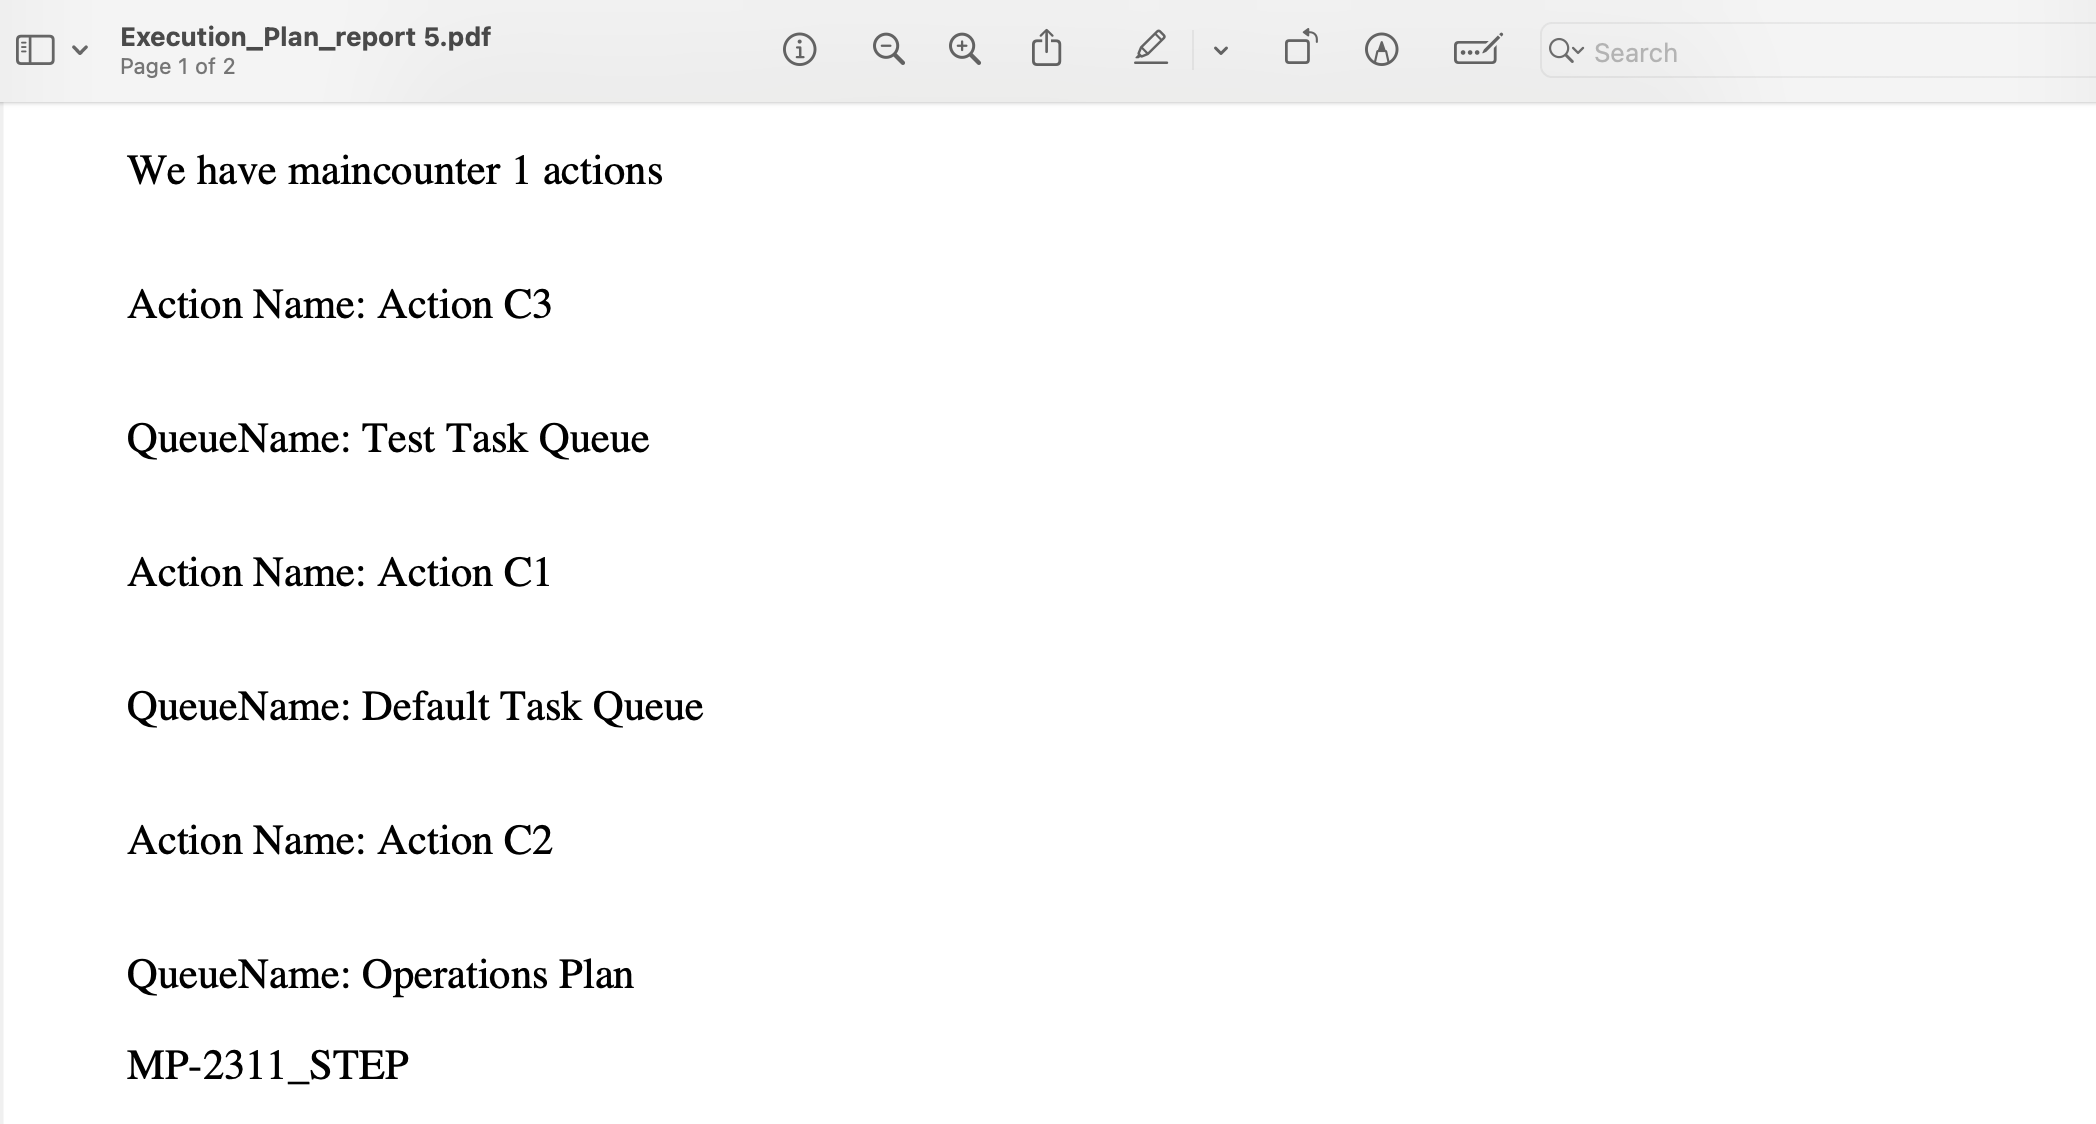
You can generate Reports pertaining to Operation Plan Executions. Information such as ID, Creation date, Name, Description, Description, list of Counters, data of each Counter, Actions inside the Counters, and Variables can be presented in the Reports generated. This information could vary depending on the Report Model used.
This option of generating Reports is available only when the Tasks are grouped by Operation Plans.
To generate a Report from the section Planning:
From the main menu, go to > .
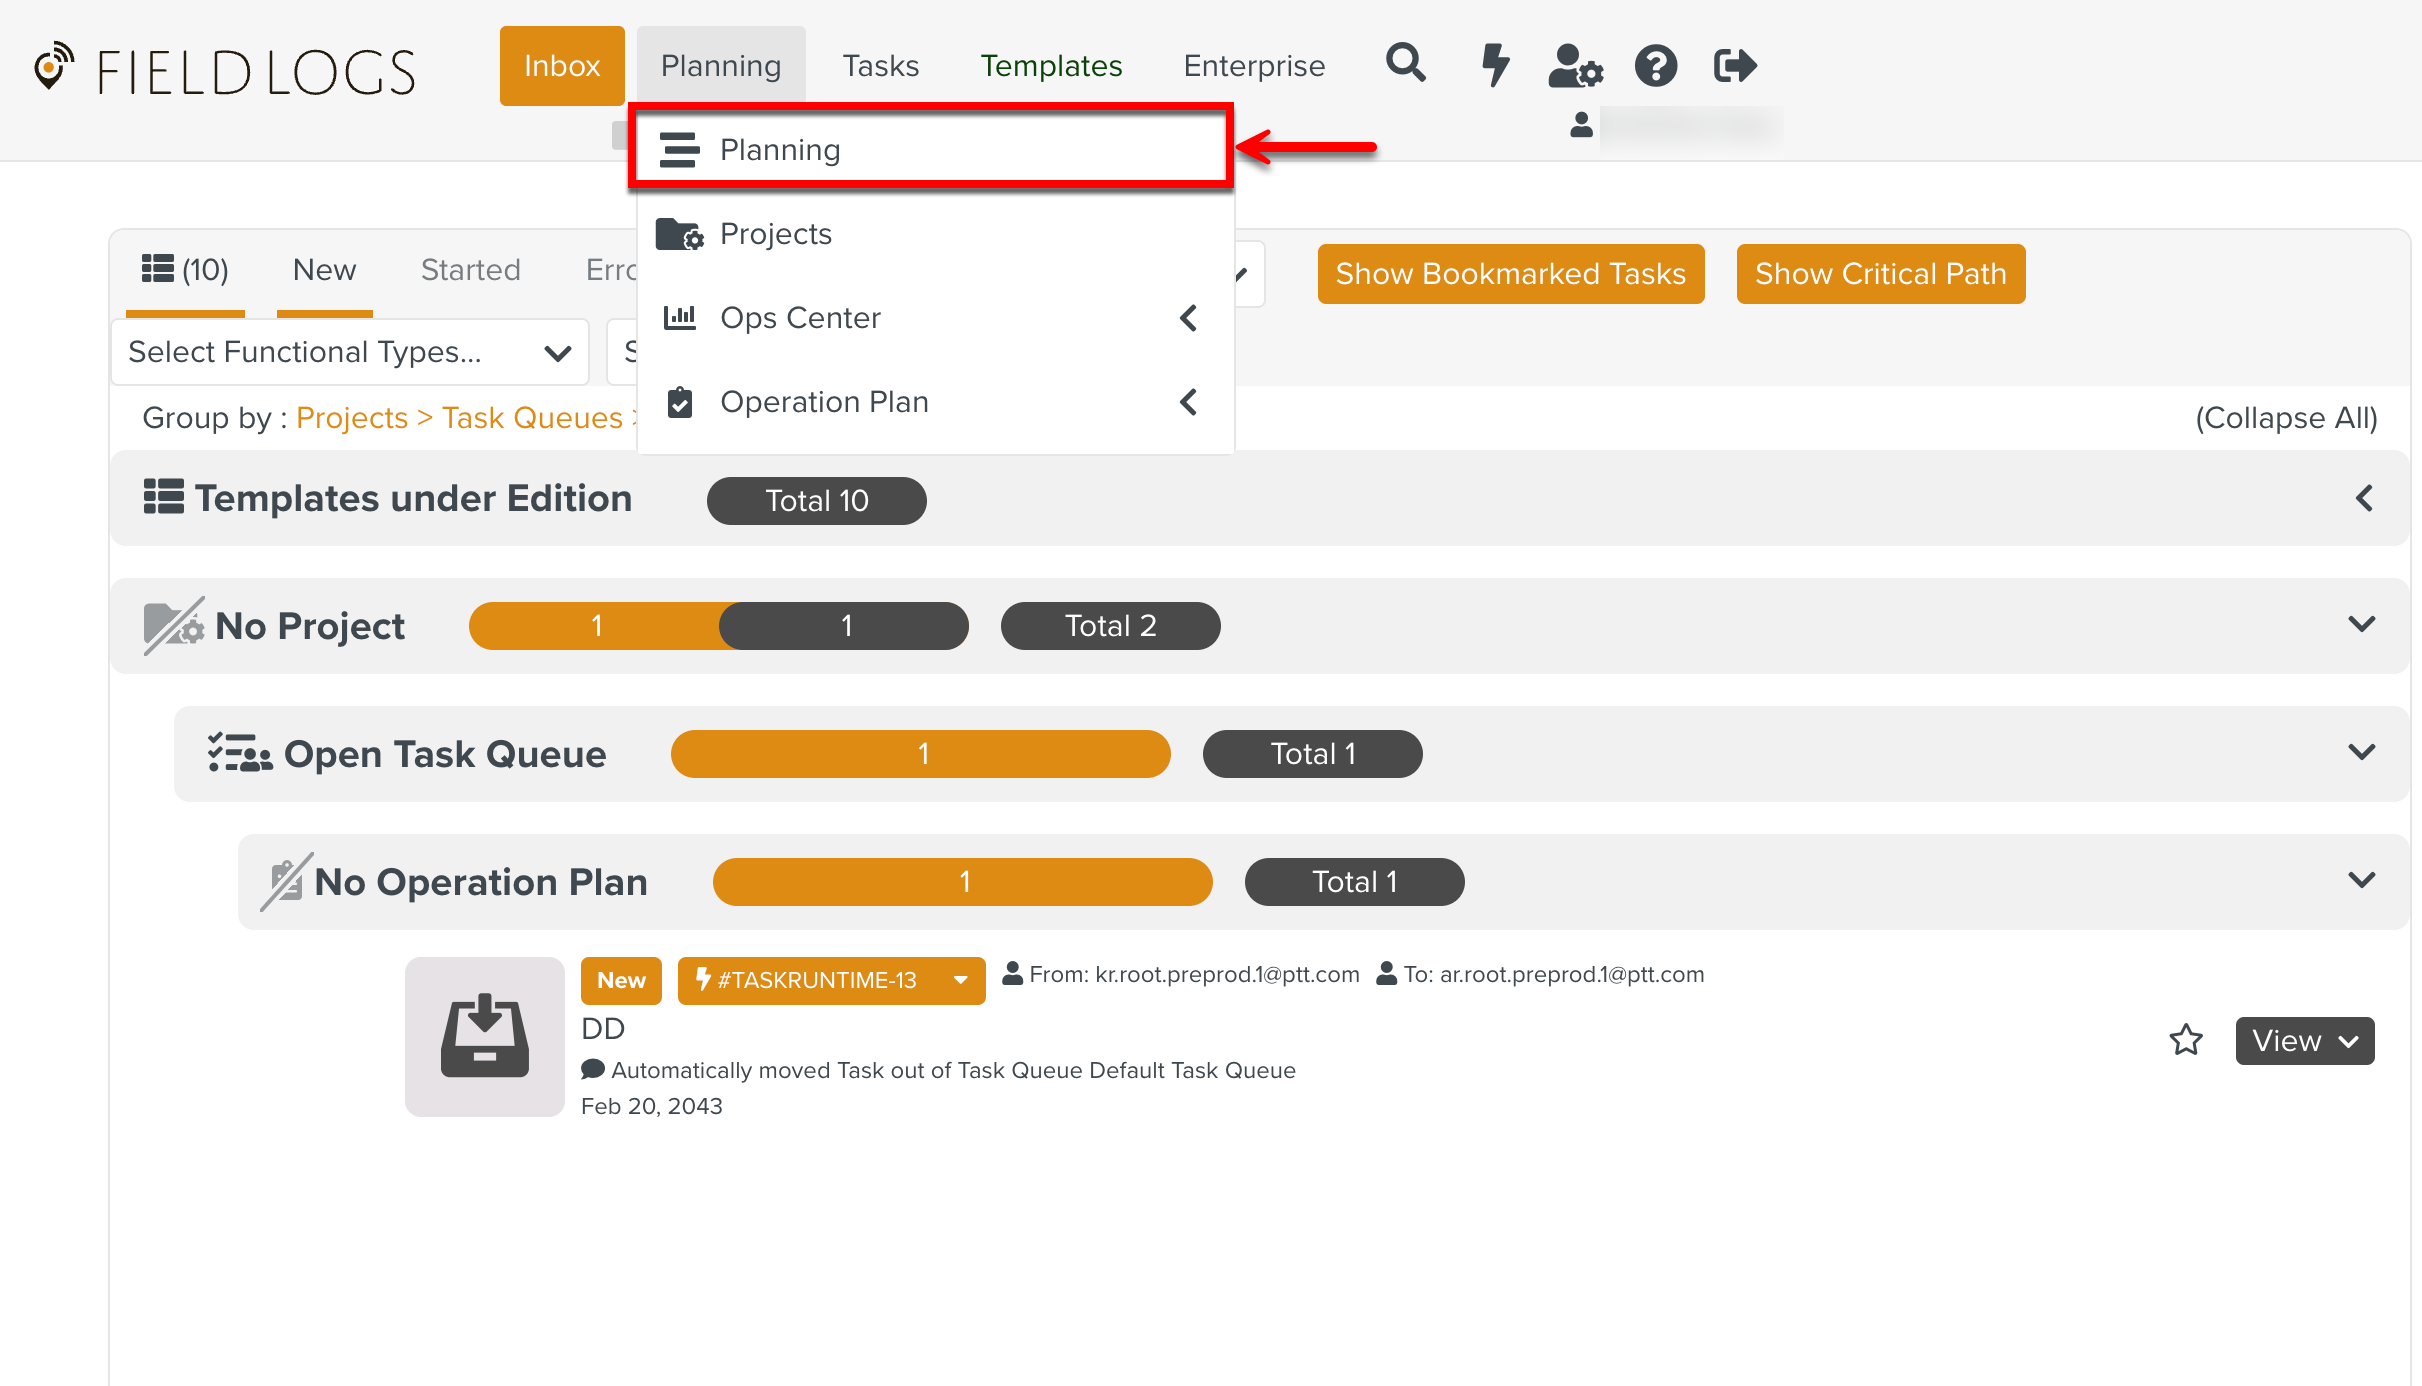
The page Planning opens.
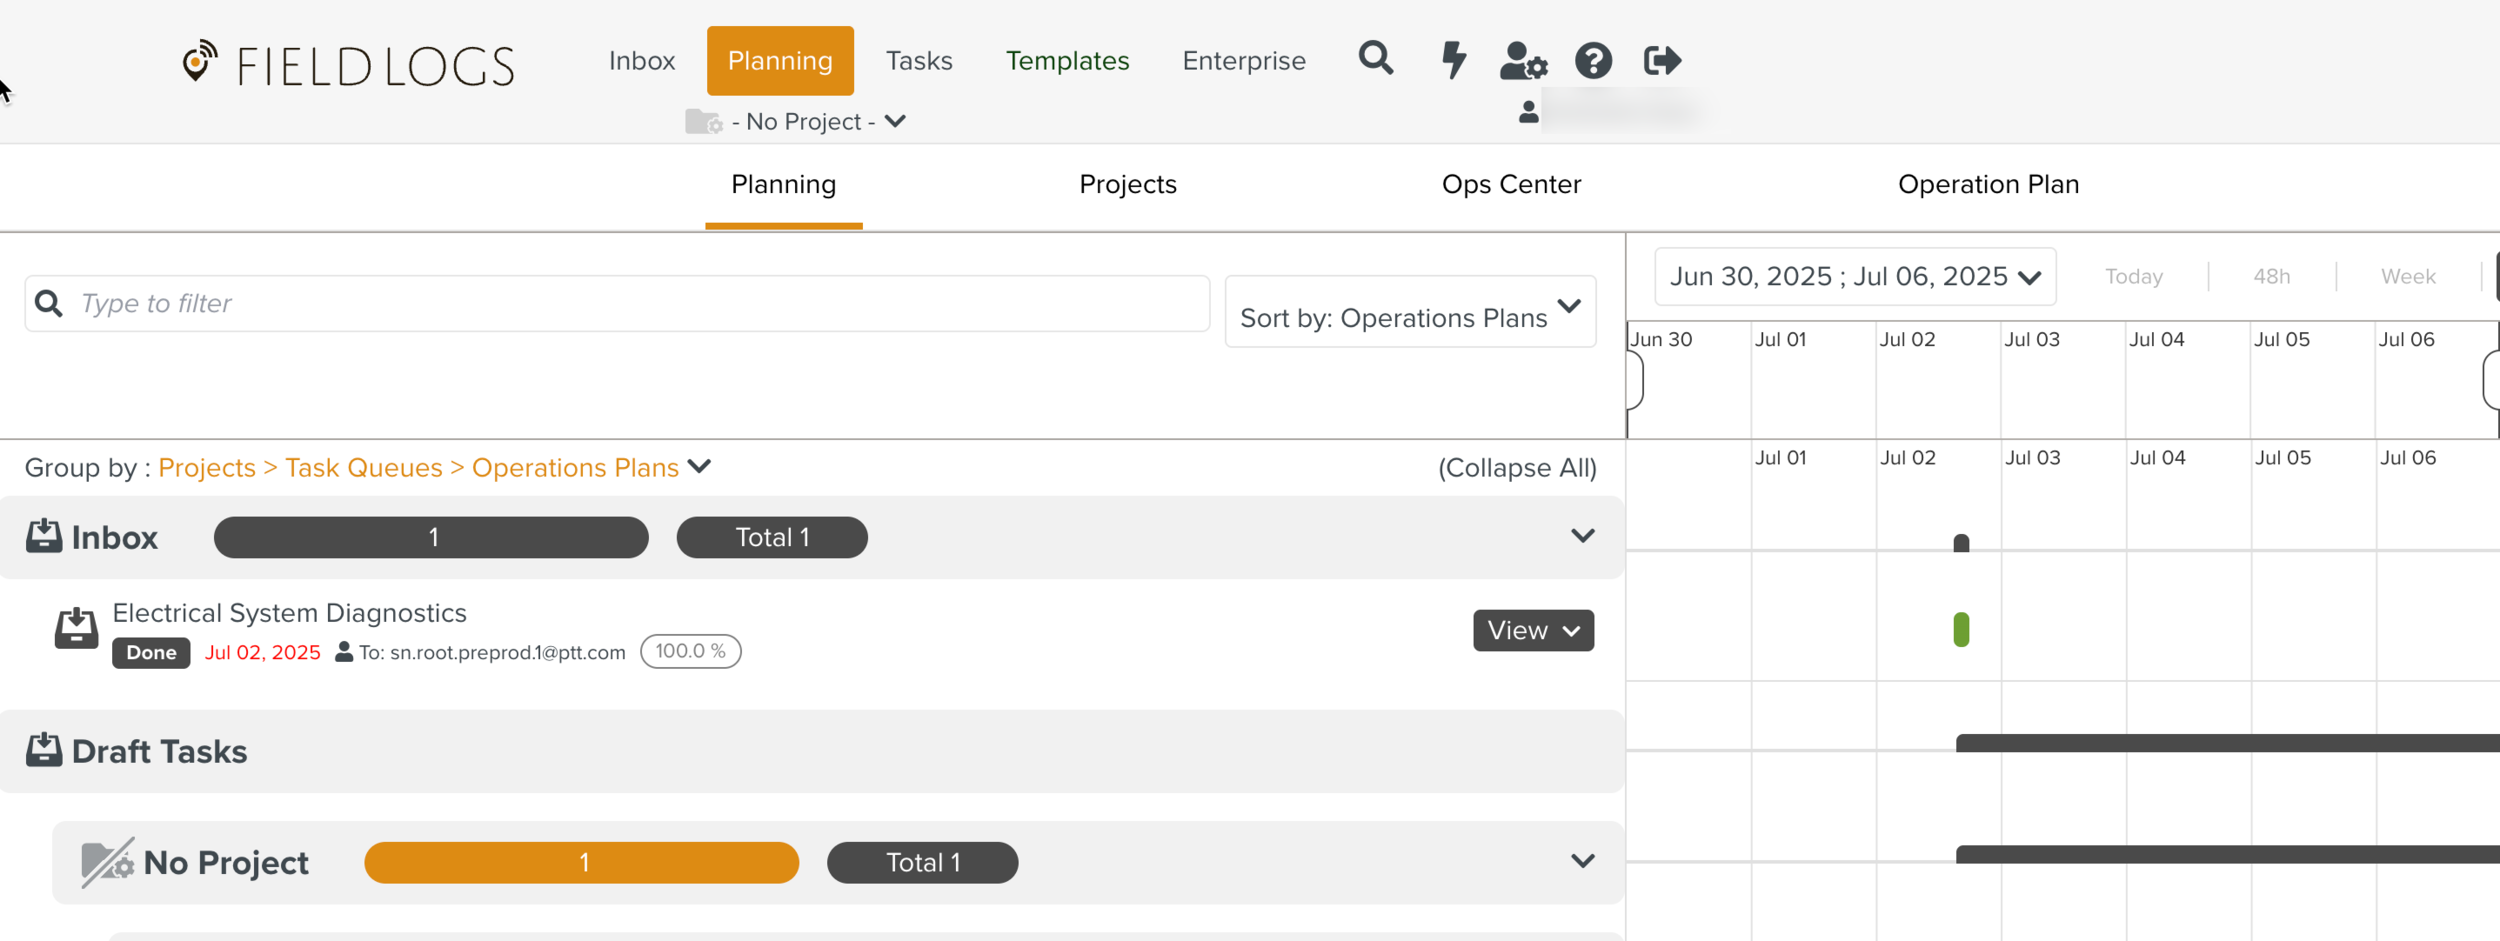
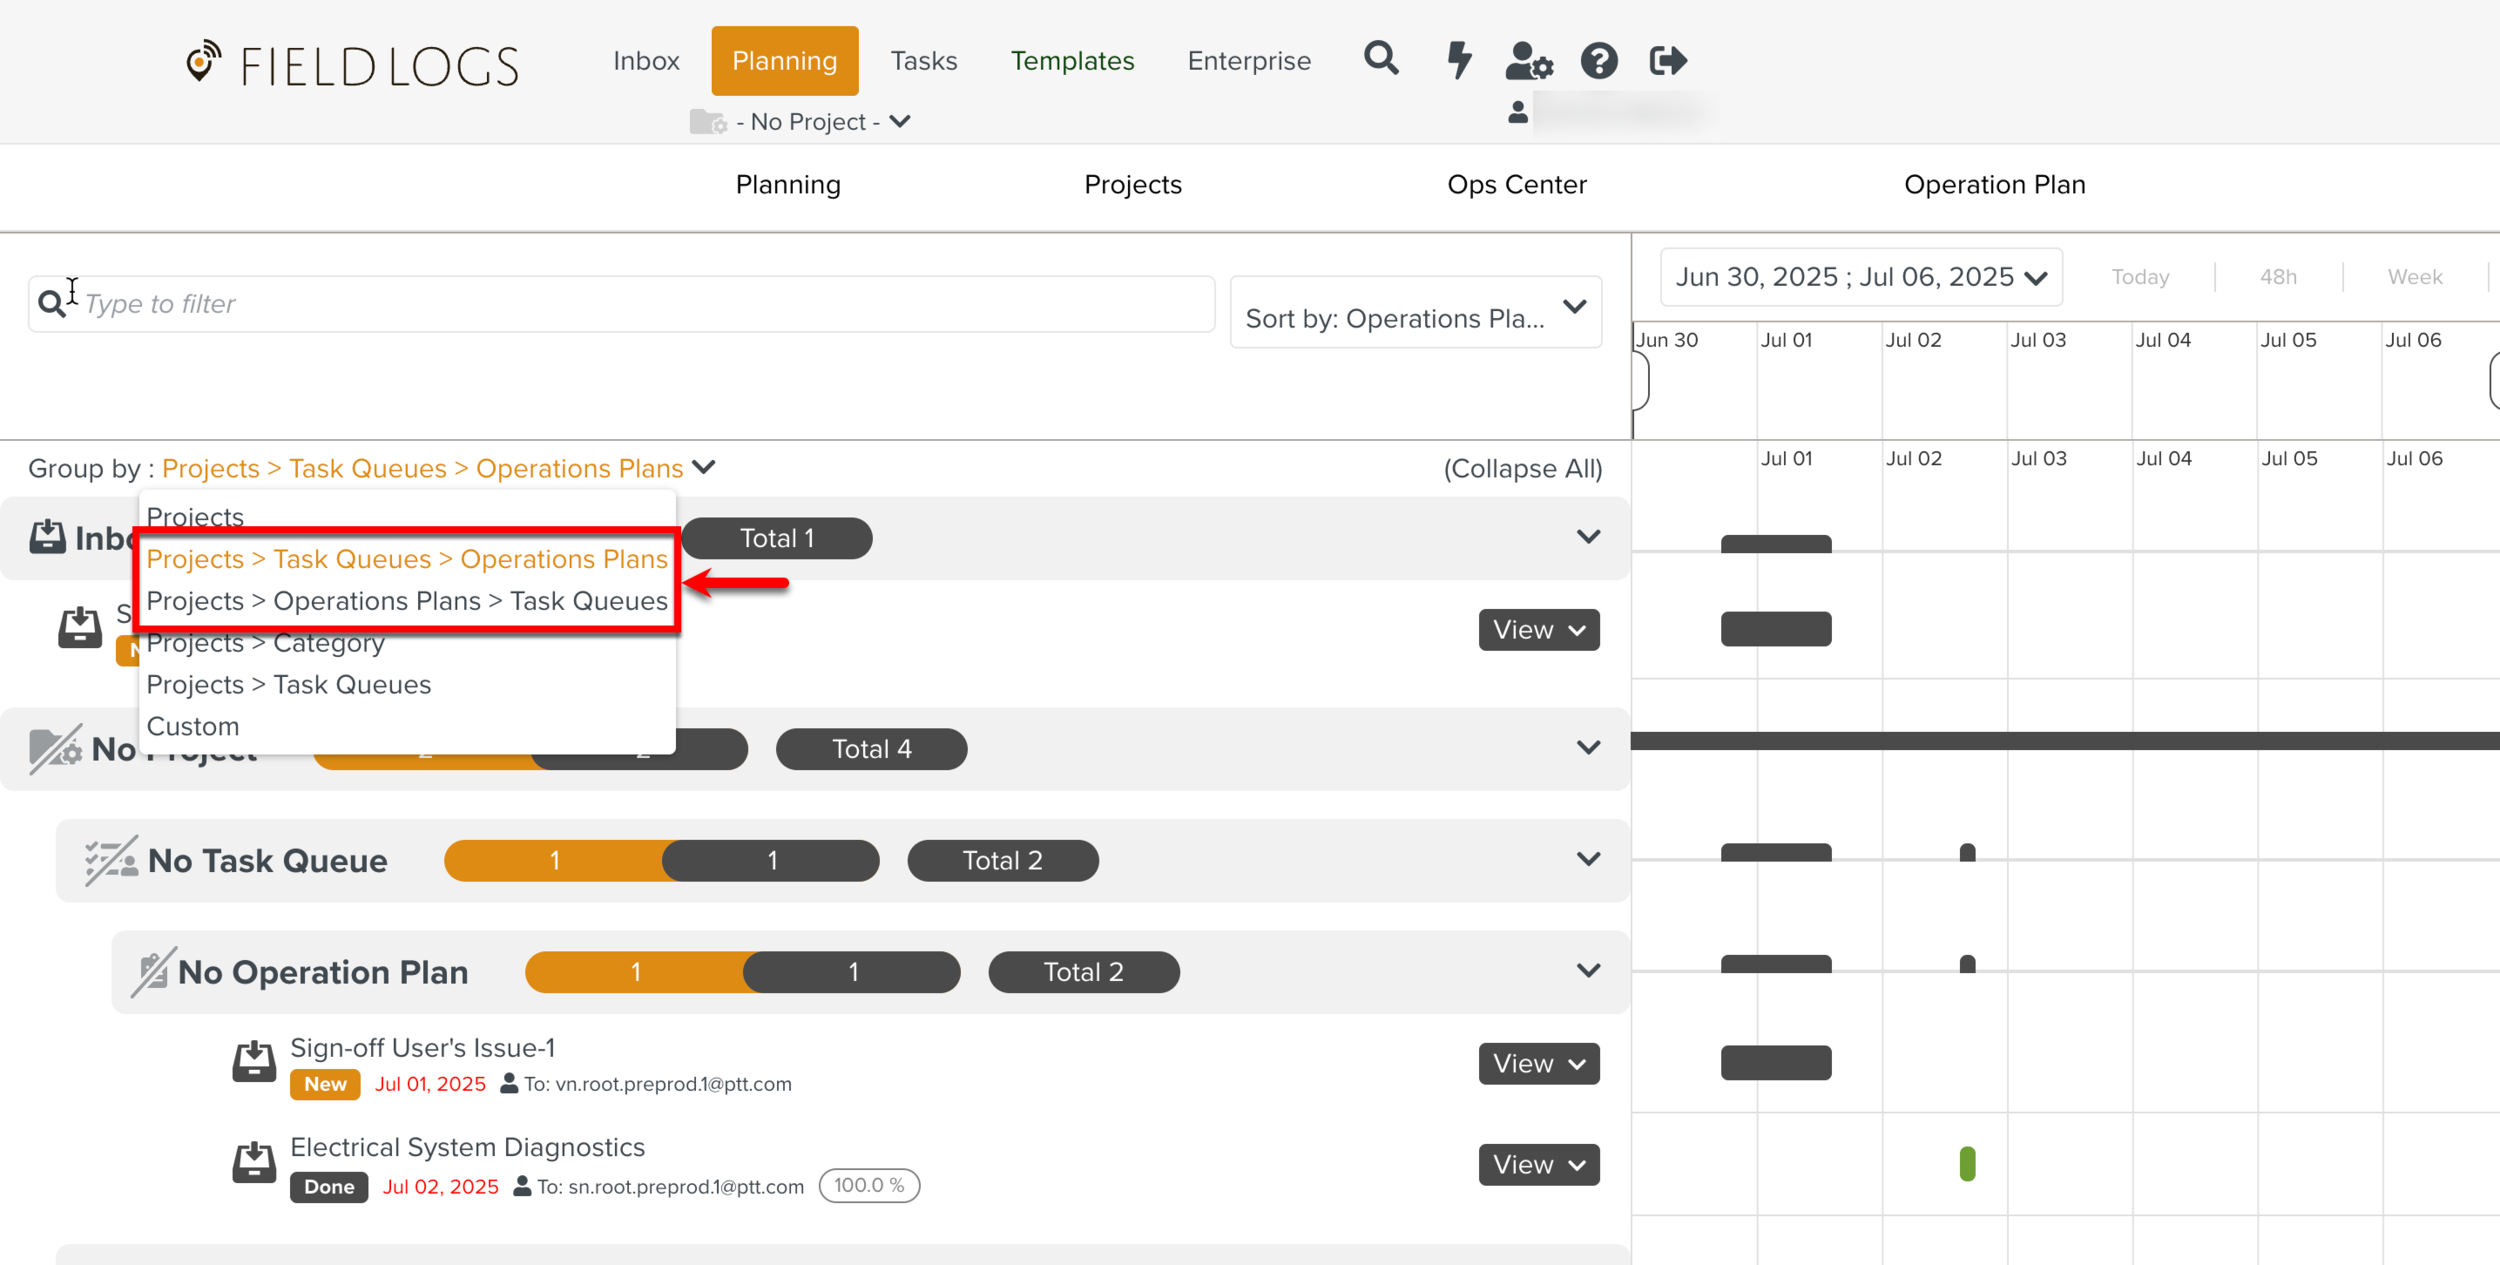
Expand the Group by dropdown and select any one of the below highlighted options to group the Tasks by Operation Plans.
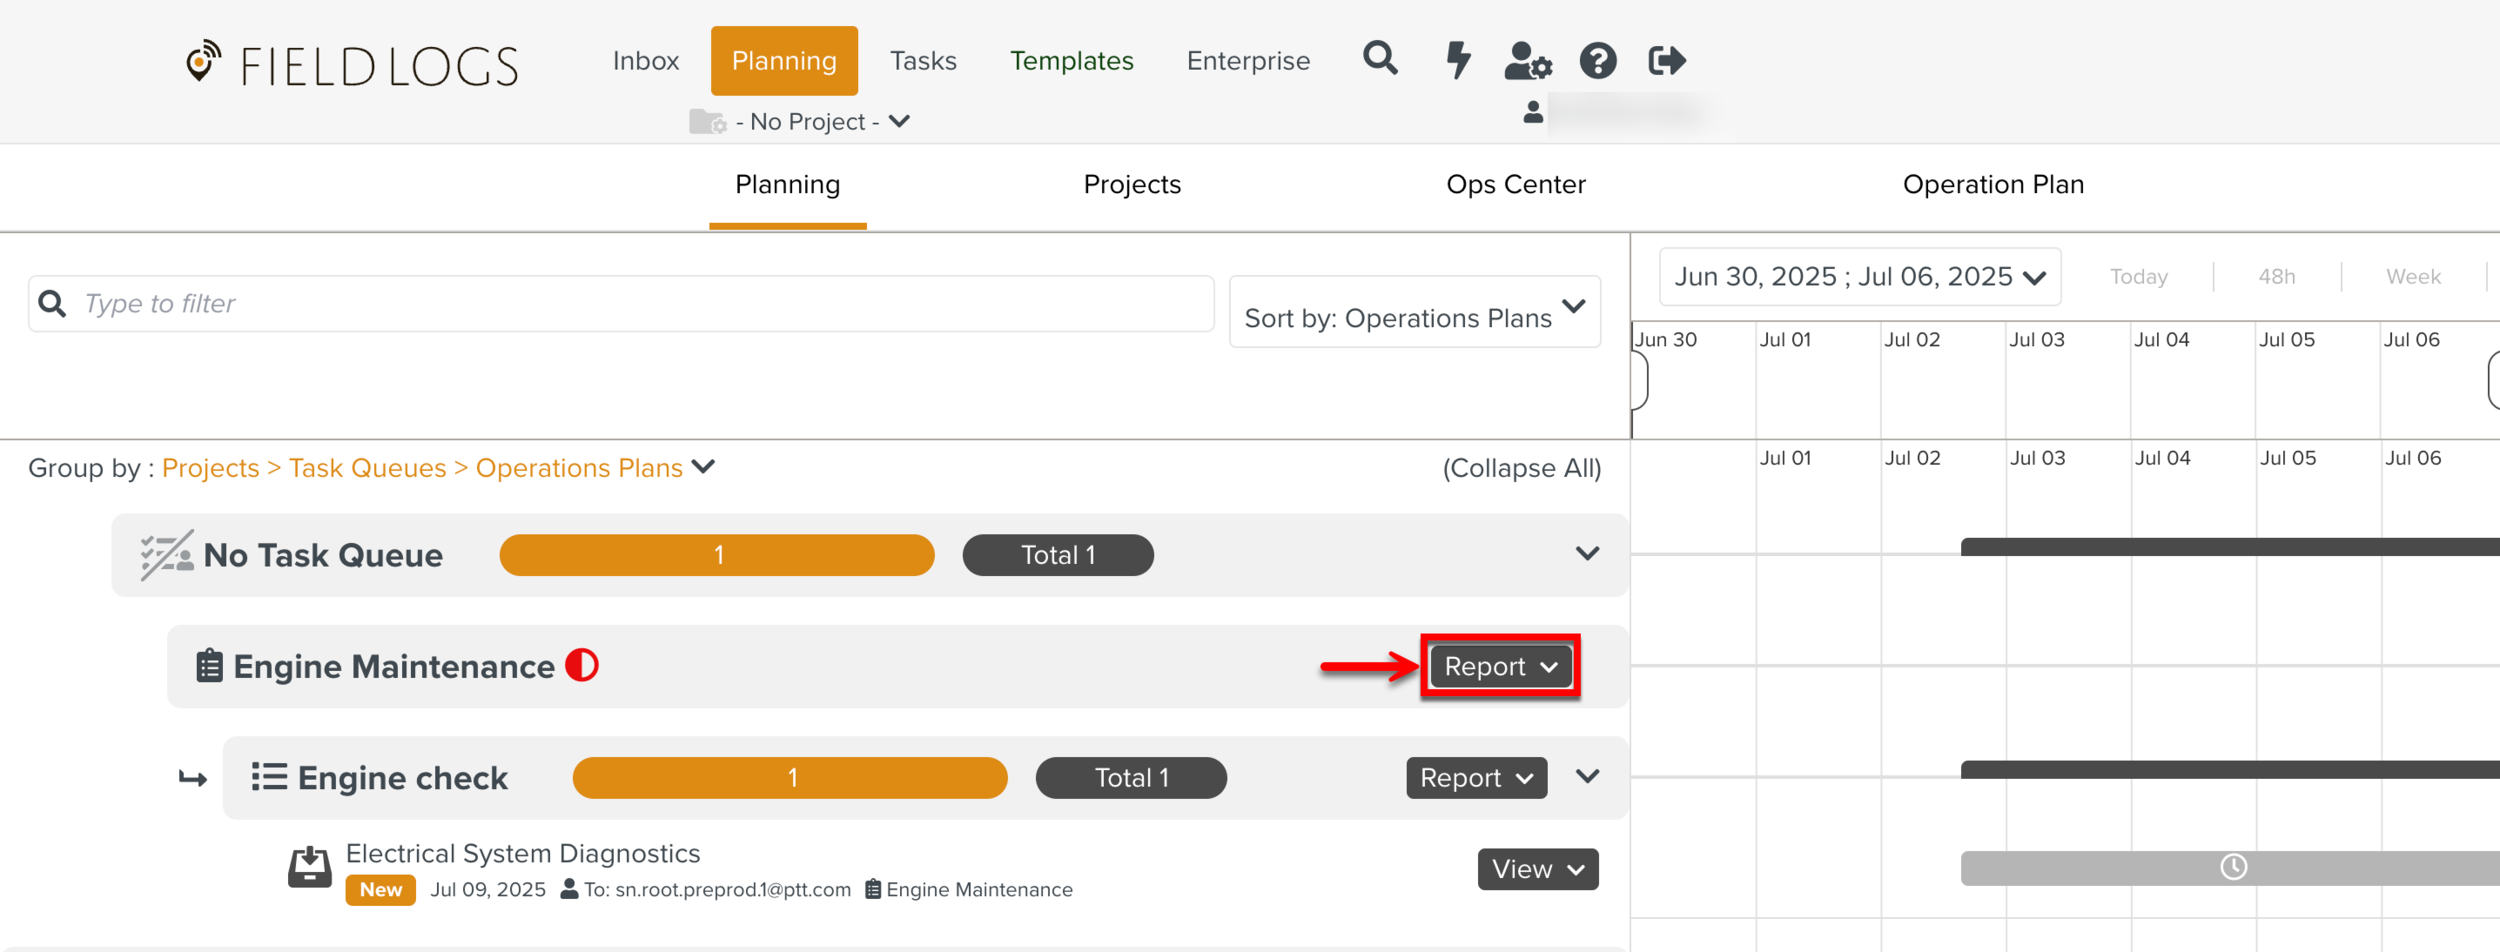
Click on the Operation Plan or Counter levels as shown below.
Note
The button appears only when the Tasks in the page Planning are grouped by Operation Plans.
The Executed Operation Plan dialog appears as shown below.
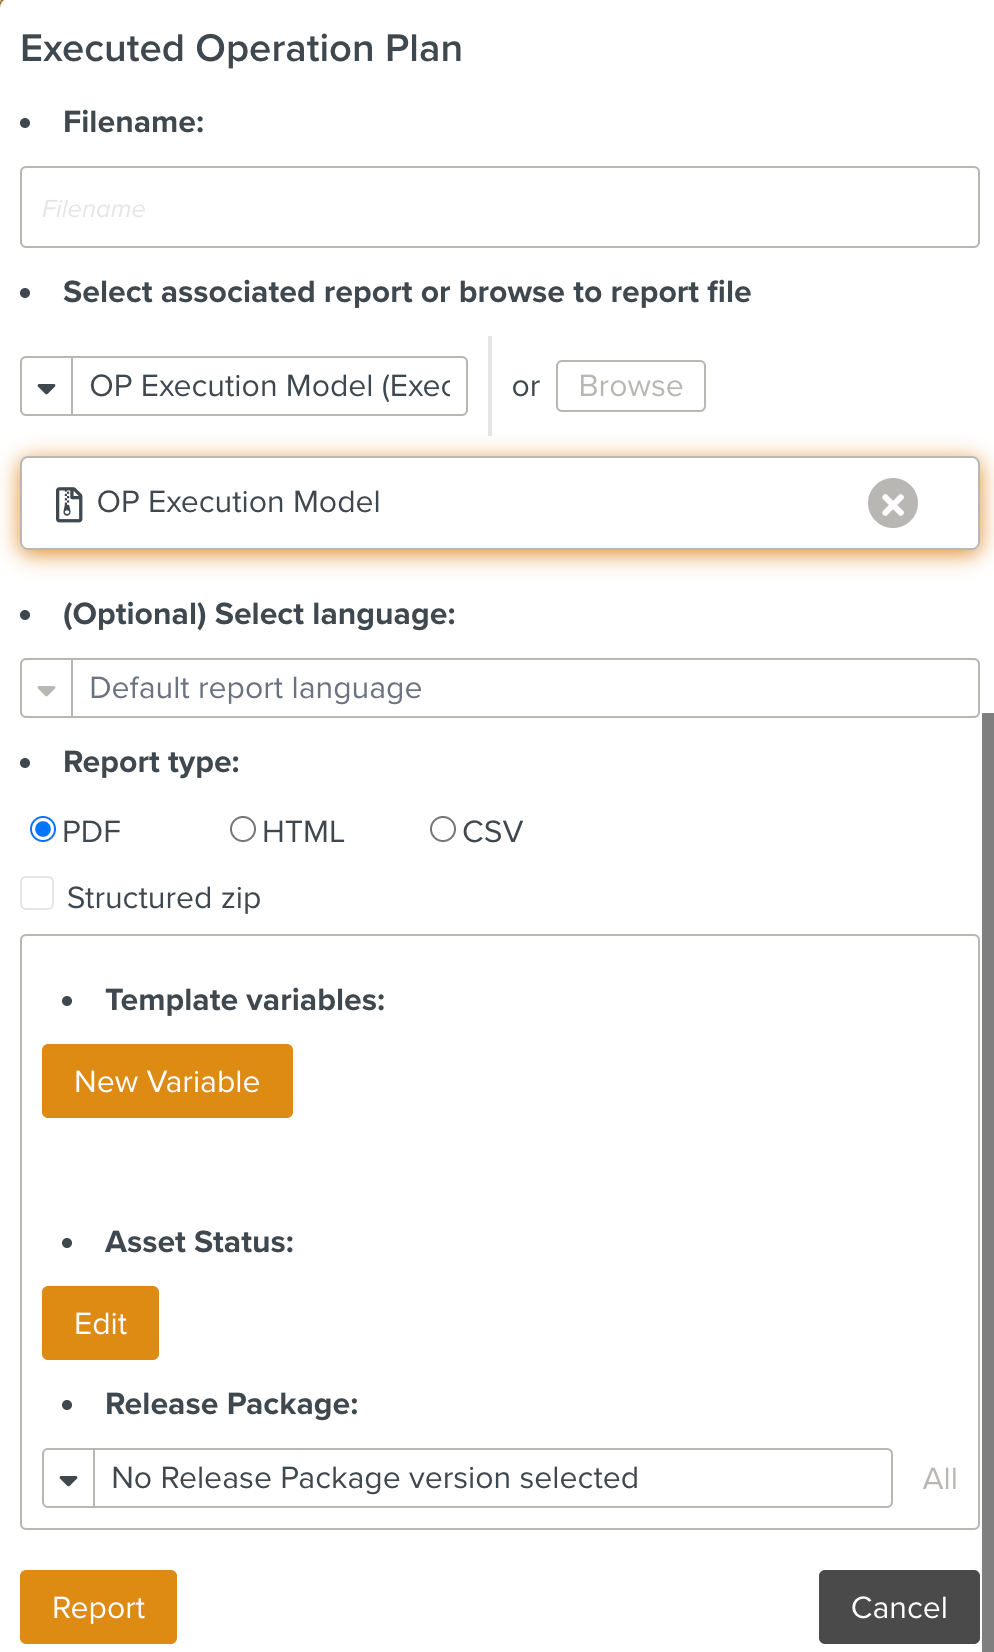
Enter the details as indicated below.
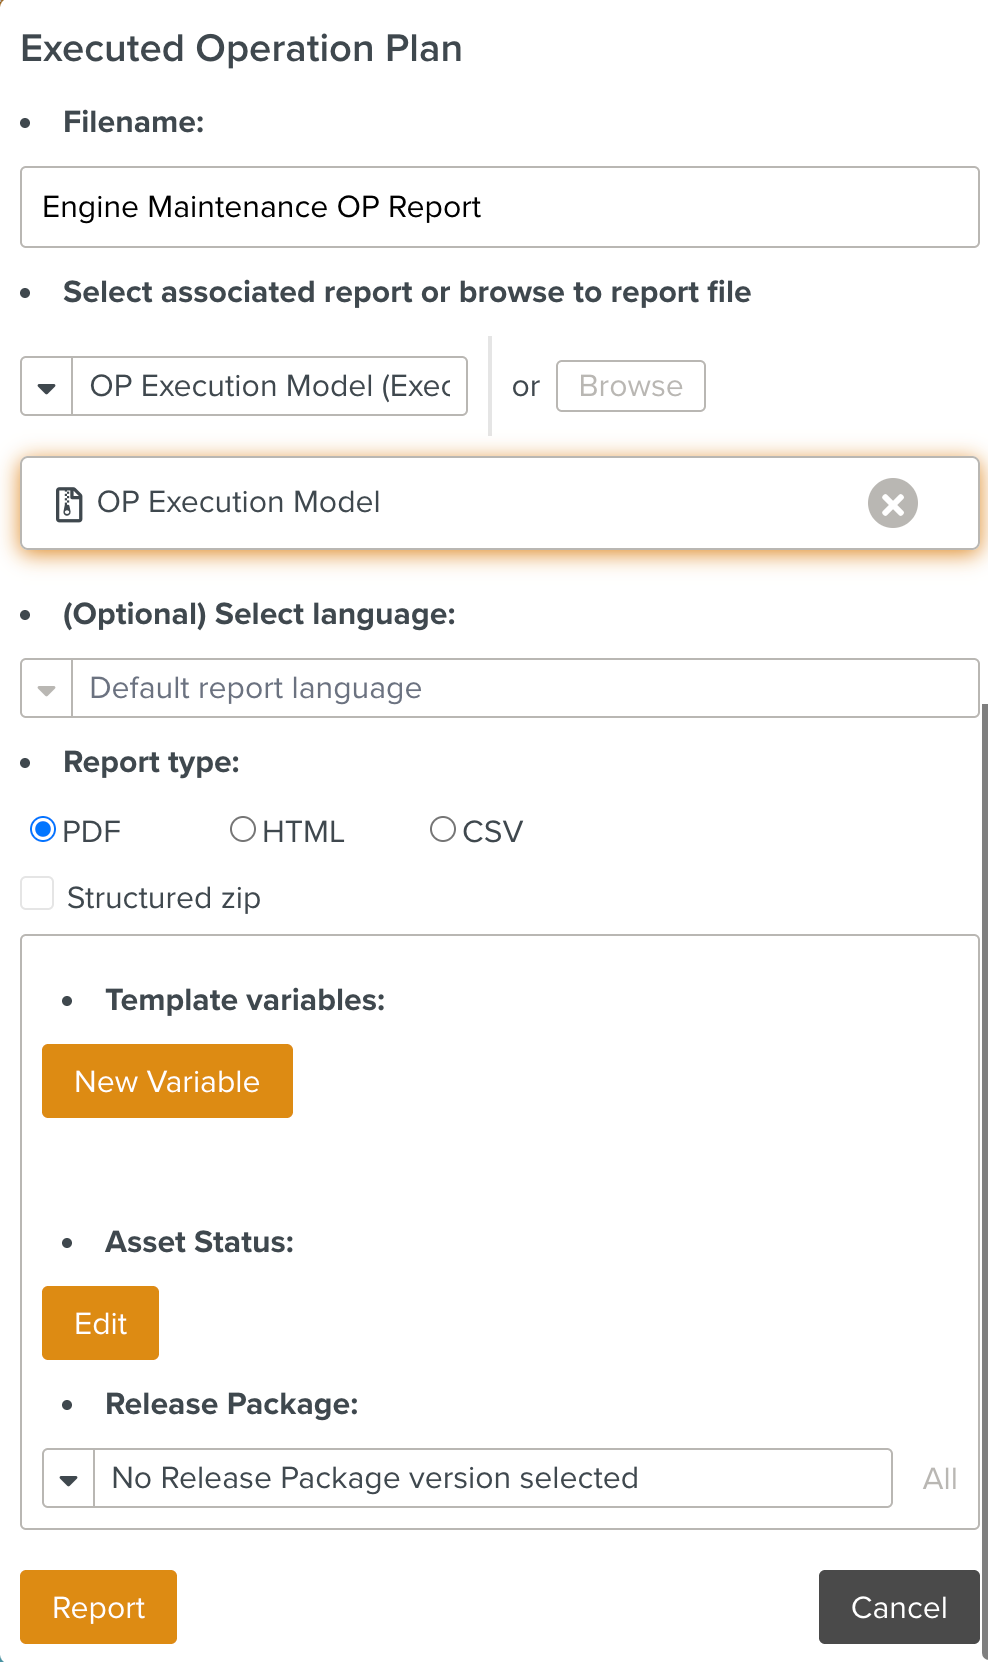
Filename: Enter the desired name of the Report. By default, it takes the name of the associated Report Package.
Select associated report or Browse to report file: Select an associated report model that already exists in the system from the dropdown or click to select the .ftl file or .zip file that extracts the information to be presented in the report.
Select language: Select the desired language of your Report. This is optional.
Report type: You can choose the report to be in PDF, HTML or CSV format.
Structured zip: Check Structured zip to generate a zip of reports organized by Suite and Package.
Template Variables: Click to add new Template Variables to the Report.
Asset Status: Click to modify the applied Effectivity.
Release Package: Select the Release Package versions.
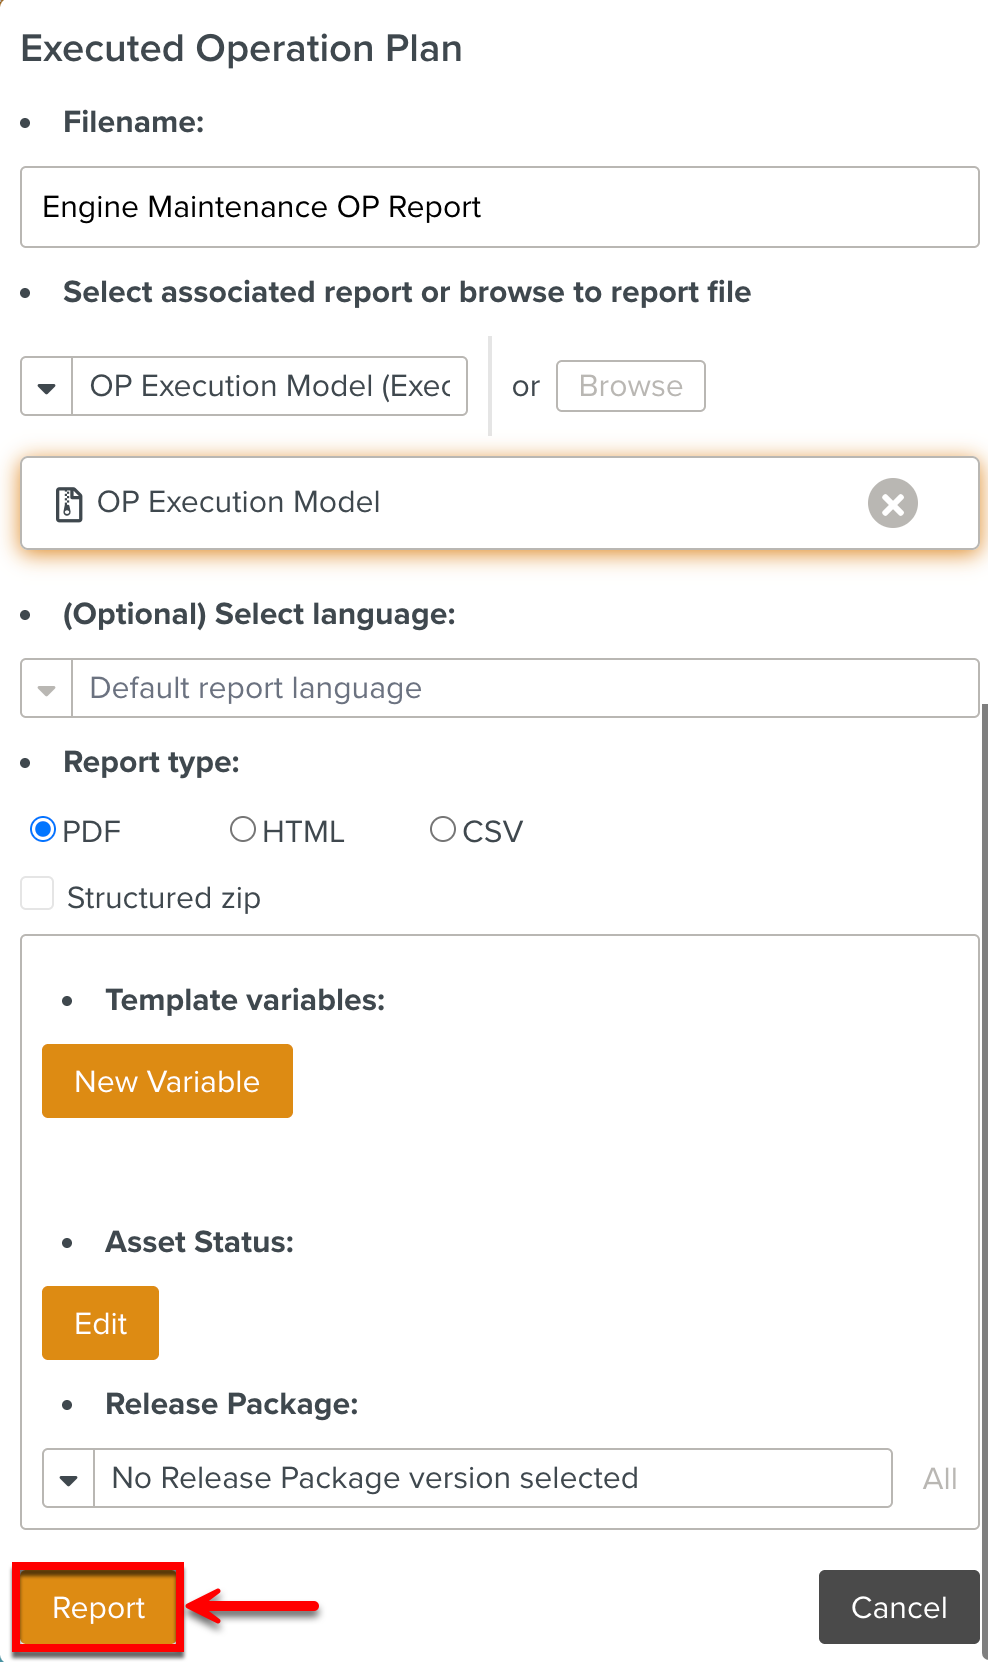
Click to download the report in the specified format.
The Operation Started dialog appears.
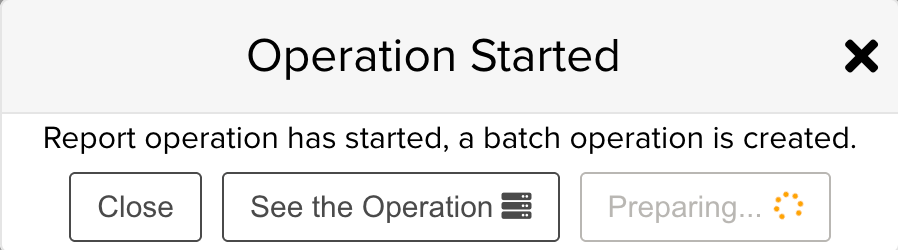
You can either download the report from the dialog or from the page Batch Operations.

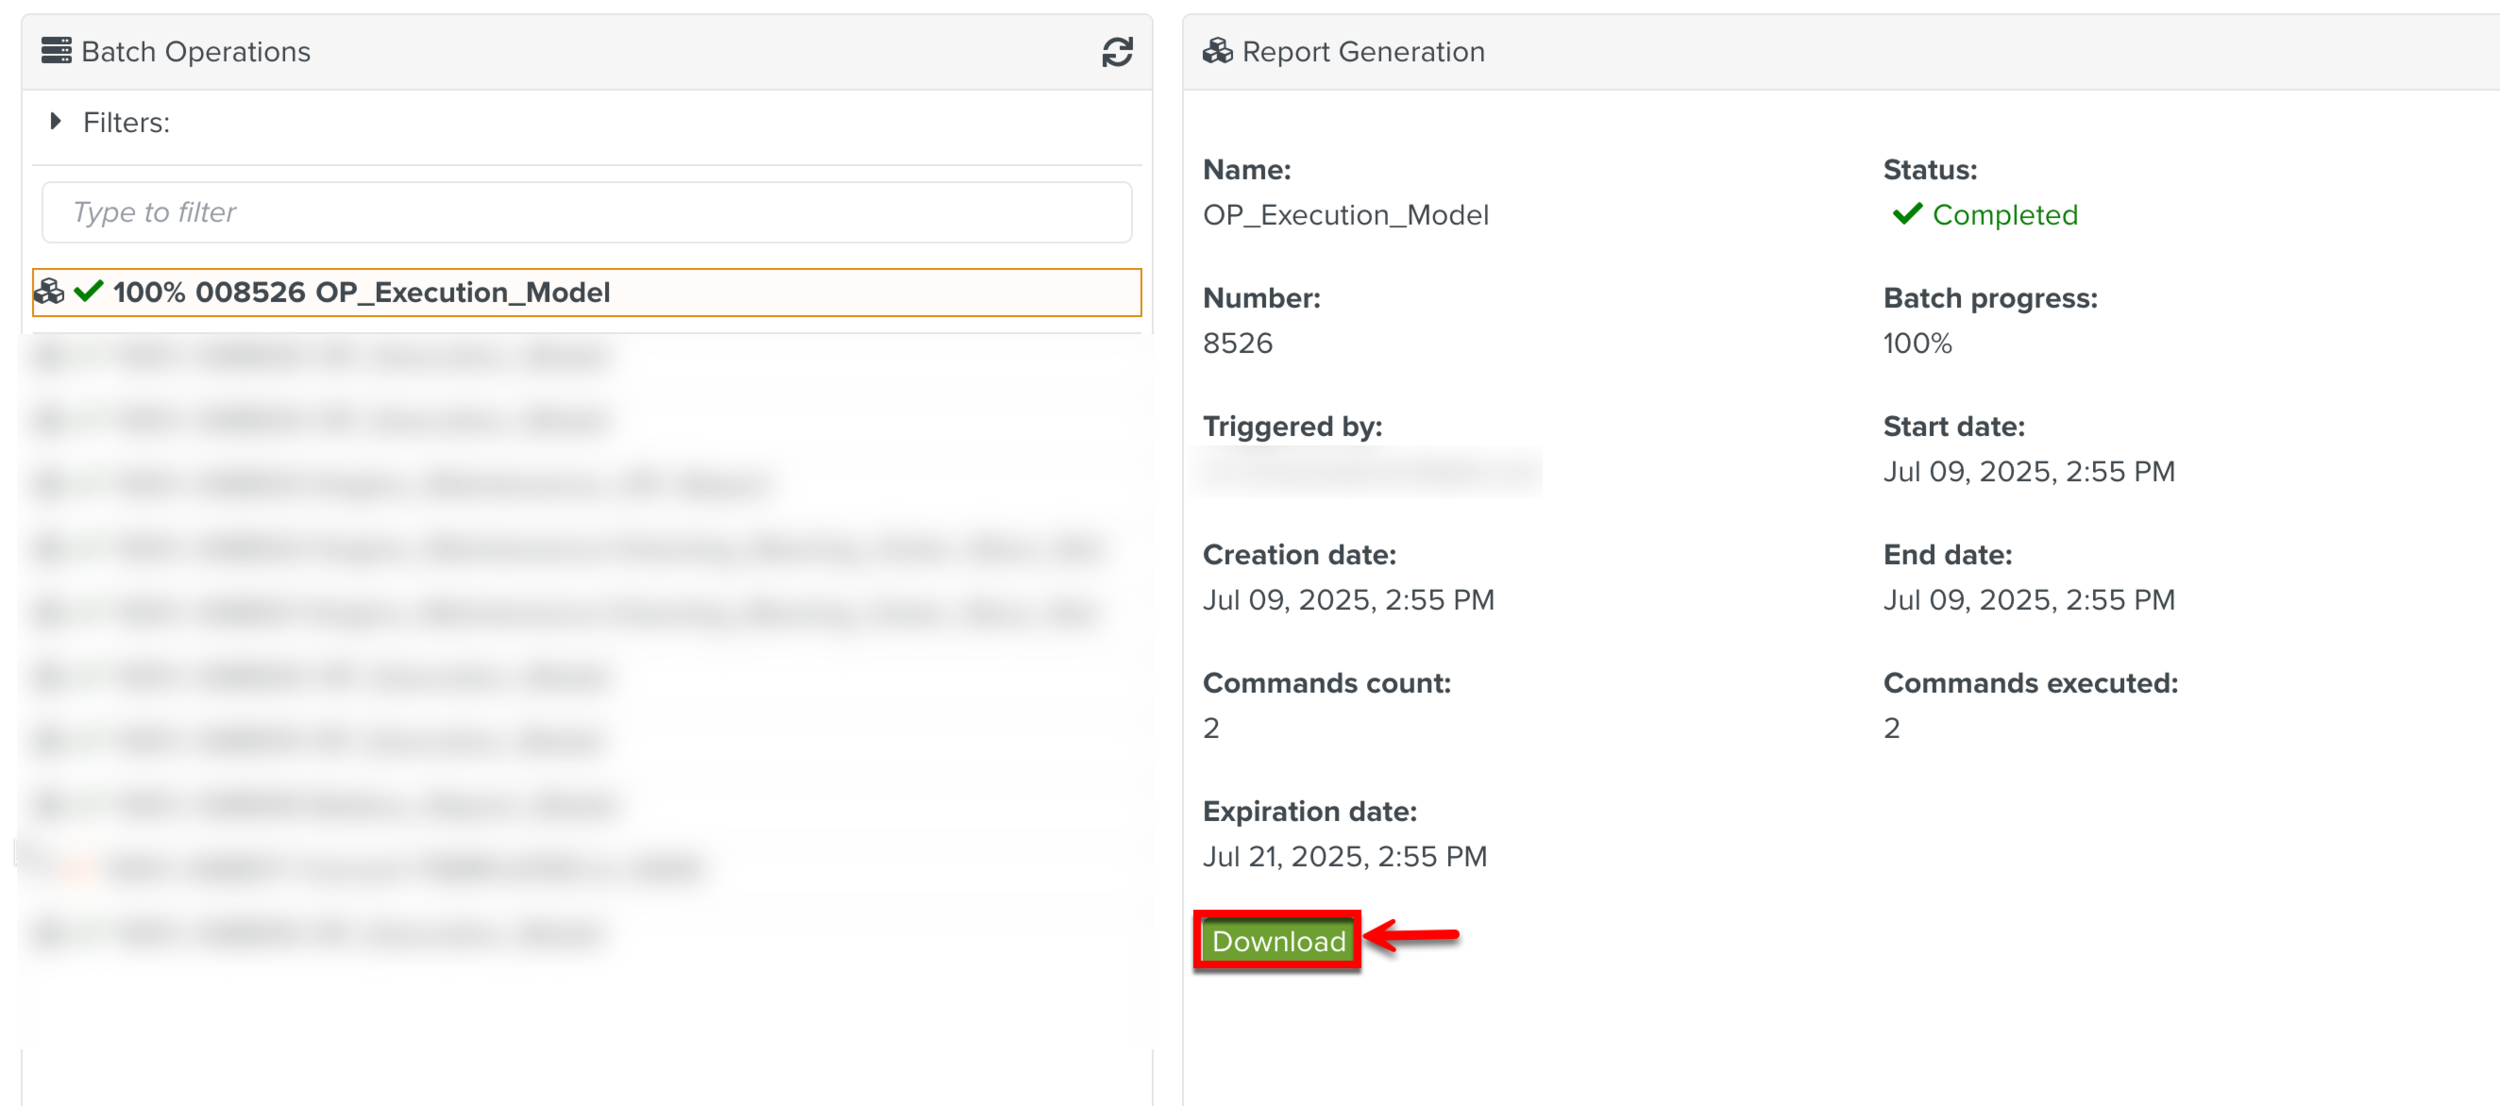
An Operation Plan execution report is generated as shown below.