Setting Up Screening Comments
While performing Screening actions on the Impacts, you can use the pre-defined Screening comments instead of typing comments on each Impact. You can set up the Screening comments in the Enterprise Settings.
To perform the following actions on an Impact, configure the Screening comments as shown below:
Screening Actions Achieved | Auto-Comment Settings | Auto-Screen Settings | ||
|---|---|---|---|---|
Pre-defined comment populated without saving | Activate auto comment | Disable | Activate auto screen | Disable |
Pre-defined comment populated and saved | Activate auto comment | Enable | Activate auto screen | Disable |
Pre-defined comment saved and Impact screened | Activate auto comment | Disable | Activate auto screen | Enable |
Pre-defined comment saved and Impact screened | Activate auto comment | Enable | Activate auto screen | Enable |
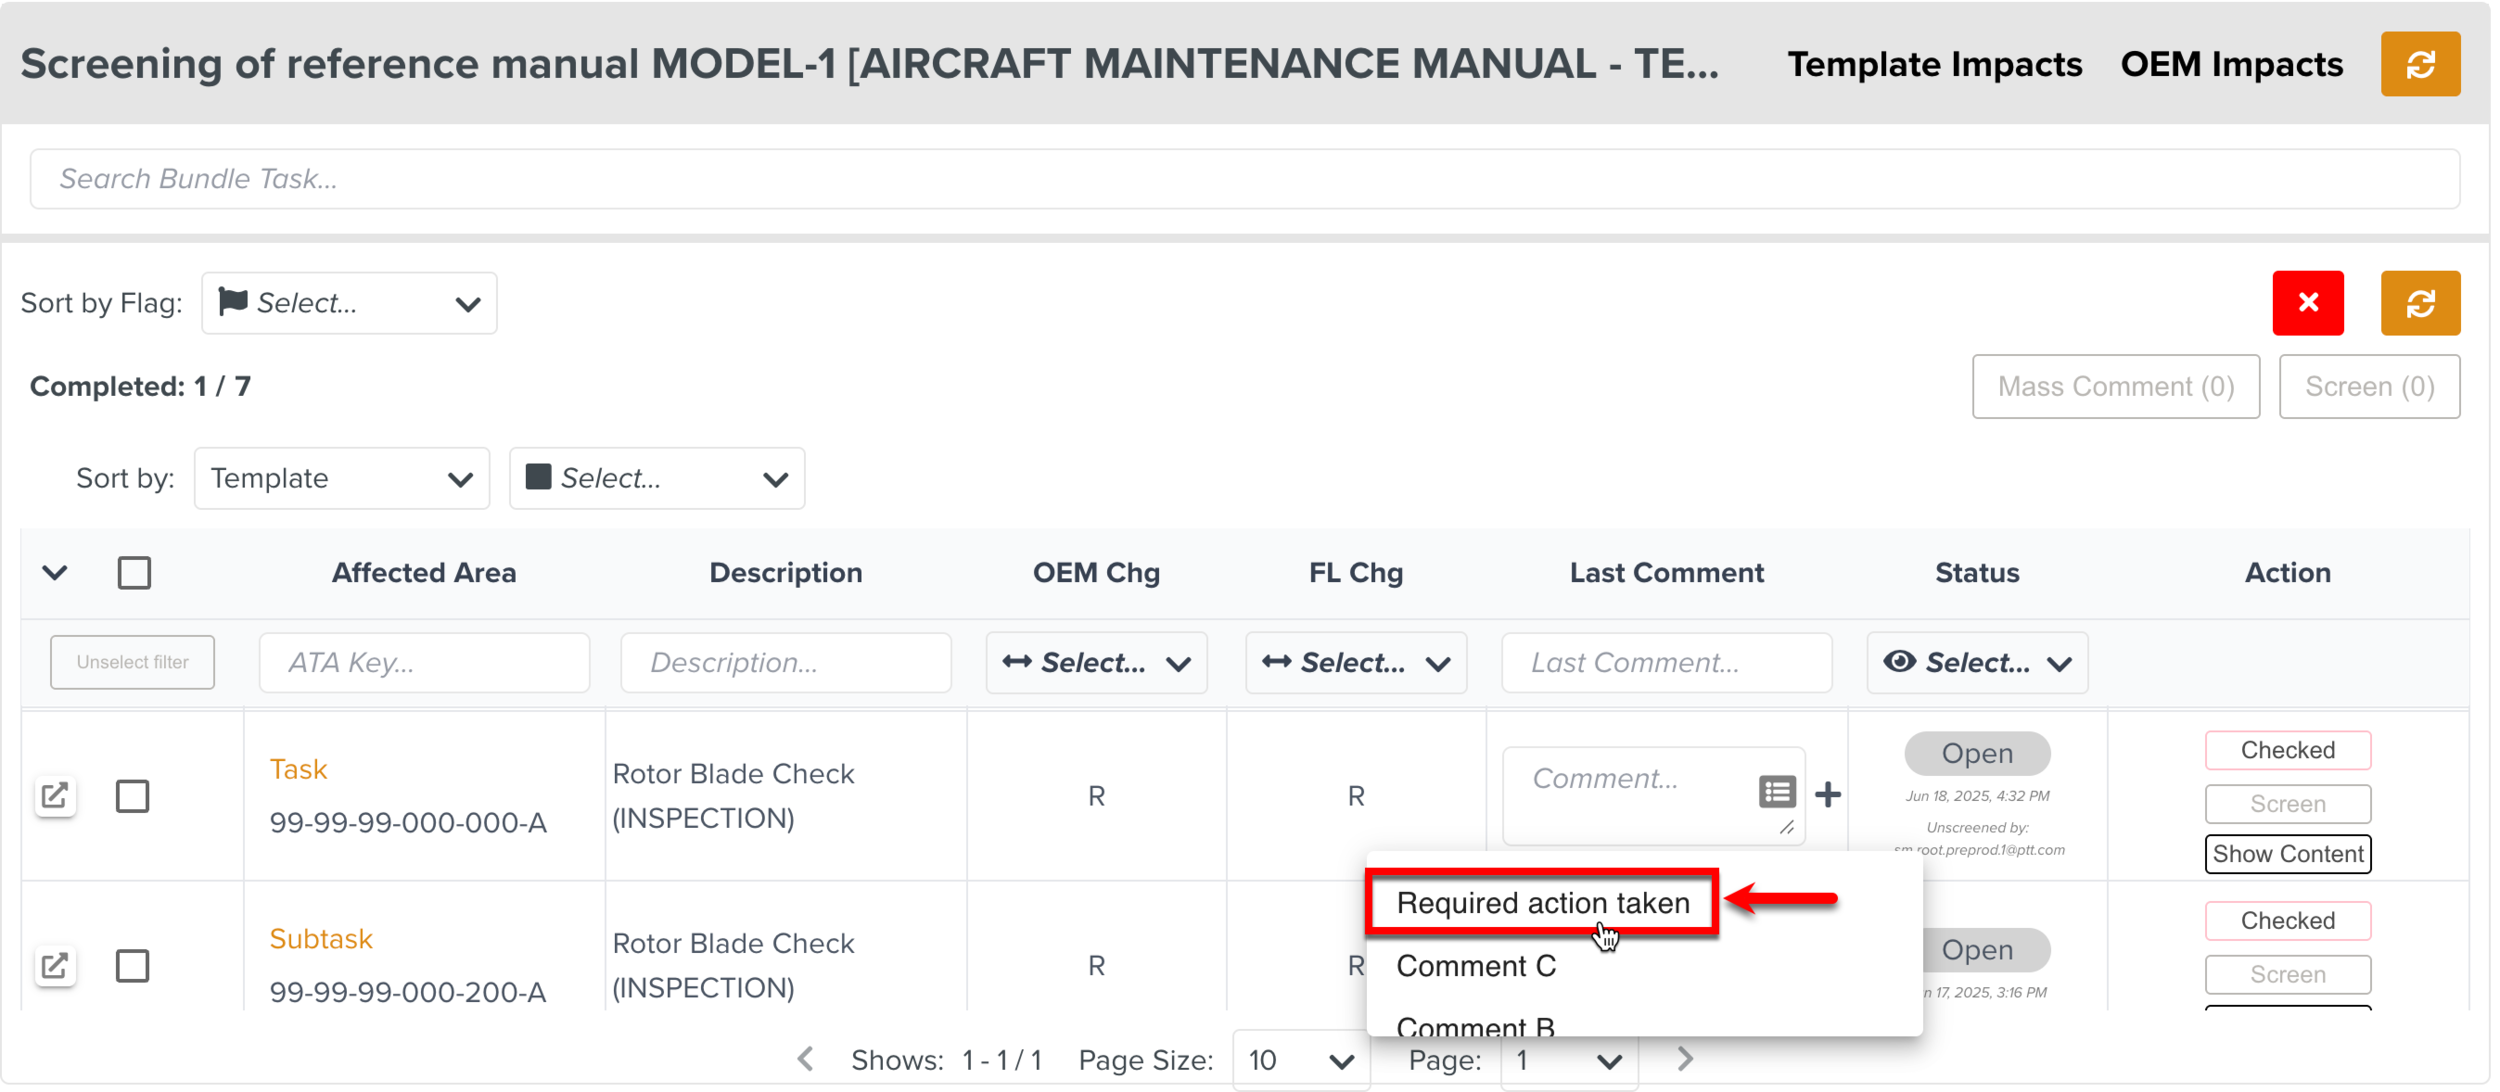
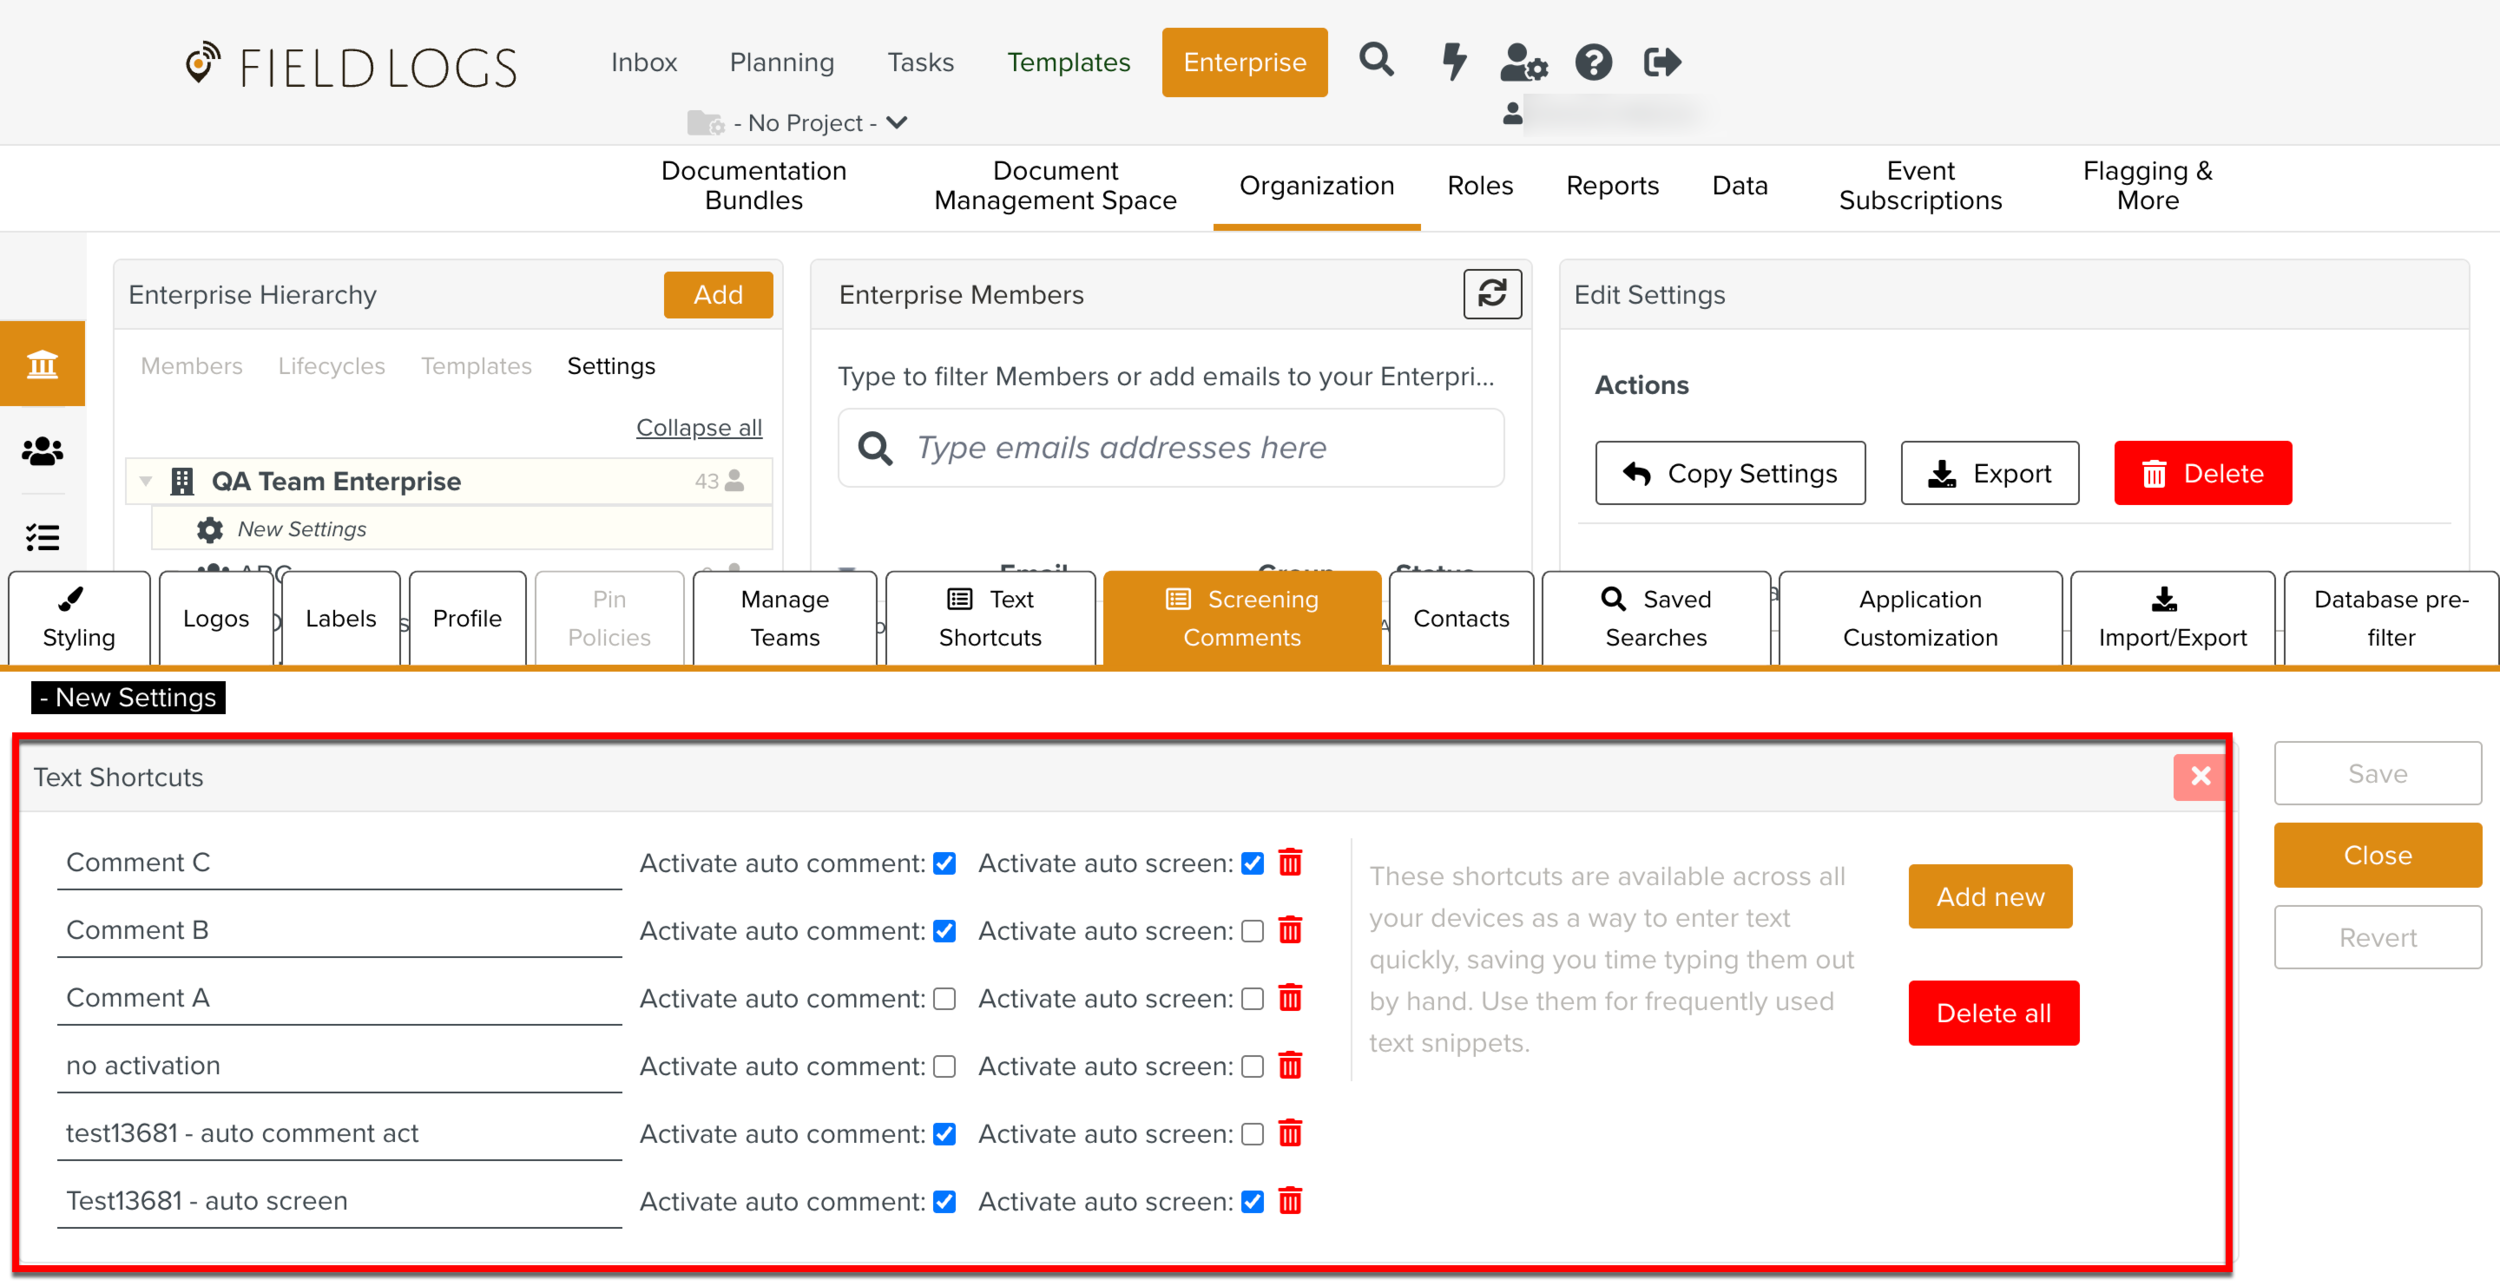
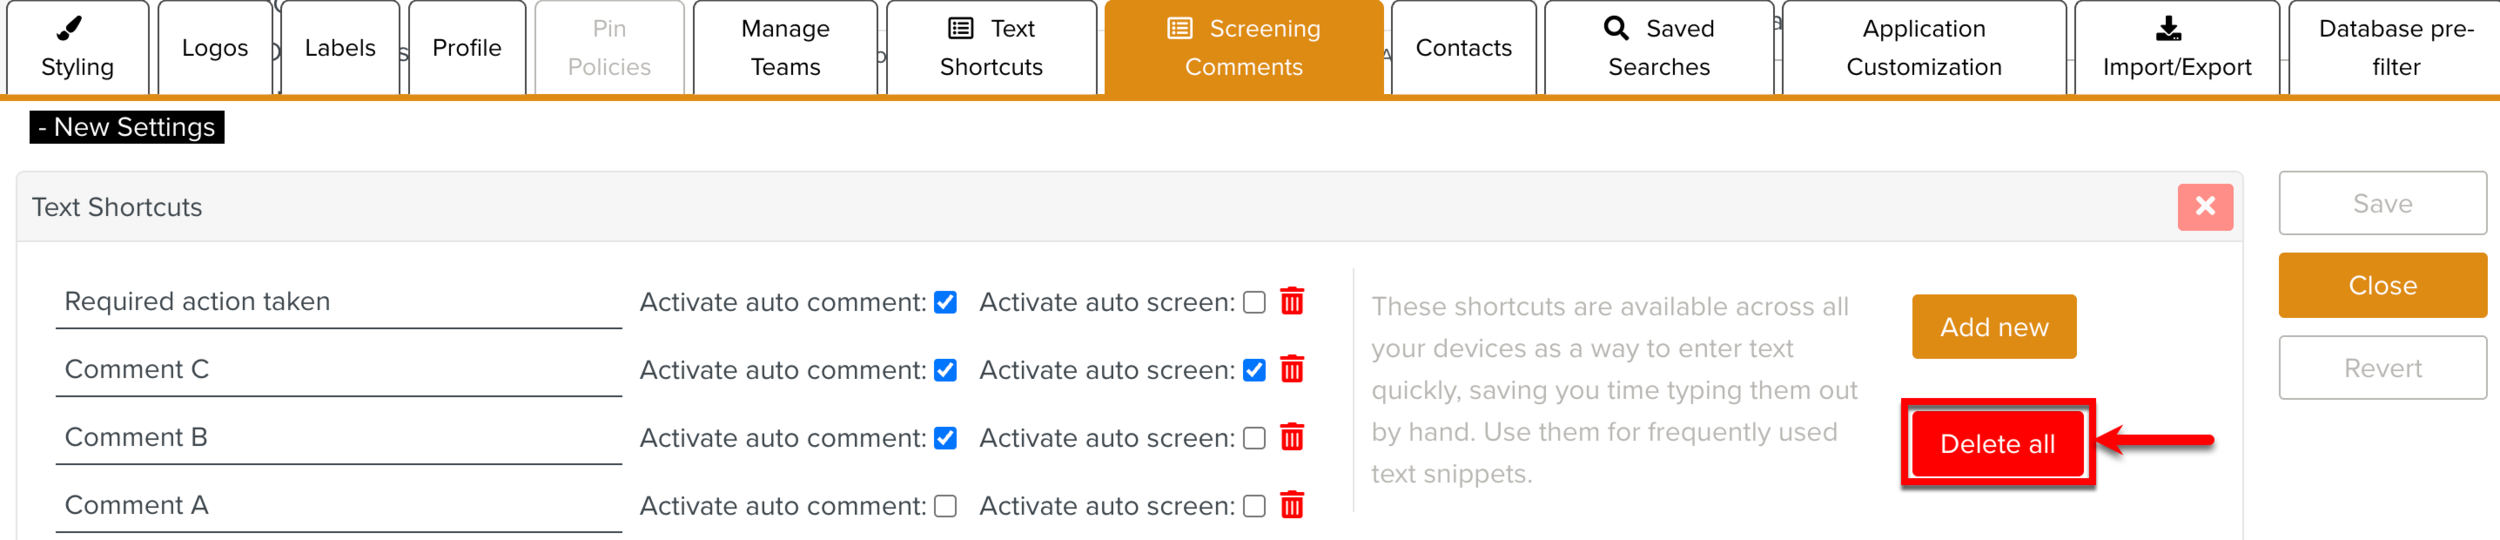
Let us suppose, the following three Screening comments are set up in the Enterprise Settings:
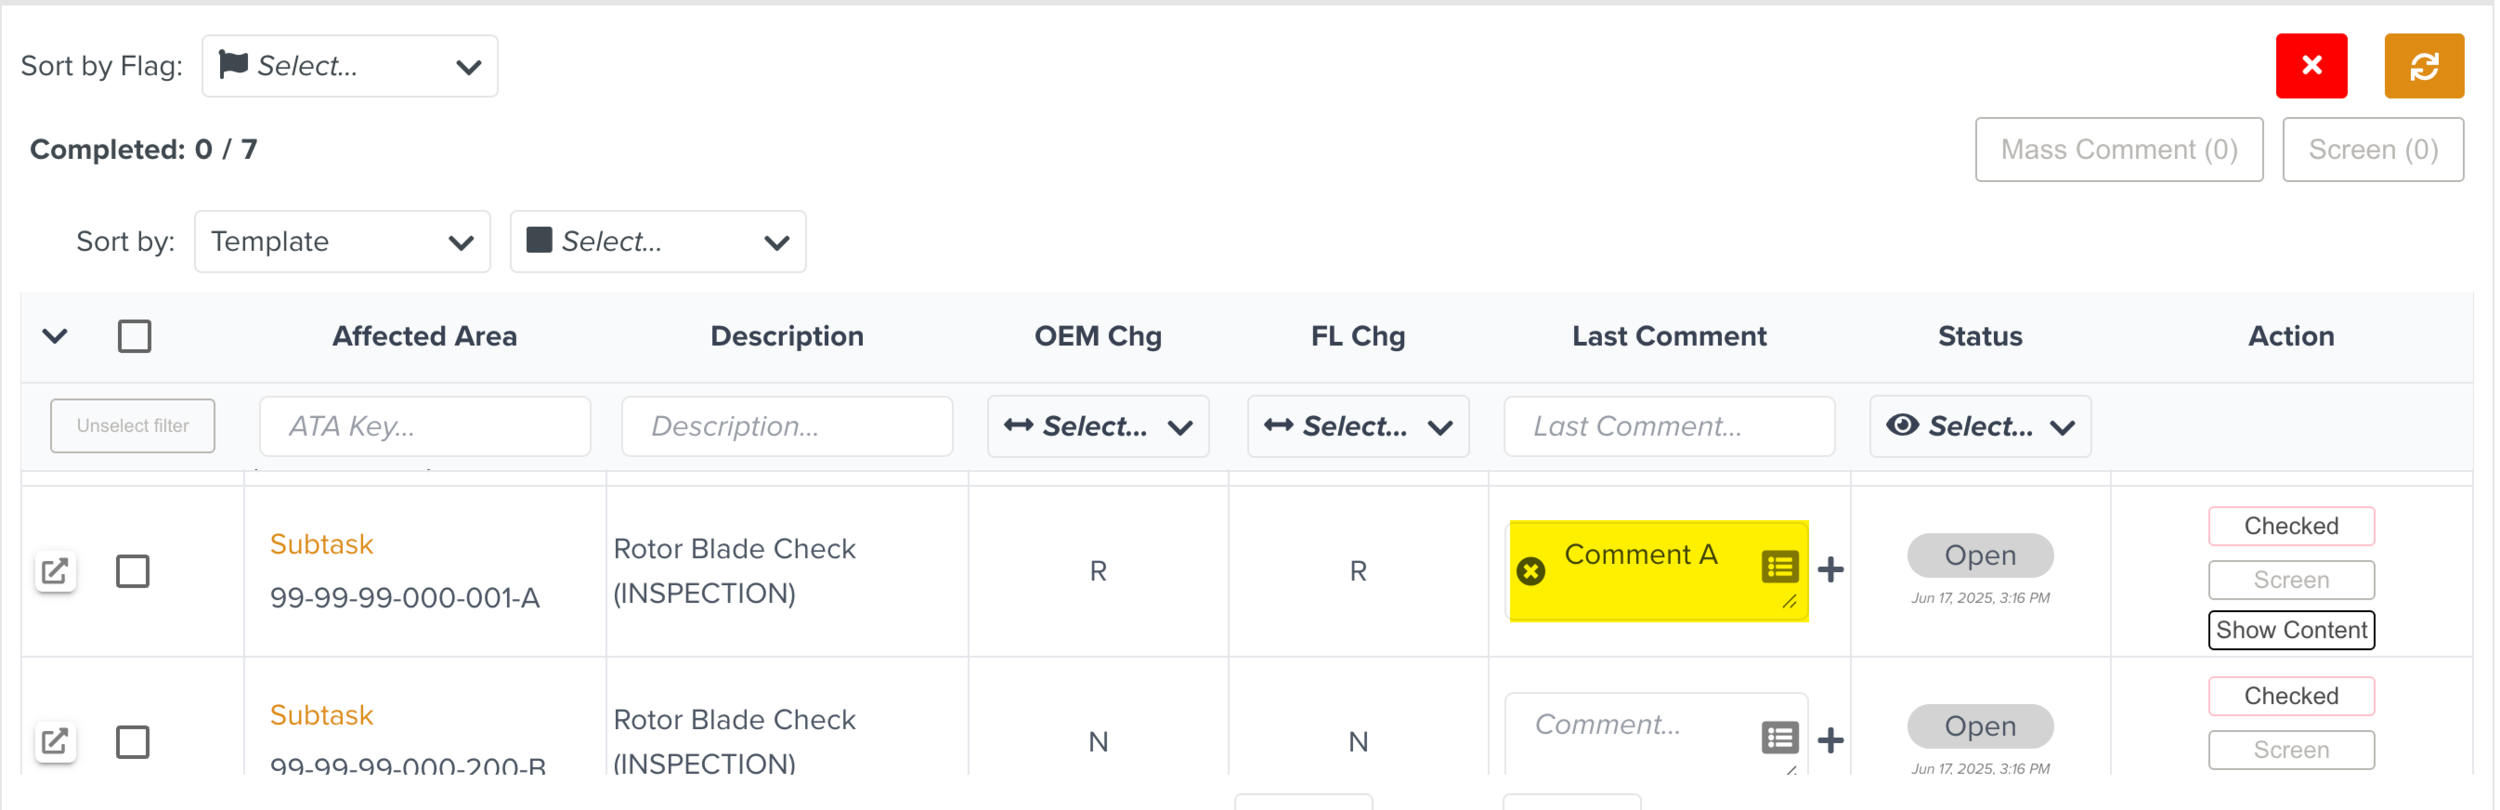
Comment A: For Comment A, both Activate auto comment and Activate auto screen are disabled.
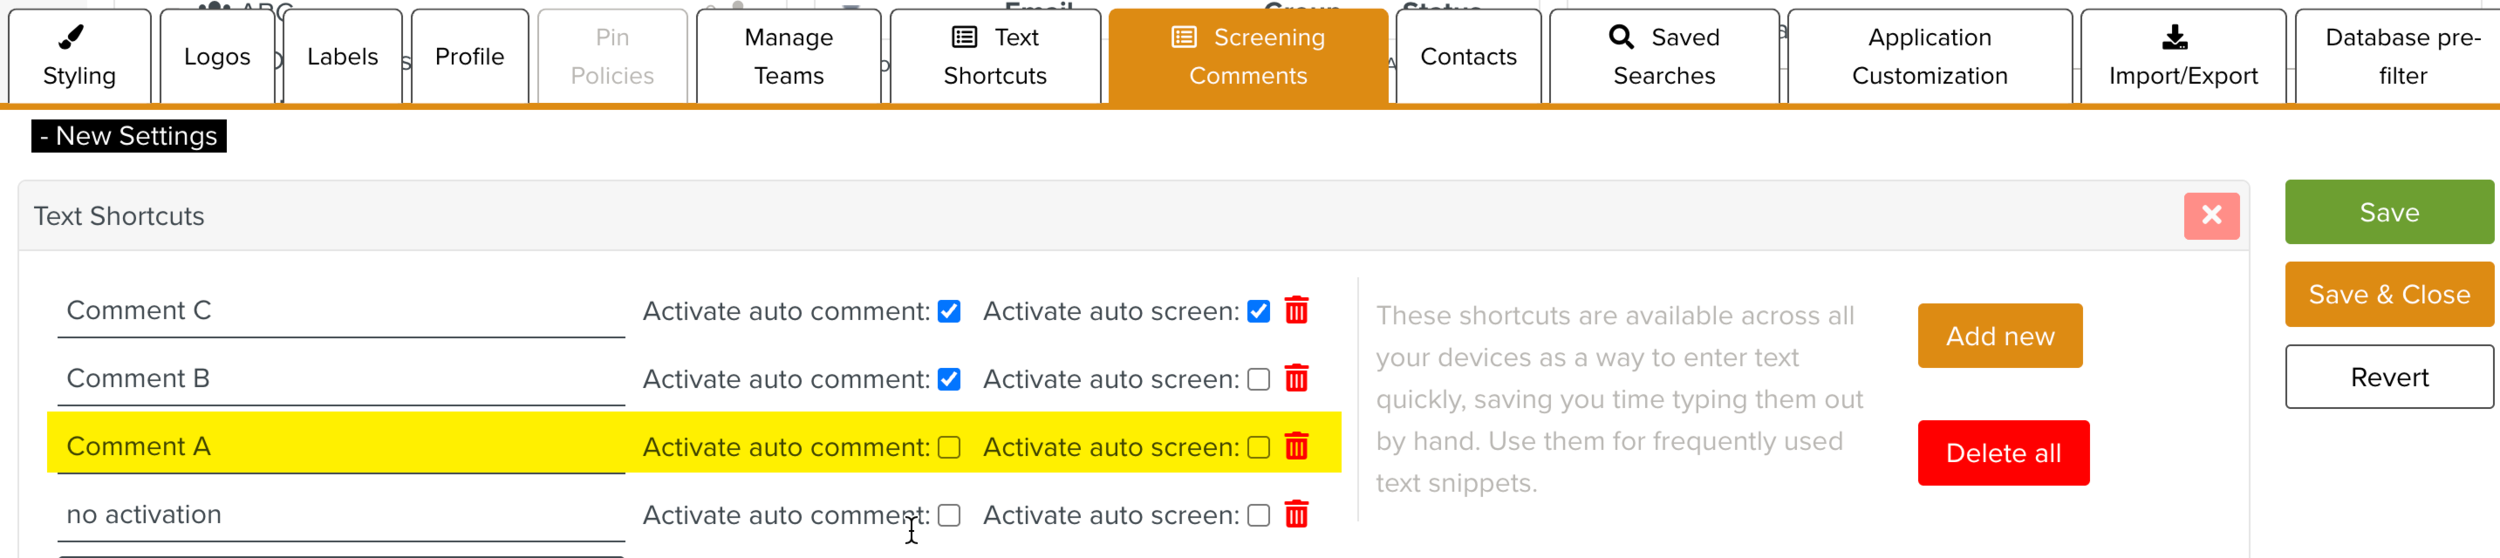
When you add Comment A to an Impact, the Screening comment is added but you have to manually save the comment.
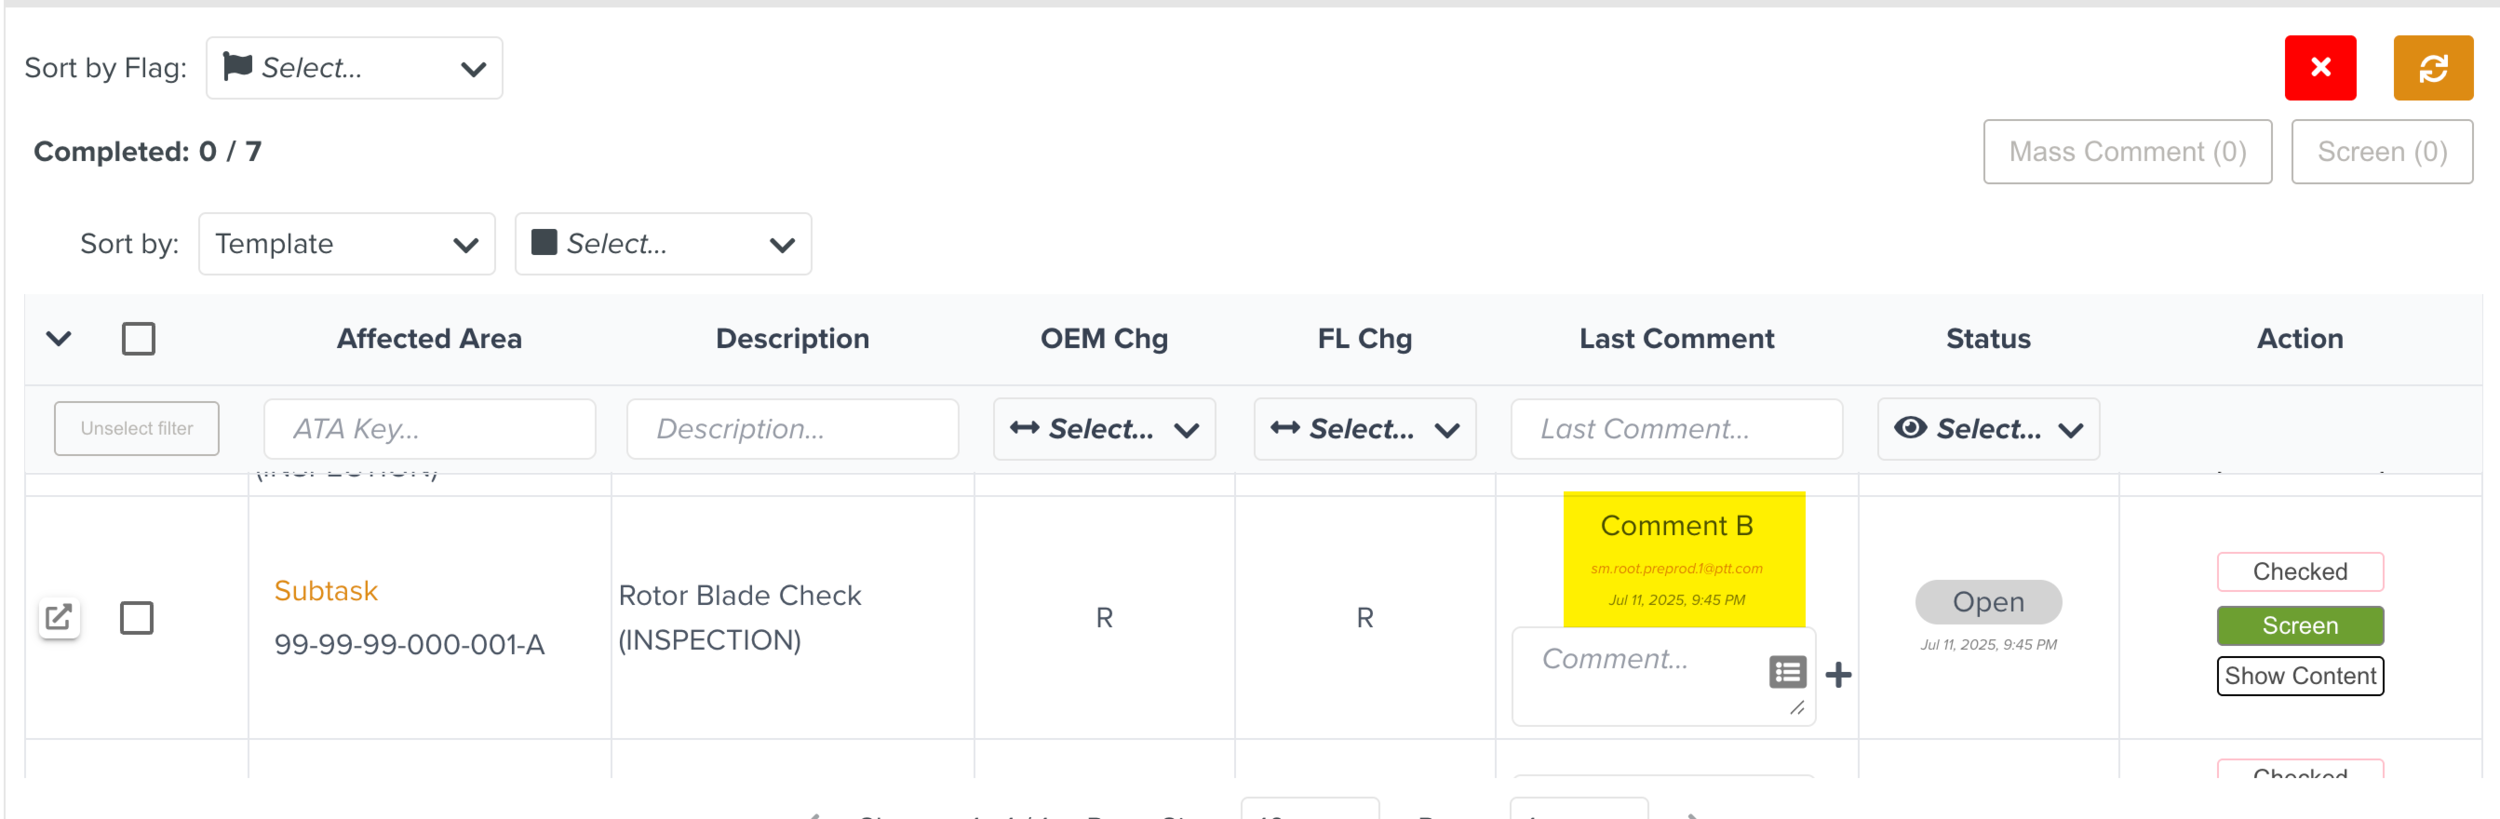
Comment B: For Comment B, Activate auto comment is enabled and Activate auto screen is disabled.
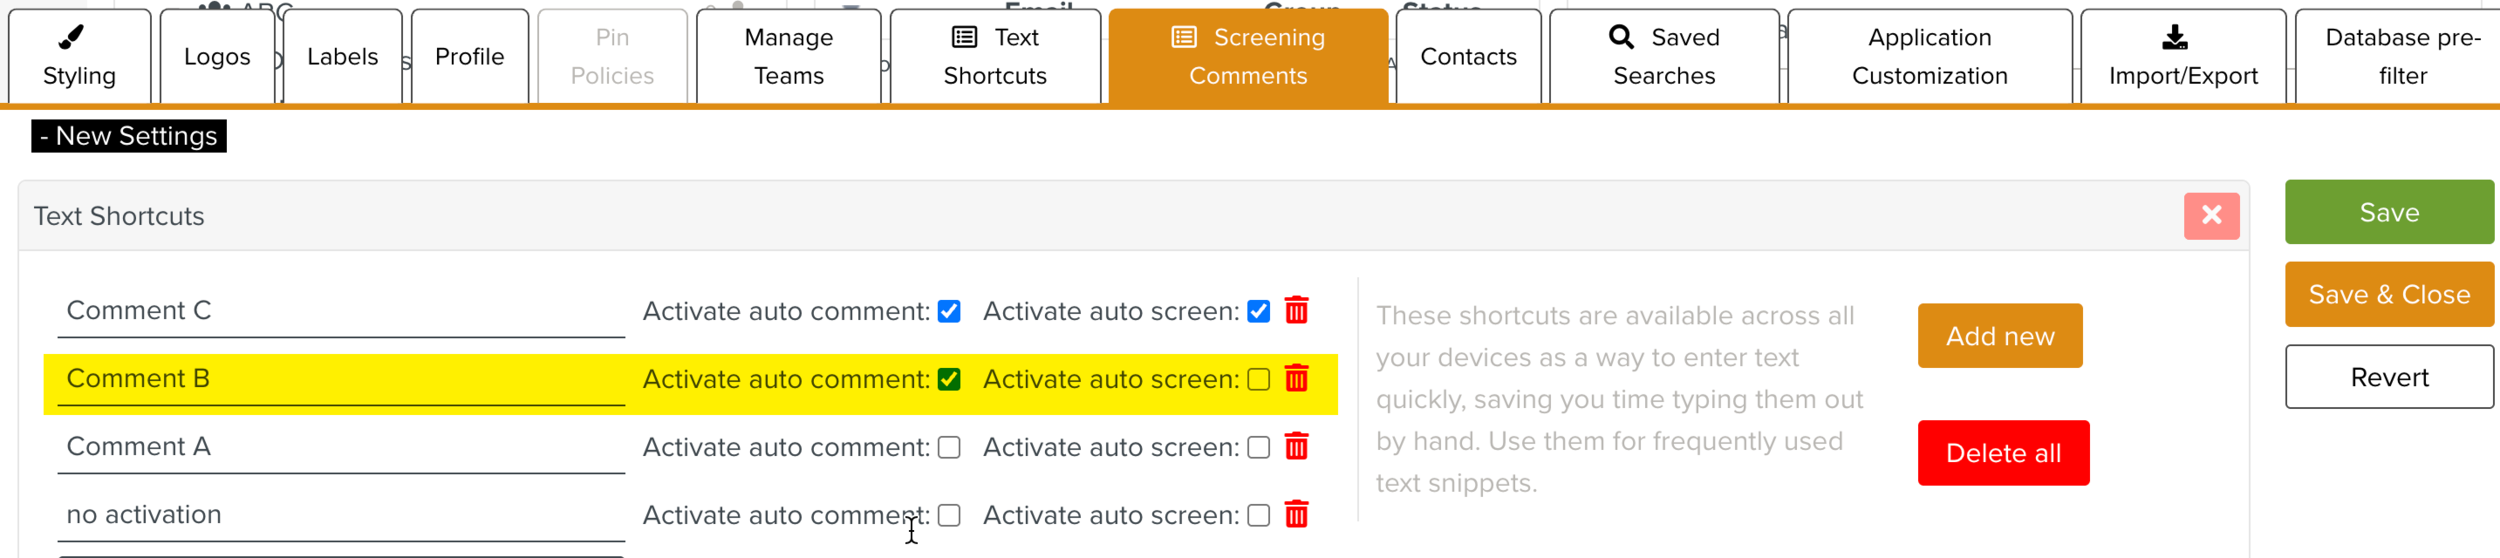
When you add Comment B to an Impact, the Screening comment is added and saved automatically.
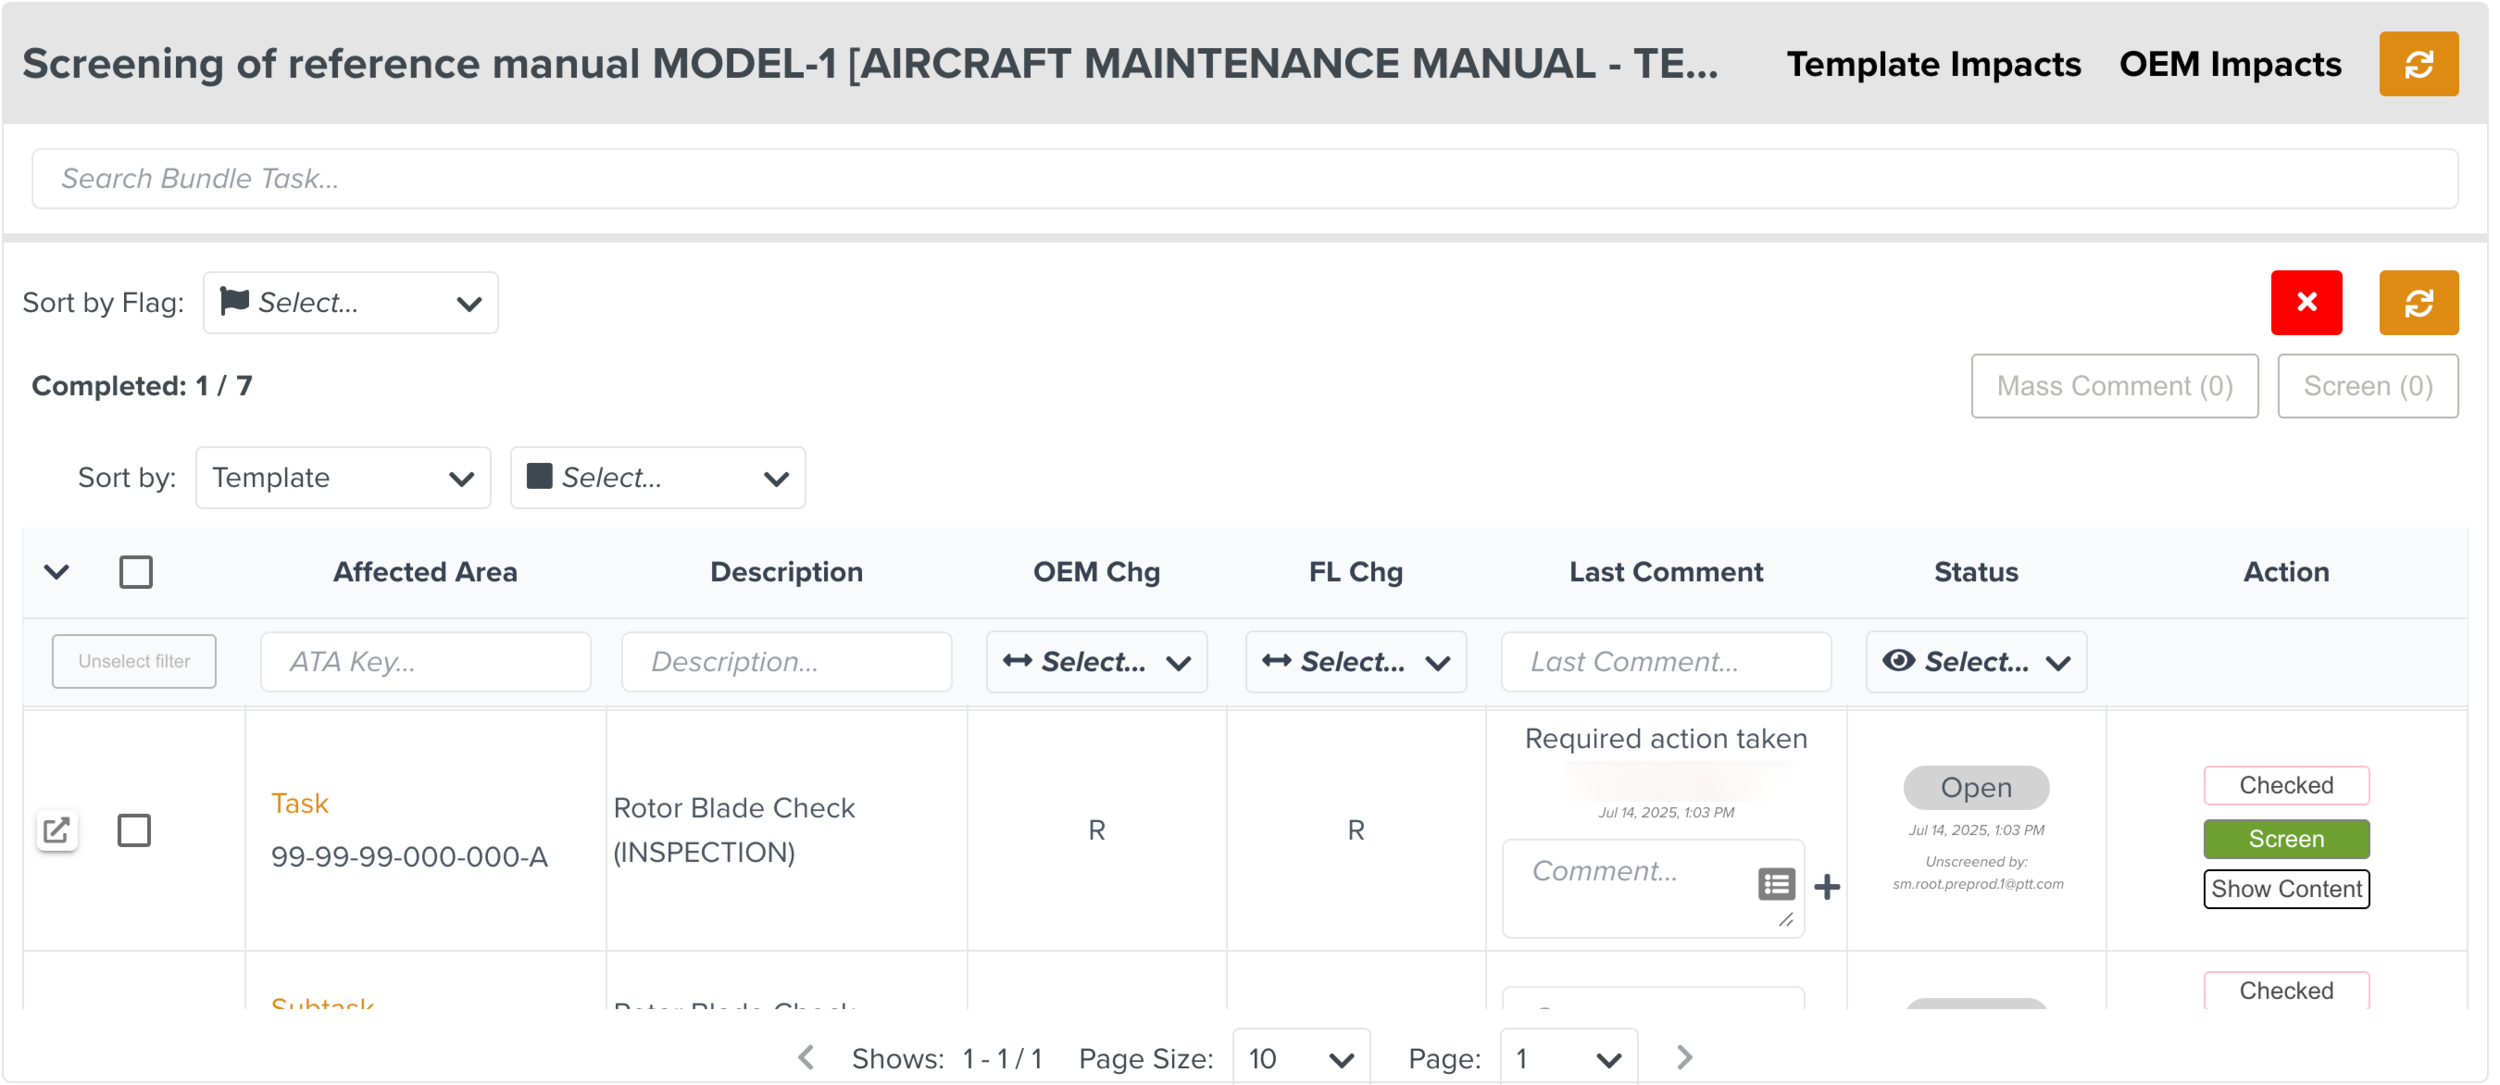
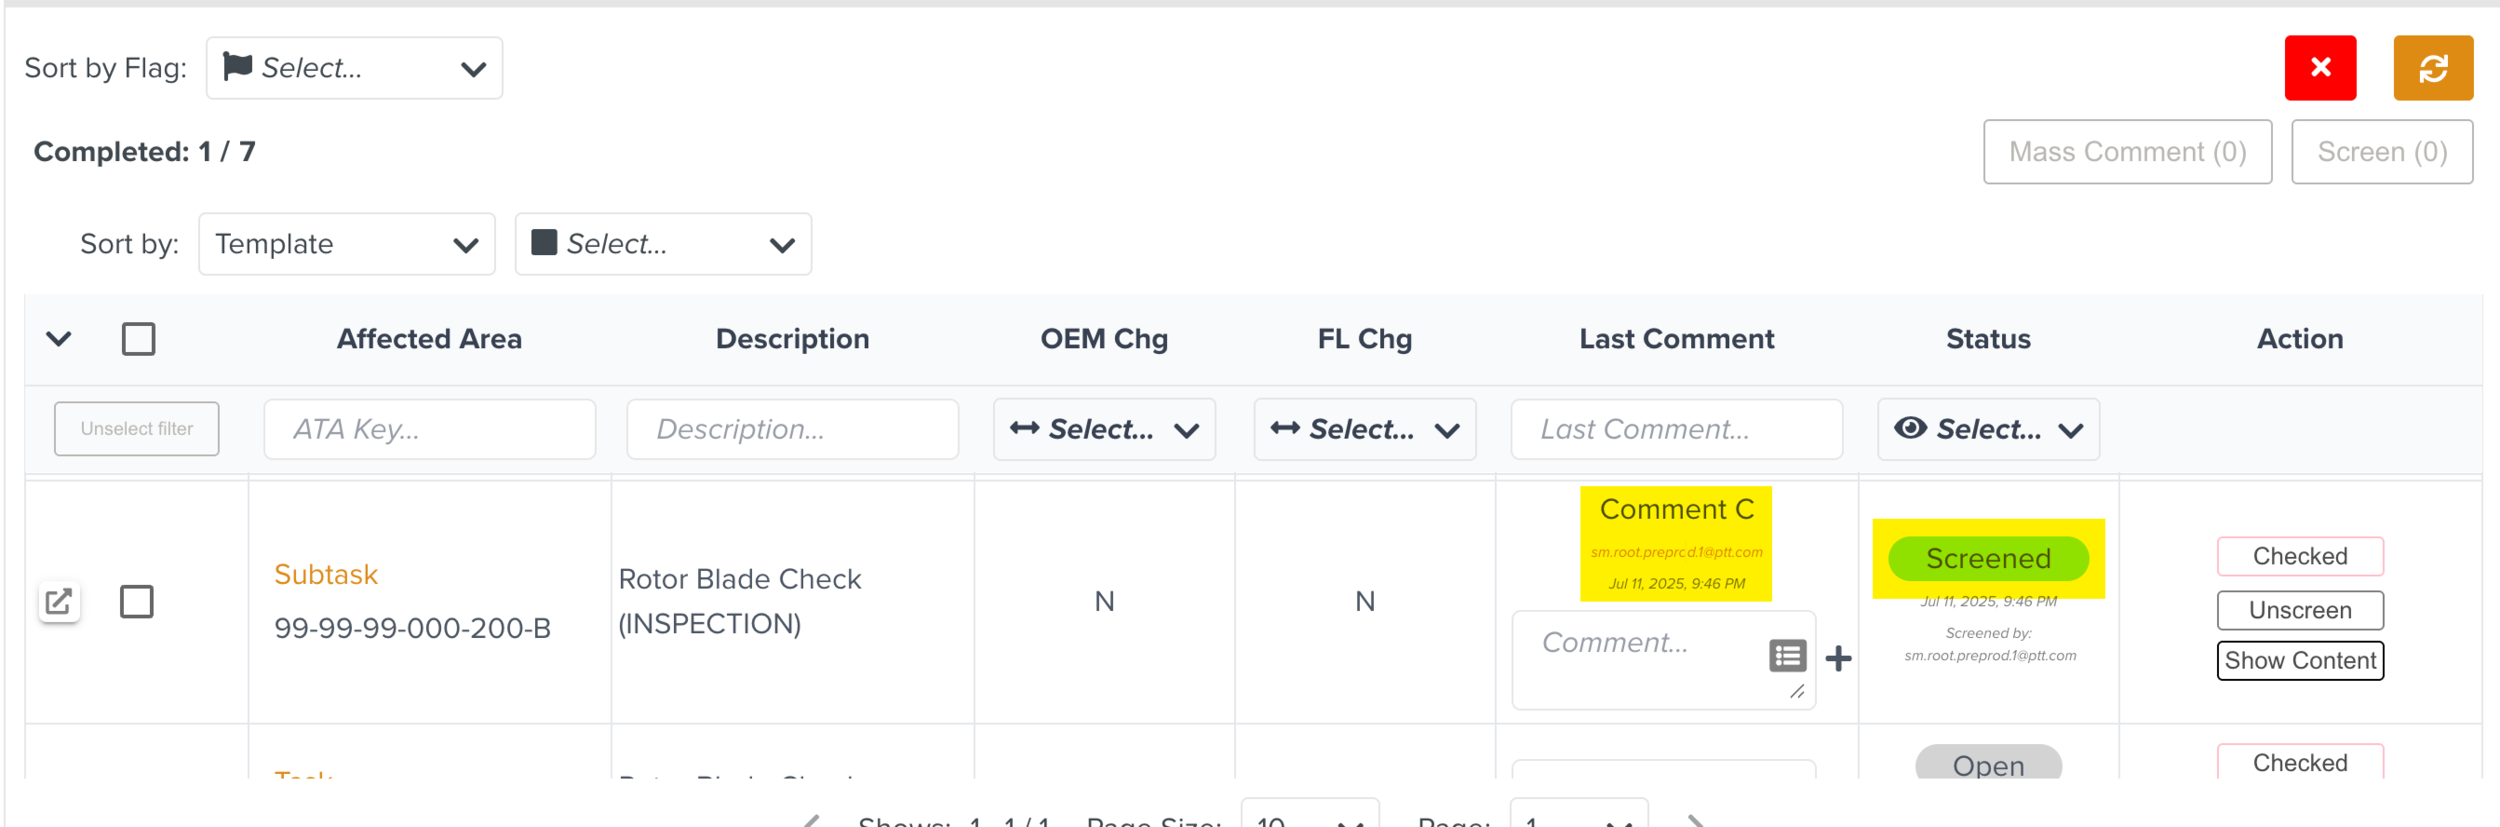
Comment C: For Comment C, both Activate auto comment and Activate auto screen are enabled.
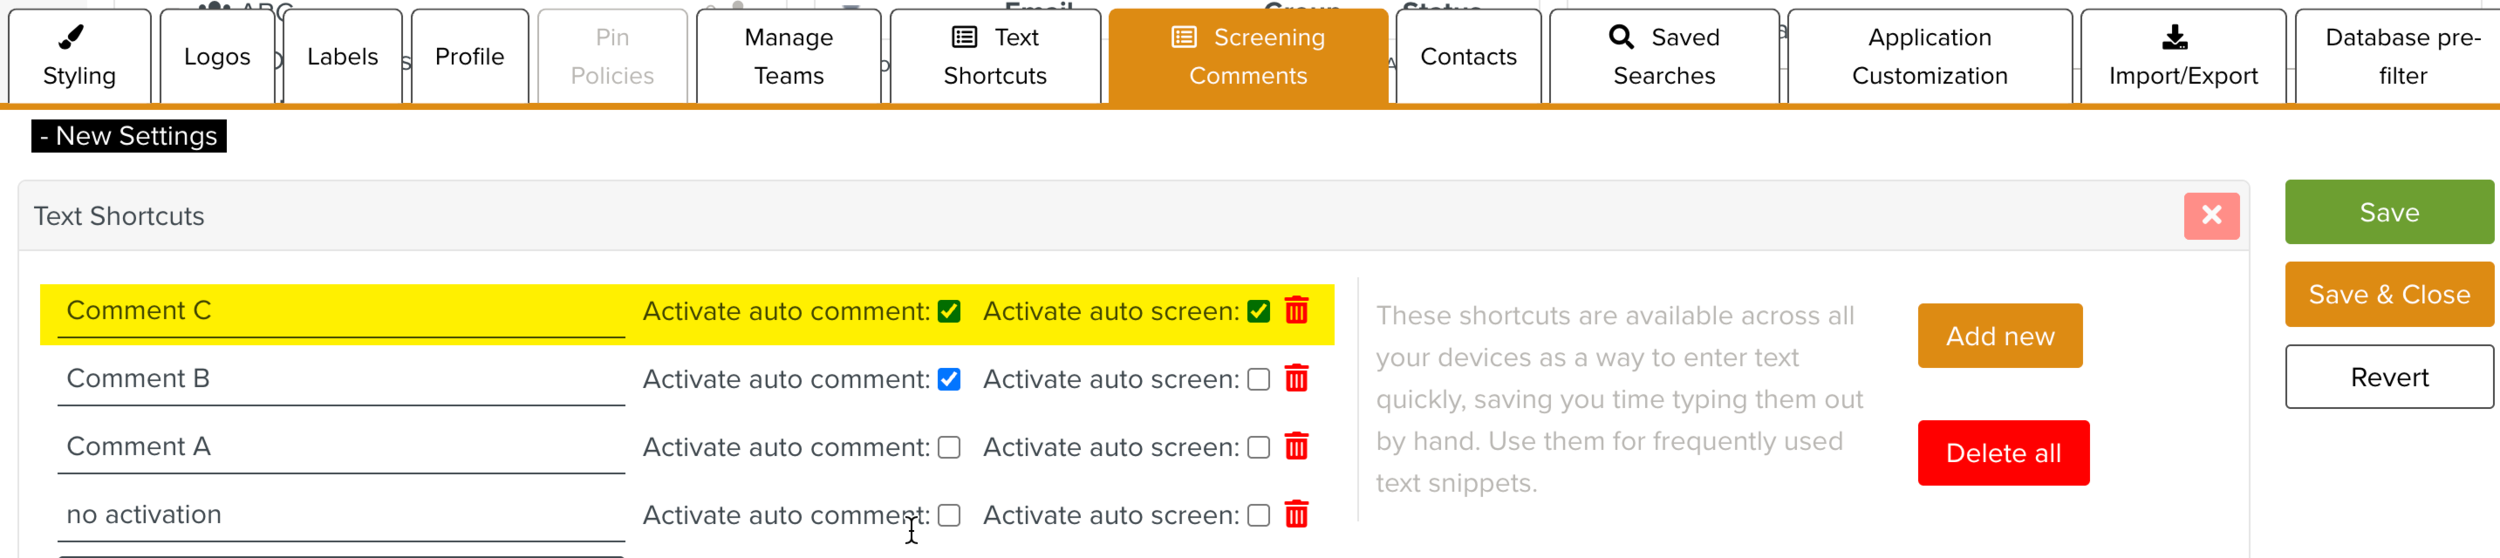
When you add Comment C to an Impact, the Screening comment is added, saved automatically, and the Impact is screened.
To configure Screening comments in Enterprise Settings:
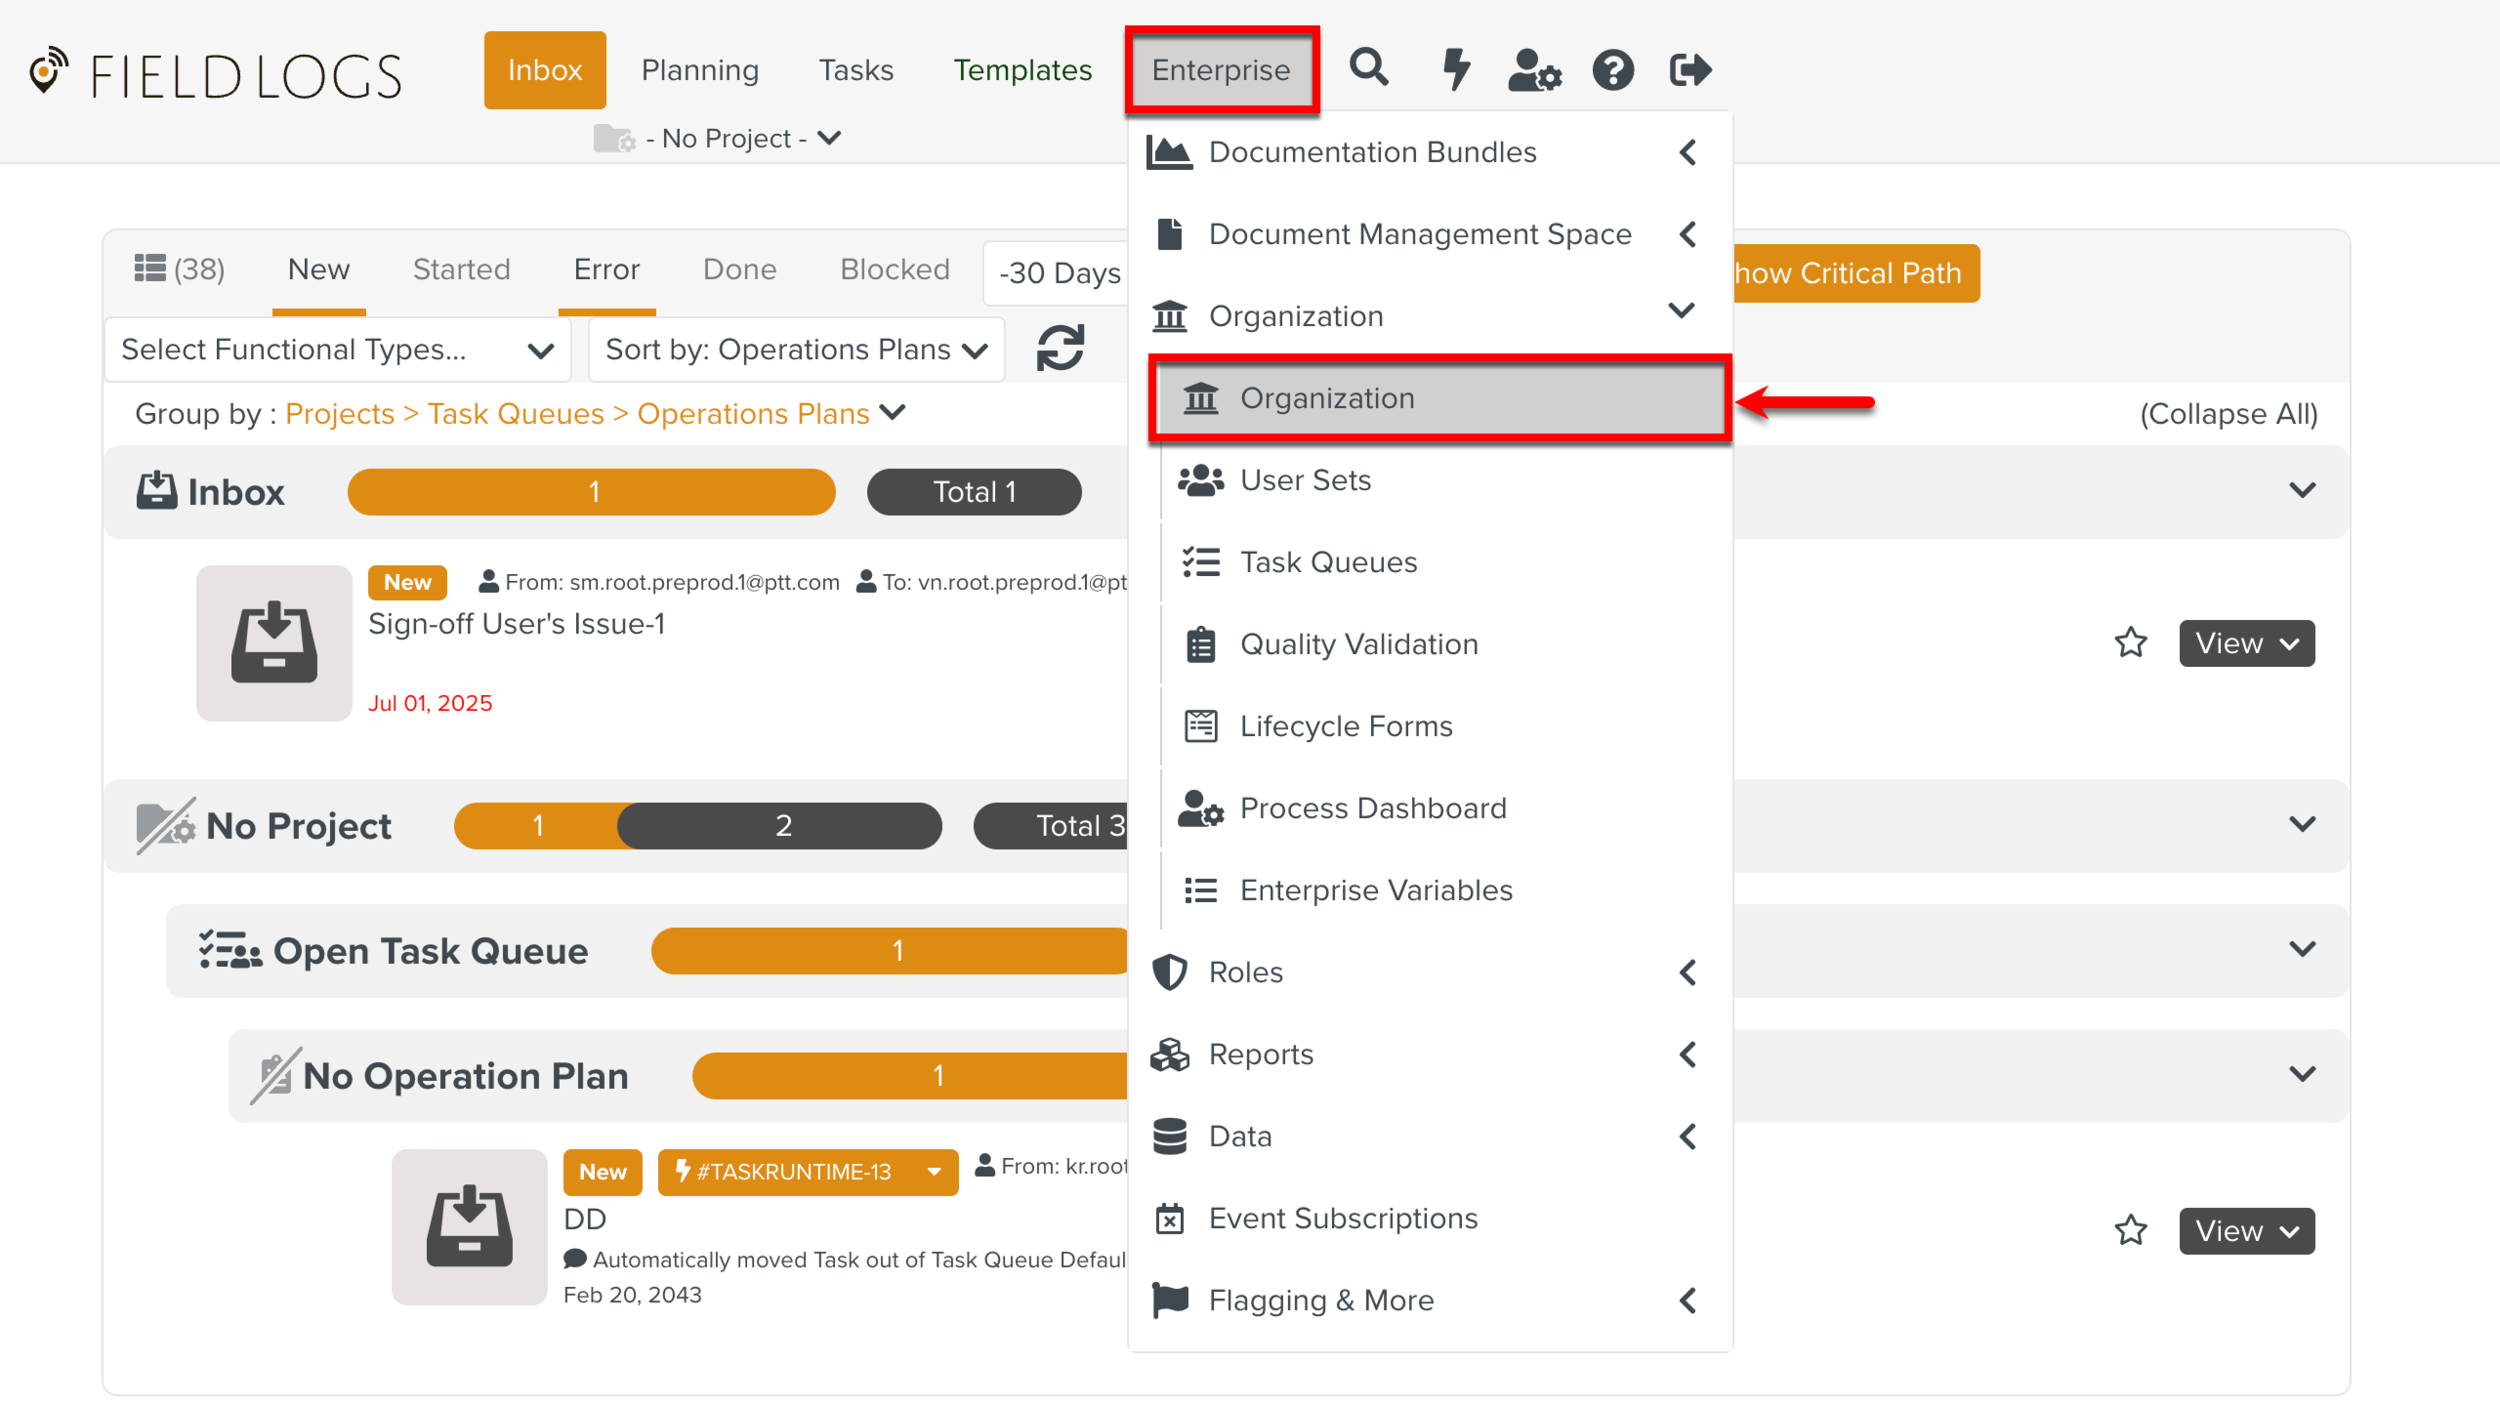
From the main menu, go to > > .
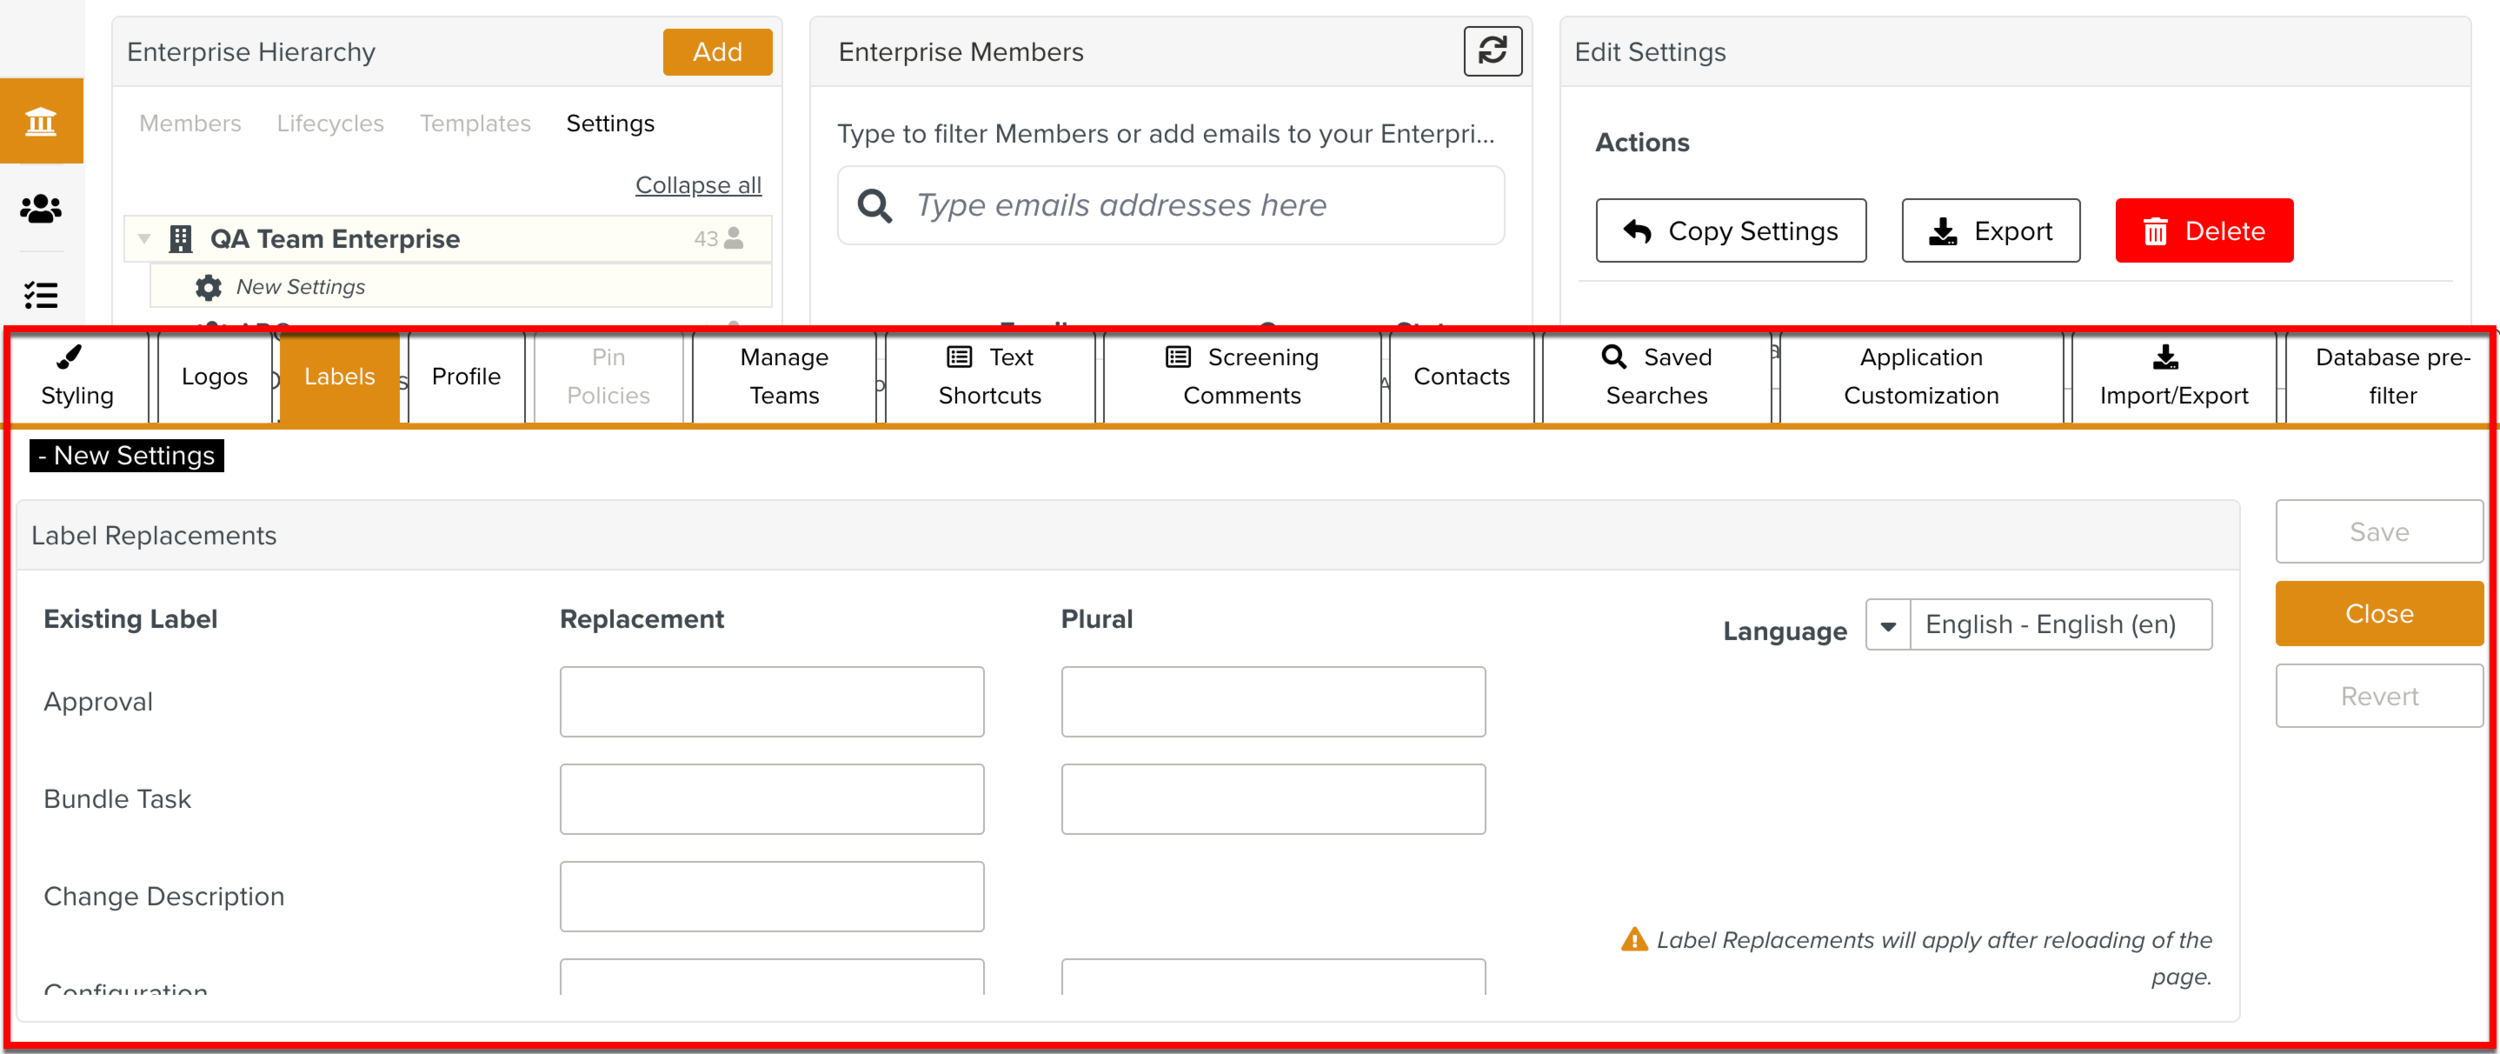
In the Enterprise Hierarchy section, go to Settings tab.
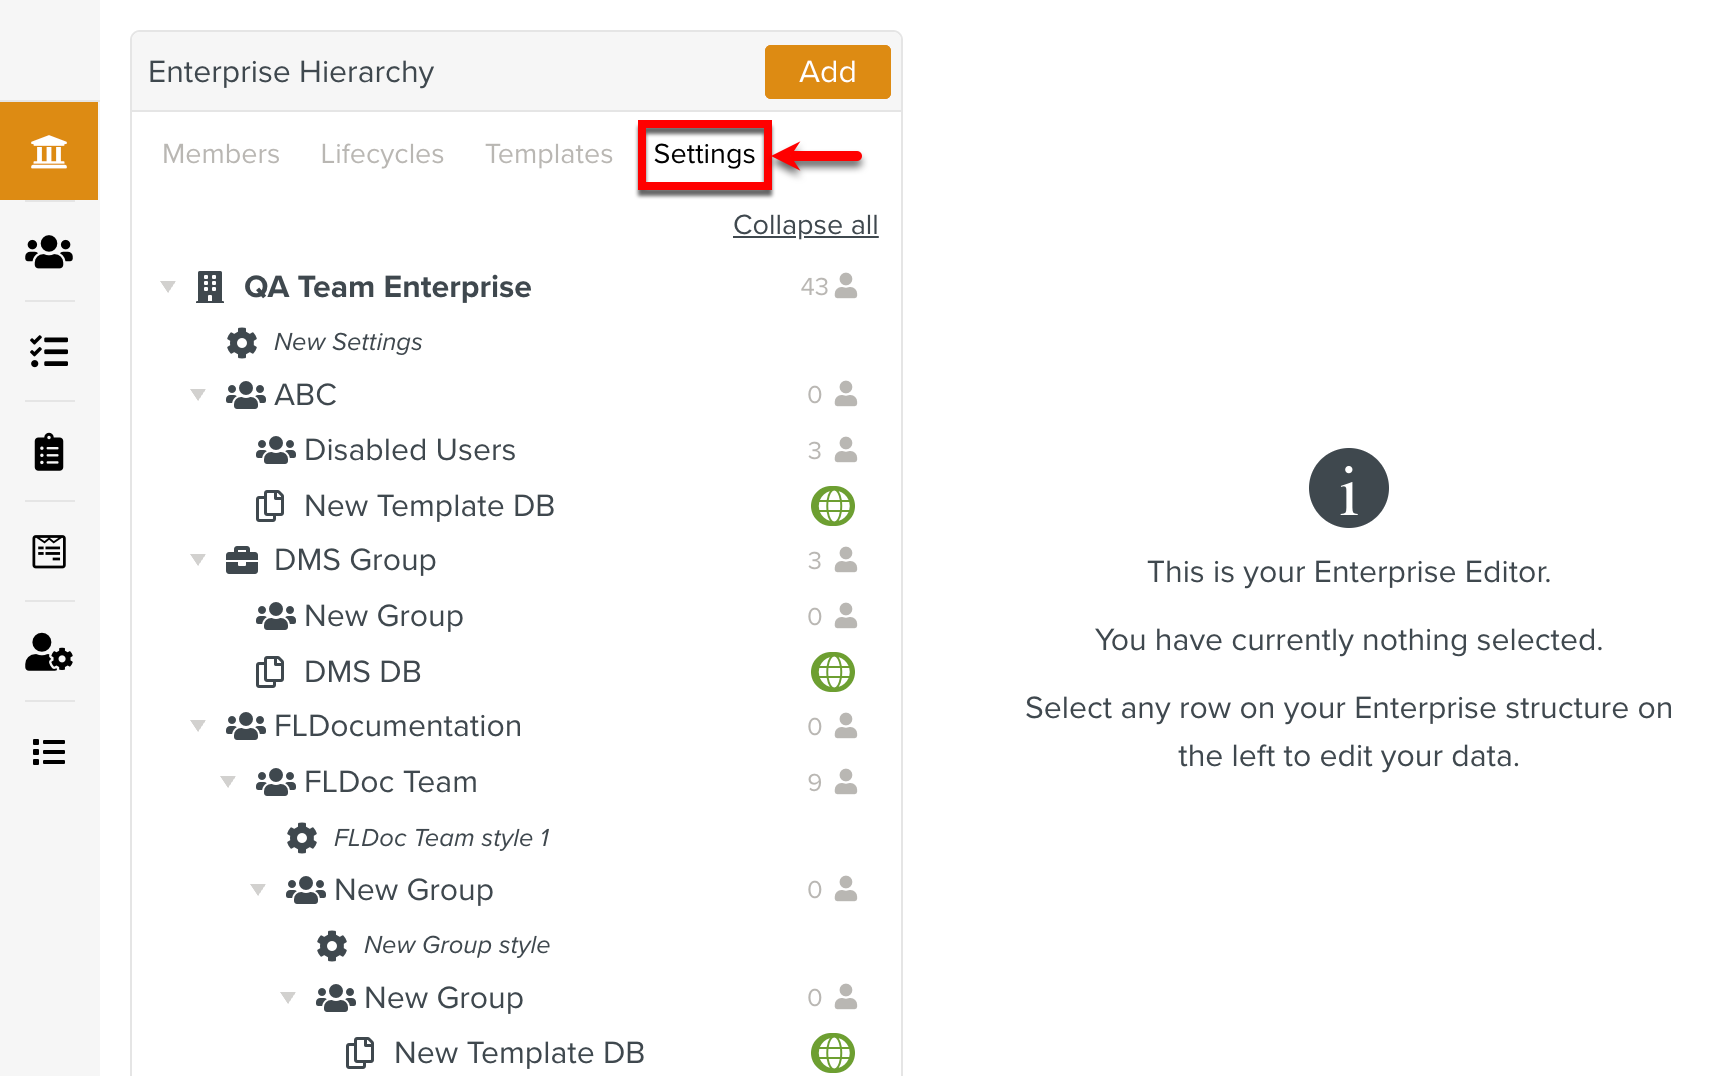
Select New Settings and click Edit.
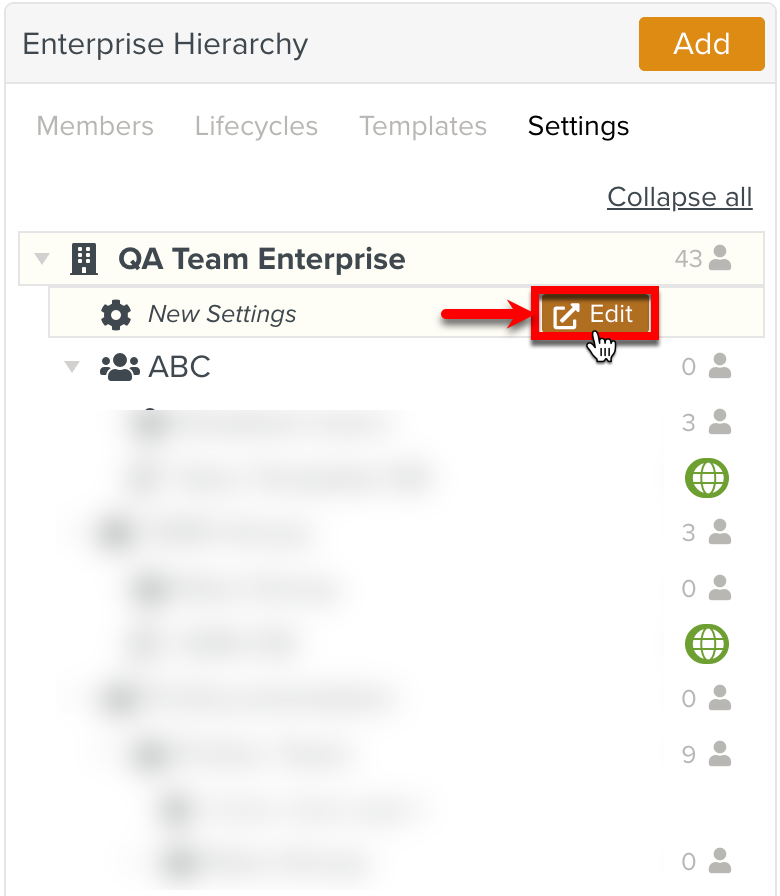
The pane New Settings appears as shown below.
Note
It is also possible to access the Enterprise Settings panel using keyboard shortcuts.
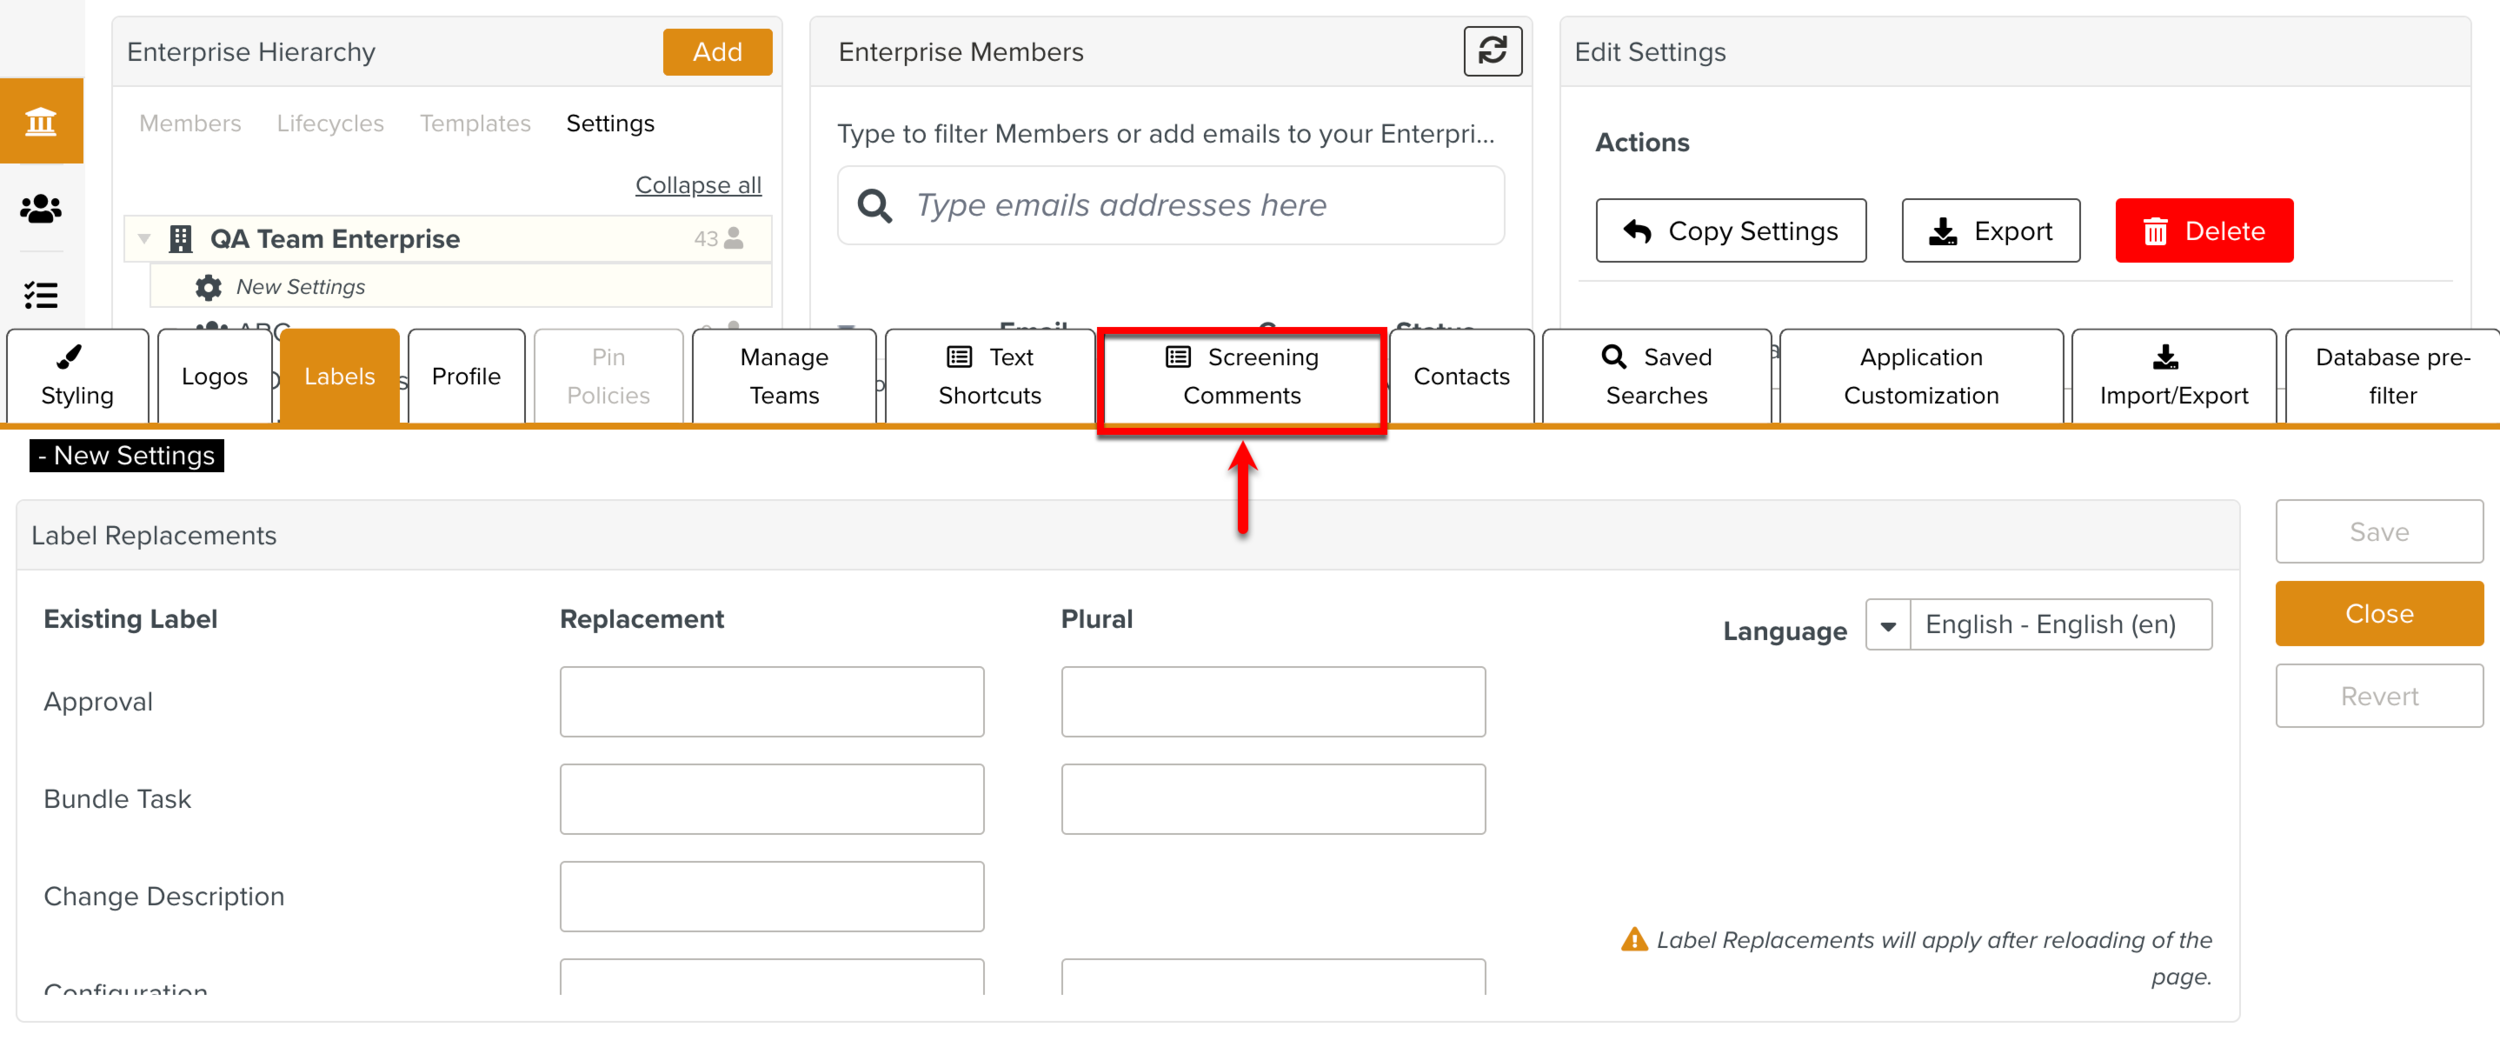
Select the tab Screening Comments.
Click .
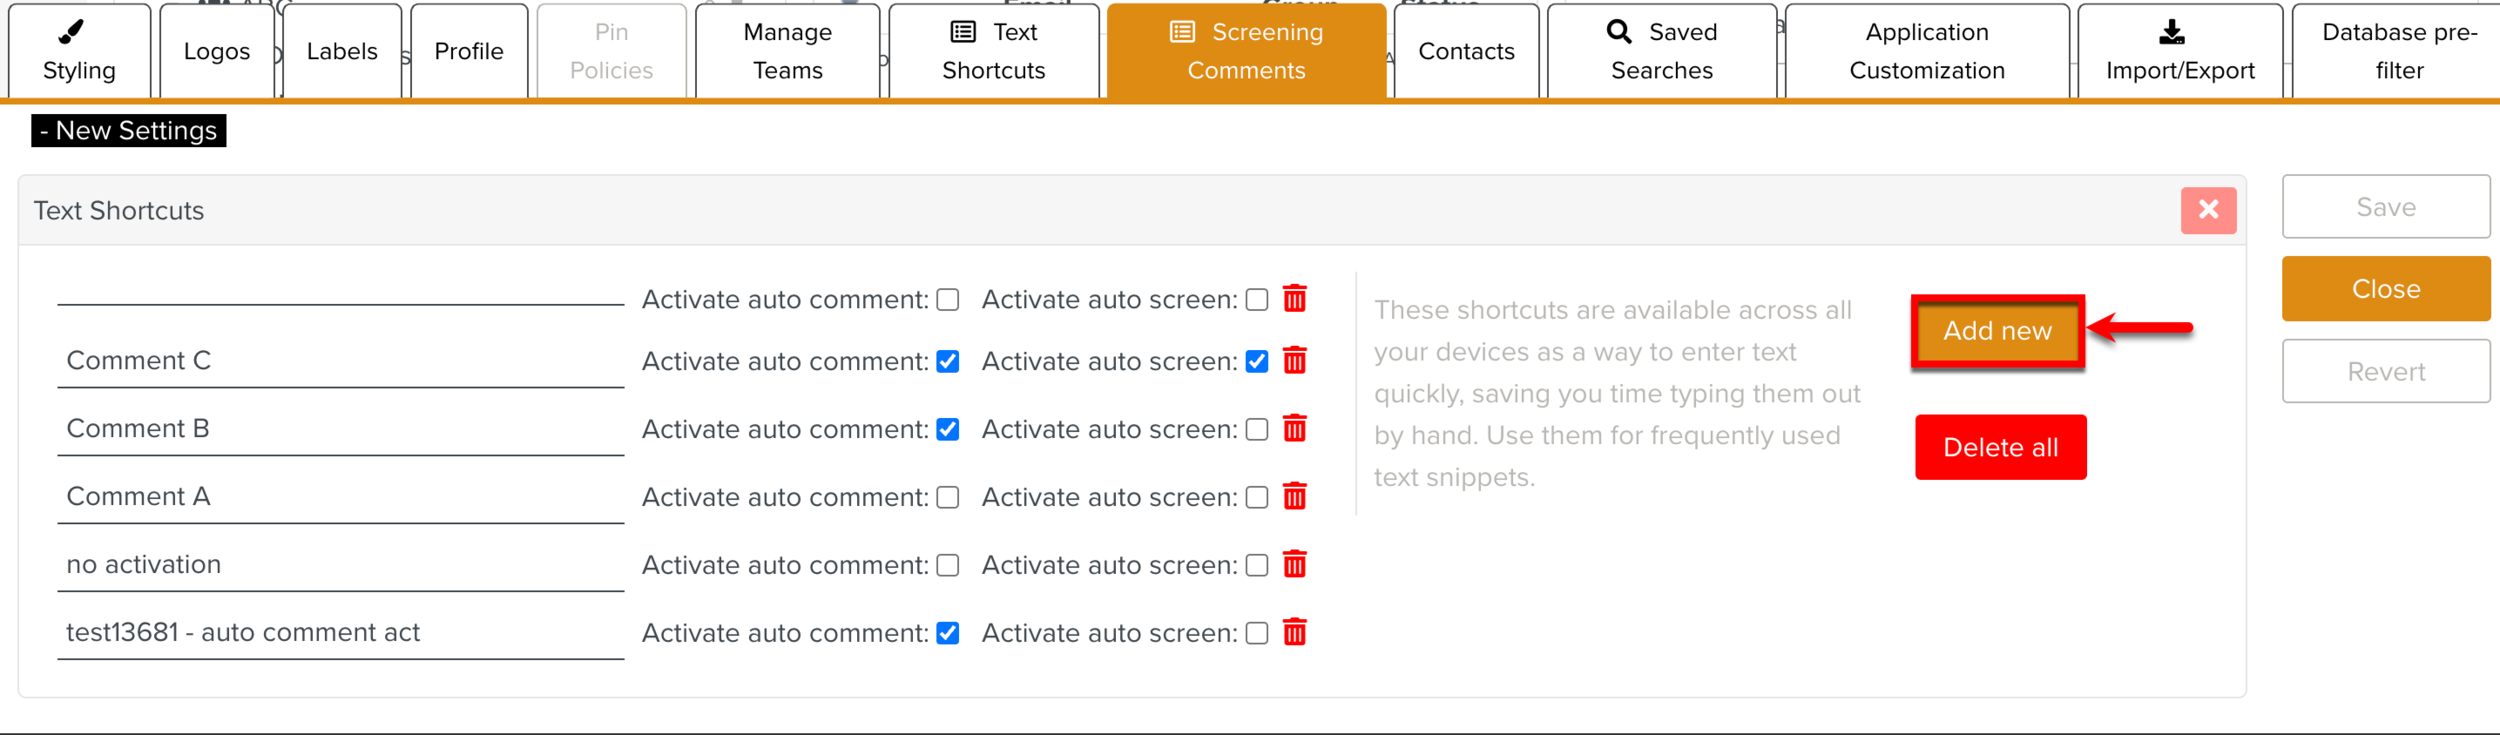
A text box to enter the new Screening comment appears.

Enter the Screening comment.
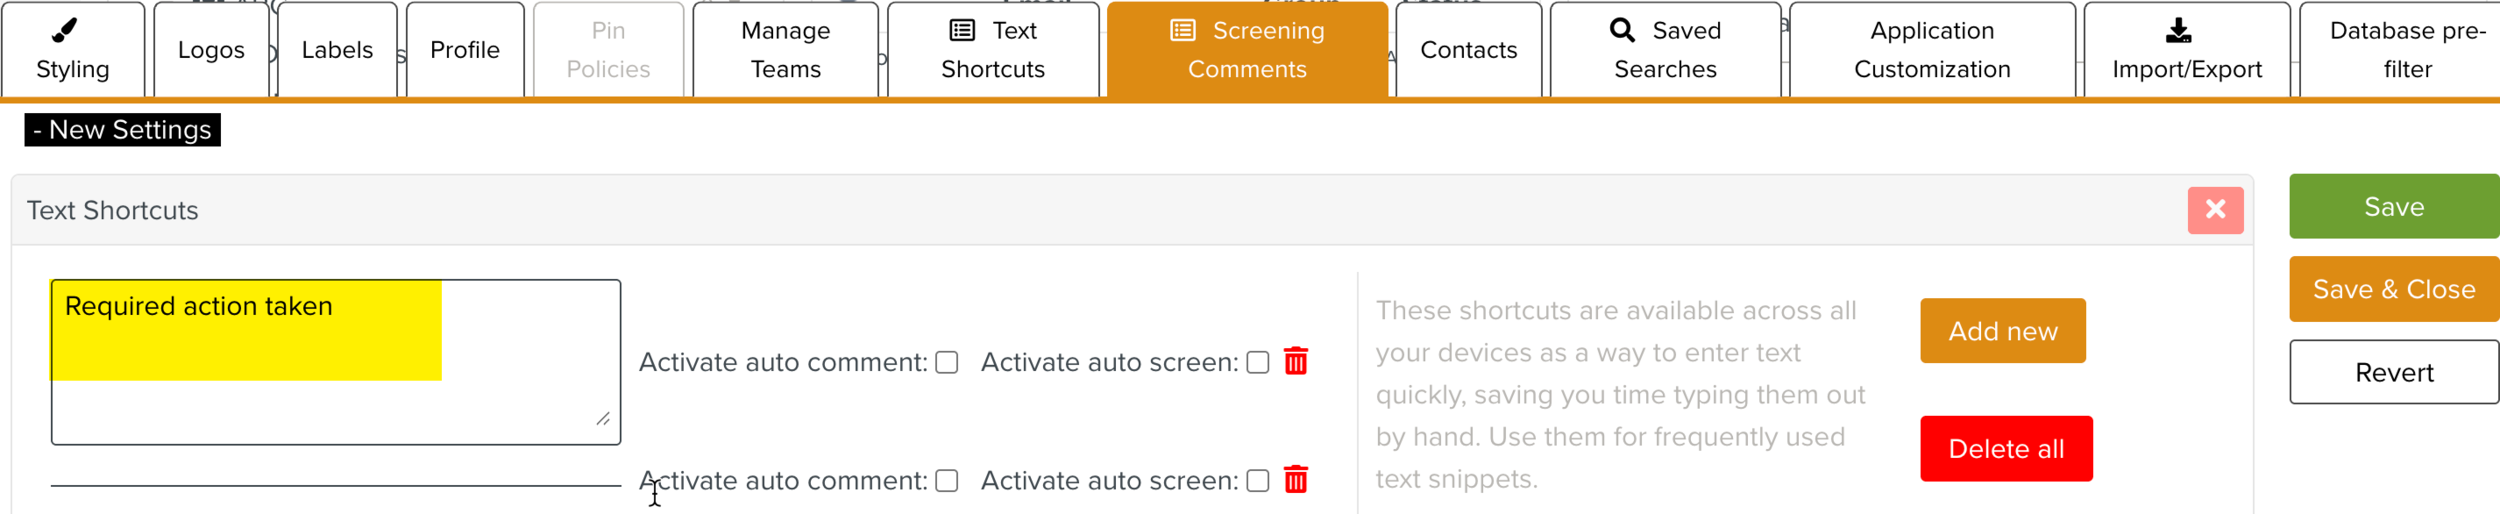
Configure the auto comment and auto screen options as required
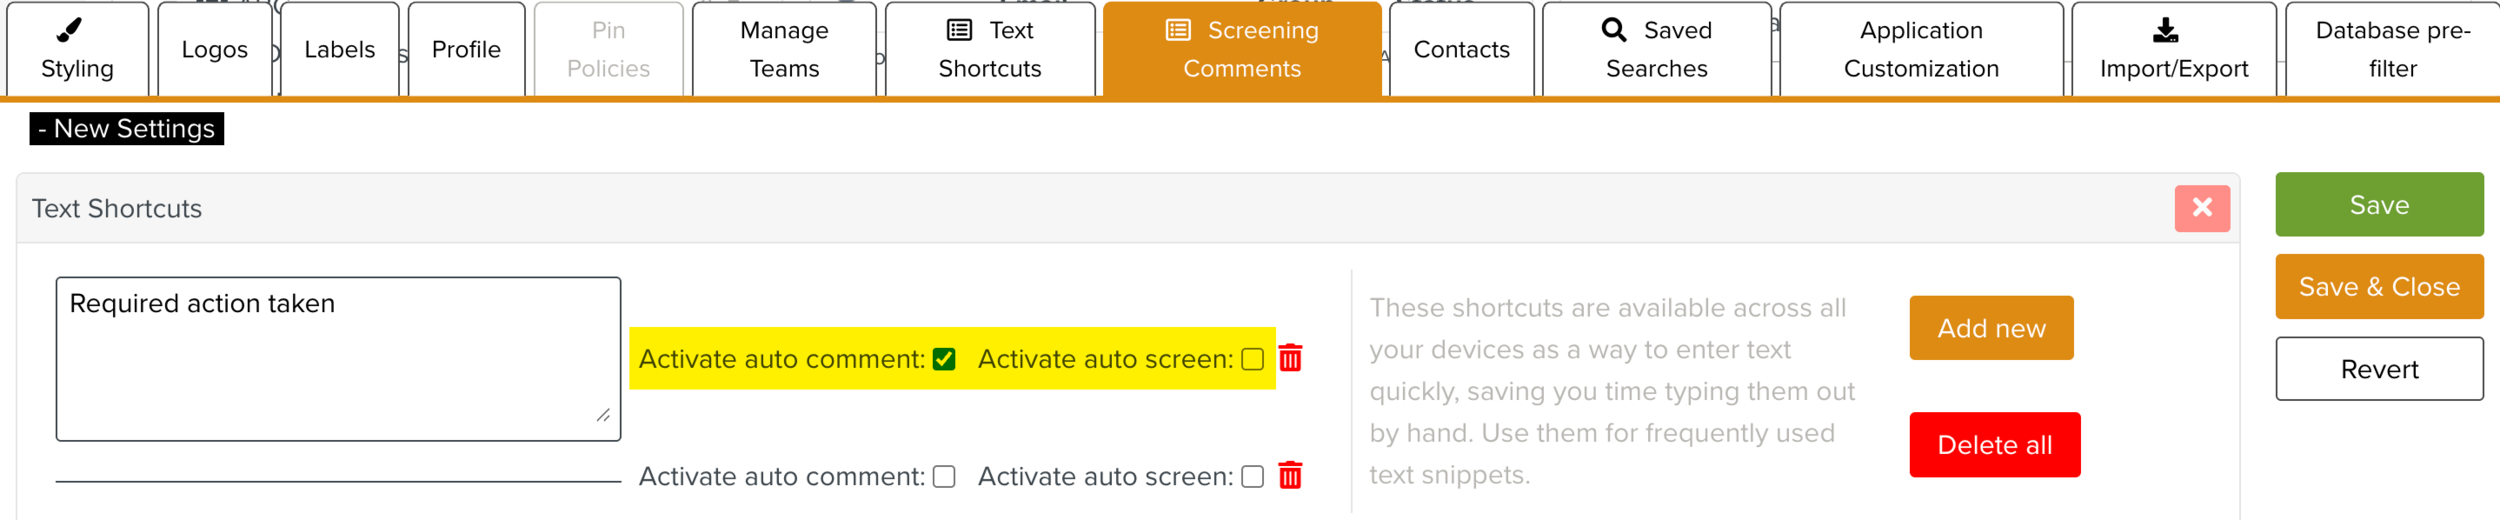
In the above example, Activate auto comment is enabled and Activate auto screen is disabled.
Click .

You can also click to save the Screening comment and close the pane New Settings.
You have now configured the Screening comment. This pre-defined Screening comment can be selected during Screening.

To delete a Screening comment, click the Delete icon
 .
.
To delete all the Screening comments, click .
You can select any of these predefined Comments while screening an Impact.