Setting up Event Triggers
The Counter in an Operation Plan is Trigger-based. It has an Event Trigger that executes an Action when the specified Event occurs in the system.
An Event Trigger provides a method to initiate a Task creation. It enables users to establish a logical process for generating Tasks based on their requirements.
Select the Type of Event Trigger from the Type dropdown list as shown below:
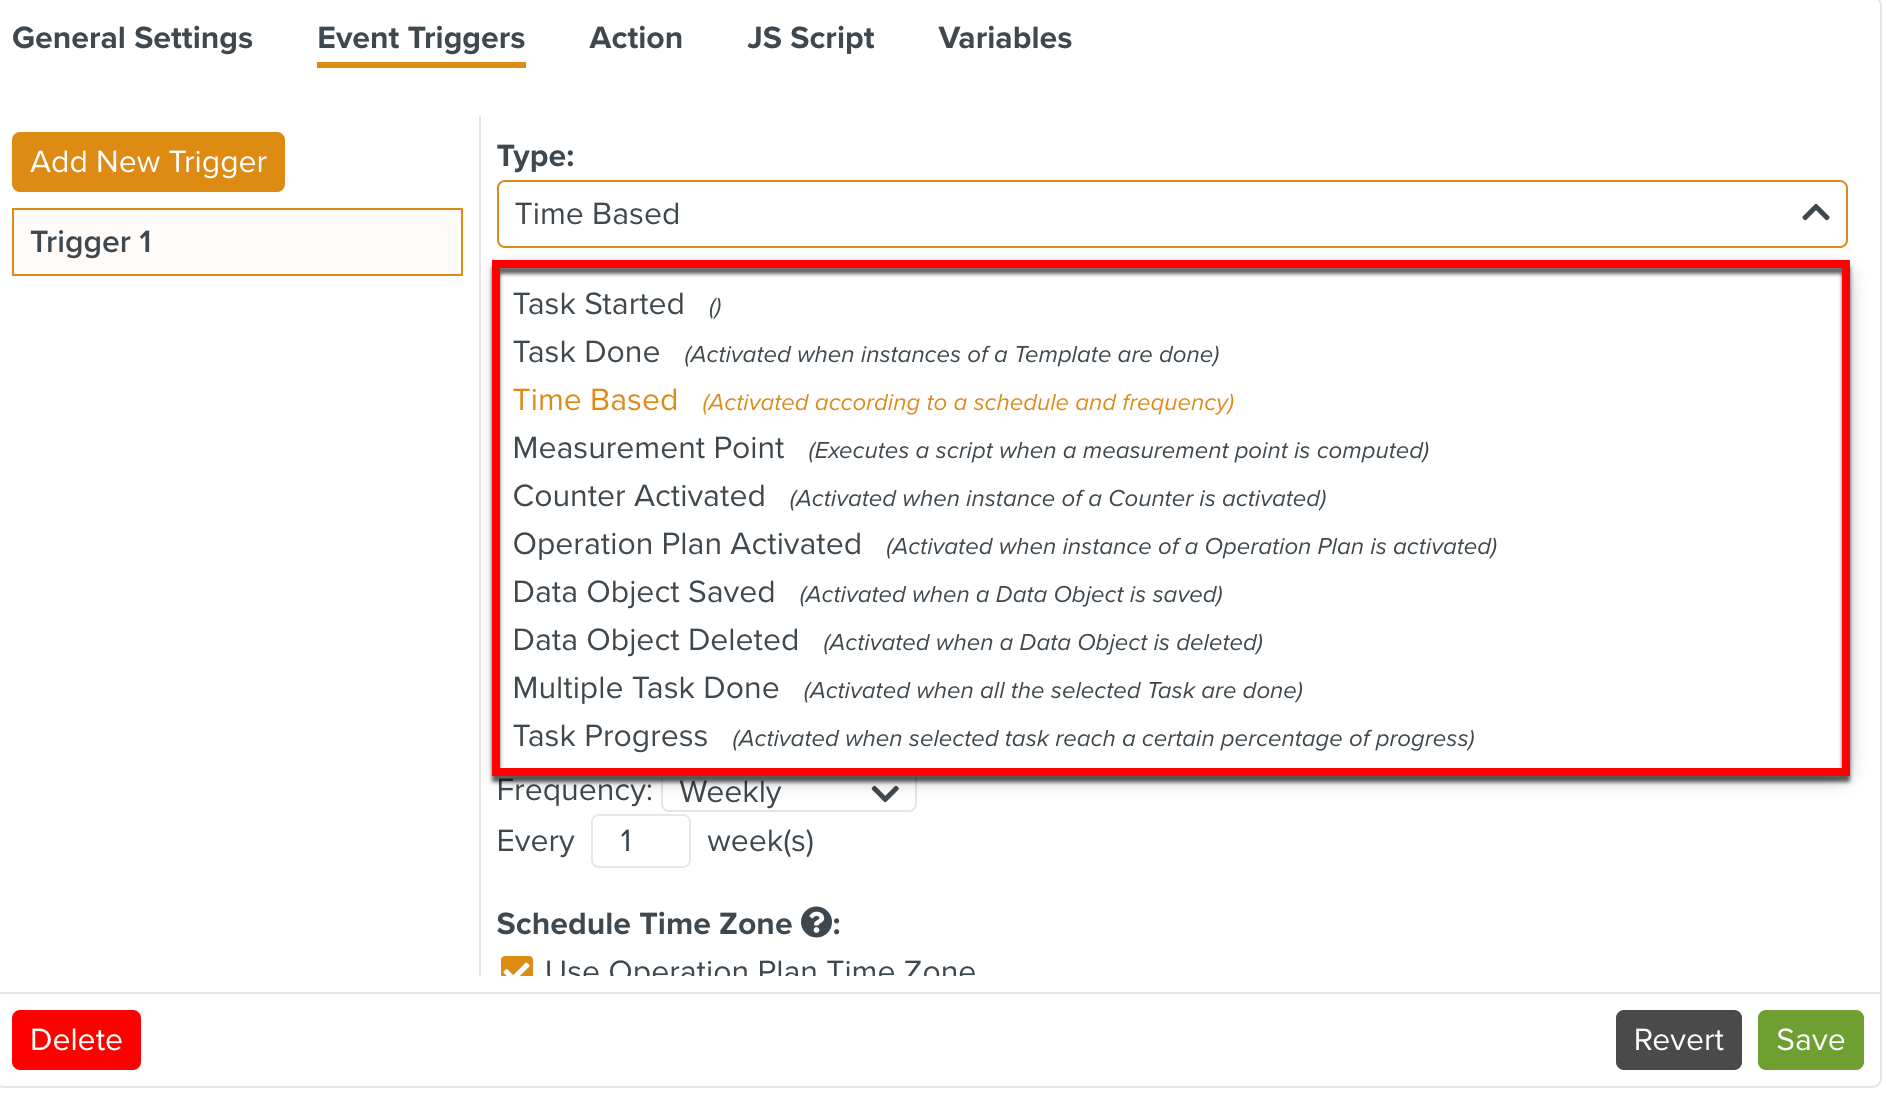 |
There are ten different types of Event Triggers:
Task Started
Task Done
Time Based
Measure Point
Counter Activated
Operation Plan Activated
Data Object Saved
Data Object Deleted
Multiple Task Done
Task Progress
Based on the Type of Event Trigger chosen, the fields relevant to the chosen Type appear.
An Event Trigger of Type Task Started triggers the Action when a Task of the selected Template is started.
To add an Event Trigger of Type :
Select Task Started from the Type dropdown list.
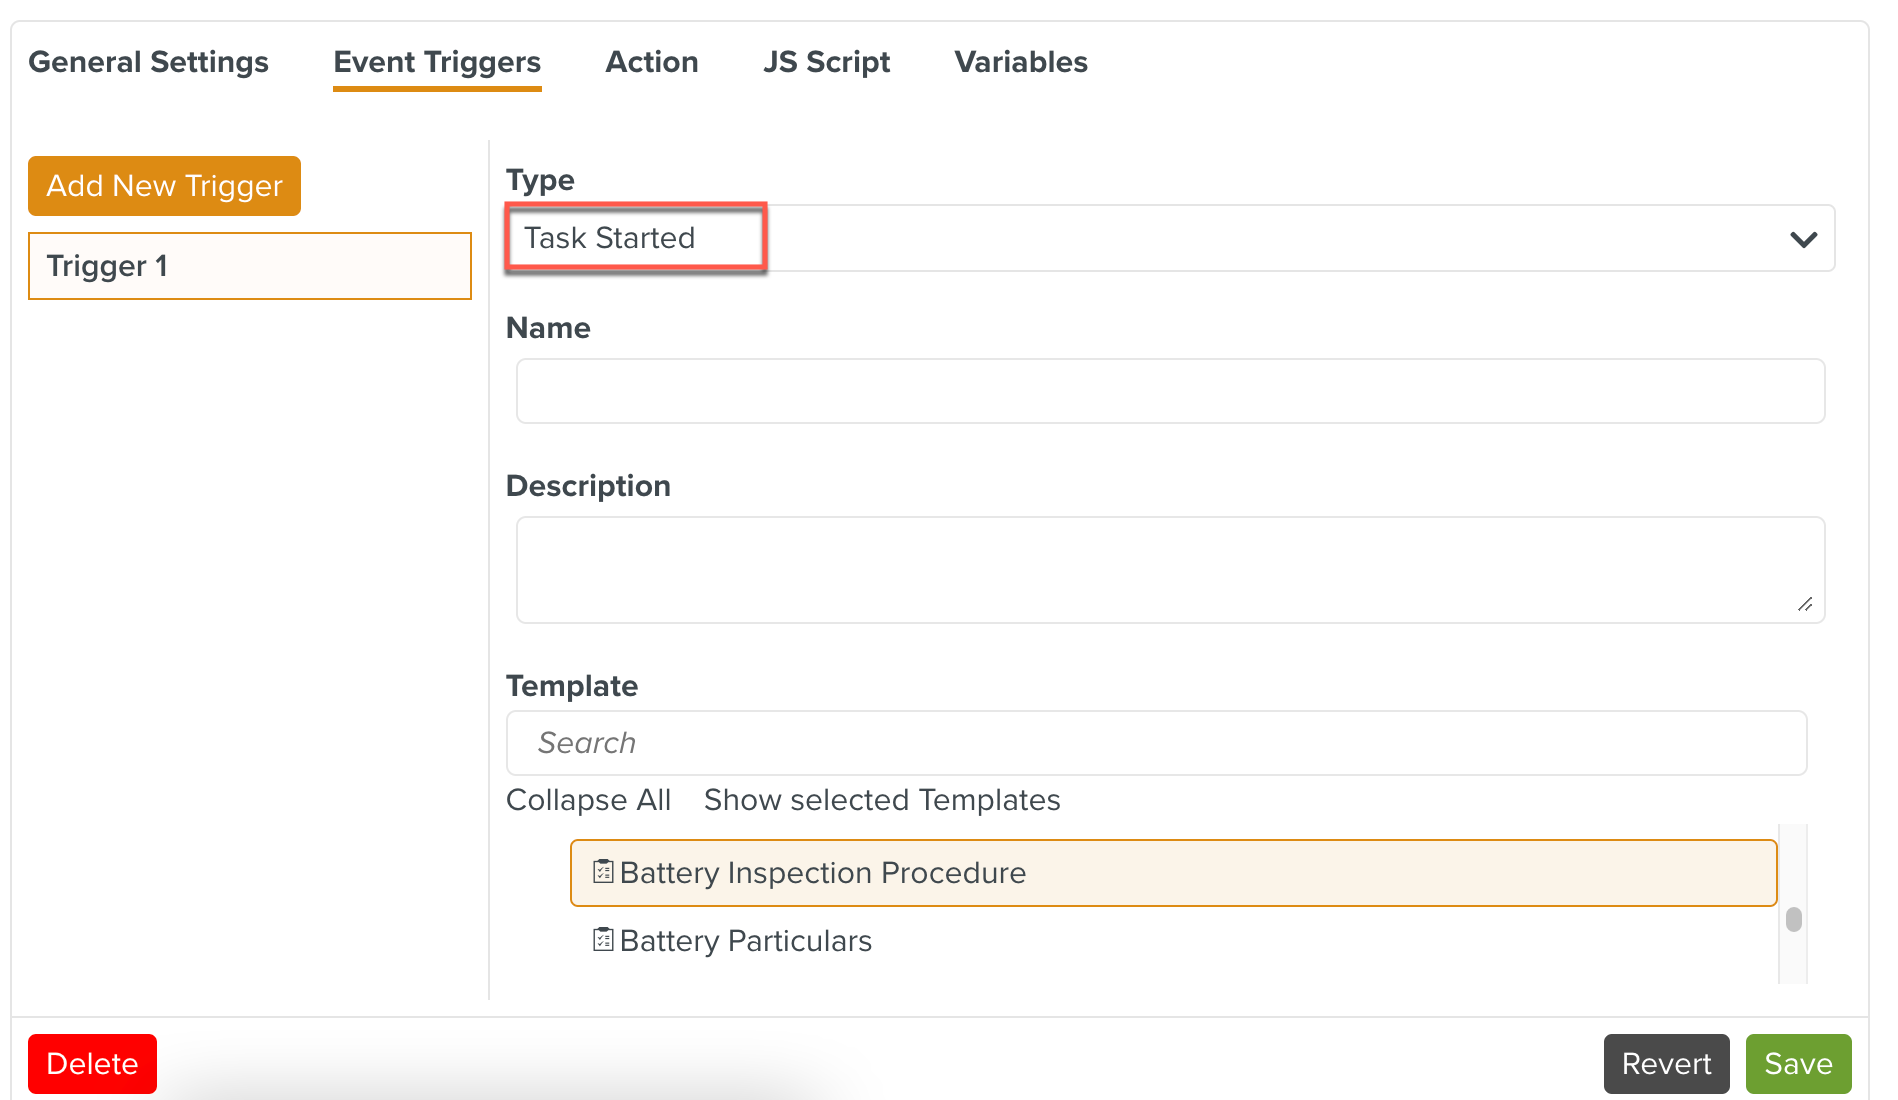
Select the Template associated with this Trigger.
In the example below, this Event Trigger is set to be triggered when a Task assigned from the Template Battery Inspection Procedure is started.
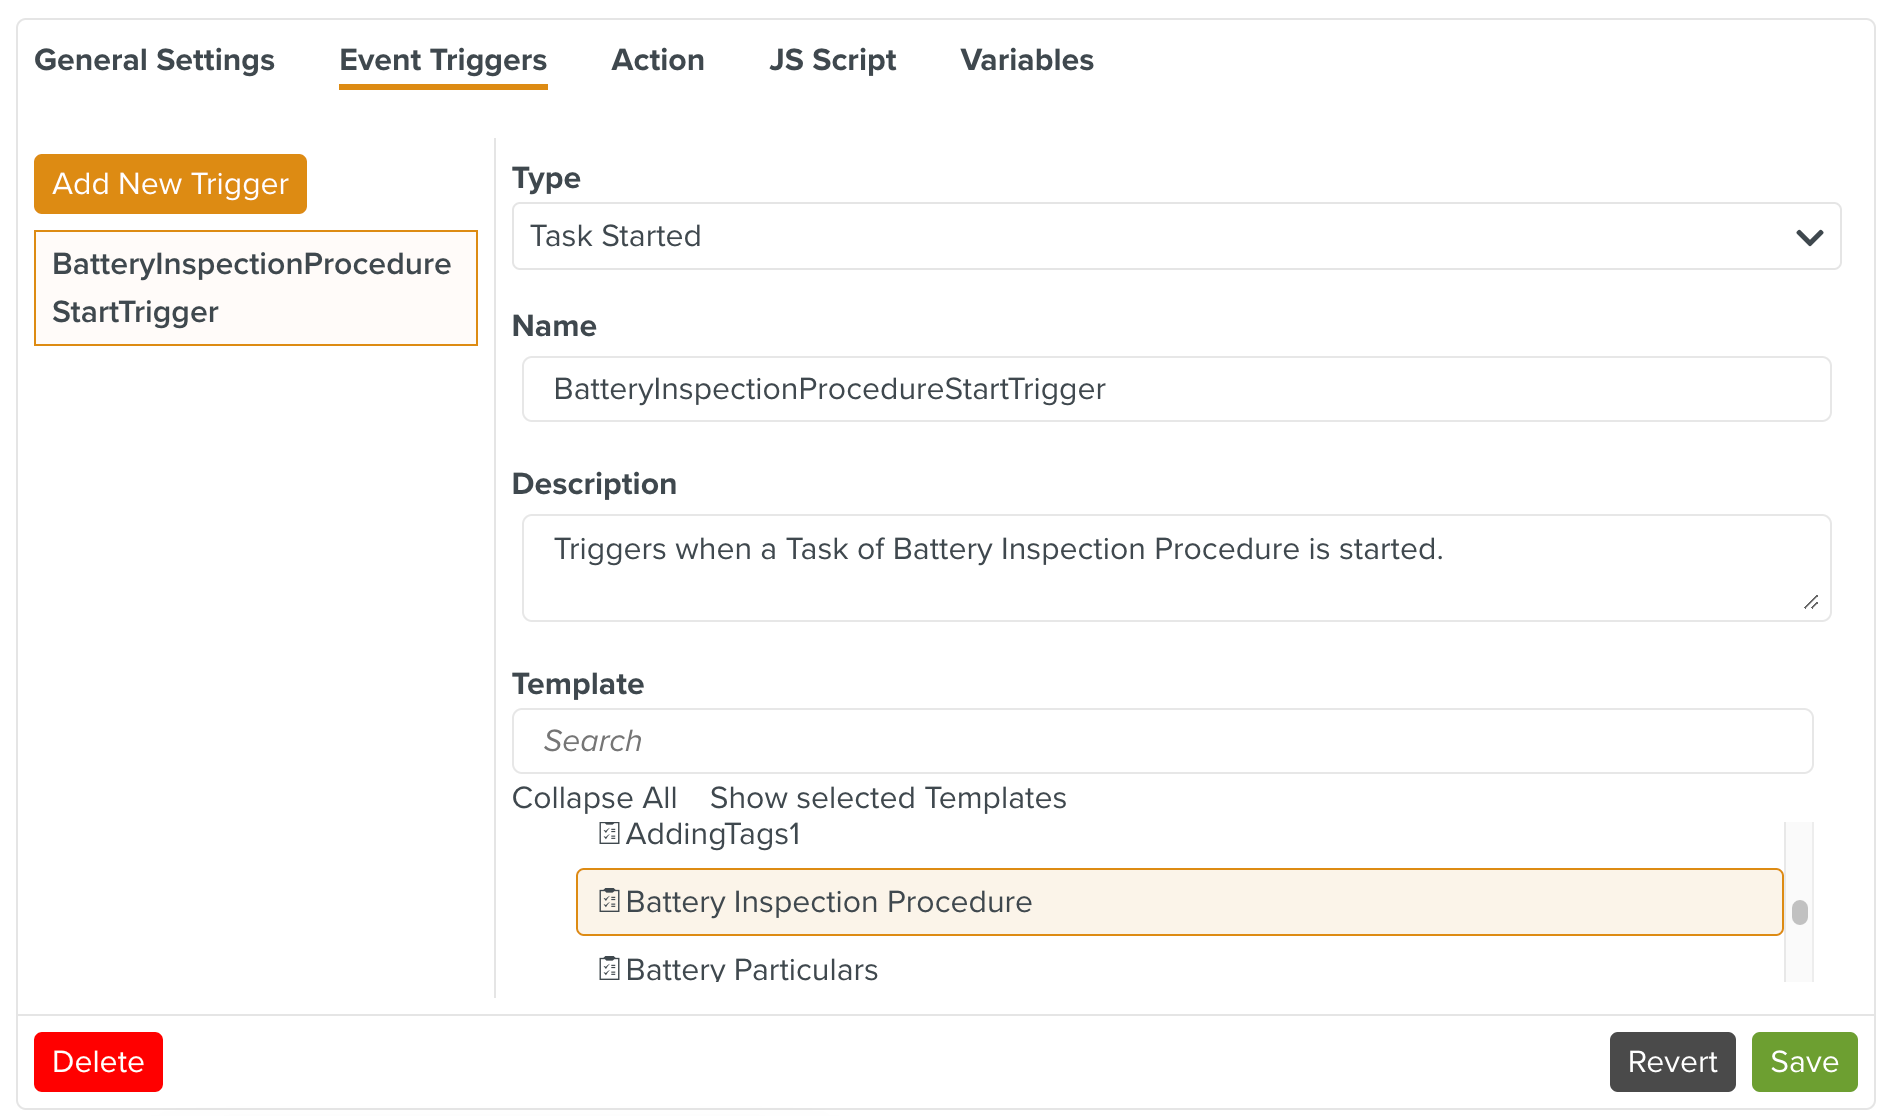
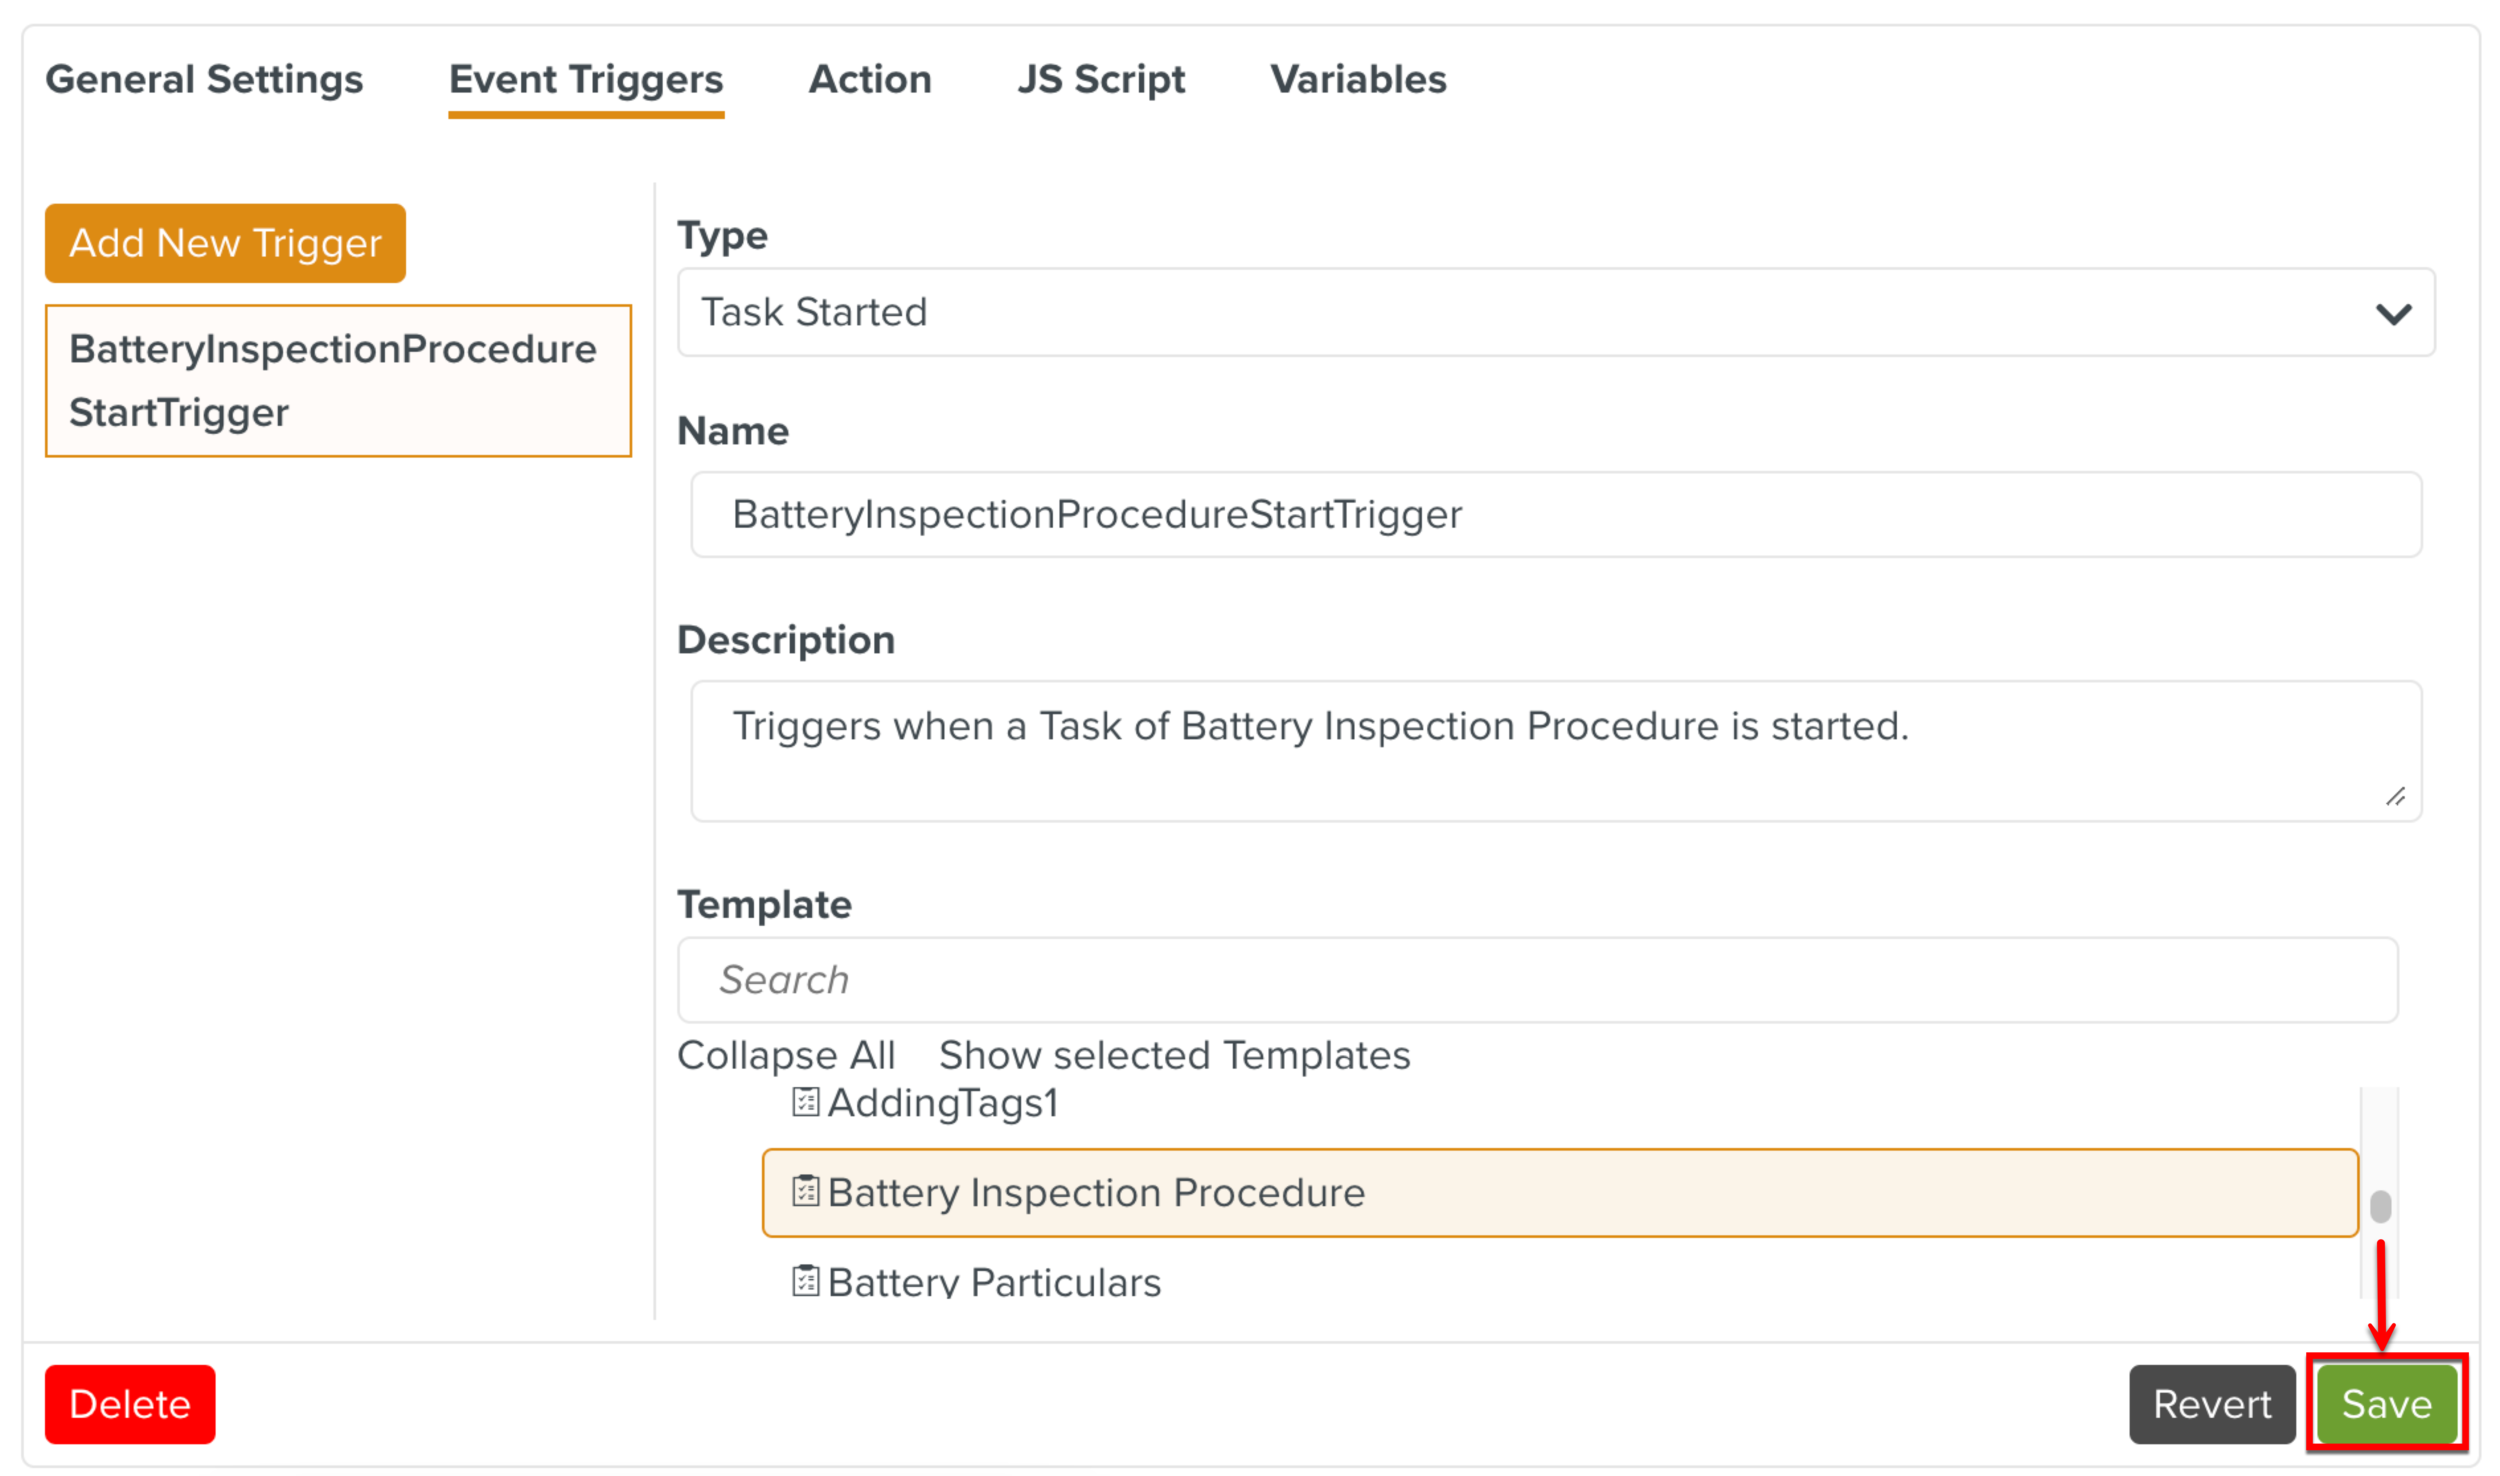
You can customize the name and description of the Event Trigger as shown in the example.
Click .
An Event Trigger of Type Task Done triggers the Action when a Task for the selected Template is completed.
To add an Event Trigger of Type Task Done:
Select Task Done from the Type dropdown list.
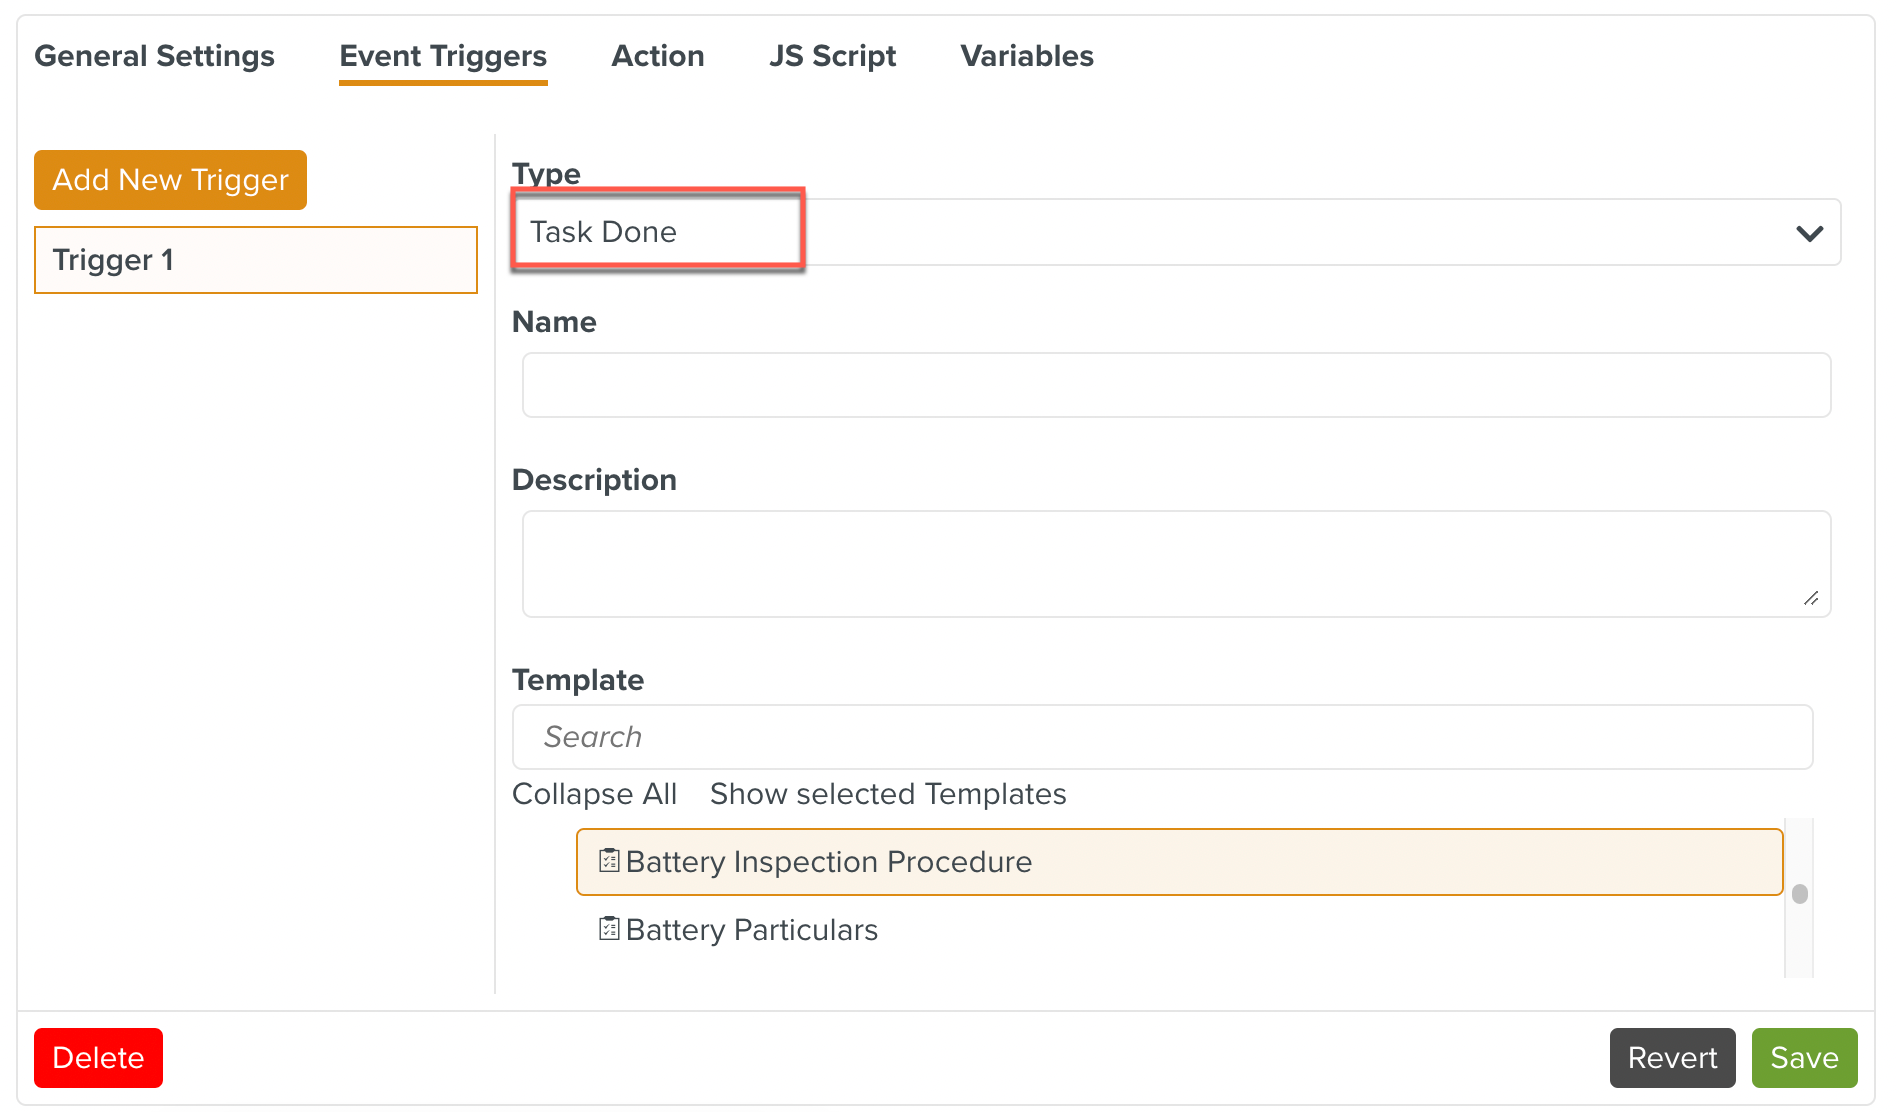
Select the Template associated with this Trigger.
In the example below, this Event Trigger is set to be triggered when a Task assigned from the Template Battery Inspection Procedure is completed.
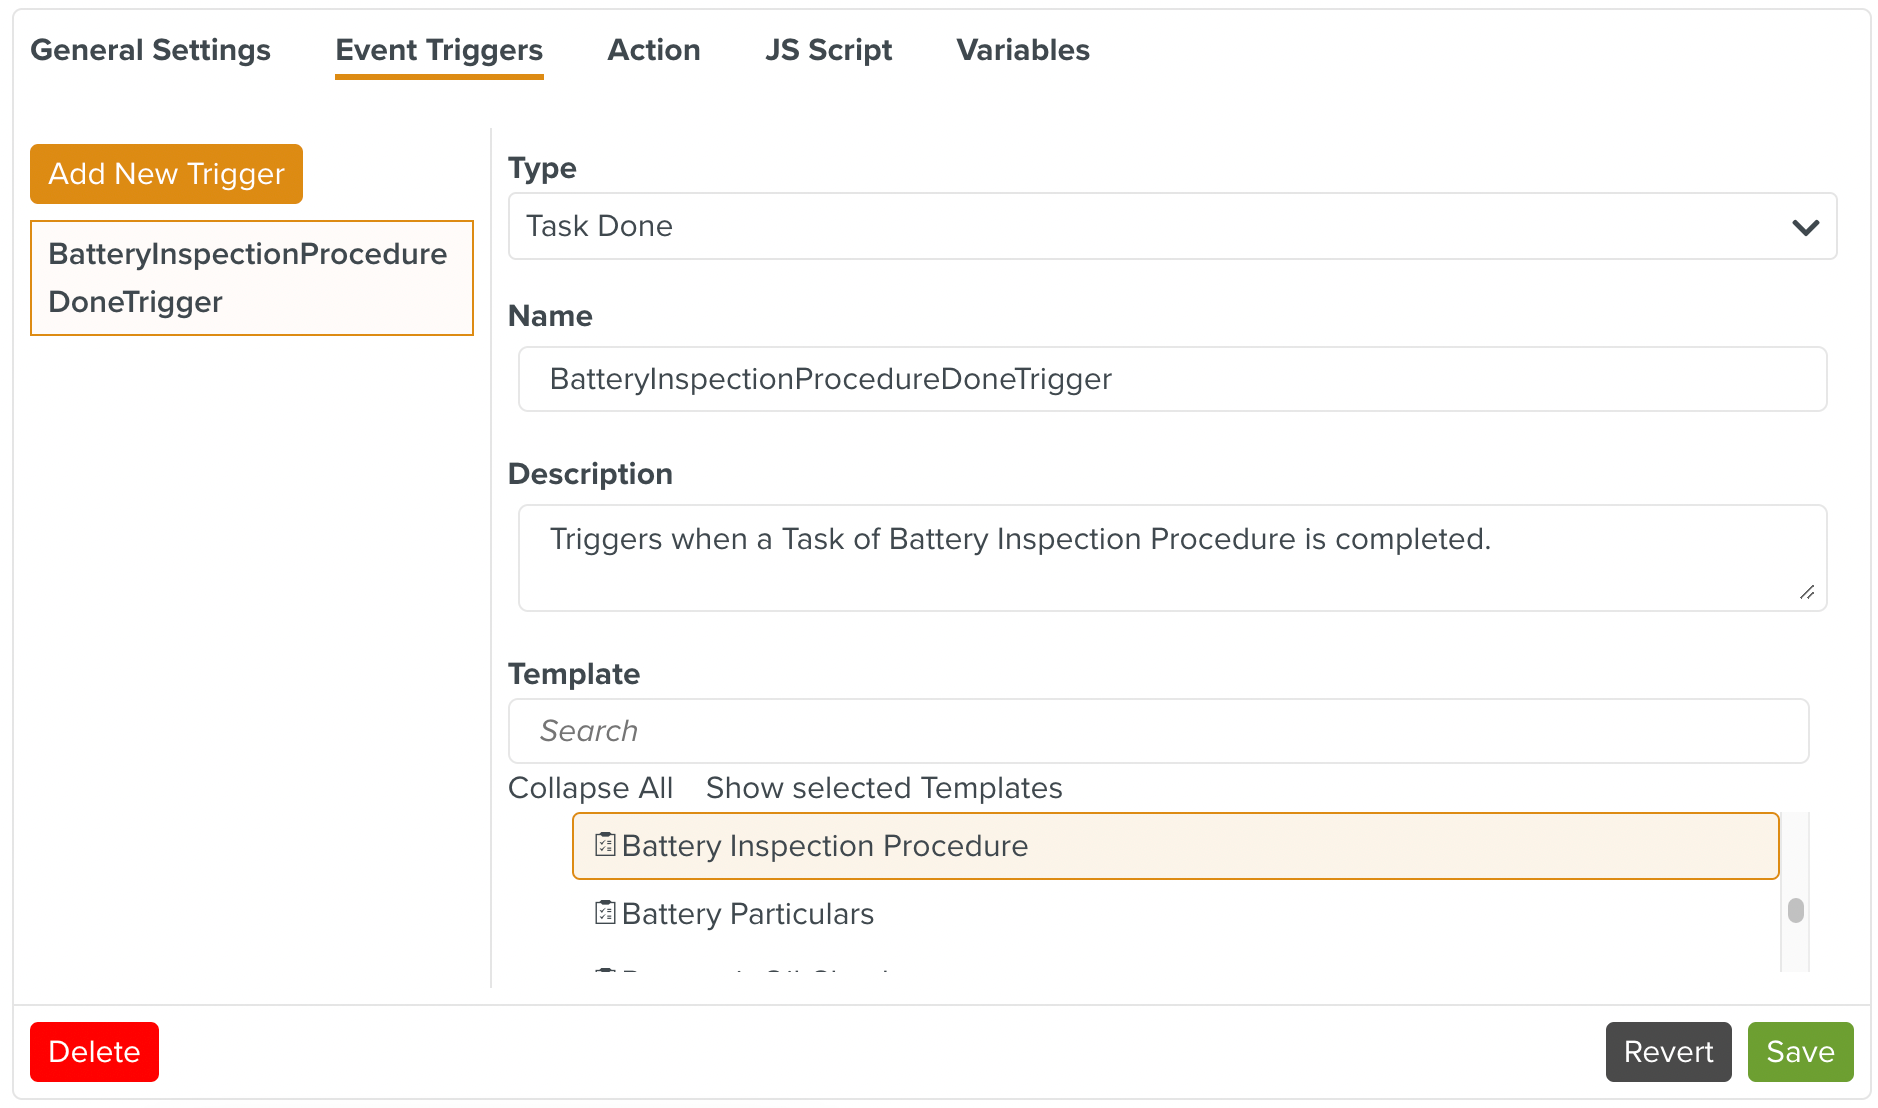
You can customize the name and description of the Event Trigger as shown in the example.
Click .

An Event Trigger of Type Time Based can be set to trigger at a specified time. It can also be set to recur at a specified frequency.
The scheduling options also allow a detailed weekly schedule to be set for an Event Trigger.
To add an Event Trigger of Type :
Select Time Based from the Type dropdown list.
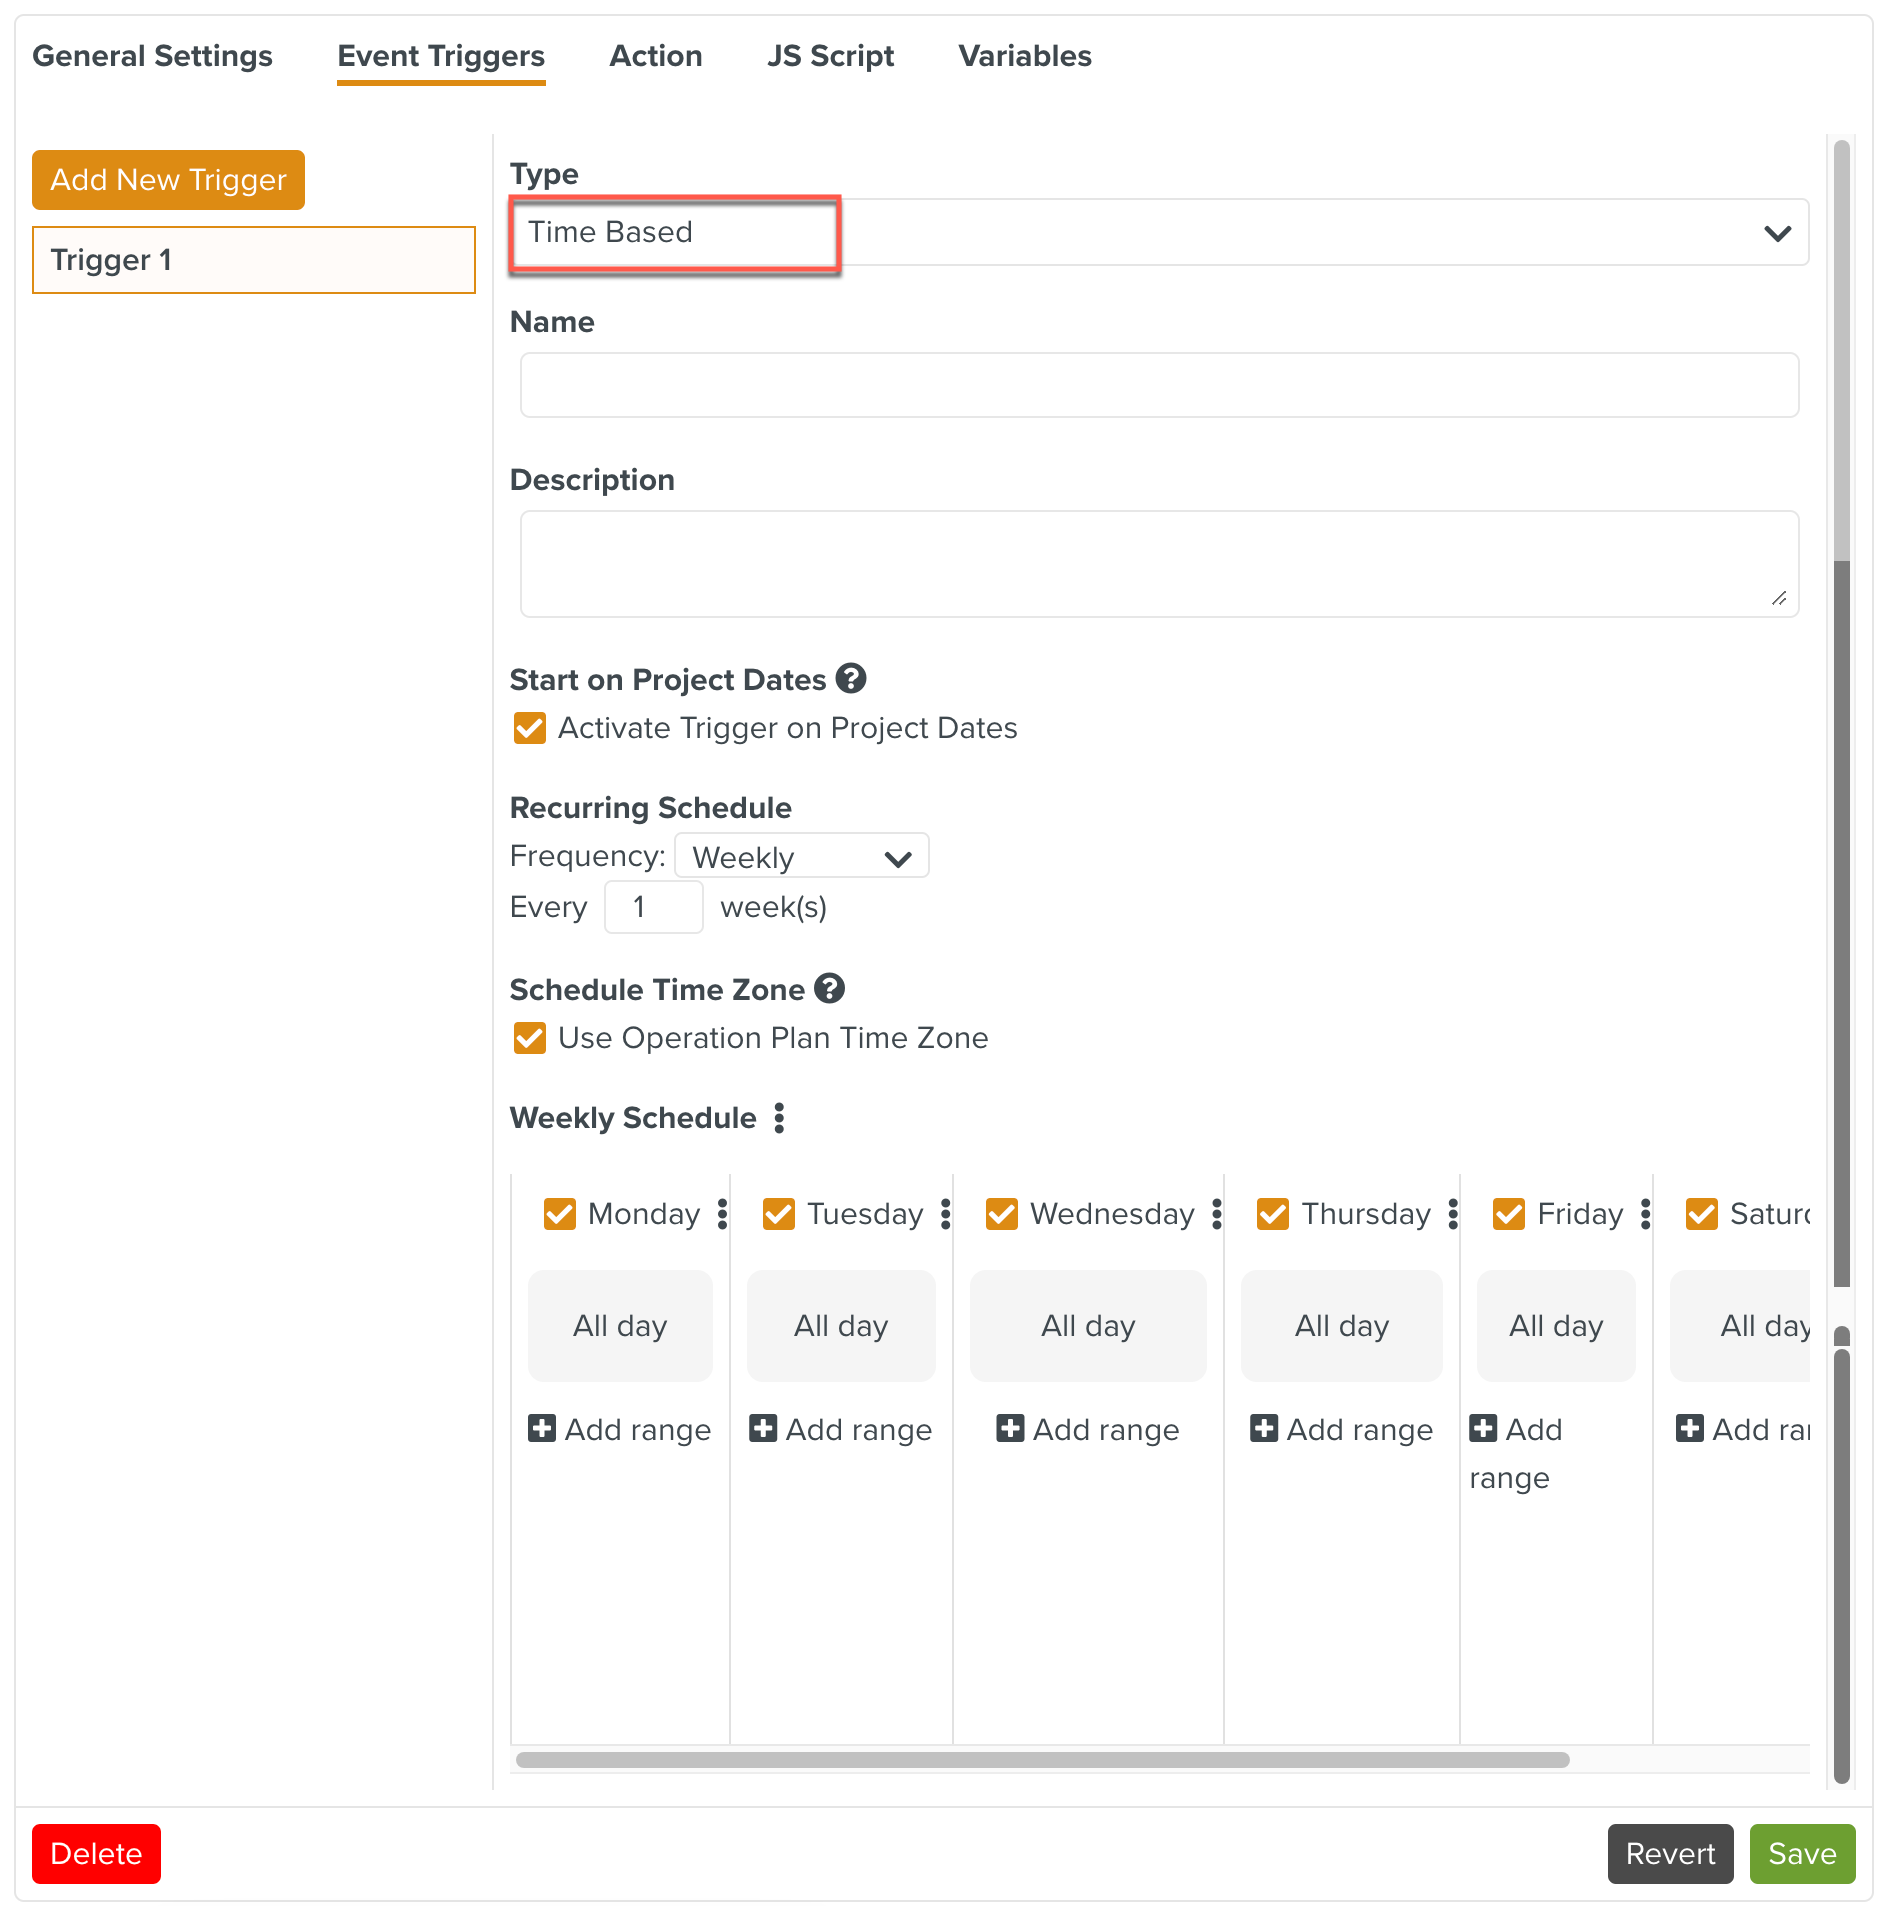
Choose the appropriate schedule for your Event Trigger by editing the Scheduling Options shown below.
You can customize the name and description of the Event Trigger as shown in the example.
Scheduling Options
You can schedule your Event Trigger to recur at a desired frequency. The following options are available to customize the Event Trigger.
1. Start on Project Dates
If the option is checked, then the Trigger will only execute if the project start date has been reached. By default, this option is checked.
 |
If this option is checked, the Event Triggers will not be activated in a Project that has not yet started or already finished, even if the Operation Plan is active and the trigger events occur in the system.
This allows you to set up all the Operation Plans for a Project in advance. You can create Operation Plan Executions from the corresponding Operation Plan Definitions and activate them well before the Project start date. If the Event Triggers have this option checked, they will be activated only when the Project starts.
Sample Scenario:
Create a Project that starts in two weeks. Create an Operation Plan Definition where a Time-Based Event Trigger executes every day and performs a Task. Set the Trigger to be activated on Project dates. Create an Operation Plan Execution from the Operation Plan Definition and activate it. Although the Operation Plan is active, the Event Triggers will not be activated until the Project start date. Once the Project is finished, the Event Triggers will stop being activated.
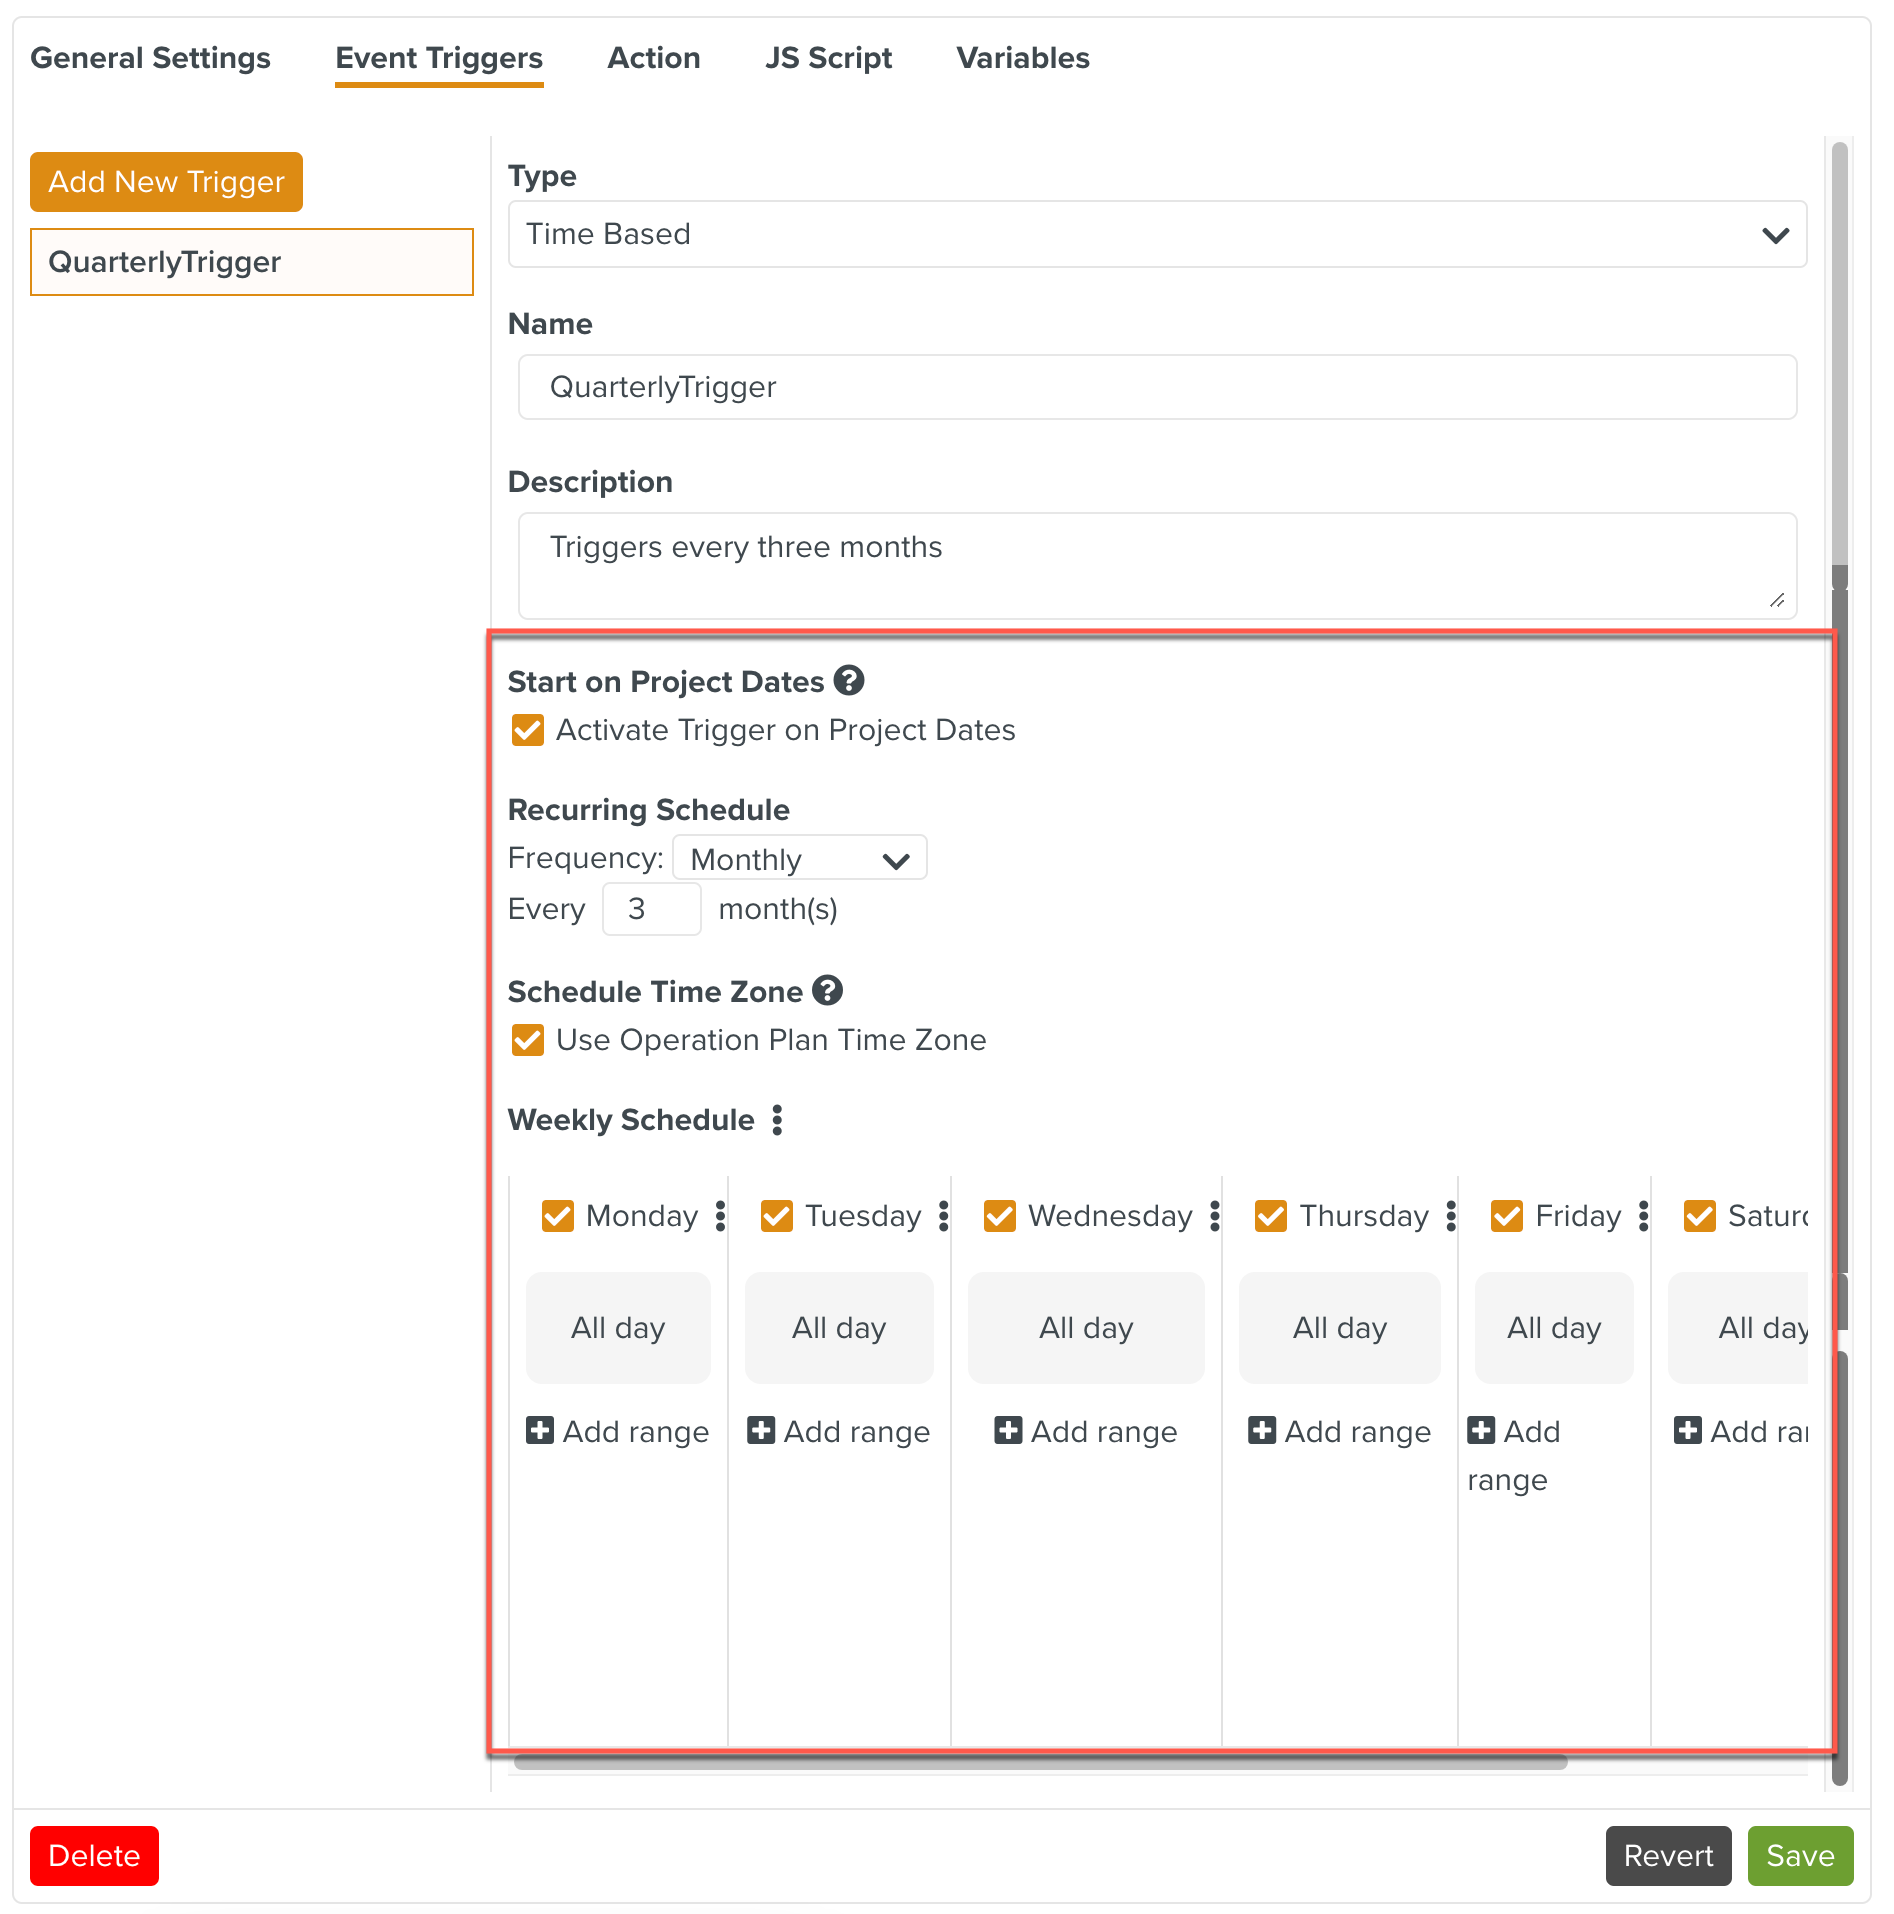
2. Recurring Schedule
Click the dropdown list to specify a frequency.
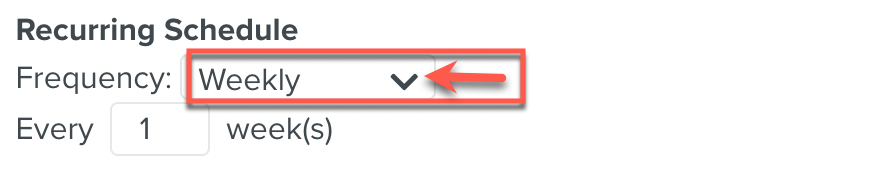 |
Select the desired frequency from the list of options available.
 |
You can choose to schedule the Trigger to run once every 'n' minutes, hours, days, months or years. This can be done by using the arrows indicated to increment or decrement the number.
 |
3. Schedule Time Zone
You can set a Time Zone which the Event Trigger must use. By default, it uses the Operation Plan Time Zone. This is indicated by the option being checked.
 |
Uncheck the option and click the dropdown list to select a Time Zone different from that of the Operation Plan.
 |
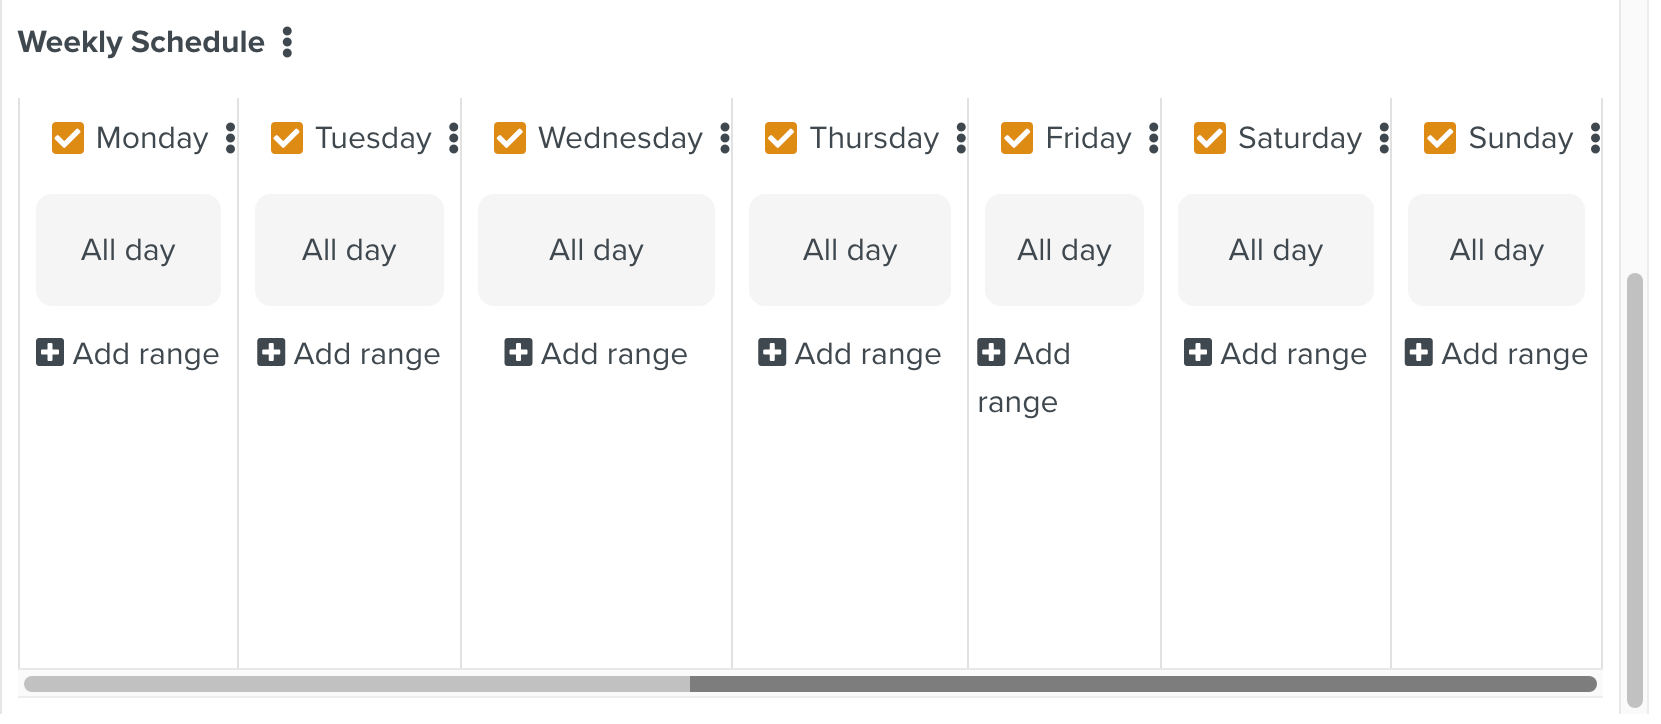
4. Weekly Schedule:
You can schedule your Event Trigger to run on specific days of the week or can also add multiple ranges on the same day. By default, all the days are checked as seen below. You can uncheck the days on which you do not want the Action to be executed.
 |
Click to set the time at which the Trigger should execute.
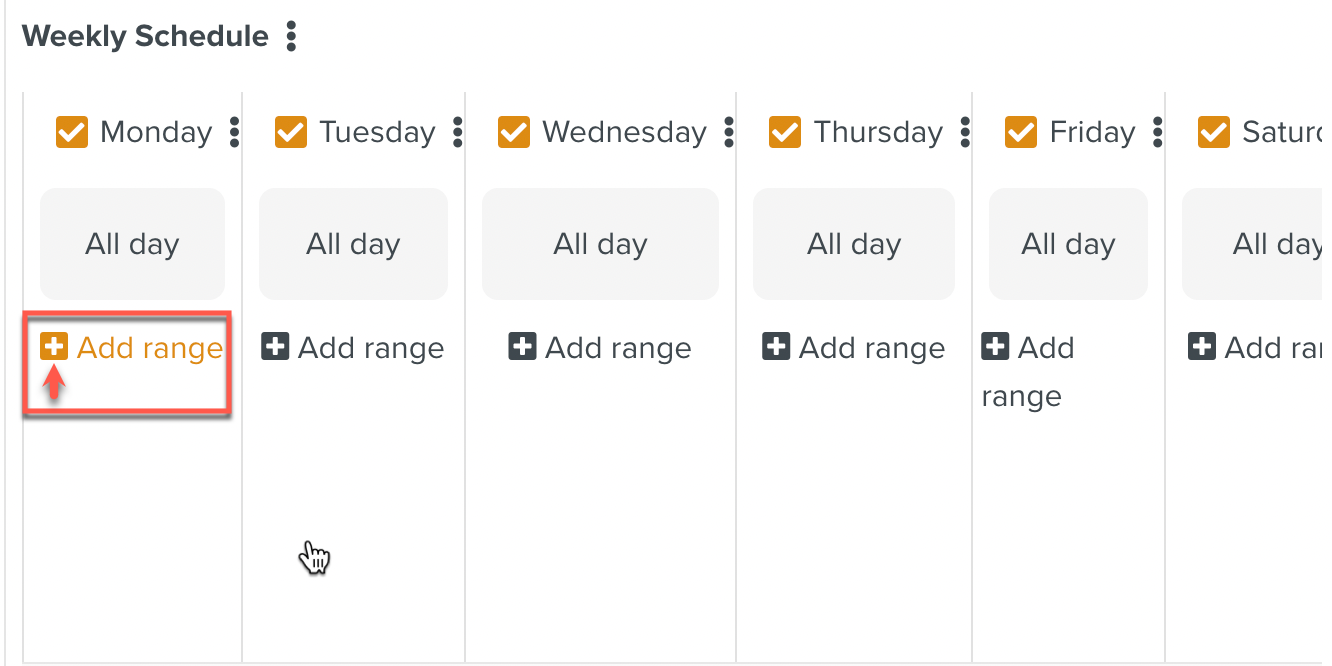 |
A 24 hour slider appears as shown below.
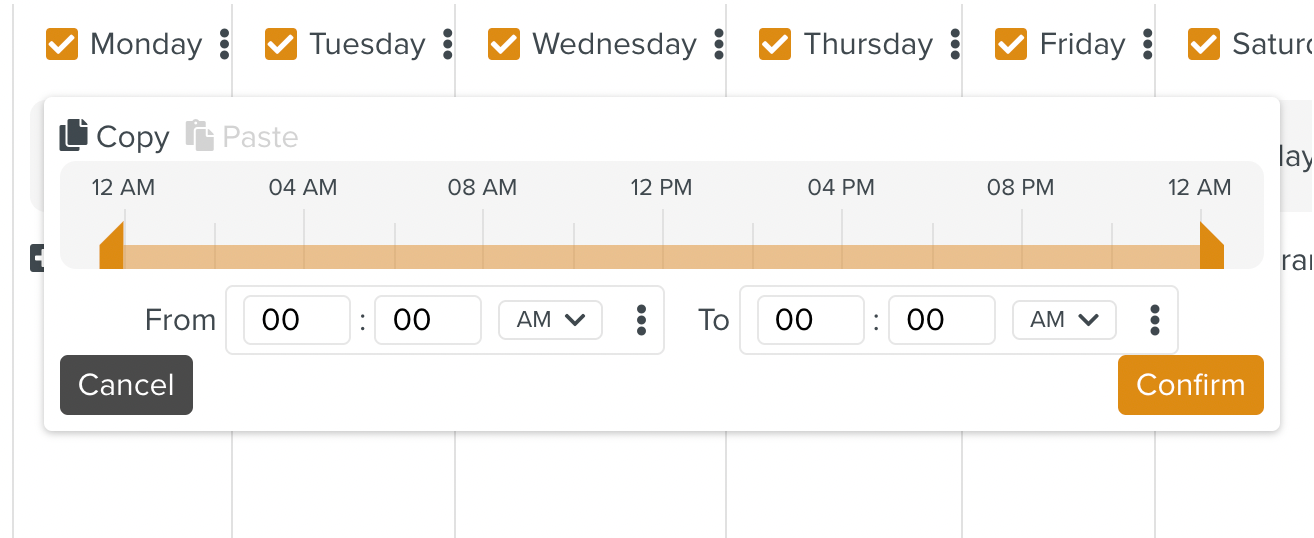 |
You can select a window of your choice to the nearest minute as highlighted below. Click to set a range.
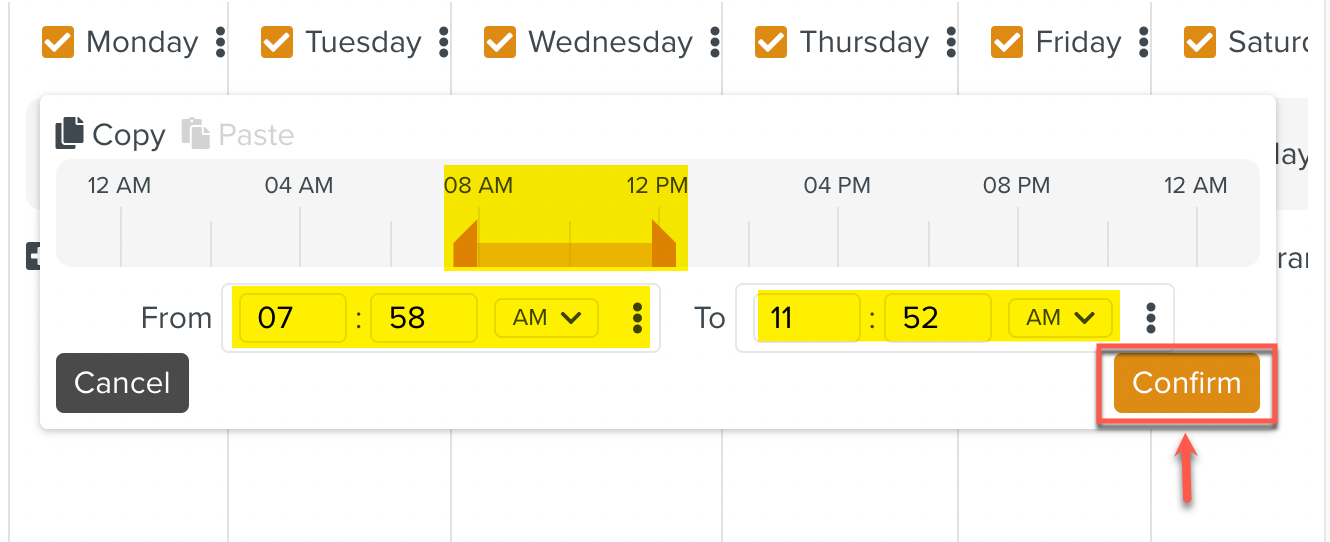 |
The range is set as shown below.
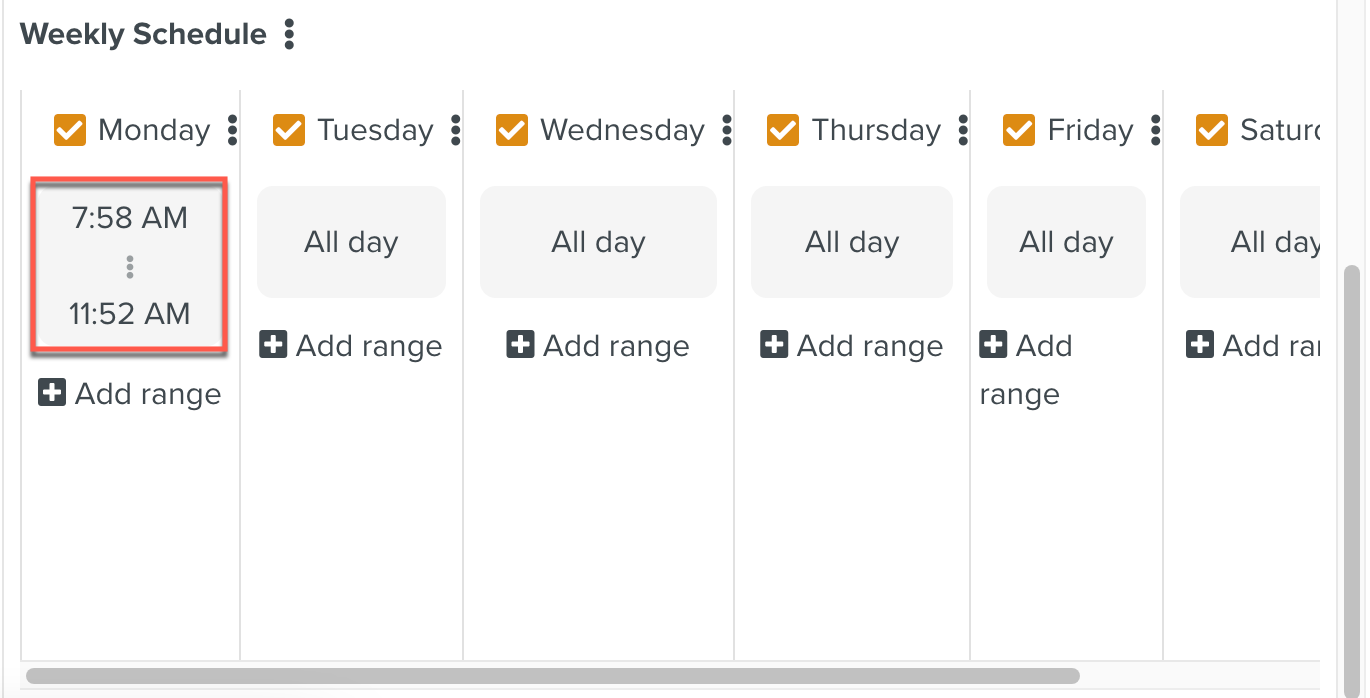 |
The range set can be copied and pasted to another day using the and options available.
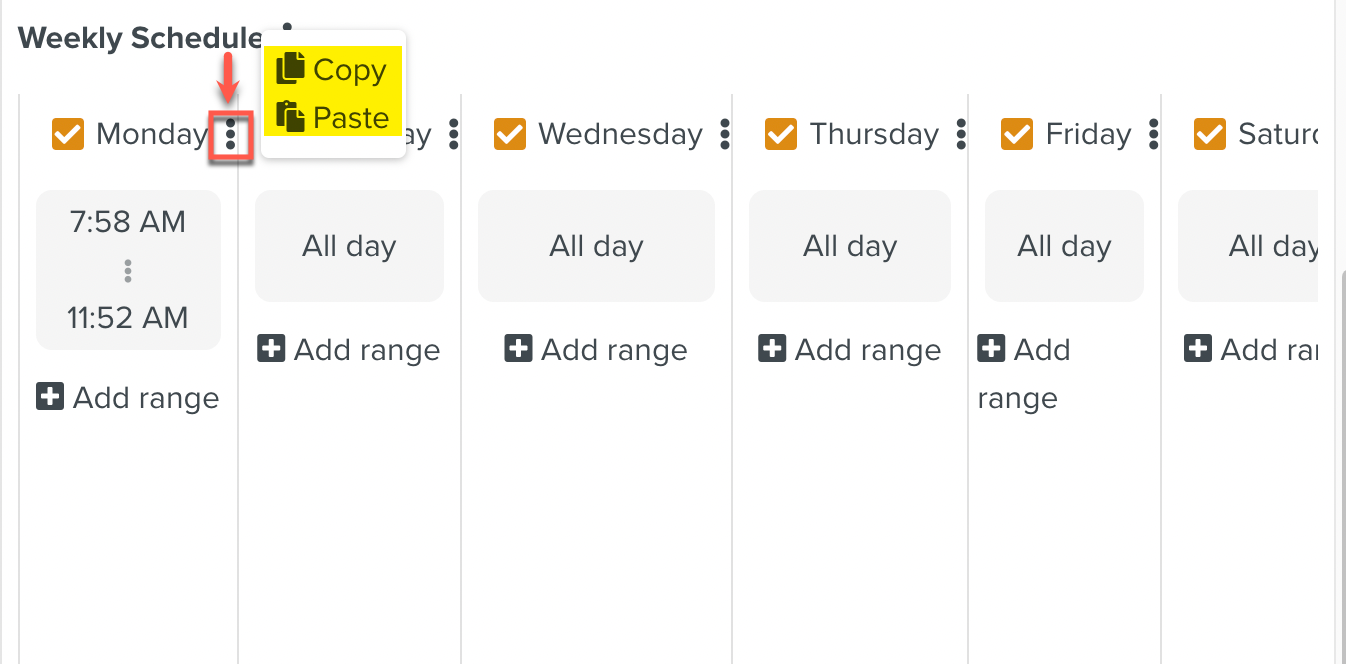 |
For example, the range from Monday has been copied to Wednesday in the example below.
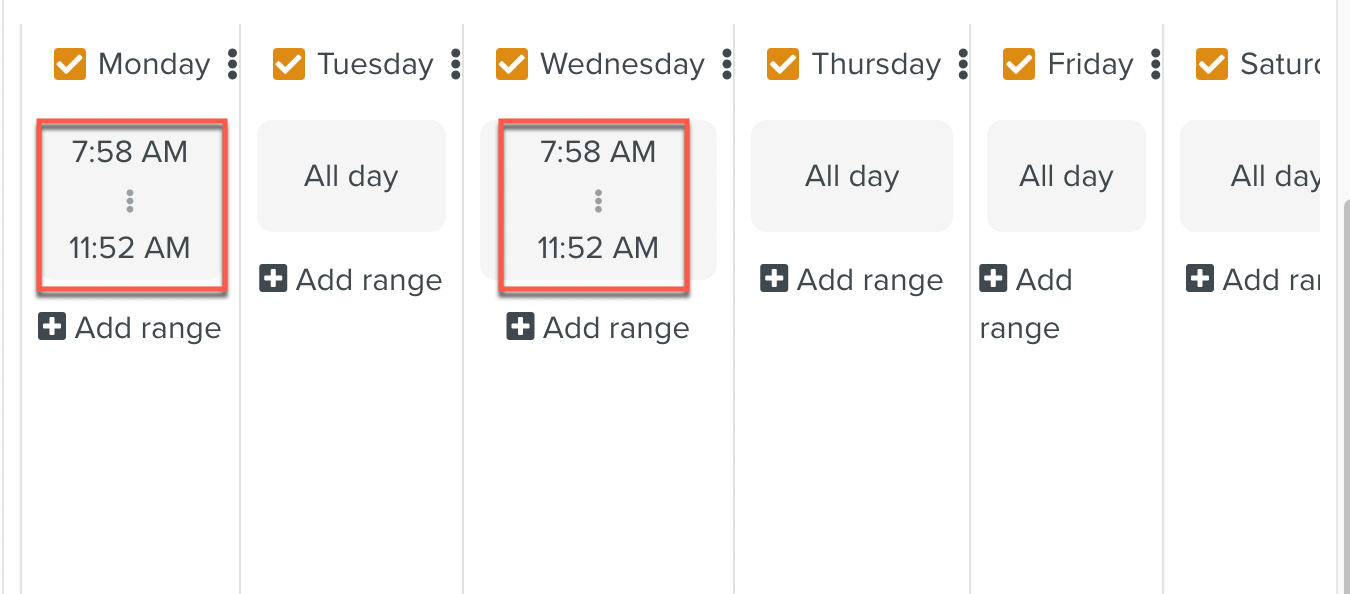 |
An Event Trigger of Type Measure Point executes the Action when the JS Script associated with the Measure Point computation returns the Boolean value of true.
To add an Event Trigger of Type Measure Point:
Select Measure Point from the Type dropdown list.
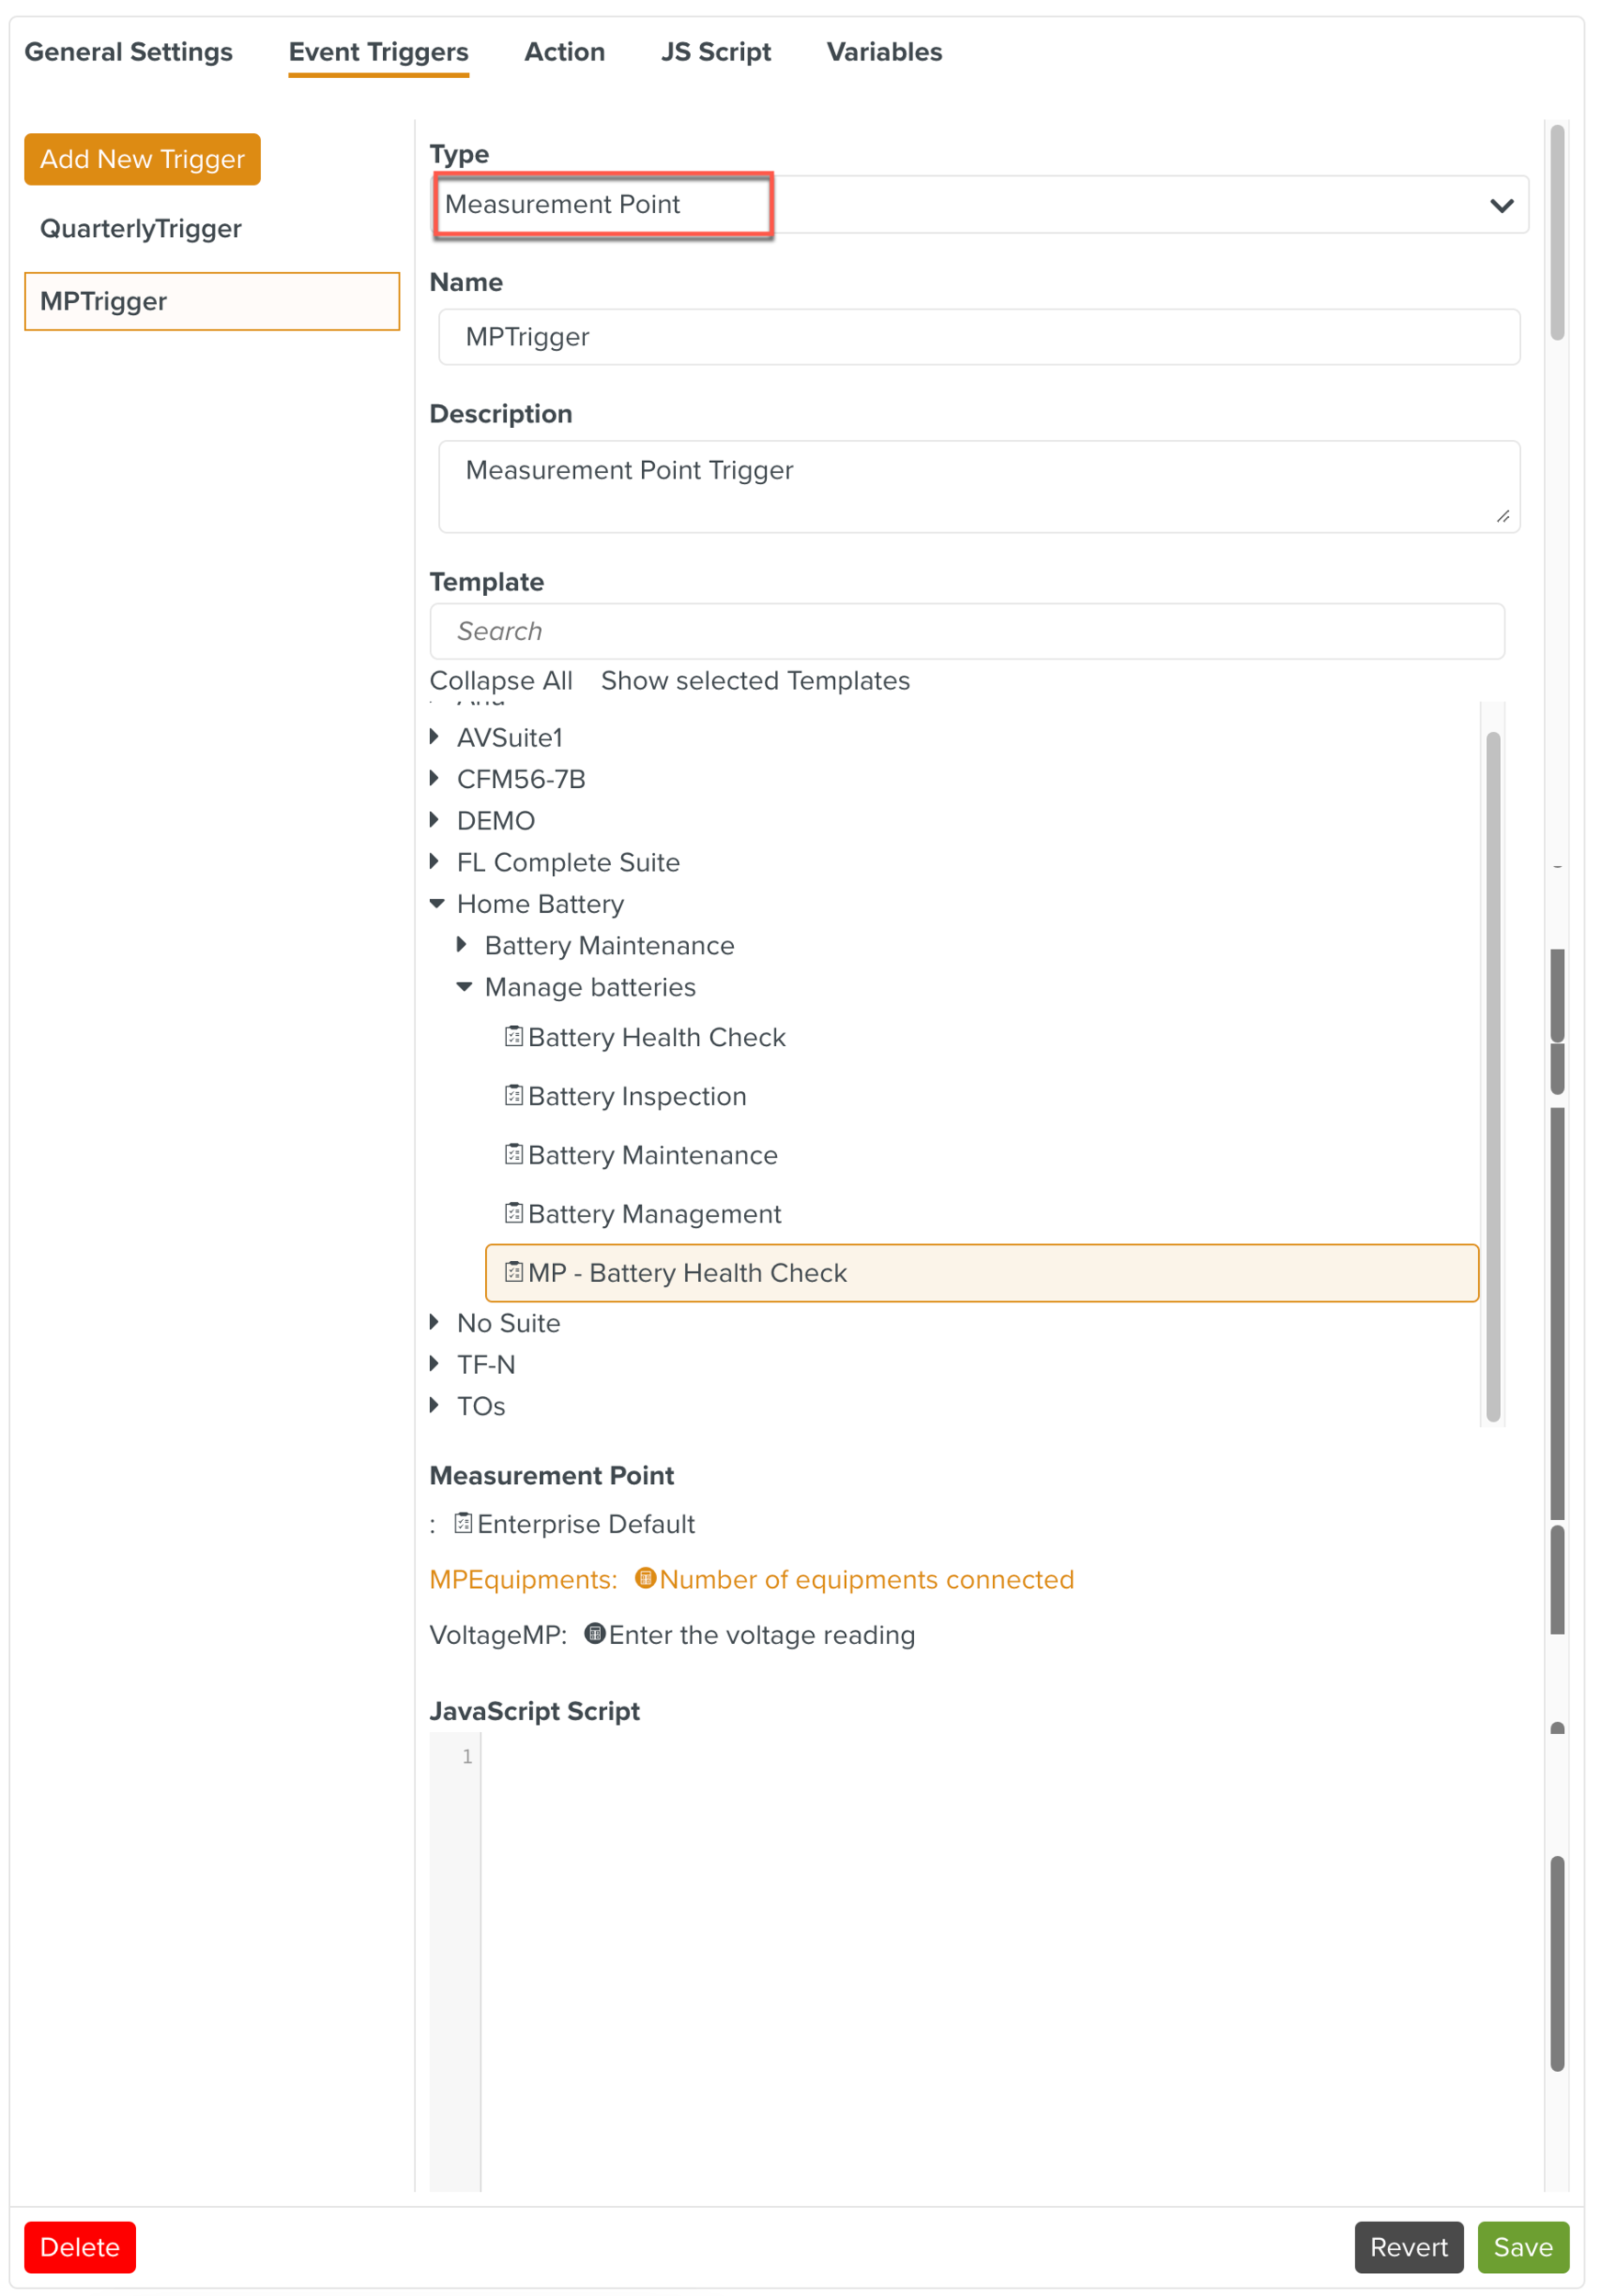
You can customize the name and description of the Event Trigger as shown in the example.
Select the Template which has the Measure Point to be associated with this Trigger.
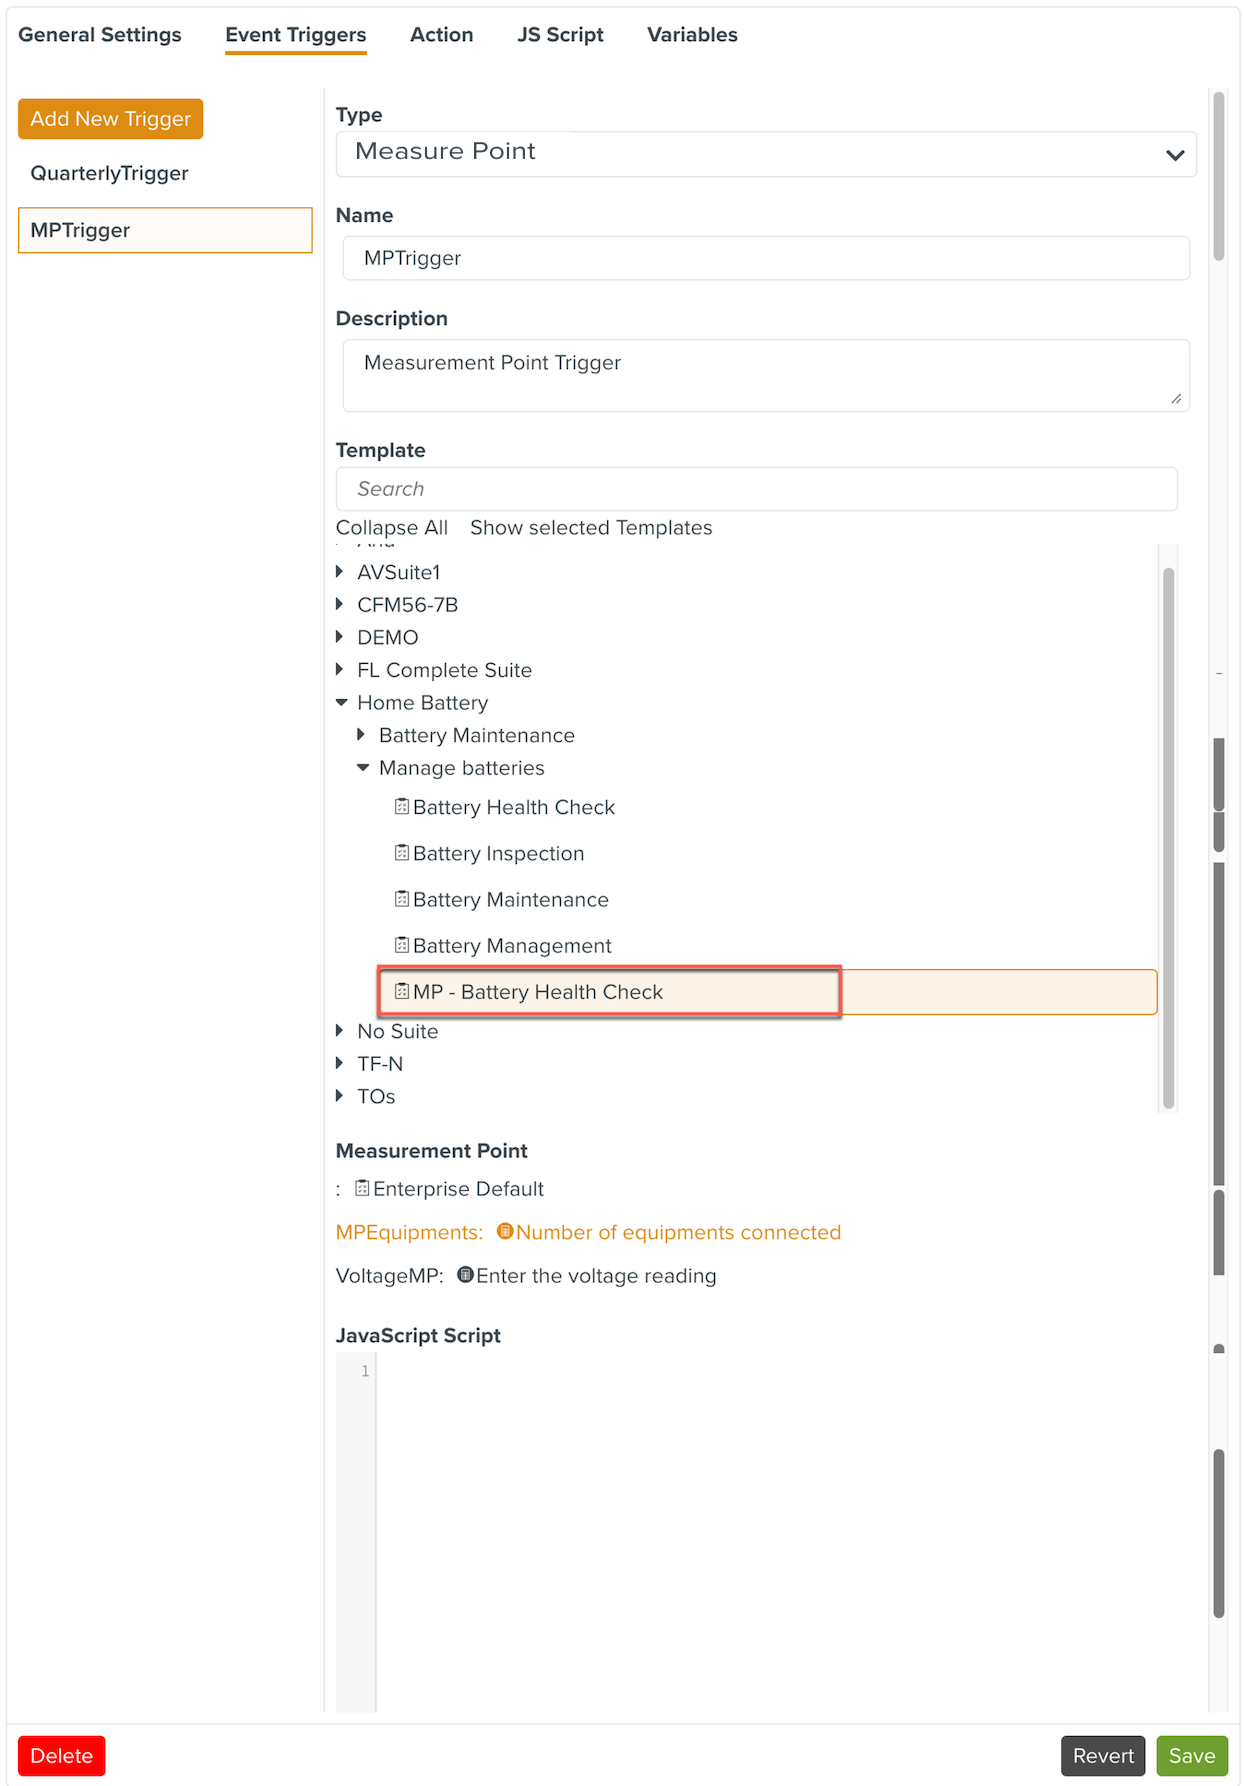
Note
Measure Points configured on Components within a Template can also be selected as Triggers. These will be triggered when the parent Template is executed.
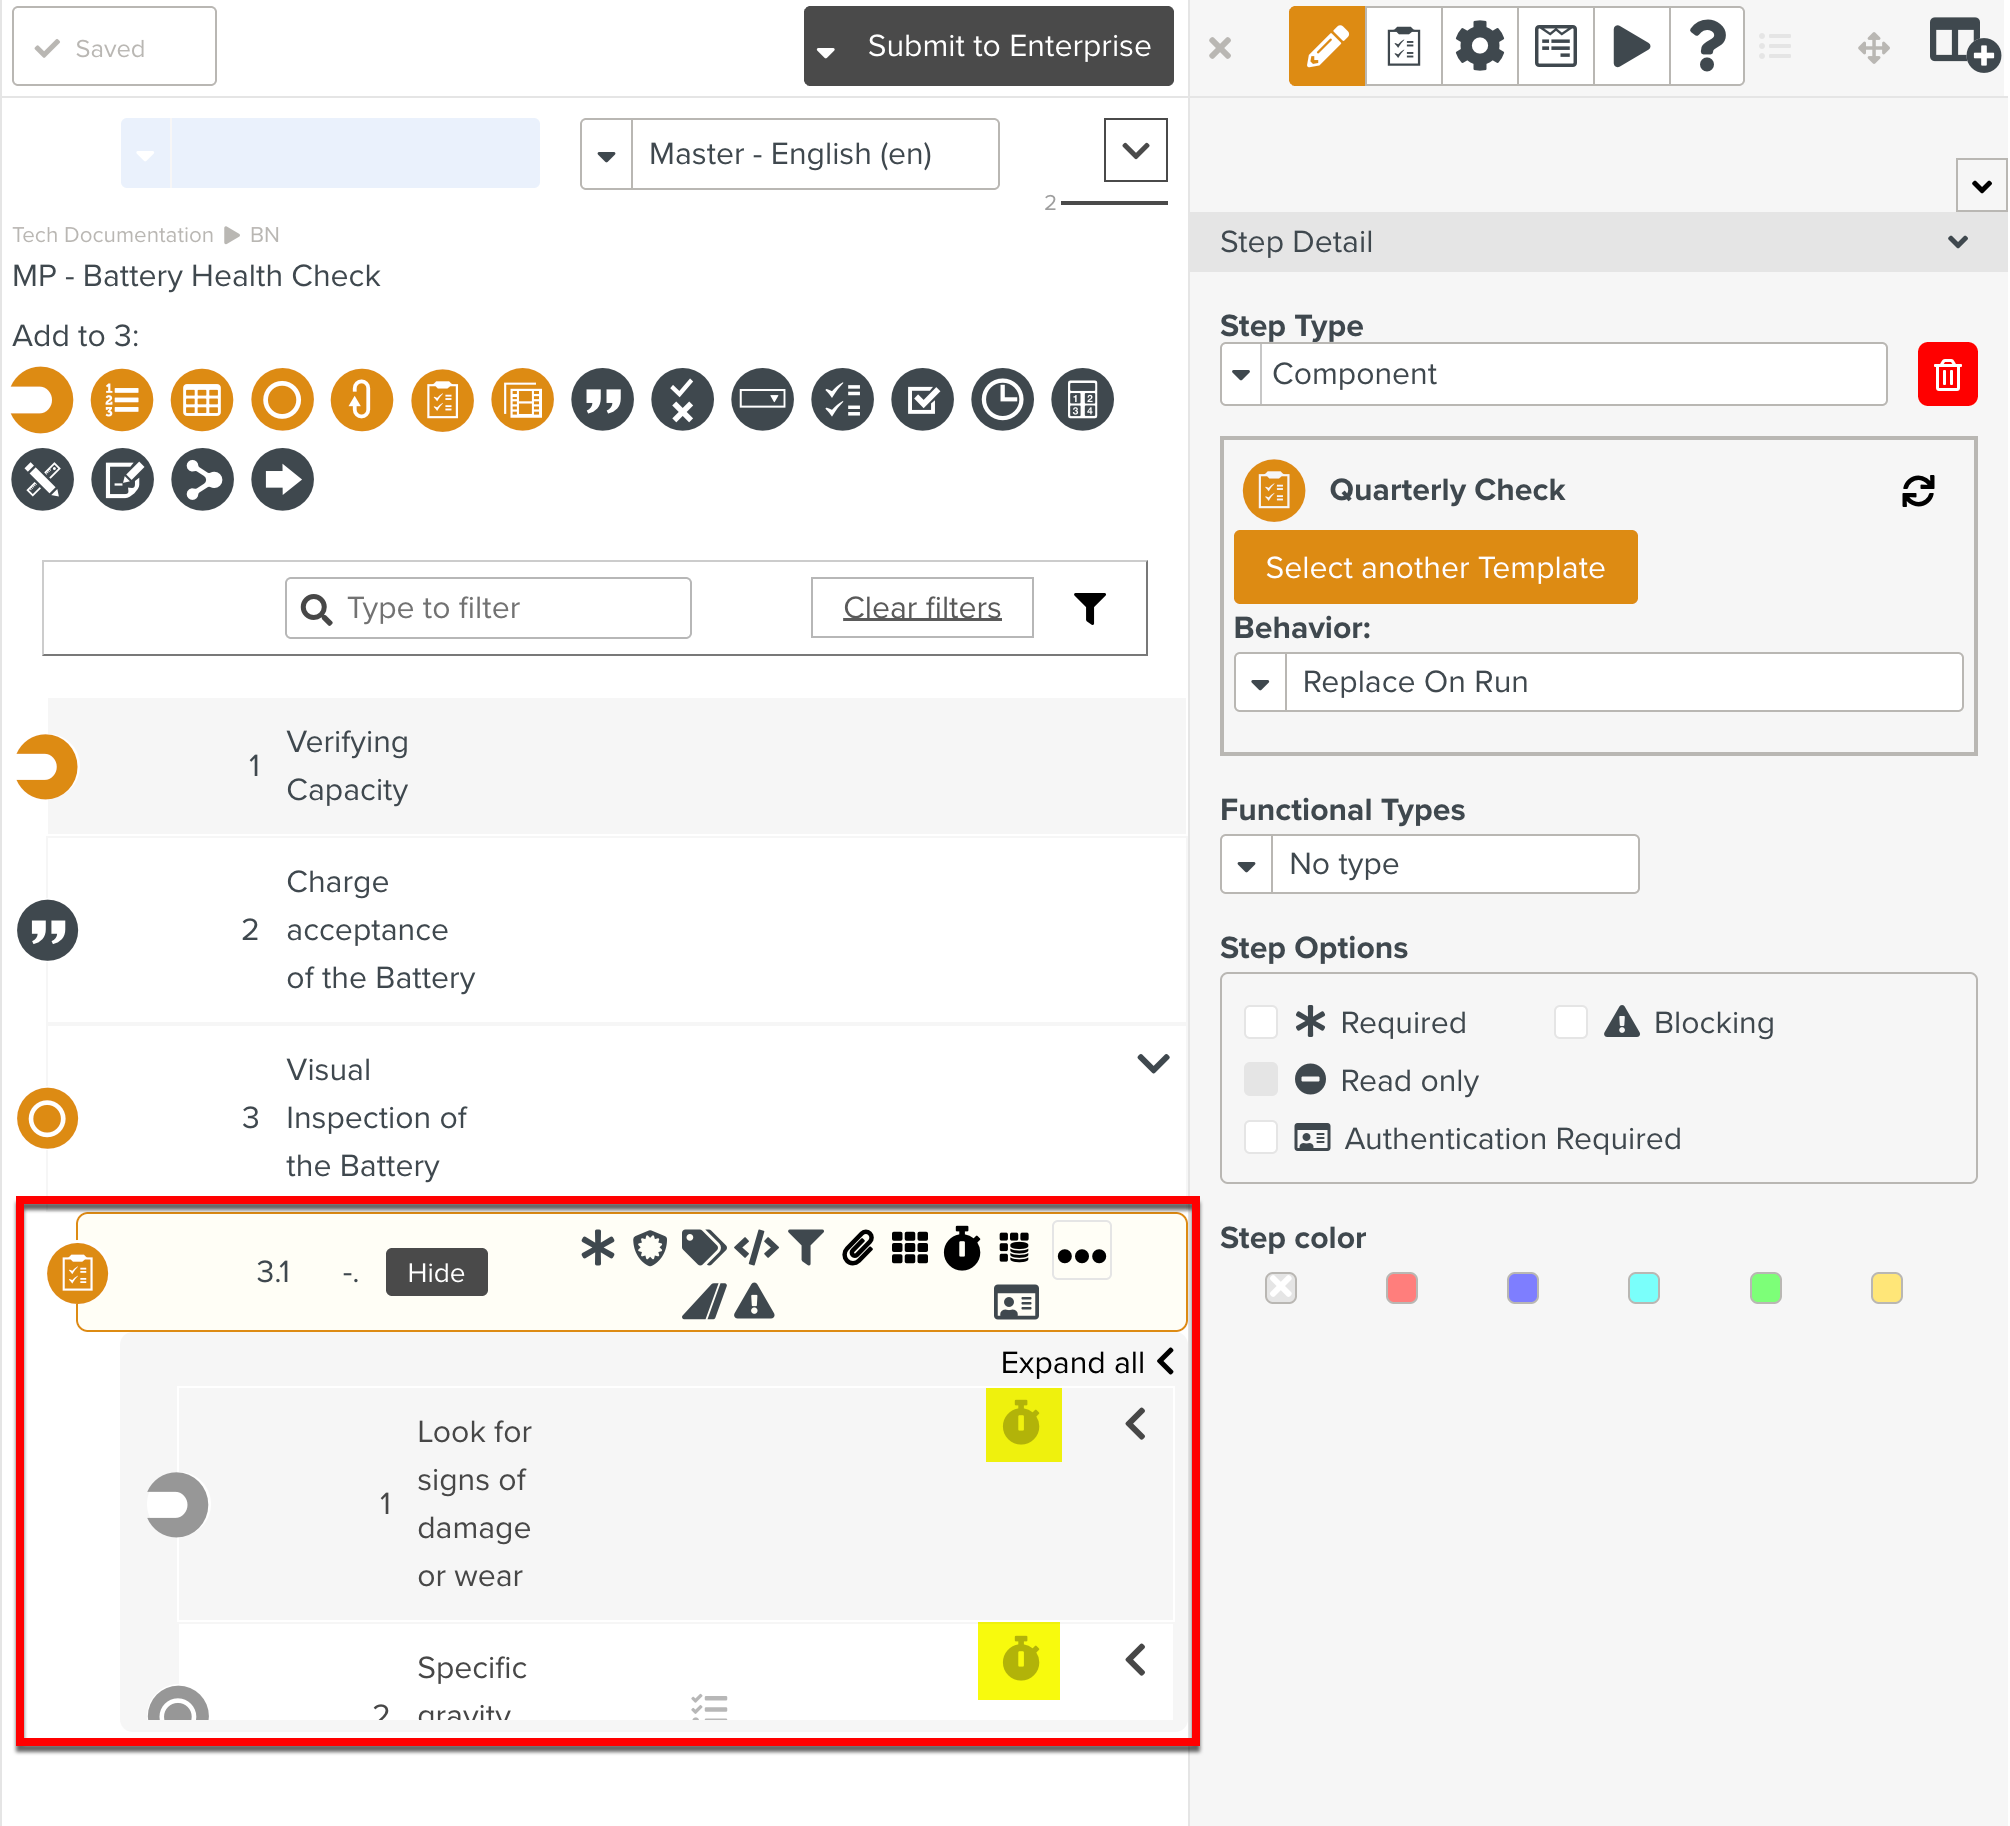
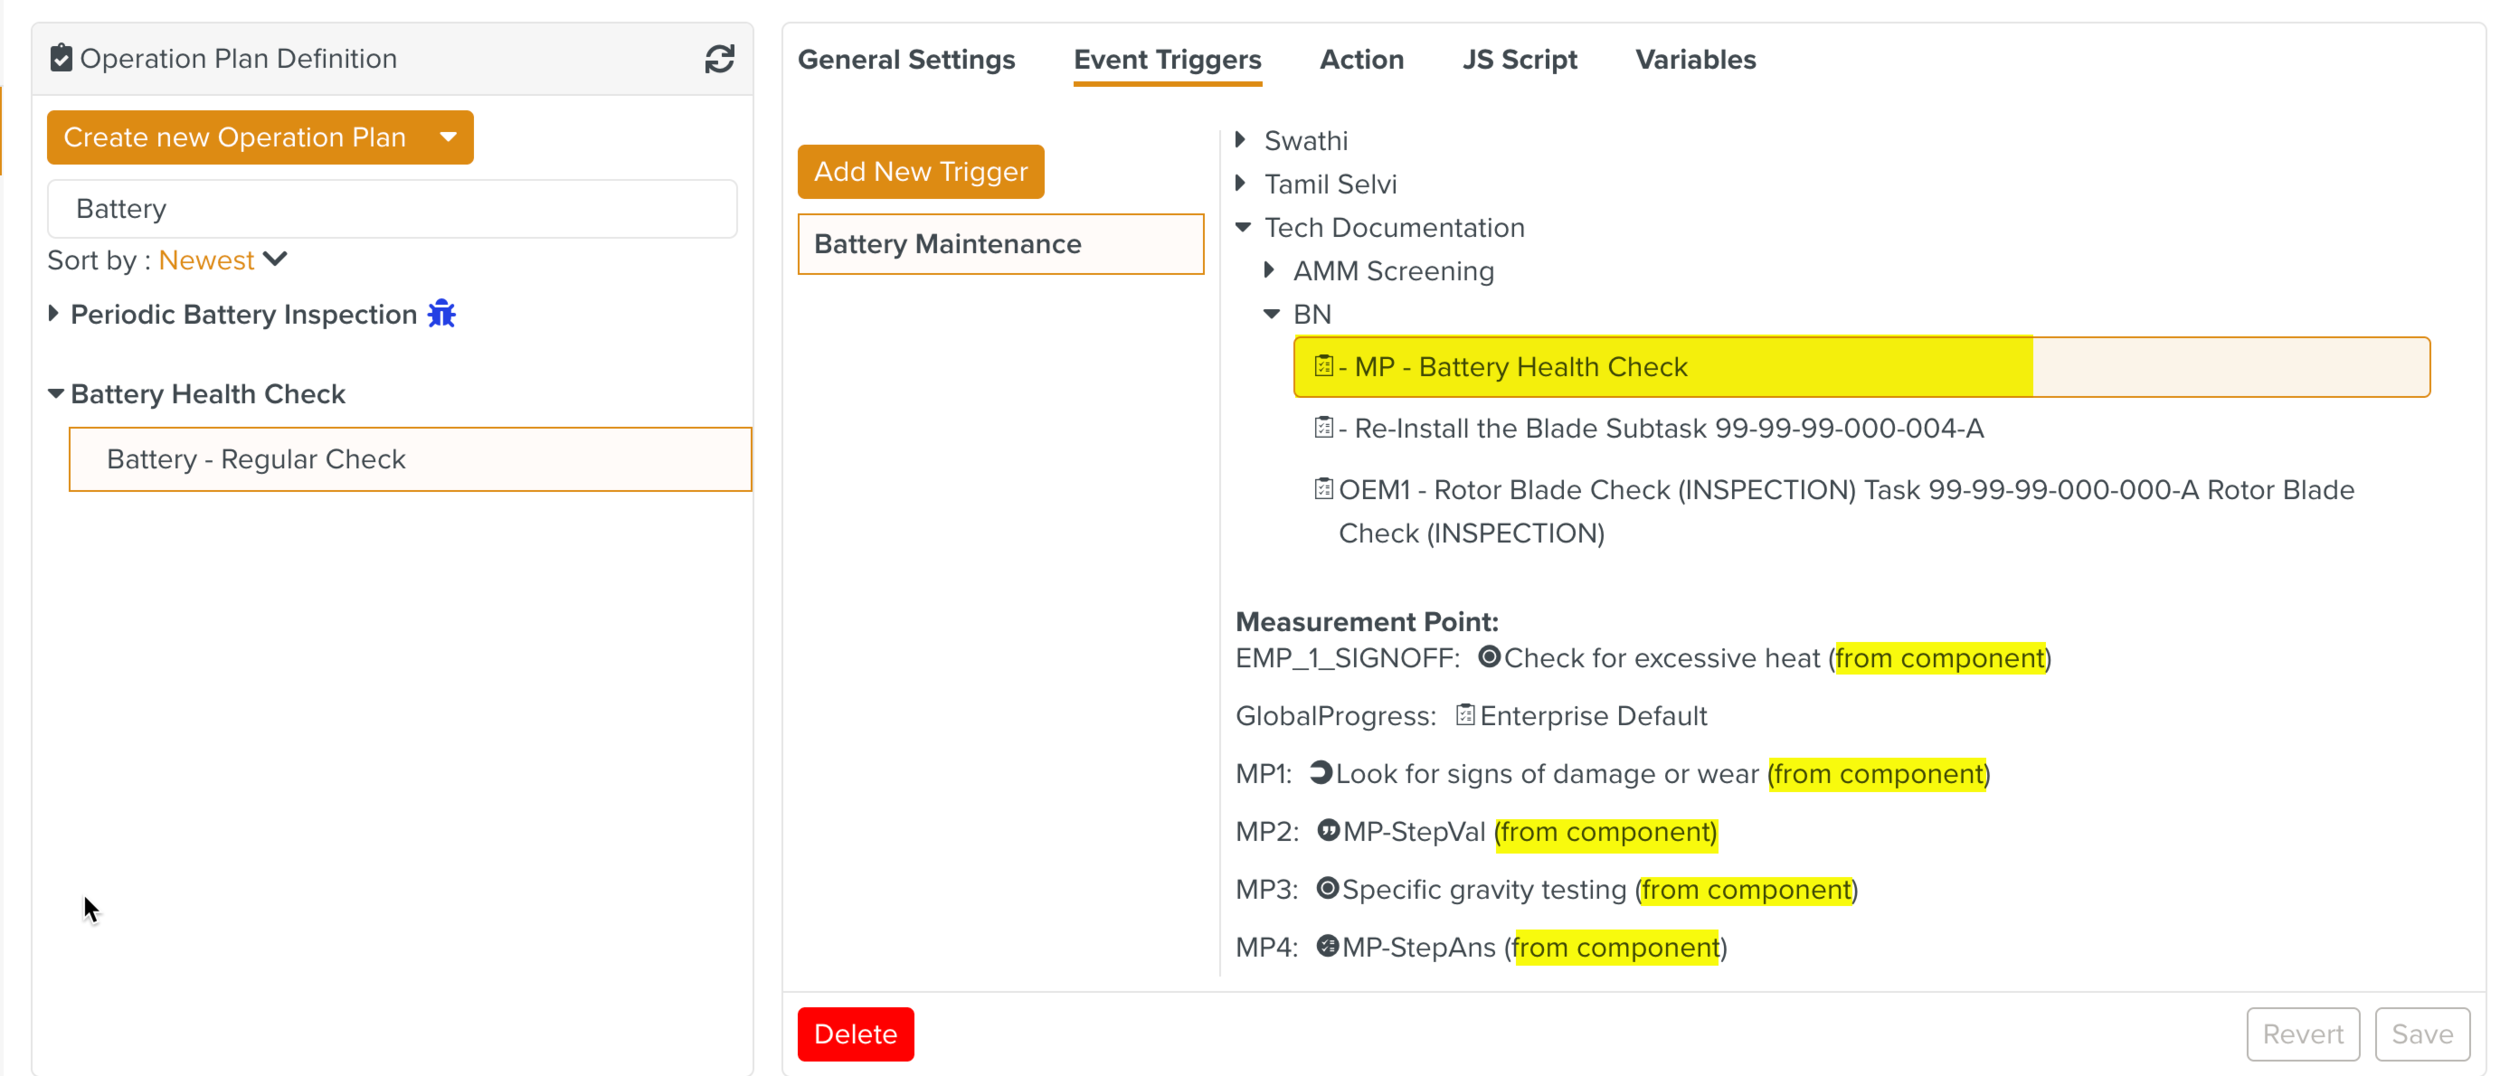
Select the Measure Point to be associated.
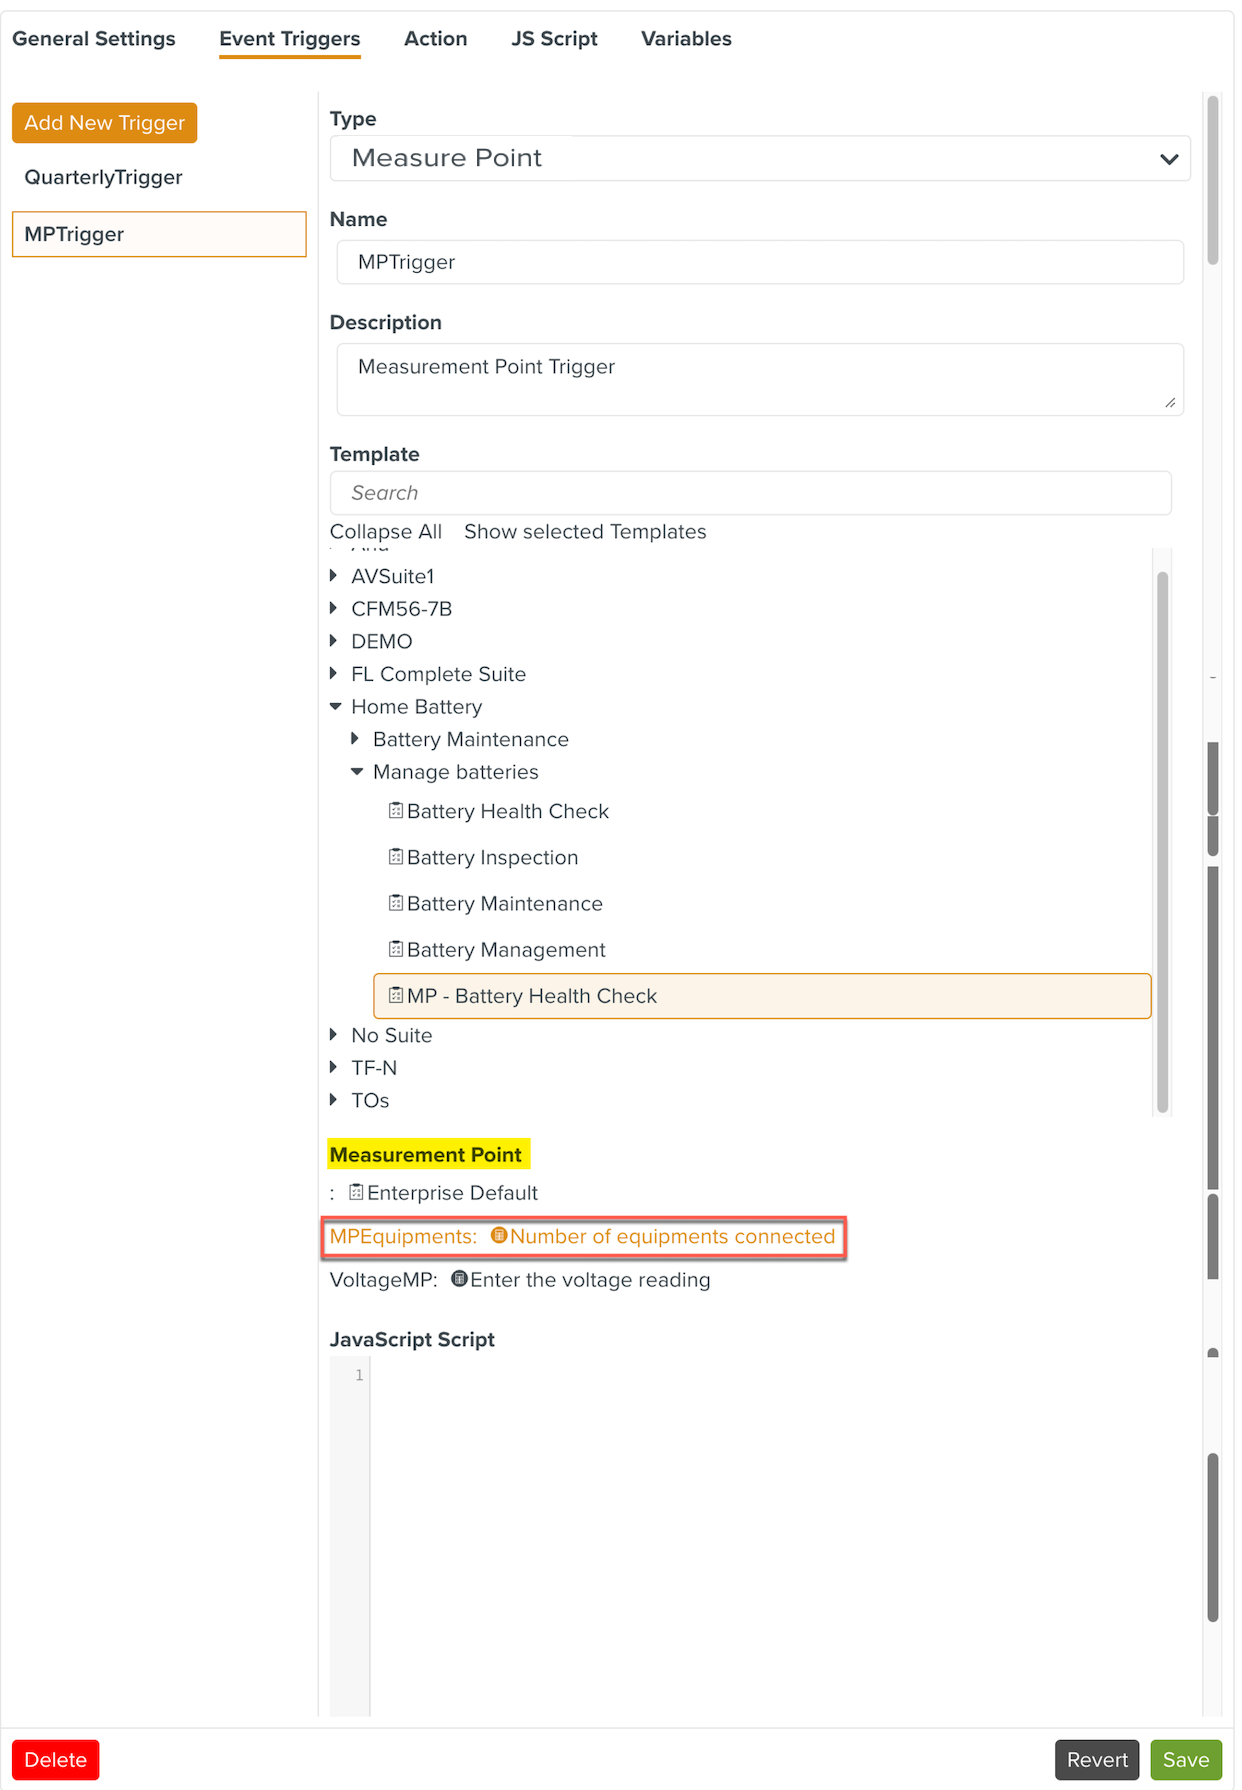
Enter the JS Script to be executed when the Measure Point is computed.
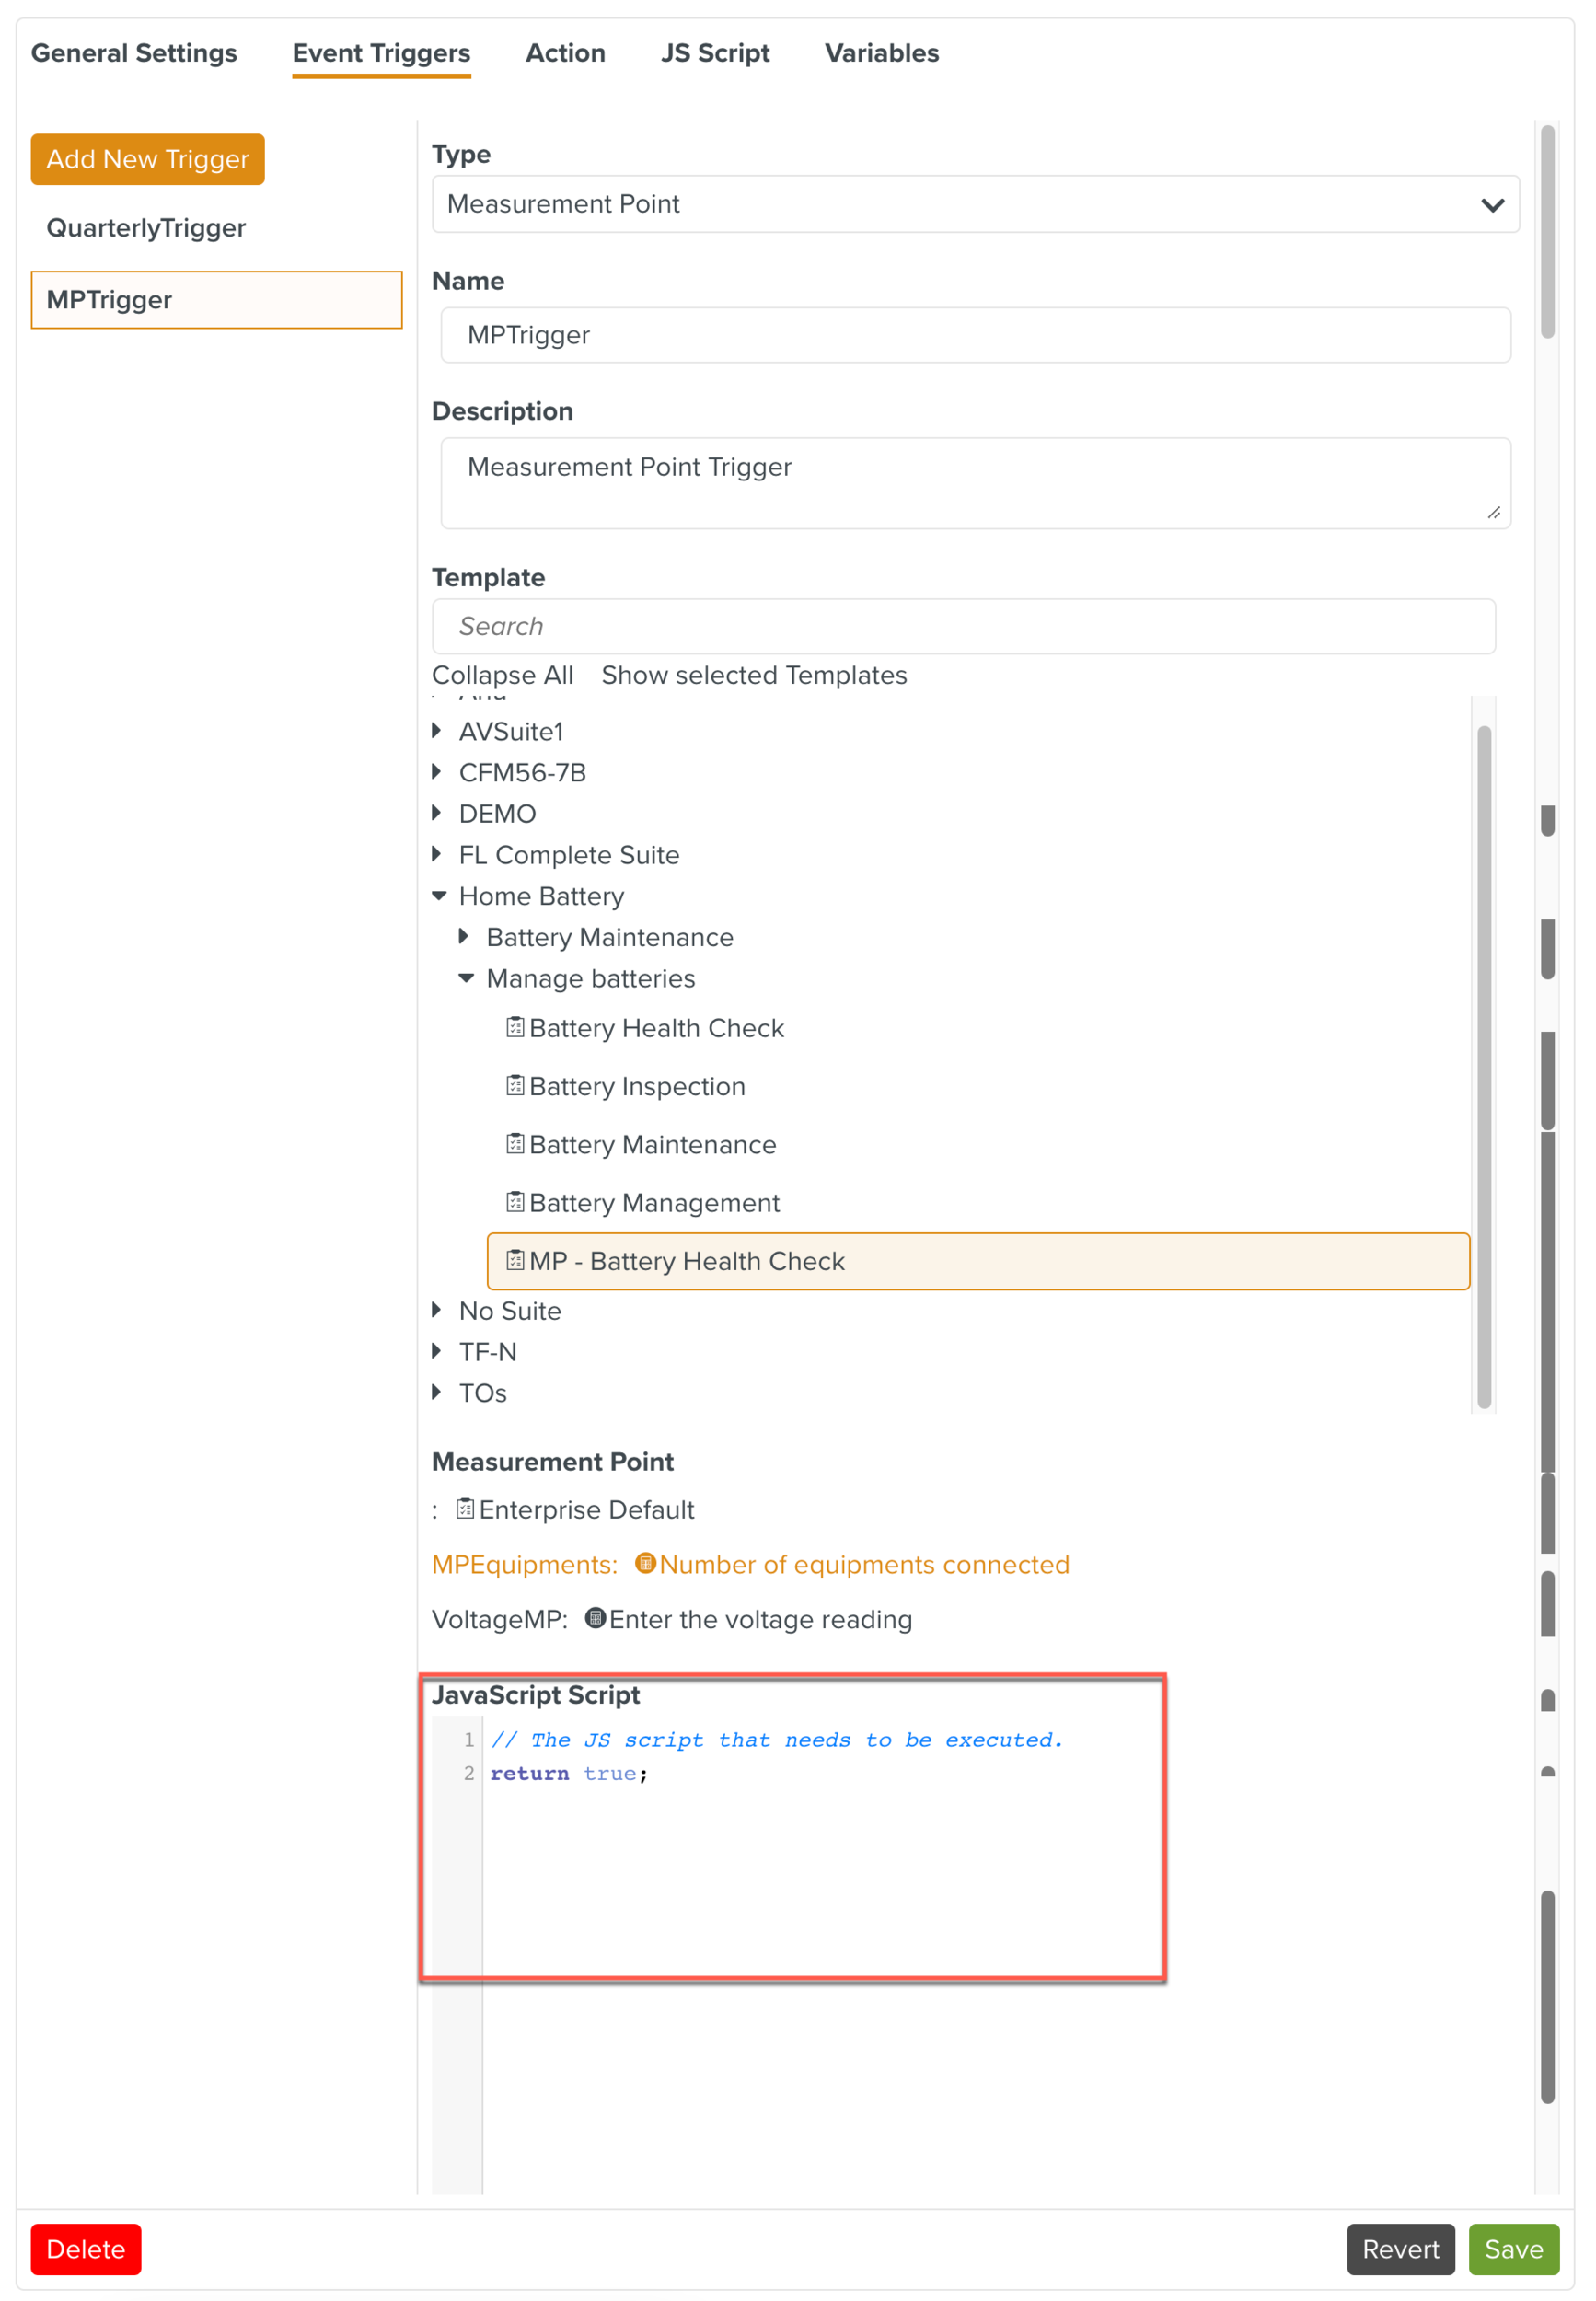
Note
The JS Script needs to return the Boolean value of
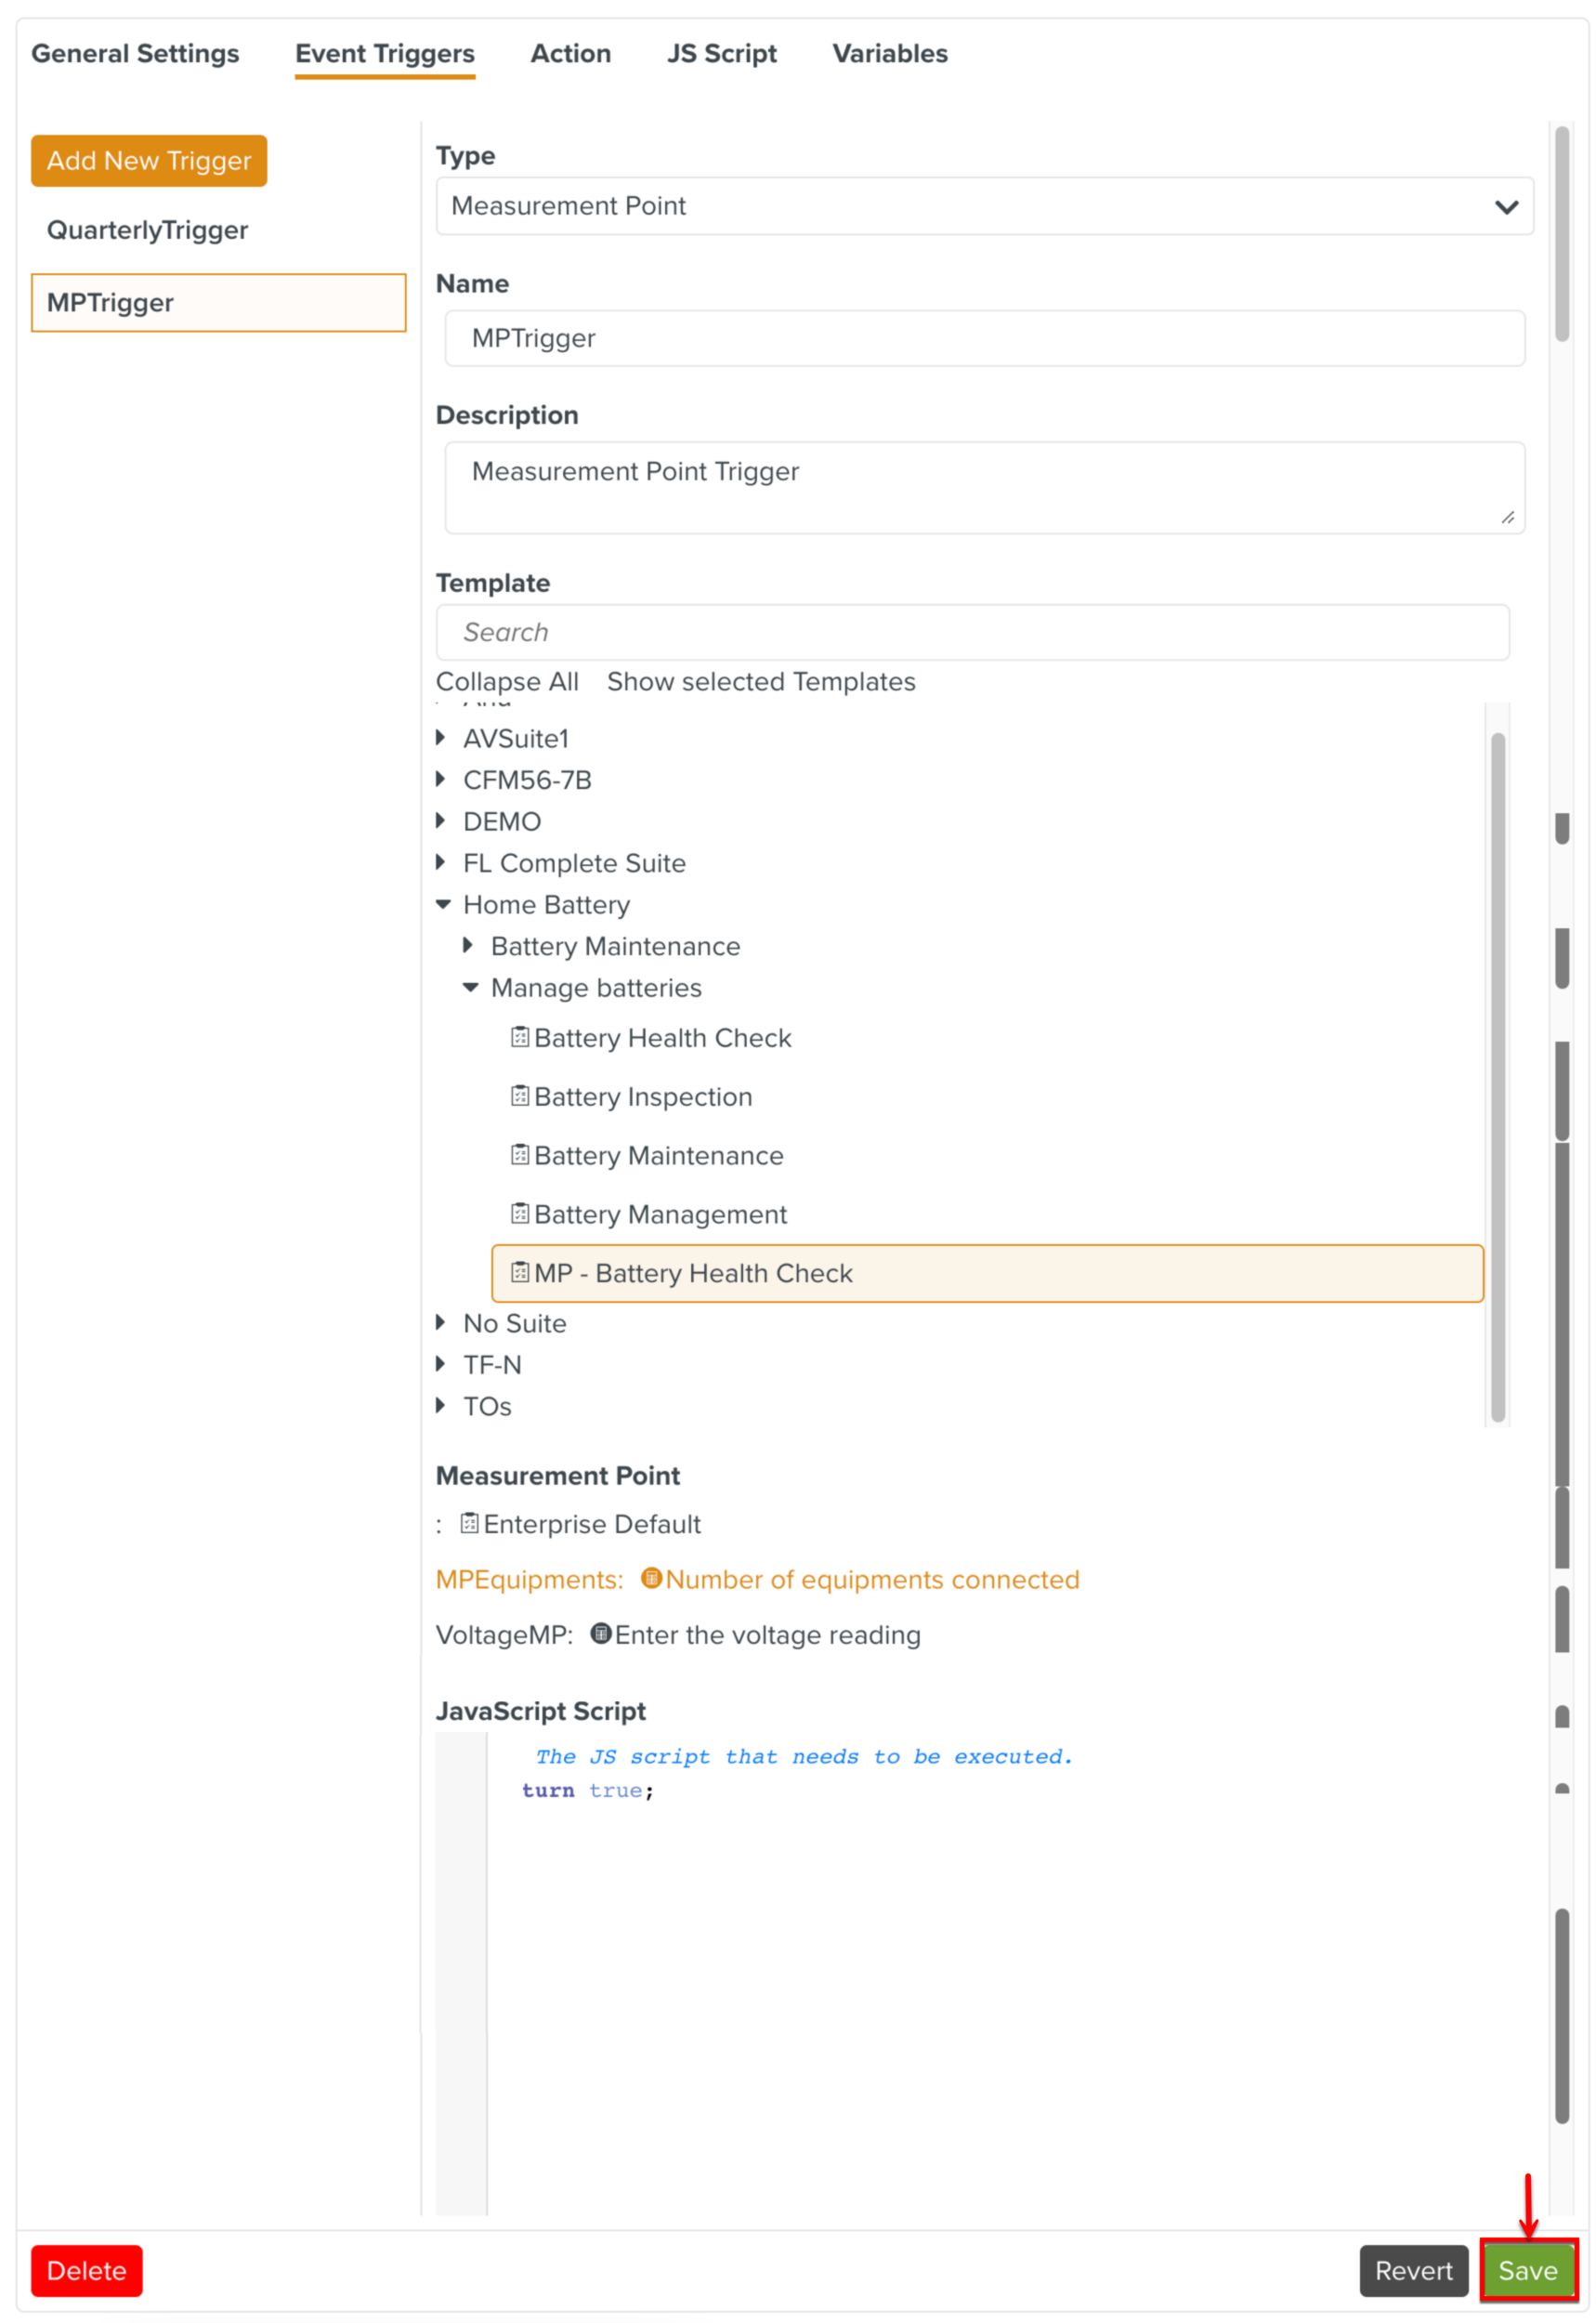
truefor the Action to be executed.Click .
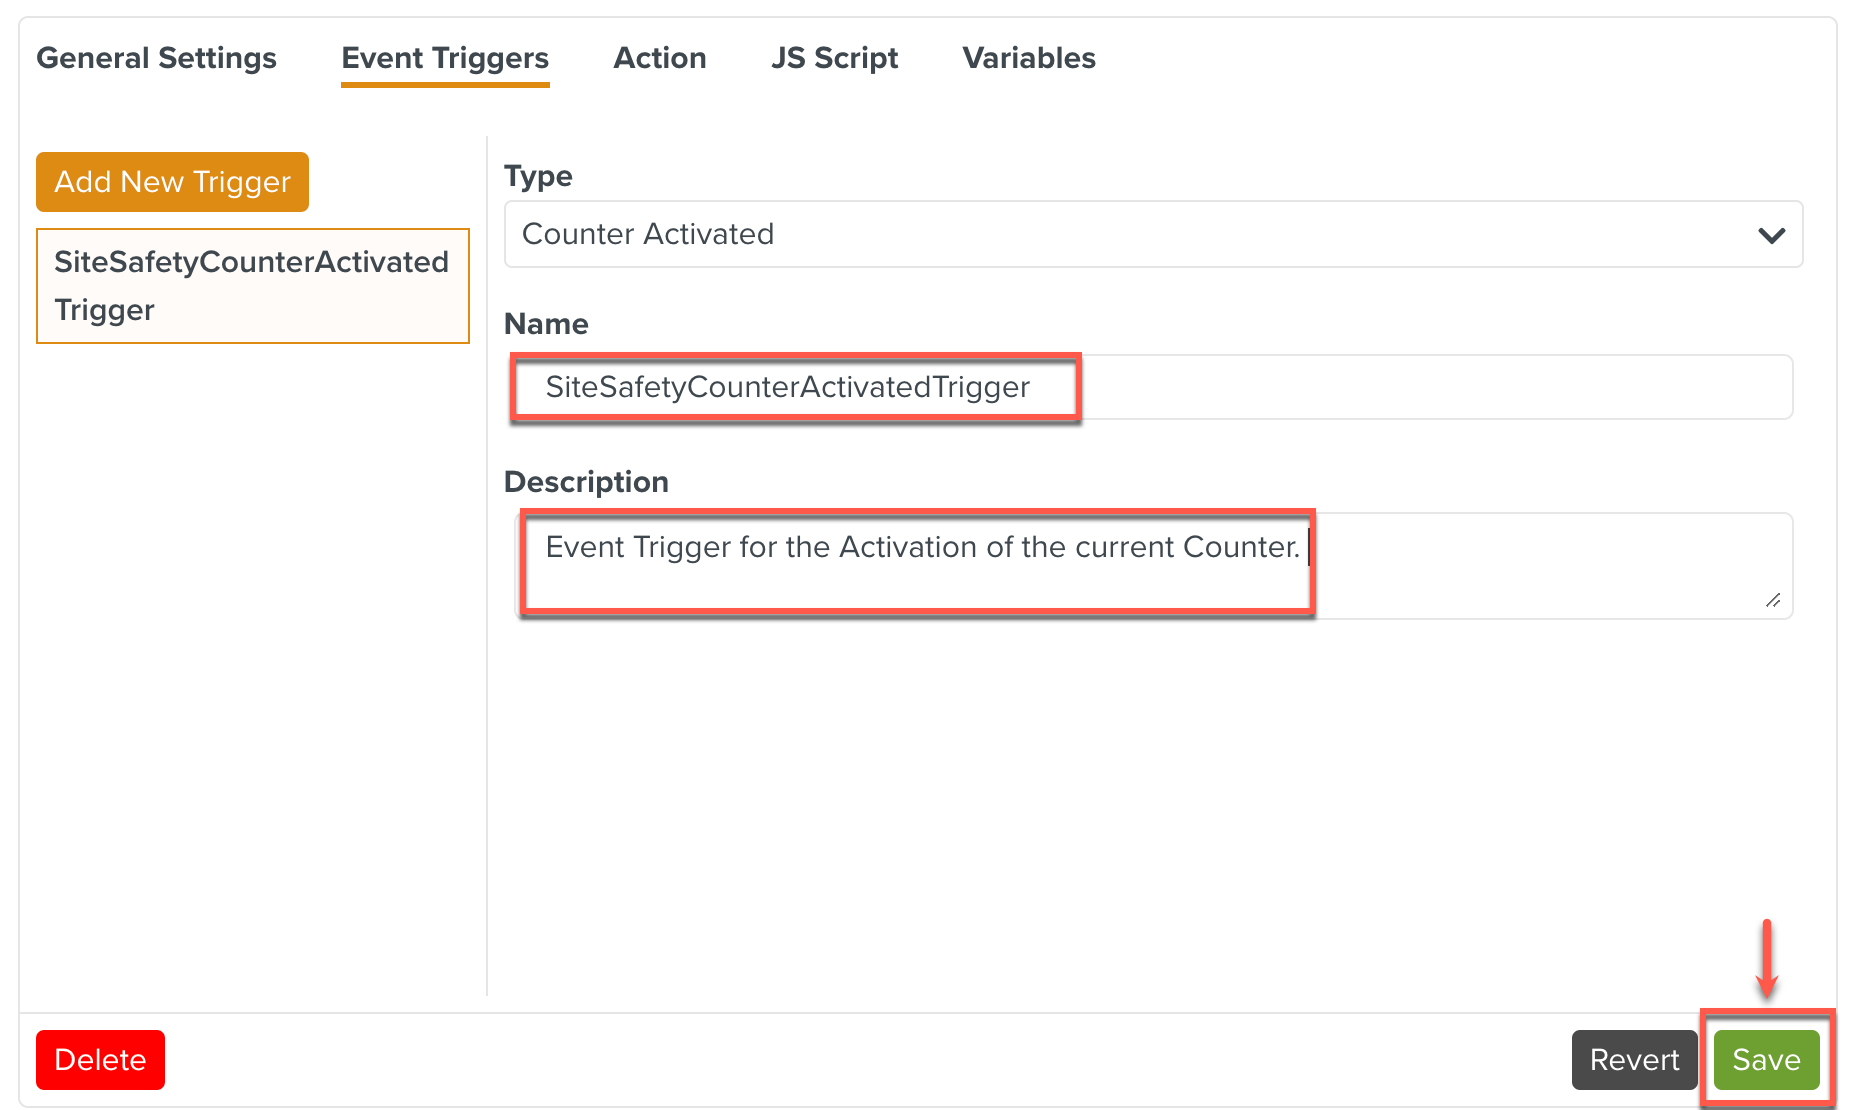
An Event Trigger of Type Counter Activated triggers the Action when the current Counter is activated.
To add an Event Trigger of Type Counter Activated:
Select Counter Activated from the Type dropdown list.
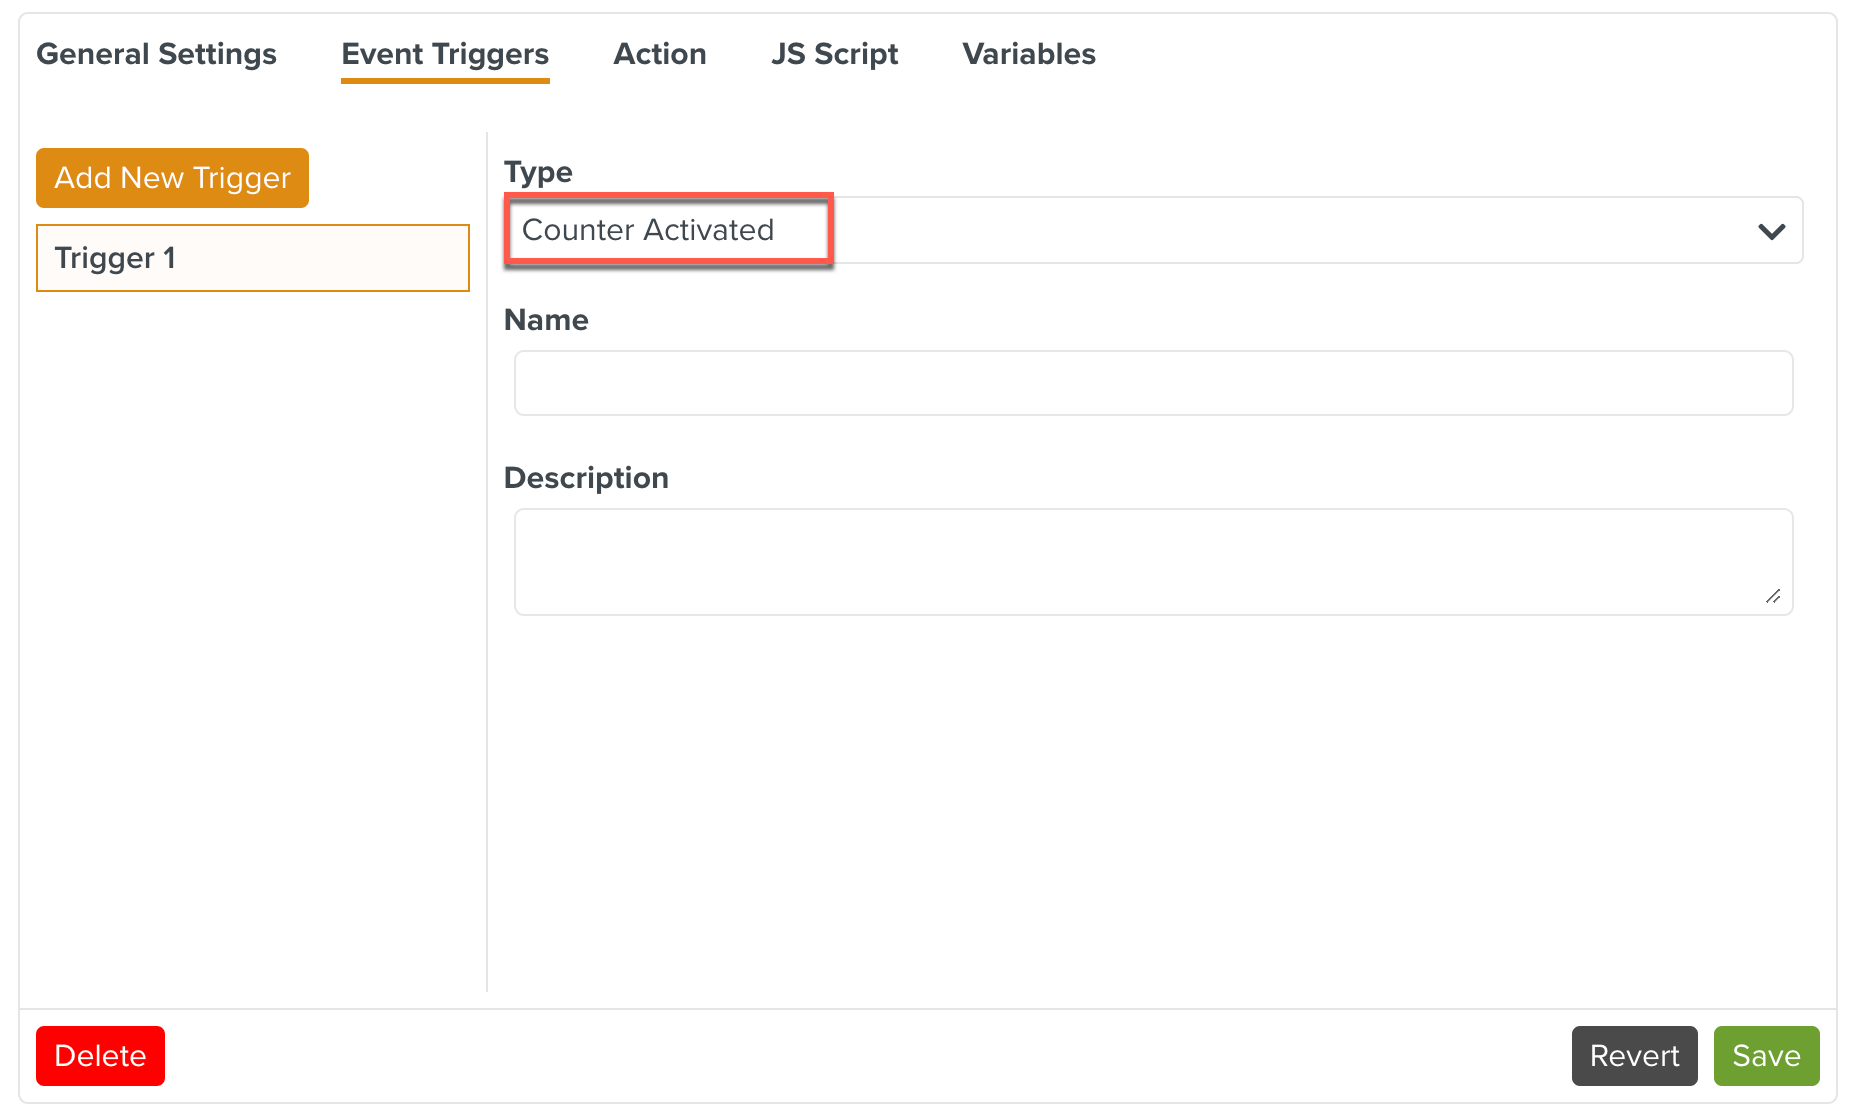
Enter the Name and Description of the Event Trigger to customize it and click to save the changes.
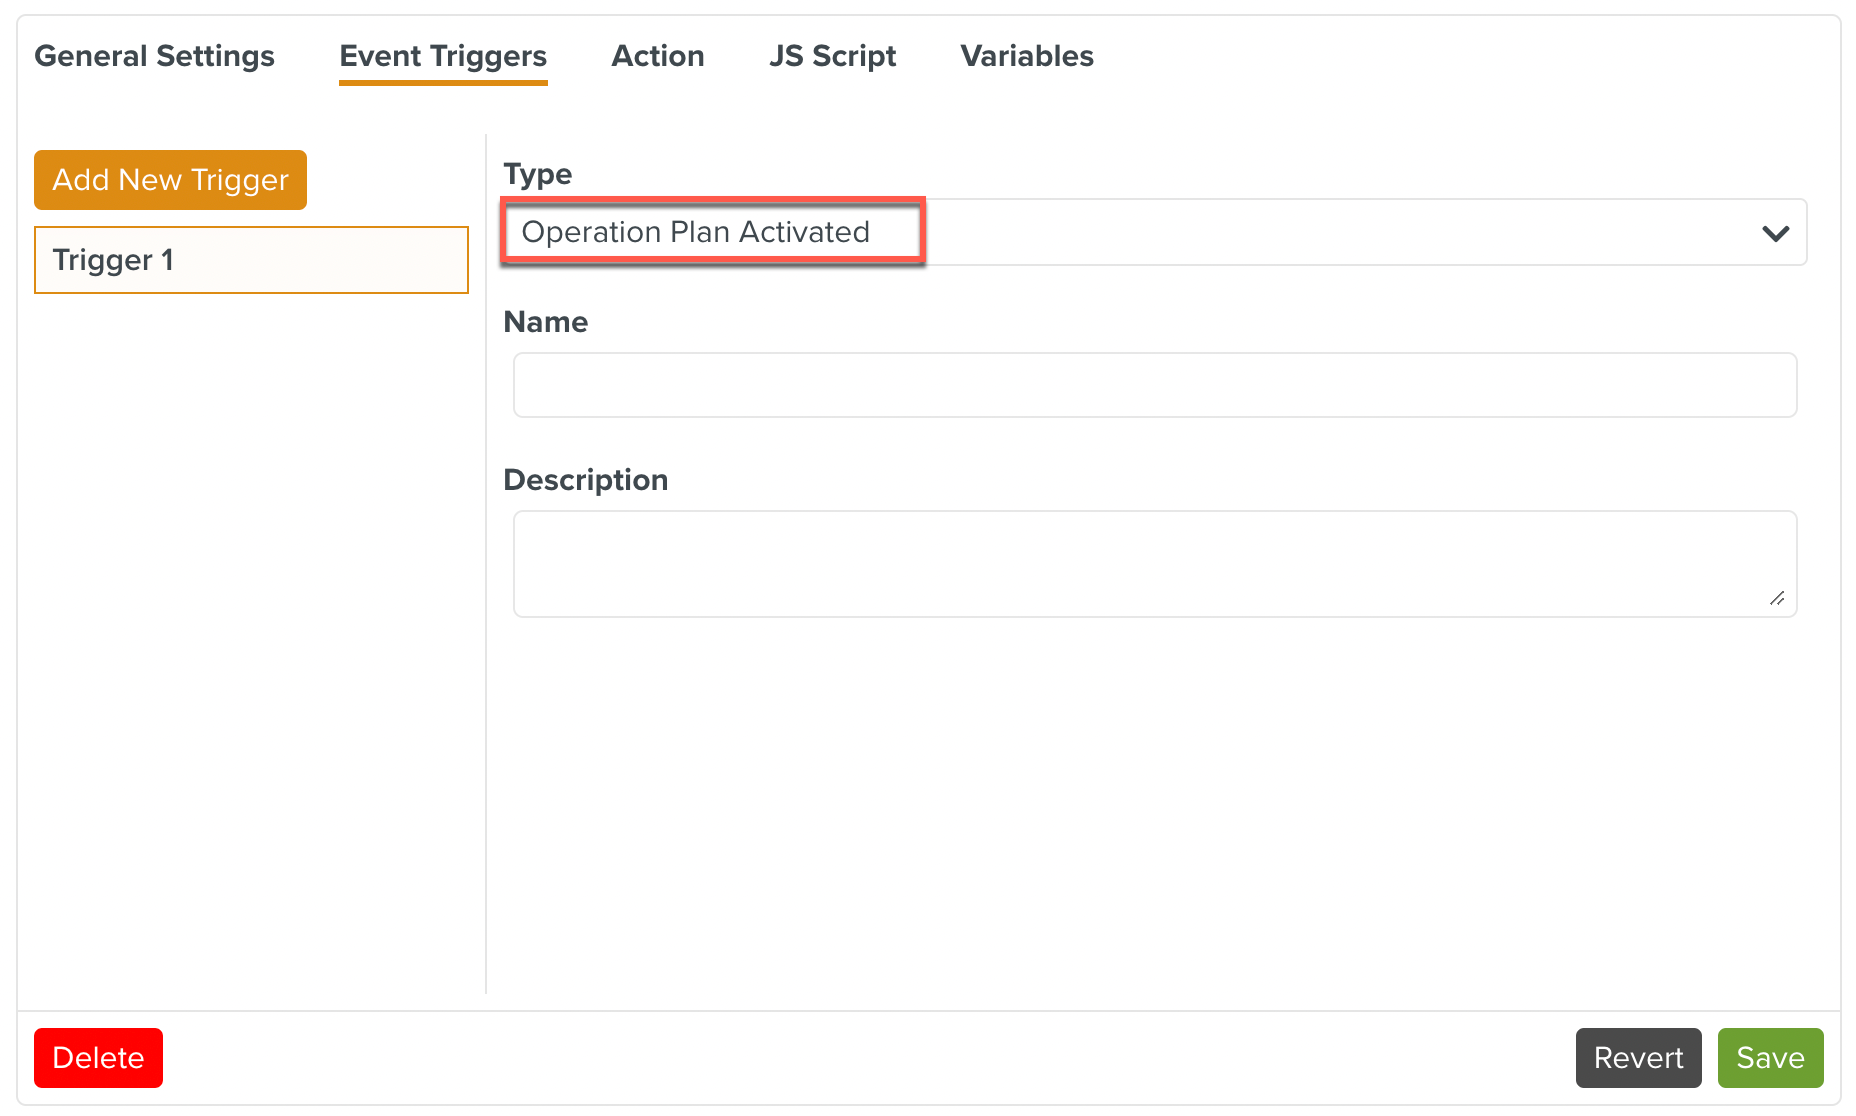
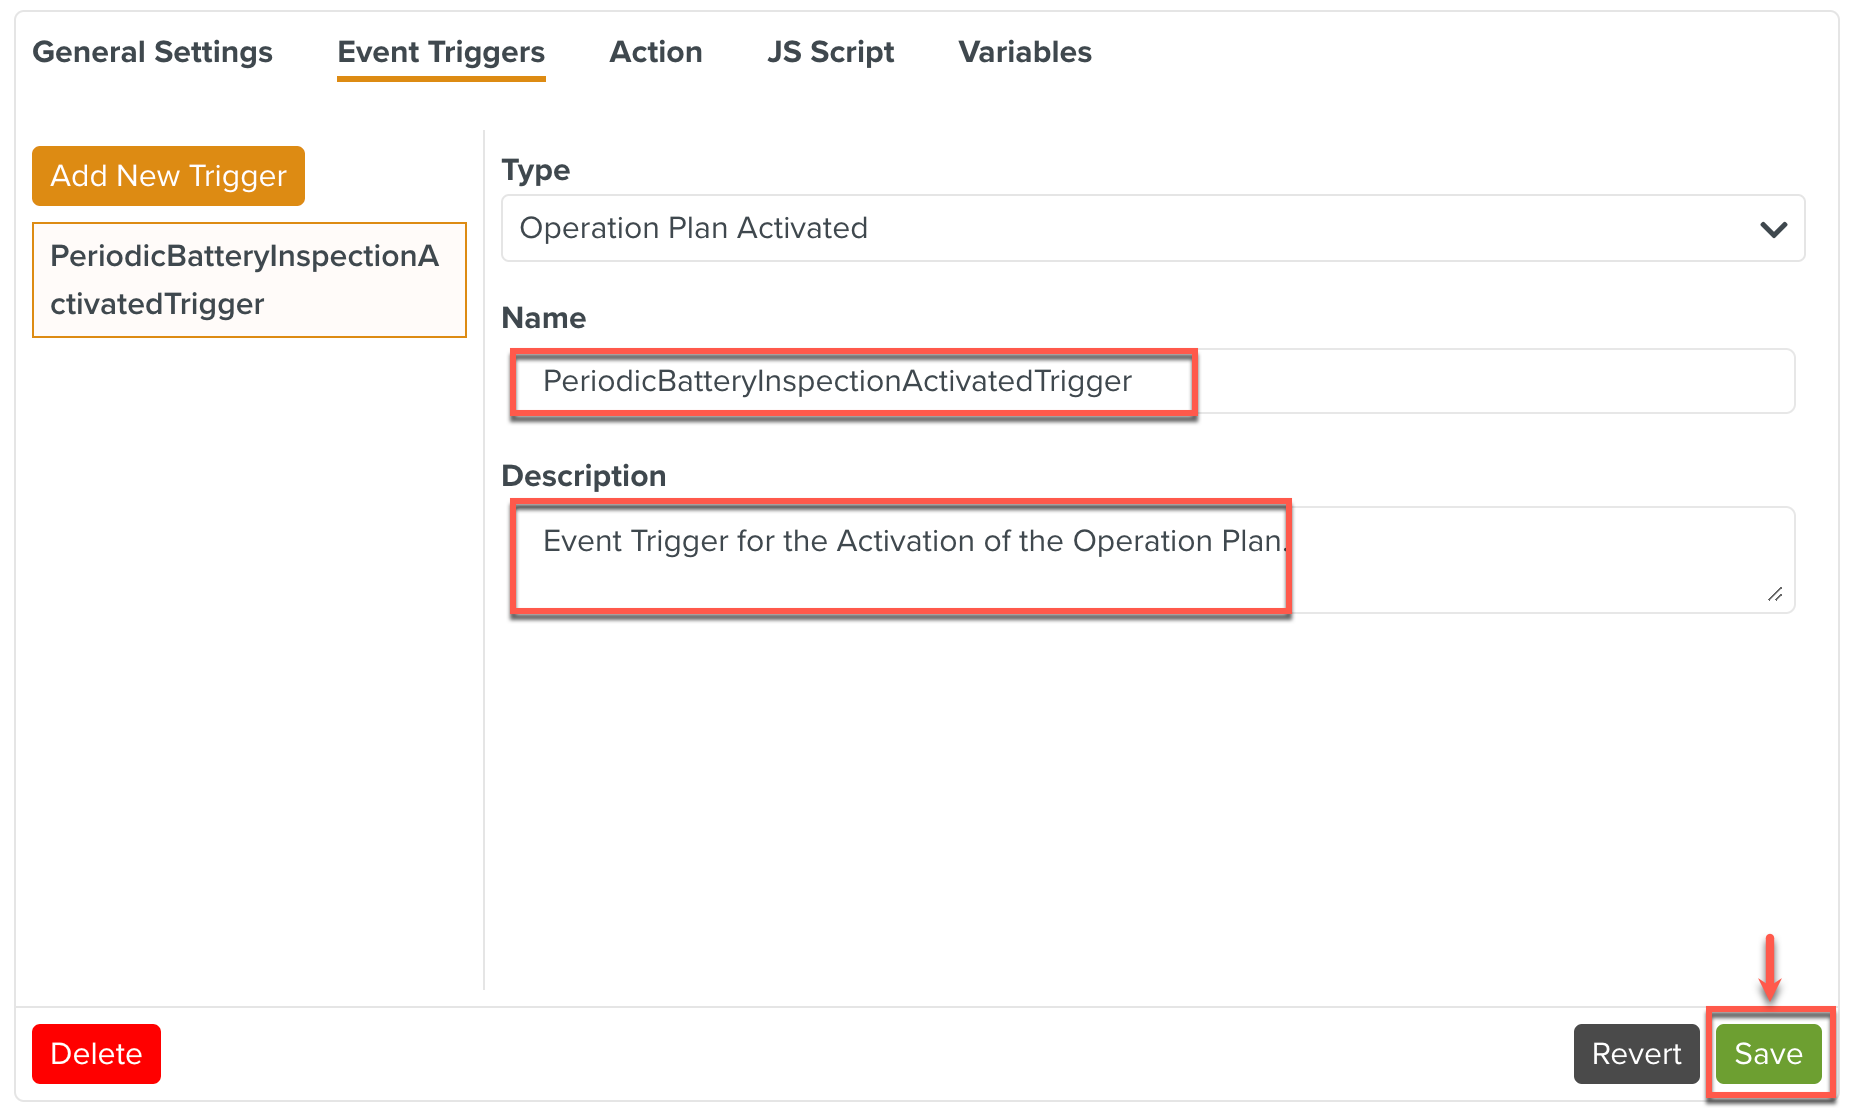
An Event Trigger of Type Operation Plan Activated triggers the Action when the current Operation Plan is activated.
To add an Event Trigger of Type Operation Plan Activated:
Select Operation Plan Activated from the Type dropdown list.
Enter the Name and Description of the Event Trigger to customize it and click to save the changes.
An Event Trigger of Type Data Object Saved triggers the Action when Data Object is saved.
To add an Event Trigger of Type Data Object Saved.
Select Data Object Saved from the Type dropdown list.
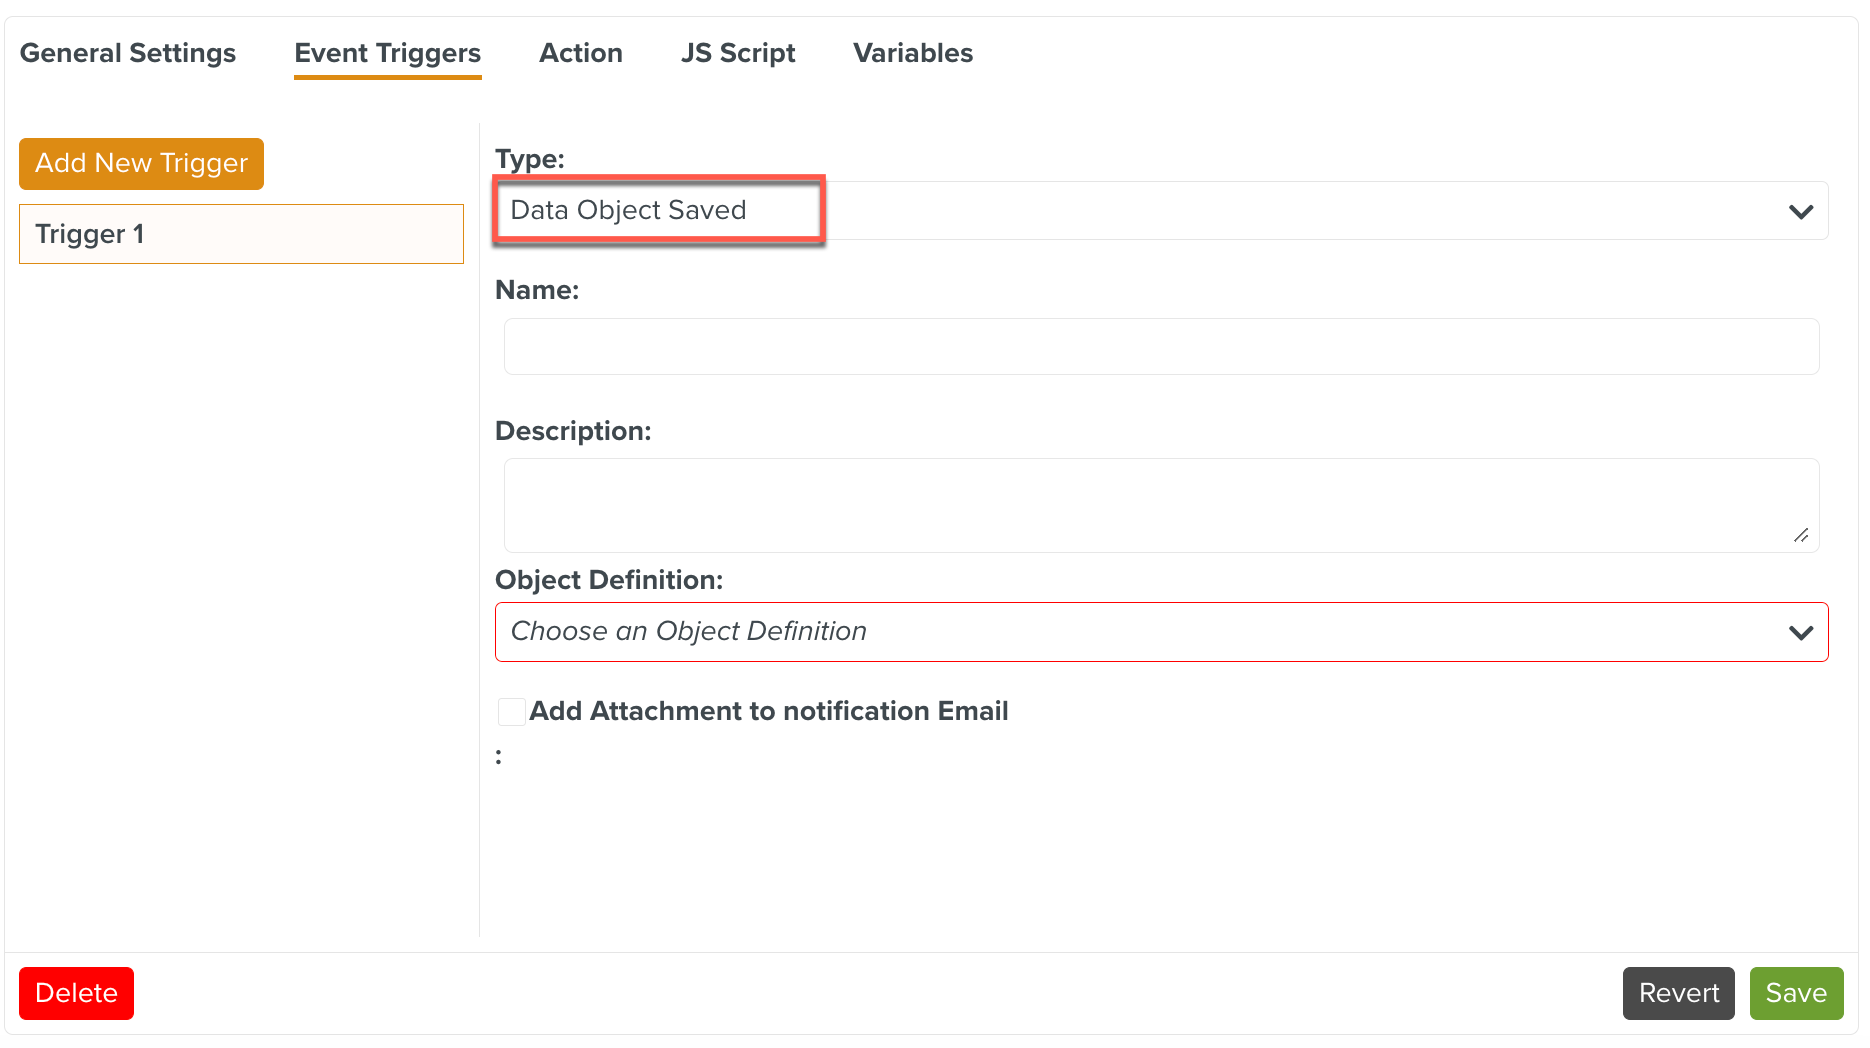
Enter the Name and Description of the Event Trigger to customize it.
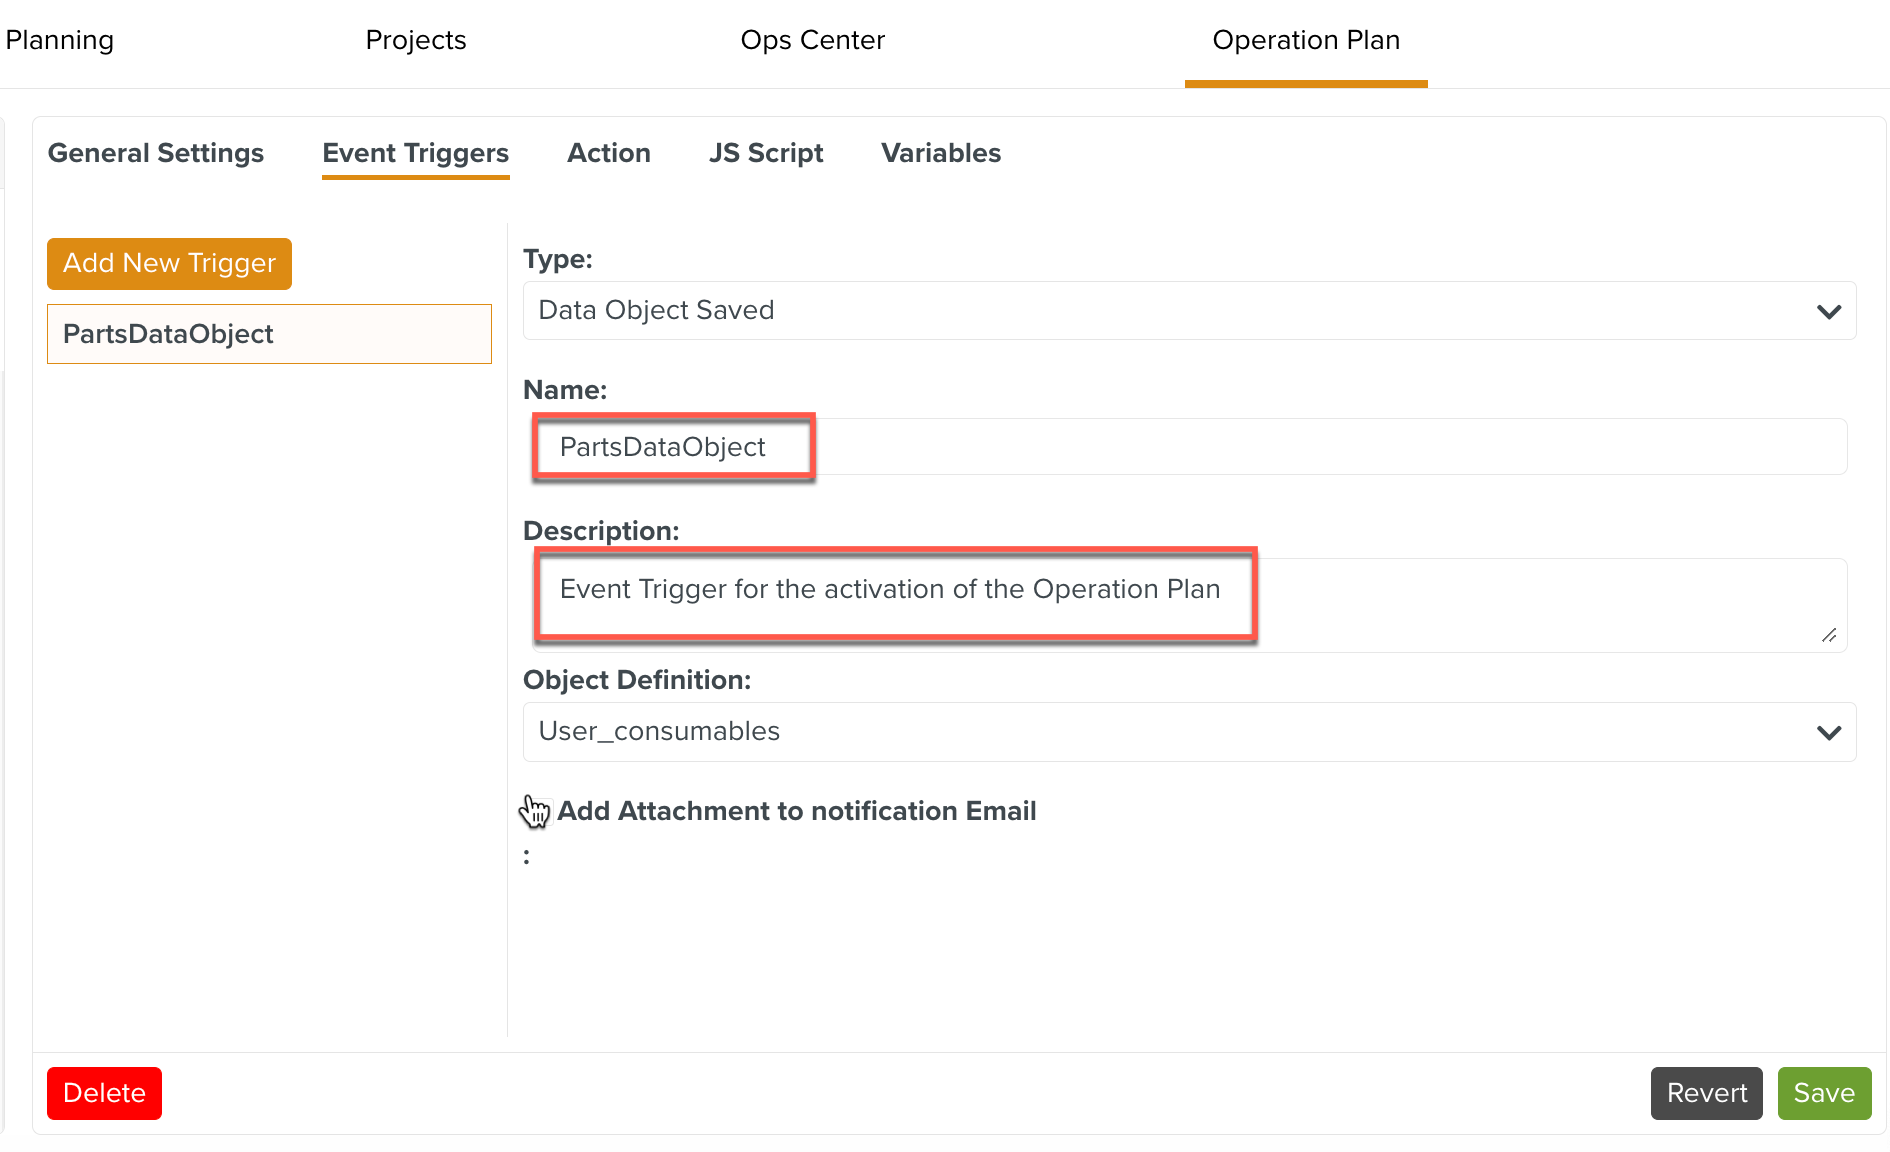
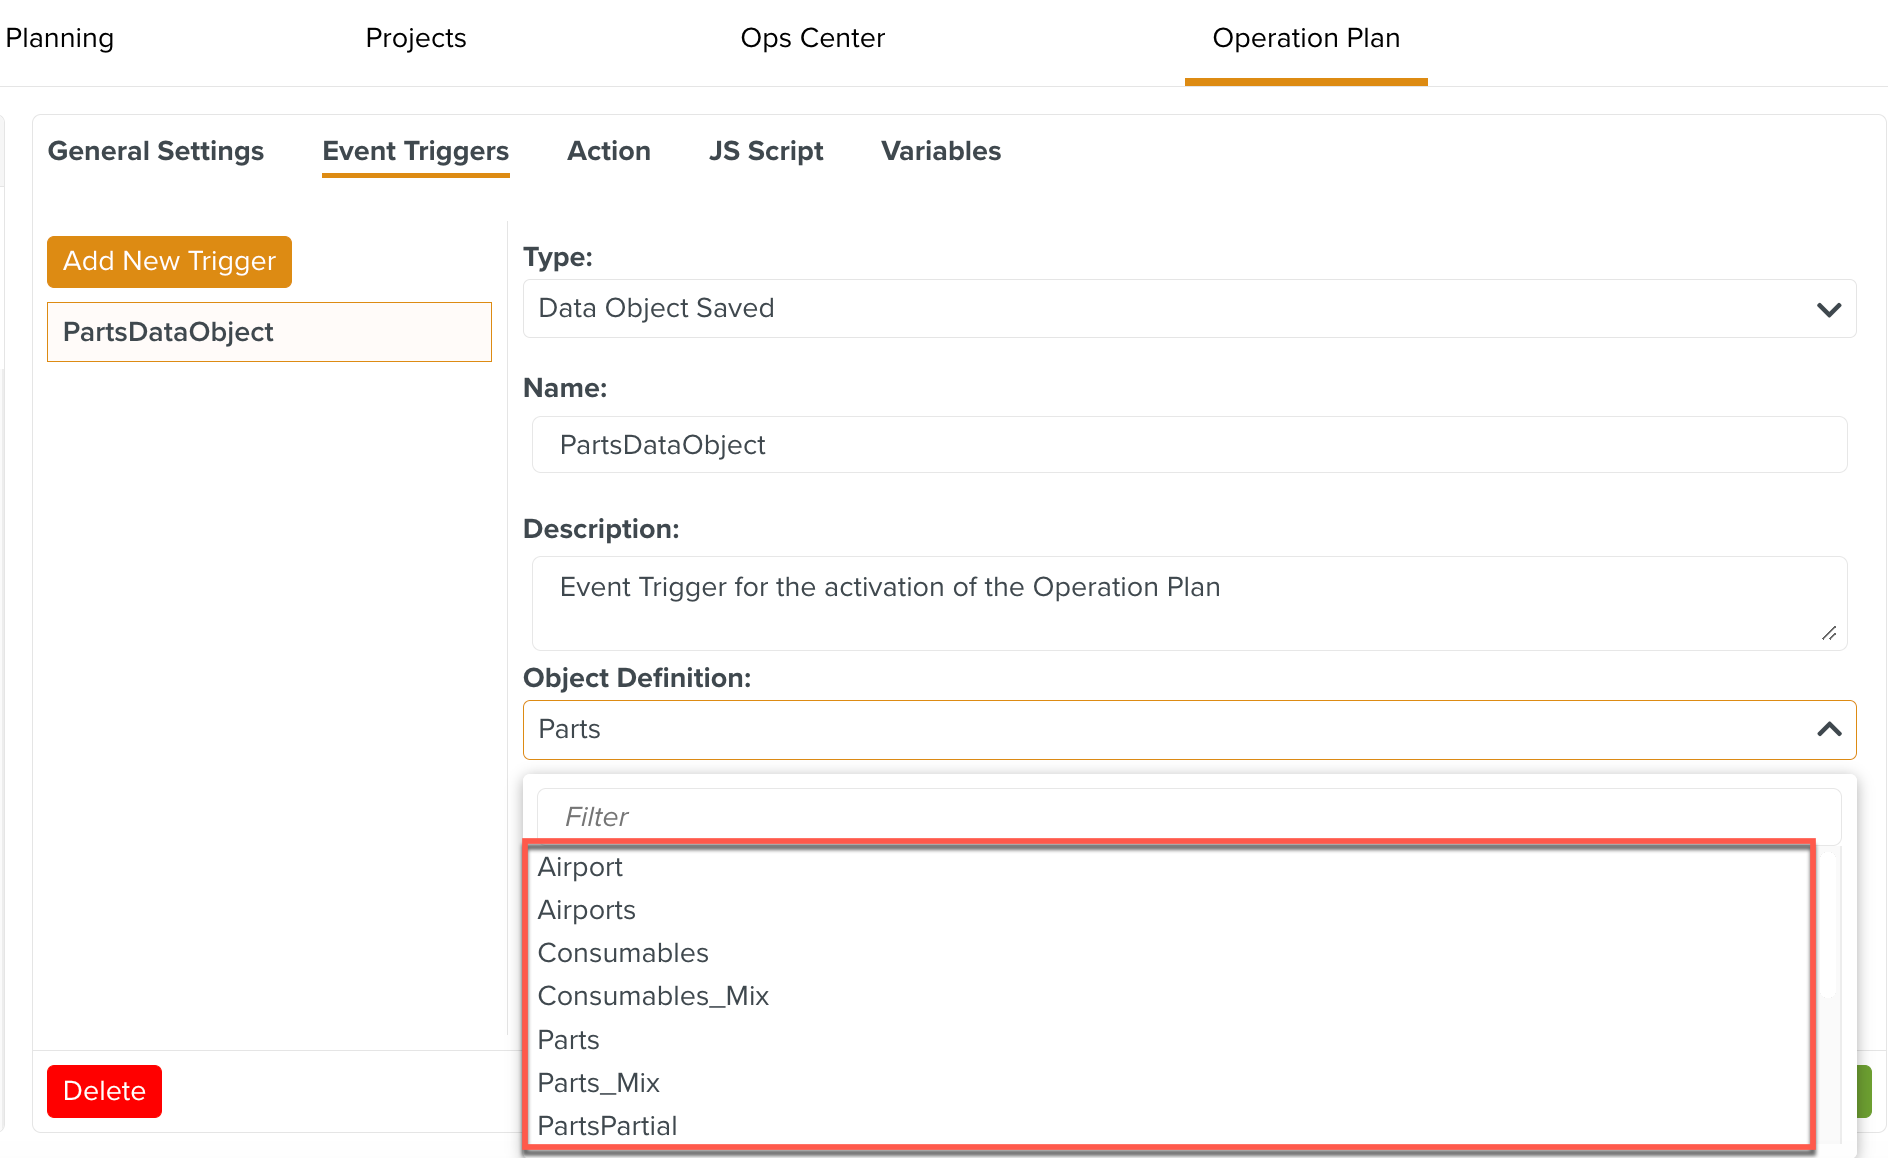
Select the required Object Definition from the dropdown list as shown below.
By Enabling the , the format of the .csv file will be sent to an email.
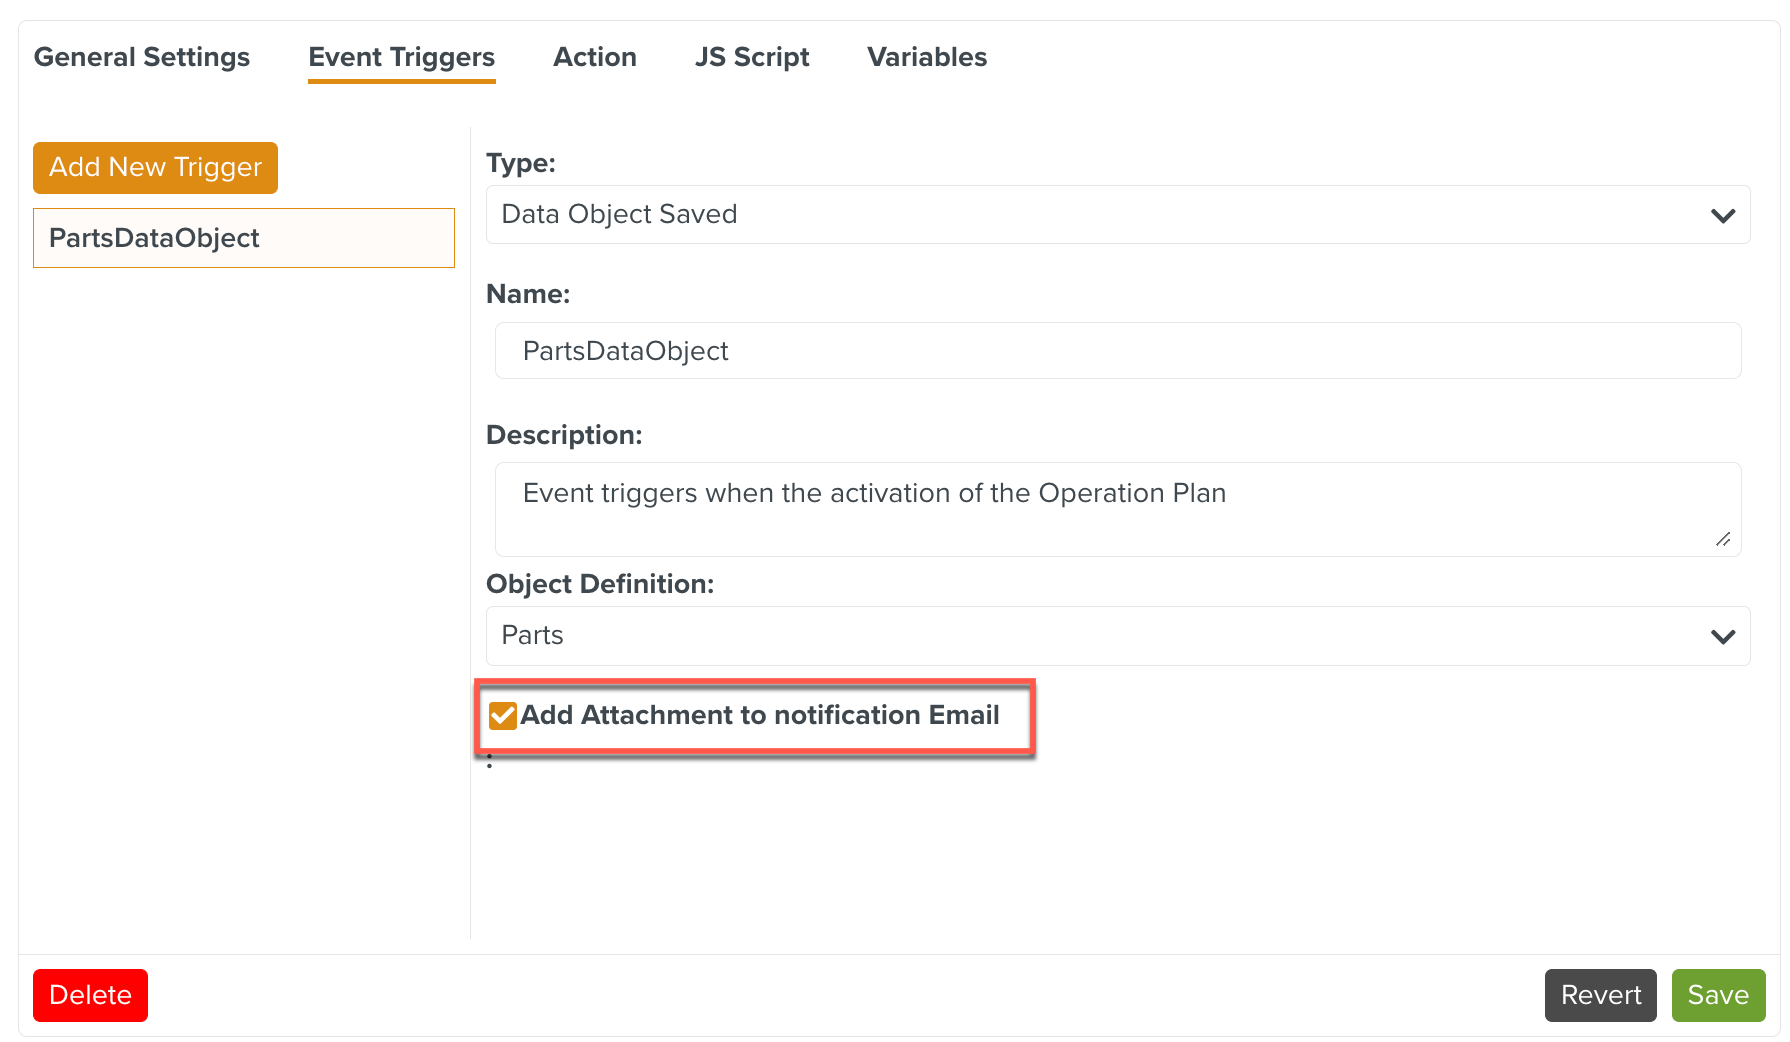
Click .

The Event trigger has been successfully set up.
An Event Trigger of Type Data Object Deleted triggers the Action when the Data Object is deleted.
To add an Event Trigger of Type Data Object Deleted.
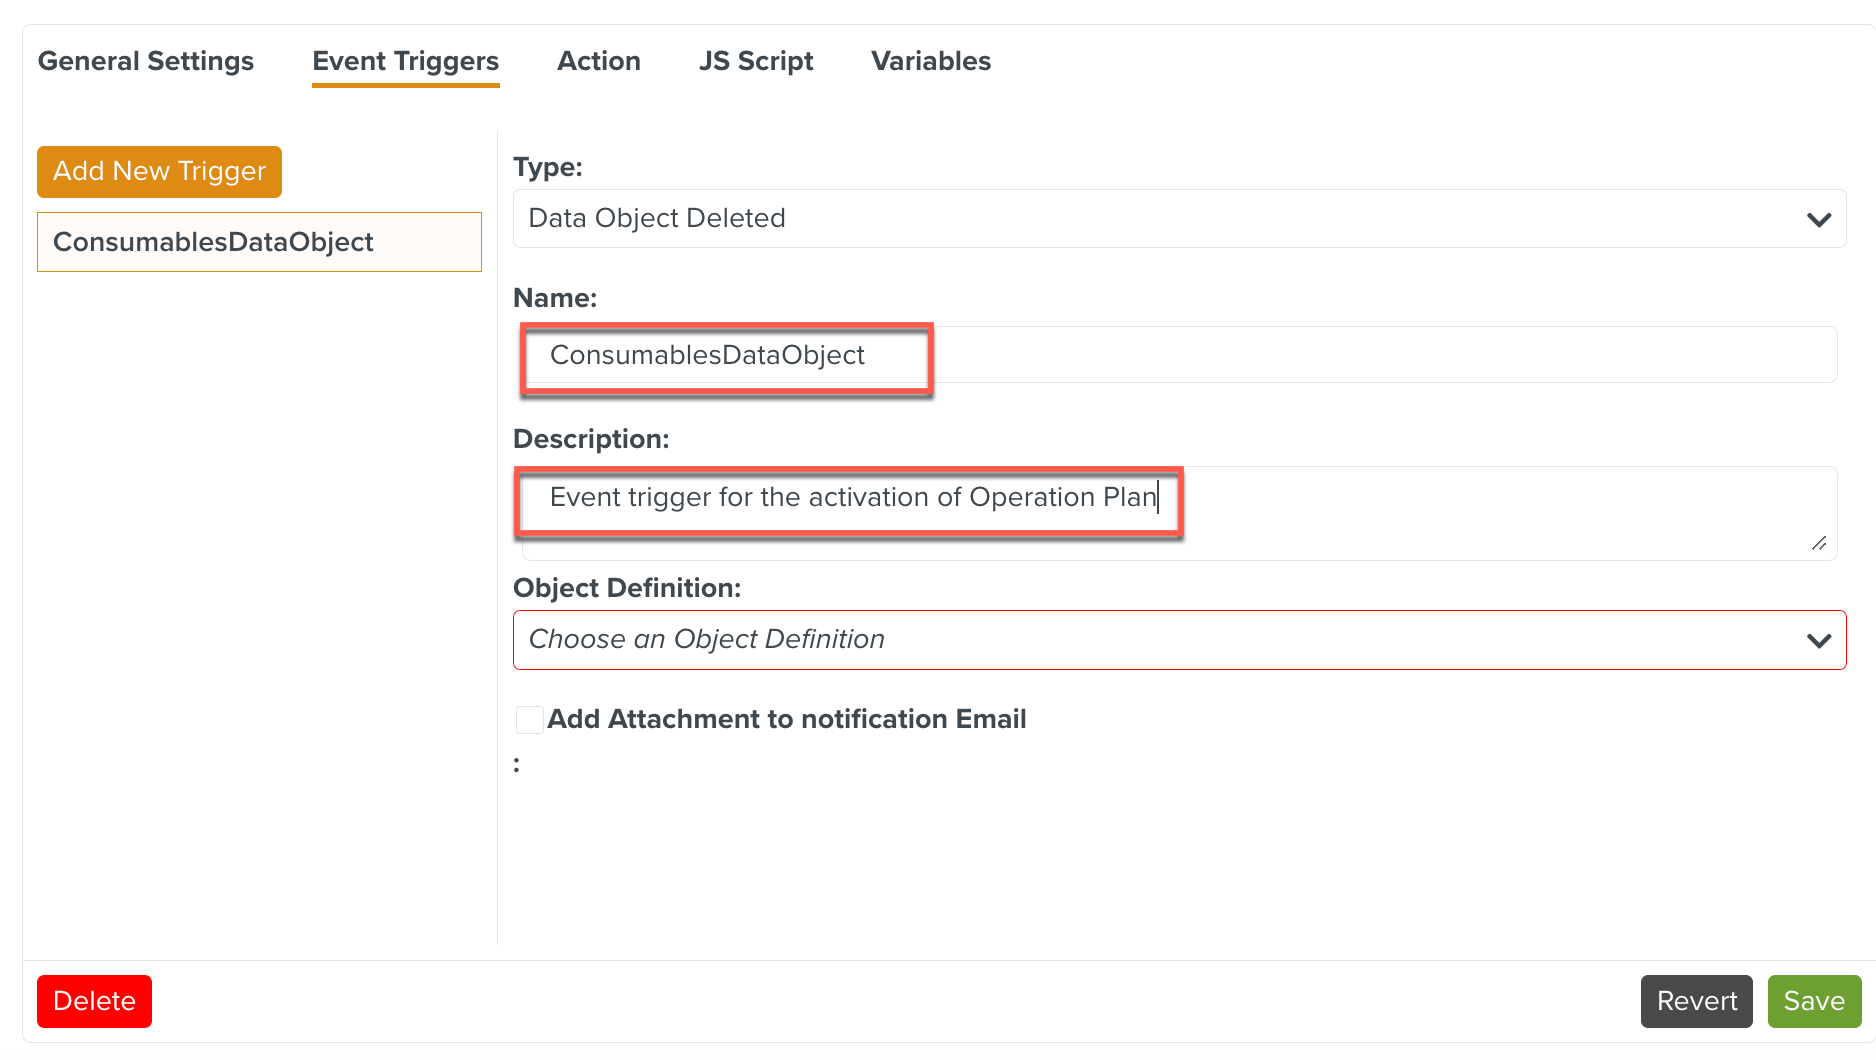
Select Data Object Deleted from the Type dropdown list.
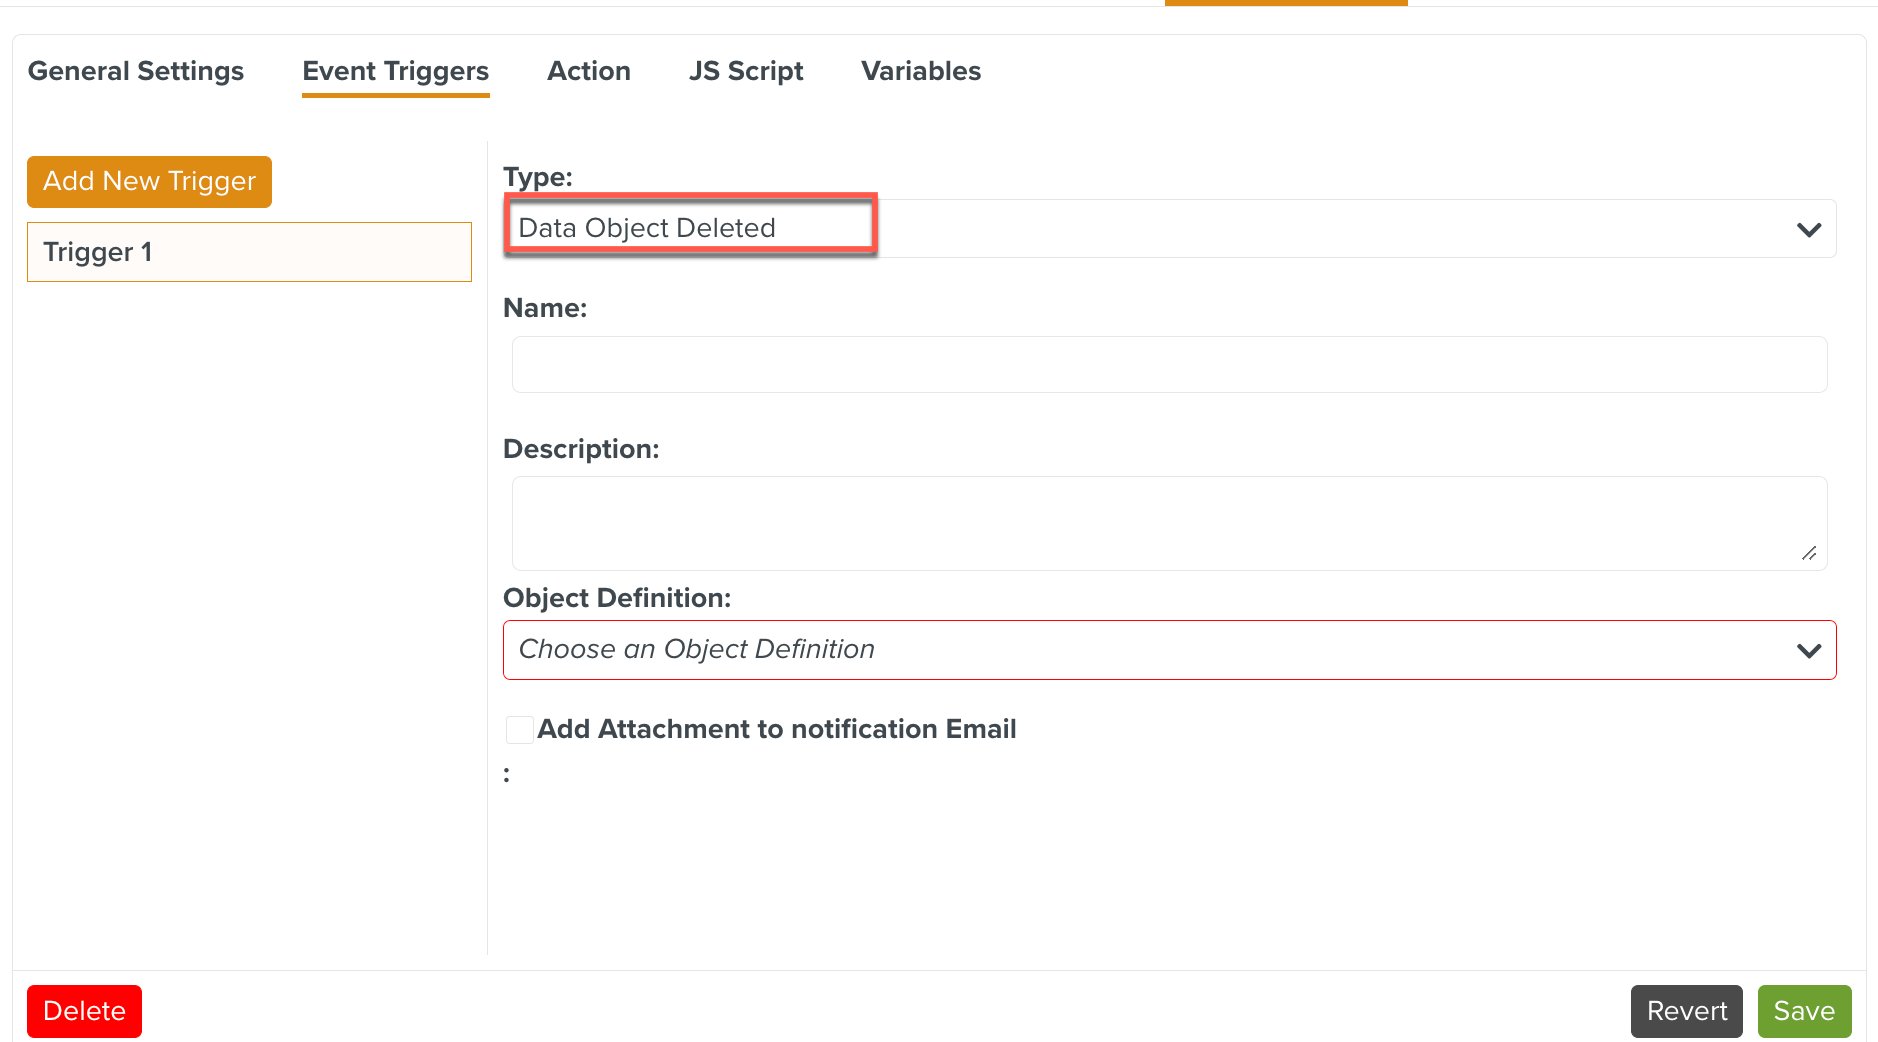
Enter the Name and Description of the Event Trigger to customize it.
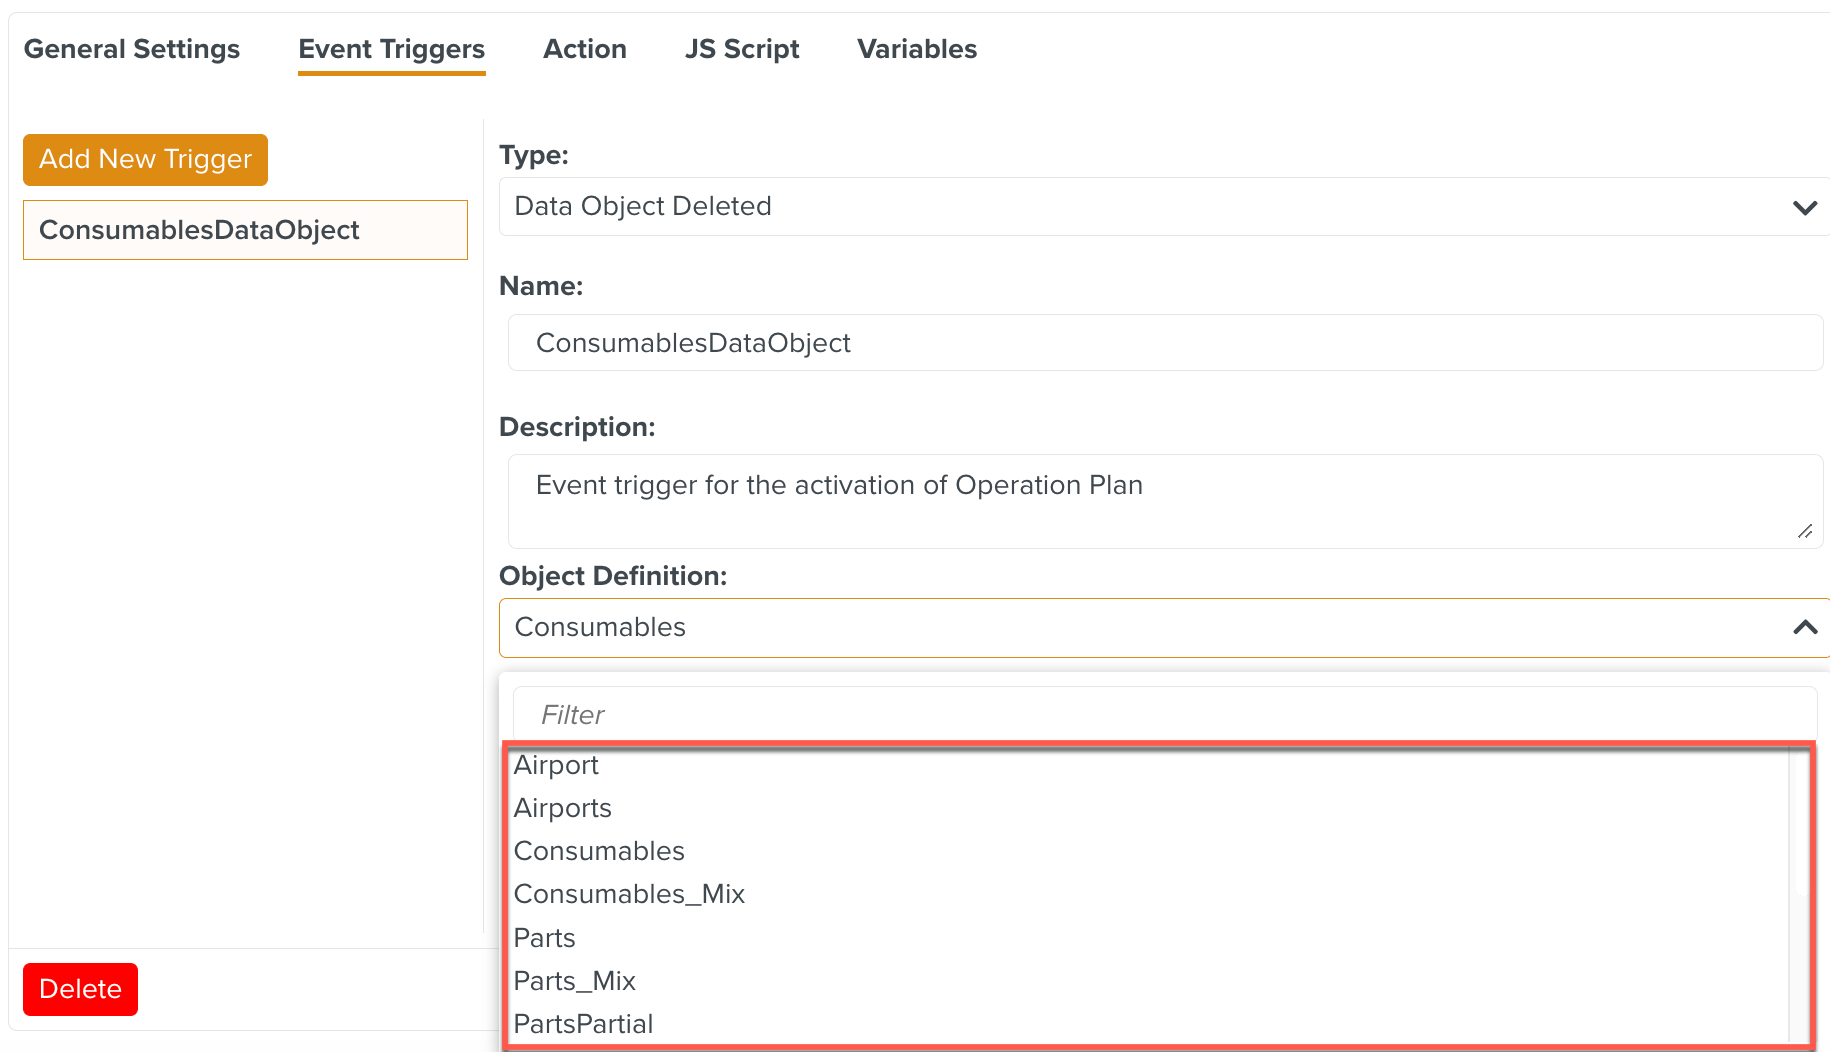
Select the required Object Definition from the dropdown list as shown below.
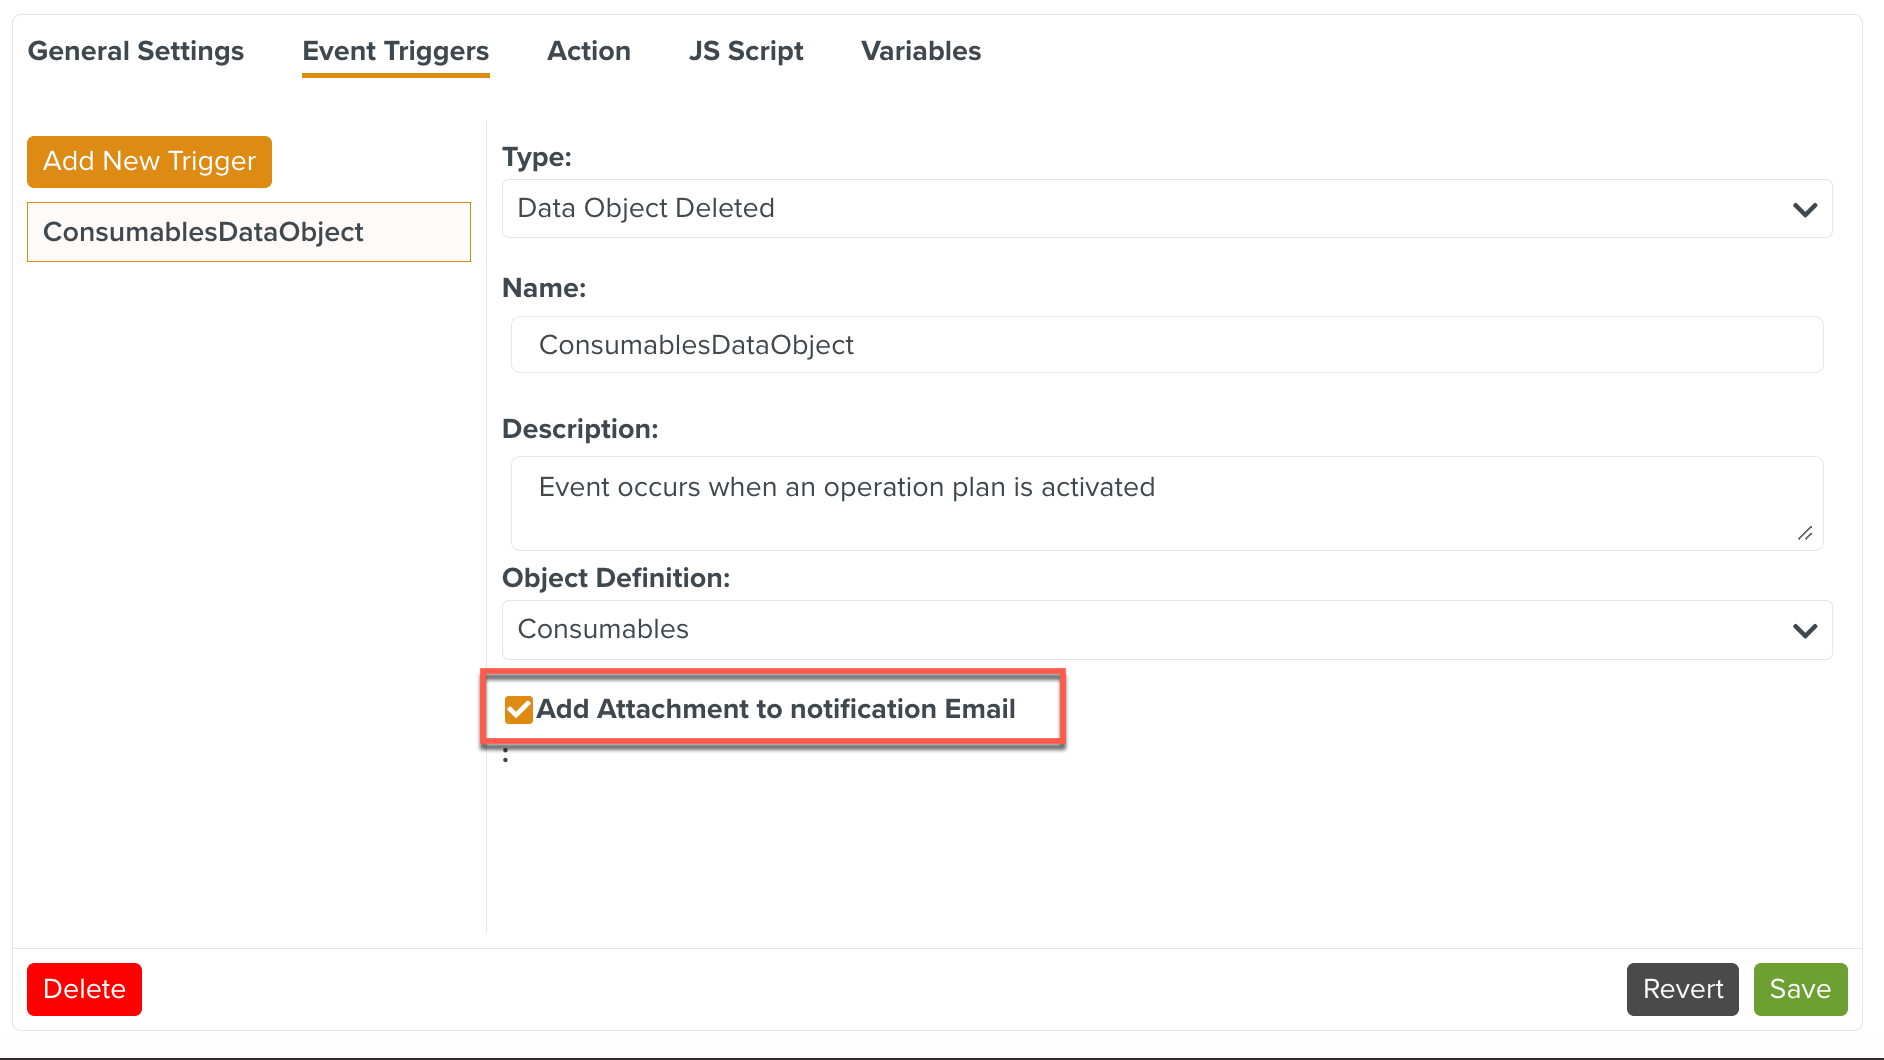
By Enabling the , the format of the .csv file will be sent to an email.
Click
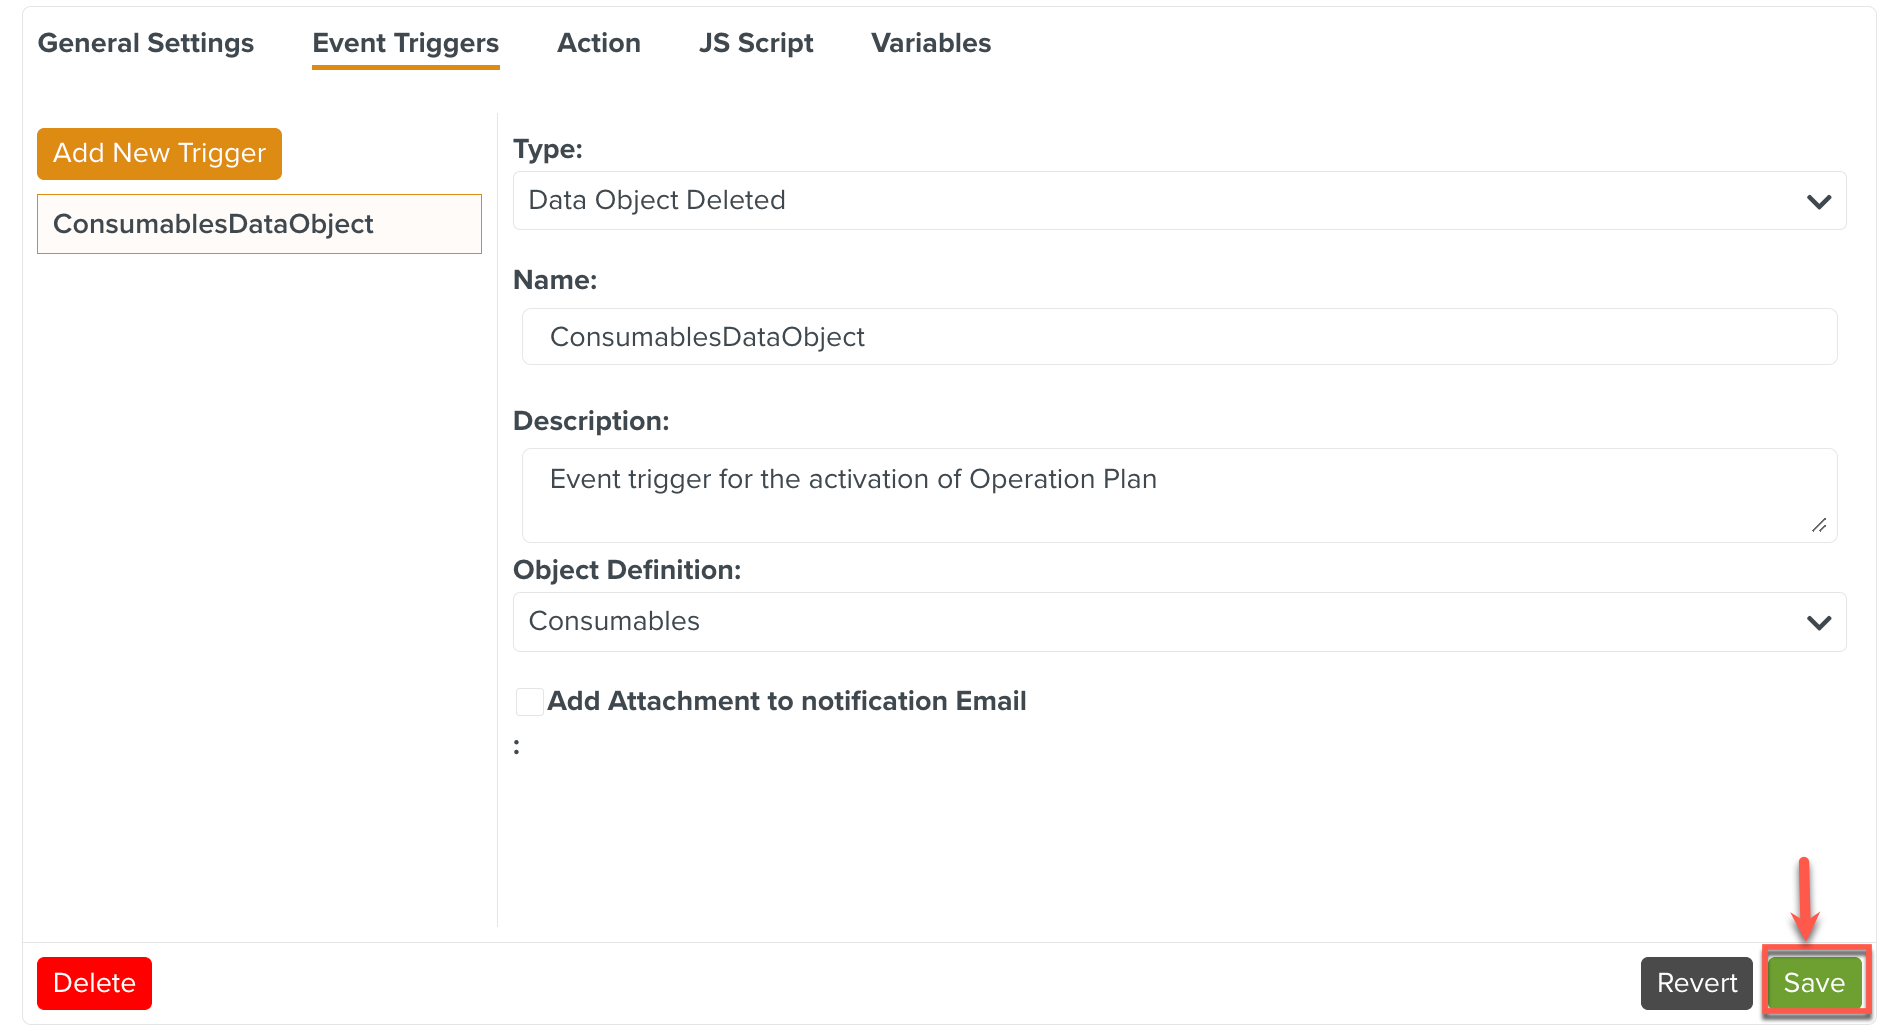
The Event trigger has been successfully set up.
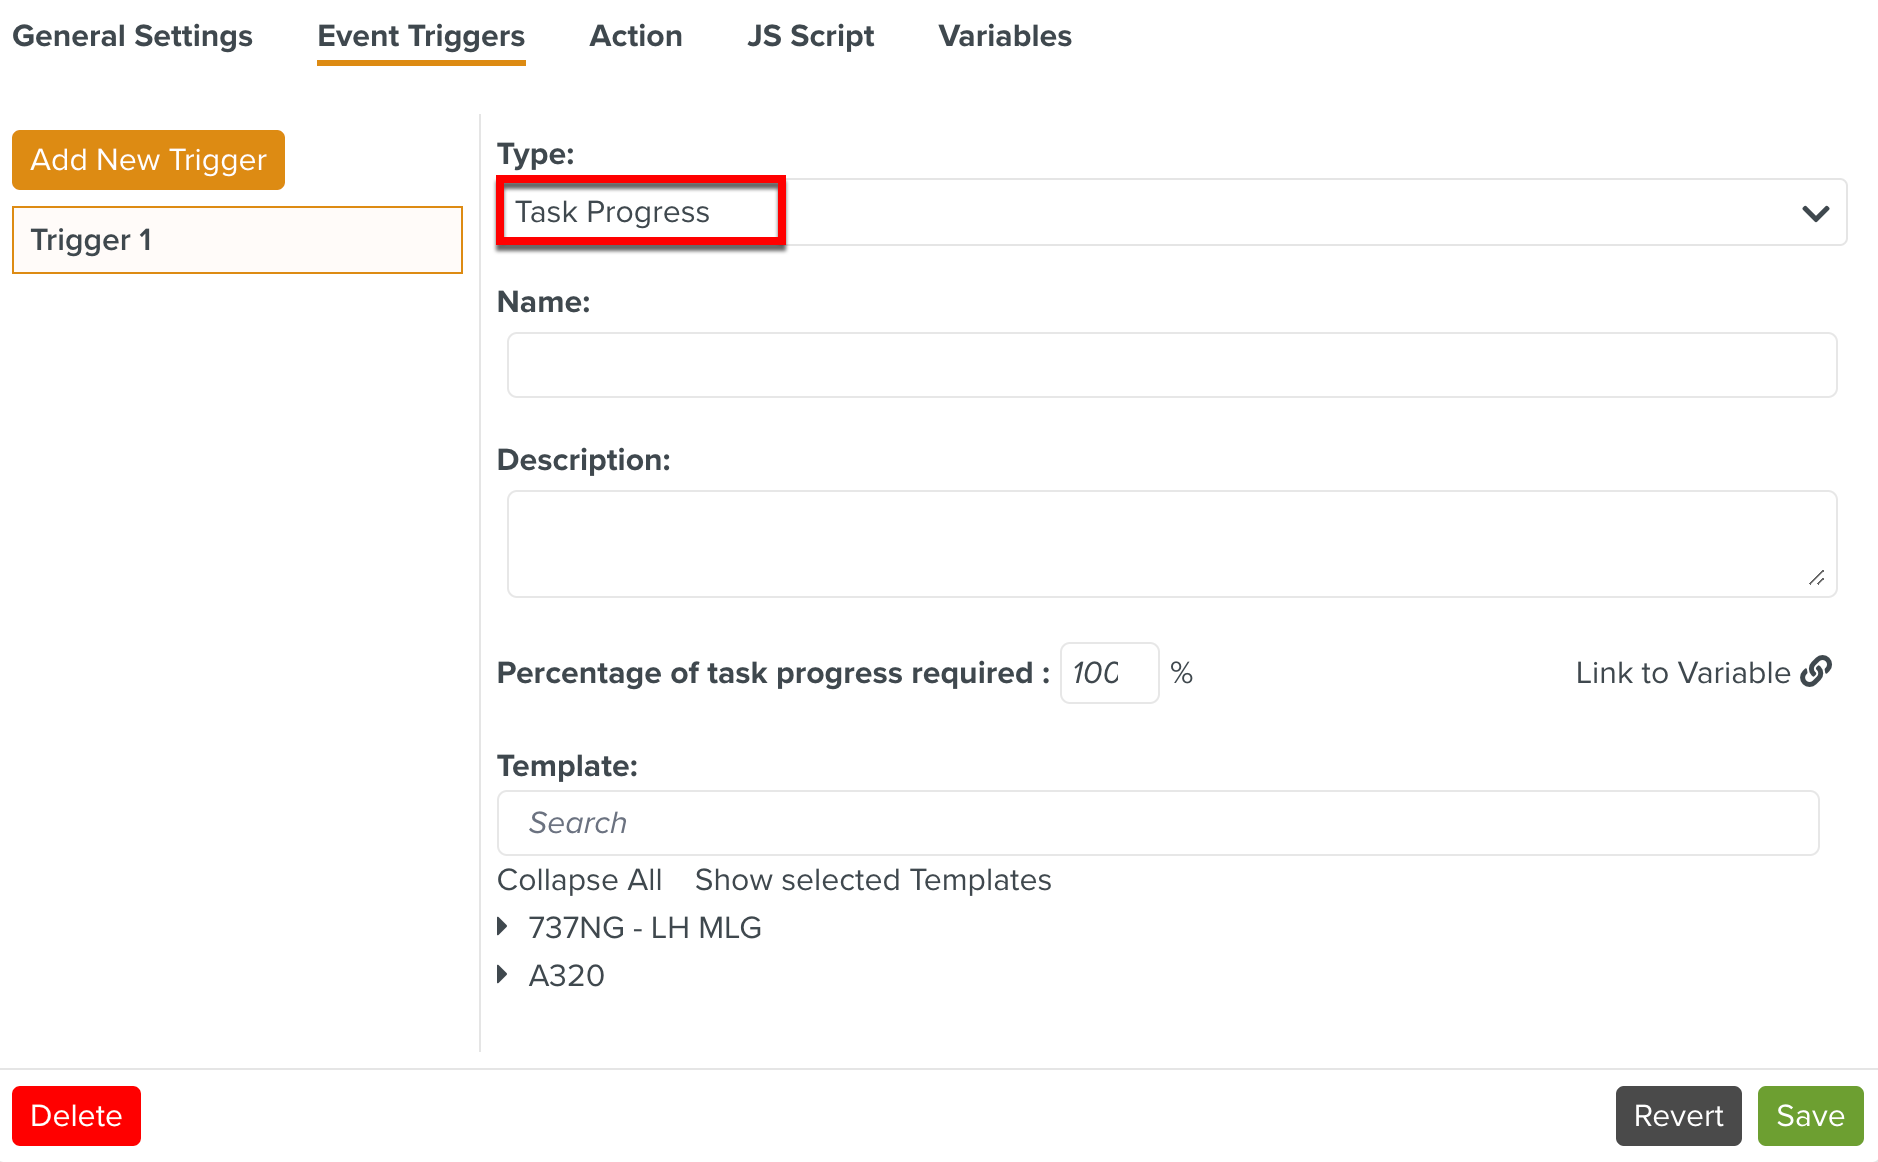
An Event Trigger of Type Task Progress triggers the Action when the selected Task advances to the configured percentage.
To add an Event Trigger of Type Task Progress:
Select Task Progress from the Type dropdown list.
Enter a value for the Percentage of task progress required. You can also link the field to a Variable.
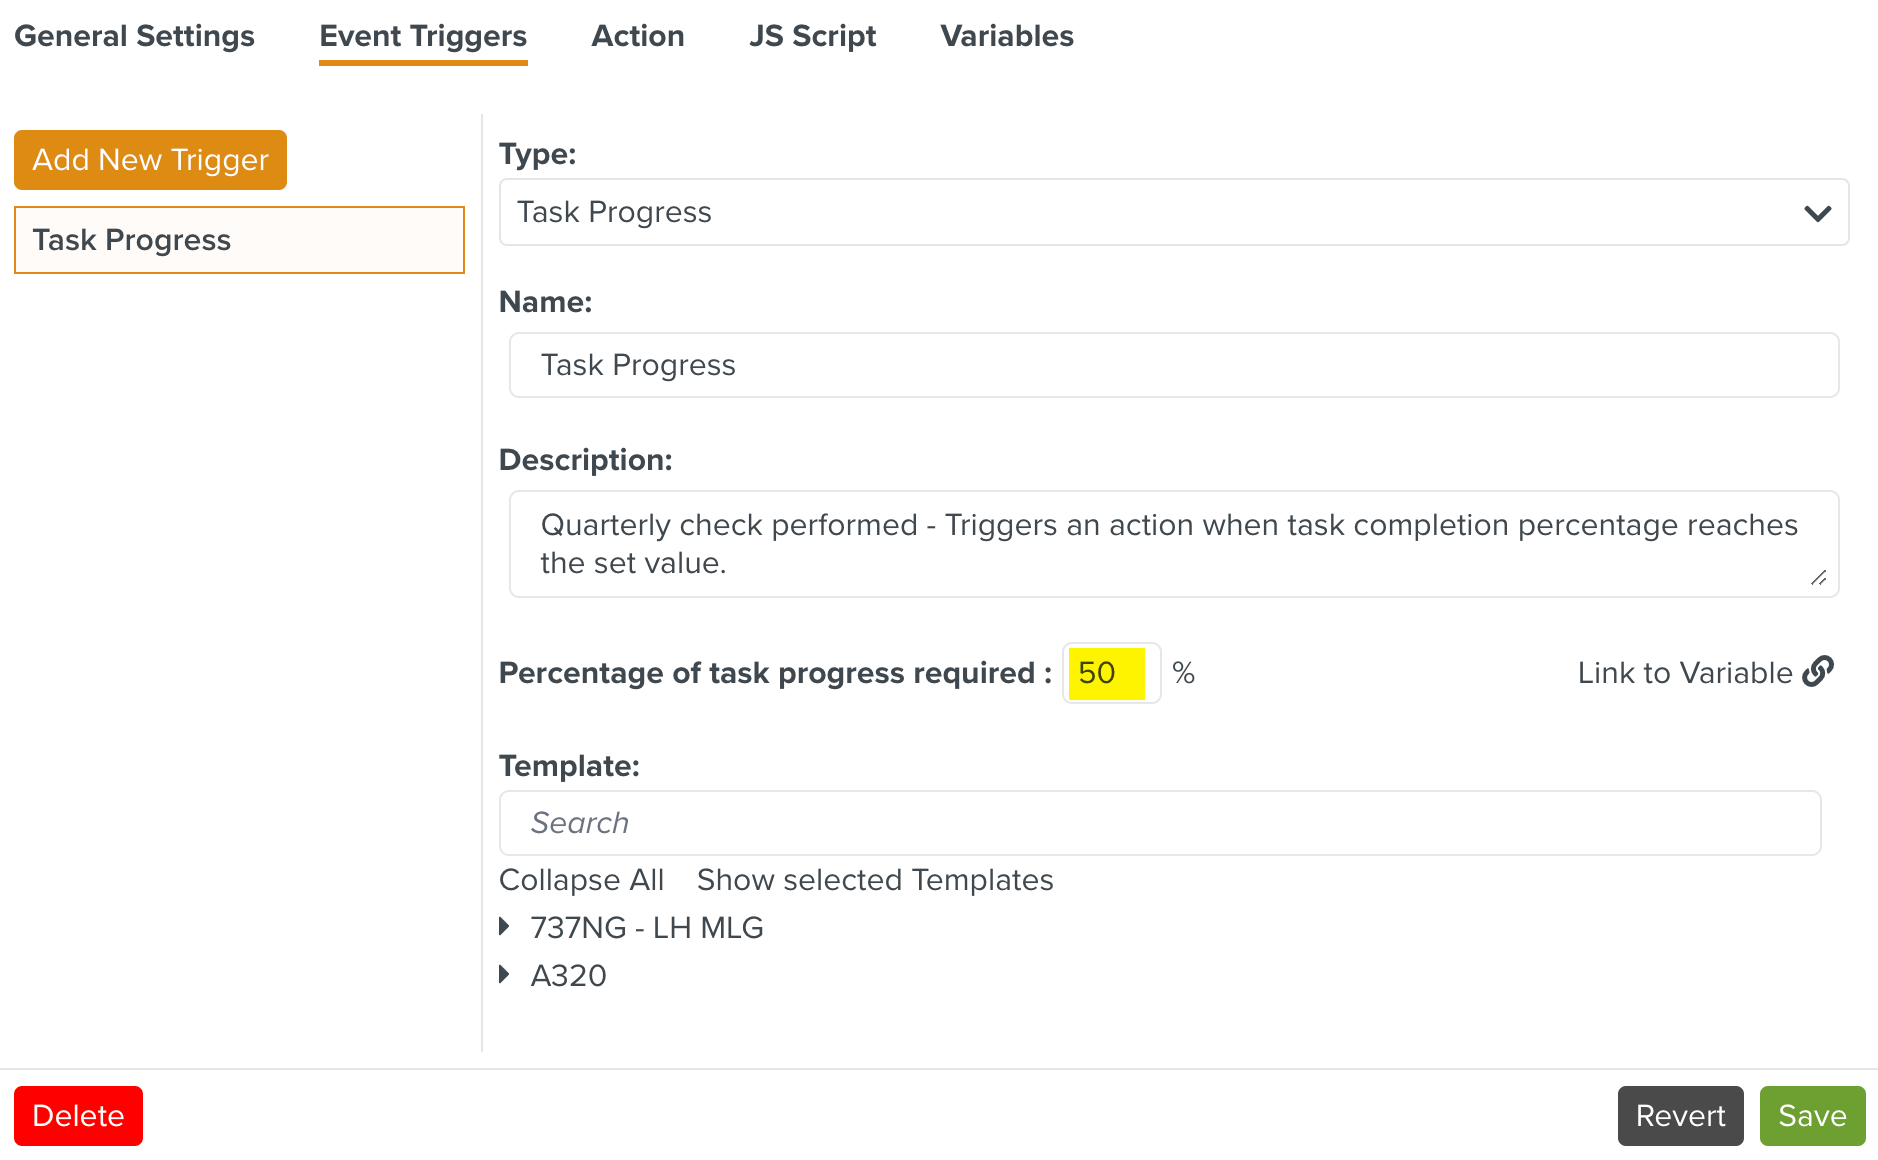
Note
The default value is set to 100%.
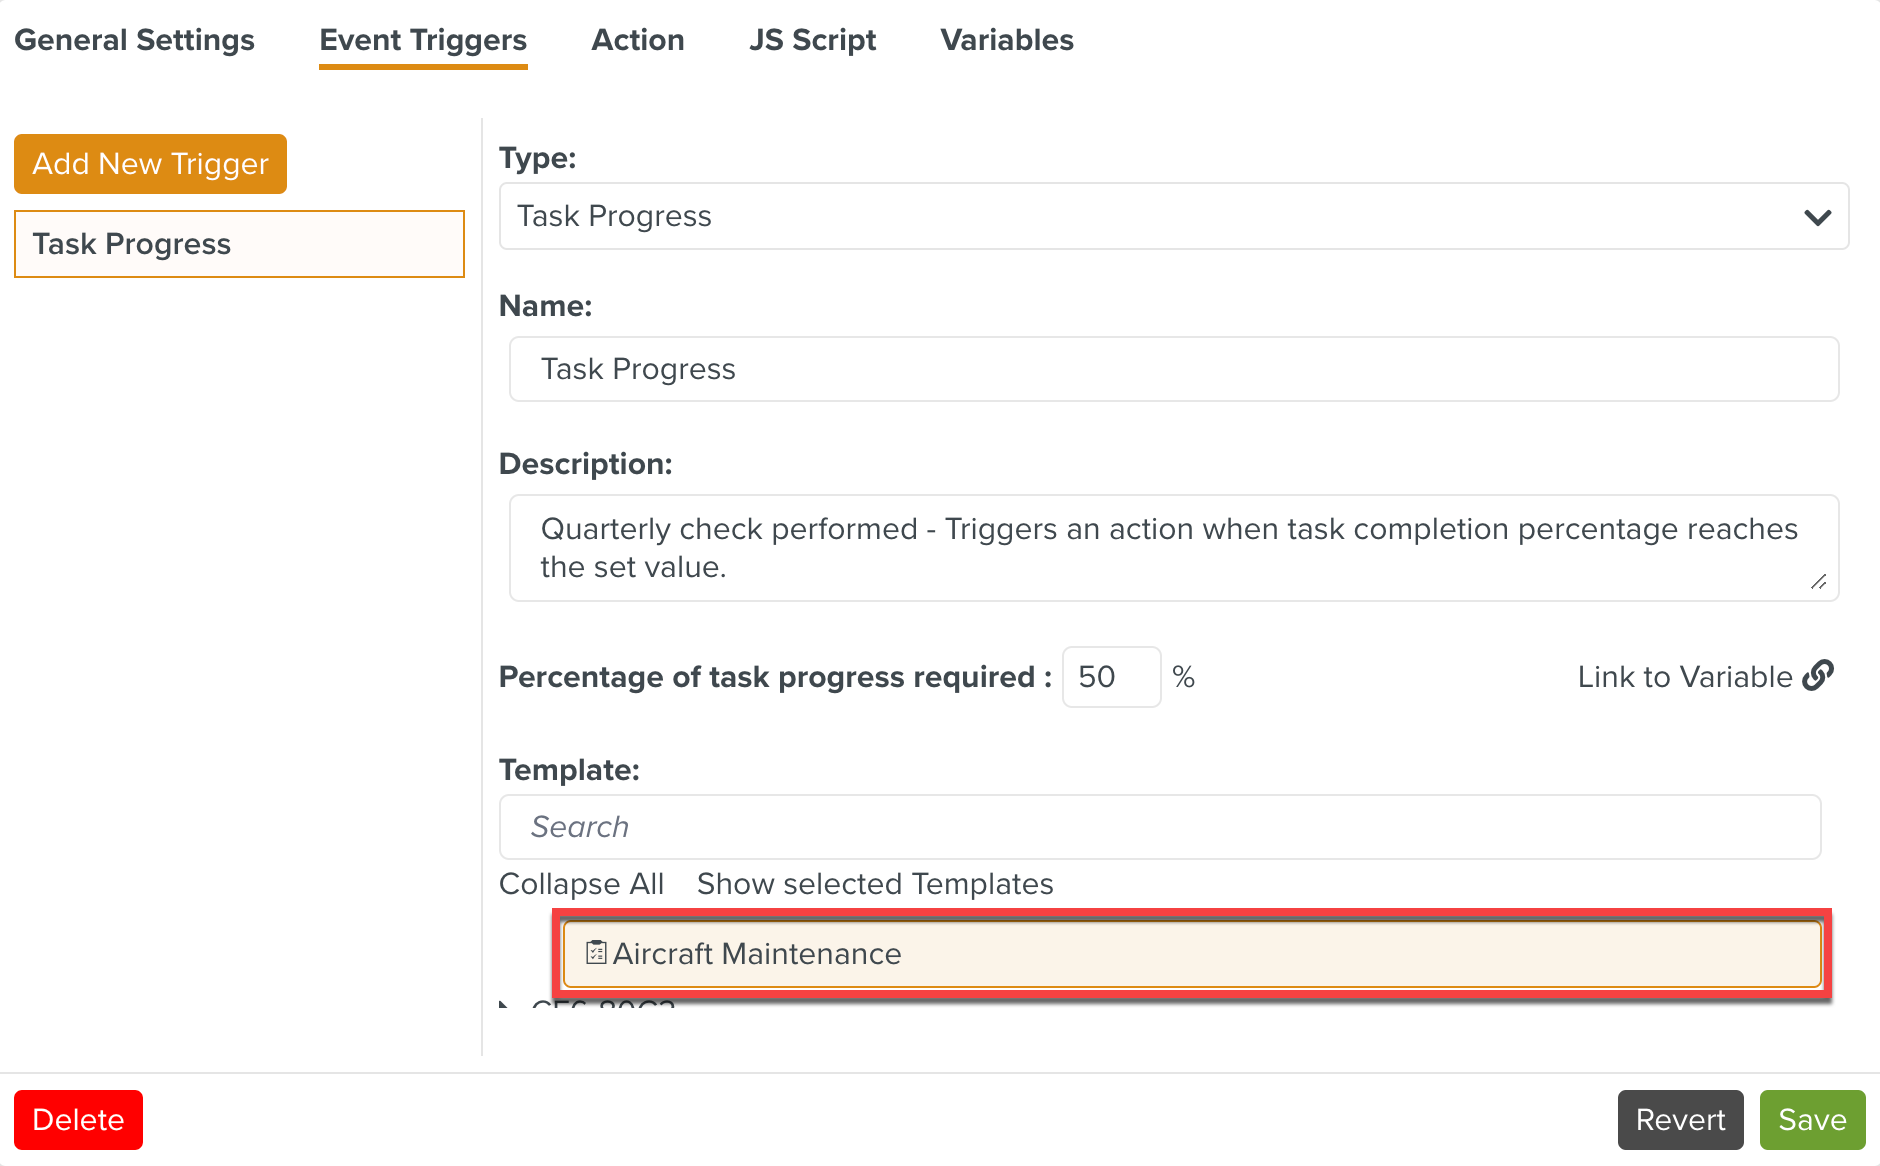
Select a Template associated with this Trigger.
In the example below, this Event Trigger is triggered when the Task Aircraft Maintenance reaches 50% completion.
You can customize the name and description of the Event Trigger as shown in the example.
An Event Trigger of Type triggers the Action when a specified percentage of the selected Tasks are complete and marked as Done.
To add an Event Trigger of Type :
Select from the Type dropdown list.
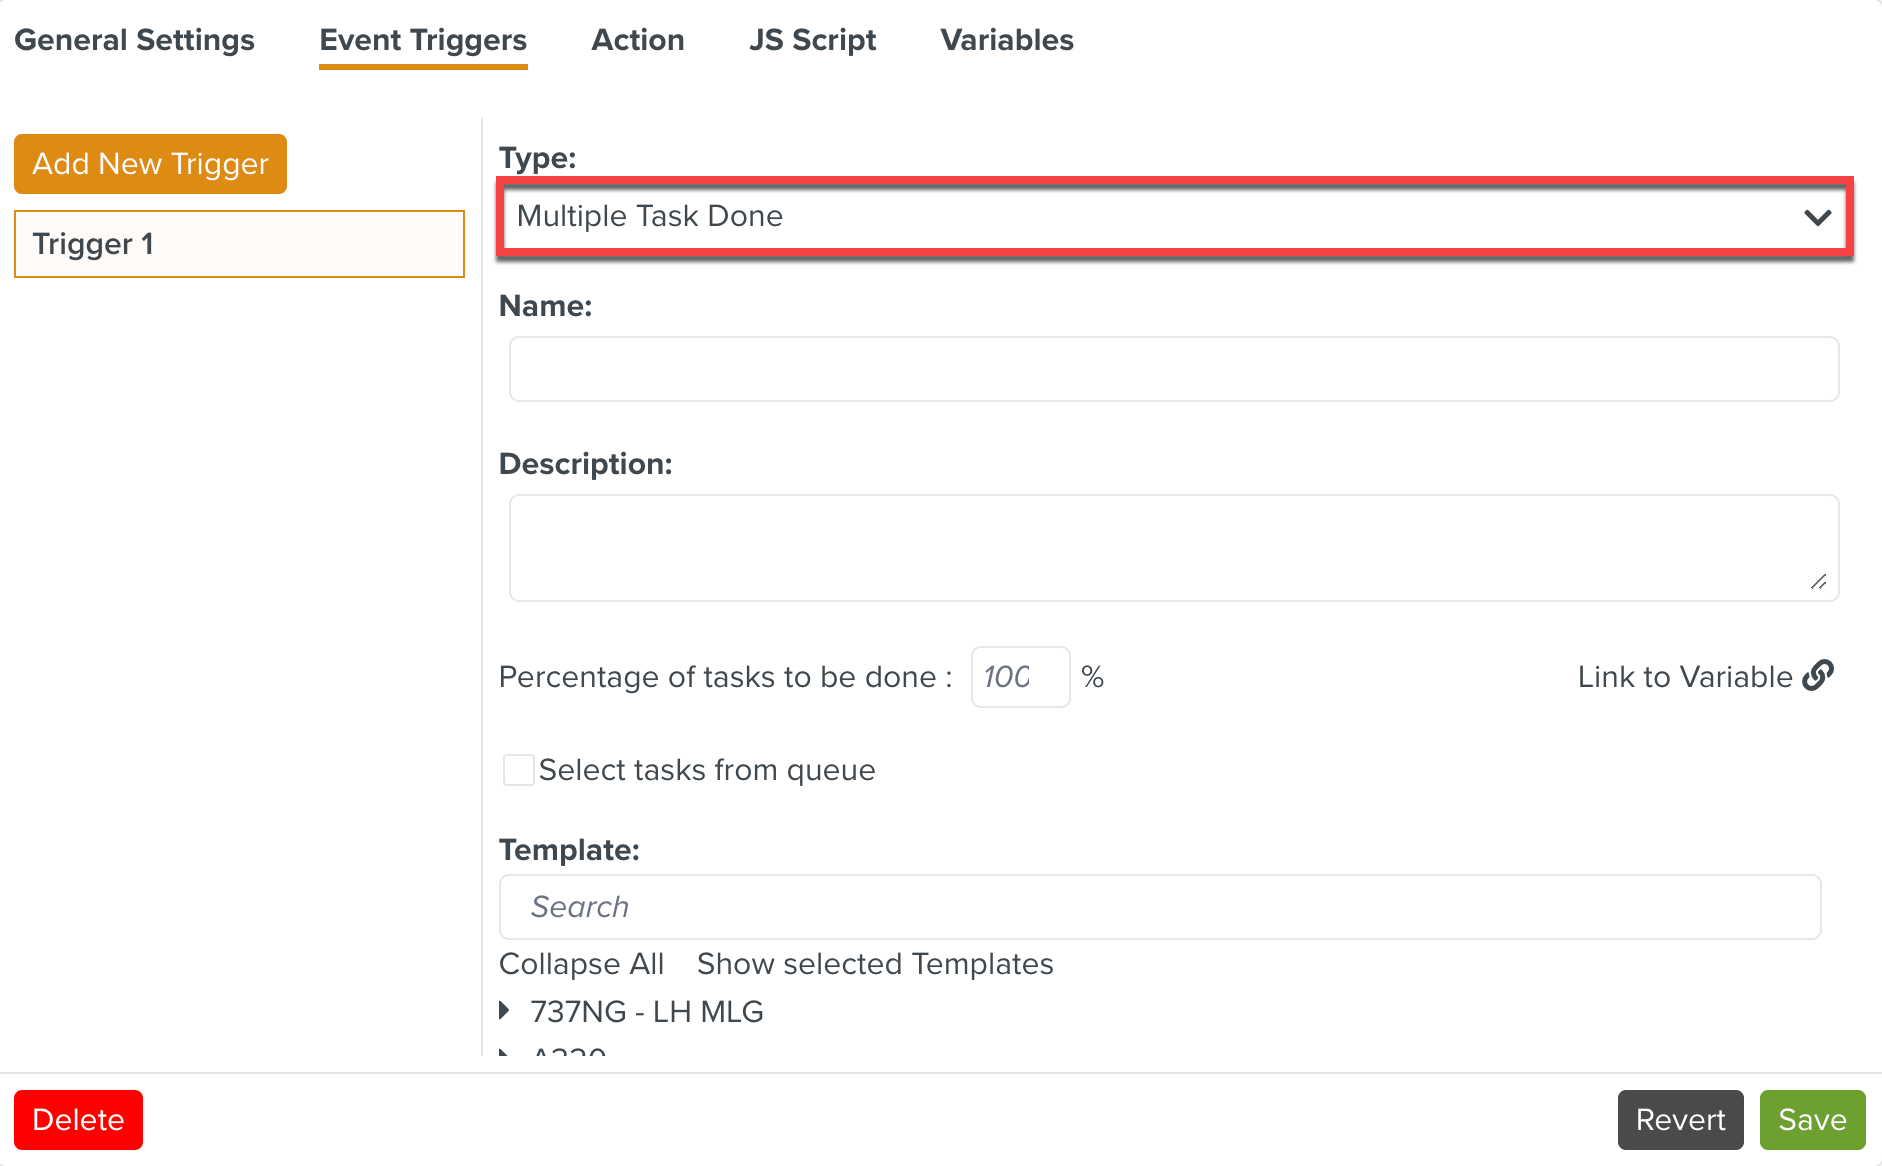
Enter a value for the Percentage of task progress required. You can also link the field to a variable.

Note
The default value is set to 100 %.
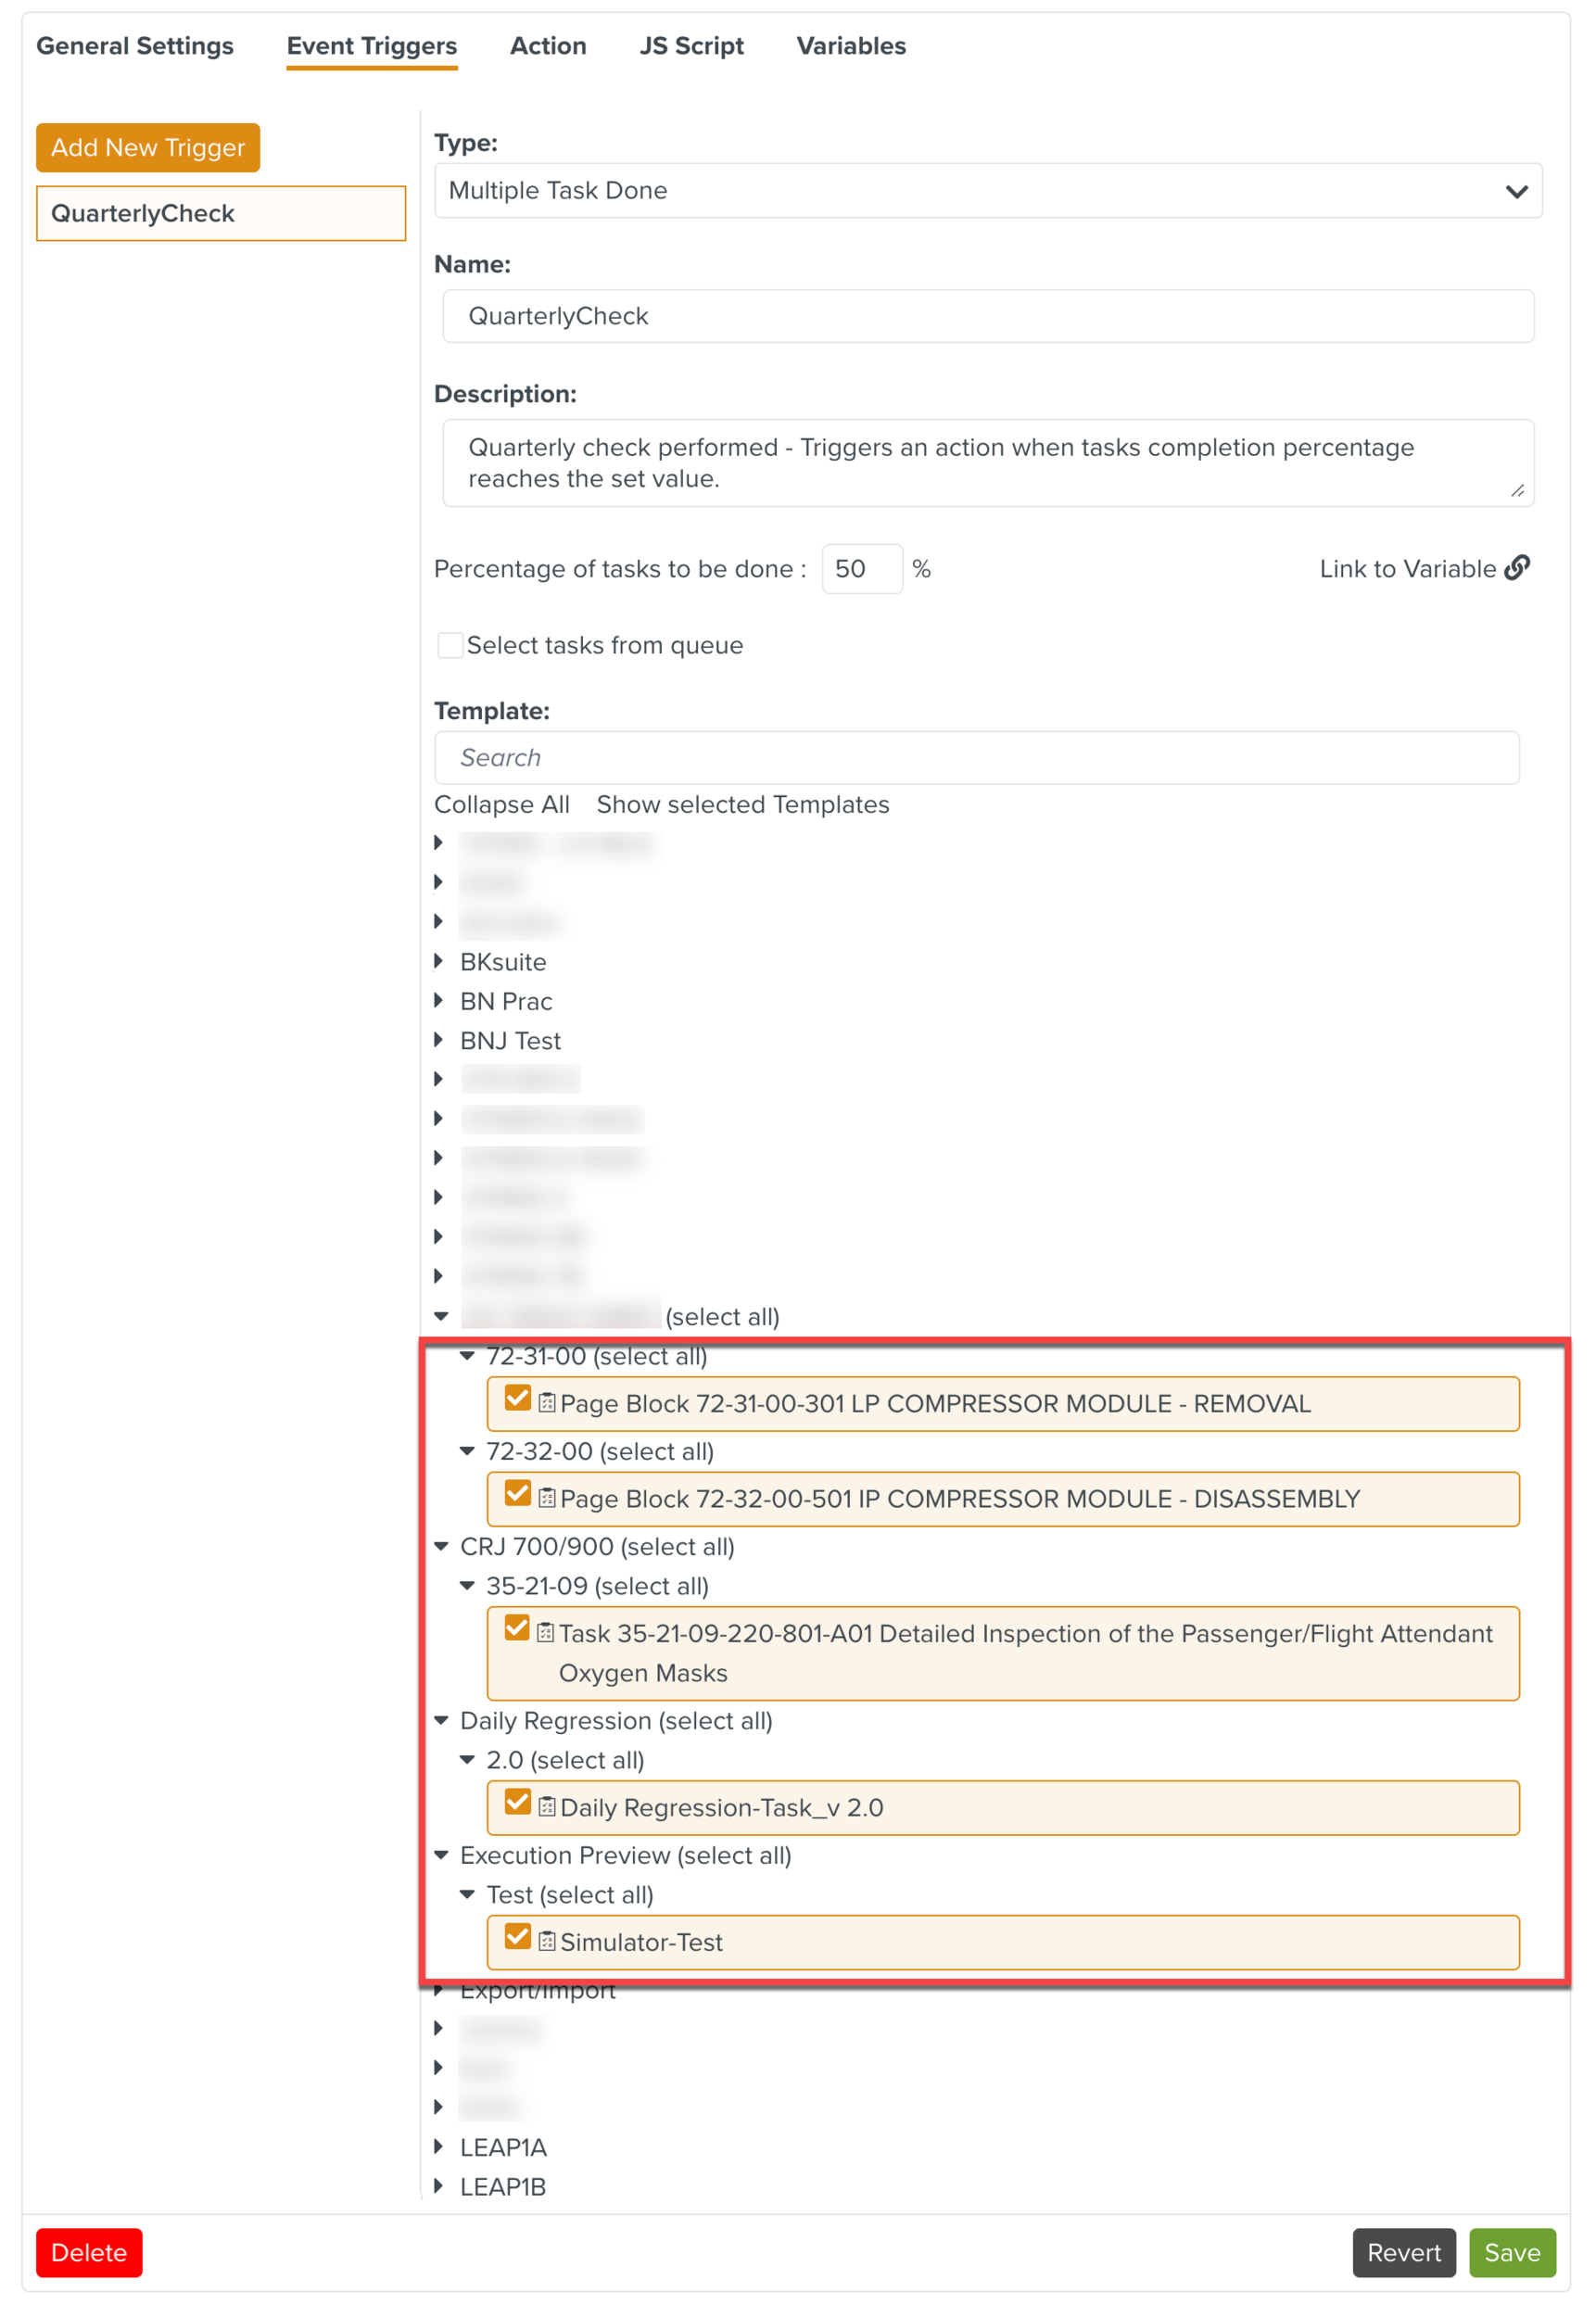
Select the Templates associated with this Trigger.
In the example below, this Event Trigger is triggered when 50% of the selected Tasks are complete and marked as Done.
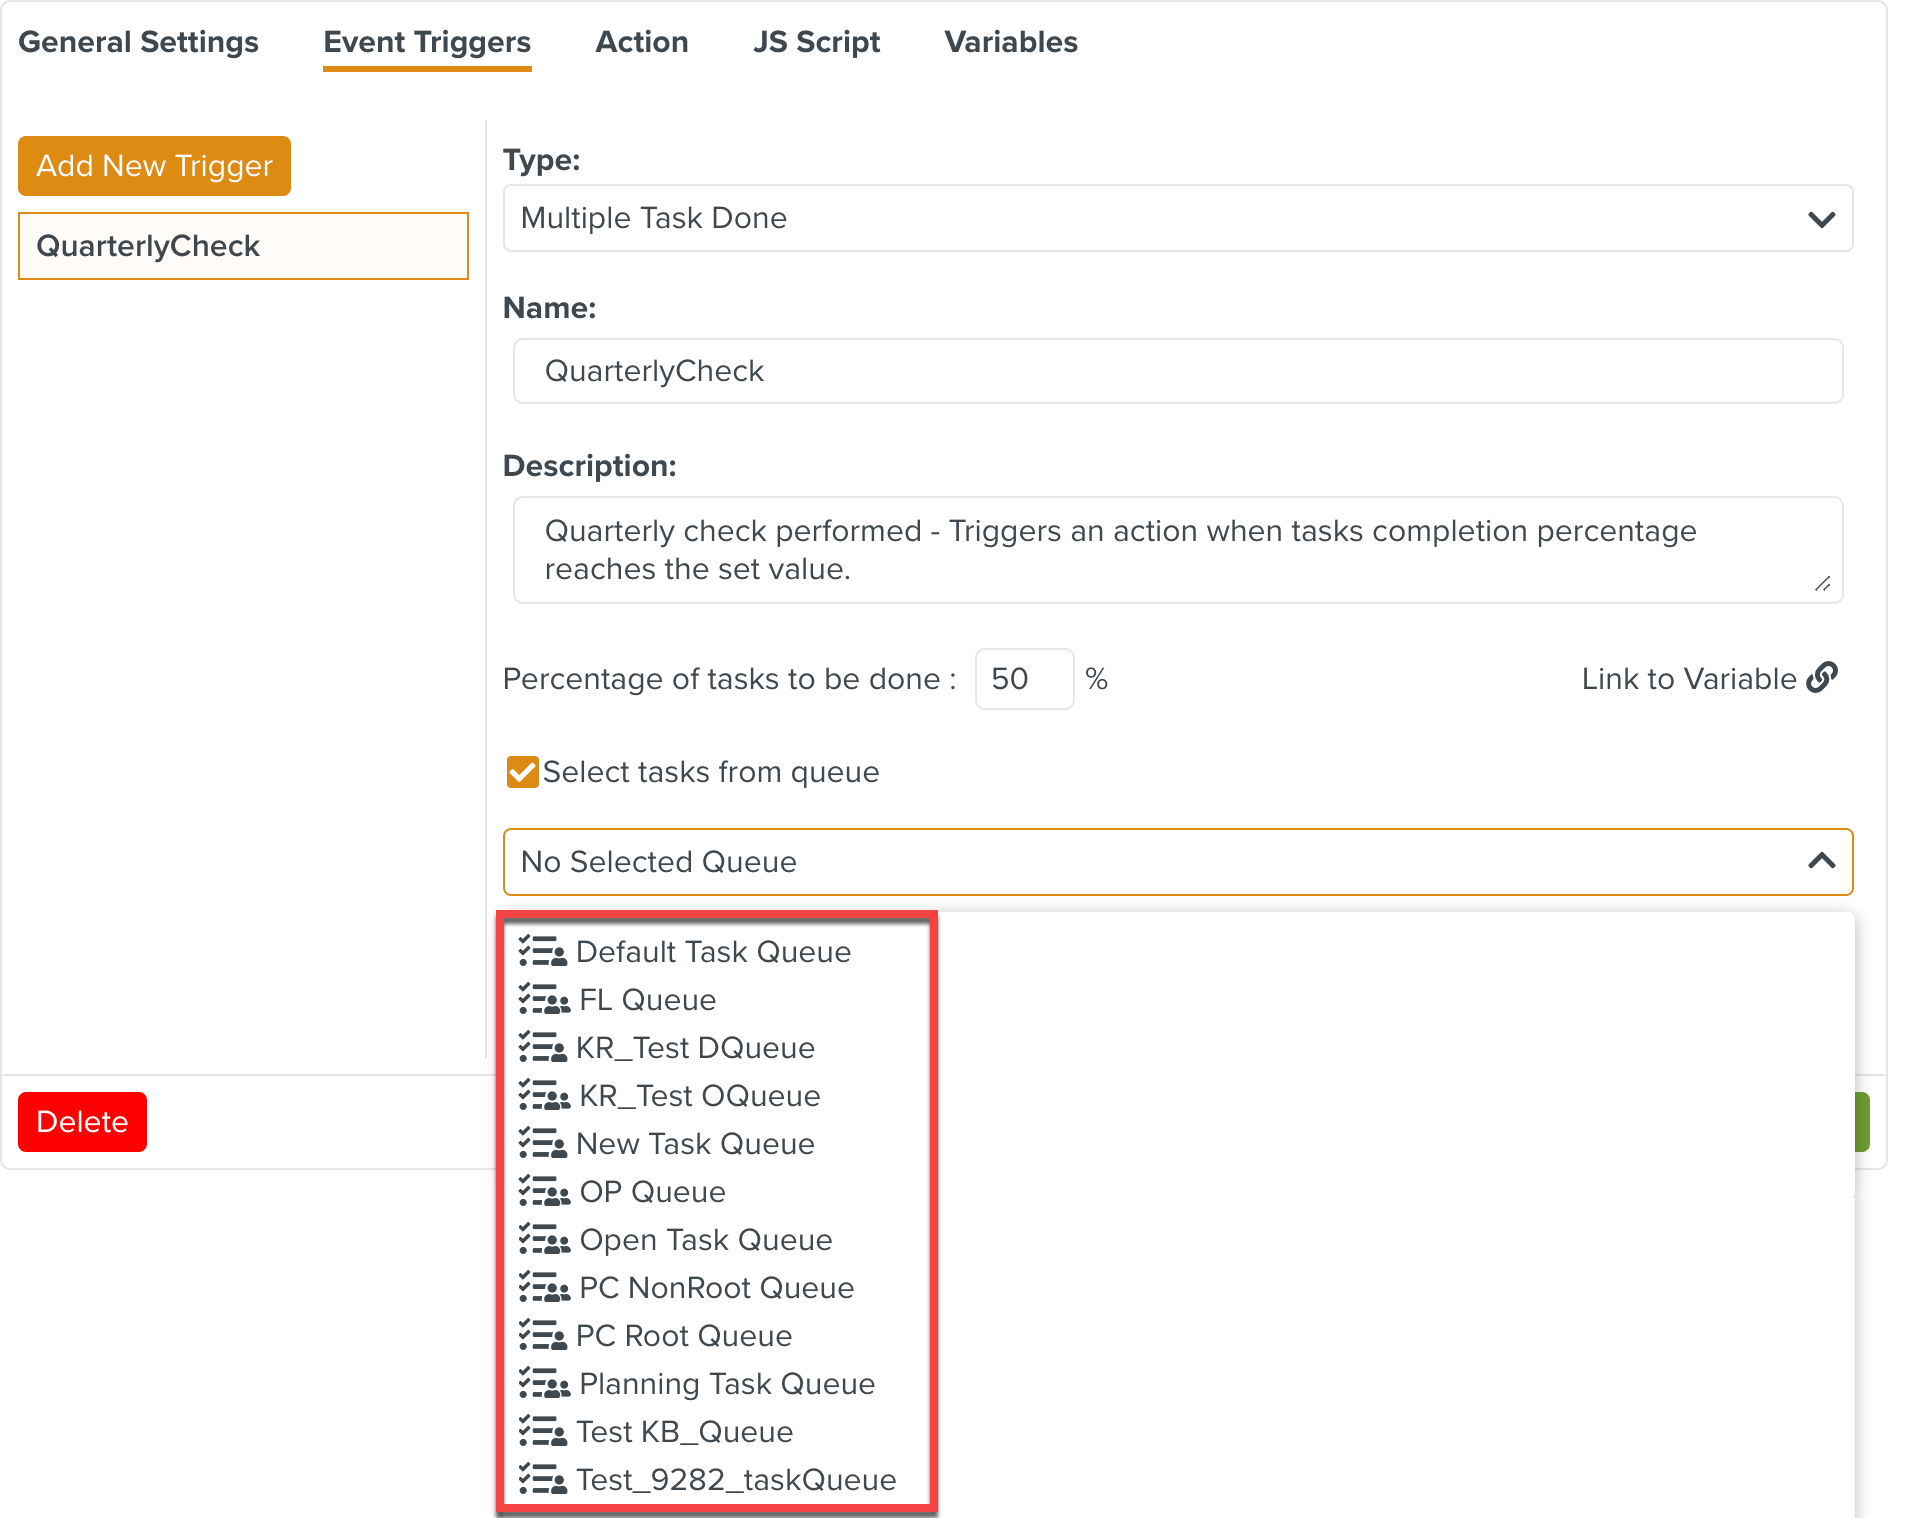
When a Task Queue is selected for the Multiple Task Done Event Trigger as shown below, the number of Tasks considered is the total number of existing Tasks in the selected Task Queue when the Operation Plan is instantiated.
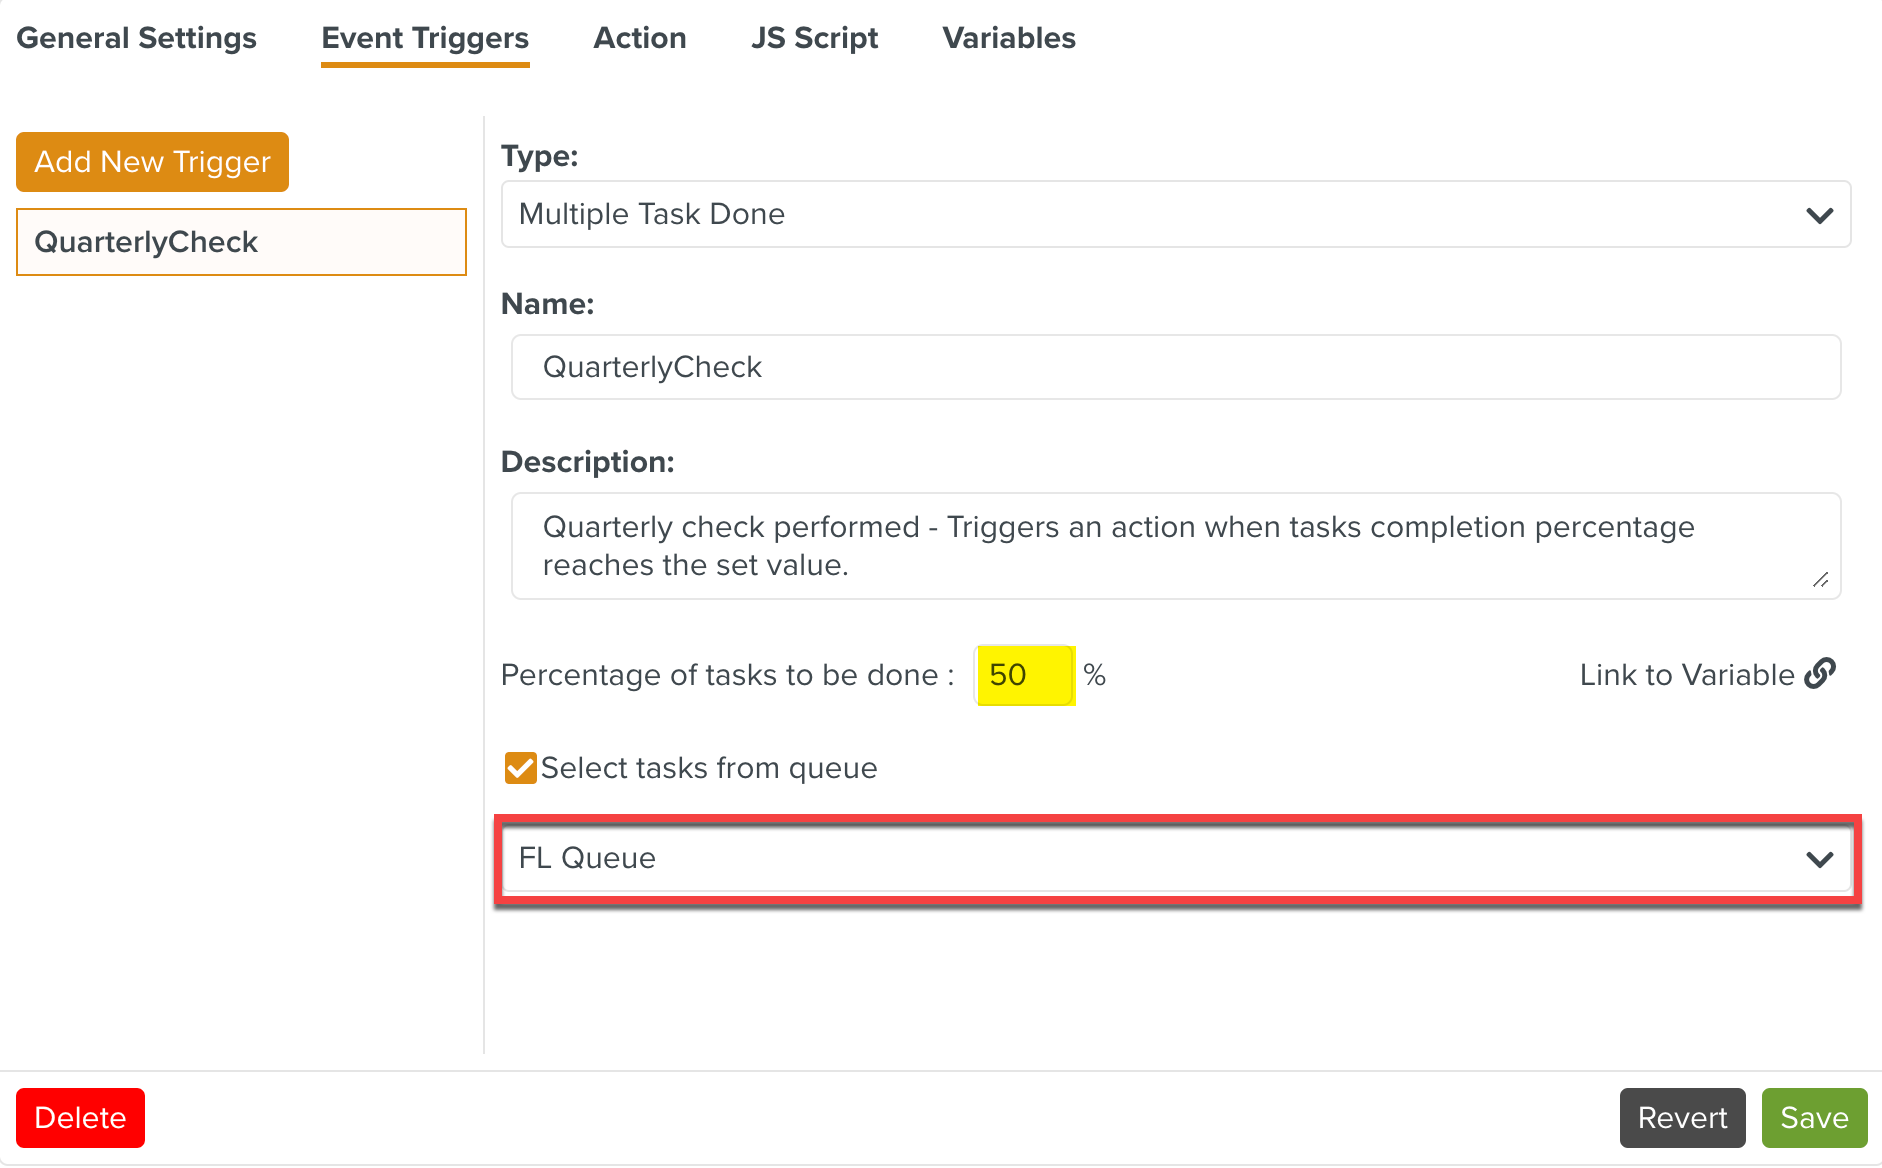
You can customize the name and description of the Event Trigger as shown in the example.
After the Instantiation of an Operation Plan, you can modify the list of Tasks linked to a Multiple Task Done Event Trigger.
Note
Only the list of Tasks of Multiple Task Done Event Triggers can be modified after Instantiation.
To modify the list of Tasks:
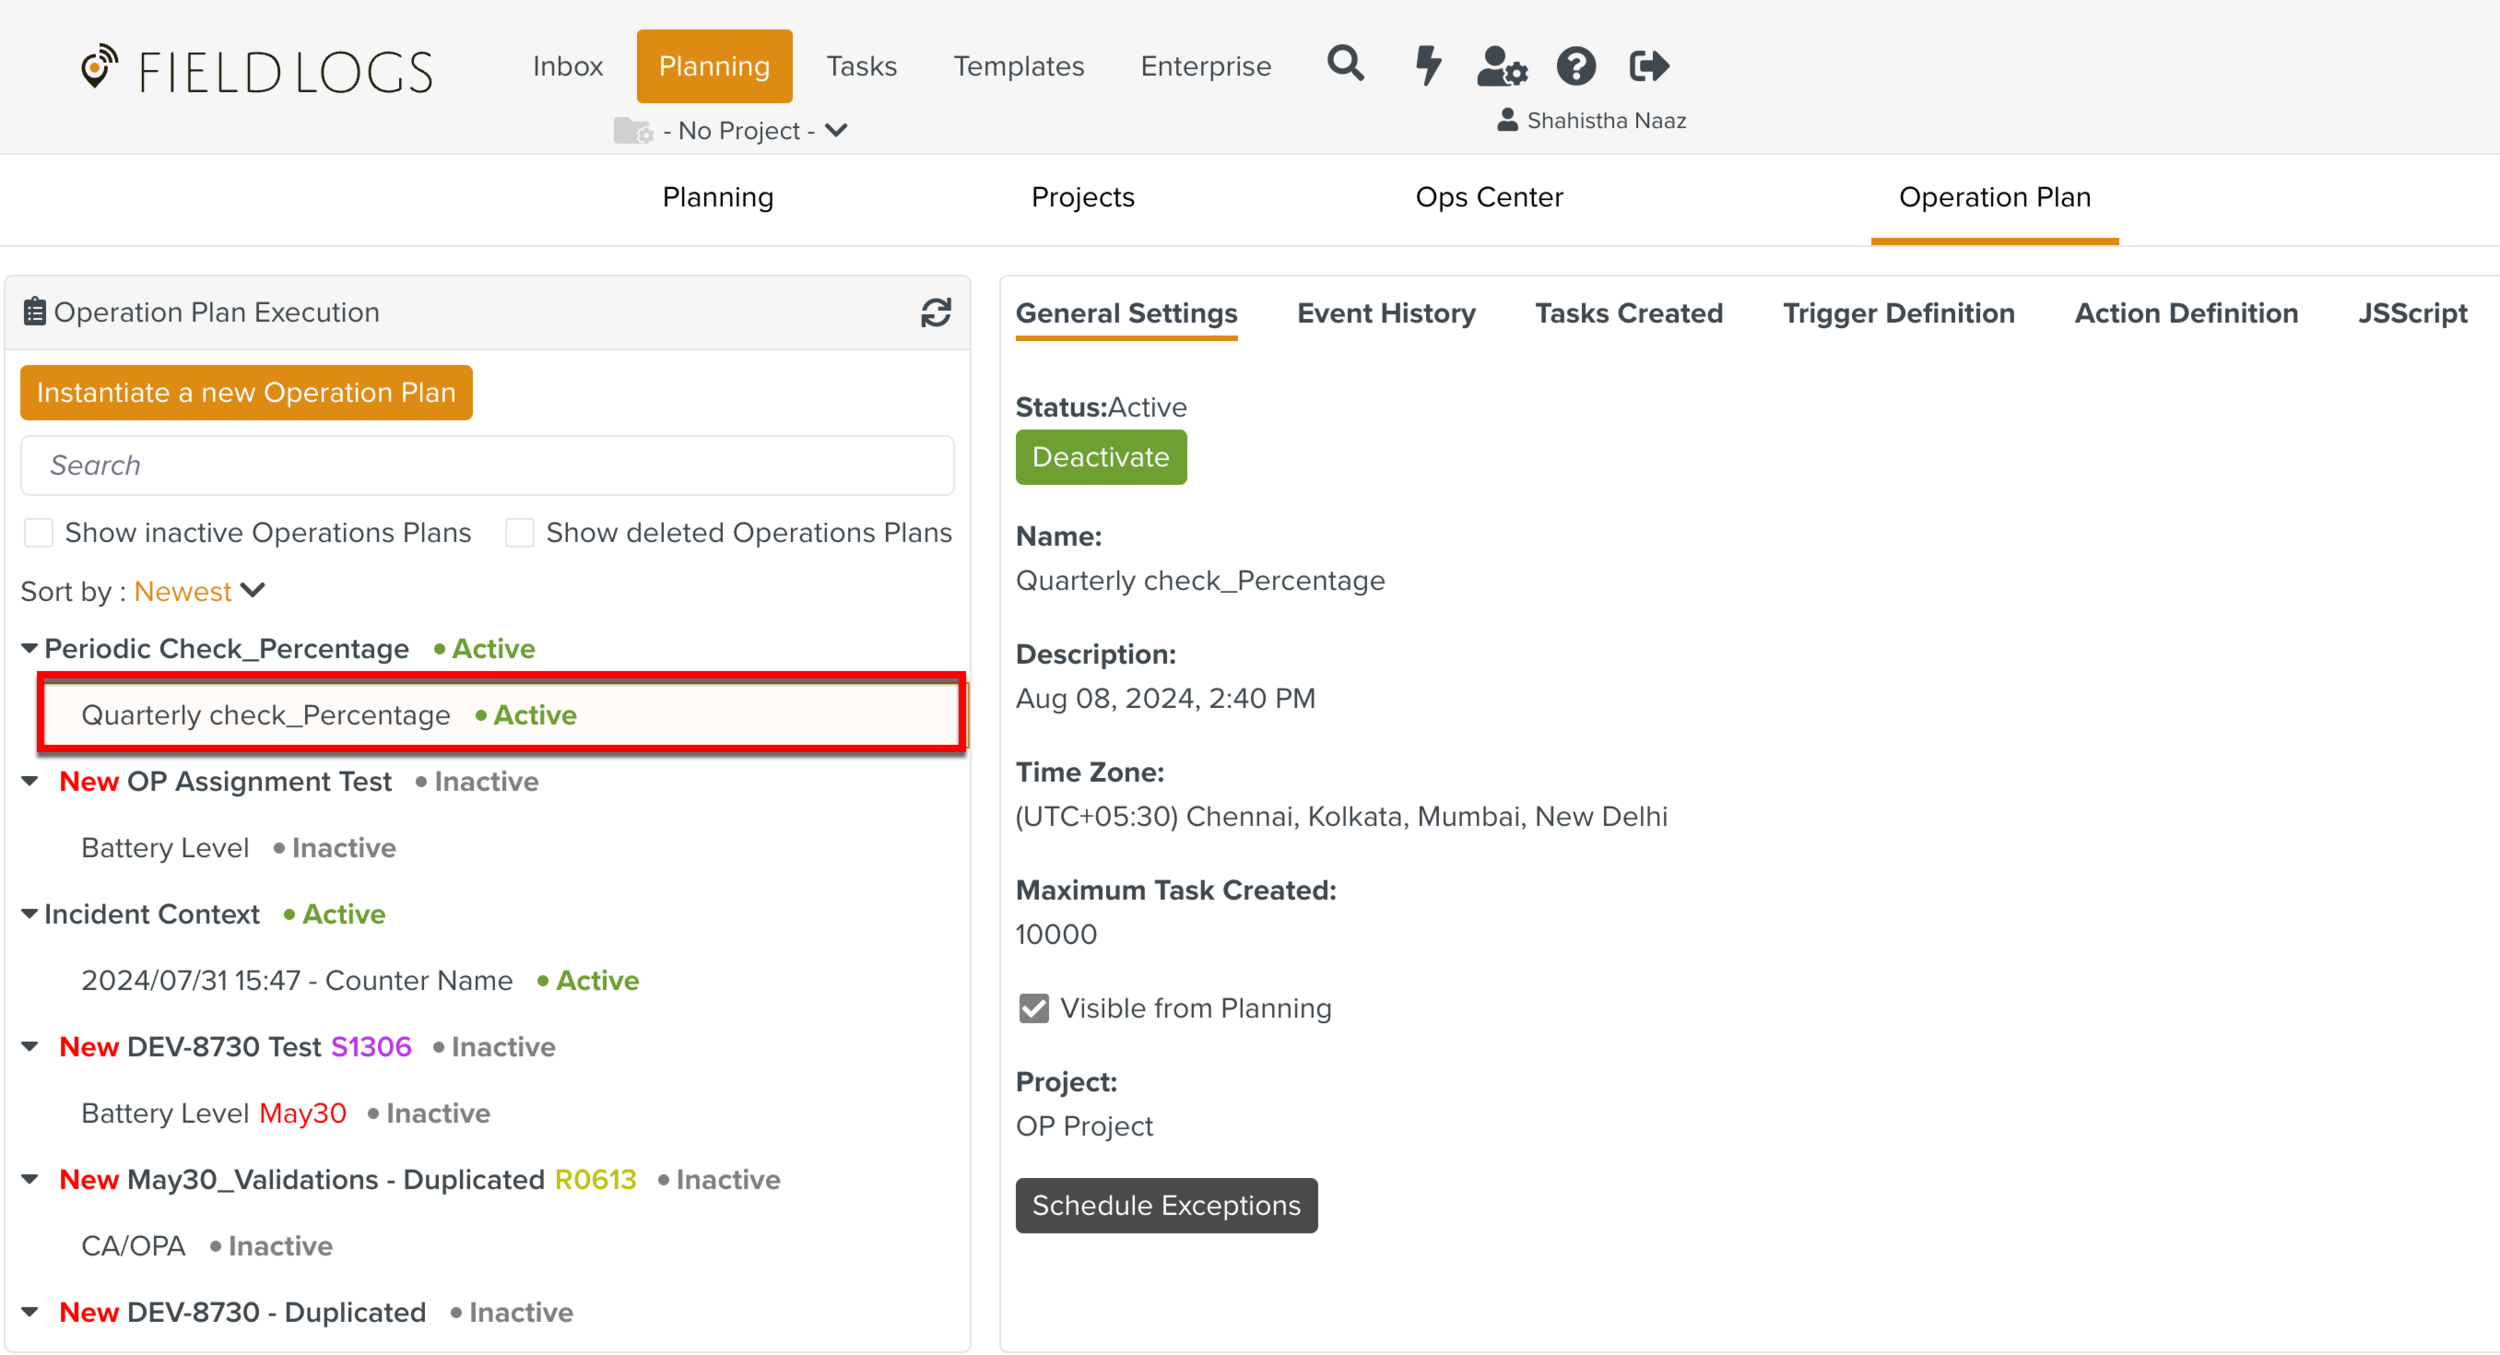
From the main menu, navigate to > > as shown.
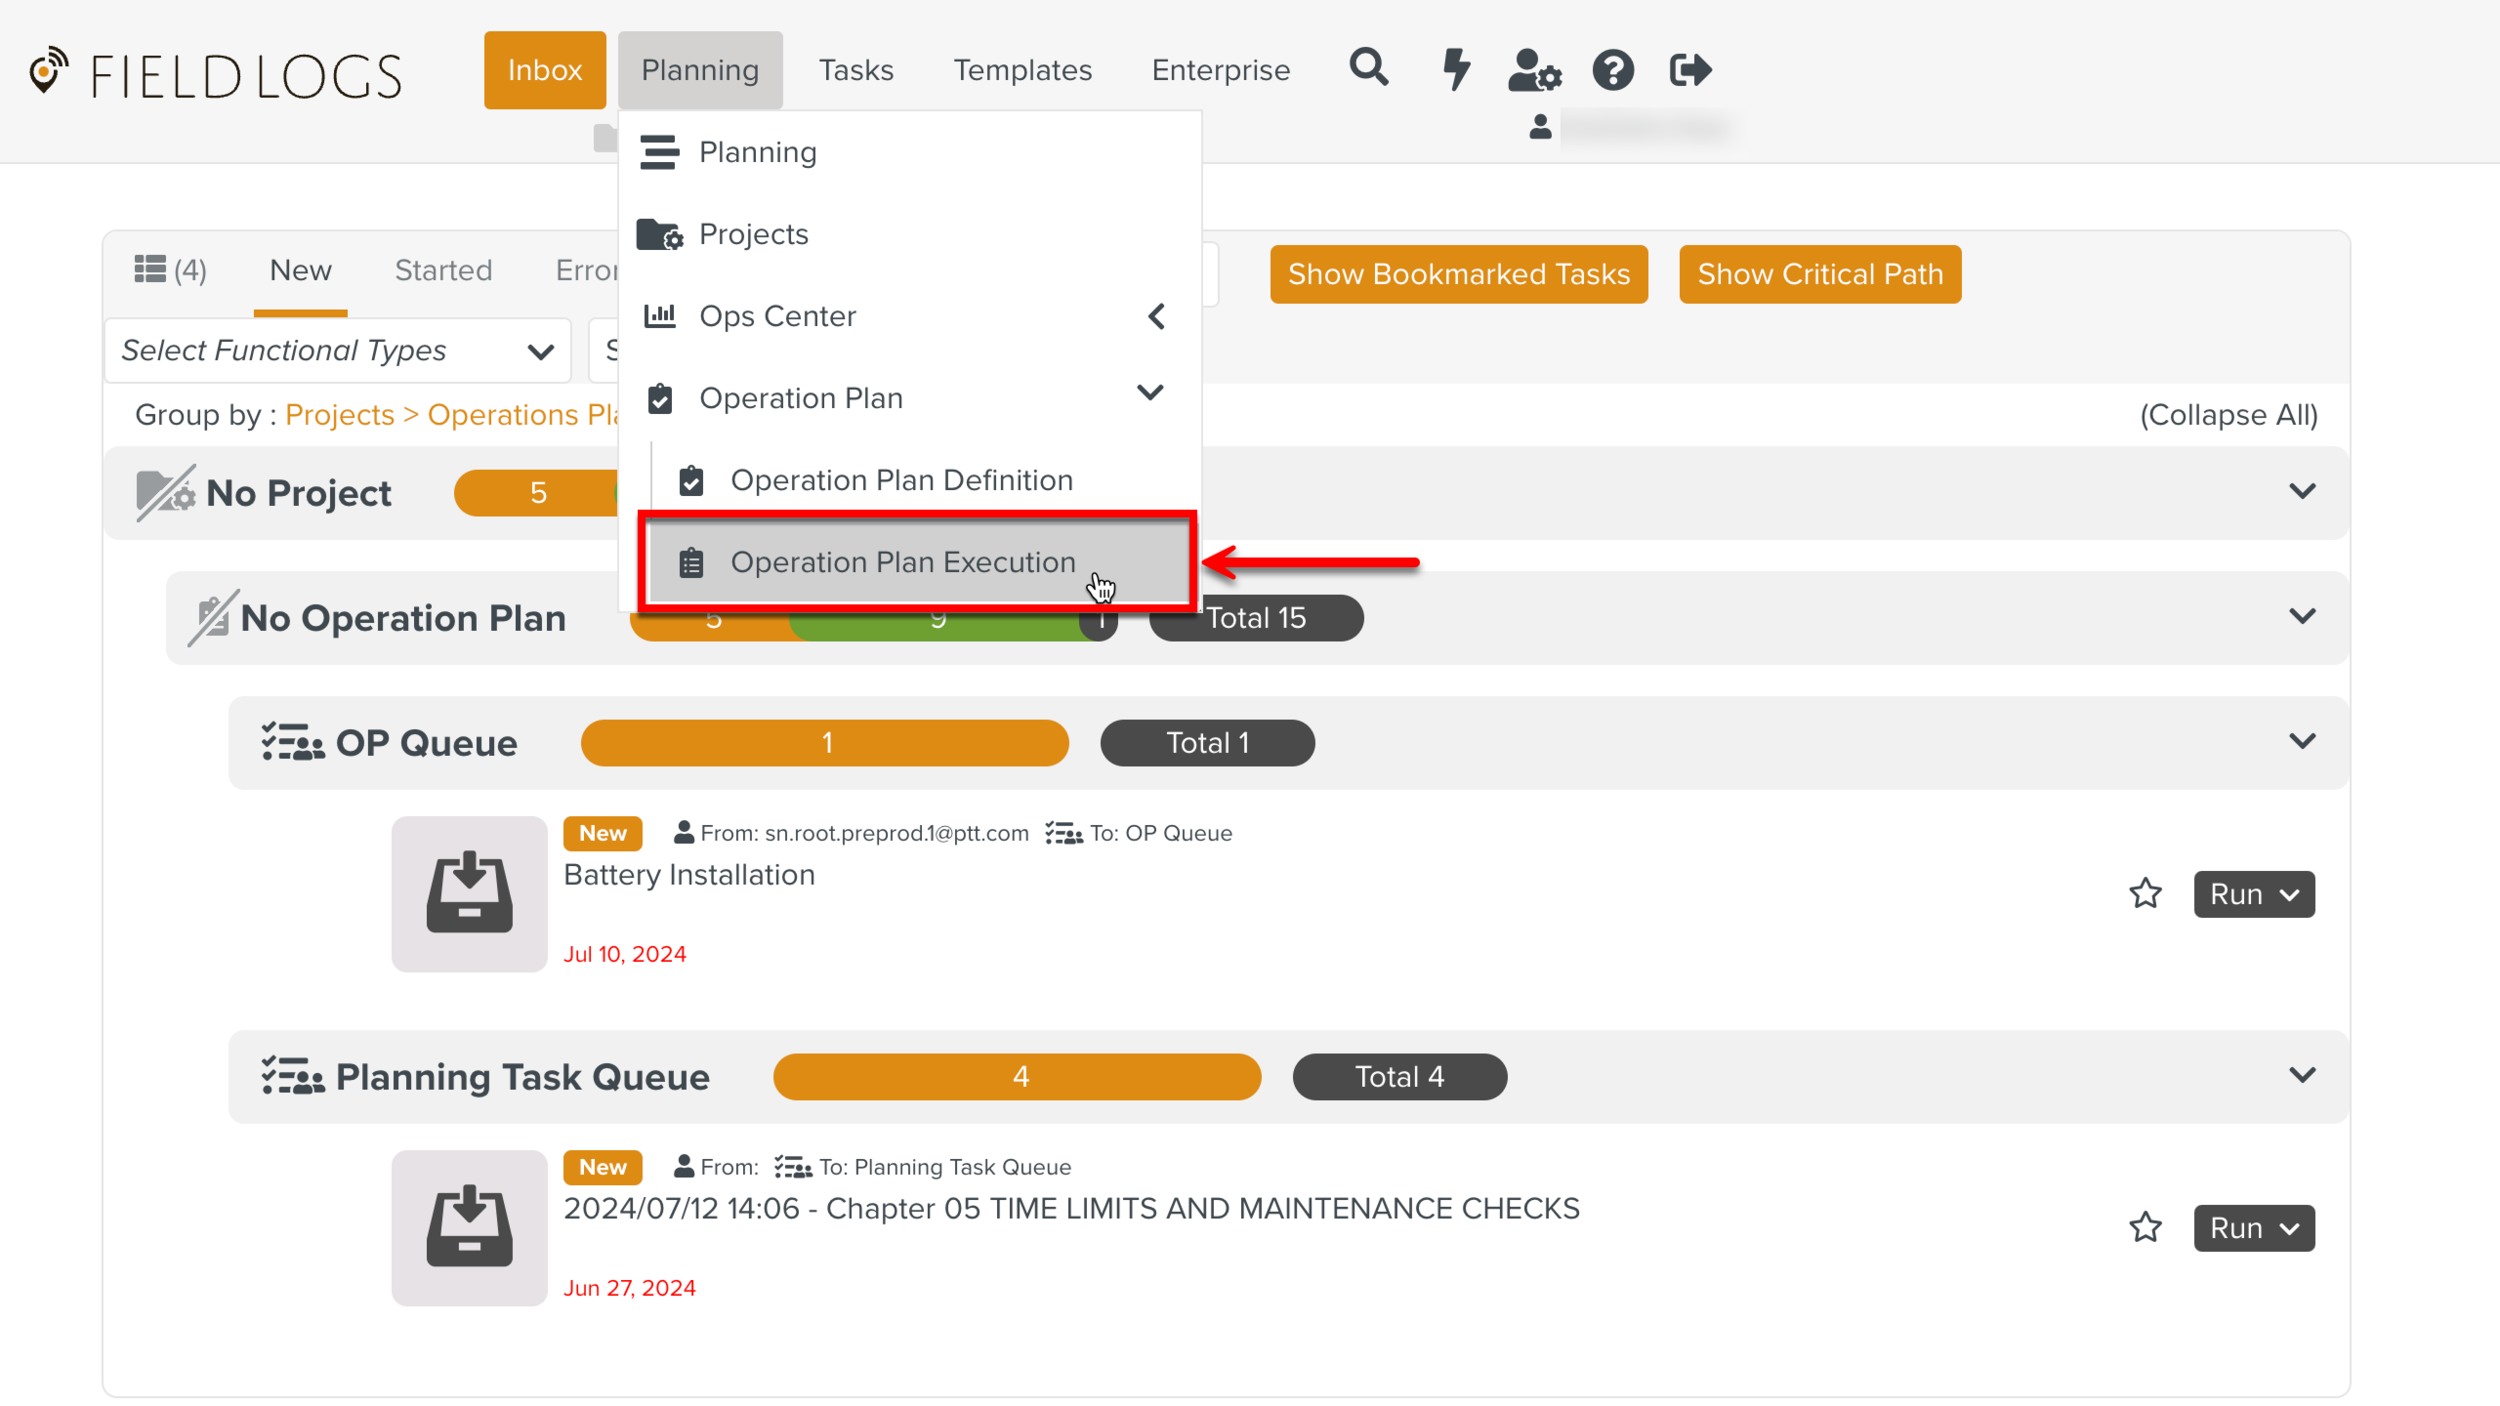
The page Operation Plan Execution opens as shown below.

Select an Instantiated Counter with a Multiple Task Done Event Trigger in an Operation Plan.
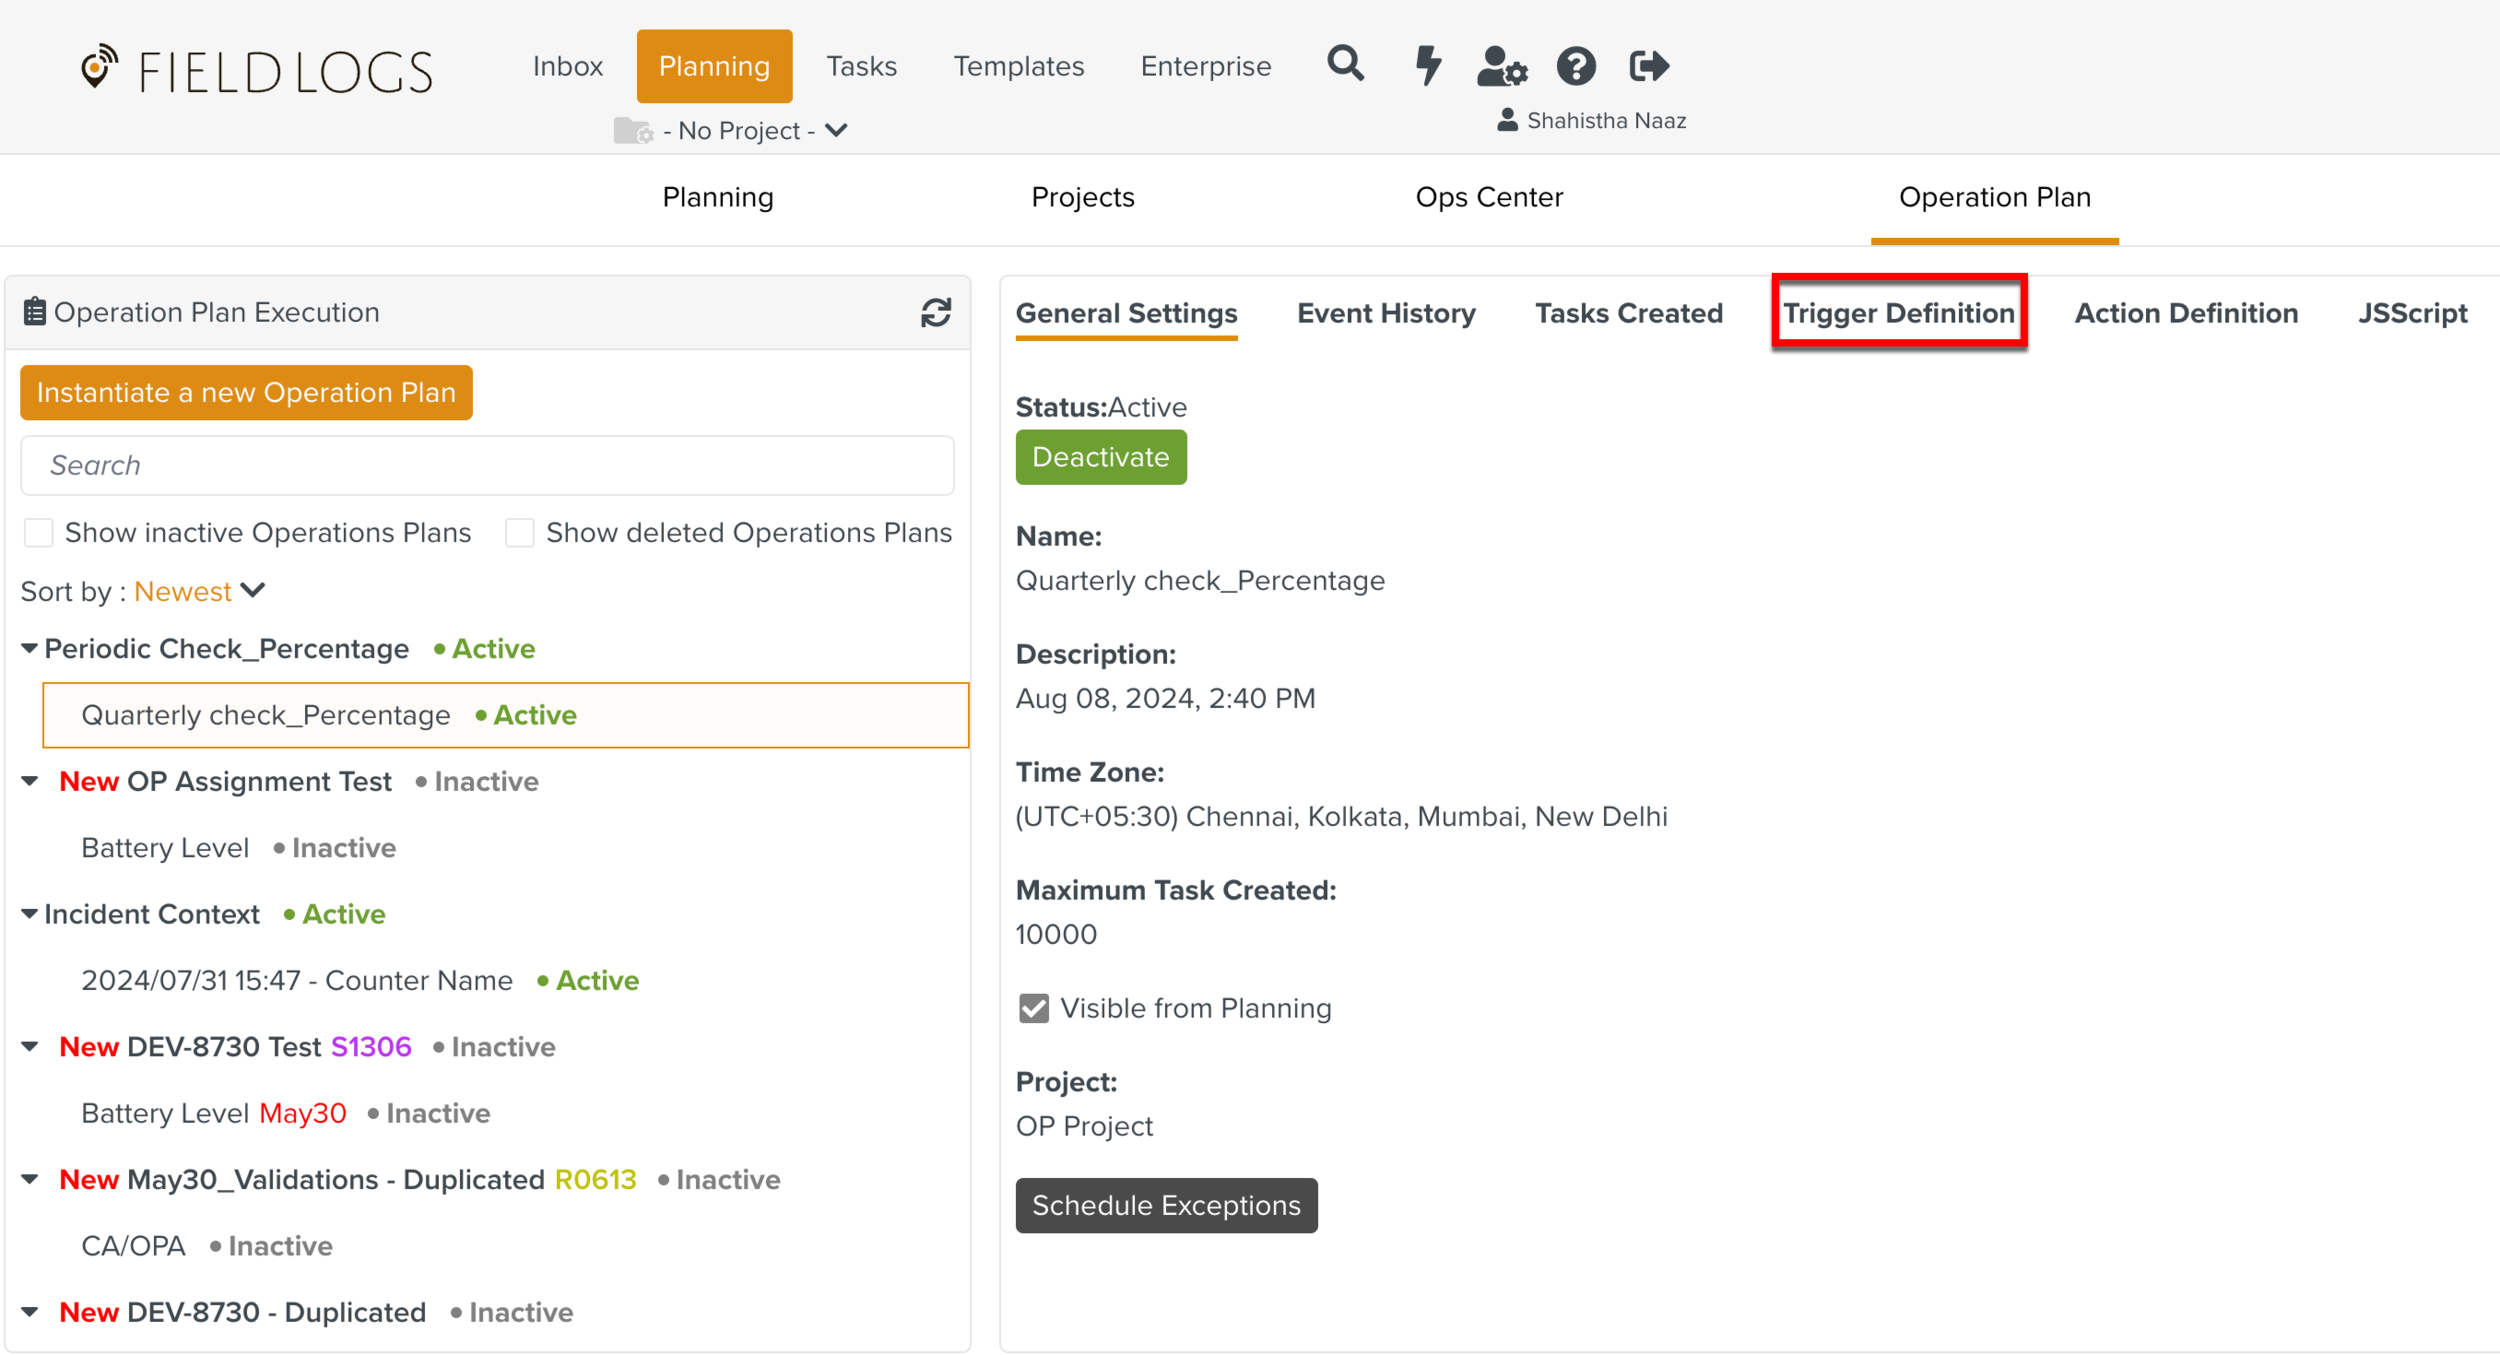
Select the tab Trigger Definition.
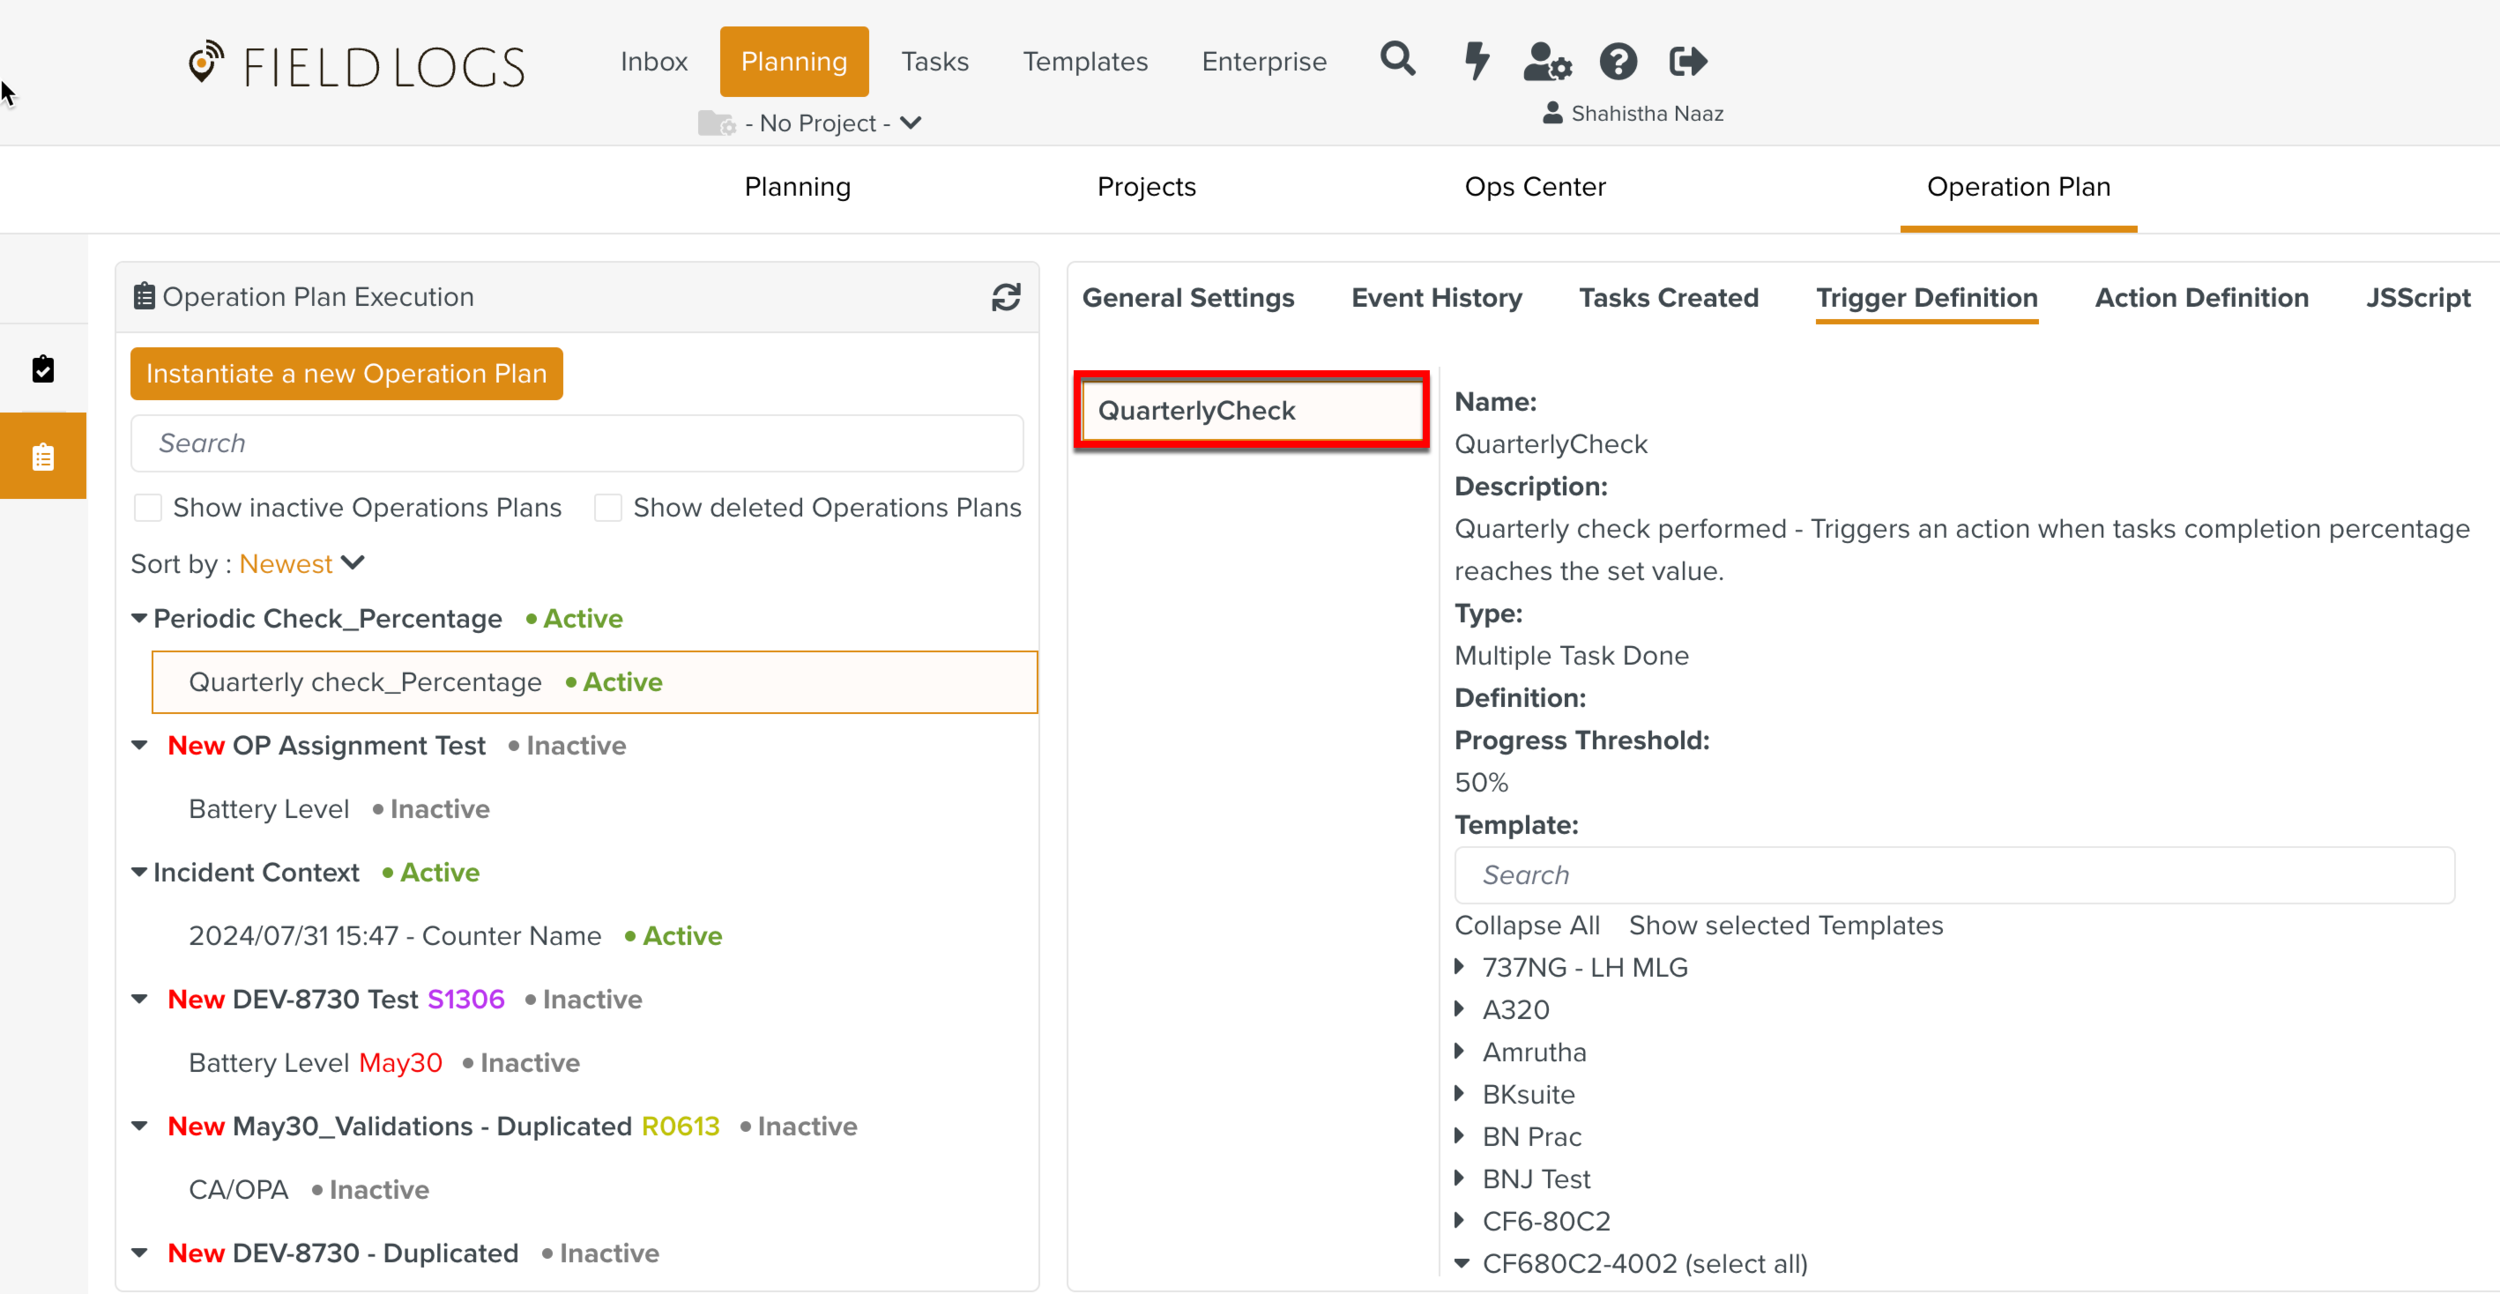
Select the required Multiple Task Done Event Trigger.
Note
Only the list of Tasks of Multiple Task Done Event Triggers can be modified after Instantiation.
Select additional, or deselect existing Templates to modify the list of Tasks.
The example below shows the list of Tasks selected during the Operation Plan Definition and the modified list after the Instantiation of an Operation Plan.

Click .
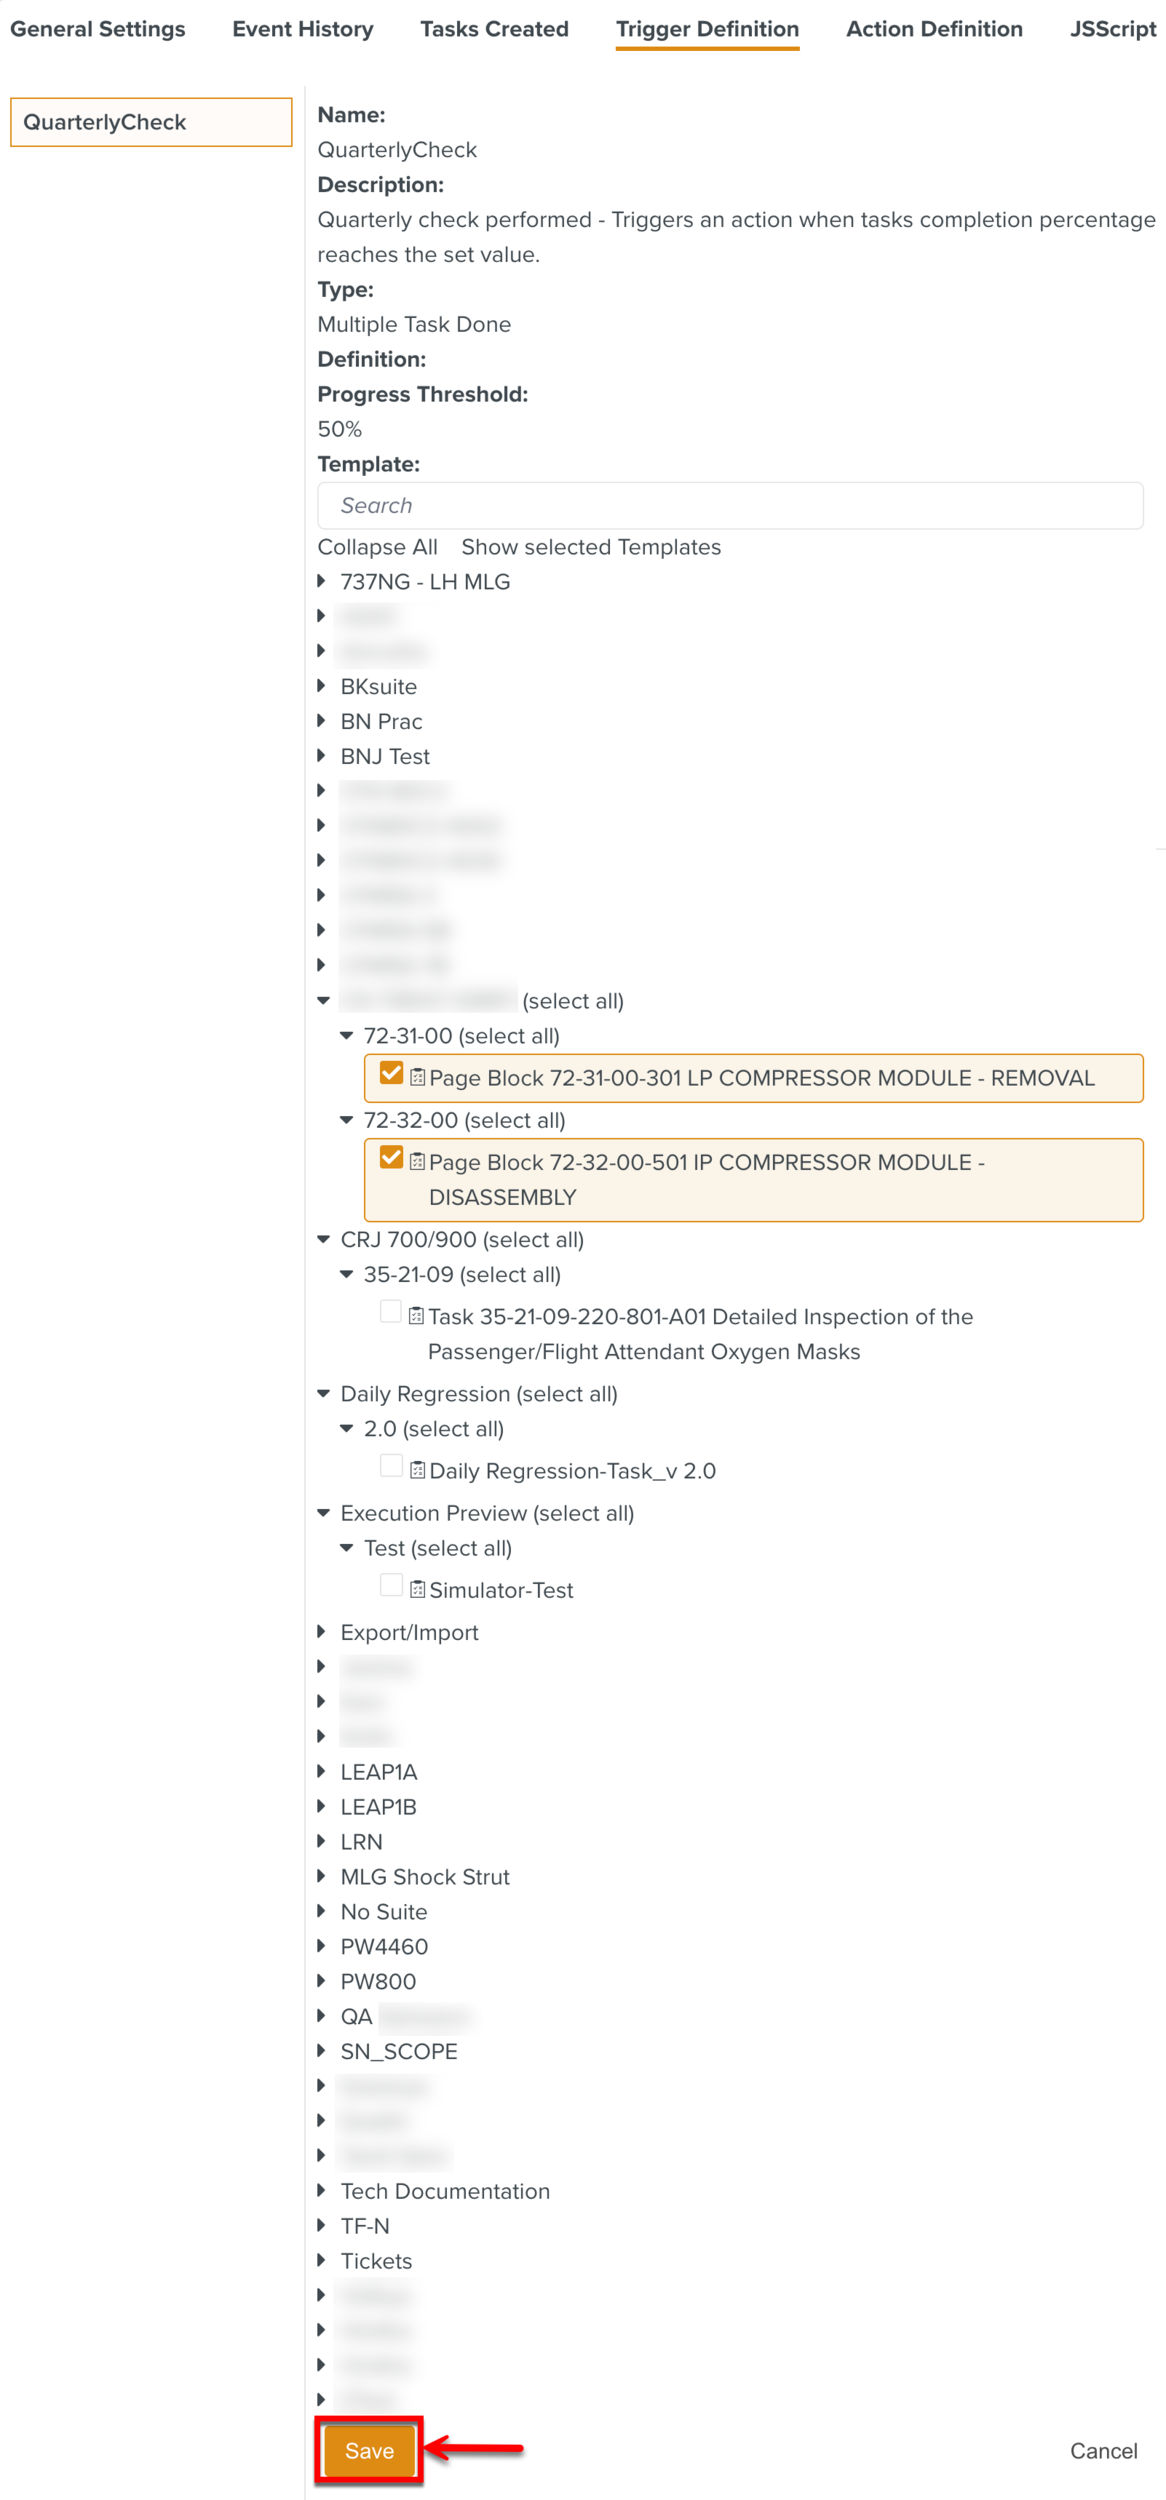
The list of Tasks linked to the Multiple Task Done Event Trigger in a Counter is modified.