Viewing the Documents
The Documents uploaded to the Document Management Space can be accessed in the Documents tab.
The Documents, the Files associated with the Documents, their Status, and other relevant details are presented in a table. Rows listing the Classifications and rows containing Documents are differentiated by color.
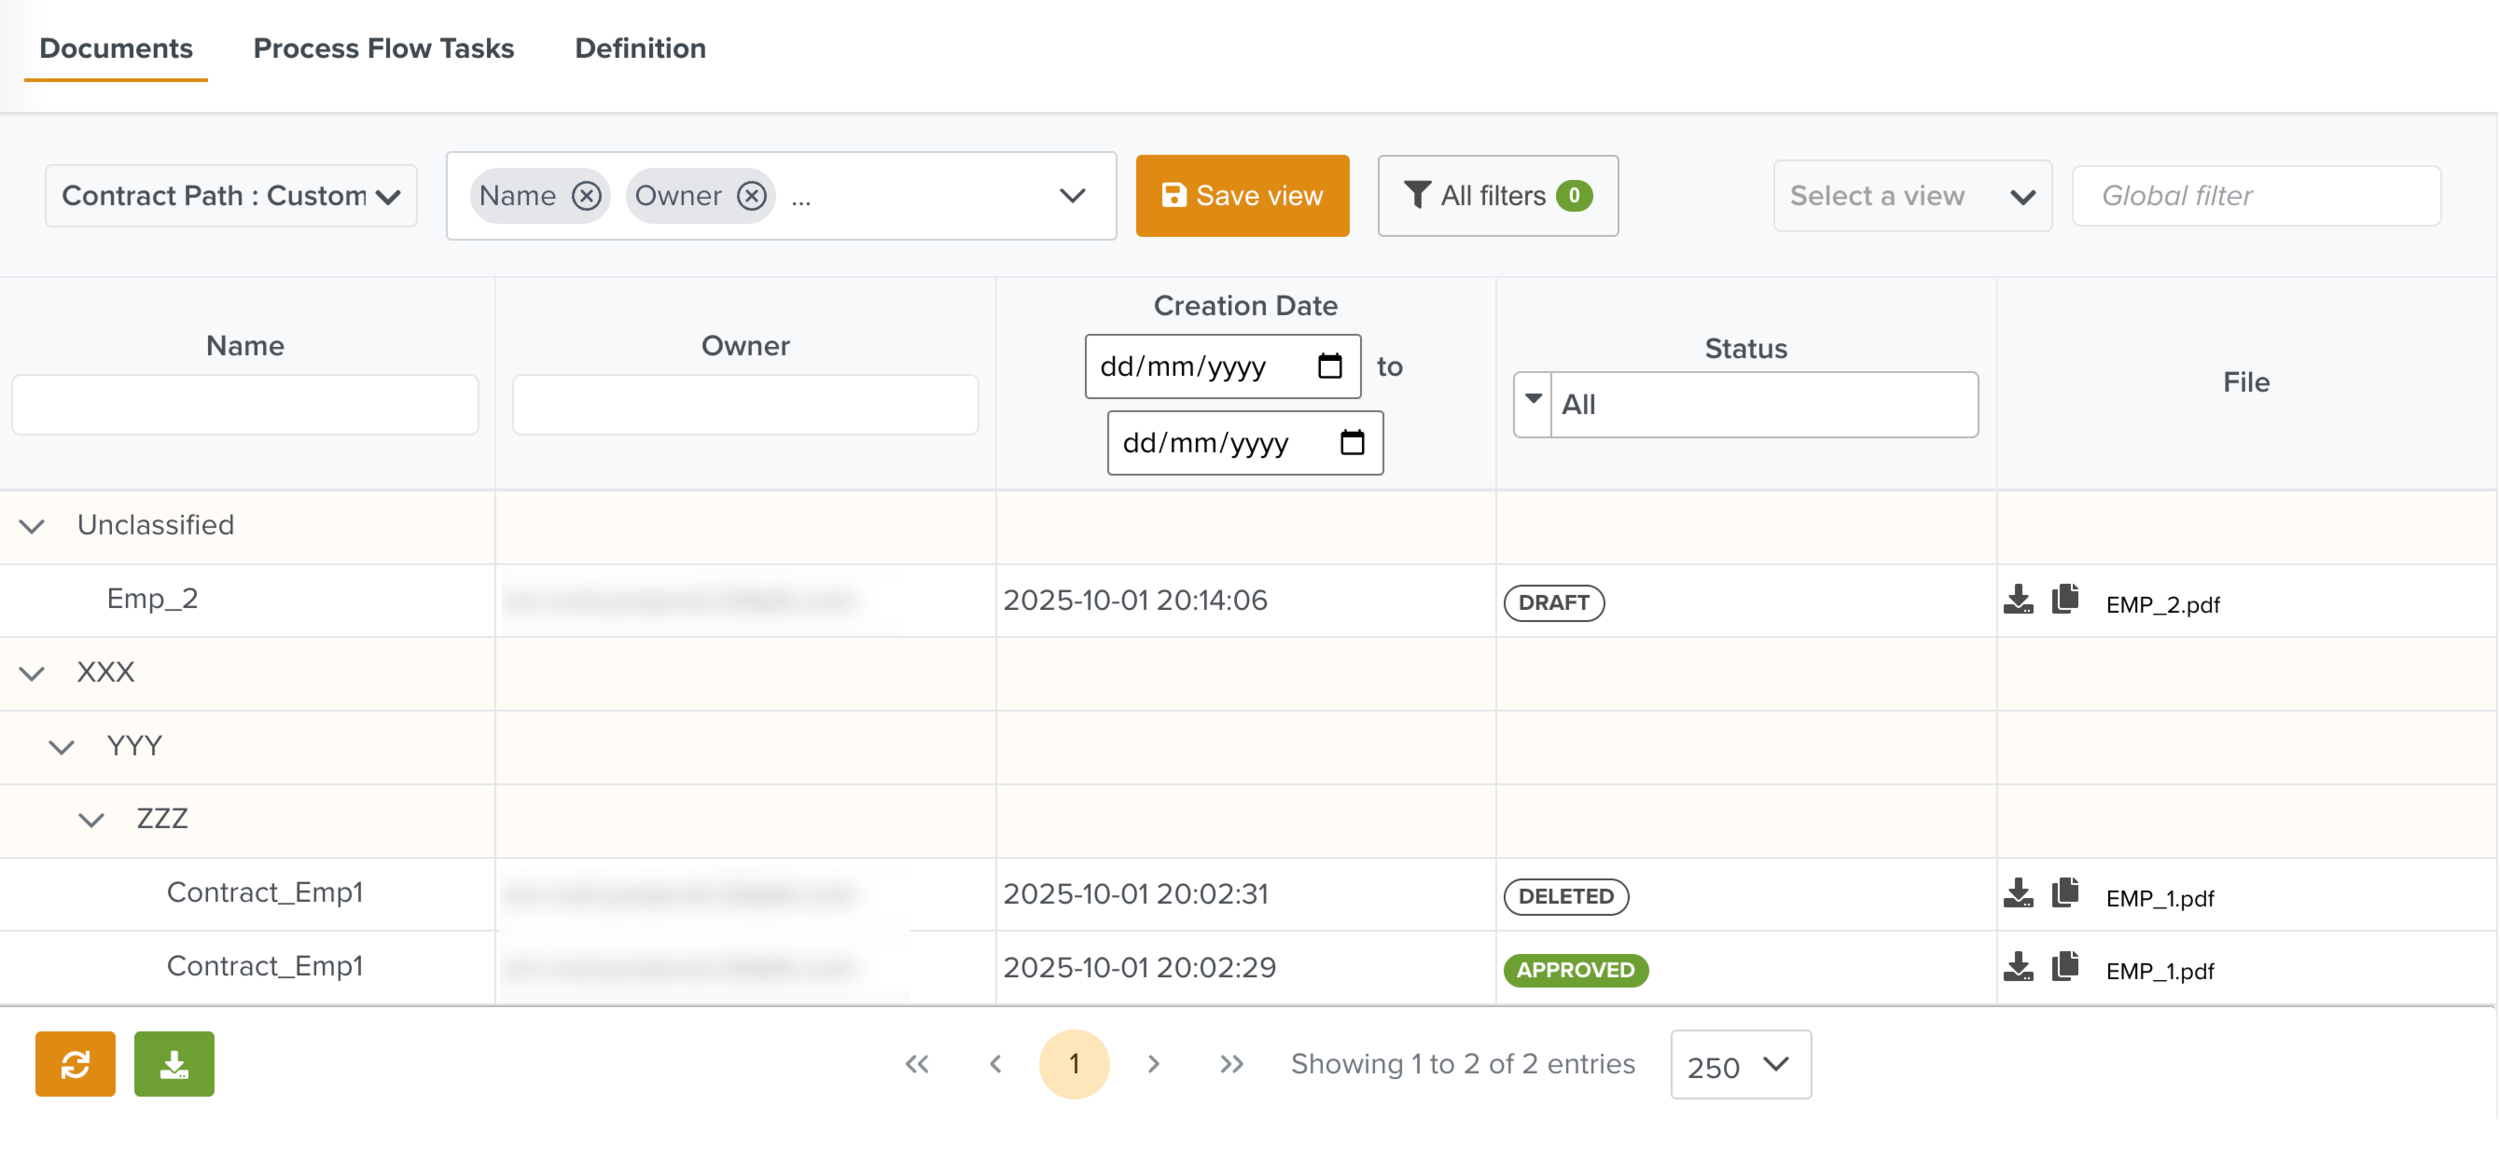 |
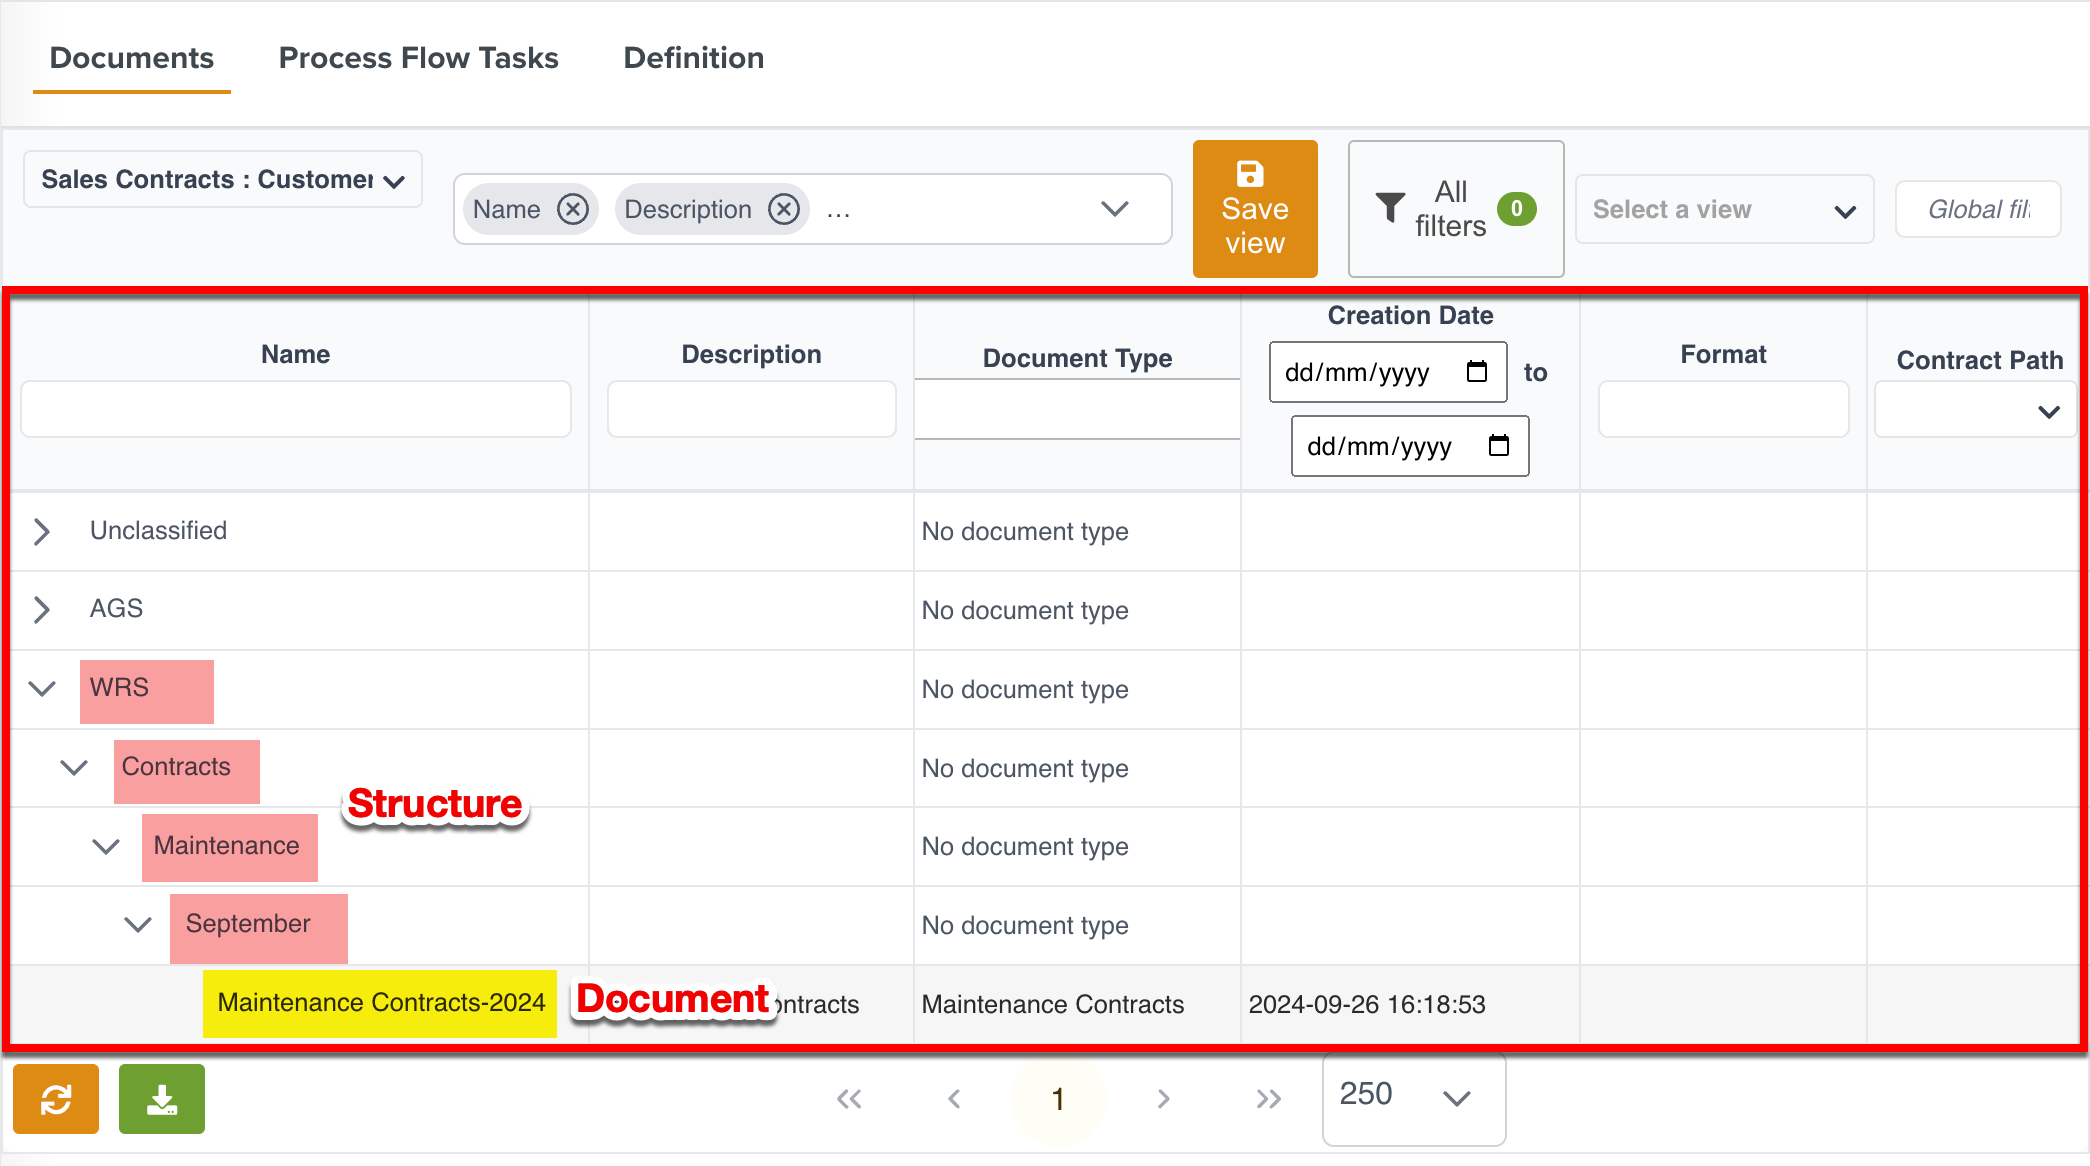
The Documents are displayed according to the structure defined during their creation.
 |
The File column displays all the files associated with the Documents. Clicking a file name displays its Document Details pane.
 |
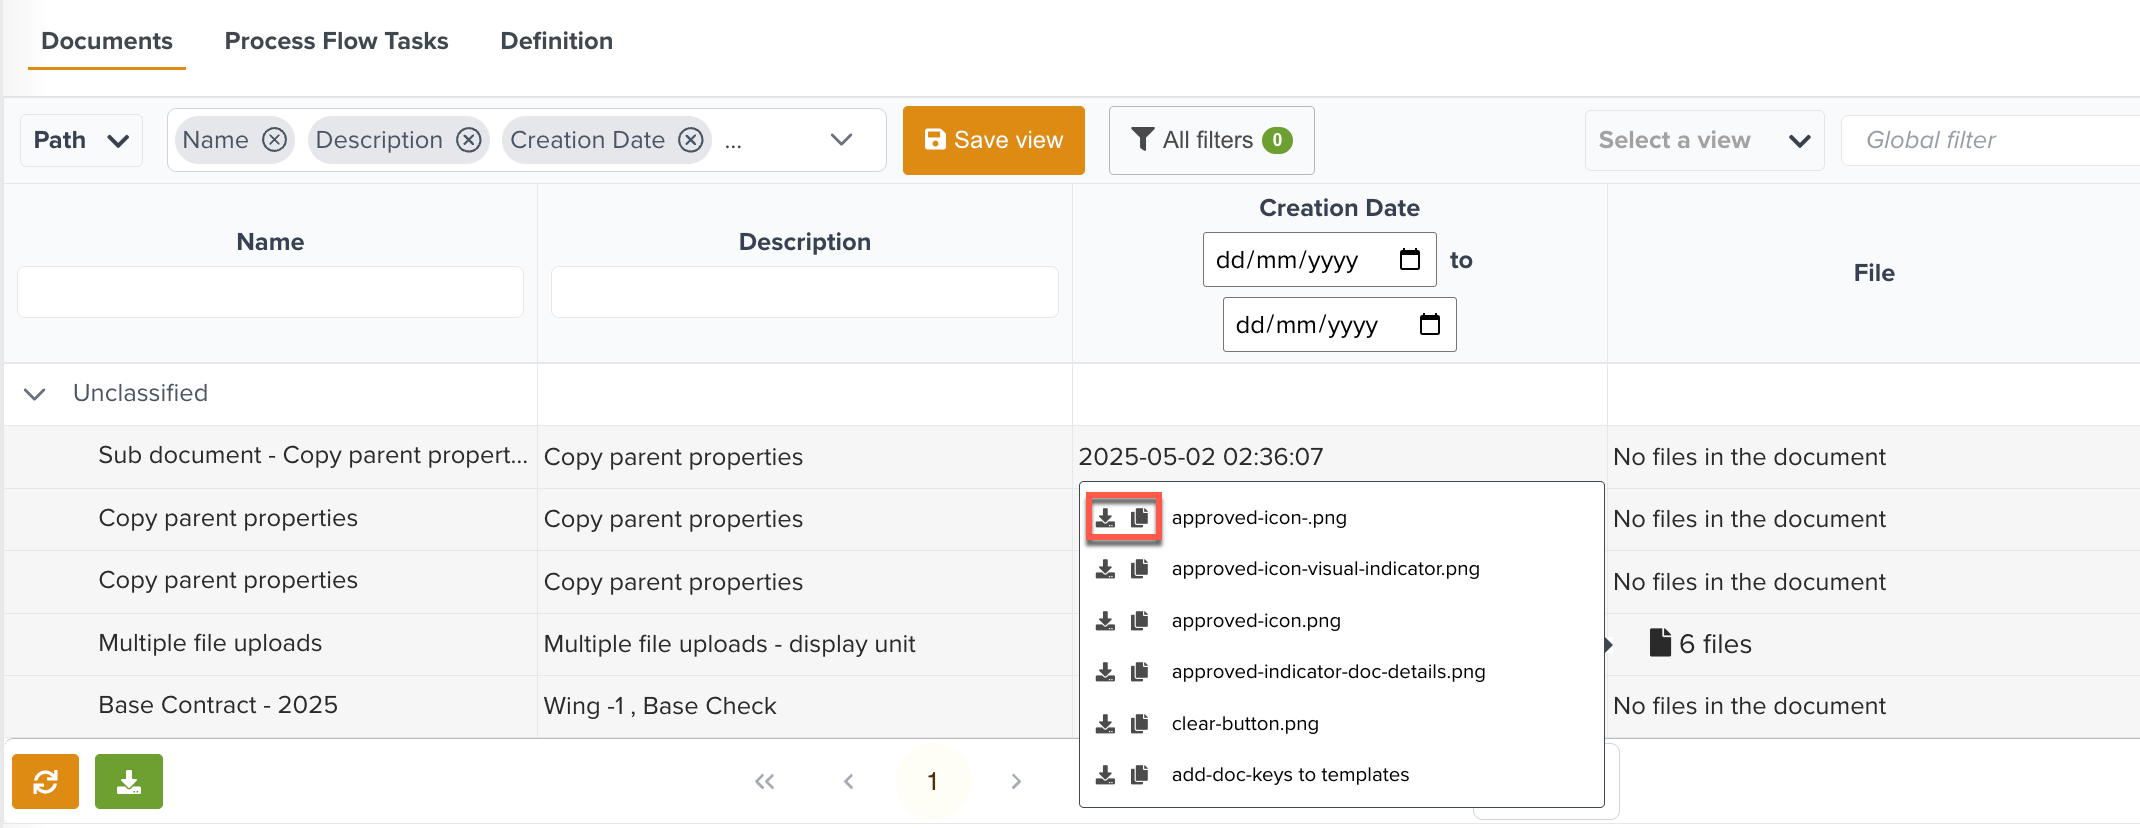
When multiple files are associated with the Document, the tooltip displays all the linked file names as shown below.
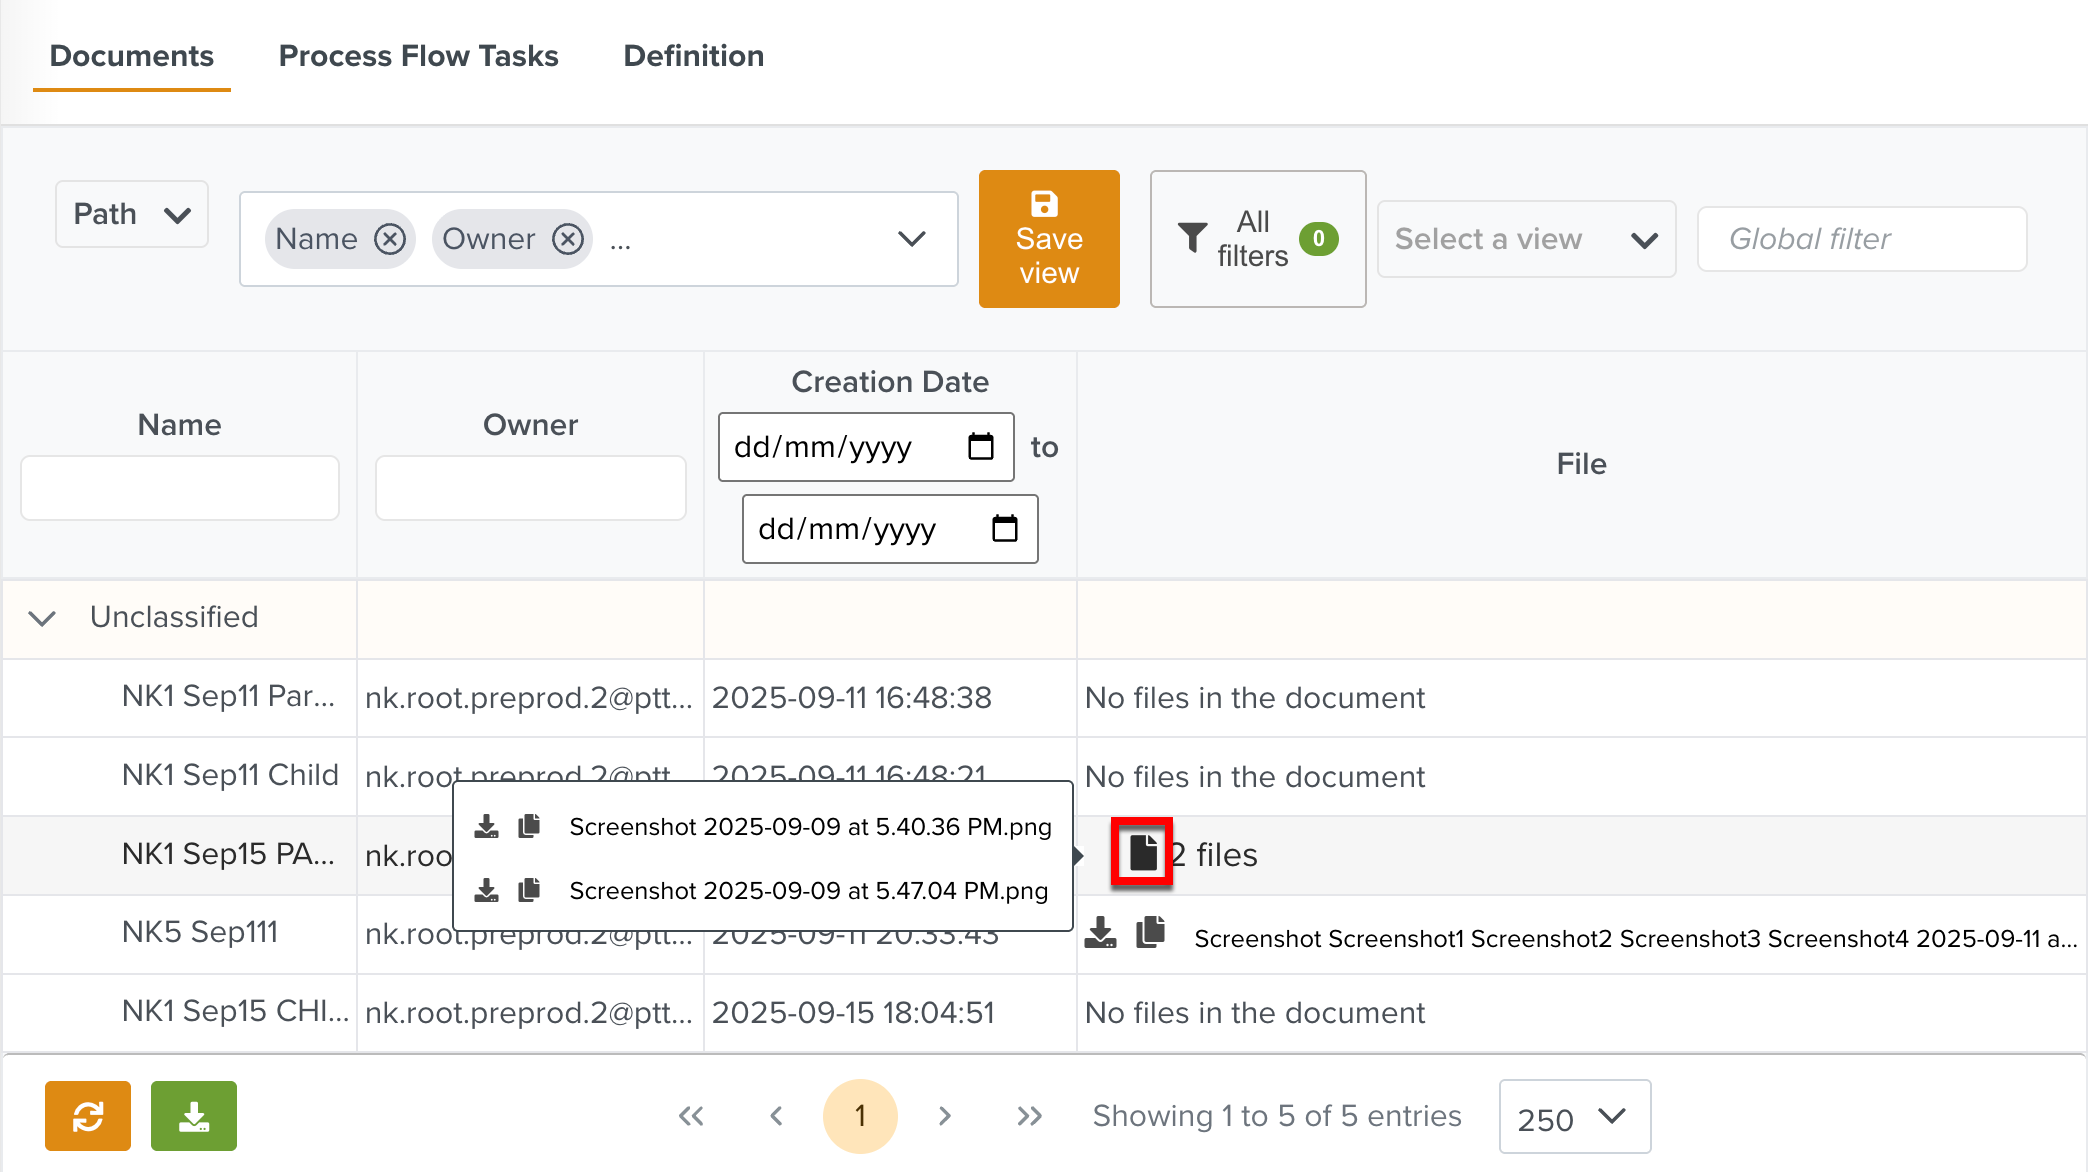 |
You can download the files or copy the file links by clicking the respective icons.
 |
The Status column includes a visual indicator for Document Status.
 |
The indicators are described below.
Indicators | Description |
|---|---|
| This indicates the Documents that are awaiting approval. |
| This indicates the Documents that are pending approval for a new revision. |
| This indicates the Documents that have completed the approval process. |
| This indicates the Documents that are deleted. |
| This indicates the Documents that are rejected. |


The Documents table view is customizable. The following options allow you to modify the view.
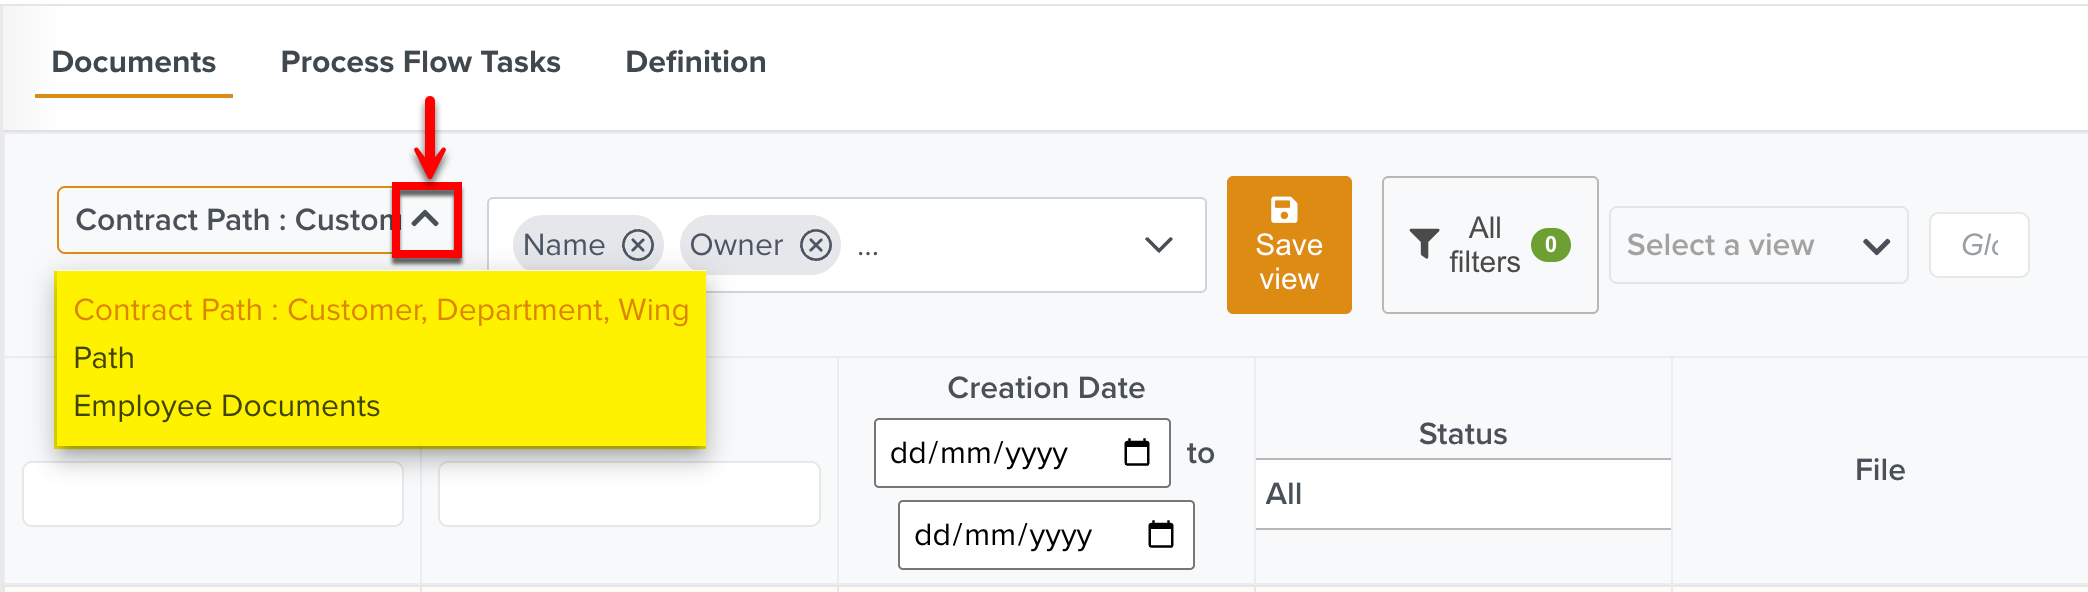
Select Classification: Select the required Classification from the list to organize the Documents under the pre-defined structure.
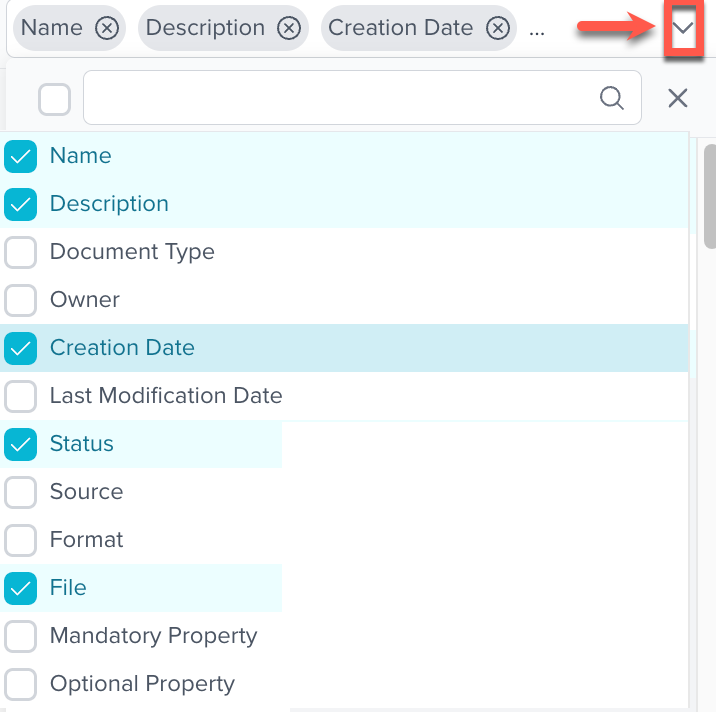
Select columns: You can hide or display the columns in the table by selecting them as shown below.
The columns of the table can also be rearranged. You can hold a column header and drag to reposition it as required.
You can hide columns by hovering over the column name and clicking
 as shown.
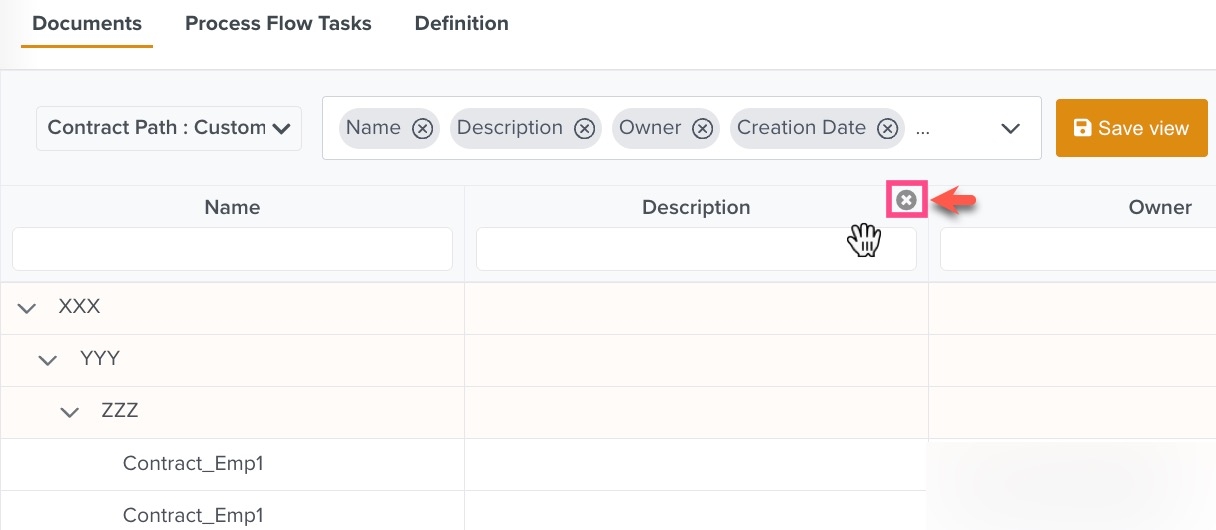
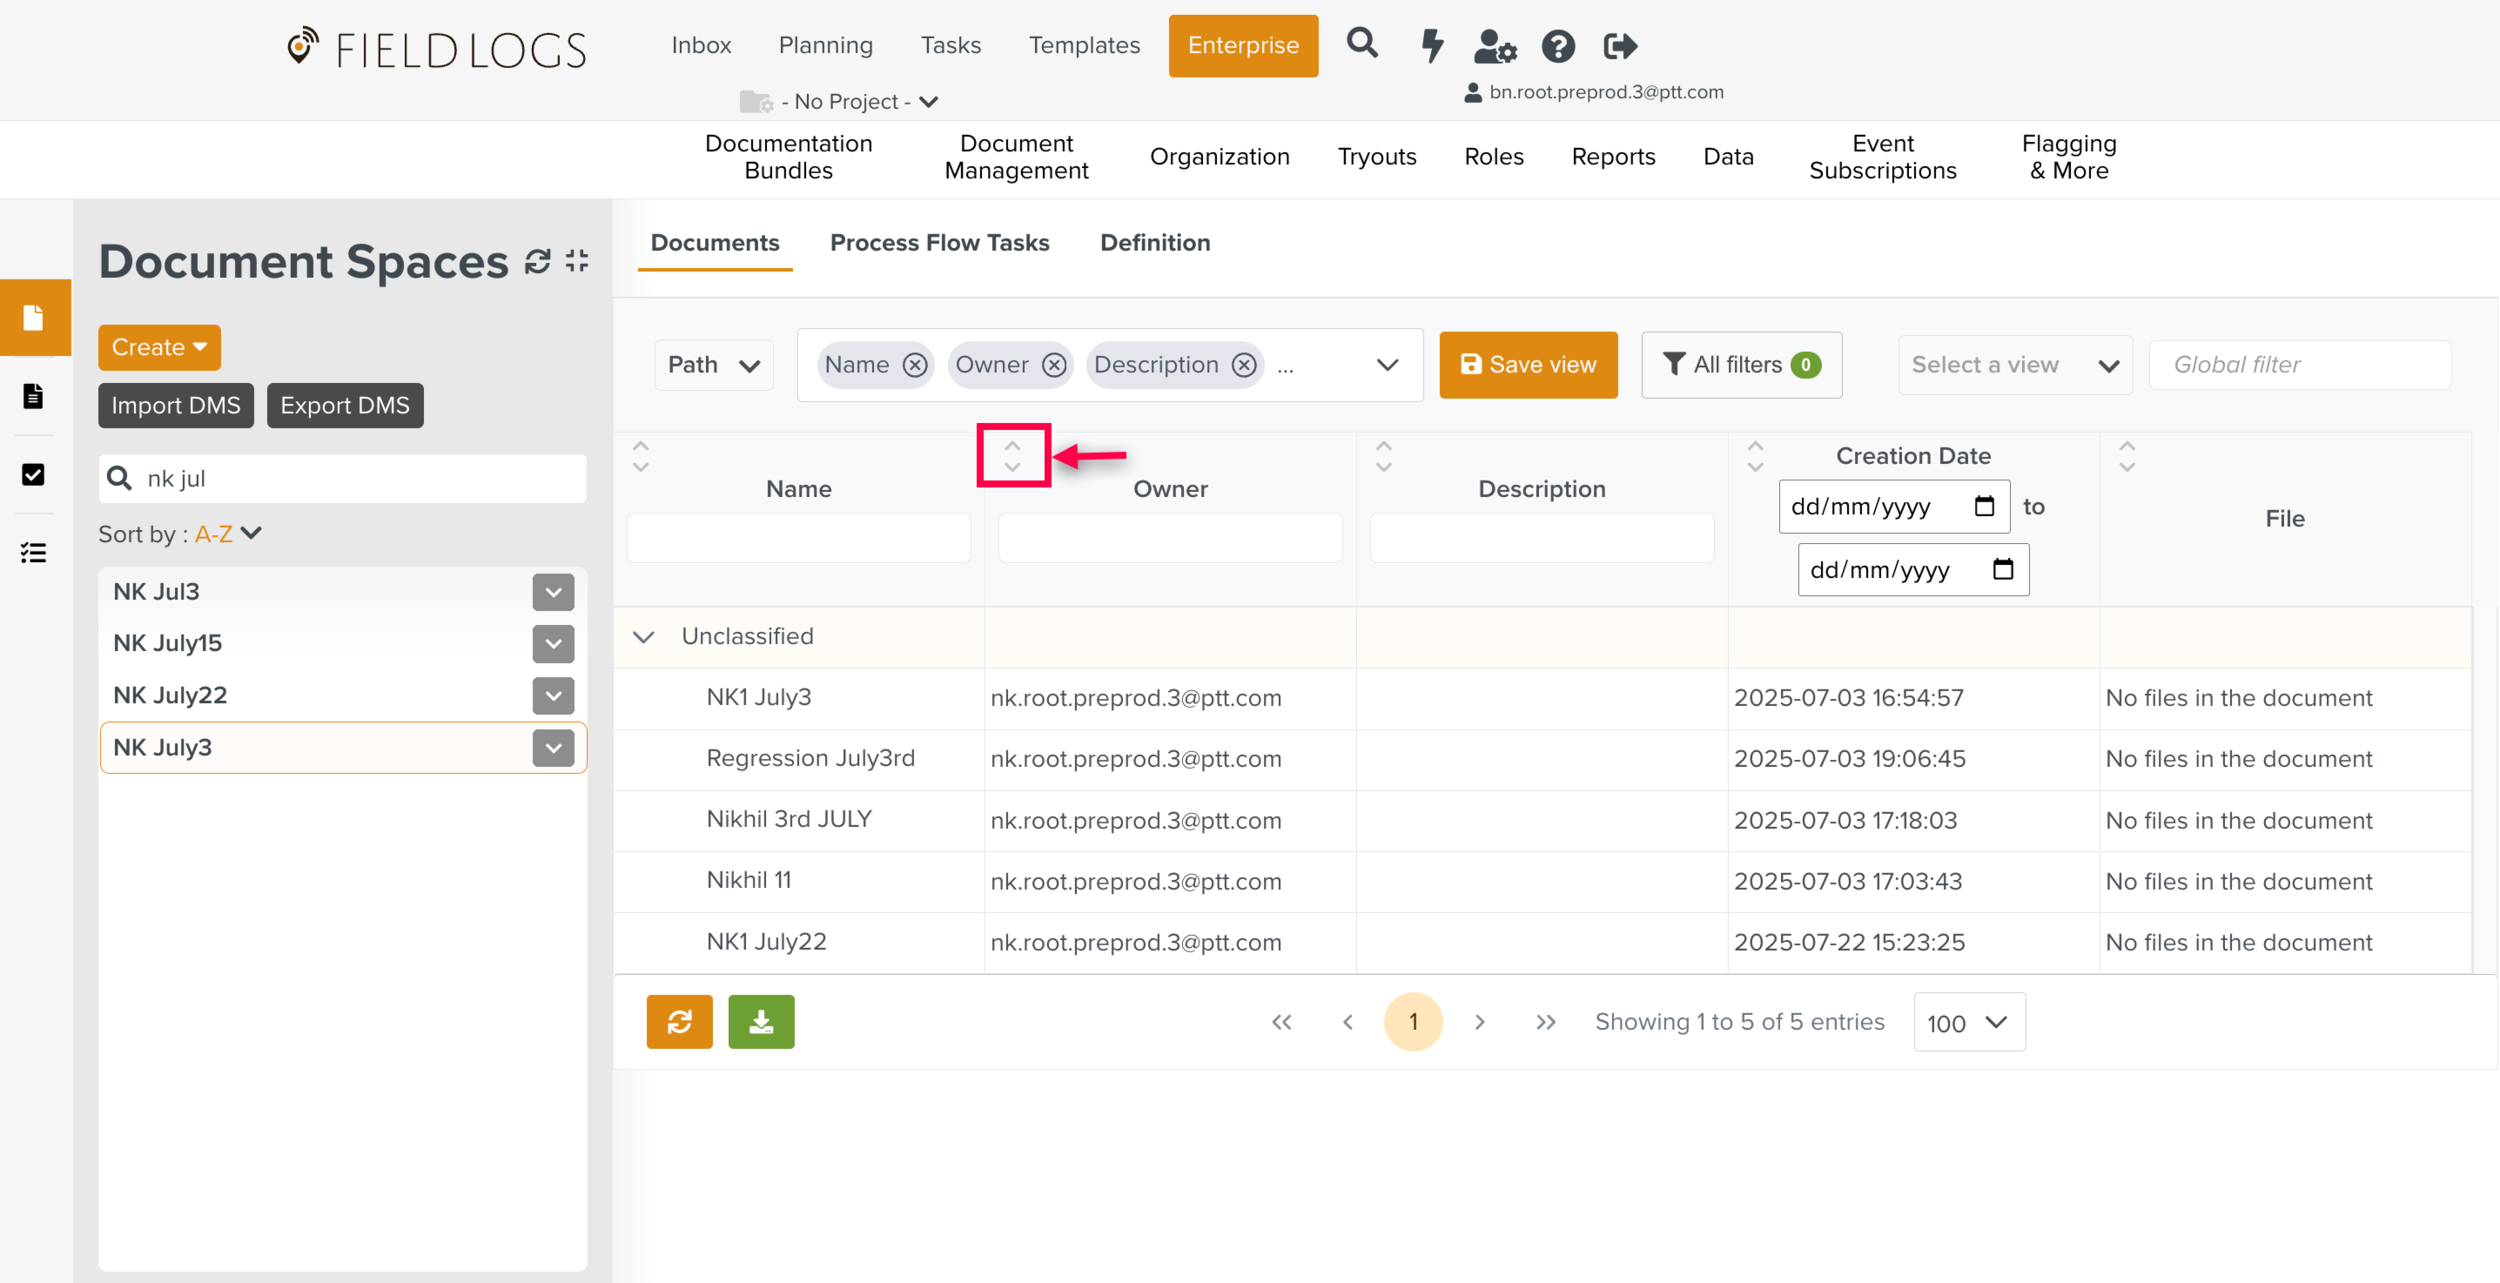
Sorting Columns: You can sort any displayed column using this icon.
You can click the icon to sort the items in ascending or descending alphabetical order or remove the sort.
Save View: Click
 to save the table setup. The Save view allows you to quickly restore Filters, Search, Selected columns, and Classifications.
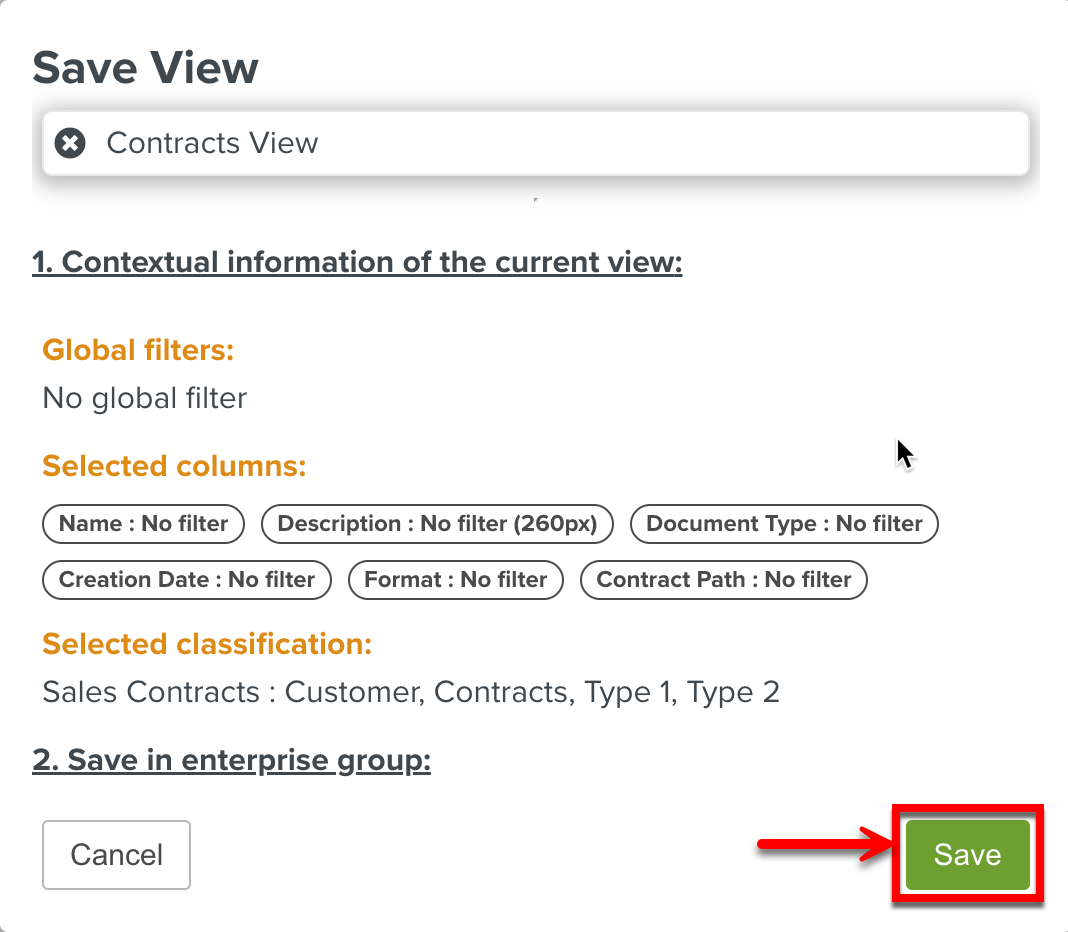
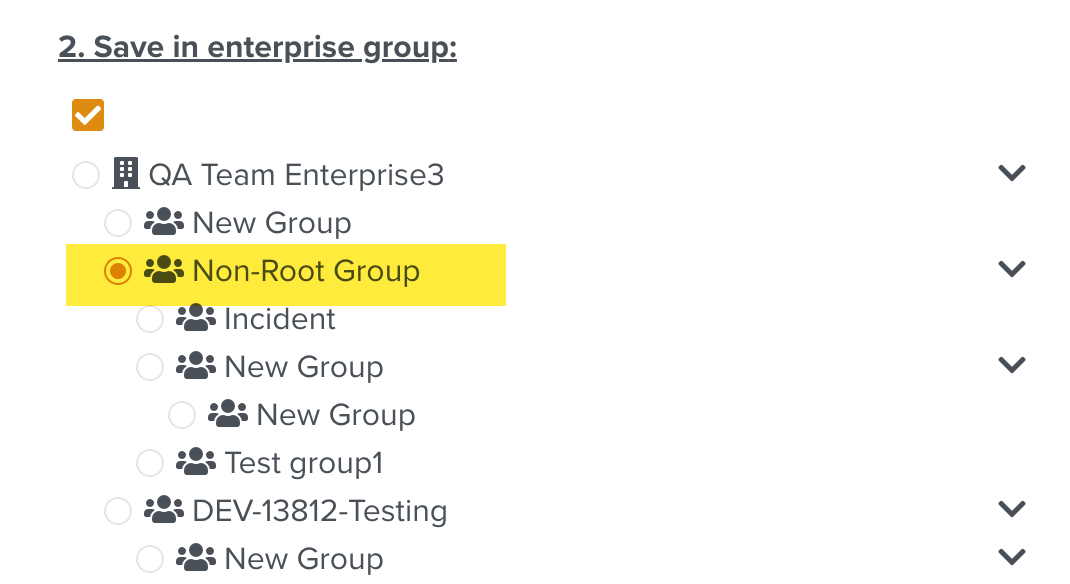
Selecting the Save in enterprise group checkbox allows you to choose only specified user groups to use this view.
Missing or duplicated name and missing enterprise group prevents you from saving the View. Hovering over the info
 icon displays the issue details.
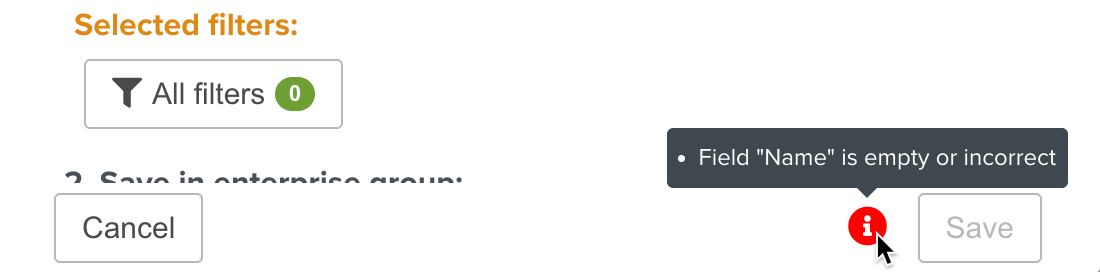
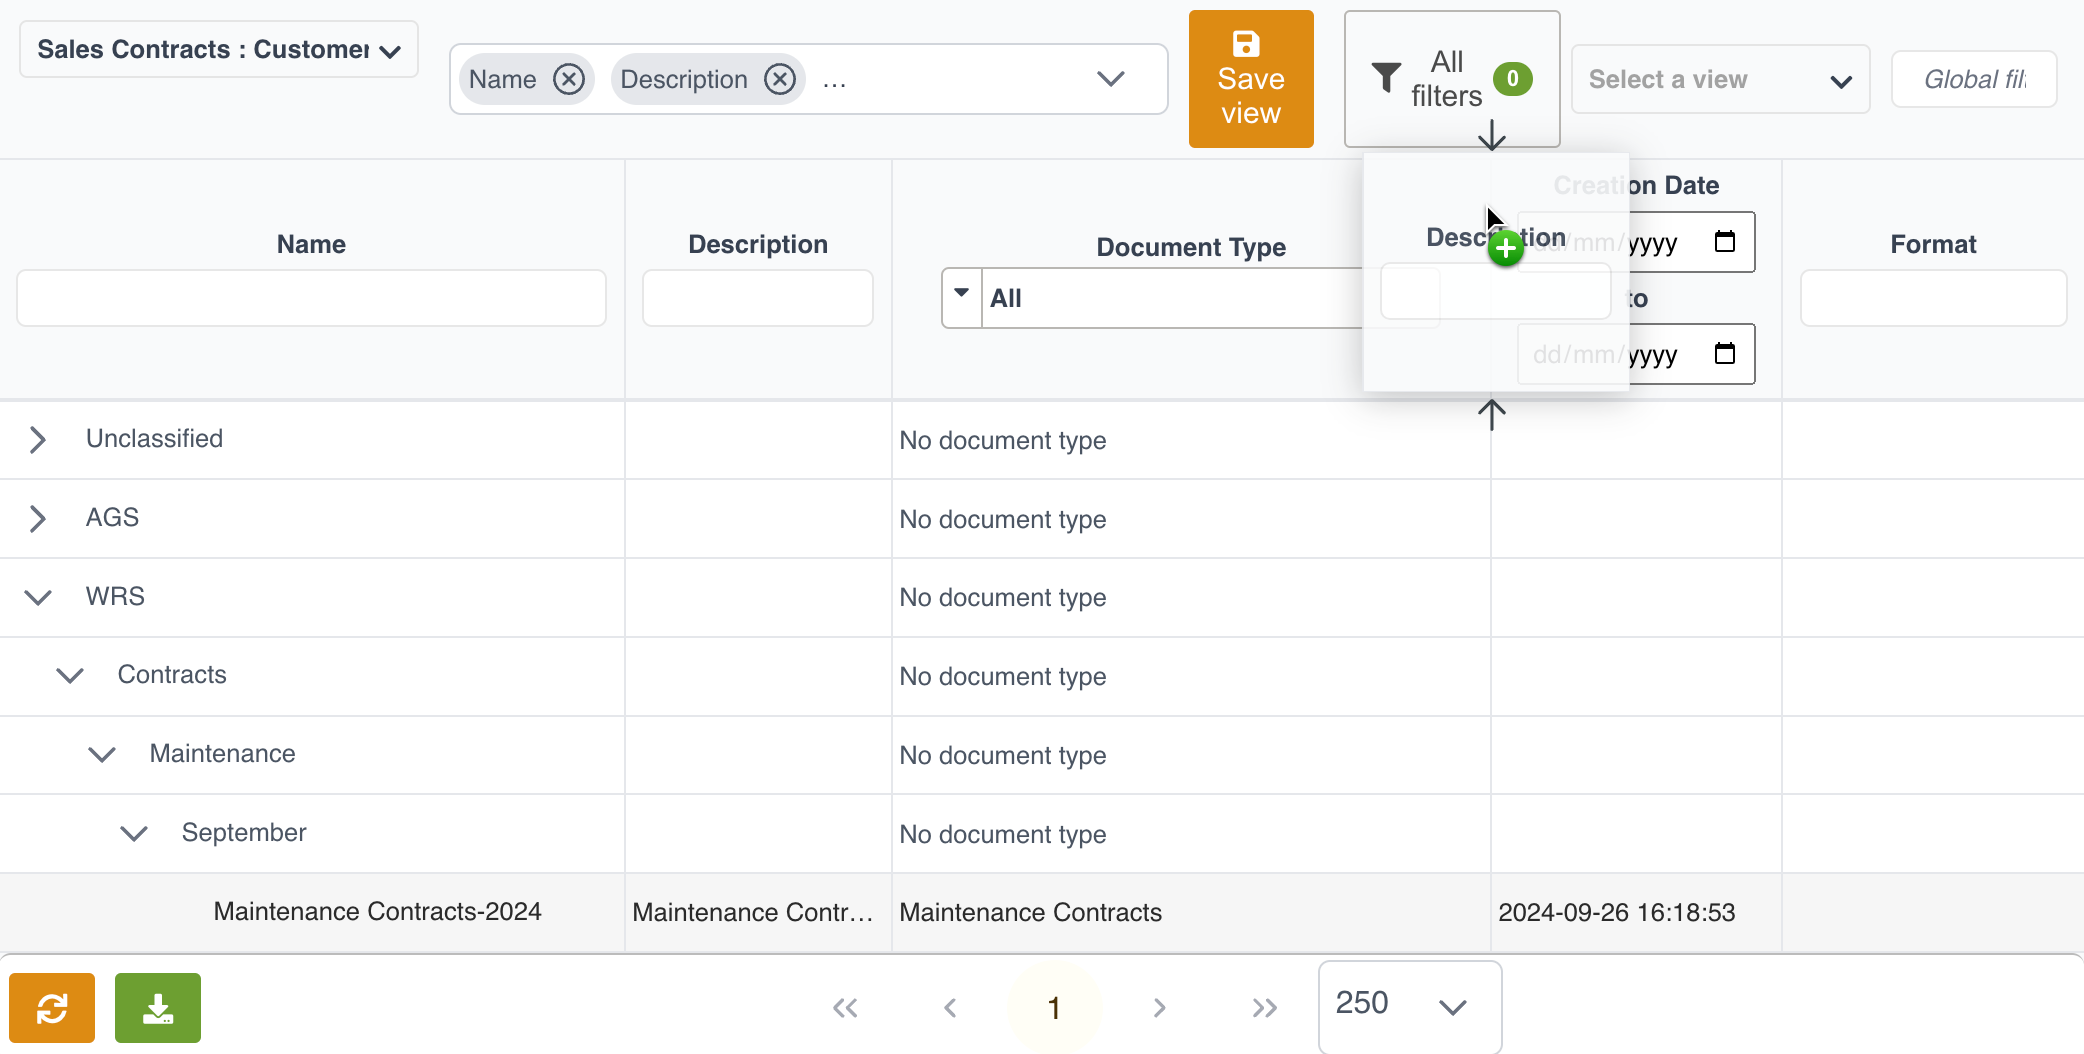
View all Filters: Click to view the filters applied in each column.
You can remove the applied filters by clicking the Delete icon.
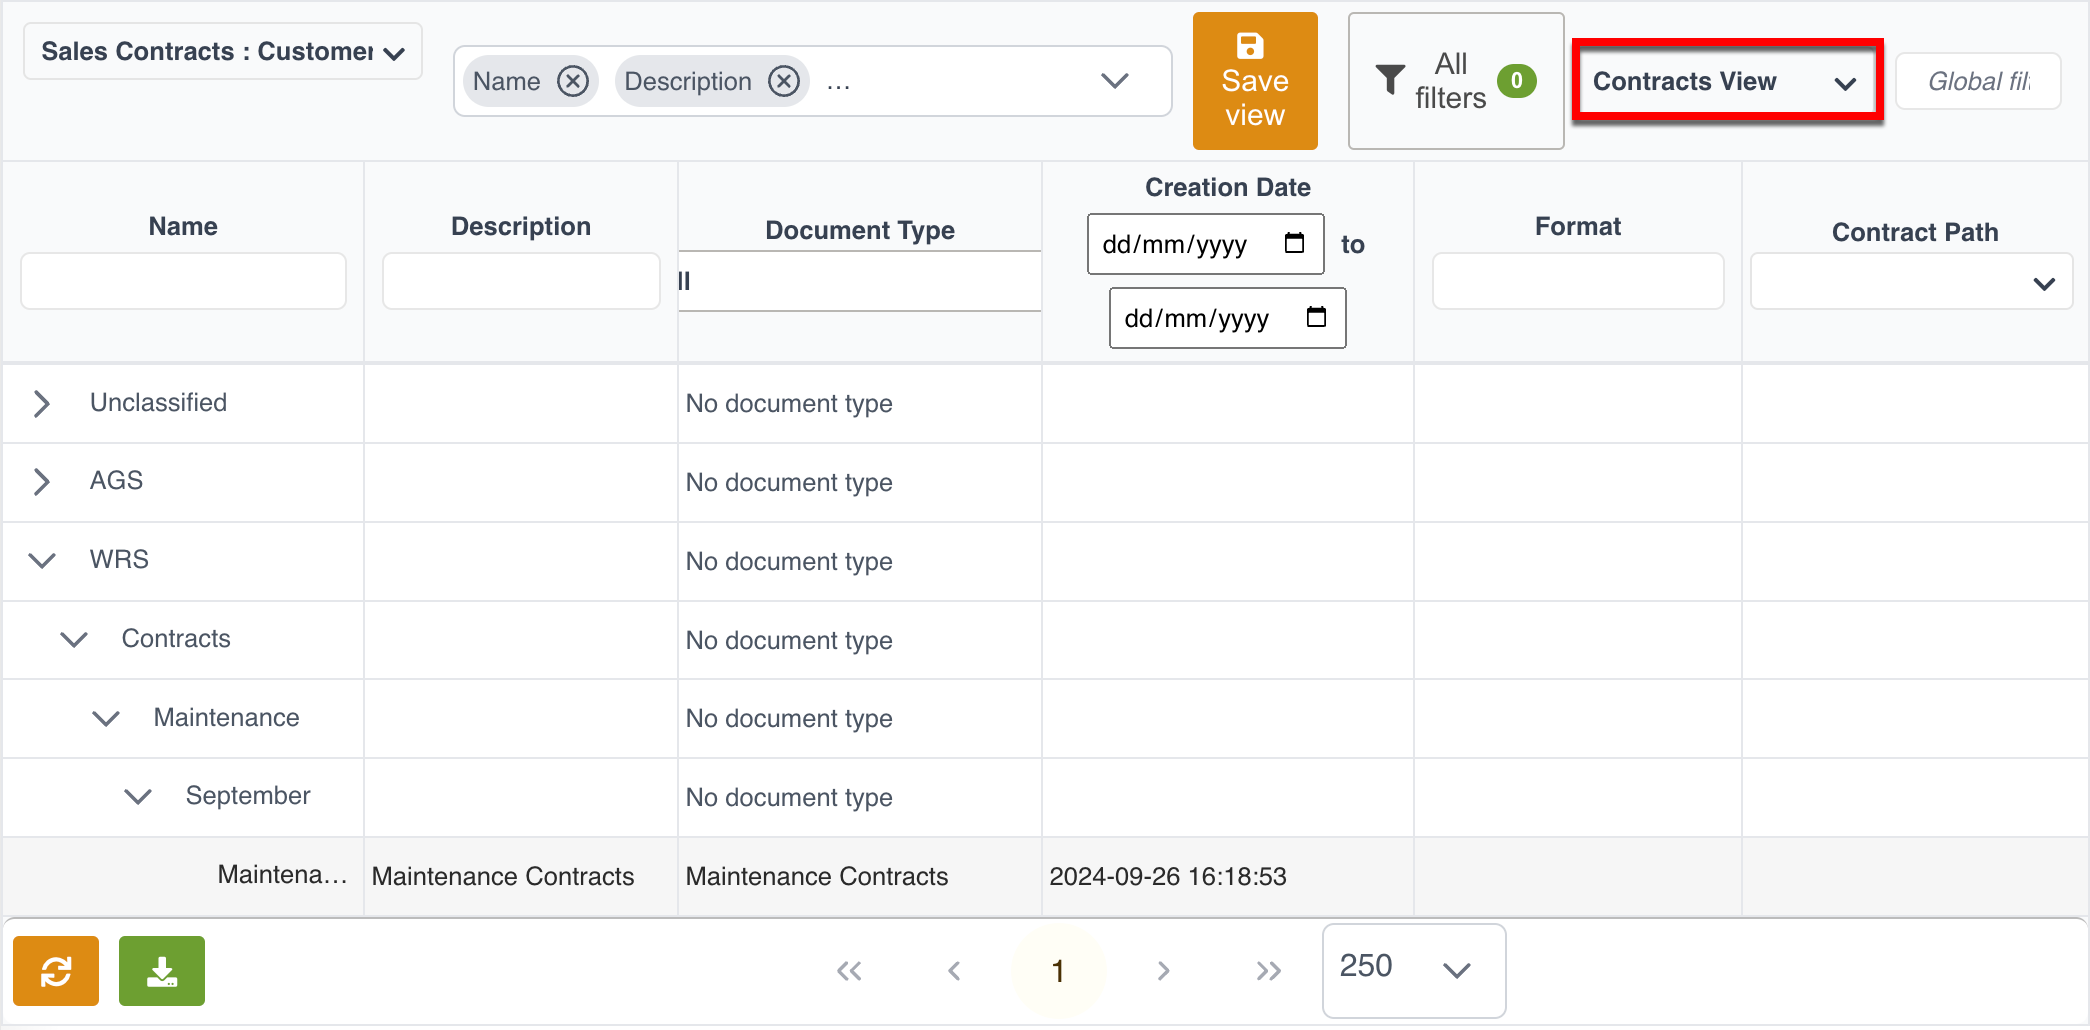
Select a View: From the Select a View dropdown, you can select a preferred view for the table.
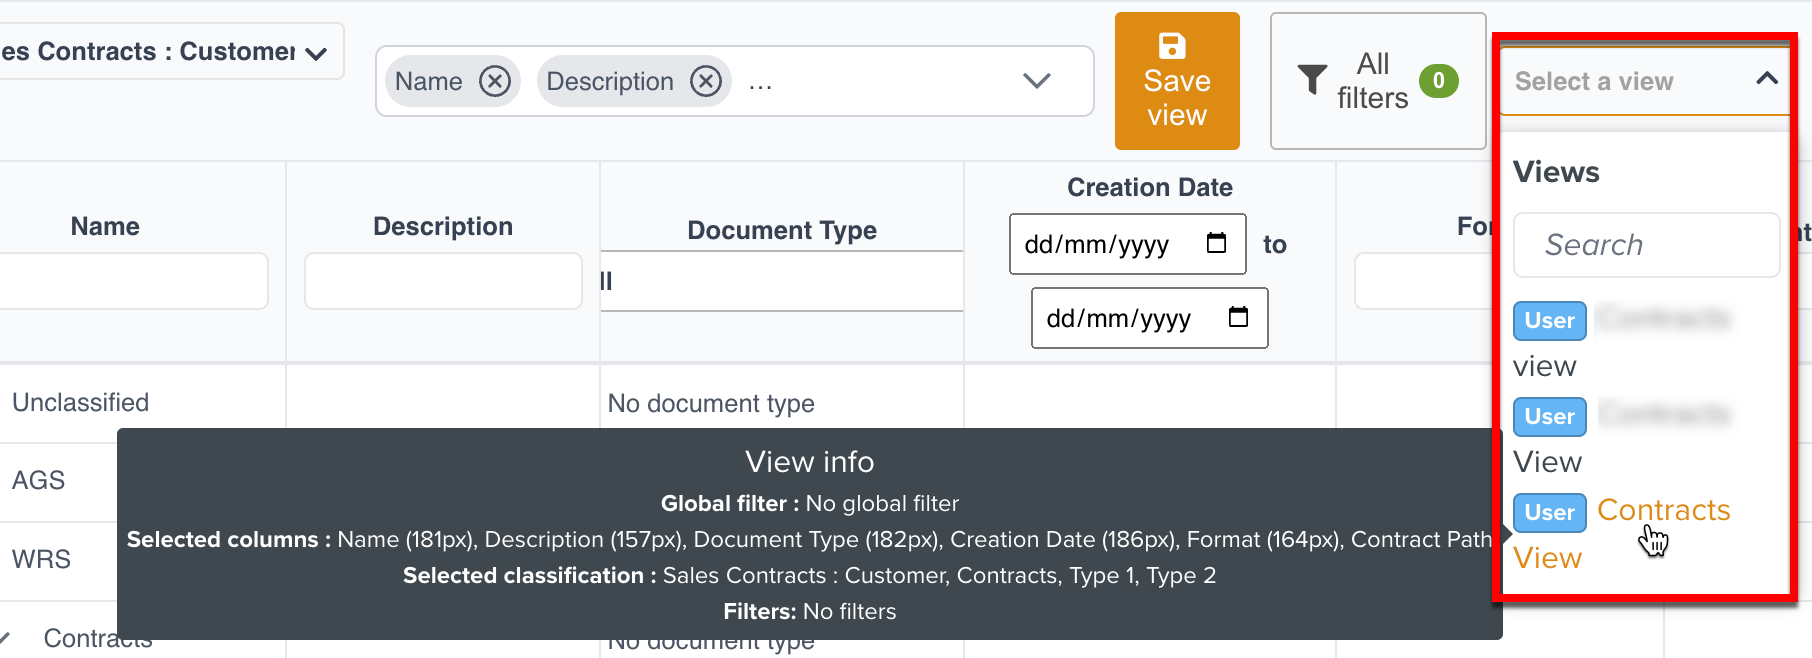
You can also delete Views using the Delete icon displayed next to each view as shown below.
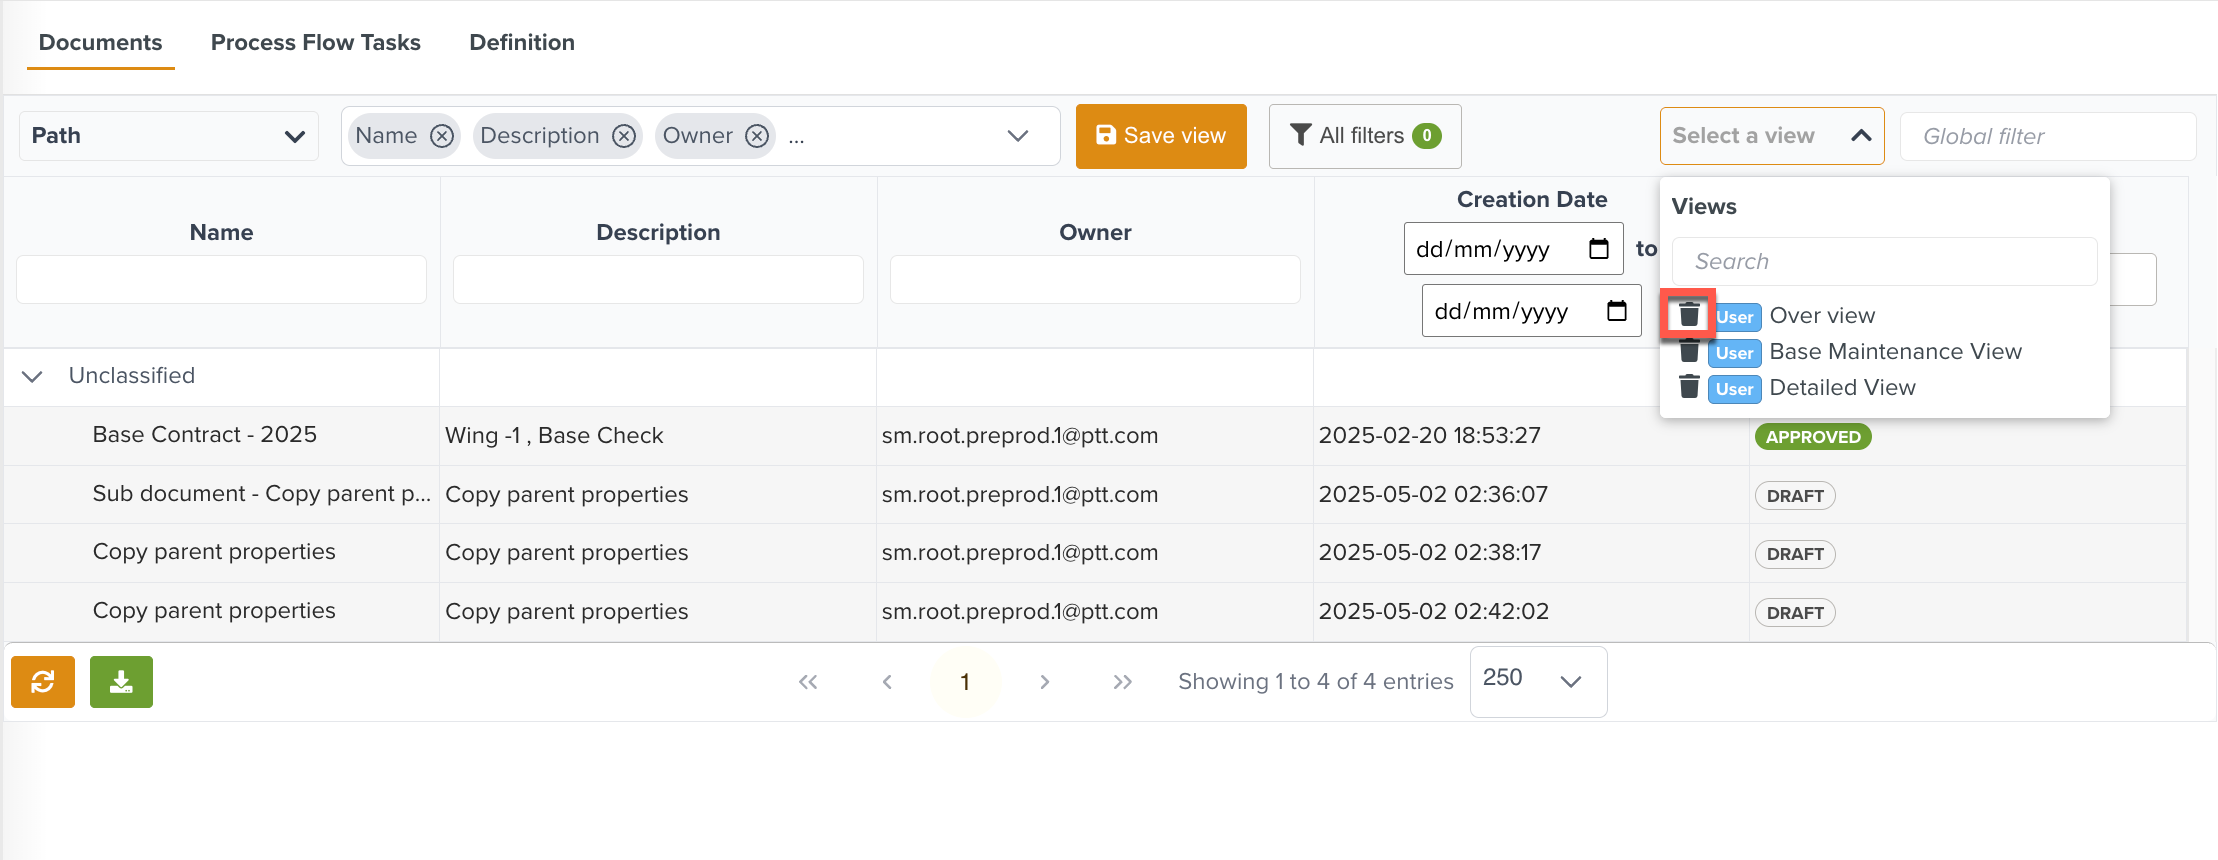
Note
Enterprise views can be deleted only by the user who created it.
Global Filter: Perform a keyword search to display relevant results.
Search and Filter Column Data: Use the search field or apply filters to individual columns to narrow down the available data.
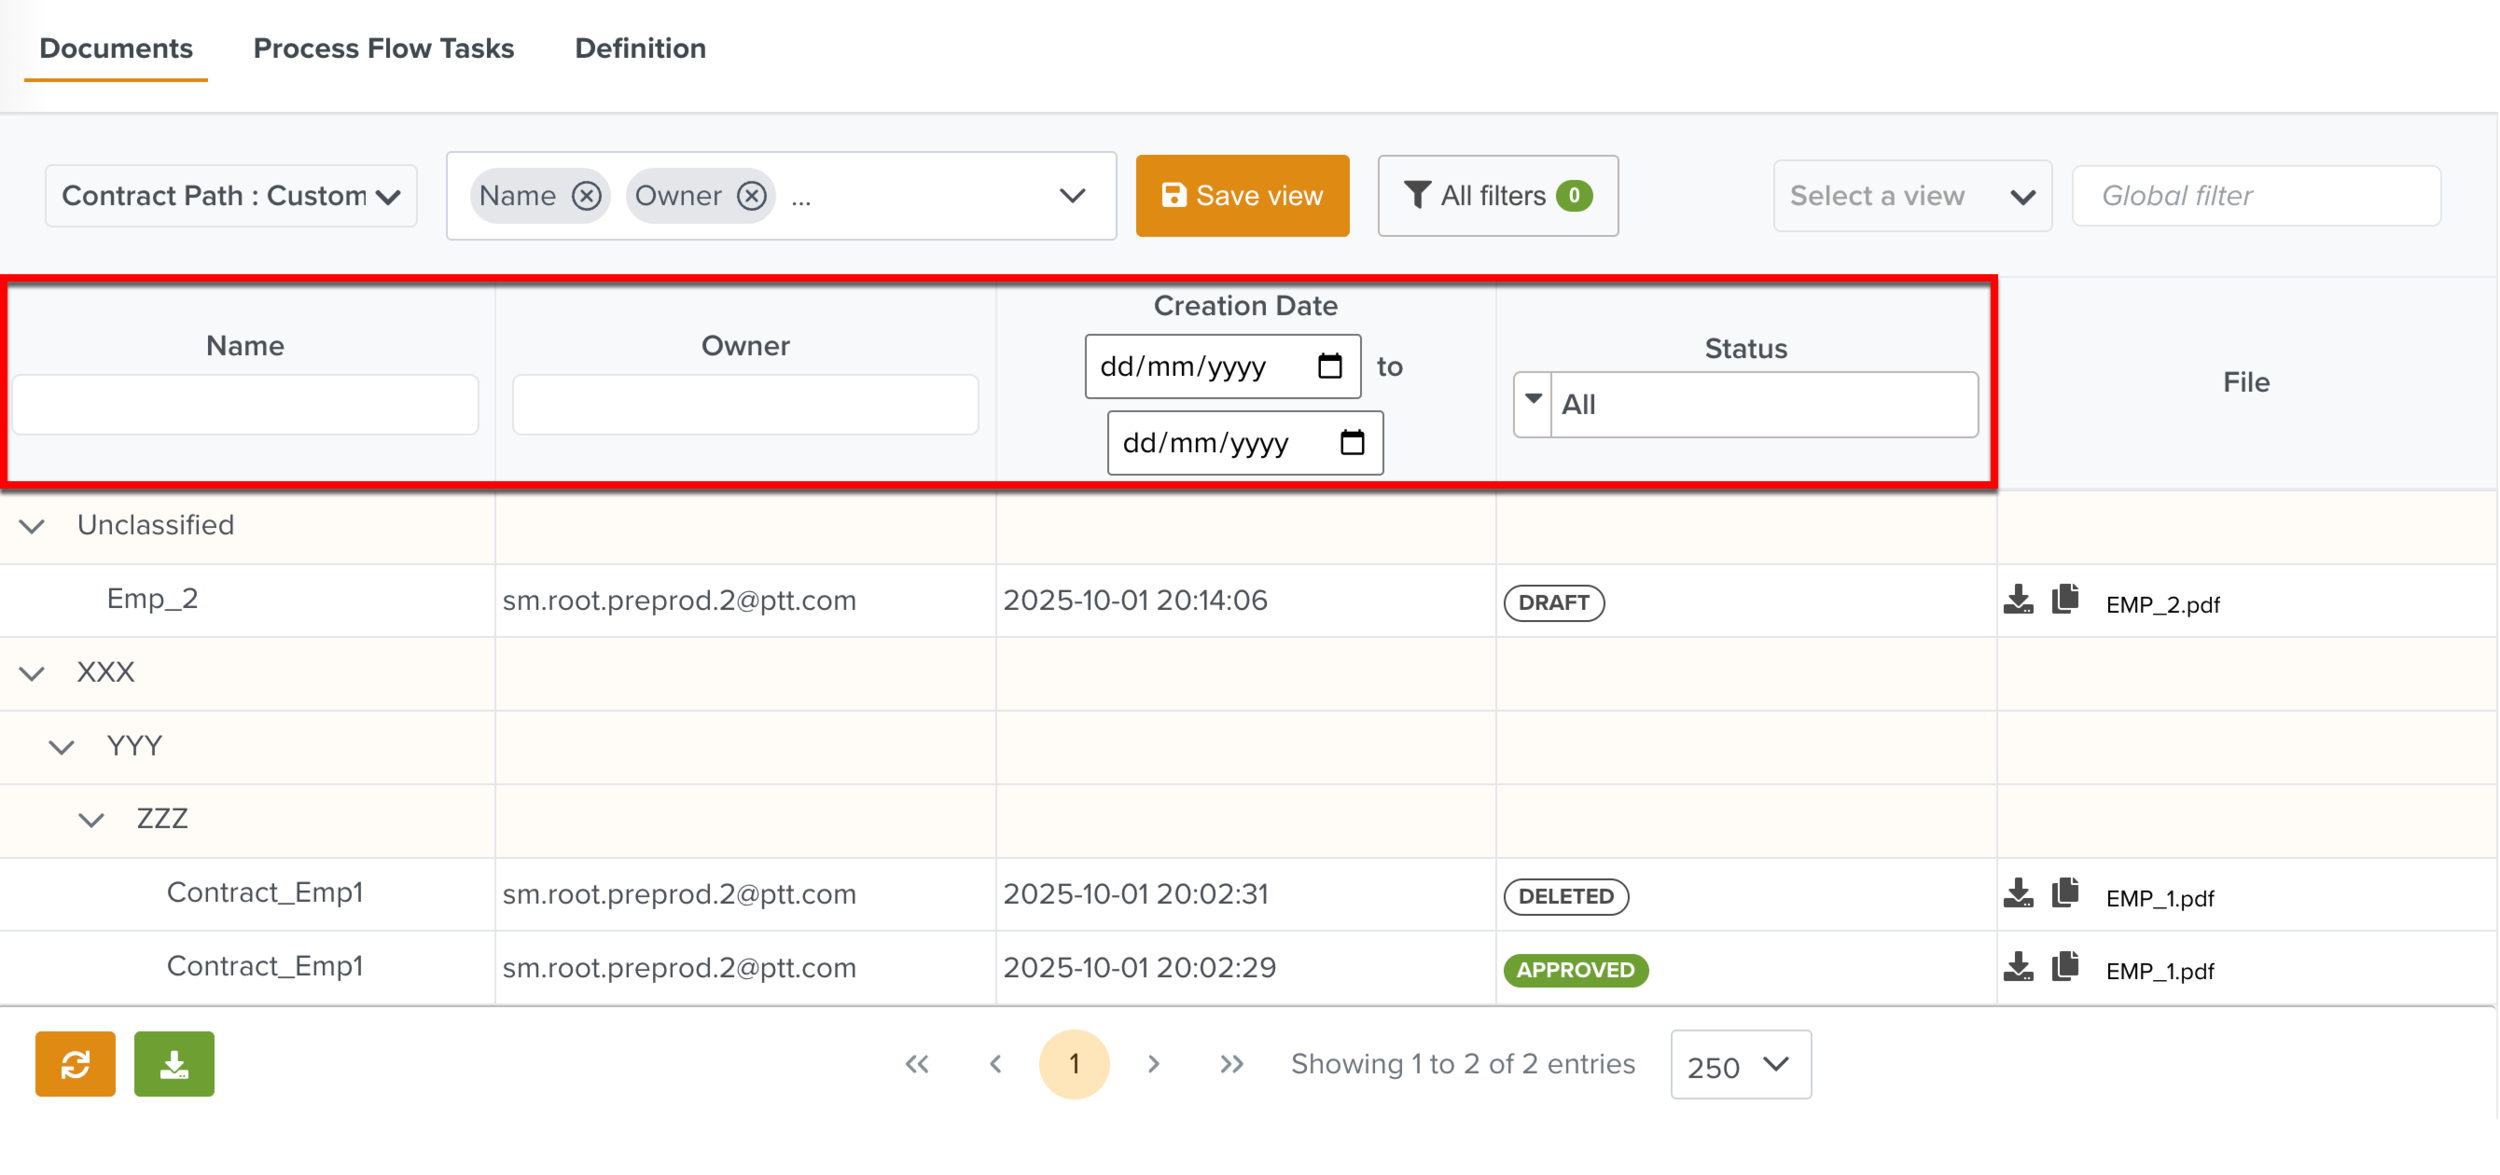
Filters are available in the columns Creation Date and Status.
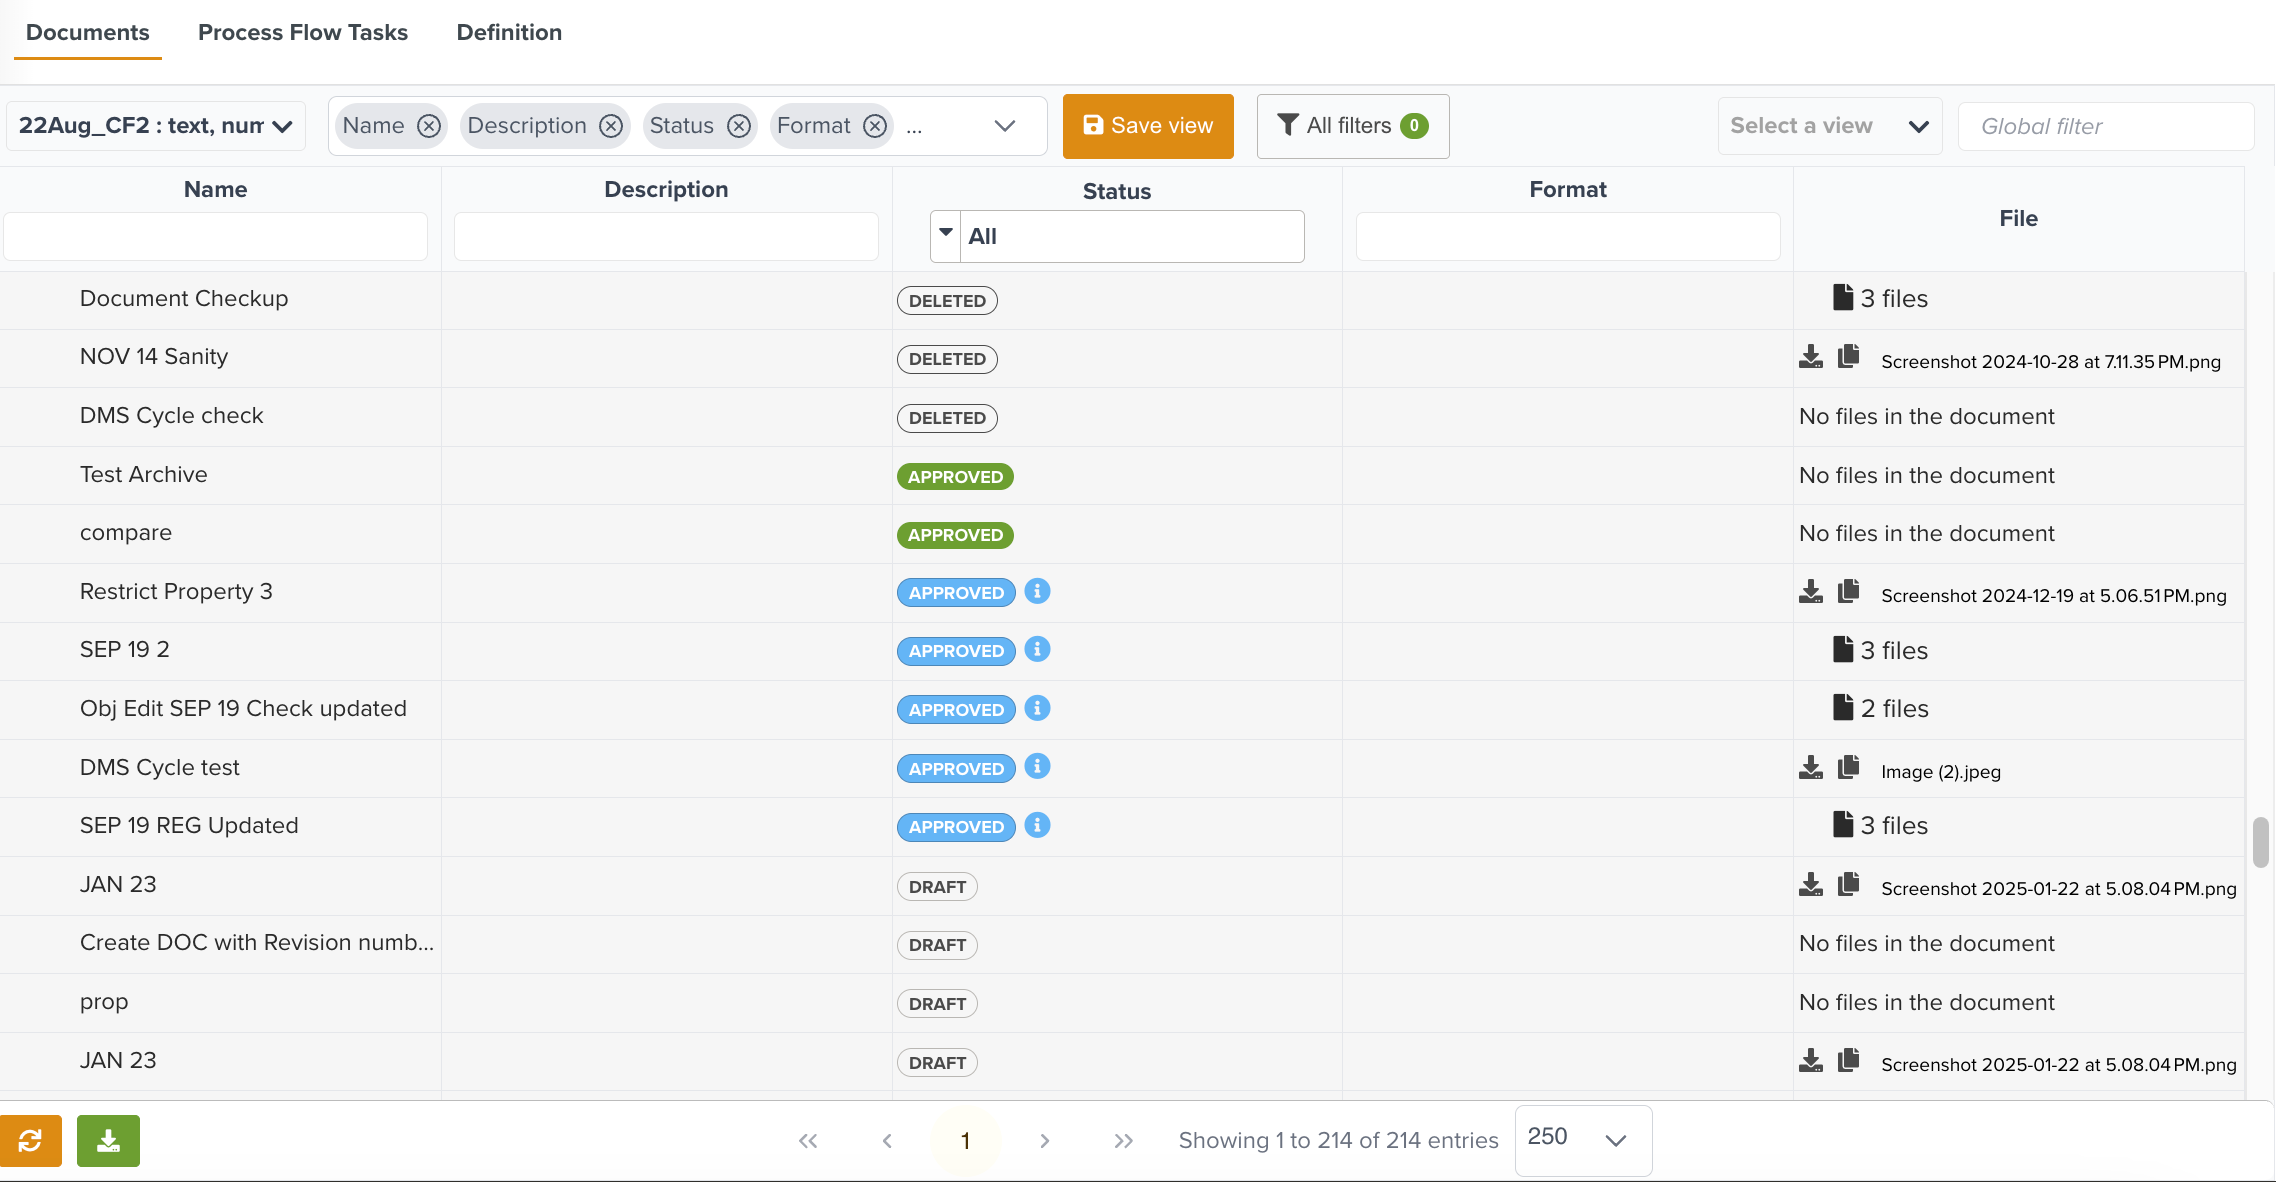
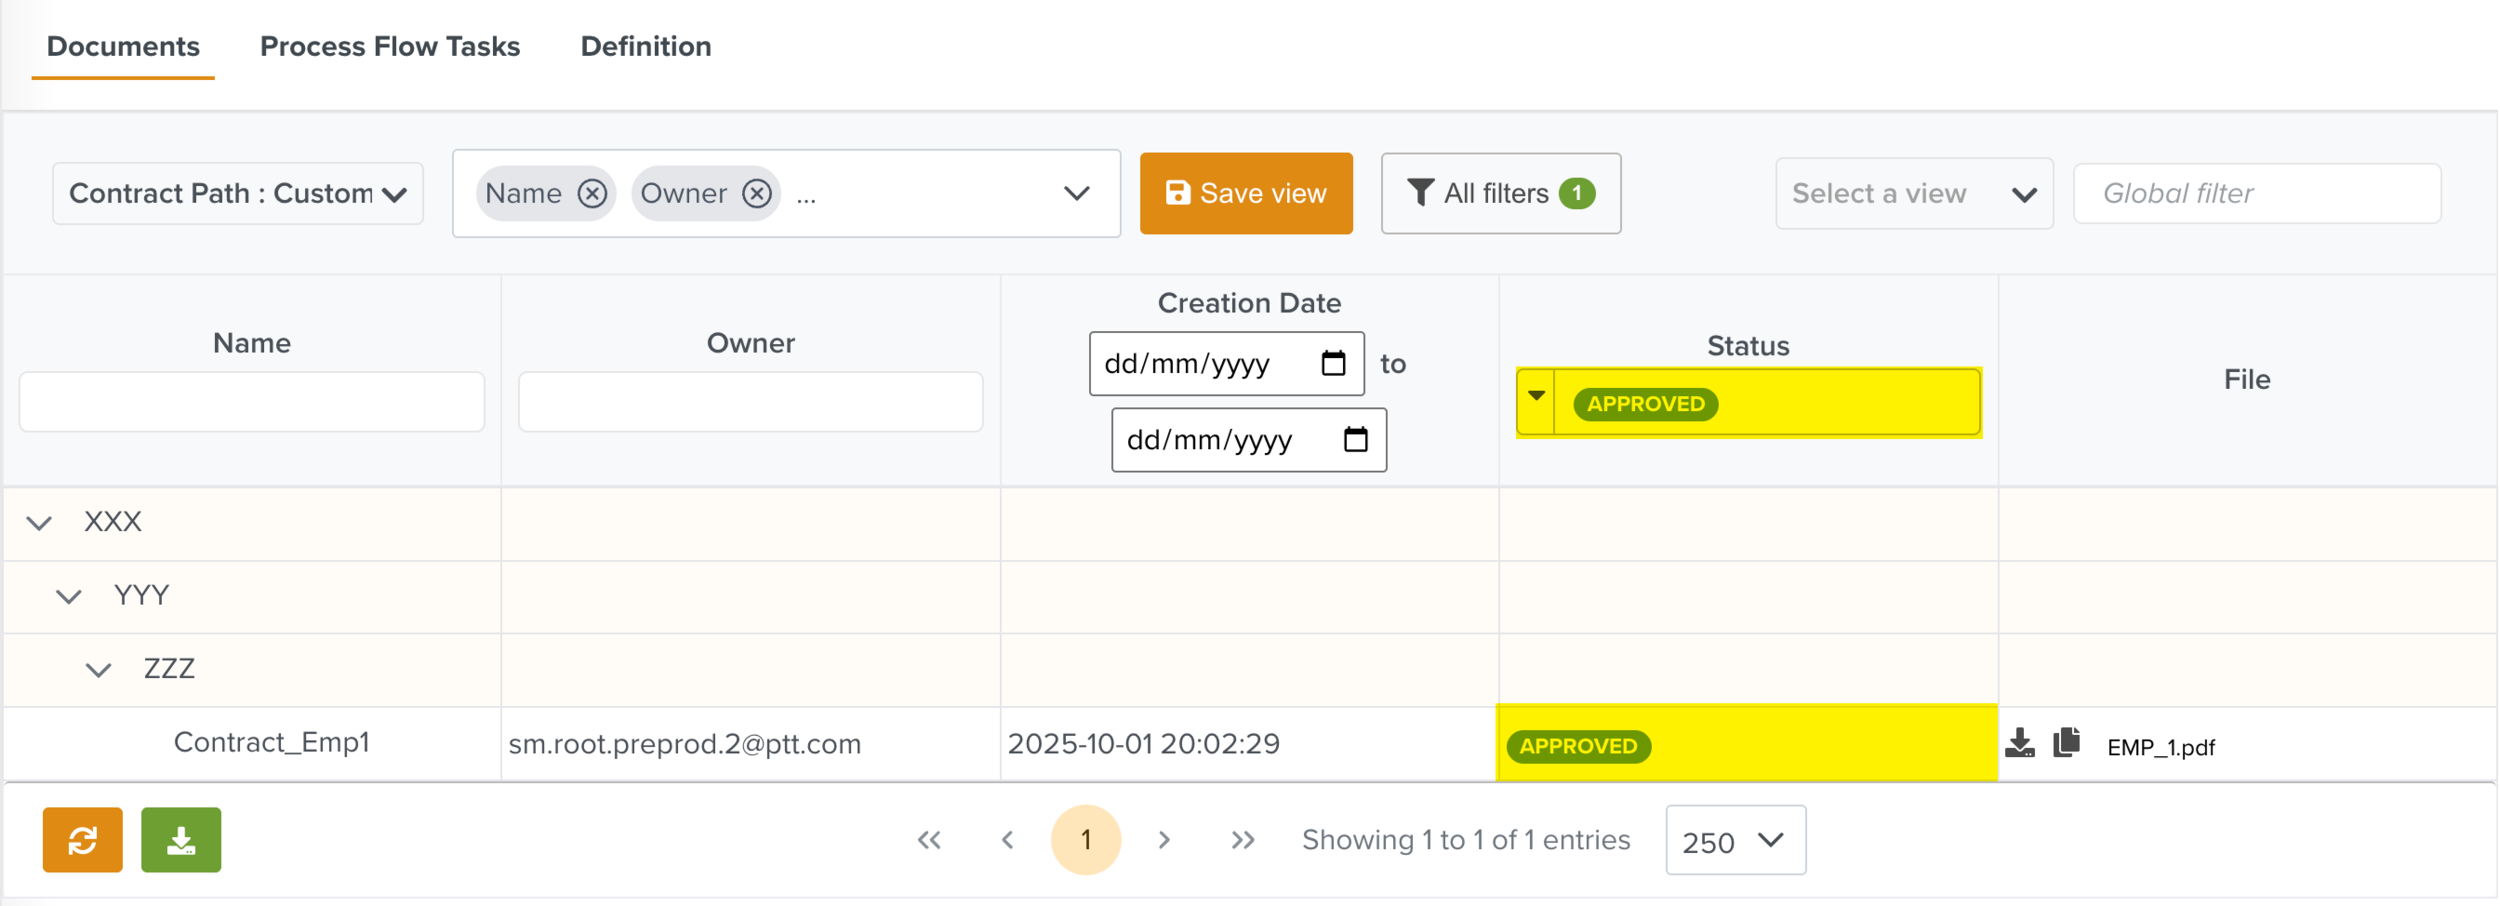
In the Status column, Documents can be filtered by selecting a specific status from the dropdown menu.
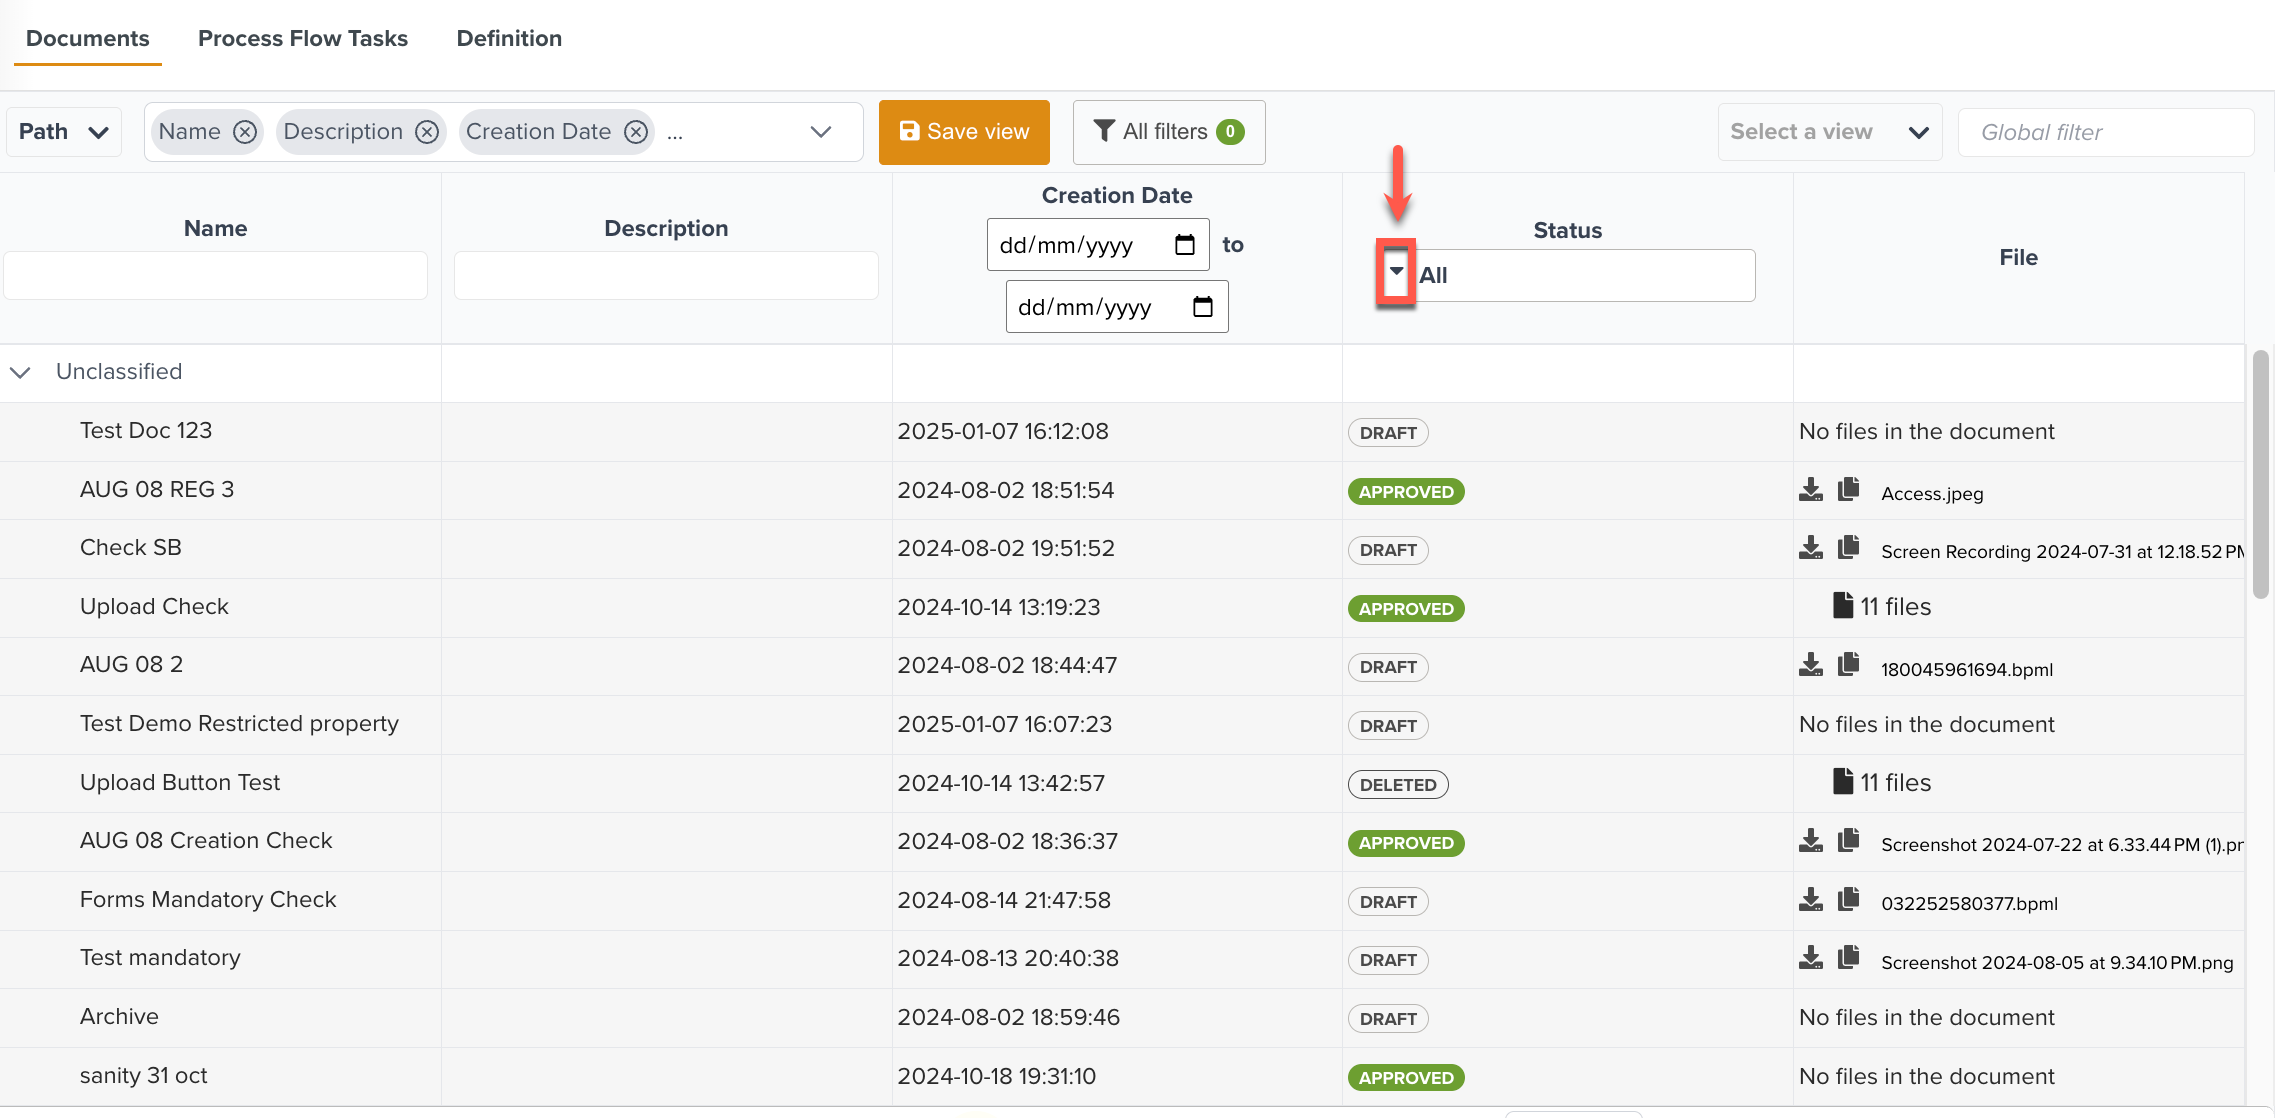
In the example below, Approved is selected and the corresponding Documents are displayed.
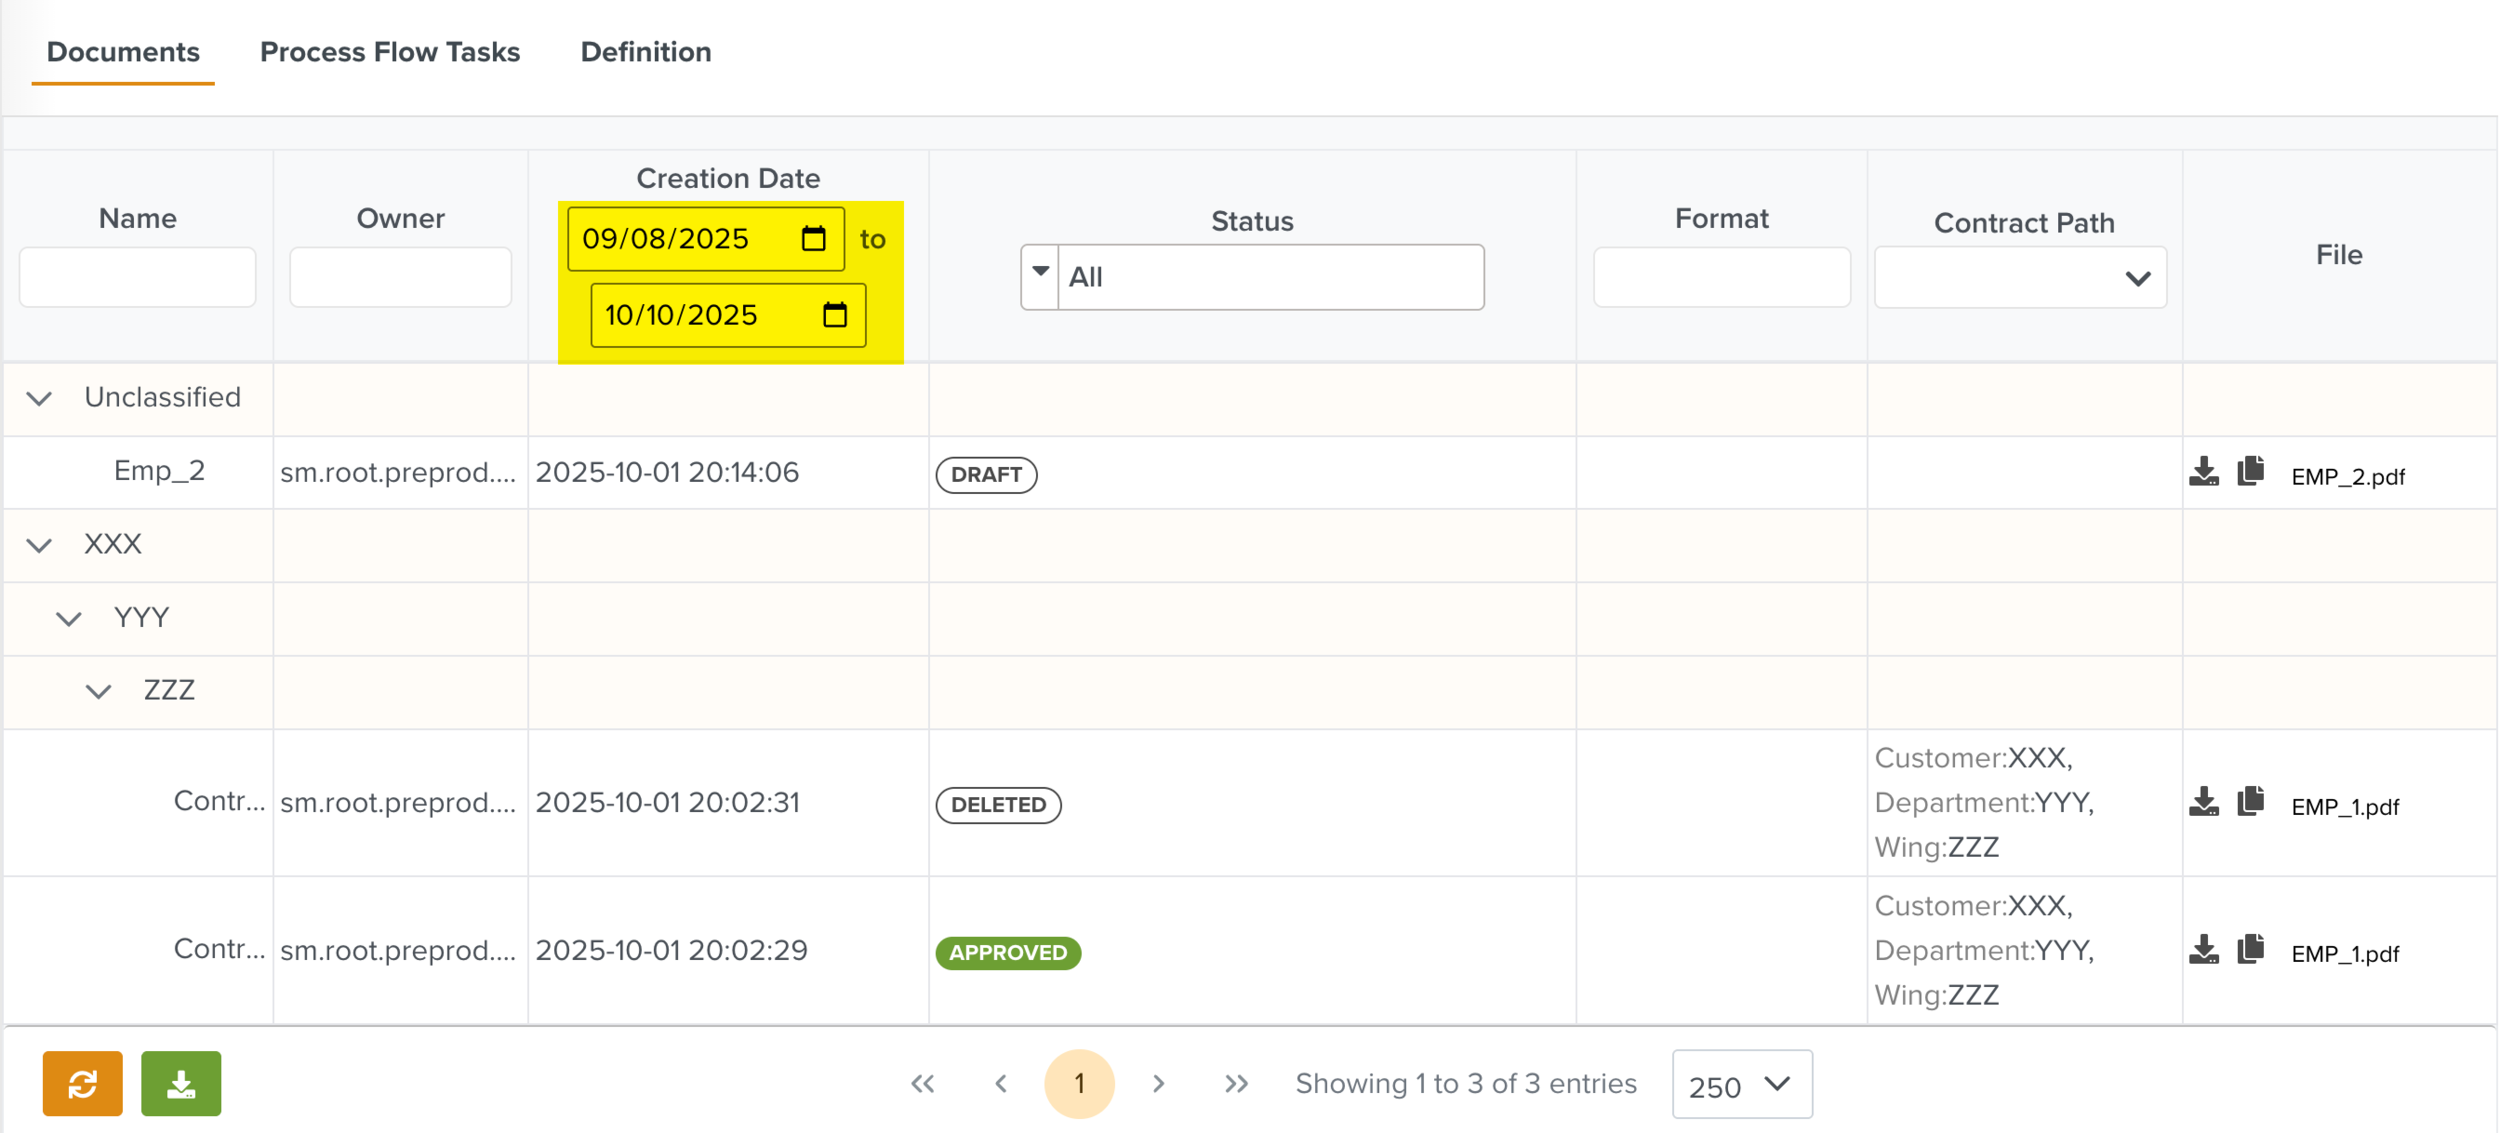
In the Creation Date column, you can apply the start and end dates to narrow down your search results based on the creation dates.
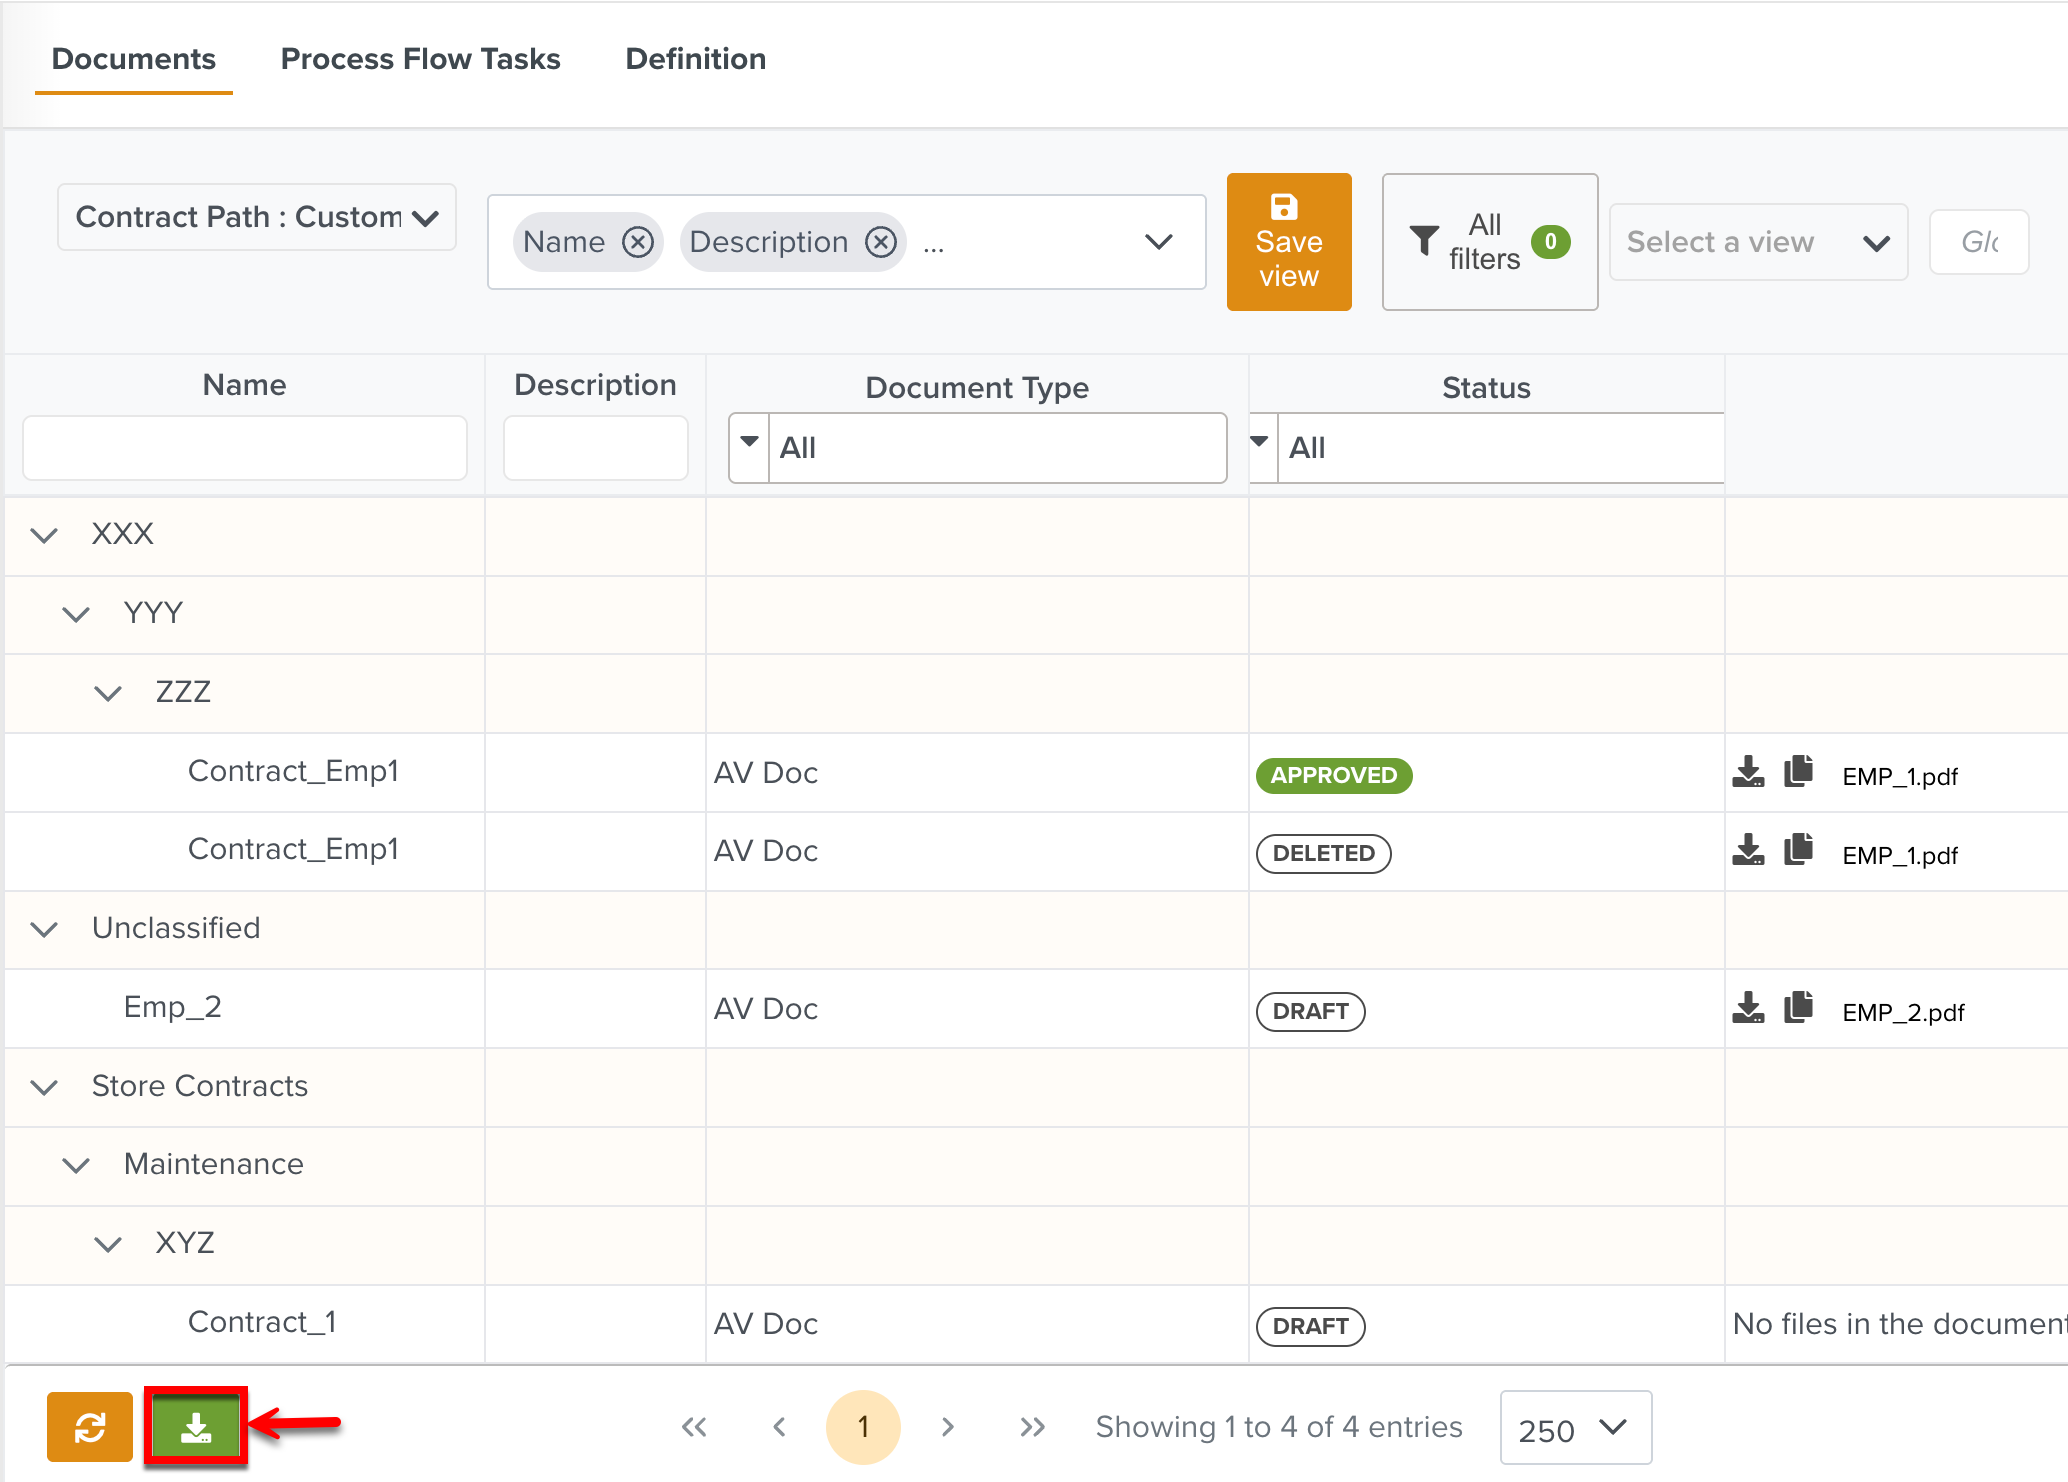
The  icon allows you to export the Documents in the Document Space either as a .csv file or a .zip file.
 |
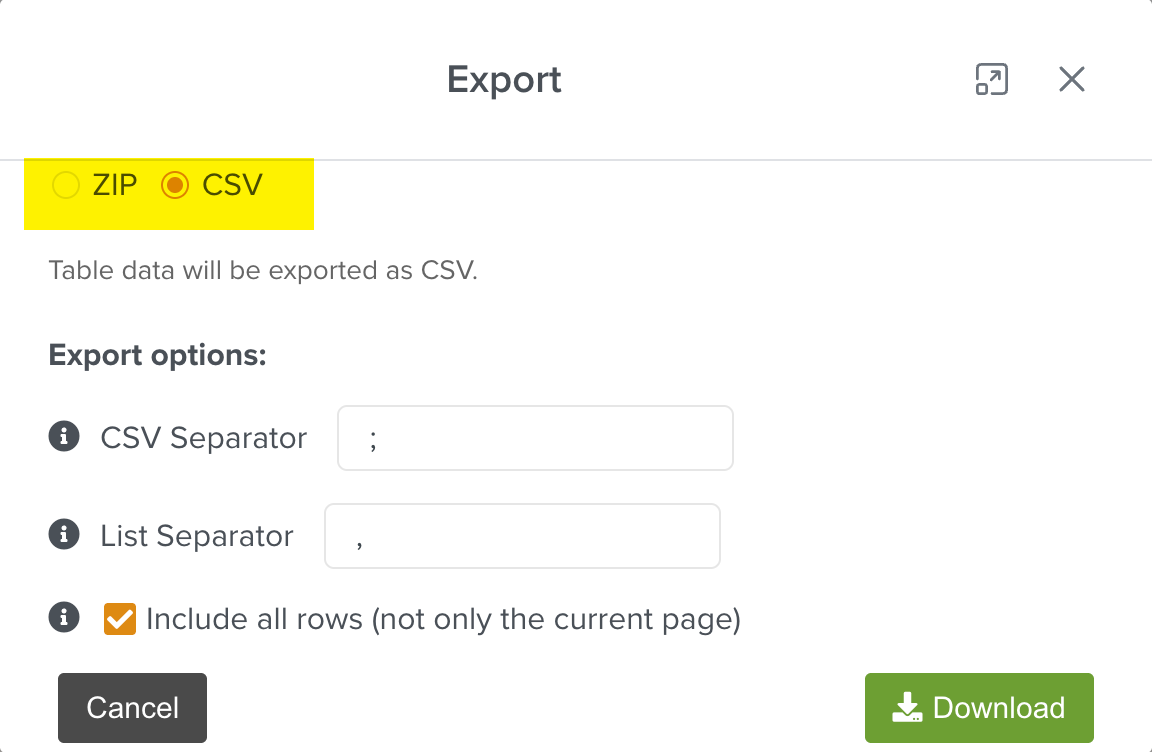 |
The table below outlines the key differences between exporting data as a .csv file and exporting it as a .zip file.
Exporting as a .csv file | Exporting as a .zip file |
|---|---|
Only the listing of Documents is downloaded. | The actual Documents are downloaded. |
This contains the relevant data from the Document Management Space related to each Document. It includes all metadata from the visible columns attached to the Documents. | Documents exported from one Document Space can be imported into another, retaining the original classification structure. |
If the option Include all rows (not only the current page) is selected, information about all the Documents are downloaded. If not, only information about the Documents in the current page is downloaded. | The Documents listed on the current page can only be downloaded. |
The CSV Separator separates the Document data. In the example below, the different column values are separated by the character ’;’.
 |
The List Separator separates the list of values. In the example below, the list of files are given in separate columns as the List Separator used here is the character ‘,’.
 |
Note
Both CSV and List Separators cannot be the same.
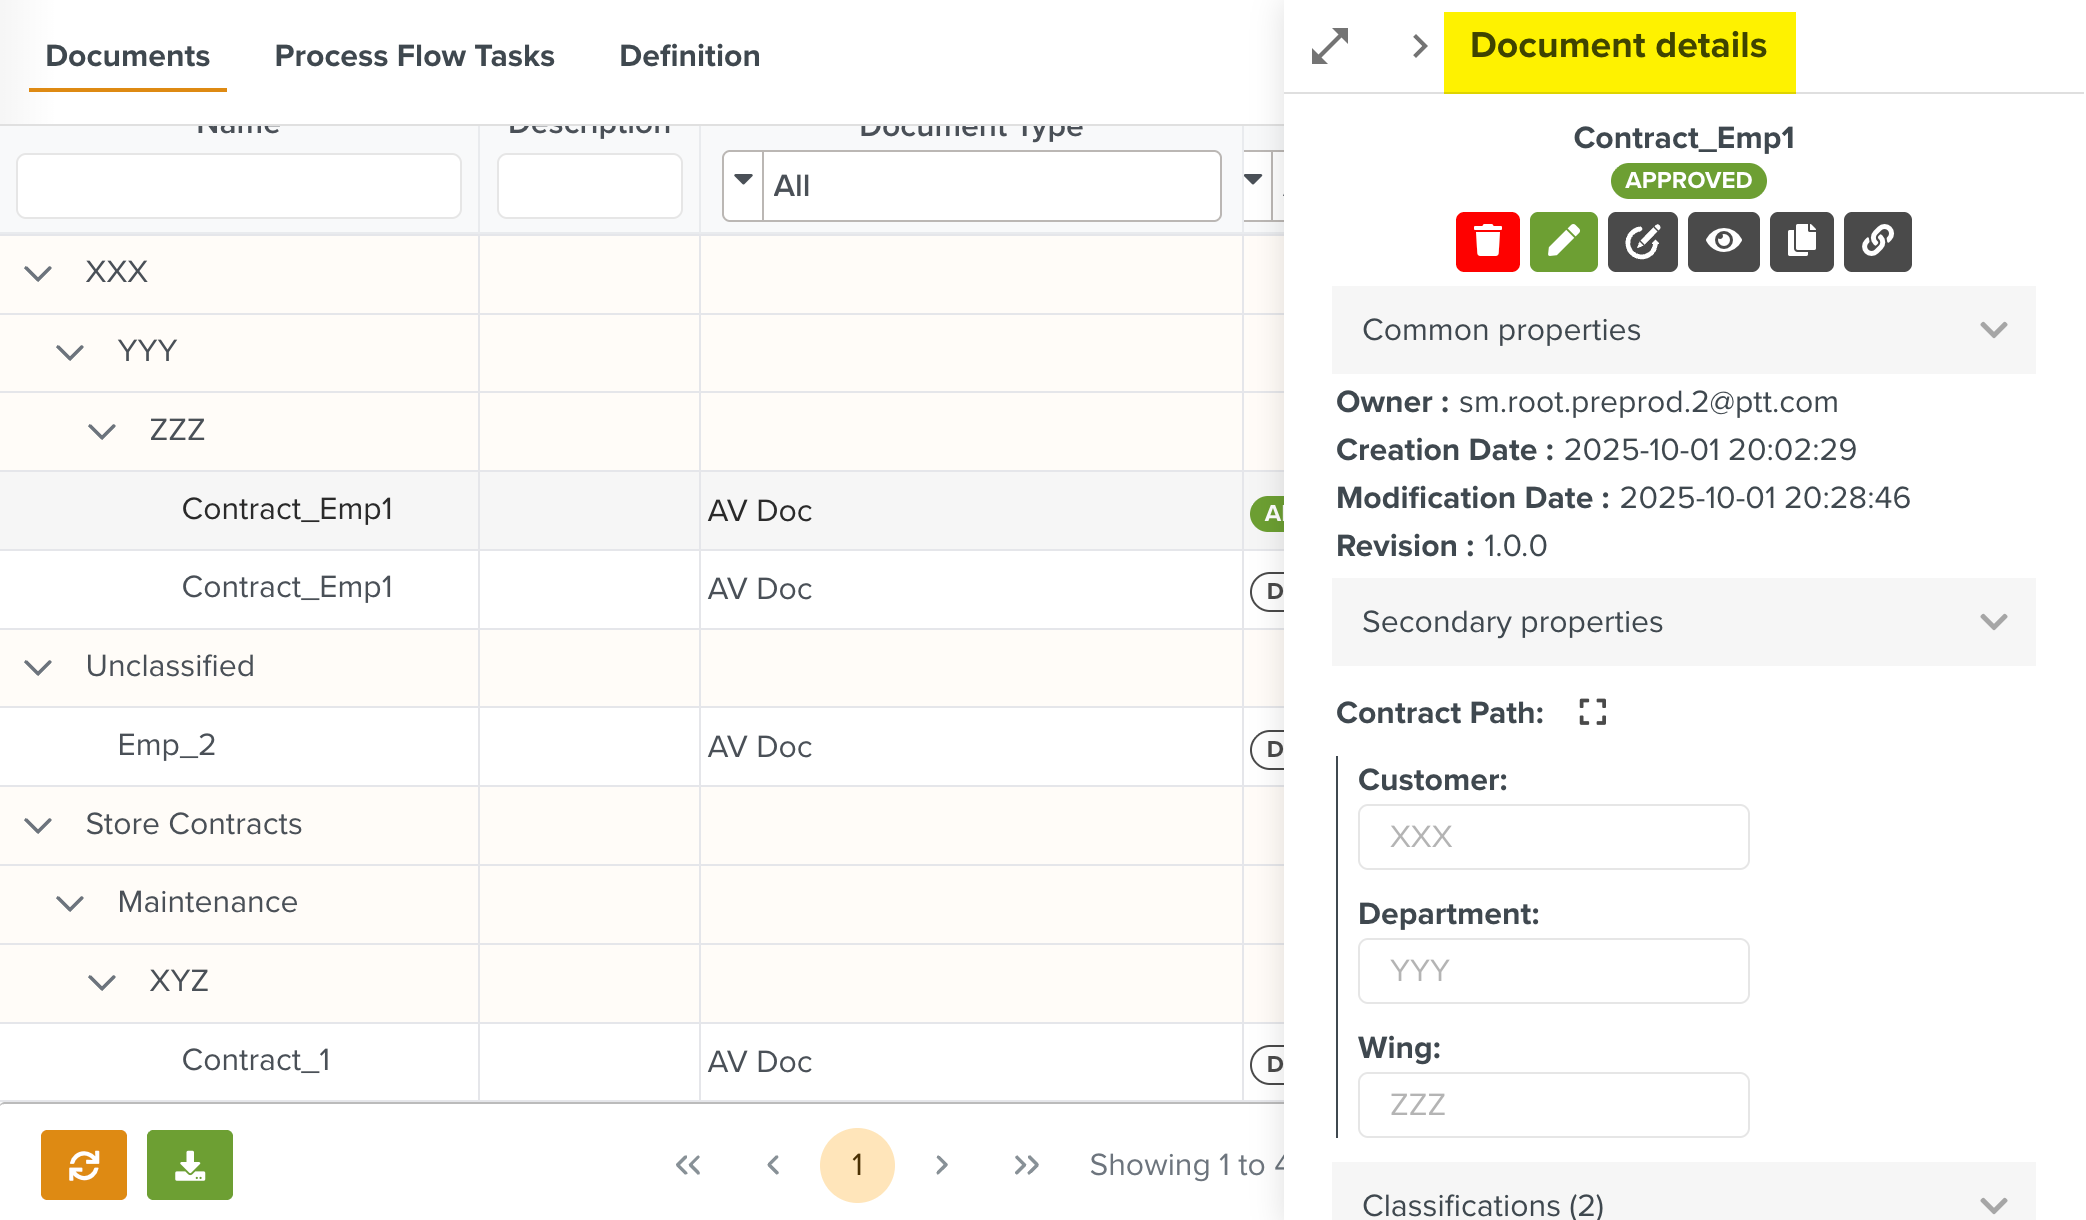
When you select a Document in the Documents tab, the Document details pane appears.
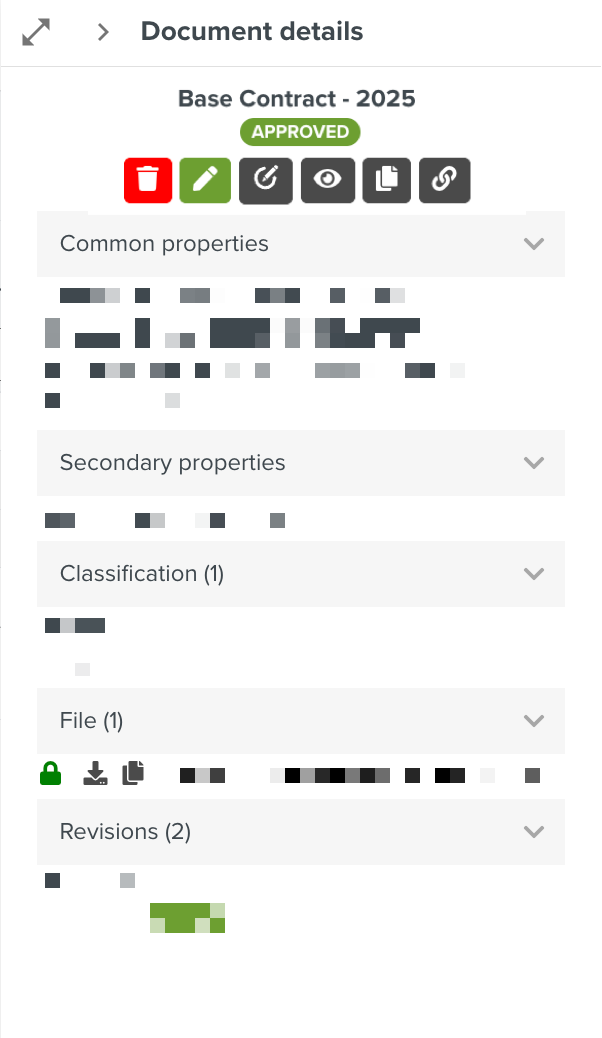 |
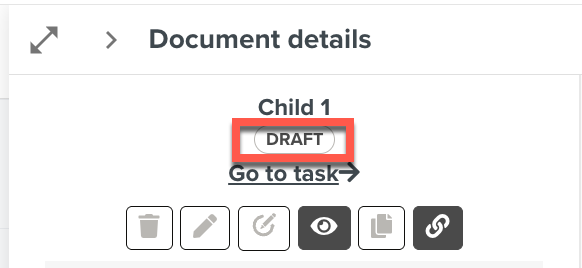
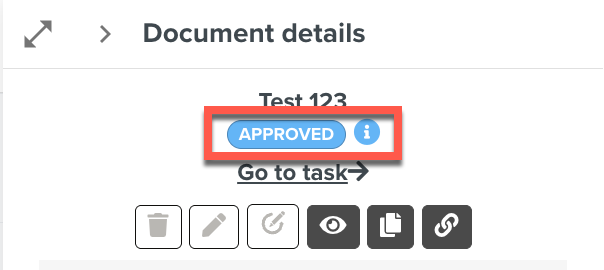
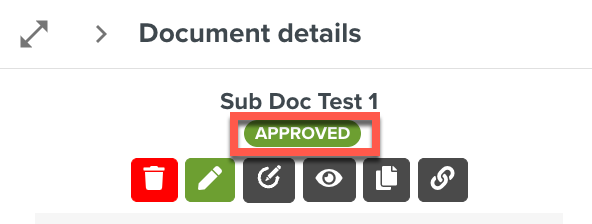
The Documents can either be in Draft , Pending revision approval, Approved or Deleted status as shown below.
 |
 |
 |
 |
Multiple document revisions can be maintained in Draft status simultaneously. When needed, any draft revision can be approved, after which it becomes the latest revision.
Following are some options available in the Document details pane. Based on the current status of the Document, the options may be enabled or disabled.
Actions | Description | |||
|---|---|---|---|---|
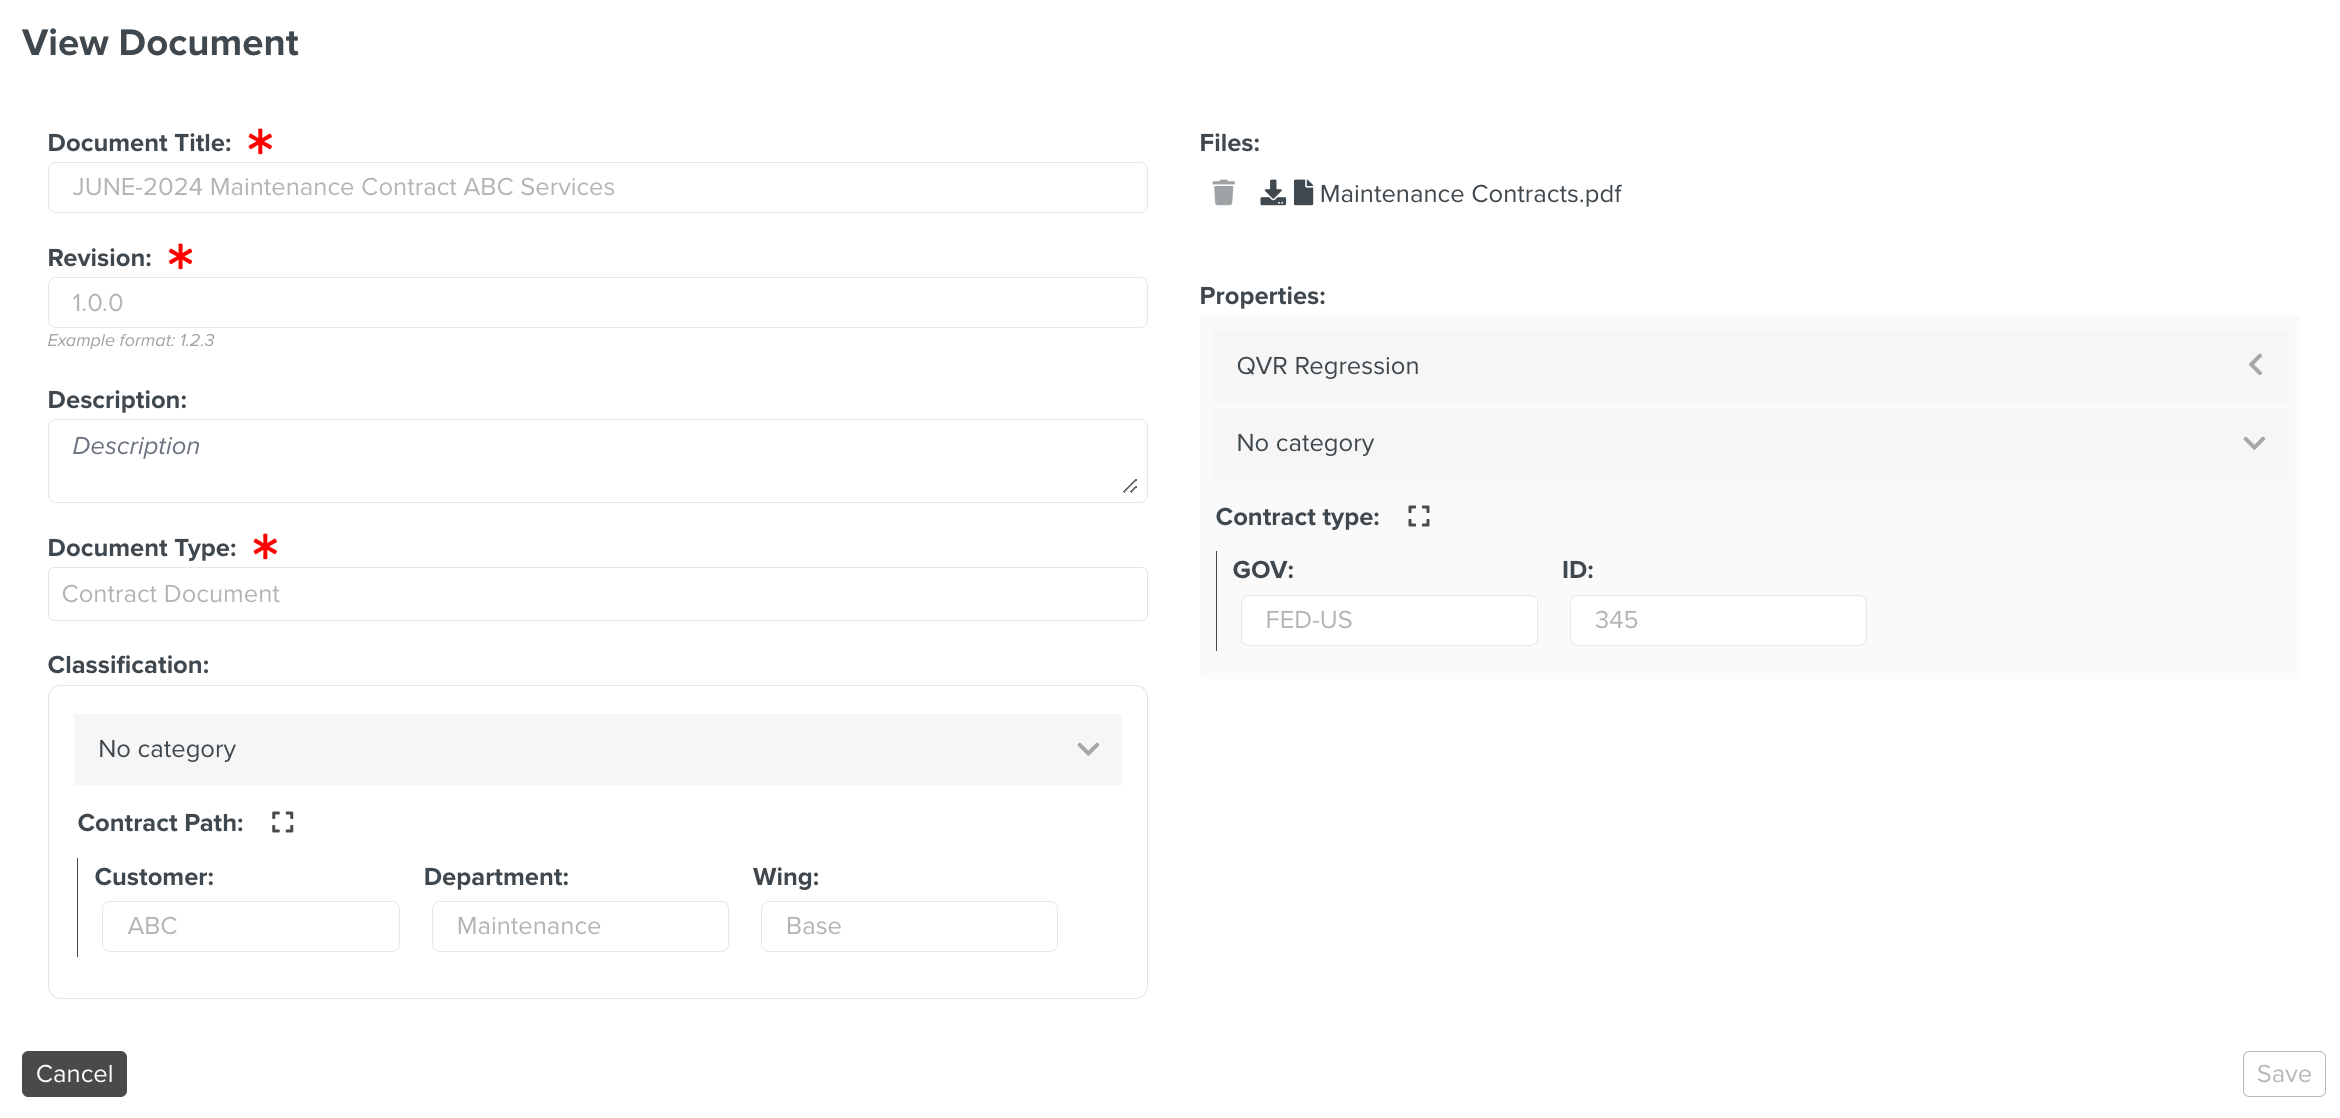
View Document
| Click the View Document icon to view the View Document screen.
| |||
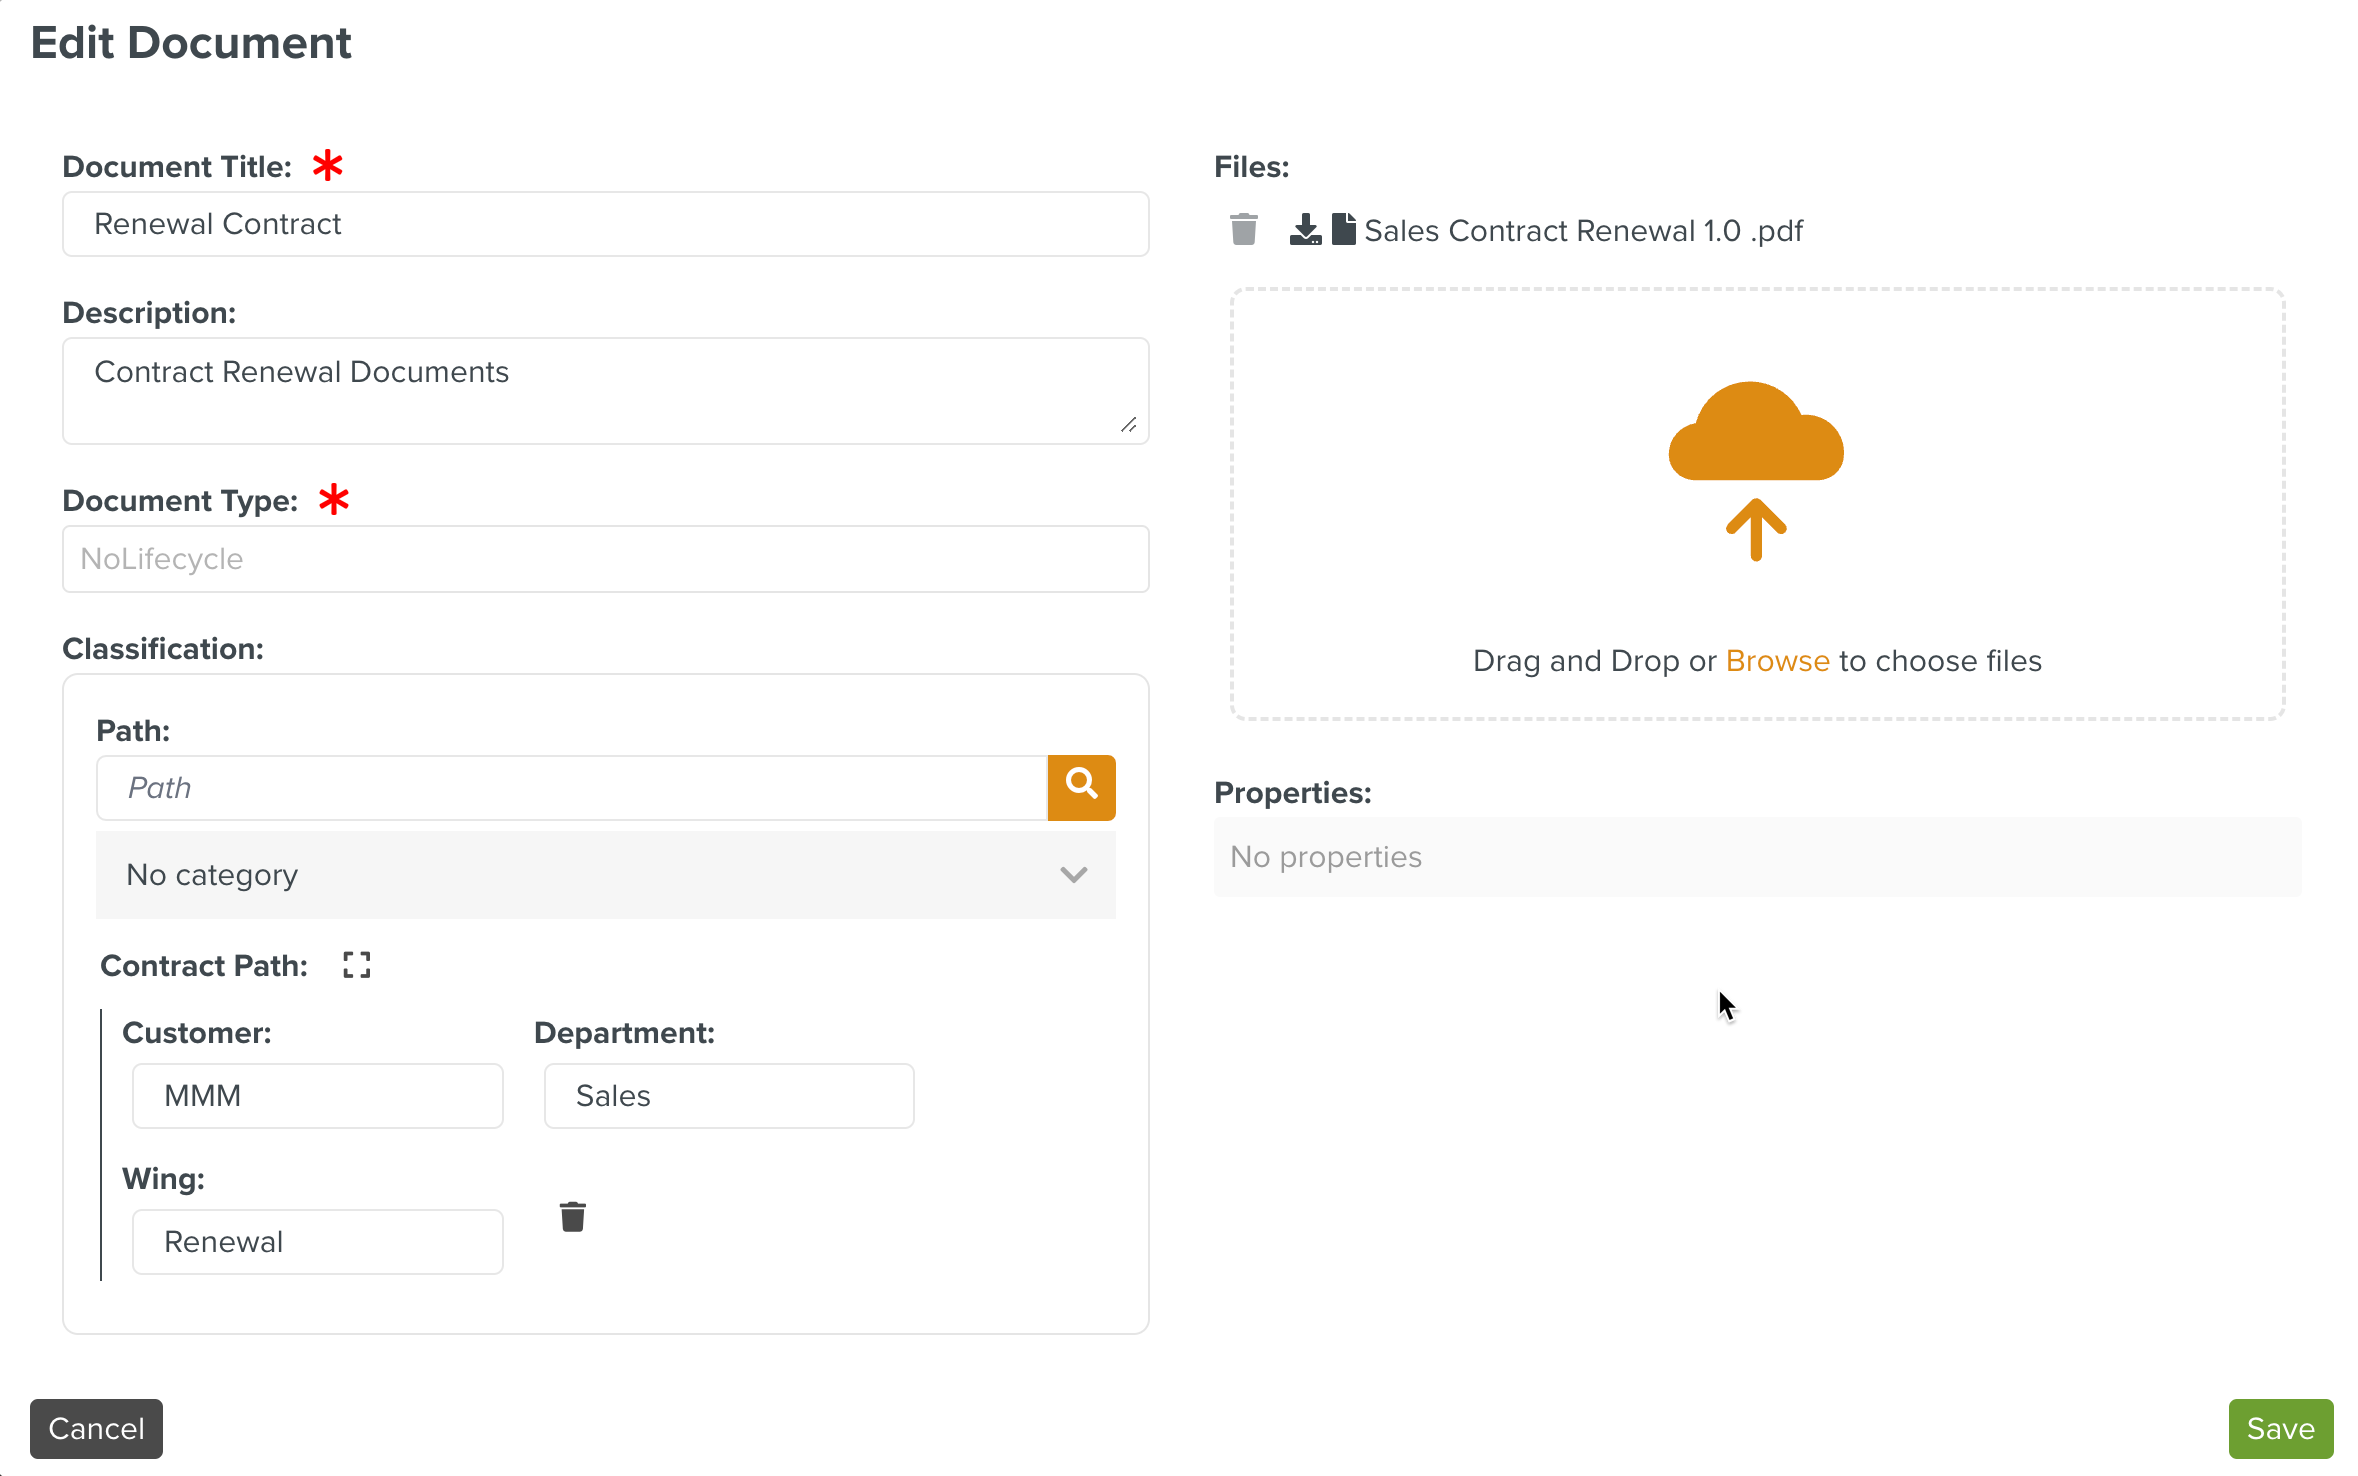
Edit Document
| Click the Edit Document icon to add or delete files and modify the details of an approved Document.
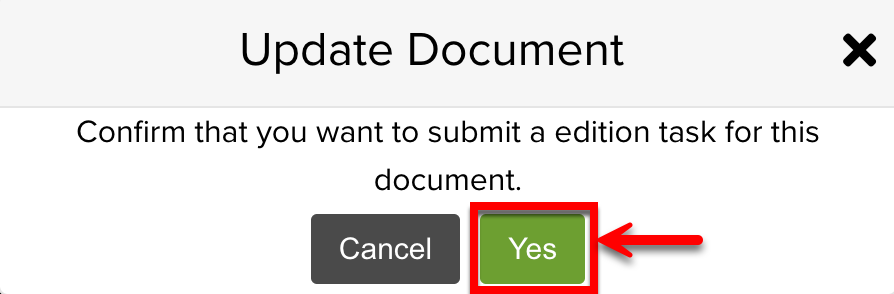
If the Document is linked to an Approval Lifecycle, the Document goes through the Approval process for update. The Document can be edited only during the Approval process.
You can use this option to edit the current revision of Documents. The Revision field is disabled and the Revision number cannot be edited.
| |||
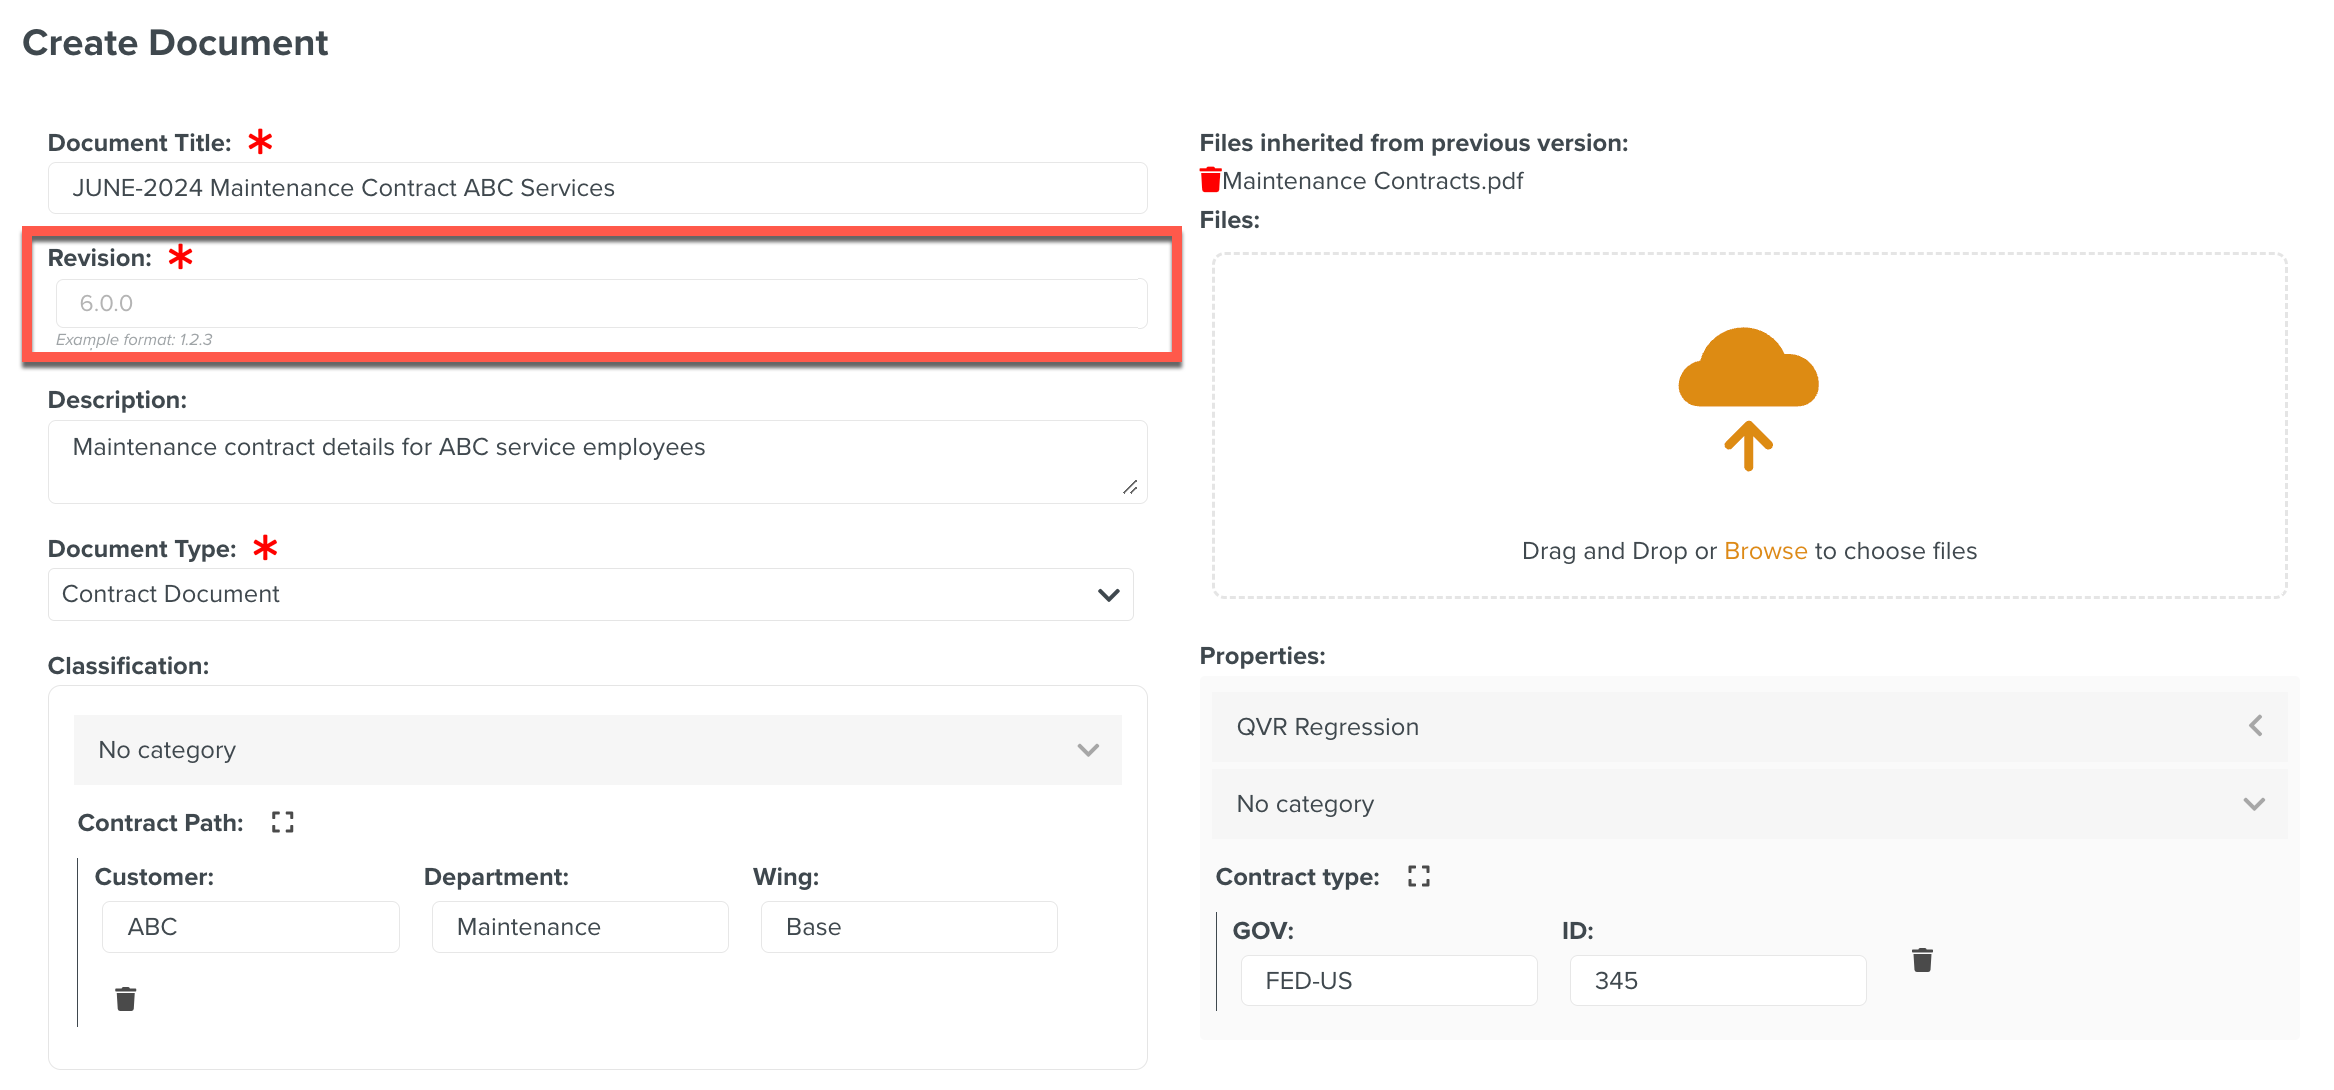
Revision
| Click the New Revision icon to create a new version of the Document. The Create Document dialog opens. You can modify the Document details and upload the new version of the Document as shown in the example below.
Fill in the Revision number that is greater than the previous version. The updated version will supersede the previous one. As shown in the above example, the format of the revision number used is 1.2.3. When you click , the new version of the Document is uploaded. If there is an Approval Lifecycle linked, the Document goes through the Approval process. | |||
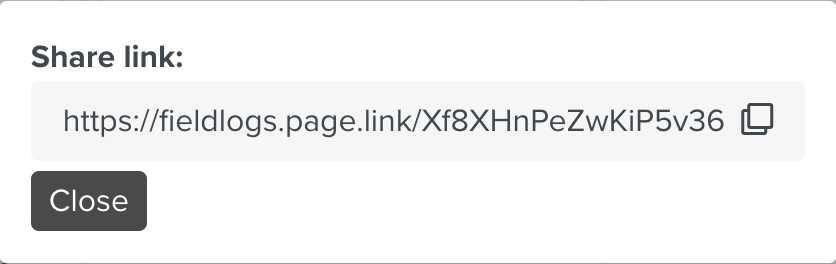
Share link
| Click to copy and share the link of the Document.
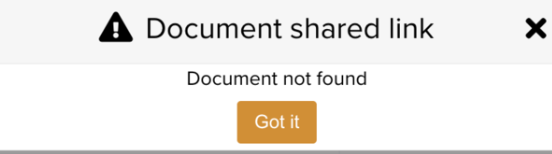
If the Document is deleted, the shared link shows a Document not found error message.
If the user has no access to DMS, then an Access denied popup is displayed.
| |||
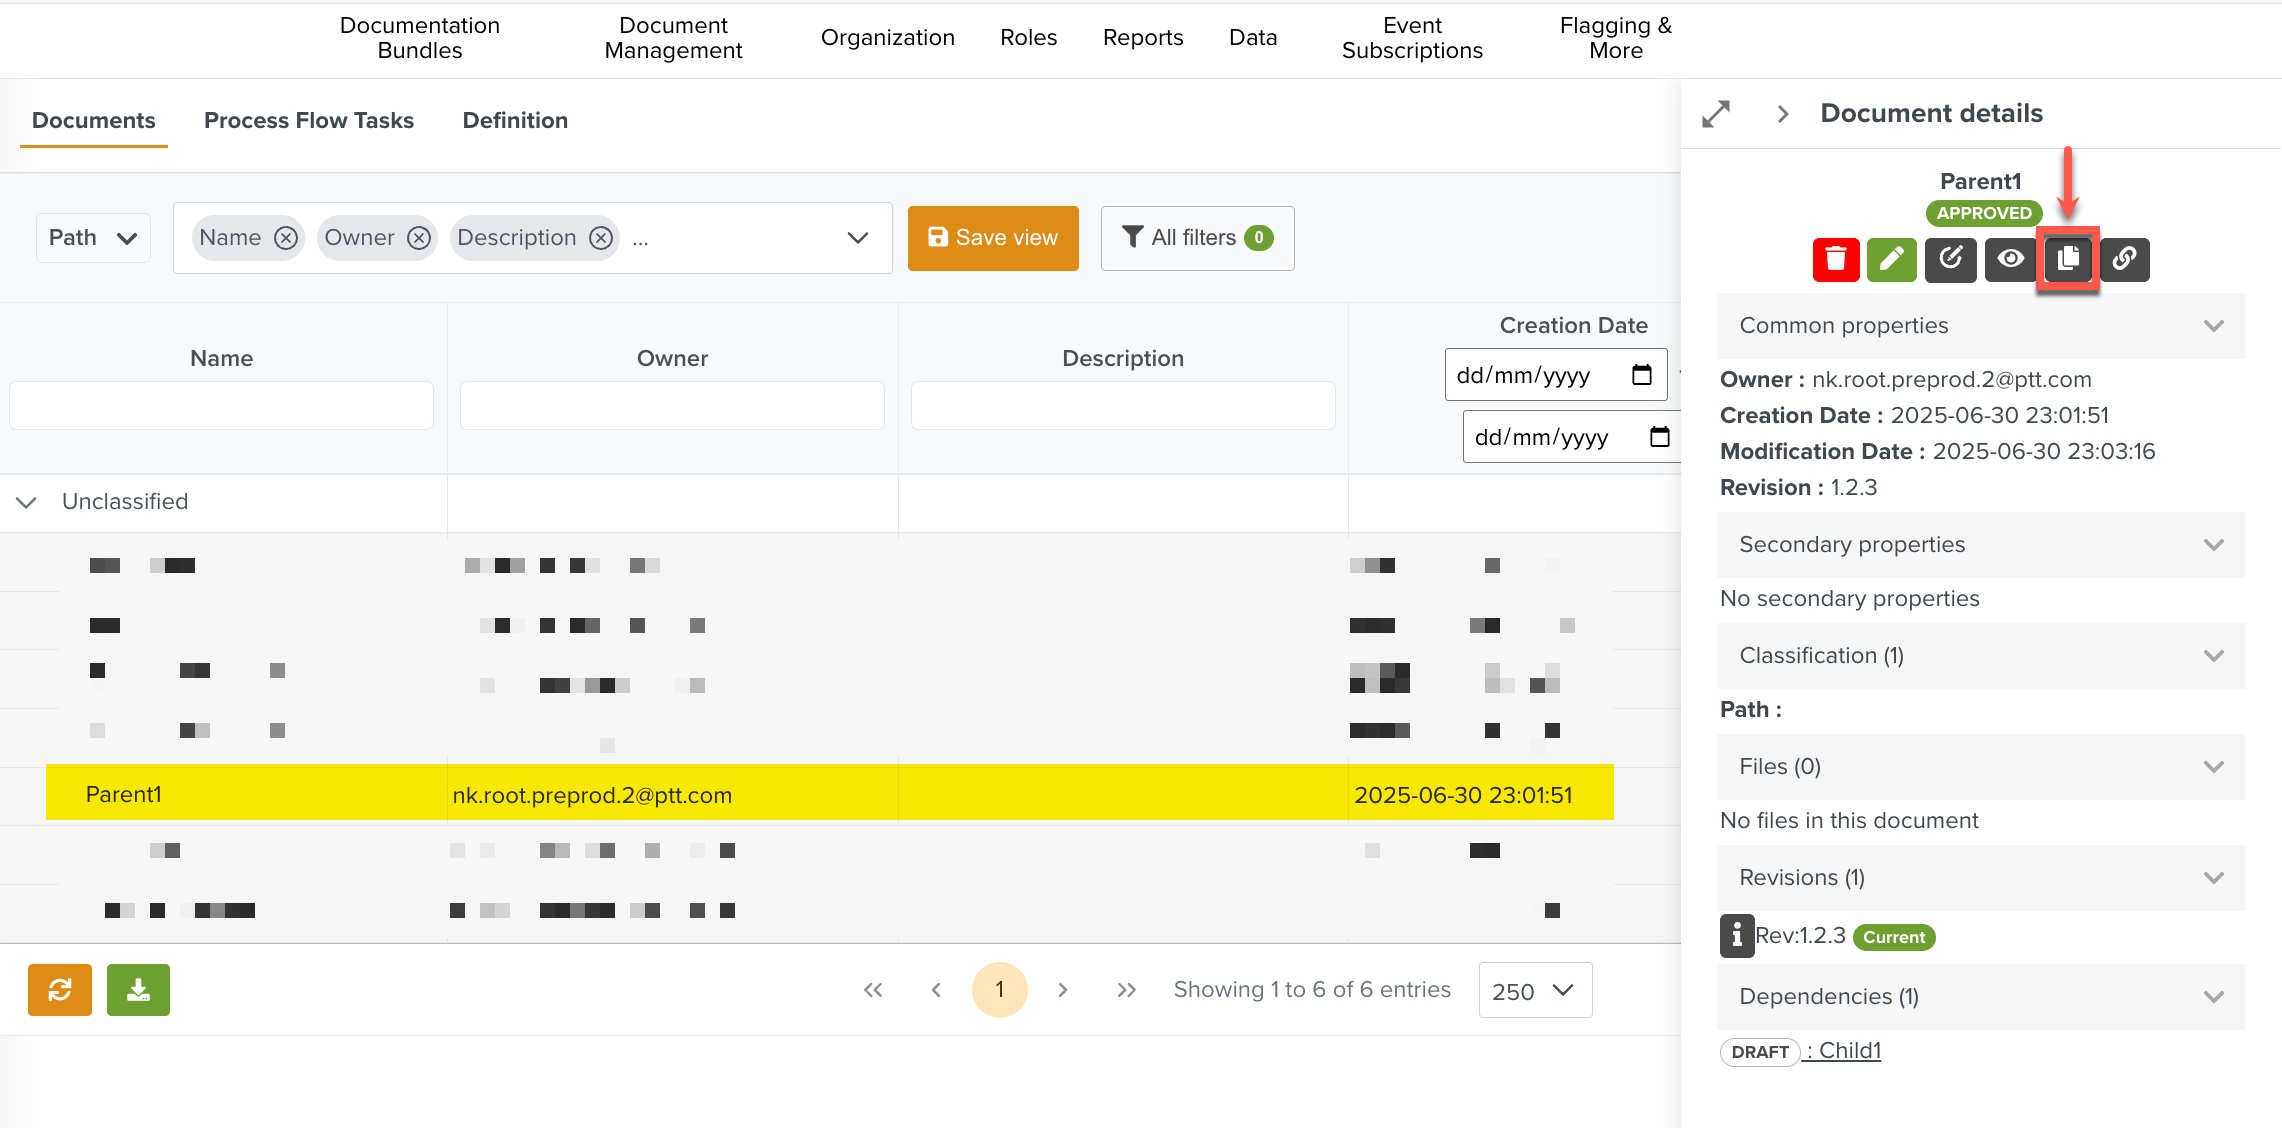
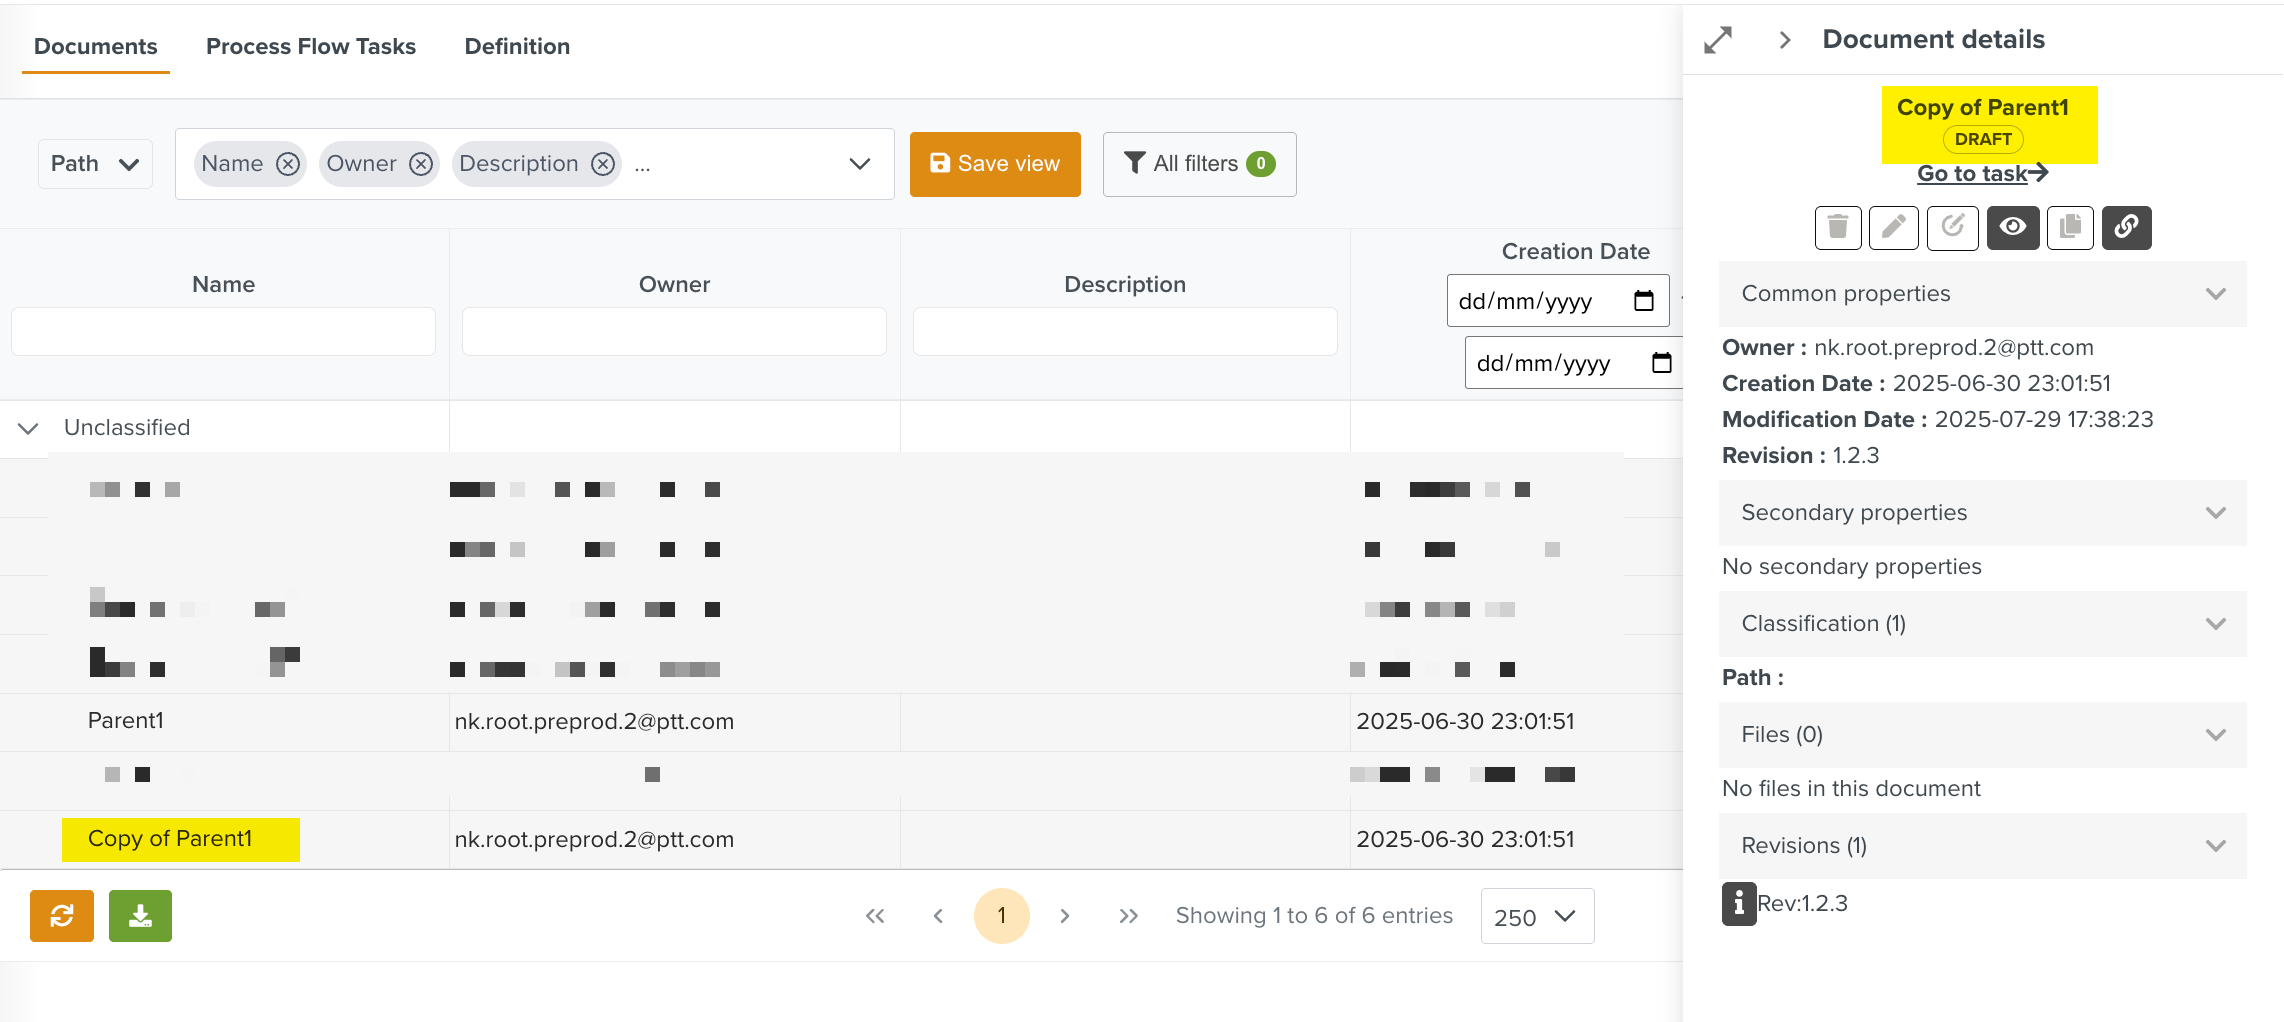
Copy
| Click the Copy button to duplicate the Parent Document.
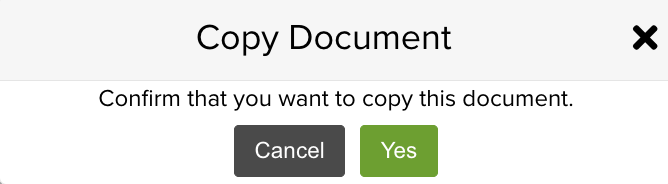
The Copy Document dialog is displayed.
When you click Yes to confirm, a copy of the Document is generated without any subdocuments. The duplicated Document is labeled as Copy and is in Draft status.
| |||
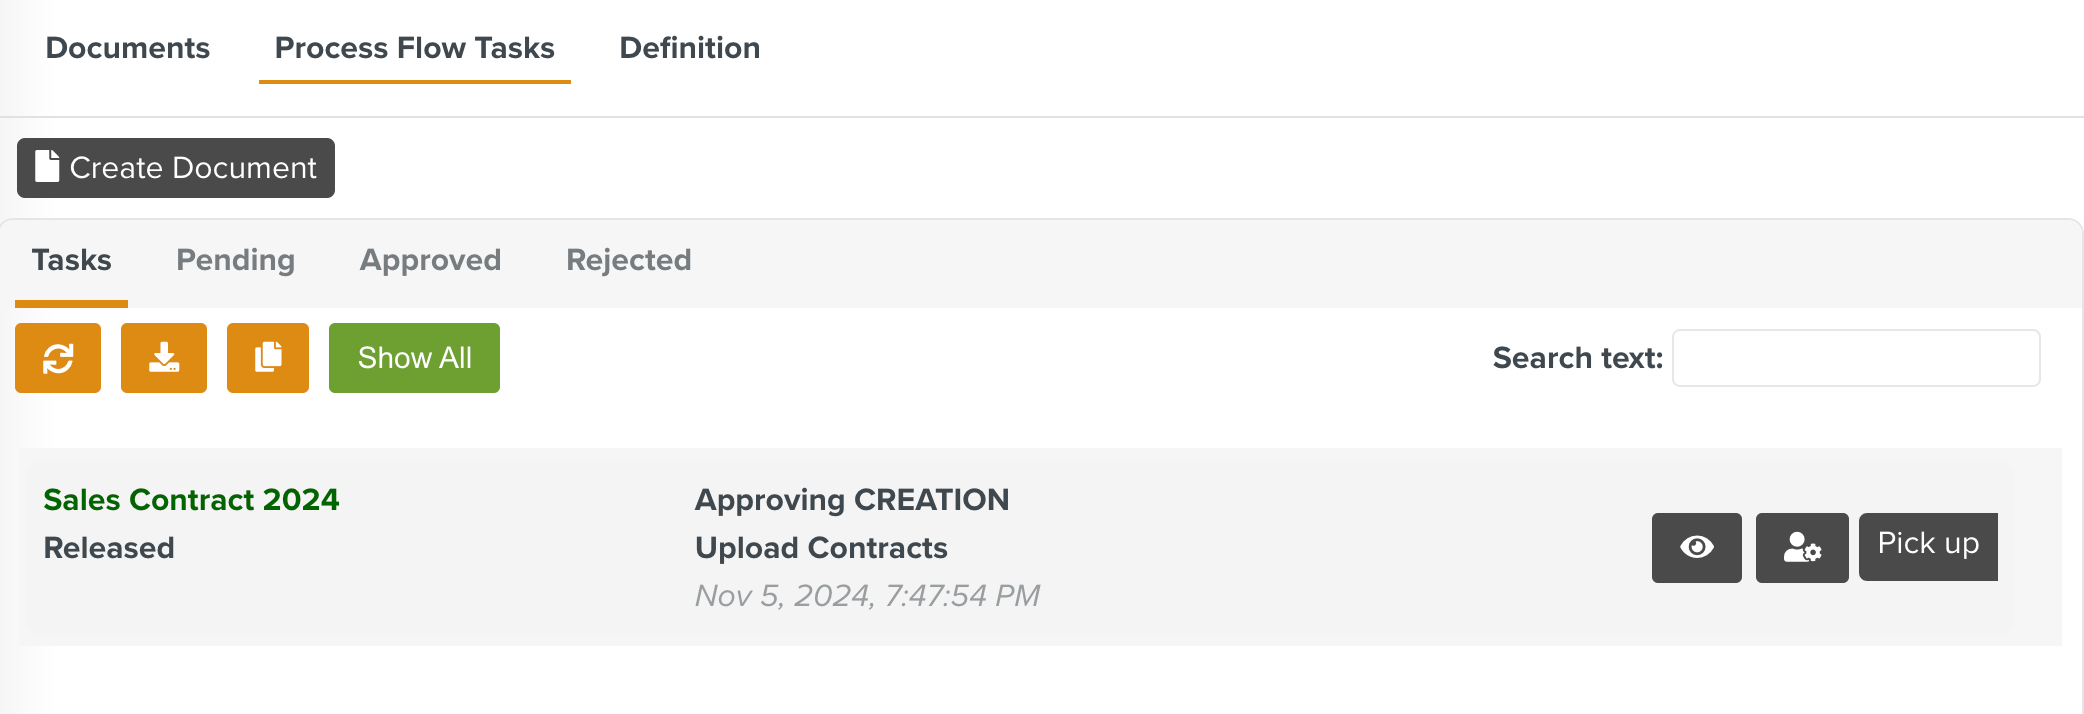
Go to task
| Click Go to task to view the associated Approval Task in the Process Flow Tasks section. This option is available for Documents in the Draft status.
NoteGo to Task option is only available on Documents that are linked to Approval Types. | |||
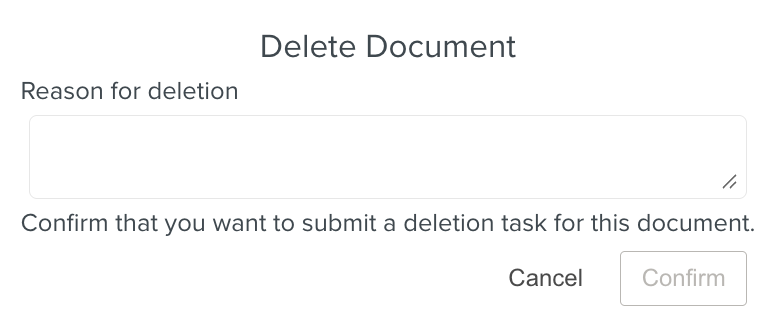
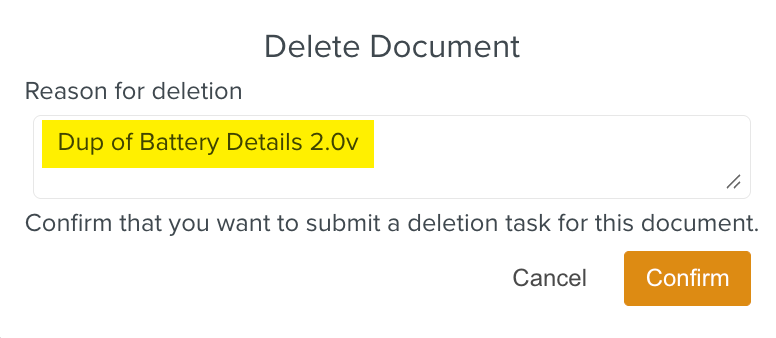
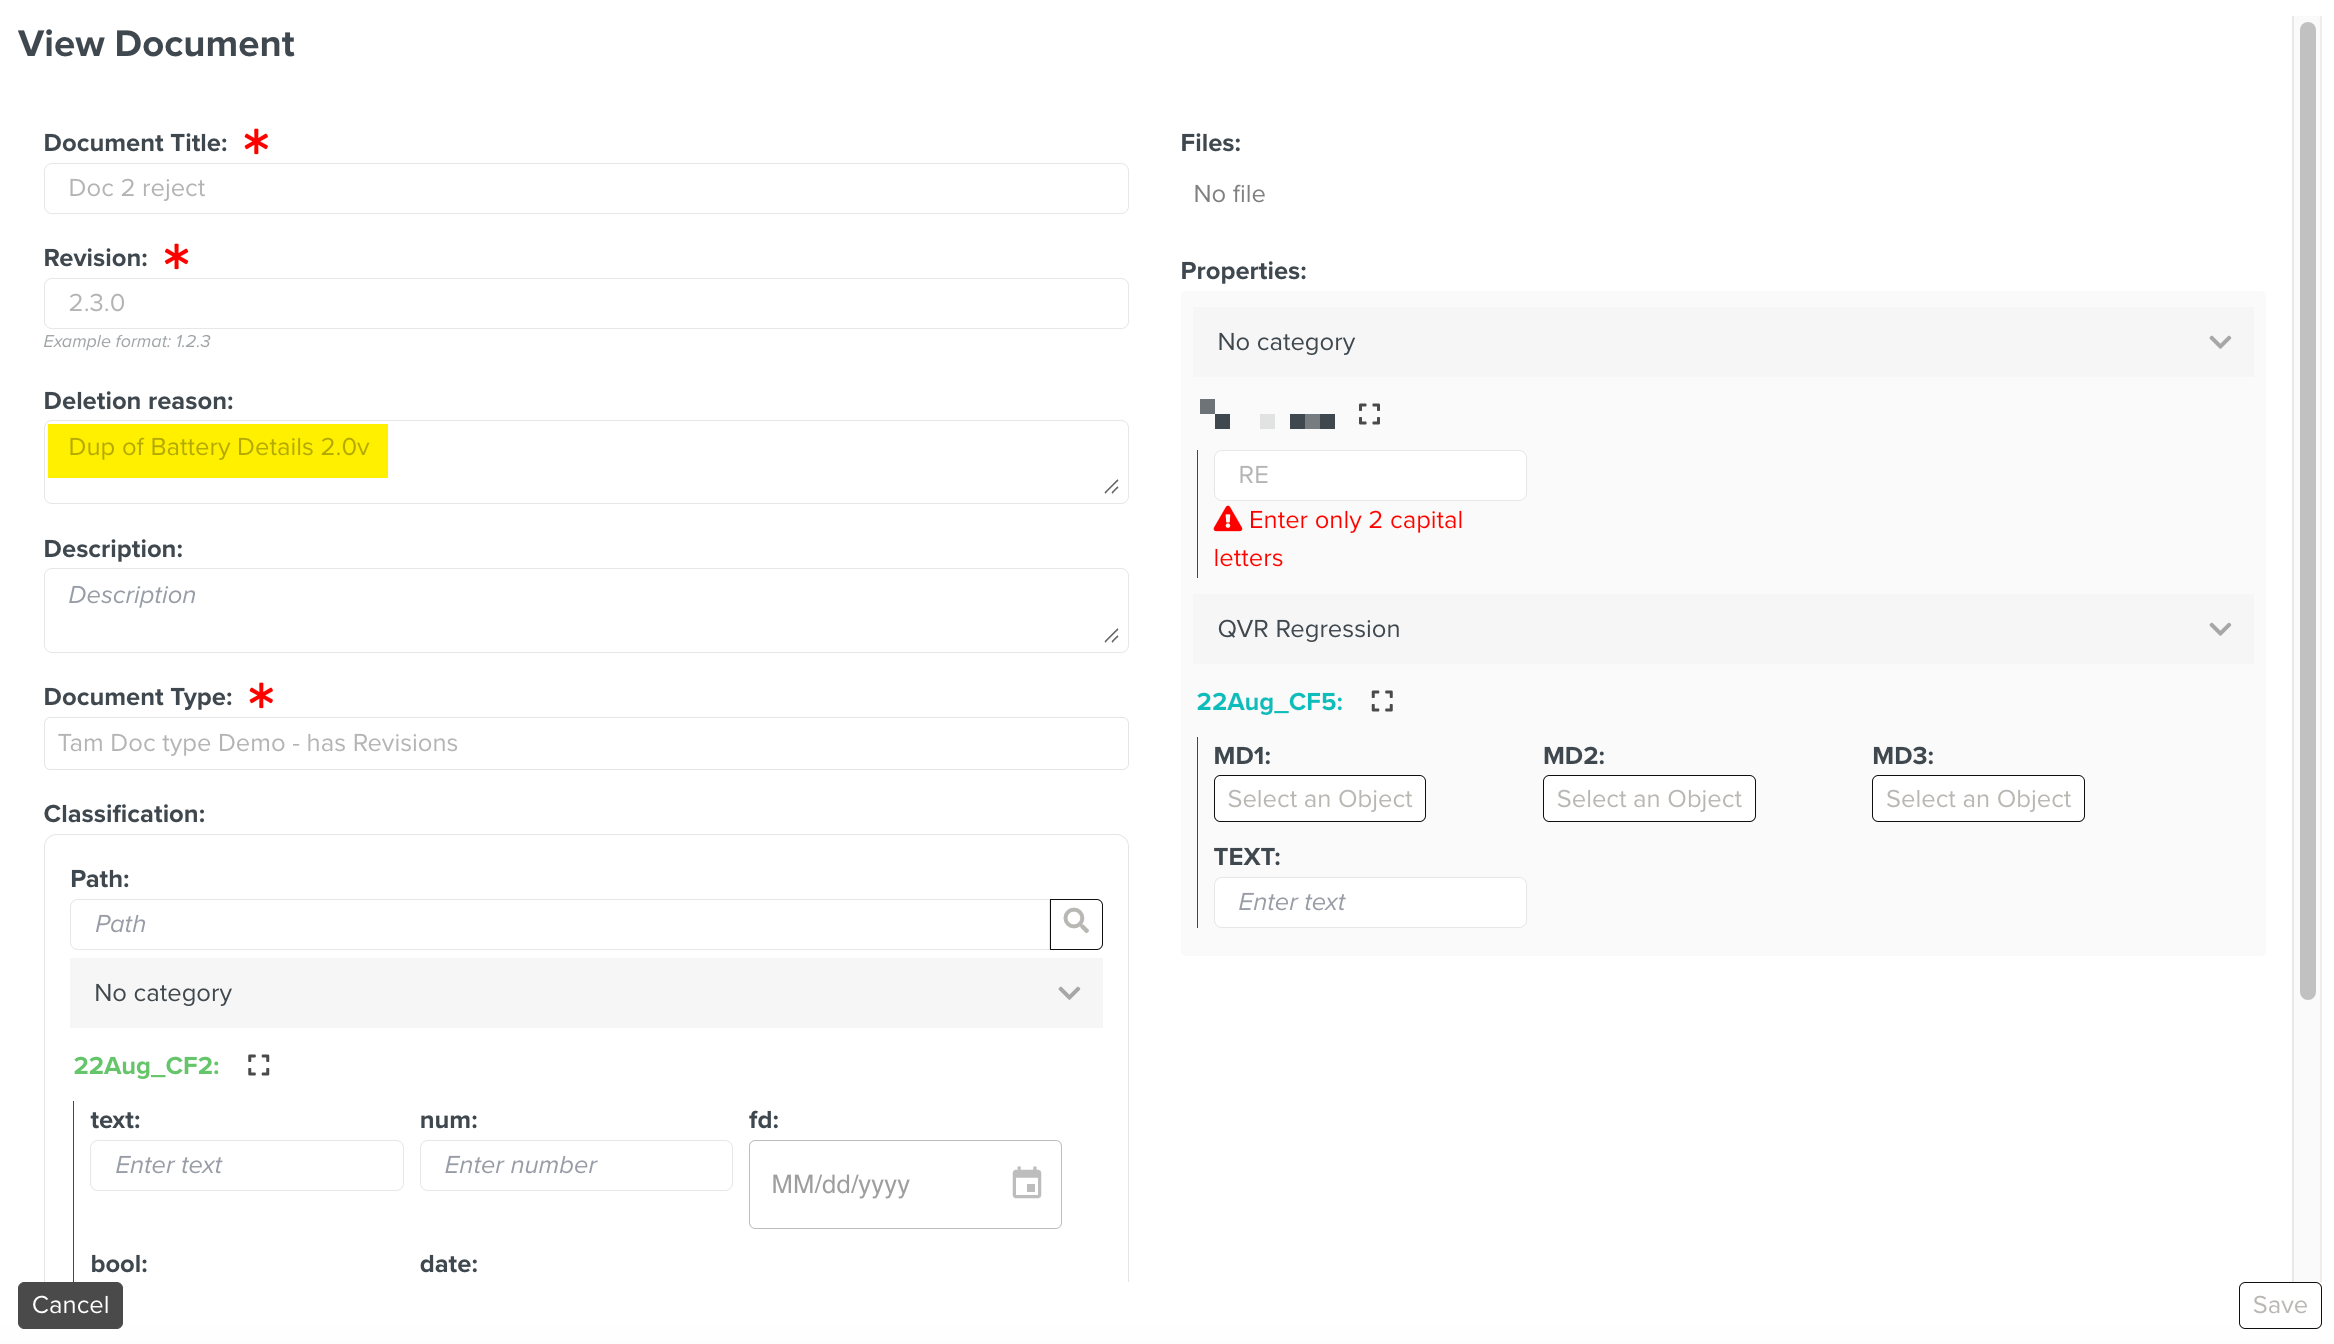
Delete
| Click the Delete icon to submit a deletion Task for the Document.
You must enter a reason for deletion as shown below.
This information is saved to the issue history.
The Reason for deletion can also be viewed in the tooltip when the user hovers over the Deleted status in the Document details. |


In addition, the following details pertaining to the Documents are displayed:
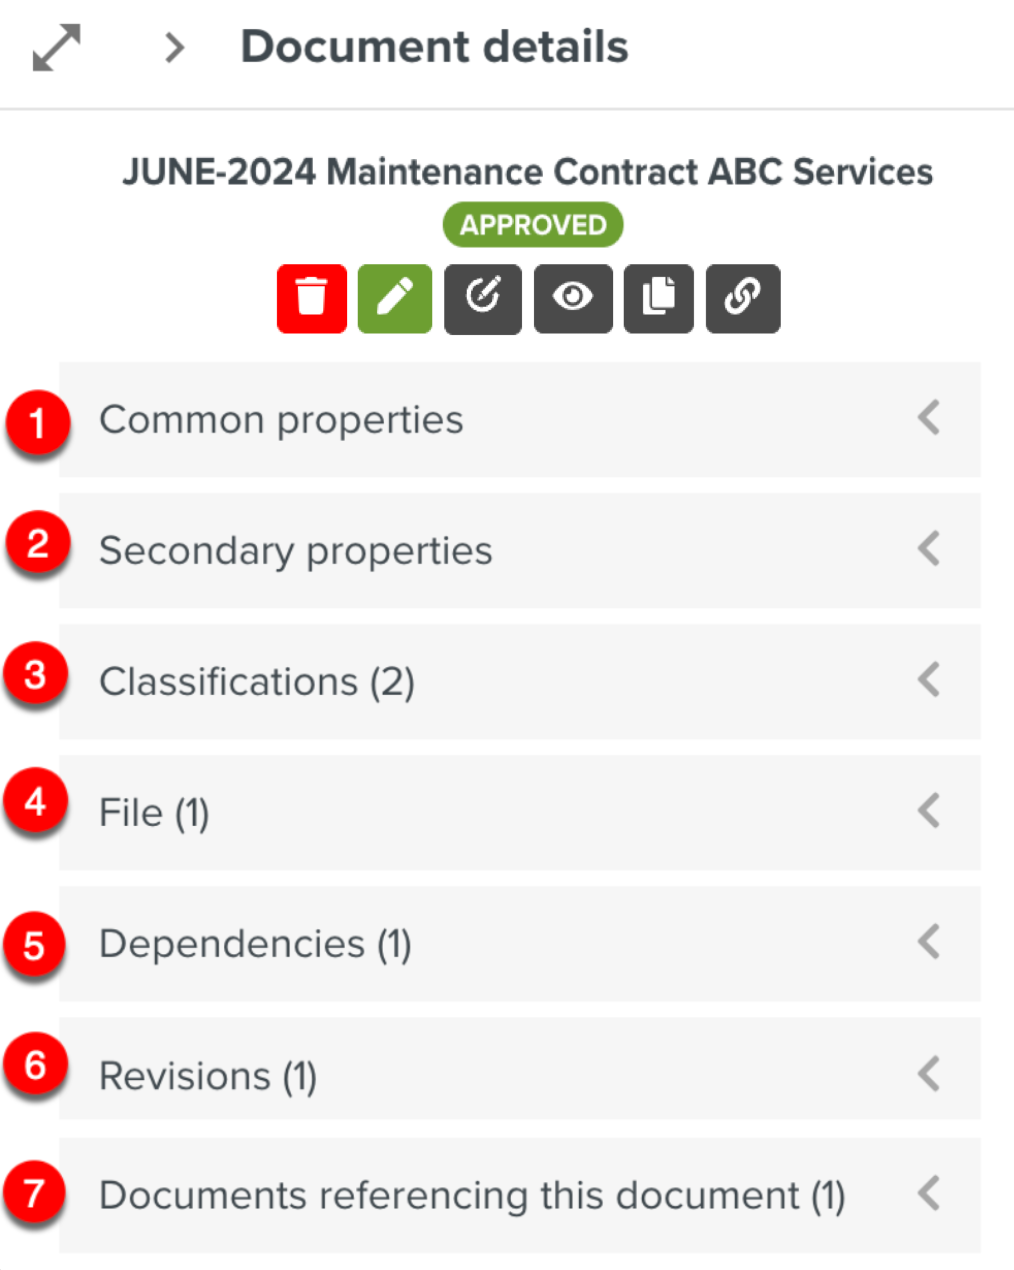 |
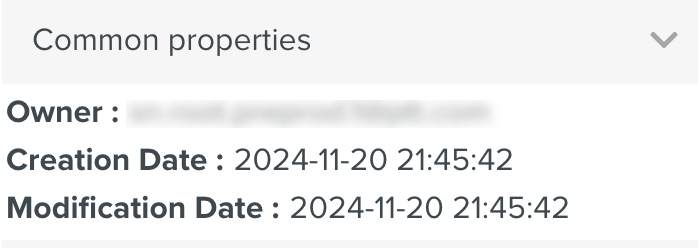
Common properties: Displays Document information such as the username of the Document owner, creation and modification date of the Document. This is common to all Documents.
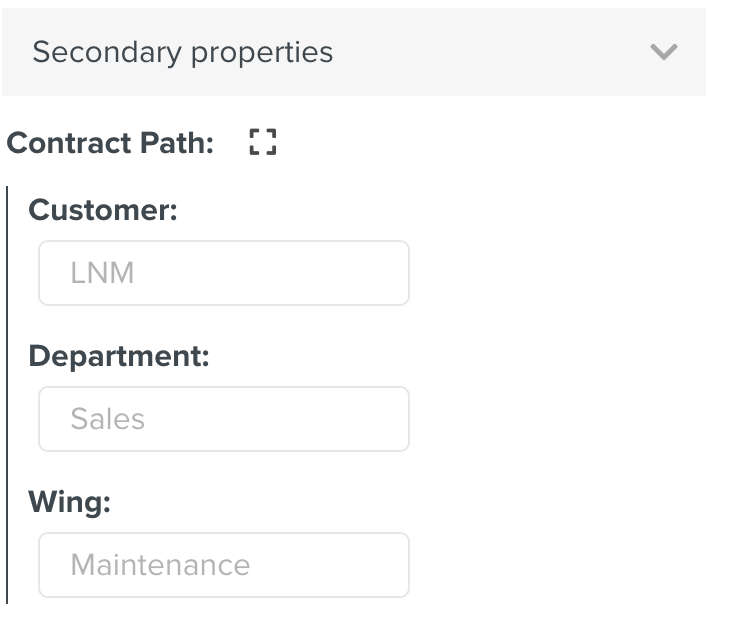
Secondary properties: Displays the Custom Fields associated with the Document. These properties can come from the Document Type and/or Document Space.
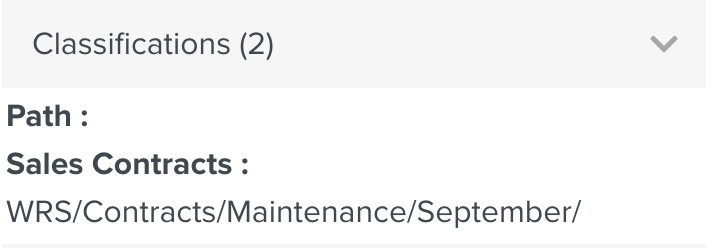
Classifications: Displays the pre-defined structure in which the Document is presented.
Files: Displays the uploaded files. Here, you can enable or disable sharing, download the Document and copy the Document link to clipboard.
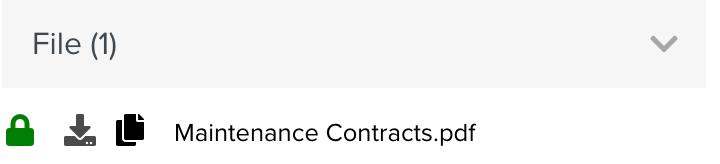
As shown in the below example, you can enable or disable sharing link by clicking on
 .
.

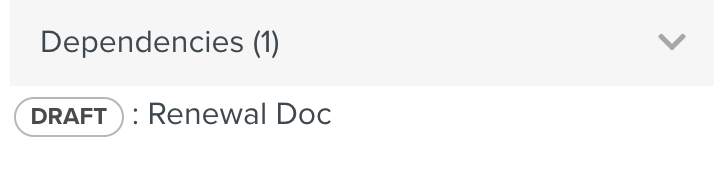
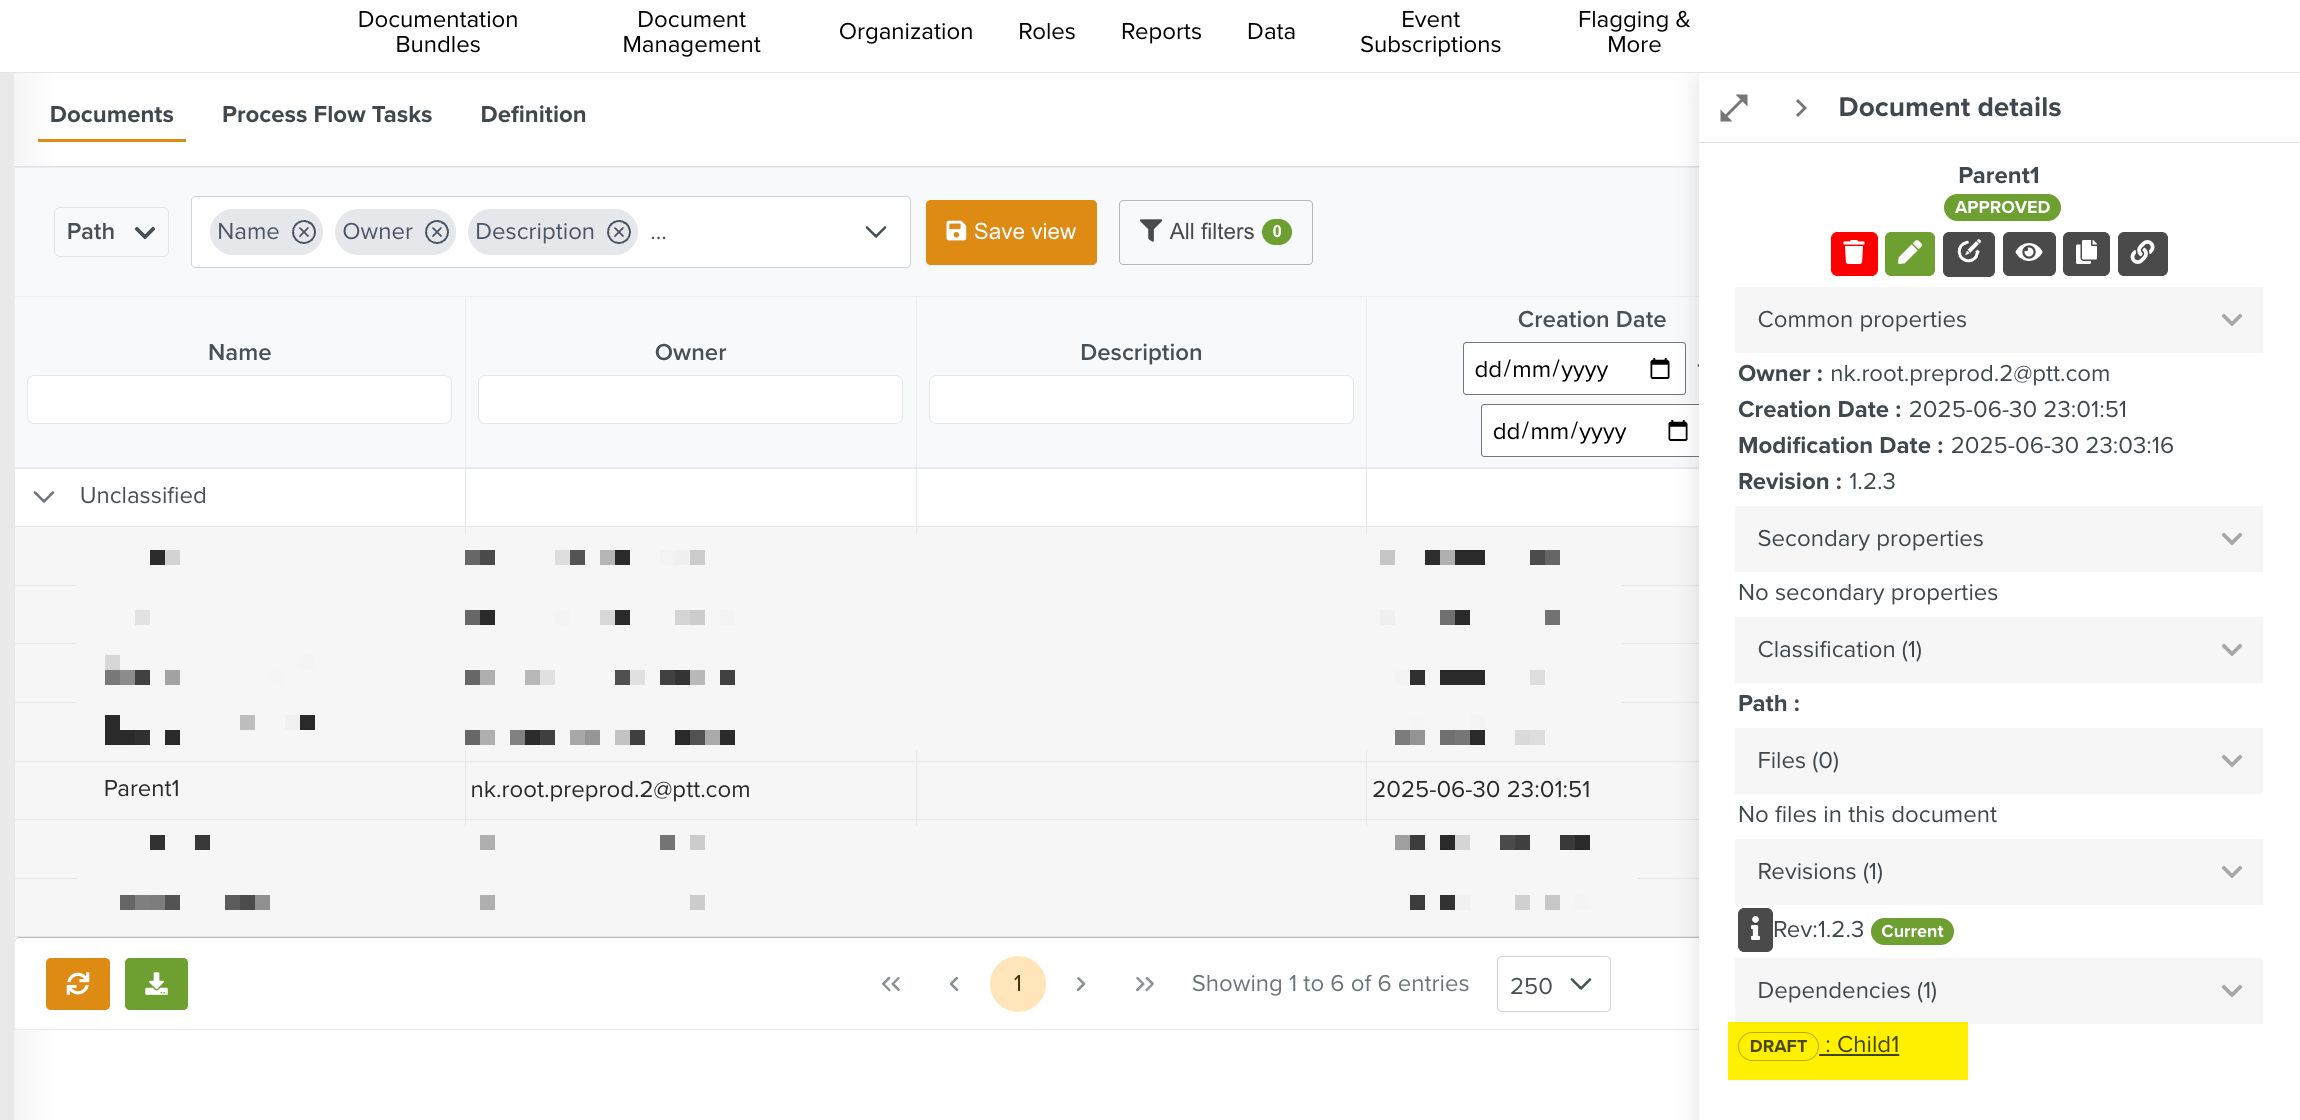
Dependencies: Displays the details of the Dependent Documents. A Dependent Document refers to a document that is linked to a parent document.
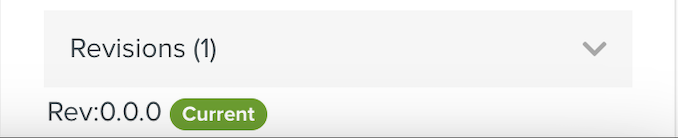
Revisions: Displays the revision numbers of the Documents and highlights the current revision.
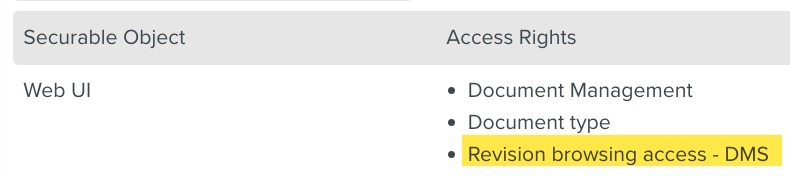
Enabling the Revision browsing access- DMS grants access to view the content of all available Document revisions.

Click
 to view the Document details.
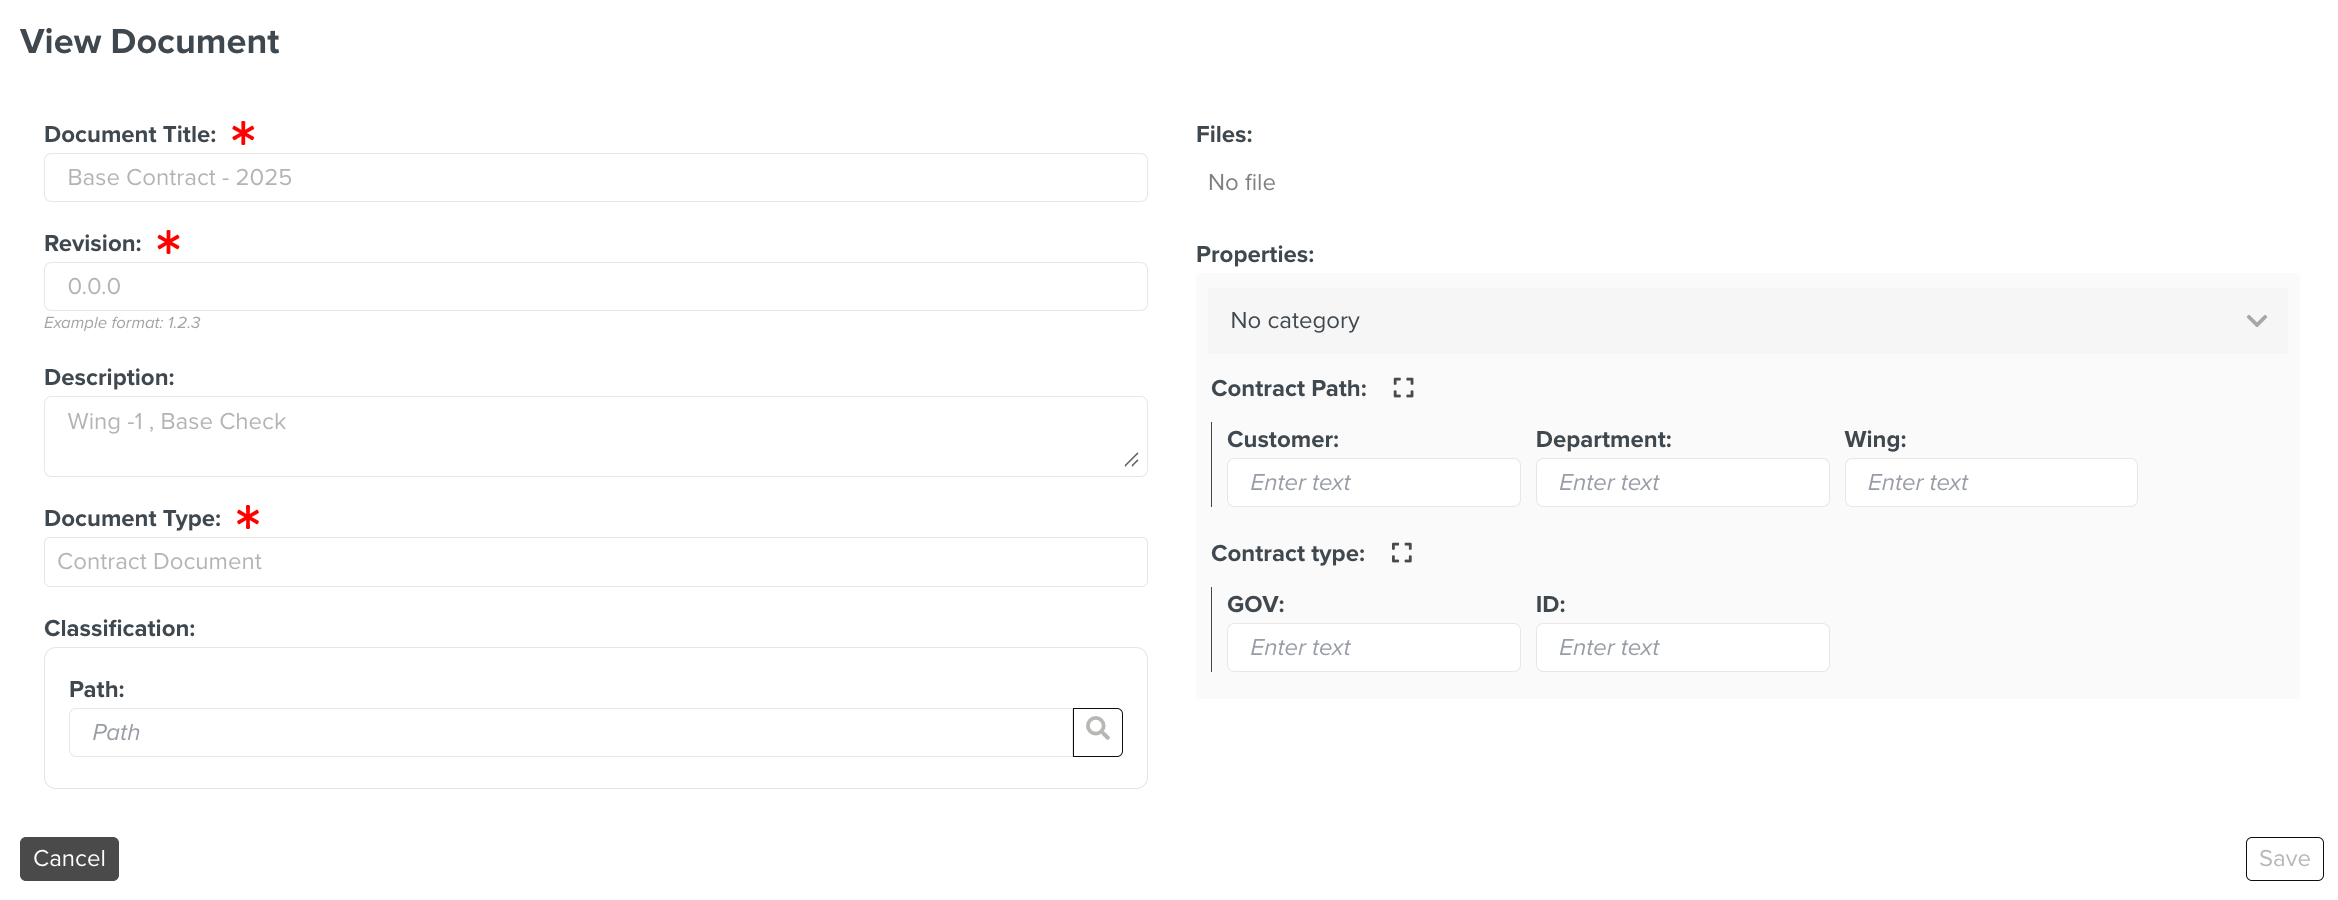
Note
You can create a Document with its initial version number as 0.0.0.
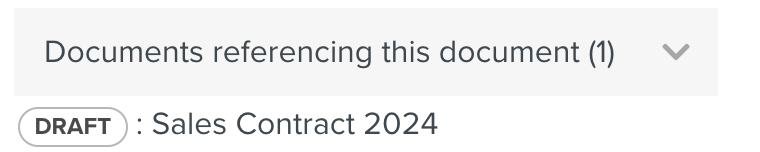
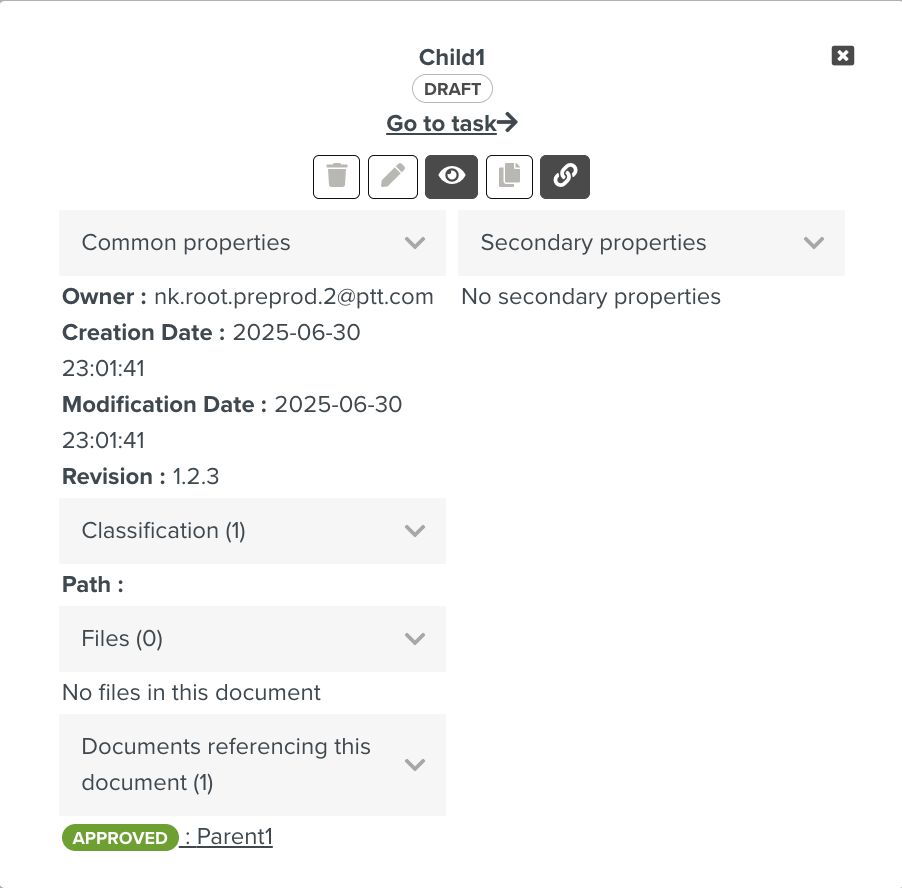
Documents referencing this document: Displays the details of the referencing Document to which this Document is added as a dependent Document.
You can access a dependent Document from the parent Document by clicking the Document link under Dependencies.
 |
On clicking the link, the dependent Document details are displayed in a separate dialog.
 |
You cannot make changes to a versioned Dependency Document. The delete and edit options are disabled, as shown below.
 |
You can invalidate an Approved Revision of a Document if required. This corrective action is taken when a Document was approved by mistake, or if an error was found in the Document after approval.
Note
Invalidating a Revision can be done only on a Revision that is Approved. It cannot be performed on a Revision with an Approved Pending status. In addition, at least one previously approved version is required for the invalidation.
Invalidating a Current Revision makes the previous Revision the Current Revision.
To Invalidate a Revision, the user must be associated with a Role that has the access right Revision browsing access- DMS.
 |
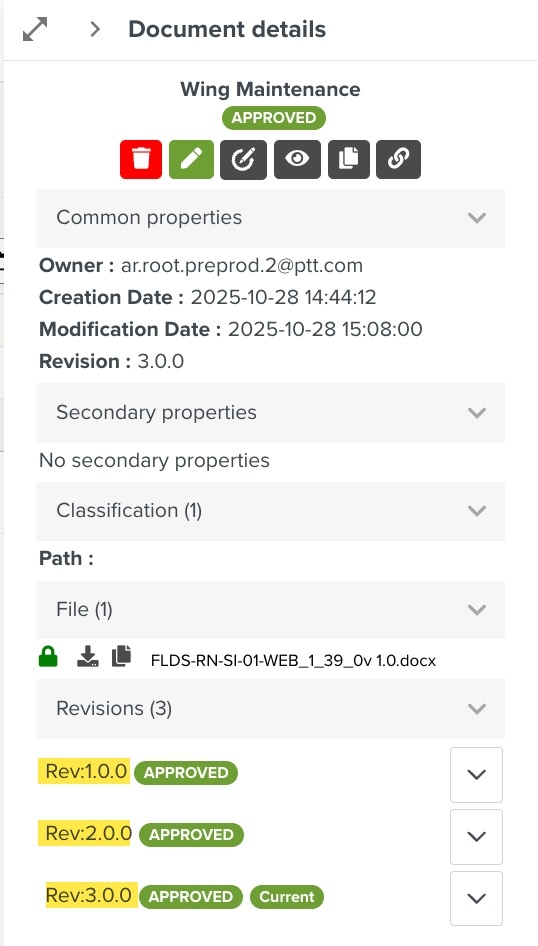
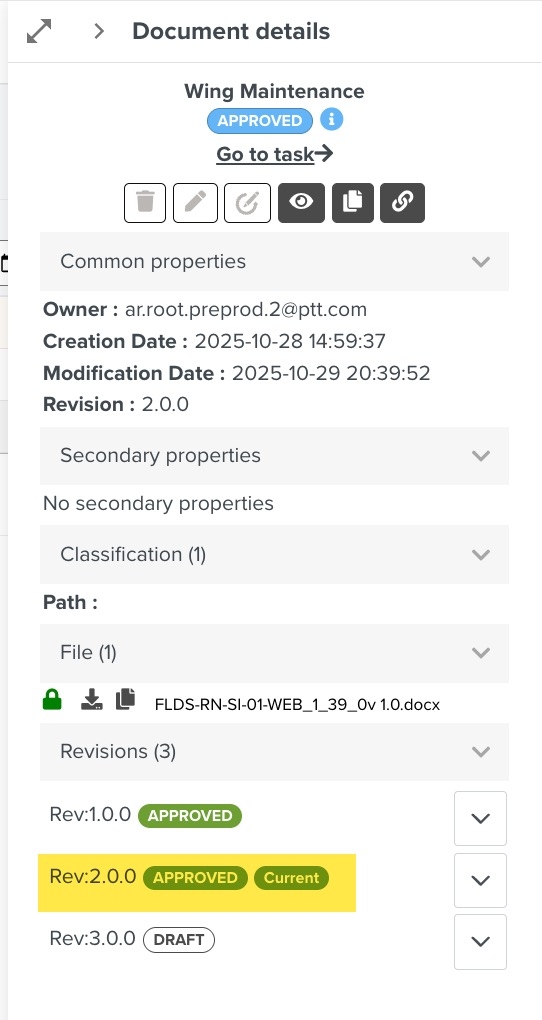
In the example below, the Document Wing Maintenance has three Revisions. Rev:3.0.0 is the current Revision.
 |
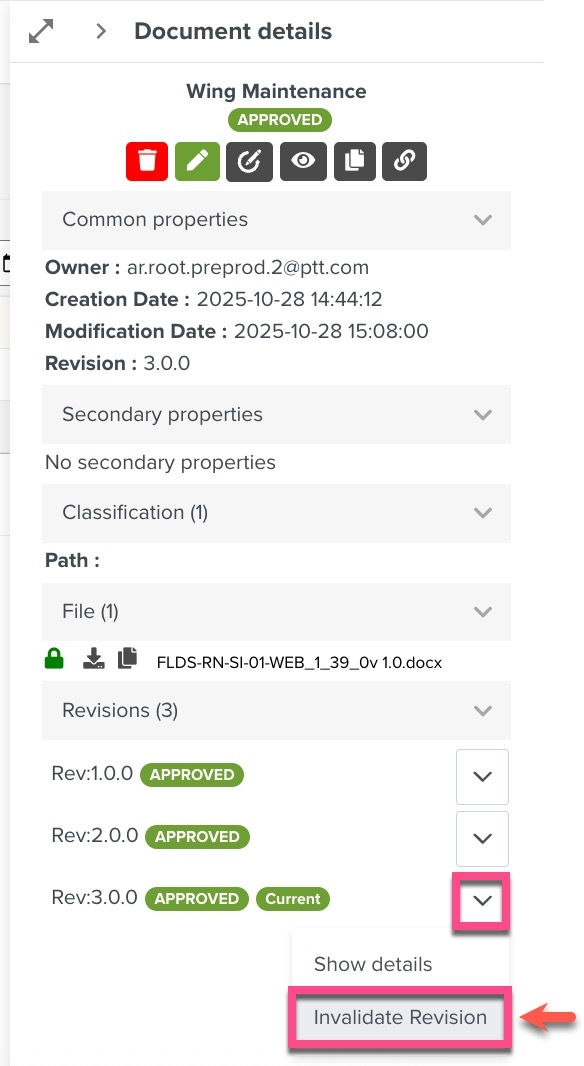
To invalidate this Revision, click the Invalidate Revision option from the dropdown, as shown.
 |
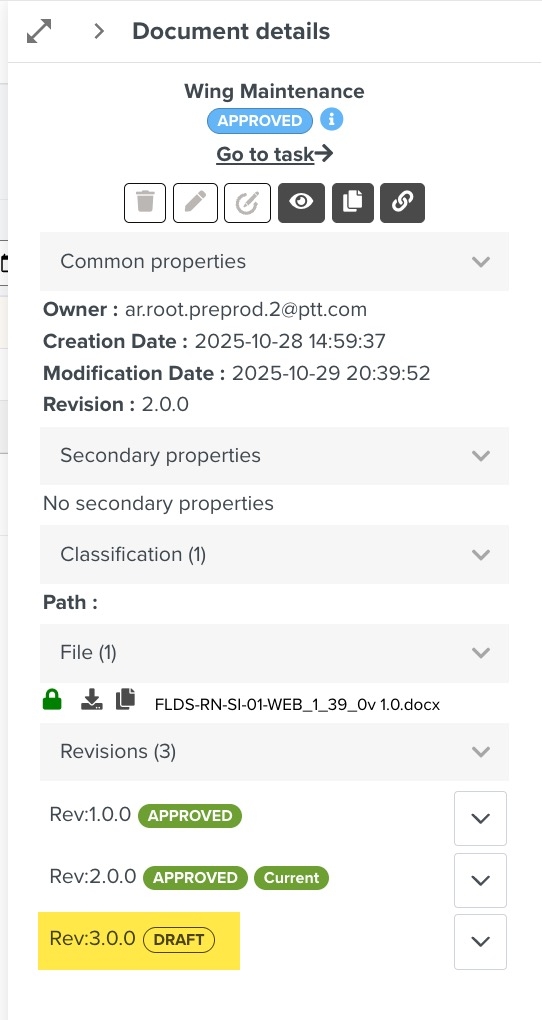
This invalidates Rev:3.0.0 and moves it to the Draft status. A Process Flow Task for the approval of the Invalidated Revision is also created.
 |
 |
The previous Revision, Rev:2.0.0 becomes the Current Revision.
 |