Using Time Tracking
The Time Tracking feature can be used to track execution time. This is the time spent on each Step of the Task at Runtime. In some Enterprises, Time Tracking in real-time is called Labor time or Clock In/Out Time.
The Time tracked can be of two types.
Automatic - The time tracked in the system during Task Execution.
Manual - The time entered manually by the user during Task Execution.
Setting up the Estimated duration at the Template and the Step level is used In the Time Tracking Summary.
Automatic time is the time tracked during runtime when the execution starts/stops automatically or by initiating the execution manually.
The icons shown are used during the execution to track the Automatic Time in addition to the Auto Start/Stop by the system.
 |
 |
Note
The start/stop icon is only available if the Step has an estimated duration set.
FieldLogs begins tracking time automatically when one of the following occurs:
When a Step is answered/validated, automatic time tracking is started at the Step or the Parent Step depending on where the estimated duration is set and stopped on a Step outside of the hierarchy.
When the container Step is answered, automatic time tracking is stopped.
When a signoff is done on a Step /PIN sign entered/flag raised /blog is added on a Step, automatic time tracking is started on the Step or the Parent Step depending on where the estimated duration is set and stopped on a Step outside of the hierarchy.
Manual Time is the time that is manually entered in the Step by the user during the execution of the Task. This can be done in the following ways.
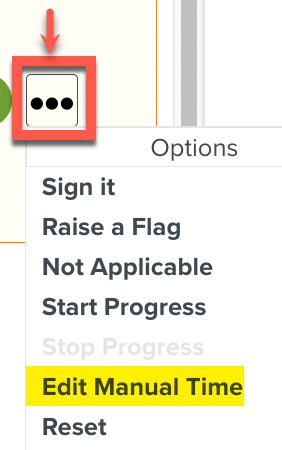
Using the Edit Manual Time during the execution of the step.
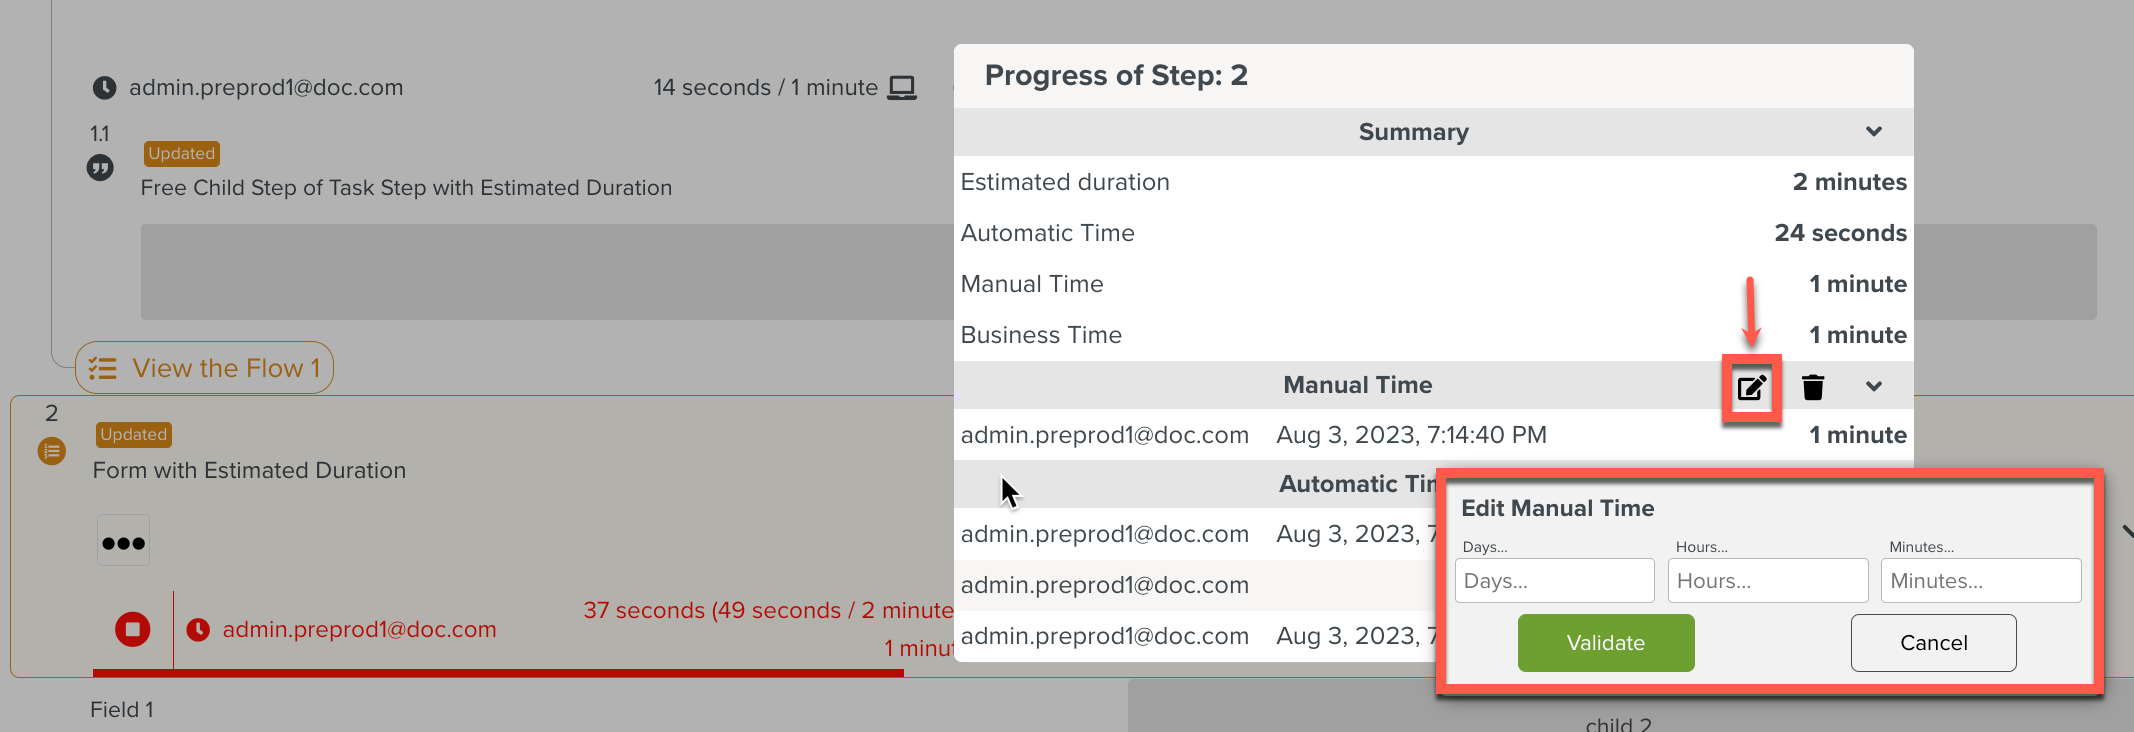
Using the Manual Edit icon from the Step Progress Summary.
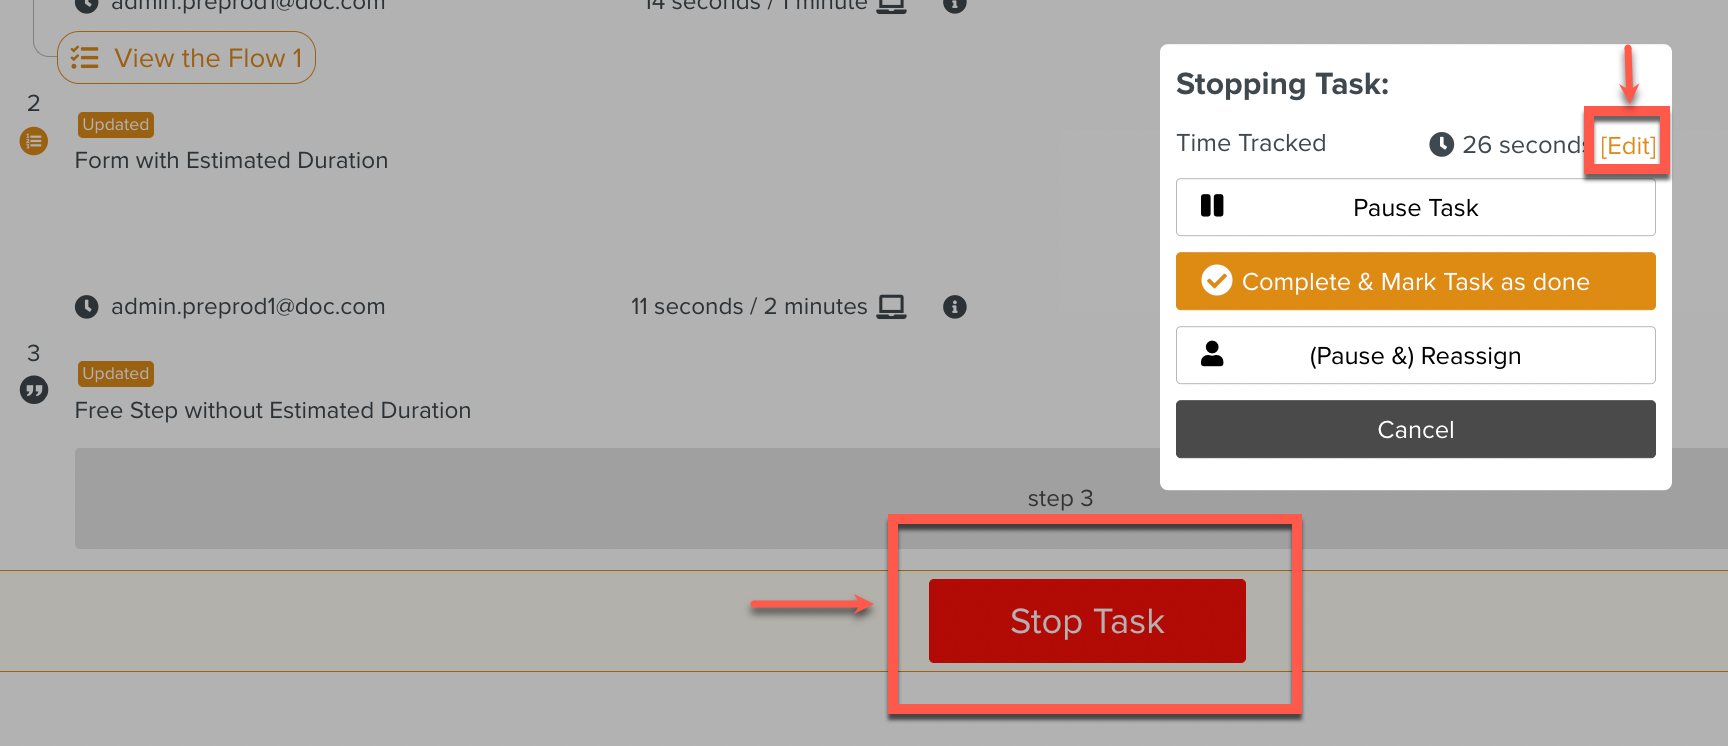
Using the Manual Edit icon from the Stop Task popup.
During the process of Setting up a Template, the Total Template Run Estimate Duration is added to track the time taken to run the Task.
To set up the Estimated Duration for a Template:
In the
 Templates Information Editor, expand the section .
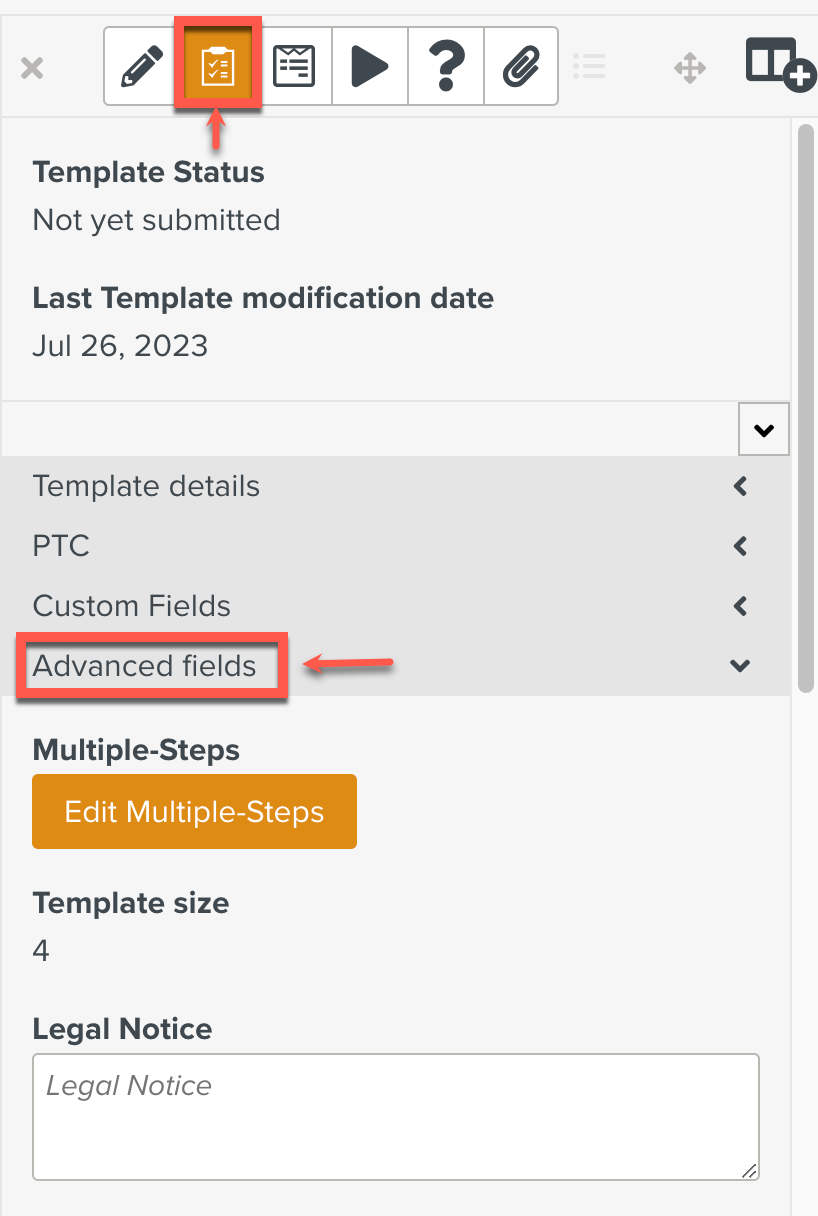
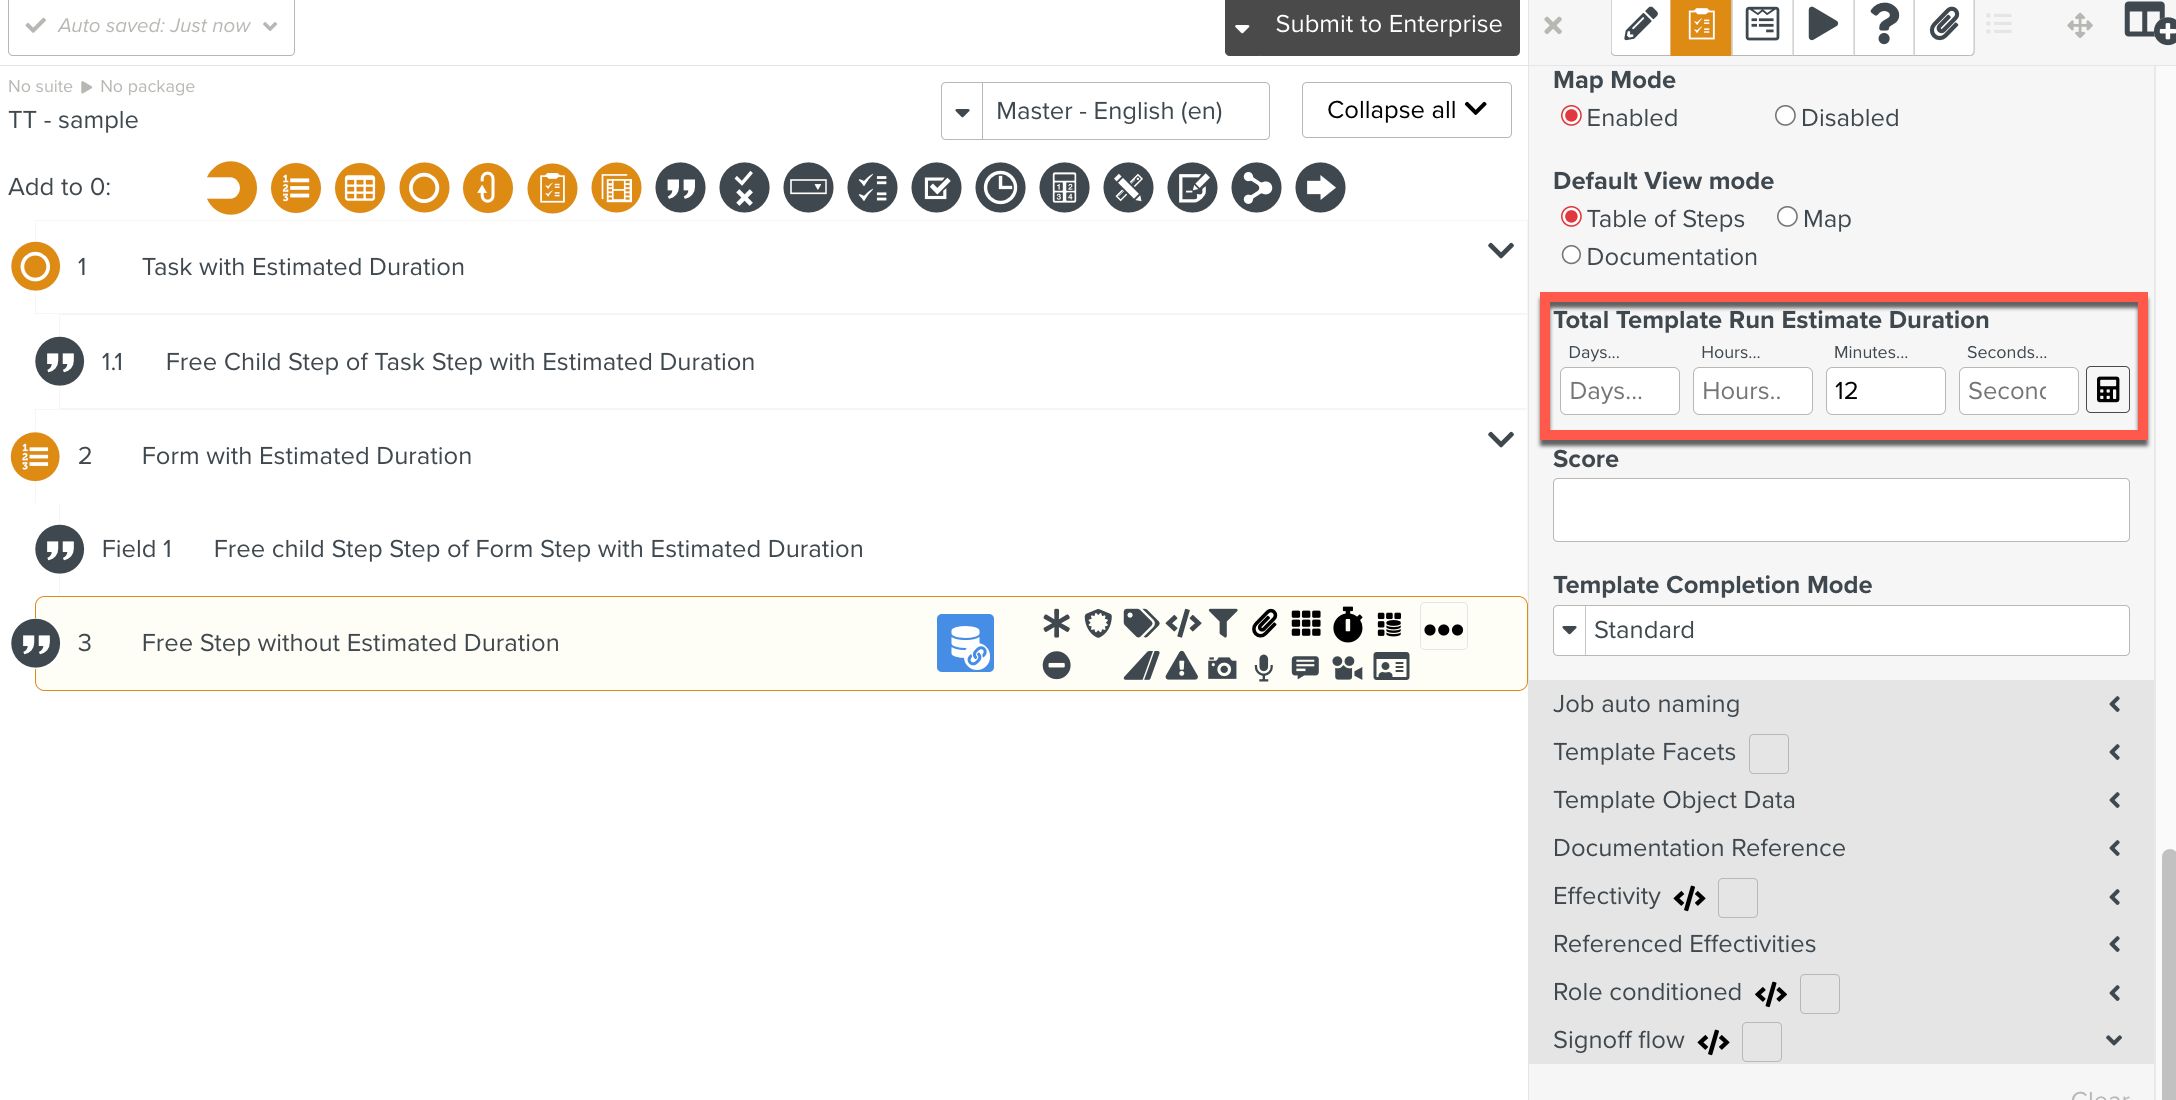
Enter the Total Template Run Estimate Duration. This is the total Estimated Duration on the Template definition.

Clicking the calculator button
 adds the Estimated Duration set on all the Steps of the Template and populates that sum in the Total Template Run Estimate Duration field.
Click Save.
The Estimated Duration for the Template is set.
The Estimated Duration can be set on any of the container Steps or Input Steps. The Estimated Duration set at the Step Level is taken into account for the Task and Step Progress Summary.
To set up the Estimated Duration for the Steps:
Click the Step editor icon.
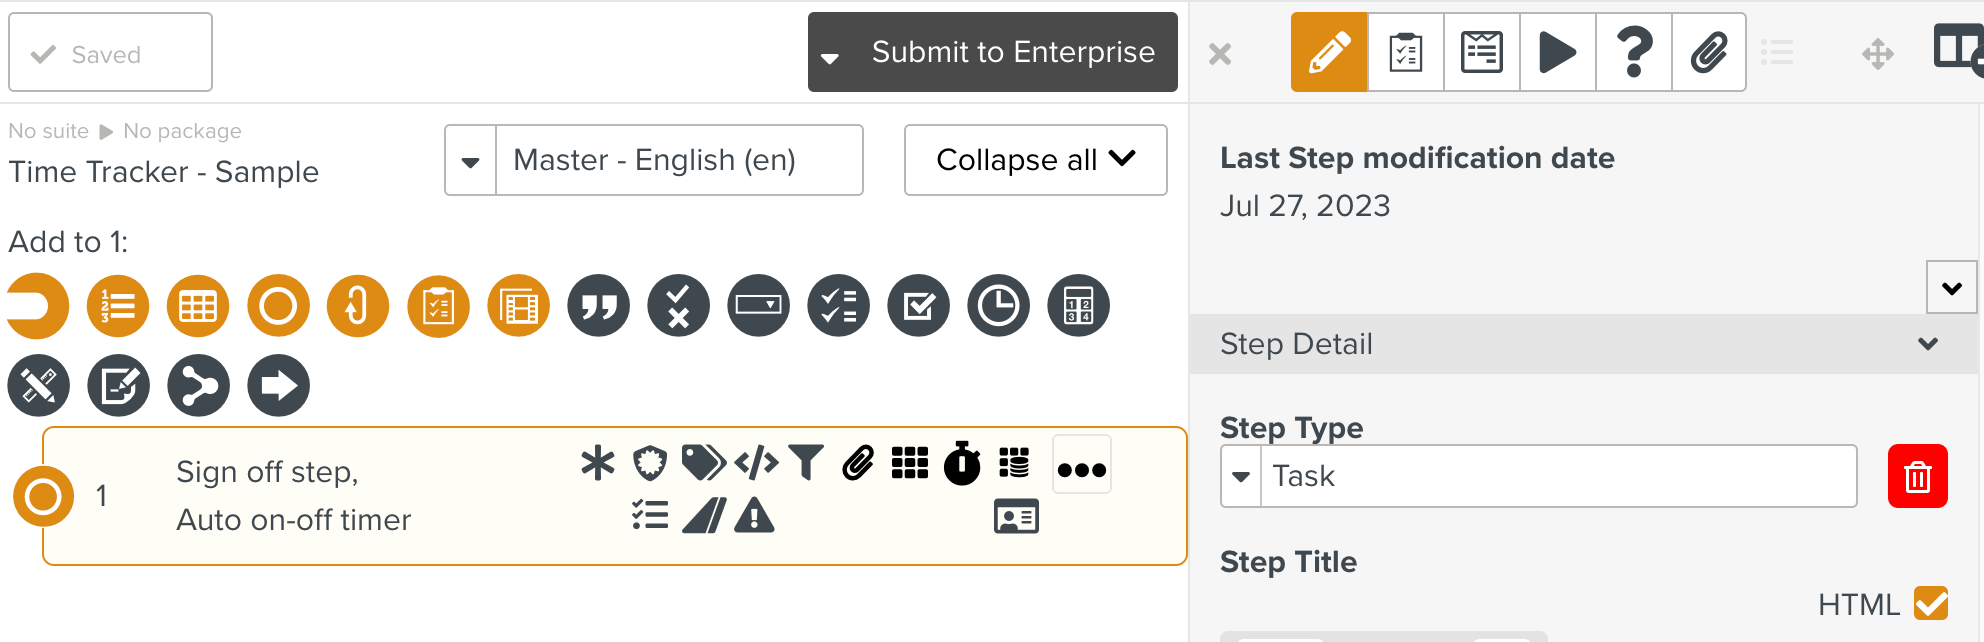
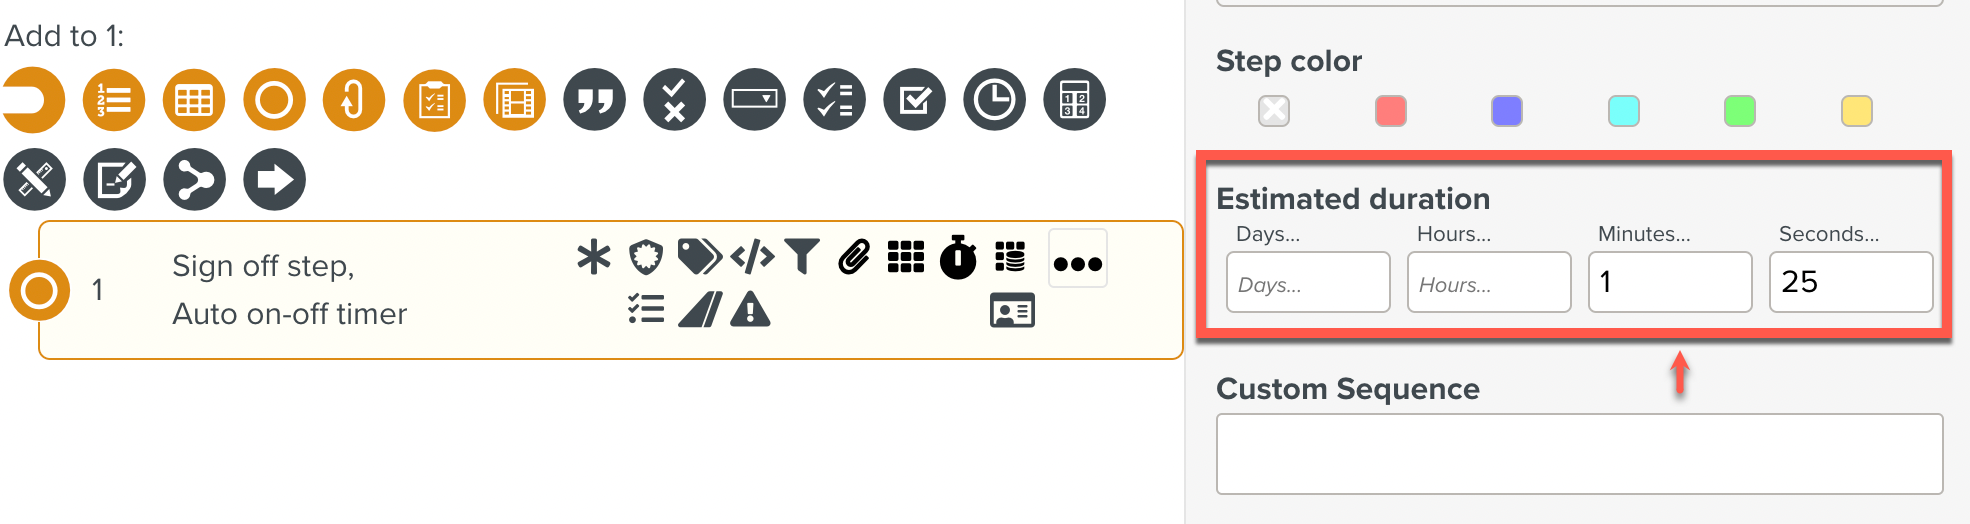
Enter the Estimated duration.
Click Save.
The Estimated duration for the Step is set.
Note
The Estimated duration set in the child Step is ignored for automatic time recording during Runtime and while calculating the Task Summary. Refer Task Summary section for details.
This section explains the different icons of the Time Tracking as shown in the image below.
 |
The Red colour on the Time Tracking view indicates that the Step is being executed.
 | Start button |
 | Stop button |
 | Current Processing time (Cumulative Time/Estimated duration set on the Step) |
 | Manual Time is entered using the option during the execution. |
 | Information about the Step. Clicking the |
 | Progress bar of the step Execution. |
This section walks through a Task Step by Step and examines the time tracked.
Let us take the example of the Template shown below:
Setting up of the Estimated Duration at the Template Level is shown.
 |
Setting up of the Estimated Duration at the Step Level is shown. Here the Estimated Duration of all the Steps is captured for better understanding.
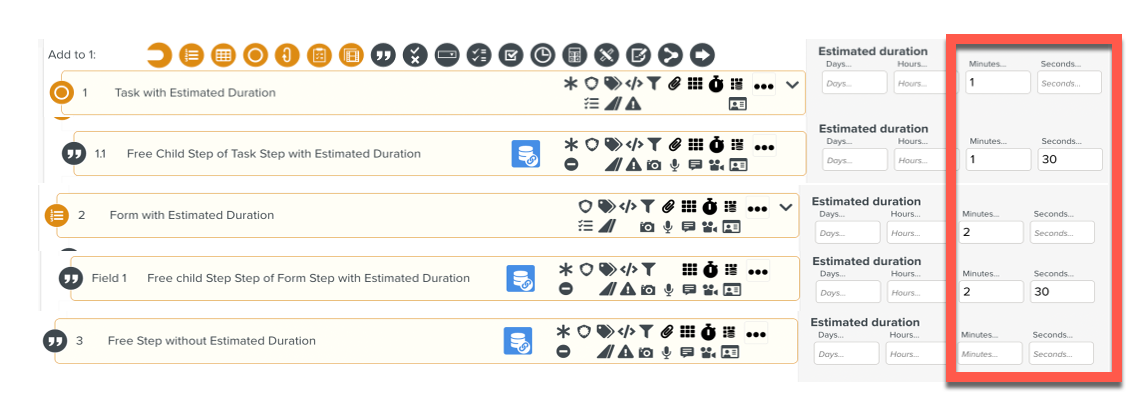 |
At Runtime:
The Execution page opens.
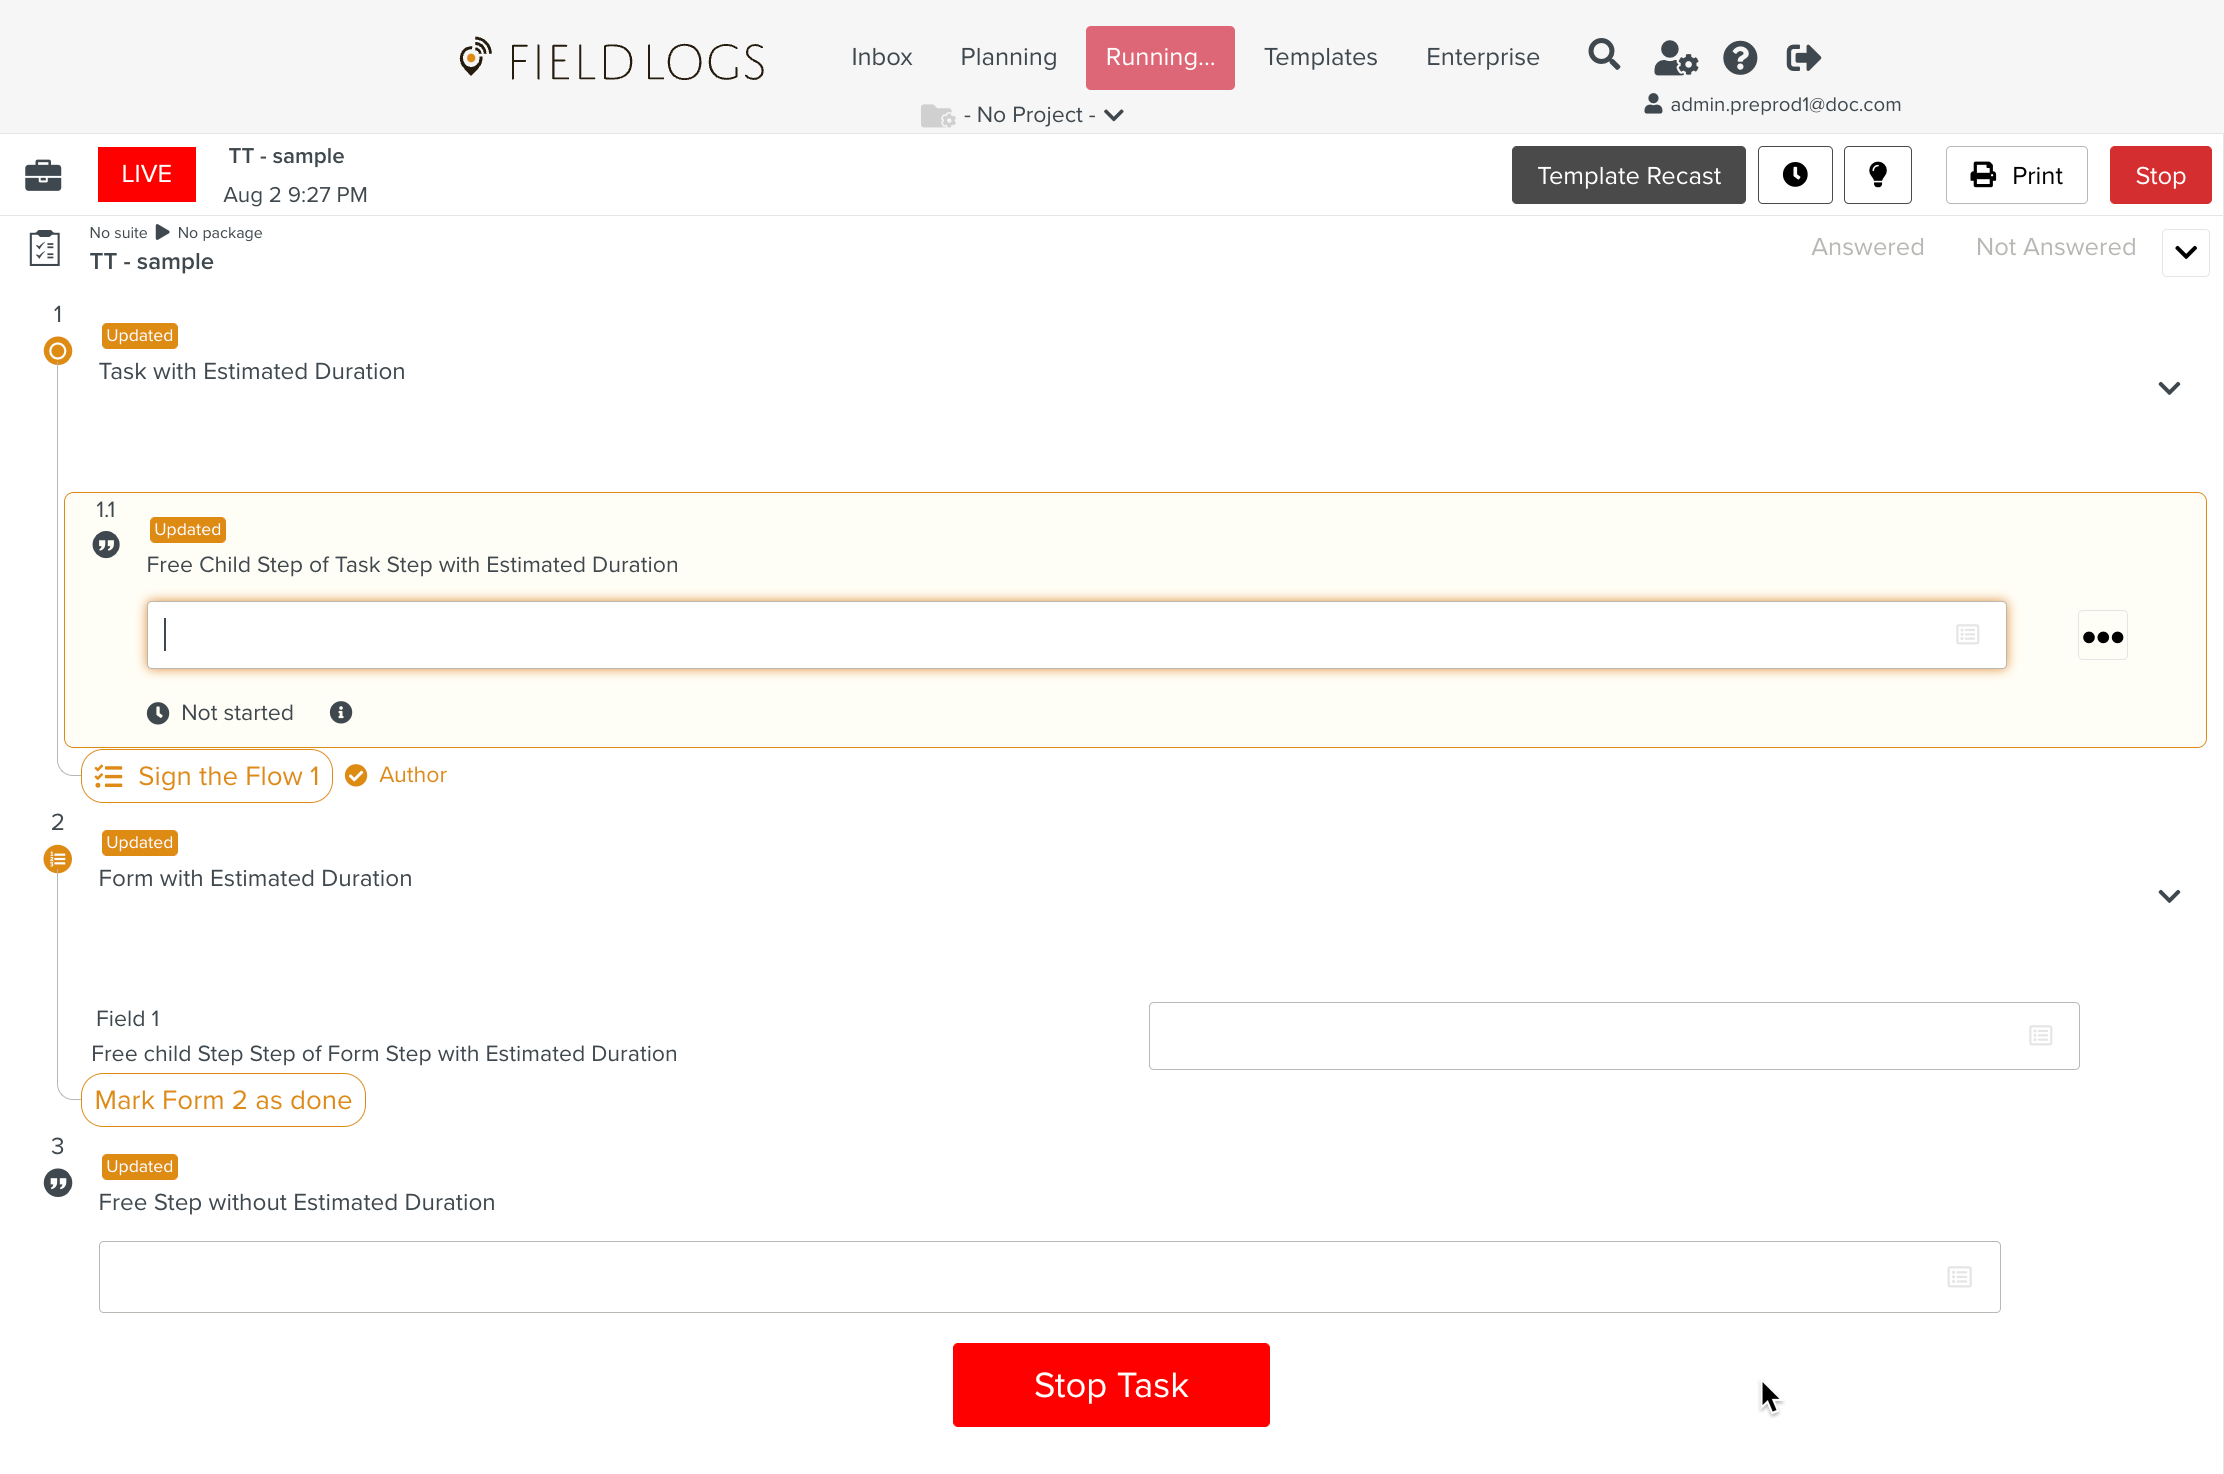 |
Step 1 is a Task Step. The validation can be done in Child Step 1.1.
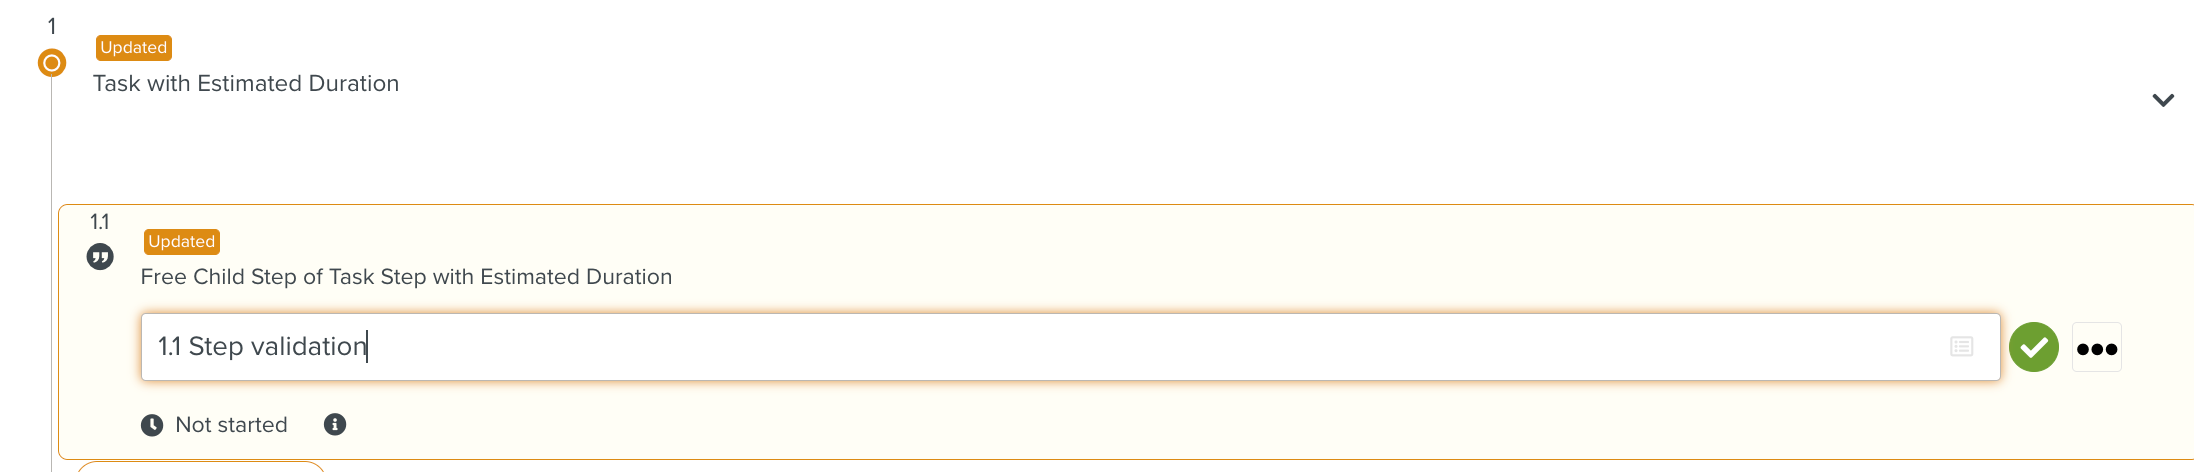 |
Time tracking for Step 1 is started automatically after the validation of Child Step 1.1. This is because Time Tracking is always started on the step with an Estimated duration at the higher level in the hierarchy.
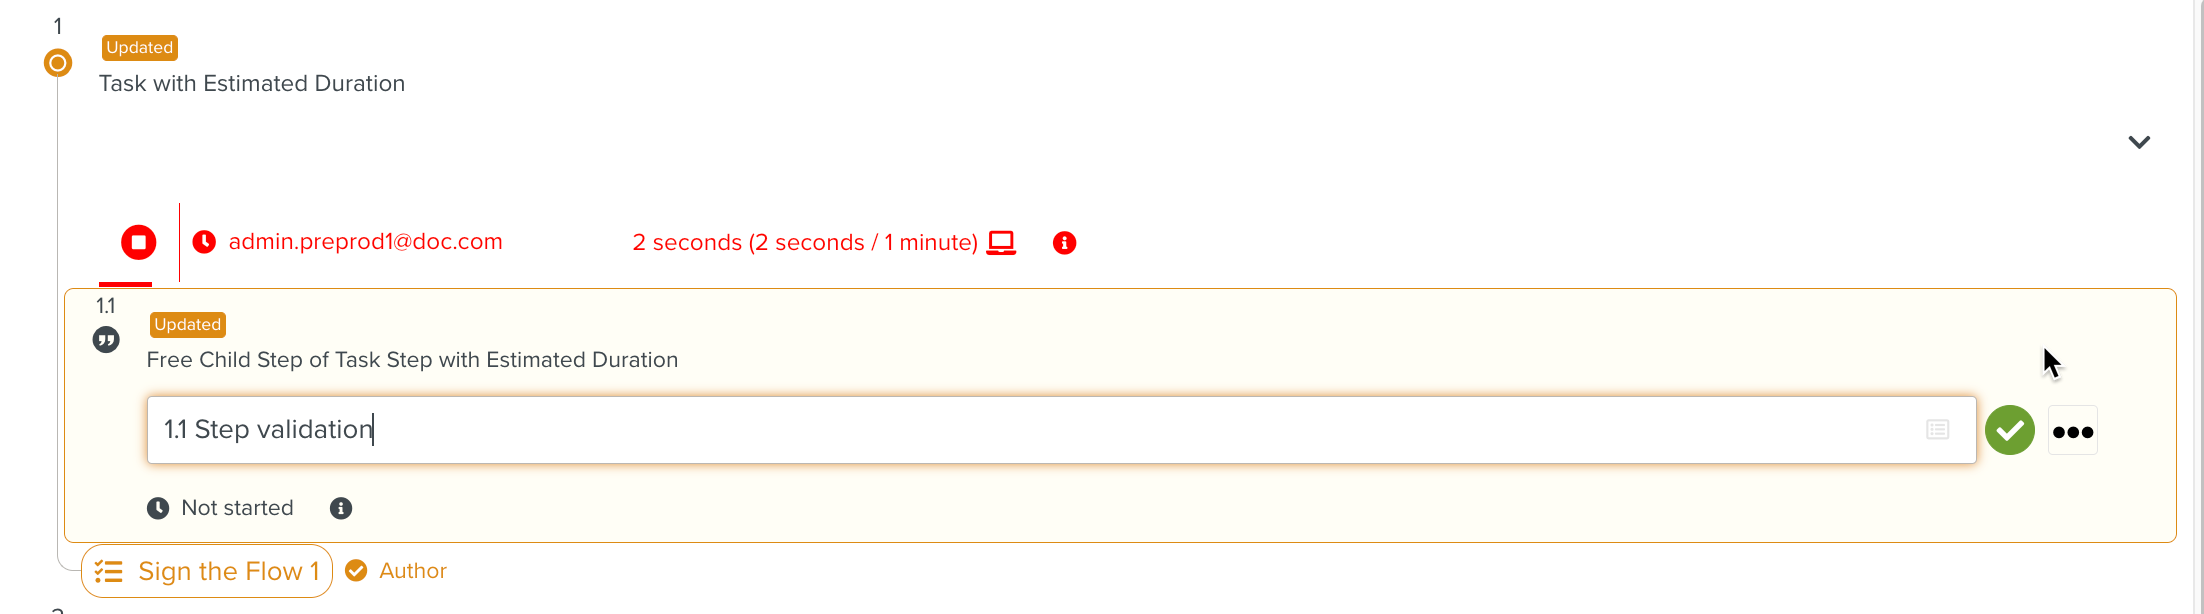 |
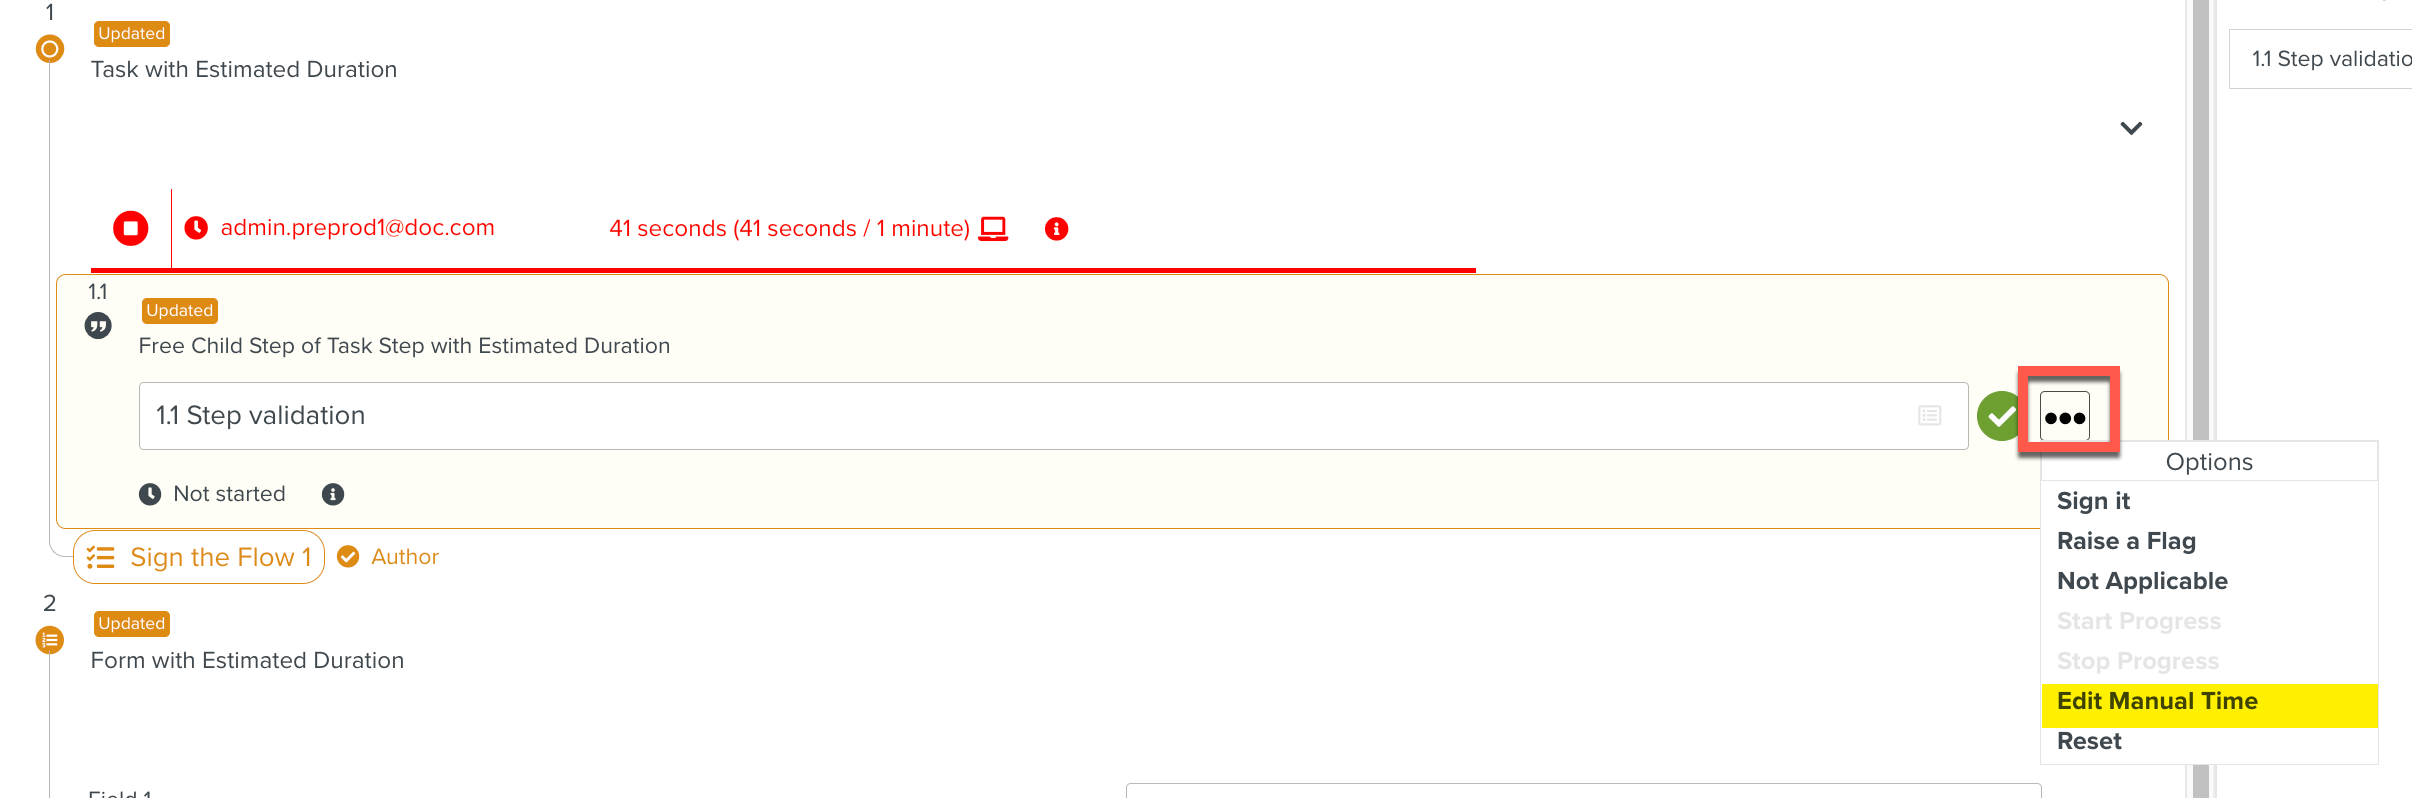
Validating the Child Step 1.1 allows the user to enter the Manual Time. The purpose of editing the Manual time arises when the automatic time is wrong and it has to be adjusted. In general Manual time has a higher priority than Automatic Time.
 |
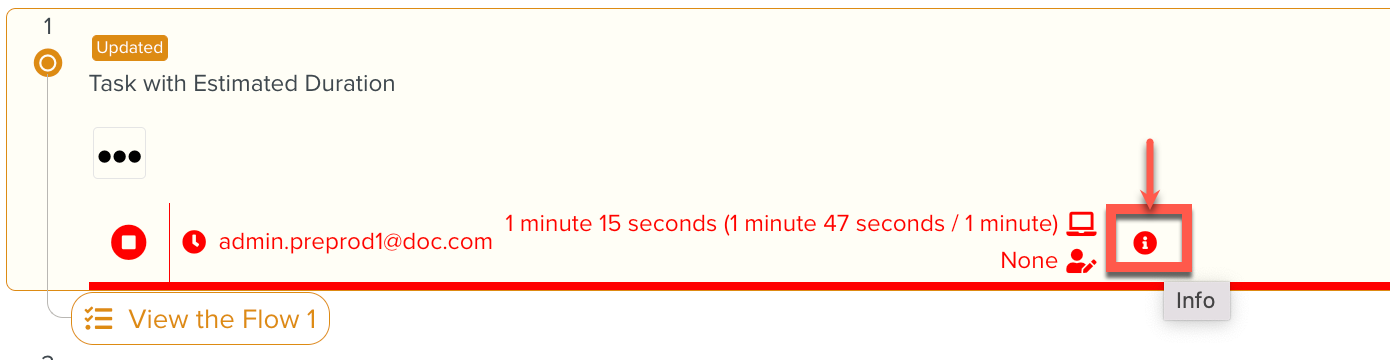
Progress Summary can be viewed for each executing/executed Step by clicking the Info Icon as shown.
 |
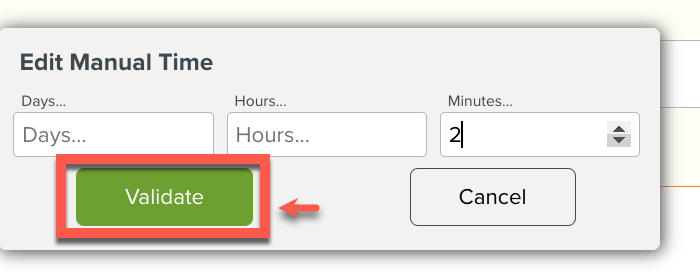
Enter Manual Time and click Validate.
 |
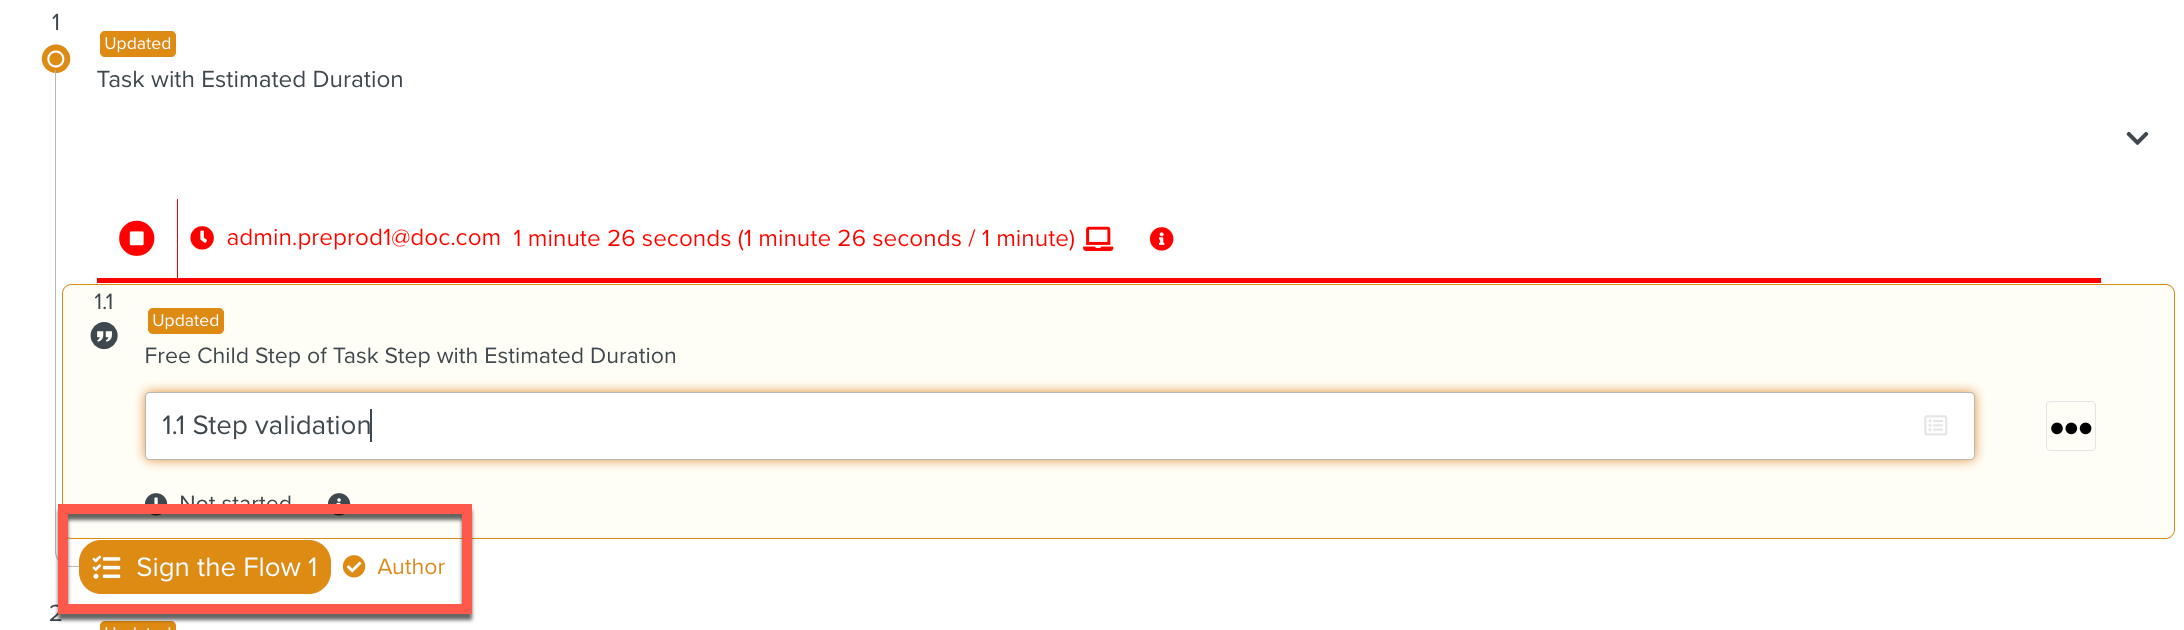
Sign the Flow for Step 1 to complete Validation.
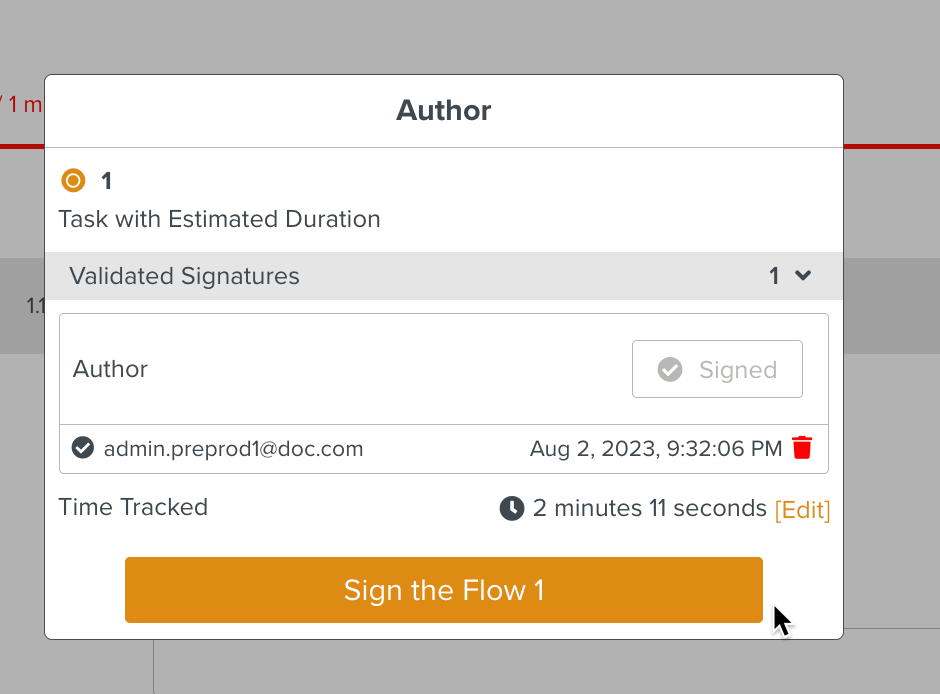 |
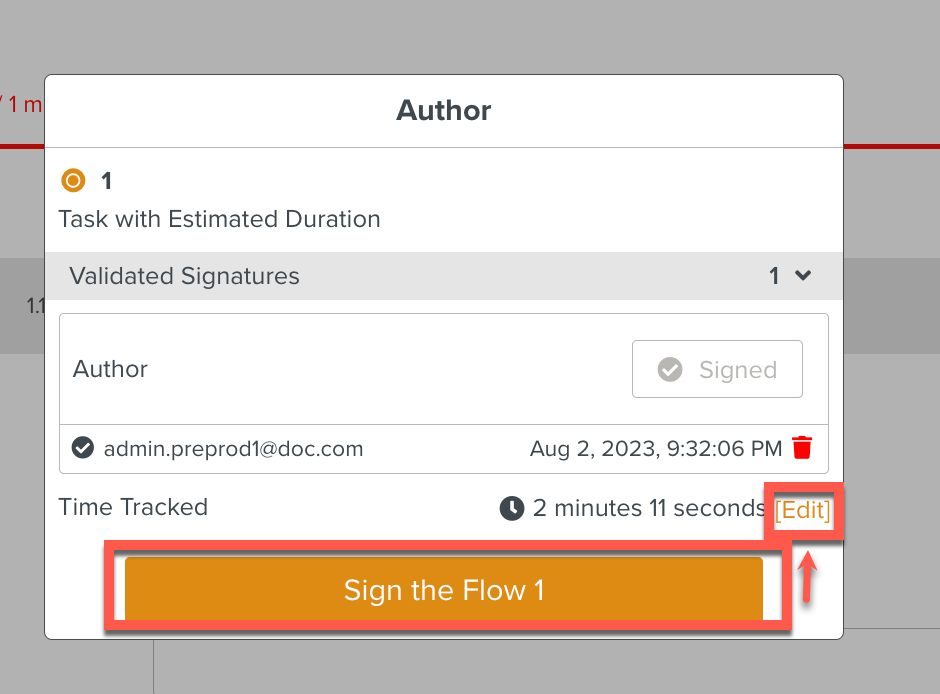
Note
The Edit option allows you to enter the Manual time during the Signoff. This time is accountable during the final calculation of Manual and Business Time in the Time Tracking summary.
 |
Validating Step 1 allows you to enter the Manual Time.
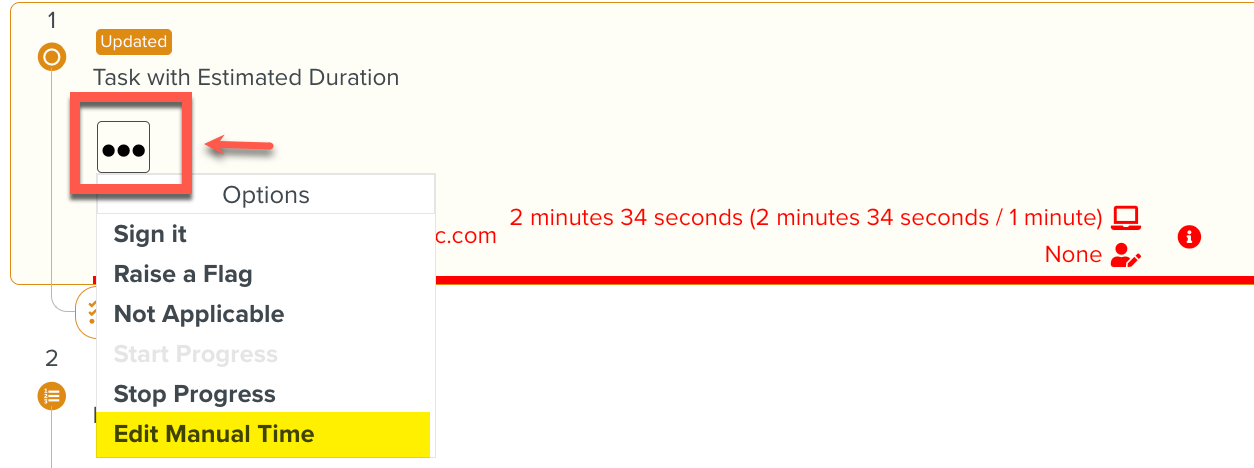 |
Enter Manual Time for Step 1 and proceed to the validation of the next step.
 |
If the user confirms, then Step 1 time tracking is stopped automatically and Step 2 time tracking begins.
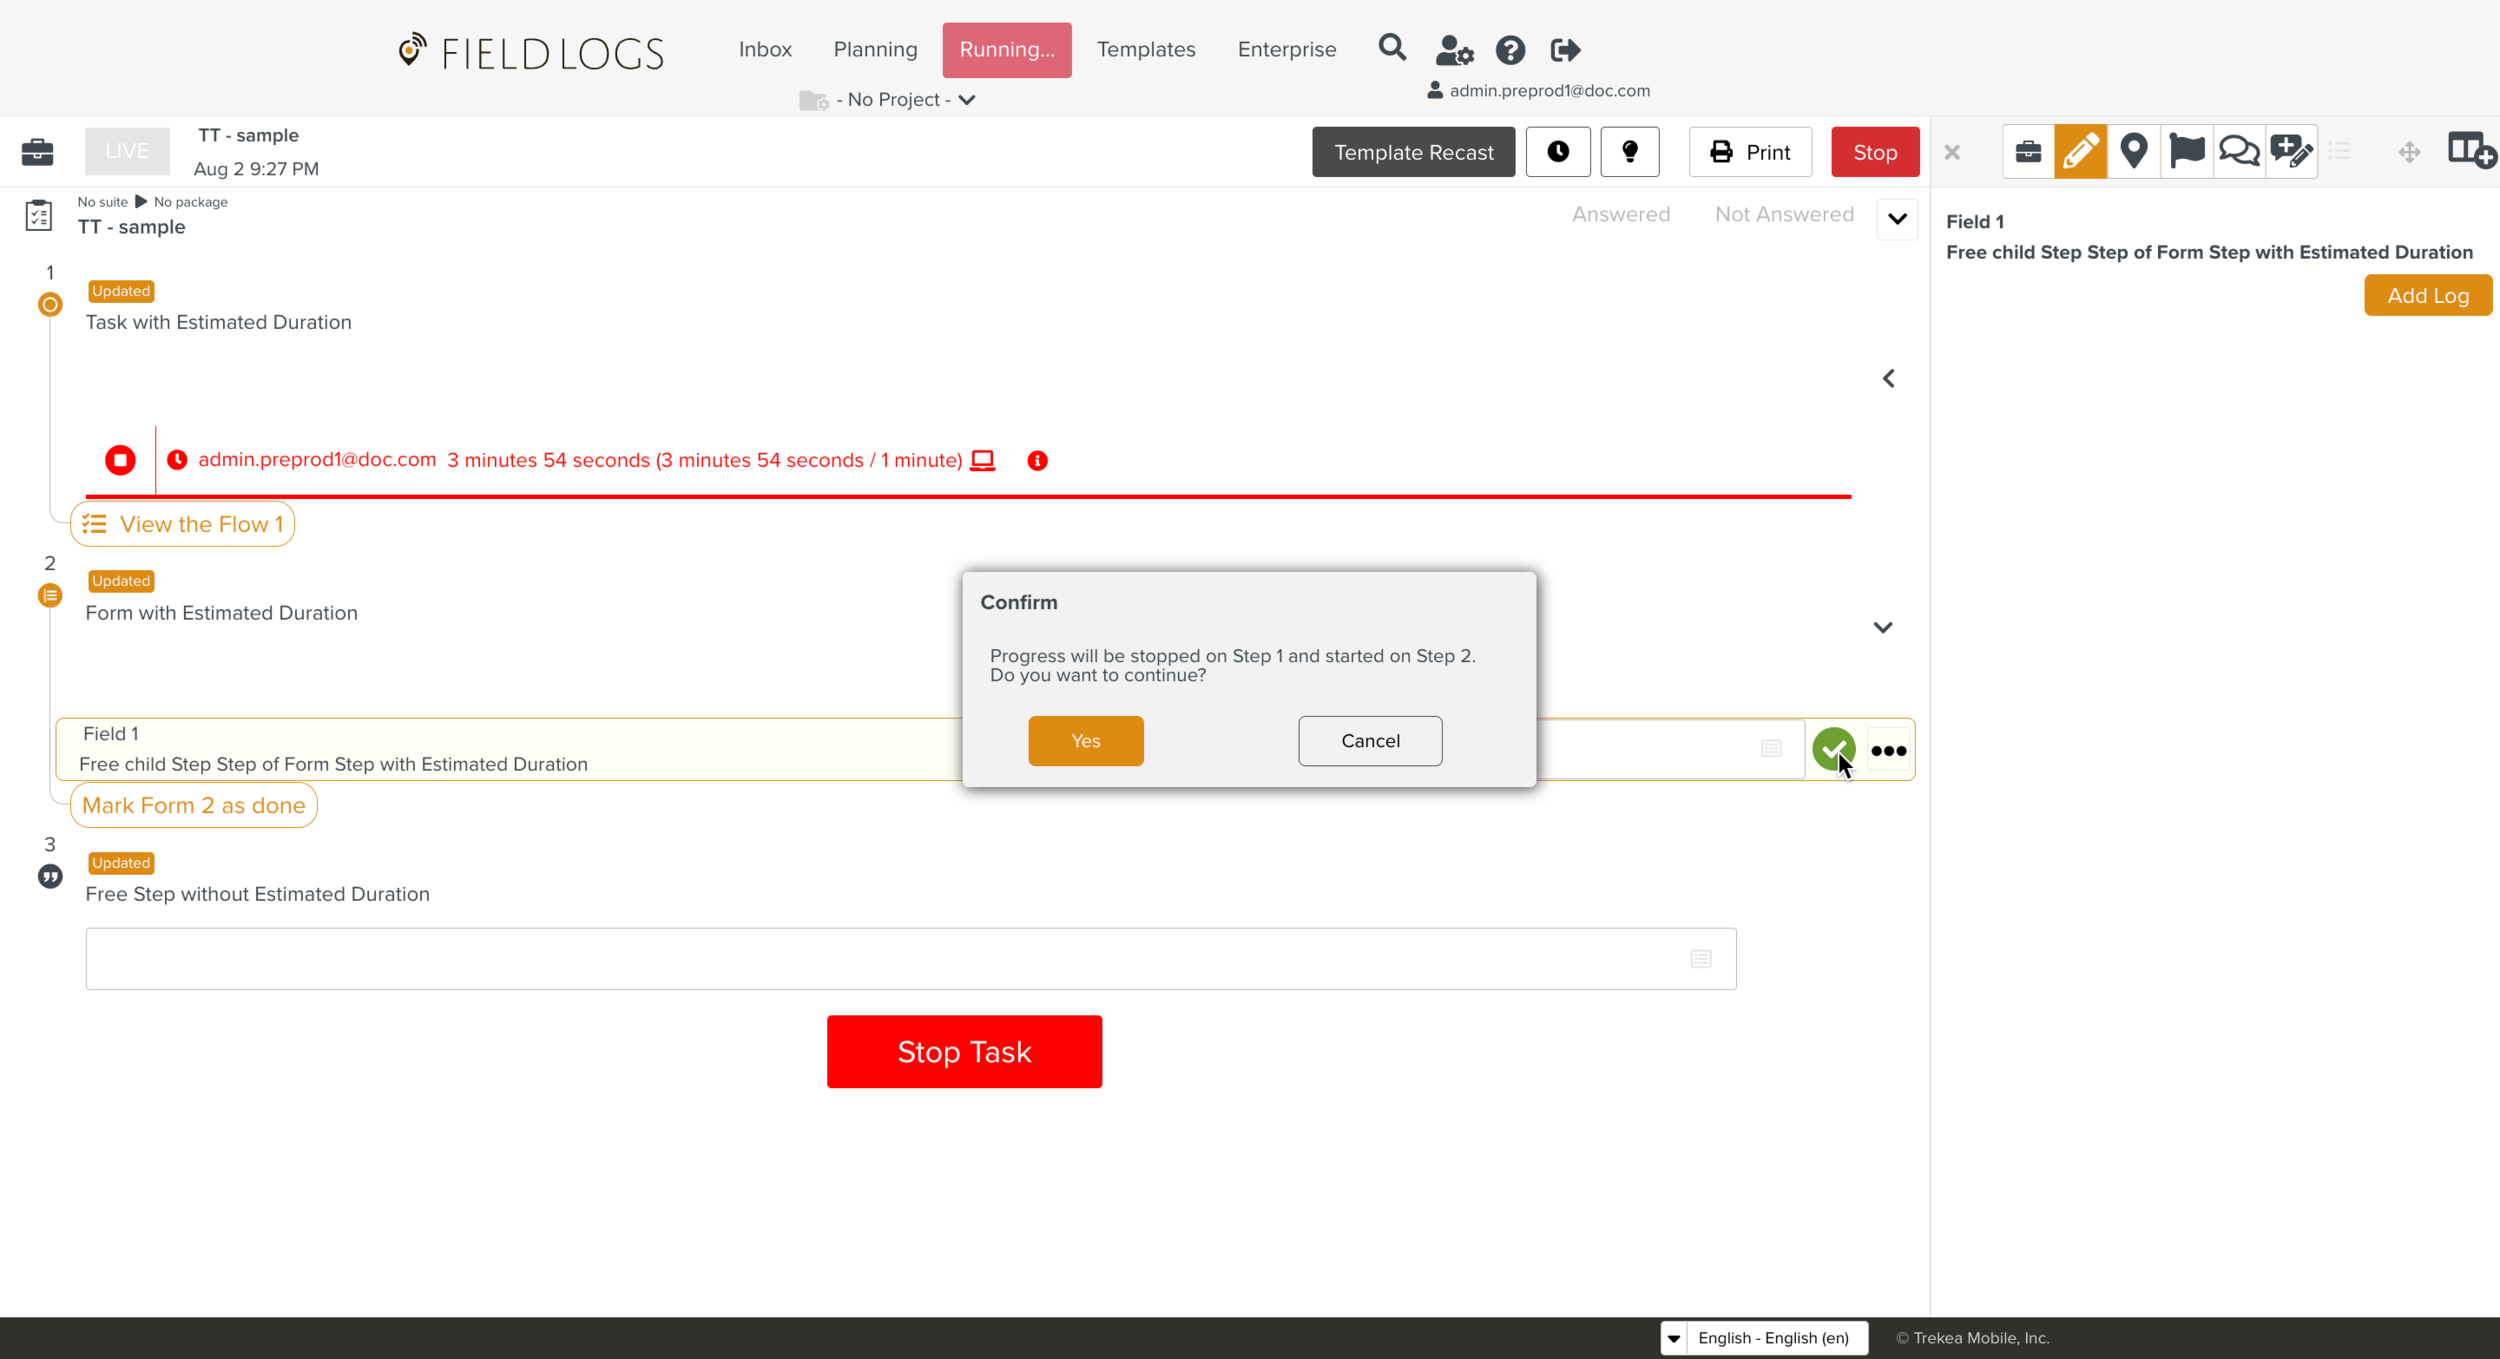 |
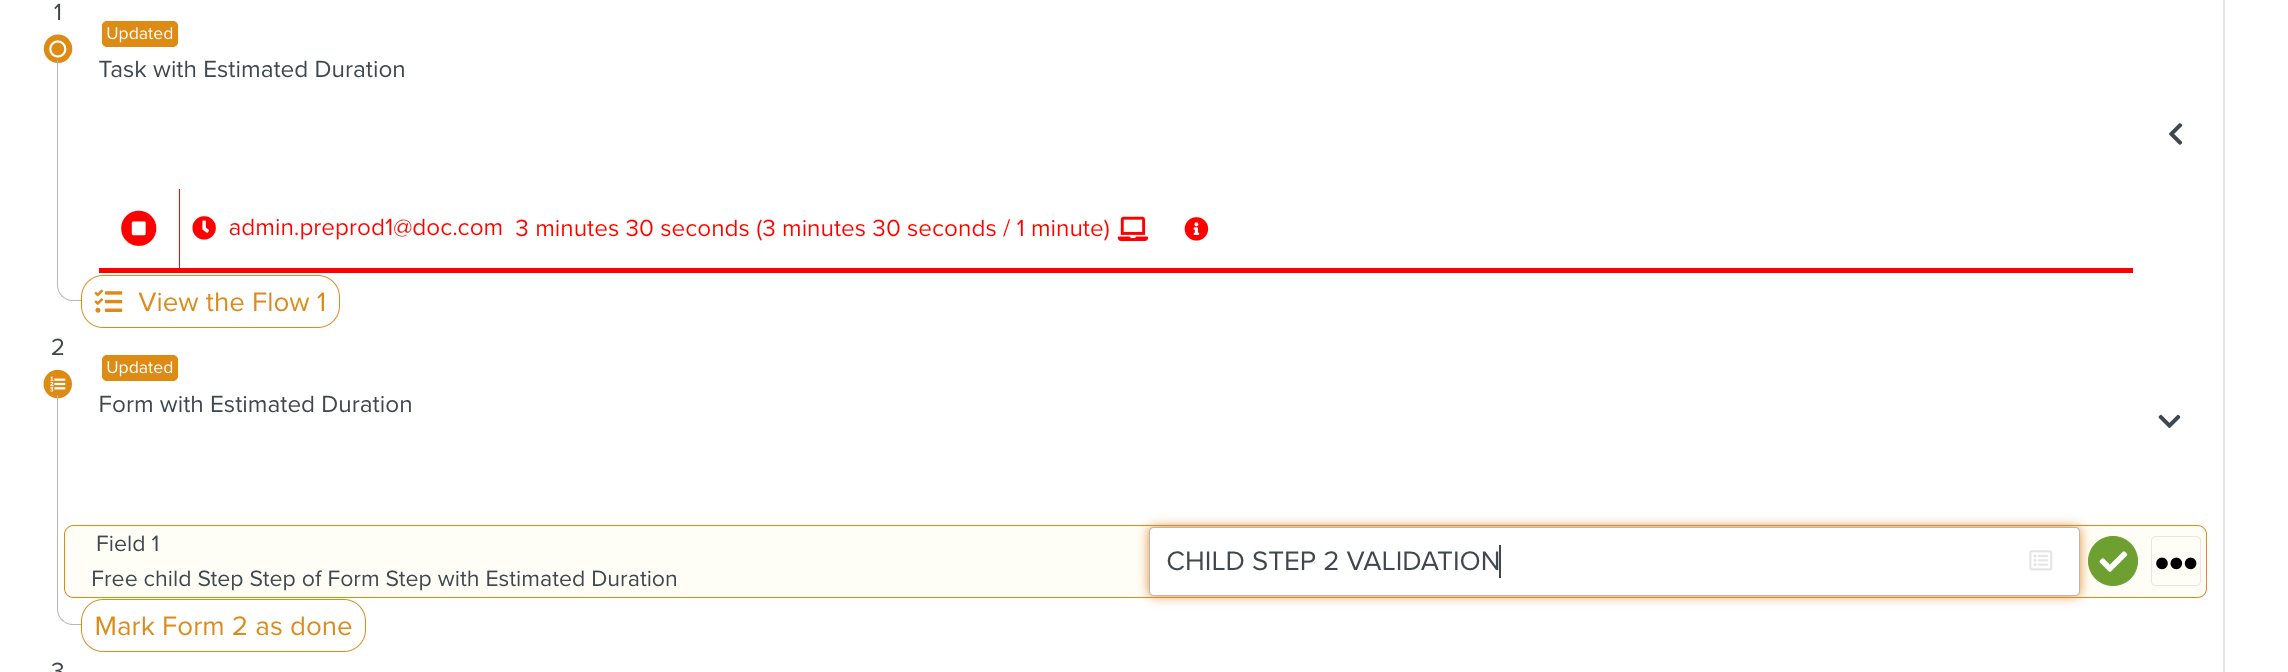
After confirmation, Time tracking for Step 2 has started automatically.
 |
Validating Step 2.1 allows the user to enter the Manual Time.
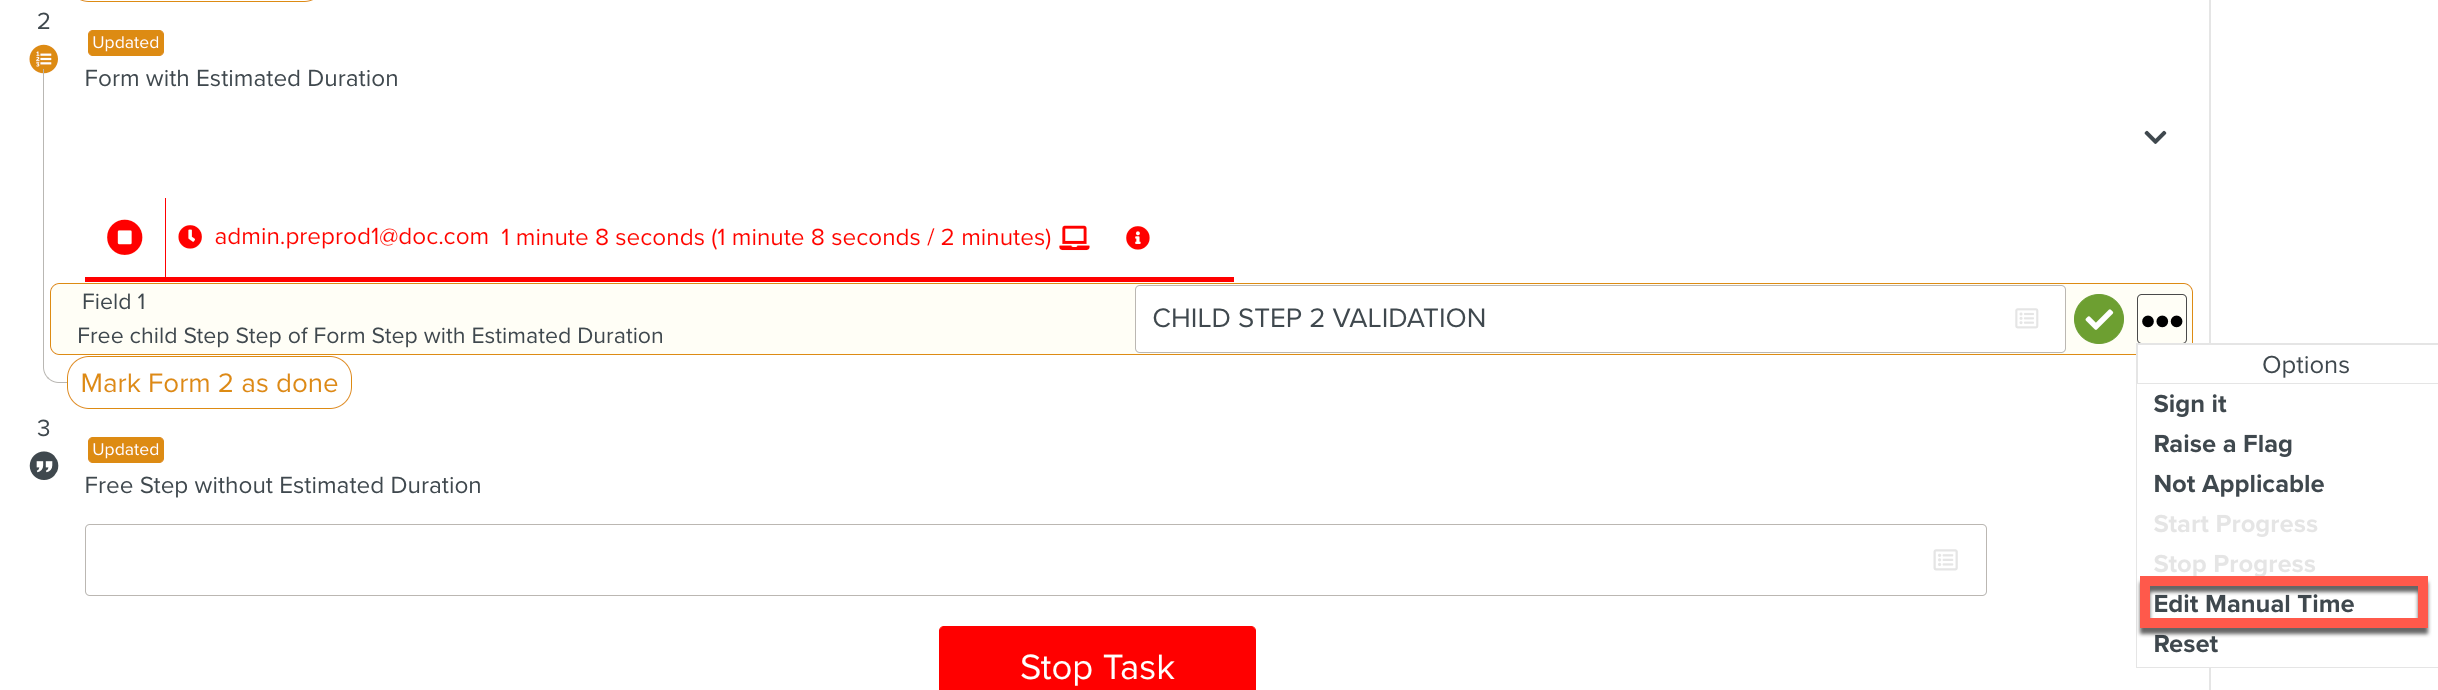 |
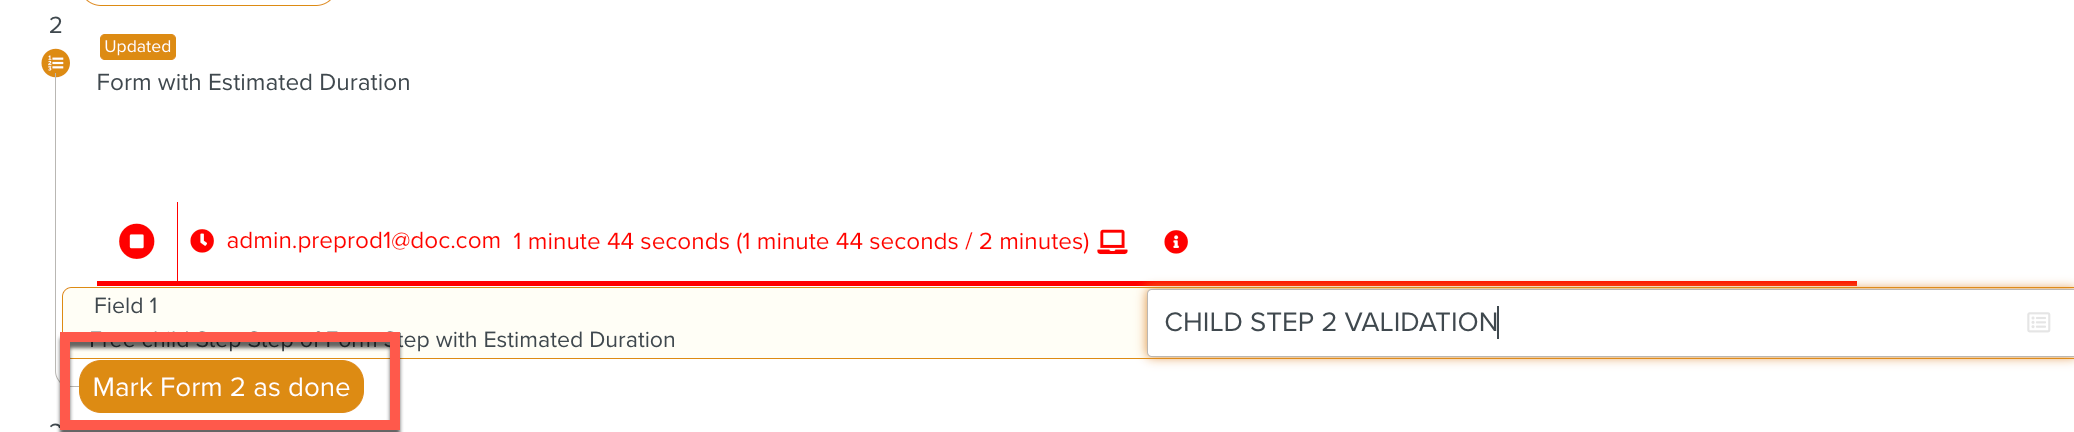
Enter Manual Time and proceed to Mark Step 2 as done.
 |
Validating Step 2 allows the user to enter the Manual Time.
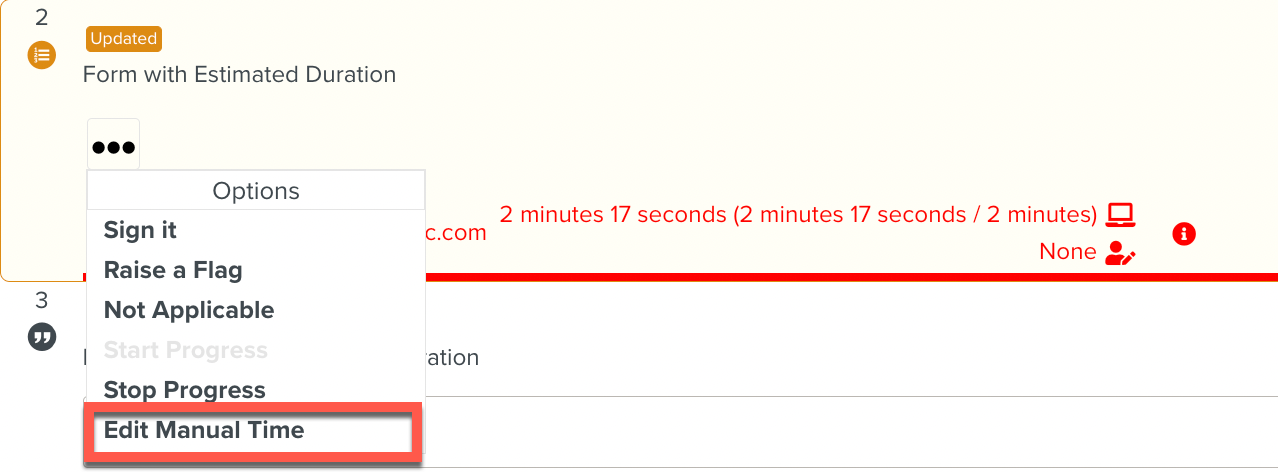 |
Enter Manual Time and proceed to validate the next Step.
 |
A confirmation dialog box opens to stop Step 2.
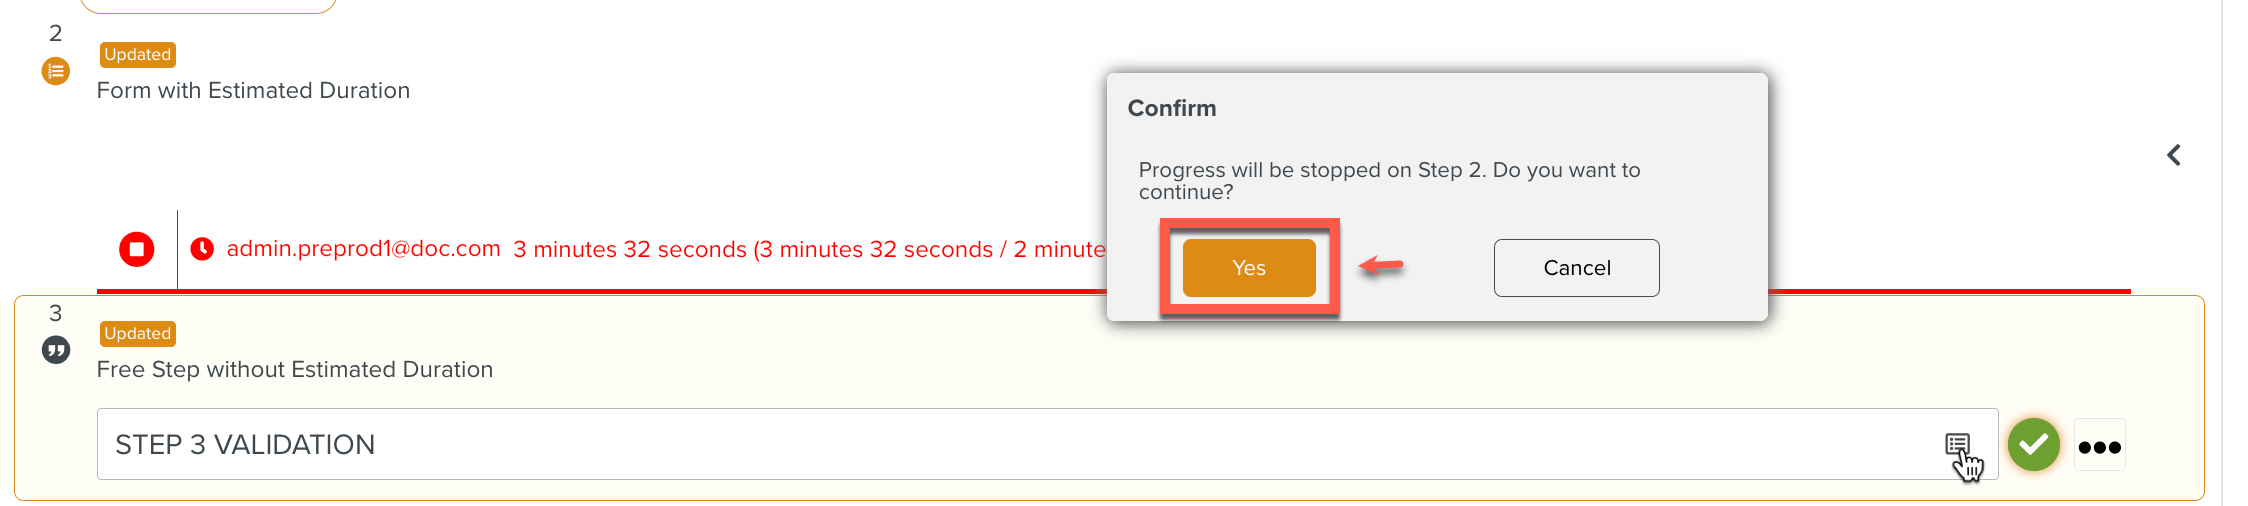 |
If the user confirms, Step 2 time tracking is stopped automatically.
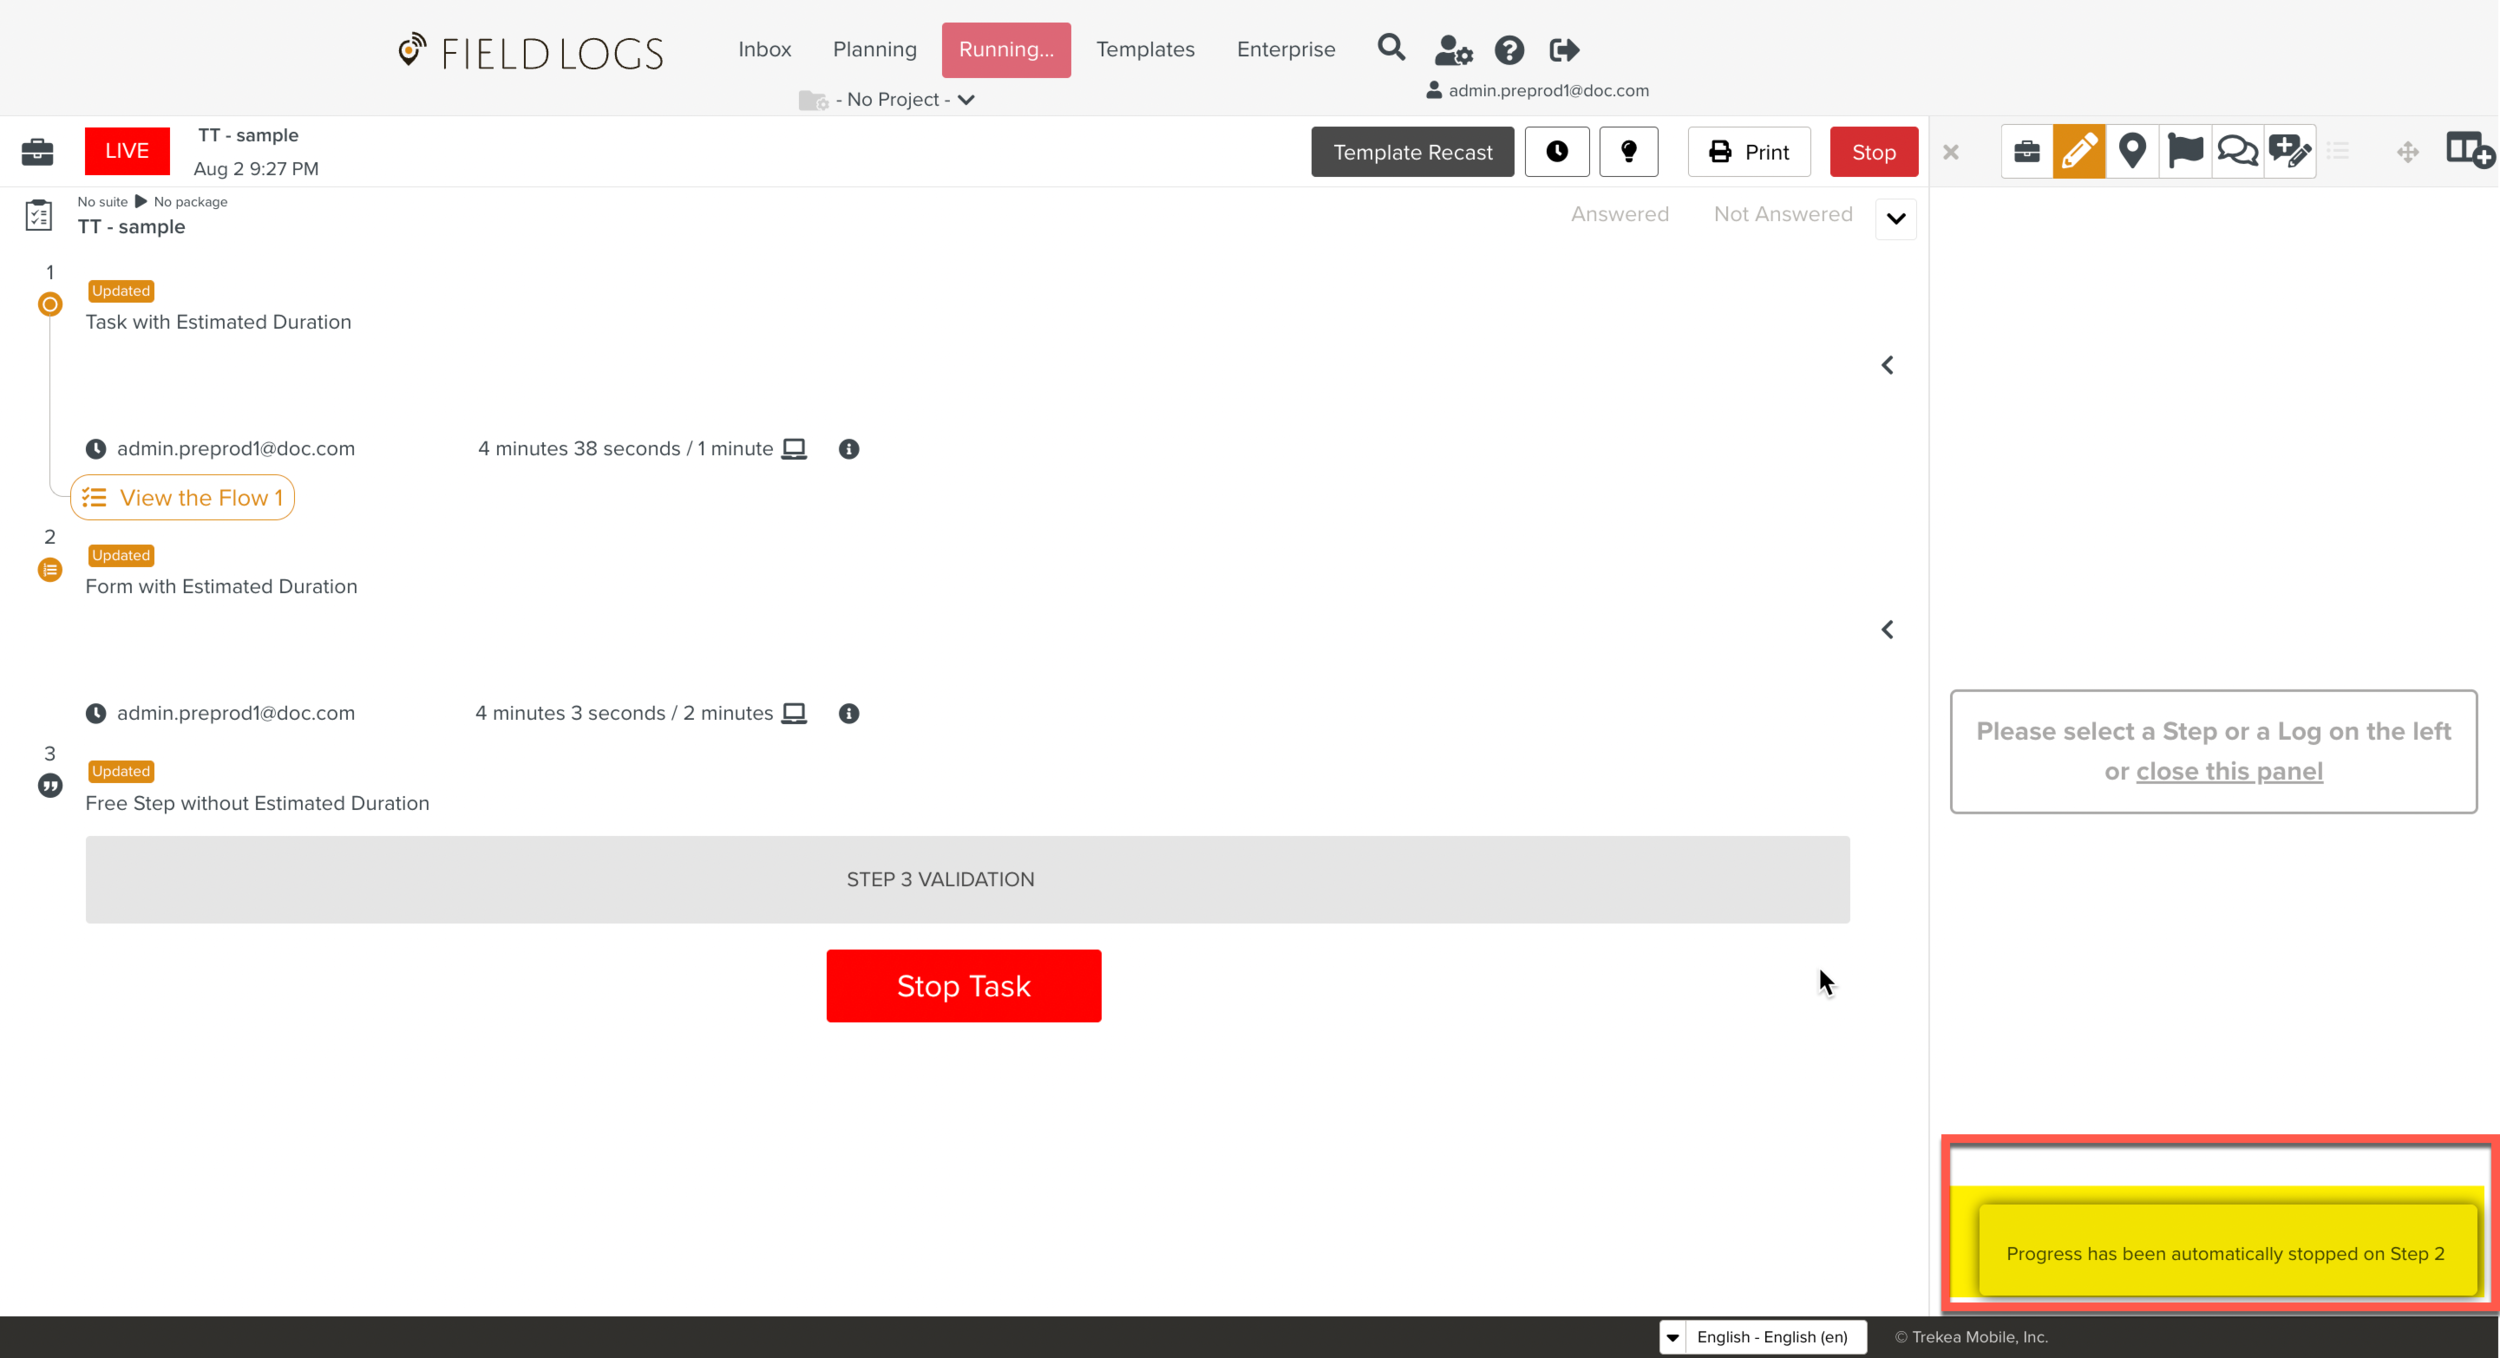 |
Note
Time tracking can only happen on one Step of the Task at a time.
Step 3 is a Free Step without an Estimated duration. This Step does not start automatically. The user validates the steps.
Validating Step 3 allows the user to enter the Manual Time.
 |
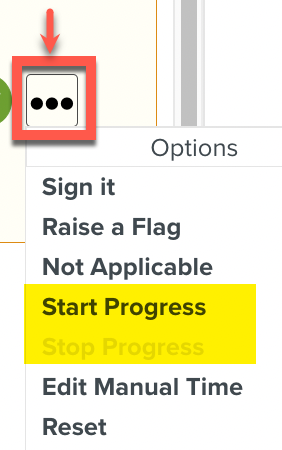
Click Start Progress to start the execution of the Step.
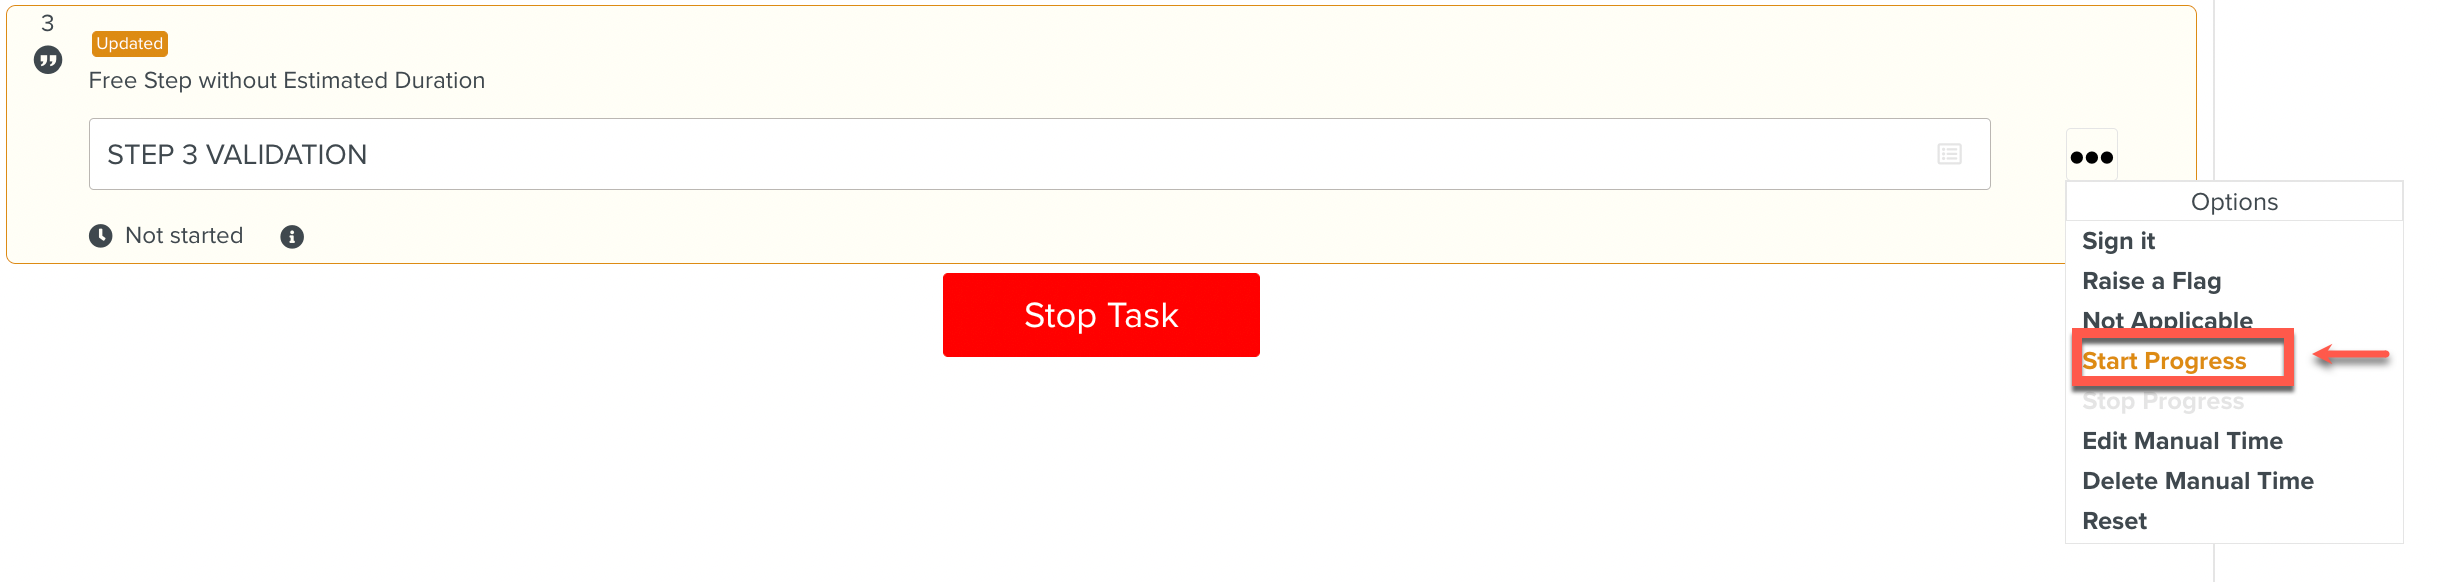 |
Time tracking on Step 3 has started.
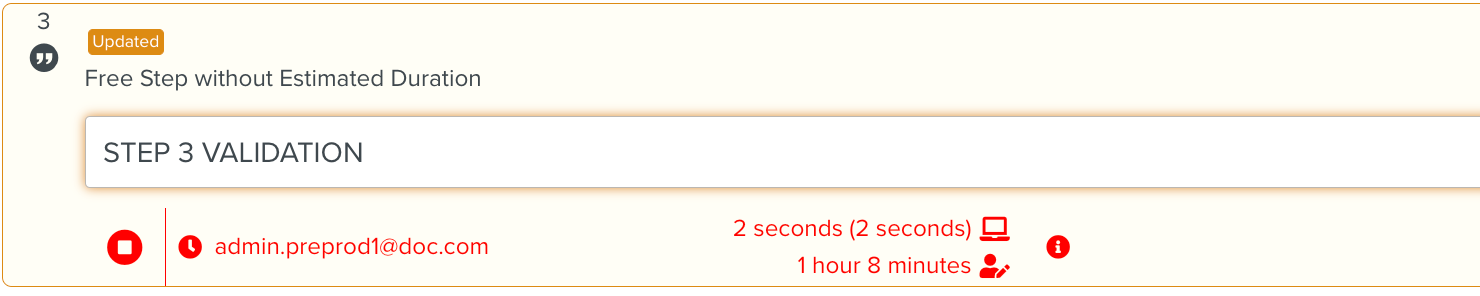 |
Click Stop Progress to stop the execution of the Step.
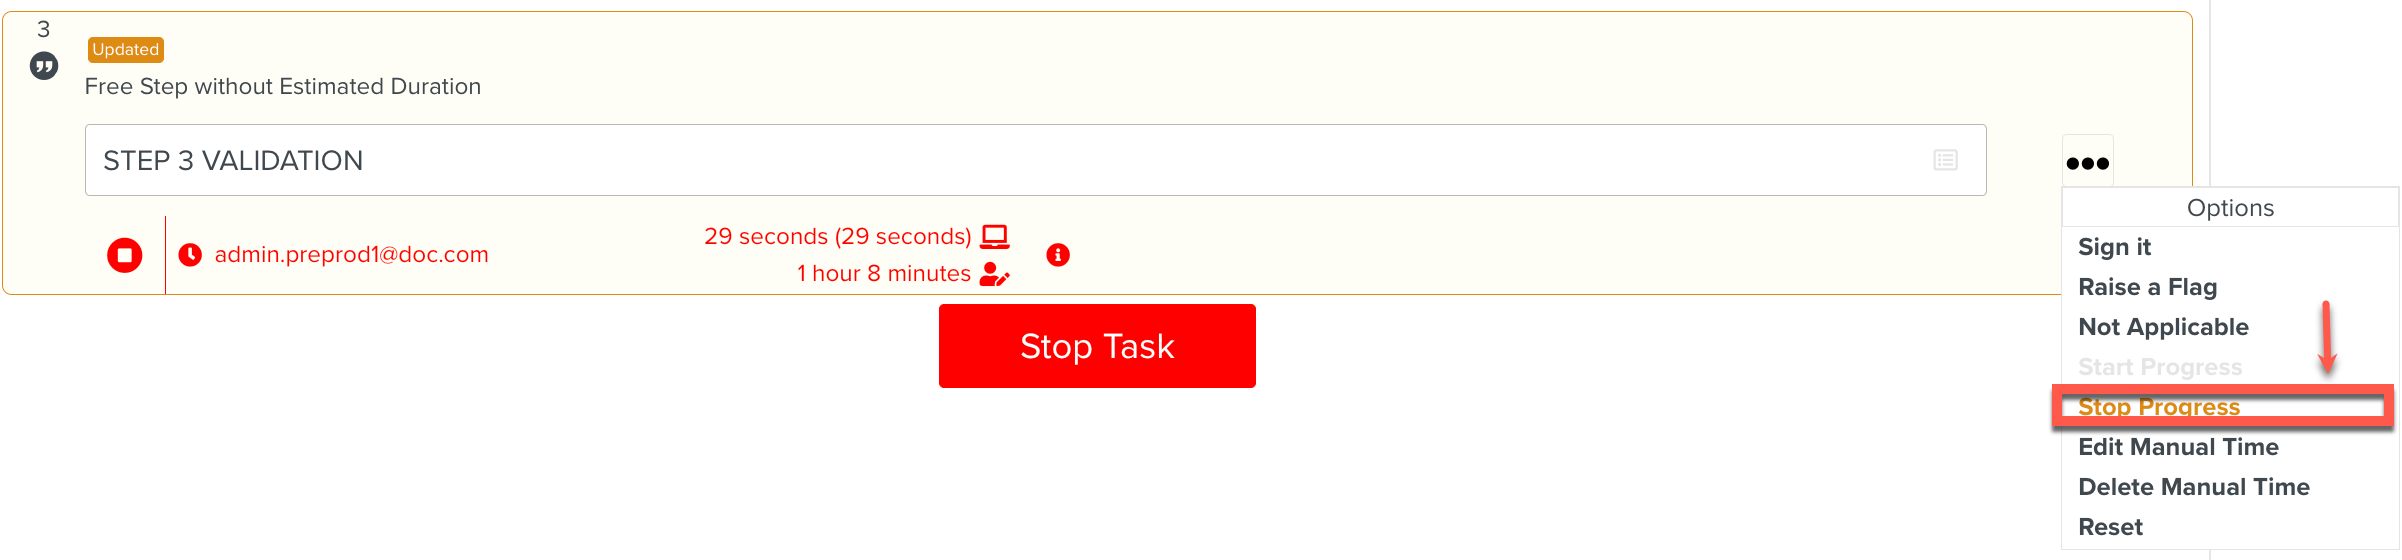 |
After completion of the last step, click Stop Task.
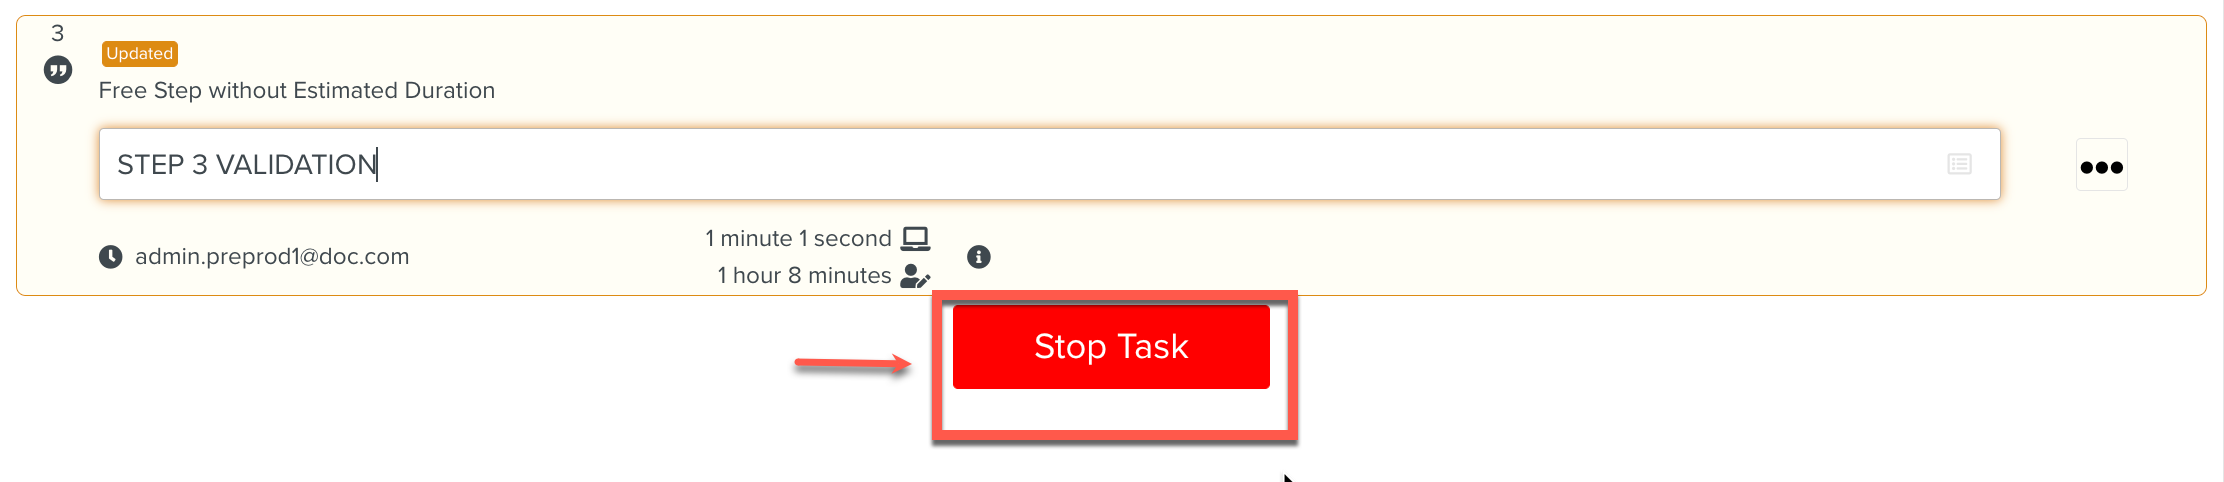 |
Click Complete & Mark Task as done.
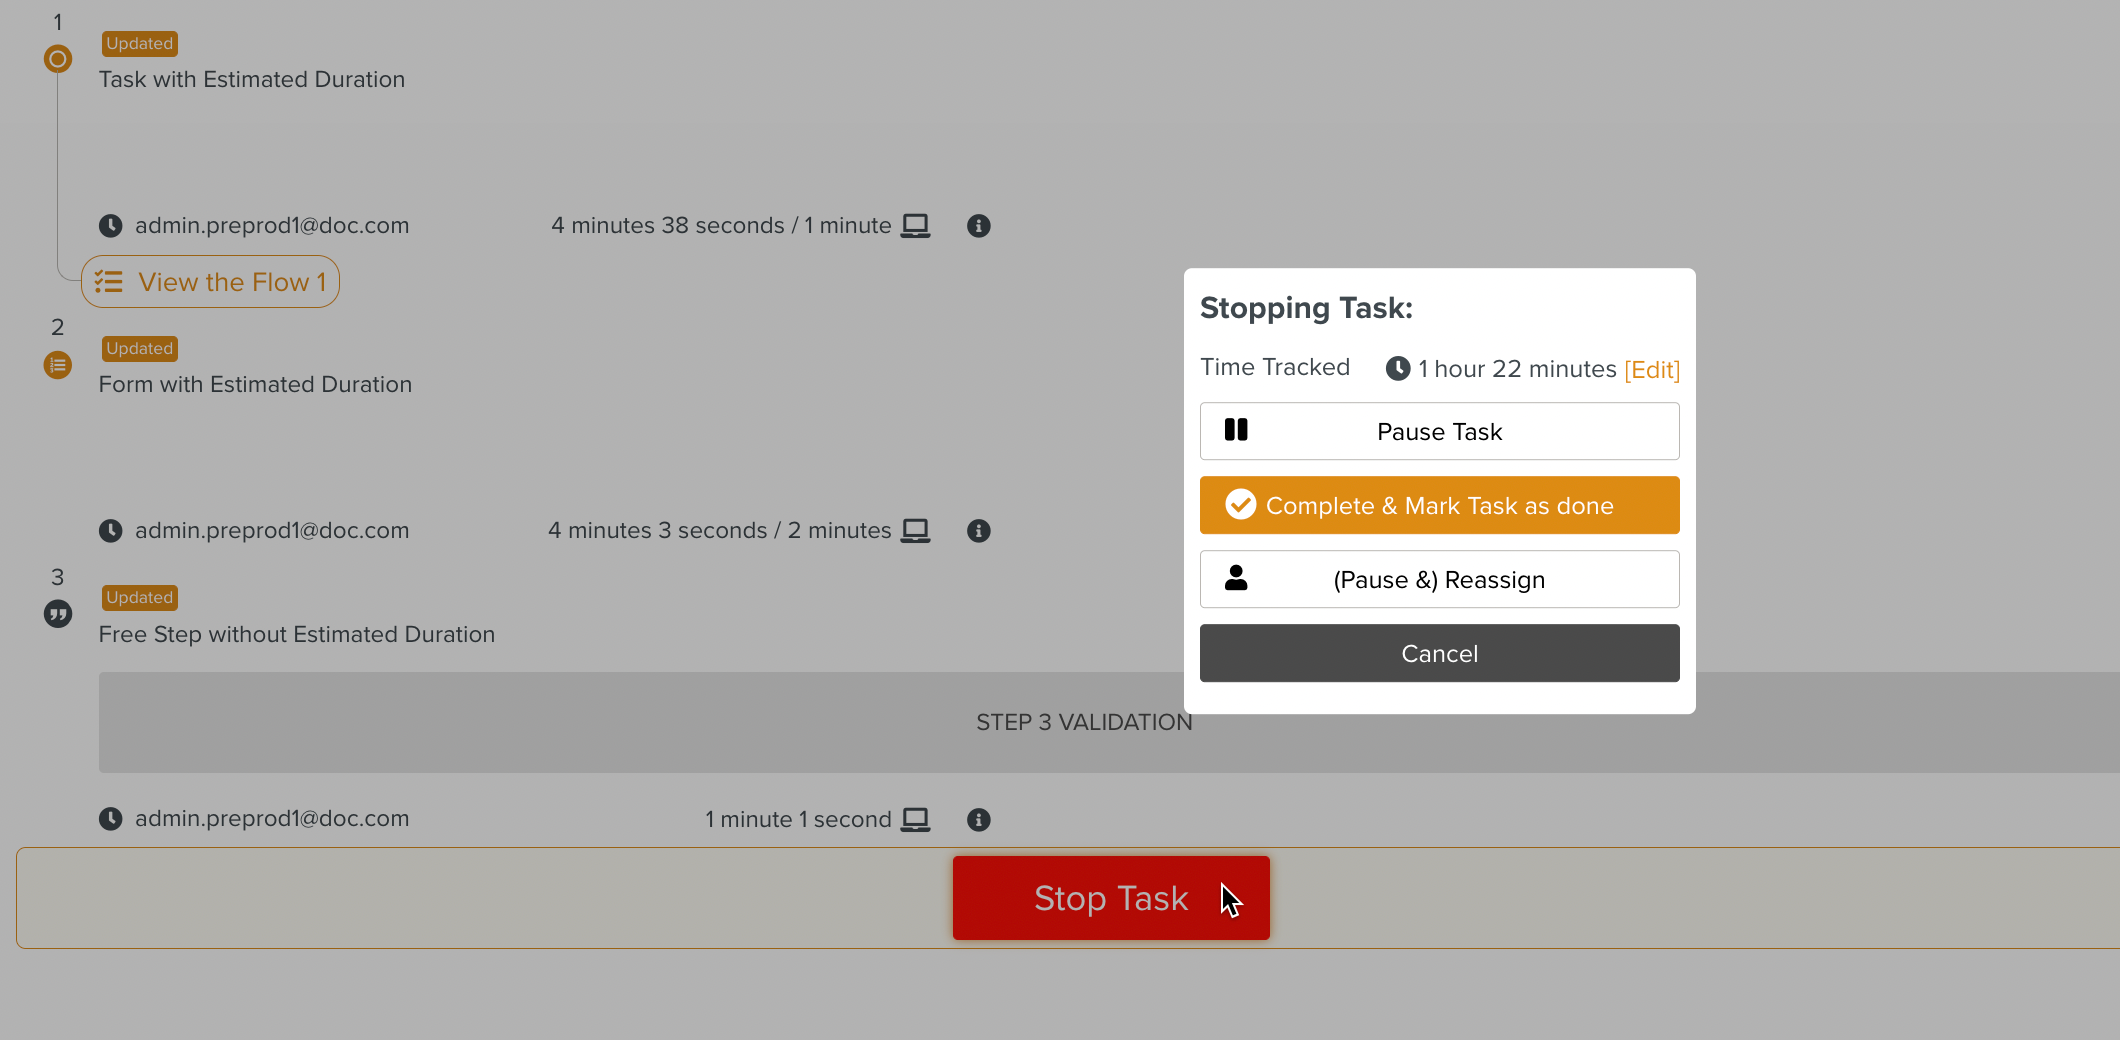 |
Add a comment and click Mark done.
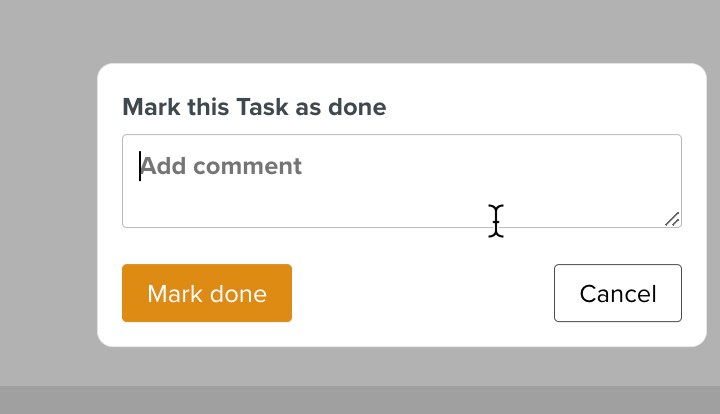 |
Time Tracking on the Task is complete.
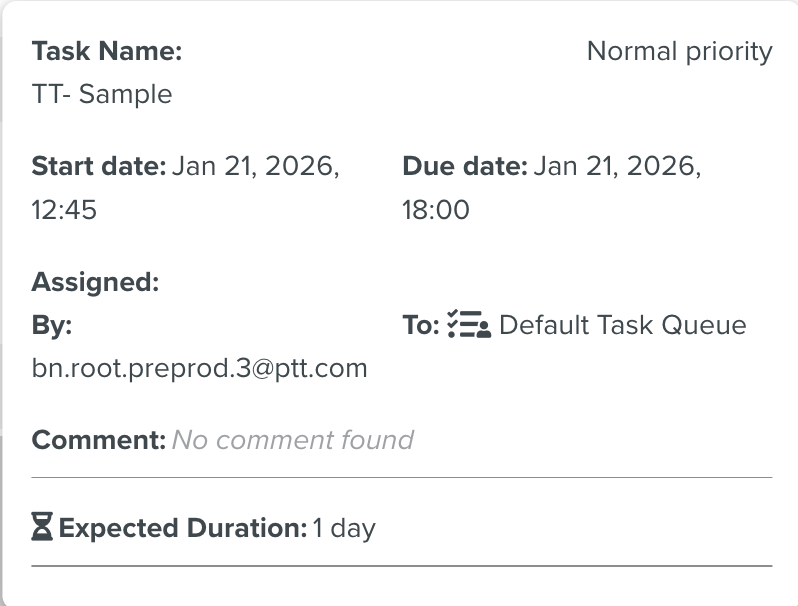
You can also view Estimated Duration under View Info. The Estimated time acts as a reference against which the time tracked on a Task can be compared.
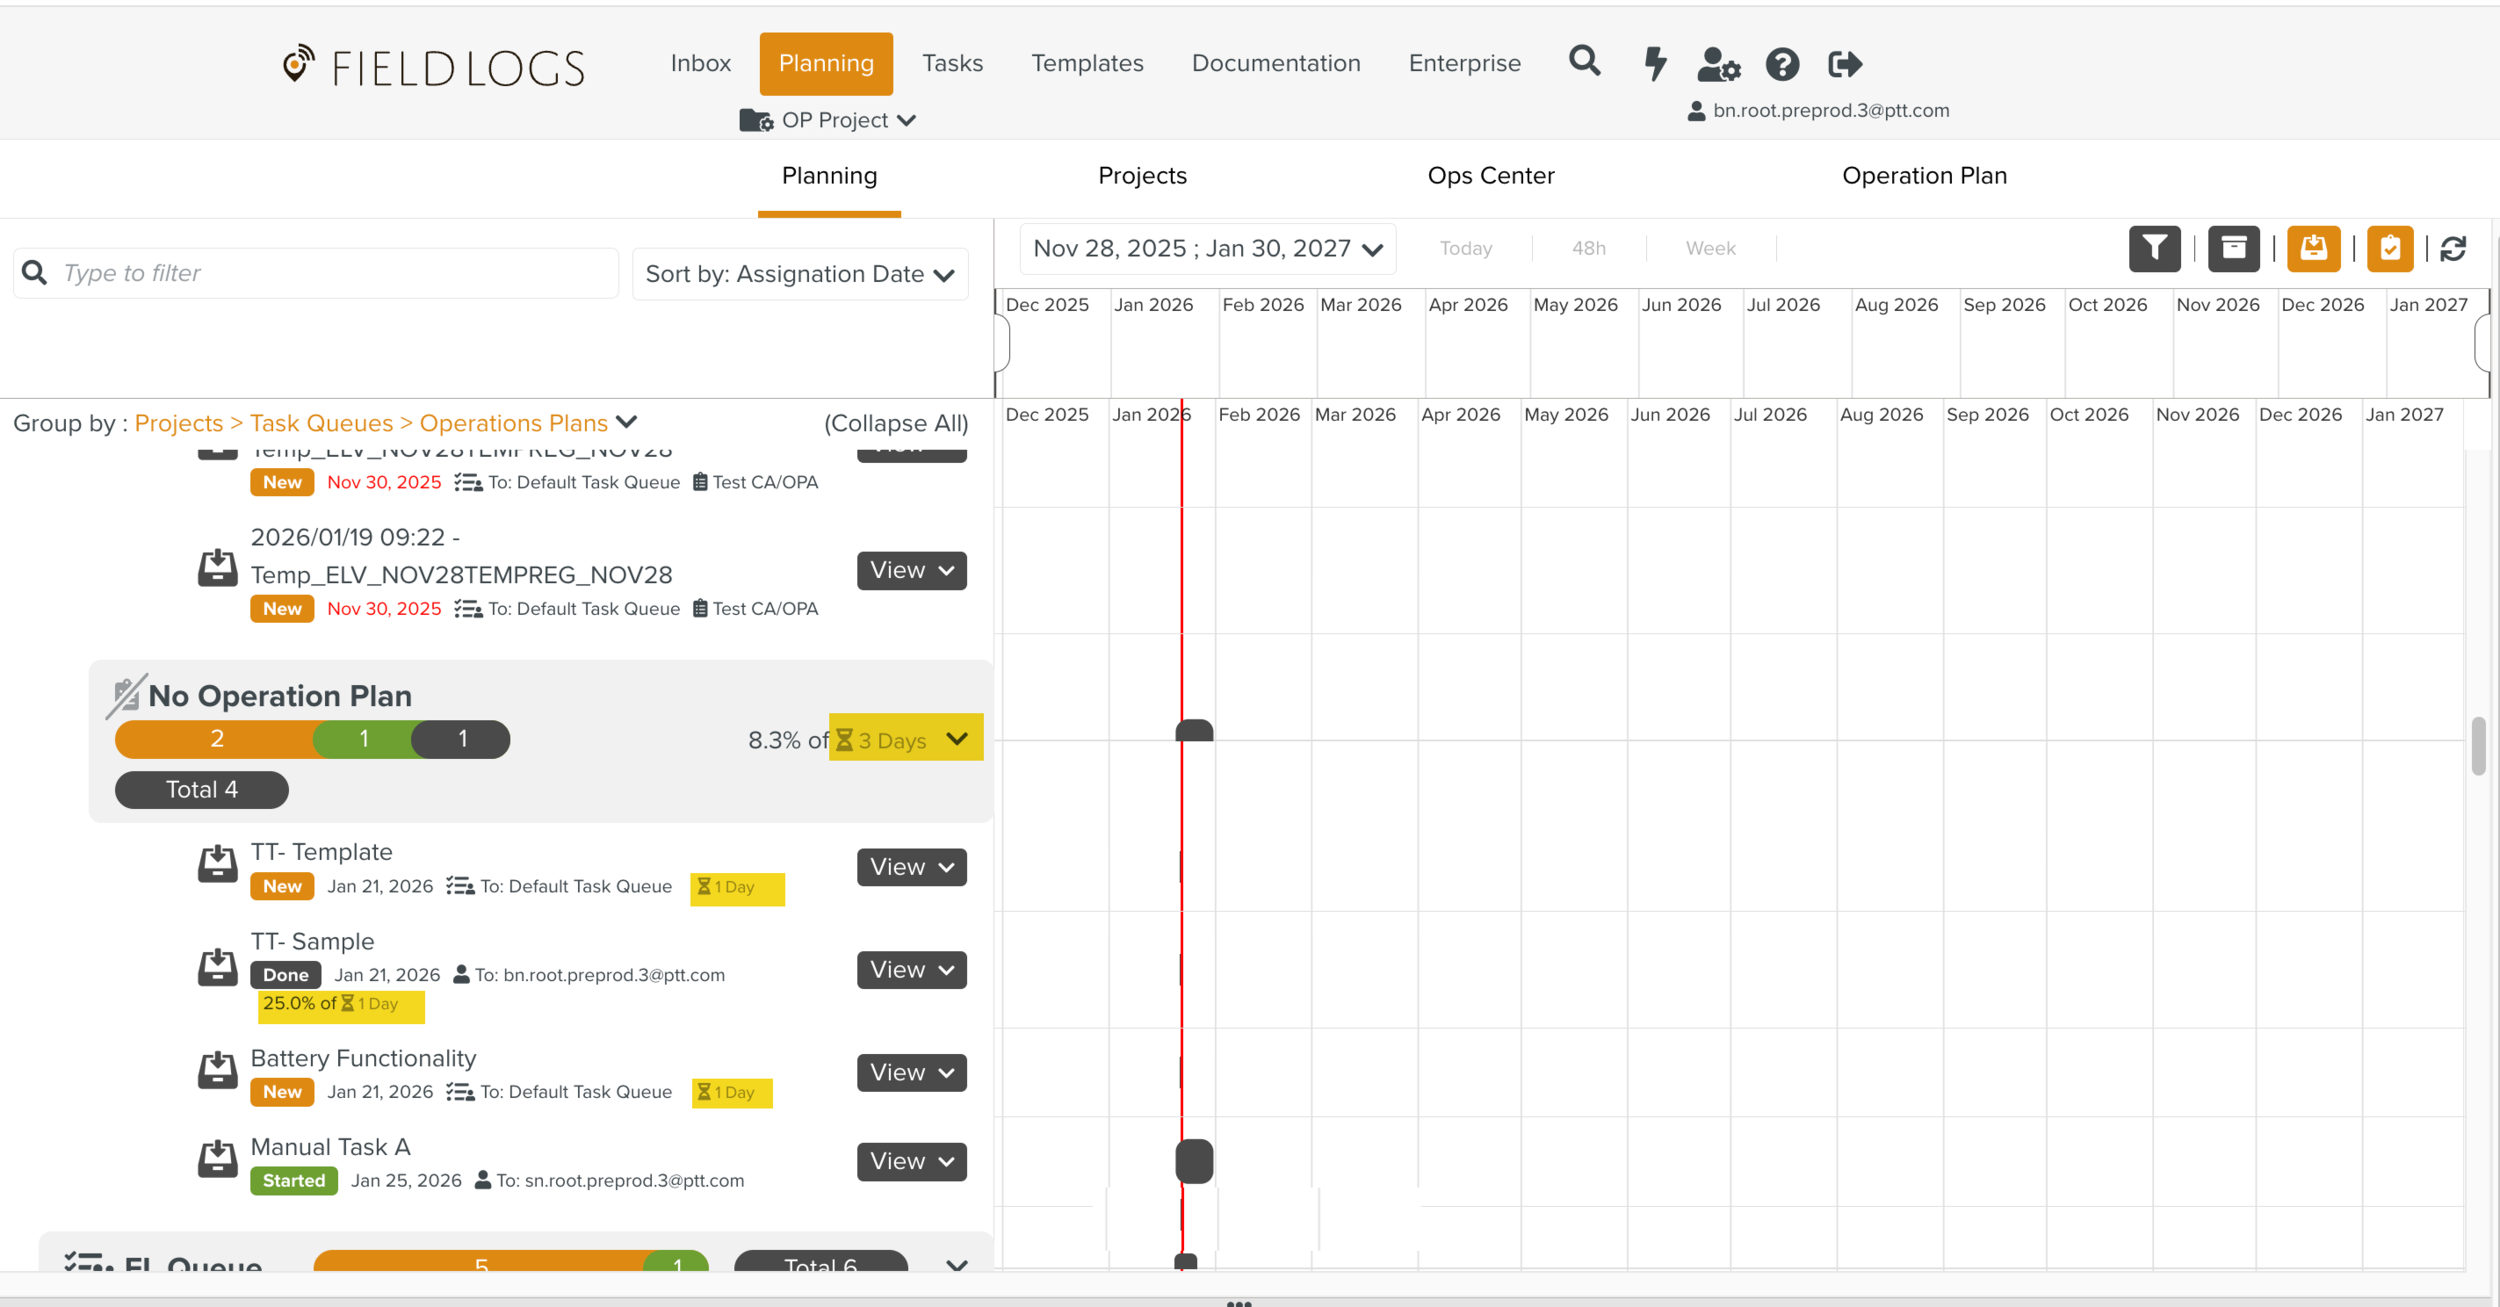
The following information is available in the Planning sections:
The estimated time stored in the Template is reflected in both the Default Task Queue and OpenTask Queue when the Template is assigned
The time tracked for already executed Task to overall Estimated Time defined during Template creation is displayed as percentage.
If the Template does not have a duration defined, no value is shown.
A red vertical line on the timeline shows the current time for better readability
Click the Time Tracked  to view the Task Progress.
 |
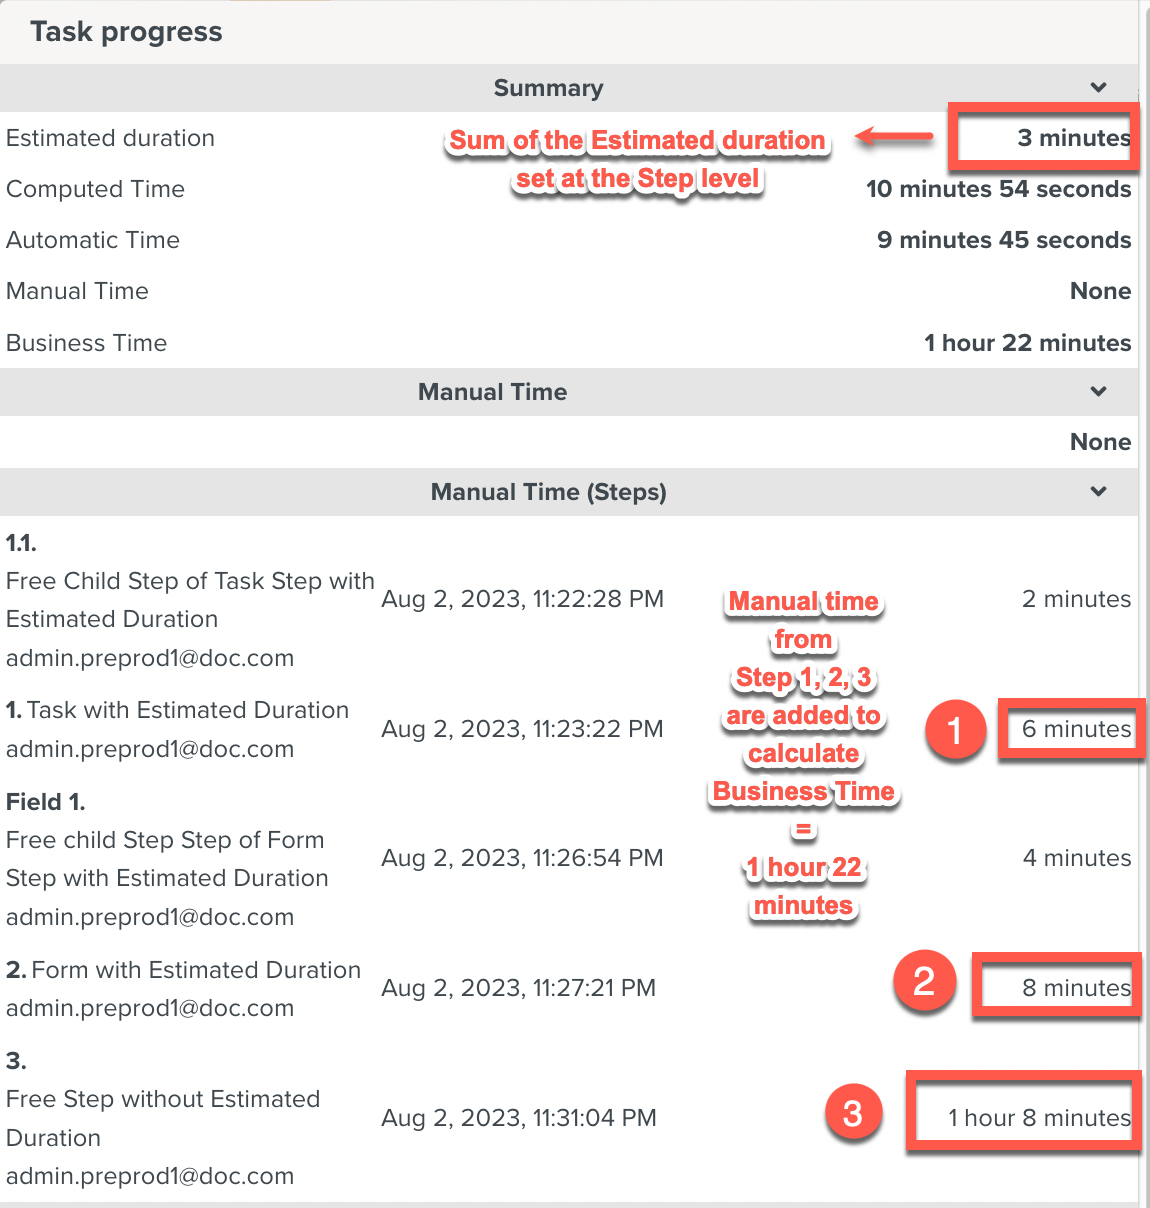
Important
Estimated duration: Sum of the Estimated duration of all the steps in the Template.
Computed Time: Time taken for the entire Task execution.
Automatic Time: Time Tracked either during automatic trigger or manual intervention of the user.
Manual Time: Time entered manually using the Edit option during Runtime
Business Time: Sum of the Manual Time and/or Automatic Time based on the execution.
Note
Time Tracking Summary can be viewed during the process of the execution and after the completion of the execution.
The difference is that Computed Time will be available only after the completion of the entire Task execution.
Automatic Time at the summary level is the sum of all time tracked automatically during the task execution.
 |
Business Time is the sum of Manual and/or Automatic Time.
 |
Note
When the time is tracked under the Manual Time and Automatic Time for the same Step, the Time tracked under the Manual time gets the higher priority in the Business Time calculation.
The manual time entered for Child Steps is ignored during the calculation of the Business Time if the parent has some recorded time.
When the Manual Time is not entered for any of the Steps, Business Time will be the sum of all Automatic time tracked in the Steps.