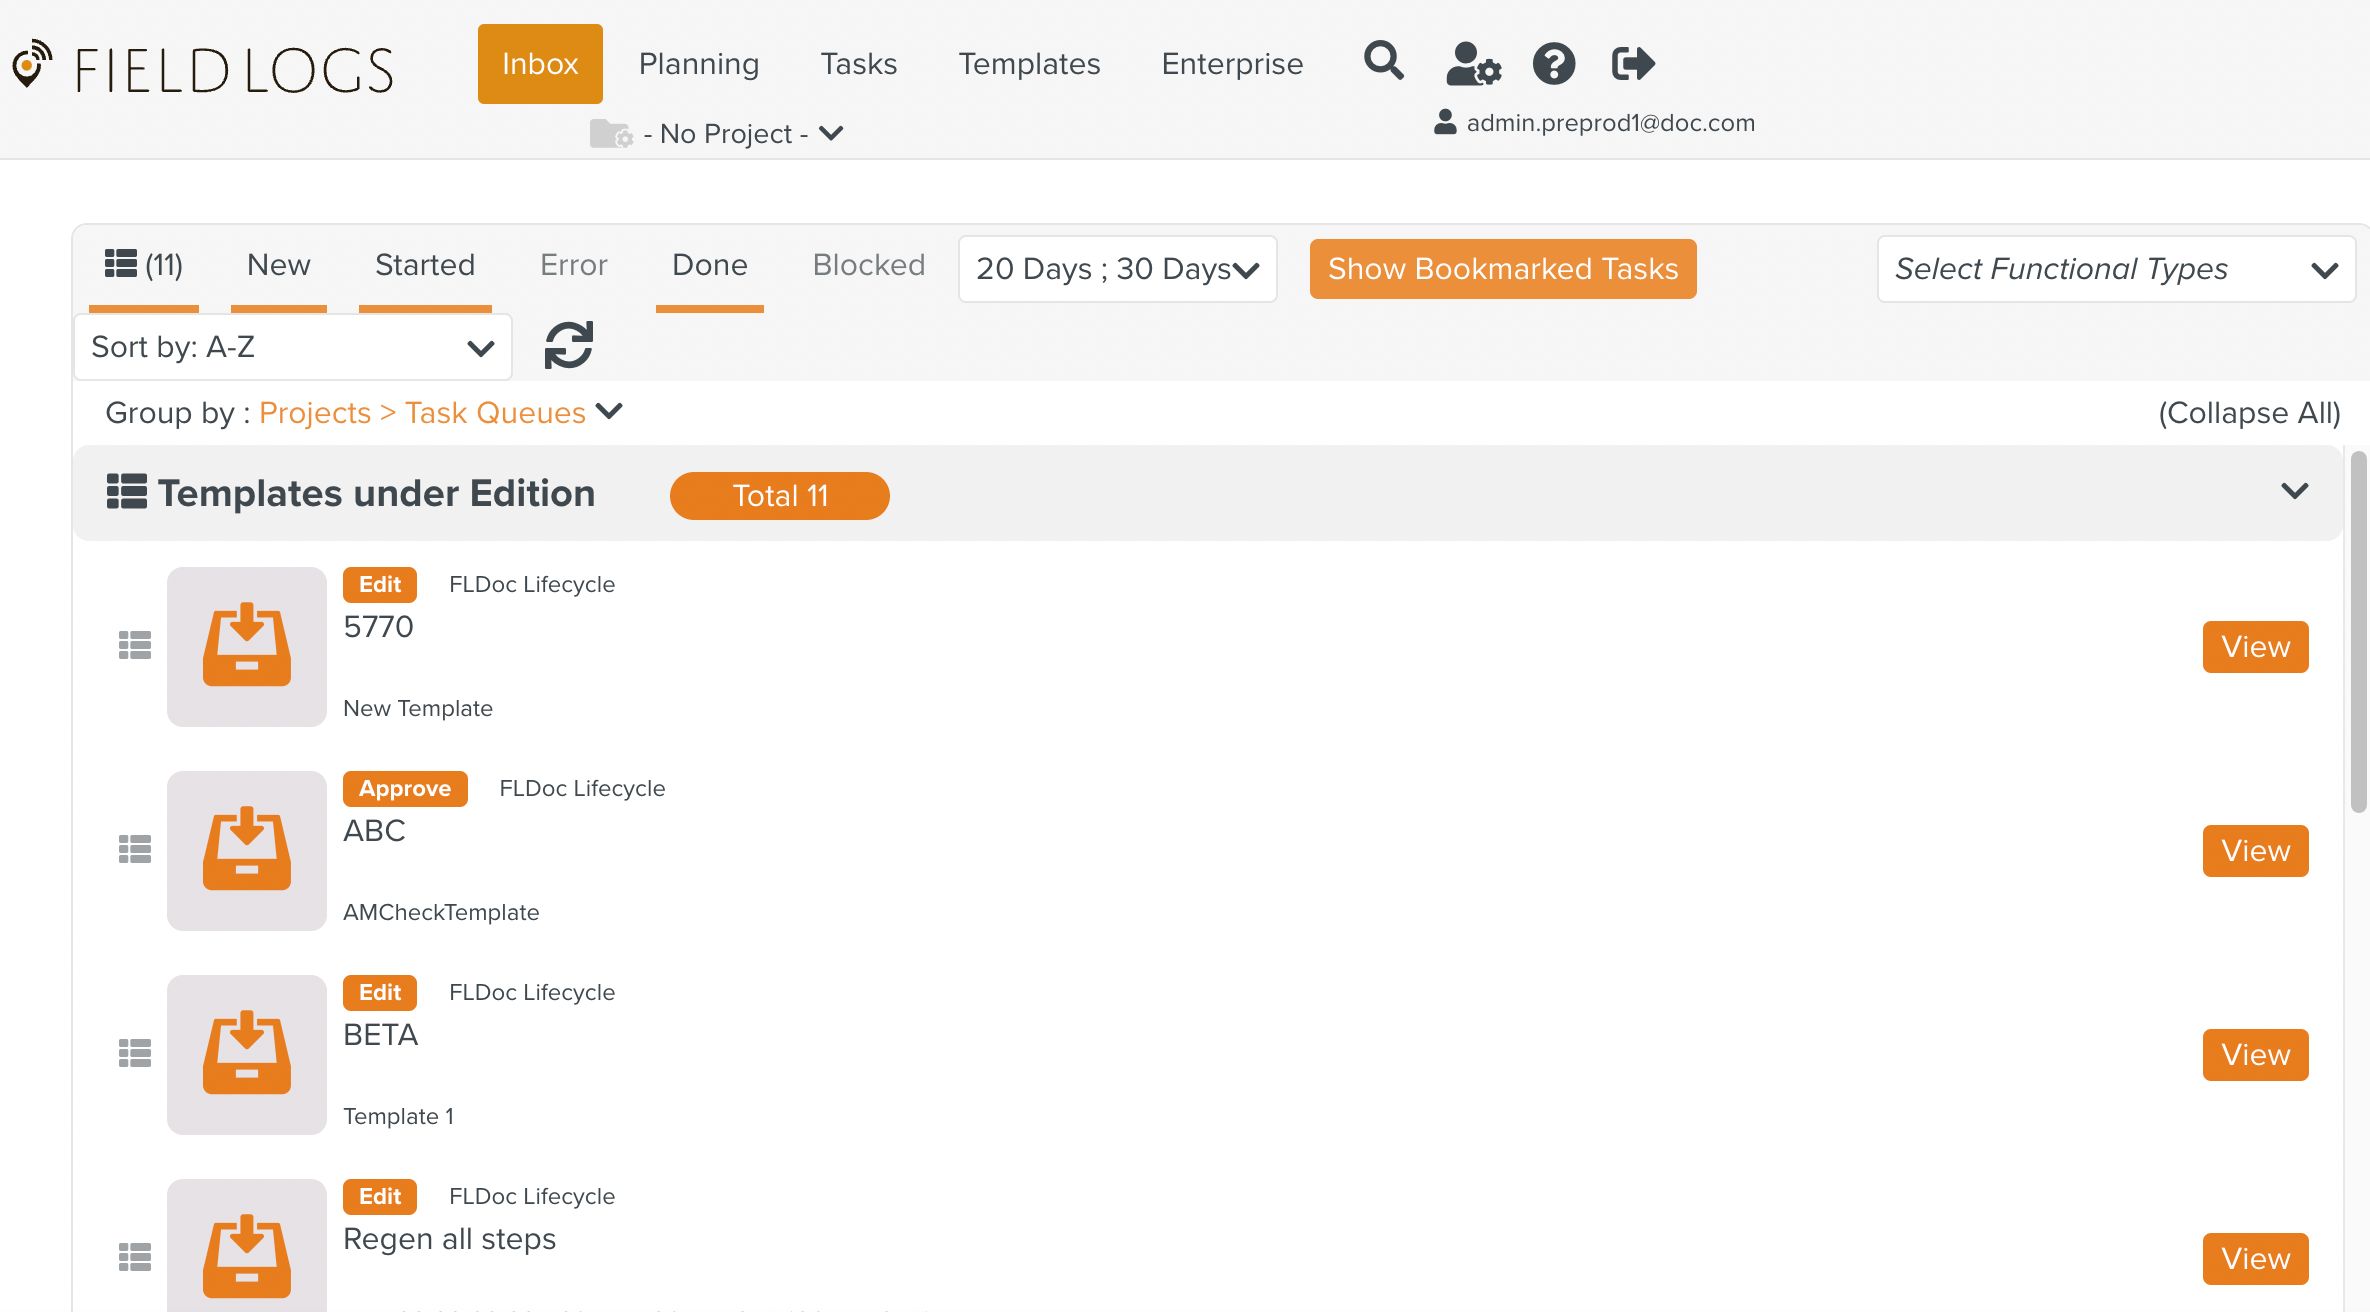
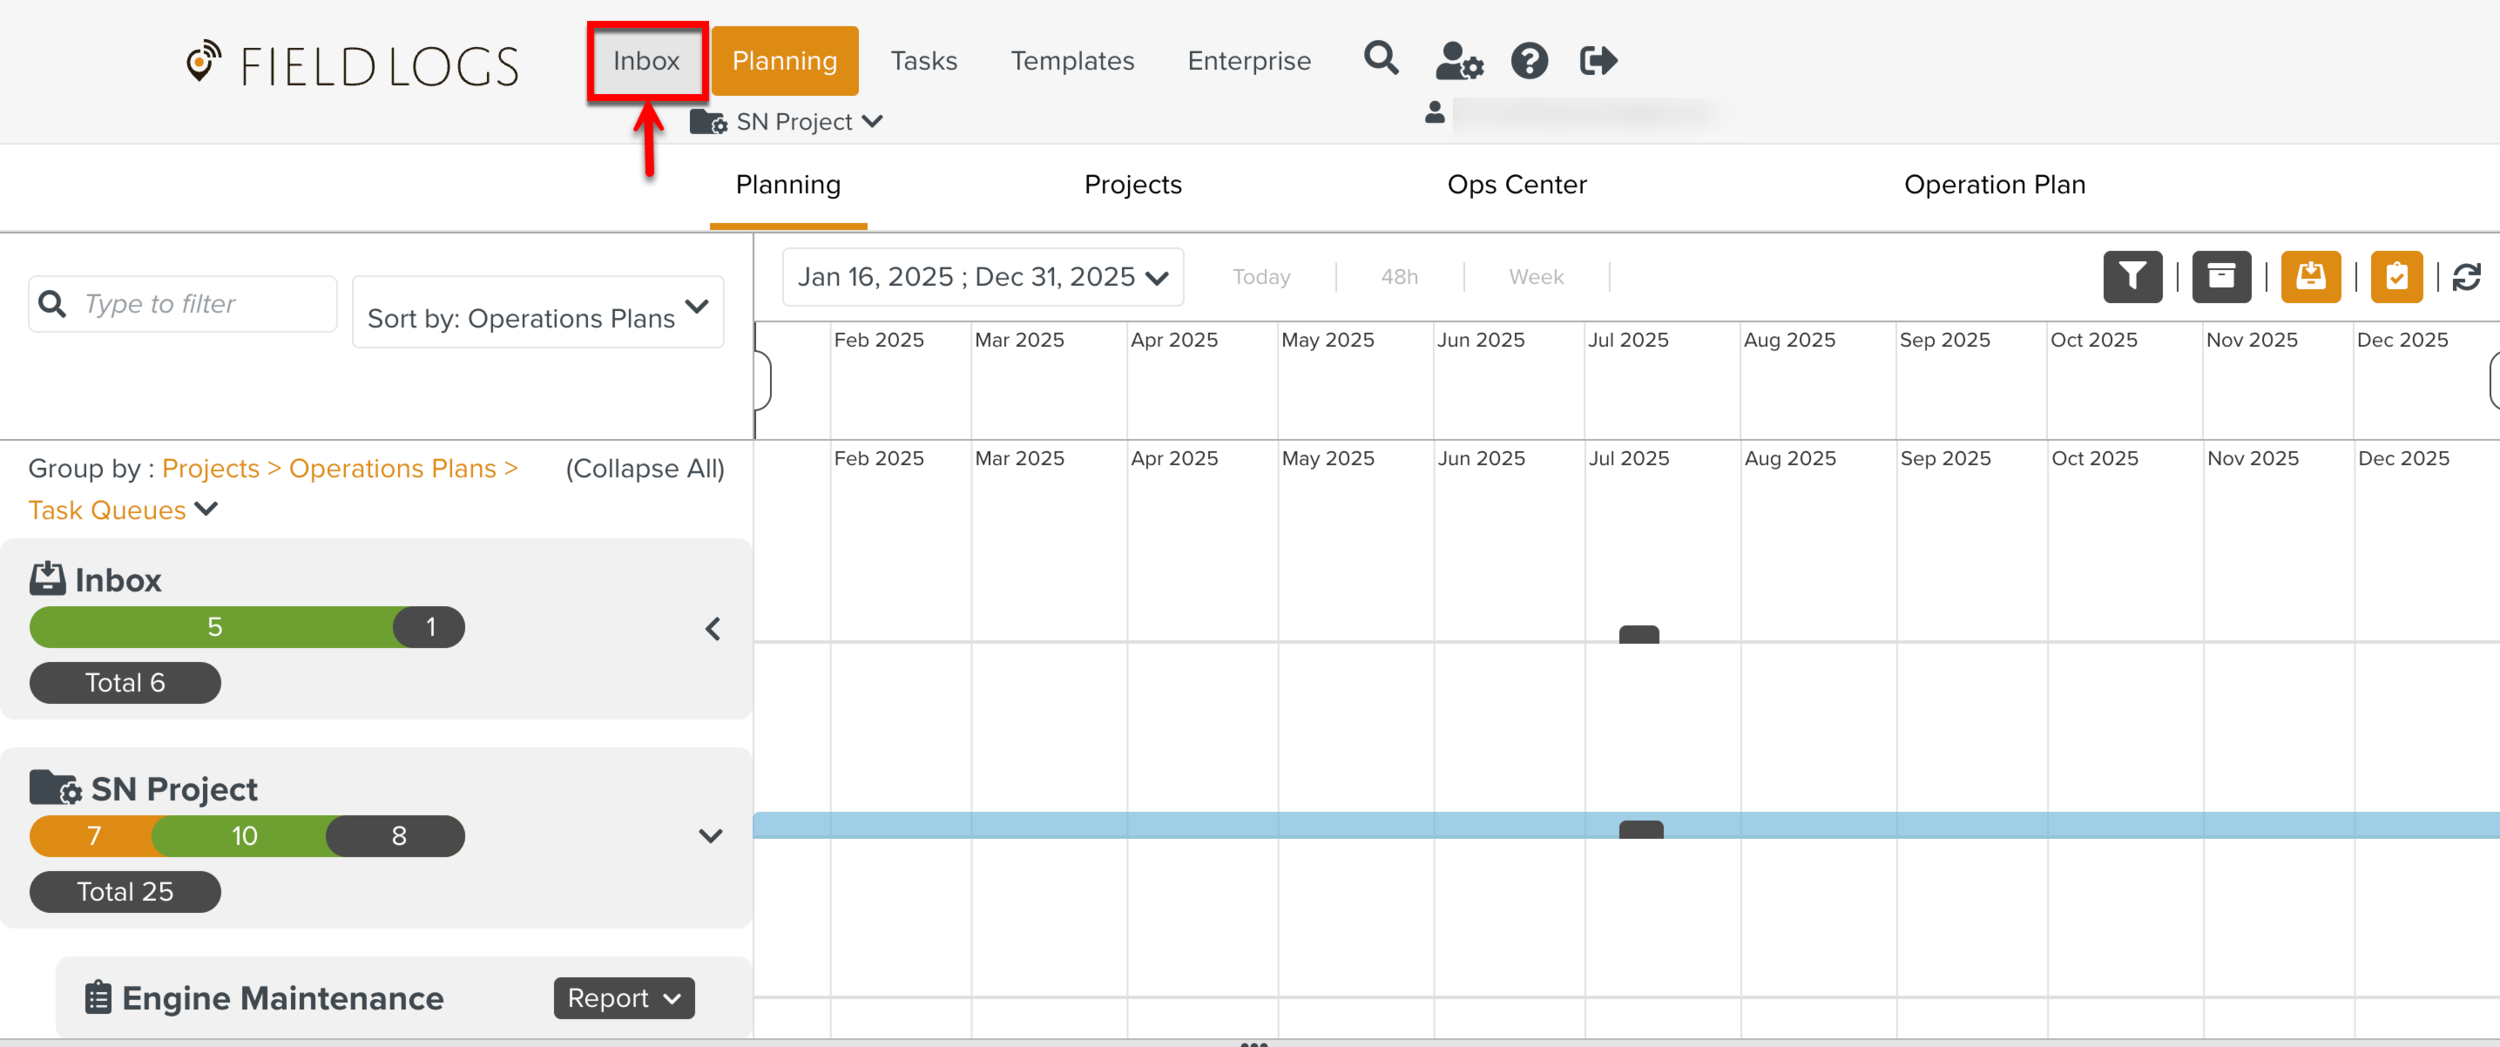
Using the FieldLogs Inbox on the Website
The Inbox section of FieldLogs displays all the Tasks assigned to the User. The Inbox serves as the initial landing page for Field Employees upon login, offering a comprehensive view of incoming/pending Tasks, enabling them to take actions directly from the Inbox.
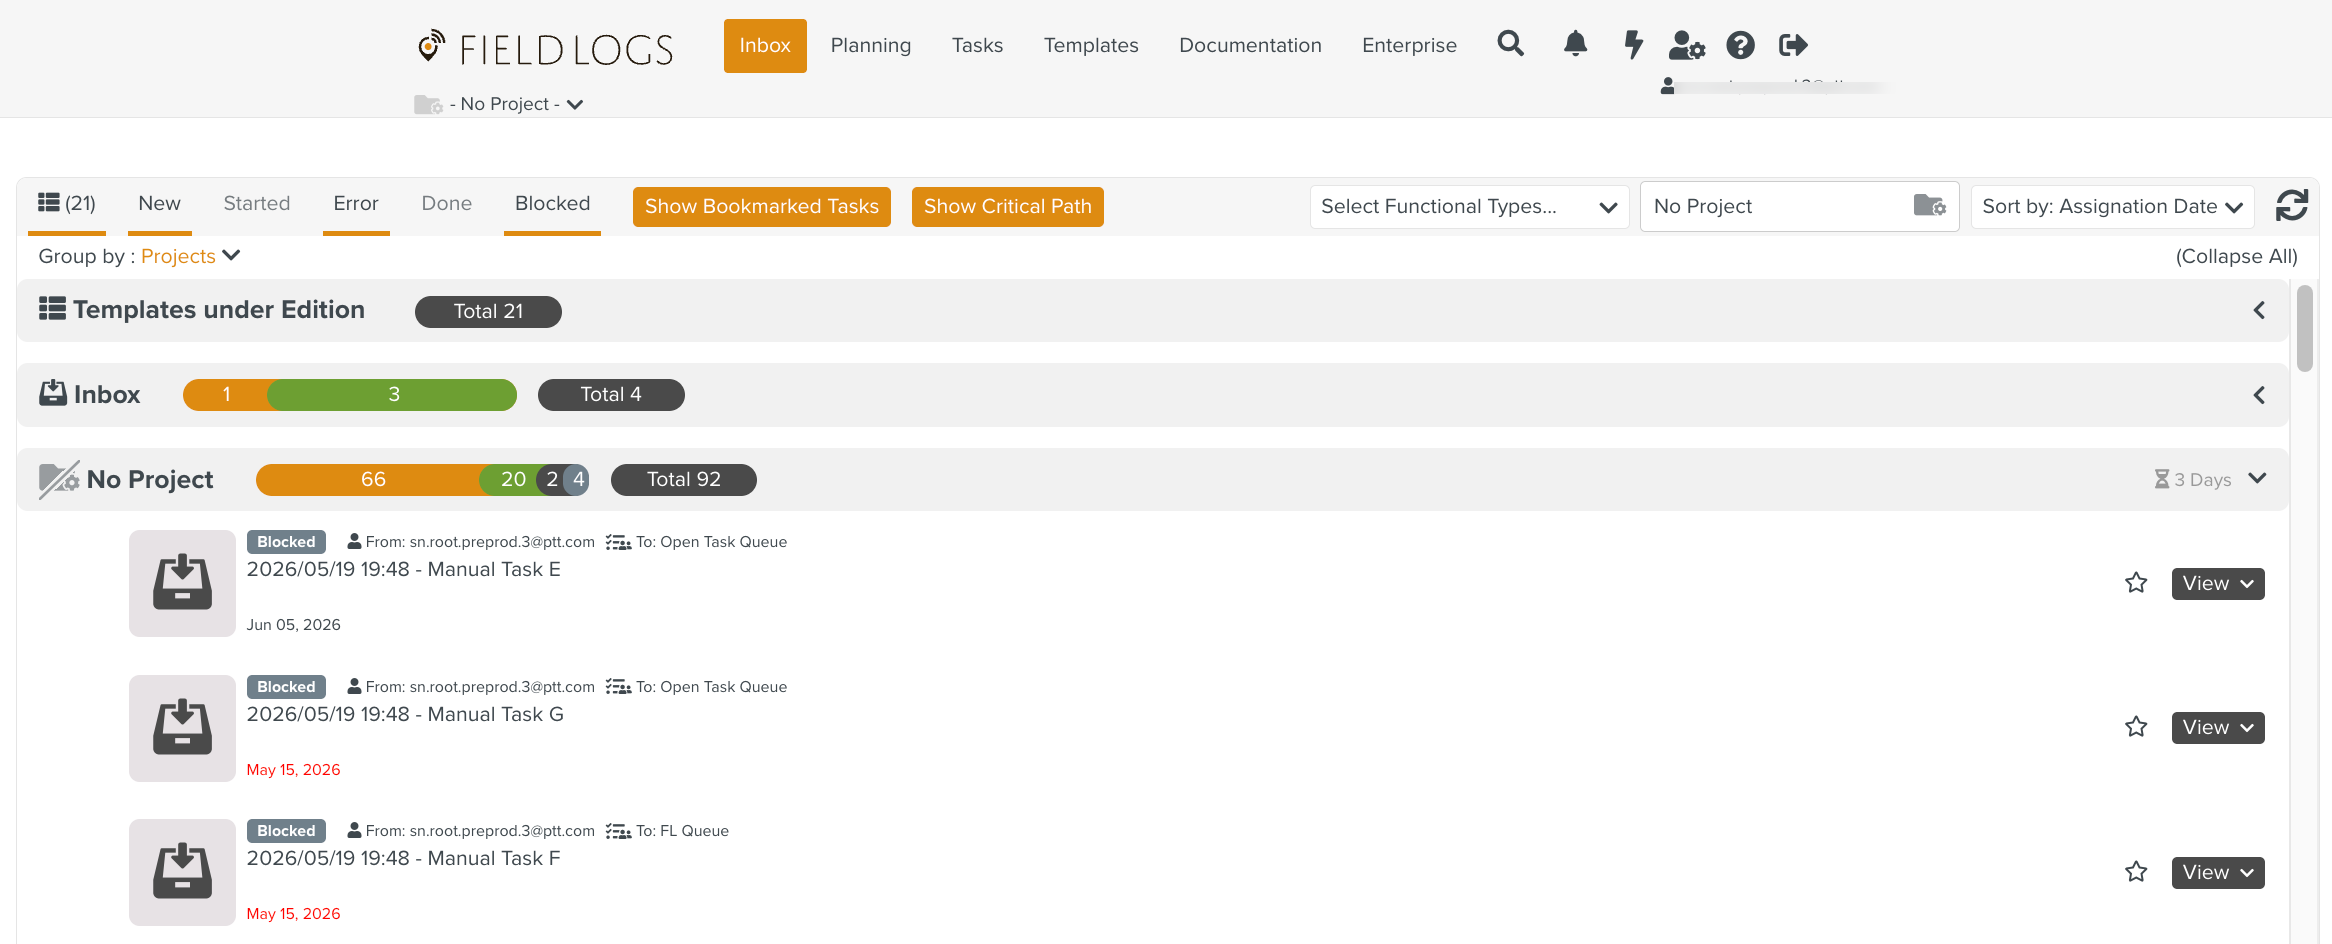
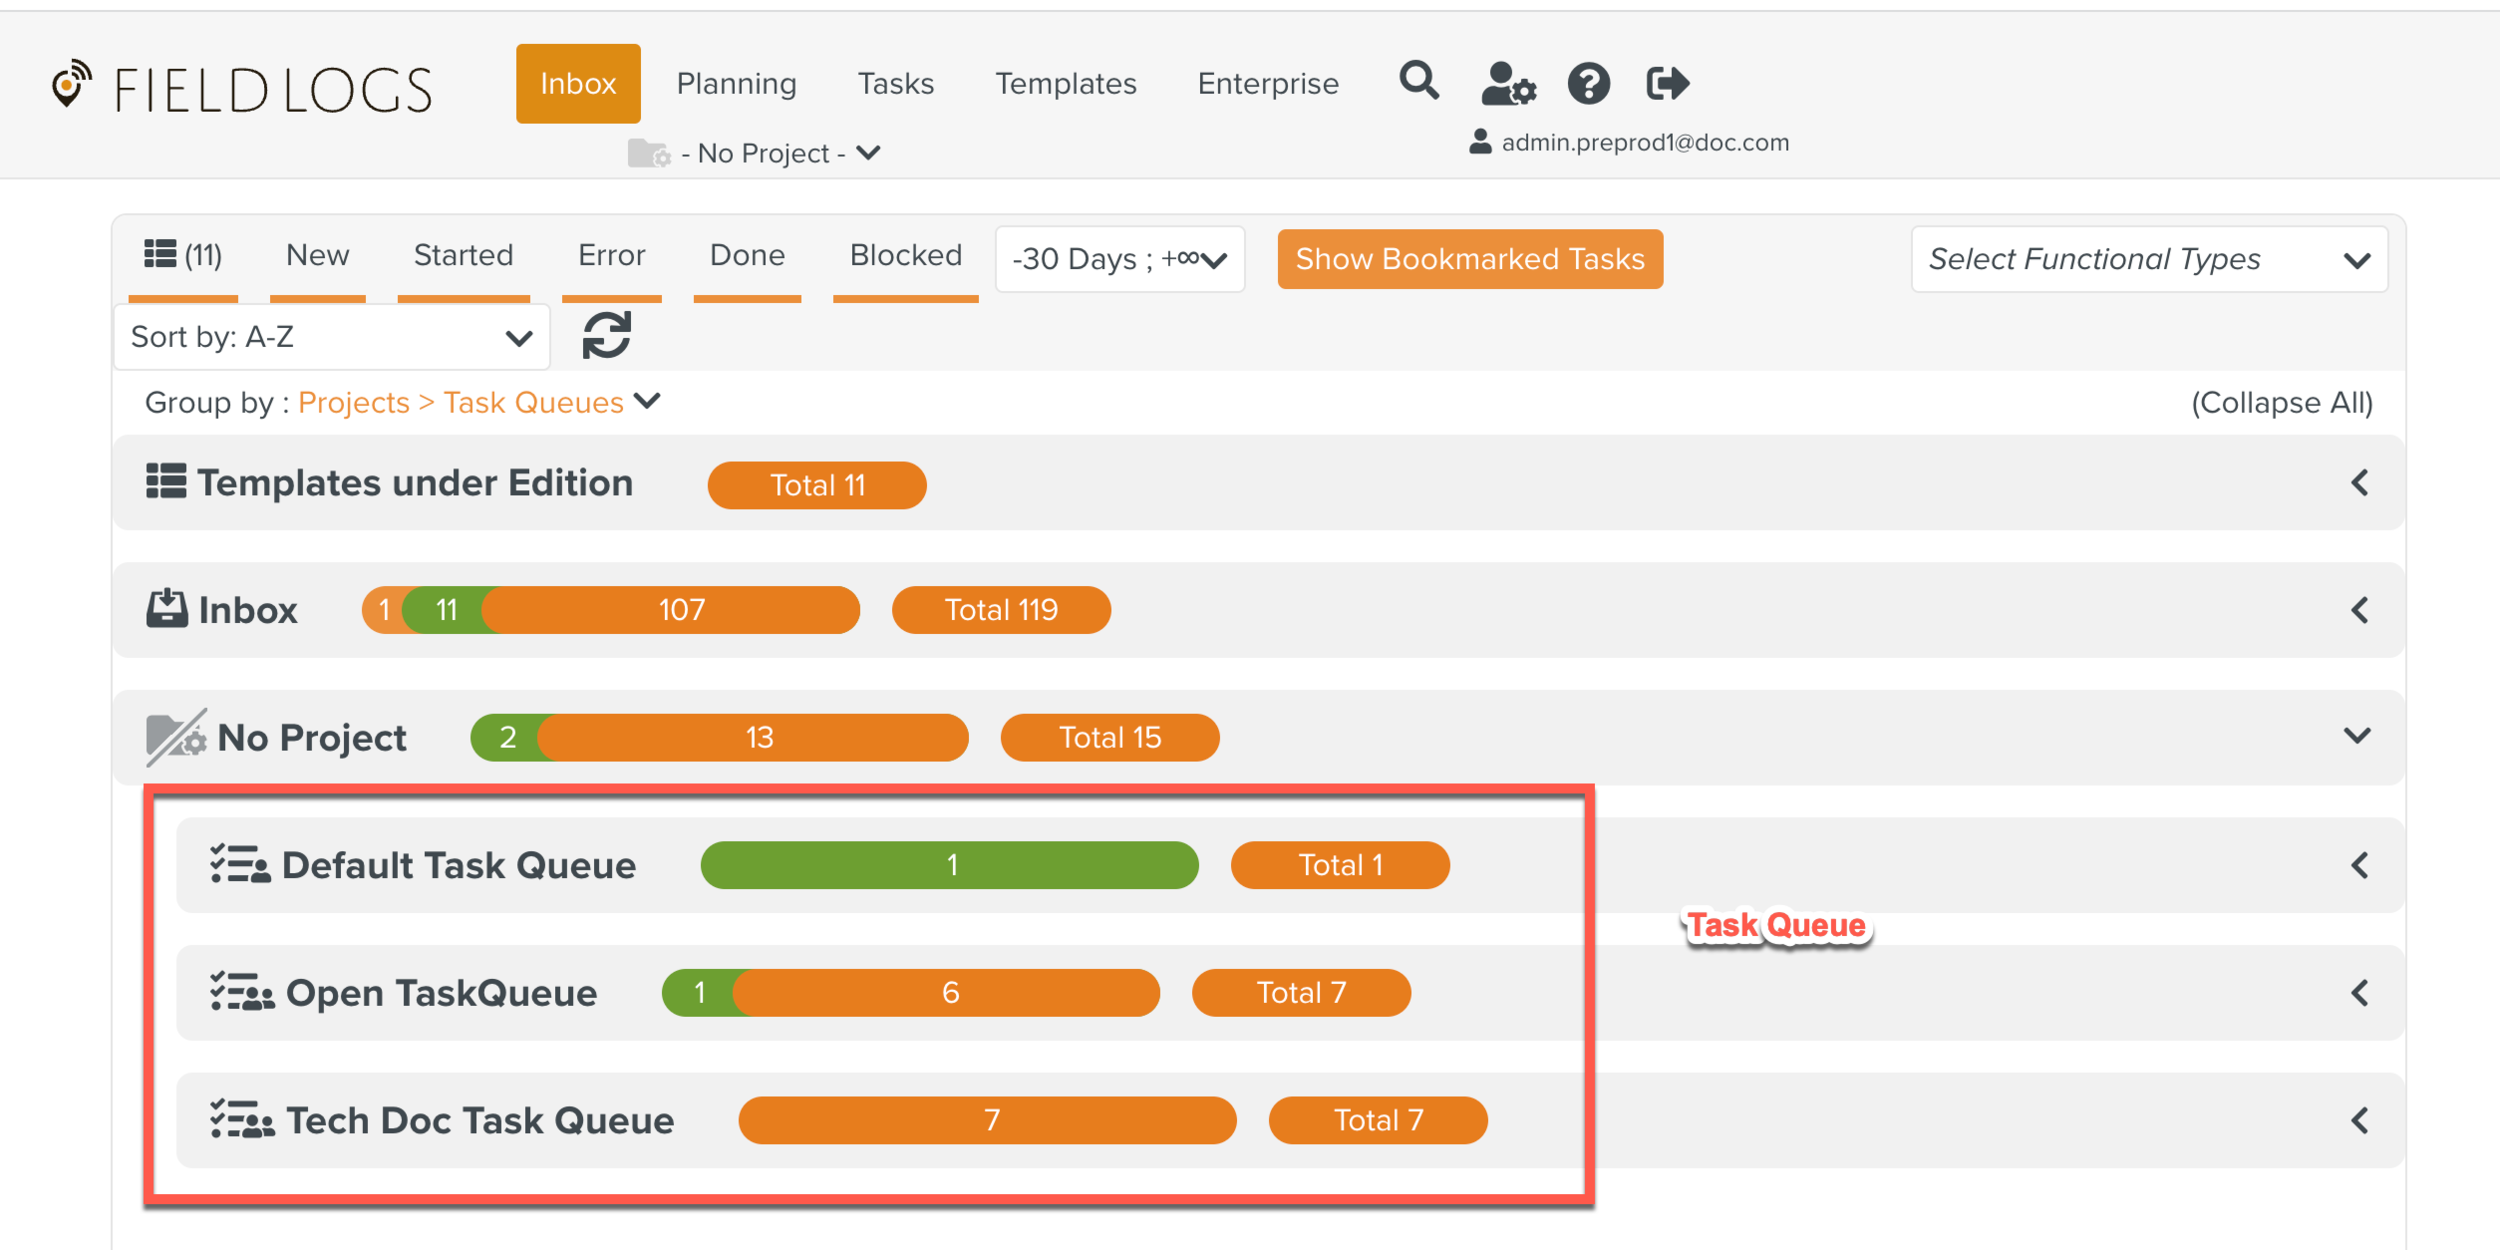
The Inbox is organized as shown below:
Task Header levels - The Task headers can be the names of Projects, Operation Plans, Task Queues, Assignees, Production Capacities, etc.
There can be different levels of Task headers. Task Header levels are configured using the grouping options.
Task List: The Tasks are listed under the corresponding Task headers.
Task Cell: A Task cell within the Task list represents a specific Task.
Filters: Filters the Tasks based on different criteria.
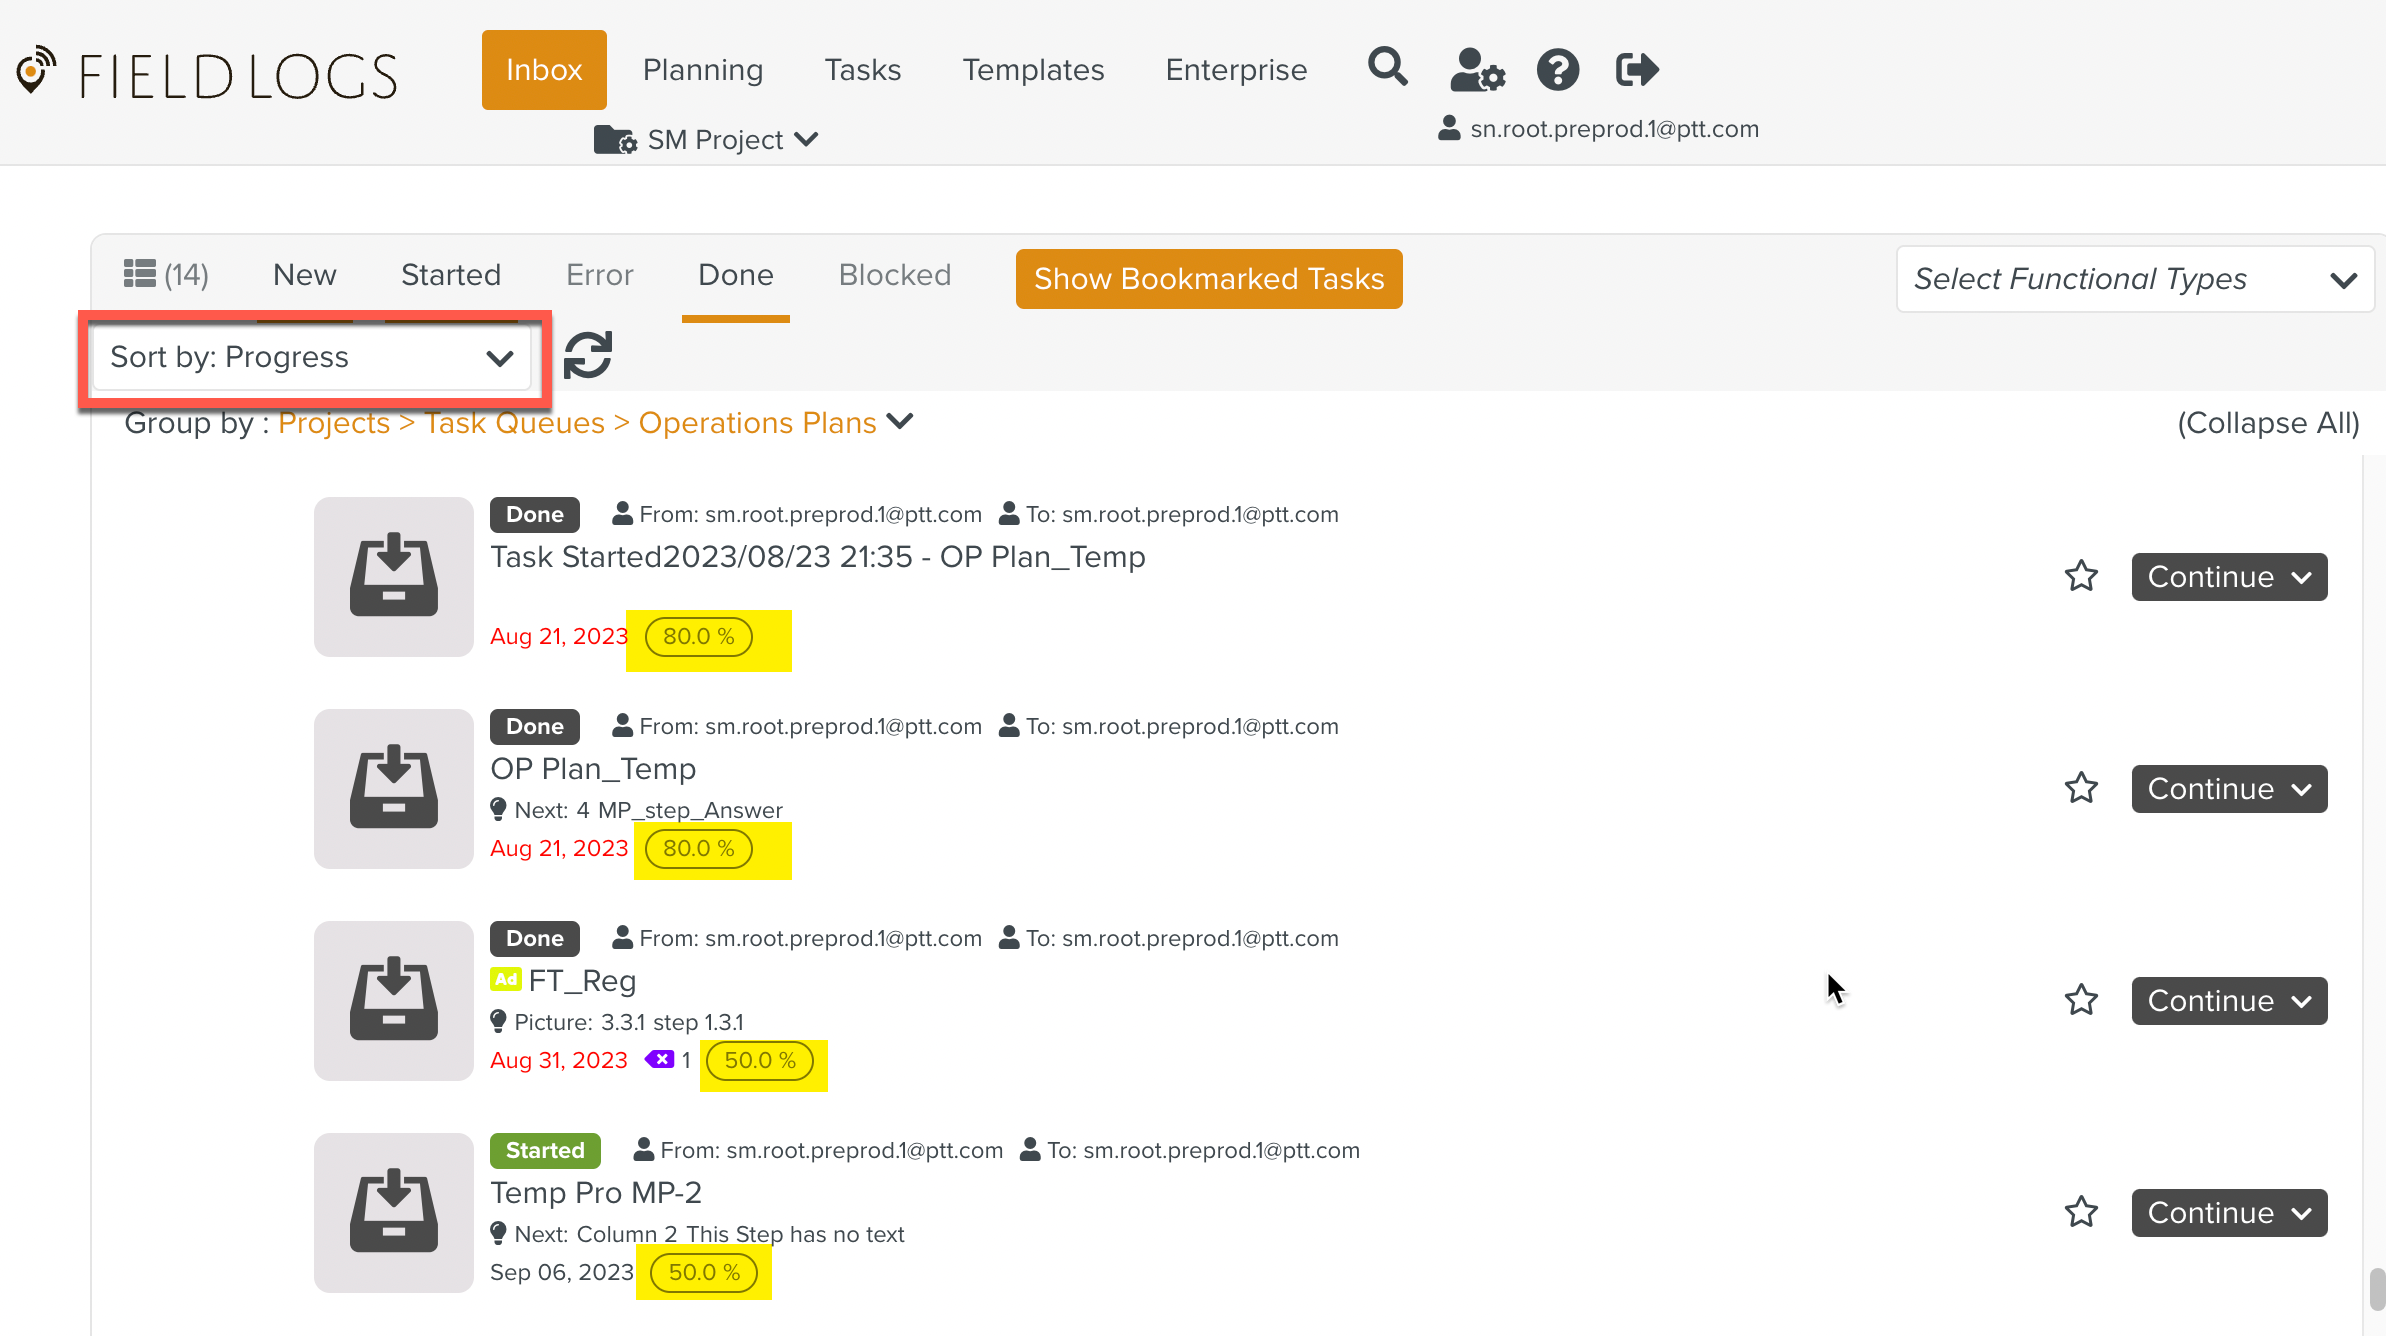
Sorting: Sorts options available to organize the Tasks based on the selected criteria.
Grouping: Groups the Tasks under different categories.
Based on the grouping and sorting settings, Tasks appear under their corresponding Projects, Operation Plans, Task Queues, and other categories.
 |
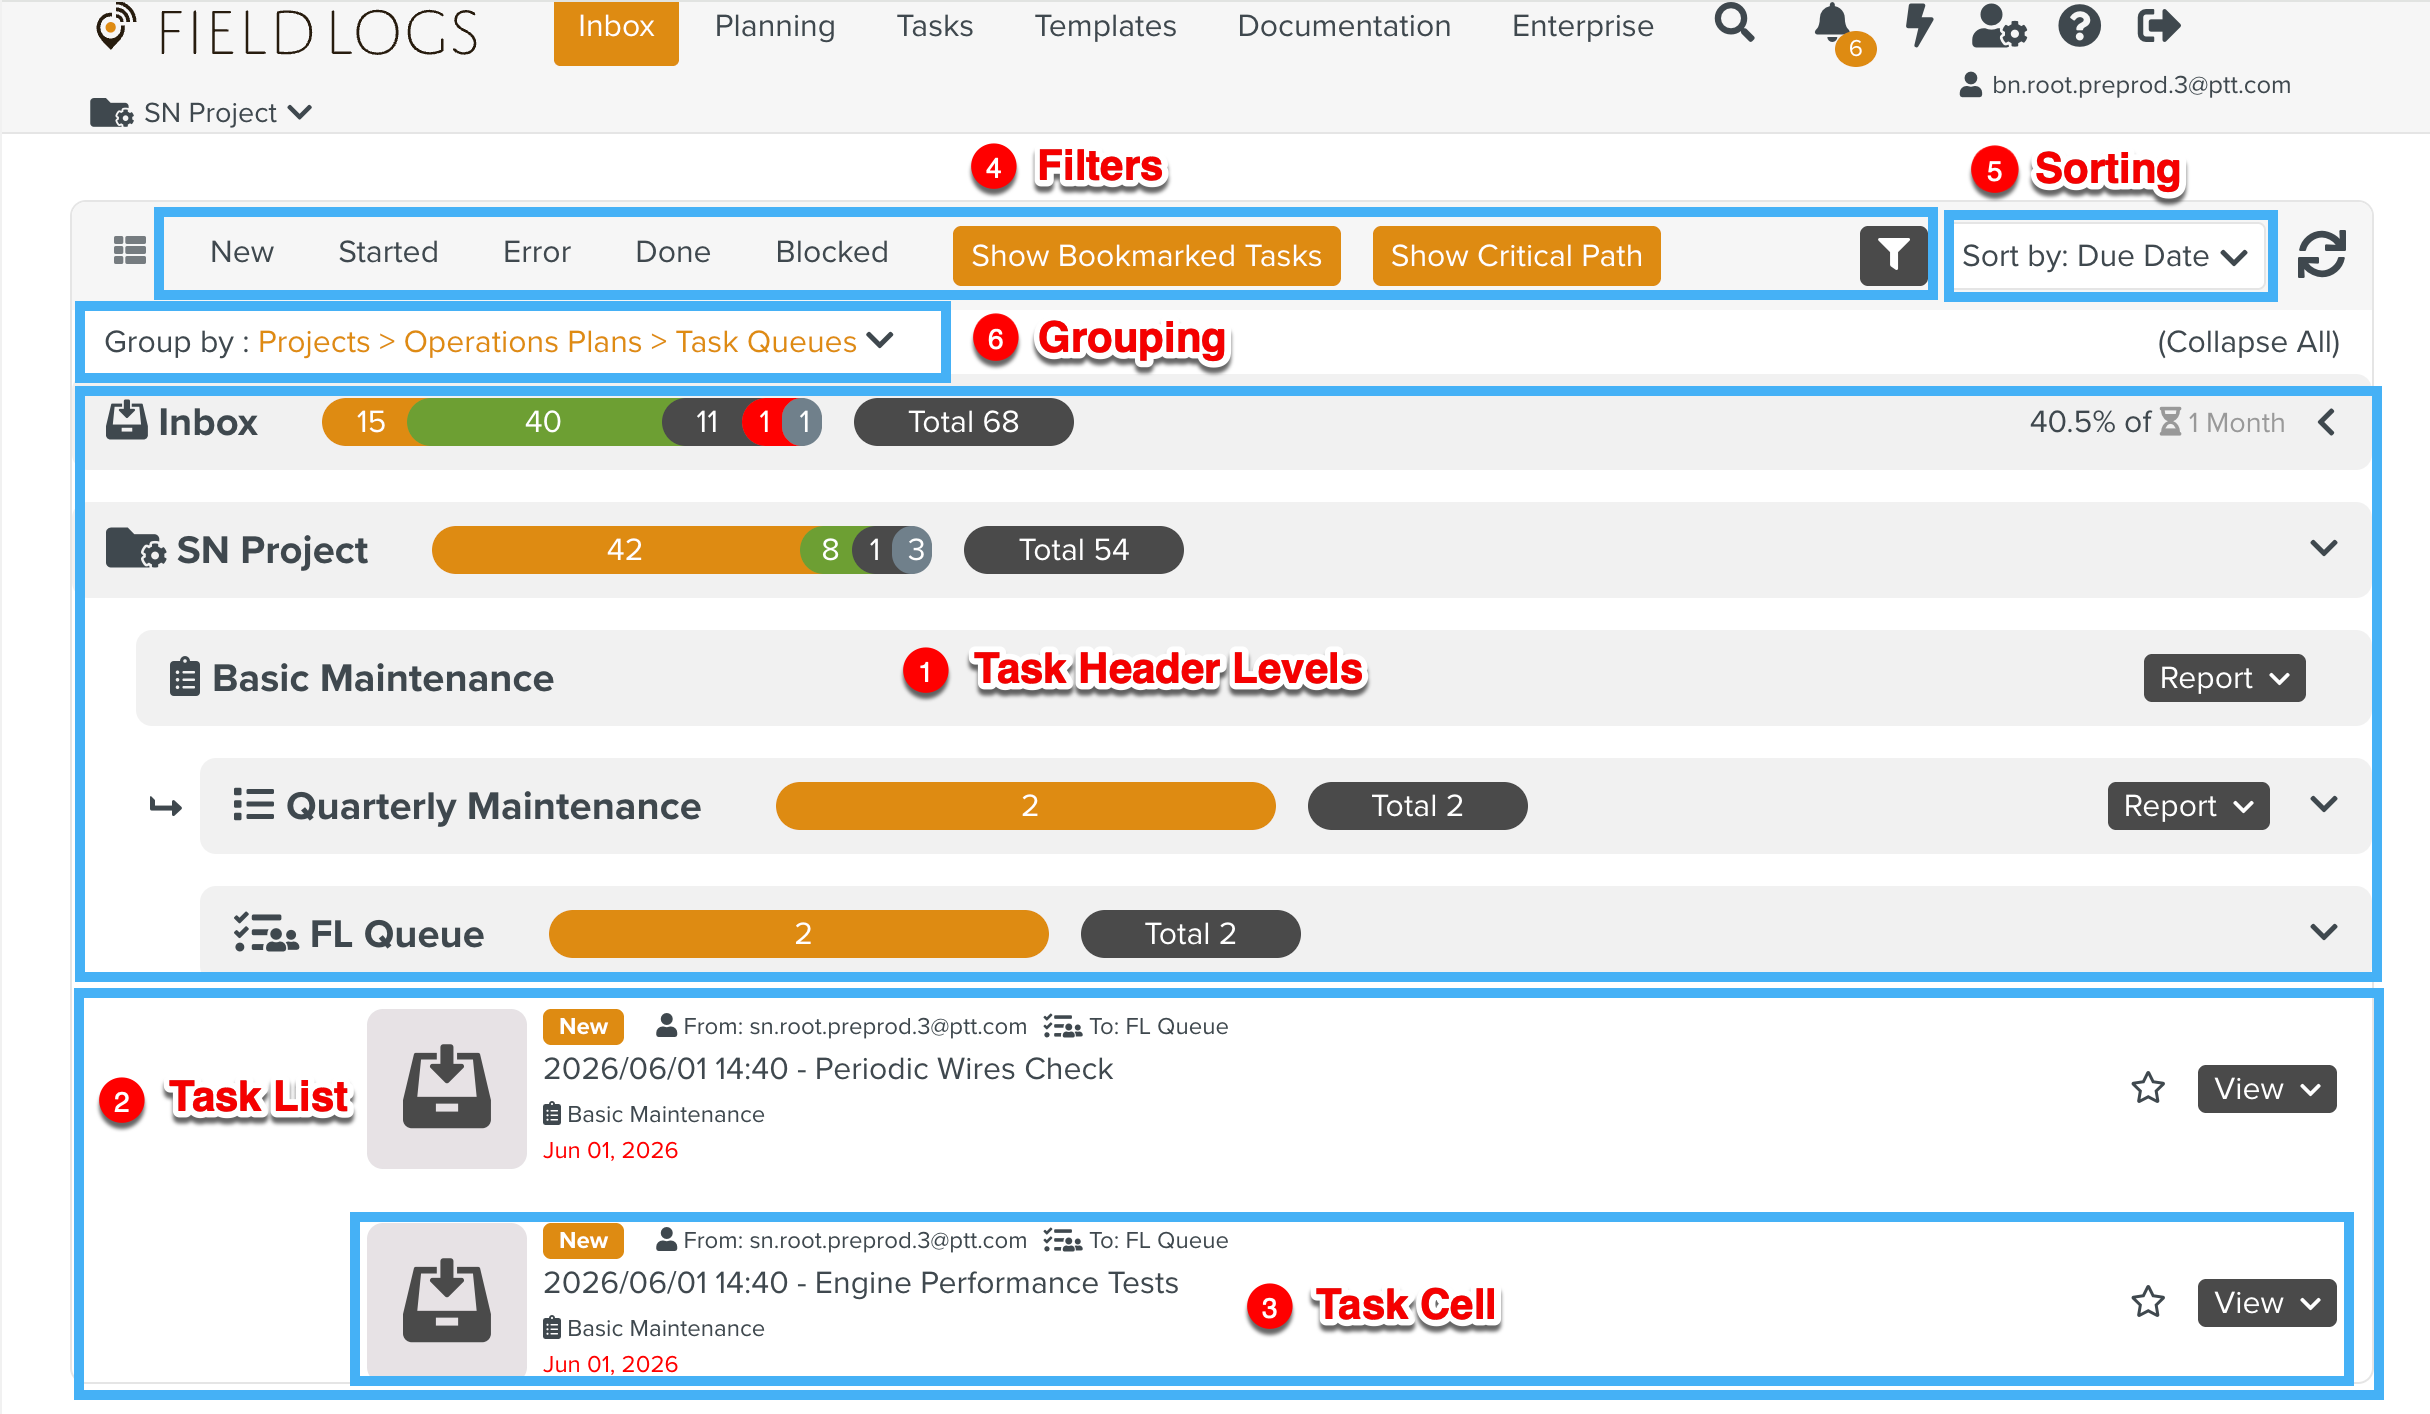
On the Task headers, you can find the following details and options:
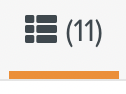
Number of Total Tasks.

Number of Tasks in each status.

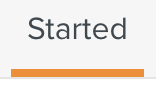
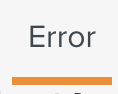
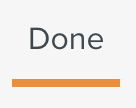
Each Task status is color coded as listed below:
Orange – New Tasks
Green – Started Tasks
Black – Completed Tasks
Red – Error
Grey – Blocked Tasks
button is displayed on the Operation Plan header level.
Note
This button is available only on the Operation Plan and Counter header levels when the Tasks are grouped by Operation Plans.
When you expand the button, the following options are available.
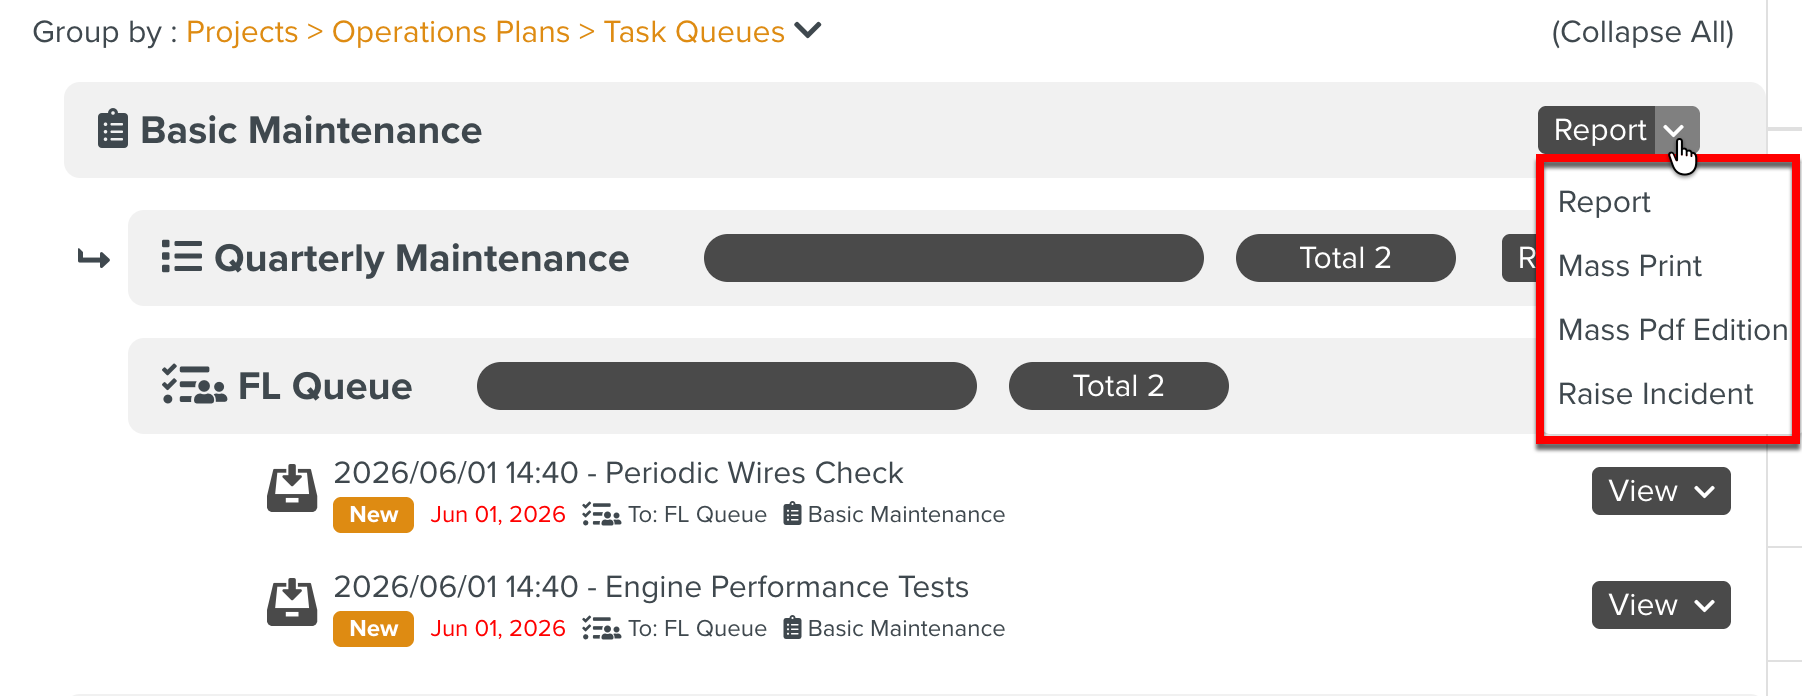
Options
Description
Report
Generate Operation Plan Execution reports.
Mass Print
Generate reports of all Templates/Tasks associated with an Operation Plan.
Mass Pdf Edition
Retrieves the variable values of an operations plan and counter levels.
Raise Incident
Raise an Operation Plan context Incident.
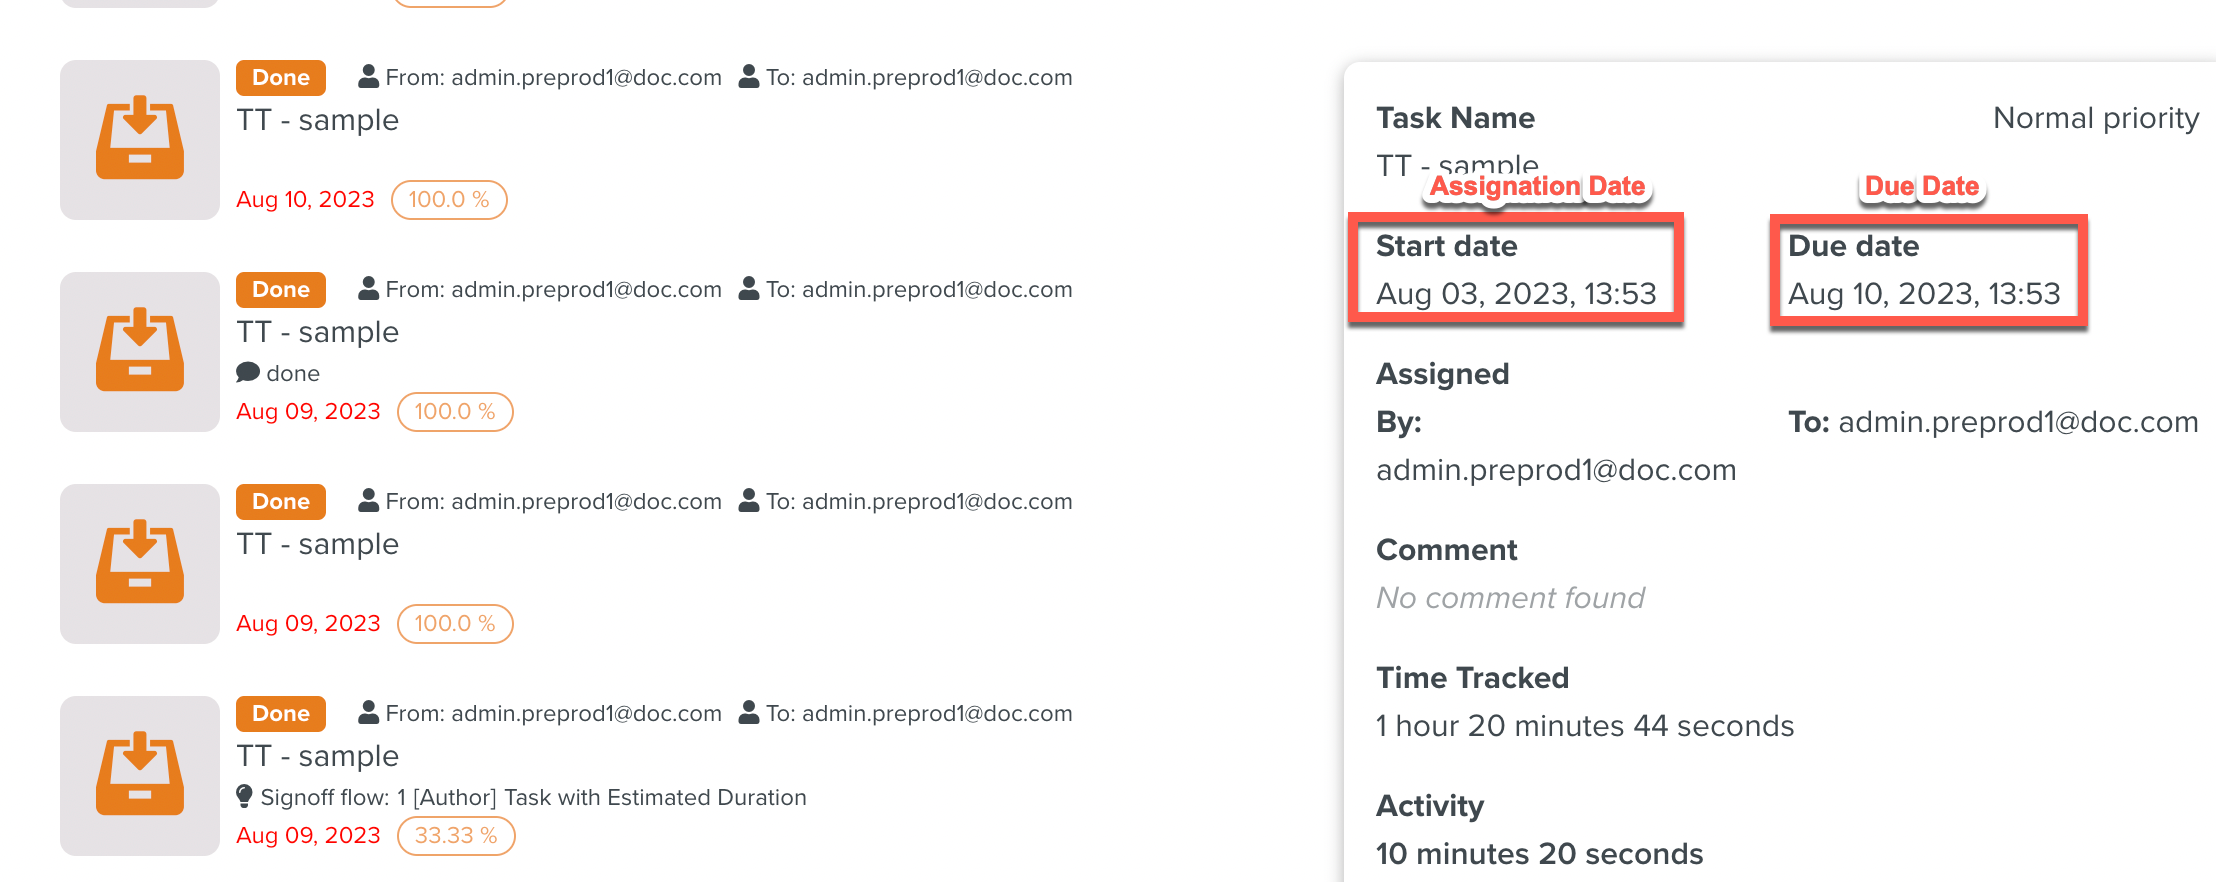
On each Task cell, the following information is provided as shown:
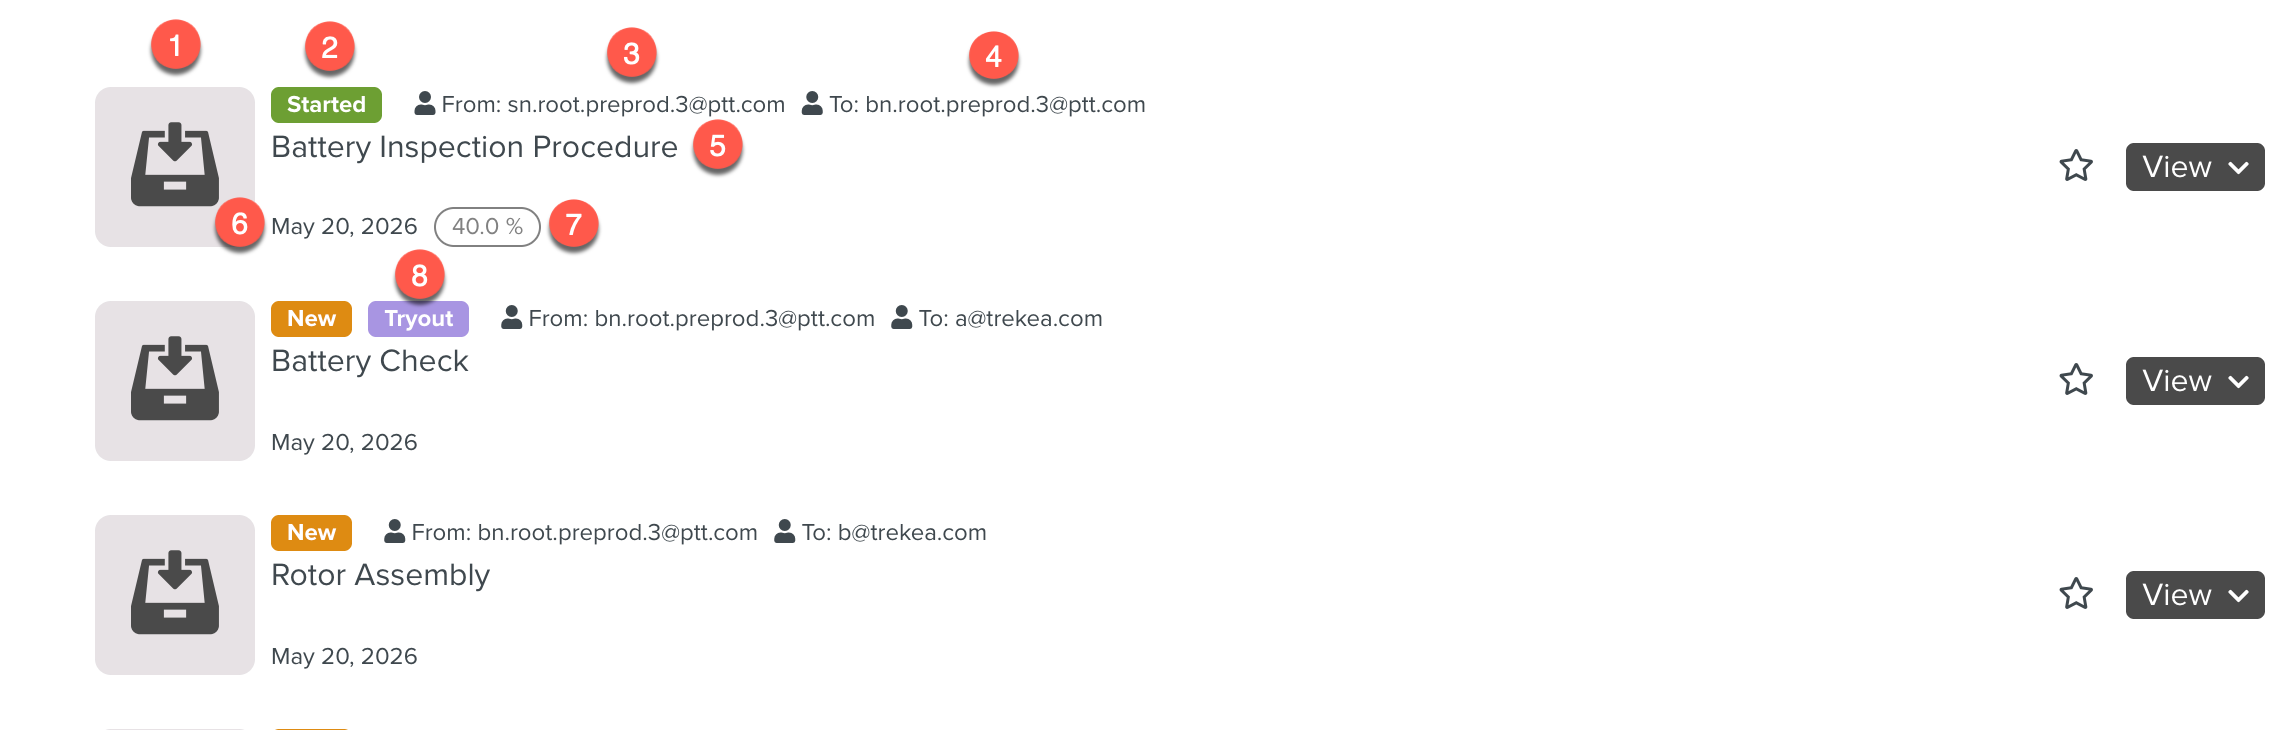 |
Task Image: The picture associated with a Task.
Status: Indicates the current status of the Task. The status of the Task can be one of the following:
- The Assignee has not seen or started the Task.
- The Assignee has run the Task.
- The Job is completed and the Task is marked as Done.
- The Task is in error.
Assigner: User who assigned the Task.
Assignee: User to whom the Task is assigned.
Task title: The title of the Task.
Date: Date of assignation of the Task.
Progress bubble: Indicates the percentage of completion of the Task.
Tryout label: Tryout label is displayed if a Task is assigned for Tryout from the Templatessection or Tryout Process Flow Tasks.
Hovering over the label displays the Tryout name. You can click on the Tryout name to view the Tryout definition and Process Flow Tasks in the Tryouts section.
You can perform the following actions in the Inbox section:
Filter the Tasks based on the following criteria:
Projects. (Multiple Projects can be selected using the Multi-Project Selector.)
Task Queues.
Functional Types.
Competencies linked to the Signoff flow in Tasks.
Tasks that are going through the Template Publication process.
Task Status: New, Started, Error, Done, and Blocked.
Sort the Tasks based on date, alphabetical order, priority, progress, Operation Plans, and Operation Number.
Execute the Tasks from the Task Queue.
Perform various actions from the Task Queue List.
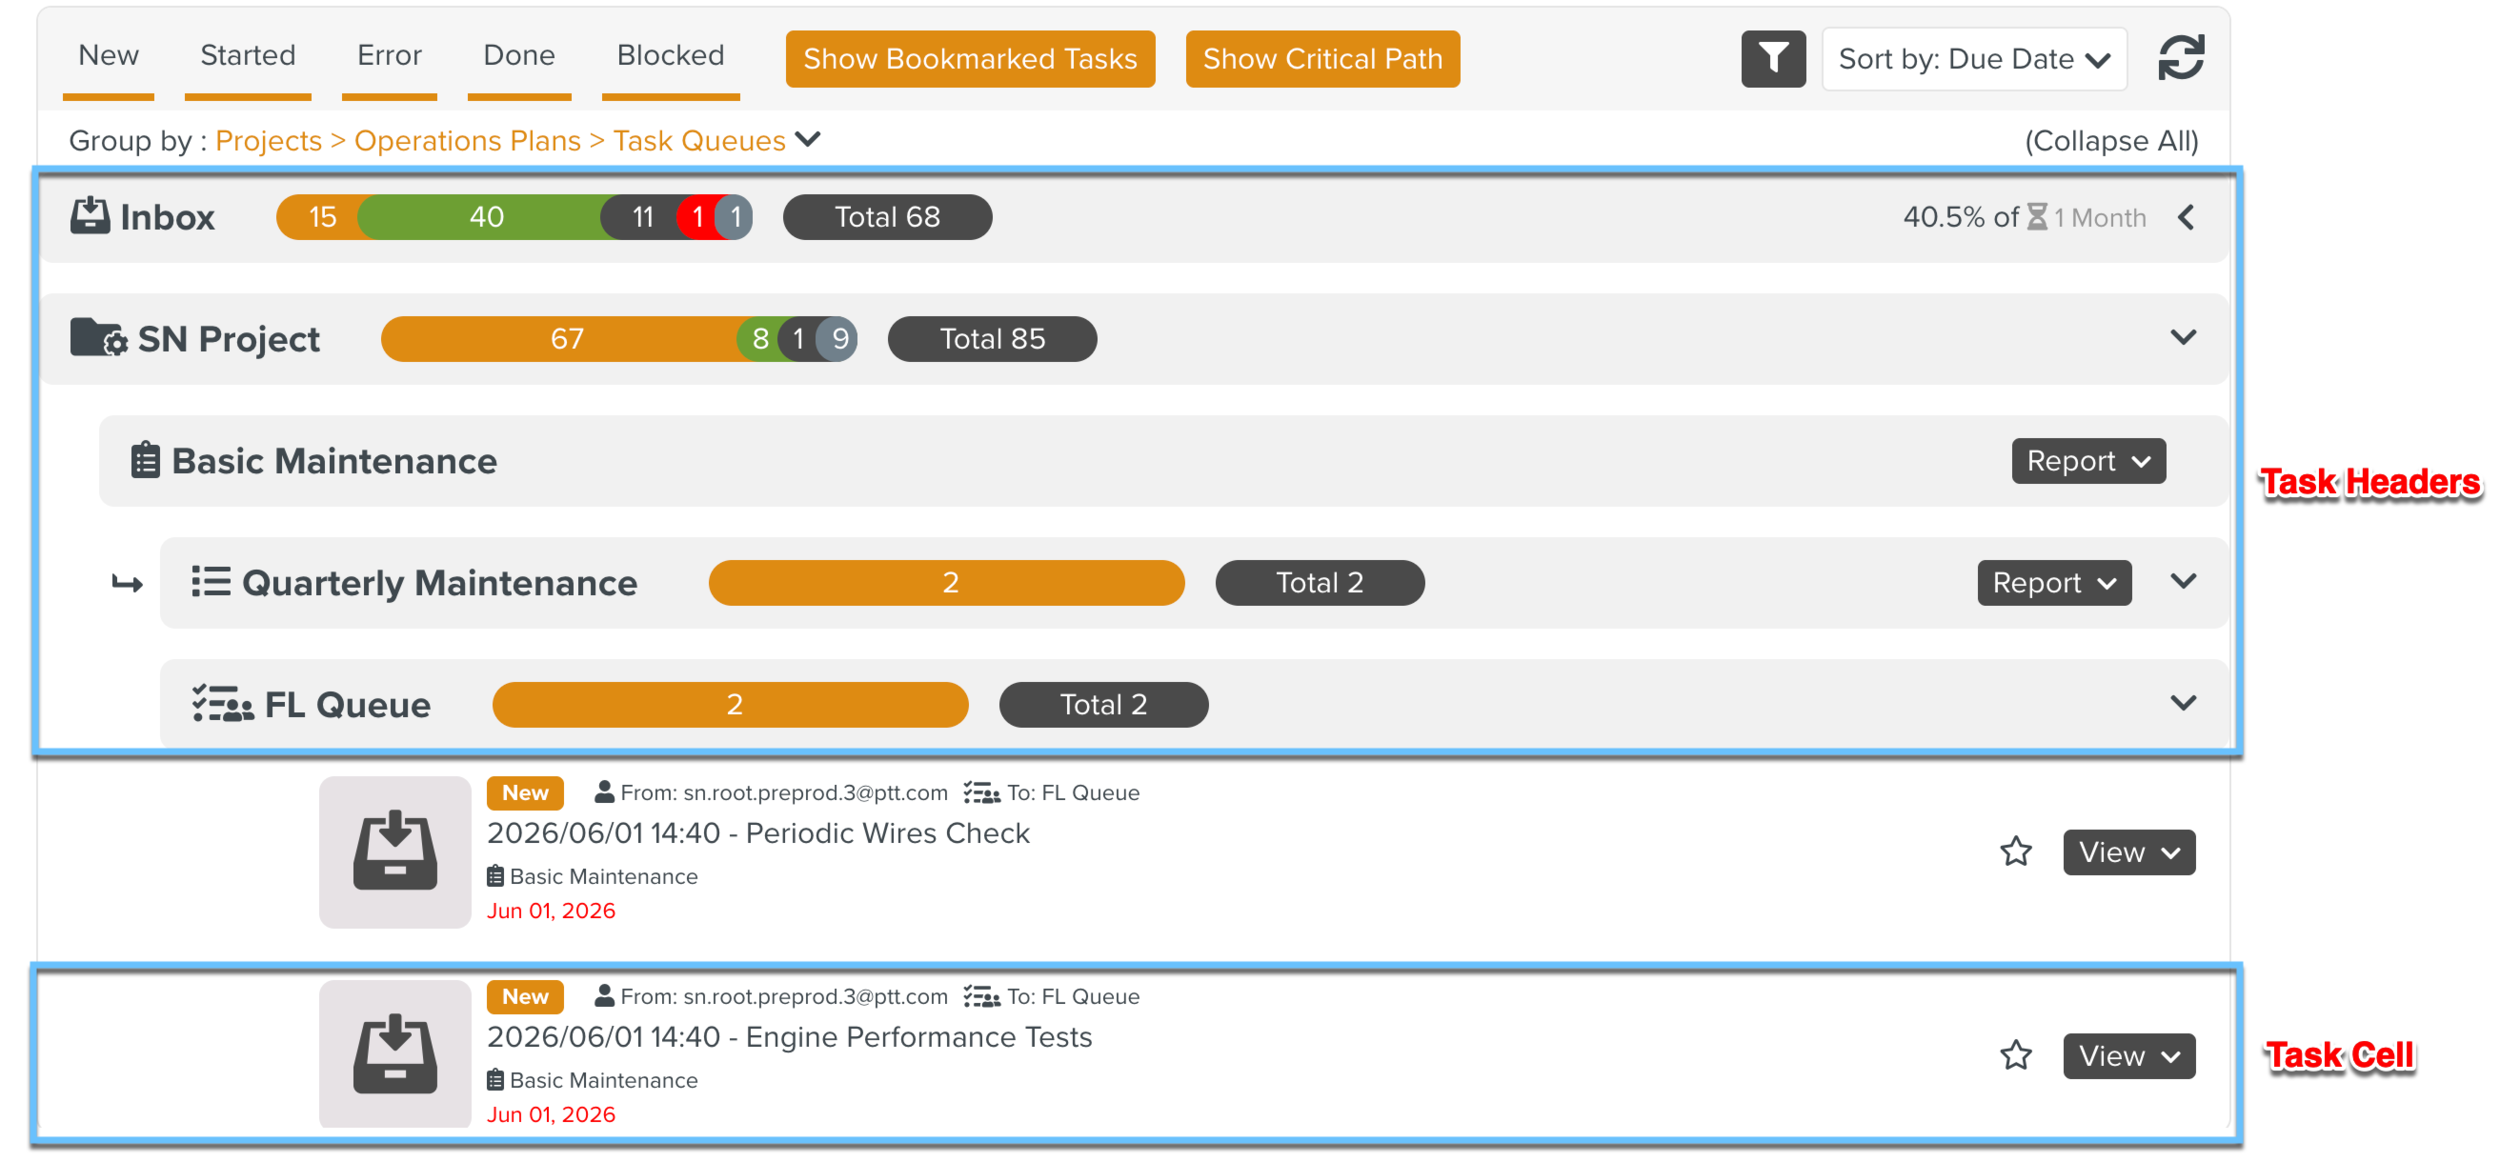
Filters at the top of the page allow you to narrow down your Tasks based on the selected criteria.
When a filter is clicked, an orange line appears  which indicates the filter is enabled. When disabled the orange line disappears
  .
.
You can enable/disable one or more filters.
Icon | Filter name | Description | ||
|---|---|---|---|---|
| Templates Under Edition | Displays the Template publication Tasks that require an action from you. | ||
| New | Displays Tasks that are New and assigned for execution. | ||
| Started | Displays Tasks that Started execution. | ||
| Error | Displays Tasks that have an Error during execution. | ||
| Done | Displays Tasks that are done with execution. | ||
| Blocked | Displays Tasks that are blocked by means of an Operation Plan update and are restricted from executing. | ||
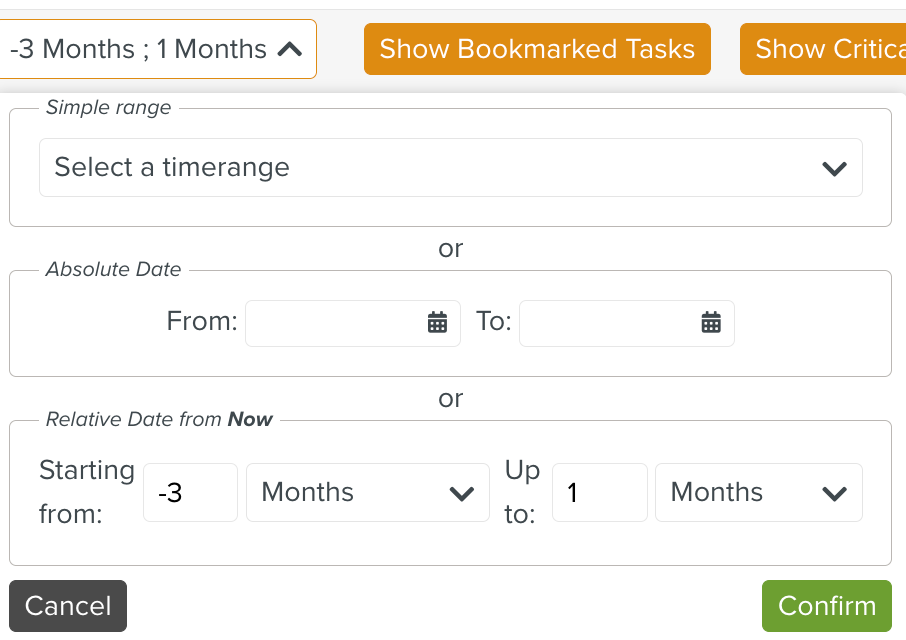
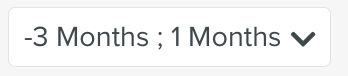 | Date Selection filter | Displays Tasks based on the Task Start Date/Time and End Date/Time. A Date filter is used to create a customized time frame for the display of the Tasks. You can select a simple time range, set an absolute date in the Inbox and set a Relative date in the Inbox. NoteThis filter appears only when the No Project is selected.The default Time Range is from 3 months ago until 1 month from now.
| ||
| Show Bookmarked Tasks | Displays only bookmarked Tasks. | ||
| Show Critical Path | Displays the critical Tasks. | ||
| Show All | Displays all Tasks by removing the Bookmarked filter. | ||
| Select Functional Types | Displays Tasks based on Functional Types. | ||
| Multi-Project Filter | |||
| Sort by | Sorts the Tasks displayed based on various categories as shown below.
| ||
| Group by | Group by Task Queues to display the Tasks based on Projects/TaskQueues/Operation Plan/Category.
| ||
| Collapse All/Expand All | Expands and Collapses the Selection page. |


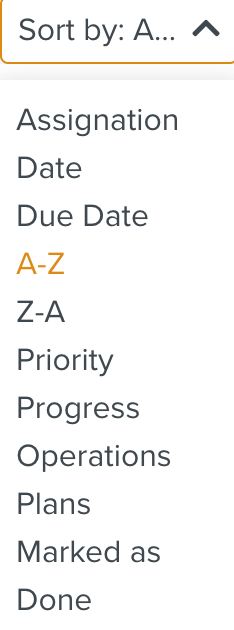
The Sort by filter in the Inbox is used to Sort the Tasks based on the list shown below.
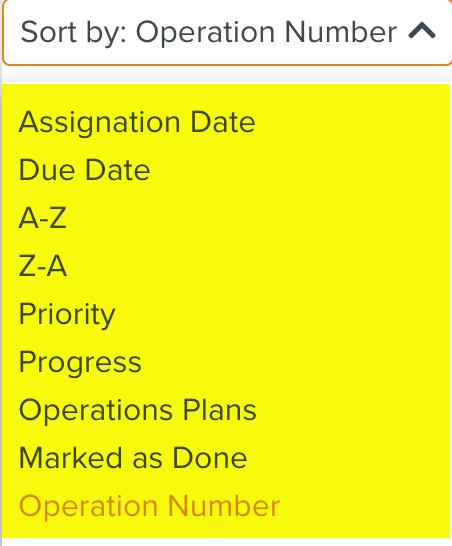 |
Assignation Date - Displays the Tasks in the Inbox in the order of the latest Assignation Date.
Due Date - Displays the Tasks in the Inbox in the order of the latest Due Date.
A- Z - Displays the Tasks in the Inbox in alphabetical order.
Z-A - Displays the Tasks in the Inbox in reverse alphabetical order.
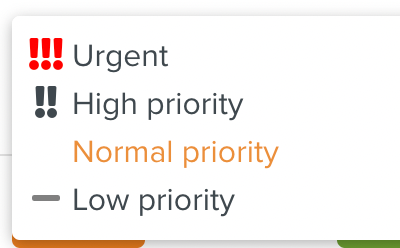
Priority - Displays all the Tasks in the Inbox according to their Priority.
Progress - Displays the percentage of completion of the Task execution.
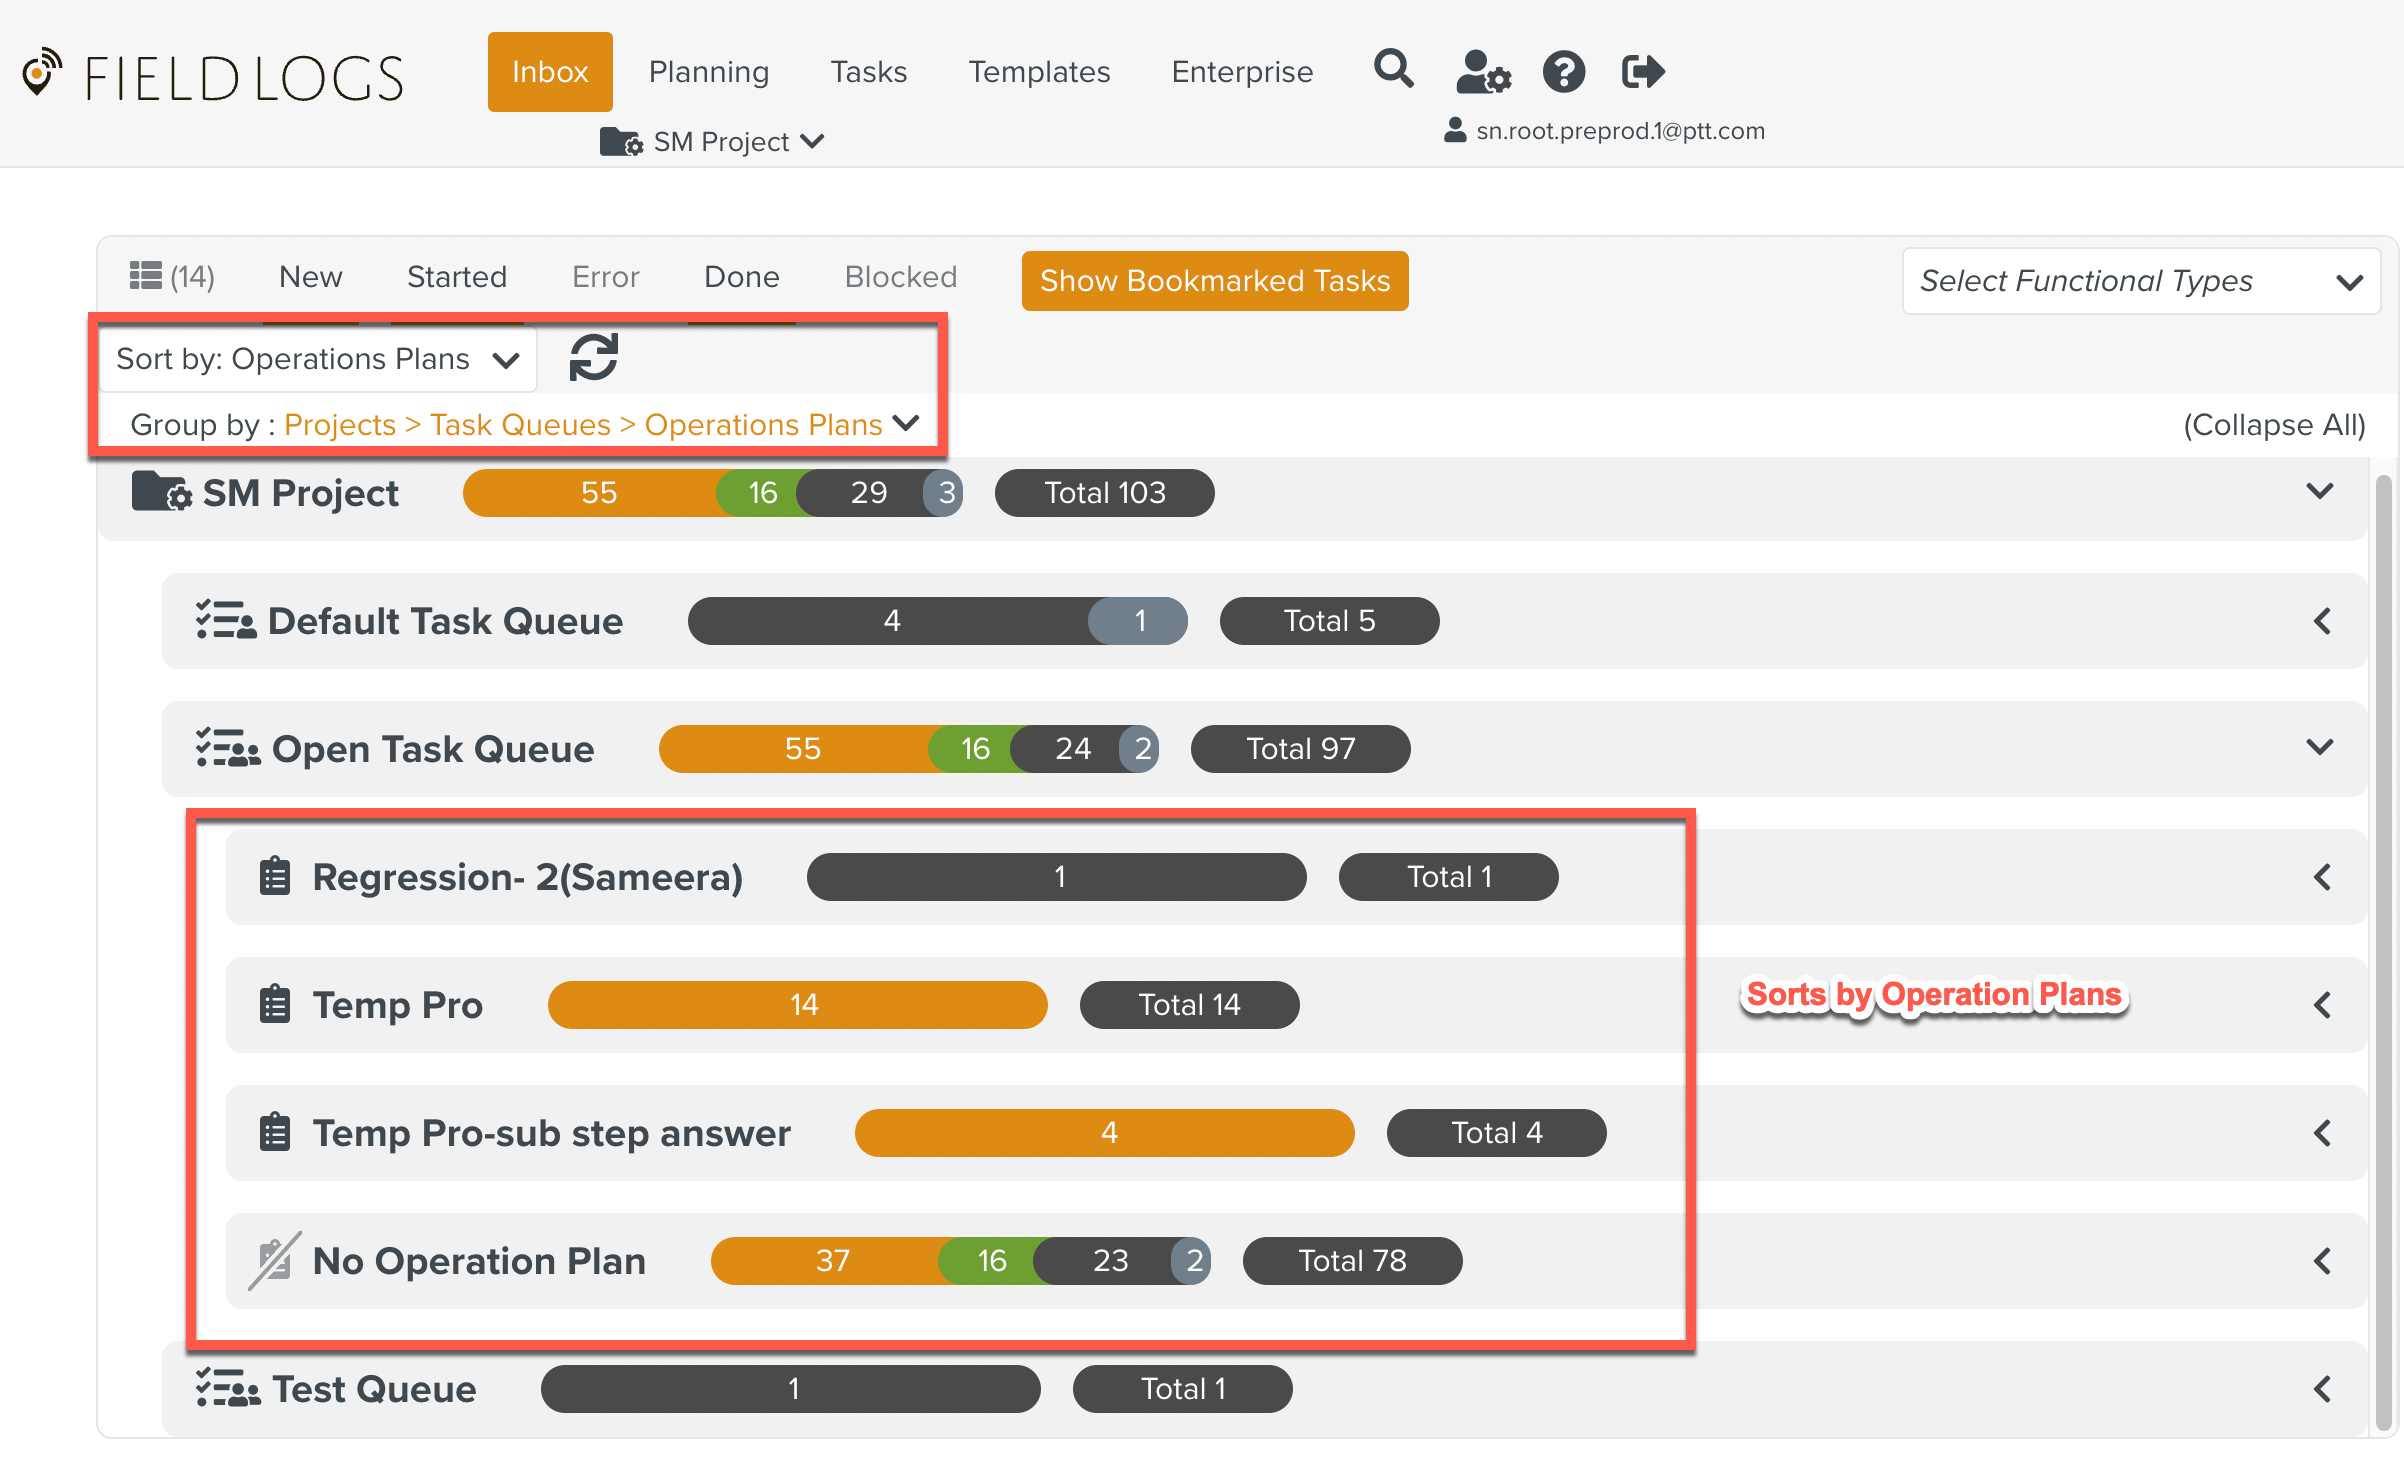
Operations Plans - When the Sort by and Group by are filtered with Operations Plans , the Tasks are grouped by Operations Plans under the Task Queue and Sorted by Operations Plans in alphabetical order.
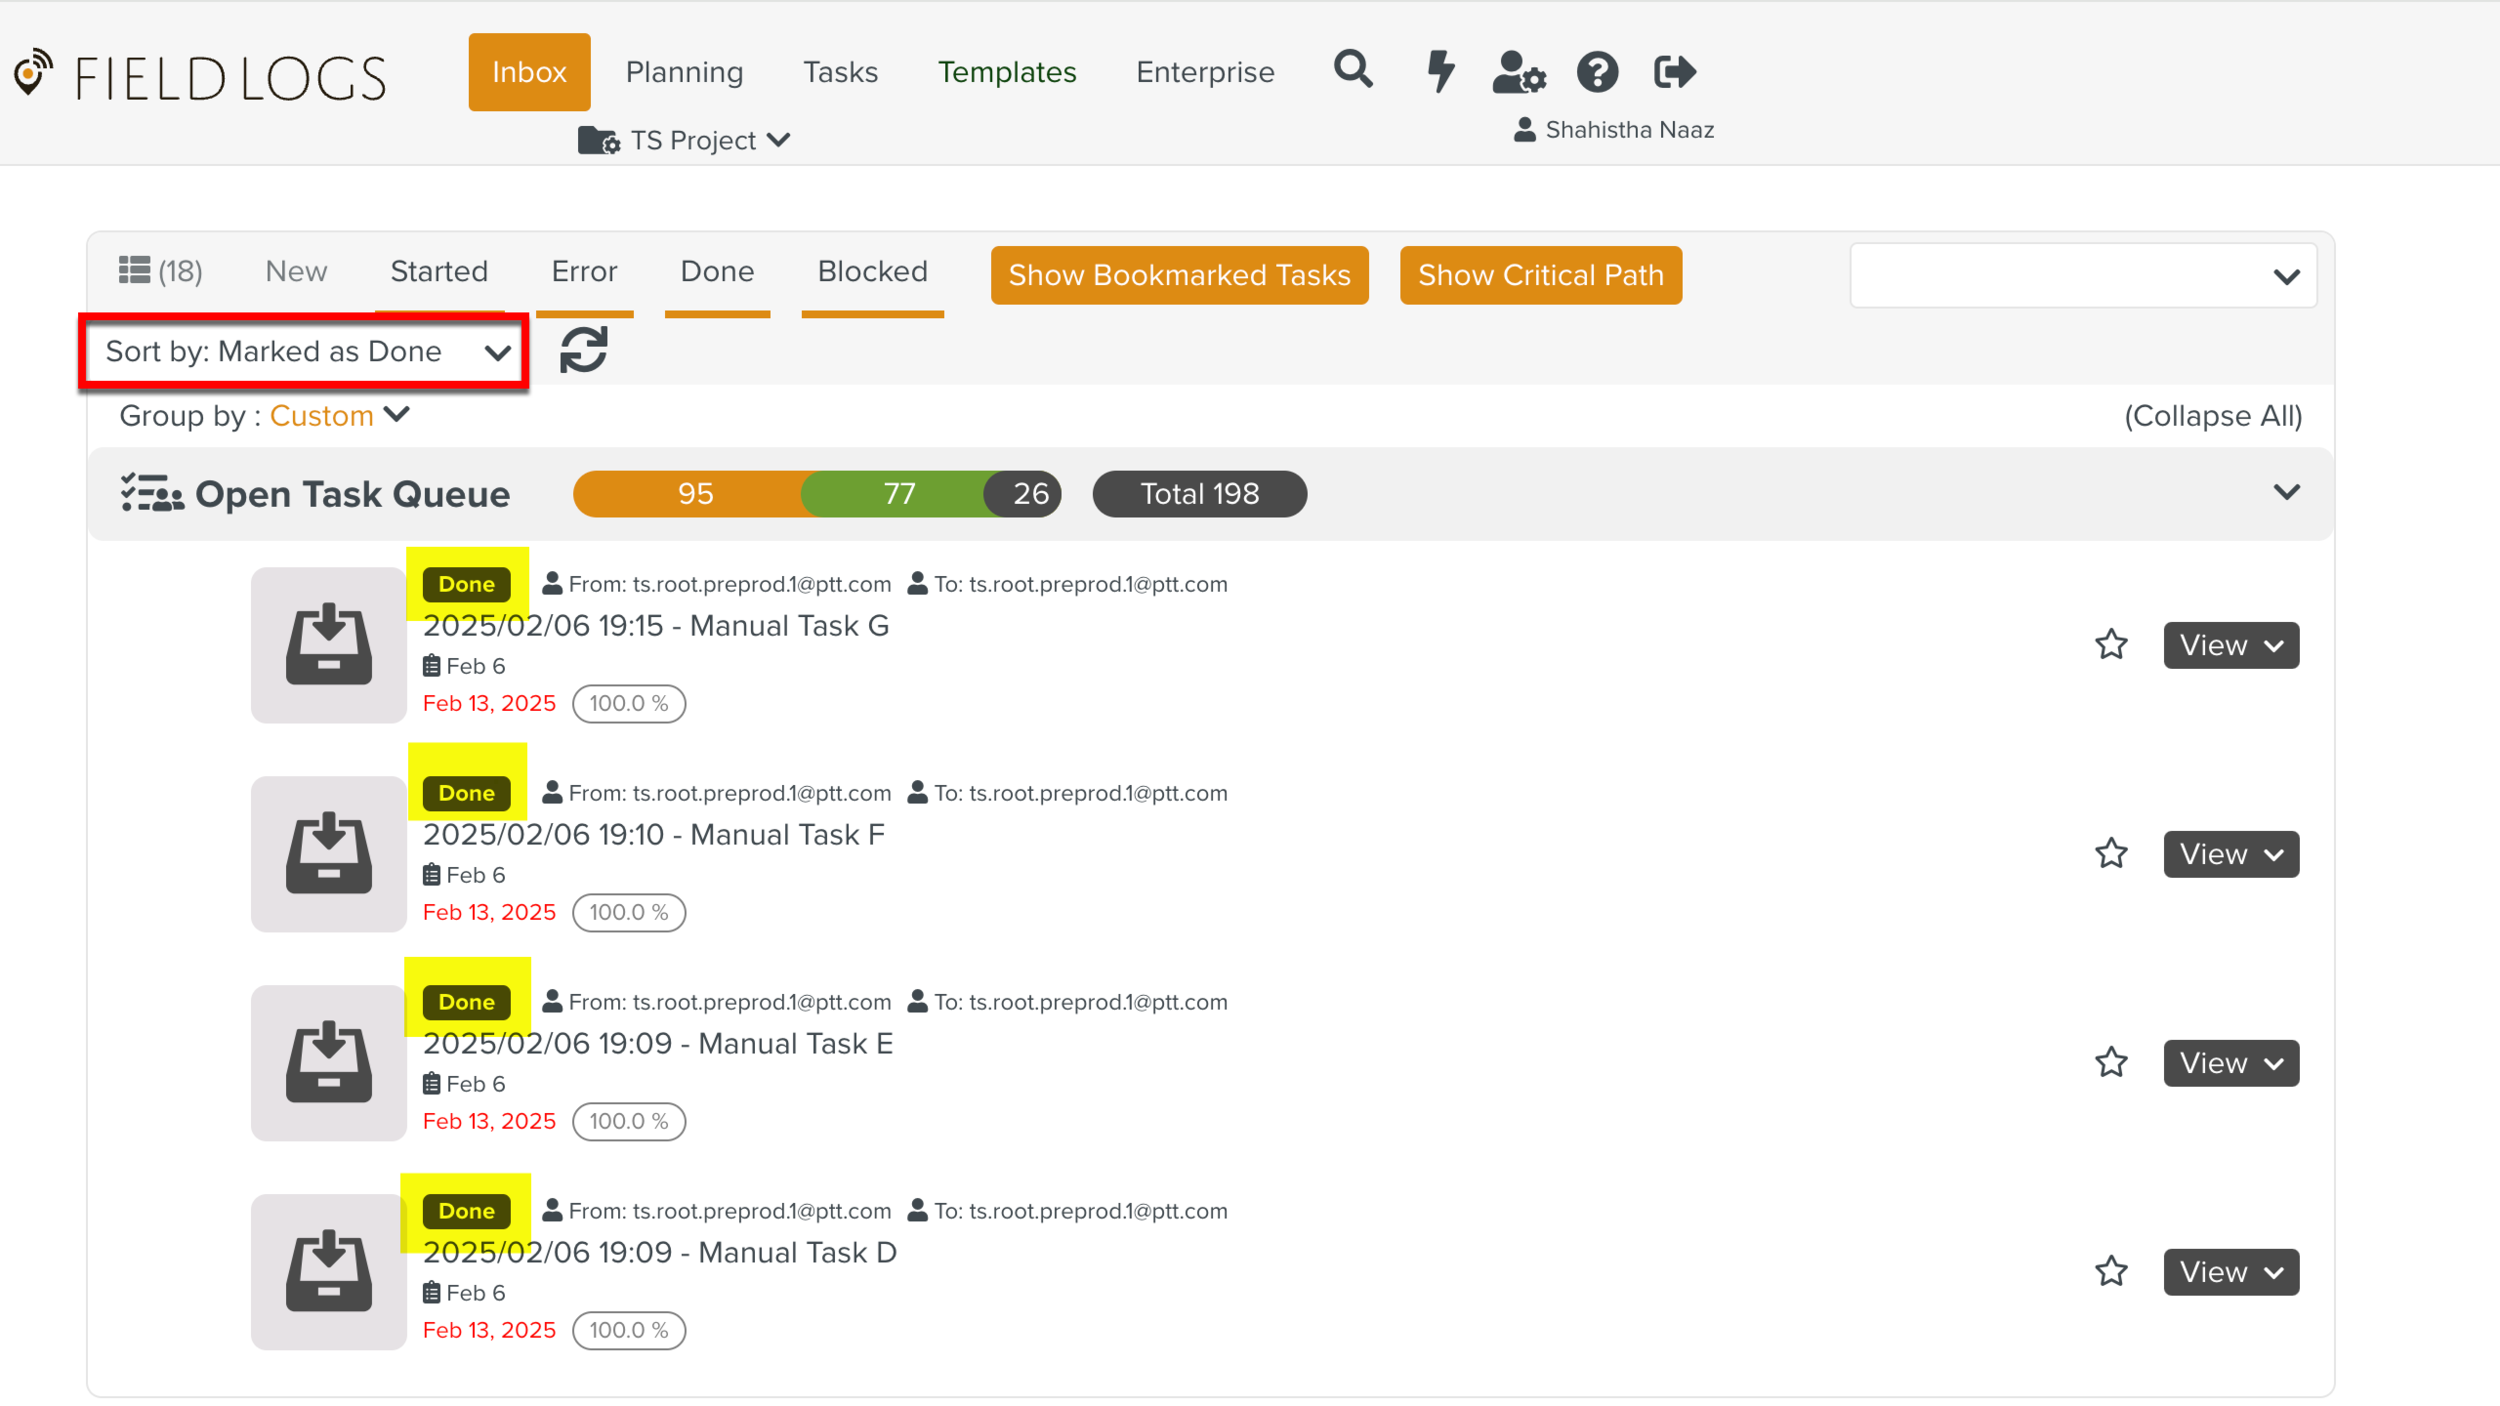
Marked as Done - Displays all the Tasks that have completed execution and Marked as Done.
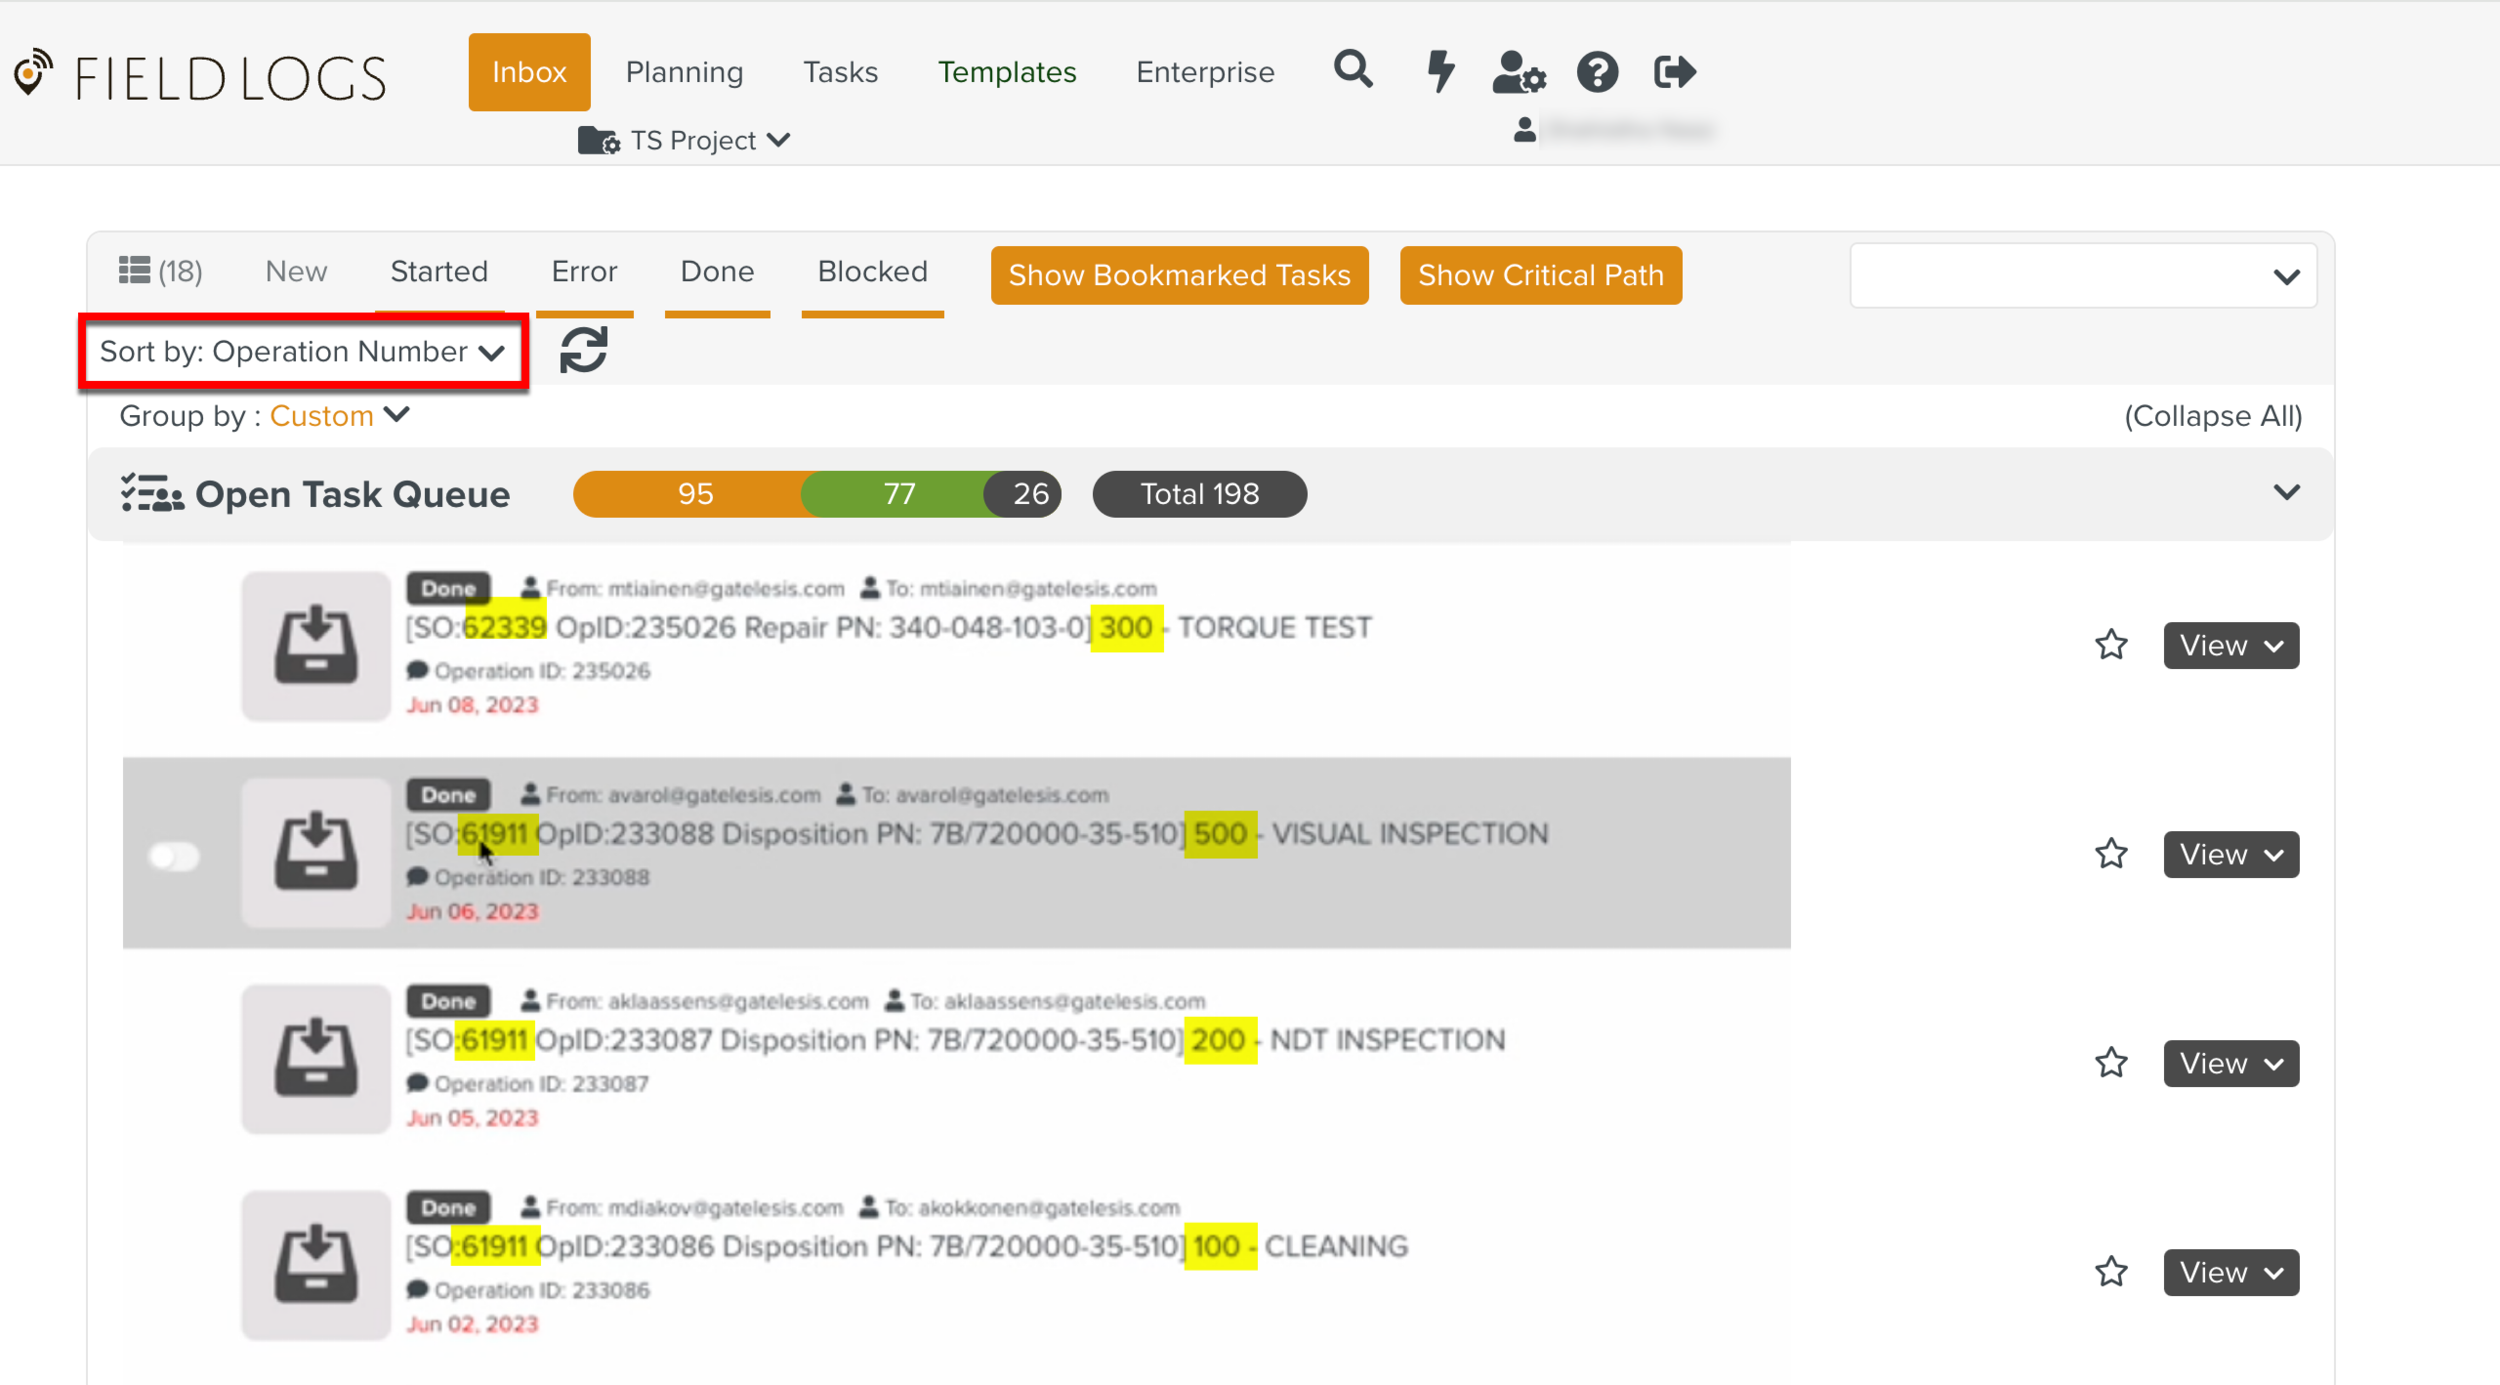
Operation Number - Displays the Tasks sorted according to their Operation Numbers.
Note
To enable sorting by Operation Number, contact FieldLogs Support.
If this sort option is disabled, you will only have the below sorting options.
In the Inbox, you can choose to display the Tasks within a specific time range.
To set a Simple time range select No Project and select any of the options in the Simple range section as shown below.
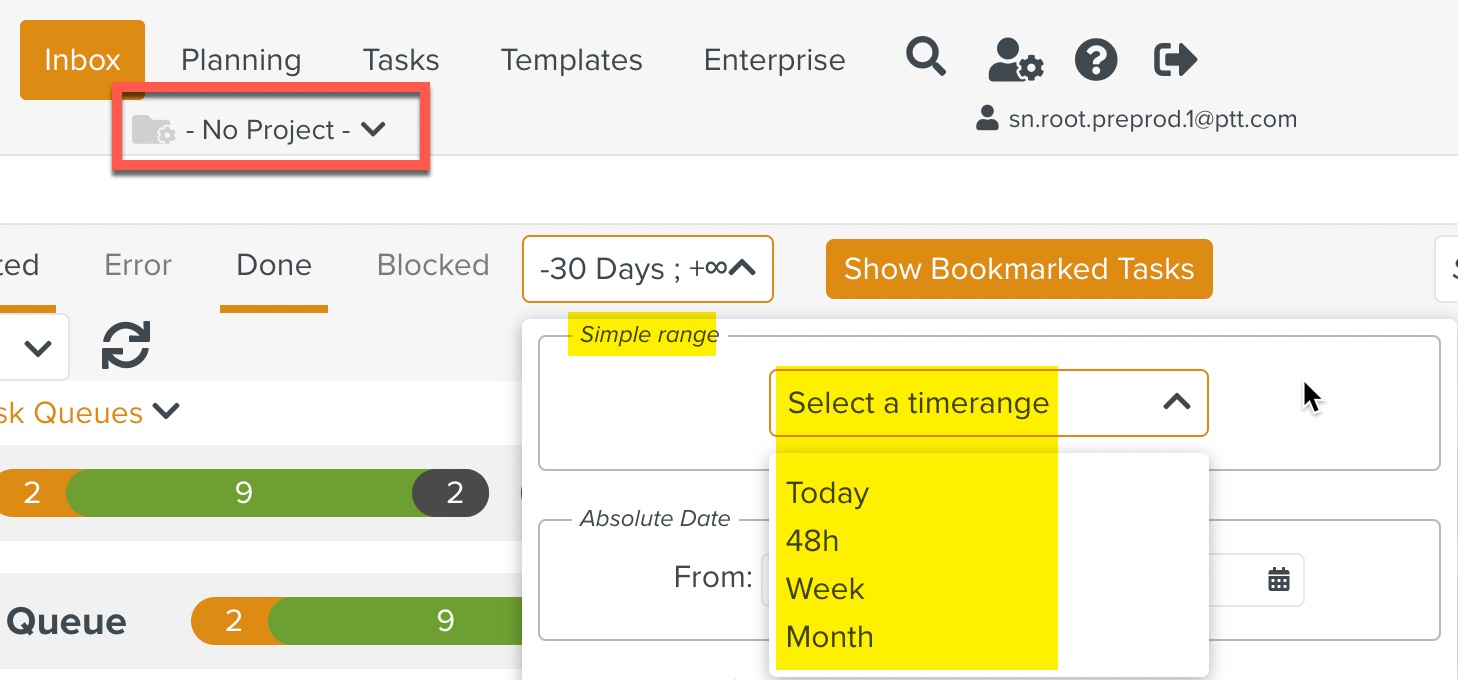 |
Today - Displays the Tasks which has the Assignation Date as

48h - Displays the Tasks which has the Assignation Date as

Week - Displays the Tasks which has the Assignation Date as any date in
Month - Displays the Tasks which has the Assignation Date as any date in the Month.
In the Inbox, you can choose to display the Tasks within a specific period of time. You can define this period using an Absolute Date.
To set an Absolute Date:
Click the date selection field.

In the section, select the From and To date.

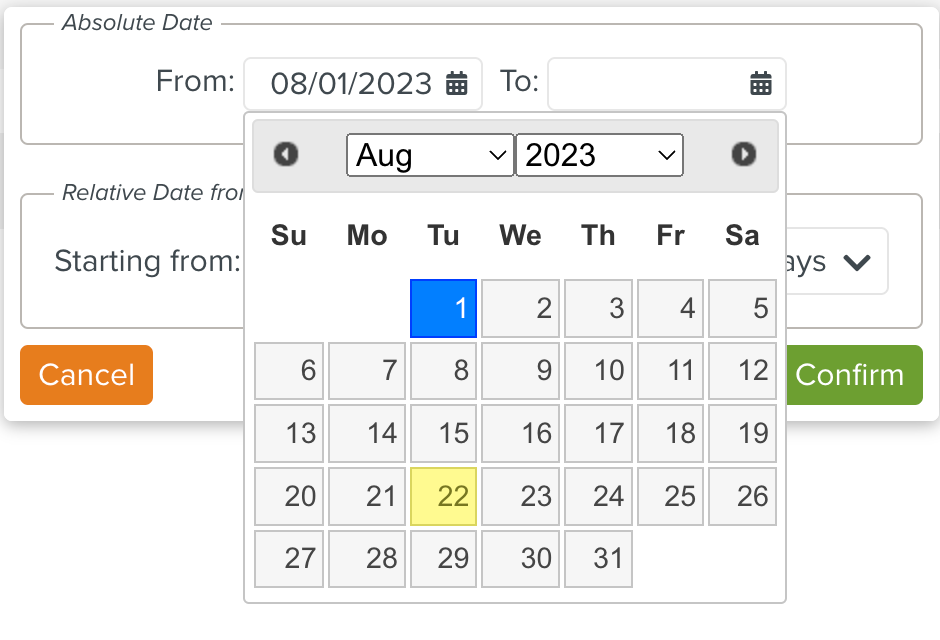
Click .
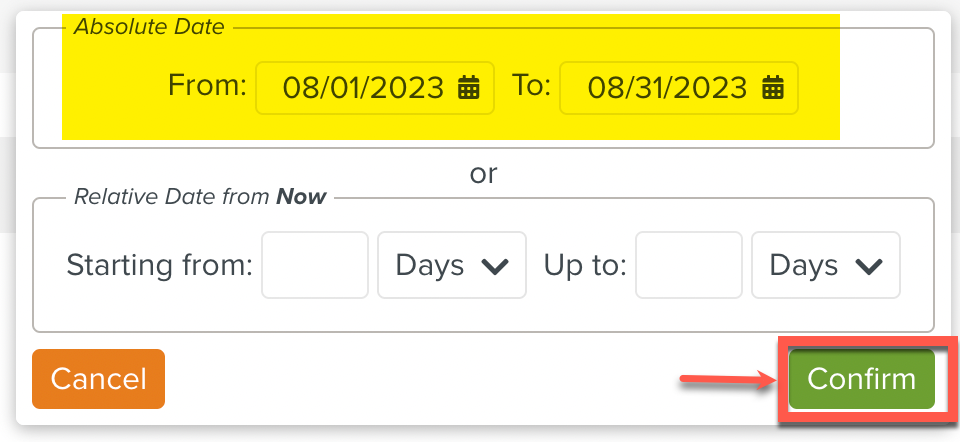
The Inbox displays the Tasks that match the date selection criteria.
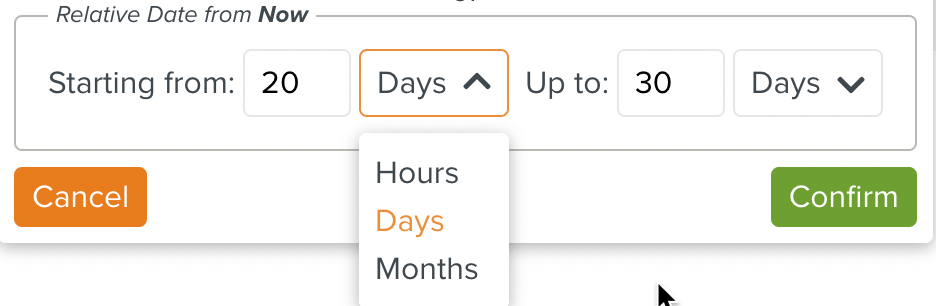
In the Inbox, you can choose to display the Tasks within a specific period of time. You can define this period using a Relative Date.
To set a Relative Date:
Click the date selection field.
In the fields of the section, enter the Starting from and Up to fields in hours, days or months.
Click .
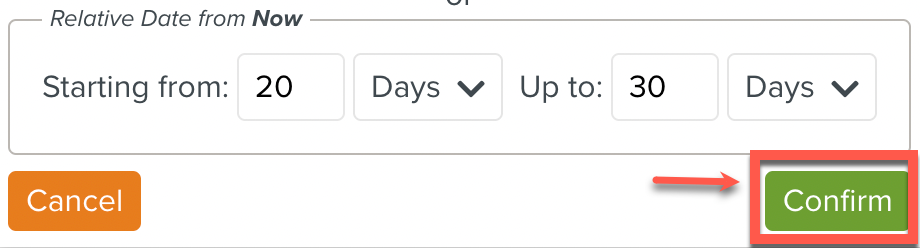
The Inbox displays the Tasks that match the Relative Date selection criteria. This includes both the Start from and Up to selection.
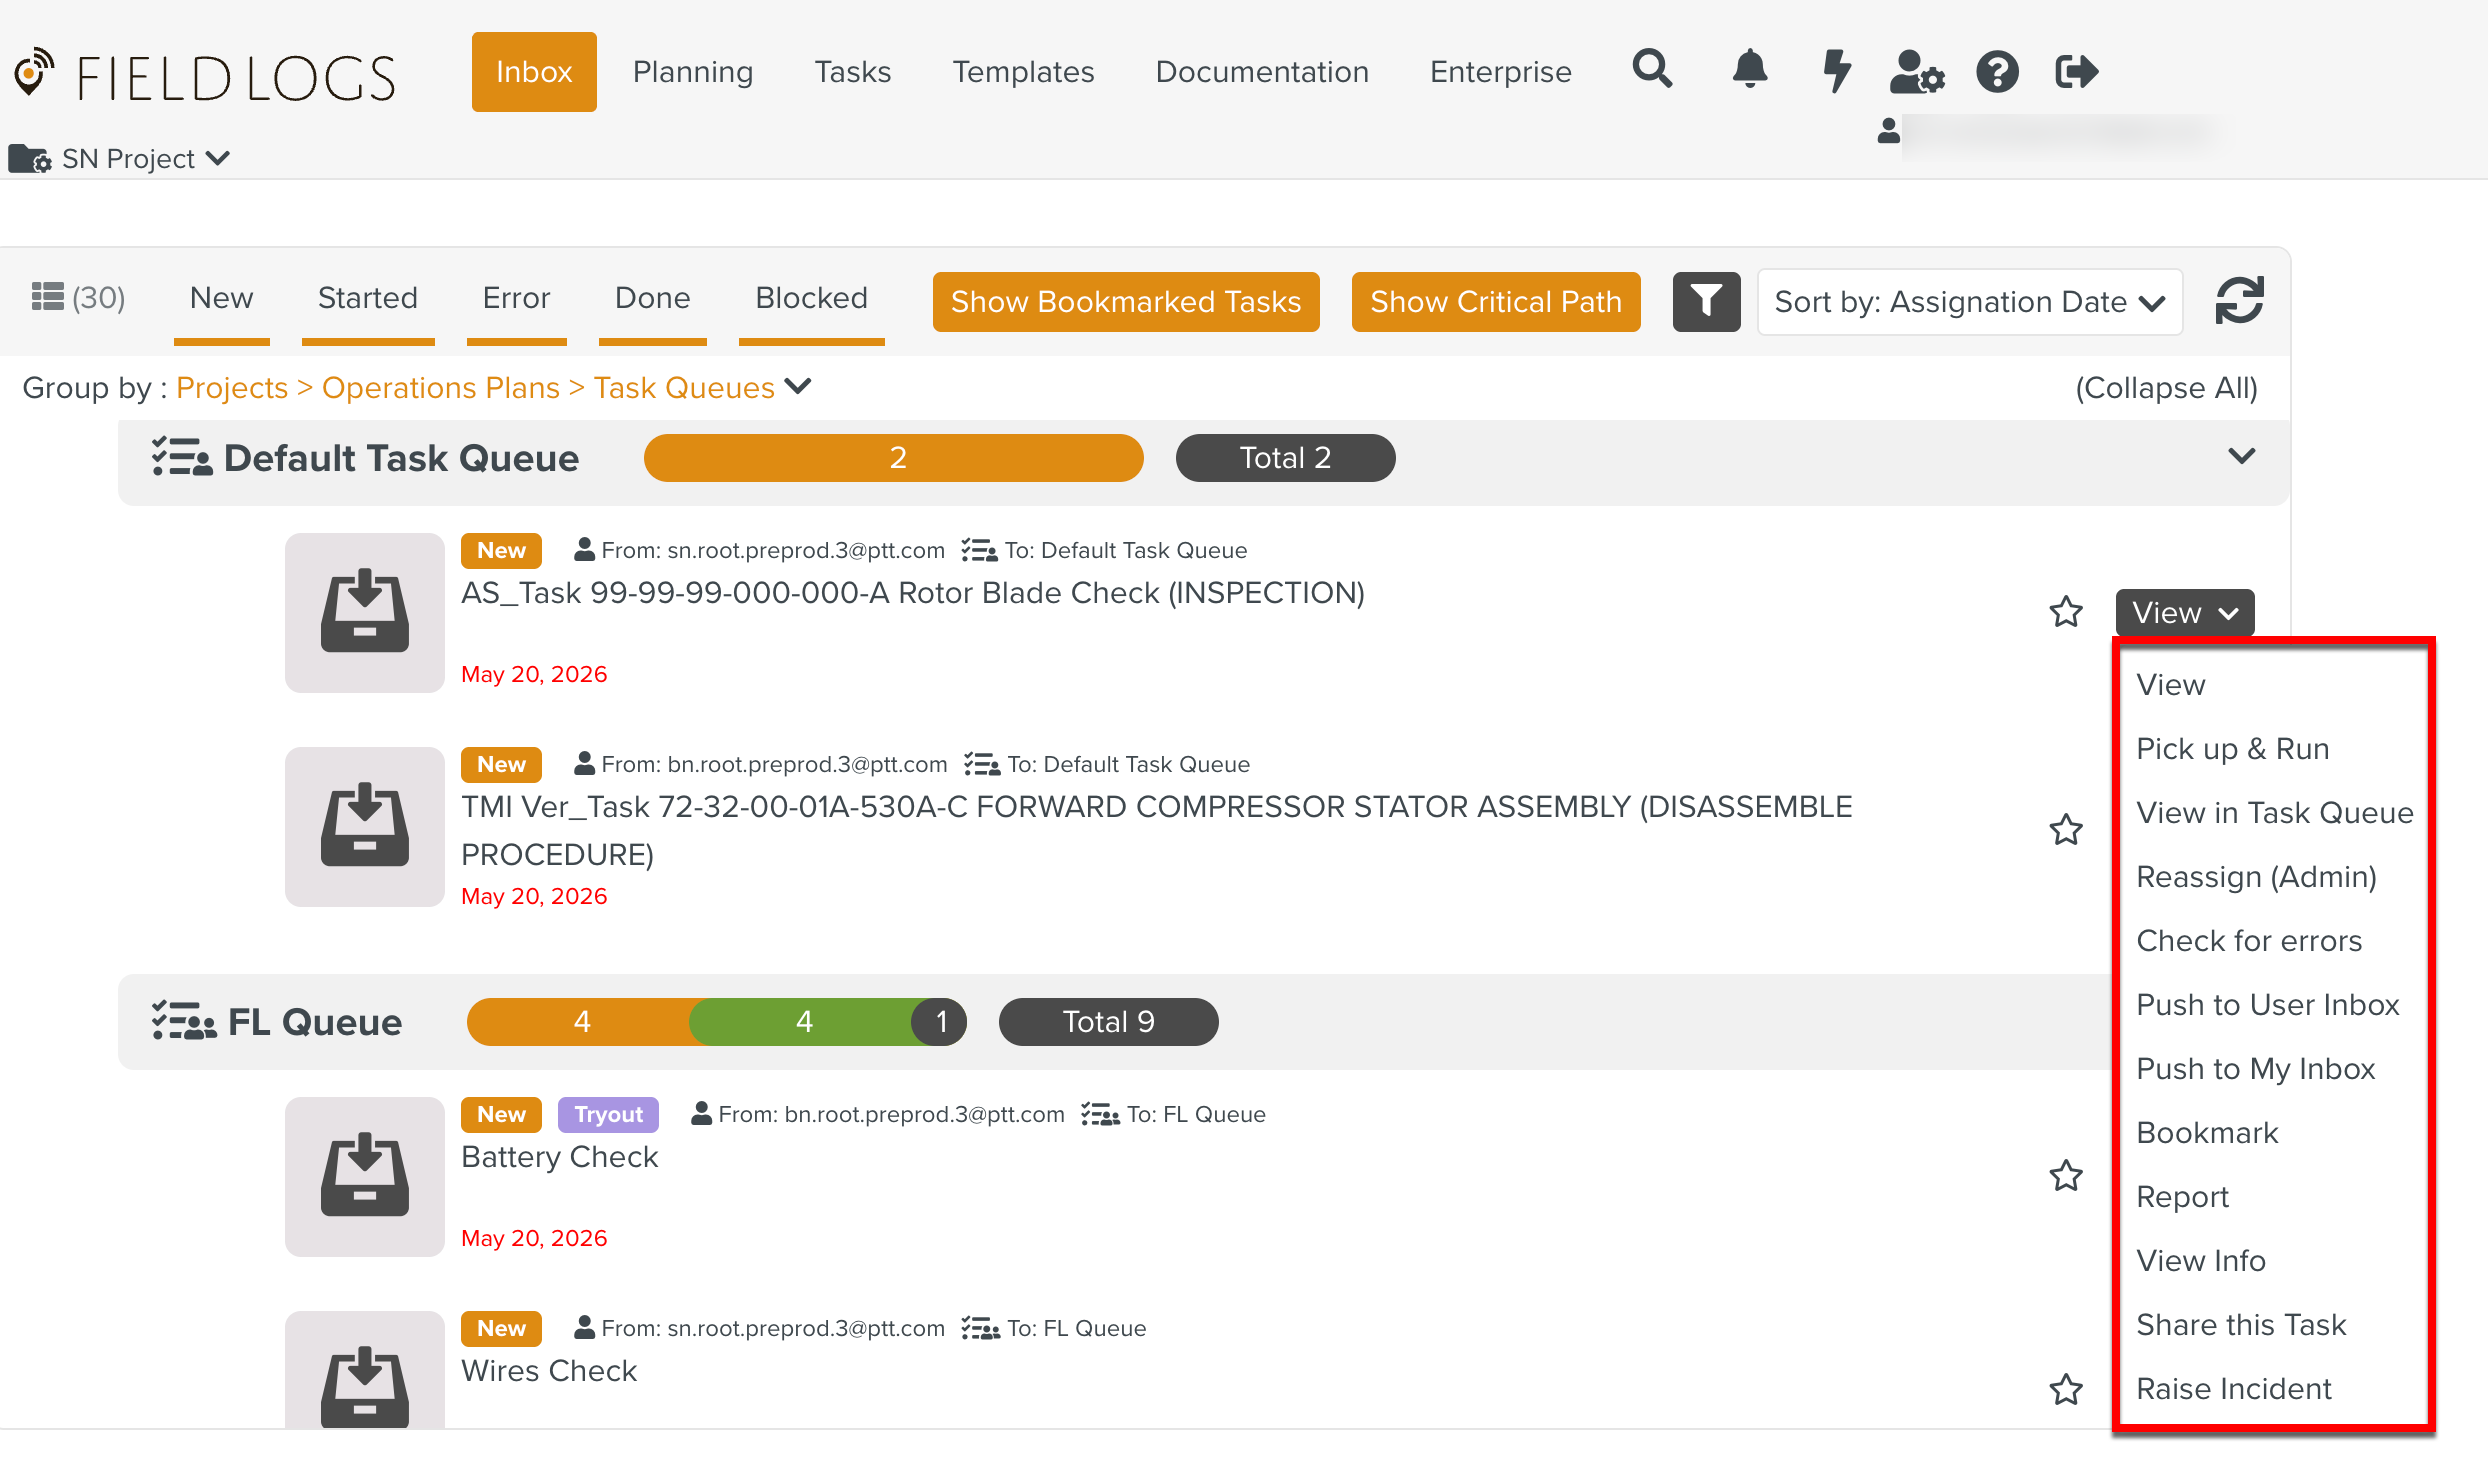
The following actions can be performed from the Inbox depending on the Role of the User. The actions appear for every Task in the Inbox as shown.
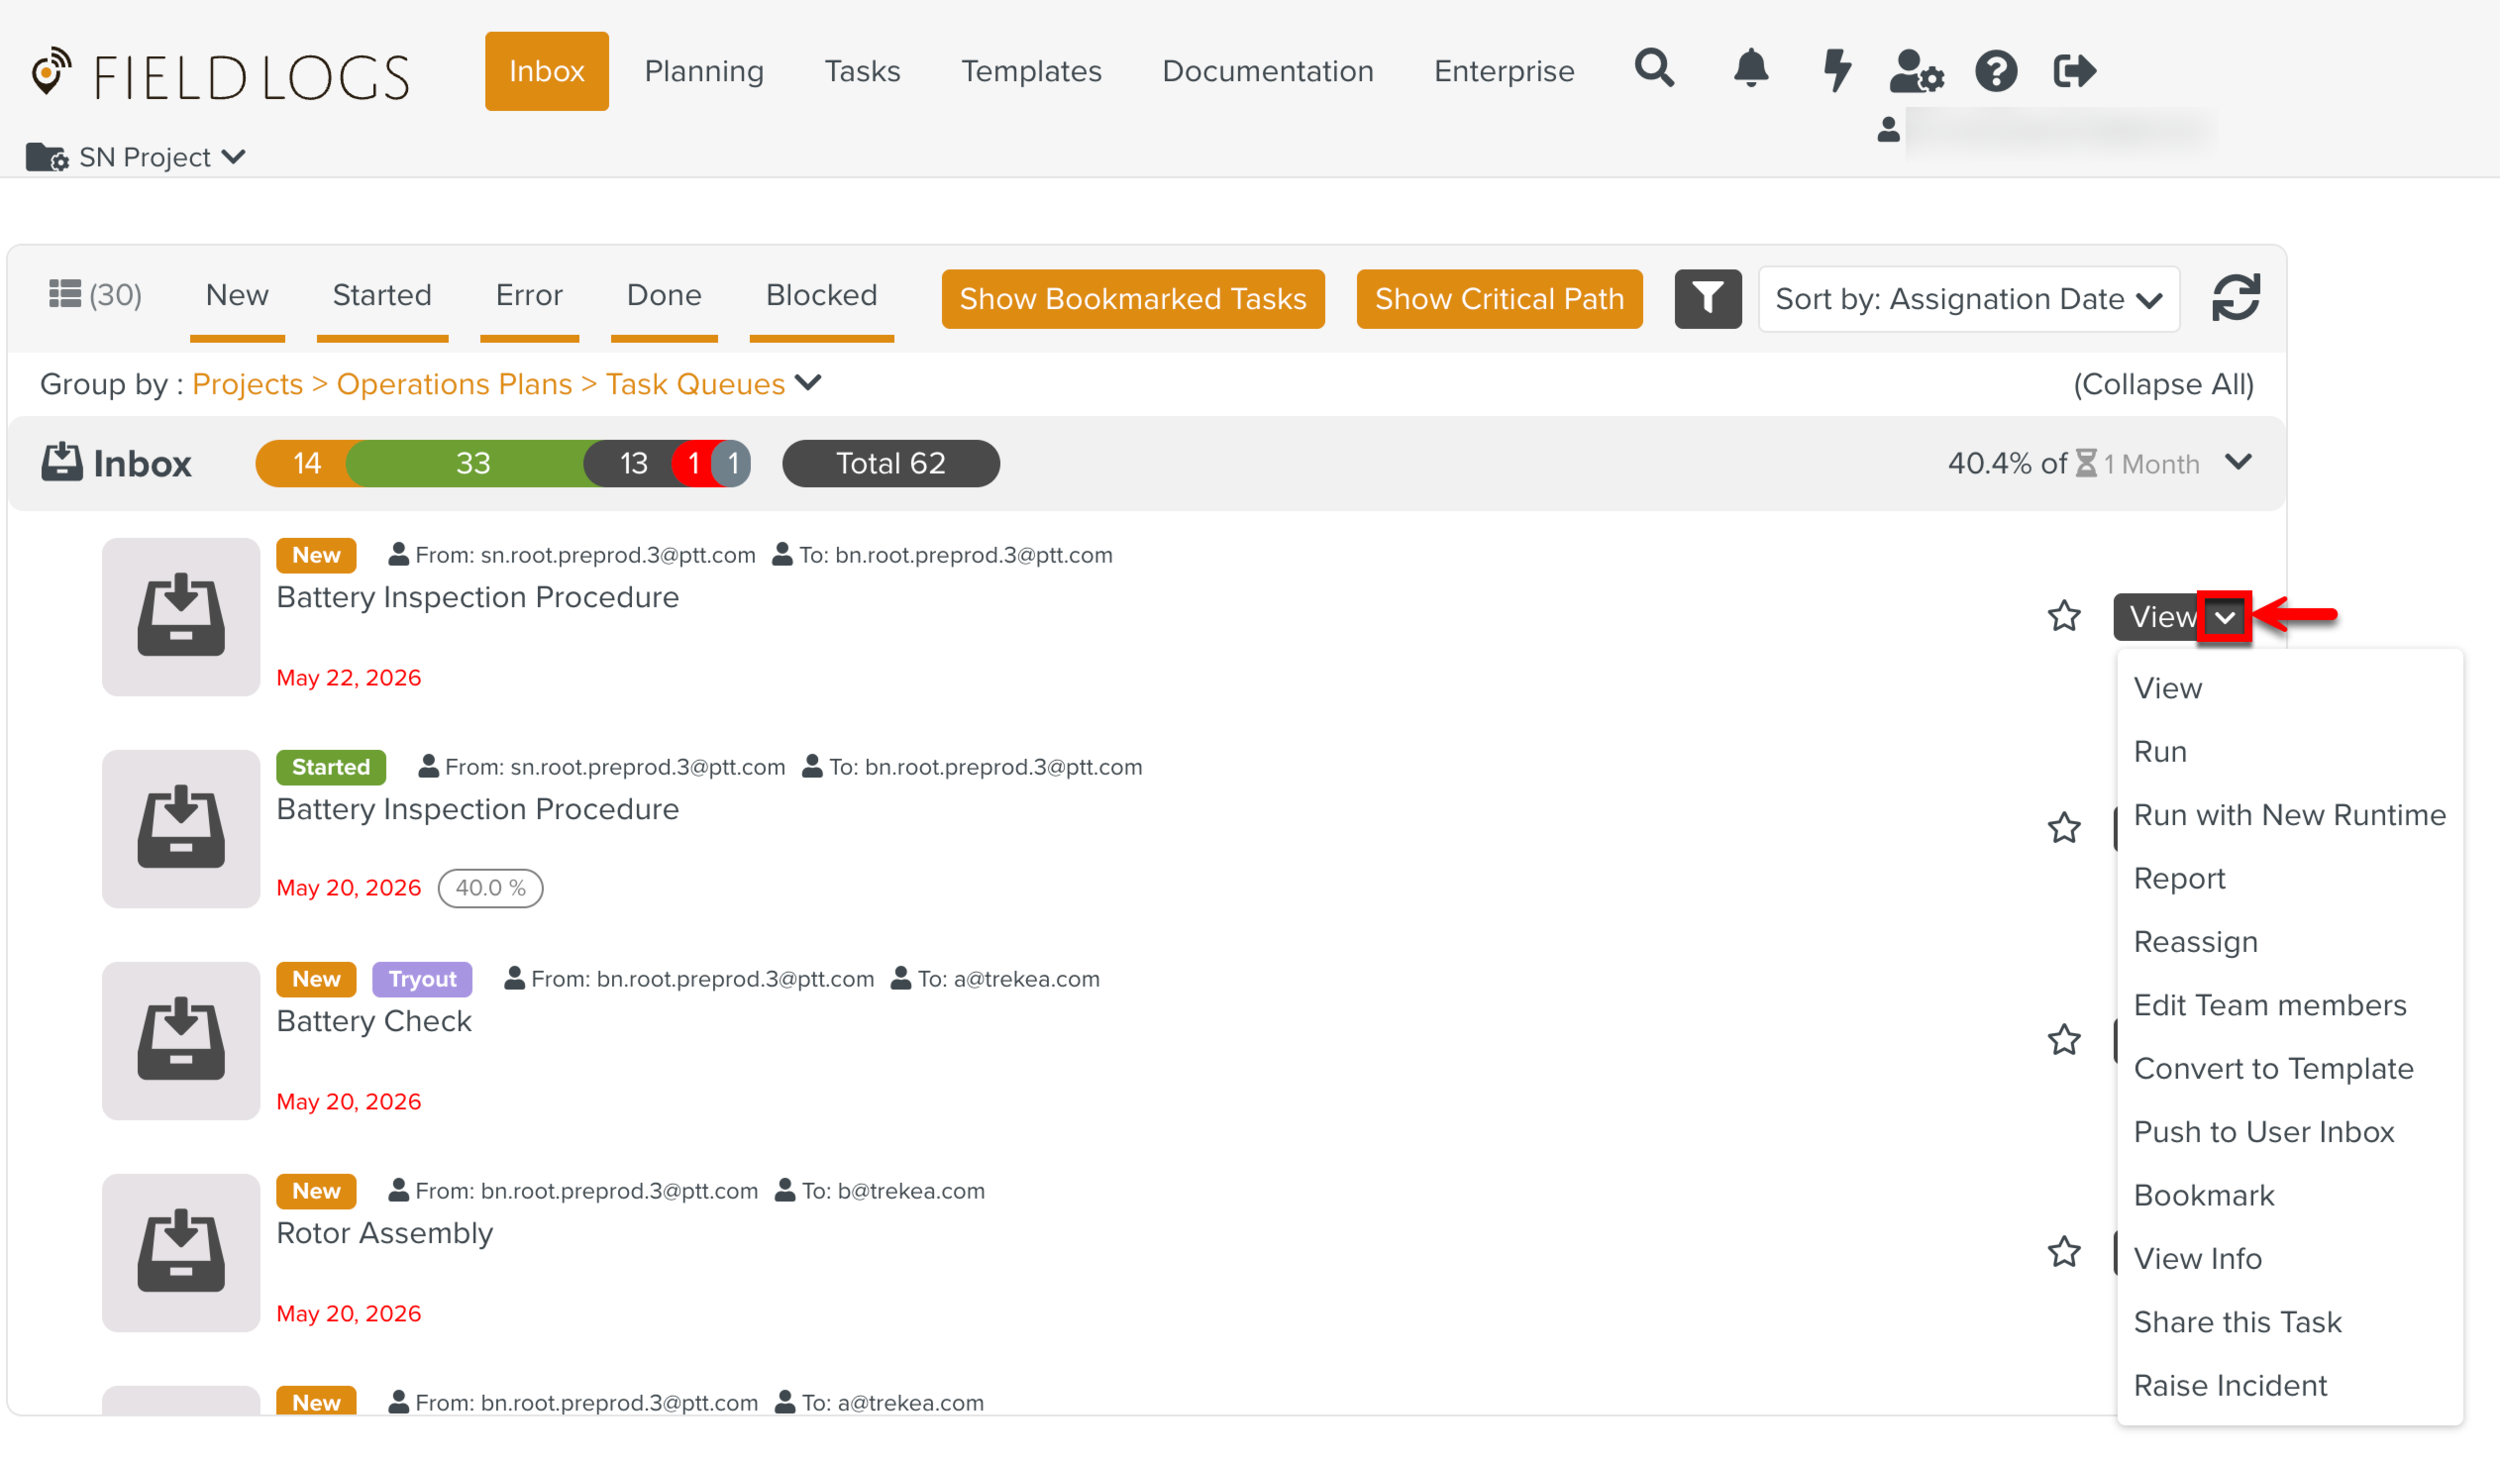 |
The table below explains the various actions that can be performed on the Tasks of different statuses.
Action | Description | Accessibility & Condition to access |
|---|---|---|
View | View the Execution page of the Task. | All members. |
Run | Execute the Task. You will be redirected to the Task execution page. | Assignee. Available only to the Assignee, and only if it is the first time the Task is run. |
Pick up & Run | Claim and execute the Task. | All members. Any member with access to the Task Queue can pick up and execute the Task. |
Continue | Resume the Task. You will be redirected to the Task execution page. | Assignee/Team members. Available to the Assignee or team members only if the Task is already started. |
Report | Creates a Task report in PDF, HTML, or Excel format. | All members. |
Reassign | Assign the Task to another user. The selected member becomes the assignee. | Assigner/Assignee. Available to the Assigner or Assignee, except if the Task is sealed. |
Edit Team members | Modify the users who have access to the Task. A dialog box opens. Expand the drop-down list and select the team members to add to the Task. Click Save. | Assigner/Assignee. |
Convert to Template | Tasks created from Applications can be converted into Templates. | All members. |
Push to User inbox | Sends the Task to the Inbox of a specific User. | All members. |
Bookmark | Bookmarks the Task. When | All members. |
Archive | Archives the Task. The Task will disappear from everyone's Inbox and delete all the data related to the Task. | All members. |
Rework | Rework allows the user to edit the Task details after execution. | All members. |
Remove | The Task is removed from your Inbox but remains in the Task list of other members. | All members. |
View Info | View the Information on the Task. | All members. |
Share this Task | Share the Task with another member. The Task is added to the Inbox of the selected member. | All members. |
Raise Incident | Raise Incident to report an issue. | Assigner |
The FieldLogs Inbox page displays the Task Queues associated with the User.
 |
Note
The Refresh button  is used to update the Task status.
On each Task Queue, you can see the Name of the Task Queue and the number of Tasks that are assigned to the Task Queue. It also clearly indicates the number of started and completed Tasks.
 |
 |
The following actions can be performed on the Task assigned to the Task Queue.
 |
.
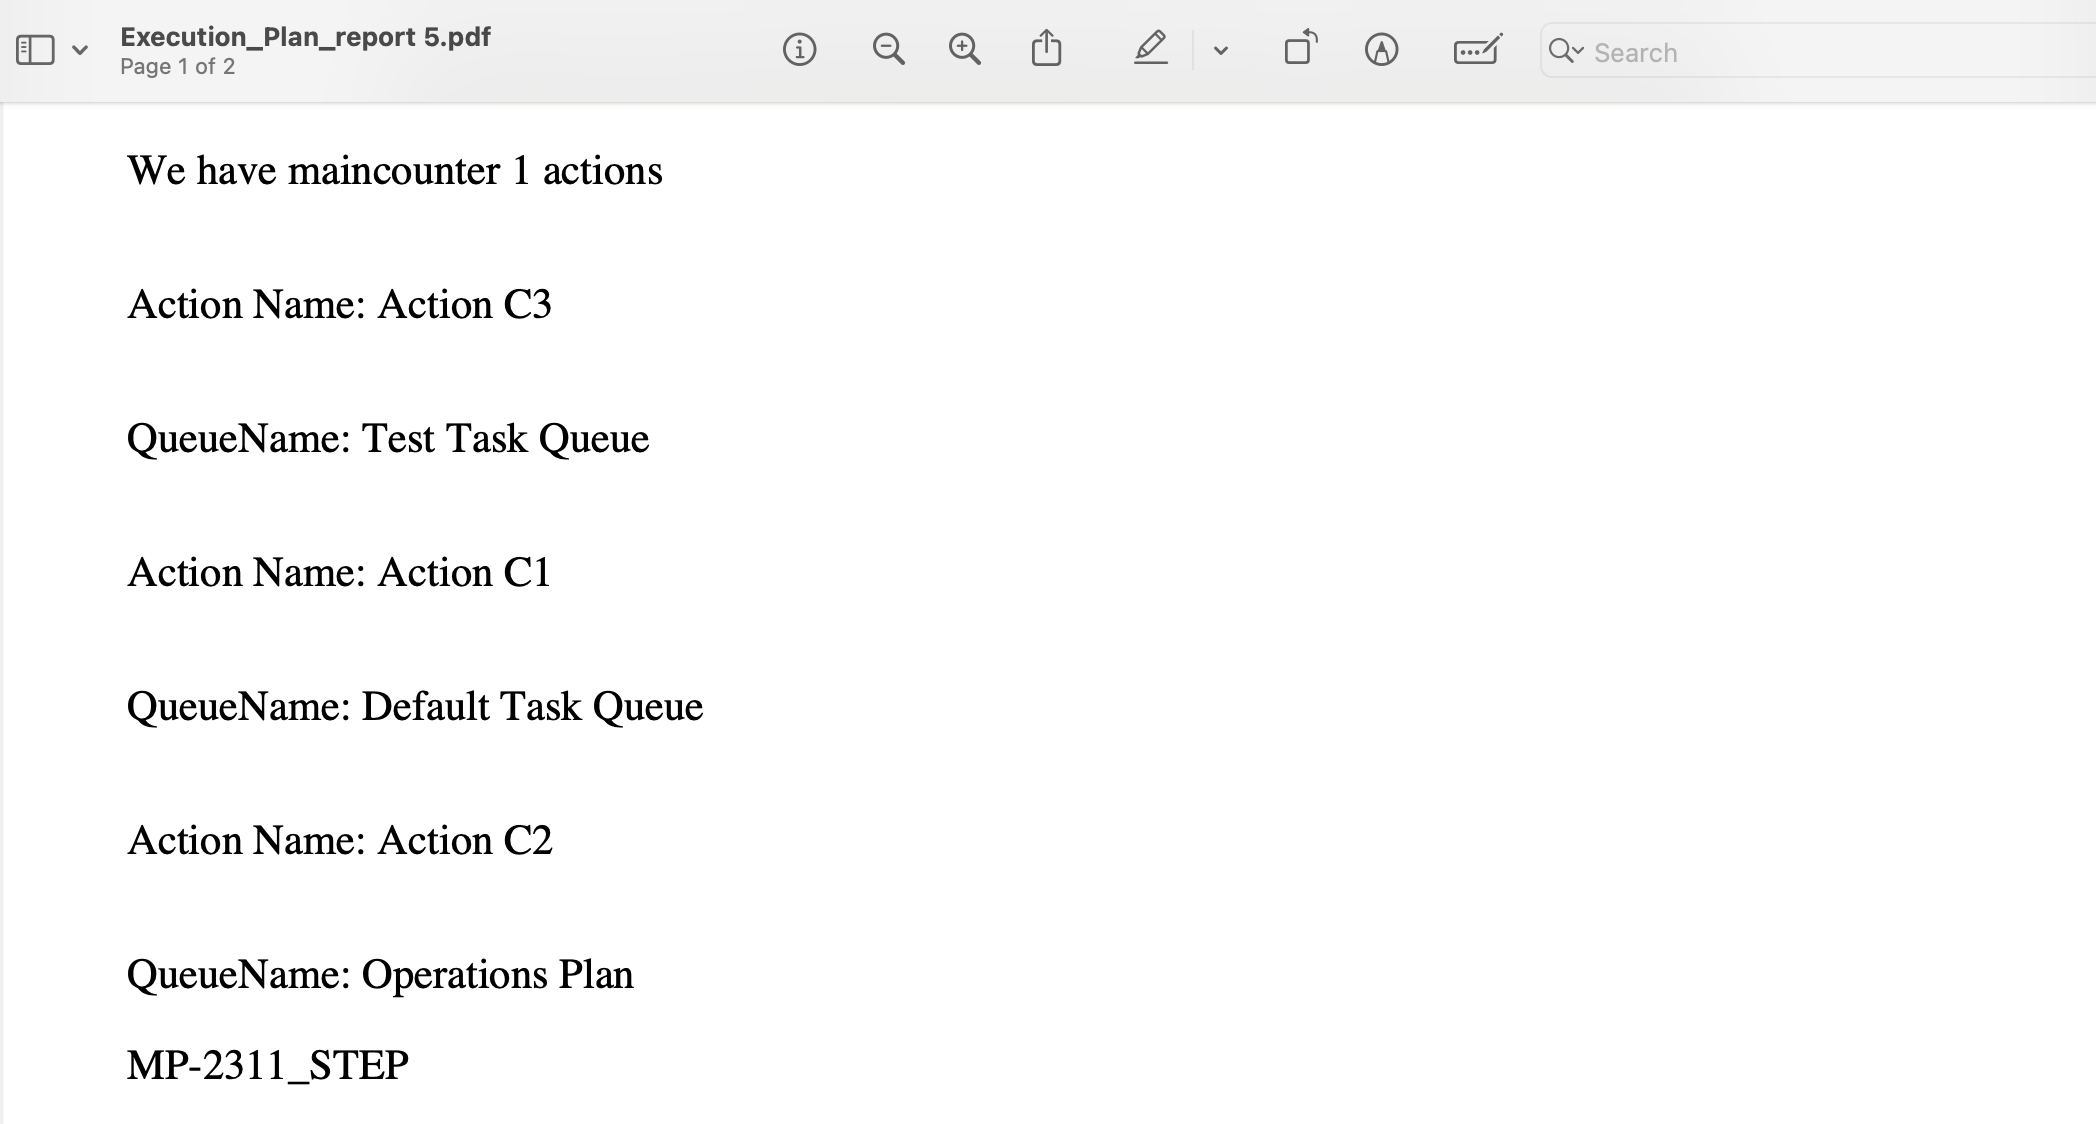
You can generate Reports pertaining to Operation Plan Executions. Information such as ID, Creation date, Name, Description, Description, list of Counters, data of each Counter, Actions inside the Counters, and Variables can be presented in the Reports generated. This information could vary depending on the Report Model used.
This option of generating Reports is available only when the Tasks are grouped by Operation Plans.
To generate a Report from the section Inbox:
From the main menu, go to .
The page Inbox opens.
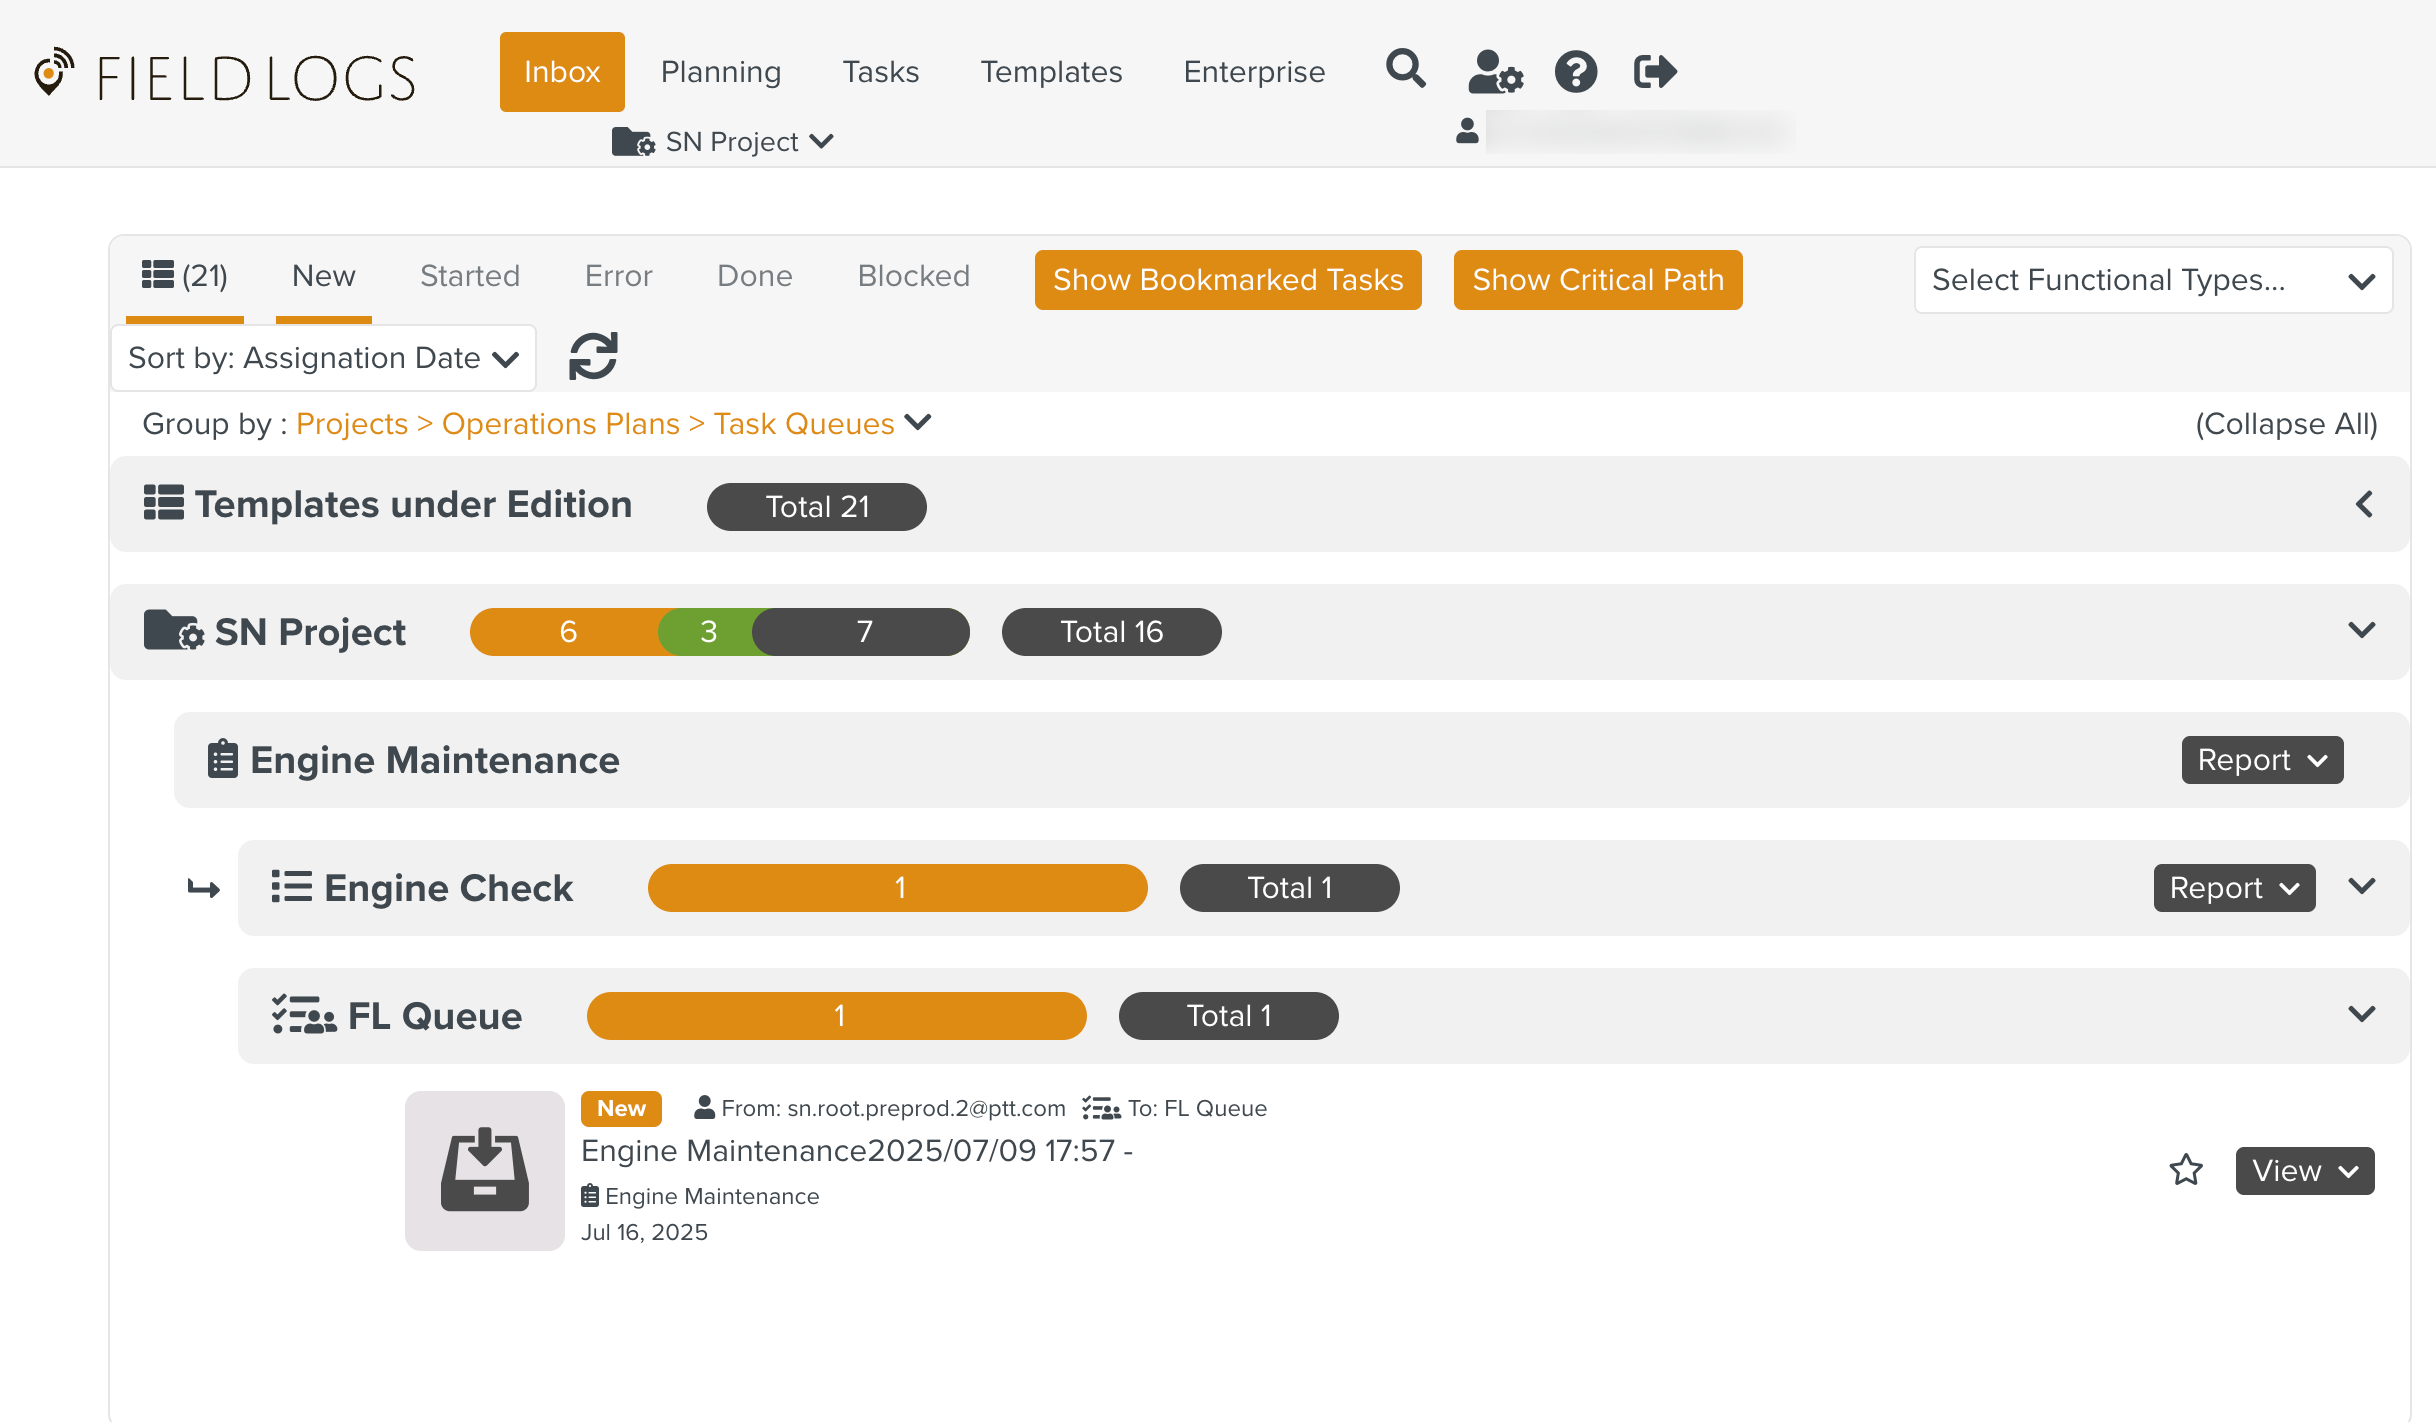
Click on the Operation Plan or Counter levels as shown below.
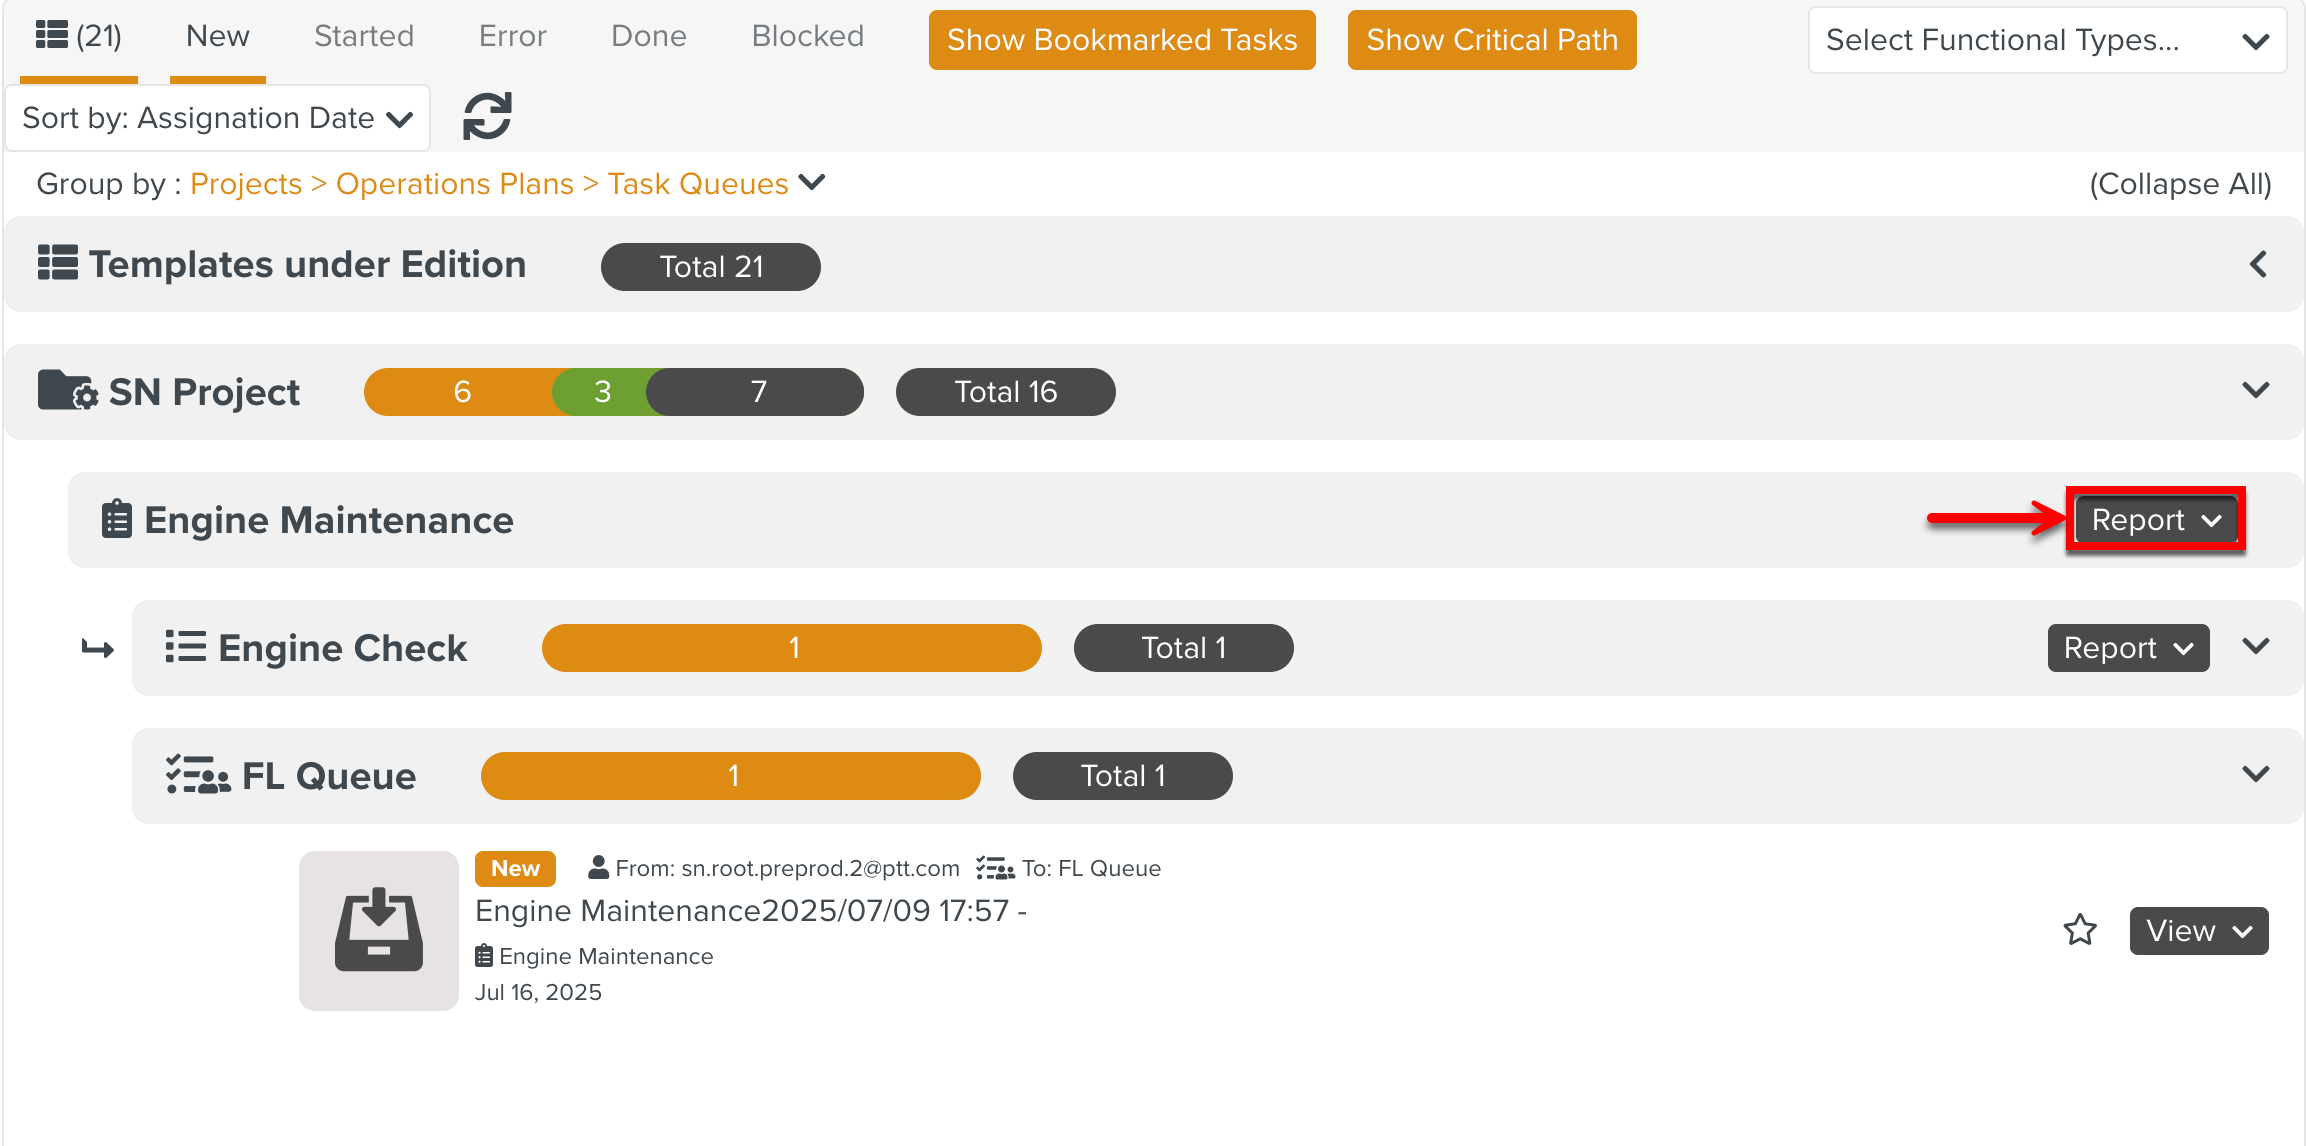
The button appears only when the Tasks in the page Inbox are grouped by Operation Plans.
A dialog appears as shown below.
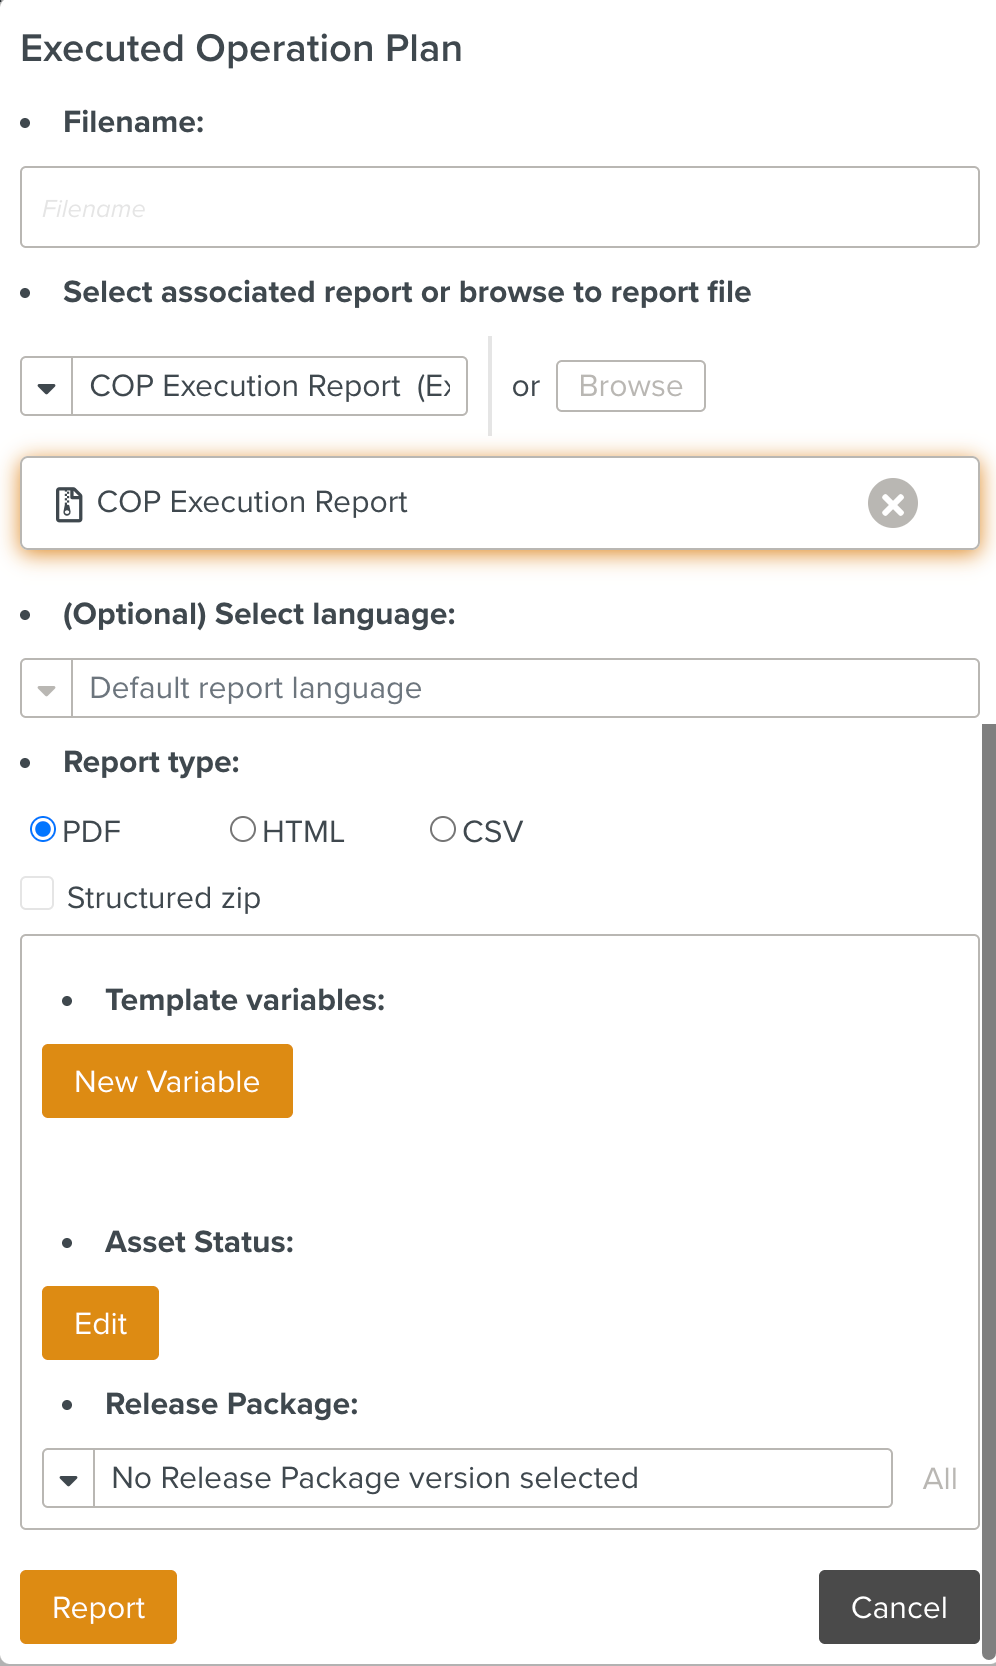
Enter the details as indicated below.
Filename: Enter the desired name of the Report. By default, it takes the name of the associated Report Package.
Select associated report or Browse to report file: Select an associated report model that already exists in the system from the dropdown or click to select the .ftl file or .zip file that extracts the information to be presented in the report.
Select language: Select the desired language of your Report. This is optional.
Report type: You can choose the report to be in PDF, HTML or CSV format.
Structured zip: Check Structured zip to generate a zip of reports organized by Suite and Package.
Template Variables: Click to add new Template Variables to the Report.
Asset Status: Click to modify the applied Effectivity.
Release Package: Select the Release Package versions.
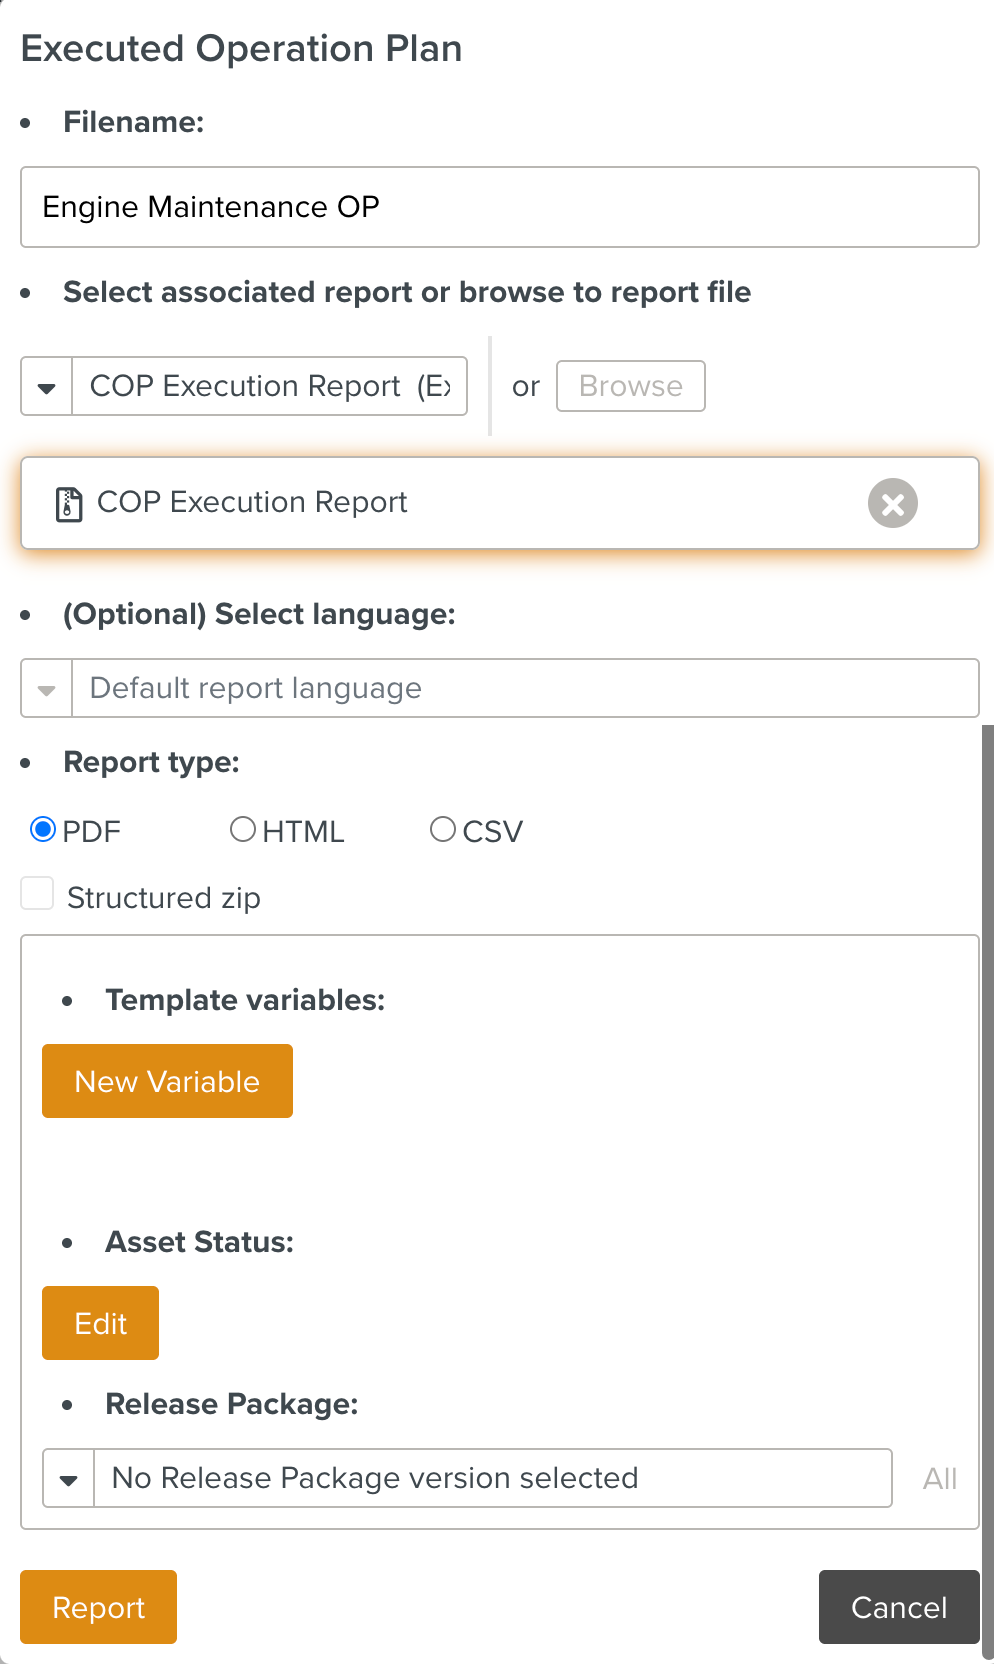
Click to download the report in the specified format.
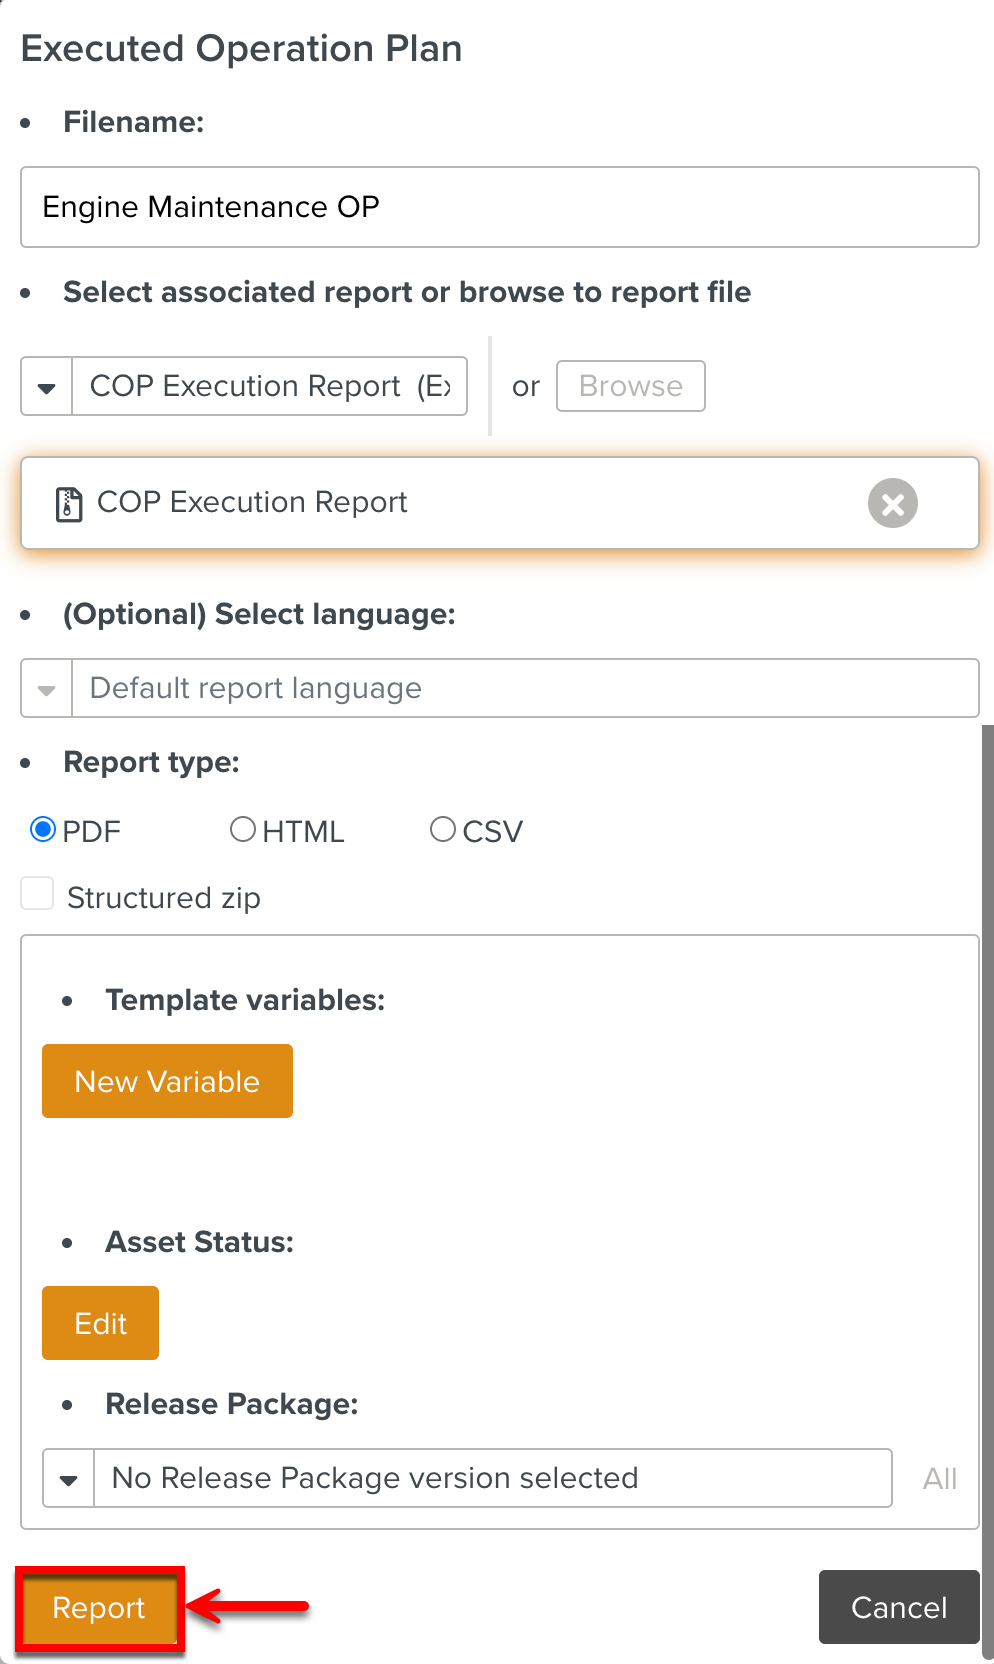
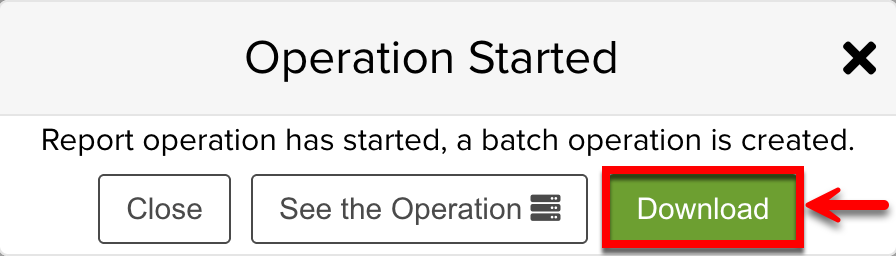
The Operation Started dialog appears.
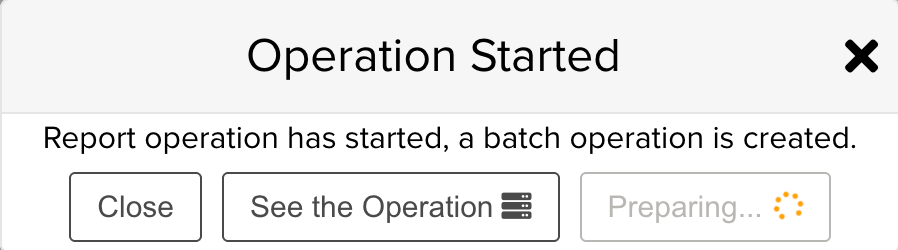
You can either download the report from the dialog or from the page Batch Operations.
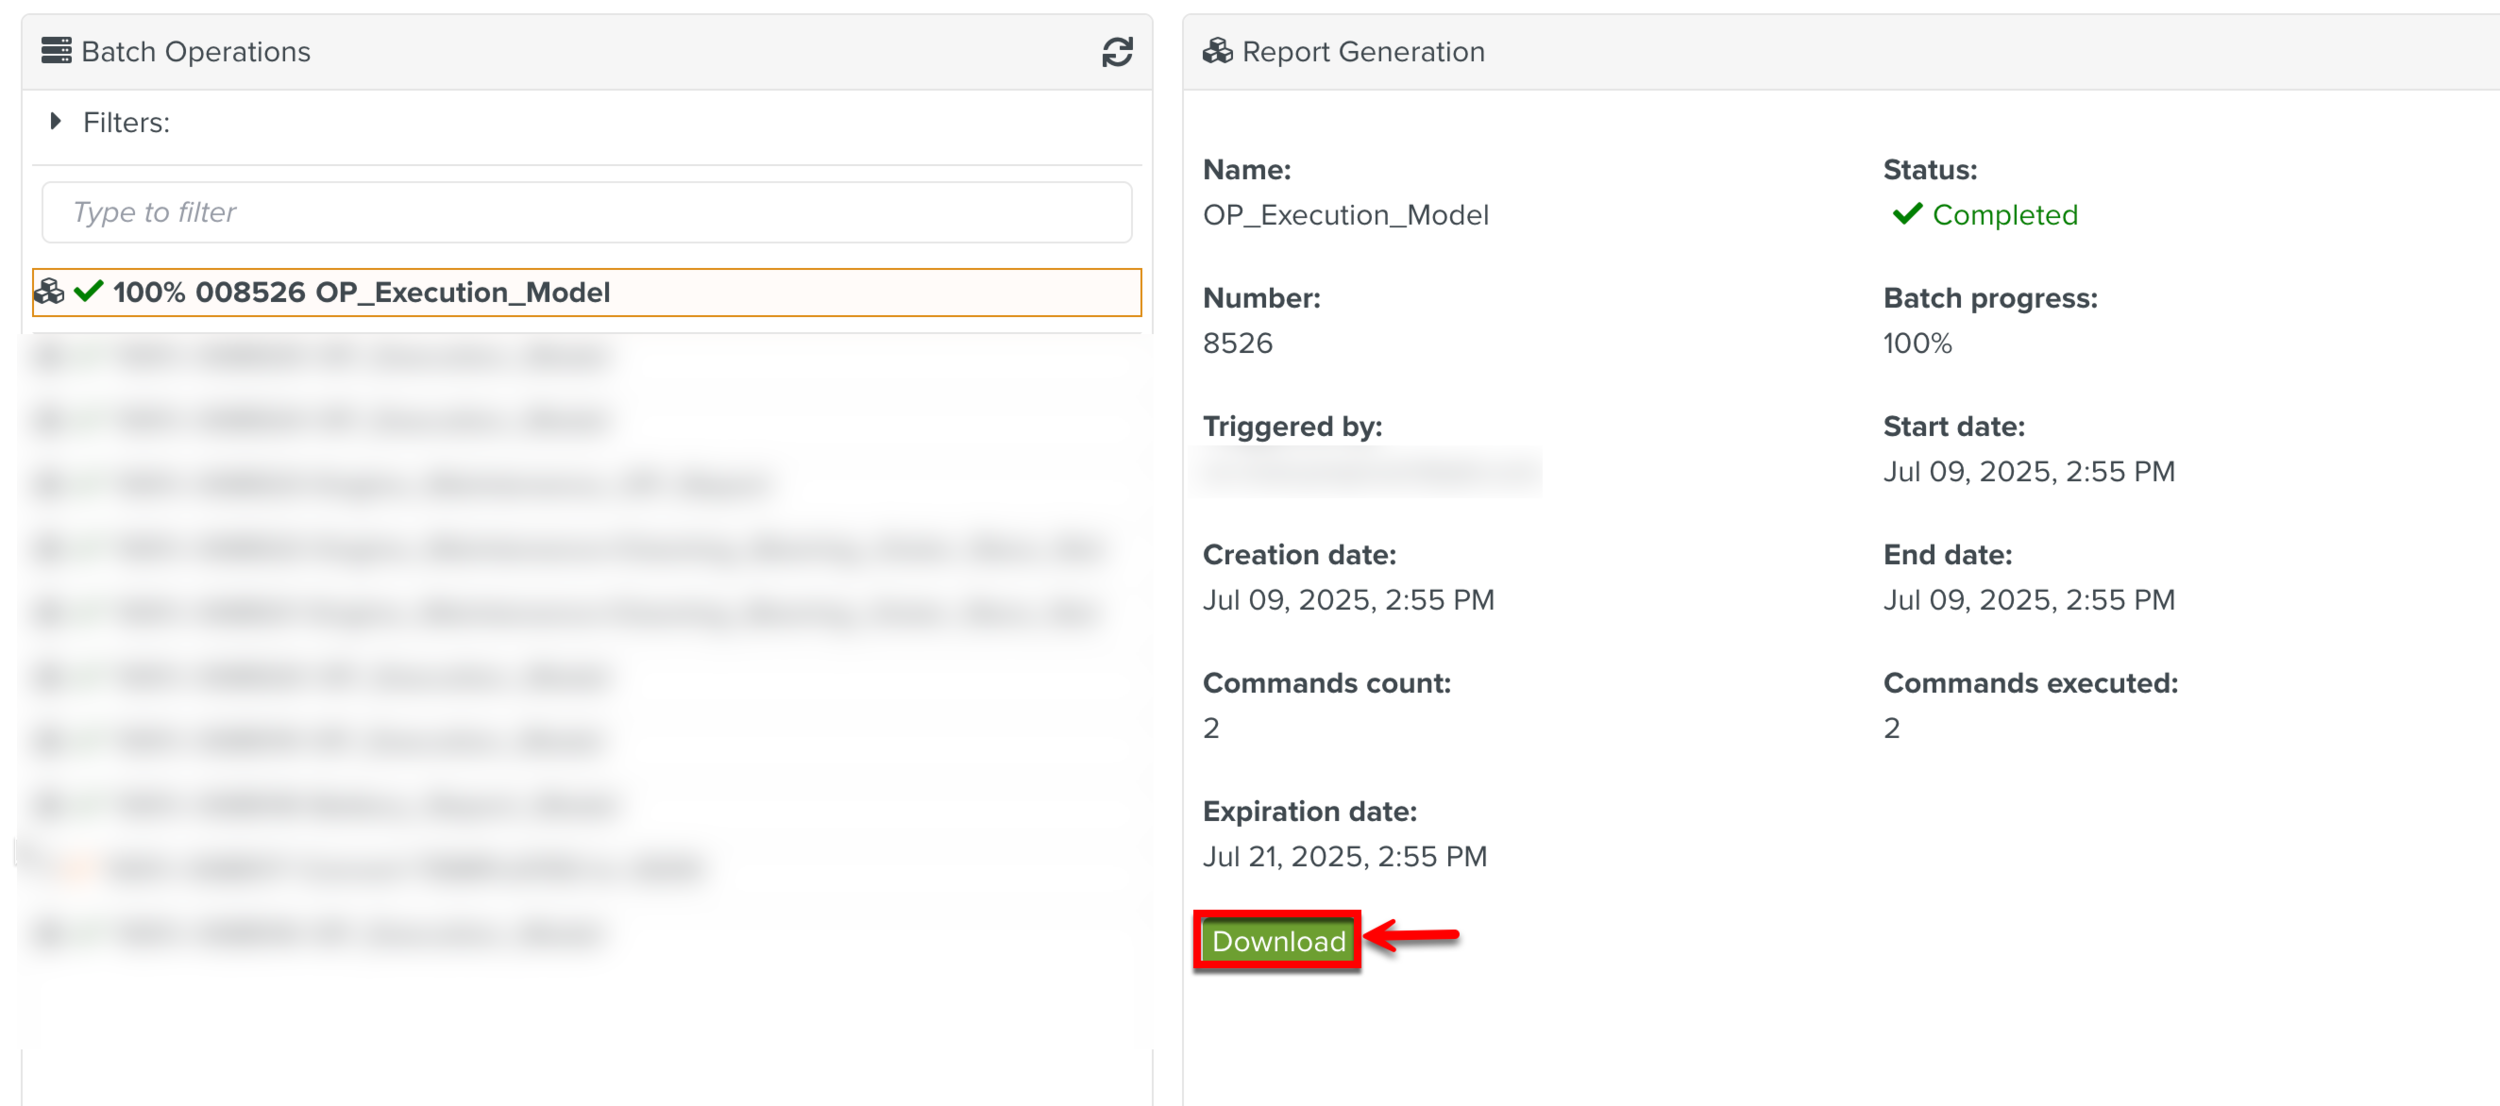
An Operation Plan execution report is generated as shown below.