Translating a Template
A Template can be translated into another language. This enables the Template to be used by a wider audience.
There are two ways of translating a Template.
Using Google Translate.
Using custom translation.
Warning
To translate with Google Translate, you need to have a Google Translate API key. The administrator can set the API Key for the enterprise in the section.
Open an editable Template that needs to be translated.
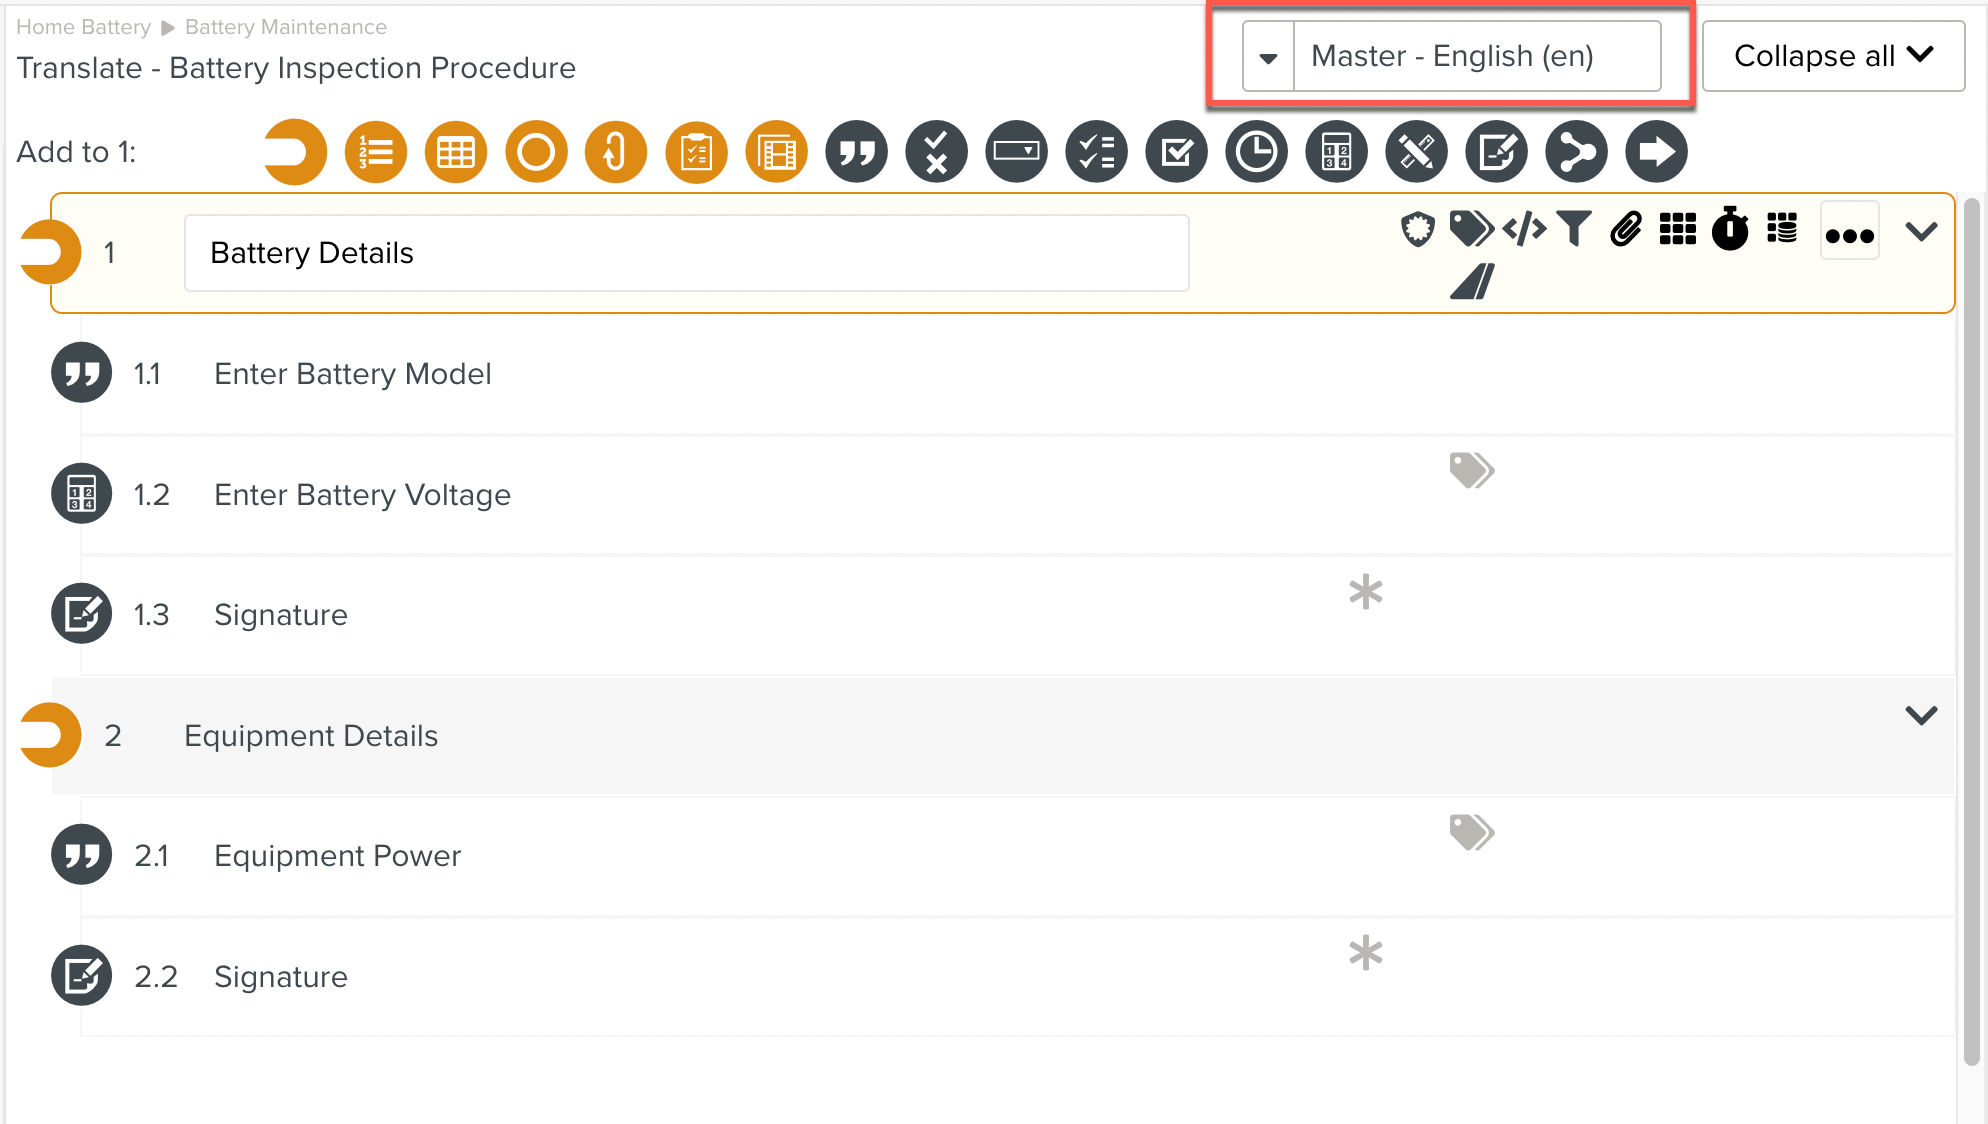
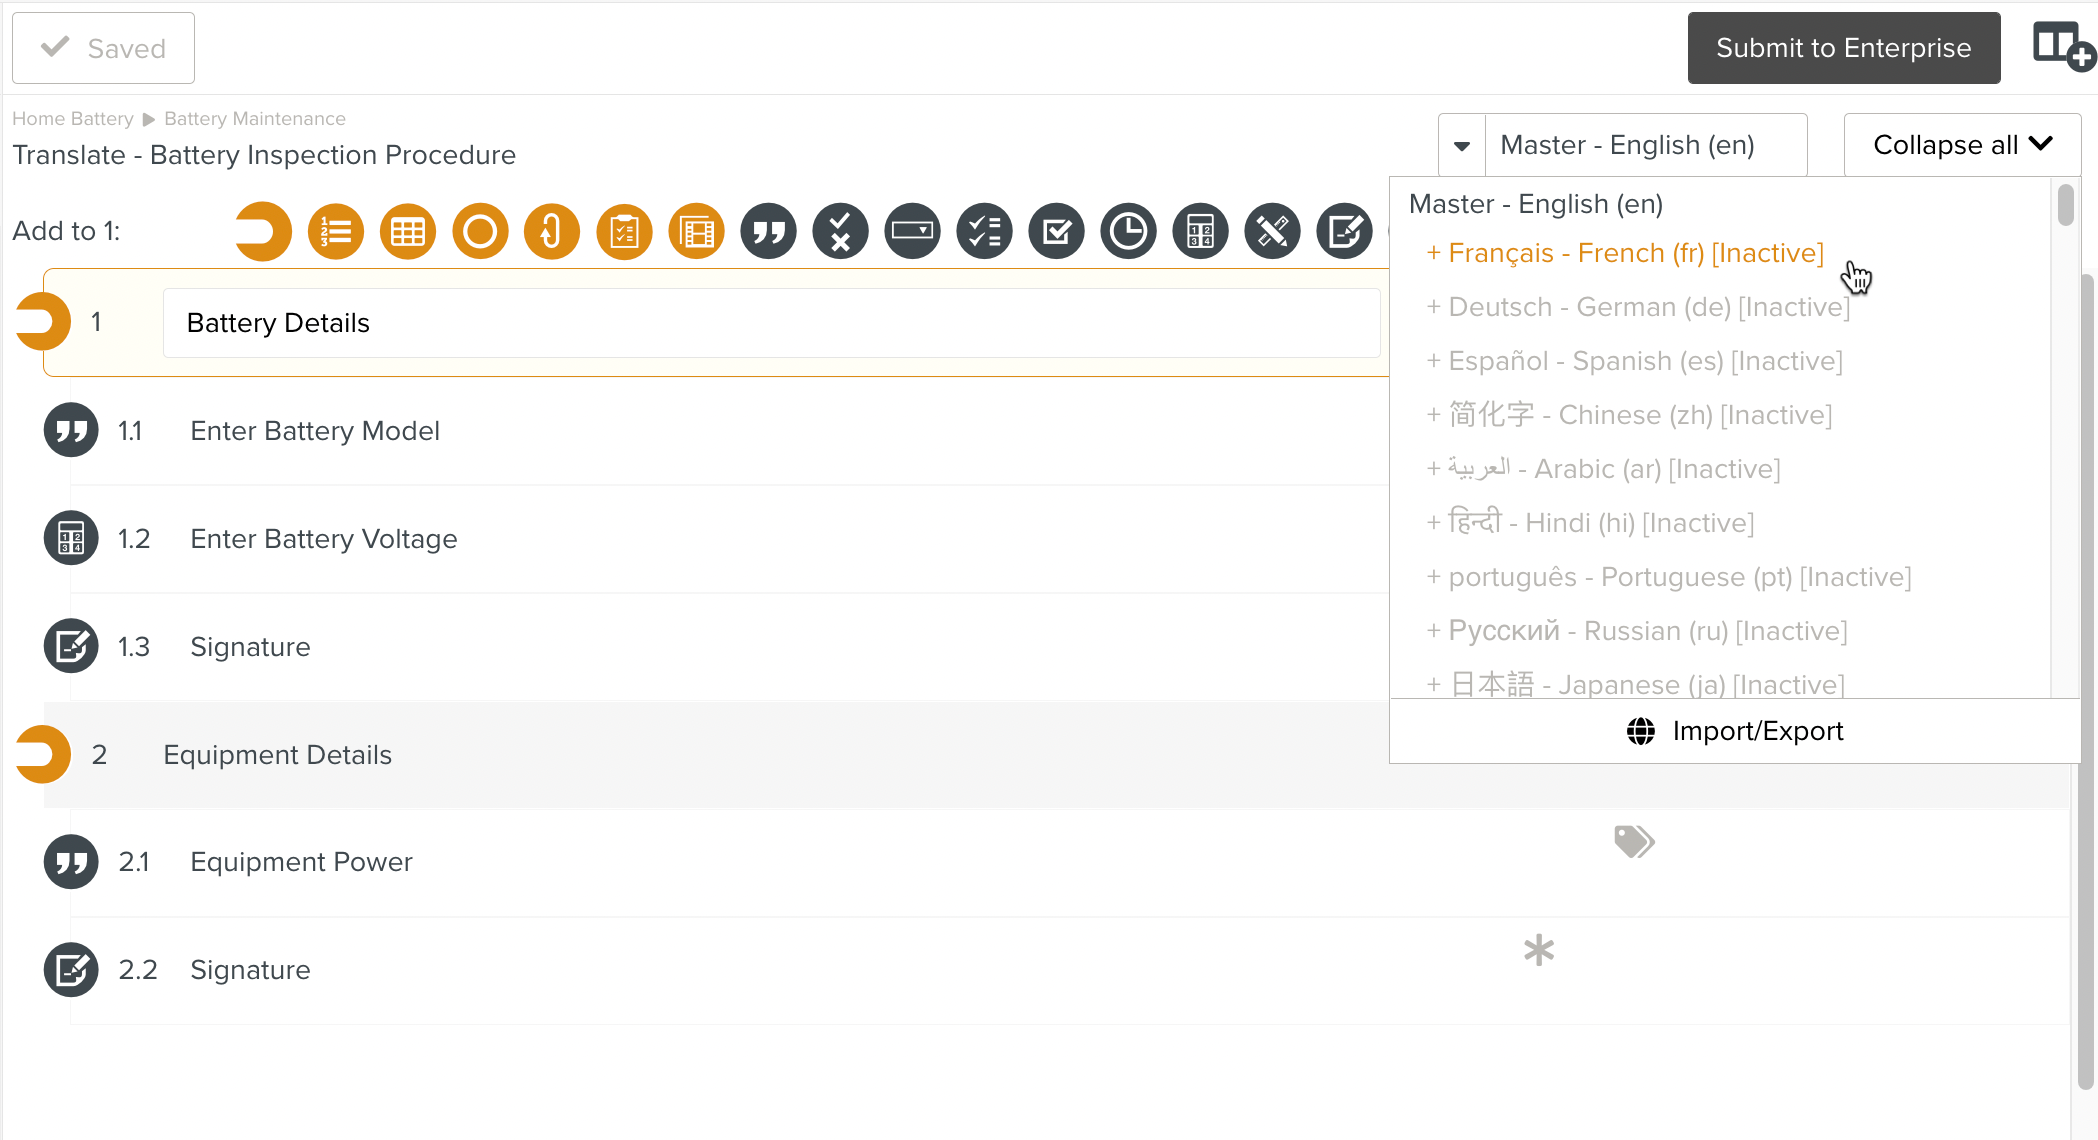
Click the dropdown list to see the list of languages. The list also indicates the language of the Master copy. In the example below, it indicates that the Master copy is in English.
You could navigate to the Tab instead and access the dropdown list.
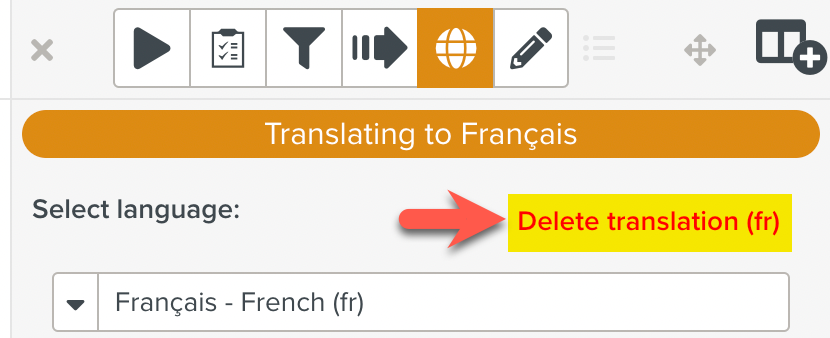
Select a language. French is chosen in the example below.
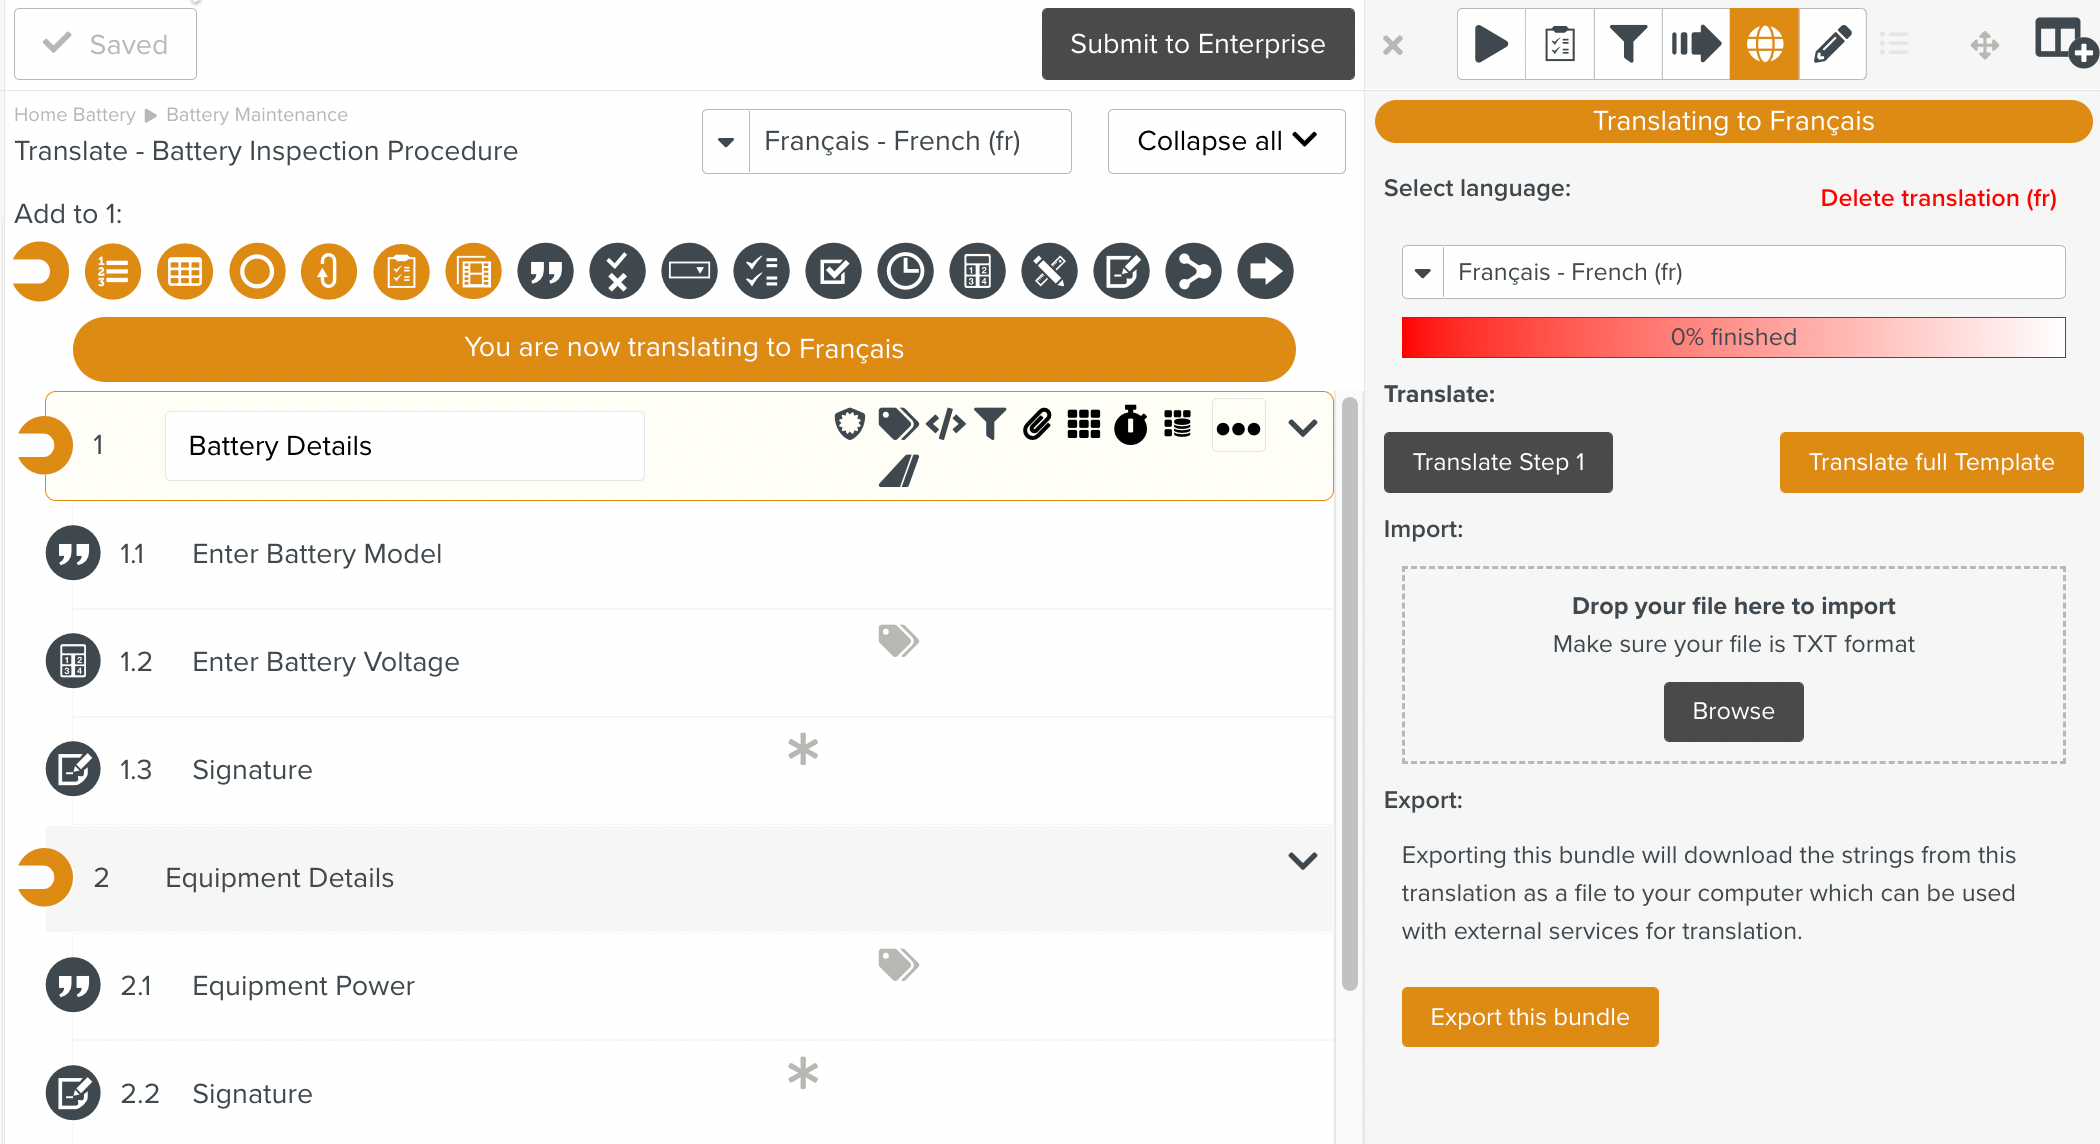
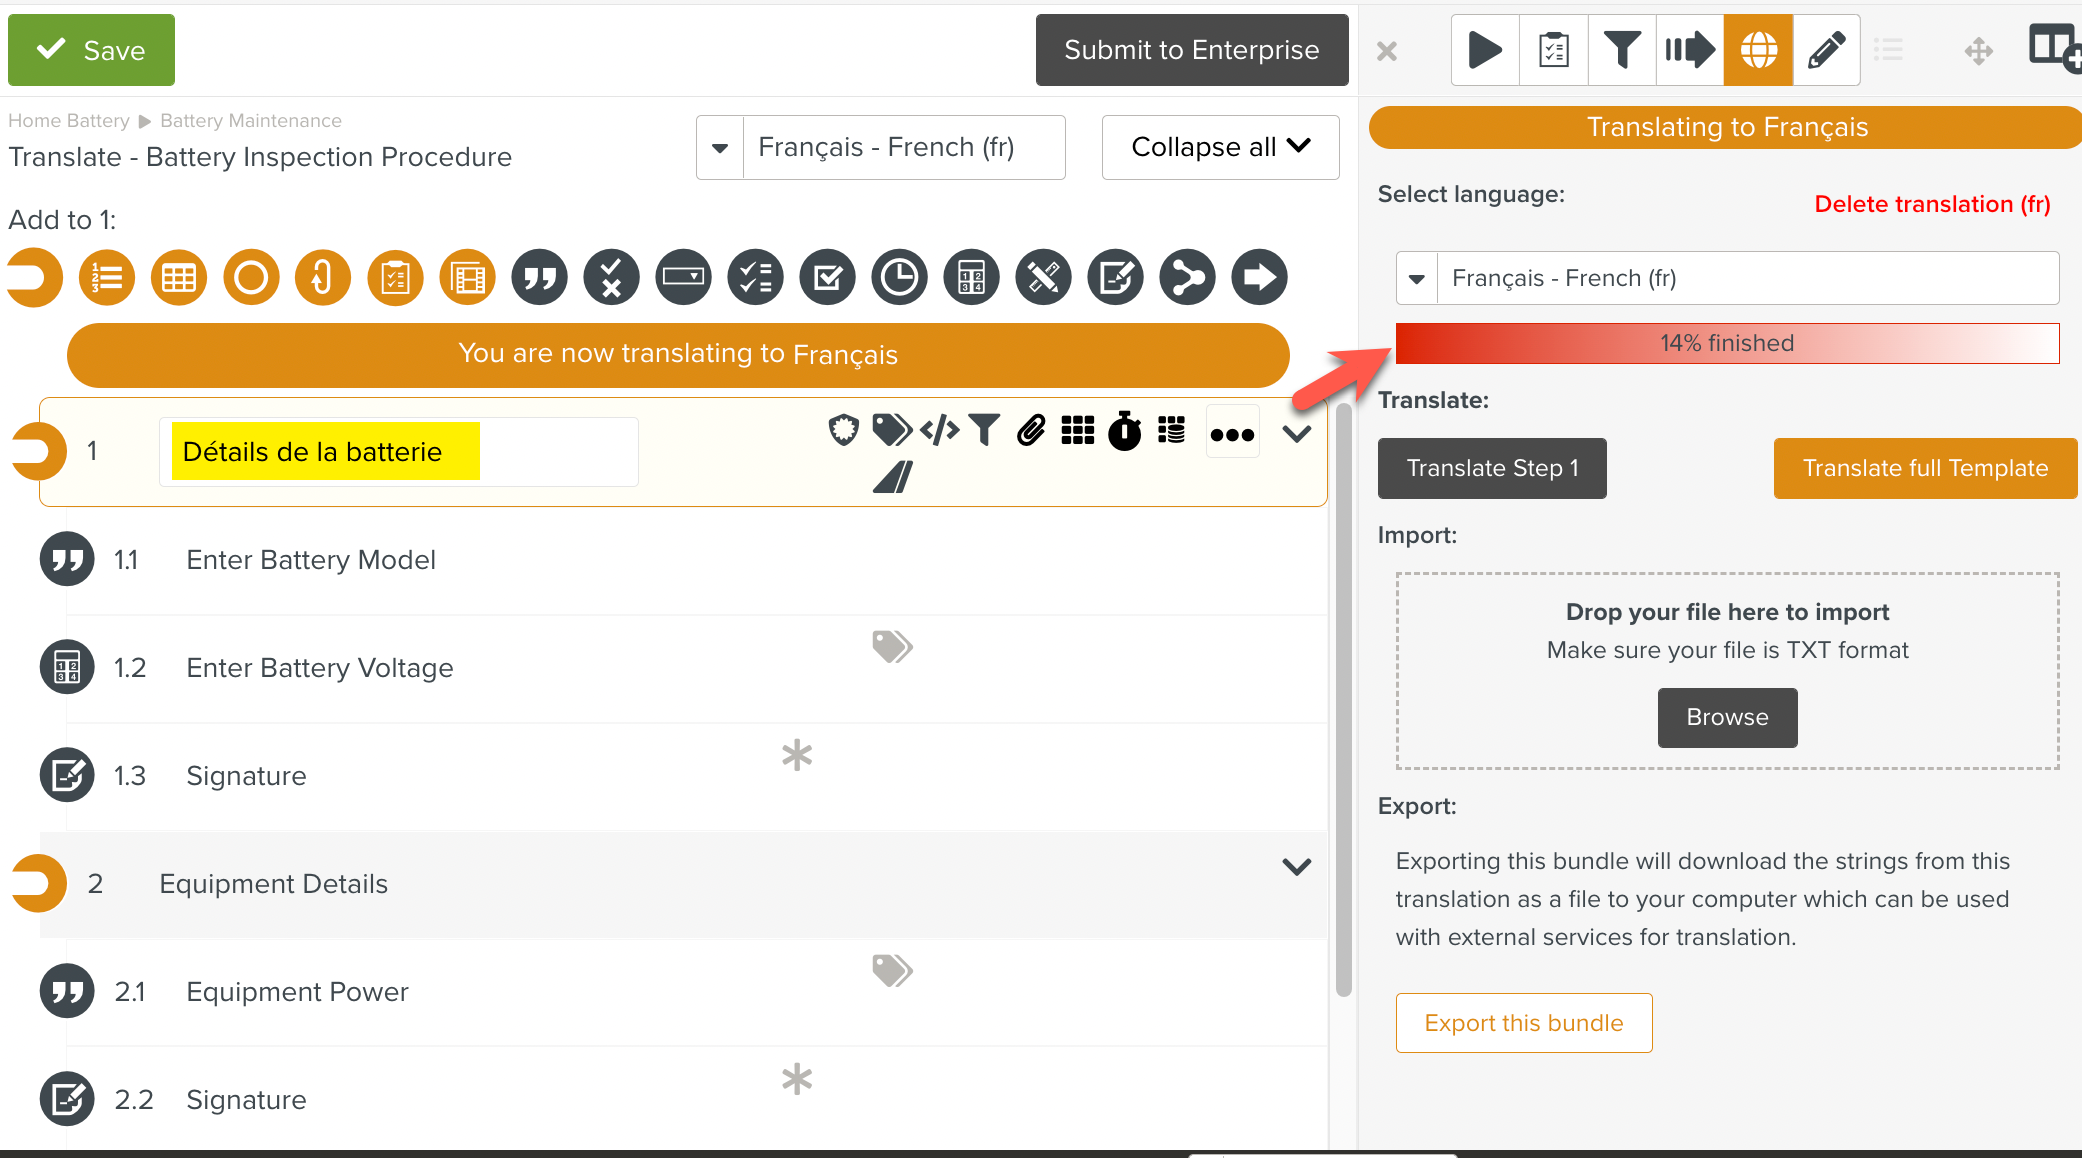
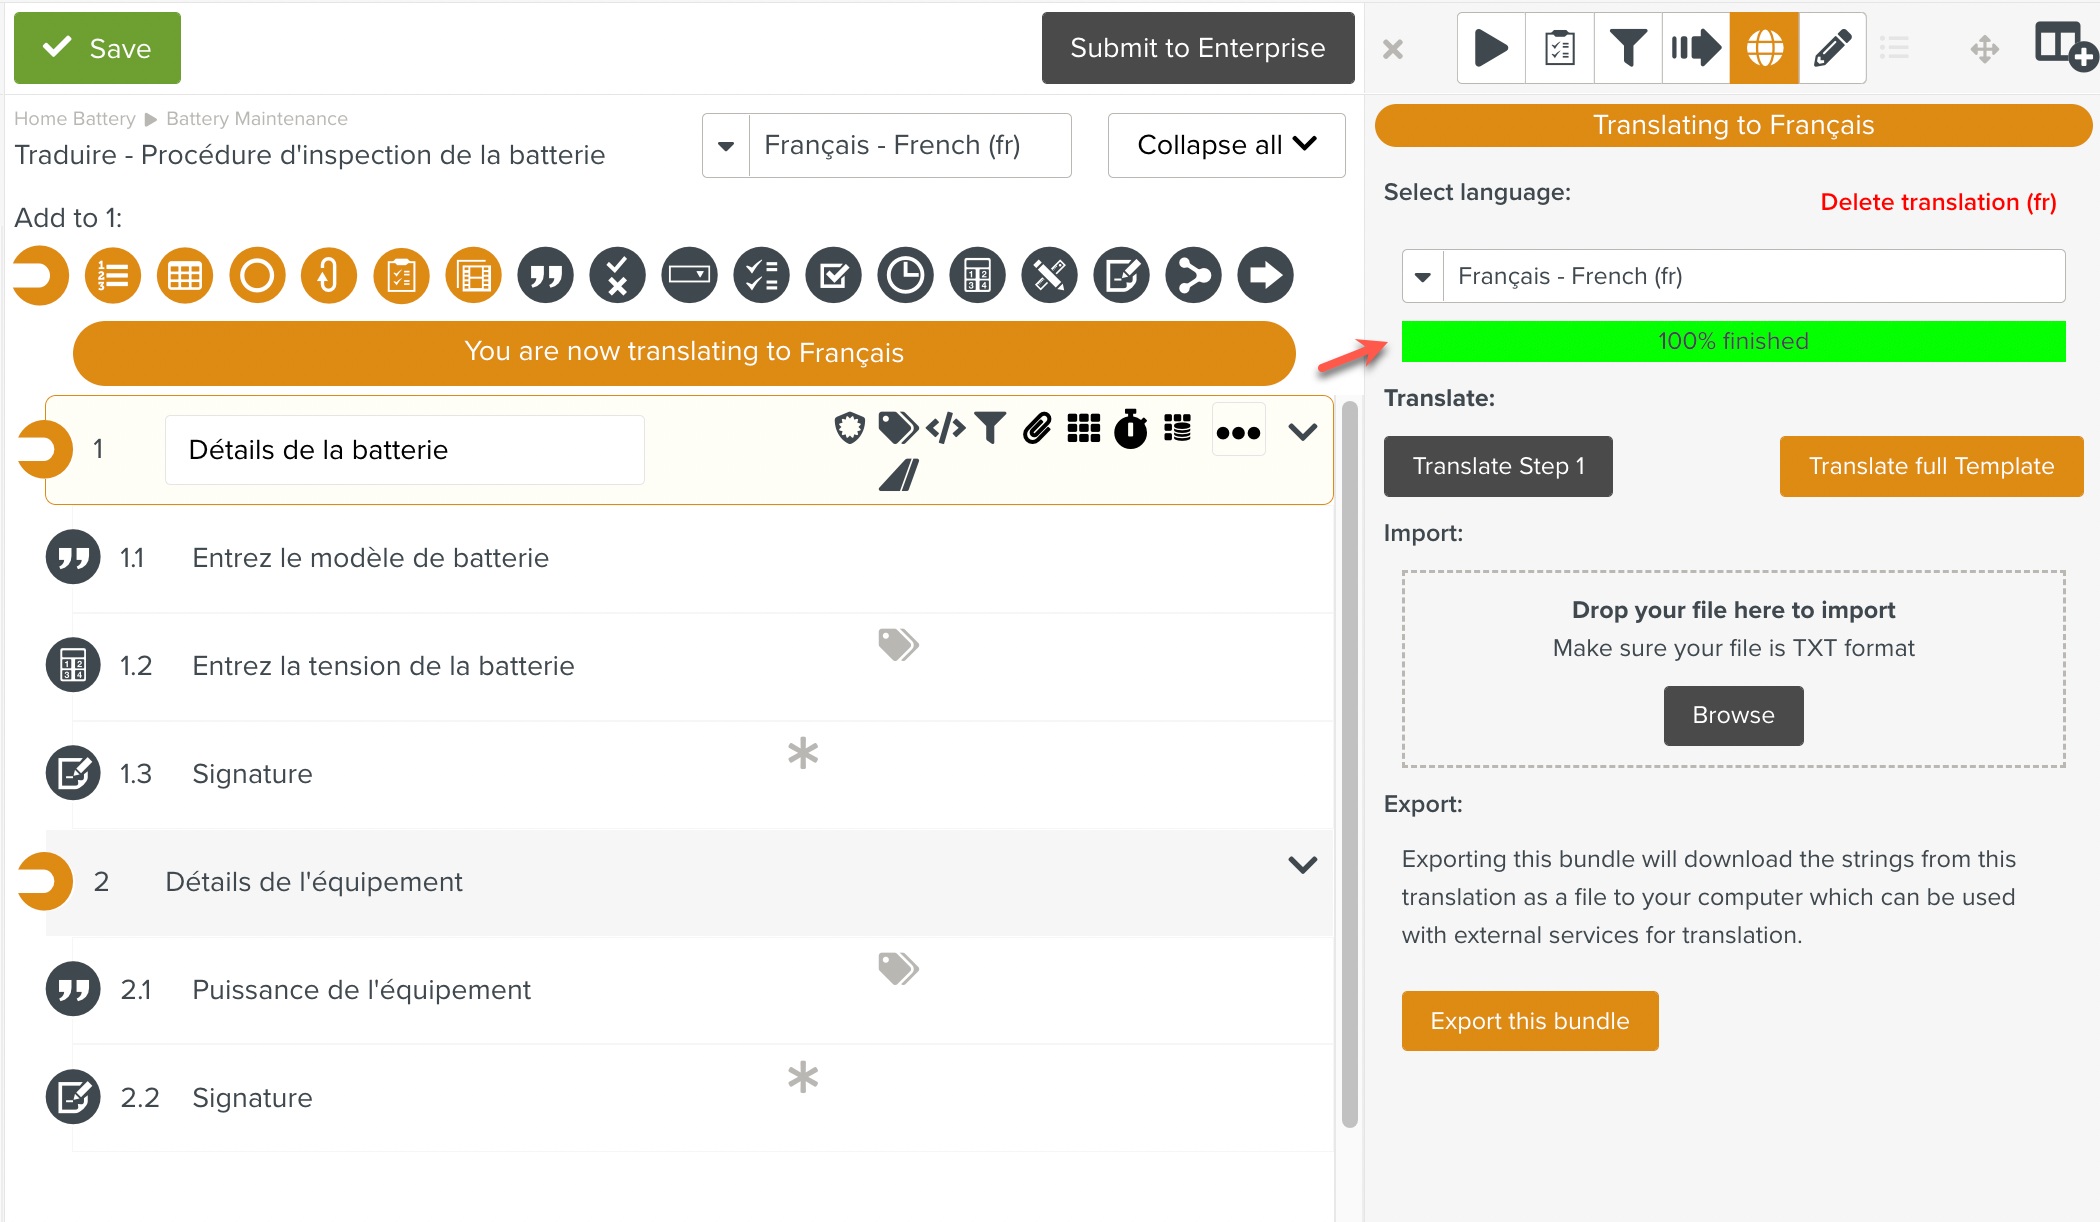
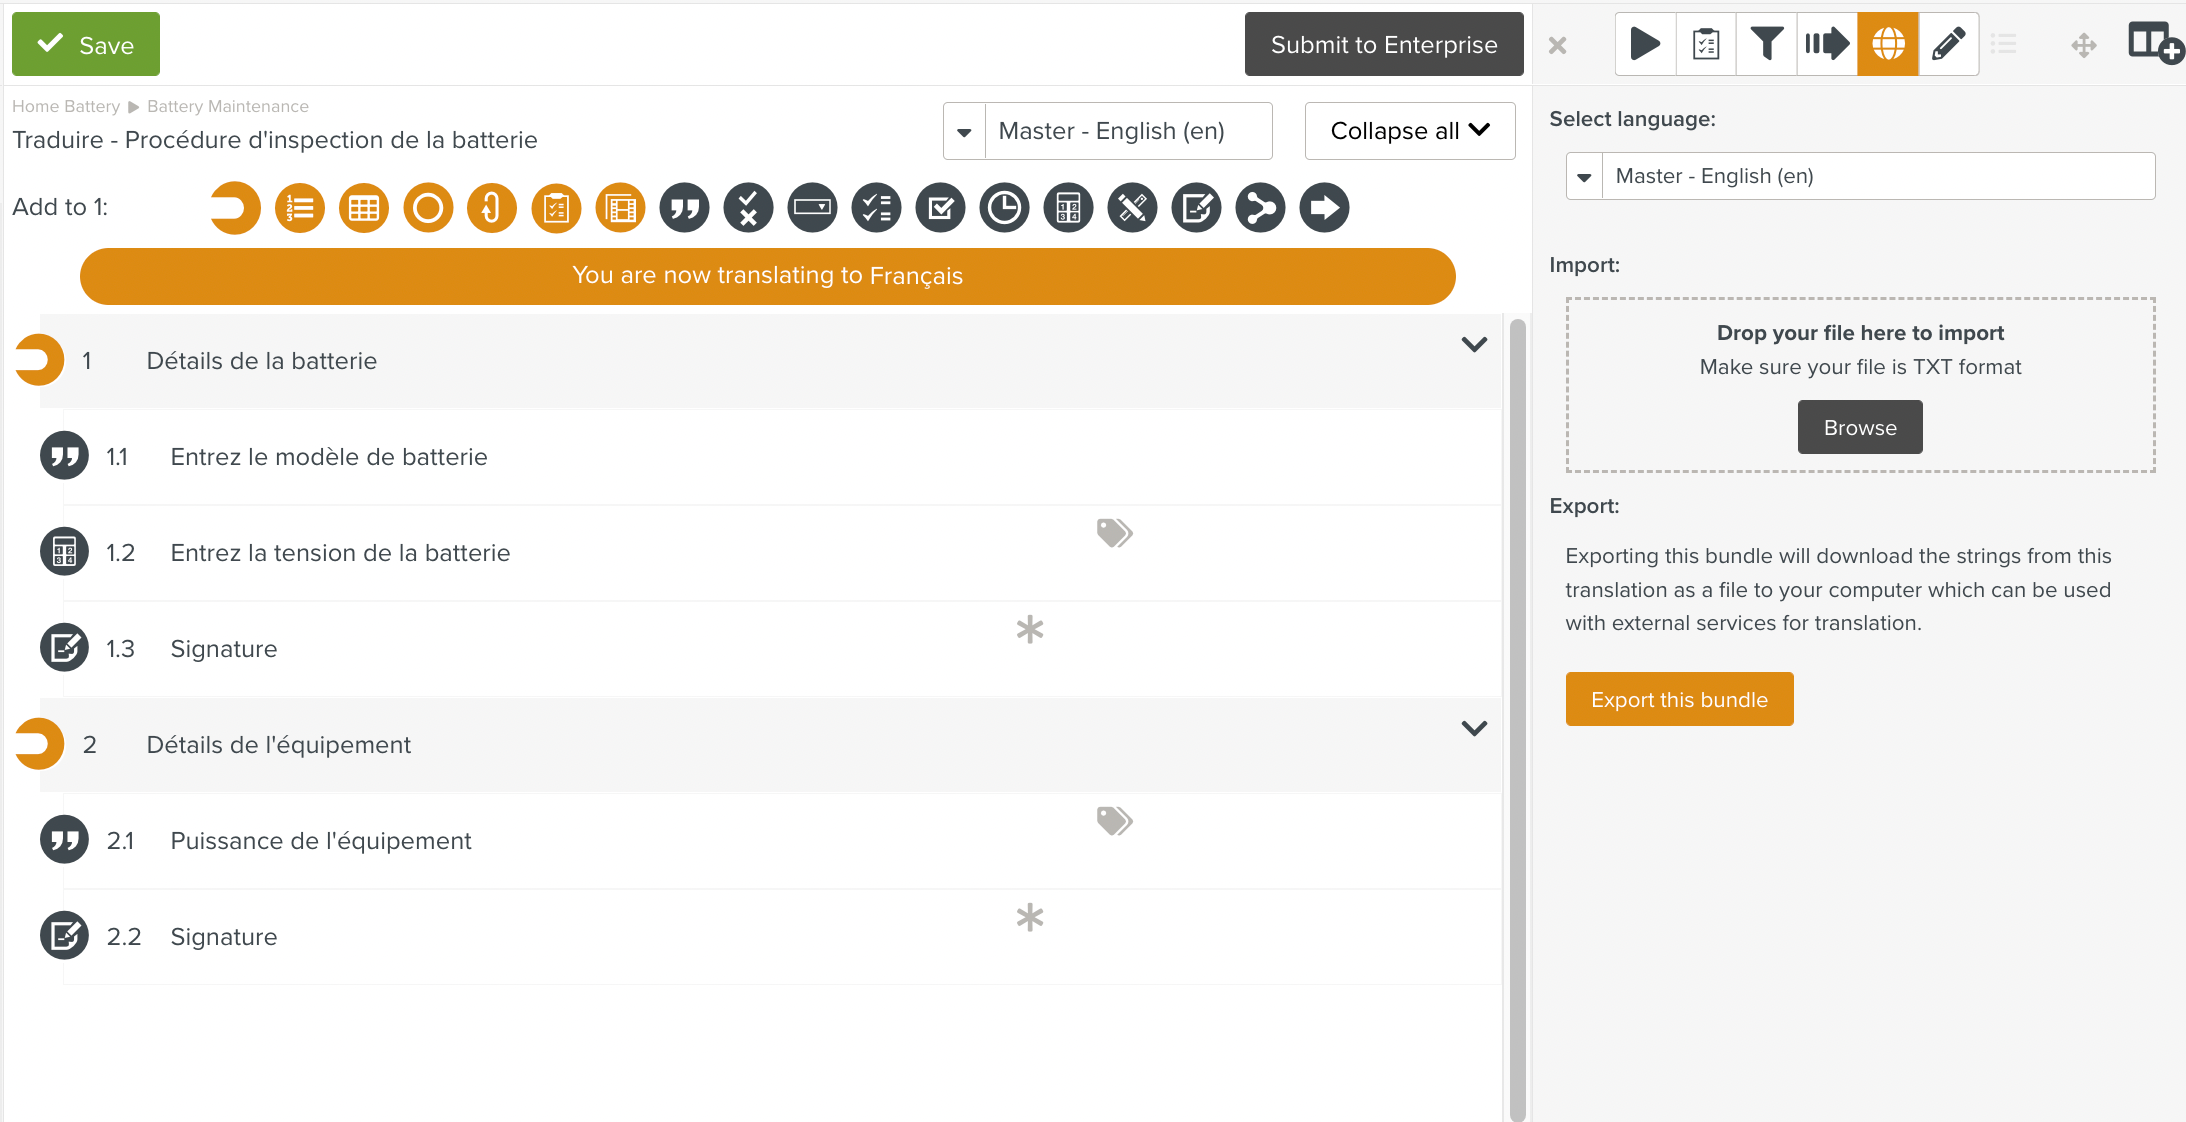
The Template is now in Translation Mode. This is indicated by the following:
An orange ribbon highlights that the Template is being translated.

A color graded progress bar appears to indicate the translation progress.

Two options are provided. The user can translate the selected Step or the full Template.

An option to delete the current translation is provided.
If you choose the option to translate just the selected Step, the selected Step is translated. The progress bar is updated.
You can translate the full Template one Step at a time. A Template can also have just a few Steps translated, if required.
If you select the option to translate the full Template, the full Template is translated. The progress bar is updated.
The translation Template is ready. You can edit the Template if required.
Click Save to save the Template.

To abort the translation at anytime, click .
A custom translation can be performed on the Template.
A text file containing all the strings in the master language is exported. The strings are translated into the target language. A text file with the translated strings are imported.
To translate the Template using the Export/Import option:
Open the Template to be translated.

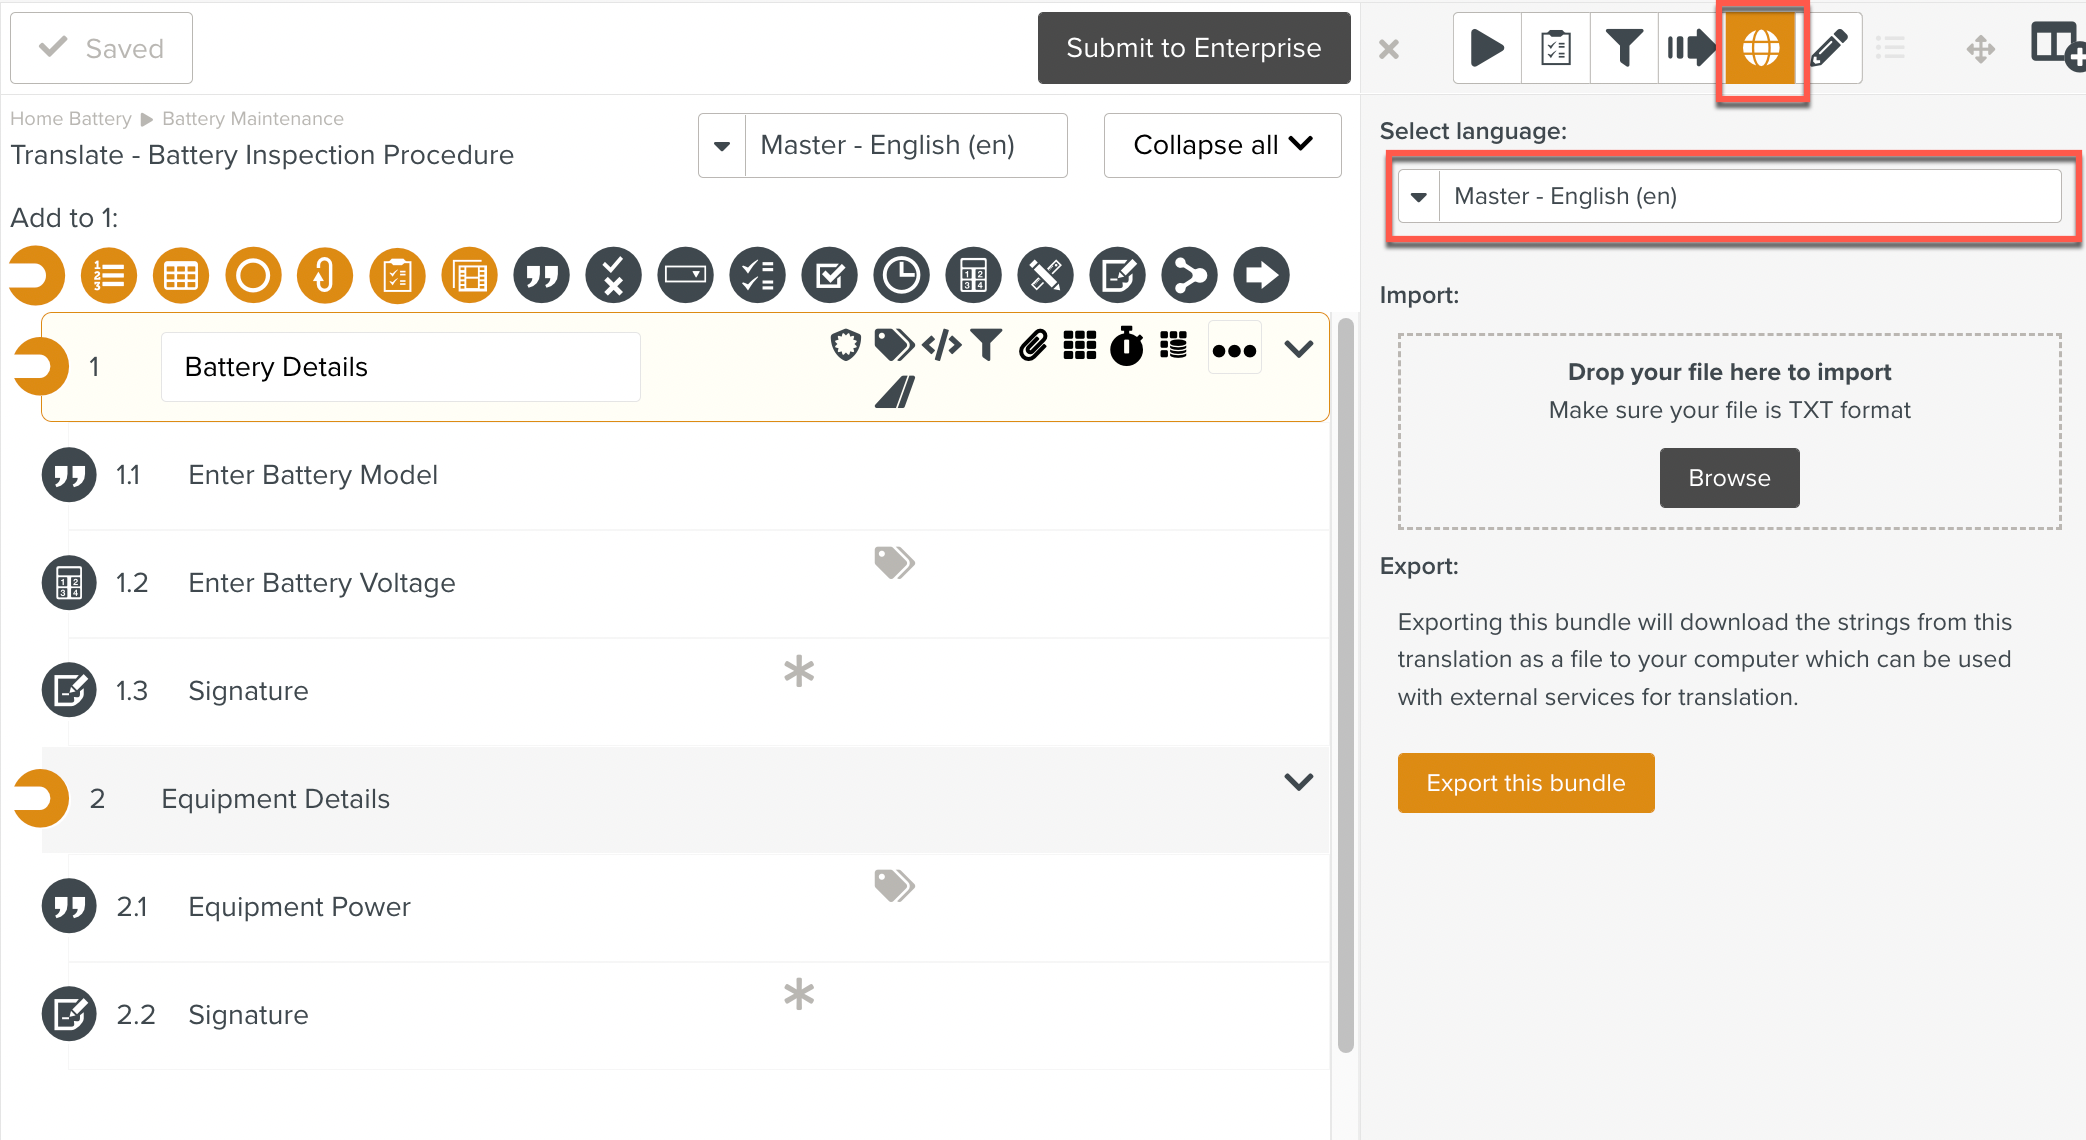
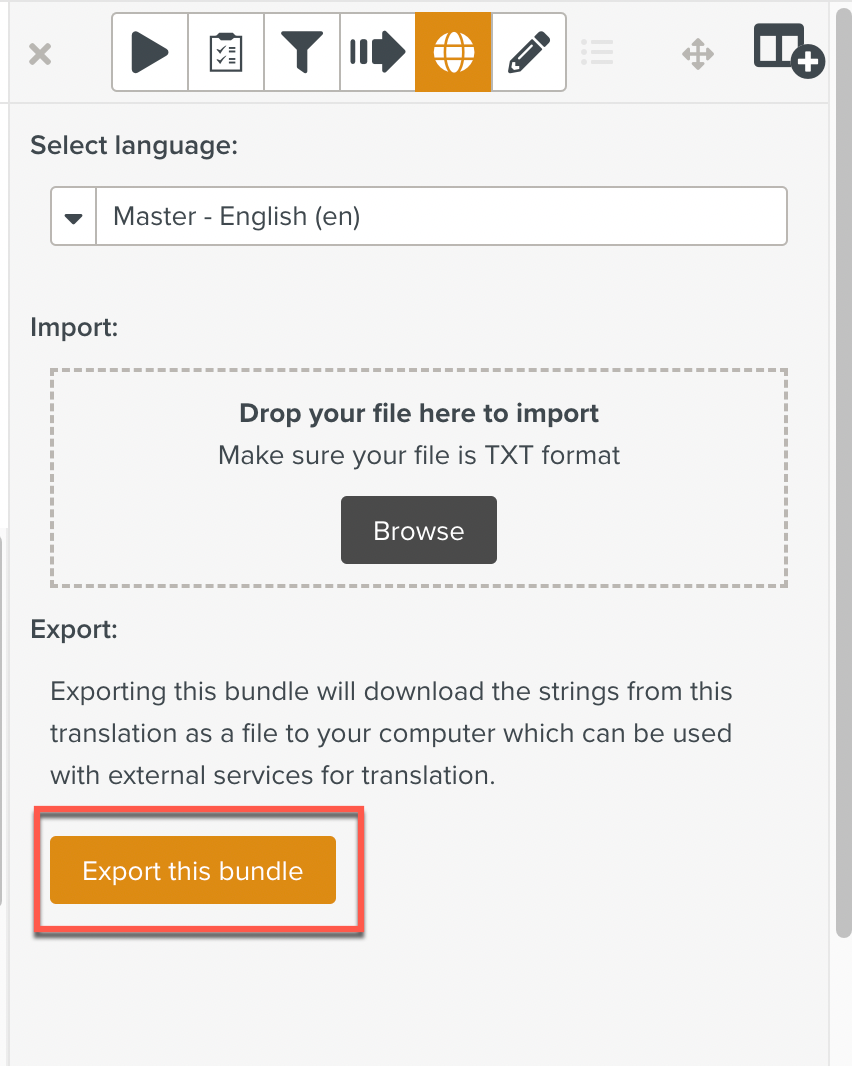
In the language dropdown list, click Import/Export.
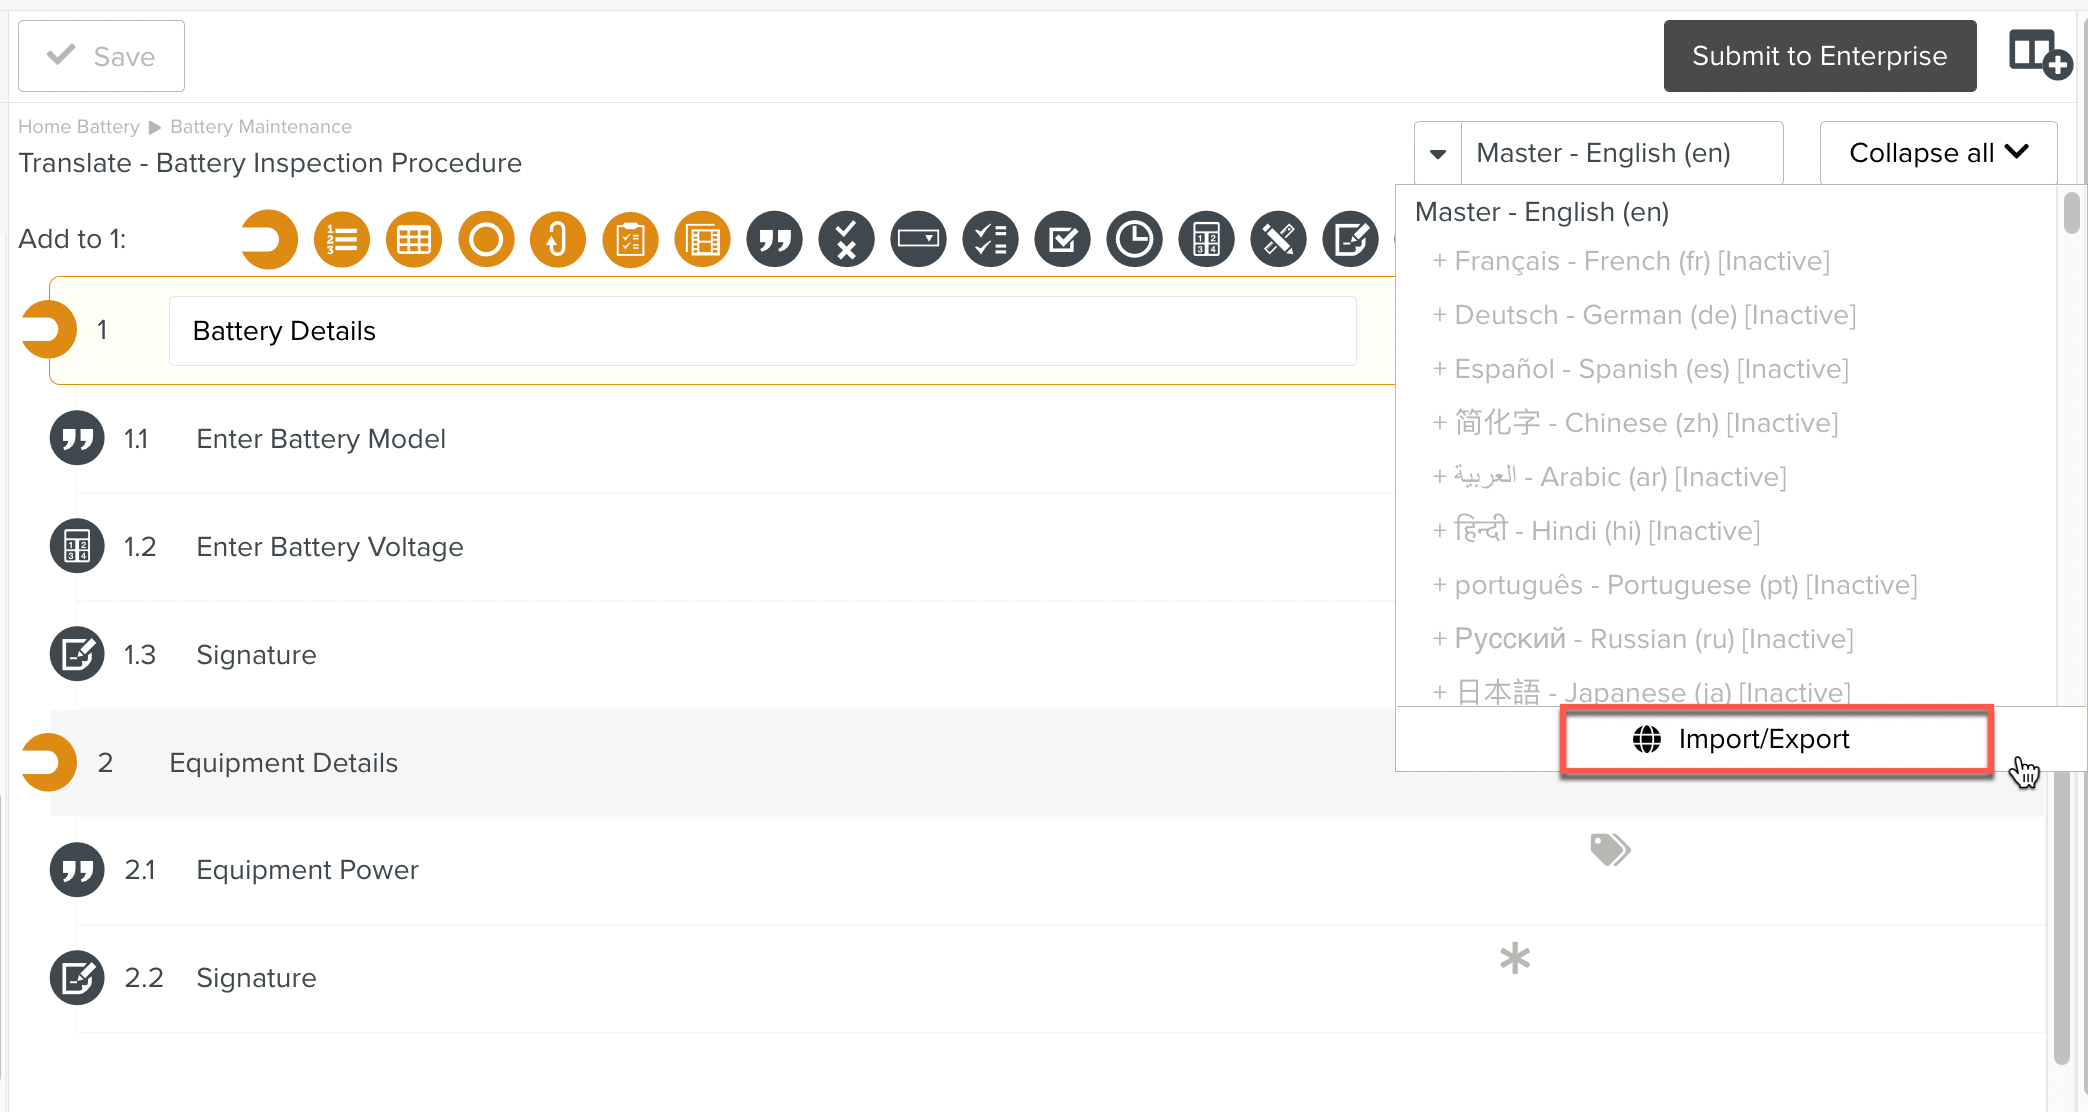
You could navigate to the Tab instead and access the Import/Export option there.
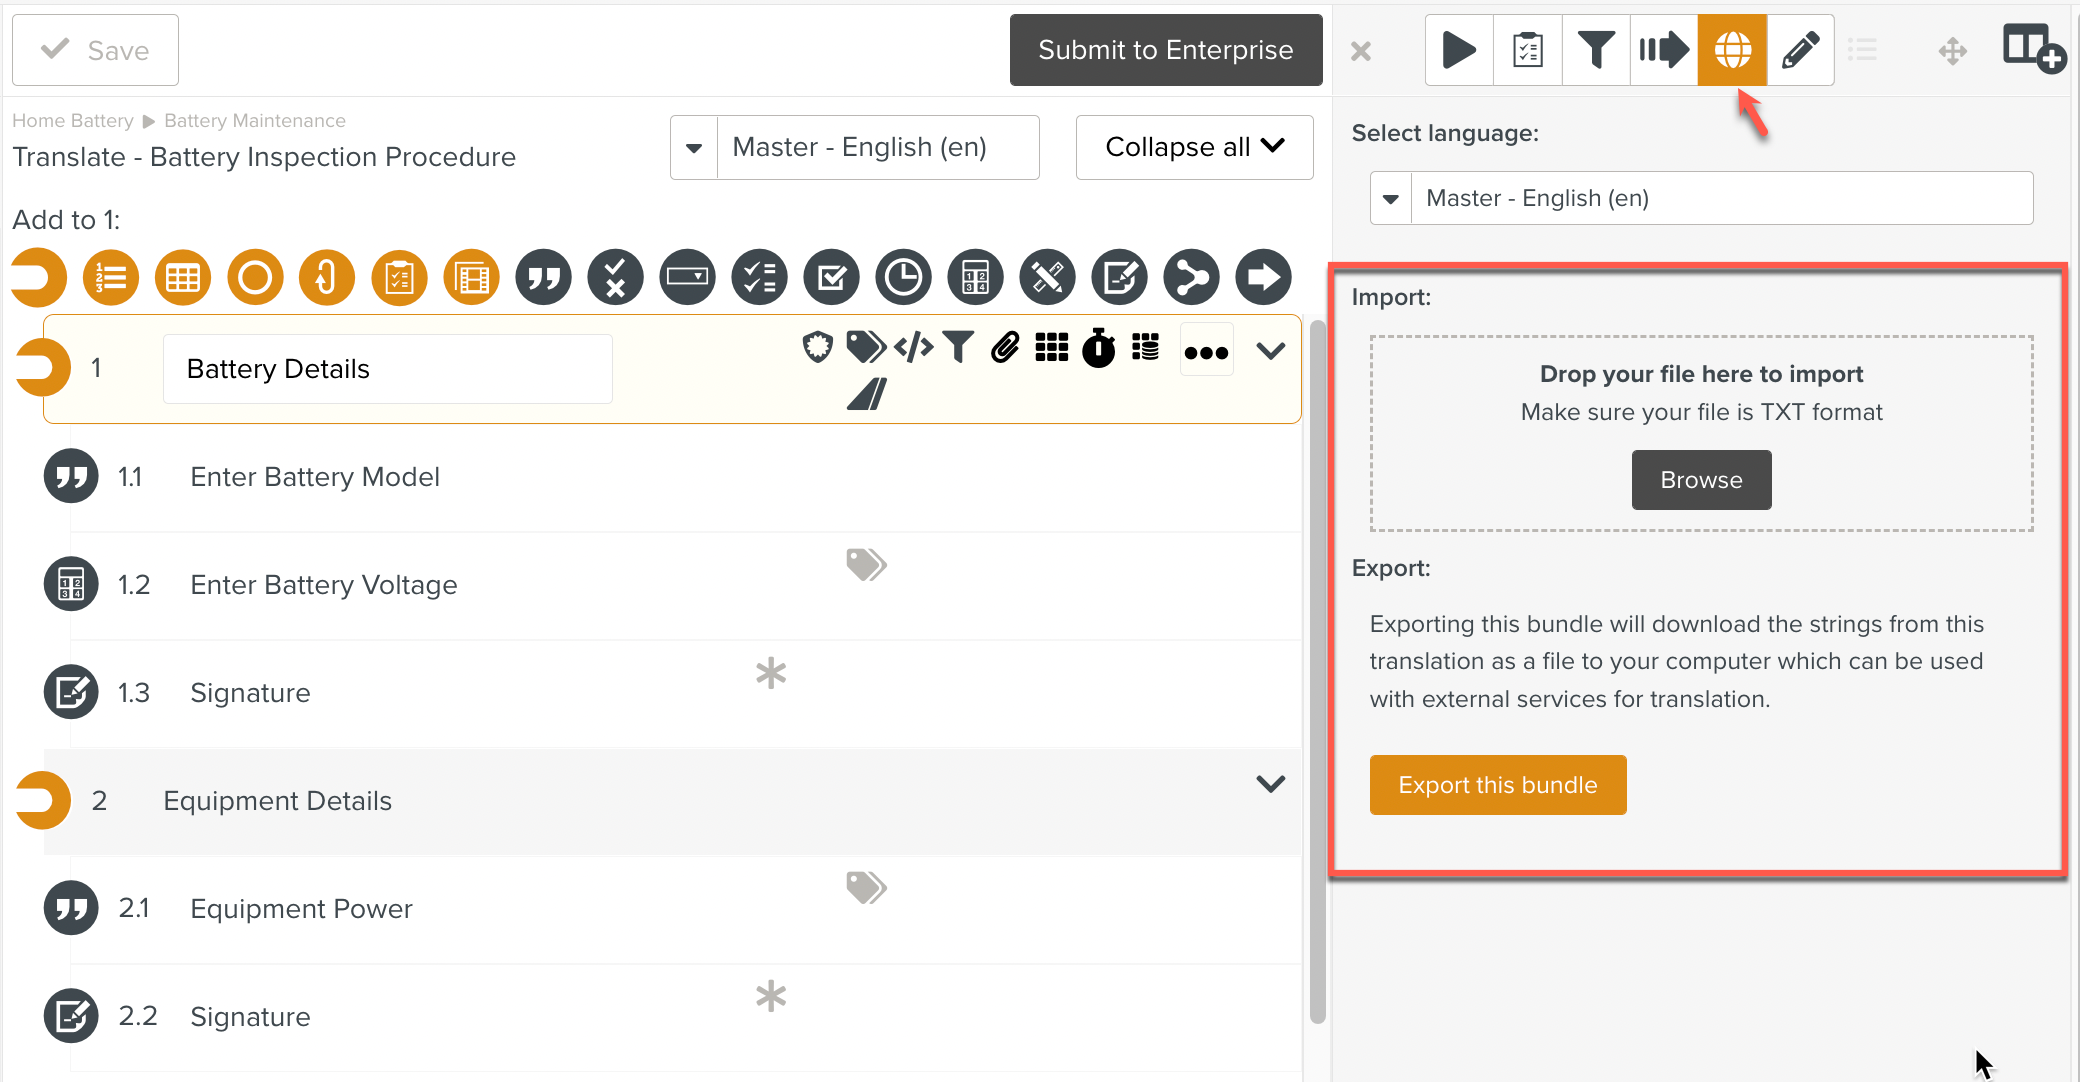
Click .
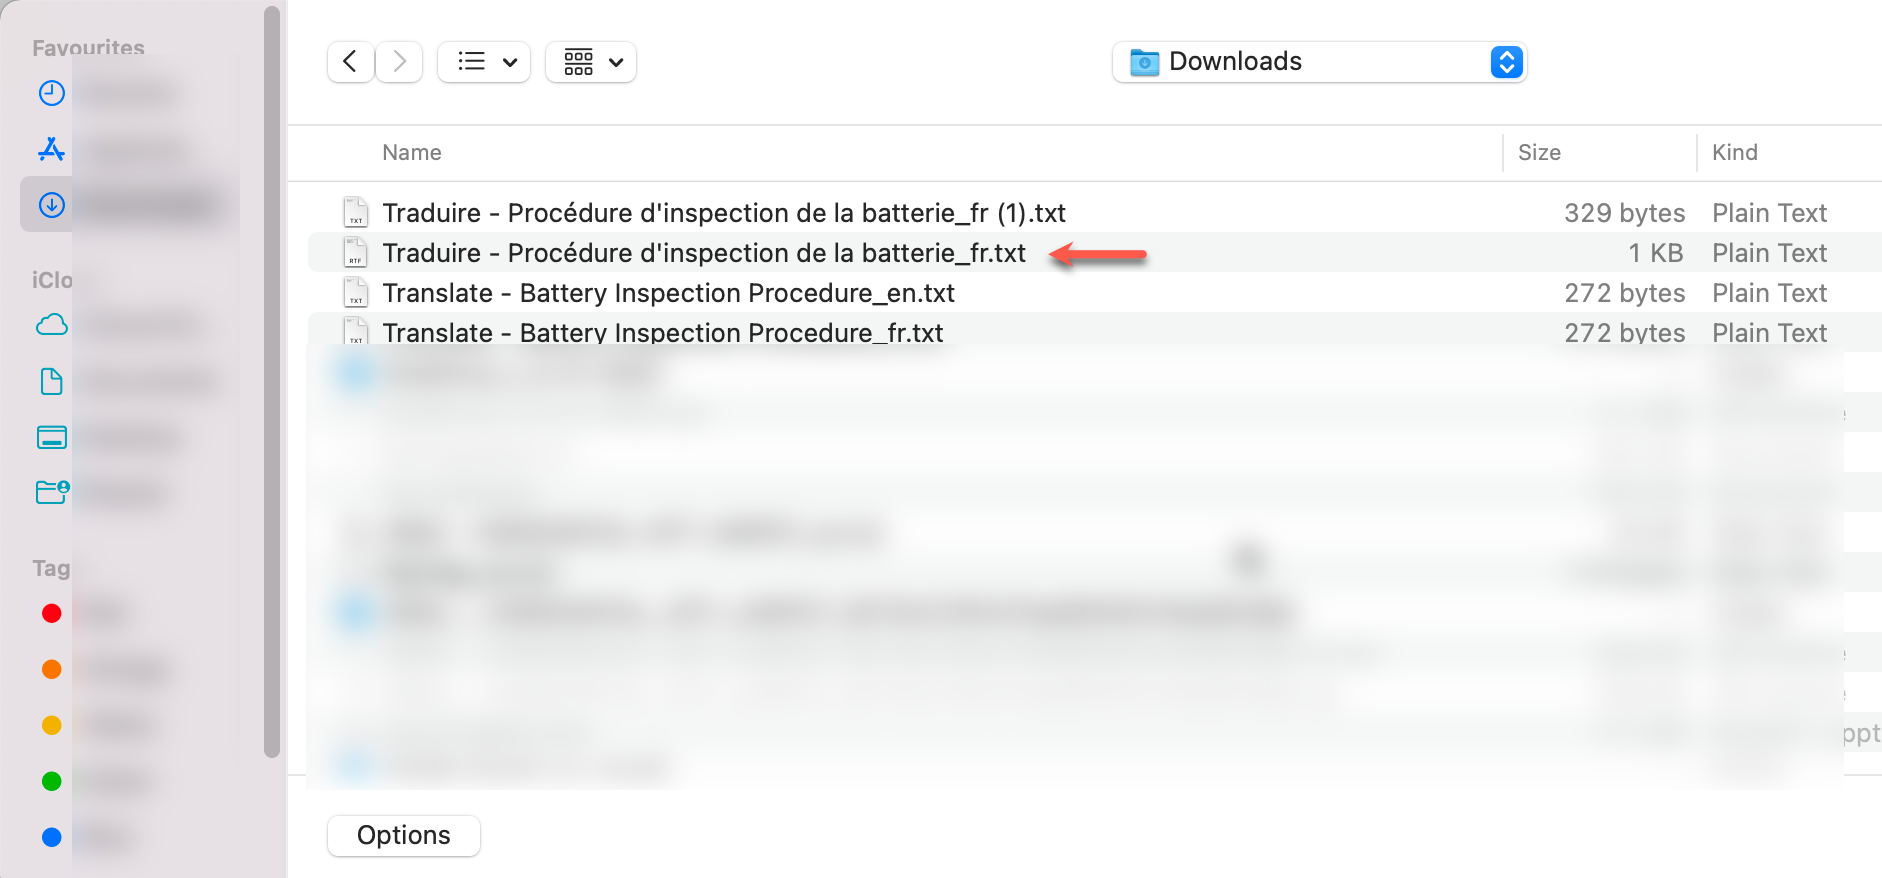
A text file with all the strings in the master copy is downloaded. The filename has a language suffix 'en' to indicate that the master copy was in English.
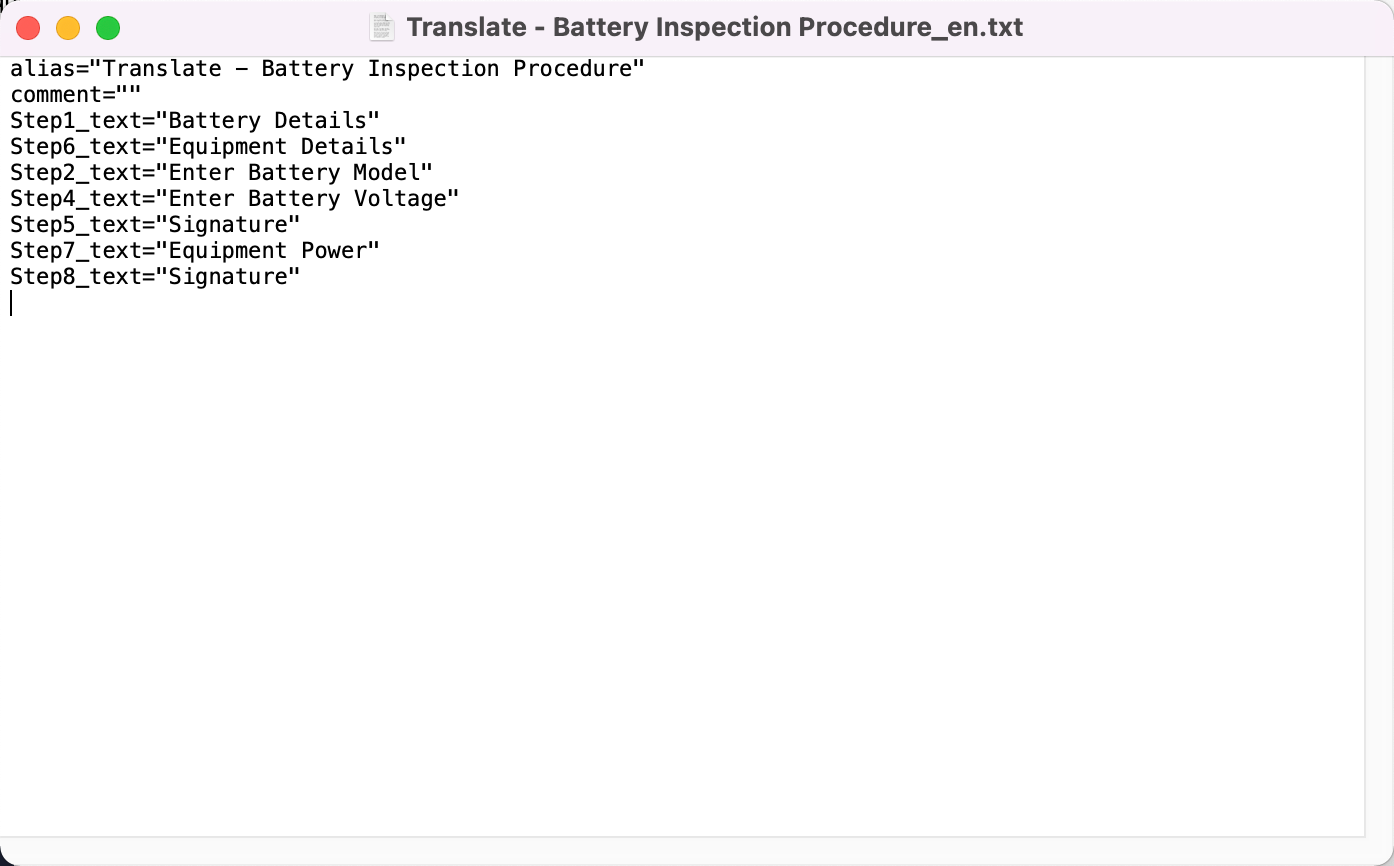
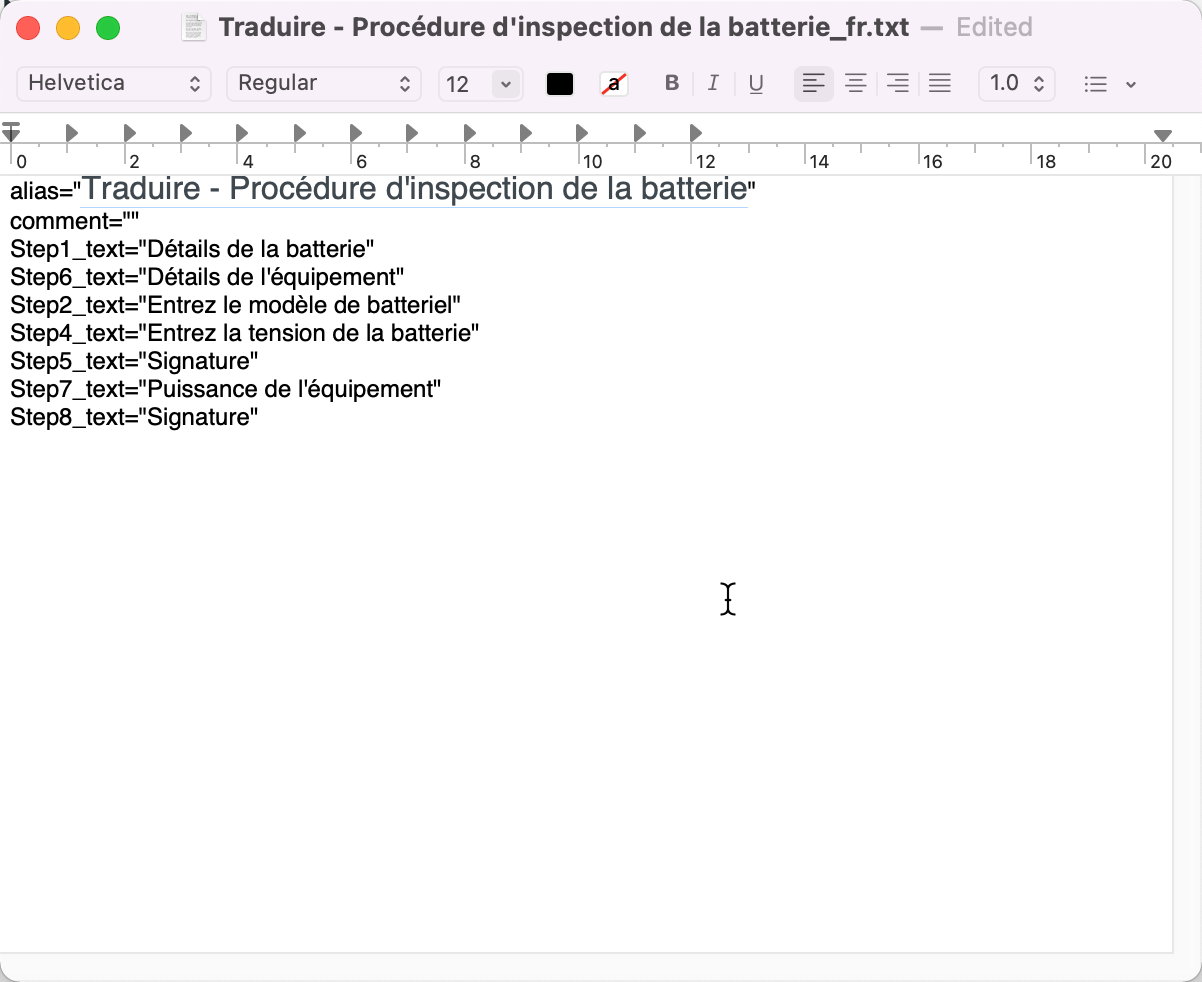
Translate strings in the text file to the target language.
Save the text file with the right language suffix. Here, note the filename has a suffix 'fr' to indicate French.
Tip
You can find the list of language suffixes in the language drop down list in the work zone or in the translation tab.
To import the translated text file, click in the section.
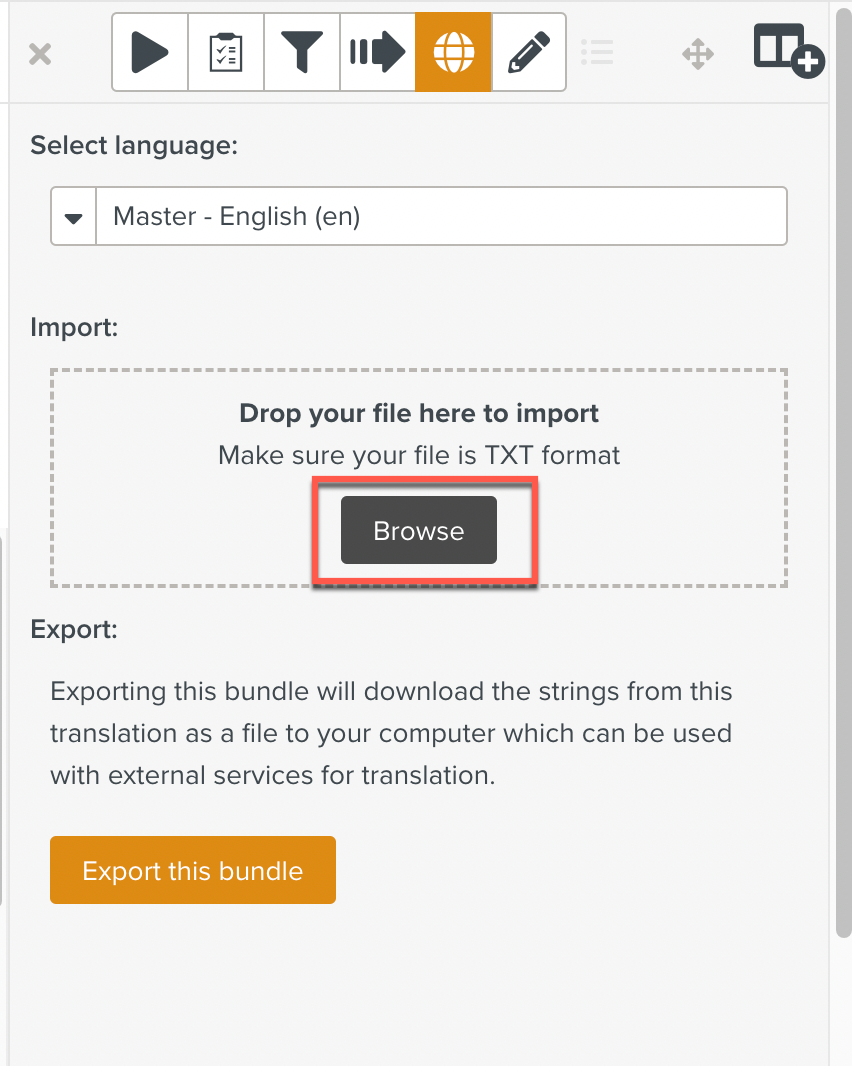
Select the text file to import.
The Template is translated using the imported file.
Click to save the Template.
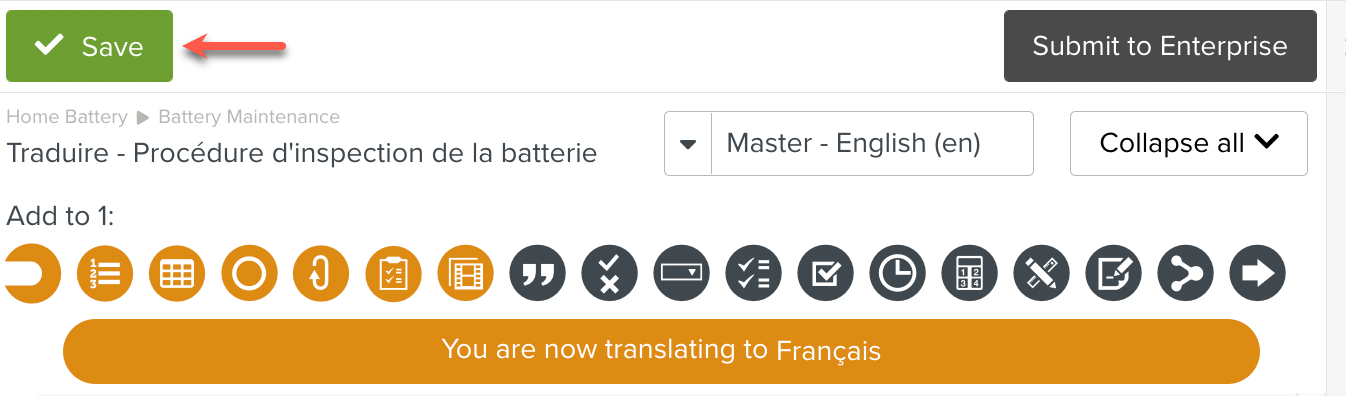
The translation of the Template is saved.