Using the Condition Editor Tab
You can add a condition to the Step to change the behaviour of the current Step based on the result of another Step.
To set a condition to the current Step, you need to identify the following:
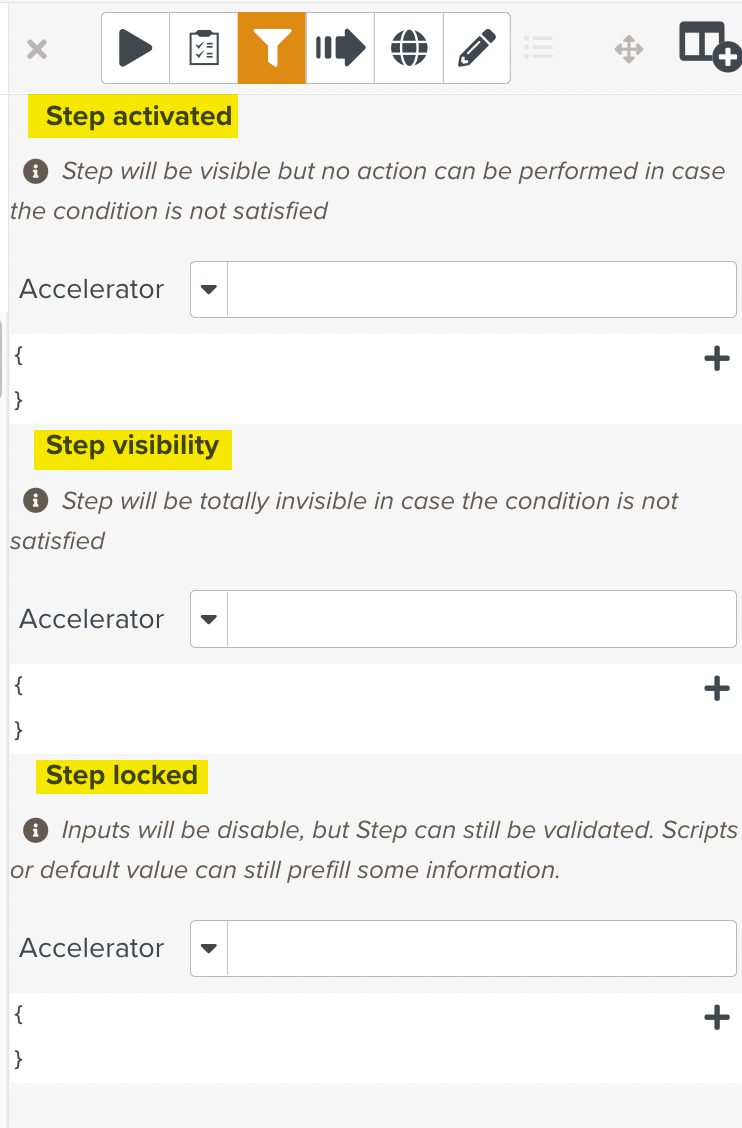
Behavior: The behavior(s) of the current Step that need(s) to be changed. For most Steps, the following three behaviors can be changed based on a condition.
Step Visibility: A Step can be made visible/invisible.
Step Activation: A Step can be activated/deactivated.
Step Locked: A Step can be locked/unlocked.
Condition: The other Step(s) in the Template whose result(s) decide(s) the behavior of the current Step.
See Step Conditions for more details on the available behaviors and conditions.
Adding Conditions to a Step
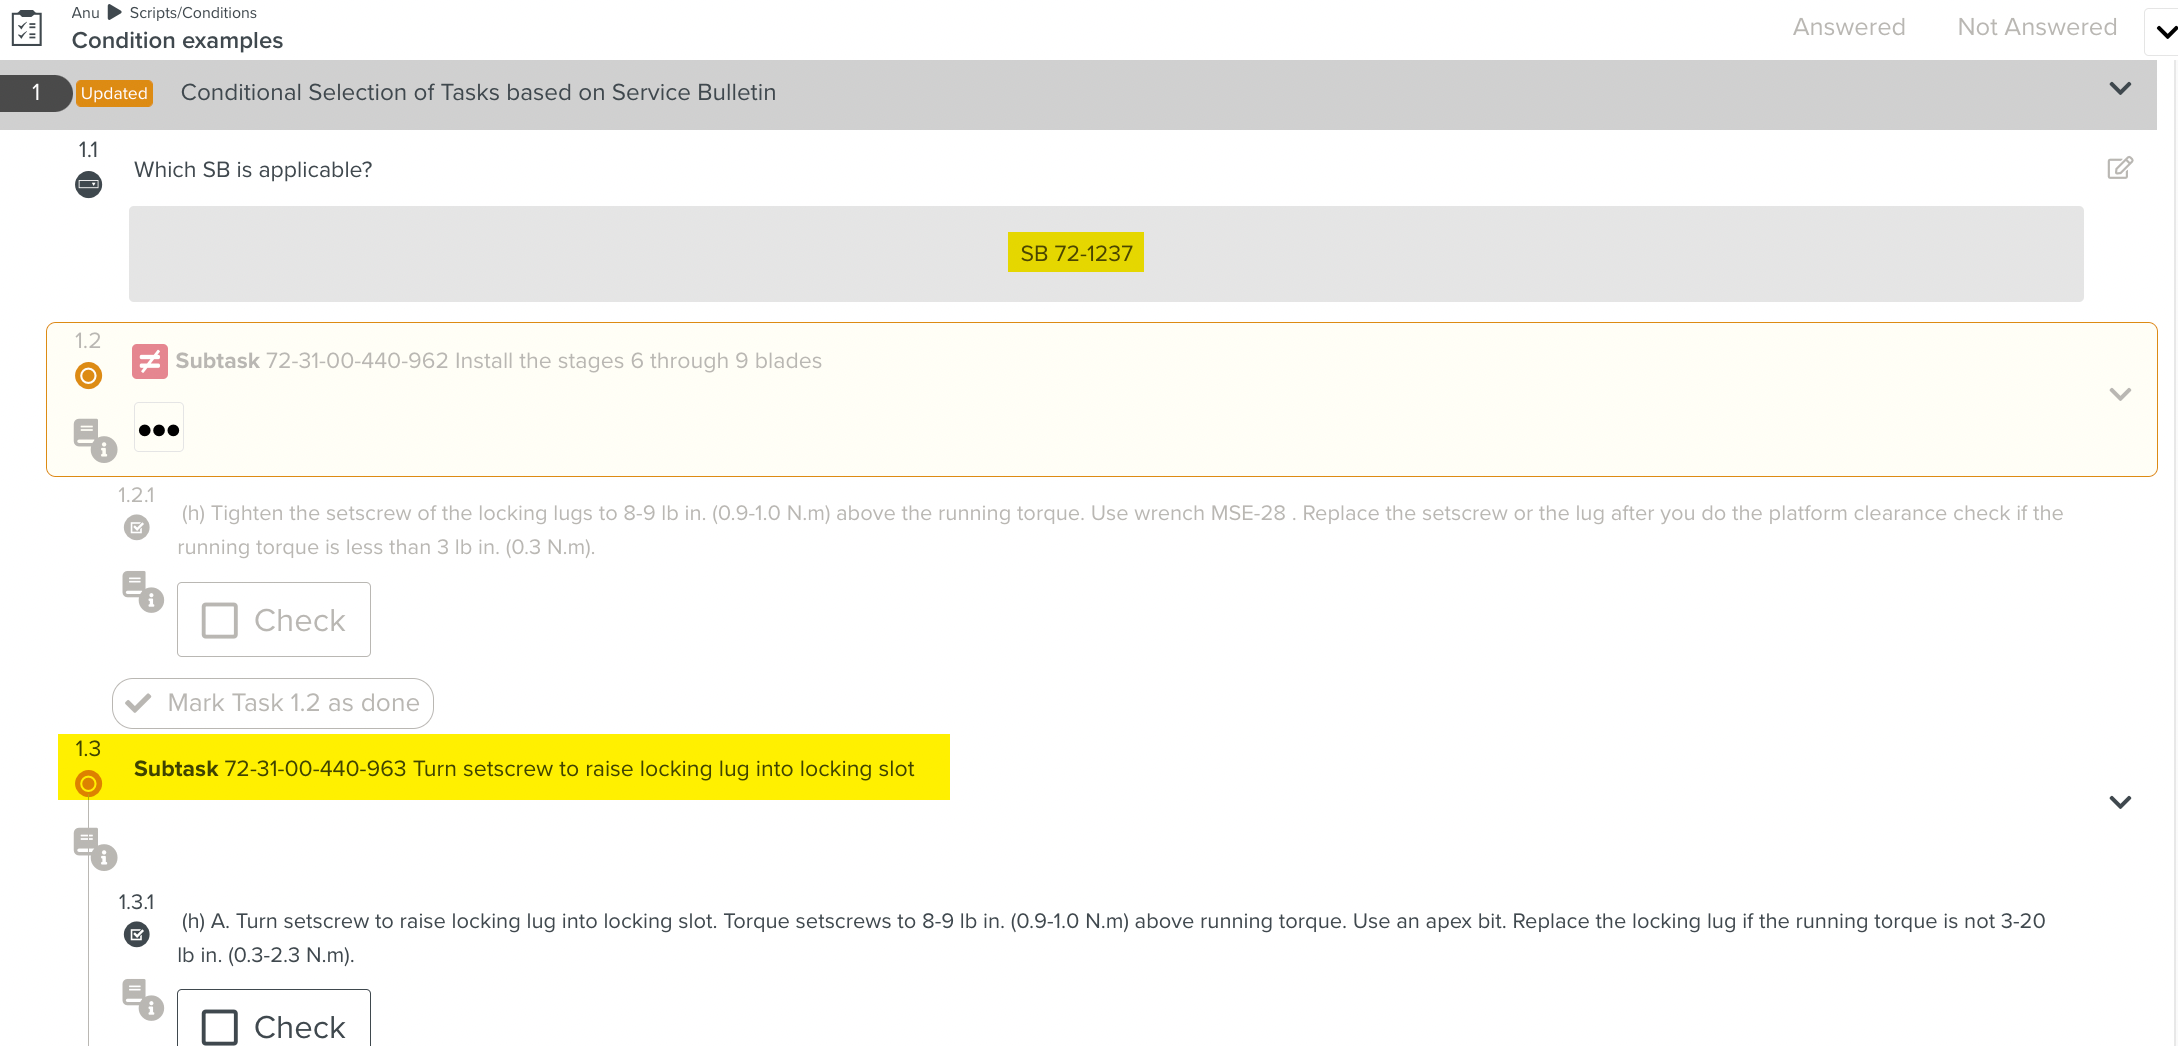
Let us consider a scenario - Based on the type of Service Bulletin that the user chooses, a different set of Steps must be activated.
The desired behavior at runtime is shown below:

To achieve this, Conditions need to be set up on Step 1.2 and 1.3.
To add a Conditions to a Step:
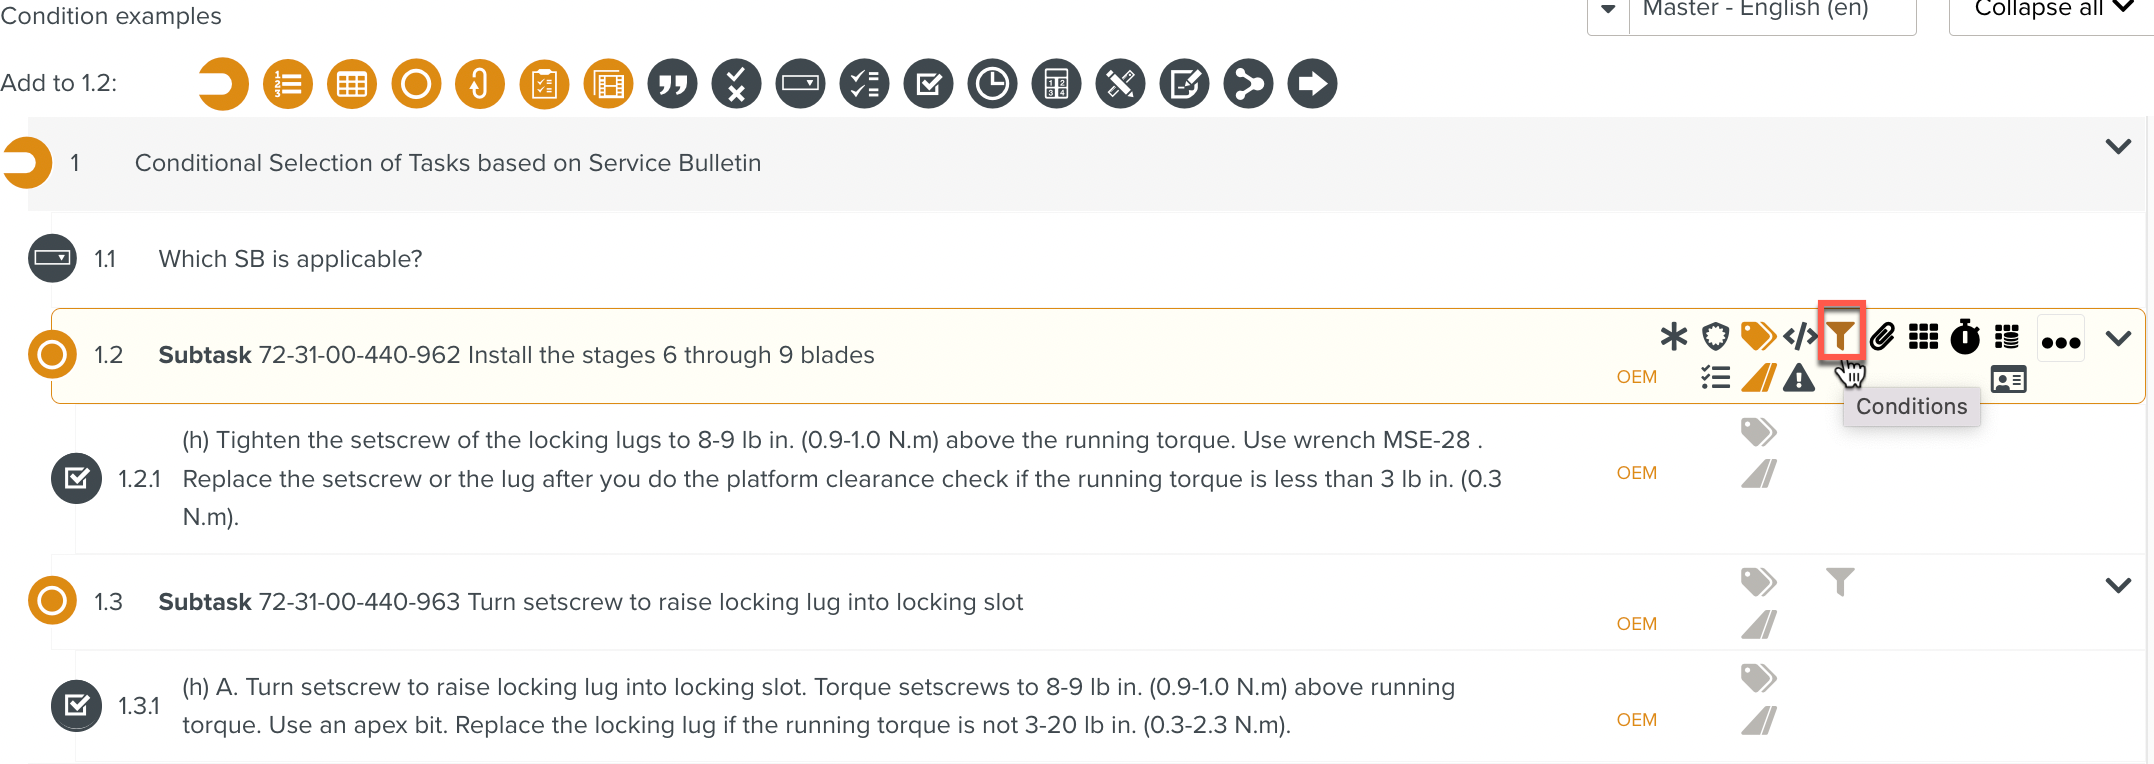
Select the Step to which the condition needs to be added and click as shown below. Here, the current Step is 1.2
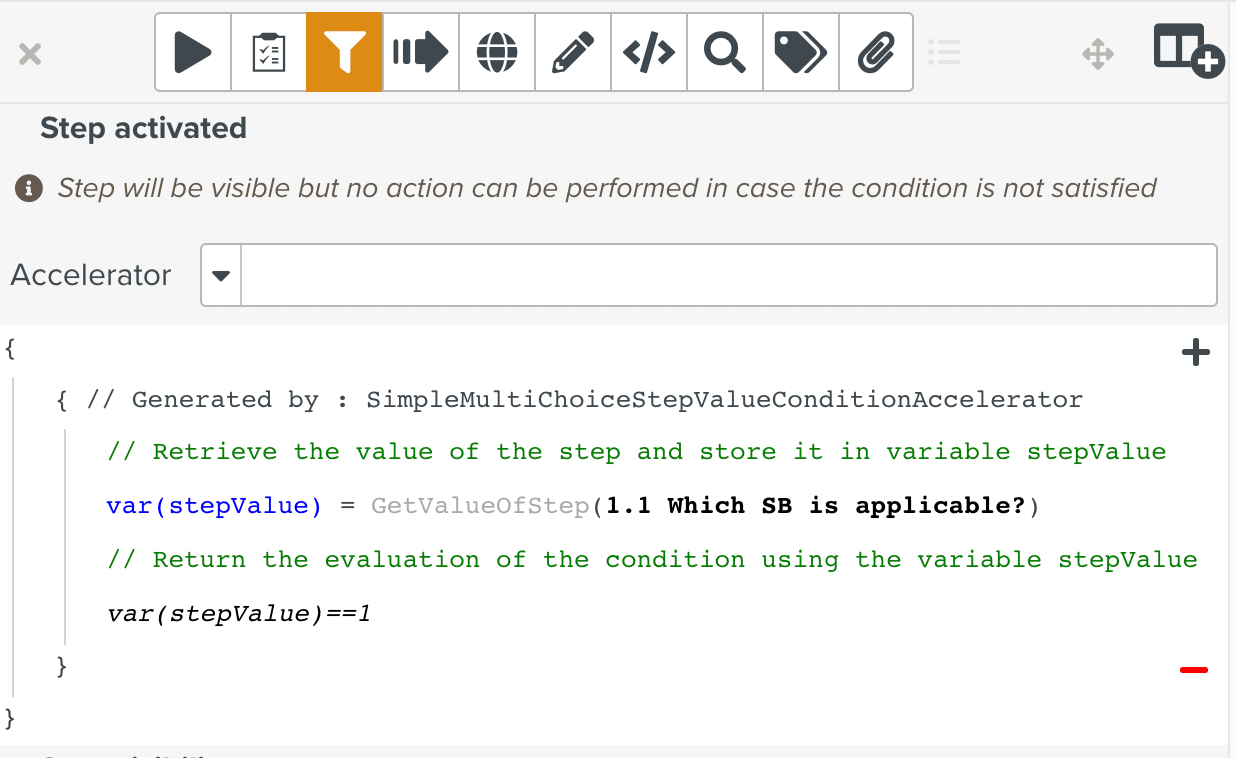
The Condition Editor opens, with a section for the three Step behaviour options.
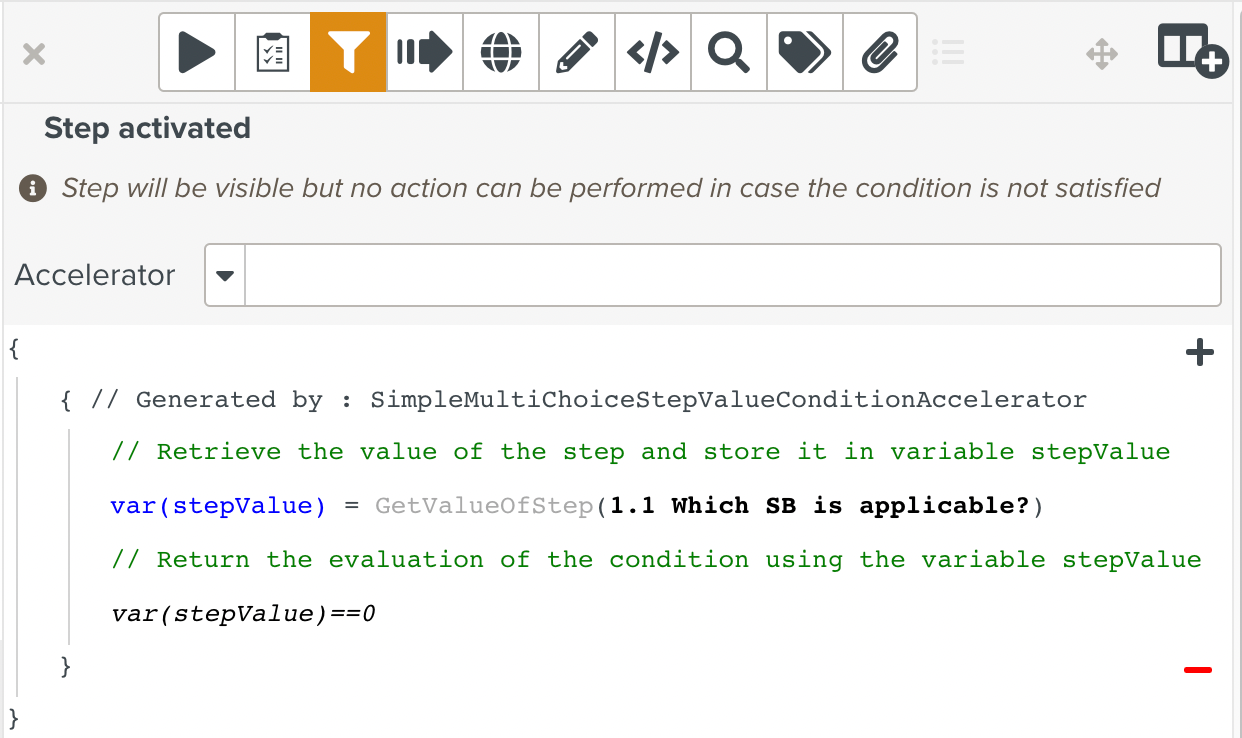
Select the behavior of the current step (1.2) that is to be changed based on the condition. See Step Conditions for the step by step explanation to set up a Step Condition. In the following example, based on the user input in Step 1.1, this Step must be activated or de-activated.
Repeat steps 1 and 2 for Step 1.3, setting the appropriate Step condition for Step 1.3 as shown below.
At runtime, depending on the user input, different Steps are activated.
When the user selects the first choice of the Multi-choice Step 1.1, Step 1.2 is activated.
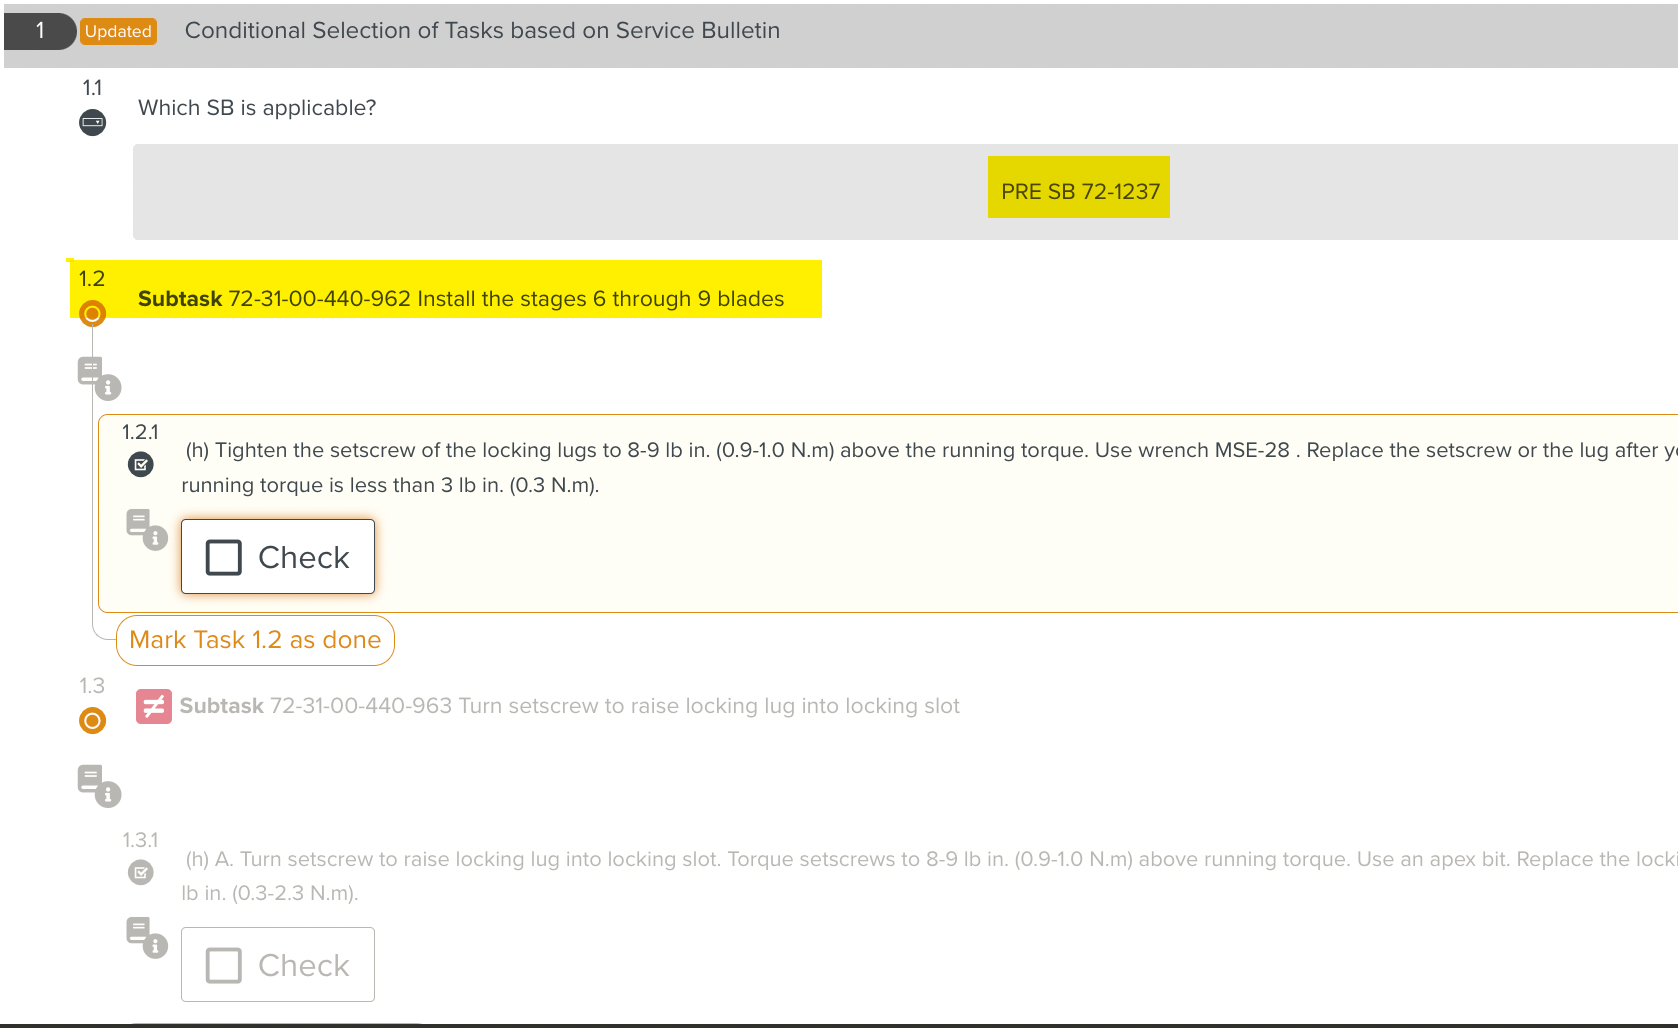
When the user selects the second choice of the Multi-choice Step 1.1, Step 1.3 is activated.