Understanding Document Management
Document Management enables you to organize Documents. You can create different spaces to store various types of Documents.
You can also associate approval workflows with Document operations. For example, if a business process requires approving a Document before it can be used, it can be enforced by an Approval Type.
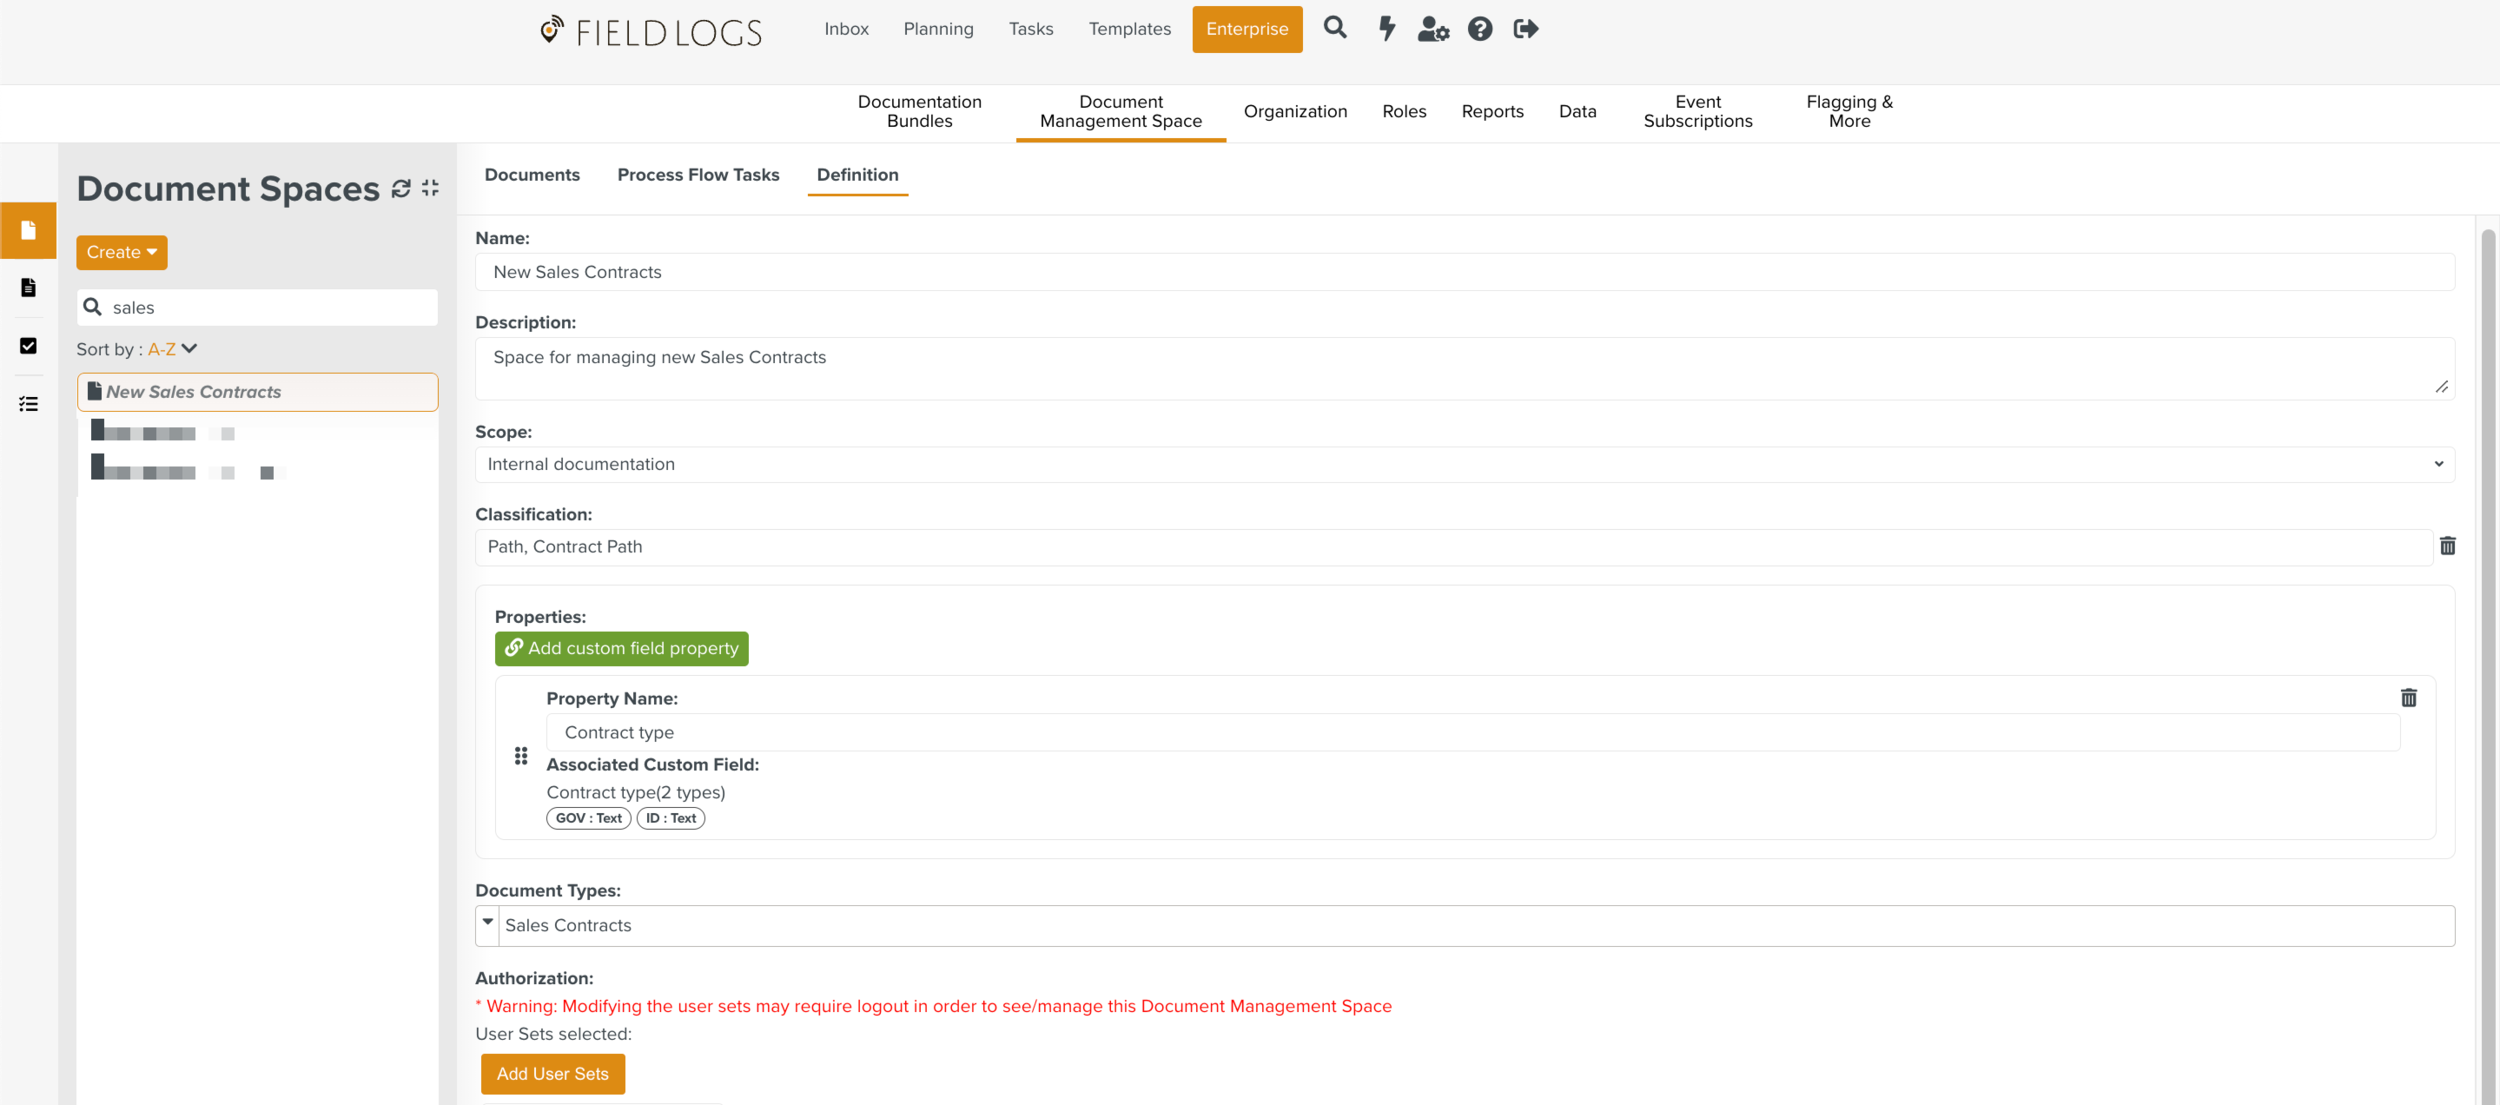
A Document Space is used to organize Documents with specific authorizations and workflow processes. In the example below, New Sales Contract is a Document Space created to store Documents related to contracts.
![]() |
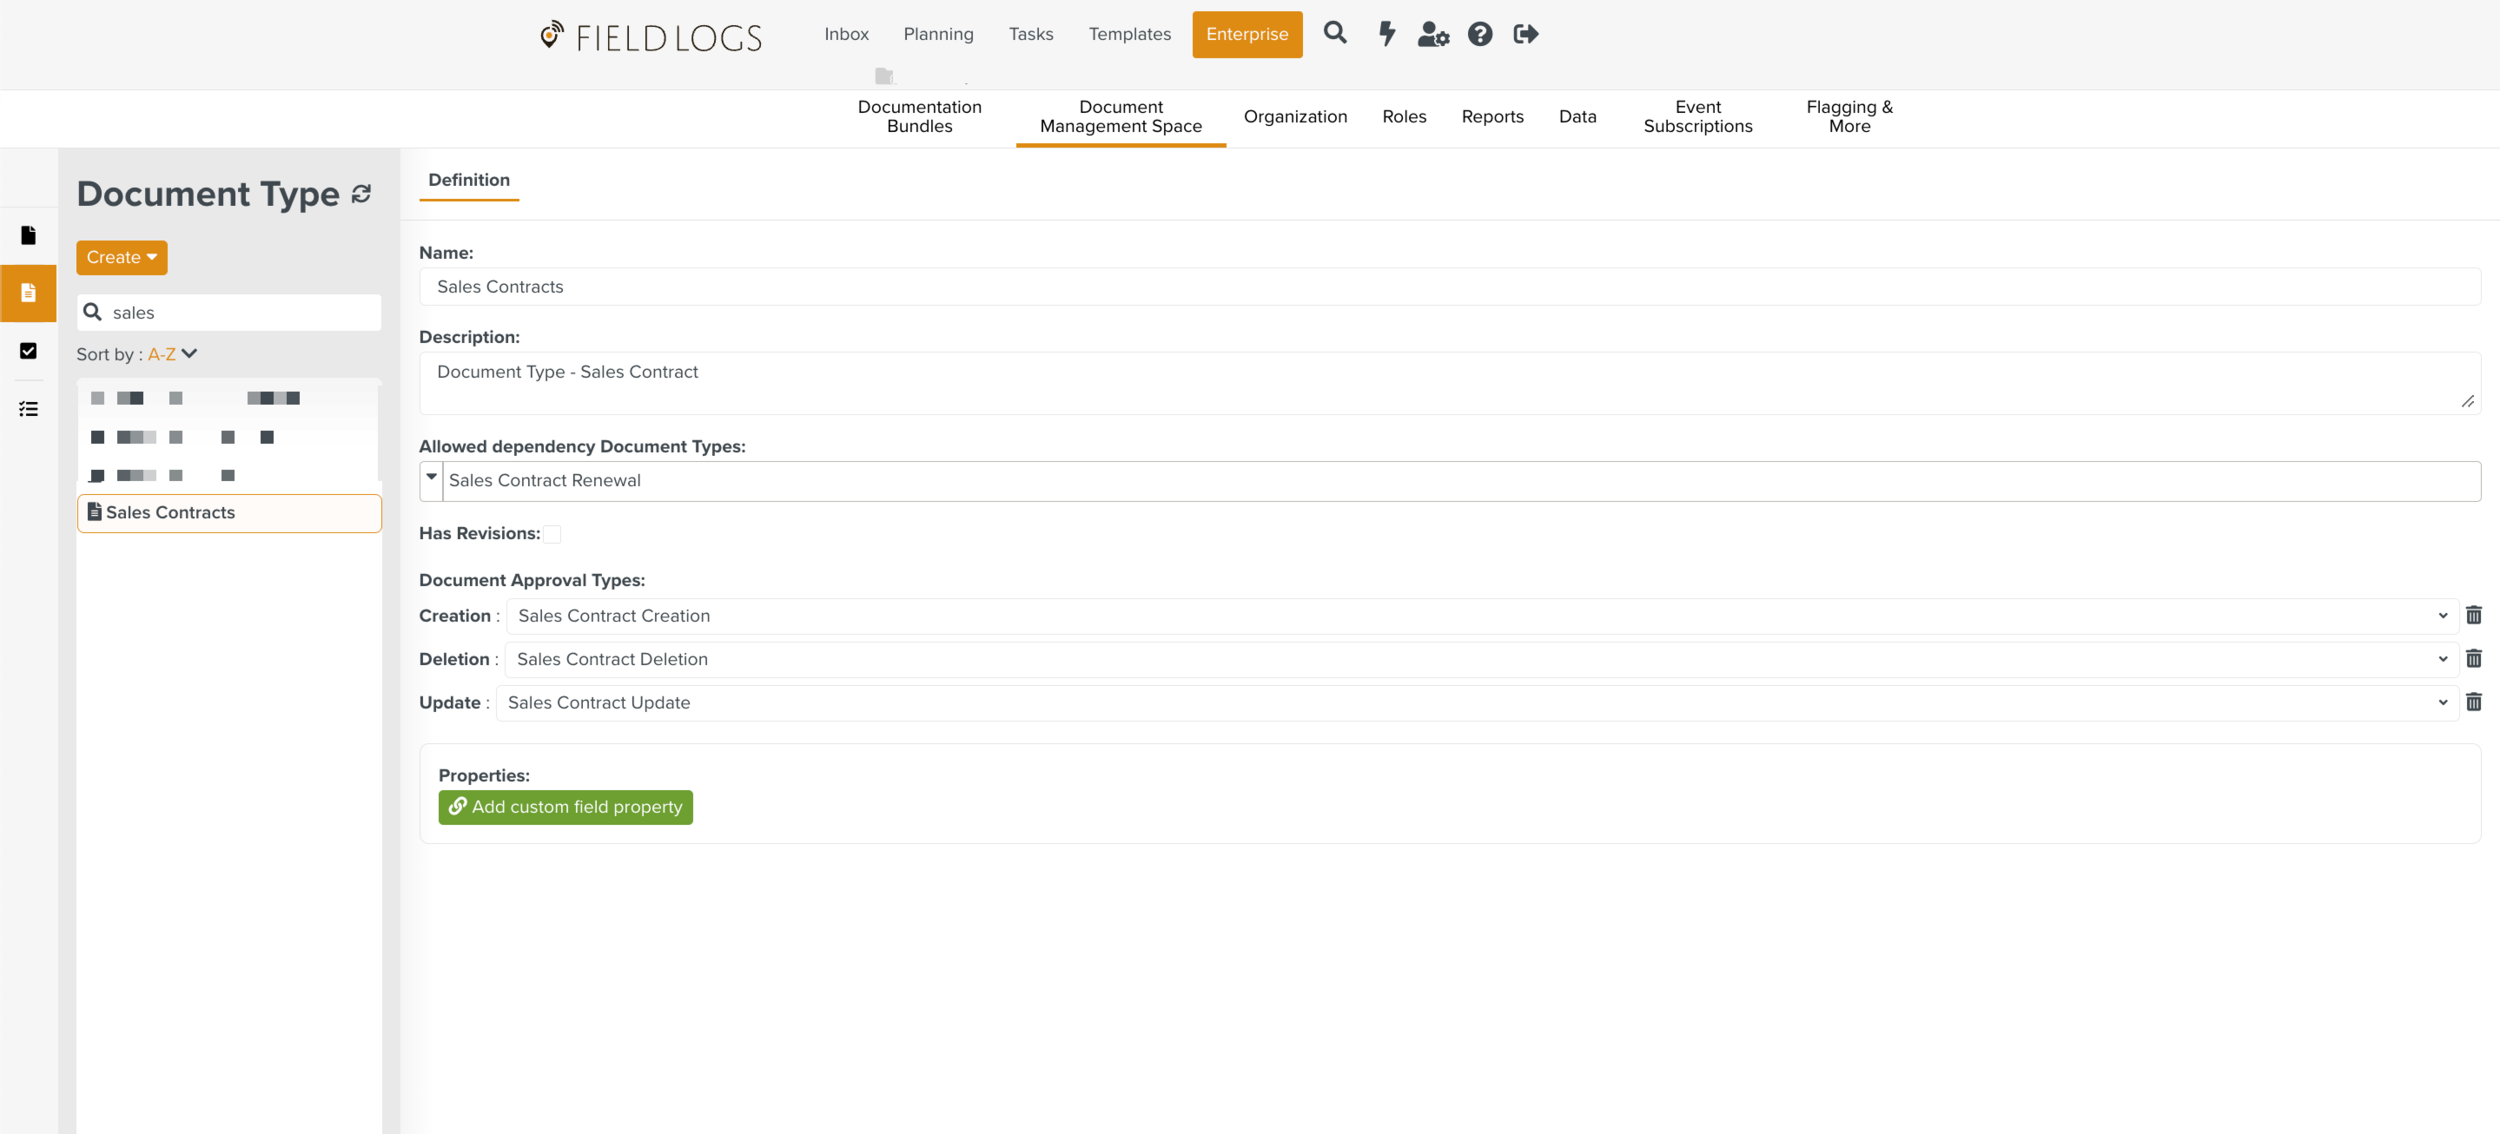
A Document Type associates Documents with the required approval cycles for Creation, Update and Deletion. In the example below, Sales Contracts is a Document Type that needs to follow a predefined Approval Lifecycle process for Creation, Update and Deletion. Note that there are different Approval Types associated with it.
![]() |
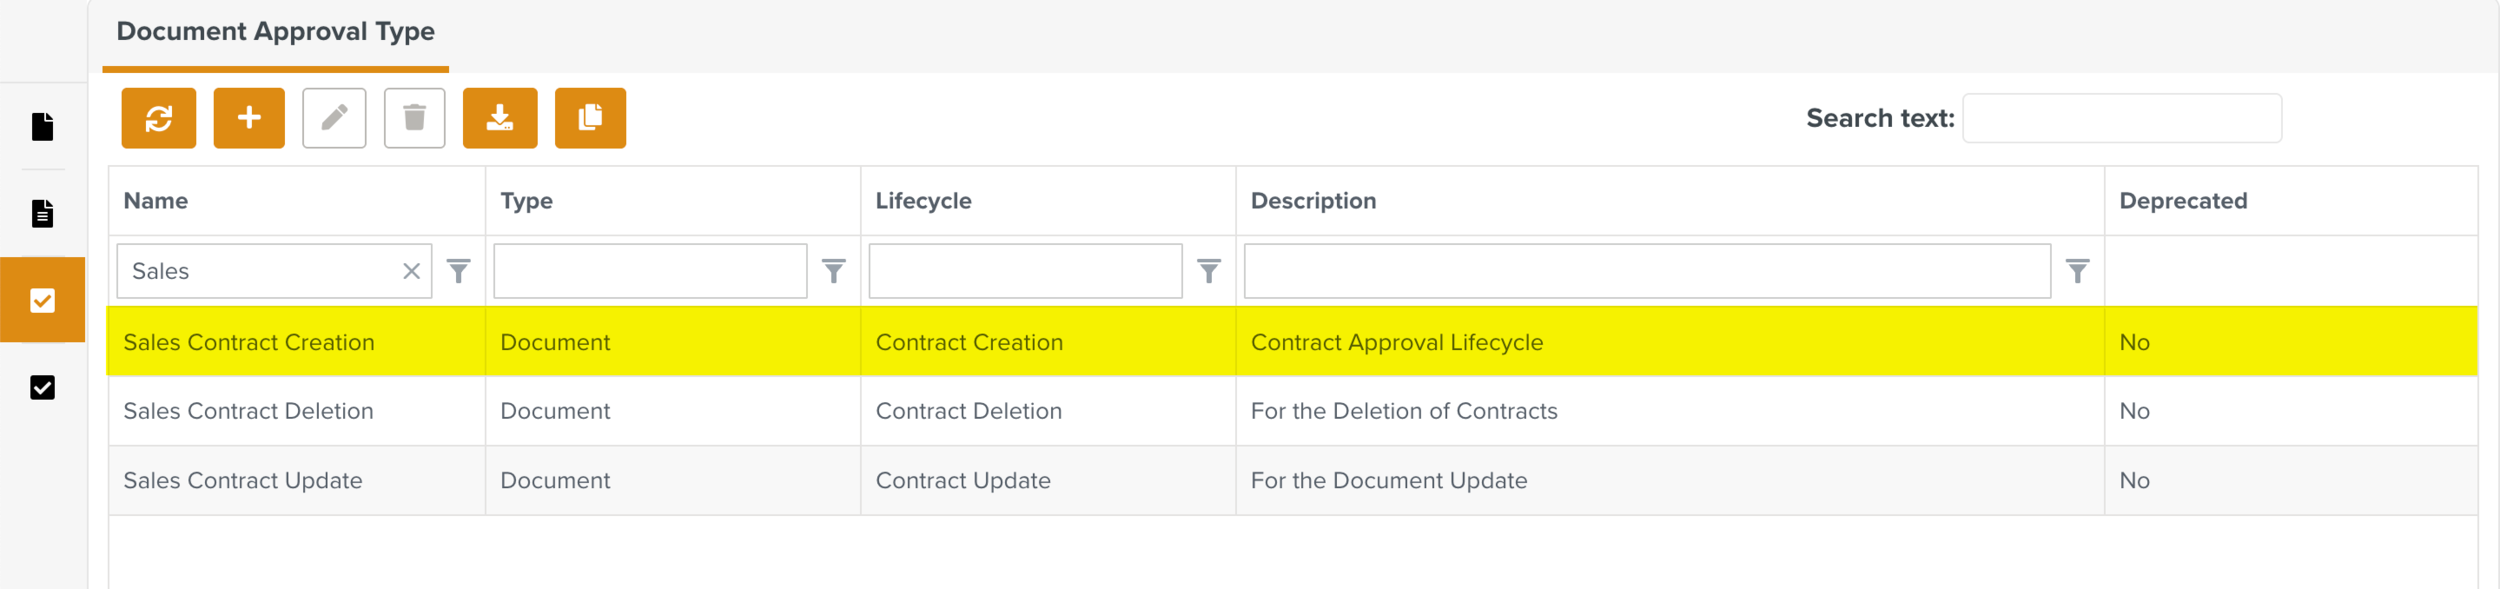
If a Document Type has an Approval Type linked with its Creation, then every Document uploaded to the specific Document Management Space will follow the approval process. In the example below, Sales Contract Creation is created for approval process that will be applied to all sales contracts Documents.
![]() |
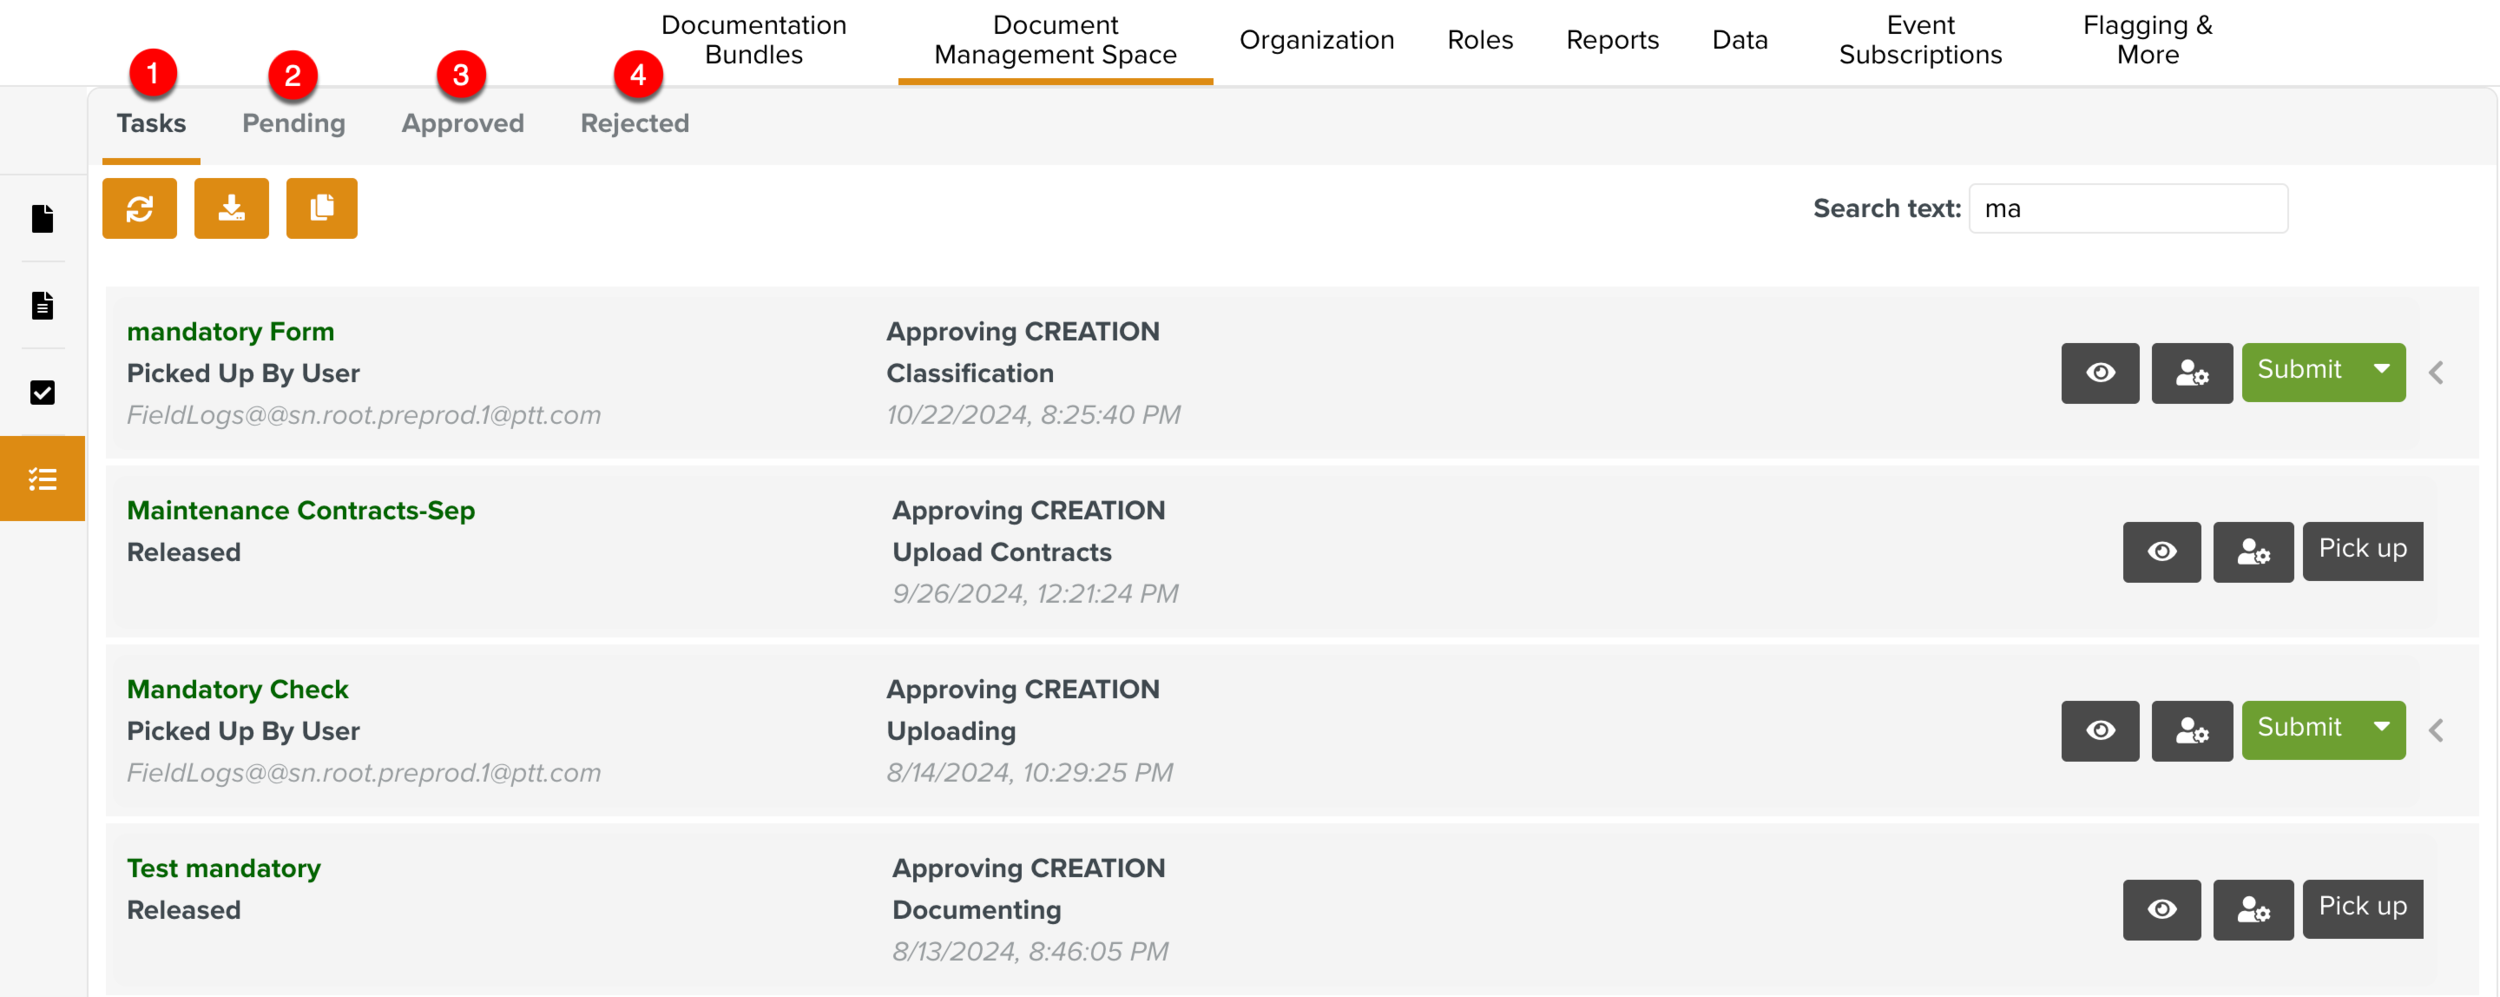
The Document Approval Manager displays all the Document Operation Approval Tasks. These Tasks are at various stages of the corresponding Approval Lifecycles.
![]() |
To access the Document Management System and perform related operations, the user must be associated with a Security Role that has appropriate Access Rights.
The Documents uploaded to the Document Management Space can be accessed in the Documents tab.
In the example below, the Documents are displayed according to the structure defined during their creation.
![]() |
The Document list view includes a visual indicator for Documents status.
![]() |
The indicators are described below.
Indicator | Description |
---|---|
This indicates the Documents that are awaiting approval. | |
This indicates the Documents that are pending approval for a new Revision. | |
This indicates the Documents that have completed the approval process. |
The Documents table view is customizable. You can hide or display the columns in the table by selecting them as shown below.
![]() |
When the File filter is applied, the tooltip displays all the linked file names.
![]() |
You can download or copy the files by clicking the respective icons as shown below.
![]() |
Click the button to save the modified table views.
![]() |
The Save view allows you to quickly restore filters, search, selected columns and Classification.
From the Select a view dropdown, you can select a preferred view for the table.
![]() |
![]() |
You can delete Views using the delete icon displayed next to each view as shown below.
![]() |
When you click the delete icon, a warning dialog is displayed.
![]() |
On clicking Yes, the action is confirmed, and the selected item is permanently deleted.
![]() |
The columns of the table can also be re-arranged. You can hold a column header and drag to reposition it as required. In the below example the column Description is repositioned.
![]() |
![]() |
The icon allows you to download the Document listing in the Document Space as a ZIP or CSV file.
When you select ZIP, the data is exported as a .zip file. The files are organized into folders similar to the predefined classification structure in which the documents are displayed.
When CSV is selected, the table data is exported as a .csv file, which can be opened using Excel. The Export dialog provides you formatting options for the comma-separated value file.
![]() |
The CSV Separator separates the document data. In the example below, the different column values are separated by the character ’;’.

The List Separator separates the list of values. In the example below, the list of files are given in separate columns as the List Separator used here is the character ‘,’.

Note
Both CSV and List Separators cannot be the same.
When you select a Document in the Documents tab, the Document details pane appears.
![]() |
The Documents can either be in Draft , Pending revision approval, Approved or Deleted status as shown below.
![]() |
![]() |
![]() |
![]() |
Following are some options available in the Document details pane. Based on the current status of the Document, the options may be enabled or disabled.
Actions | Description | |||
---|---|---|---|---|
View Document | Click the View Document icon to view the View Document screen.
| |||
Edit Document | Click the Edit Document icon to add or delete files and modify the details of an approved Document.
If the Document is linked to an Approval Lifecycle, the Document goes through the Approval process for update. The Document can be edited only during the Approval process.
You can use this option to edit the current revision of Documents. The Revision field is disabled and the Revision number cannot be edited.
| |||
Revision | Click the New Revision icon to create a new version of the Document. The Create Document dialog opens. You can modify the Document details and upload the new version of the Document as shown in the example below.
Fill in the Revision number that is greater than the previous version. The updated version will supersede the previous one. As shown in the above example, the format of the revision number used is 1.2.3. When you click , the new version of the Document is uploaded. If there is an Approval Lifecycle linked, the Document goes through the Approval process. | |||
Share link | Click to copy and share the link of the Document.
If the Document is deleted, the shared link shows a Document not found error message.
If the user has no access to DMS, then an Access denied popup is displayed.
| |||
Go to task | Click Go to task to view the associated Approval Task in the Process Flow Tasks section. This option is available for Documents in the Draft status.
NoteGo to Task option is only available on Documents that are linked to Approval Types. | |||
Delete | Click the Delete icon to submit a deletion Task for the Document.
You must enter a reason for deletion as shown below.
This information is saved to the issue history.
The Reason for deletion can also be viewed in the tooltip when the user hovers over the Deleted status in the Document details. |
In addition, the following details pertaining to the Documents are displayed:
![]() |
Common properties: Displays Document information such as the username of the Document owner, creation and modification date of the Document. This is common to all Documents.
Secondary properties: Displays the Custom Fields associated with the Document. These properties can come from the Document Type and/or Document Space.
Classifications: Displays the pre-defined structure in which the Document is presented.
Files: Displays the uploaded files. Here, you can enable or disable sharing, download the Document and copy the Document link to clipboard.
As shown in the below example, you can enable or disable sharing link by clicking on
.
Dependencies: Displays the details of the Dependent Documents. A Dependent Document refers to a document that is linked to a parent document.
Revisions: Displays the revision numbers of the Documents and highlights the current revision.
Note
You can create a Document with its initial version number as 0.0.0.
Documents referencing this document: Displays the details of the referencing Document to which this Document is added as a dependent Document.
You can access a dependent Document from the parent Document by clicking the Document link under Dependencies.

On clicking the link, the dependent Document details are displayed in a separate dialog.
![]() |
You cannot make changes to a versioned Dependency Document. The delete and edit options are disabled as shown below.
![]() |