Setting up Actions
An Action is a specific Task to be carried out to achieve the objectives of the Plan.
Actions can be configured as a part of the following Counters:
The three types of Actions available are listed below:
Create Task
Notification
Update Task
The below sections describe how to set up each type of Action.
The Action type Create Task creates a set of Tasks for you to execute.
In the Action tab of the Counter, select the Create Task Type from the dropdown list as shown below.
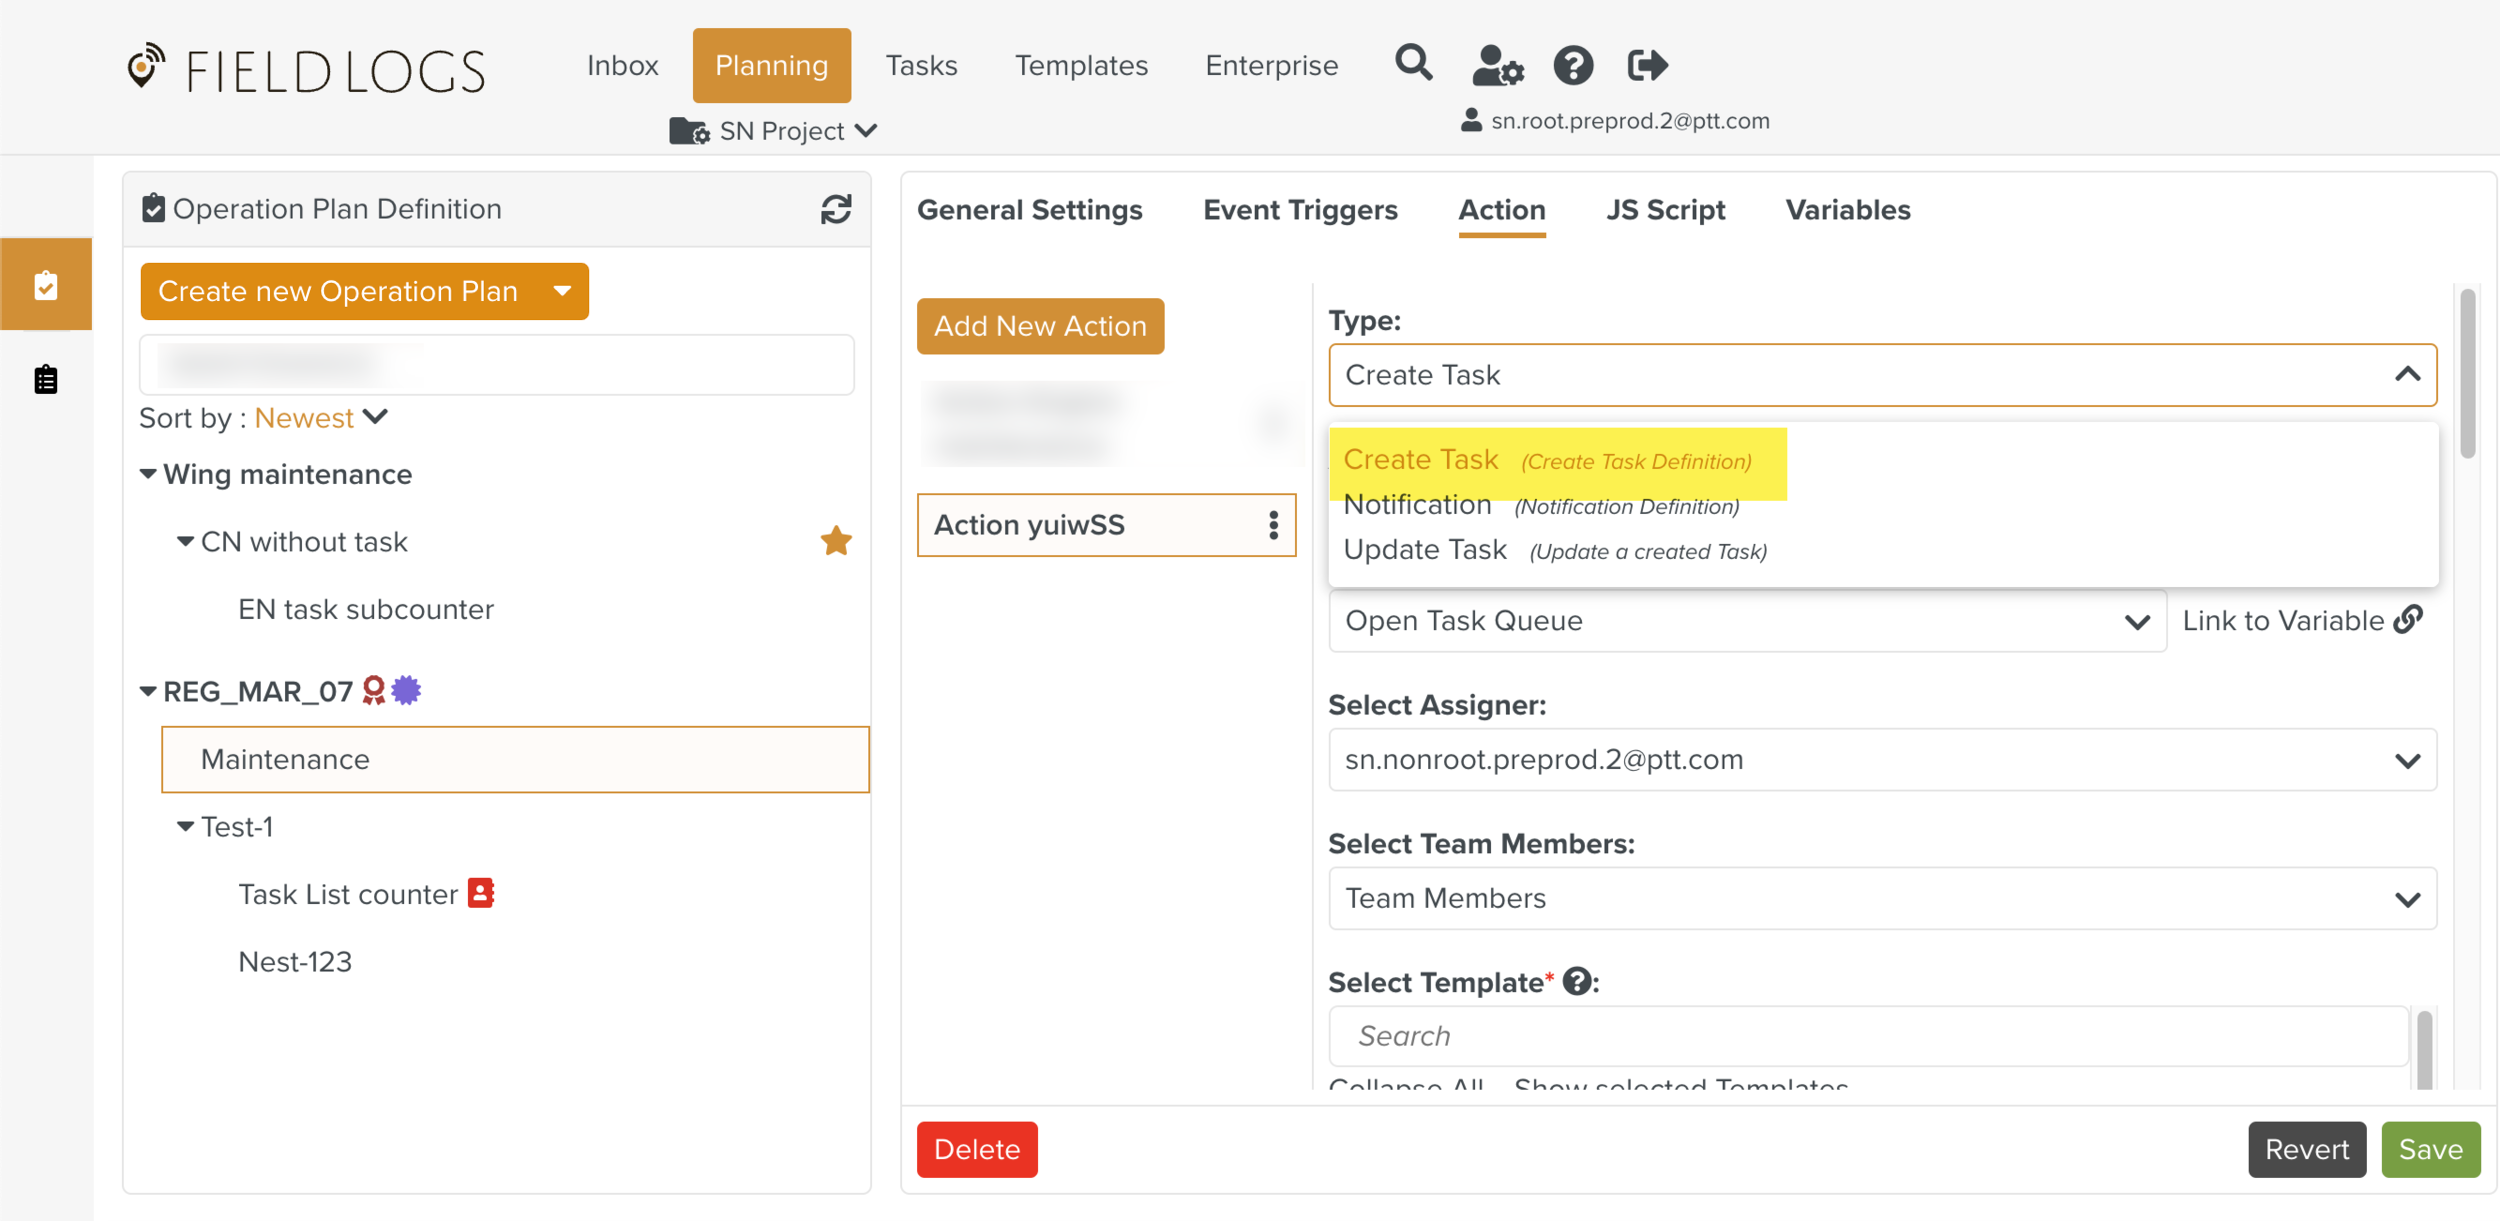
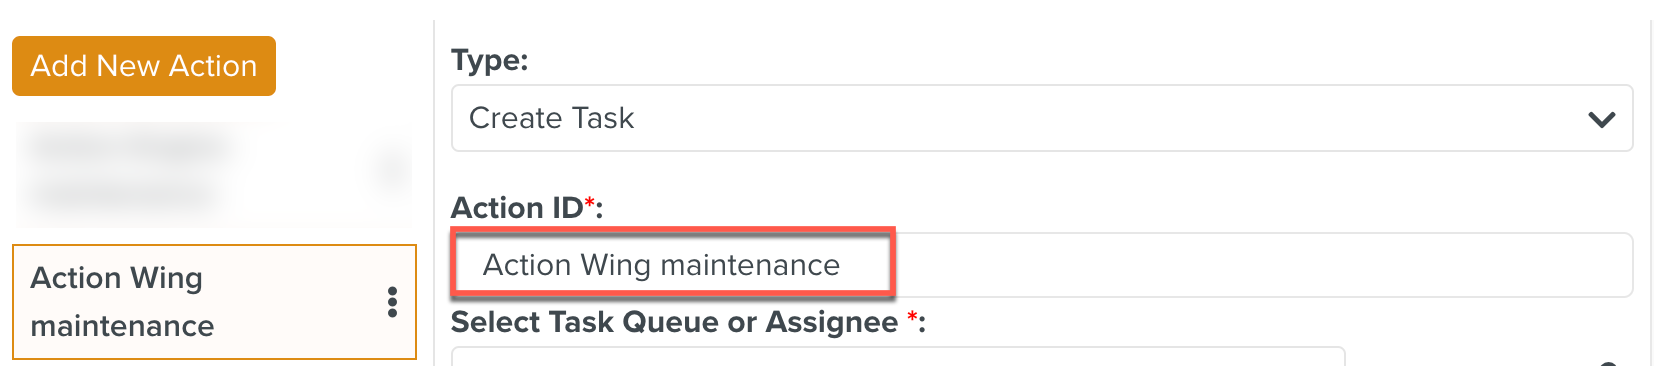
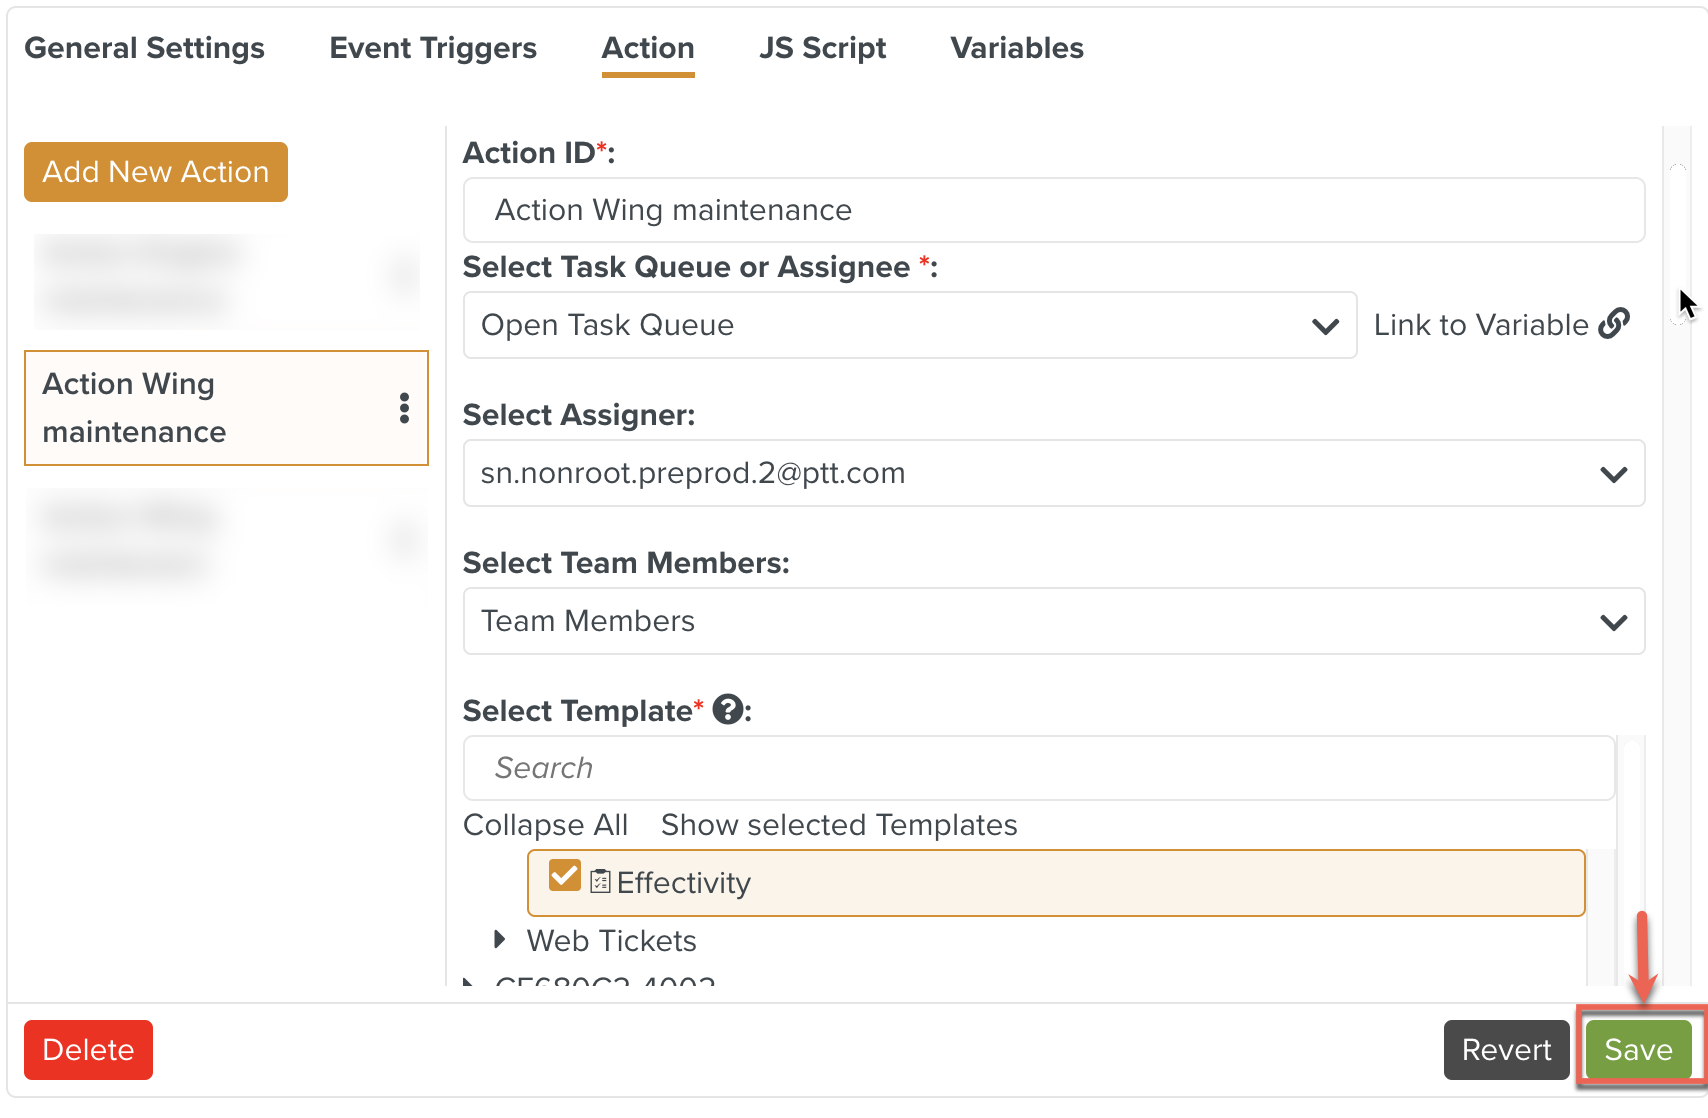
Edit the Action ID if required. You can choose to keep the system generated Action ID.
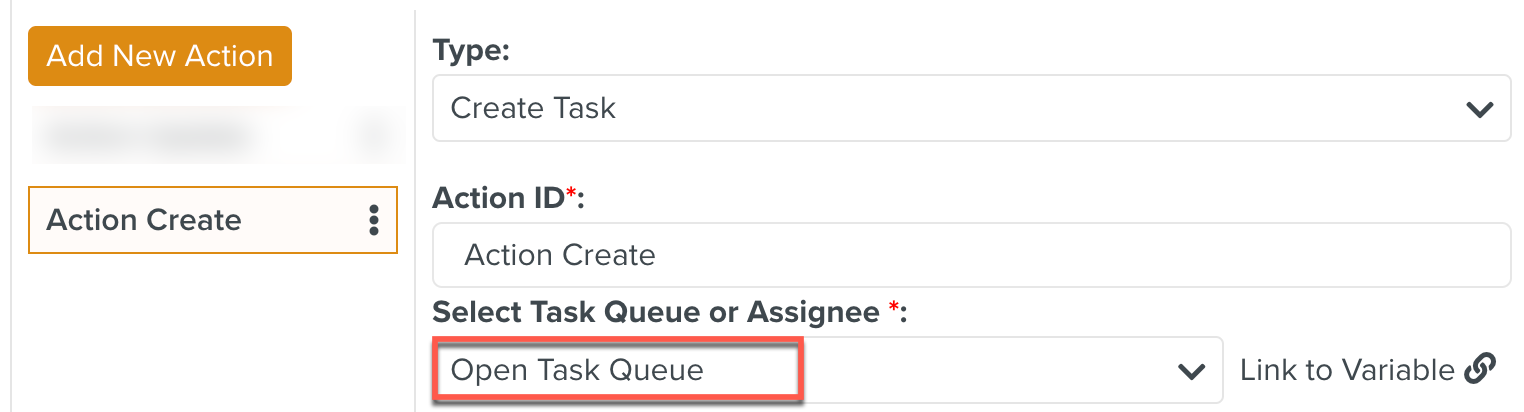
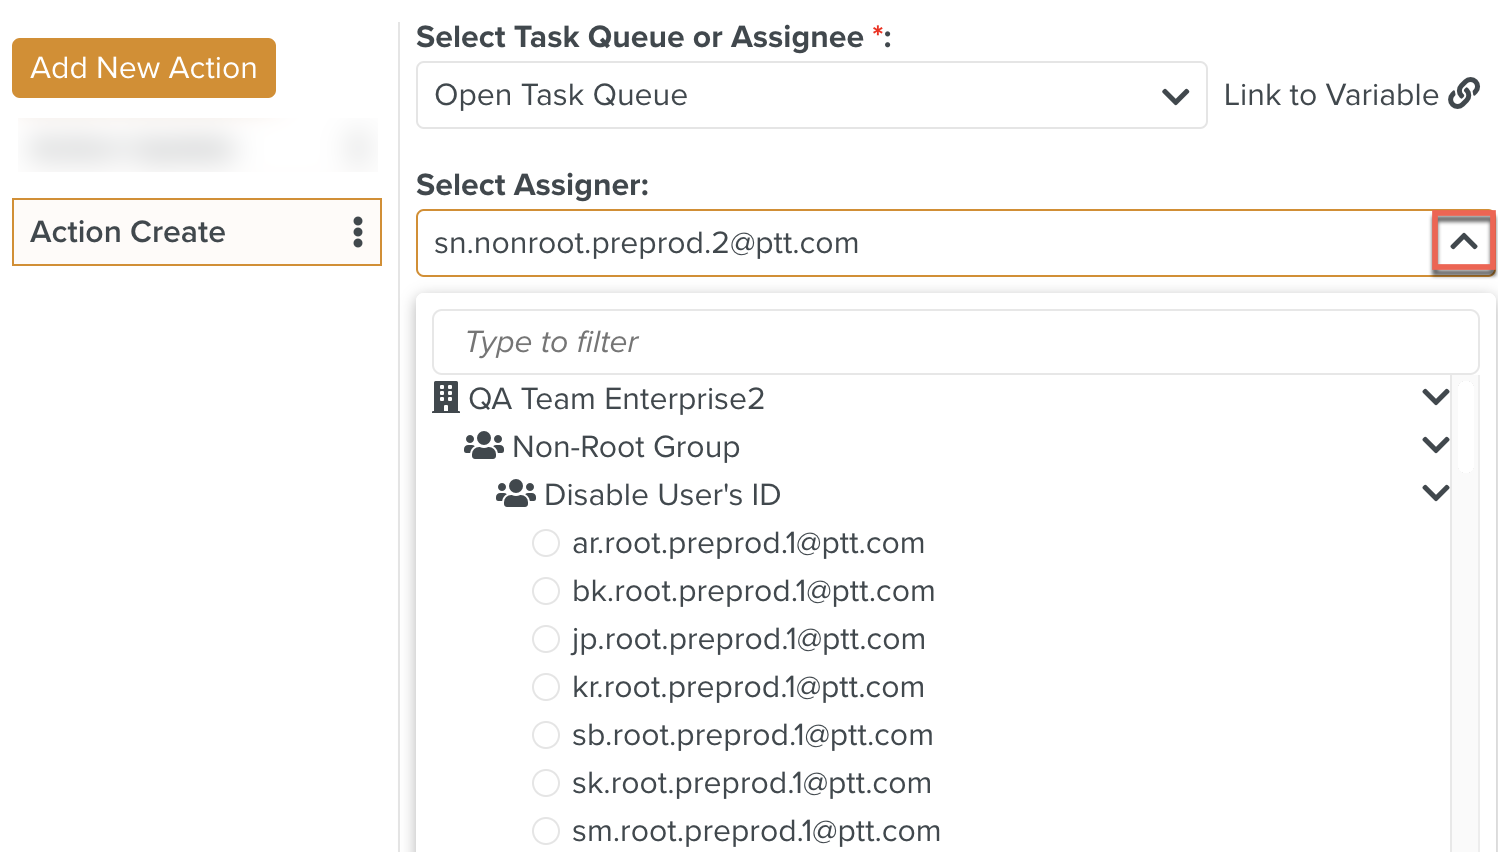
Click the dropdown list to select a Task Queue or an individual assignee to assign the Task. The Tasks will appear in their respective Inboxes.
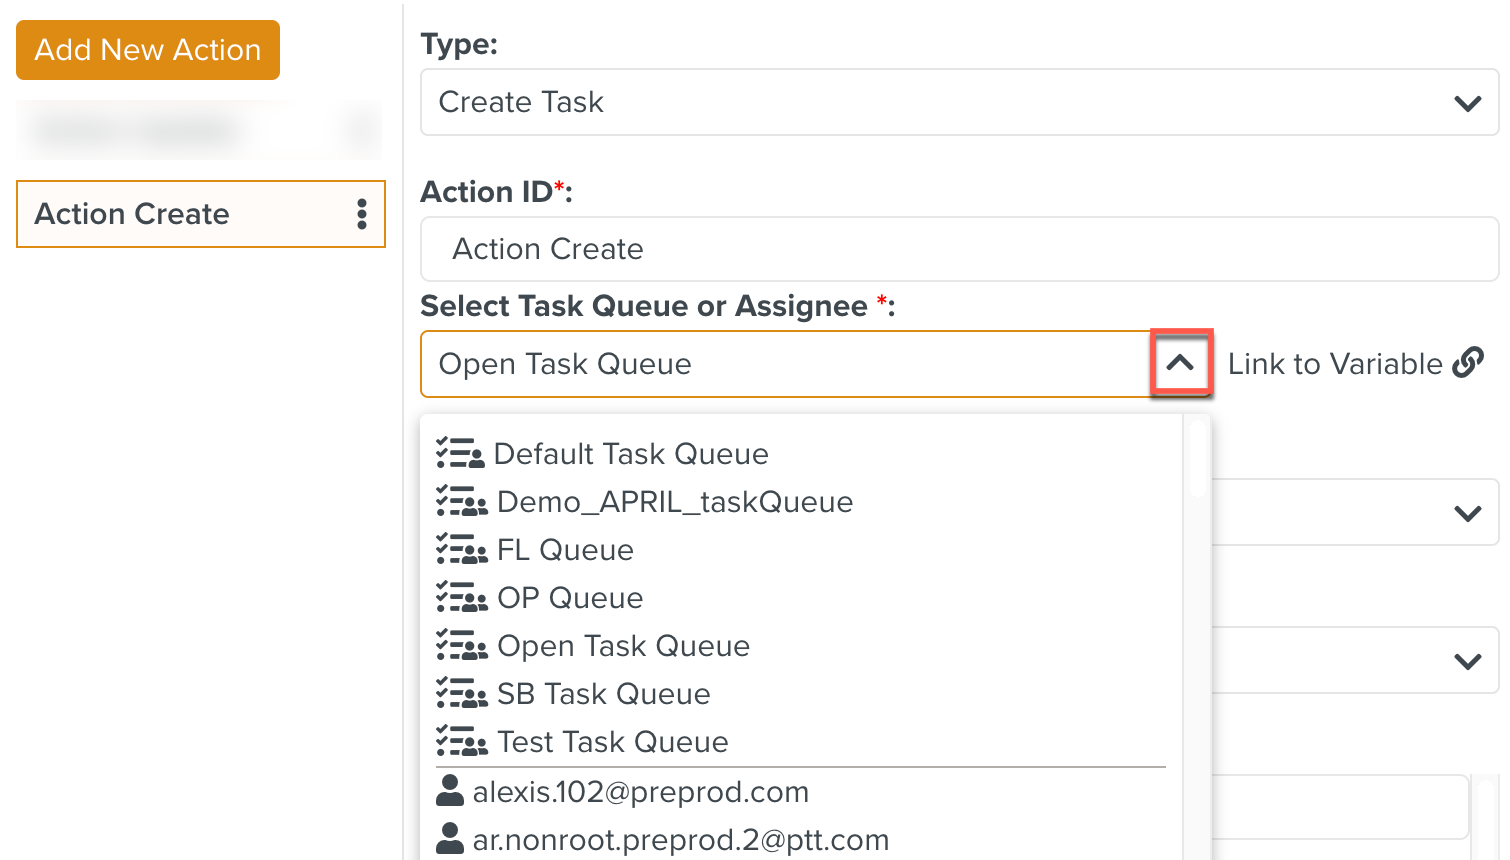
You can also link this field to a variable of type Queue or Member. Linking multiple members to the field is not supported.
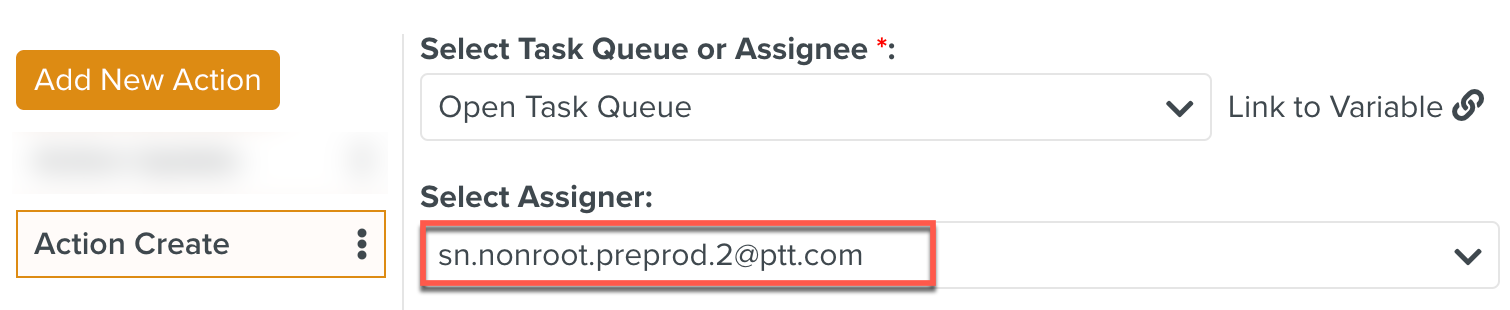
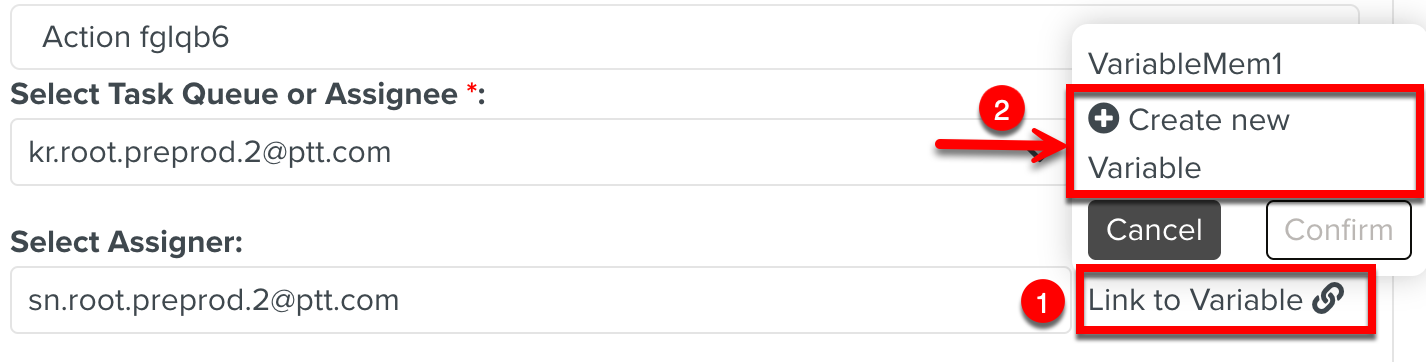
[Optional] Click the dropdown list to select an Assigner for the Task from the available options.
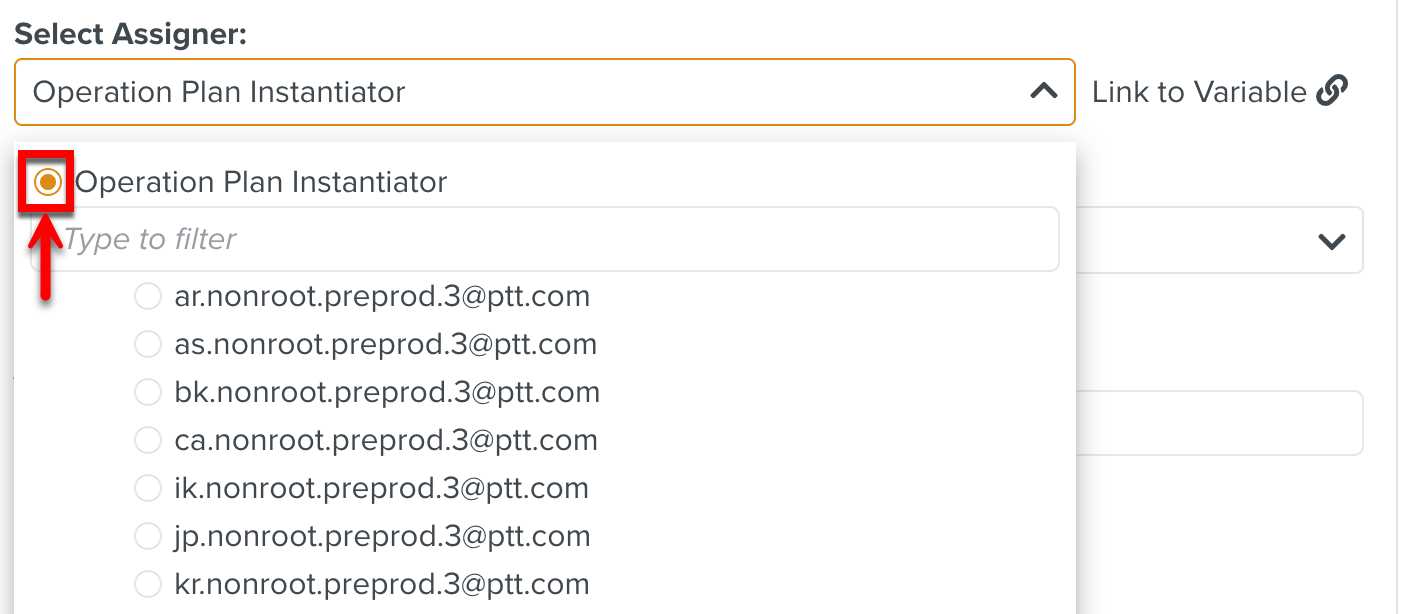
To set the Operation Plan Instantiator as the Assigner, select the Operation Plan Instantiator option as shown below. When this option is used, the Assigner will vary for every Instance of the Operation Plan.
The Task appears in the Inbox of the Assignee with the selected user ID or the Operation Plan Instantiator ID as the Assigner.
You can also link this field to a variable of type Member. Linking multiple members to the field is not supported.

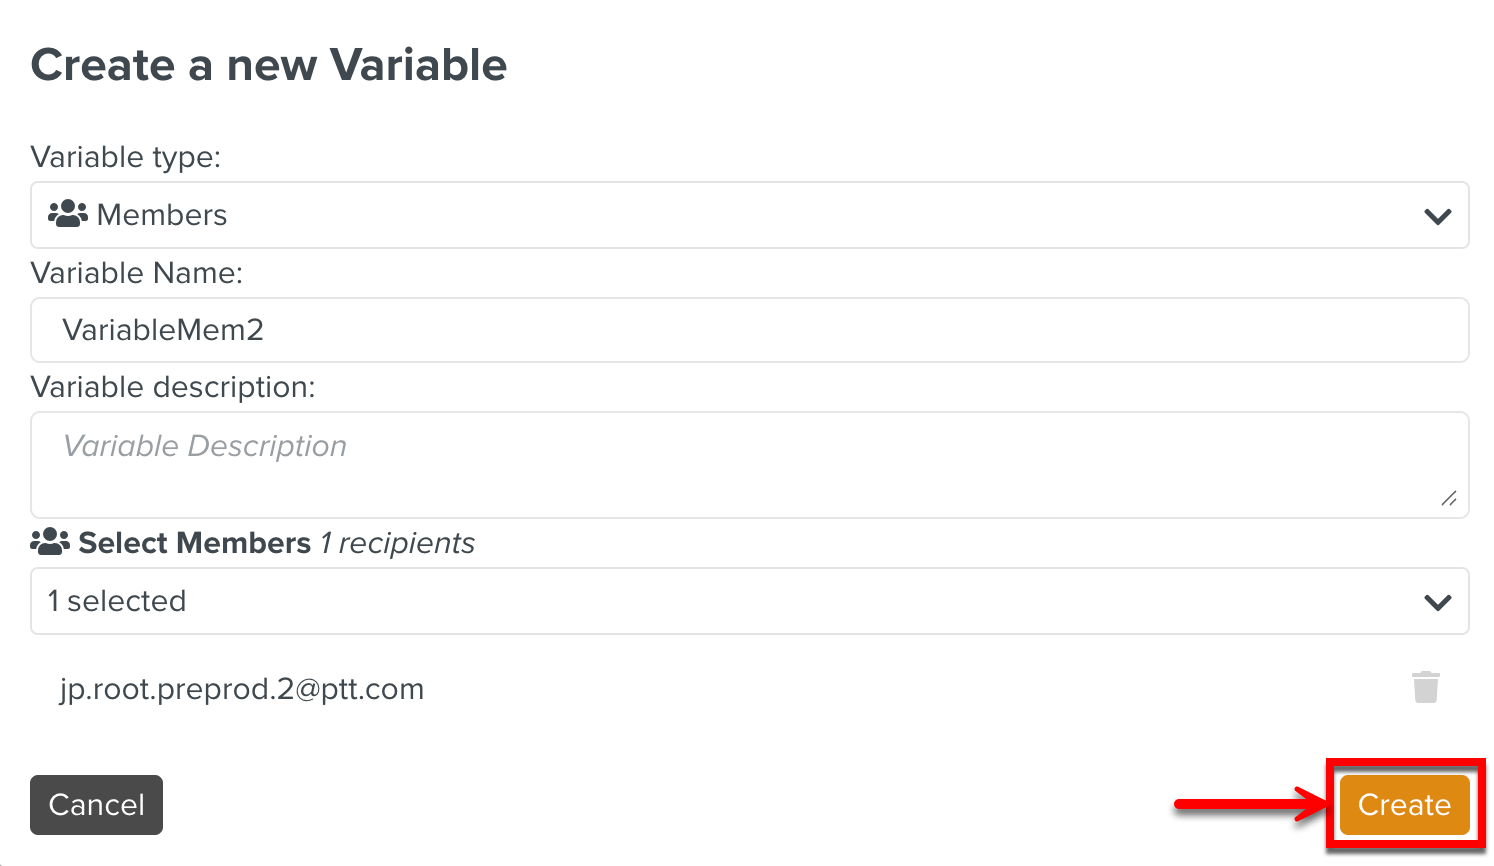
New variables can also be created as shown below.
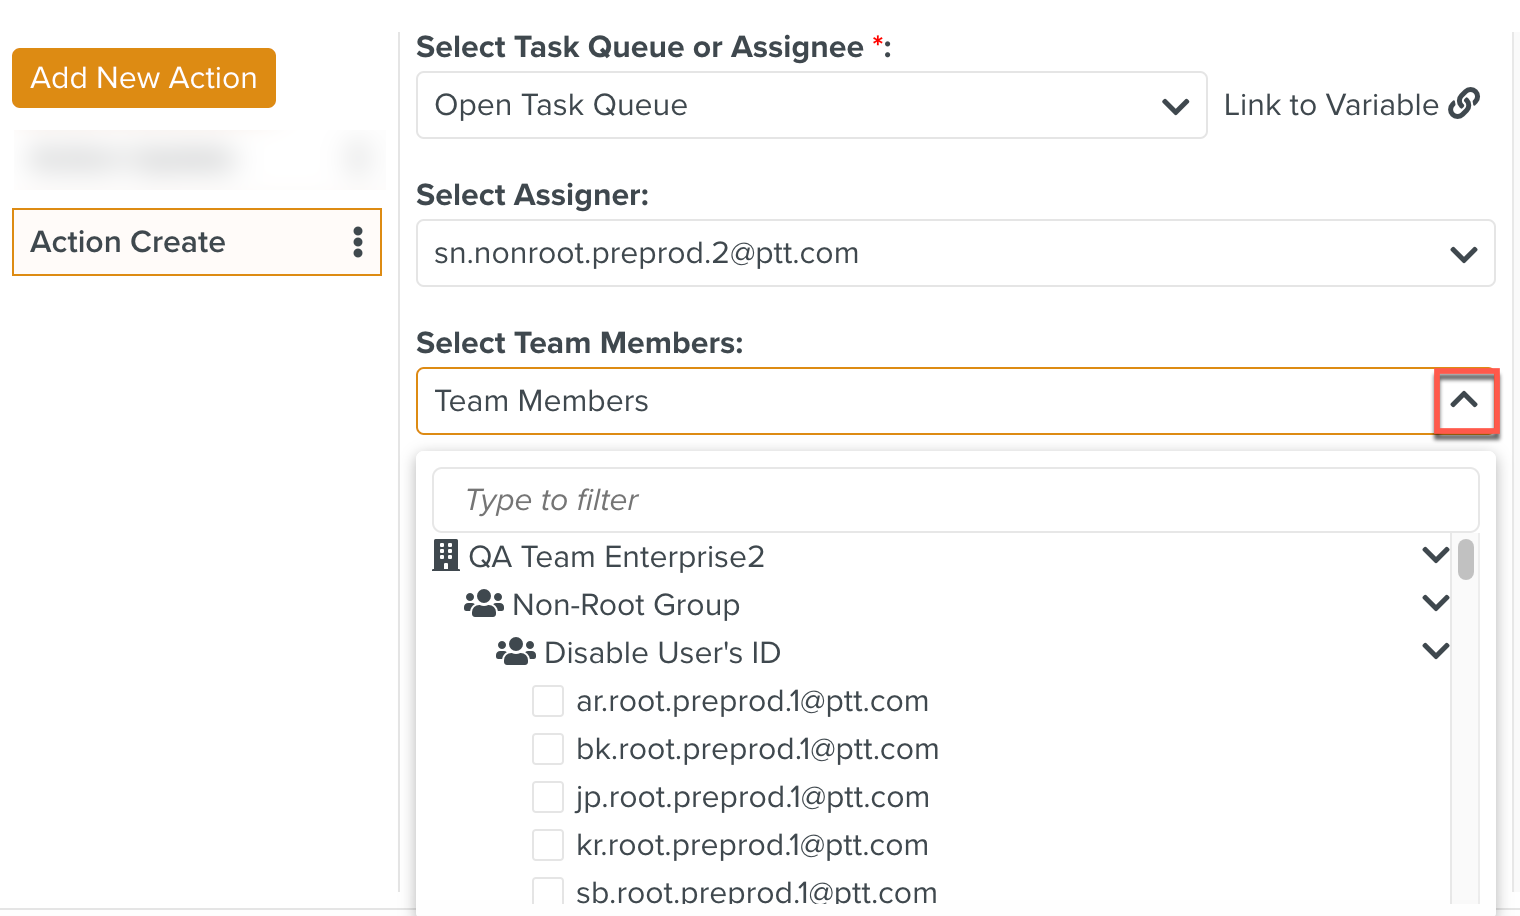
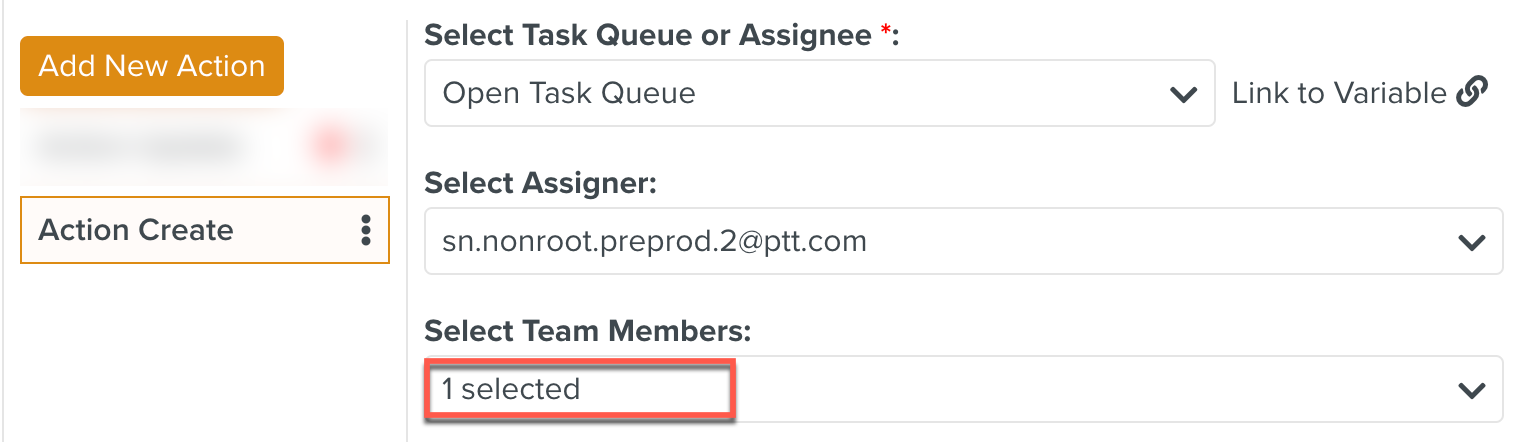
[Optional] Click dropdown list to select Team Members.
Once the selection is made, the field is updated with the number of Team Members selected.
Select one or more Templates. Instances of the selected Templates comprise the Action of this counter.

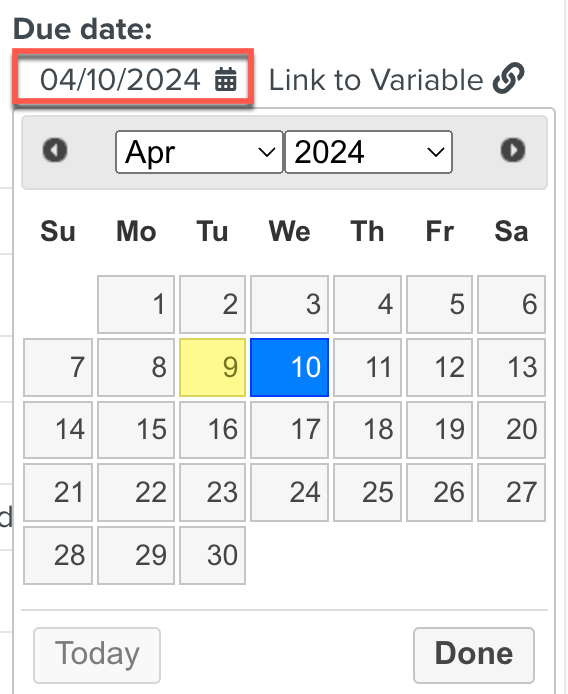
[Optional] Specify a start and due date for the Tasks. You can link these fields to a variable of type Date.

Click the date as shown below to use the date picker.
You can use the Use due date offset option. When the Operation Plan is initiated, the due date is calculated based on this offset. Due Date = Date of Instantiation + Offset.

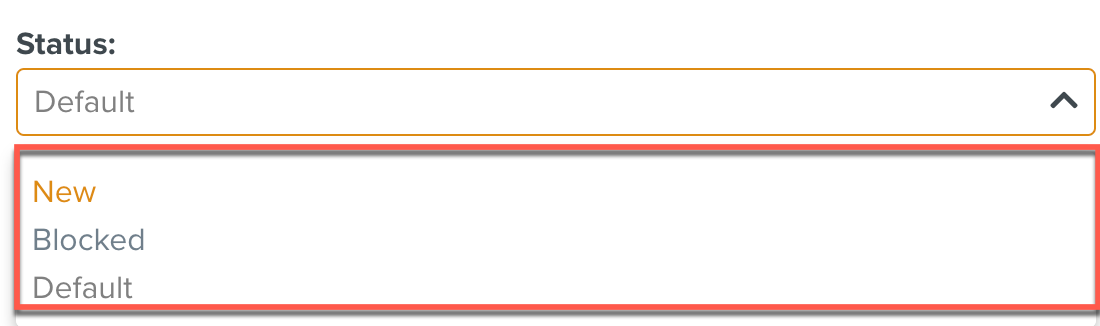
[Optional] Select the Status from the dropdown list as shown below.

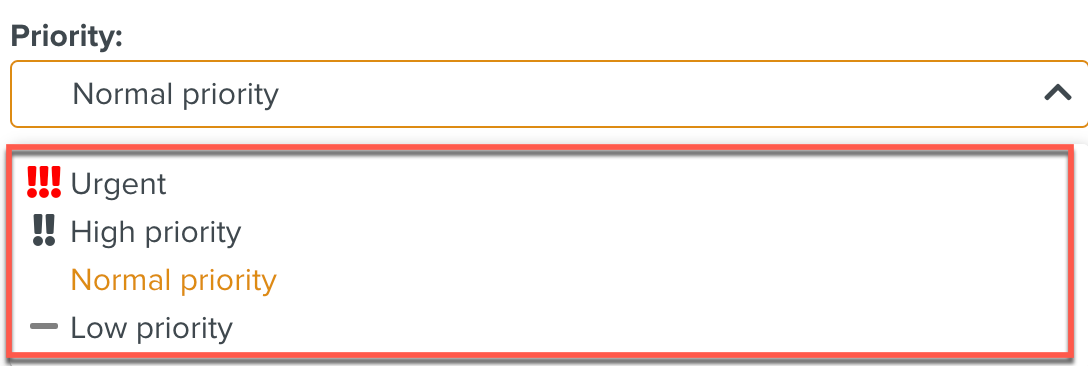
[Optional] Click the dropdown list to specify a priority for the Tasks.

[Optional] Expand the dropdown. The Release Packages and versioned Technical Manual Indexes (TMIs) are available for selection.

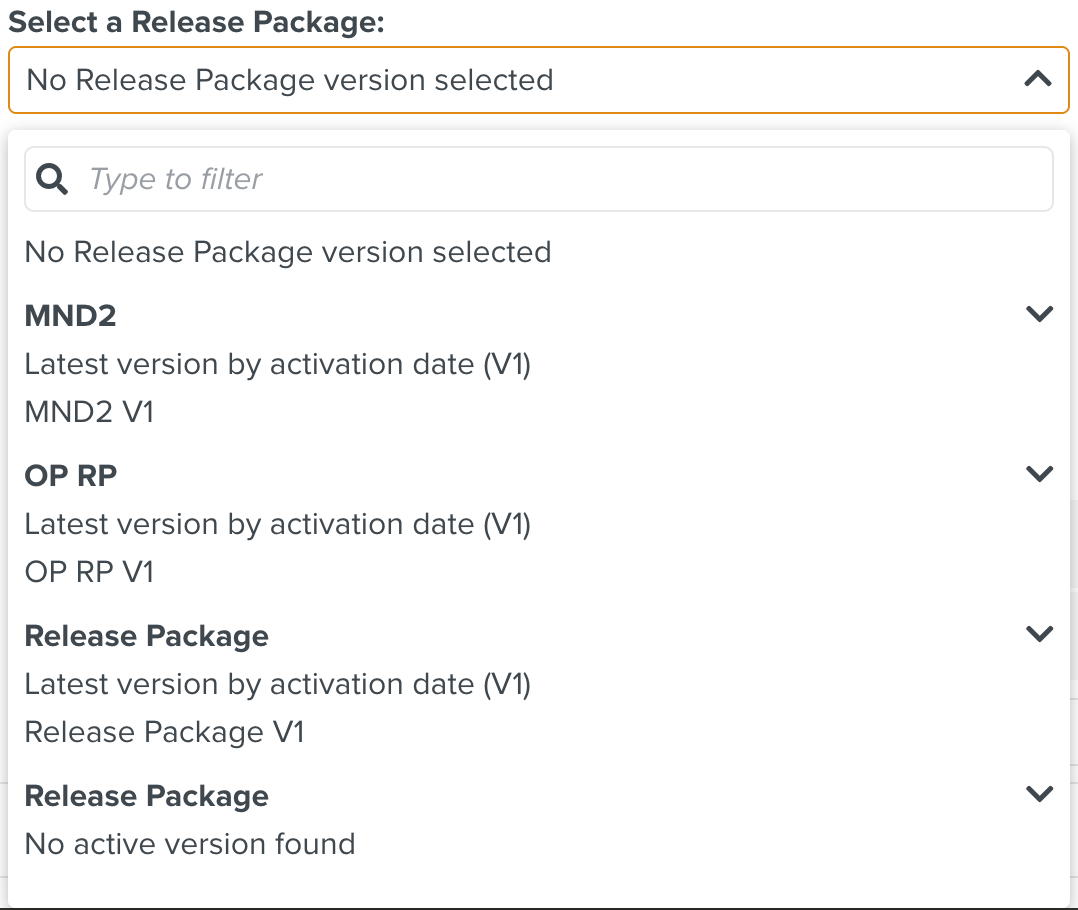
You can select a specific version of the Release Packages or the latest version.
In the example below, the Latest version by activation date (V1) of the OP RP Release Package is selected.
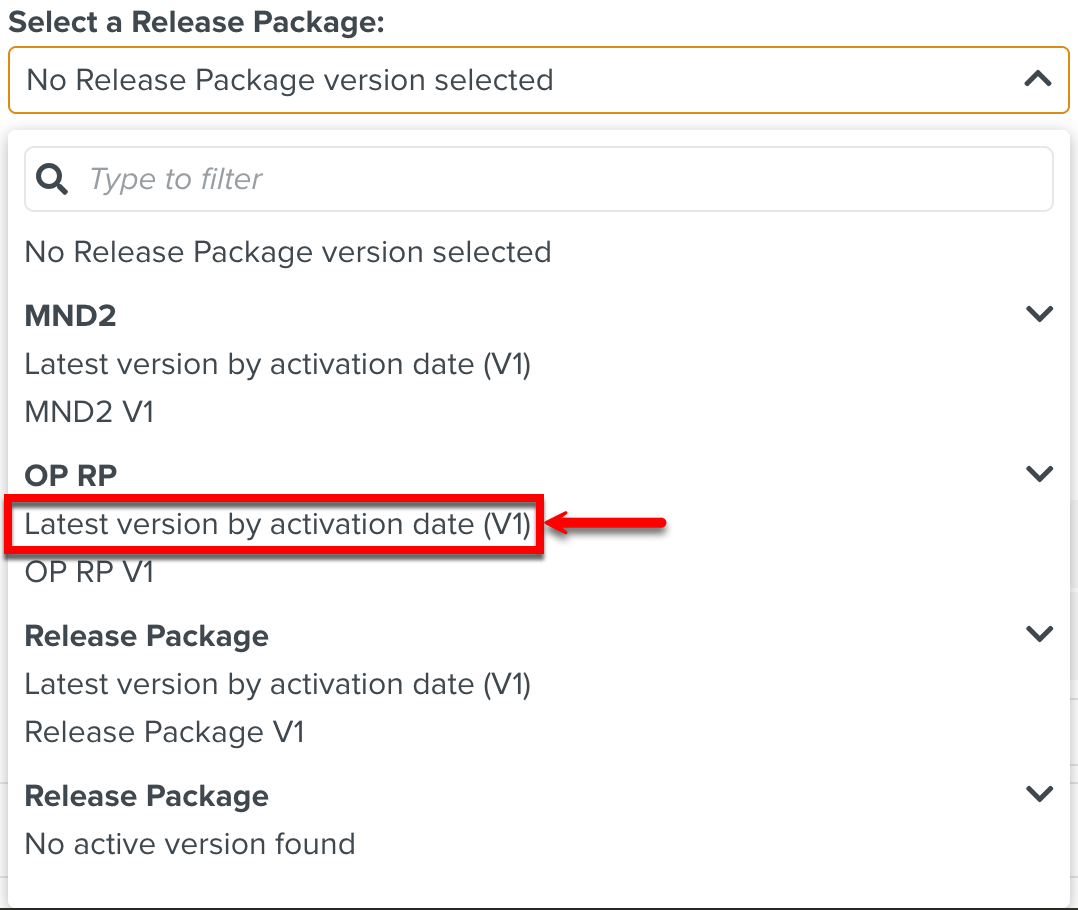
Whenever this Operation Plan is activated, the latest version of the Release Package (OP RP) is automatically selected during the execution of the respective Task that belongs to this Operation Plan.
Enter any additional comments pertaining to the Tasks in thetext box. This is an optional field. You can link this field to a variable of type Text.

Enter the .

You can enter a text value as shown below or choose to link this field to a variable of type Text.

Check to auto-name the Task. A format appears as below.
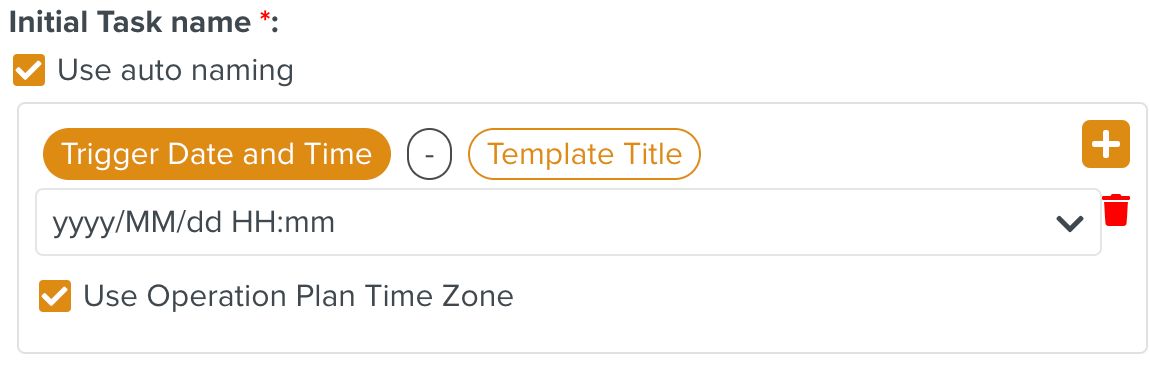
The auto-name format can be configured as shown below.Click
 to include more fields in the name.
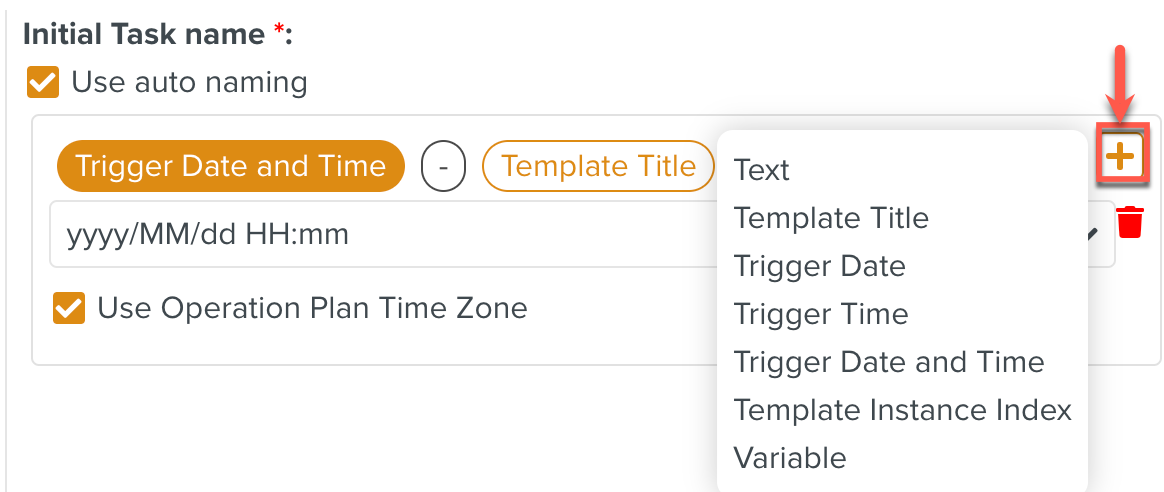
By default, one instance of each of the selected Templates is listed. Optionally, you can specify a different number of instances for each of the Templates by selecting the dropdown.
The maximum of Tasks created is ten.

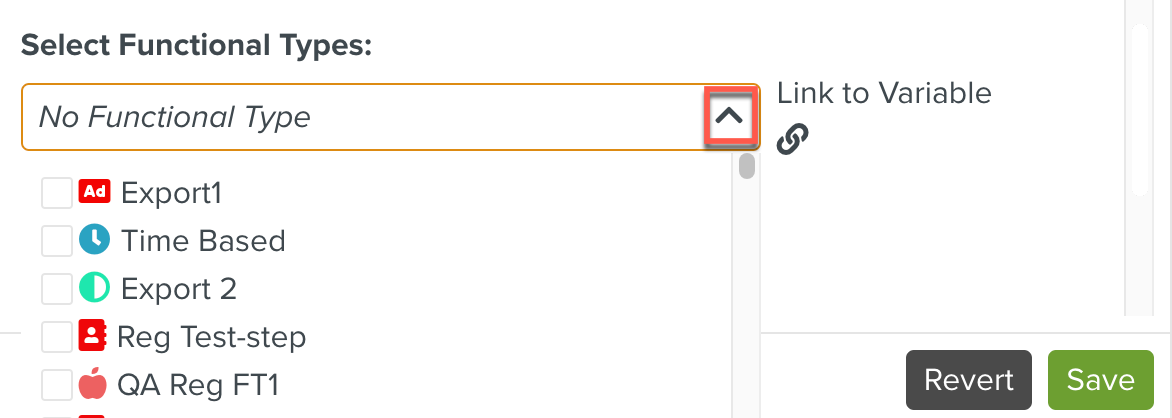
Select Functional Types from the dropdown list to link the Task to the Functional Type. You can also use the Link to variable option to link to a Functional Type Variable.
[Optional] If the selected Templates have Template variables, they can be linked to the Operation Plan variables.

Click
The Action of type Create Task has been successfully configured.


The Action of type Notification of allows you to send an email notification to the selected members.
To send a Notification email, select the type Notification from the dropdown list.

Edit the Action ID if required. You can choose to keep the system generated Action ID.

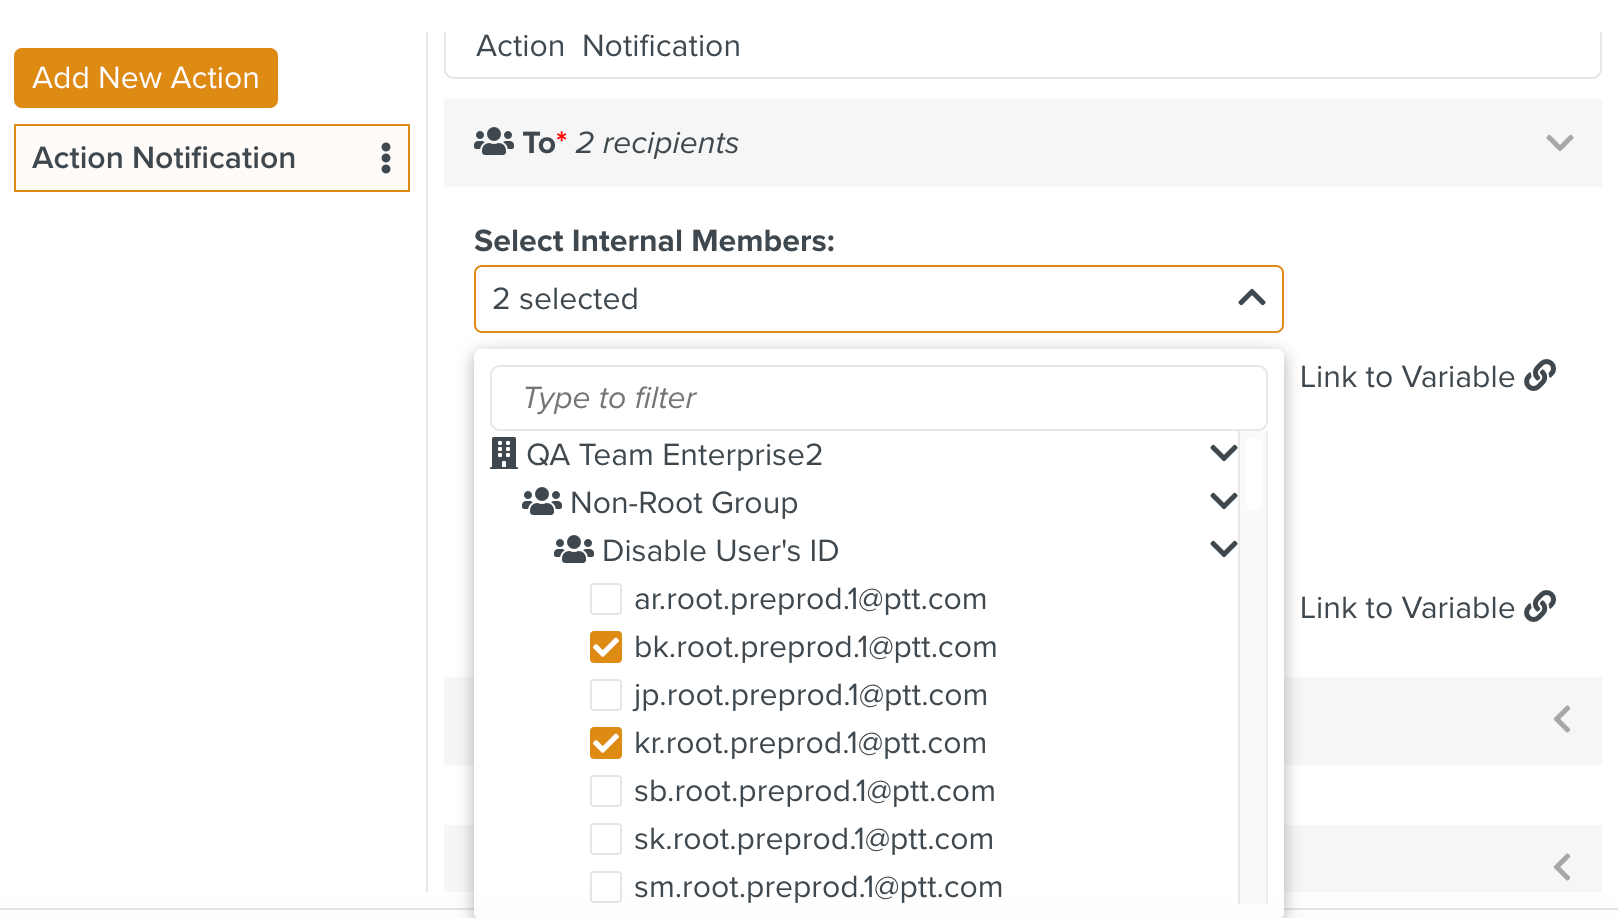
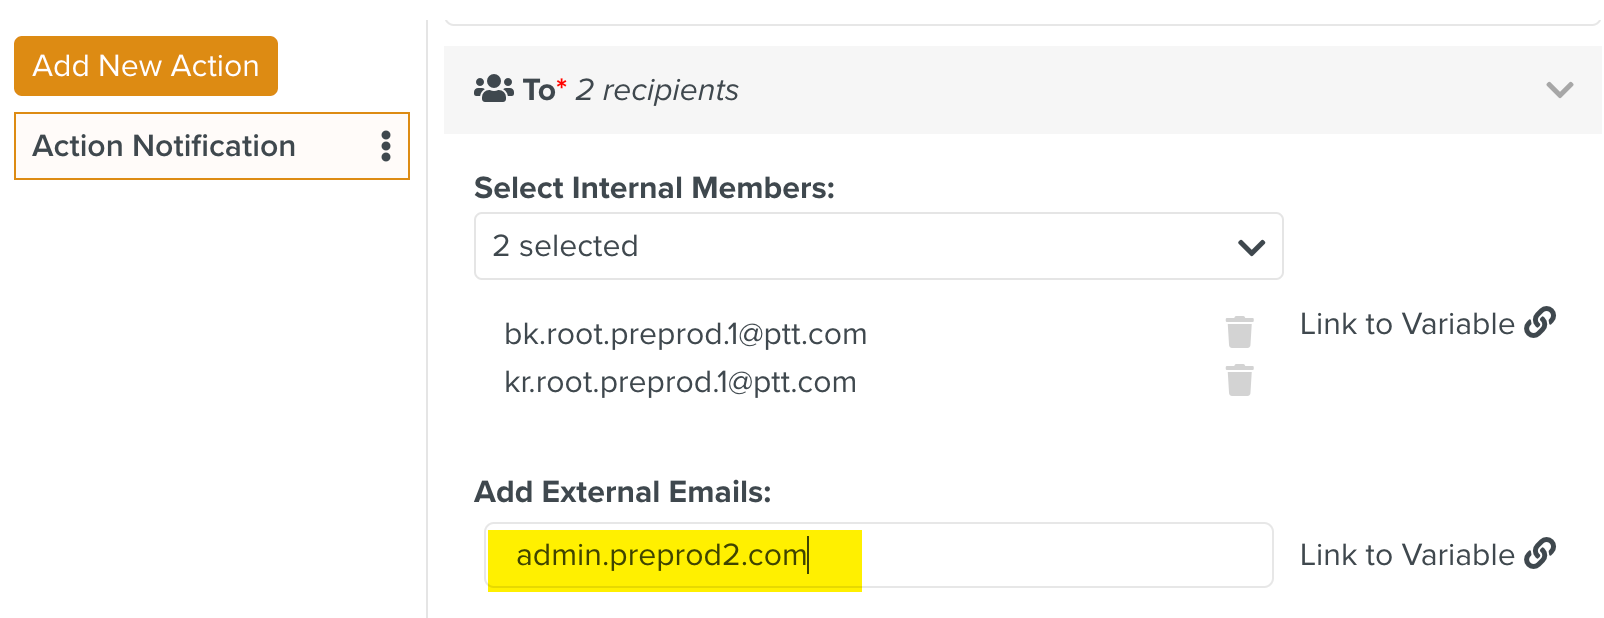
To send notifications to the Team members, select the required To recipients from the Internal Members dropdown list as shown below.
To send notifications to recipients who are not Team members, Add External Emails.
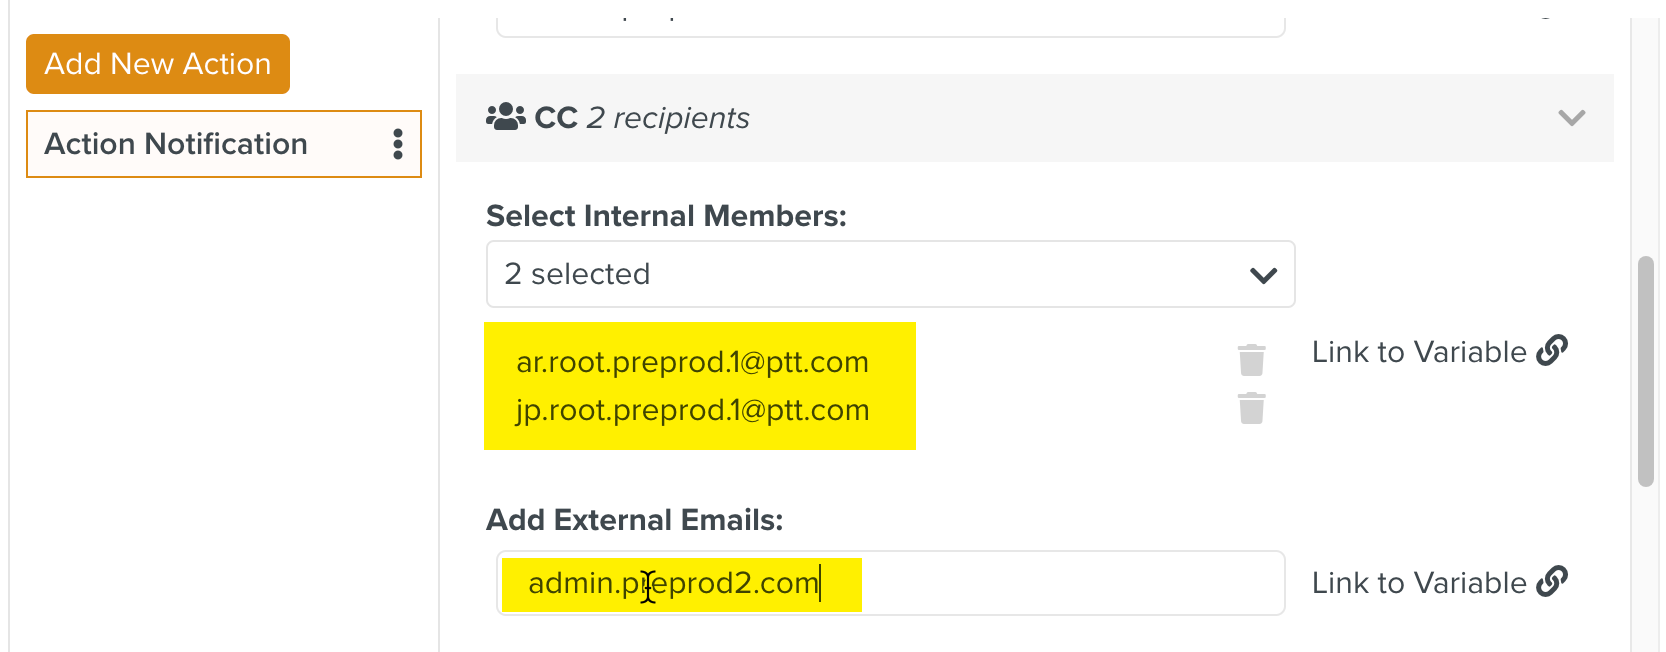
[Optional] To add CC recipients, select the Internal Members and External Emails as shown below.
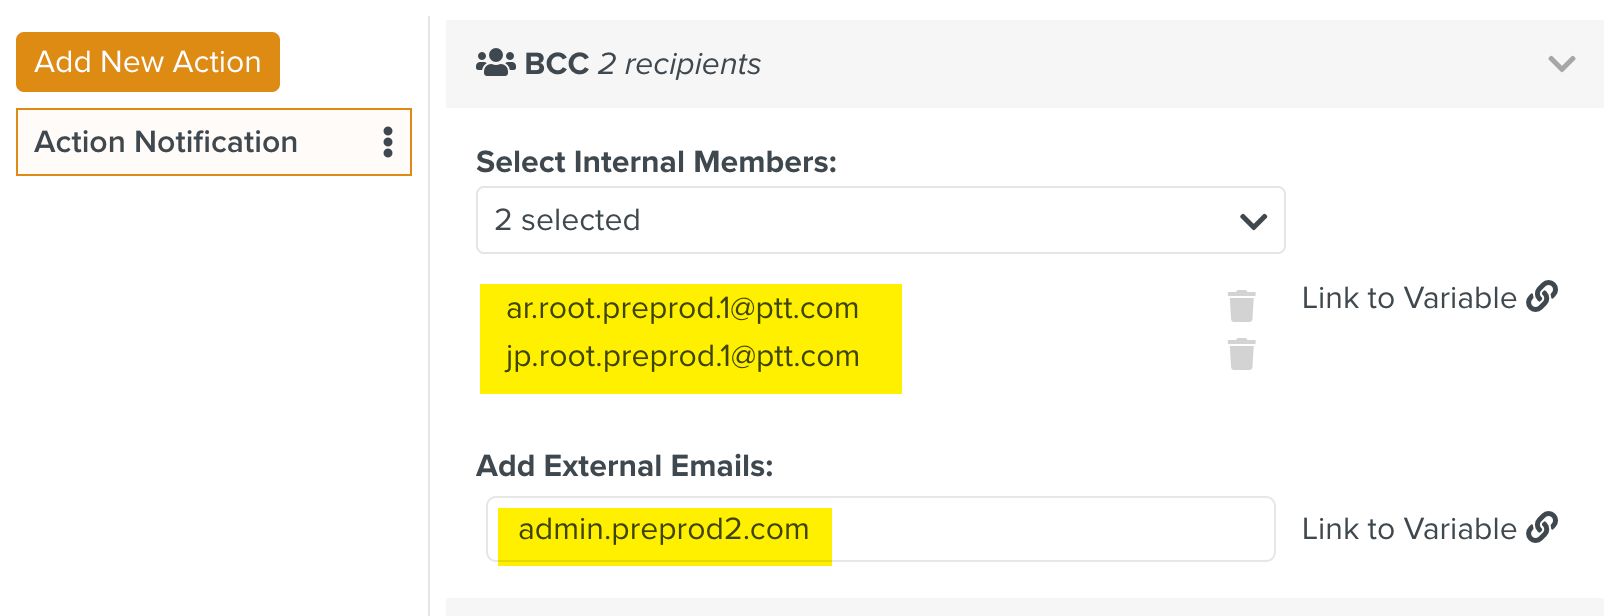
[Optional] To add BCC recipients, select the Internal Members and External Emails as shown below.
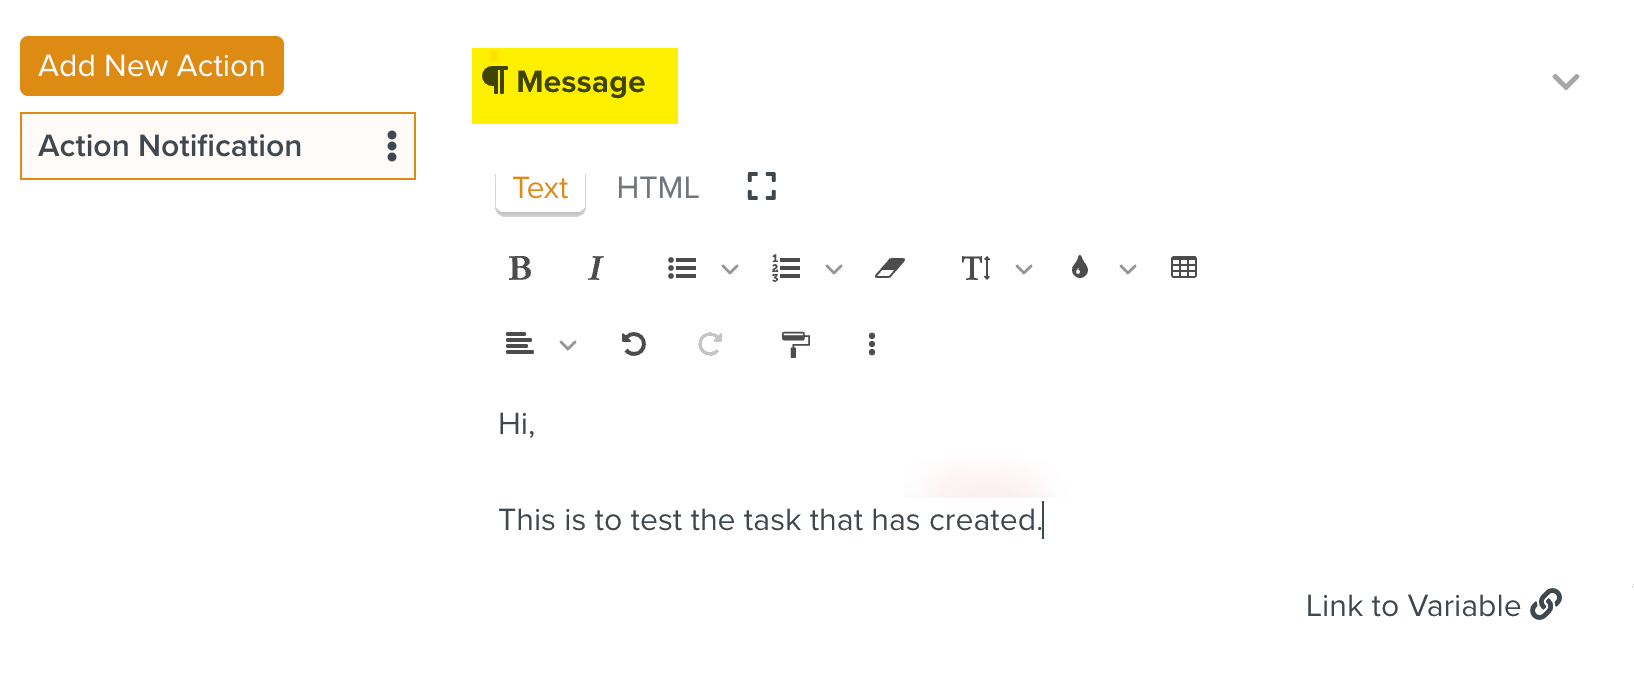
Add the Subject of the email.

Enter the Message in the text box as shown below.
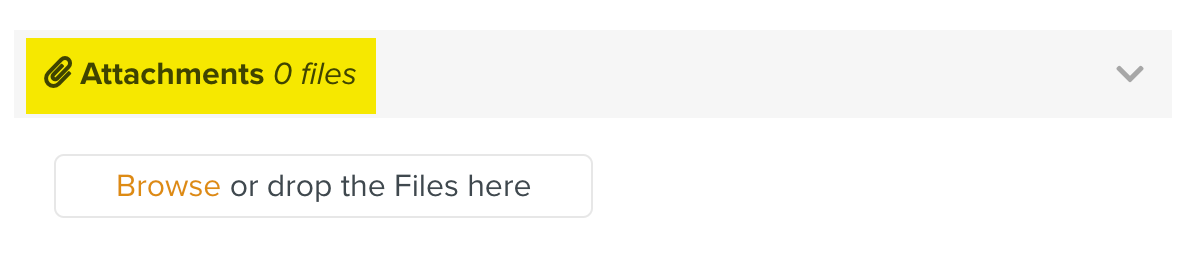
To add the Attachments, browse or drop the files.
Click
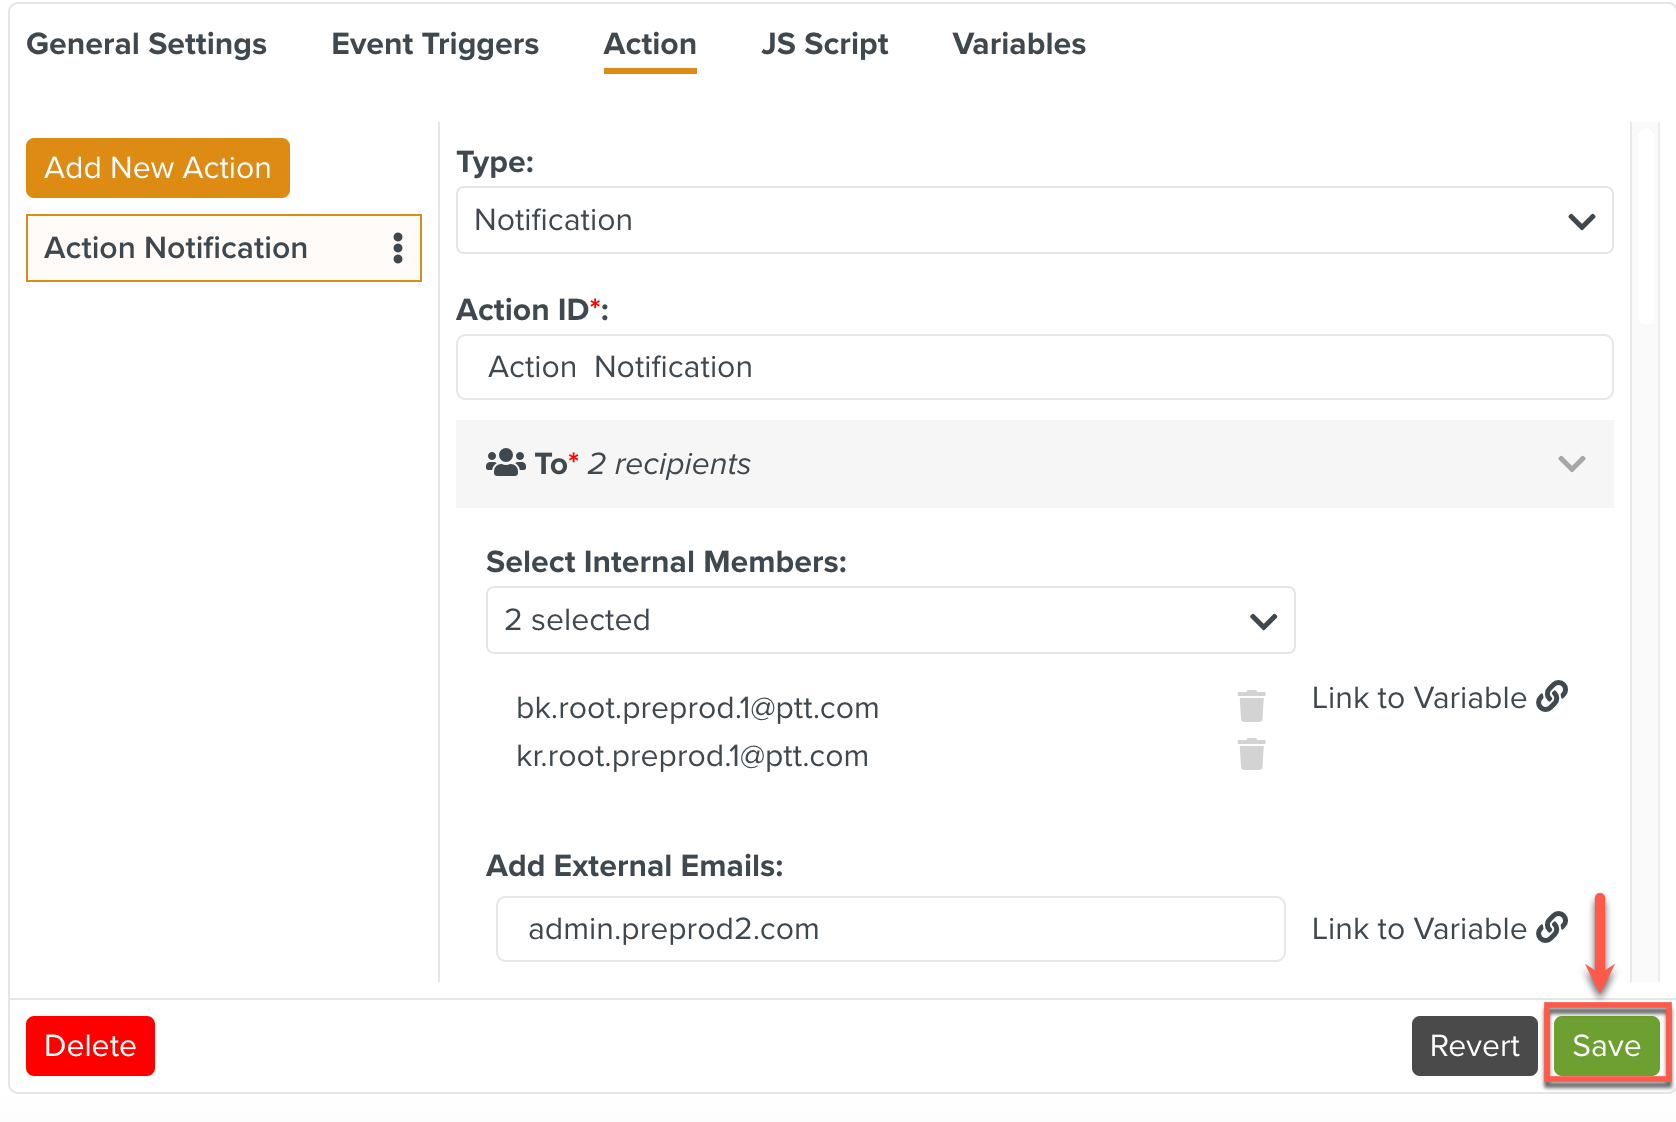
The Notification type action has been successfully configured.
Update Task allows you to block or unblock a Task. This Action type can be used to update two types of Tasks.
Tasks which are already created using the Create Task type of this Operation Plan.
The Tasks Filtered based on criteria.
Note
Tasks can be blocked only using the Update Task Action Type.
To update a Task:
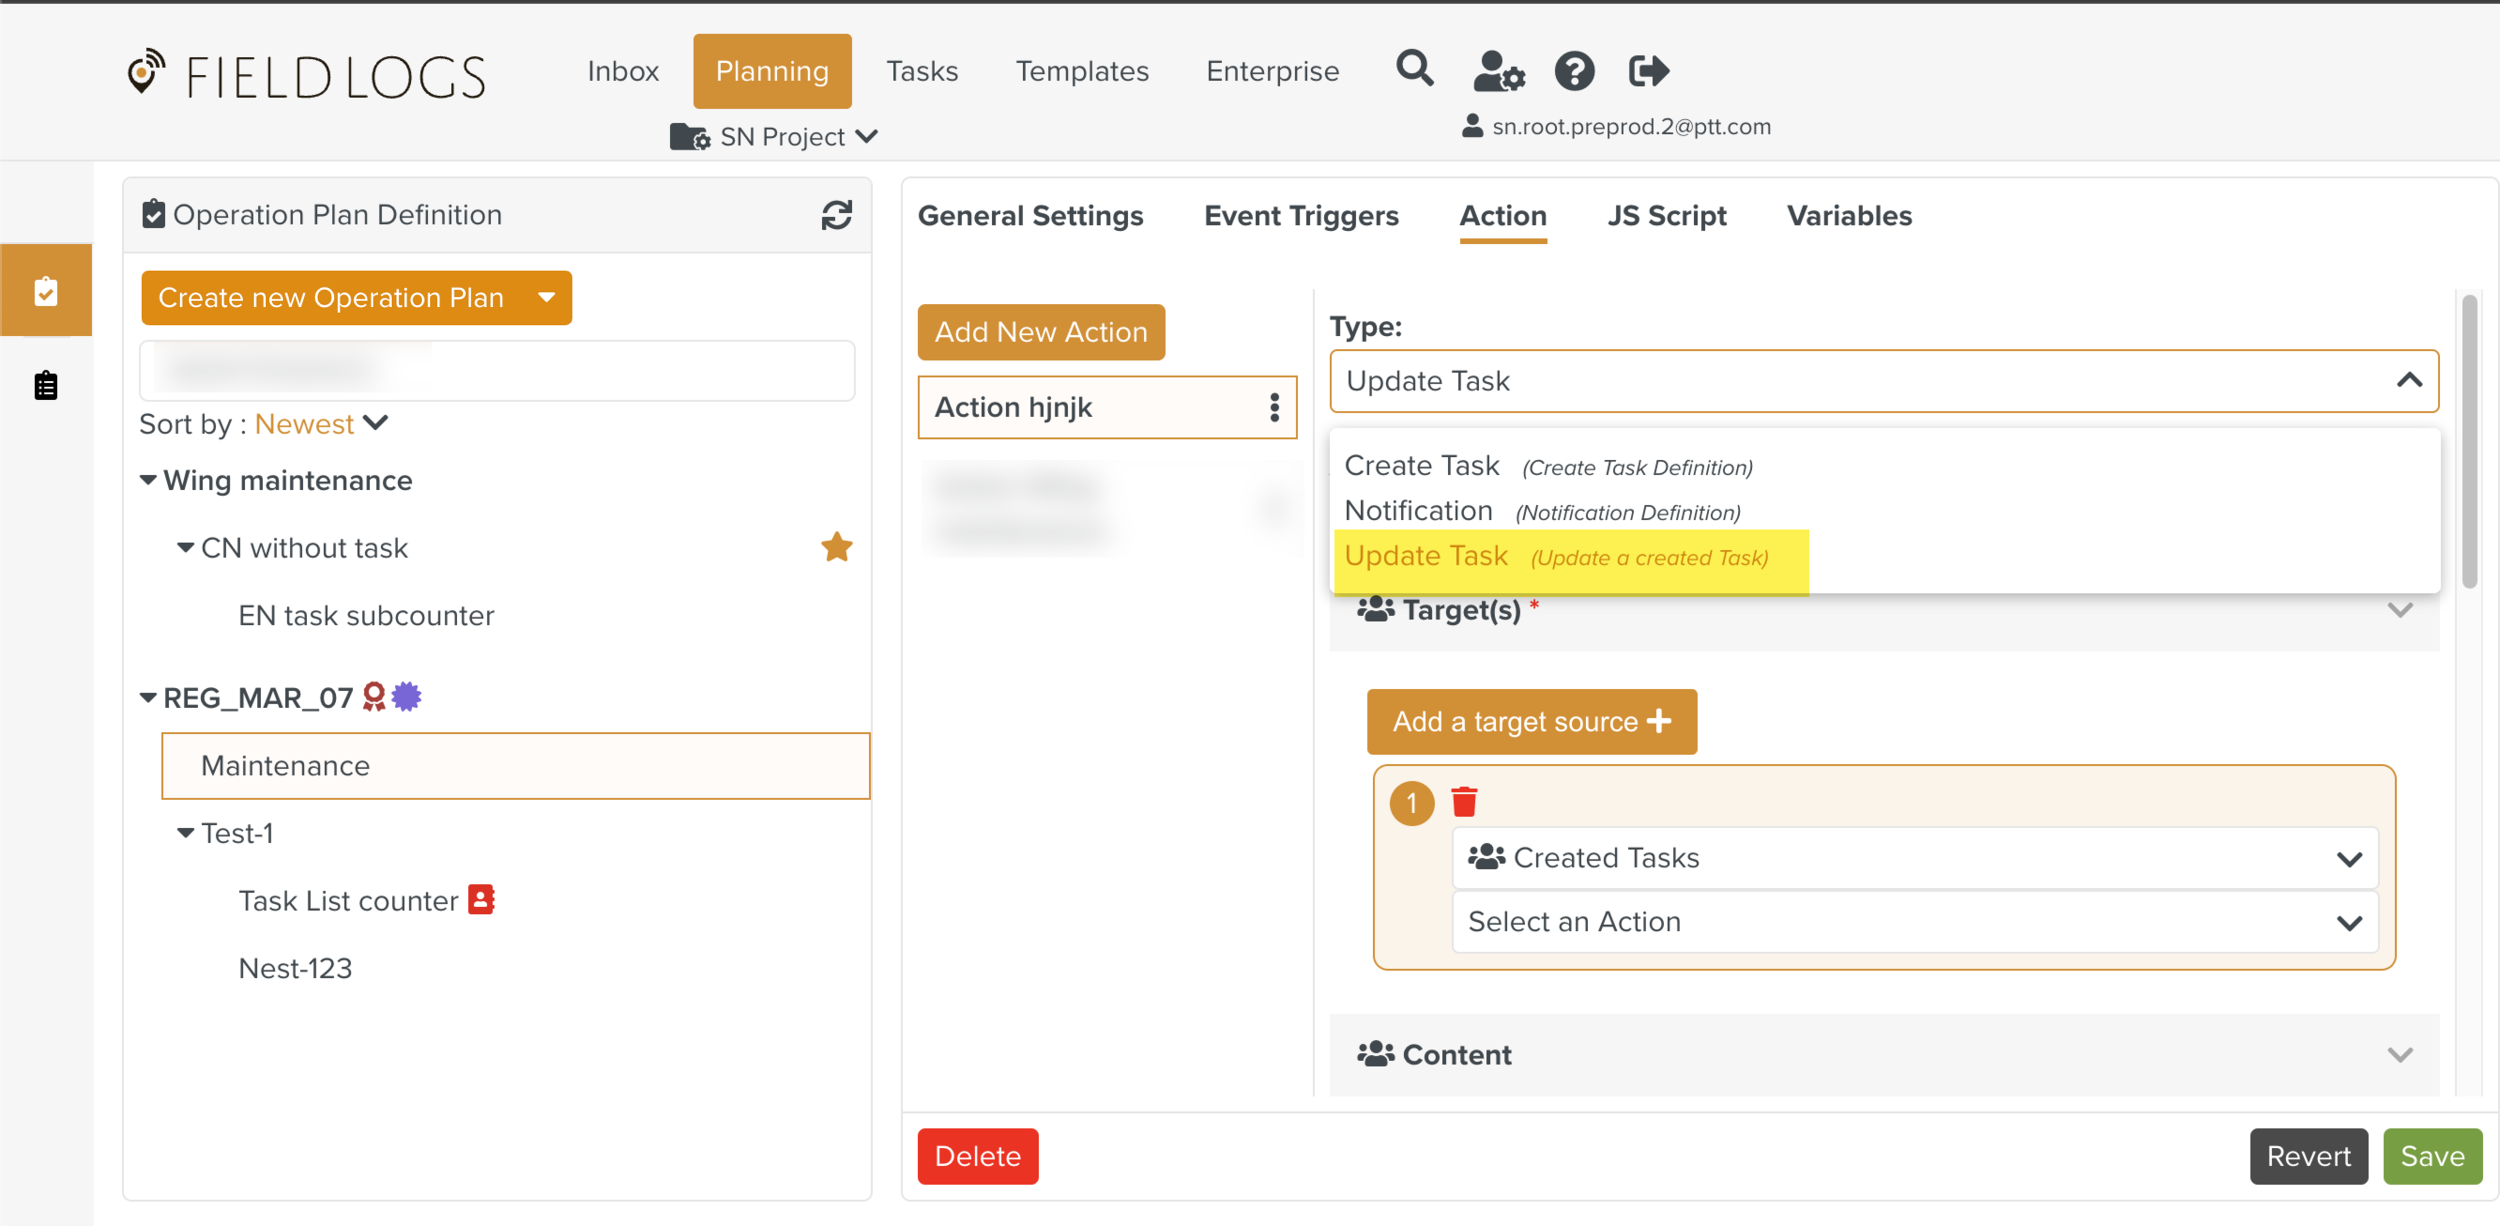
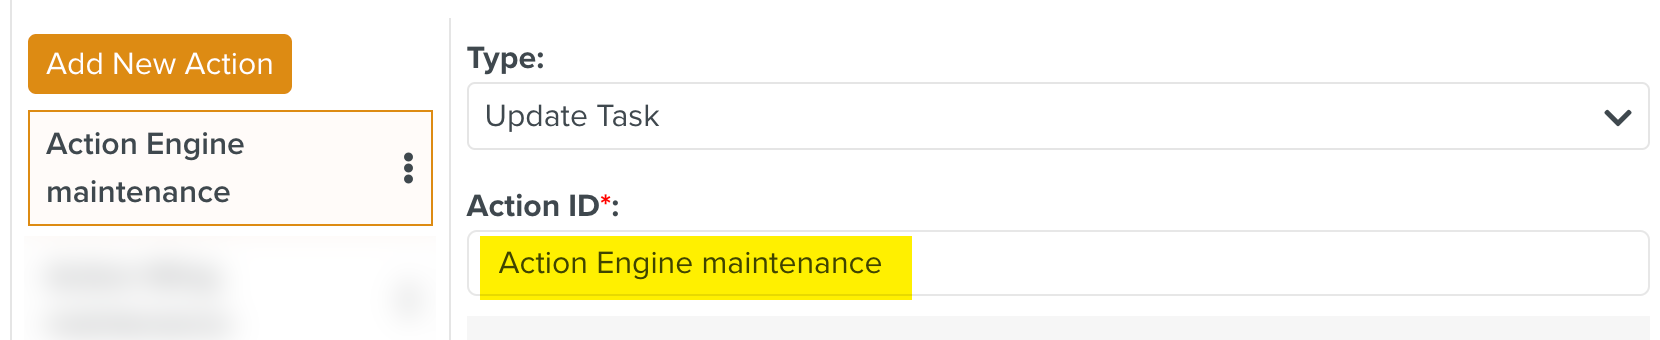
Select the Action Type as Update Task from the dropdown list.
Edit the Action ID if required. You can choose to keep the system generated Action ID.
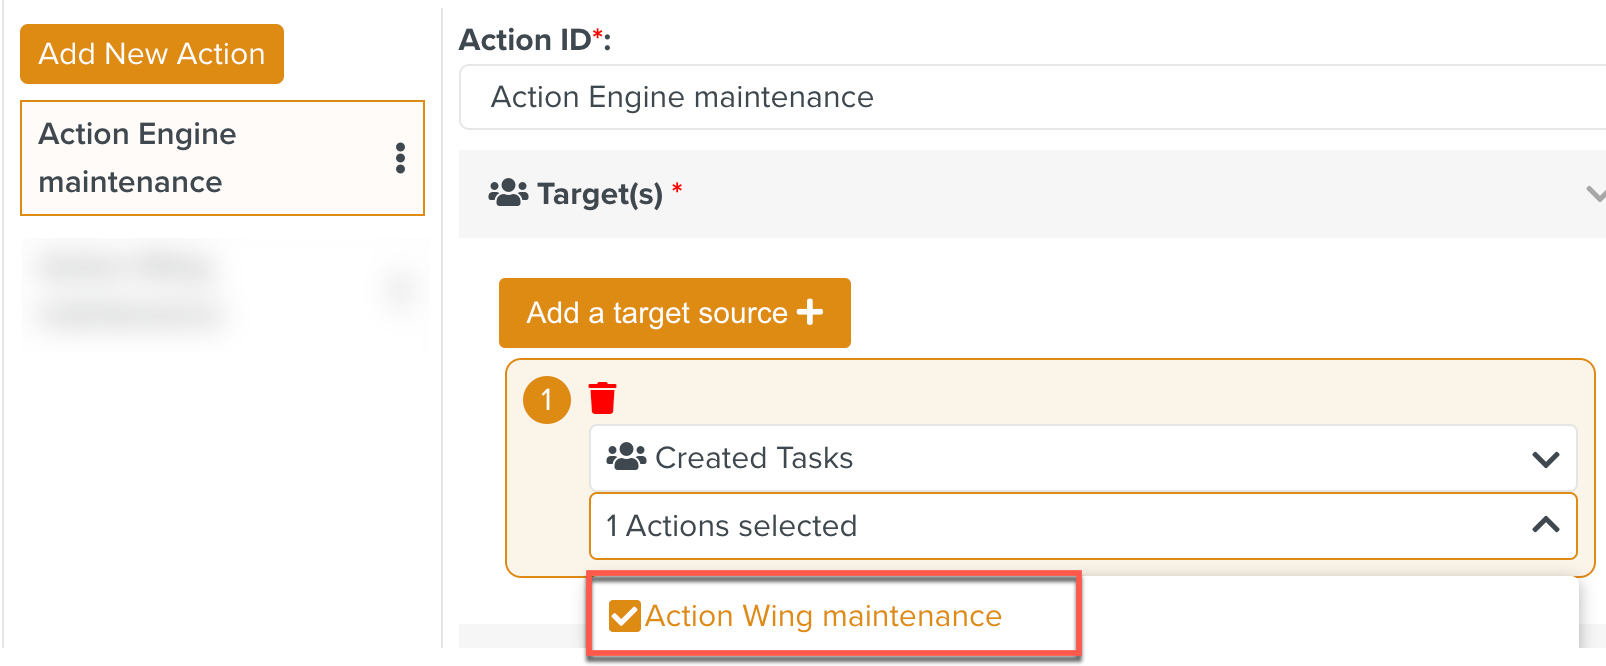
In the Target(s) section, click .
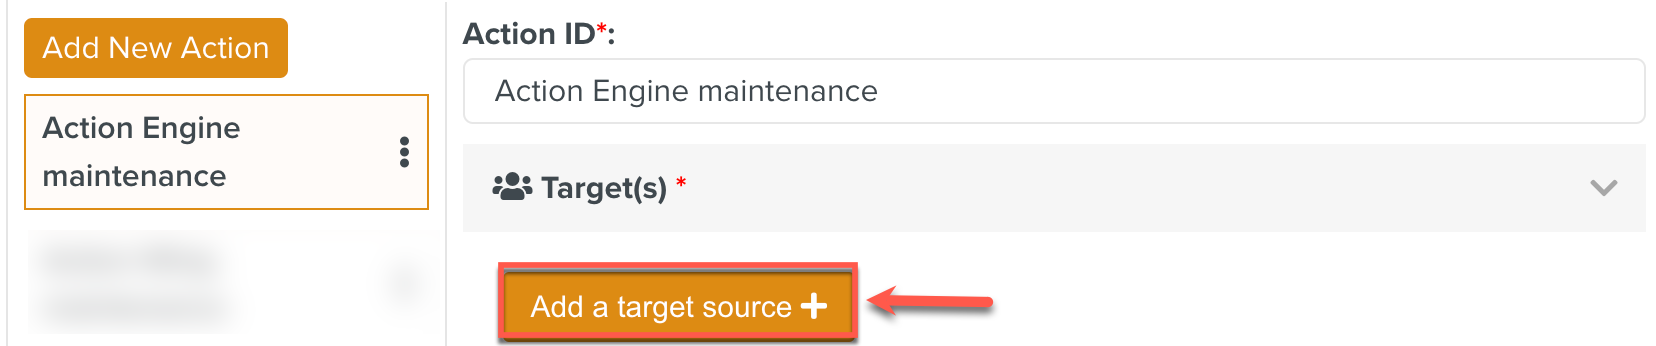
A Target Source box appears.
Select the required option from the dropdown list.
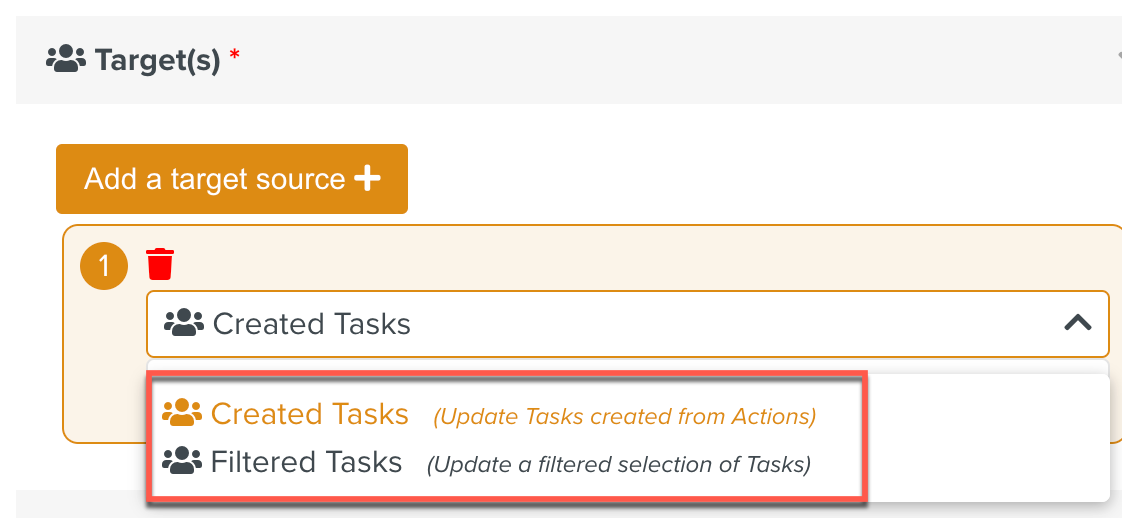
Created Tasks: This option is selected to update the Tasks created by the Action.
Filtered Tasks: This option is selected to update the Tasks filtered based on the selected criteria.
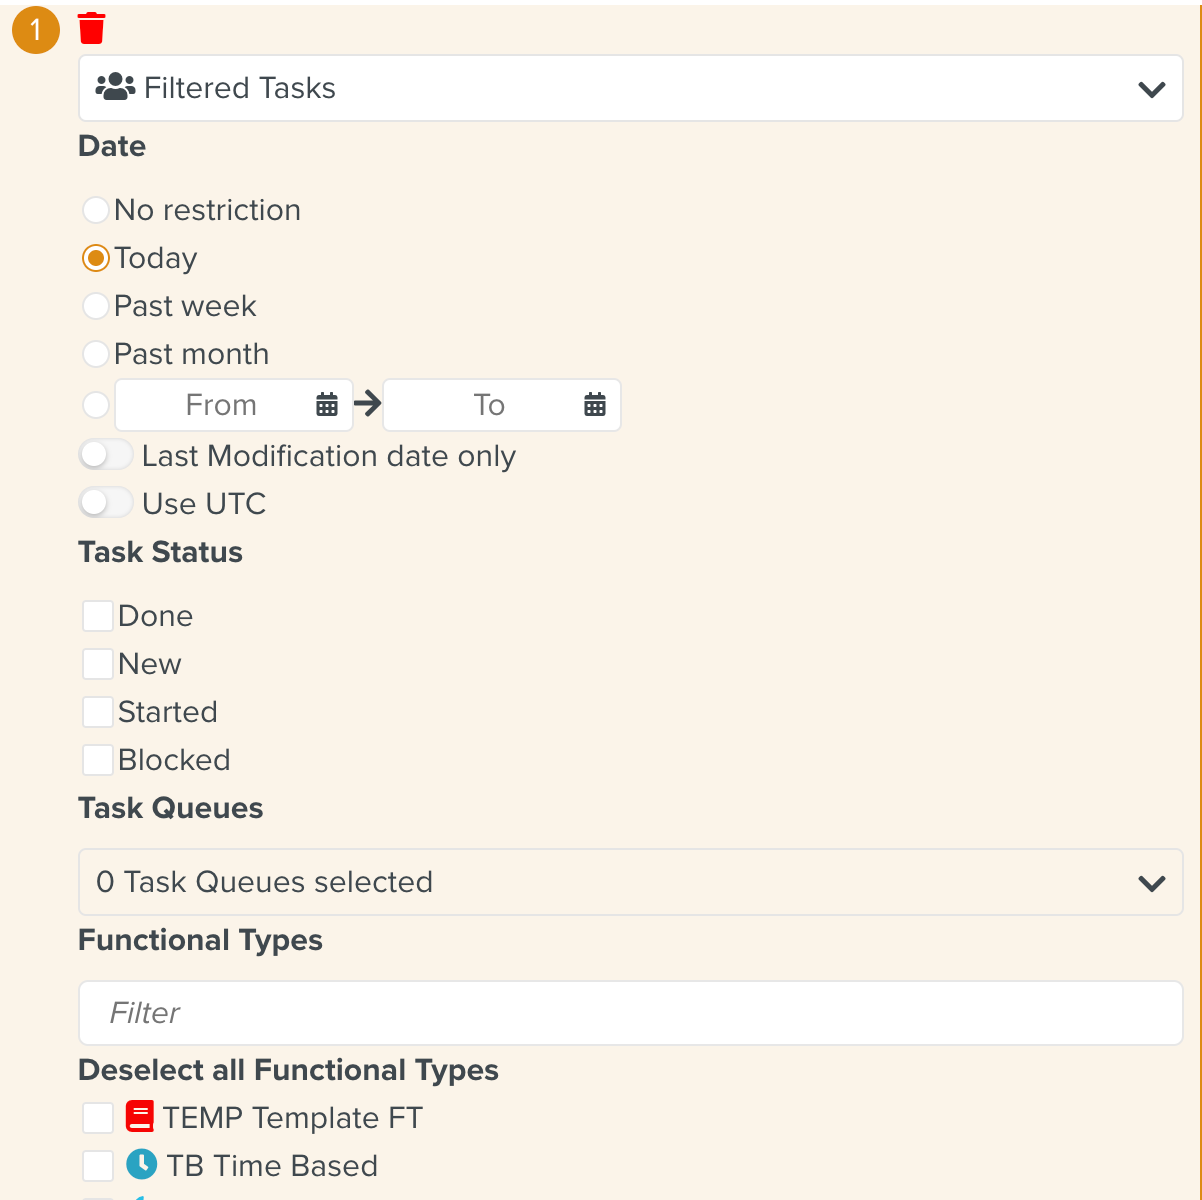
Select the Tasks that need to be updated.
In the below example, Action Wing maintenance has been filtered based on today's Date.
In the Content section, select the required fields that need to be updated for the selected Task.
In the below example, the Task Queue or Assignee and the Status details are updated for the Action Wing maintenance Task.

Click .
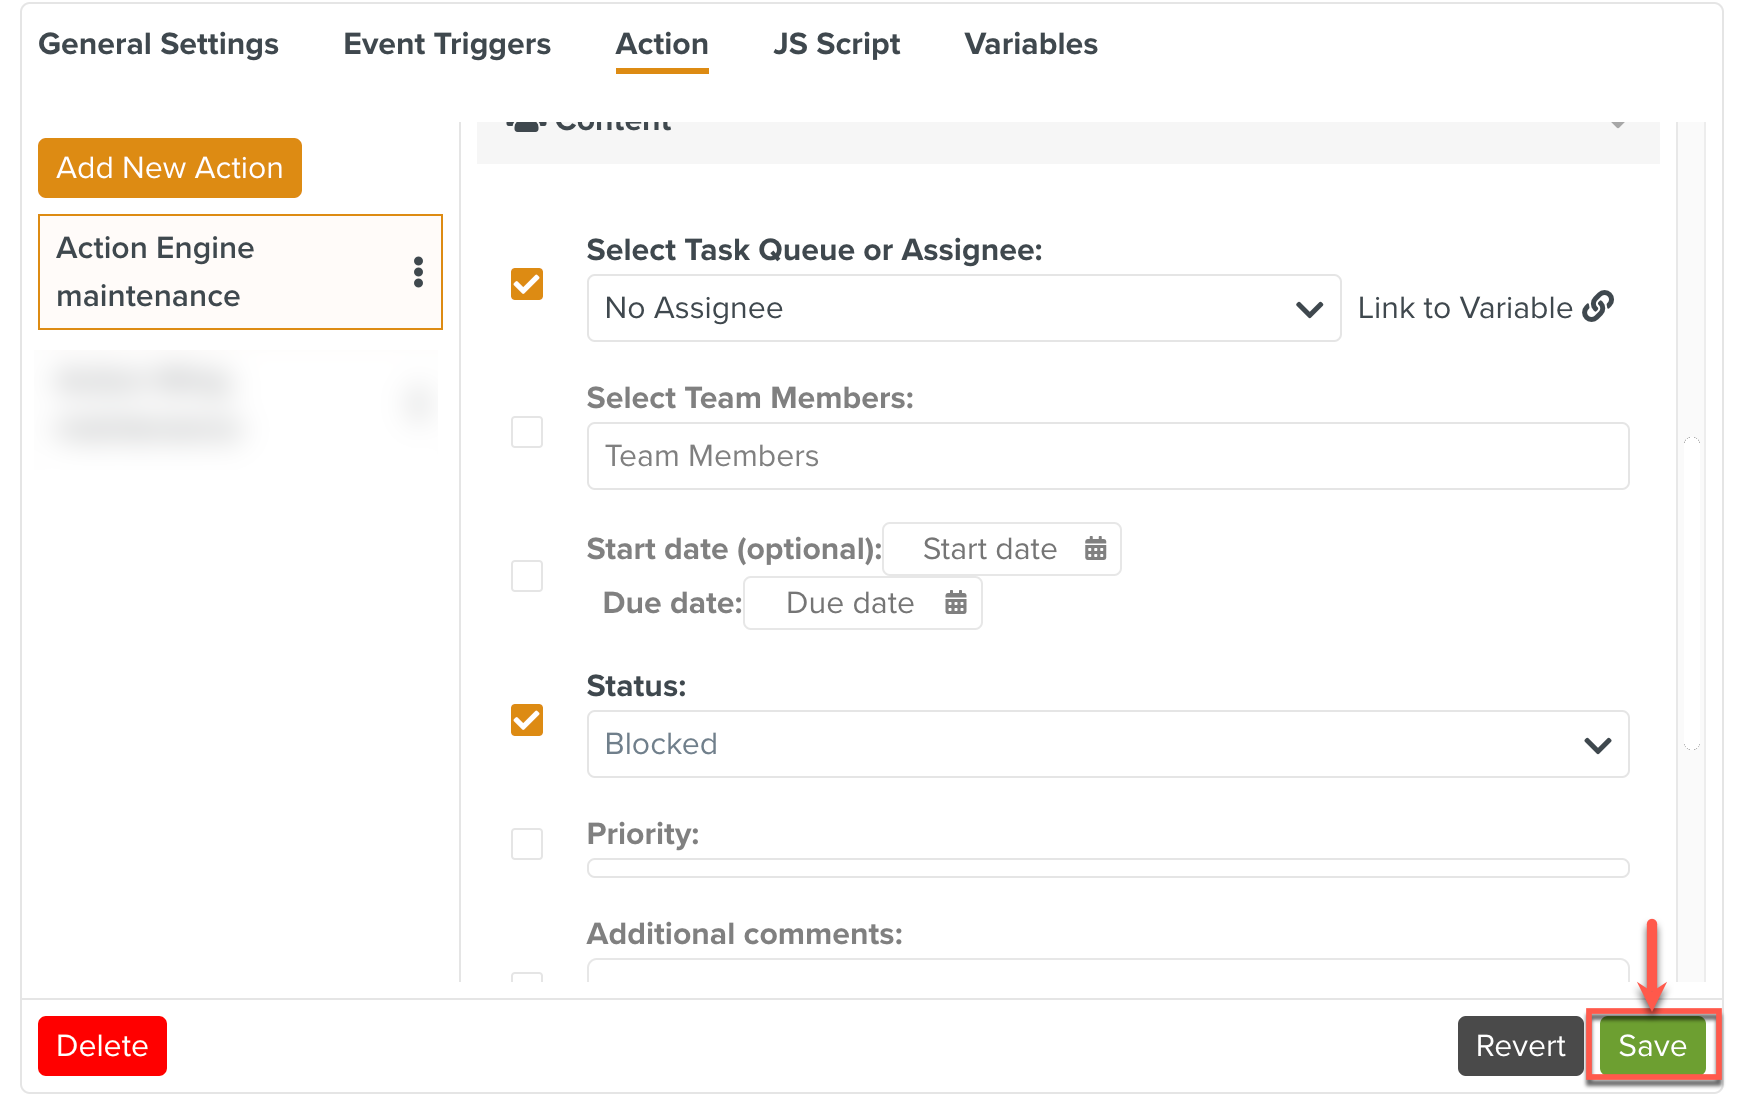
The Action of the current Operation Plan has been updated.