Setting Up Configurations
A Configuration enables users to only display a specific set of Steps from an entire Template, during Planning and Execution. This acts as a filter of Steps, based on a combination of Steps and Part Numbers.
You can create any number of Configurations, and each can have any number of Part Numbers and Steps.
You can also define the combination logic that would be applicable if two or more Configurations pertaining to a Part Number are selected while assigning the Task.
Setting up a Configuration involves the following steps:
Adding a Configuration.
Selecting Part Numbers for the Configuration.
Selecting Steps for the Configuration.
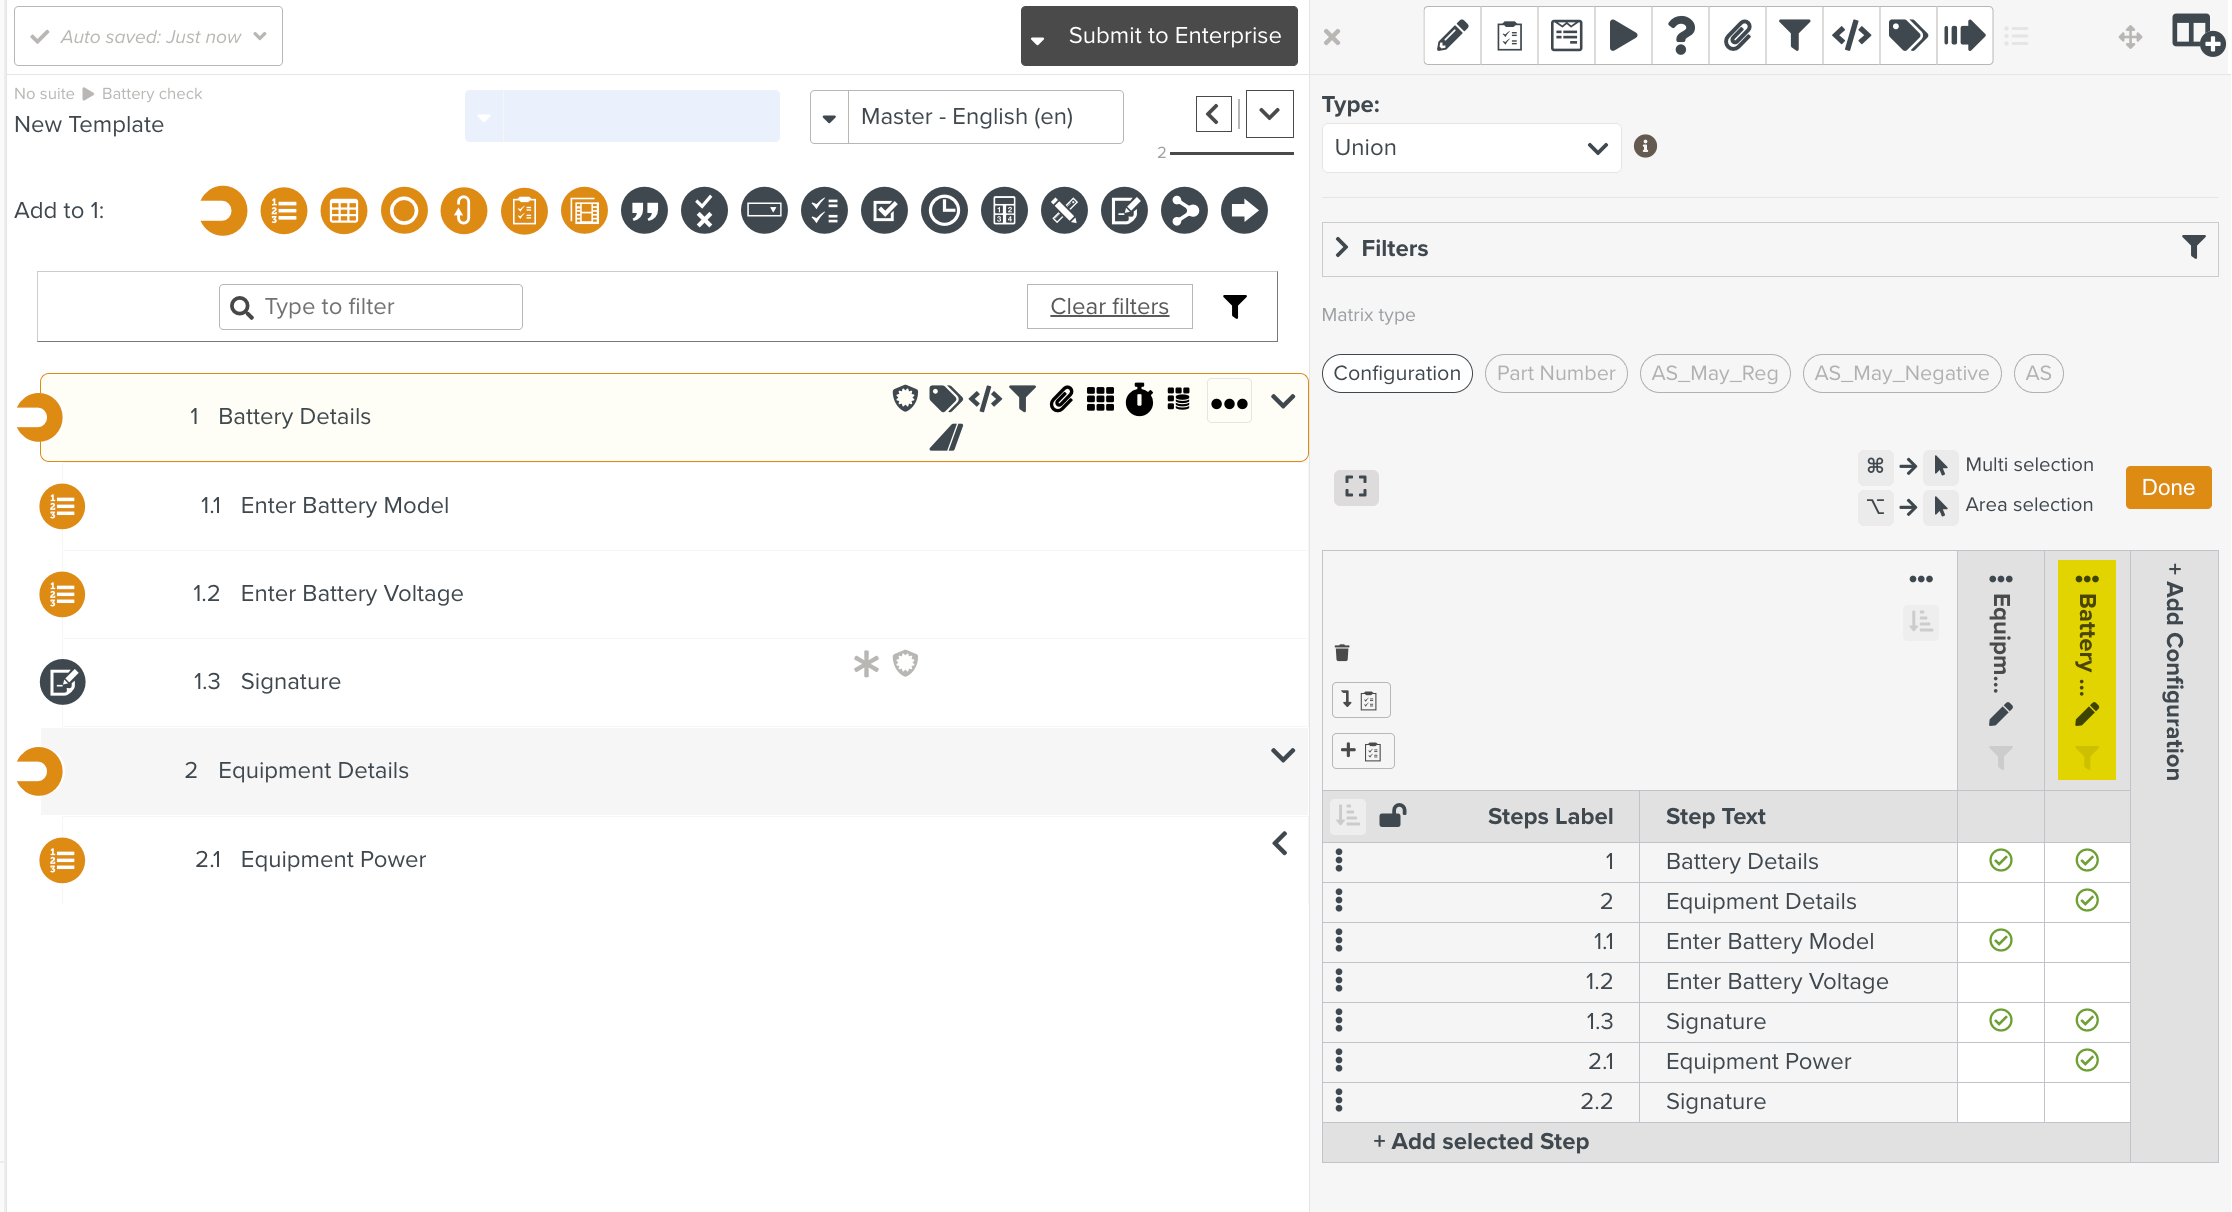
The Configurations that you add are displayed against Part Numbers and Steps in a matrix format that allows you to make various combinations easily.
To add a Configuration:
On the main menu, go to > .
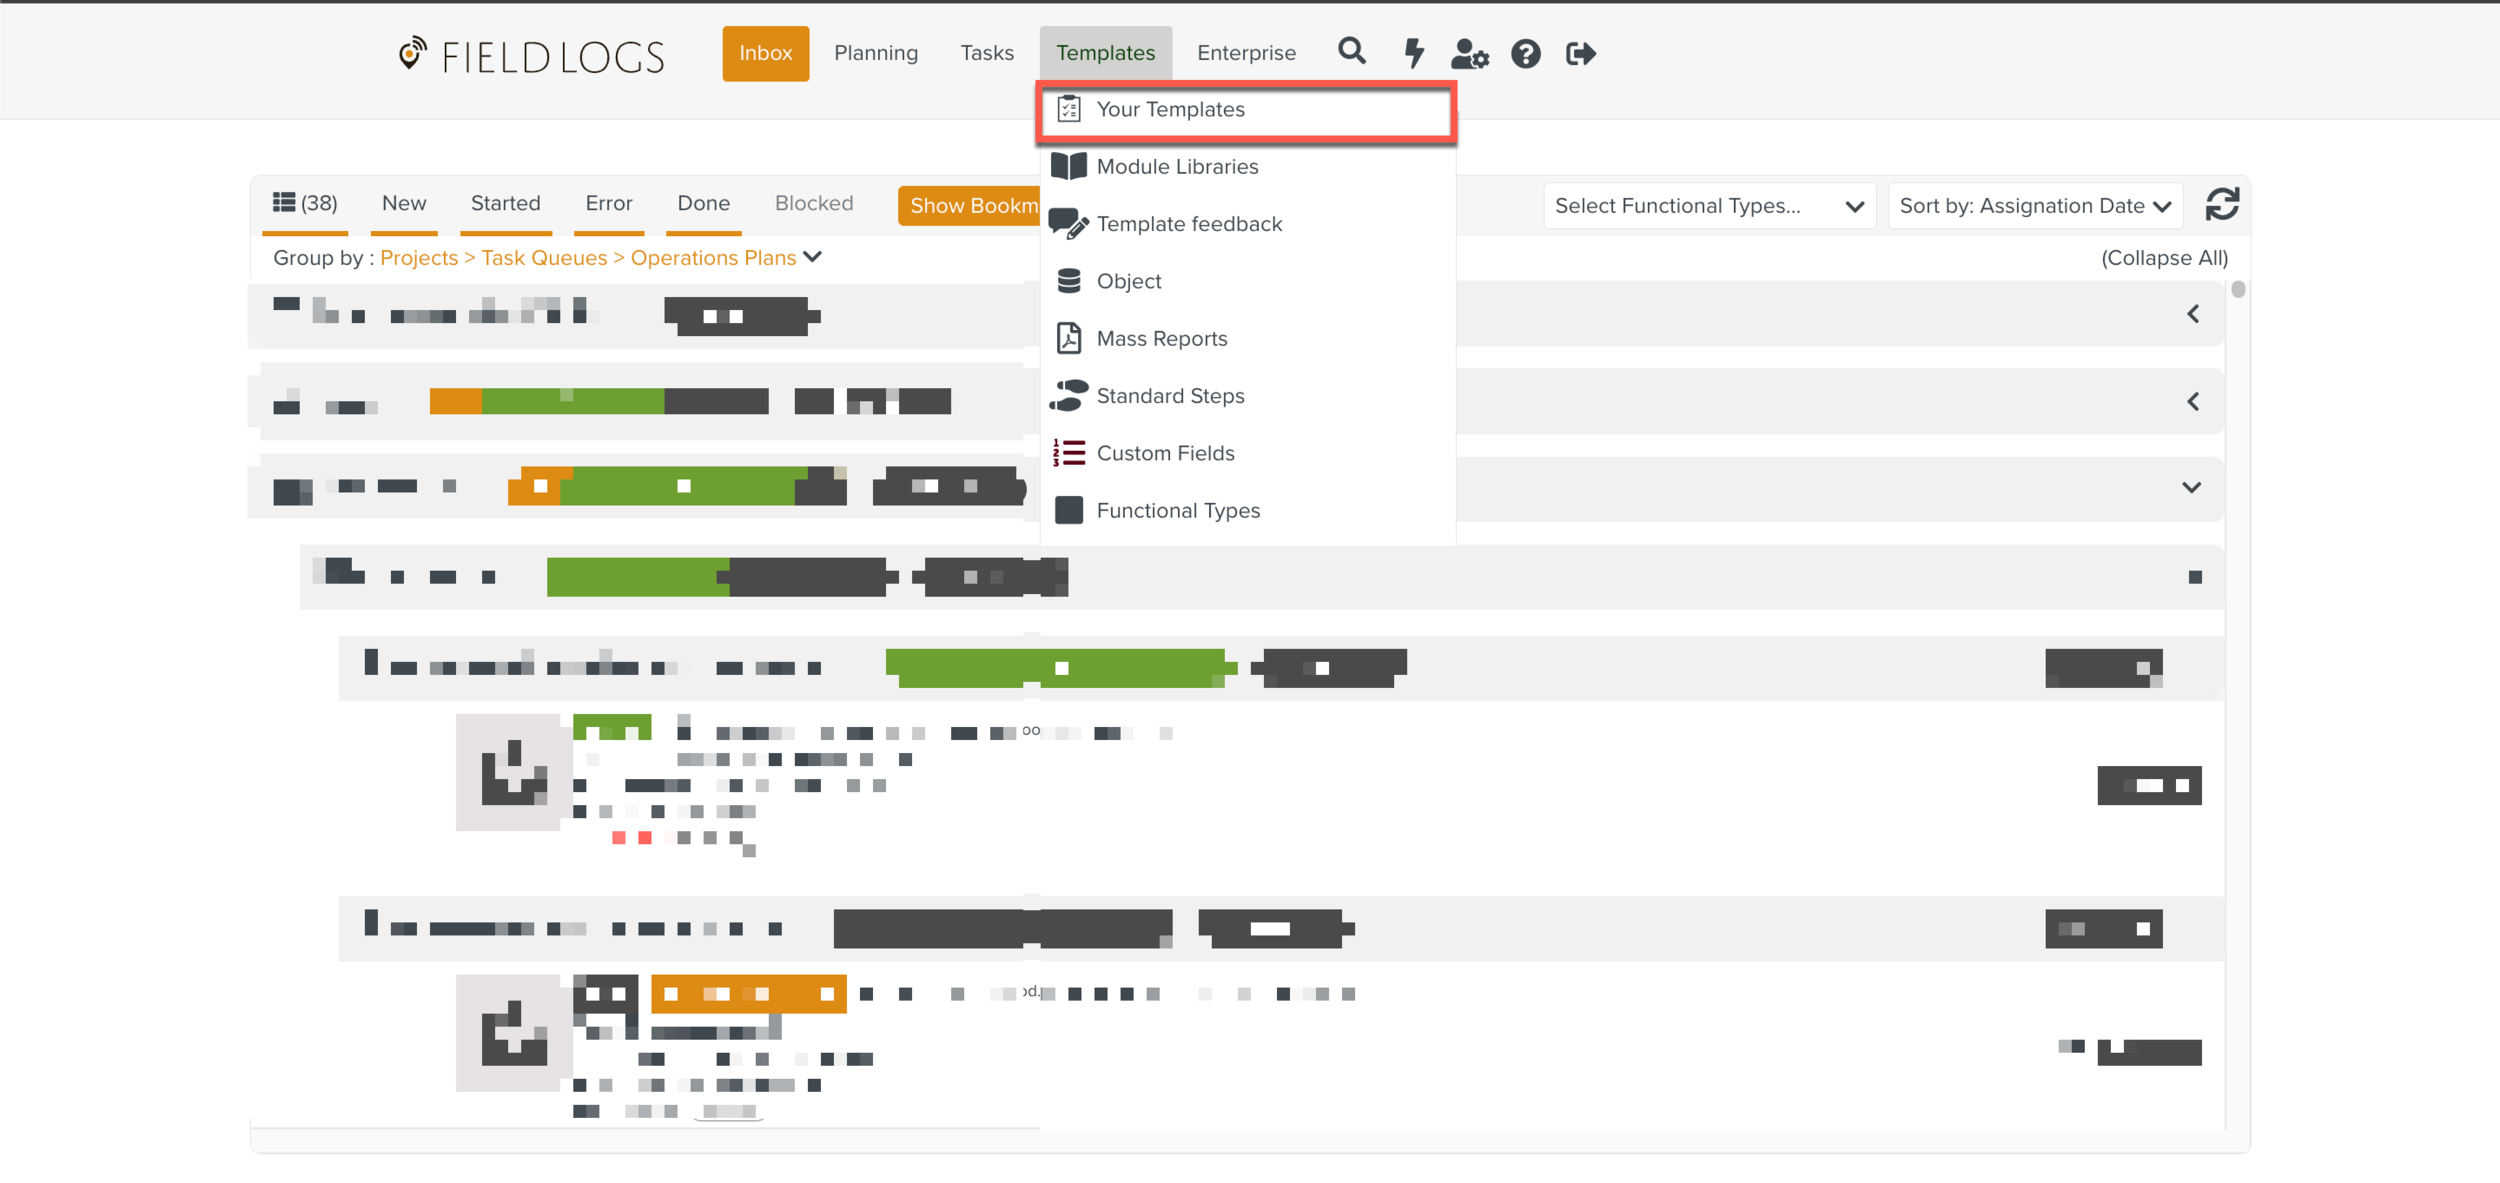
The section is displayed.
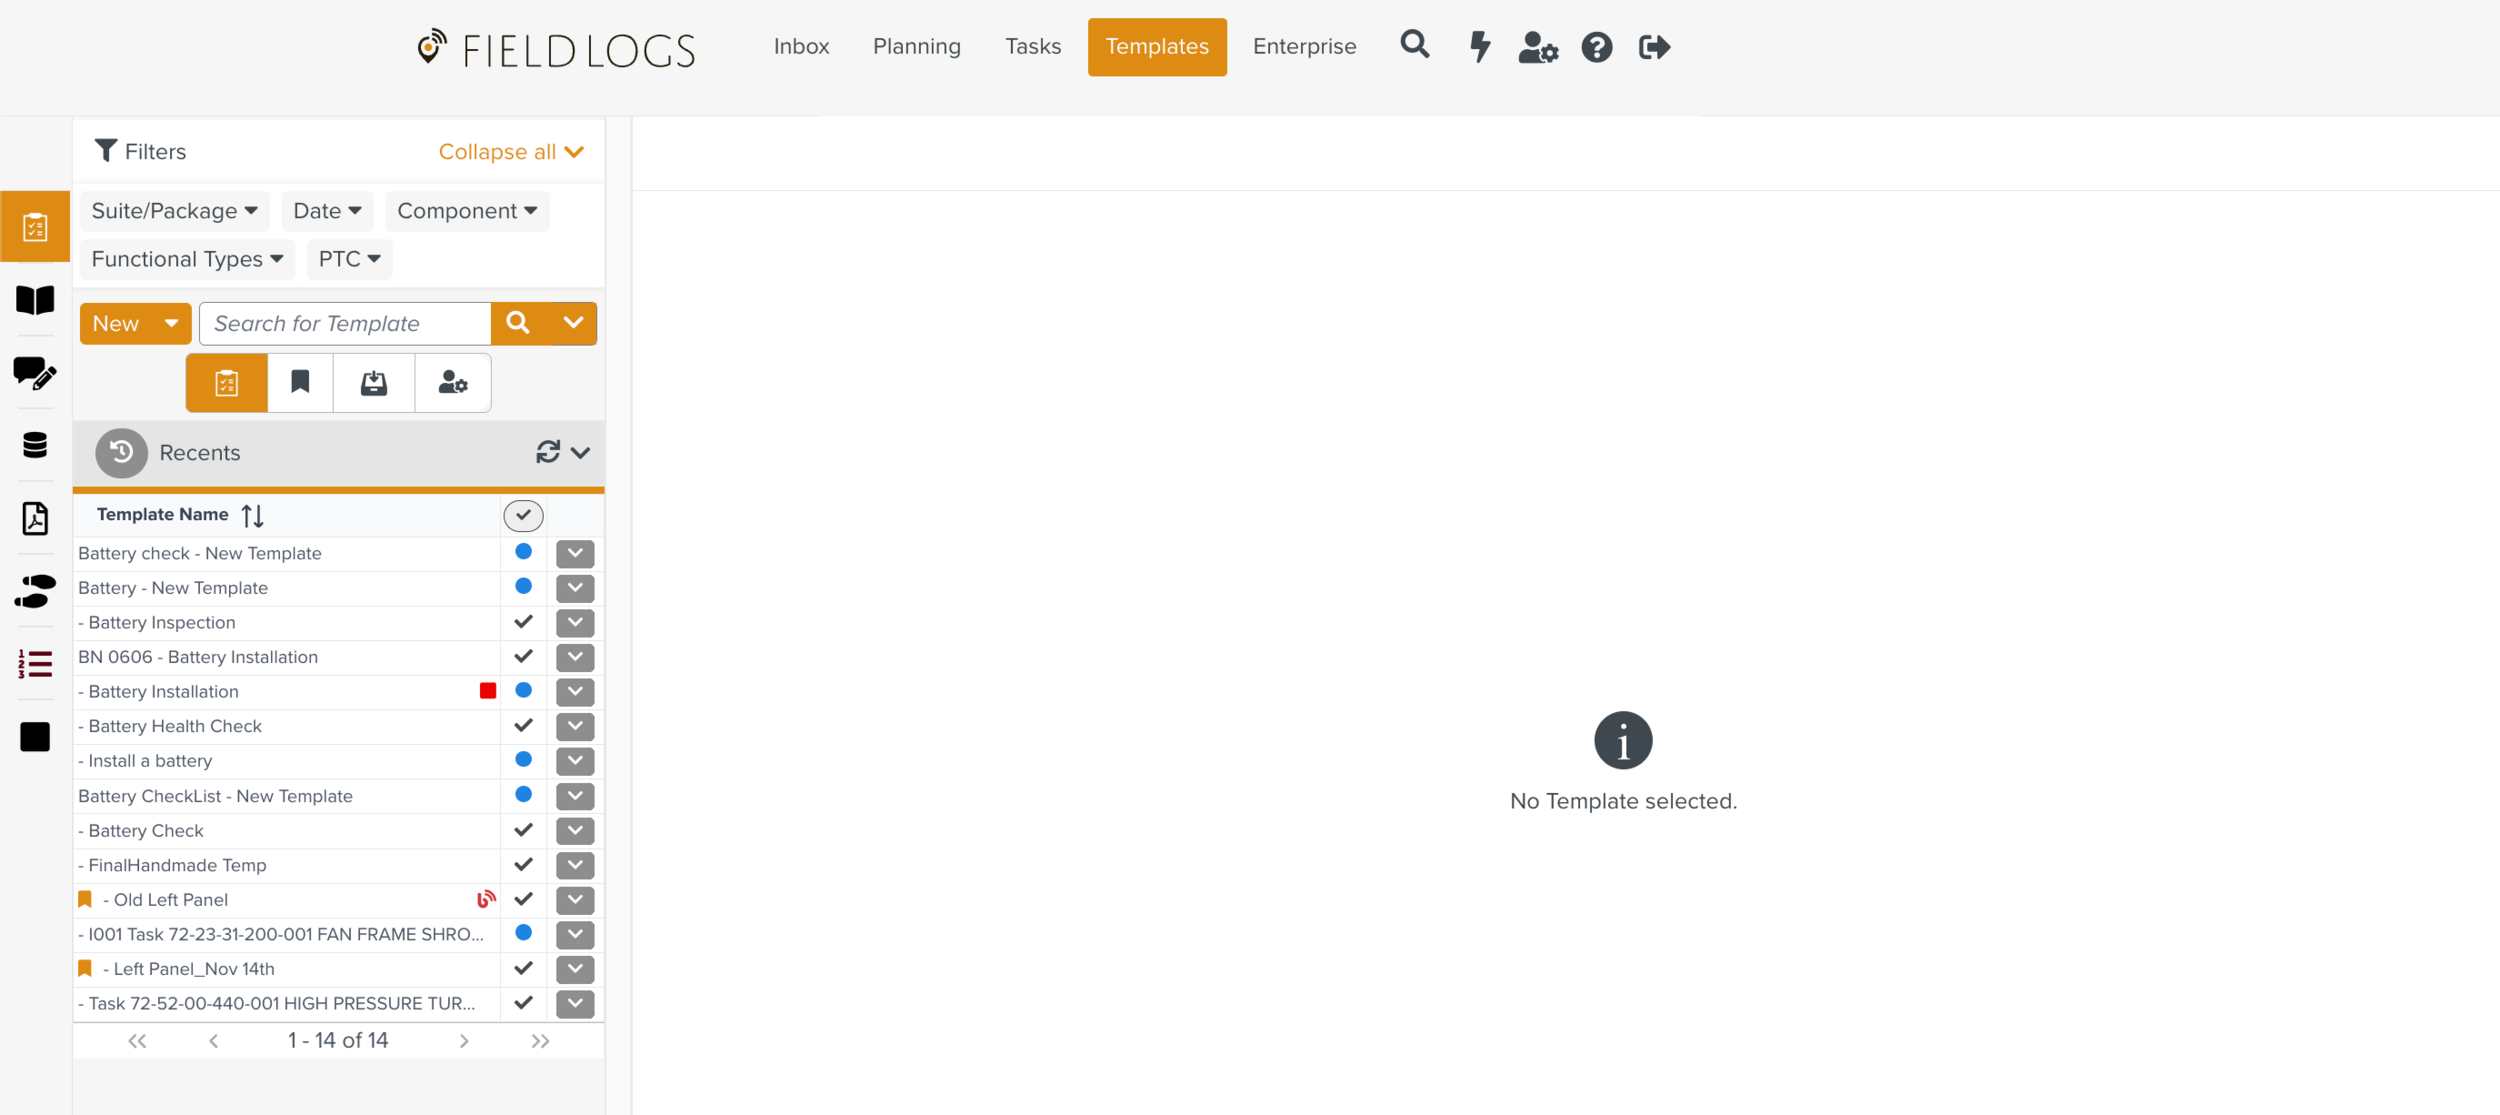
Select a Template to add Configuration.
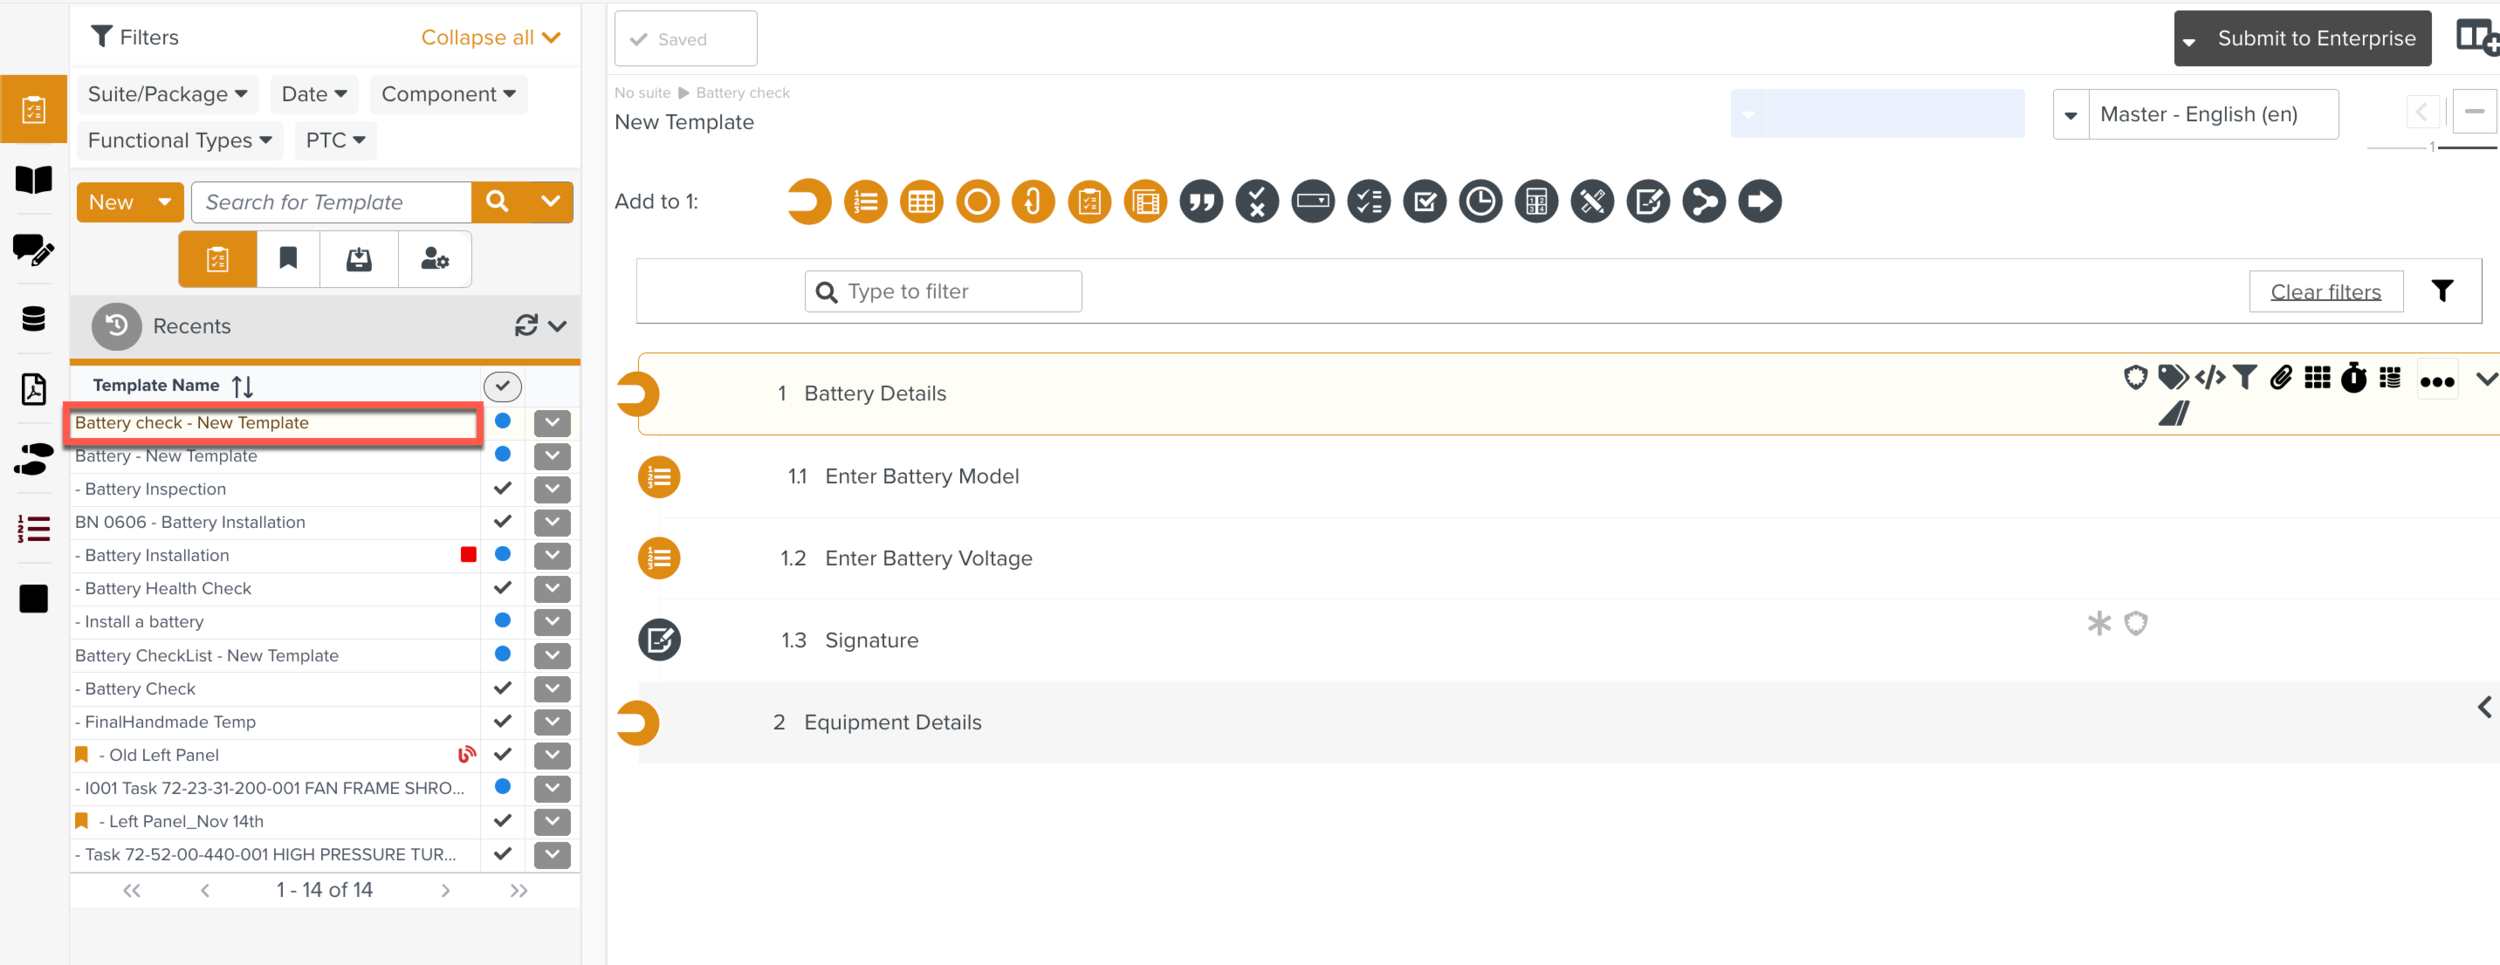
Click
 to open the Property pane settings.
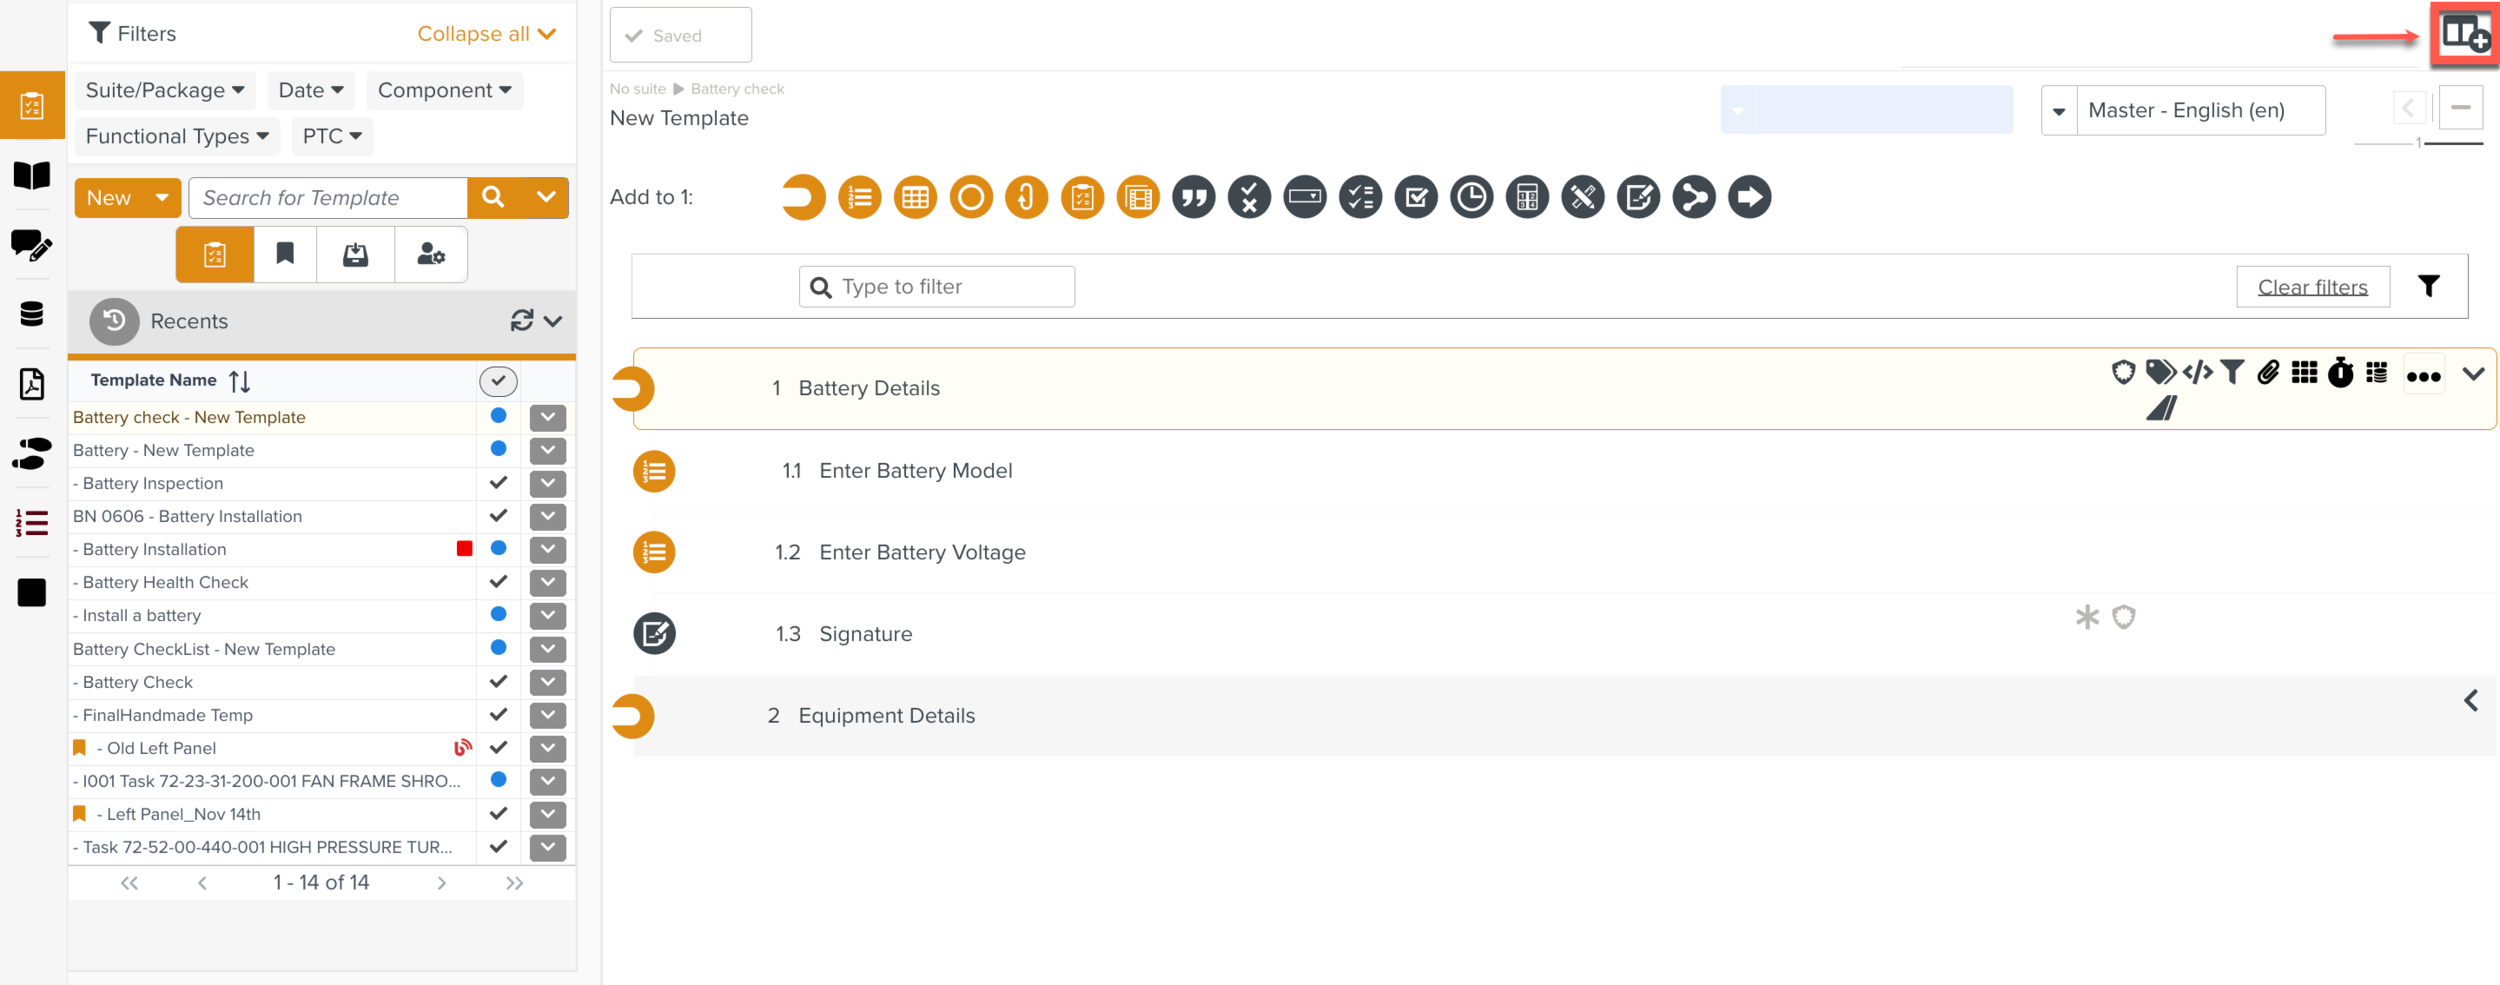
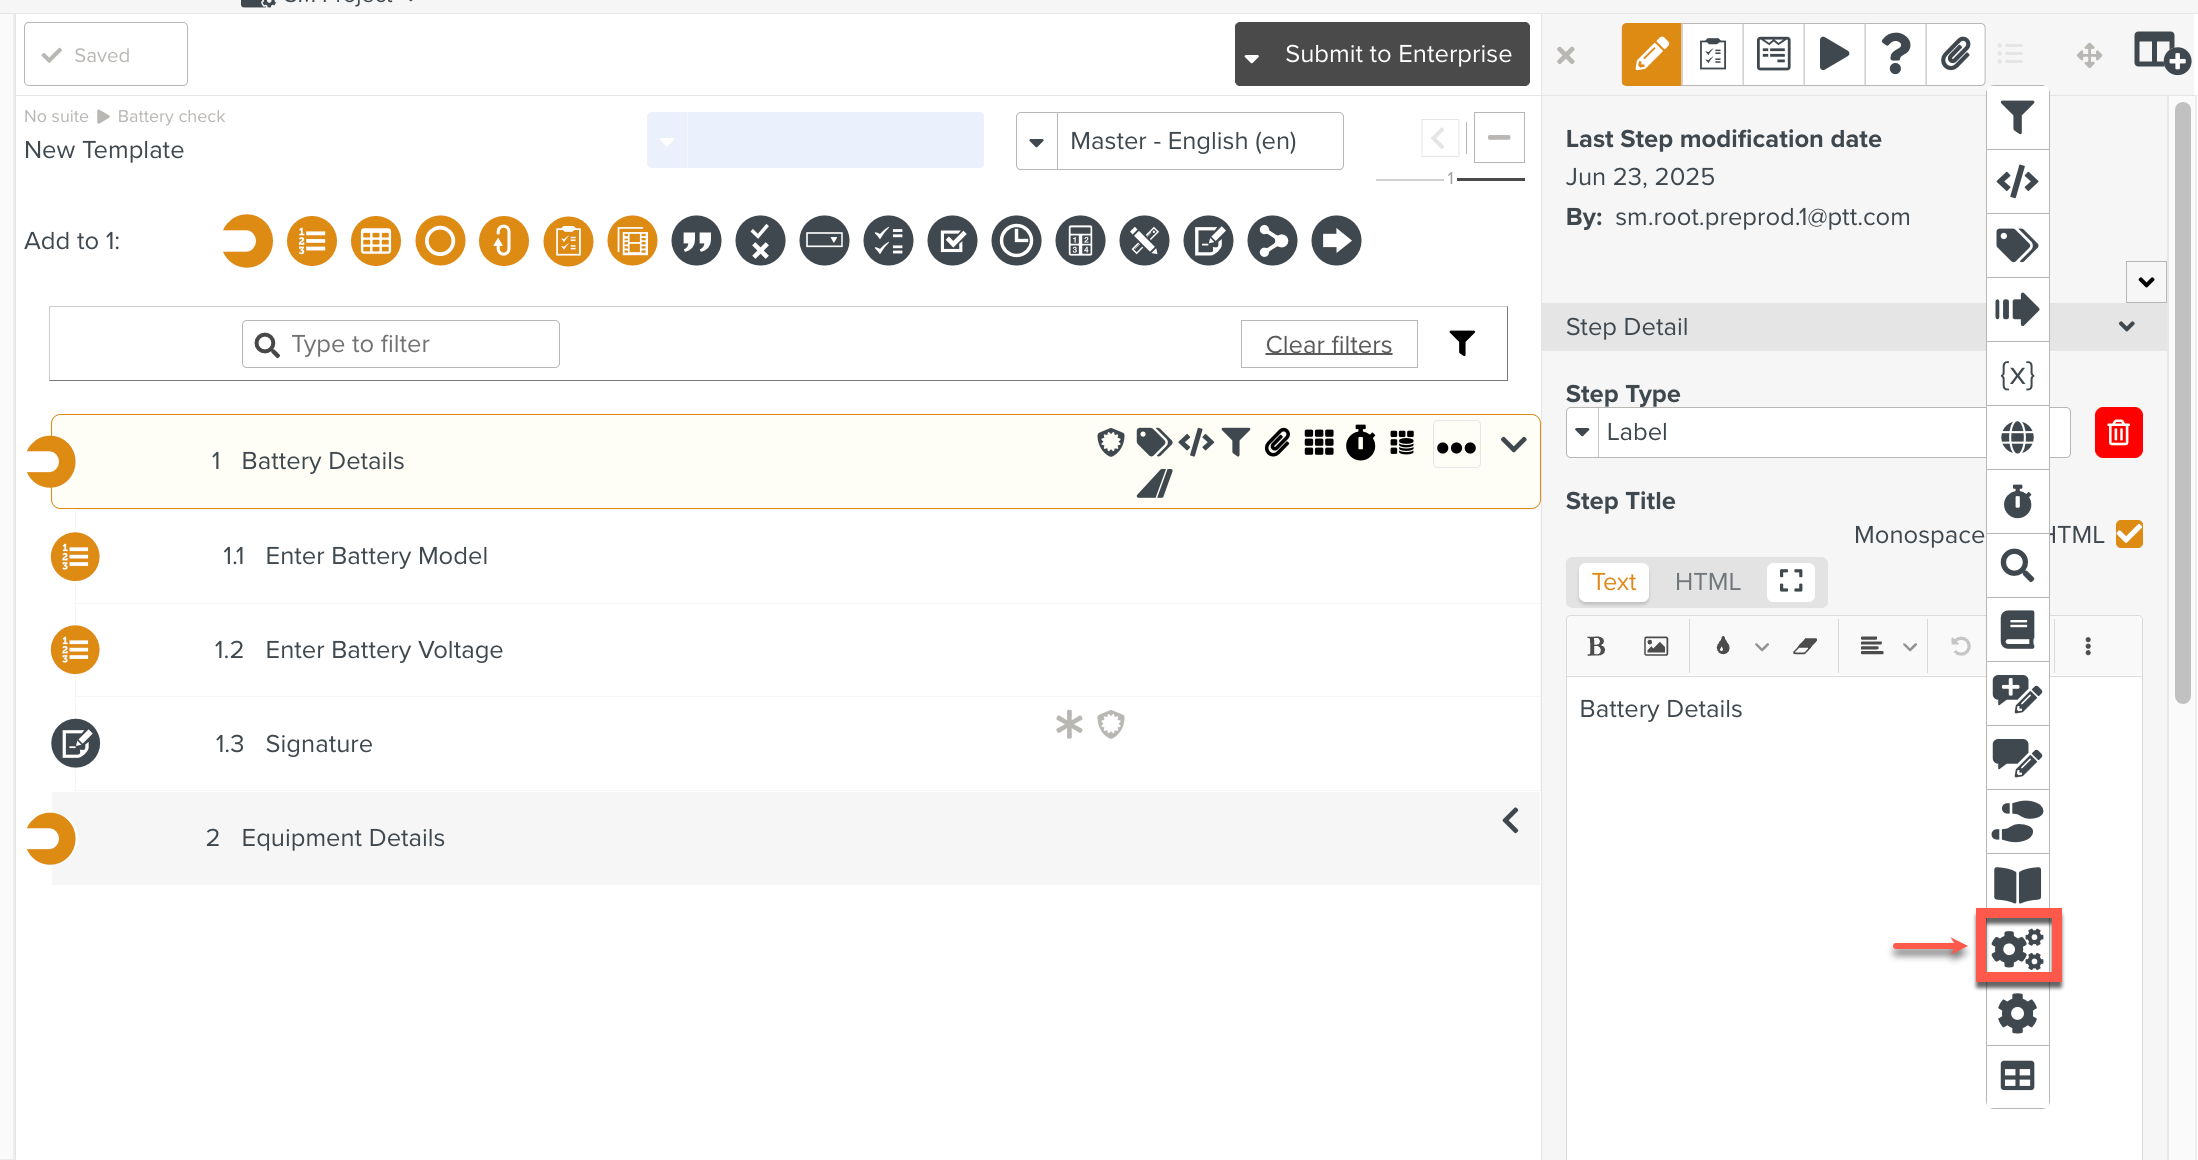
Click
 to open the Template settings.
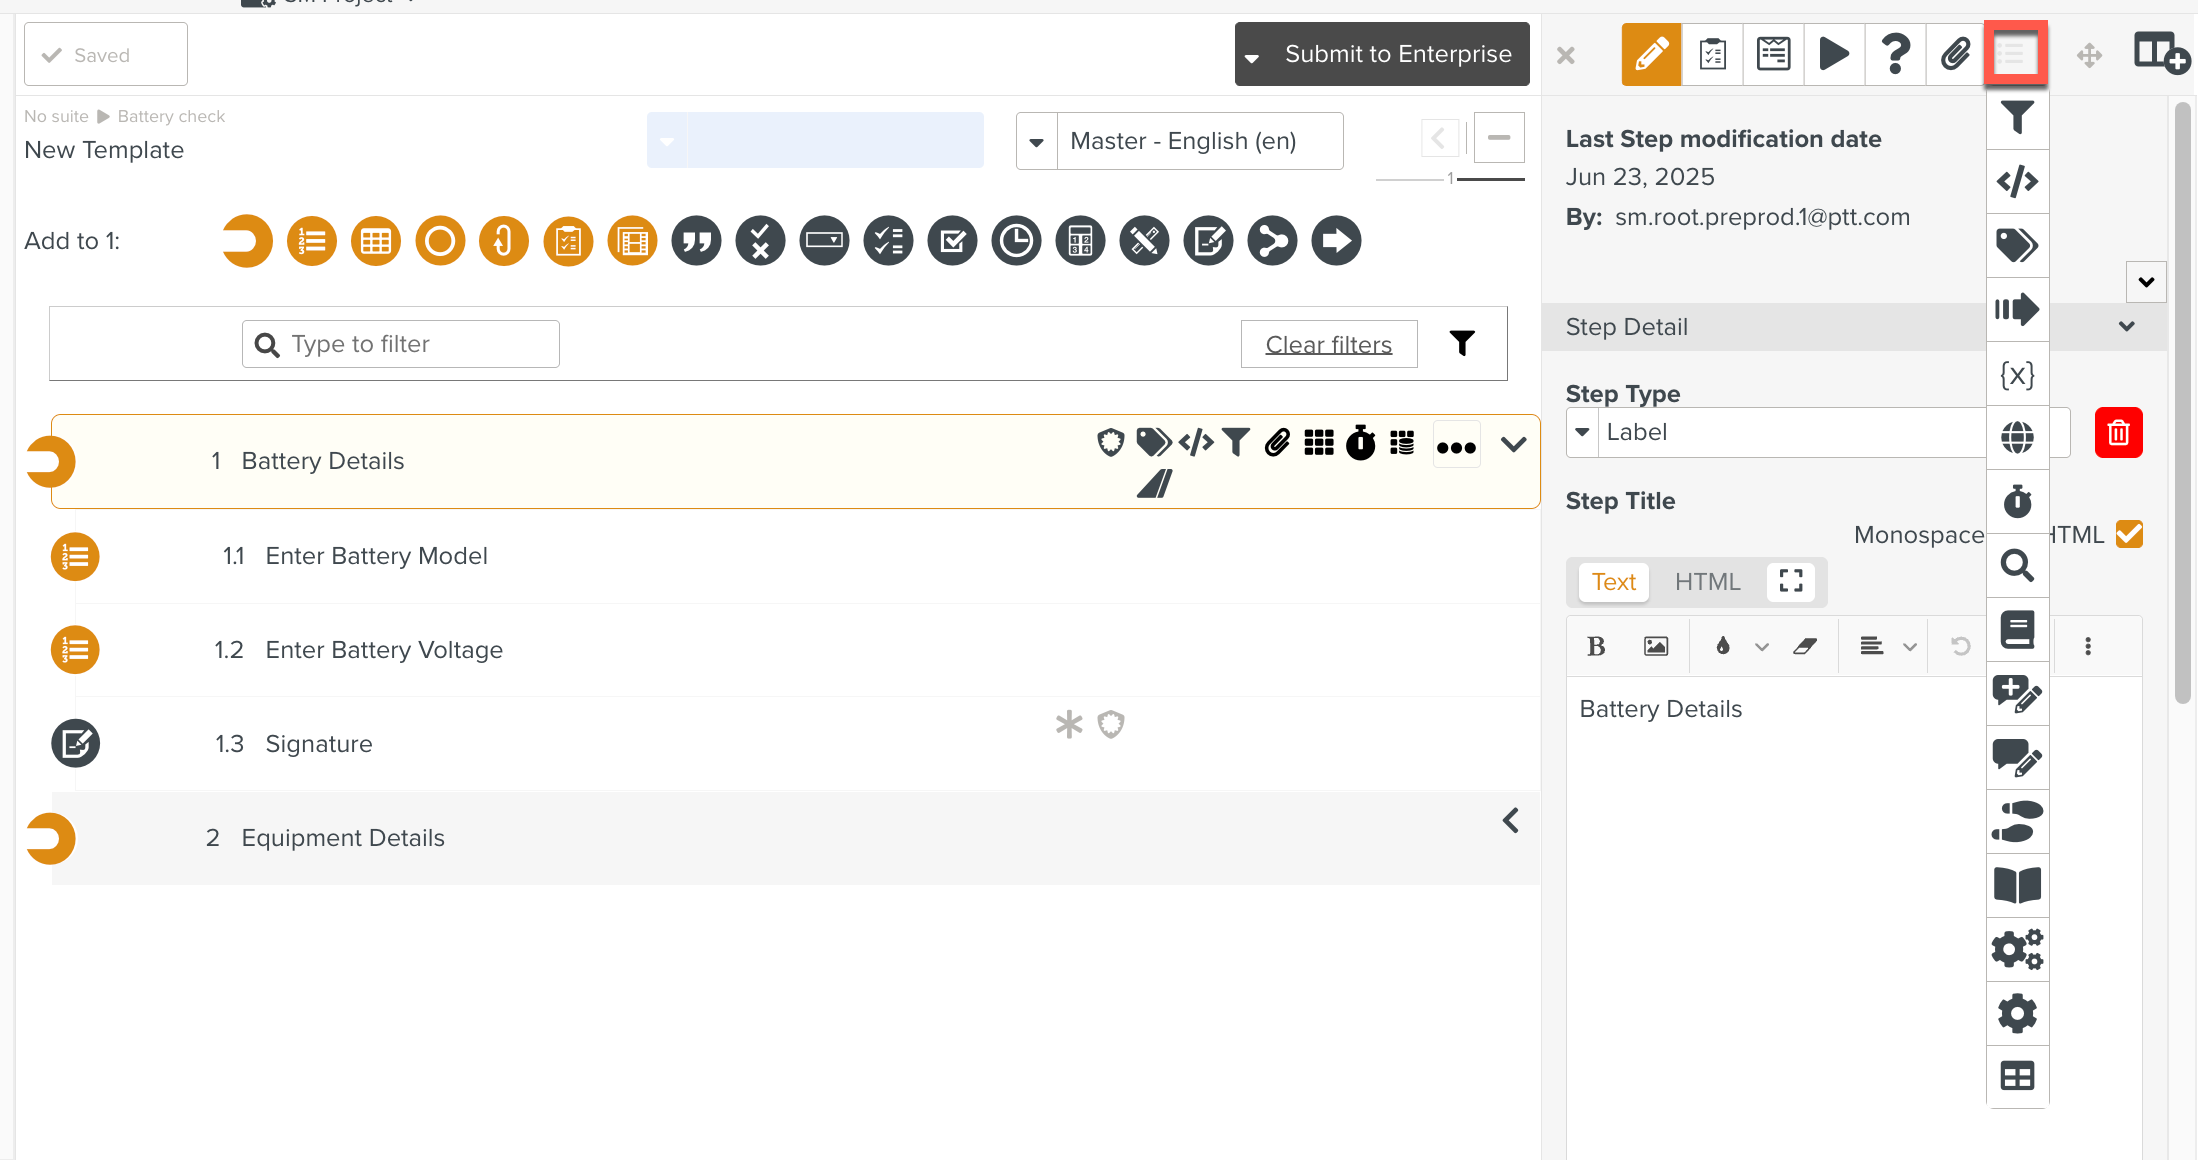
Select Configurations
 .
.
The section Configuration opens.
Click .
The Create Configuration dialog is displayed.
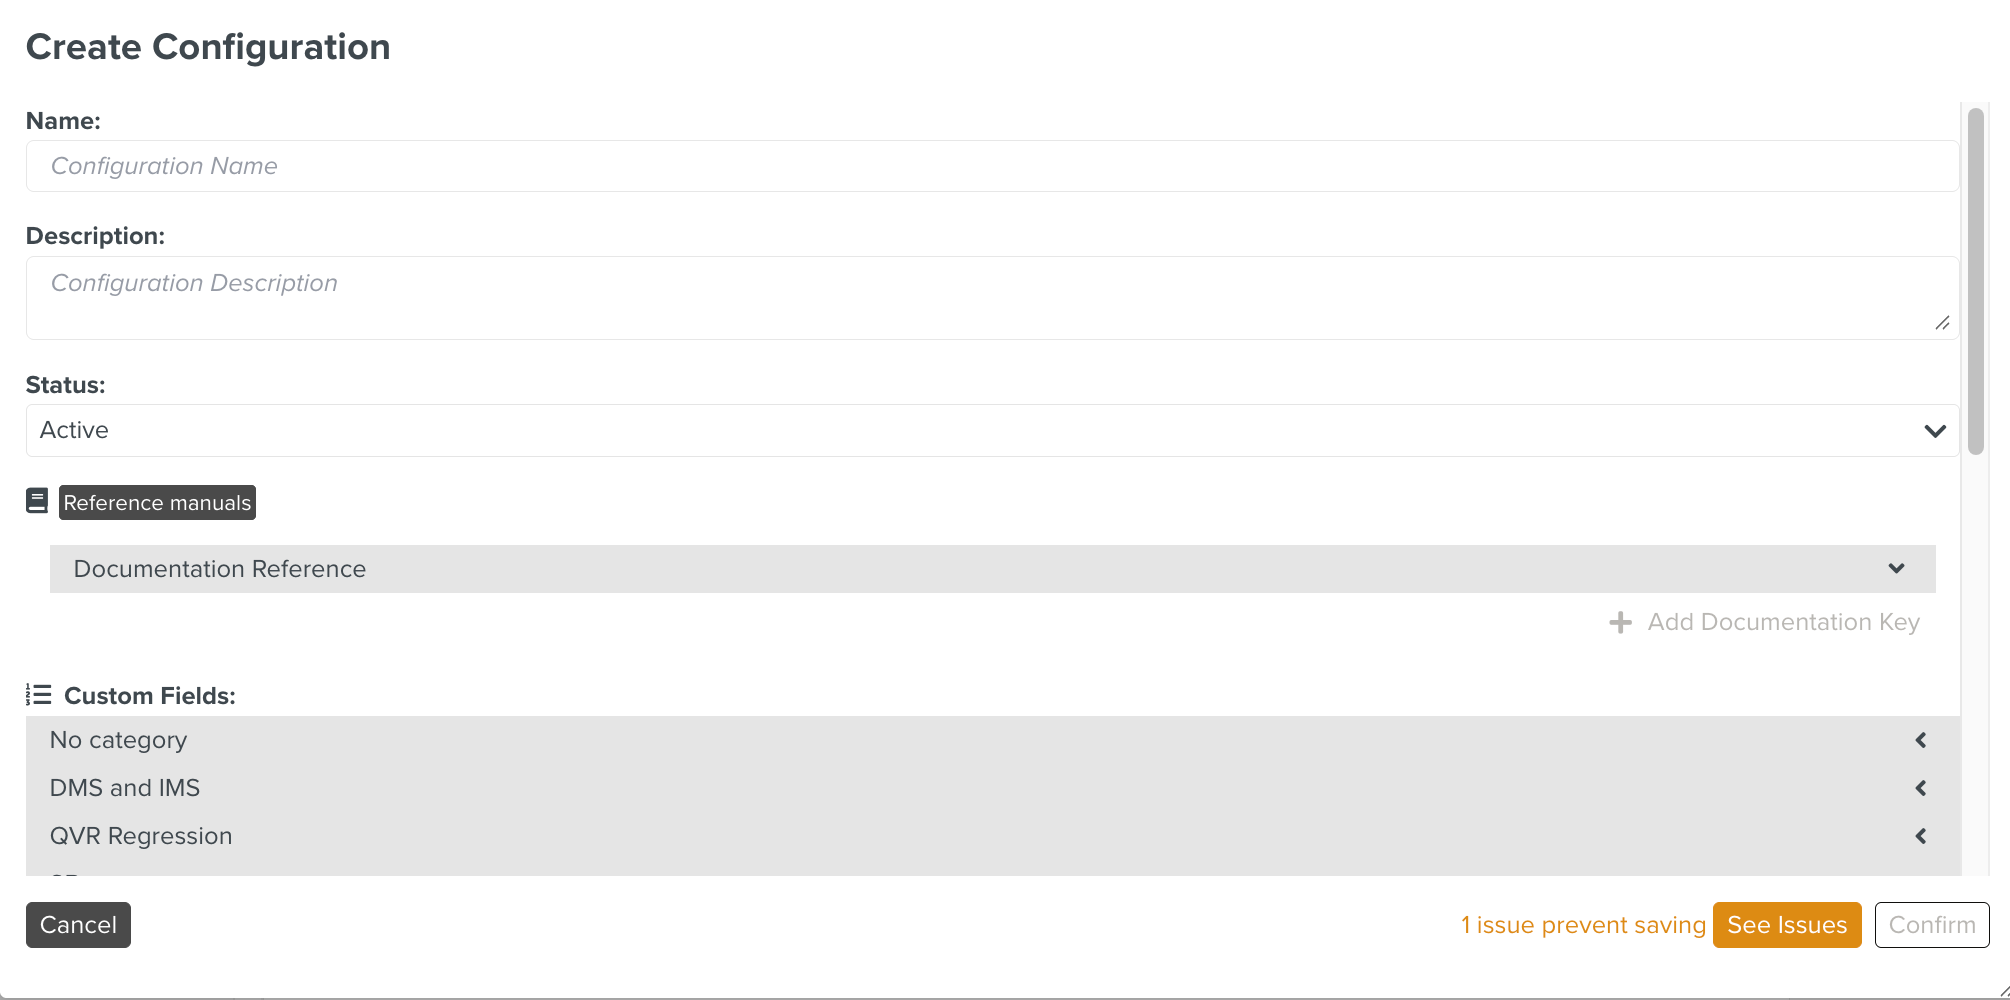
Add details in the following fields as shown below.
Field
Description
Name
Enter a name for the Configuration. This is a required field.
Description
If needed, enter a description for the Configuration.
Status
From the drop-down list, select or An Inactive Configuration will not be available for selection while Assigning a Task.
Reference manuals
Click Add Documentation Key to add Documentation Reference details.
Custom Fields
If needed, add Custom Fields to a Configuration.
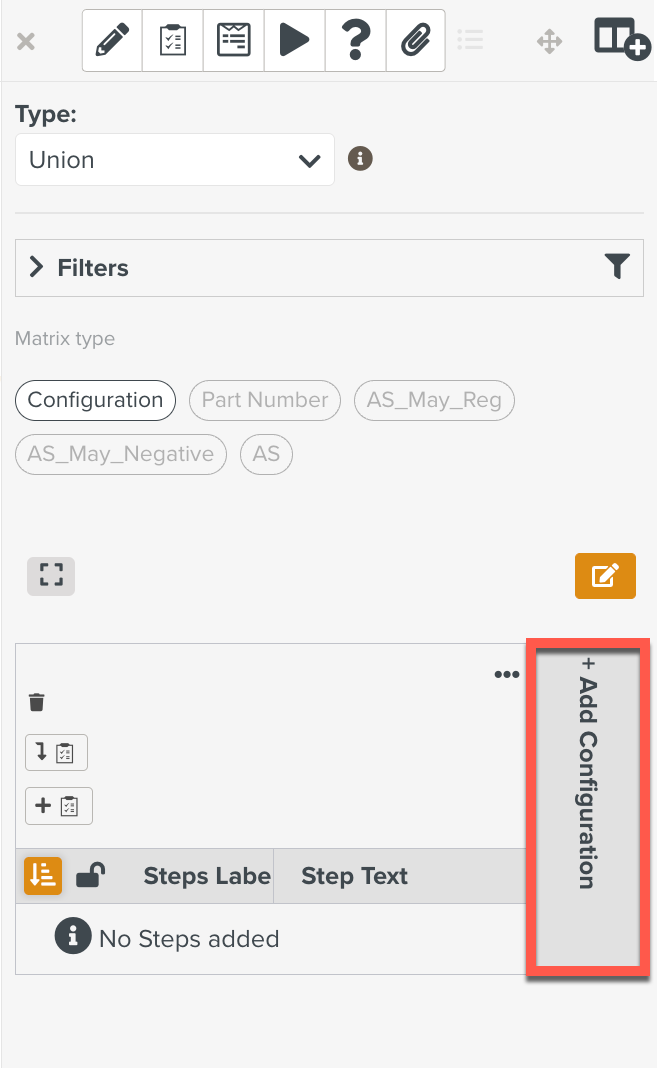
Click .
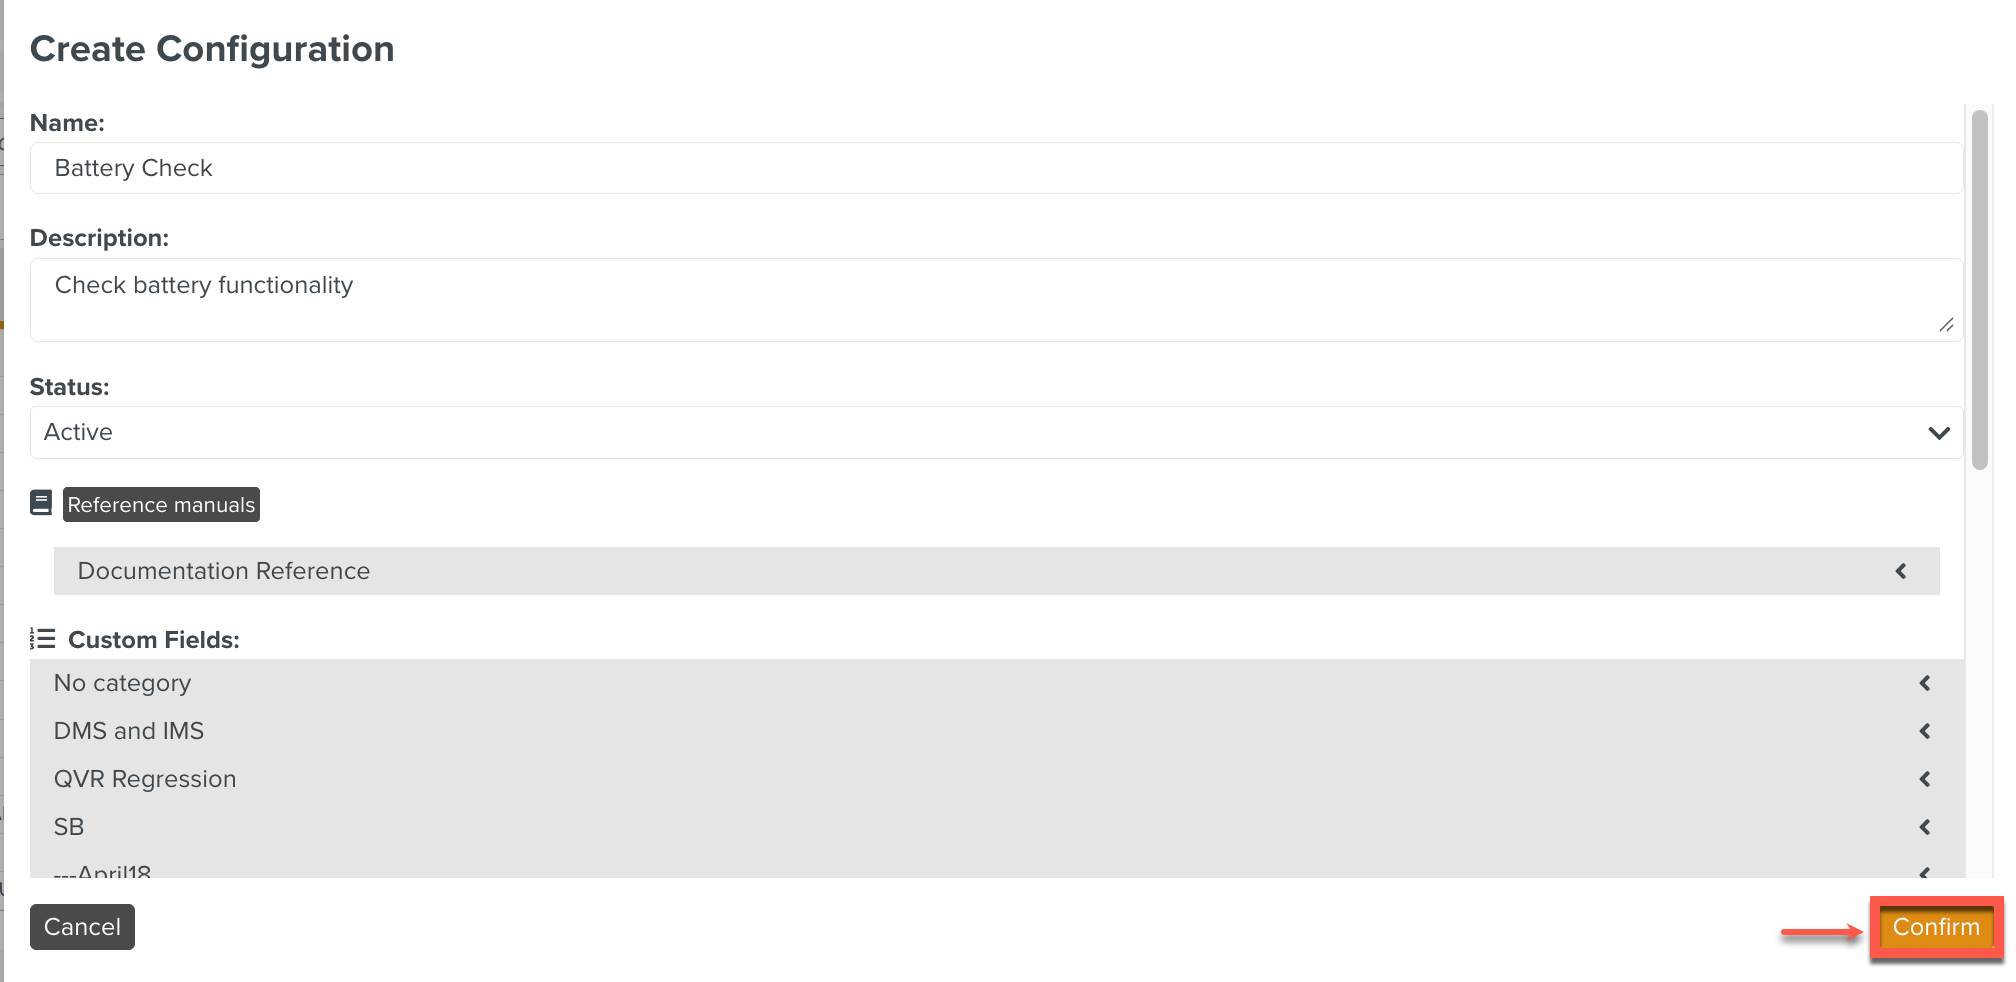
The Configuration is added.
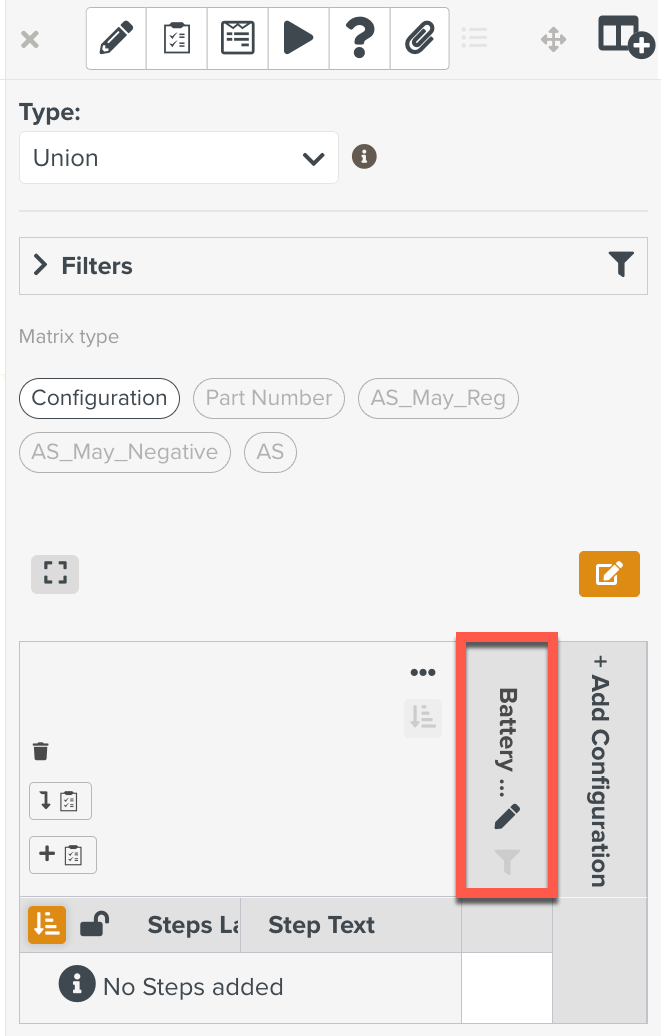
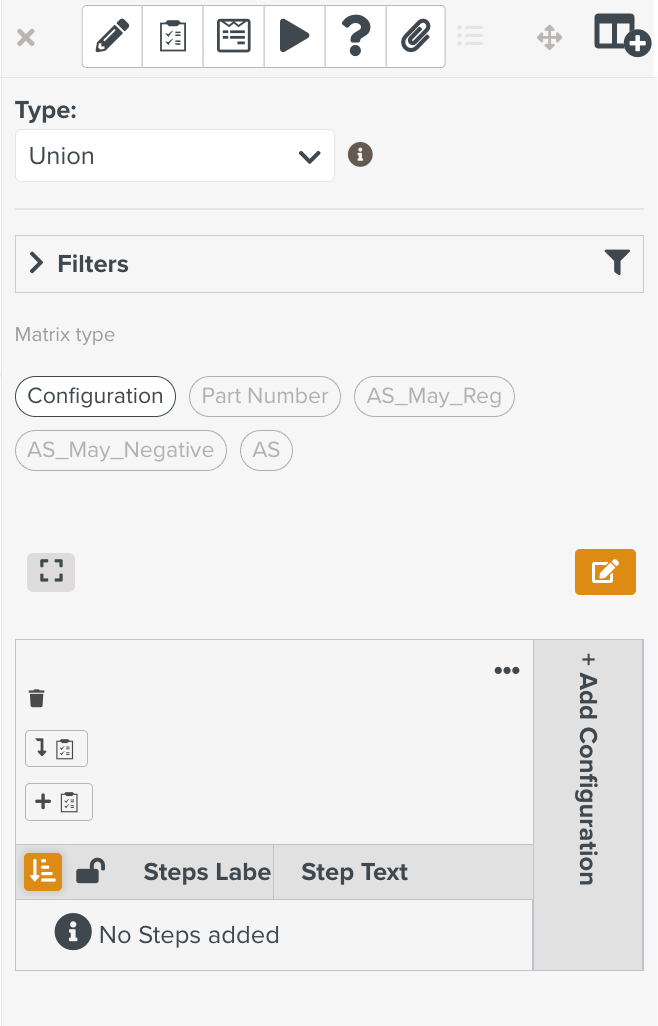
Click
 to maximize the Configuration panel.
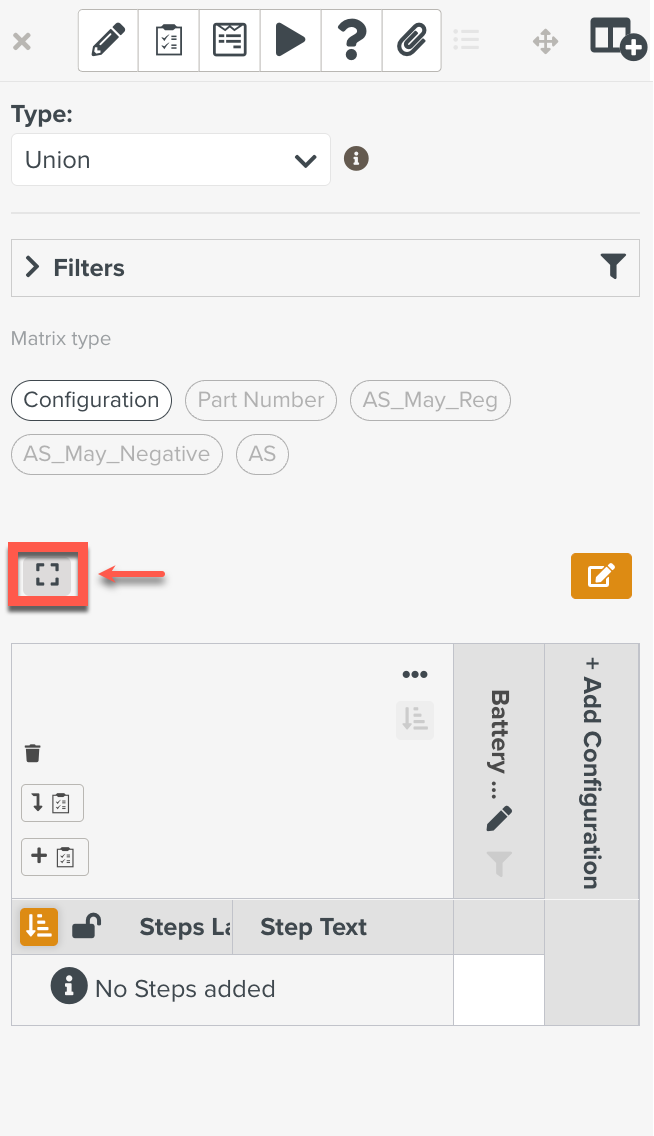
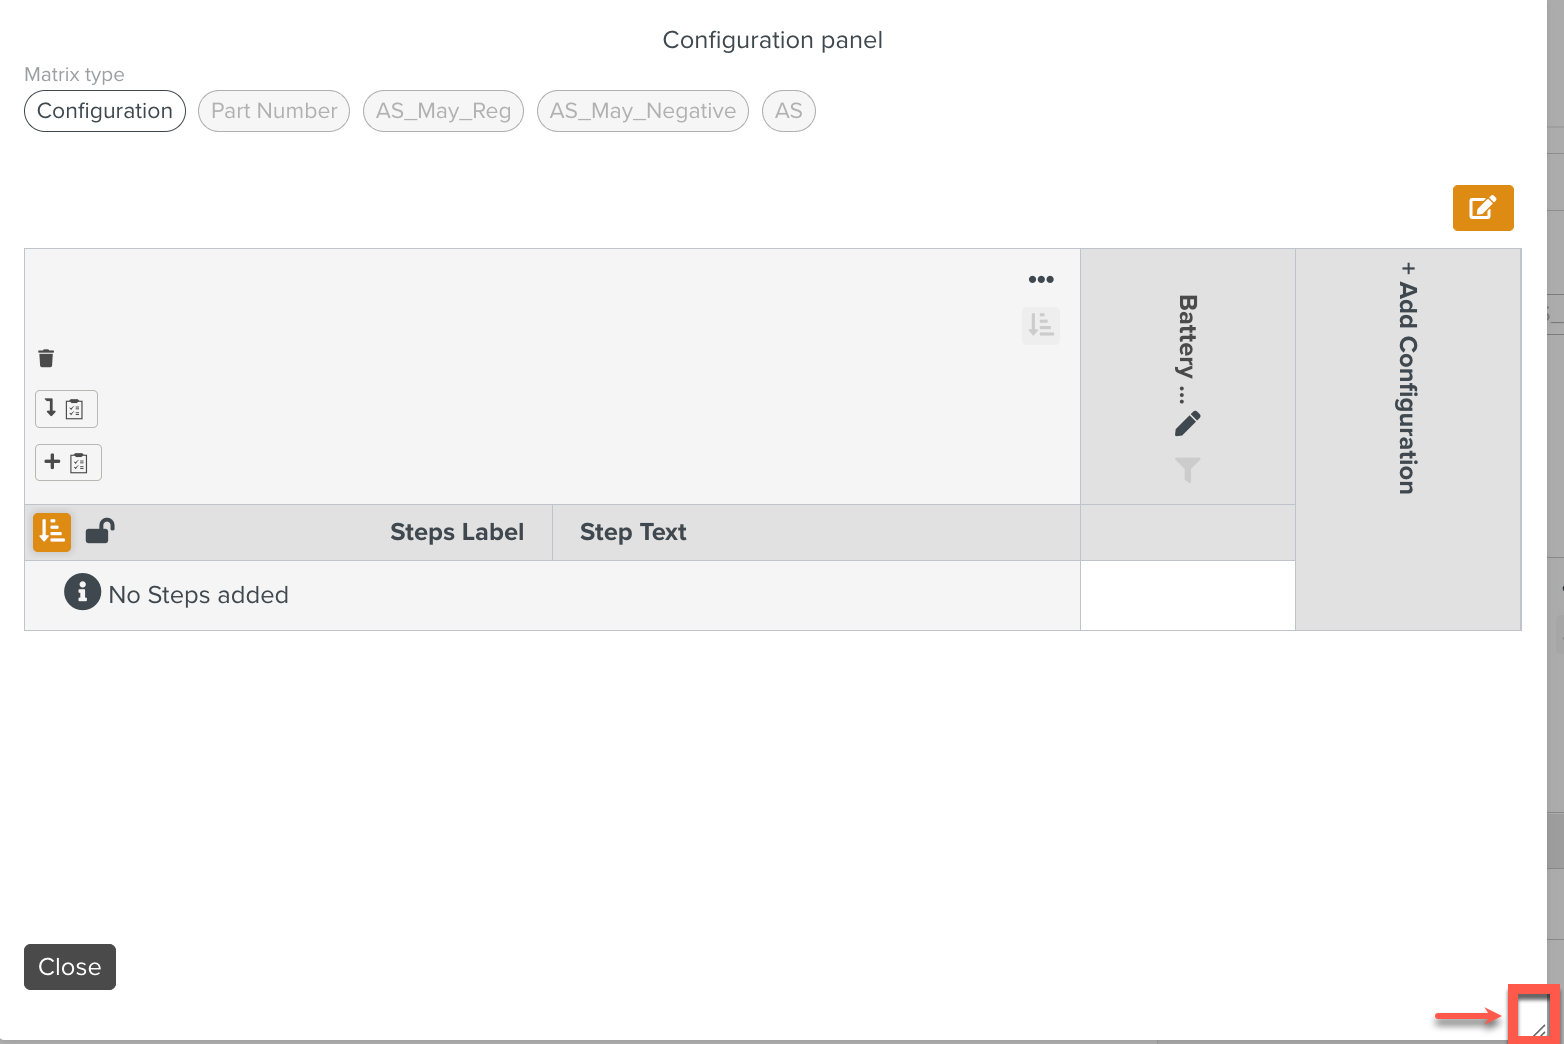
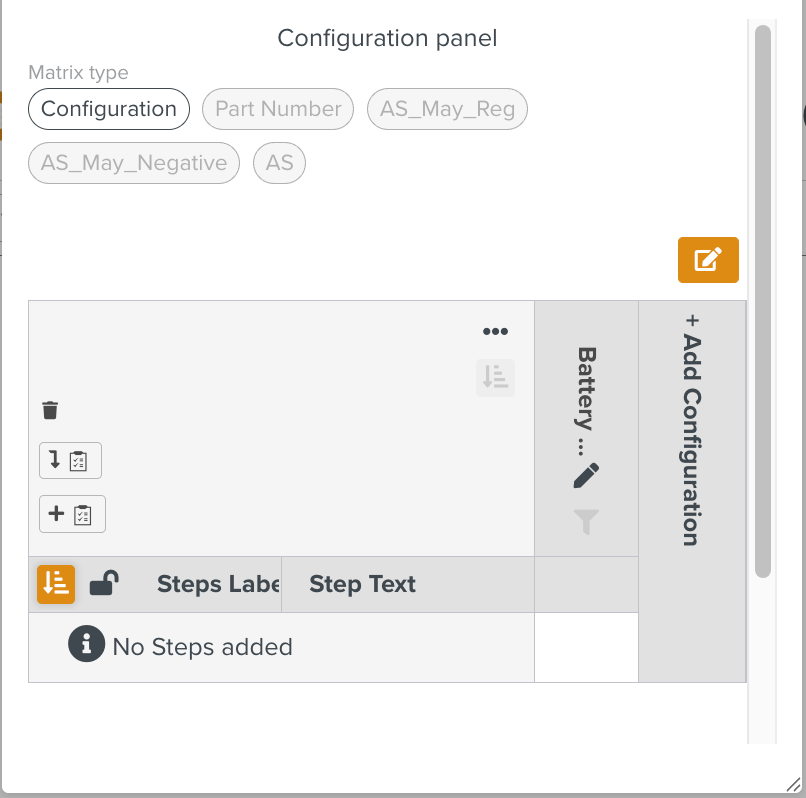
The Configuration panel is displayed.
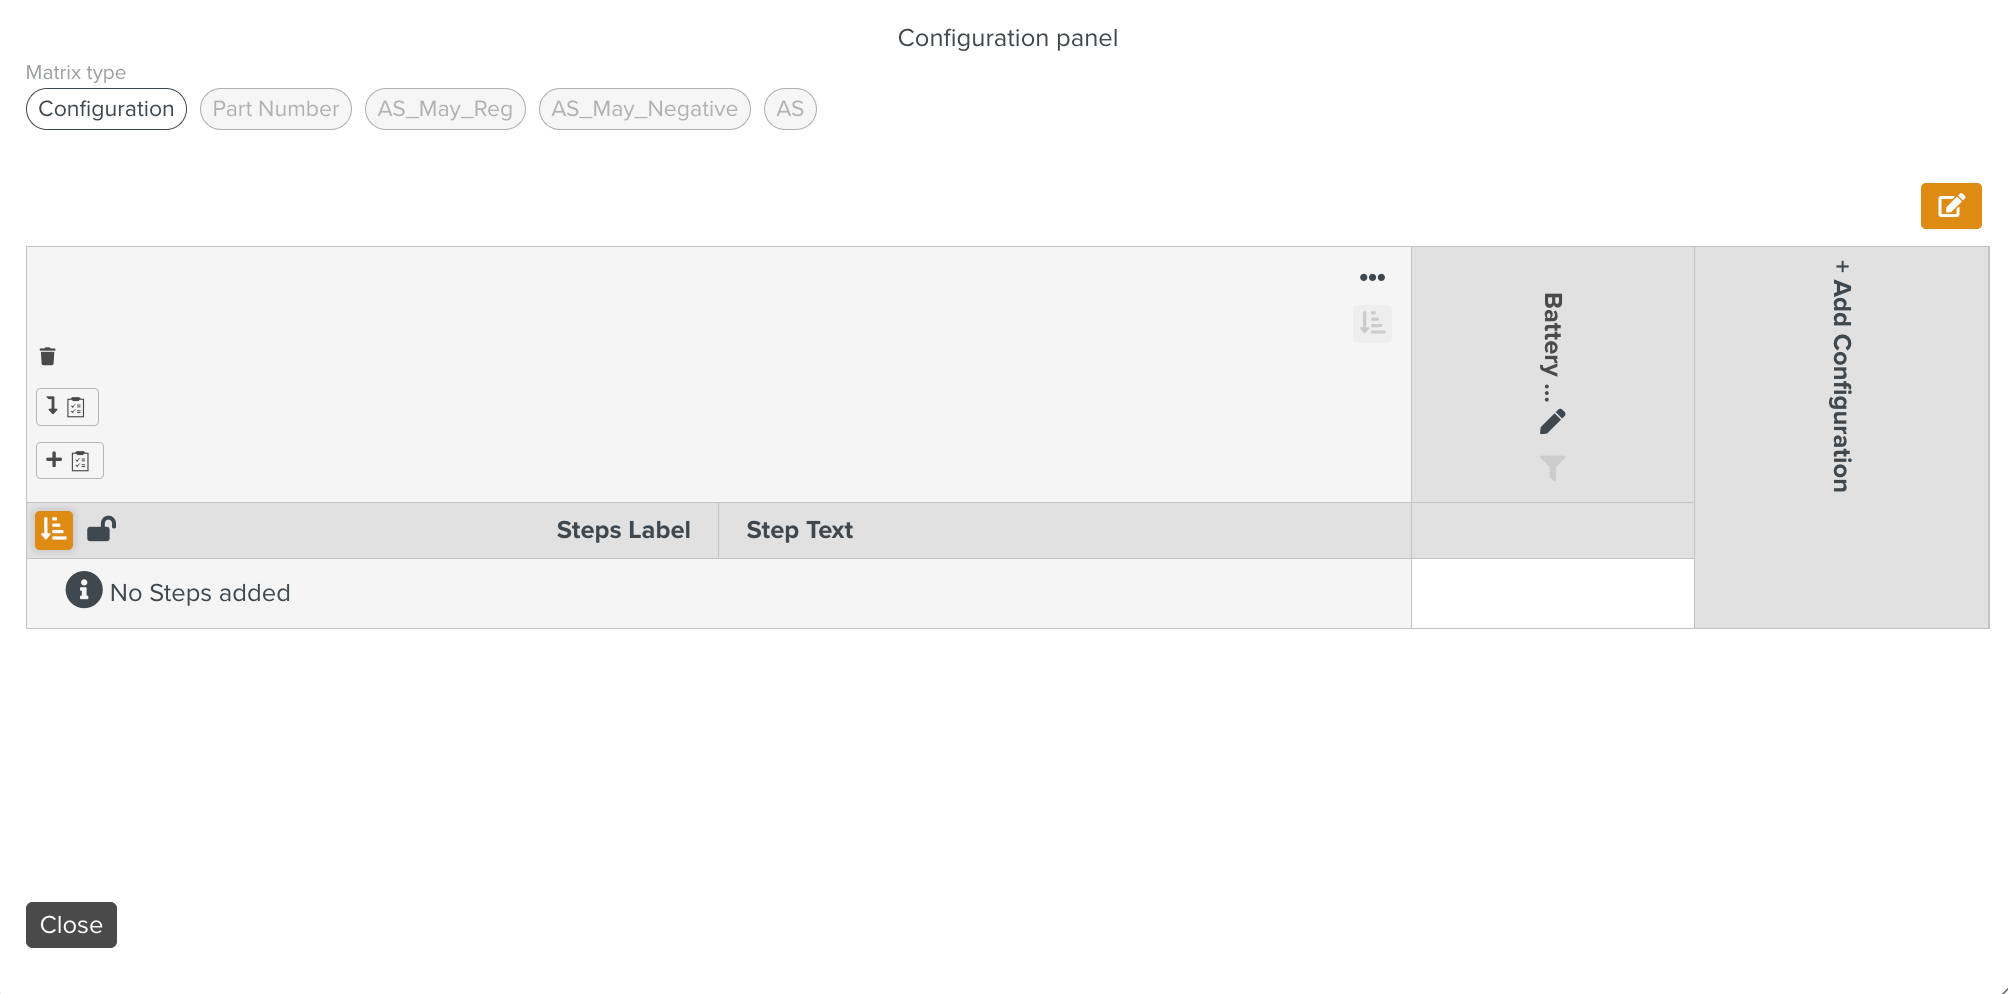
Drag the corner to resize the Configuration panel as shown below.
A Part Number can be included in multiple Configurations and a Configuration can include multiple Part Numbers.
Important
Part Numbers are available for selection in the Configuration section only if they have been added in the PTC section of the Template's Information Editor.
To select Part Numbers:
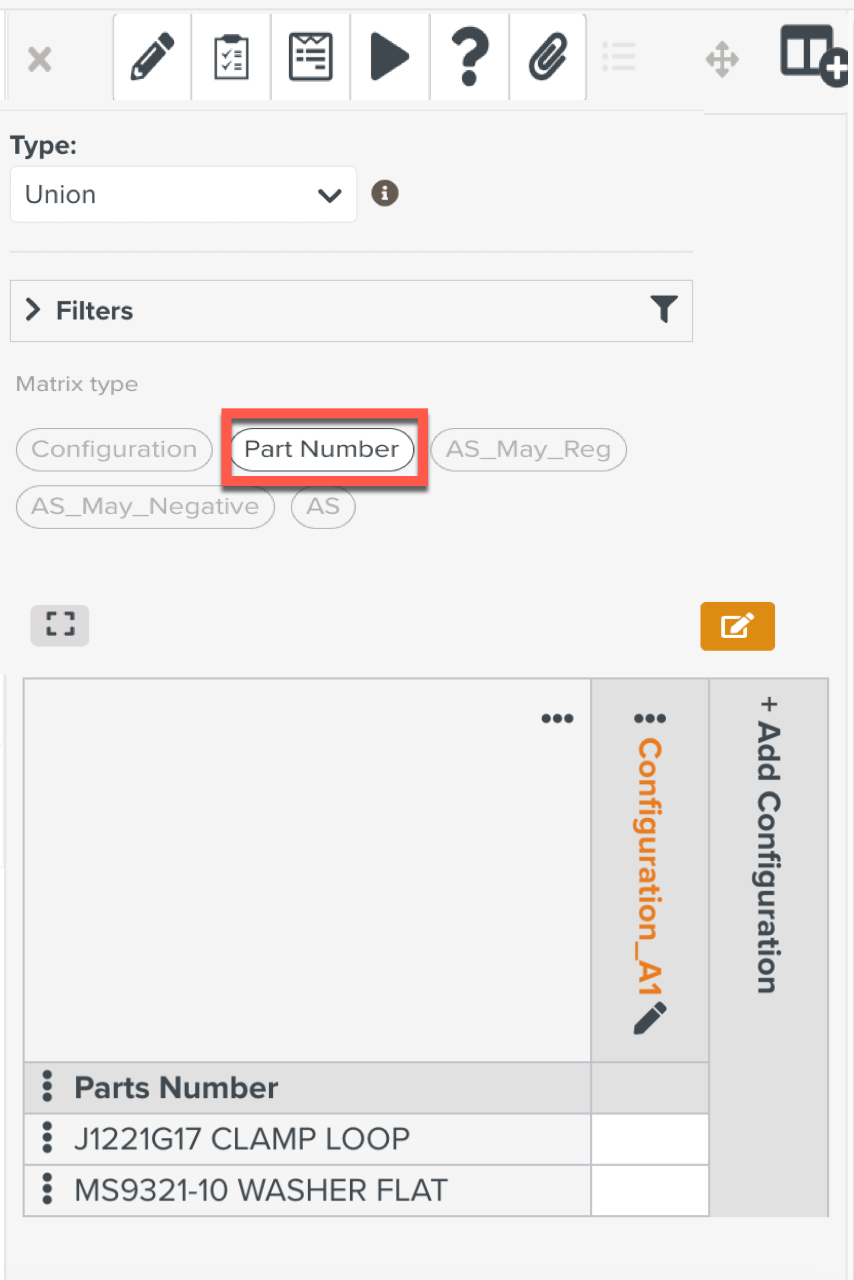
Select the Matrix type as shown below.
Click
 to edit the matrix.
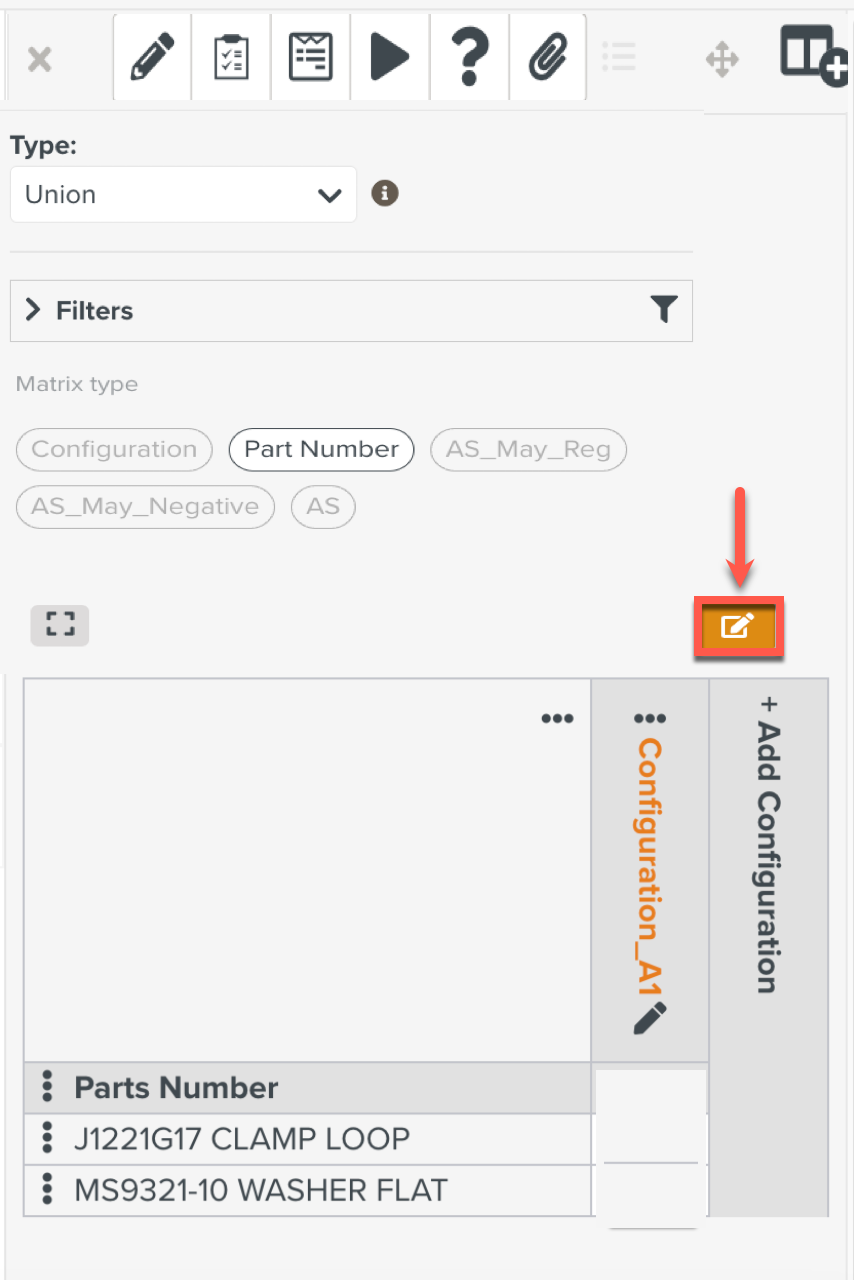
Select the cells corresponding to the Part Number.
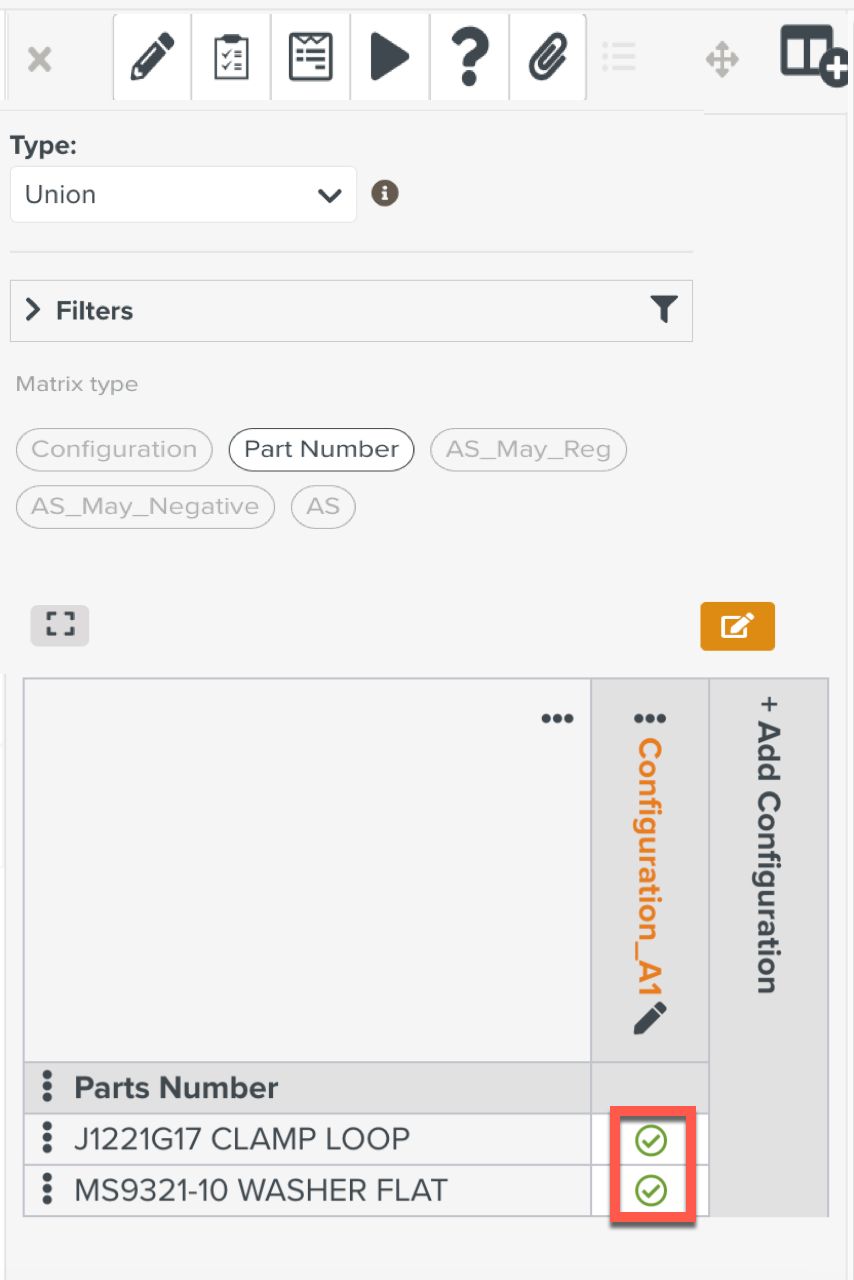
The Part number has been associated with the Configuration.
In the above example, Part Number J1221G17 CLAMP LOOP and MS9321-10 WASHER FLAT are now associated with Configuration_A1.
Click the cell to dissociate the Part Number from the Configuration.
You can select Steps for the Configuration after adding them to the matrix.
A Step can be included in multiple Configurations and a Configuration can include multiple Steps.
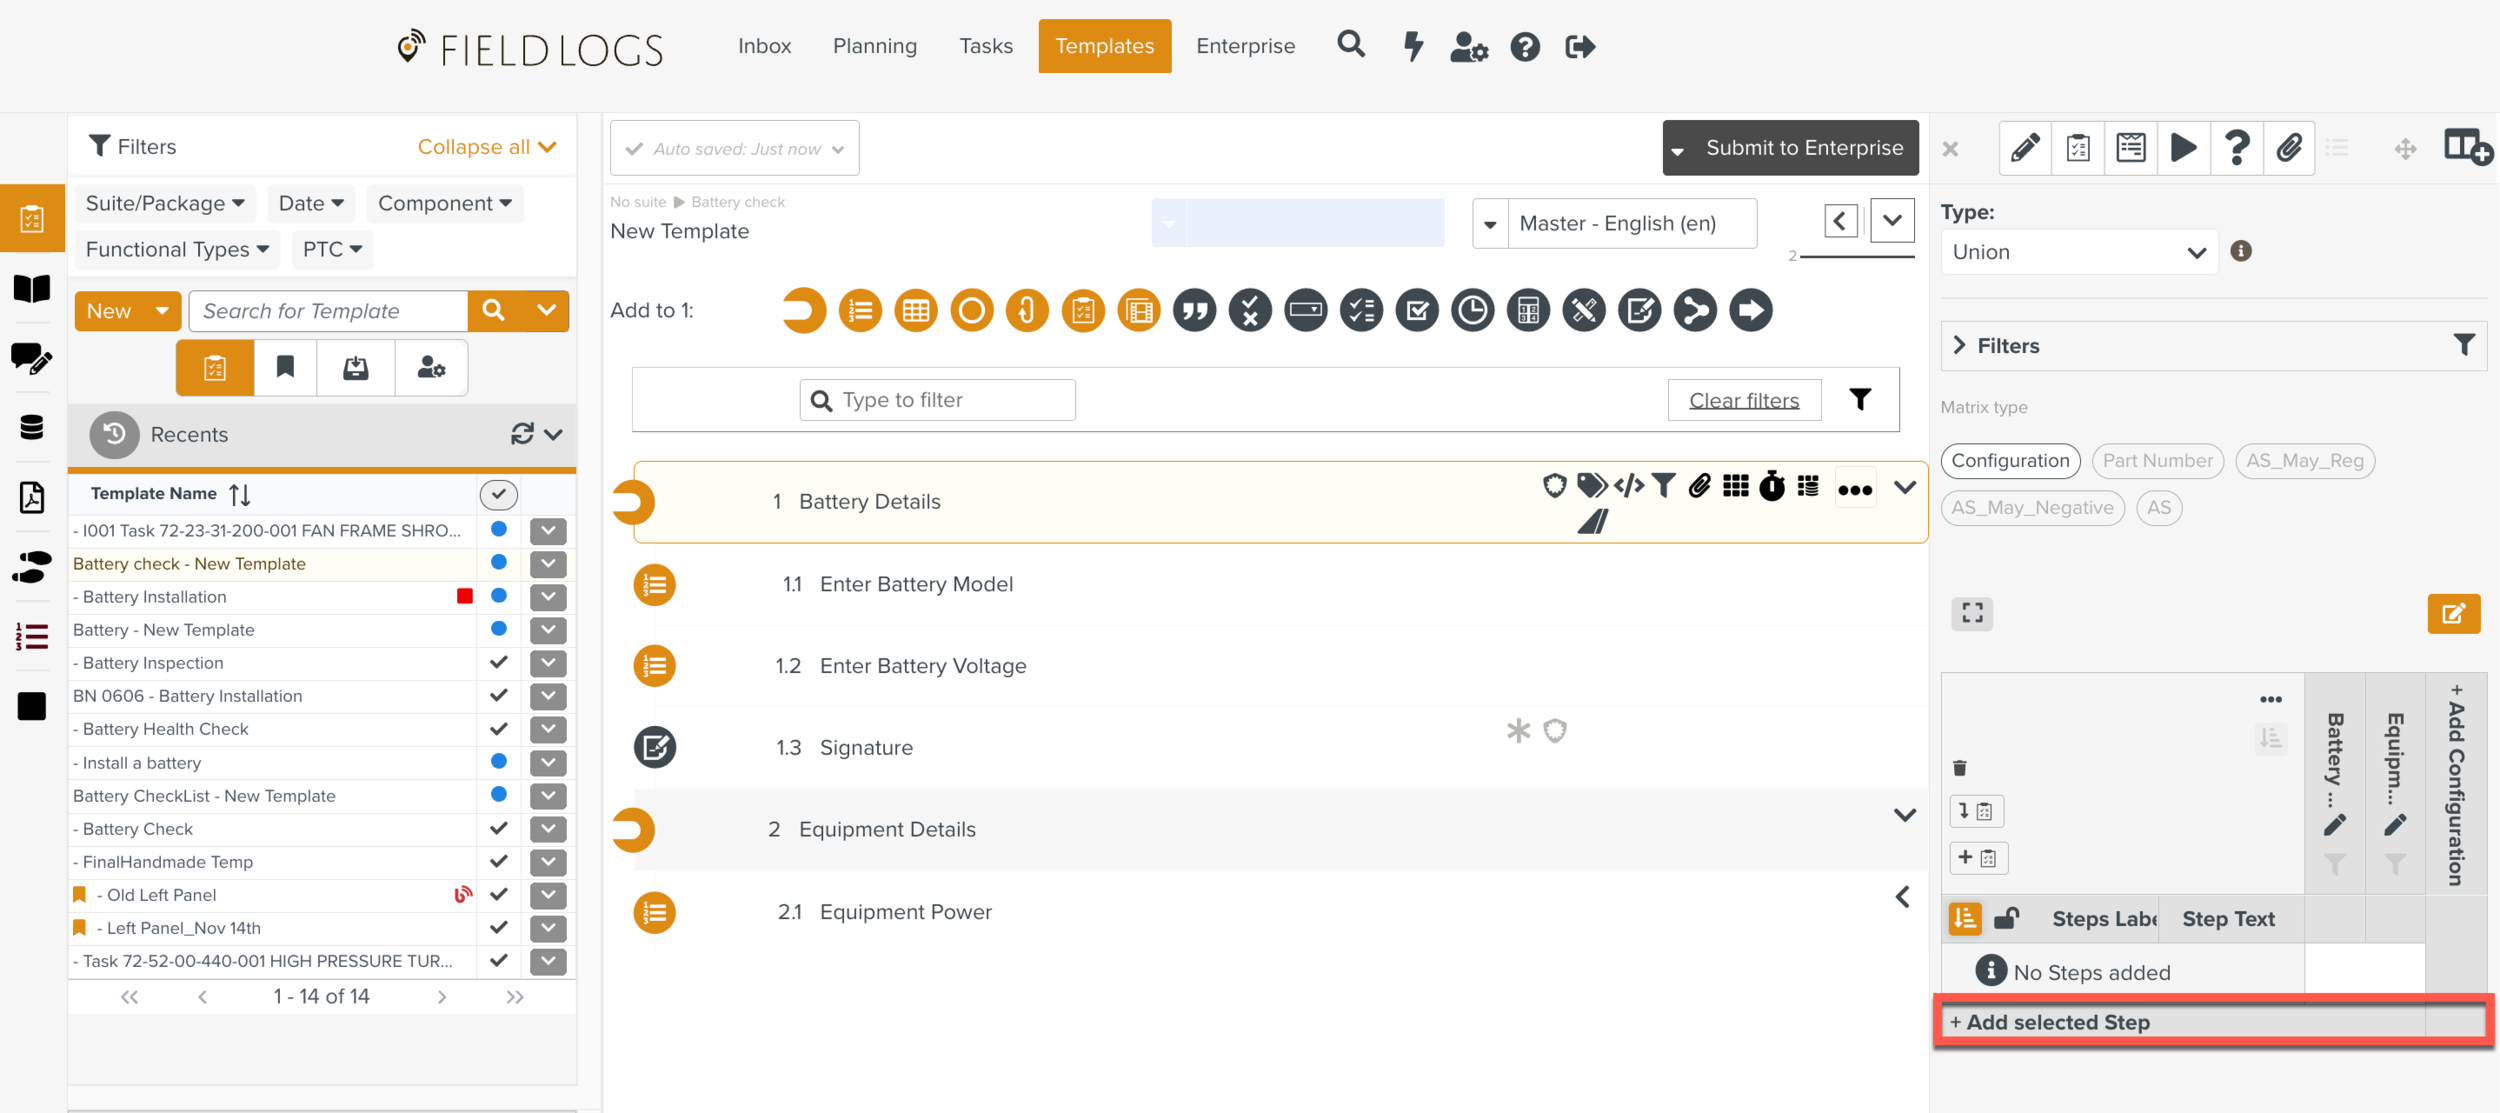
To add and select Steps:
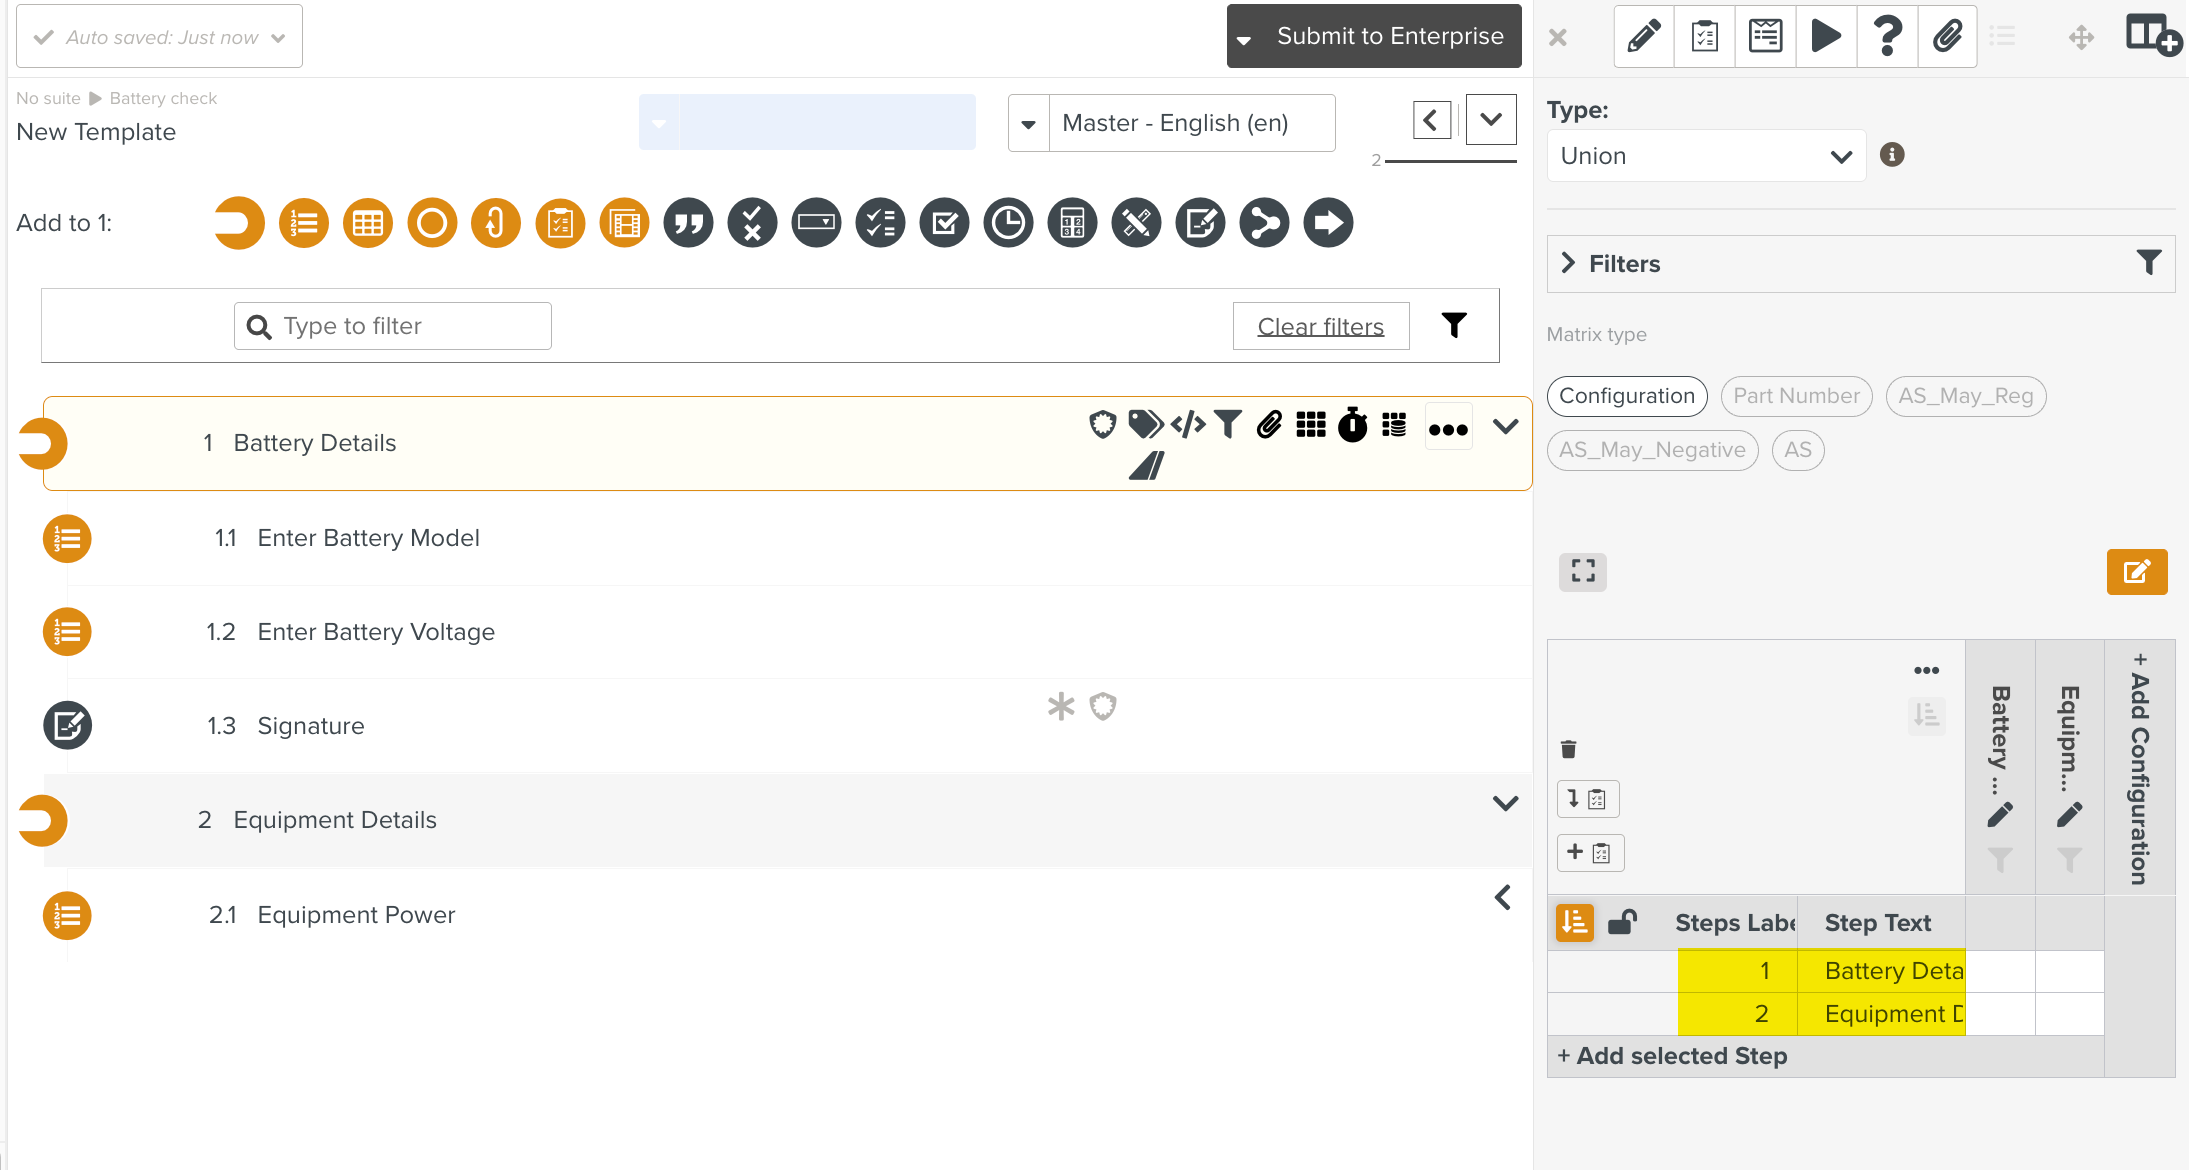
To add a specific Step, select the Step in the Workspace pane, and click .
[Optional] Click
 to .
to .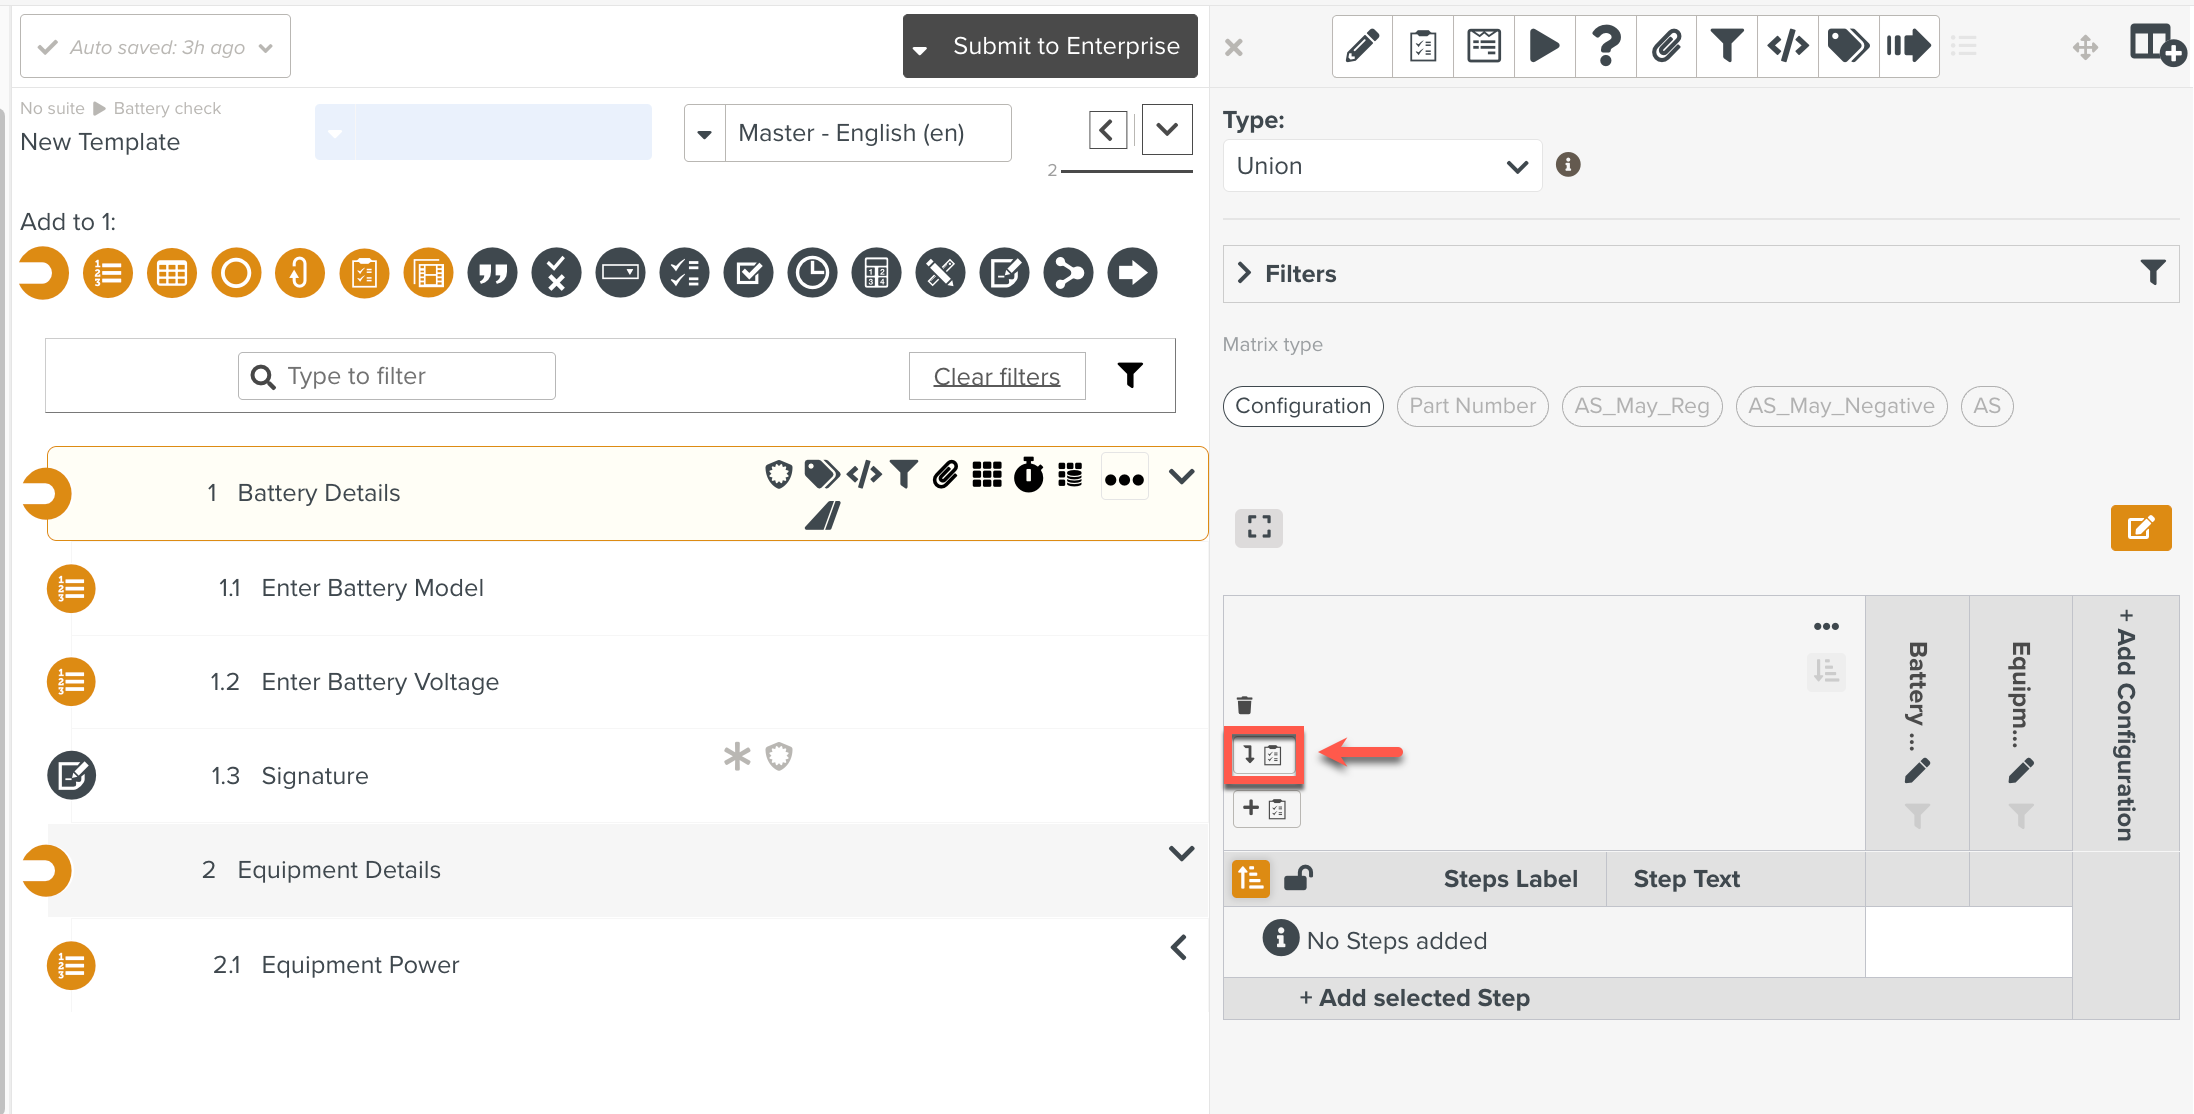
Clicking will not remove any child Steps that were already added.
A confirmation dialog is displayed.

The Level 1 Steps are added to the Configuration
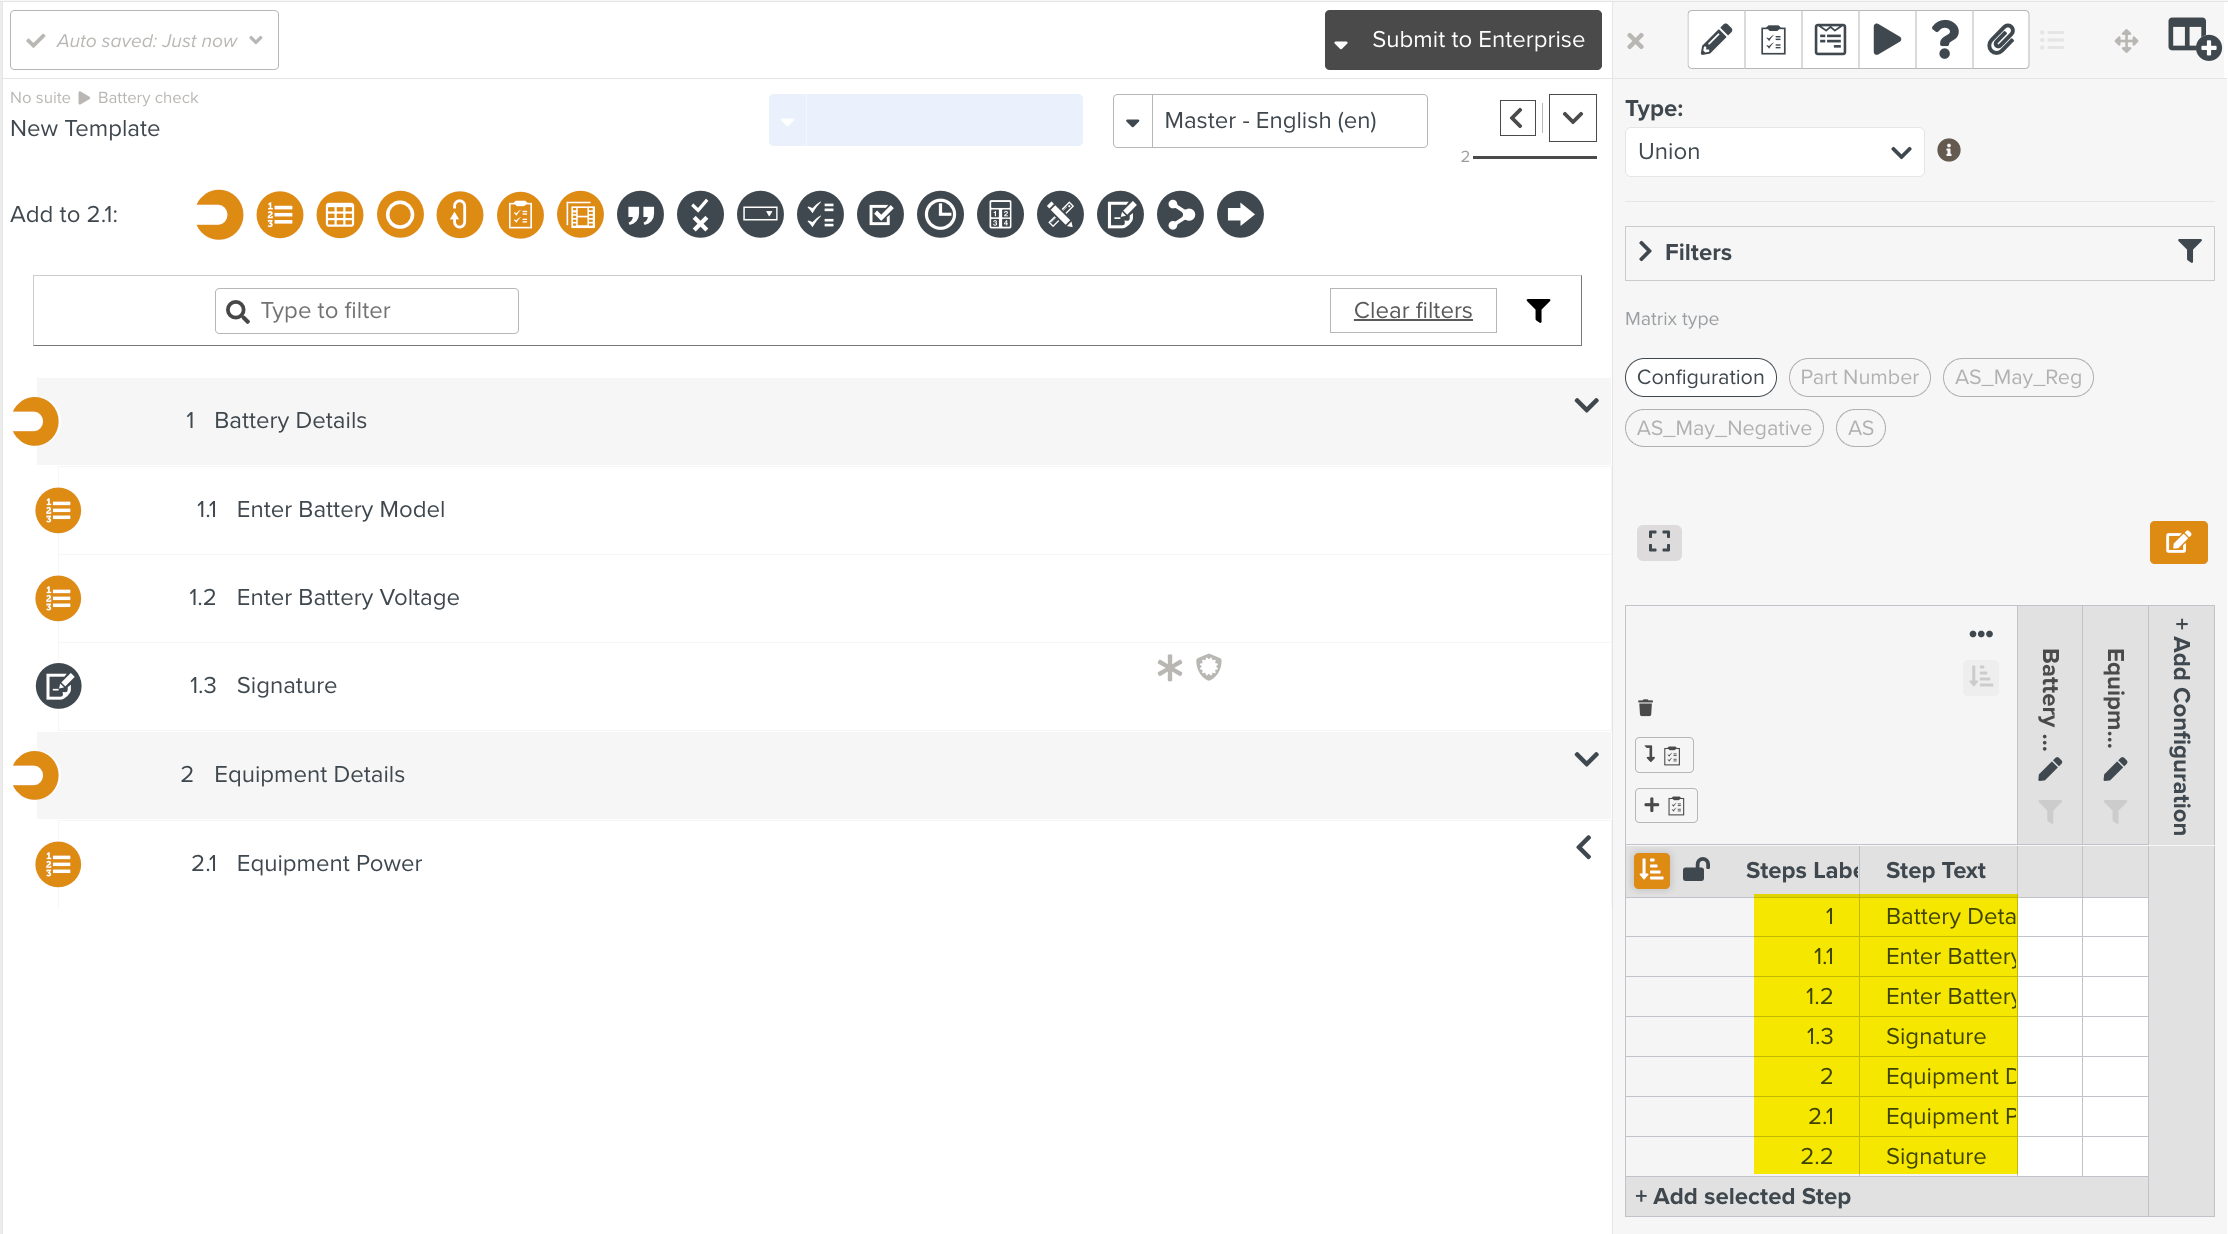
[Optional] Click
 to add all the Steps of the Template
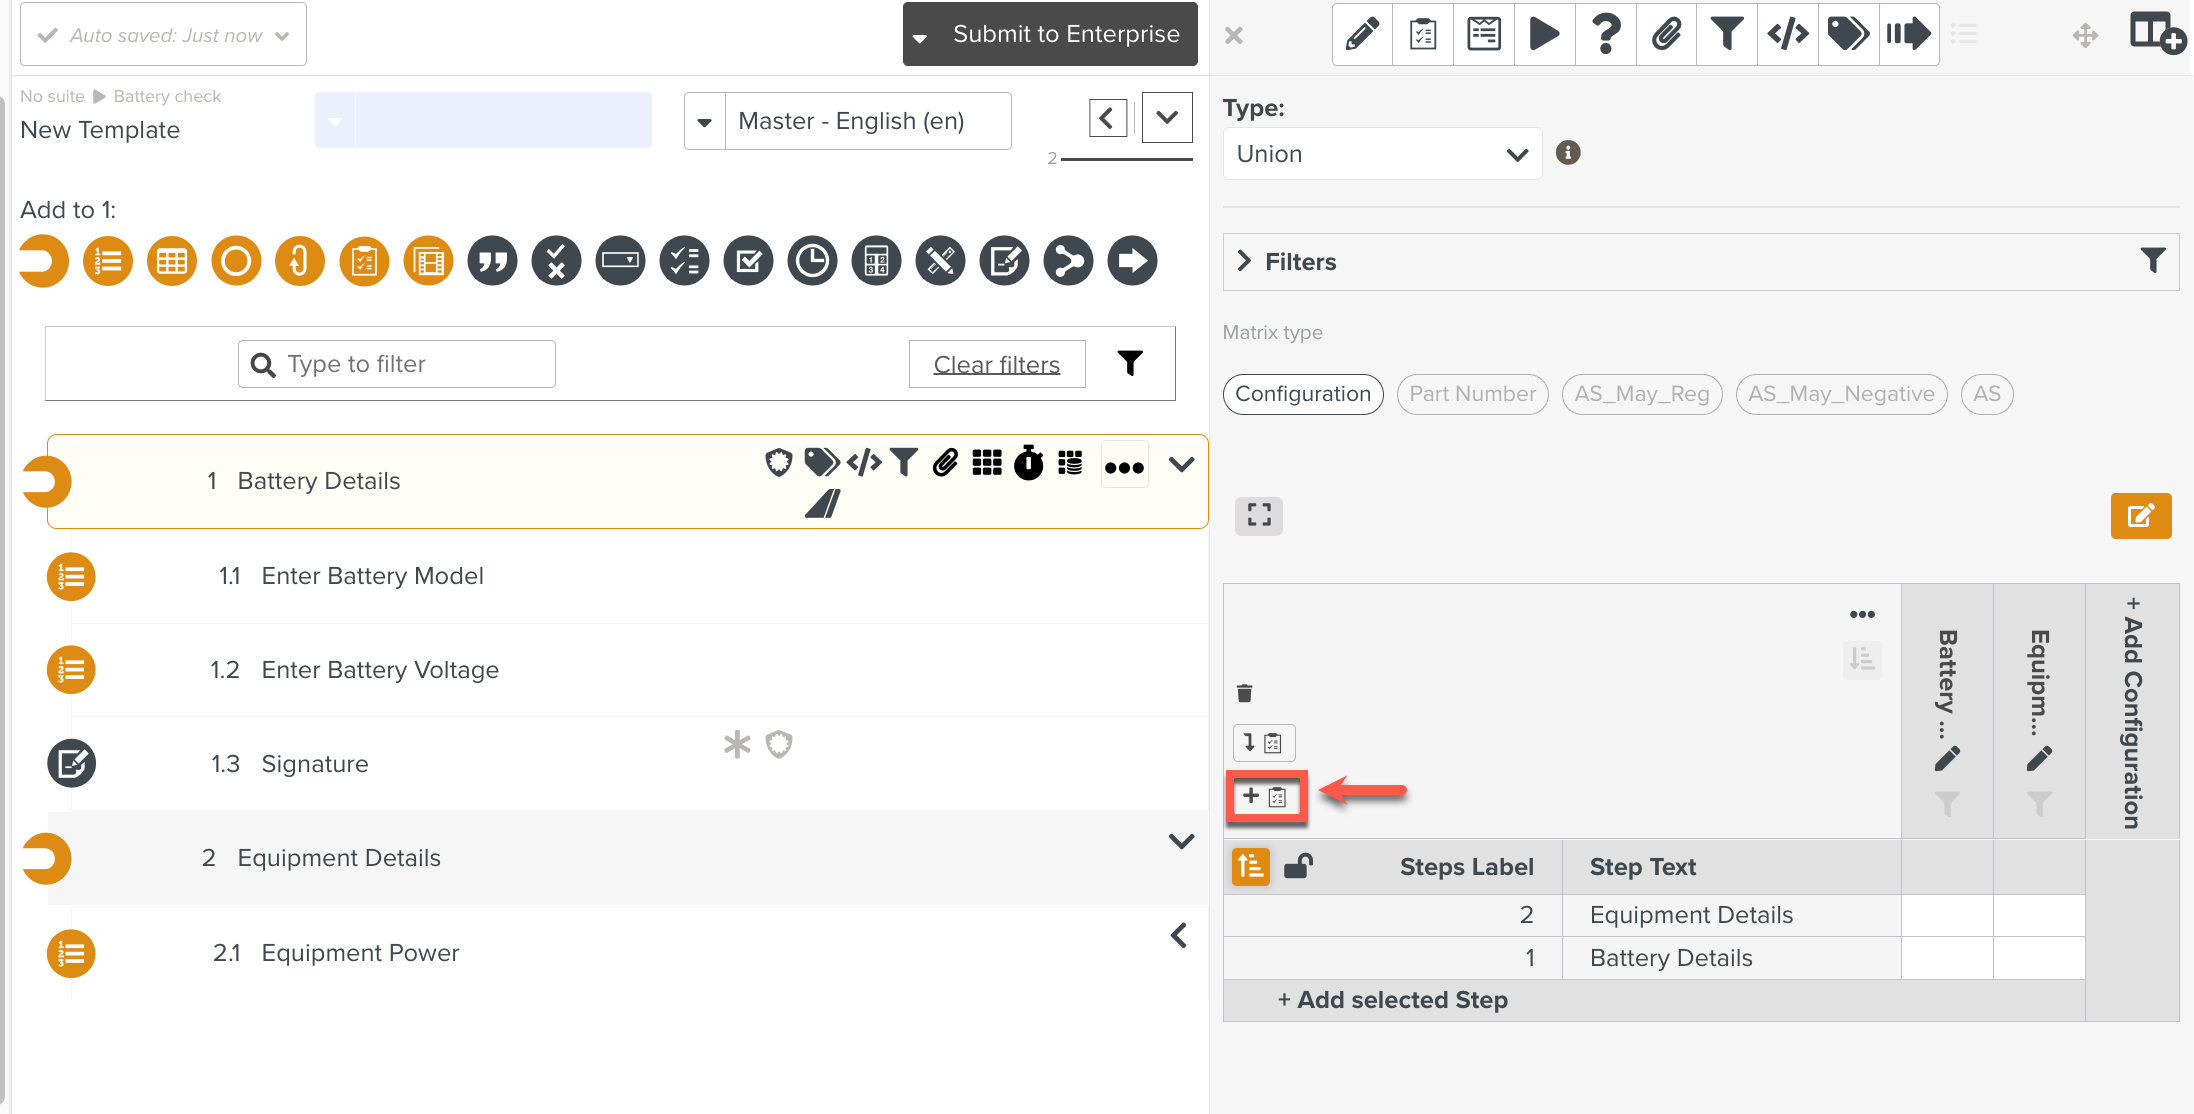
A confirmation dialog is displayed.

All the Steps in a Template are added to the Configuration.
[Optional] Click
 to lock the Level 1 Steps in a Configuration.
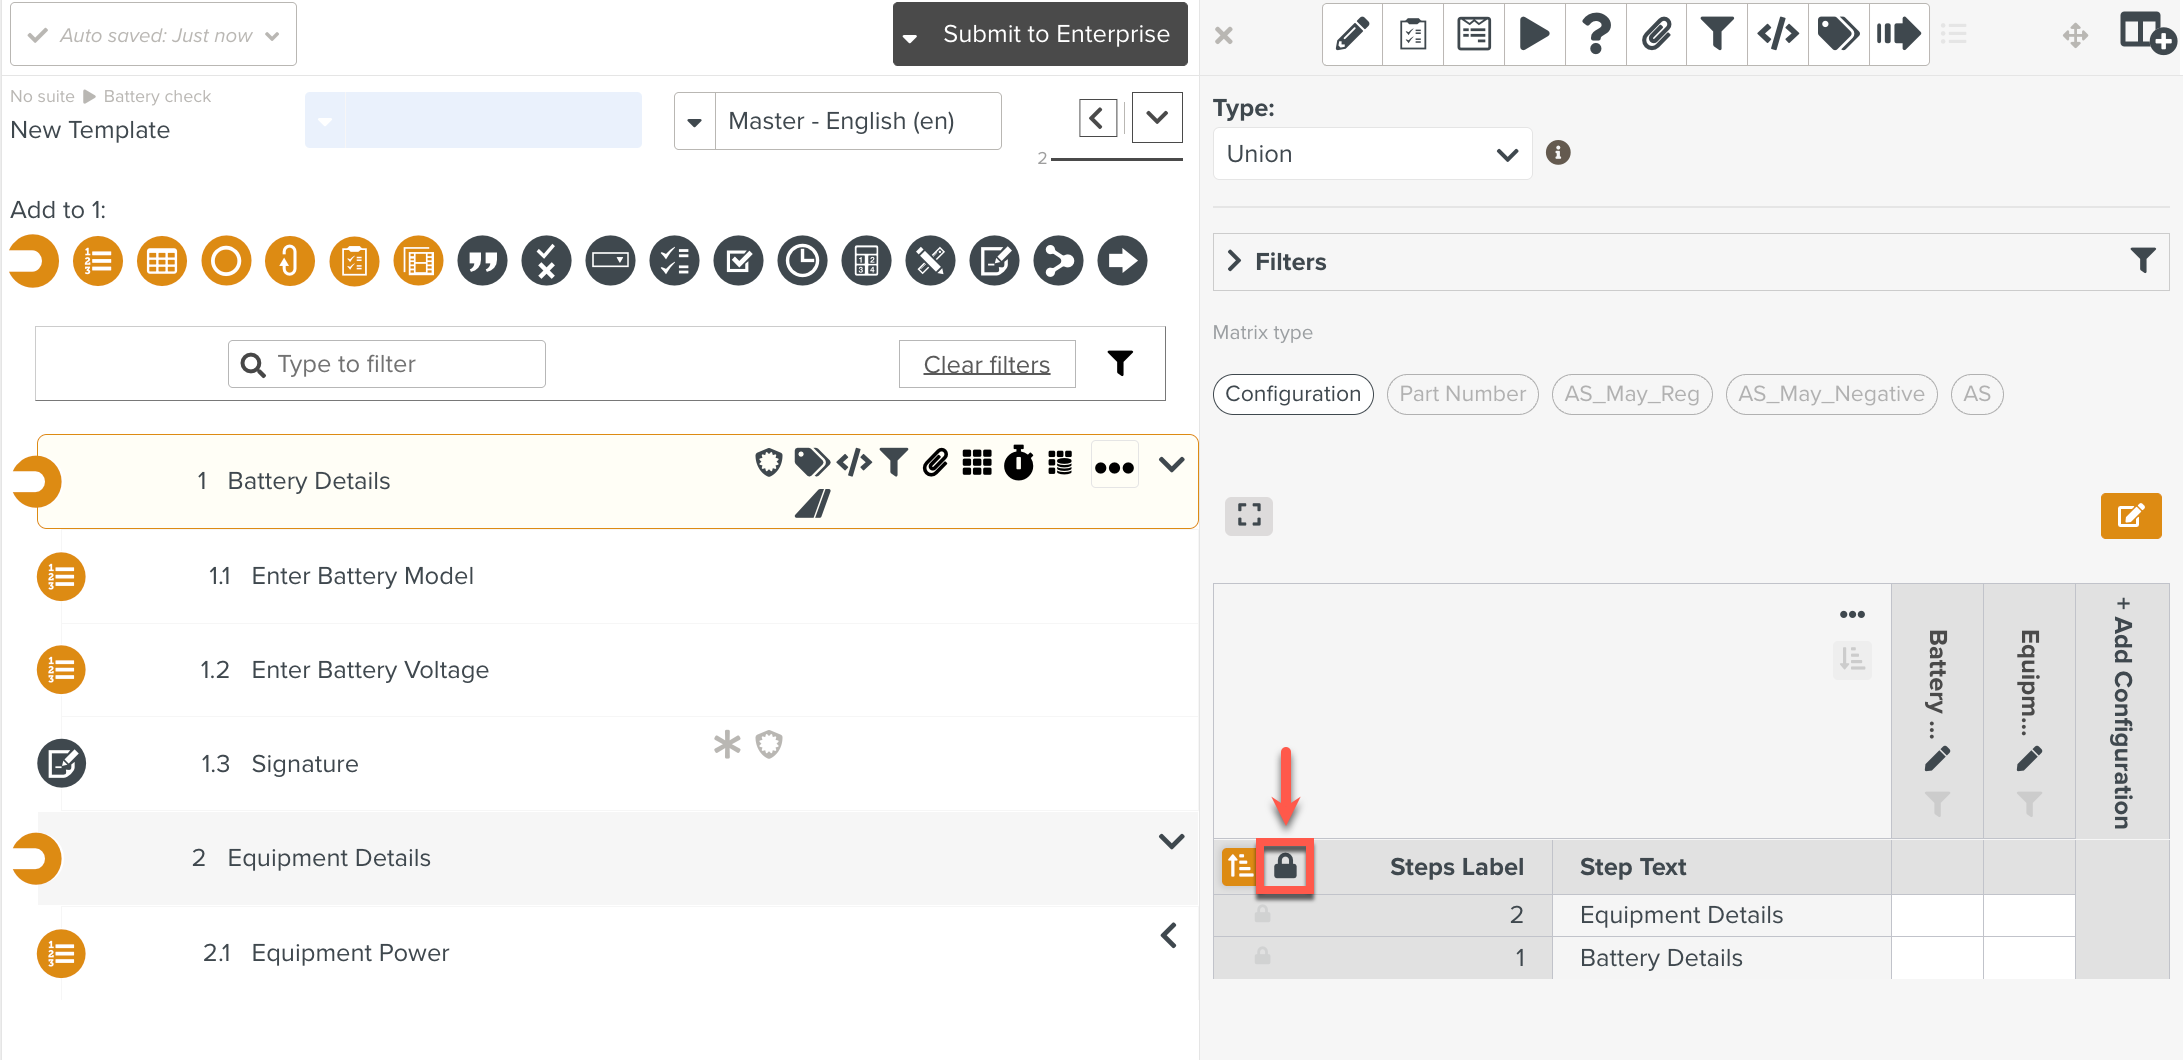
Click
to edit the Configuration matrix.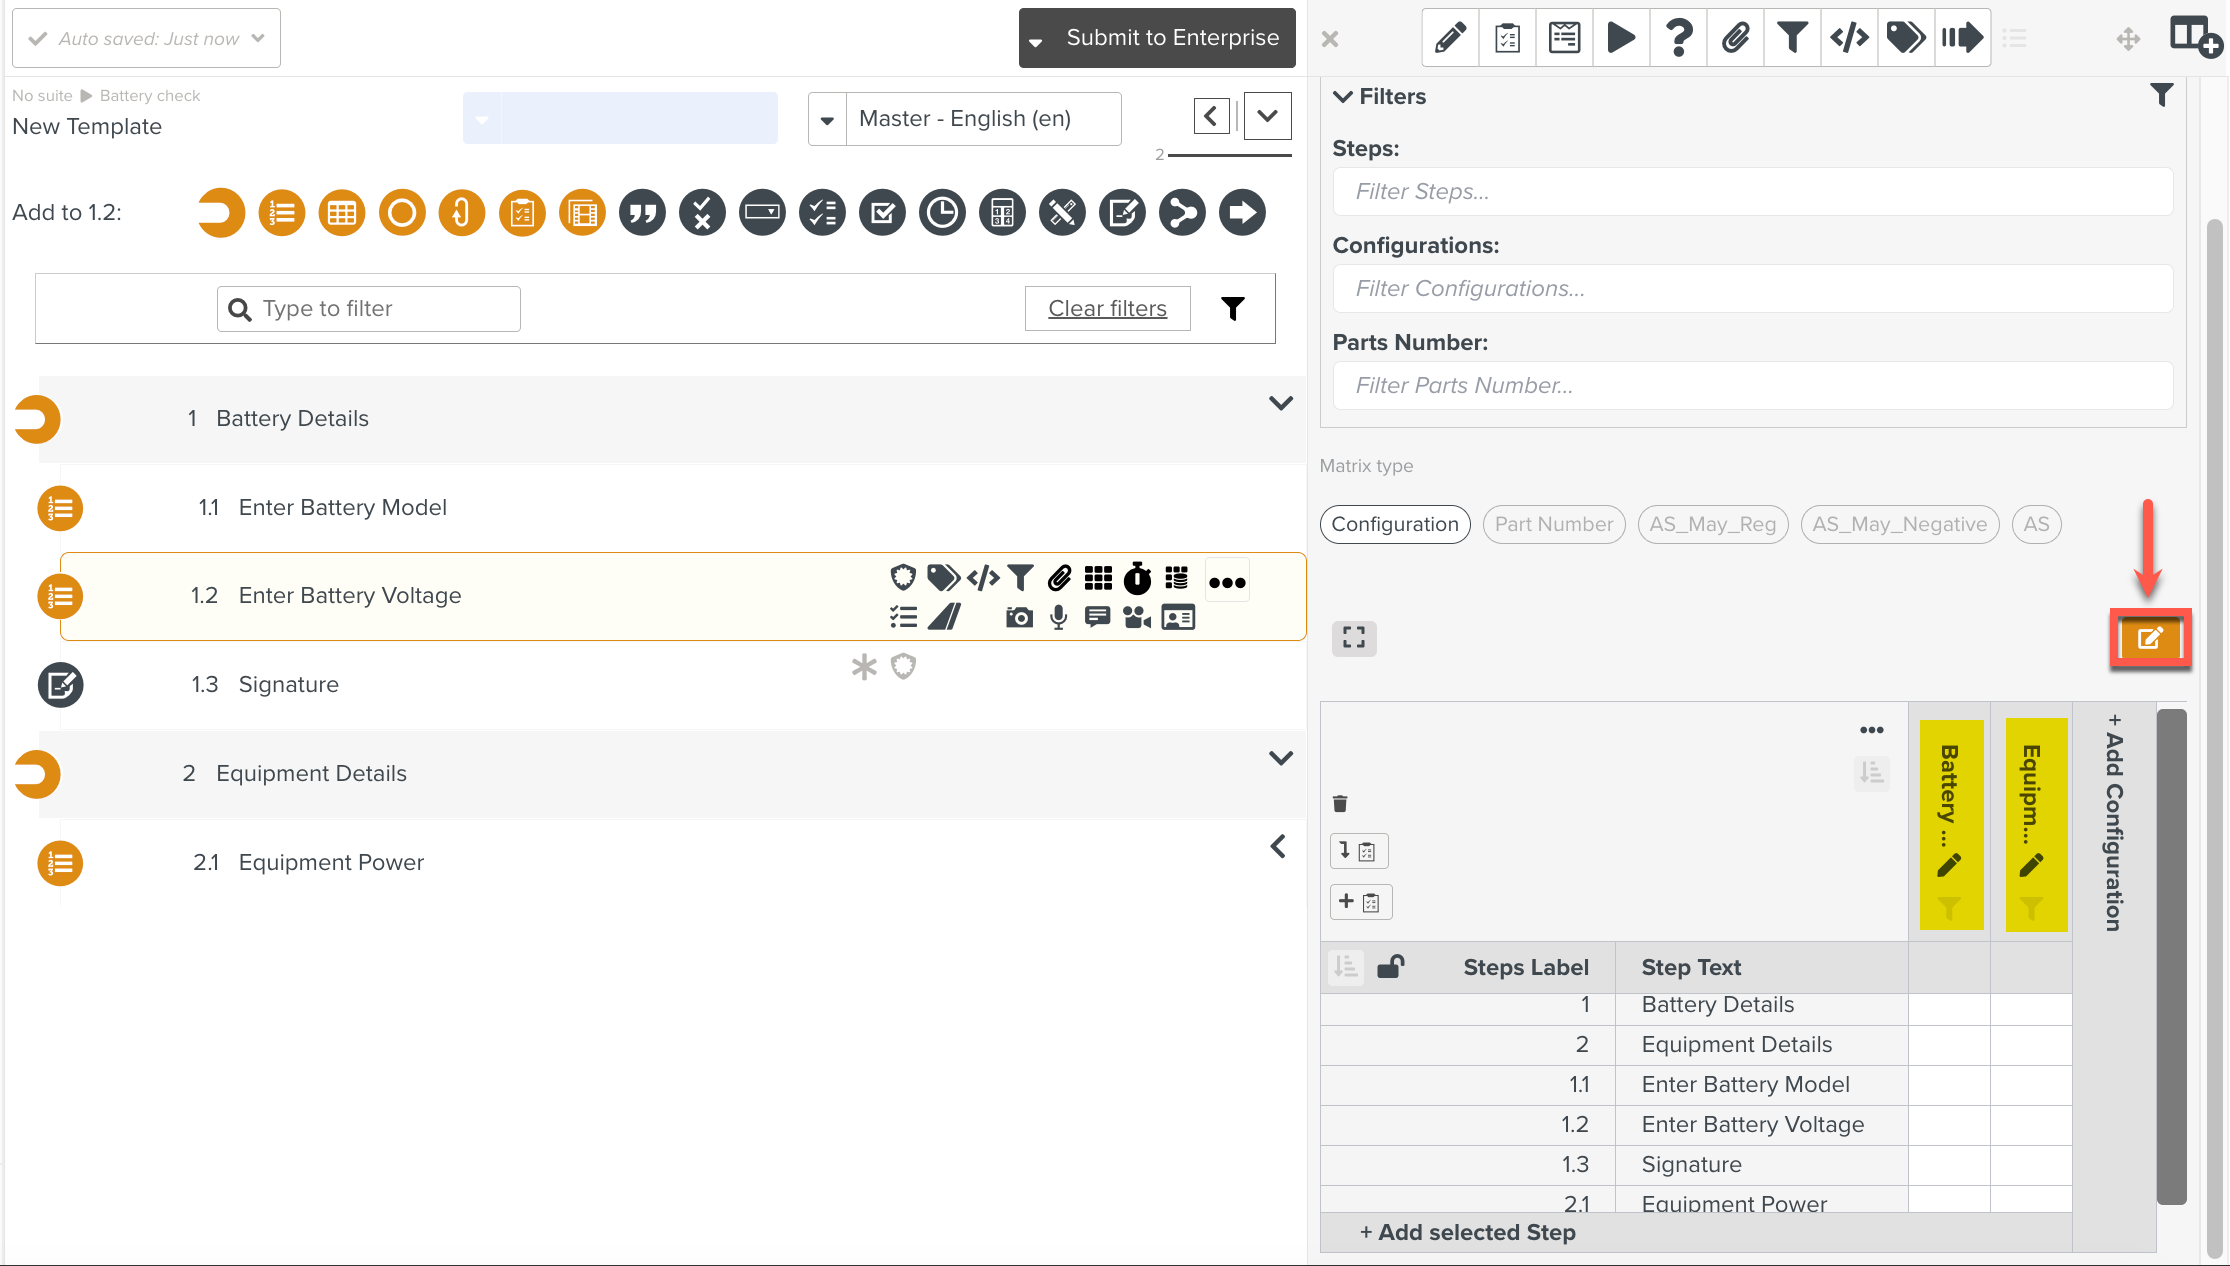
Click the cells corresponding to the Steps to be associated with the Configuration.
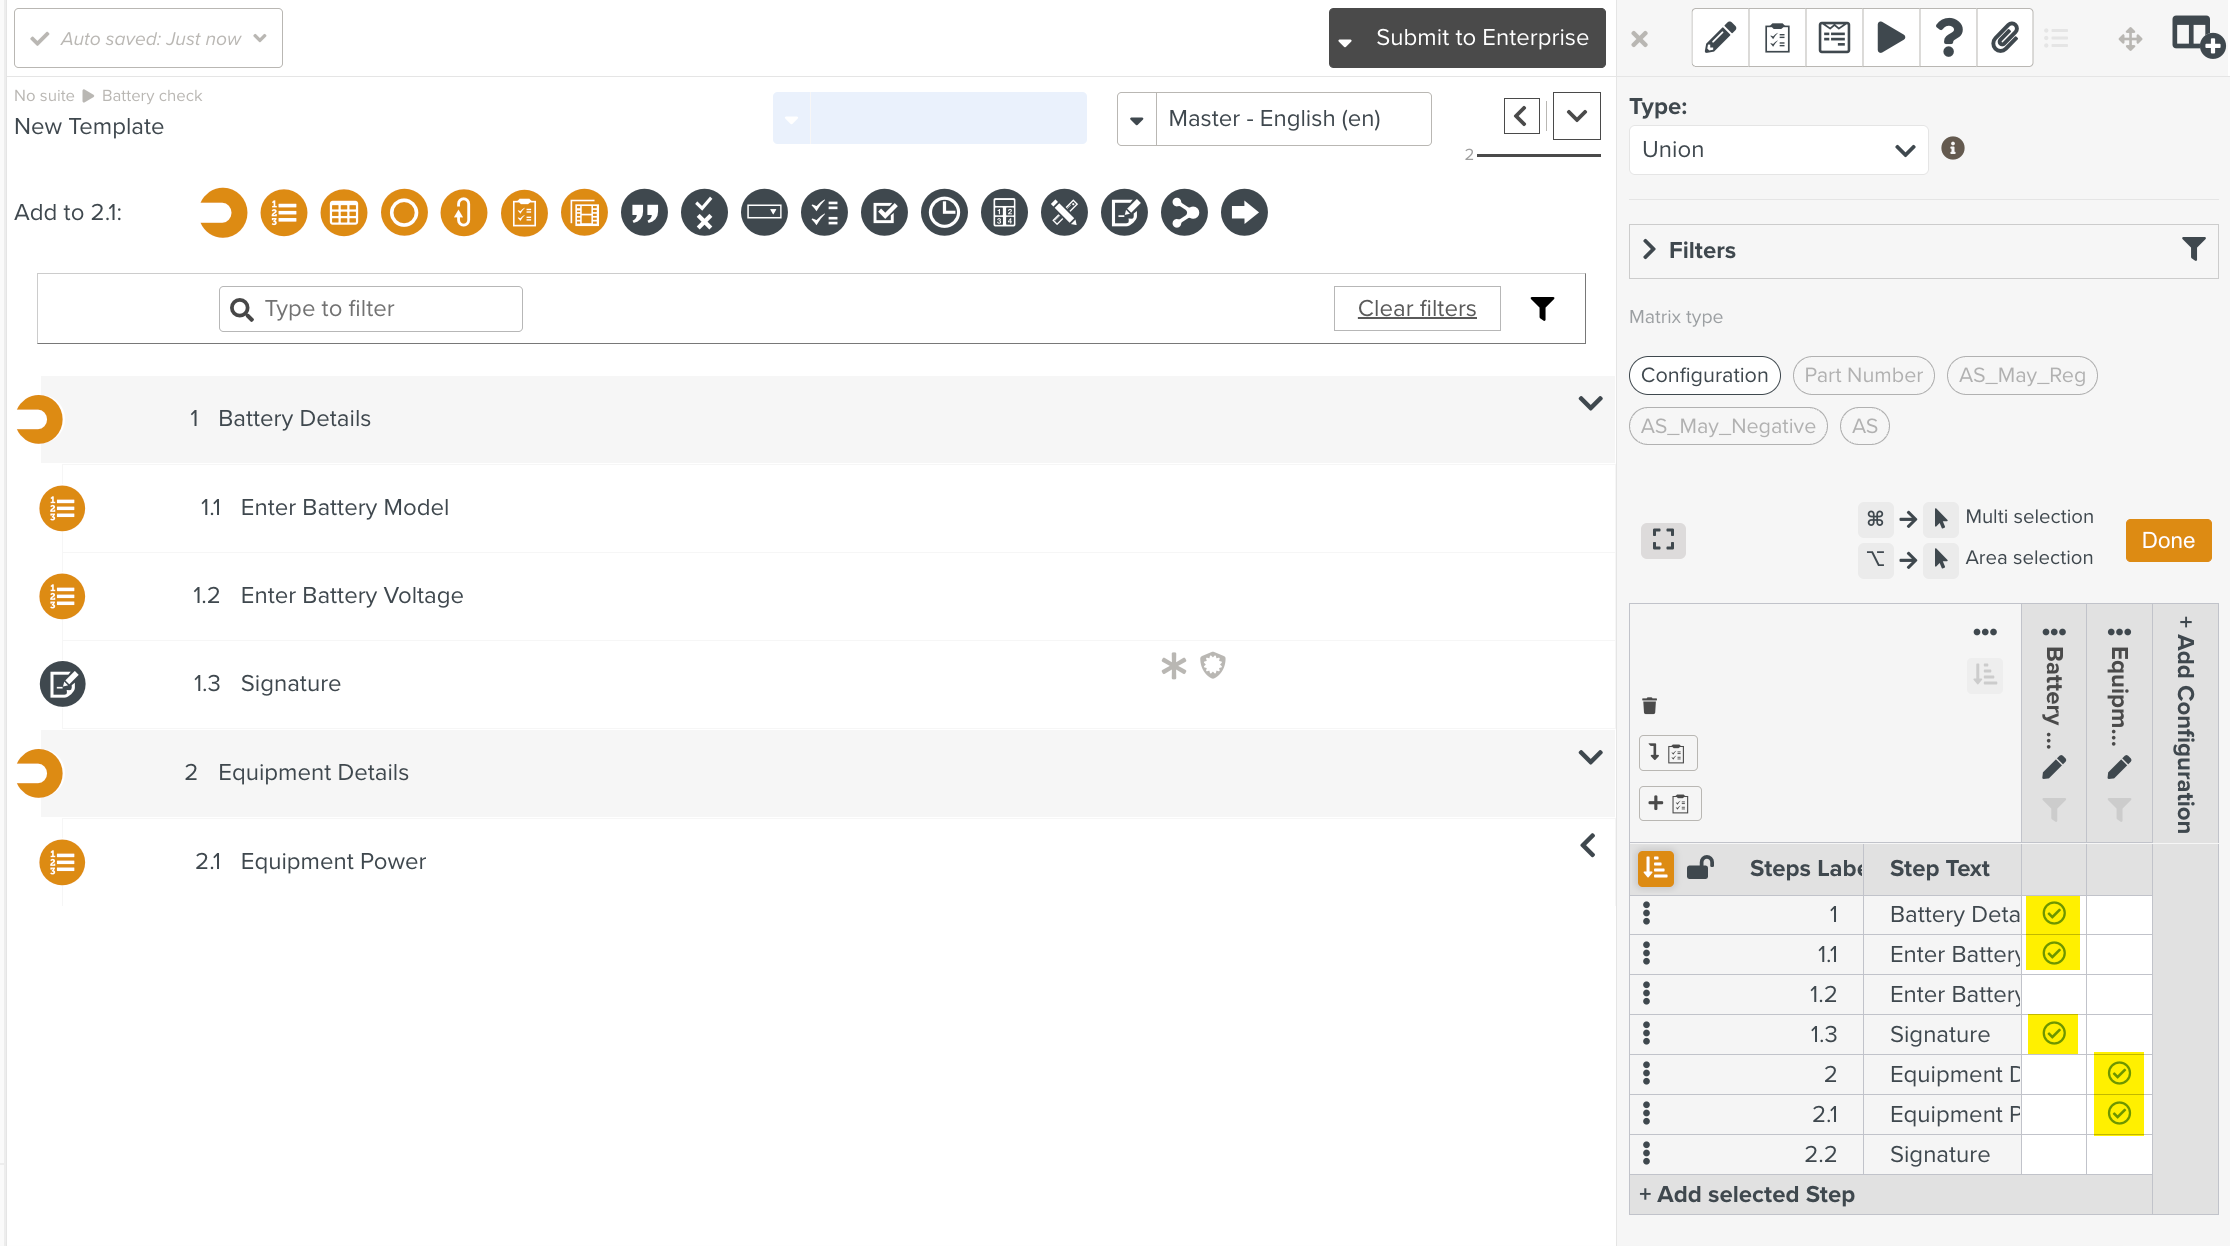
The Configuration is now set up. You can add and set up as many Configurations as needed.
Note
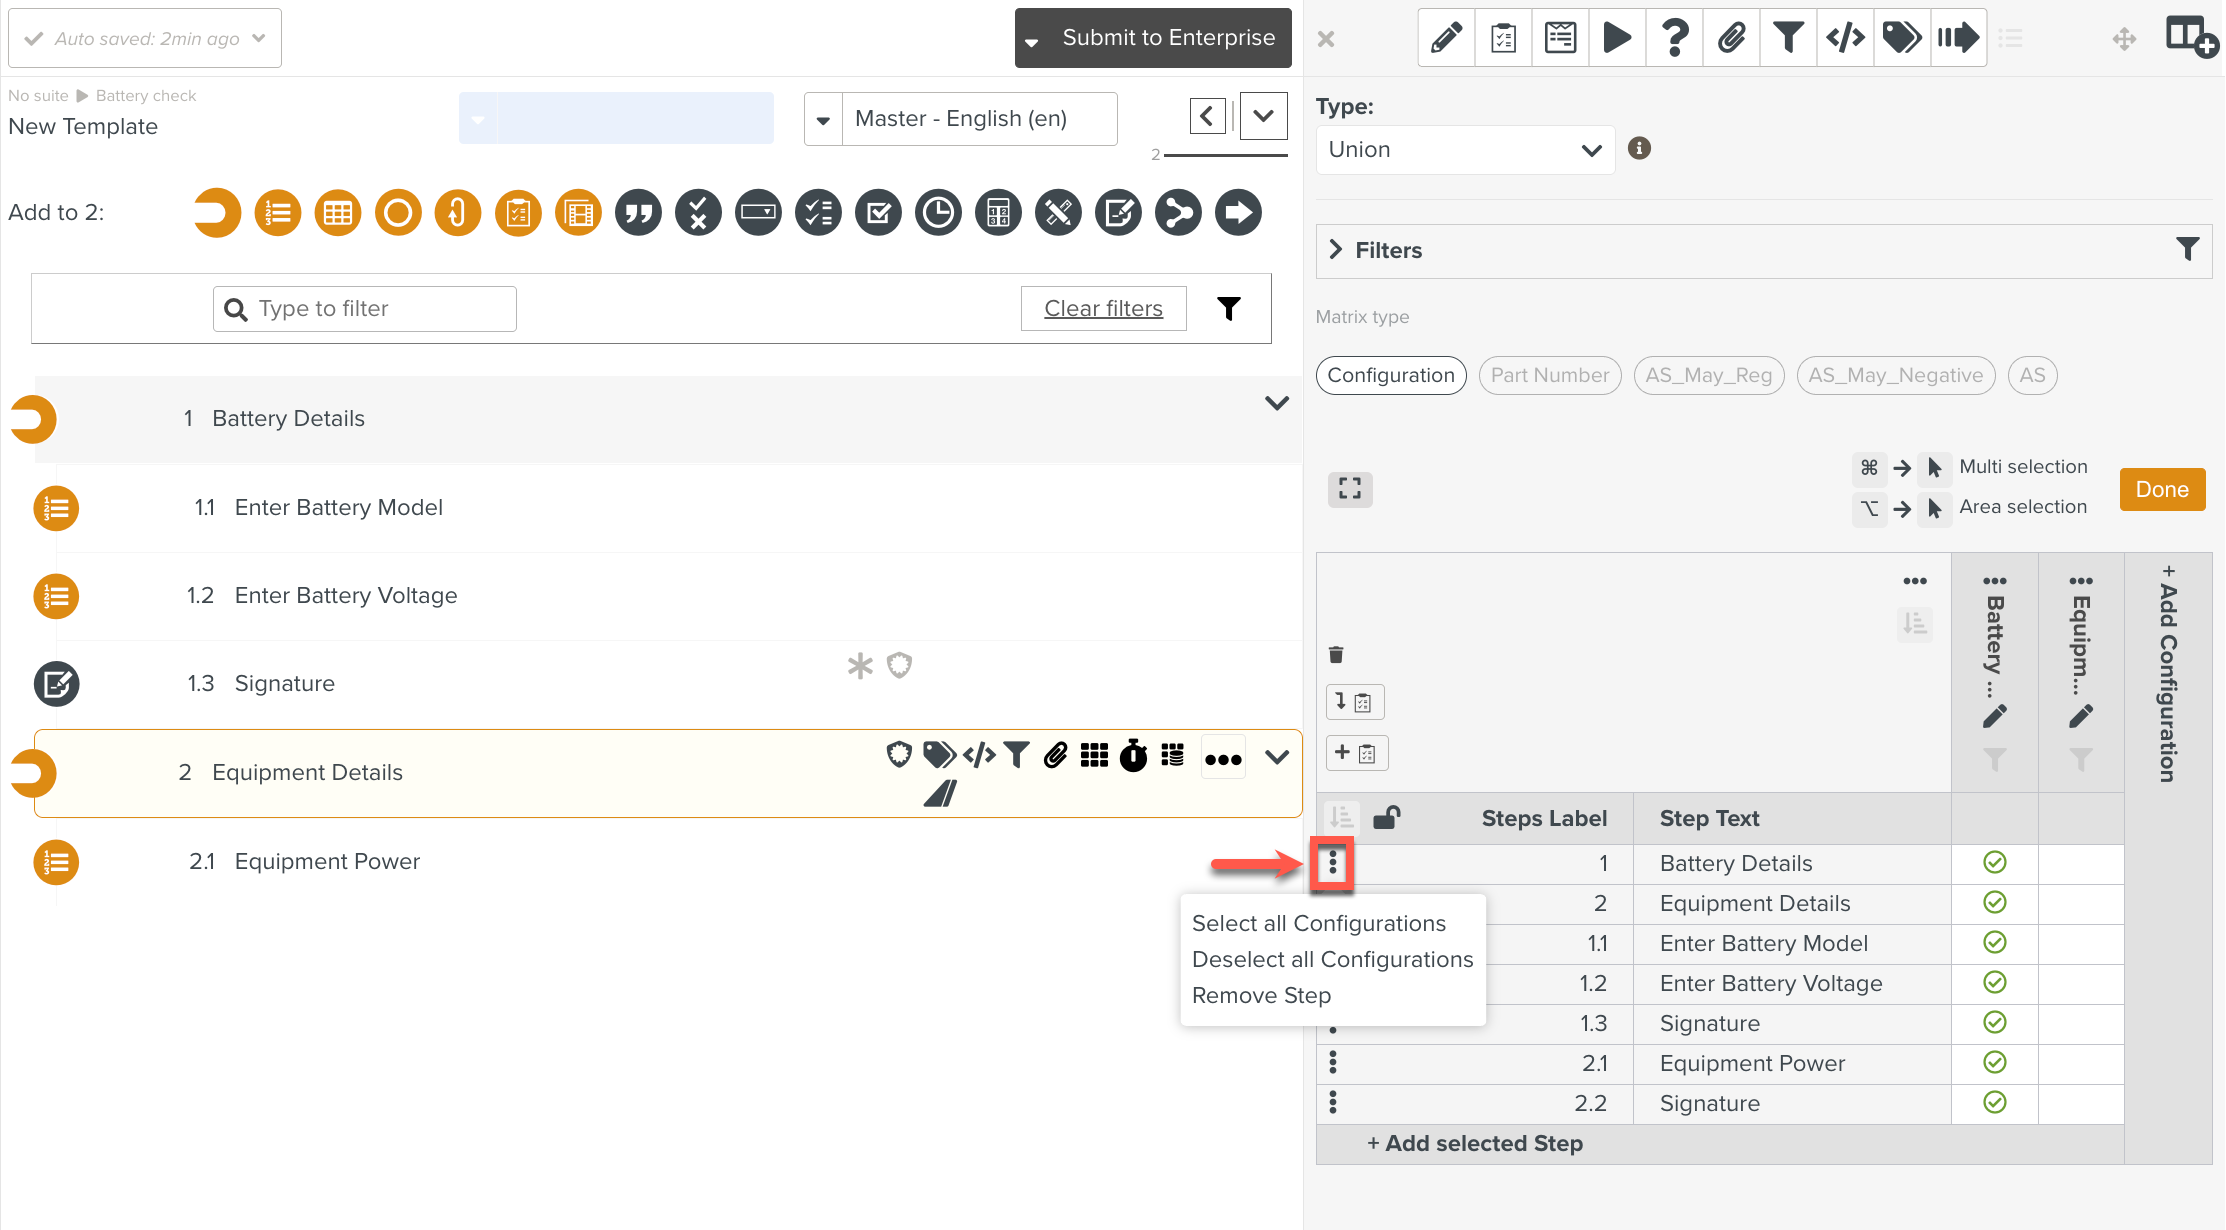
Click
 to from the matrix.
To remove a specific Step, select
 next to a Step in the matrix and then select .
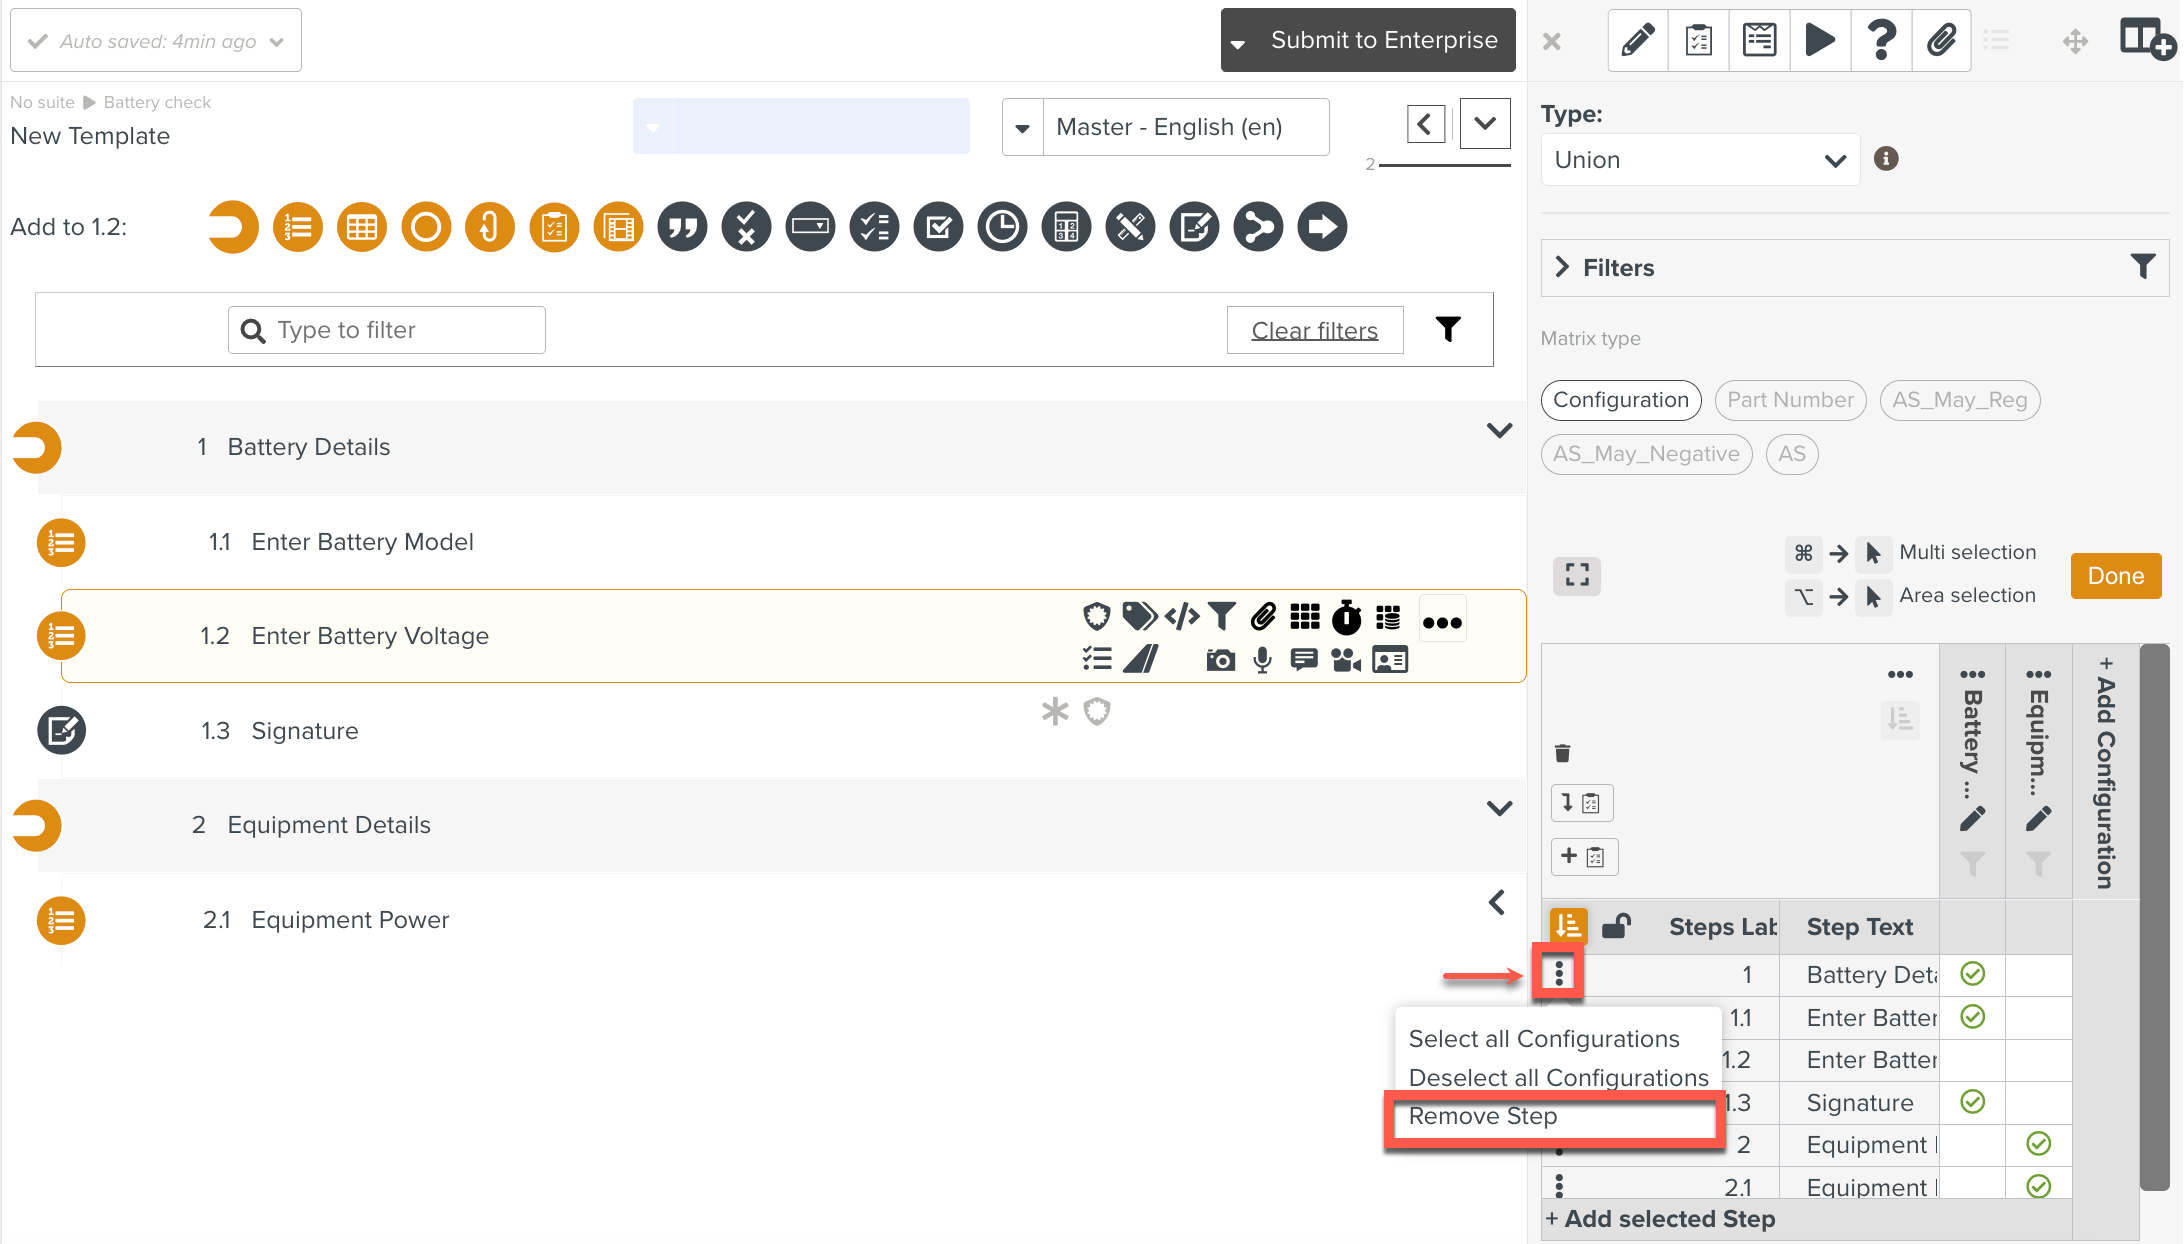
The Configuration panel provides a set of options that allow you to define and customize various aspects of a Configuration. These options control how a Configuration is structured, activated, and executed. The available options are listed below.
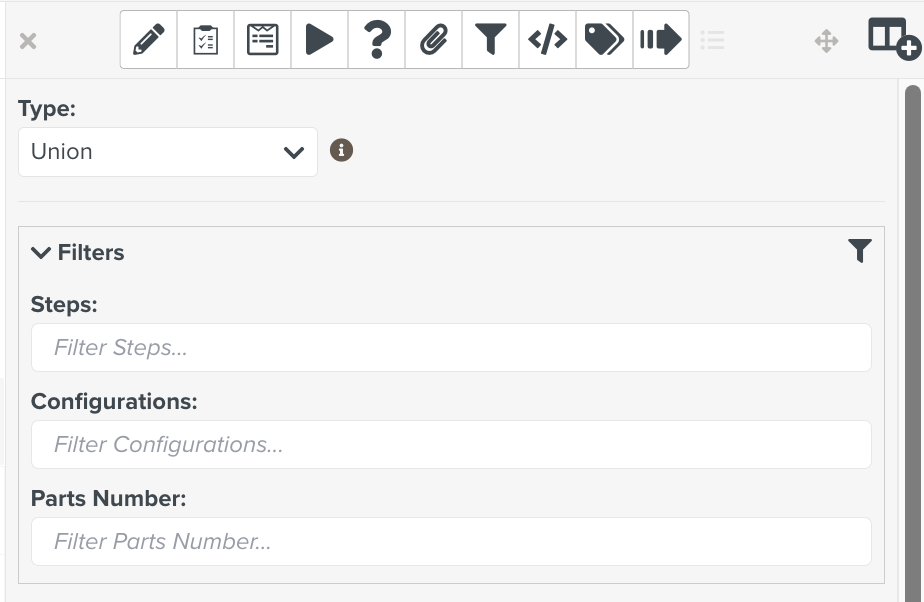
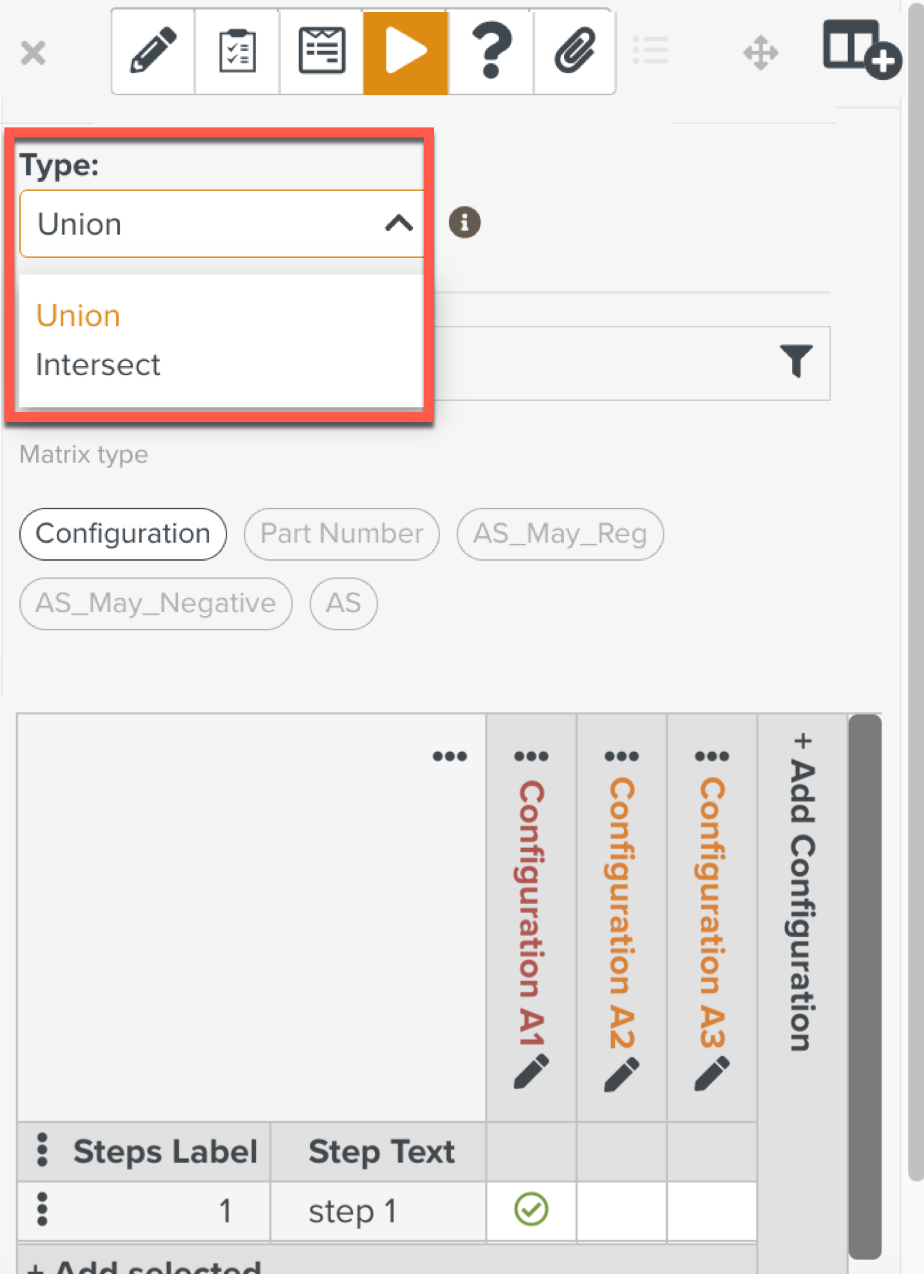
Type: Allows you to choose how Steps are displayed based on multiple Configurations.
Filters: Allows you to narrow down visible Configurations by applying specific criteria.
Matrix type: Allows you to map Steps or Part Numbers to Configurations.
Select/Deselect all: Allows you to select/deselect all the Steps or Part Numbers in the matrix, based on your requirements.
Move: Allows you to rearrange Configurations by moving them left or right to change their execution order or grouping.
1. Type
From the drop-down list, select one of the following:
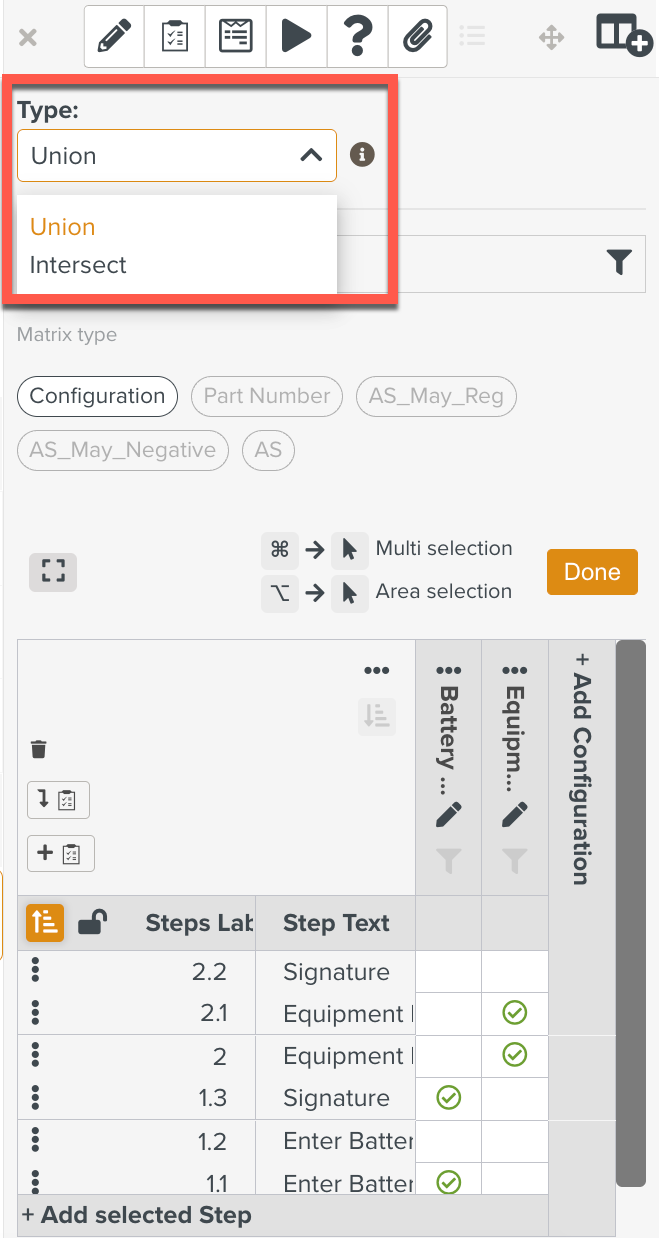 |
: Displays the Steps that are in at least one Configuration.
: Displays Steps present in all Configurations.
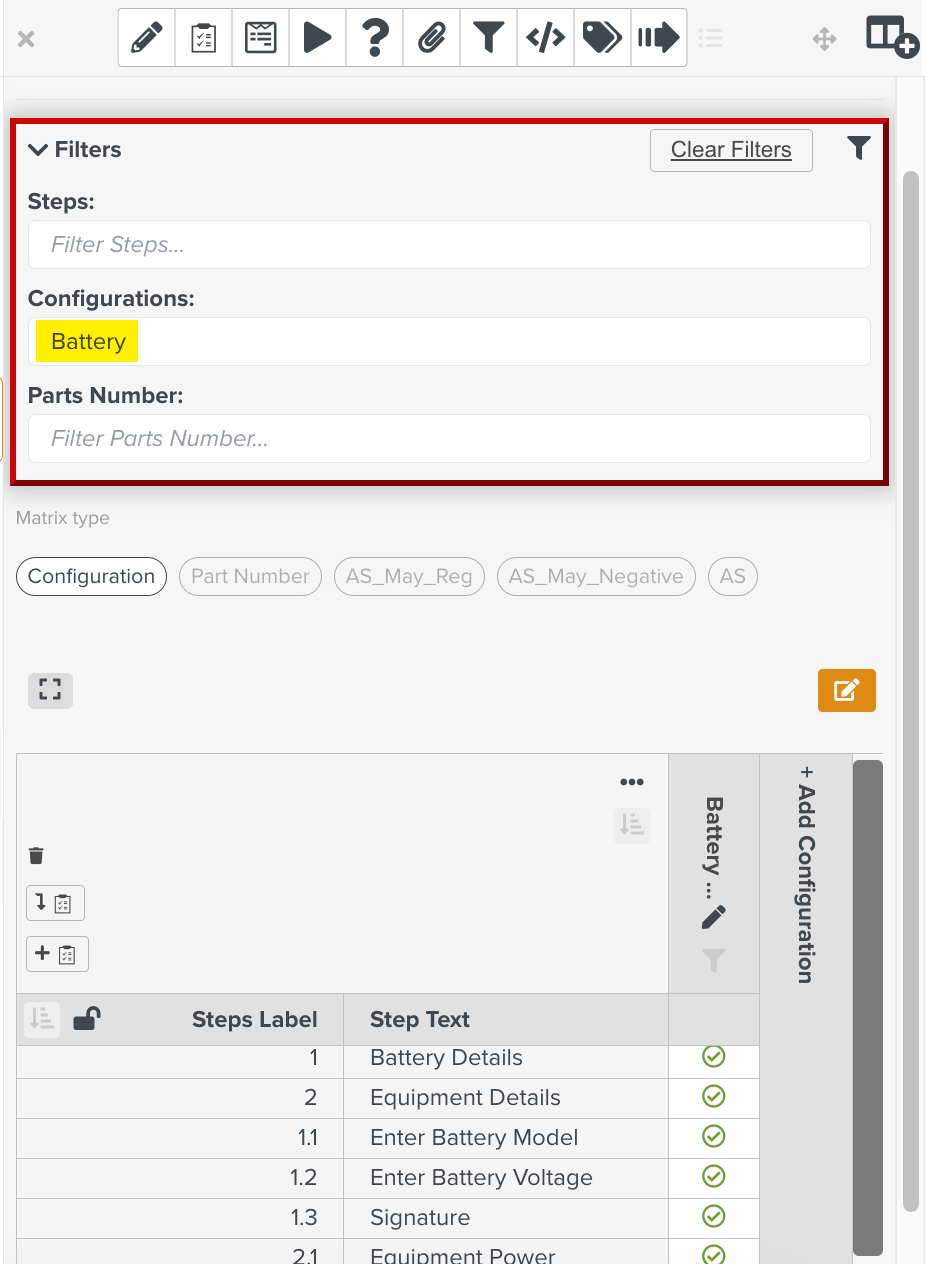
2. Filters
You can filter the Configuration Matrix based on Steps, Configurations or Part Numbers.
 |
In the following example, the Matrix is filtered based on Configurations. The filtered results are shown below.
 |
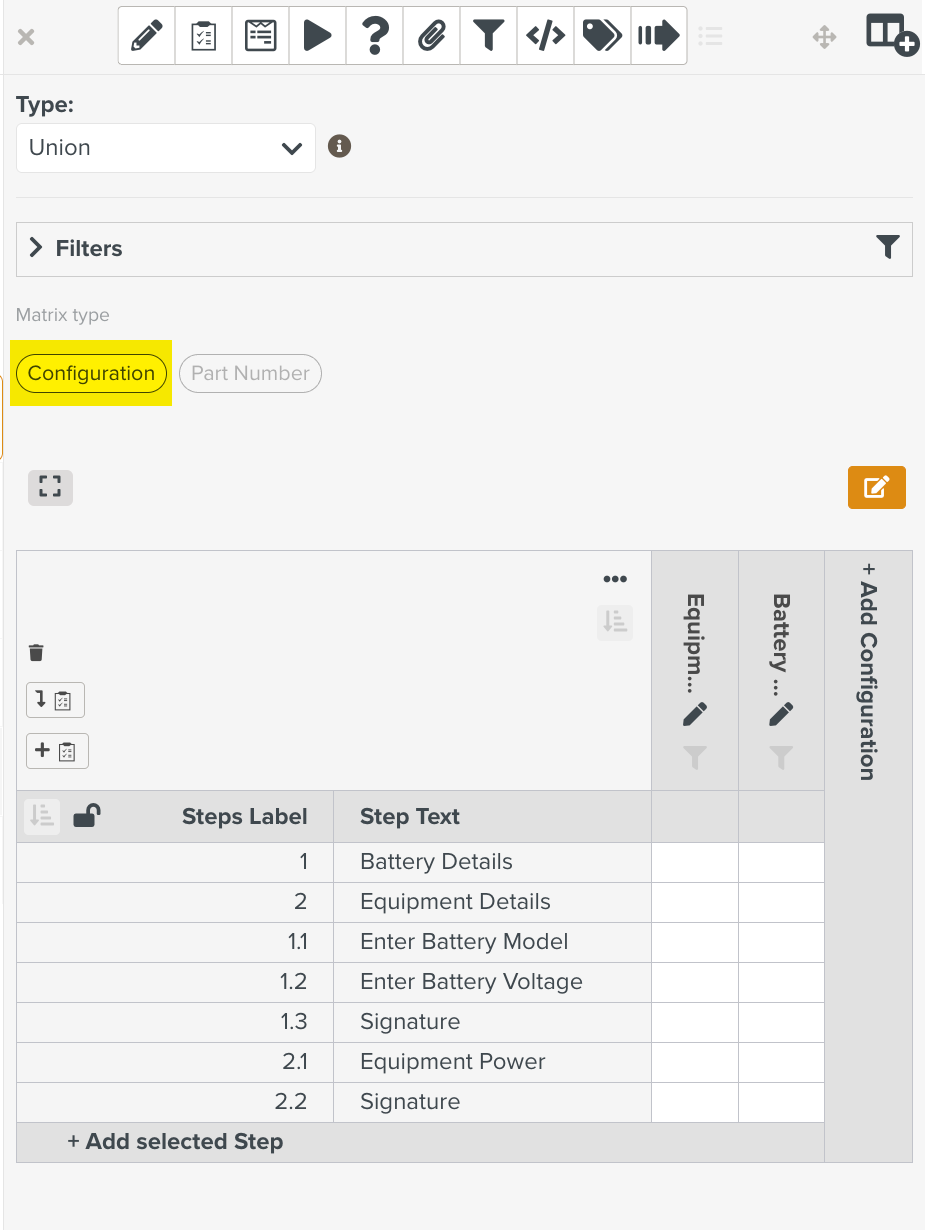
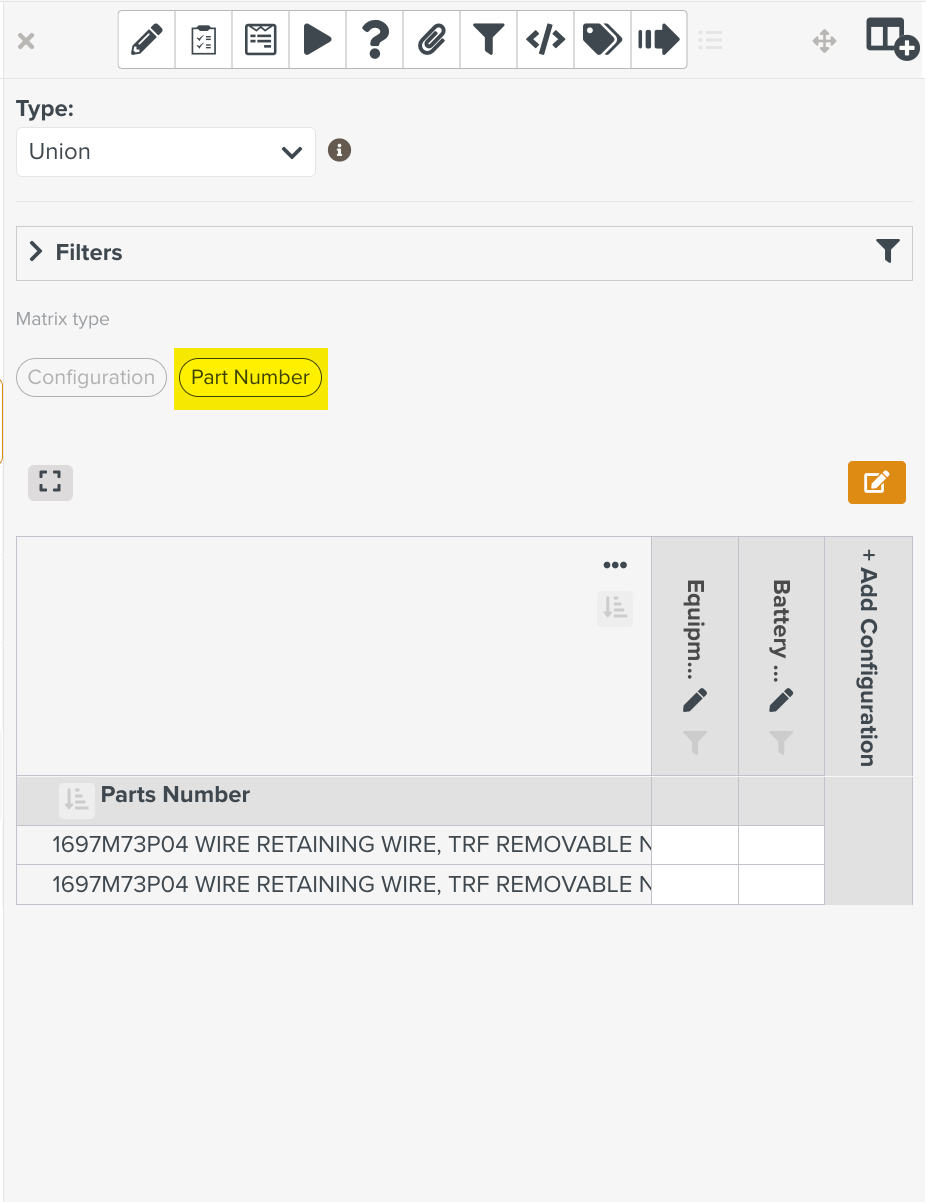
3. Matrix type
There are two types of Matrices:
Configuration Matrix displays the mapping of Step numbers to Configurations.
Part Number Matrix displays the mapping of Part numbers to Configurations.
 |
 |
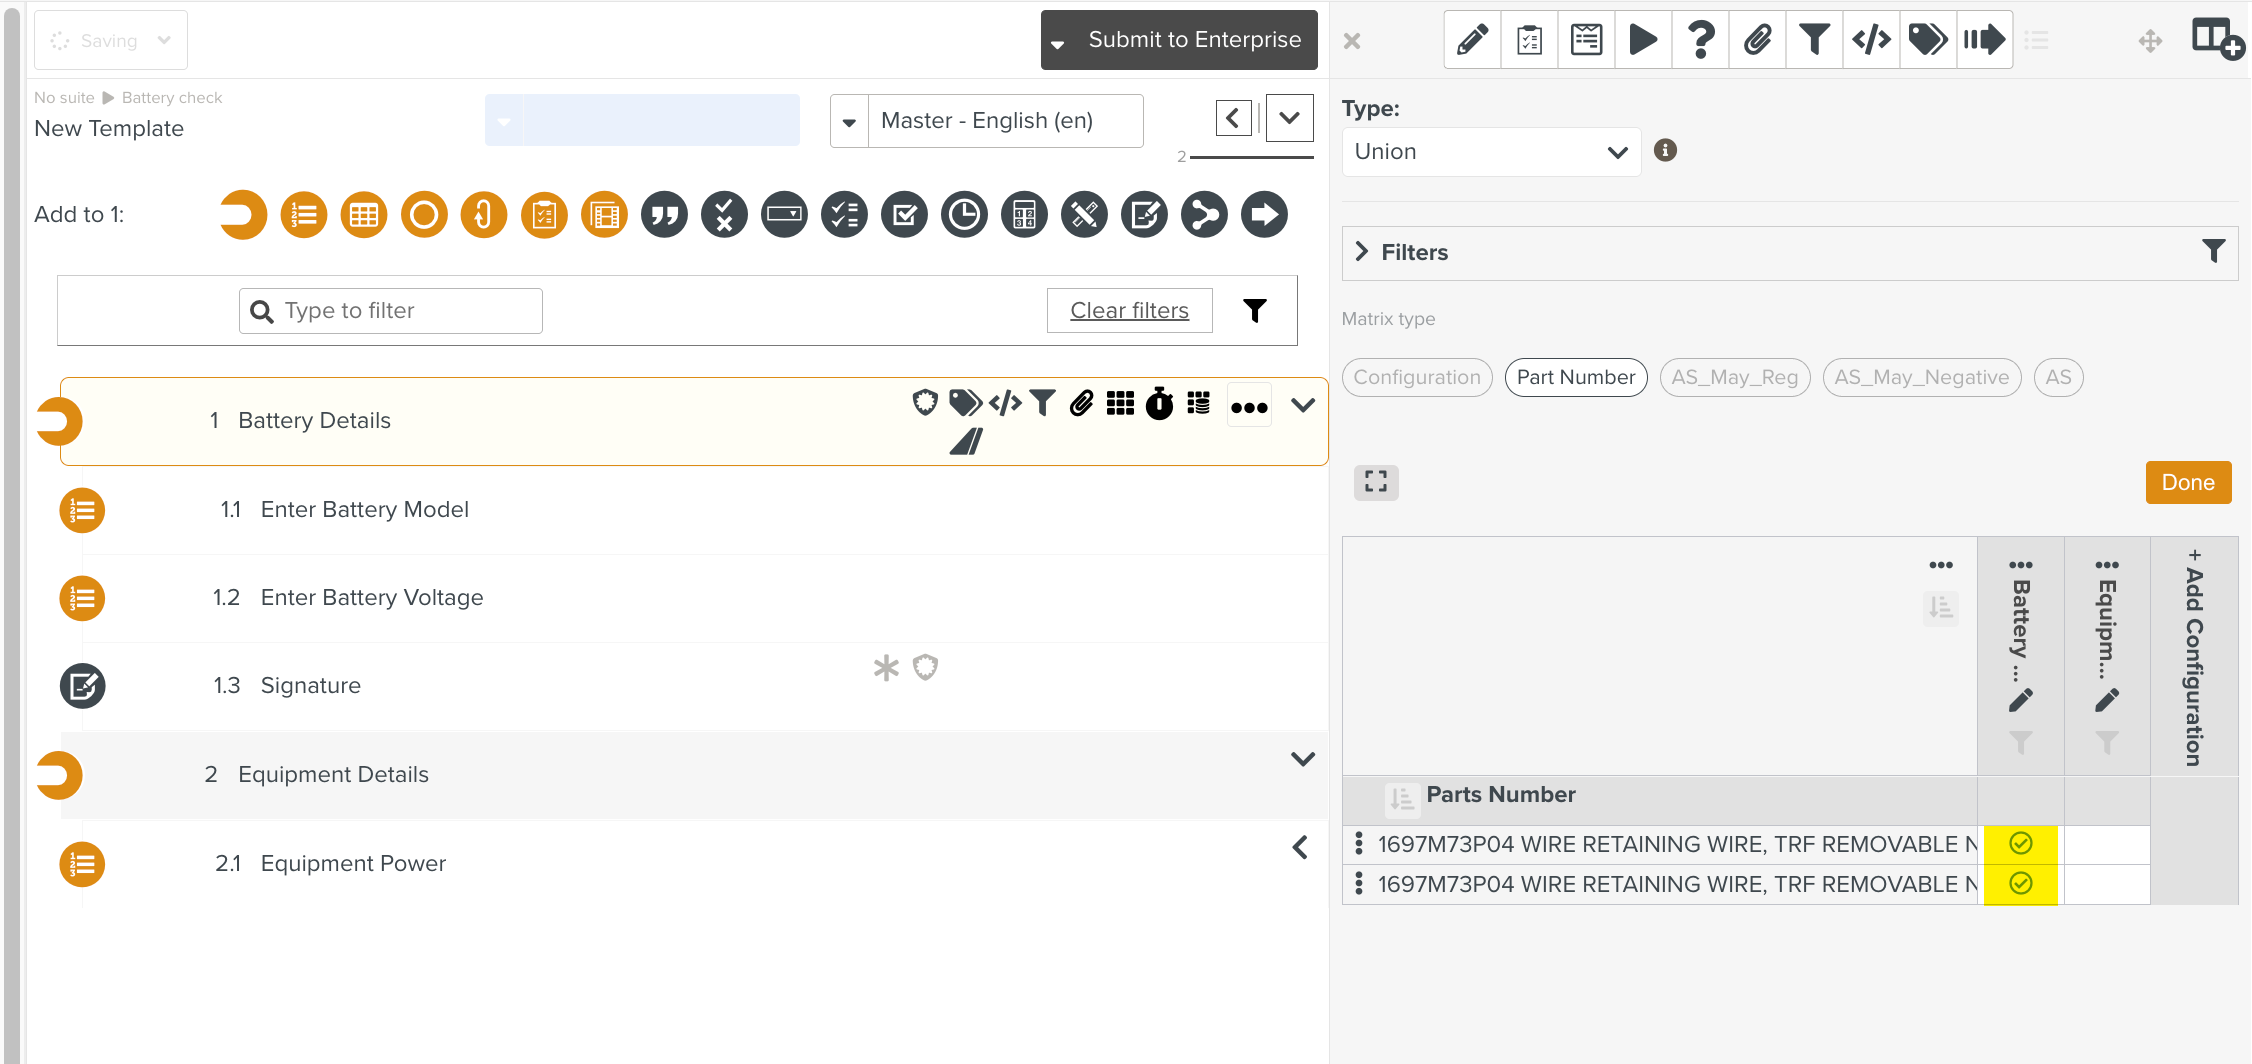
4. Select/Deselect all
Click  to select/deselect all Part Numbers in a matrix.
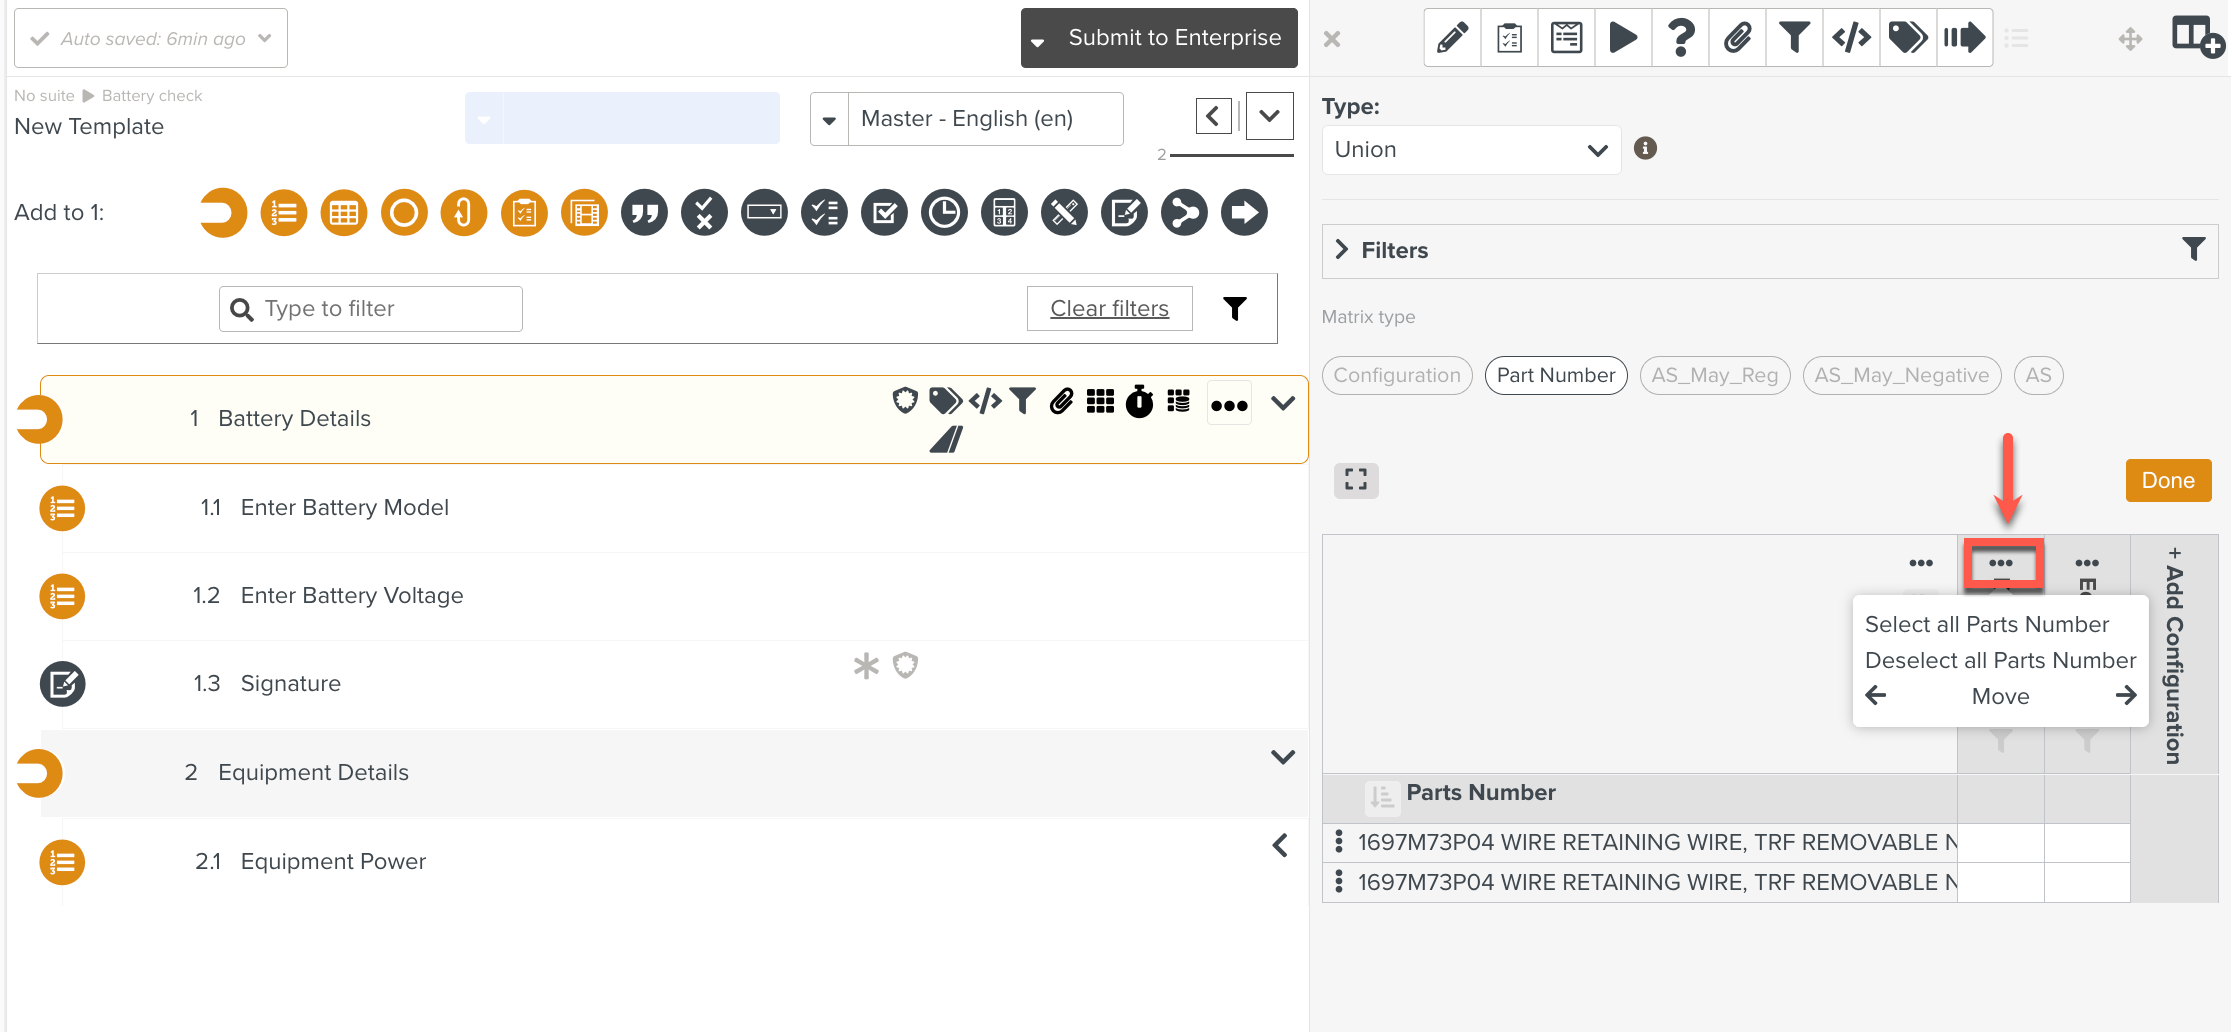 |
On clicking Select all Part Numbers, all the Part Numbers are added to the Configuration as highlighted below.
 |
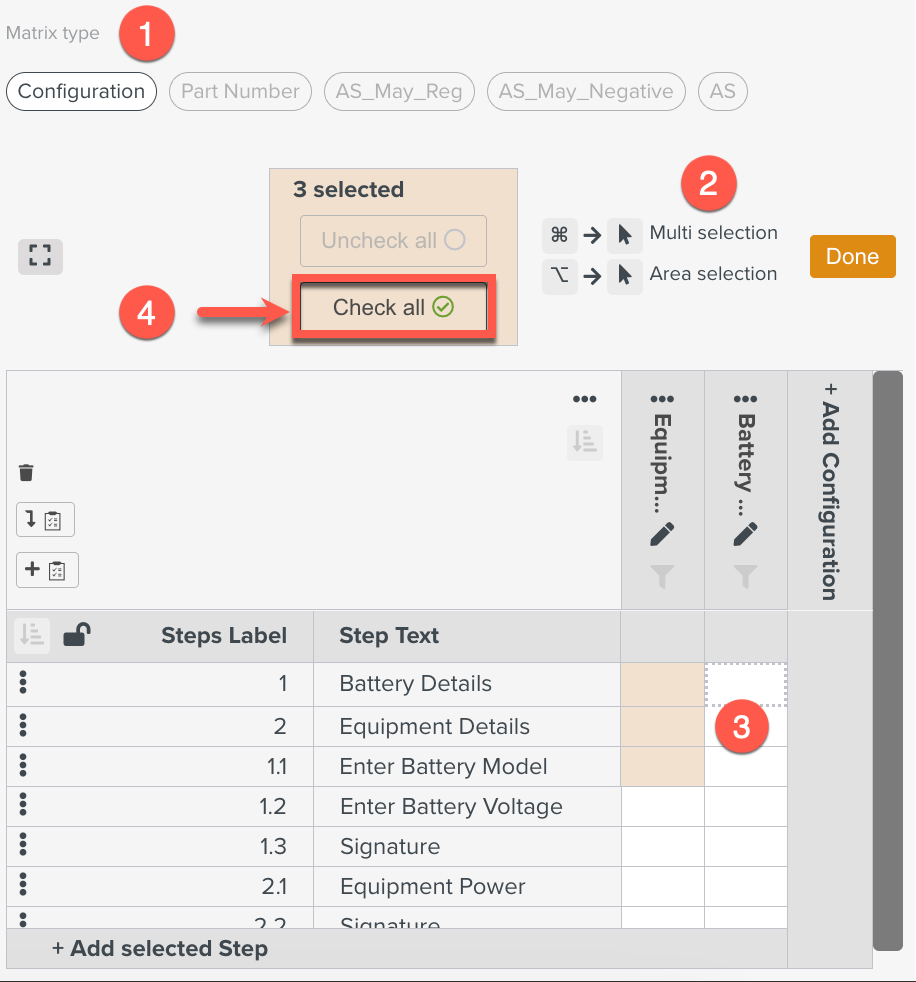
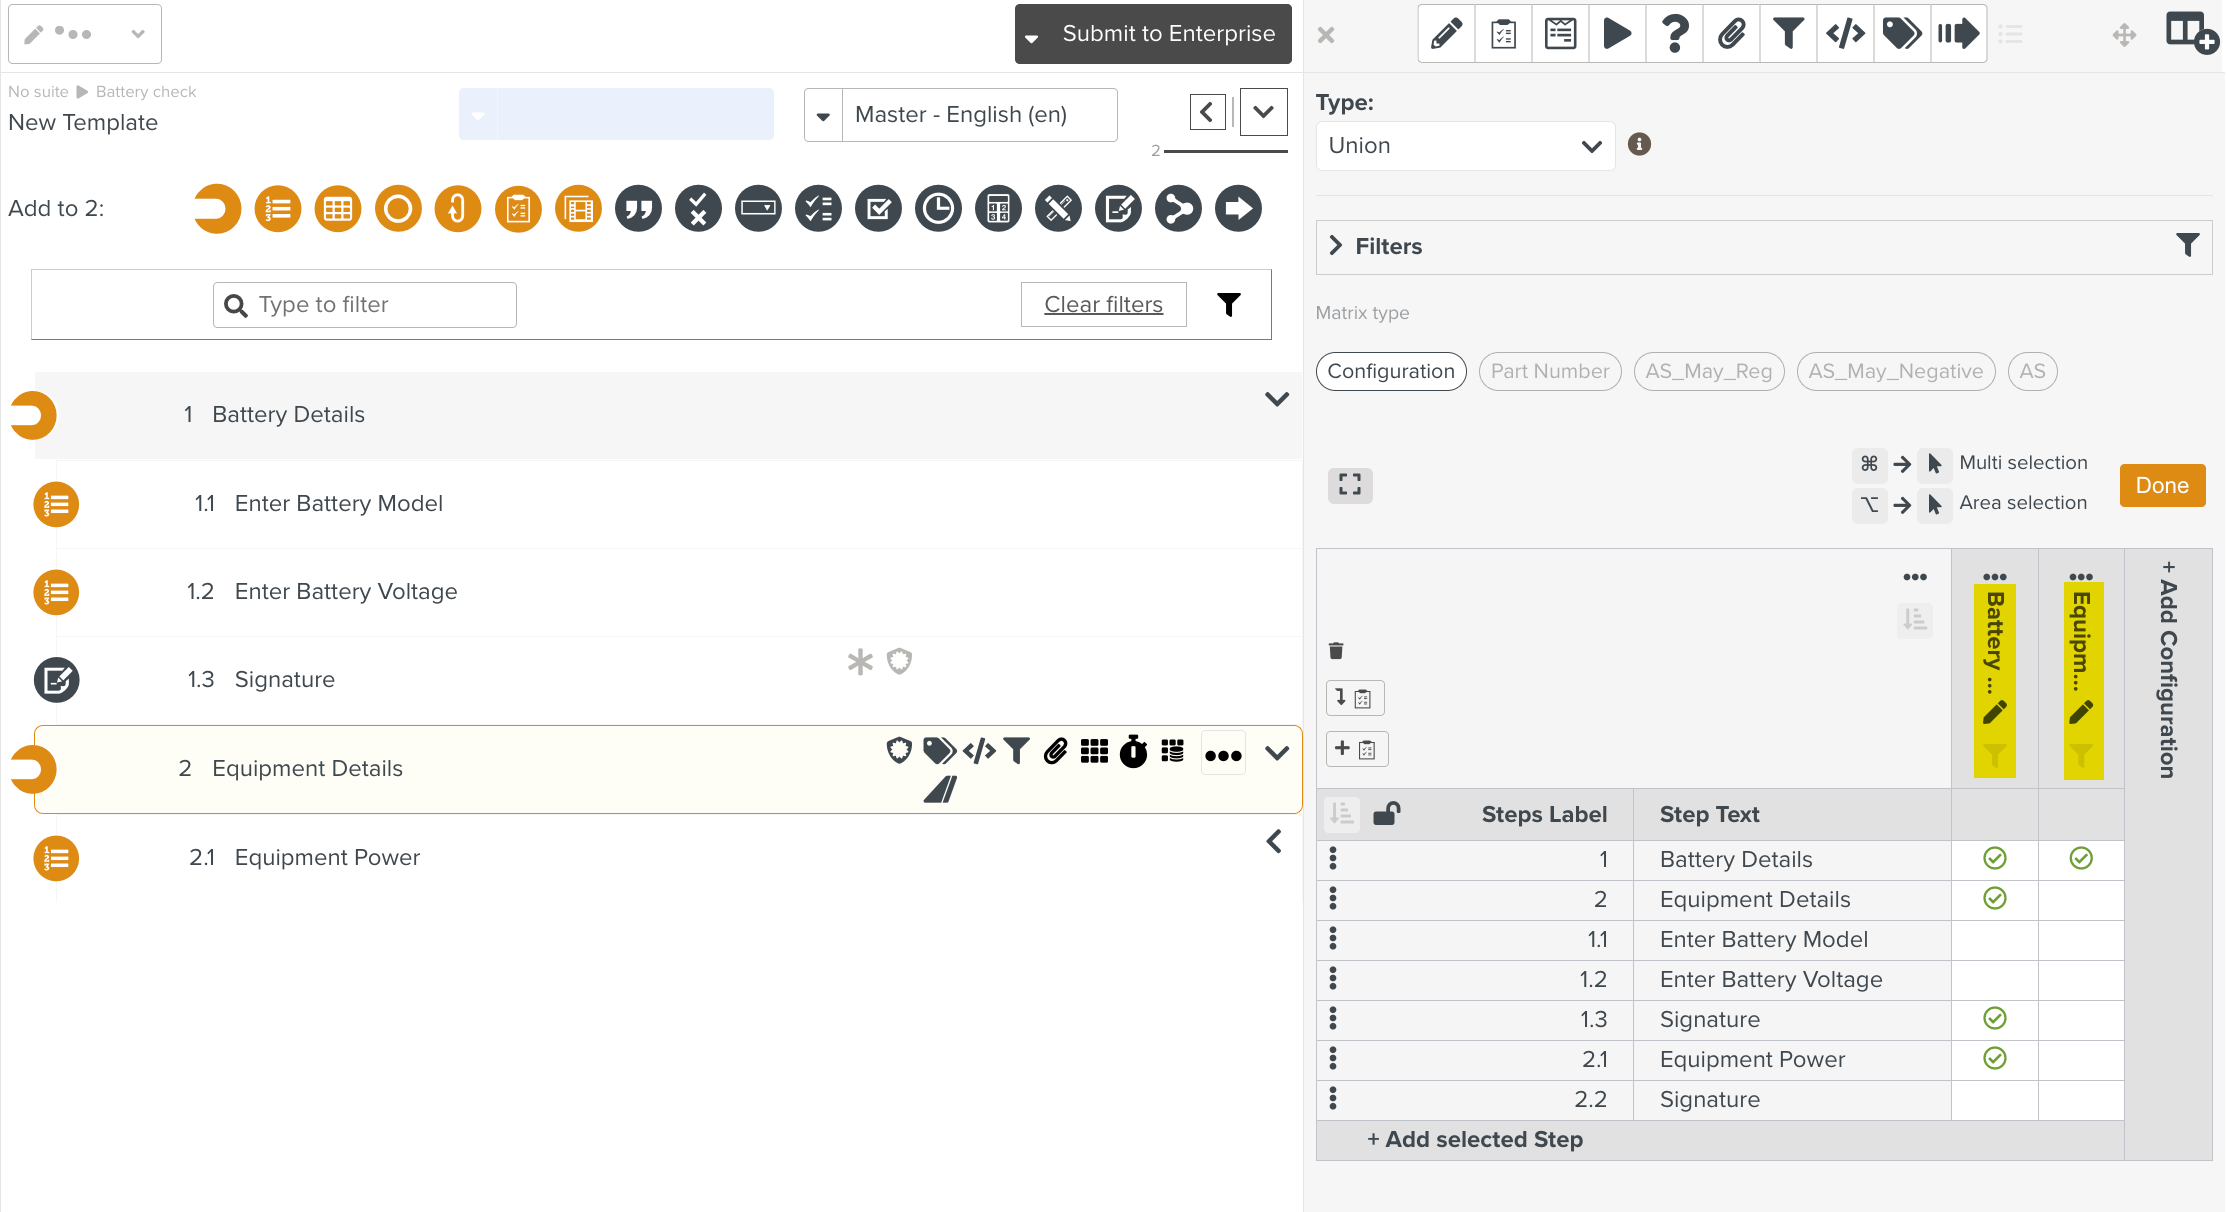
Click to select/deselect all the Steps in a matrix.
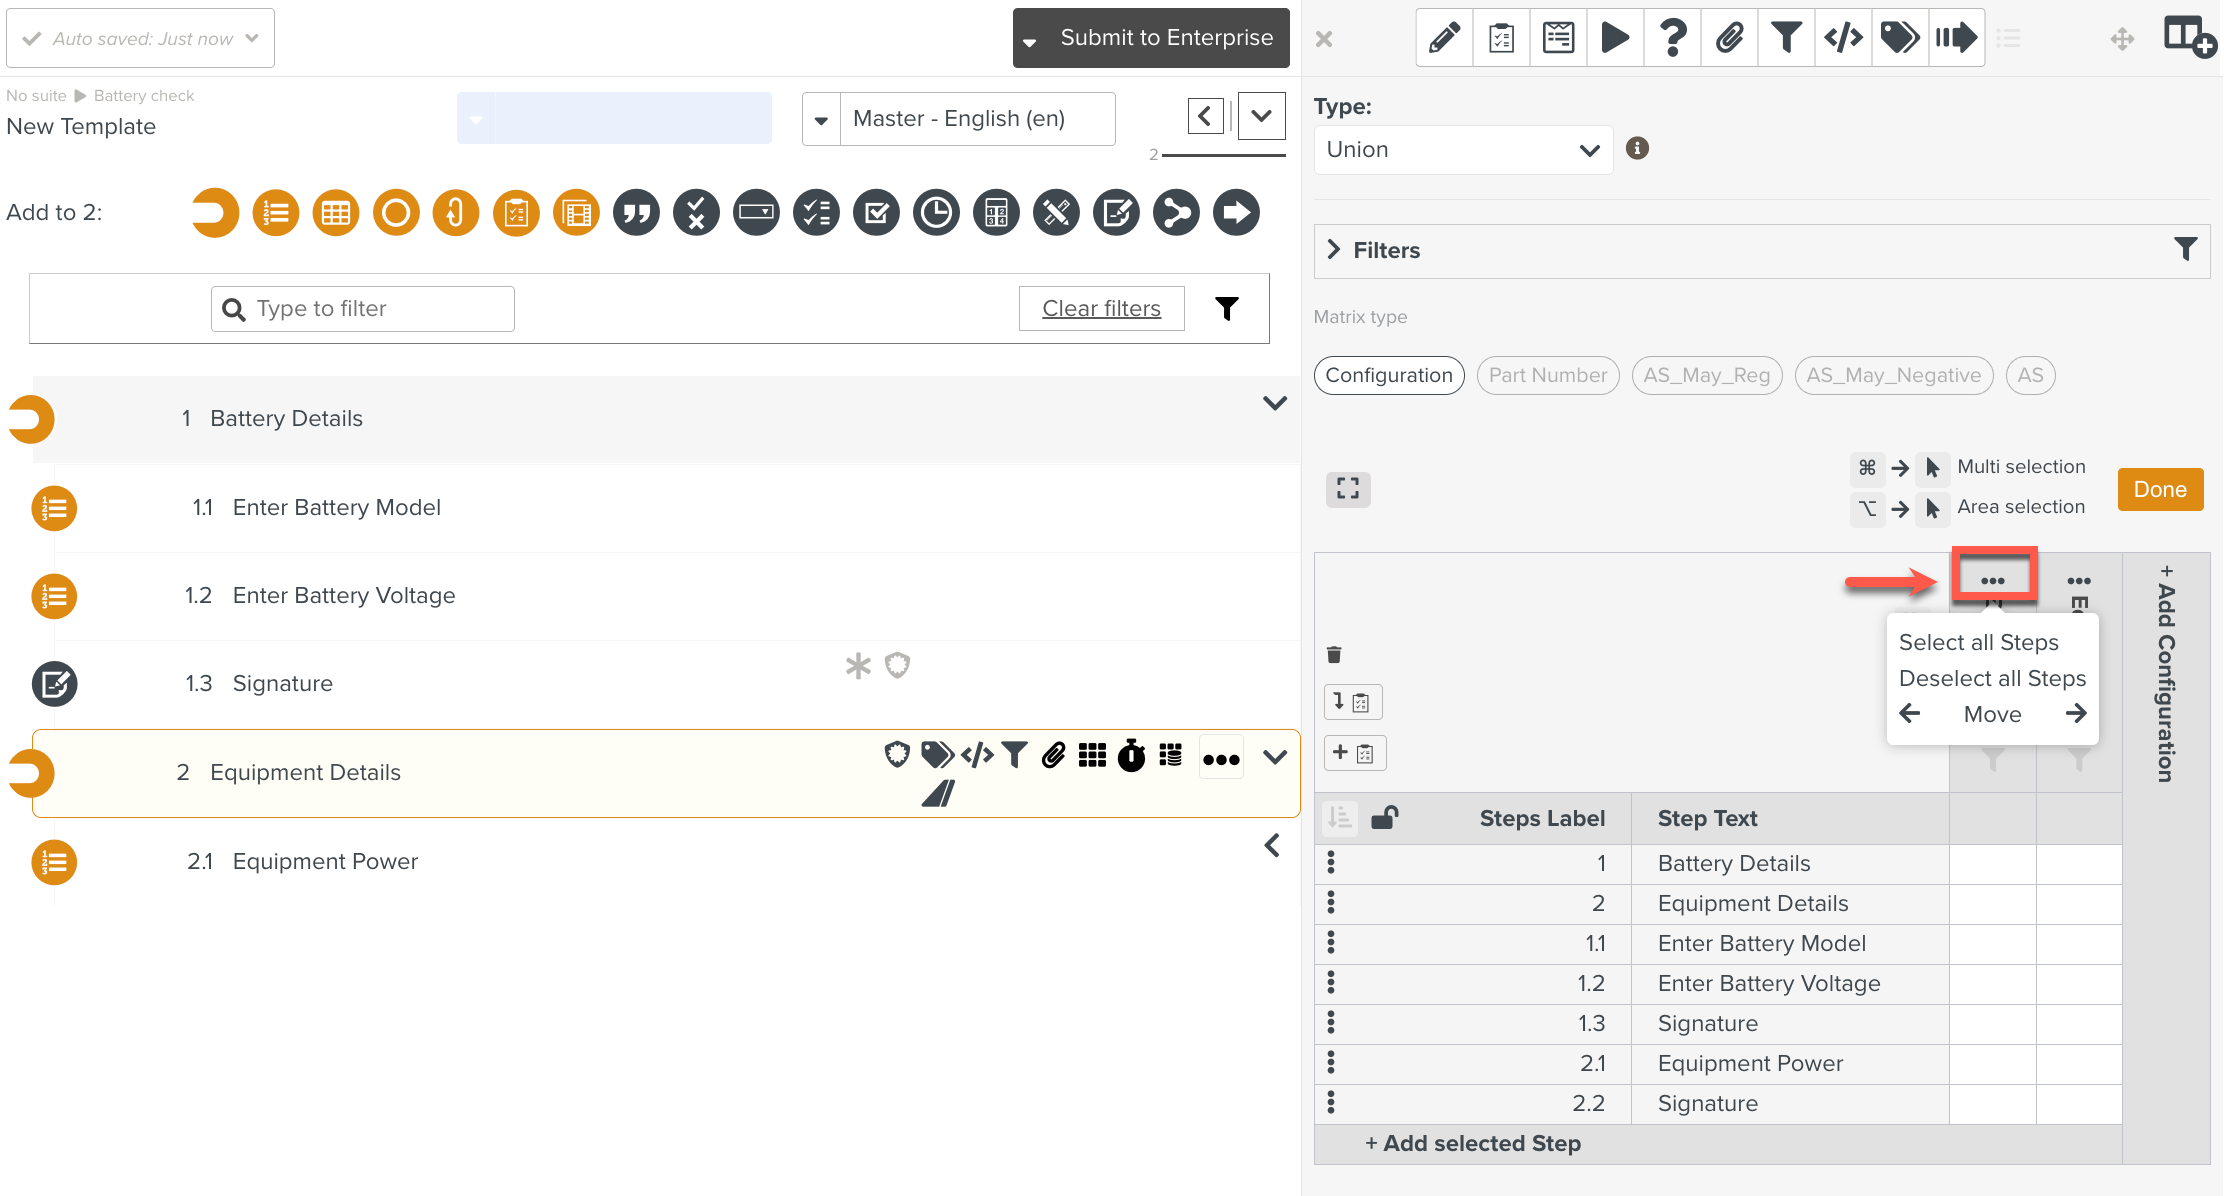 |
On clicking Select all Steps, all the Steps are added to the Configuration as highlighted below.
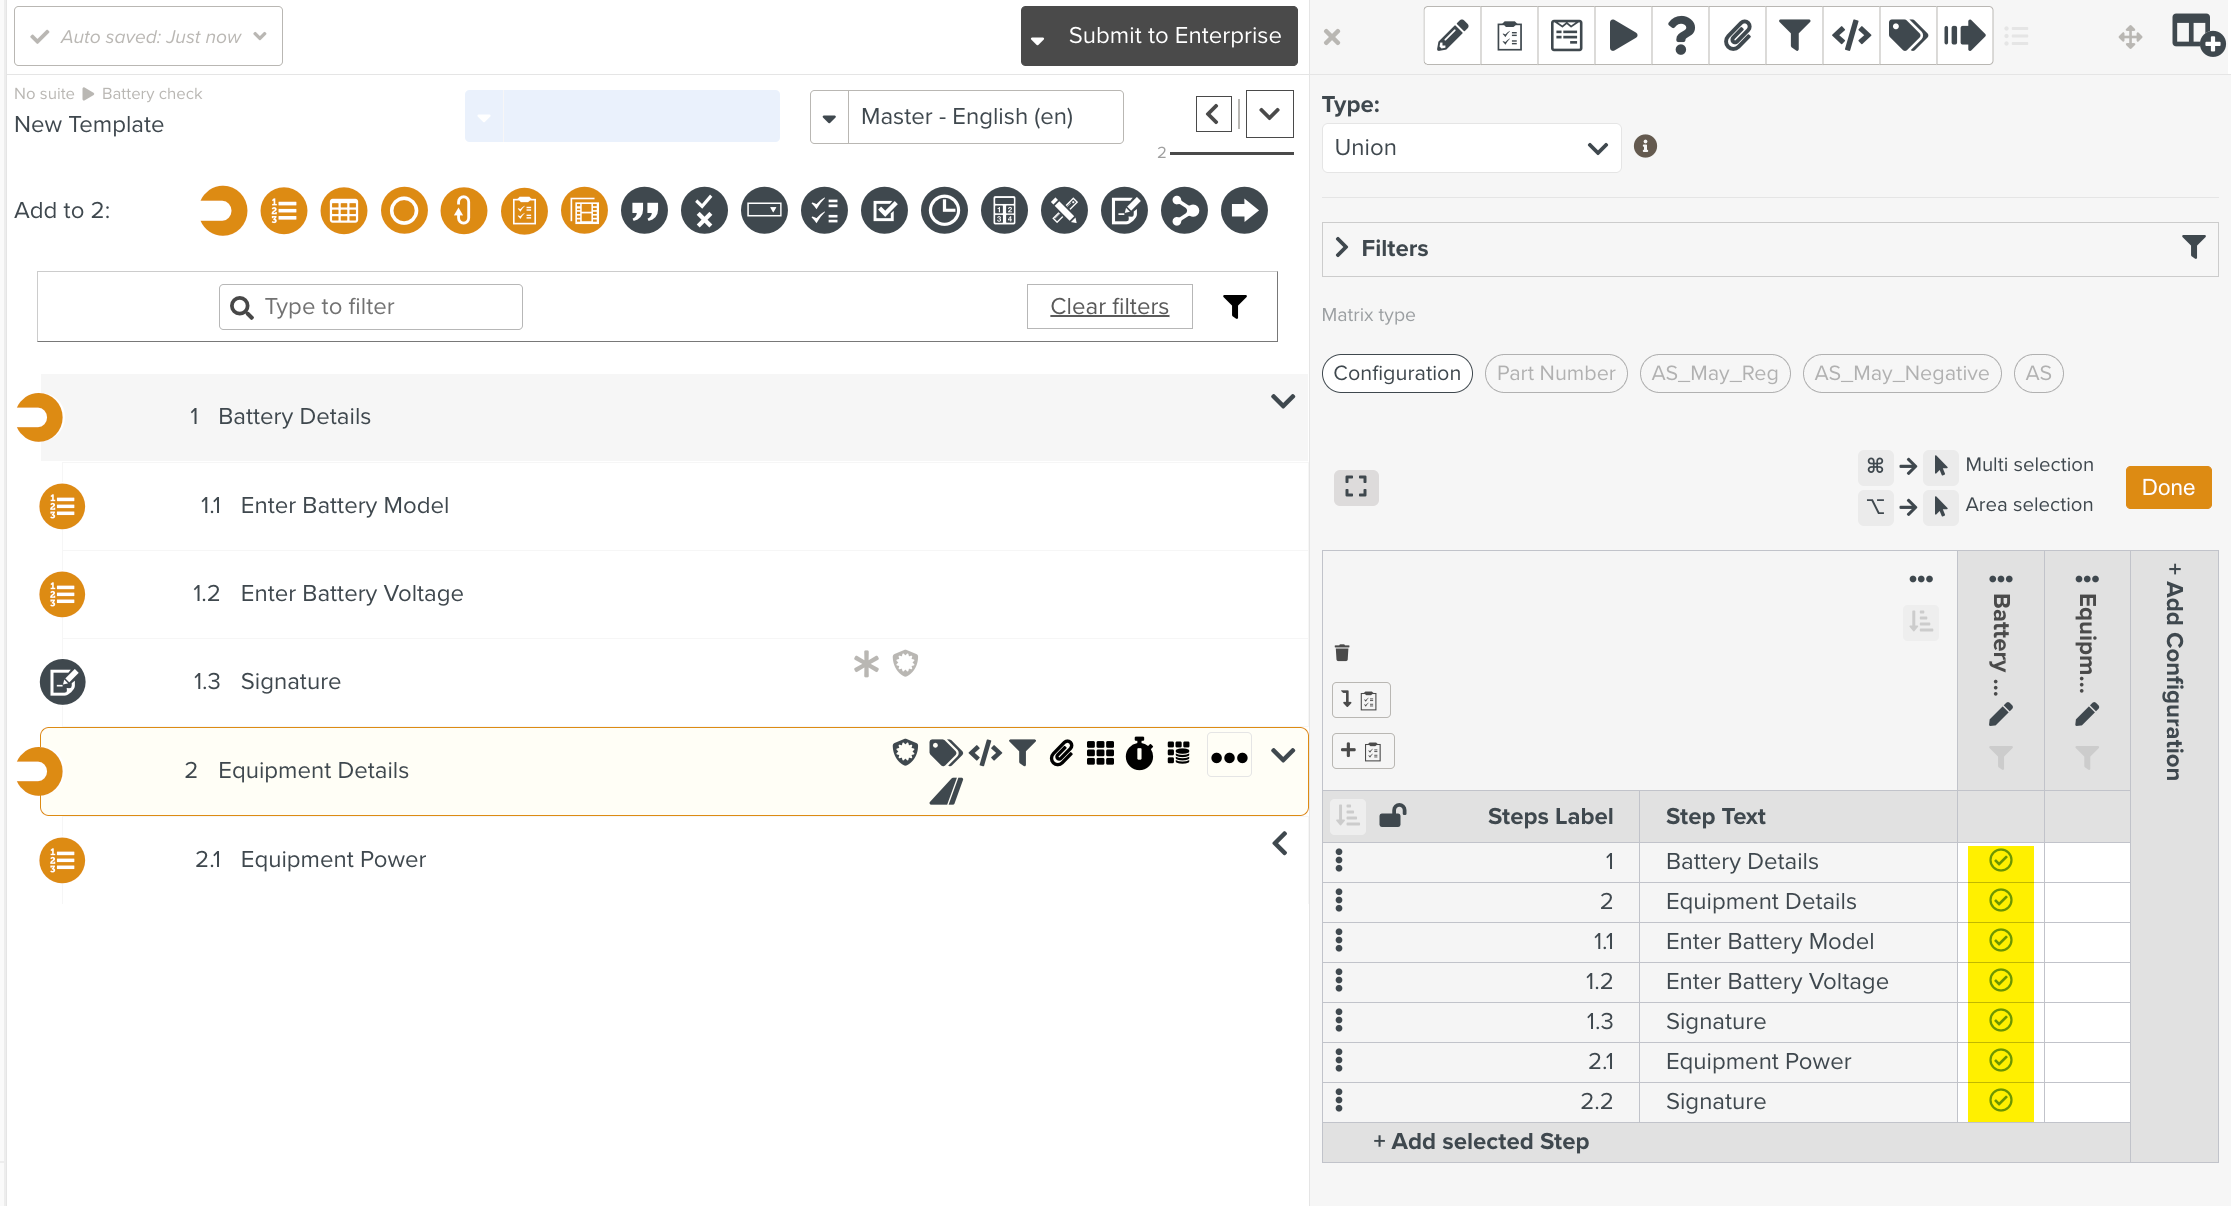 |
Note
 maps several Steps to the Configuration in a single click.
 maps several consecutive Steps to the Configuration in a single click.
 |
Click to select/deselect all Configurations.
 |
In the example below, all Configurations have been selected.
 |
Click to Activate, Deactivate or Show Decommissioned Configurations.
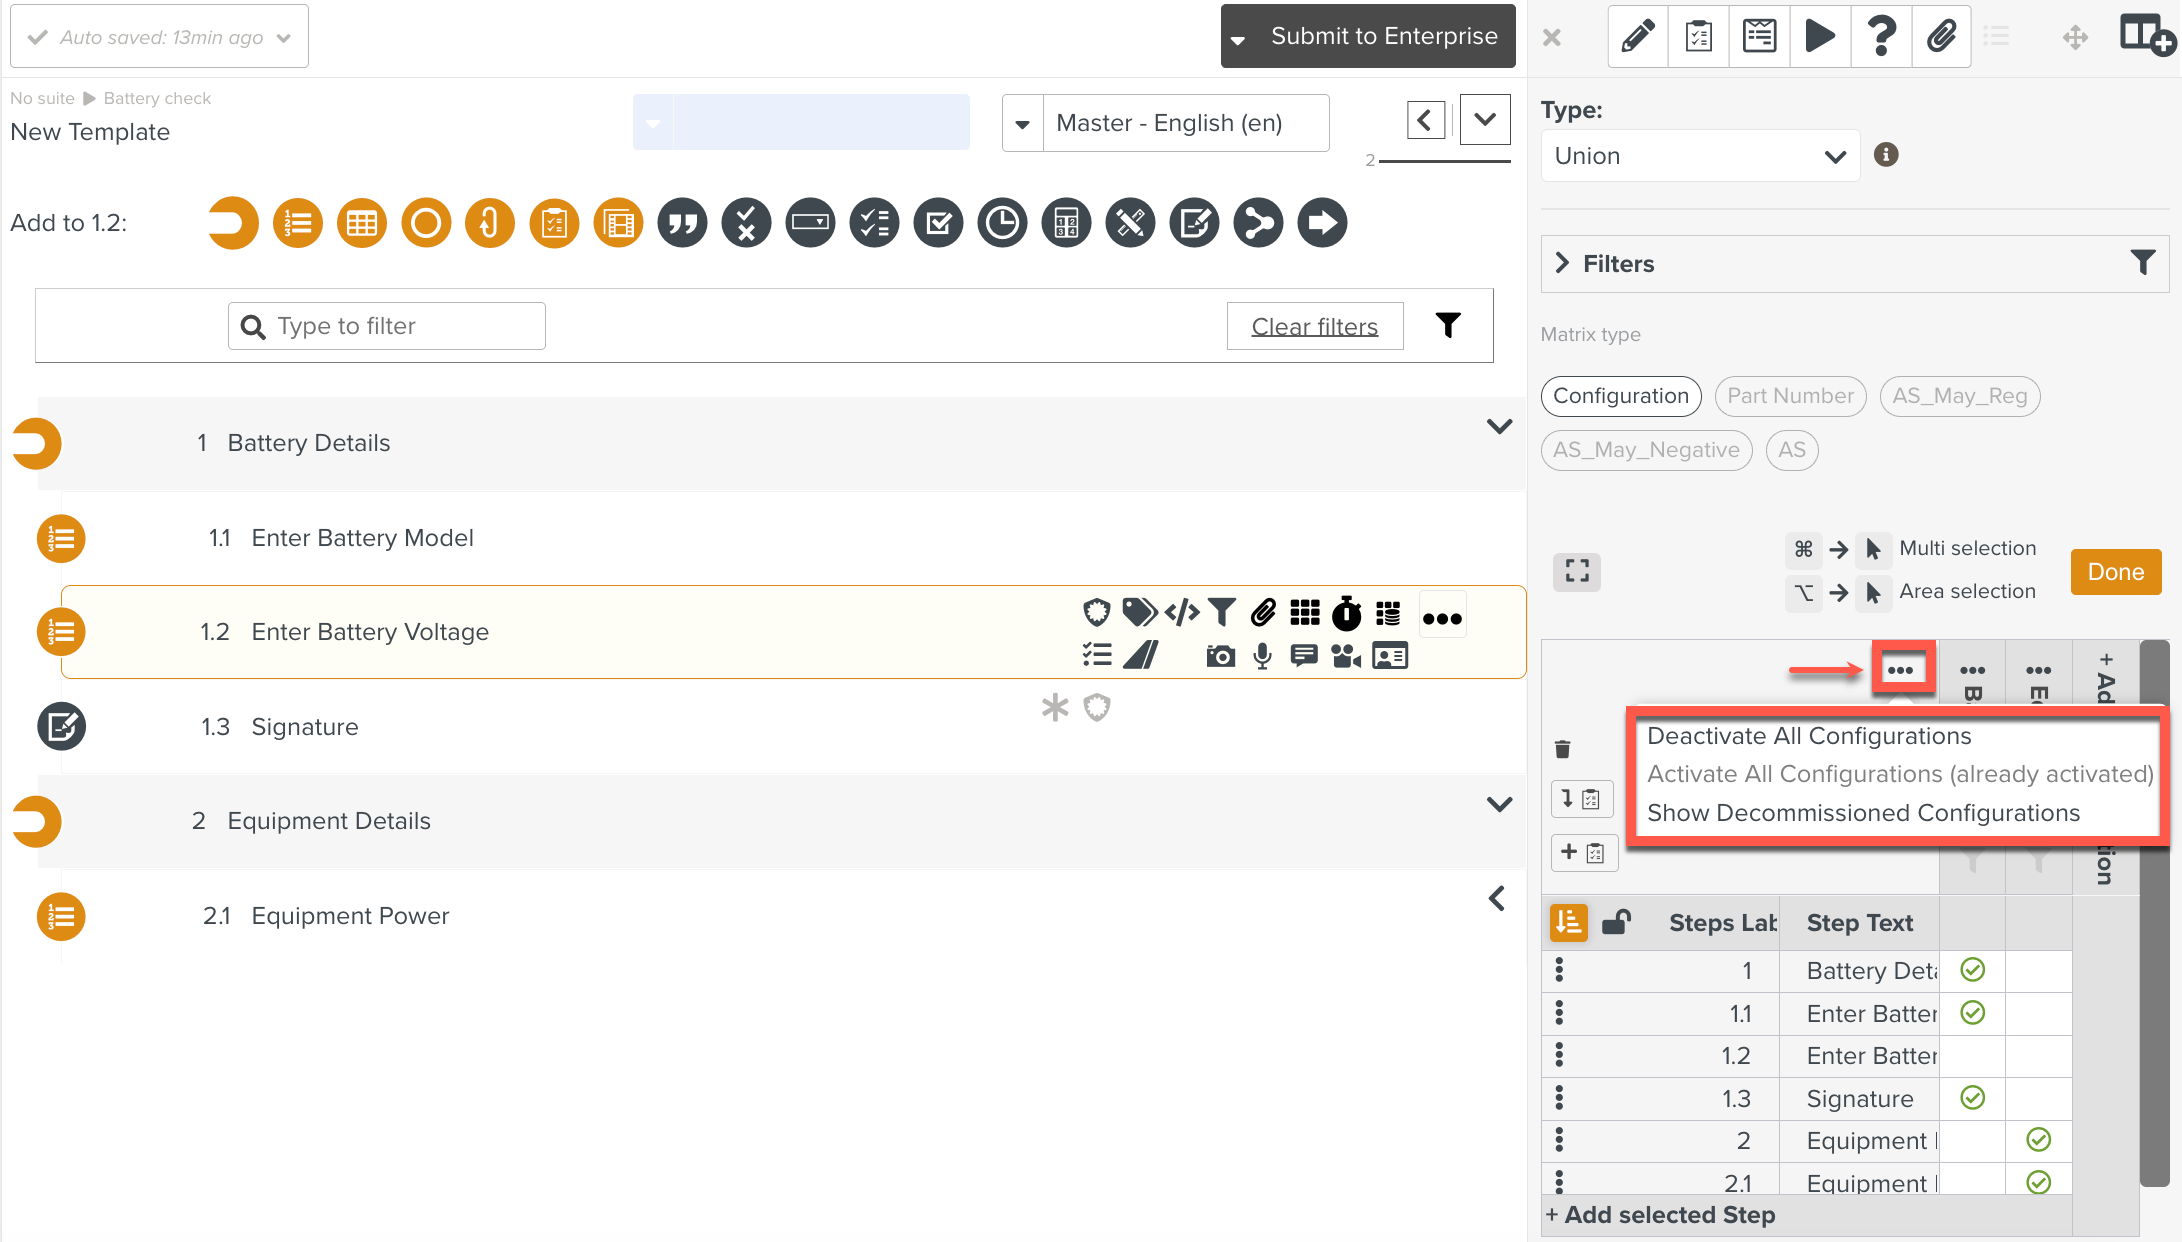 |
Click to activate all Configurations in the Configuration Matrix.
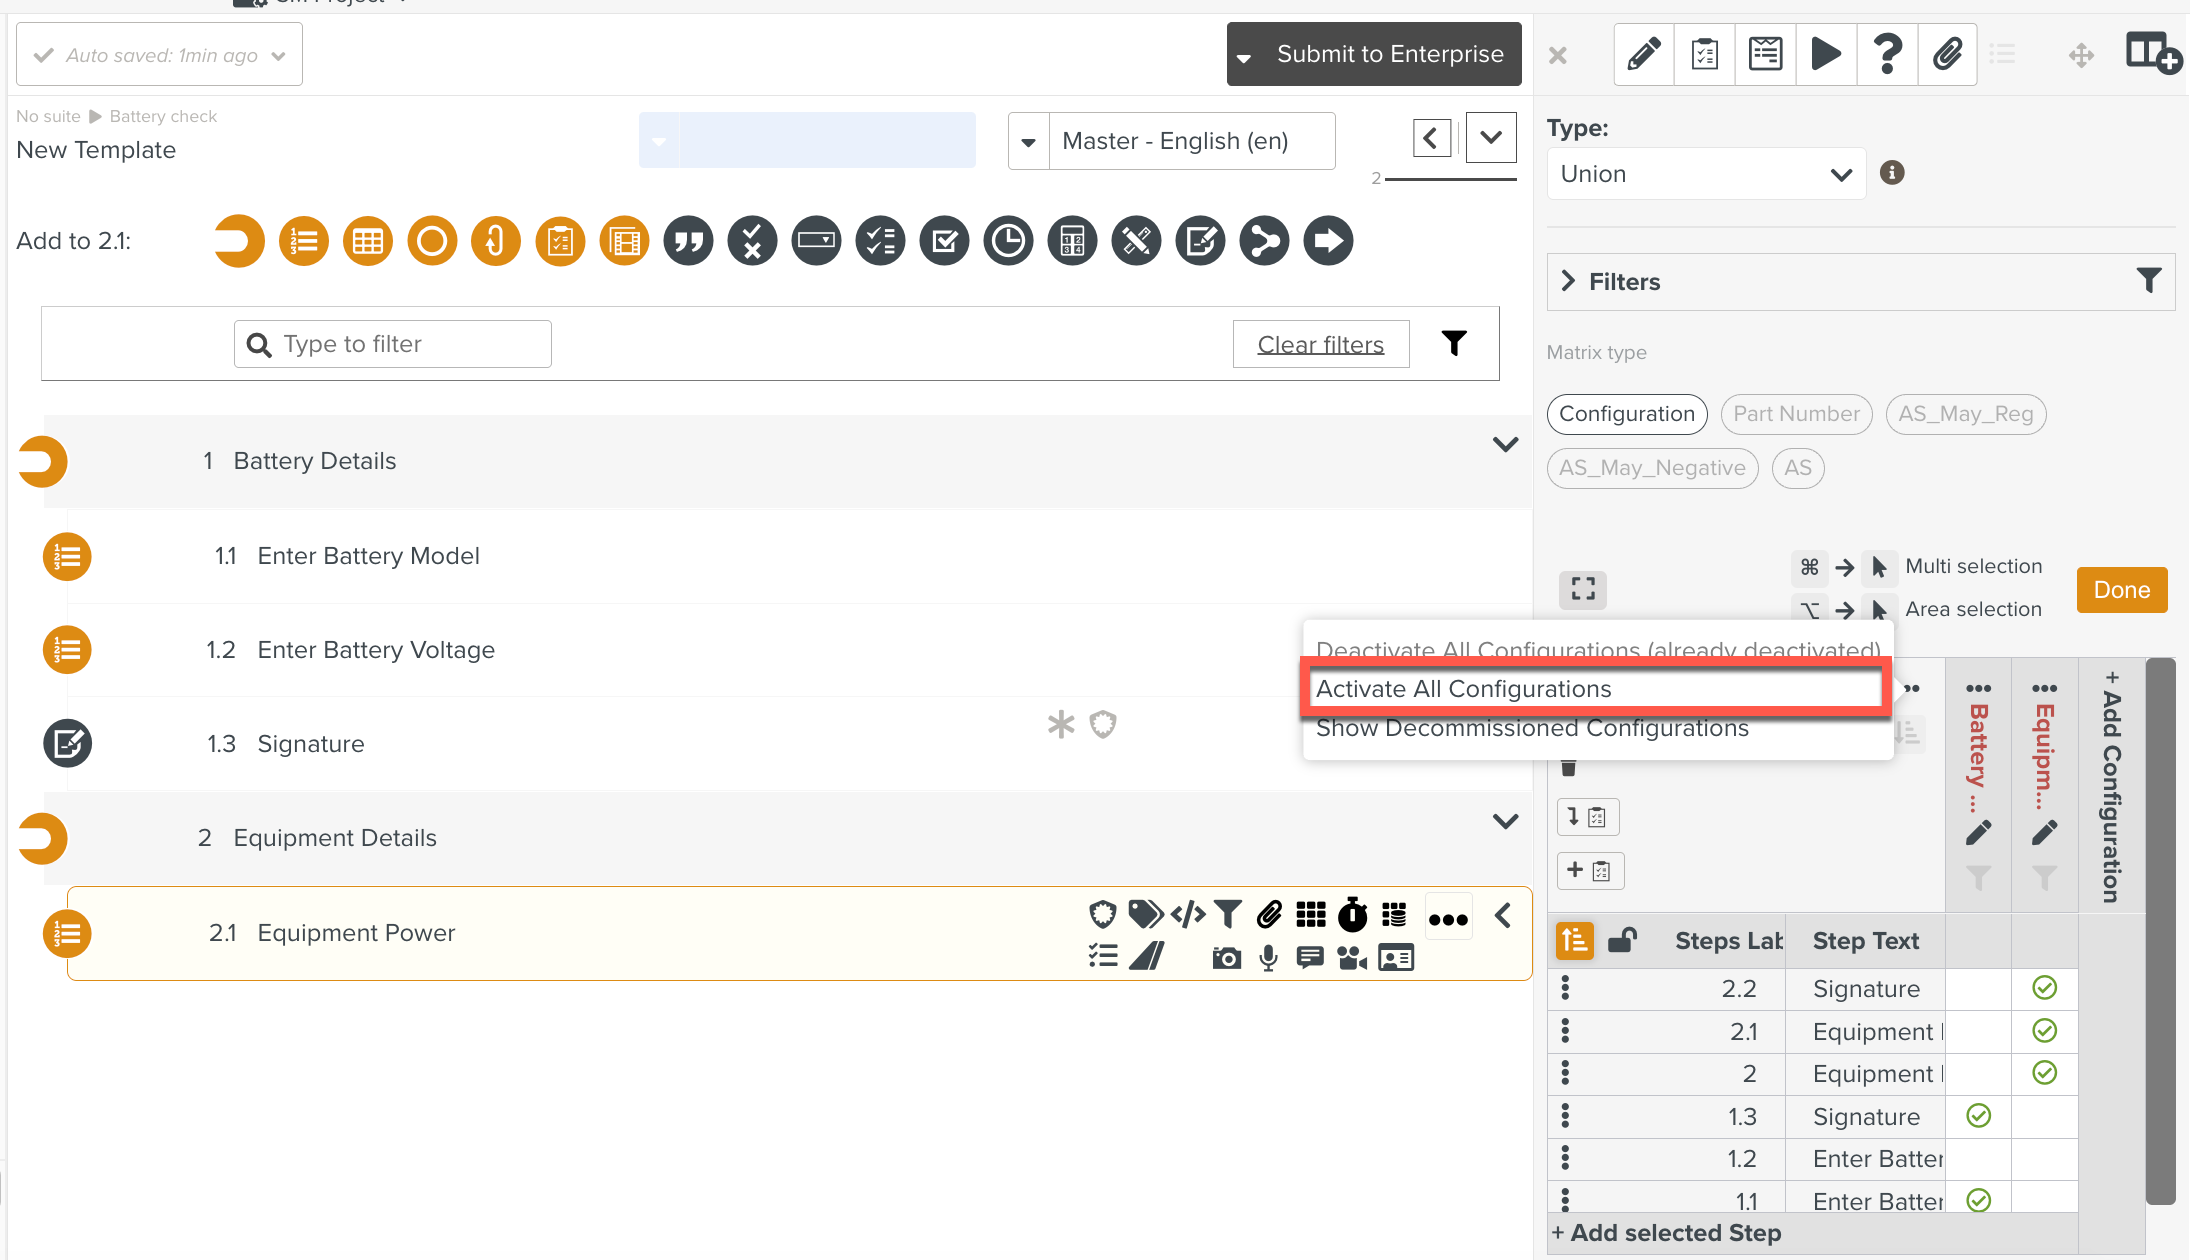 |
All the Configurations are activated as highlighted below.
 |
Deactivate all Configurations discusses how the Configurations can be deactivated in a Template.
Click  to sort Steps in Ascending order.
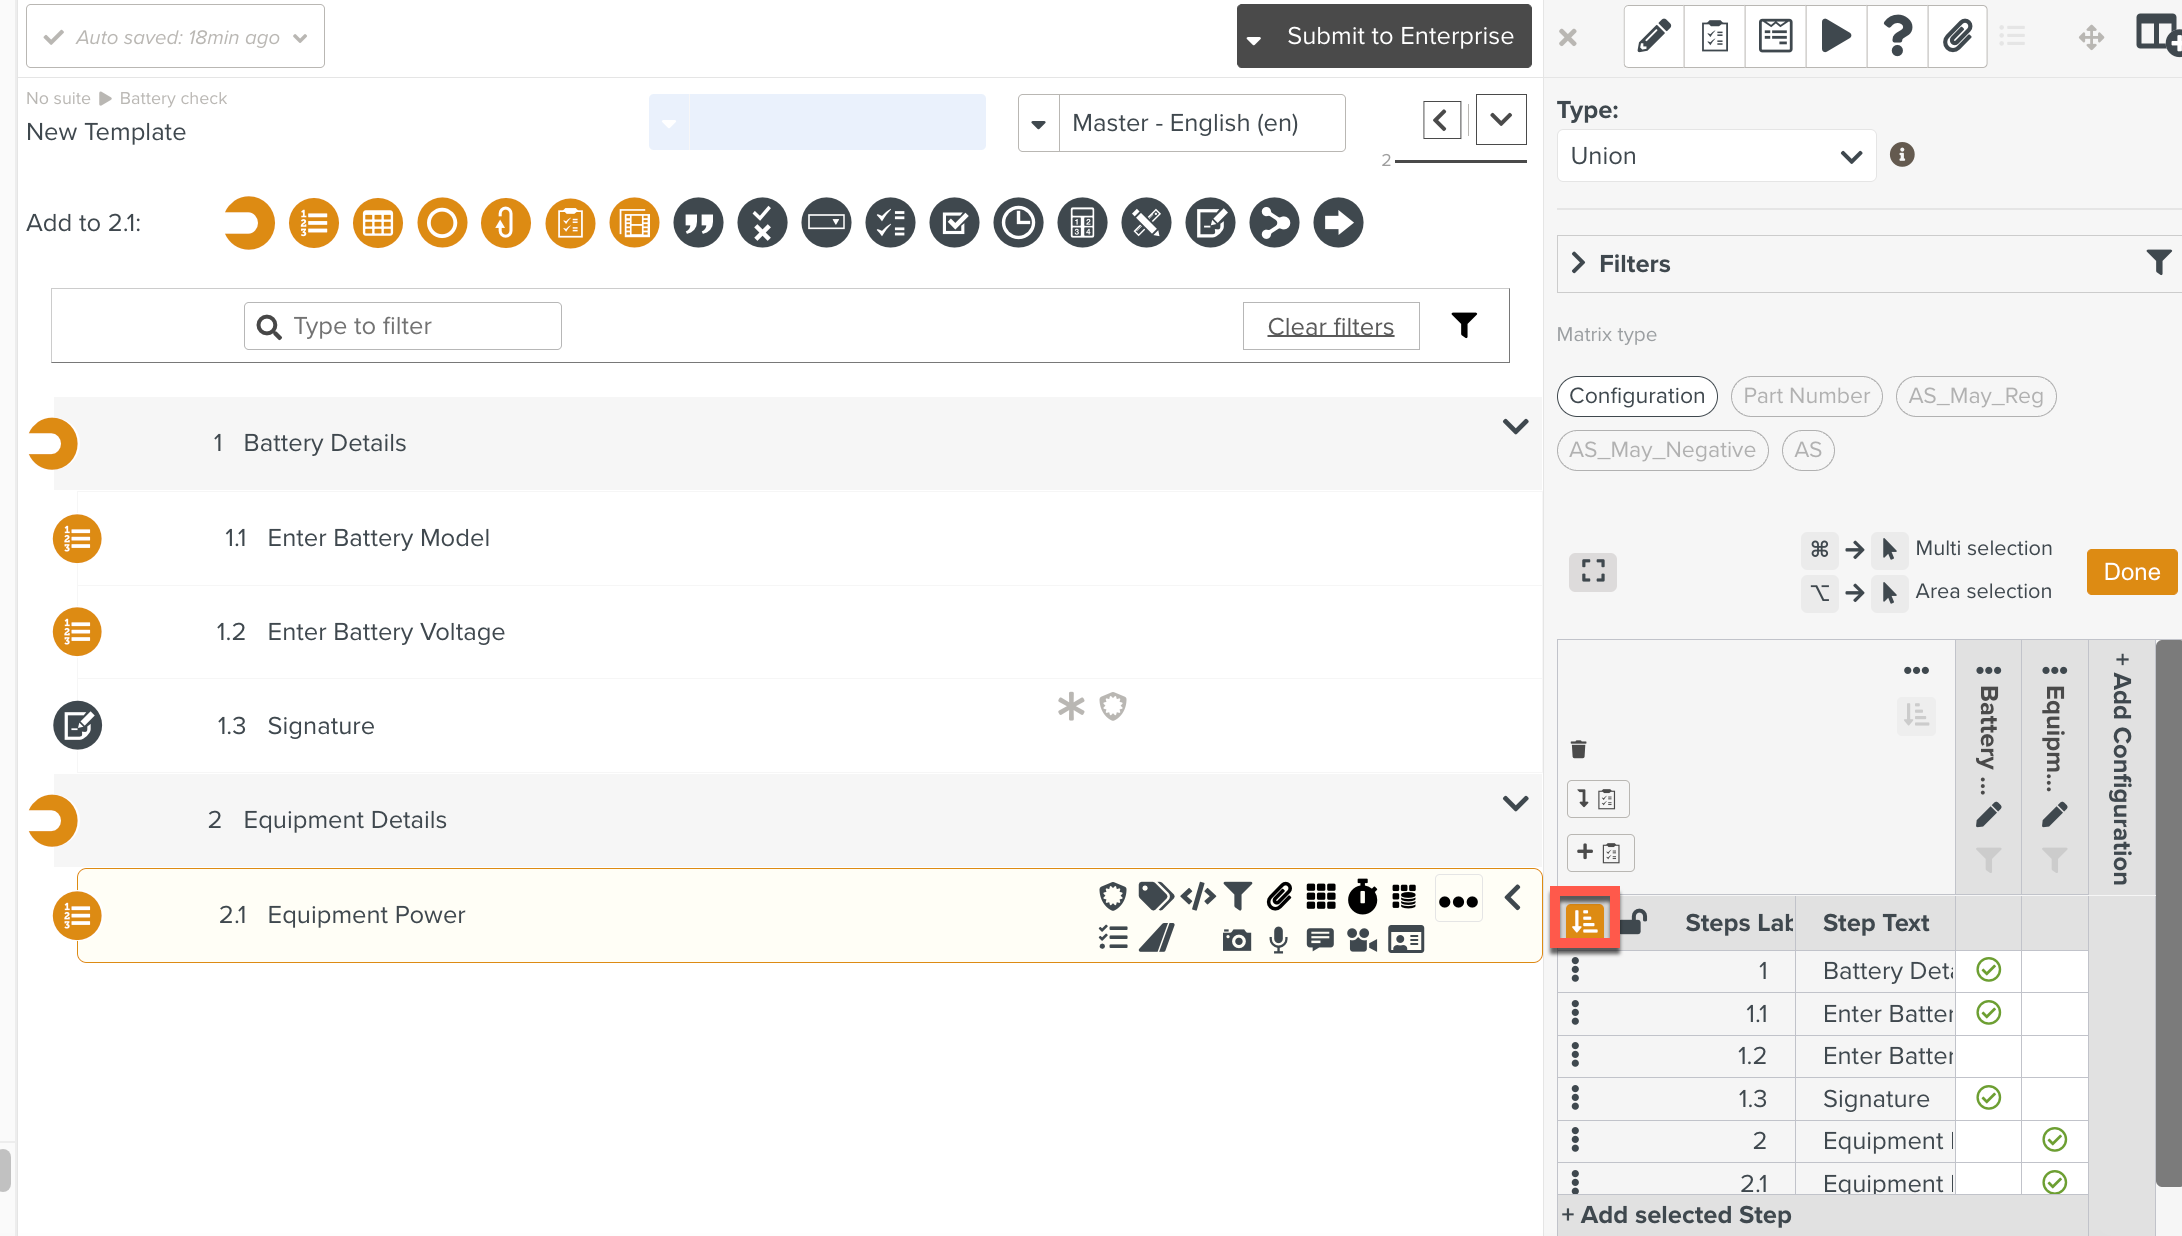 |
Click  to sort Steps in Descending order.
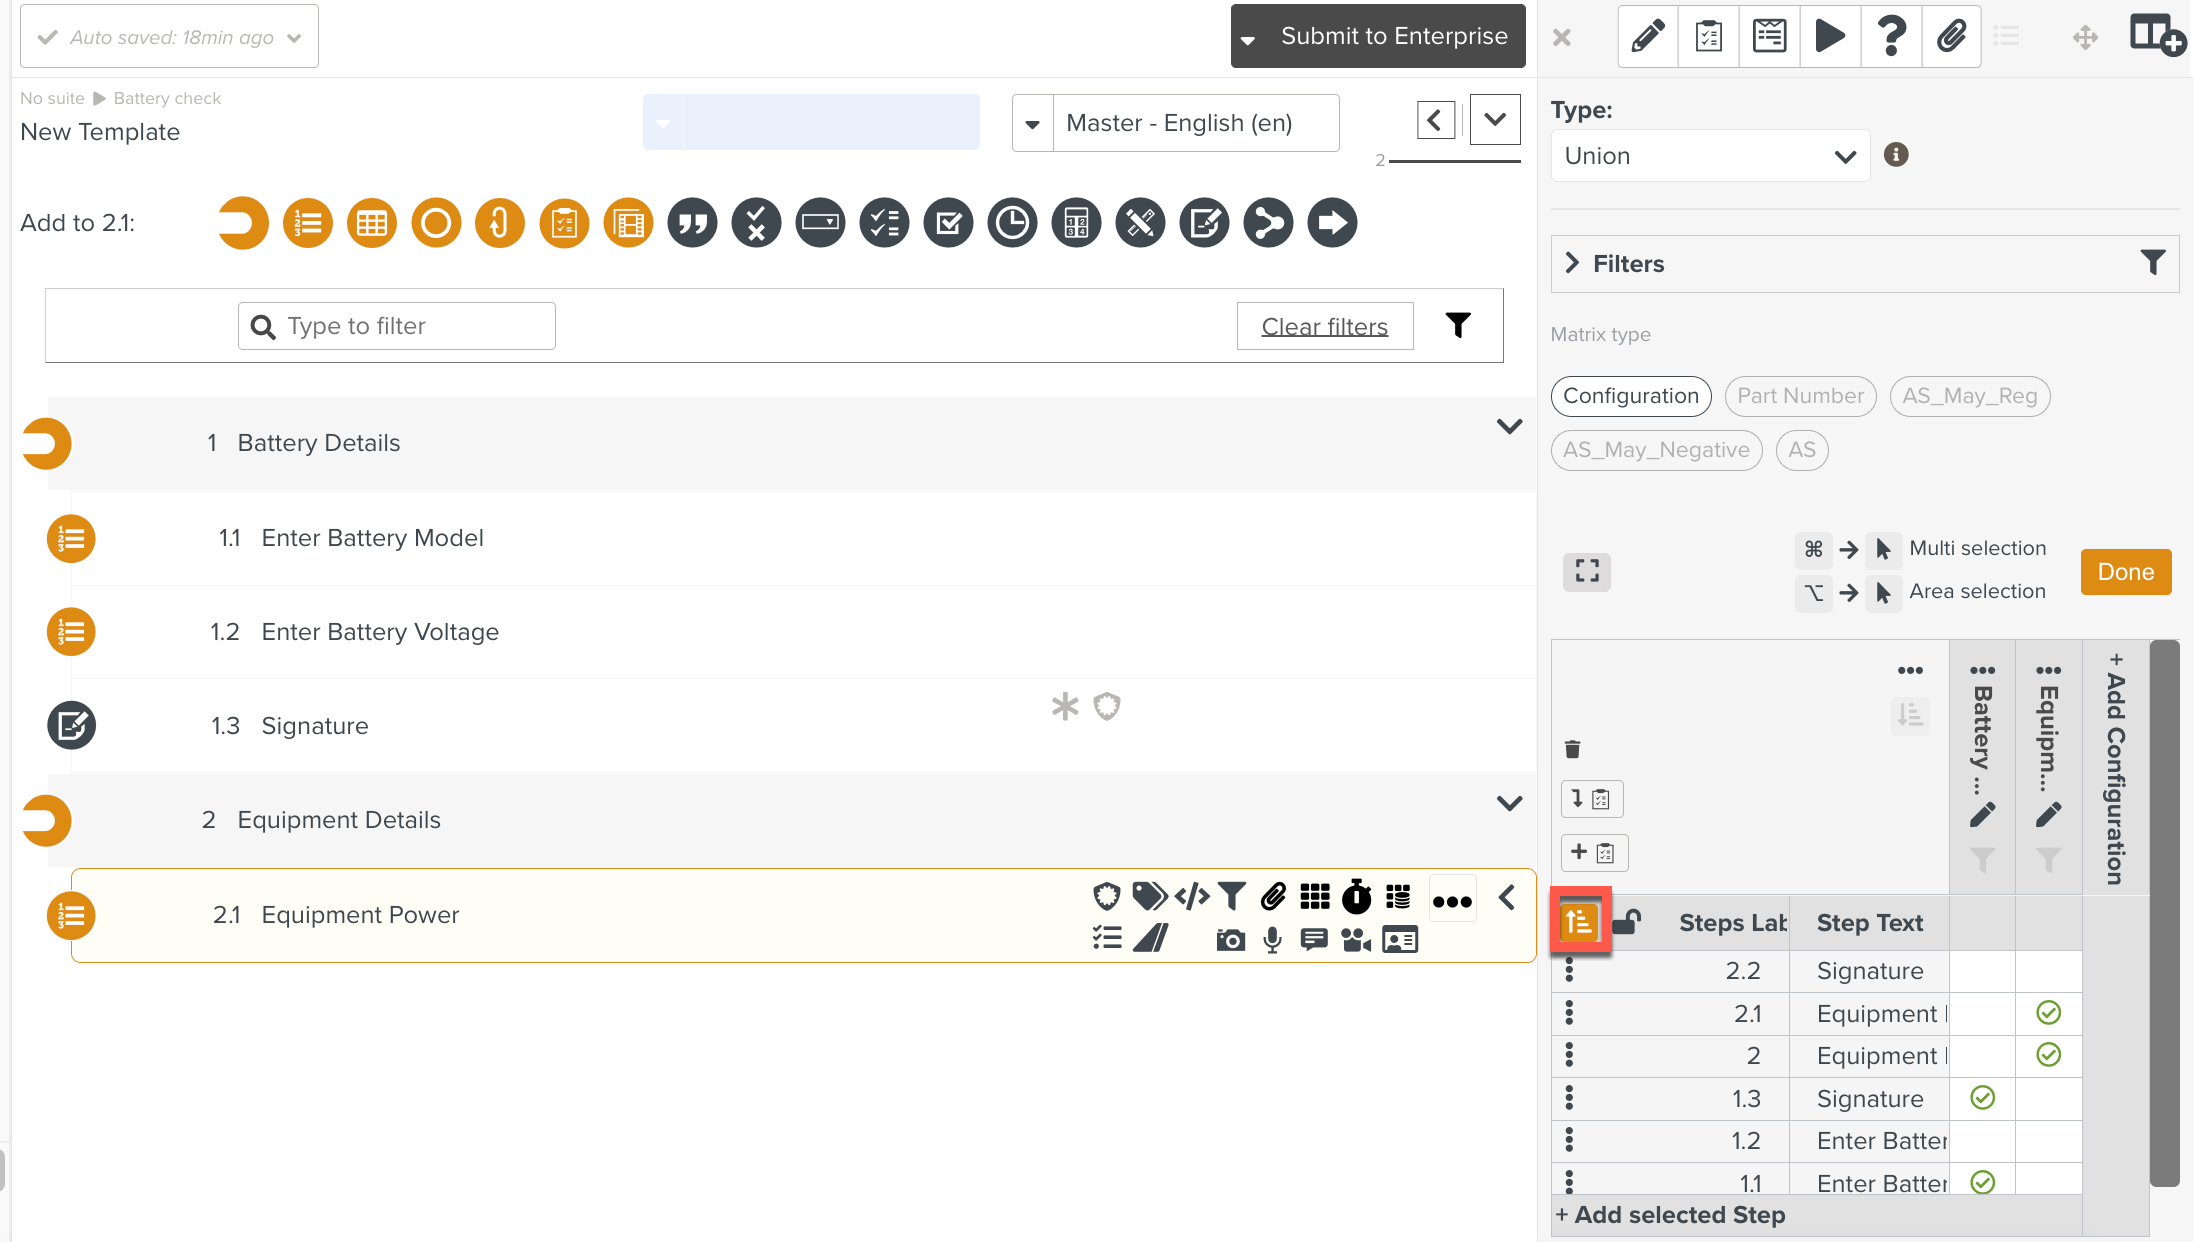 |
5. Move
Click to move a Configuration.
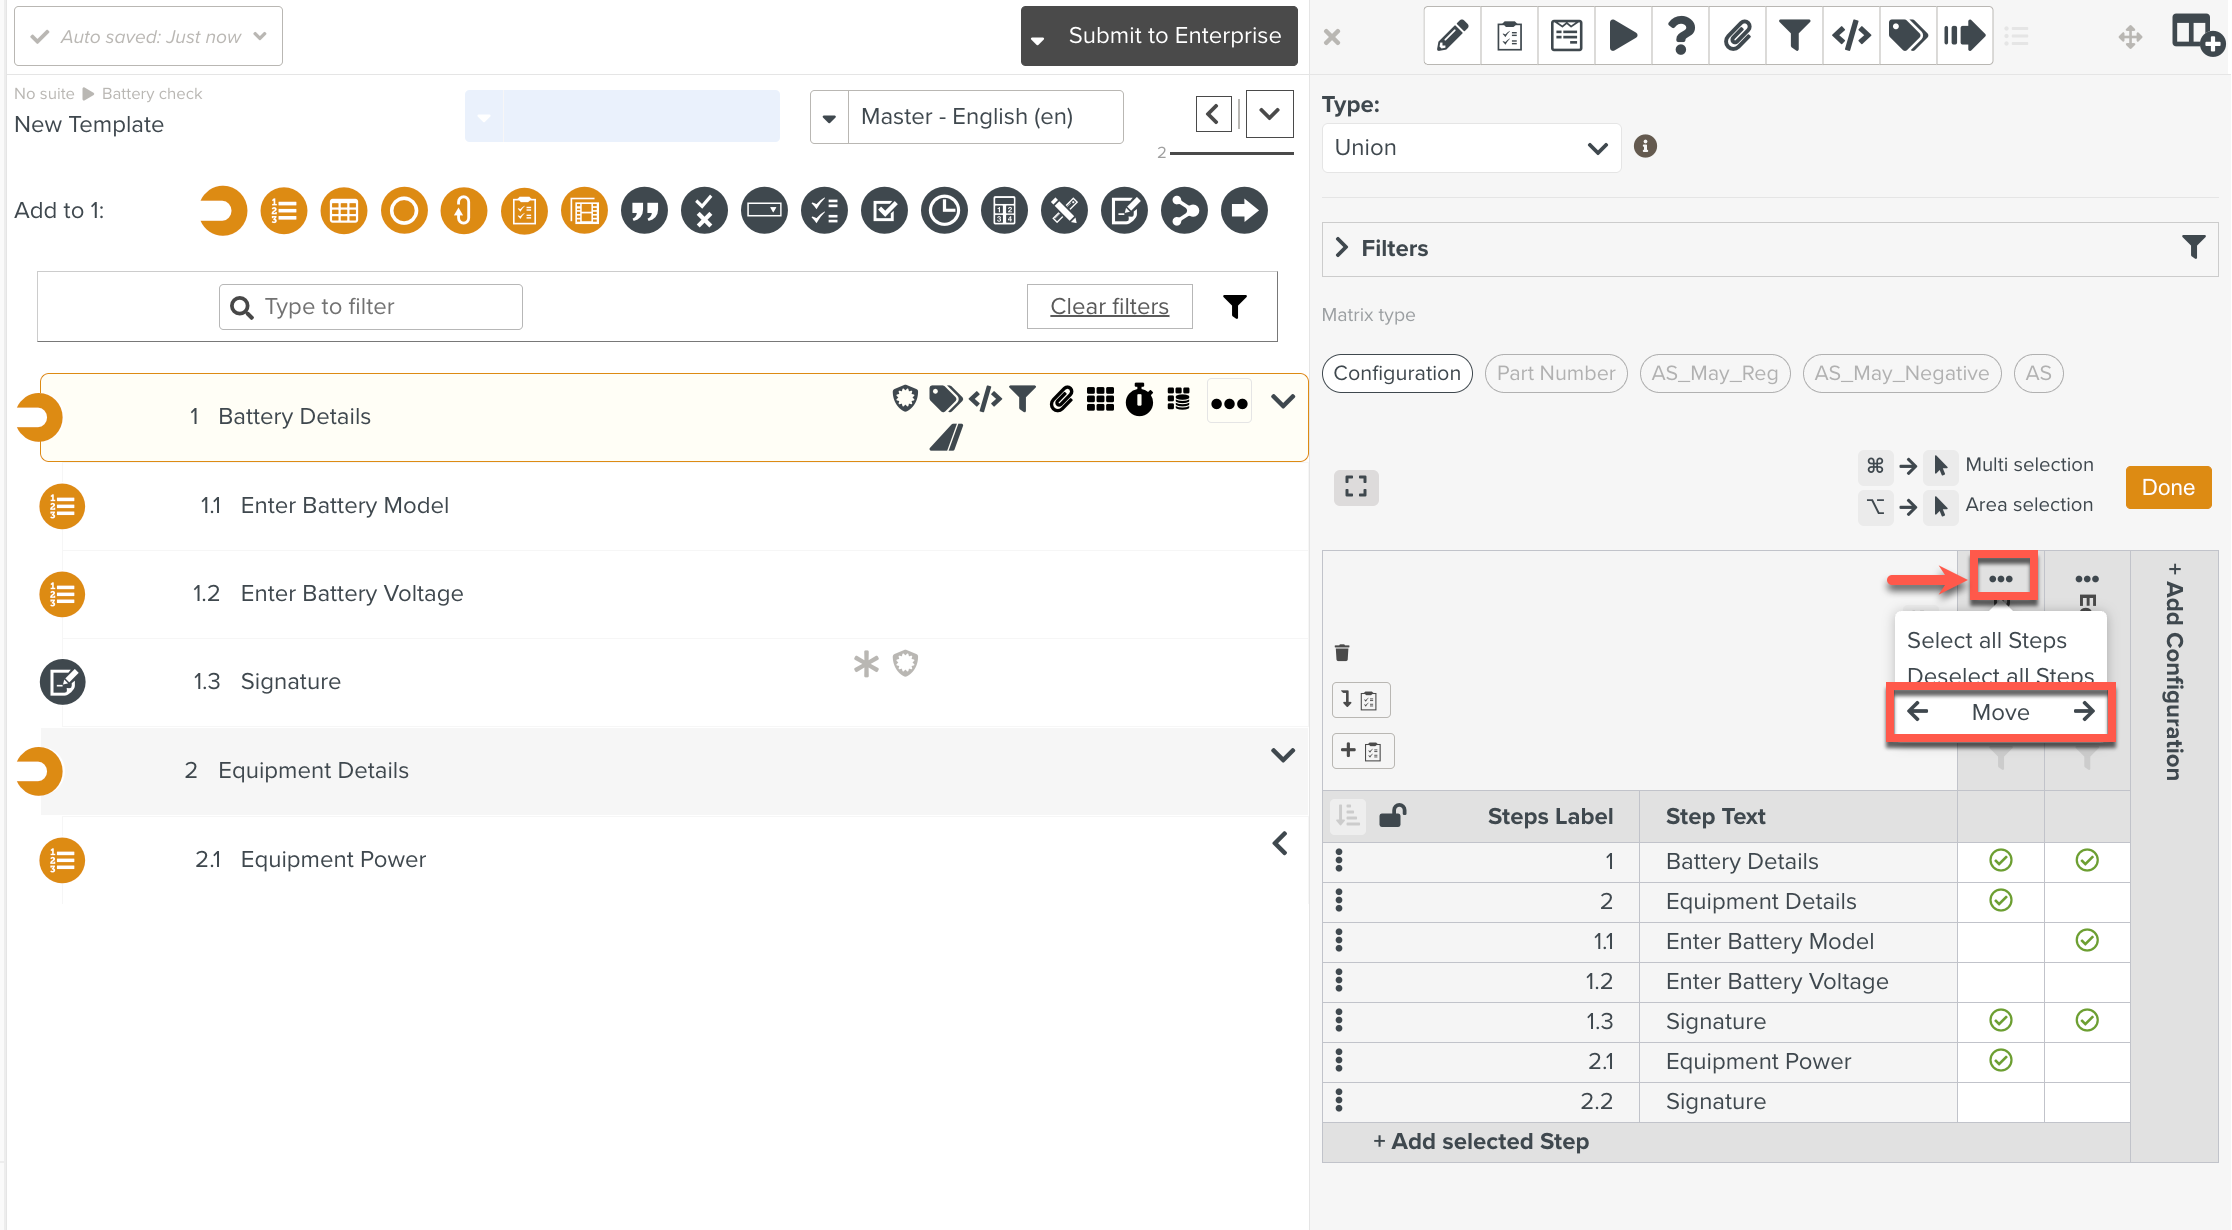 |
In the example below, the Configuration Battery Details is moved to the right.
 |
Using the Execution Preview  , you can test the execution of the Configurations while working on them. You can preview the execution any number of times and make changes to the Configuration settings to suit your requirements.
Note
The Execution Preview provides only a simulation of the actual execution. For real-time execution of the Configuration(s), the Template must be published. To know more about Template publishing, see Publishing a Template.
To preview the execution of the Configuration(s):
Select the tab Execution Preview
.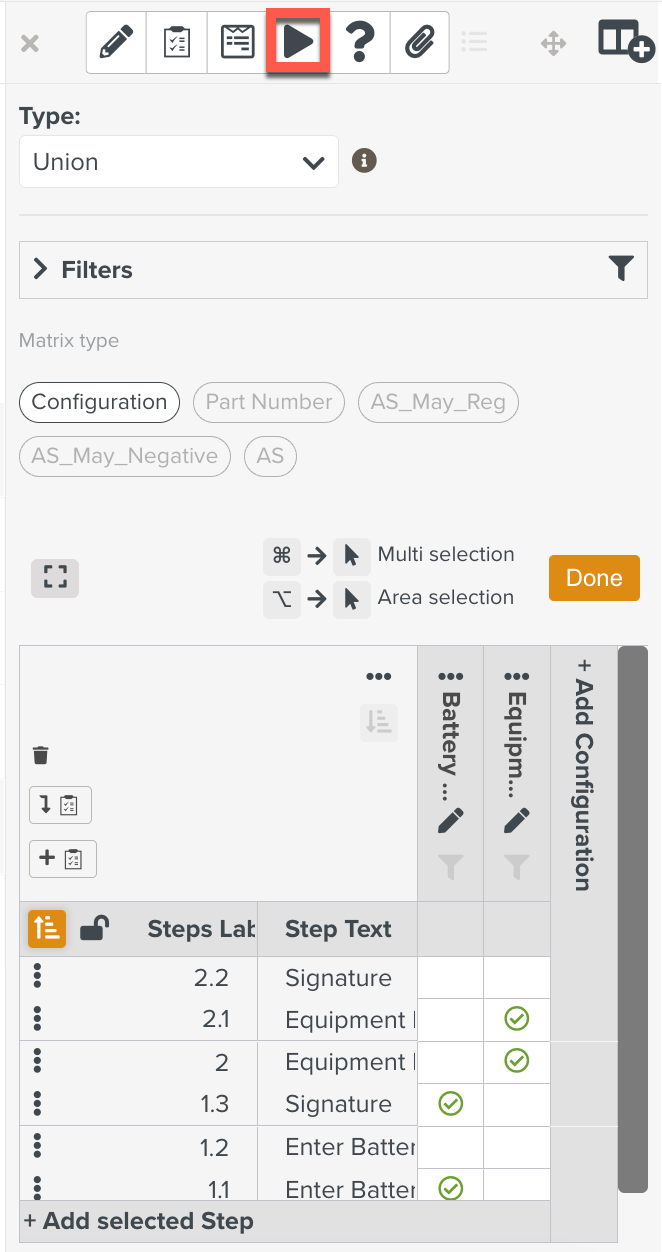
The section is displayed.
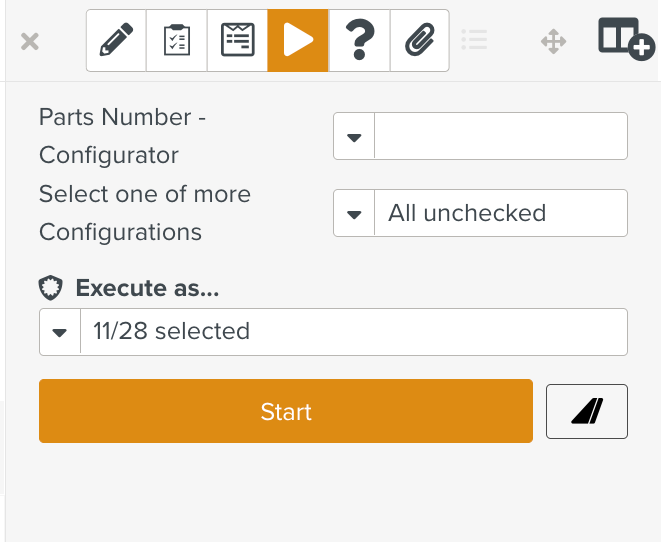
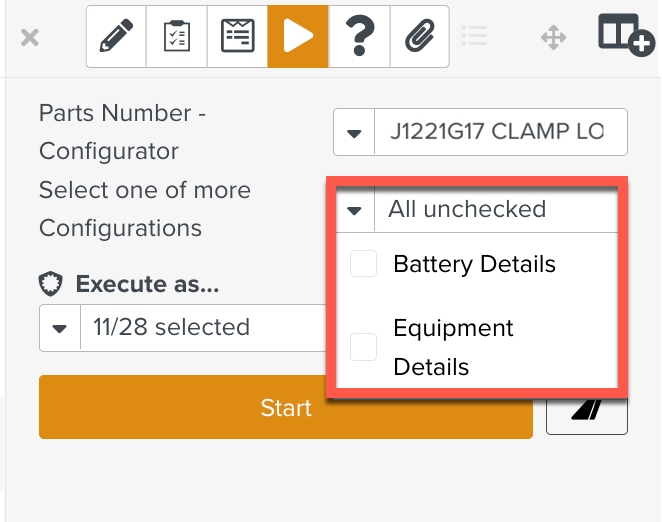
Select a Part Number- Configurator from the dropdown list as shown below.
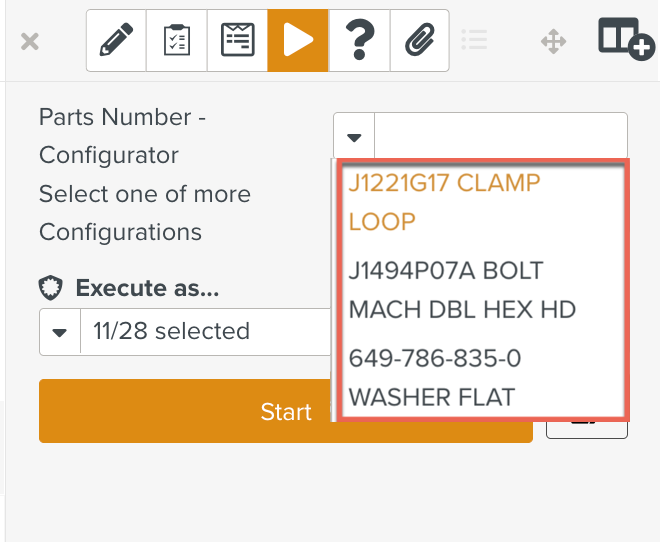
Select one or more Configurations from the dropdown list.
The Configurations associated with the selected Part Number will appear in the drop down list.
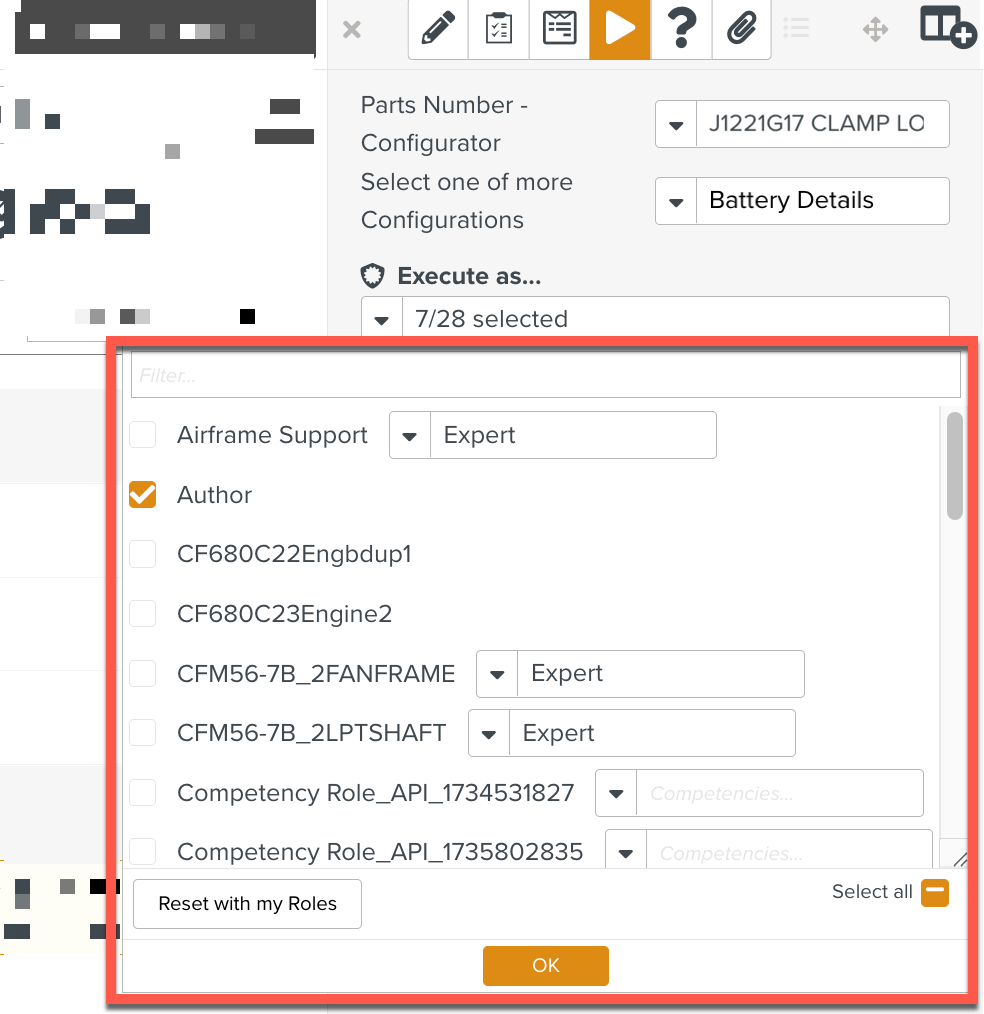
Select one or more roles from the Execute as dropdown list.
Click .
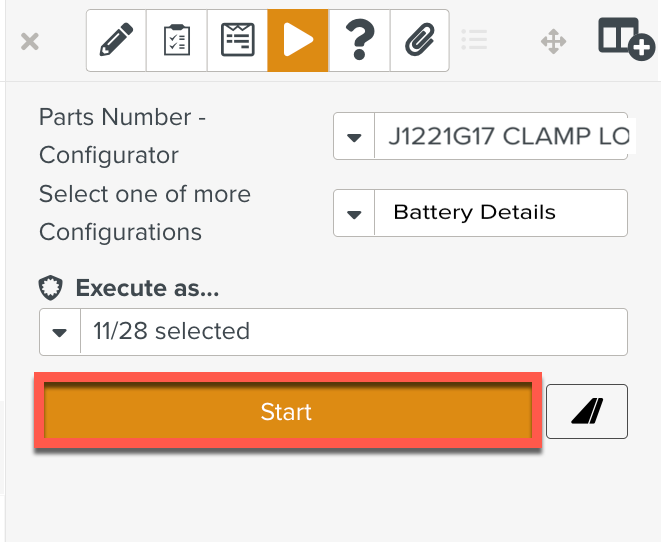
The Steps based on the selected Configuration(s) are displayed.
The following example shows how the Configuration settings are applied during execution.
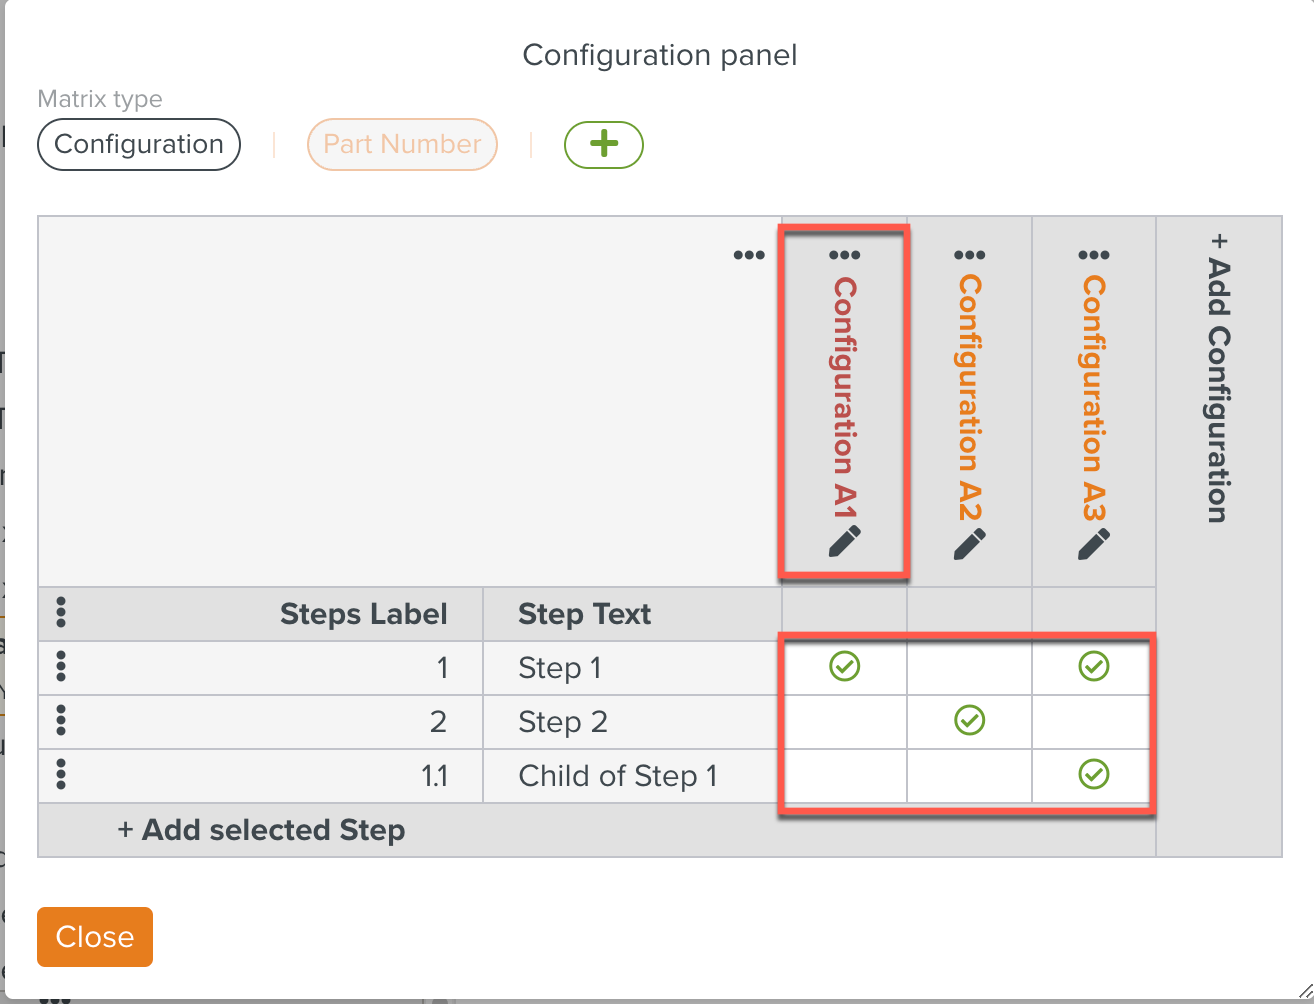
In the above example, Configuration A2 and Configuration A3 are Active Configurations. Configuration A1 is Inactive and indicated by red color.
The Type Union is selected.
For Configuration A2 Step 2 is selected. For Configuration A3 Step 1 and Child of Step 1 are selected.
In the , when Configuration A3 is selected, the relevant Steps based on the Configuration settings are displayed.
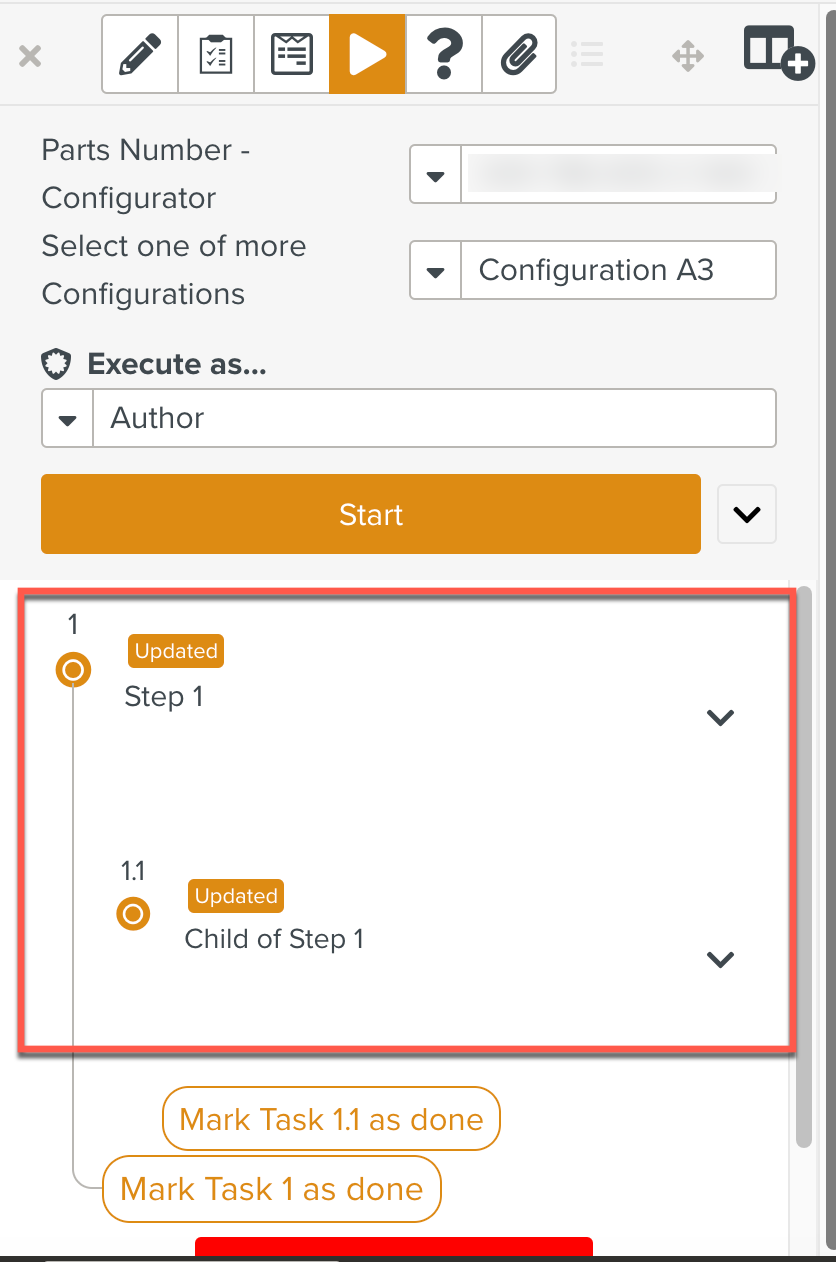
The Steps selected in Configuration A3 are displayed, due to the type settings.
Note
After Setting up the Configuration, you can also modify an existing Configuration.