Running a Task - from the Web
Tasks assigned to users, teams or Task Queues can be executed in either of the two ways:
Using the FieldLogs Application on mobile devices.
By logging into the FieldLogs server from the web.
While the execution Steps are the same for both options, the user interface is different.
Multiple users are allowed to execute the same Task concurrently. However, an individual user is not authorised to run more than one Task simultaneously.
Note
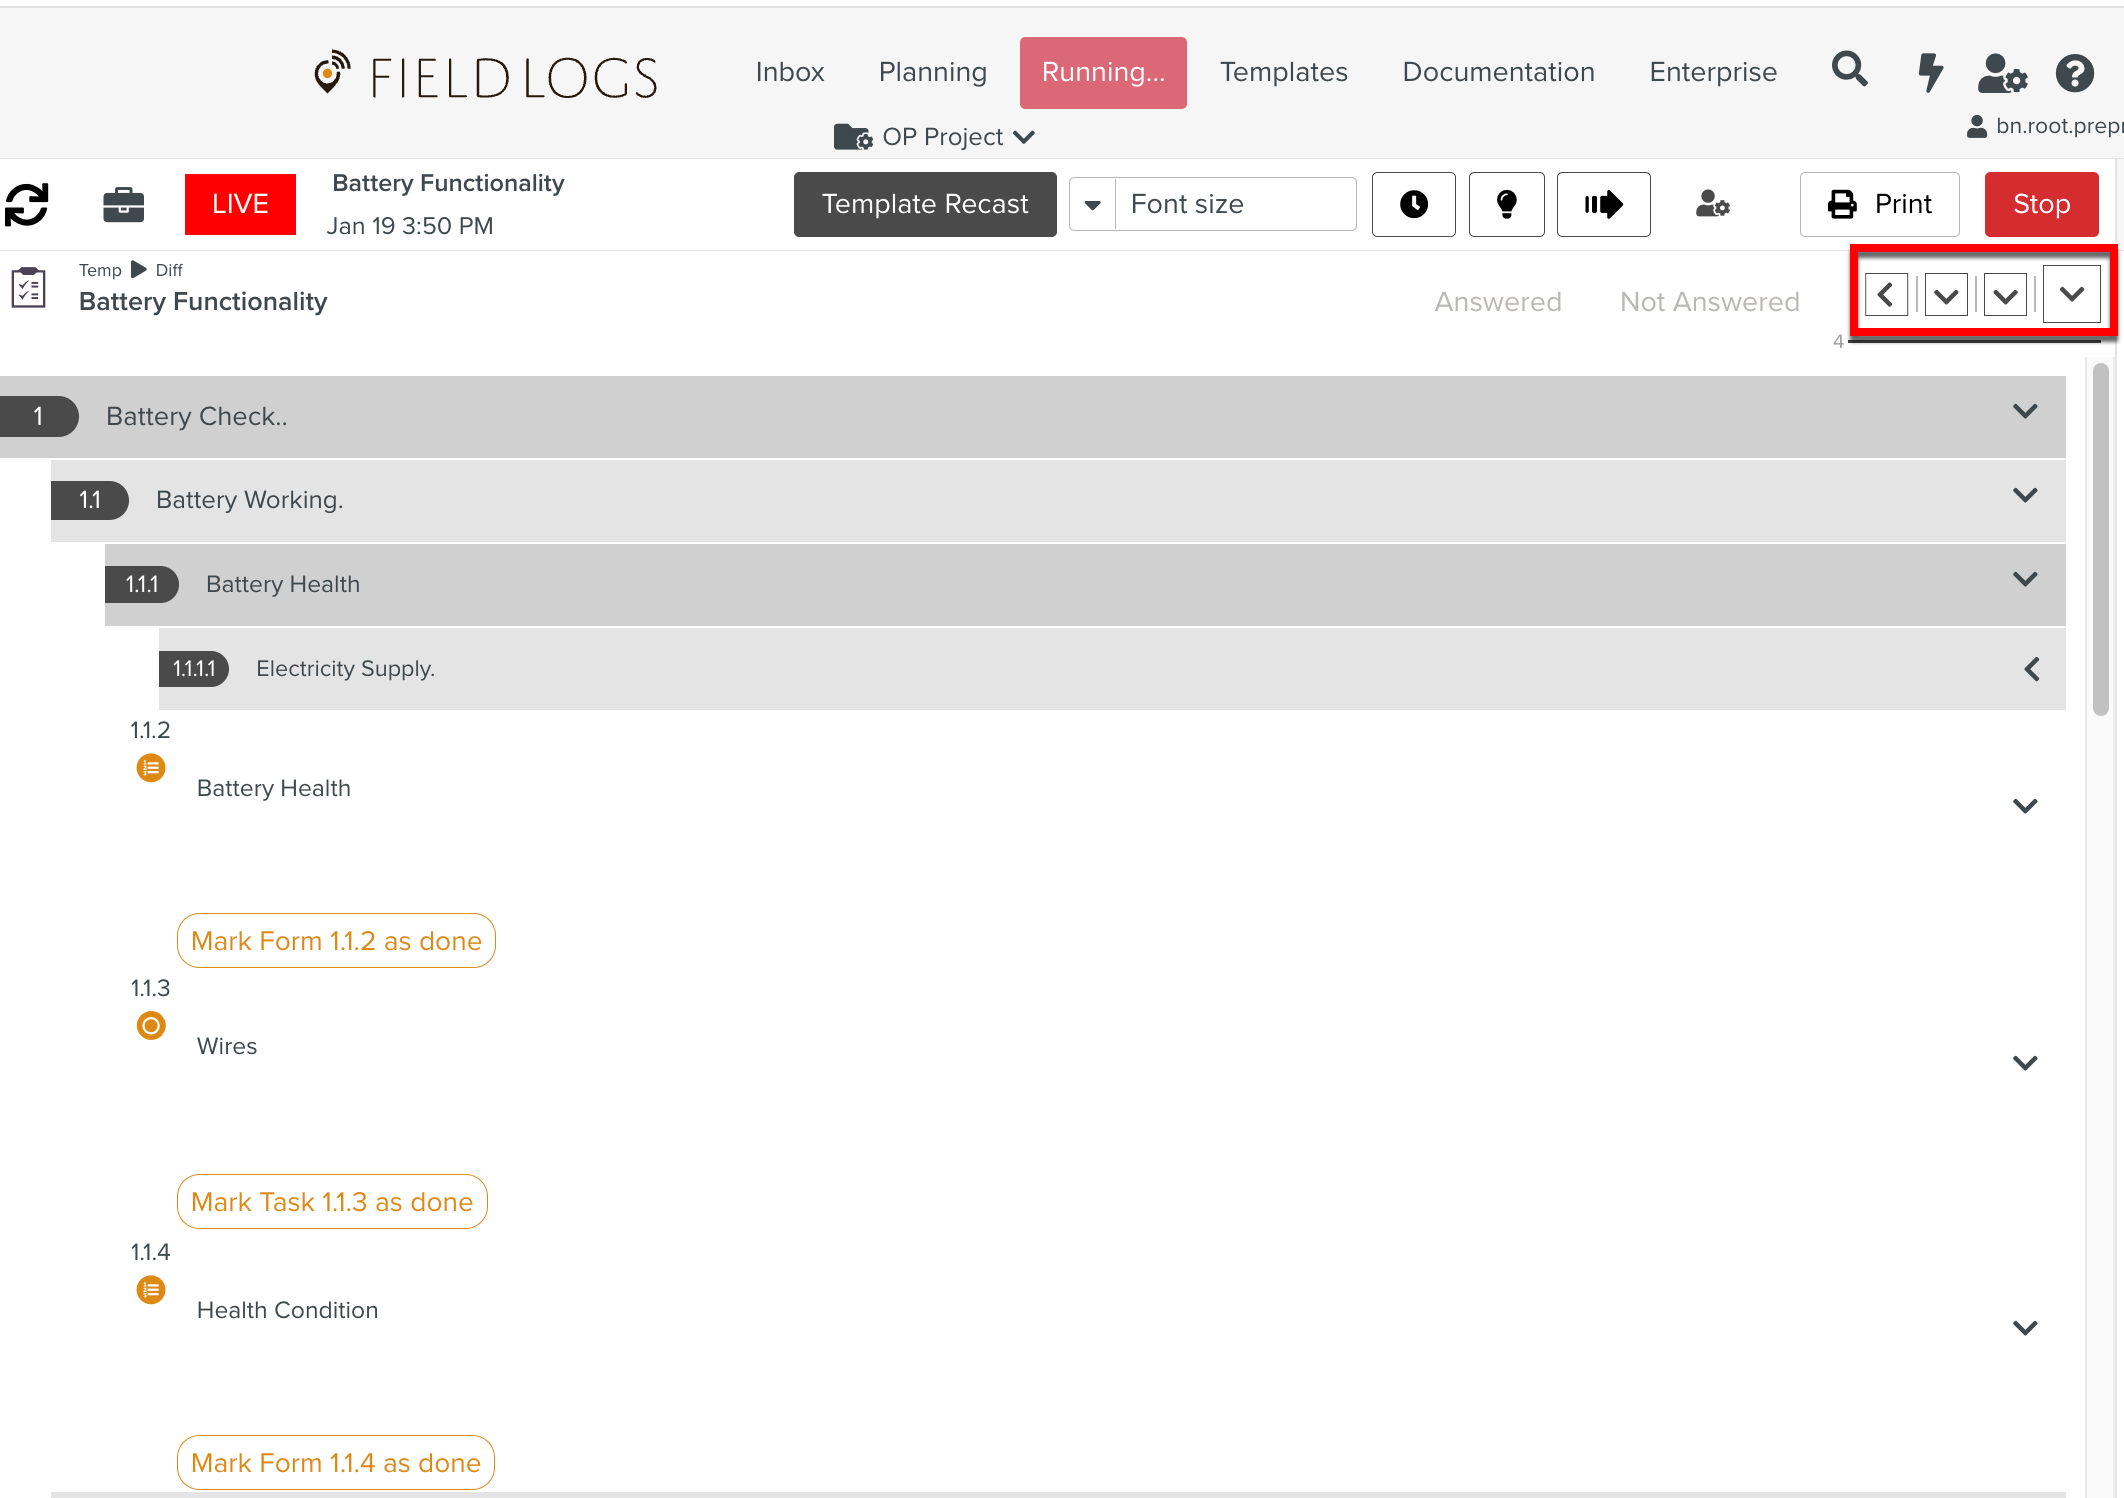
While executing a Task, you can choose to collapse Steps beyond a certain level. This level is set by the administrator using the Enterprise Settings as shown below.
 |
You can now expand or collapse all levels, or a specific level of steps at once in Task Runtime.
 |
To run a Task:
From the , select a Task to execute.
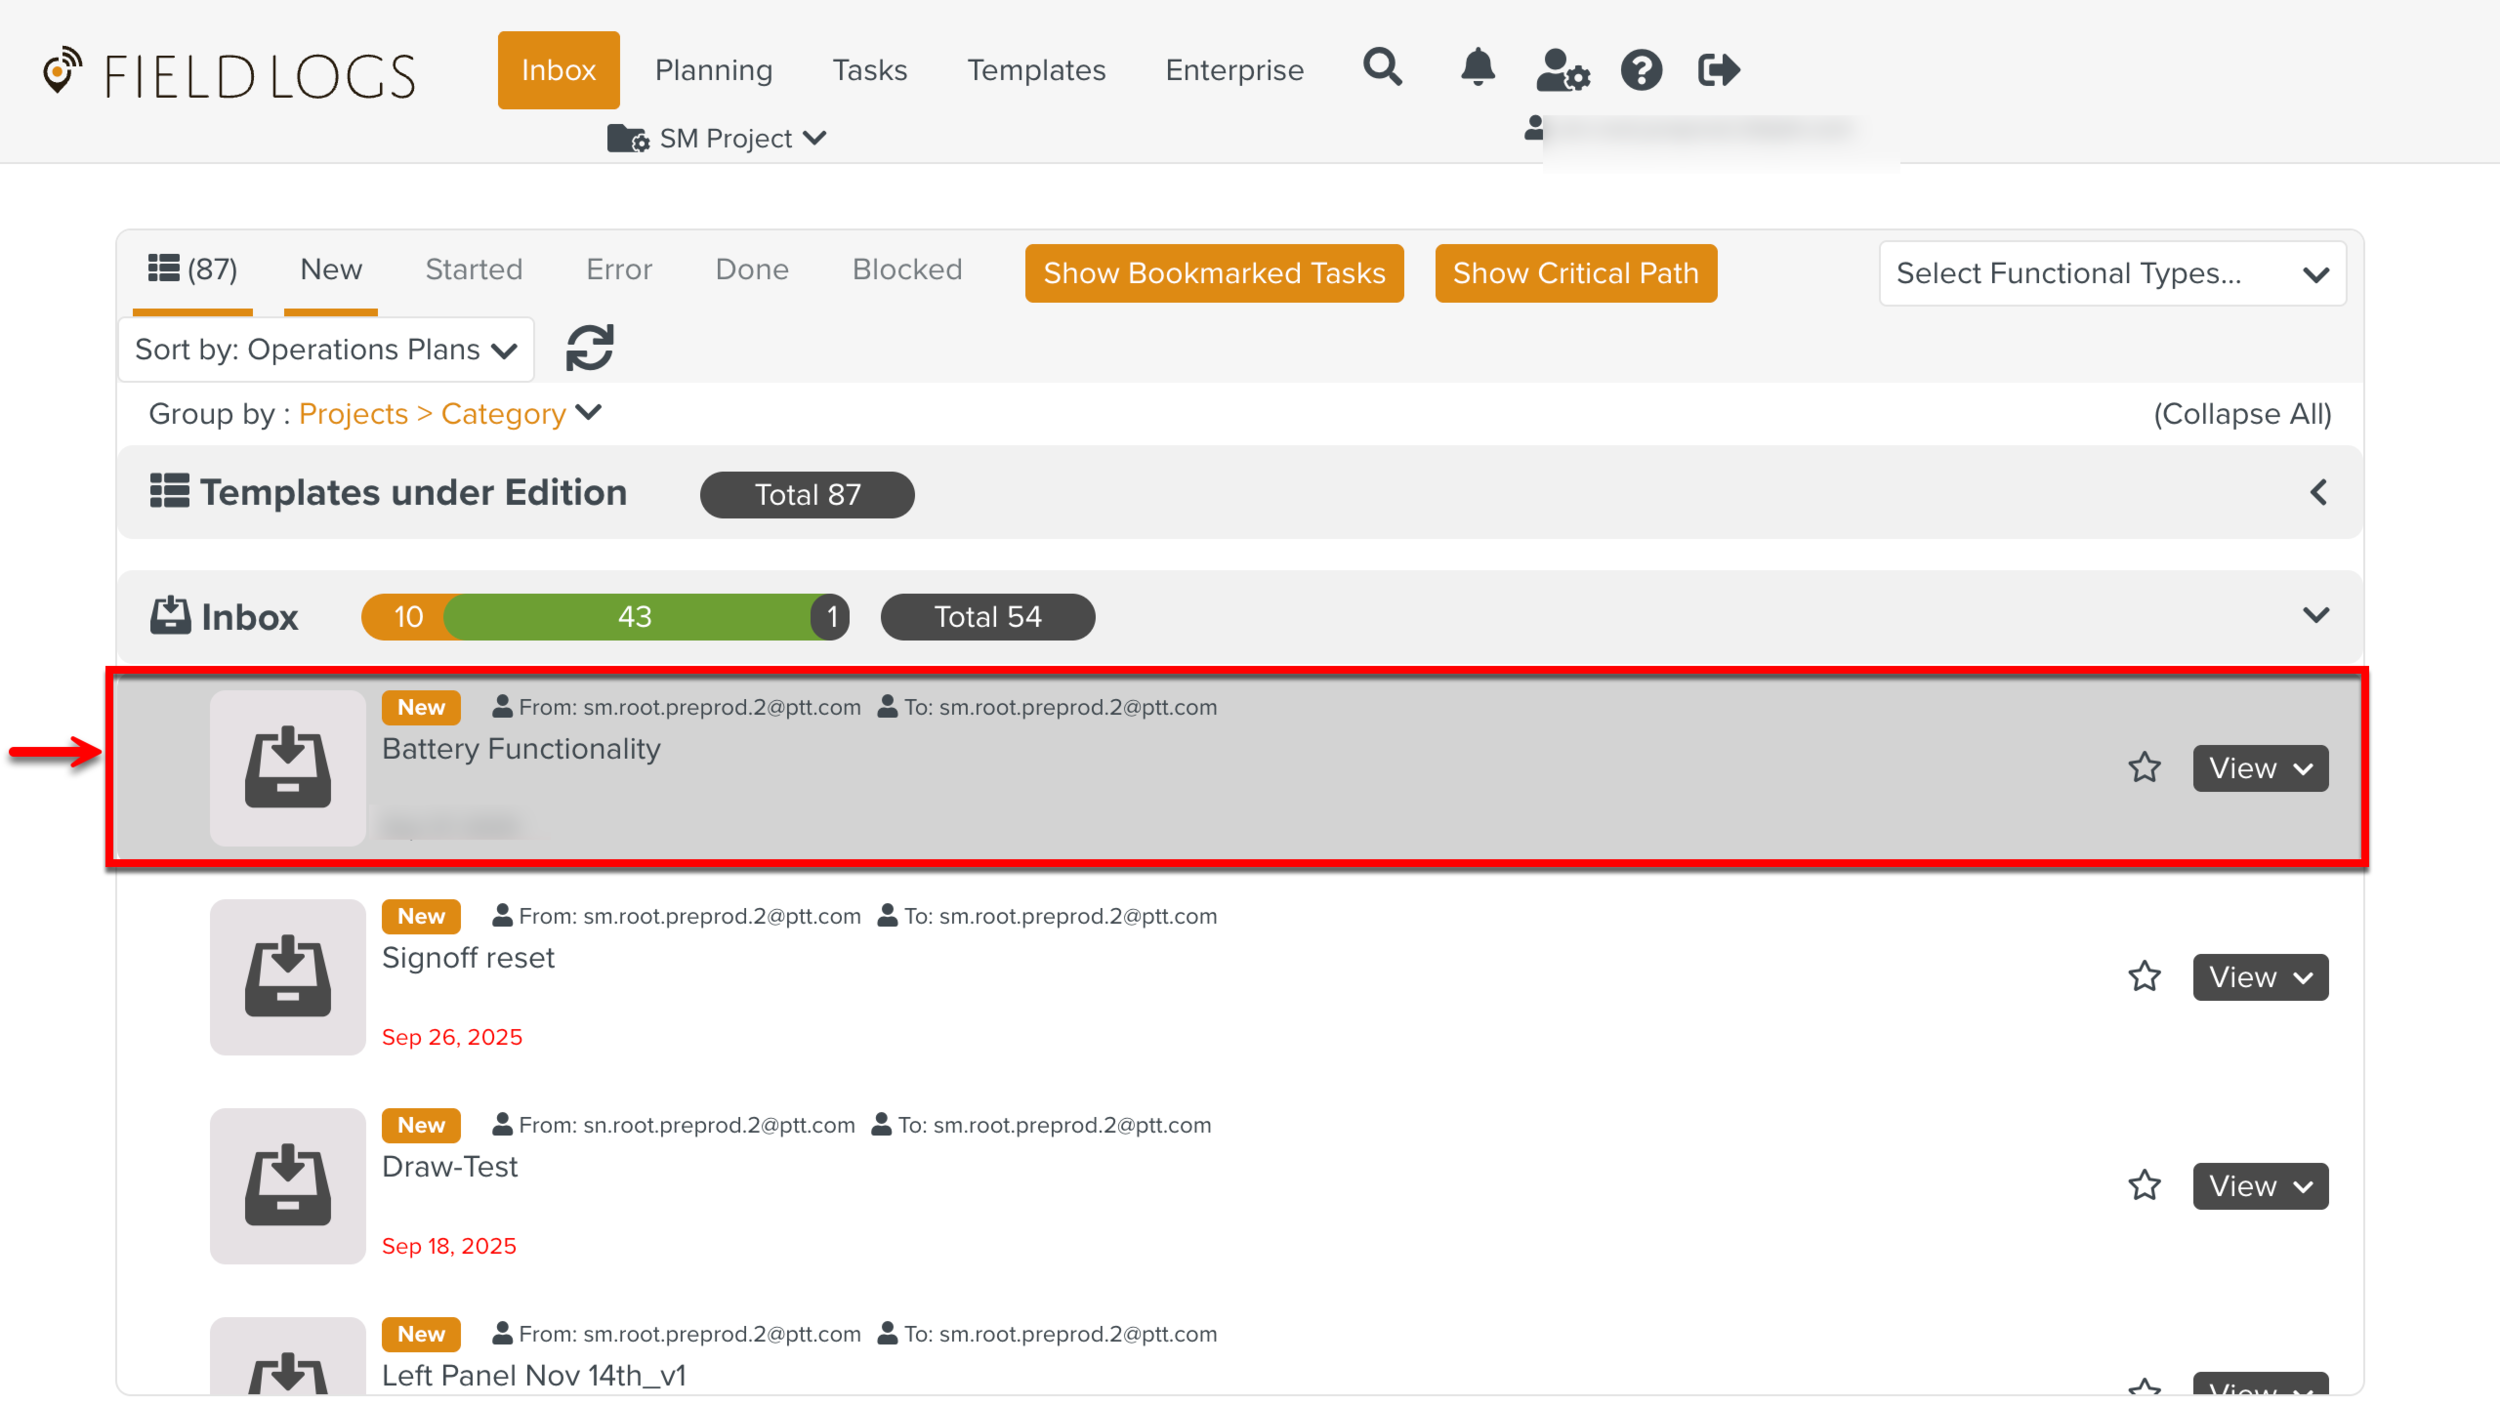
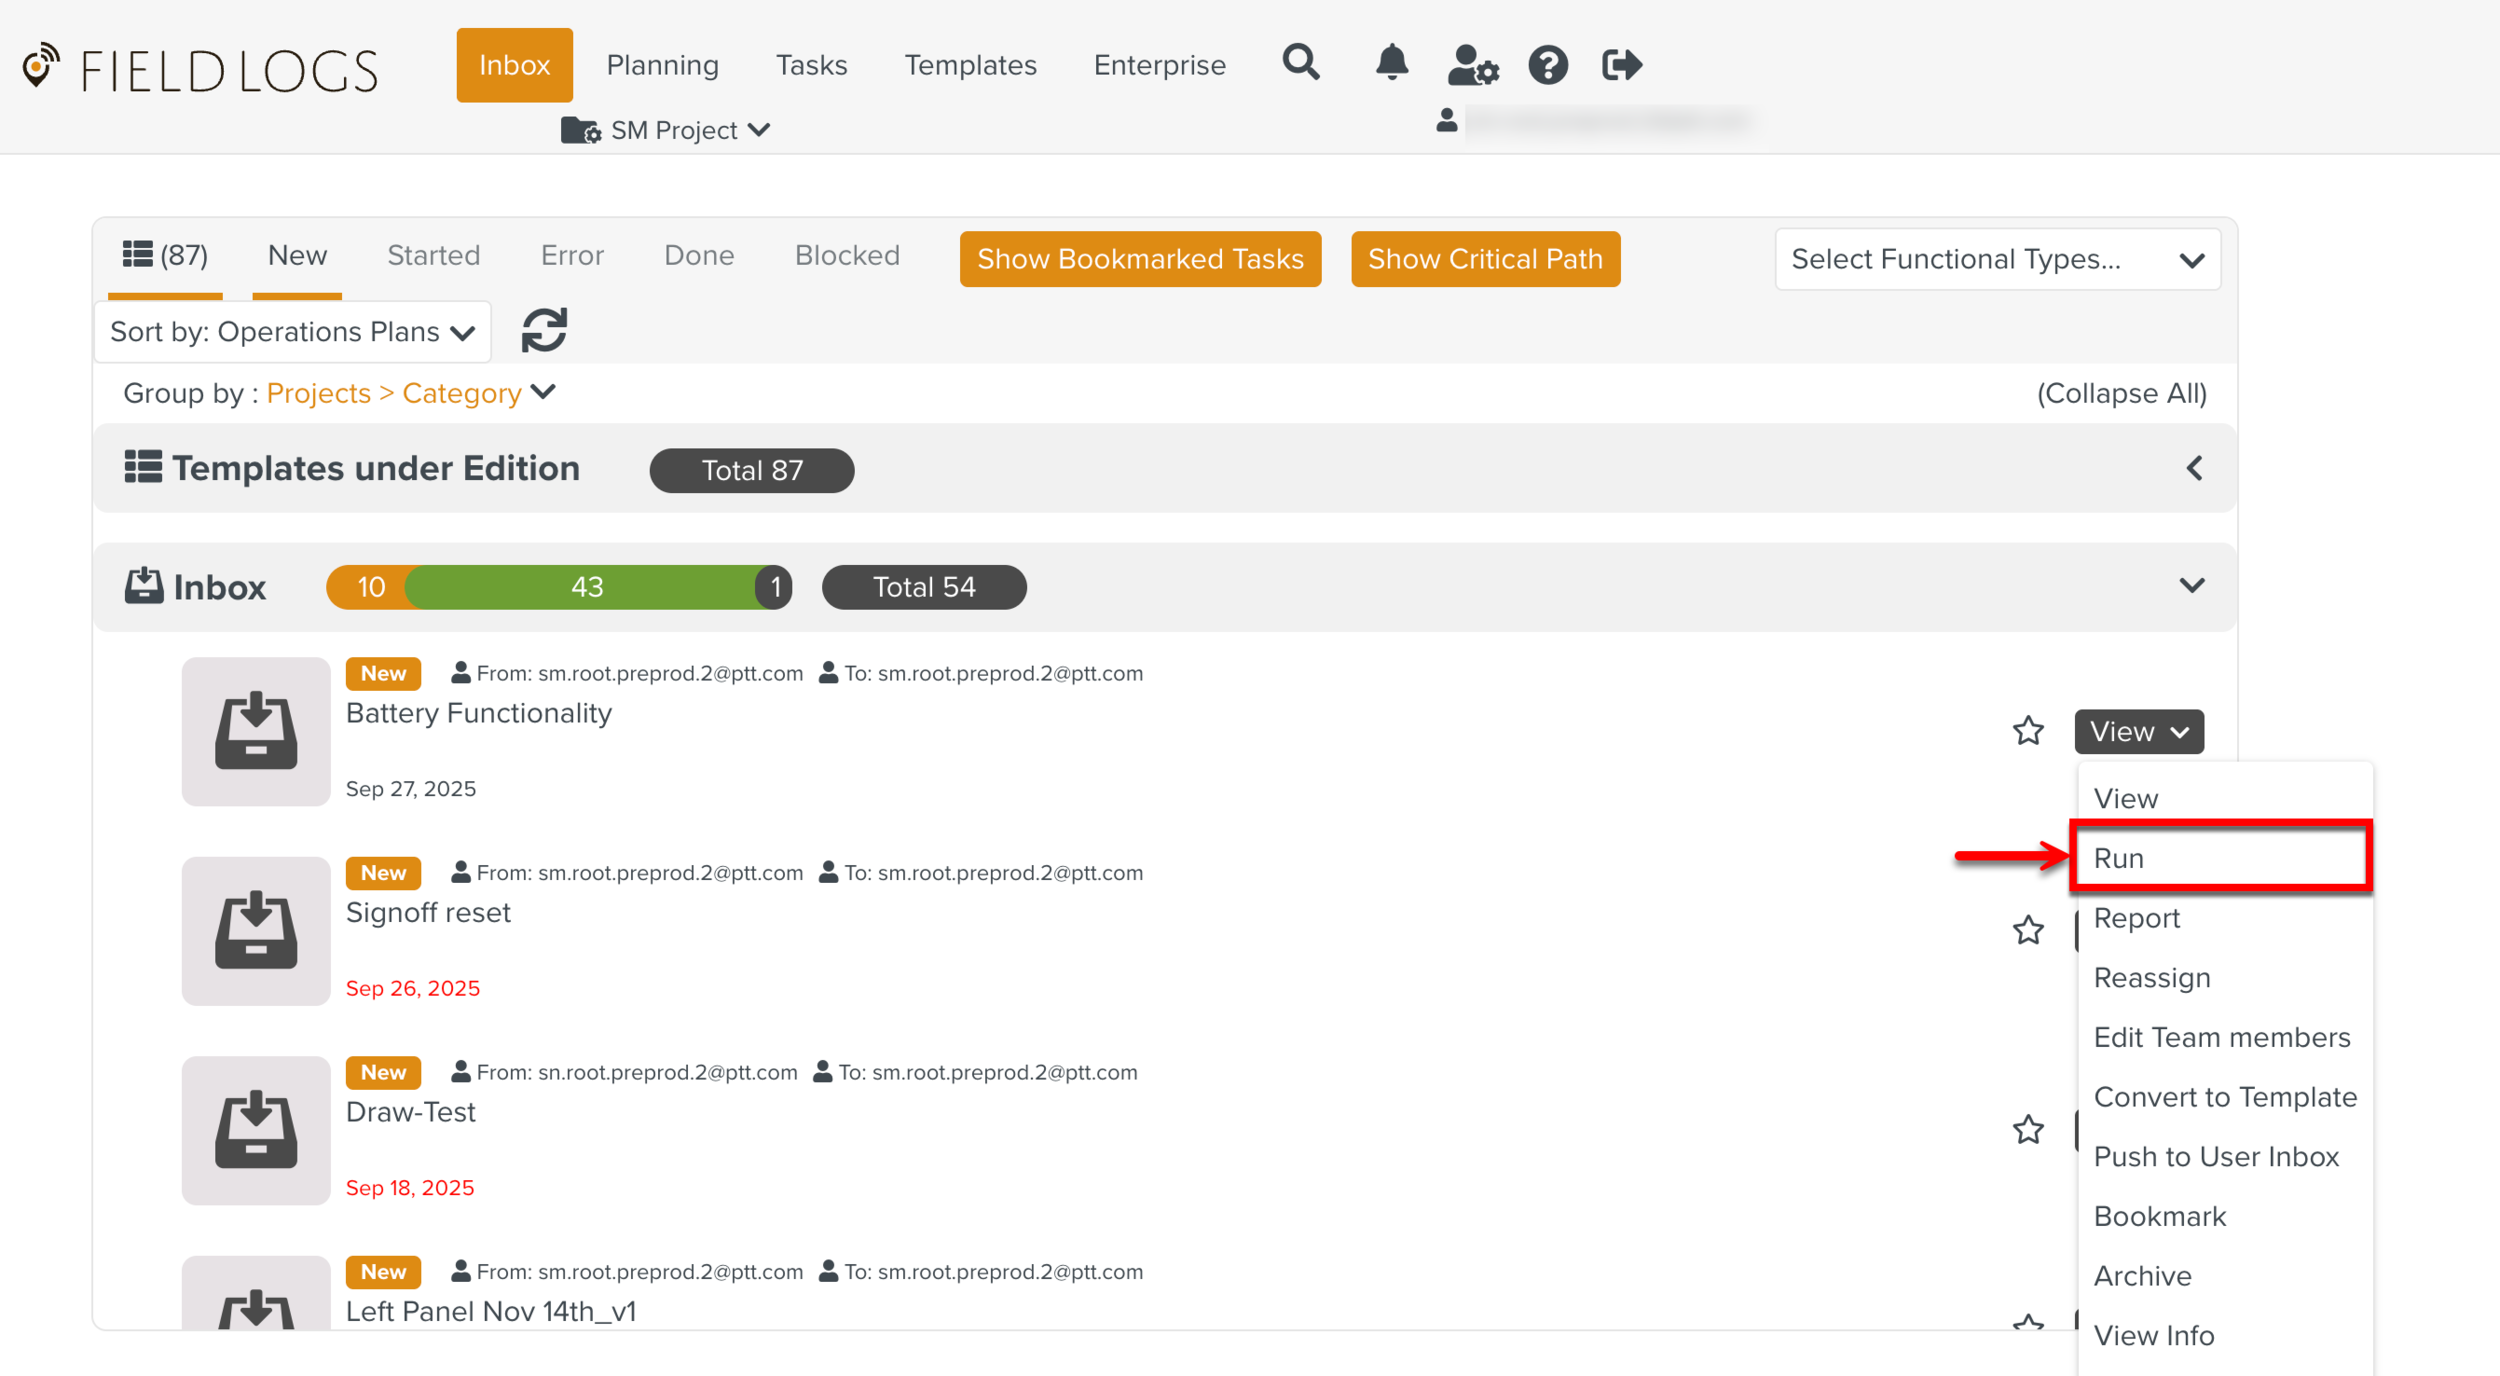
Expand the View dropdown and select Run.
Note
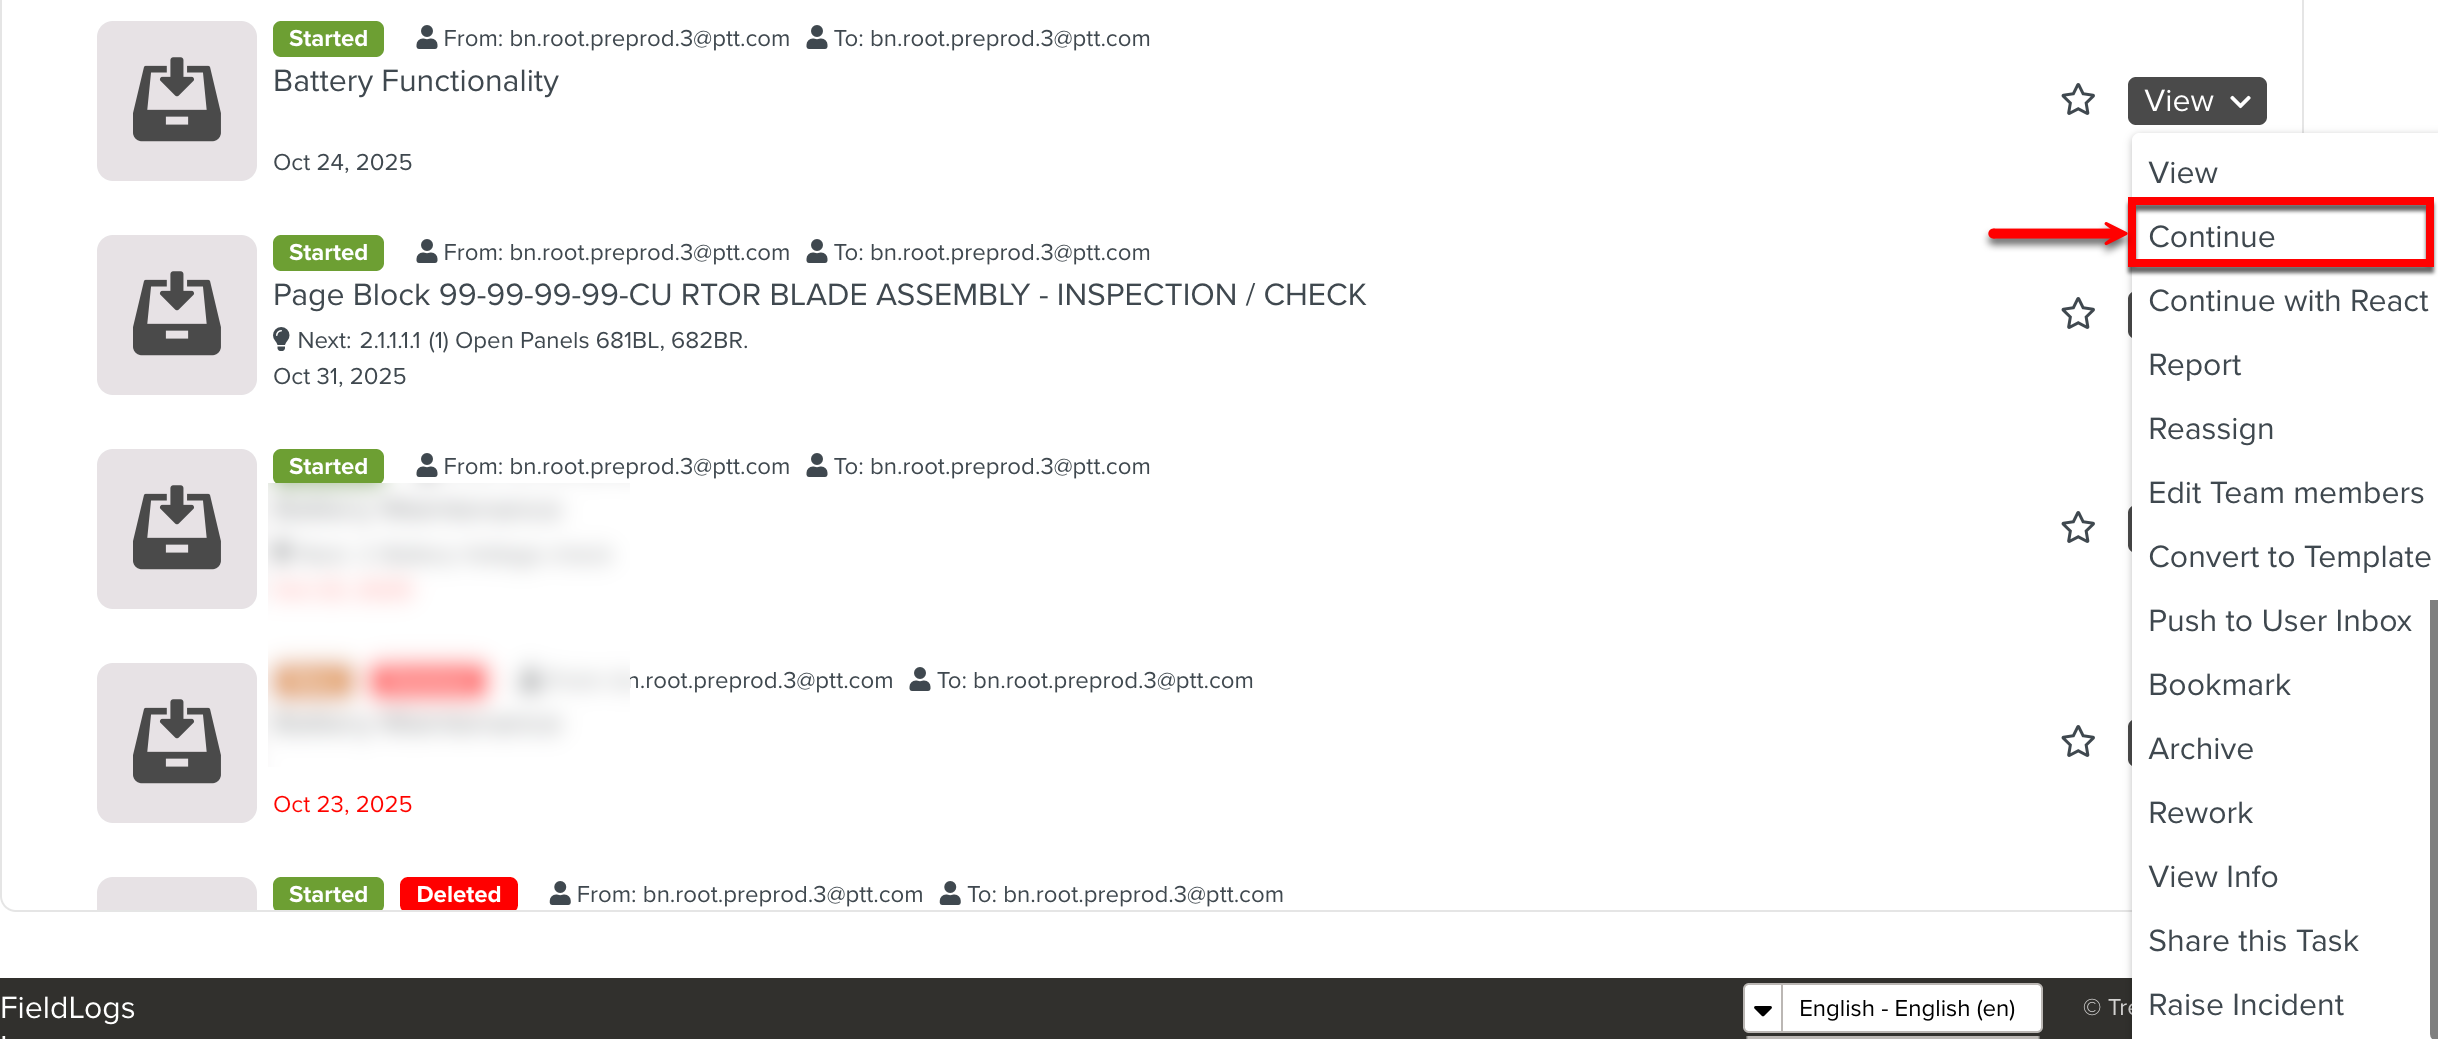
If the Task is already started, the Continue option is available instead of Run. Click Continue.
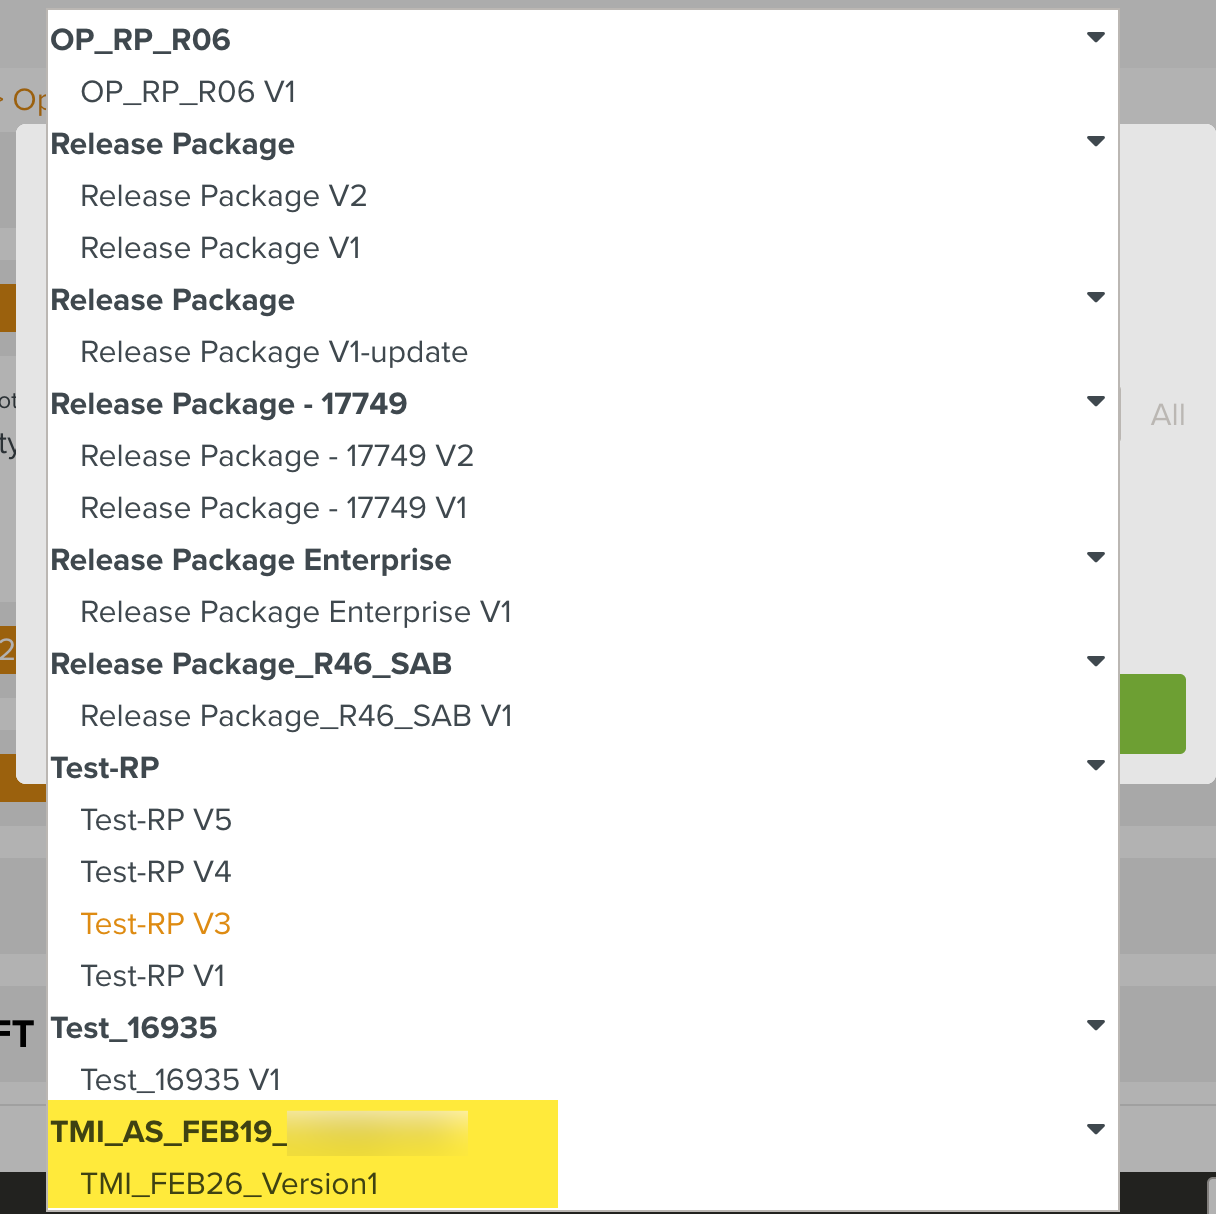
The dialog Define the Context appears. You can modify the Release Package selection and the Template variable values. Select a Configuration from the dropdown if required.
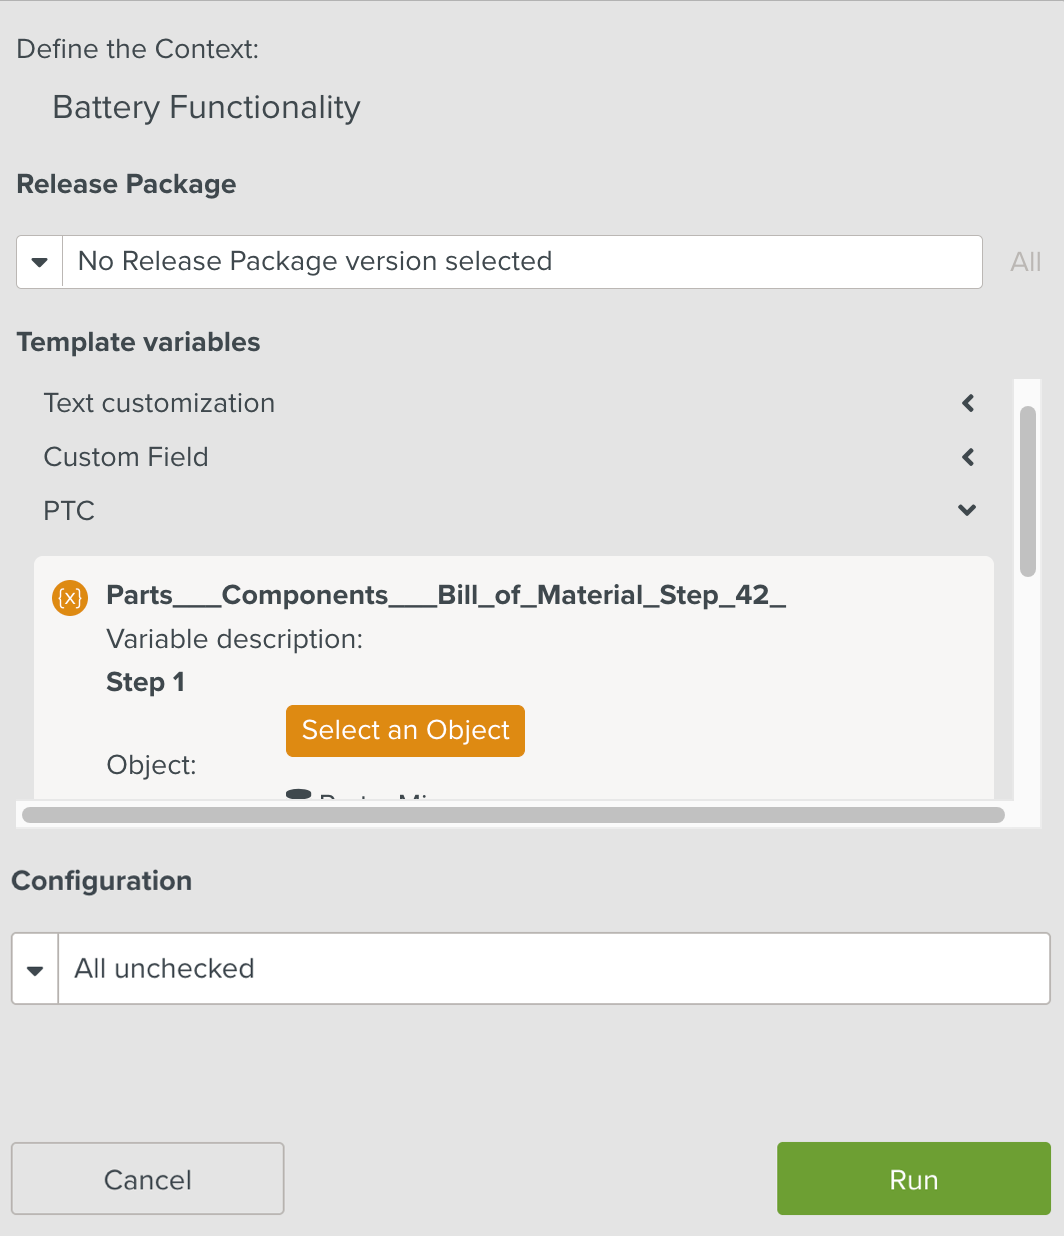
The Release Package dropdown also displays Technical Manual Index versions as shown below.
Note
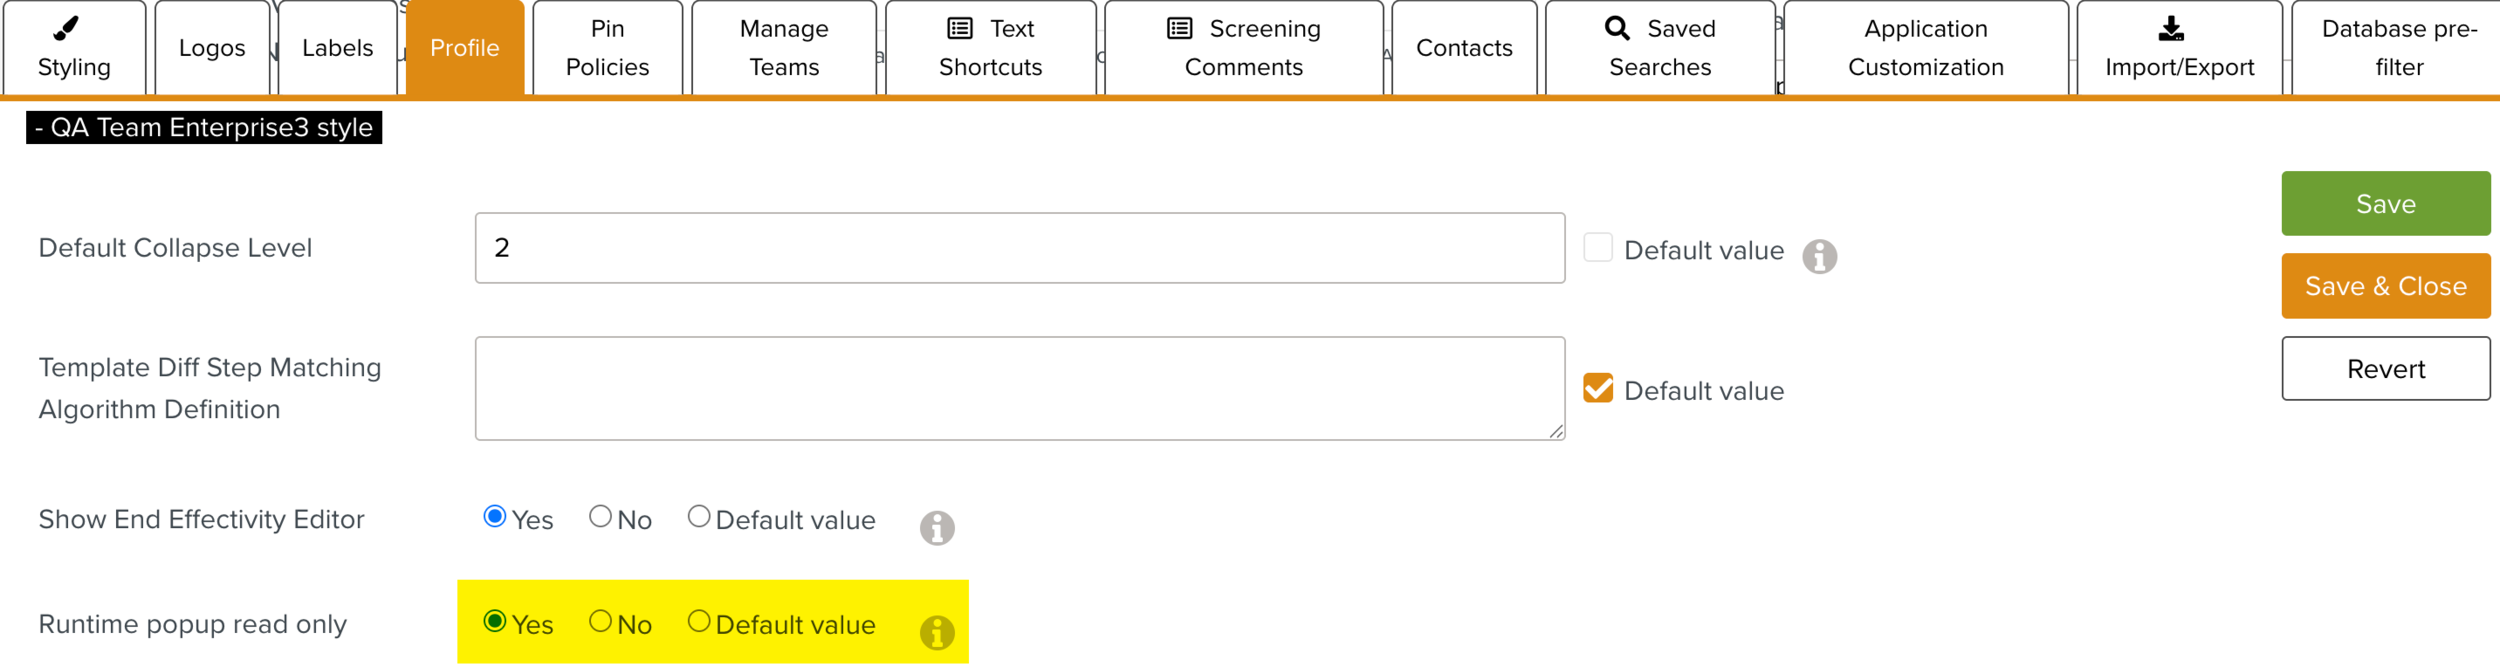
An Enterprise Setting Runtime popup read only determines if the Configurations, Release Package selection, and Template Variables are editable or not.
If Runtime popup read only is set to Yes, all the sections in the dialog are read-only. The default value is No.

A warning popup is displayed if the selected Release Package and Task have different Manual links.
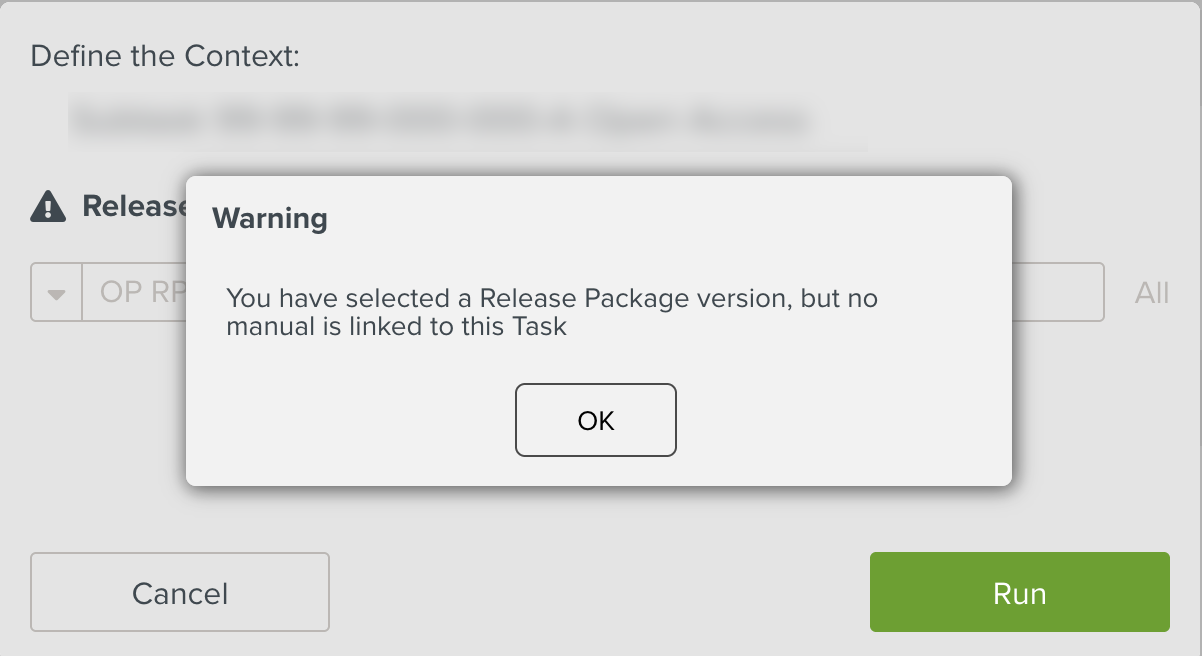
The same warning message appears when you hover over the
 icon as shown below.
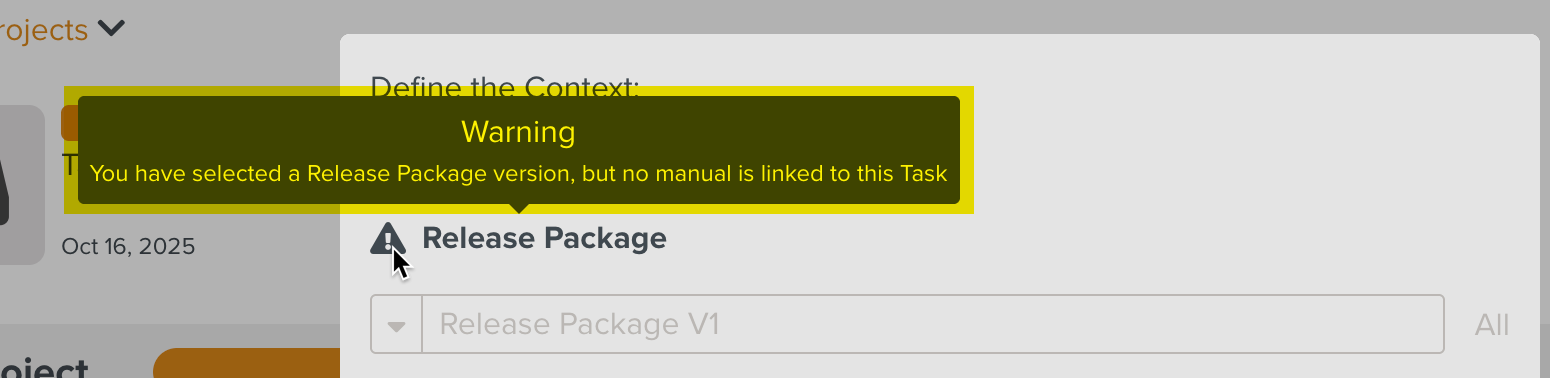
Click .
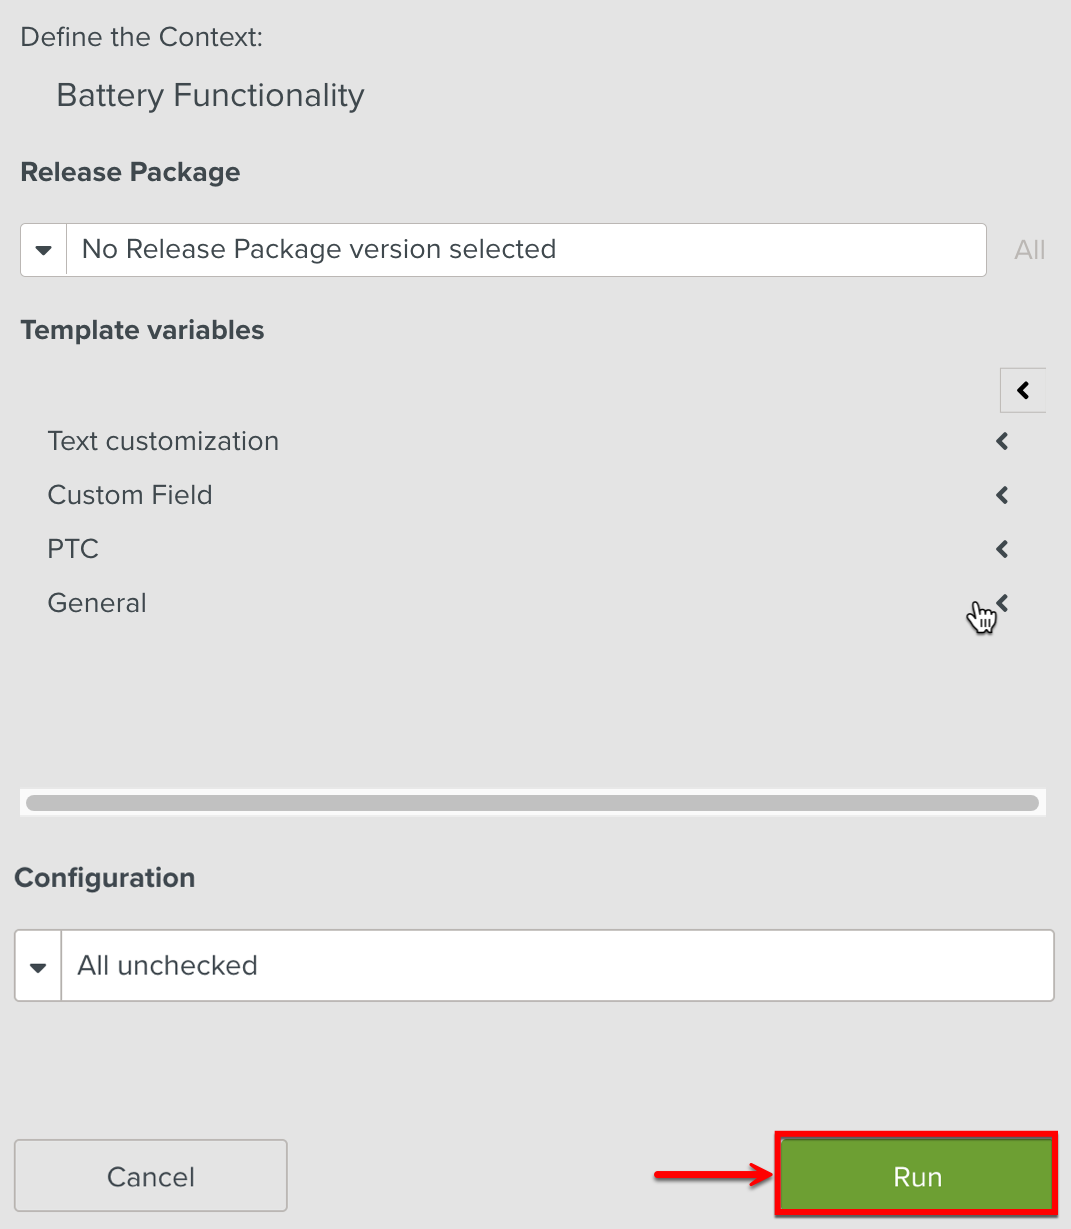
The execution of the Task begins.
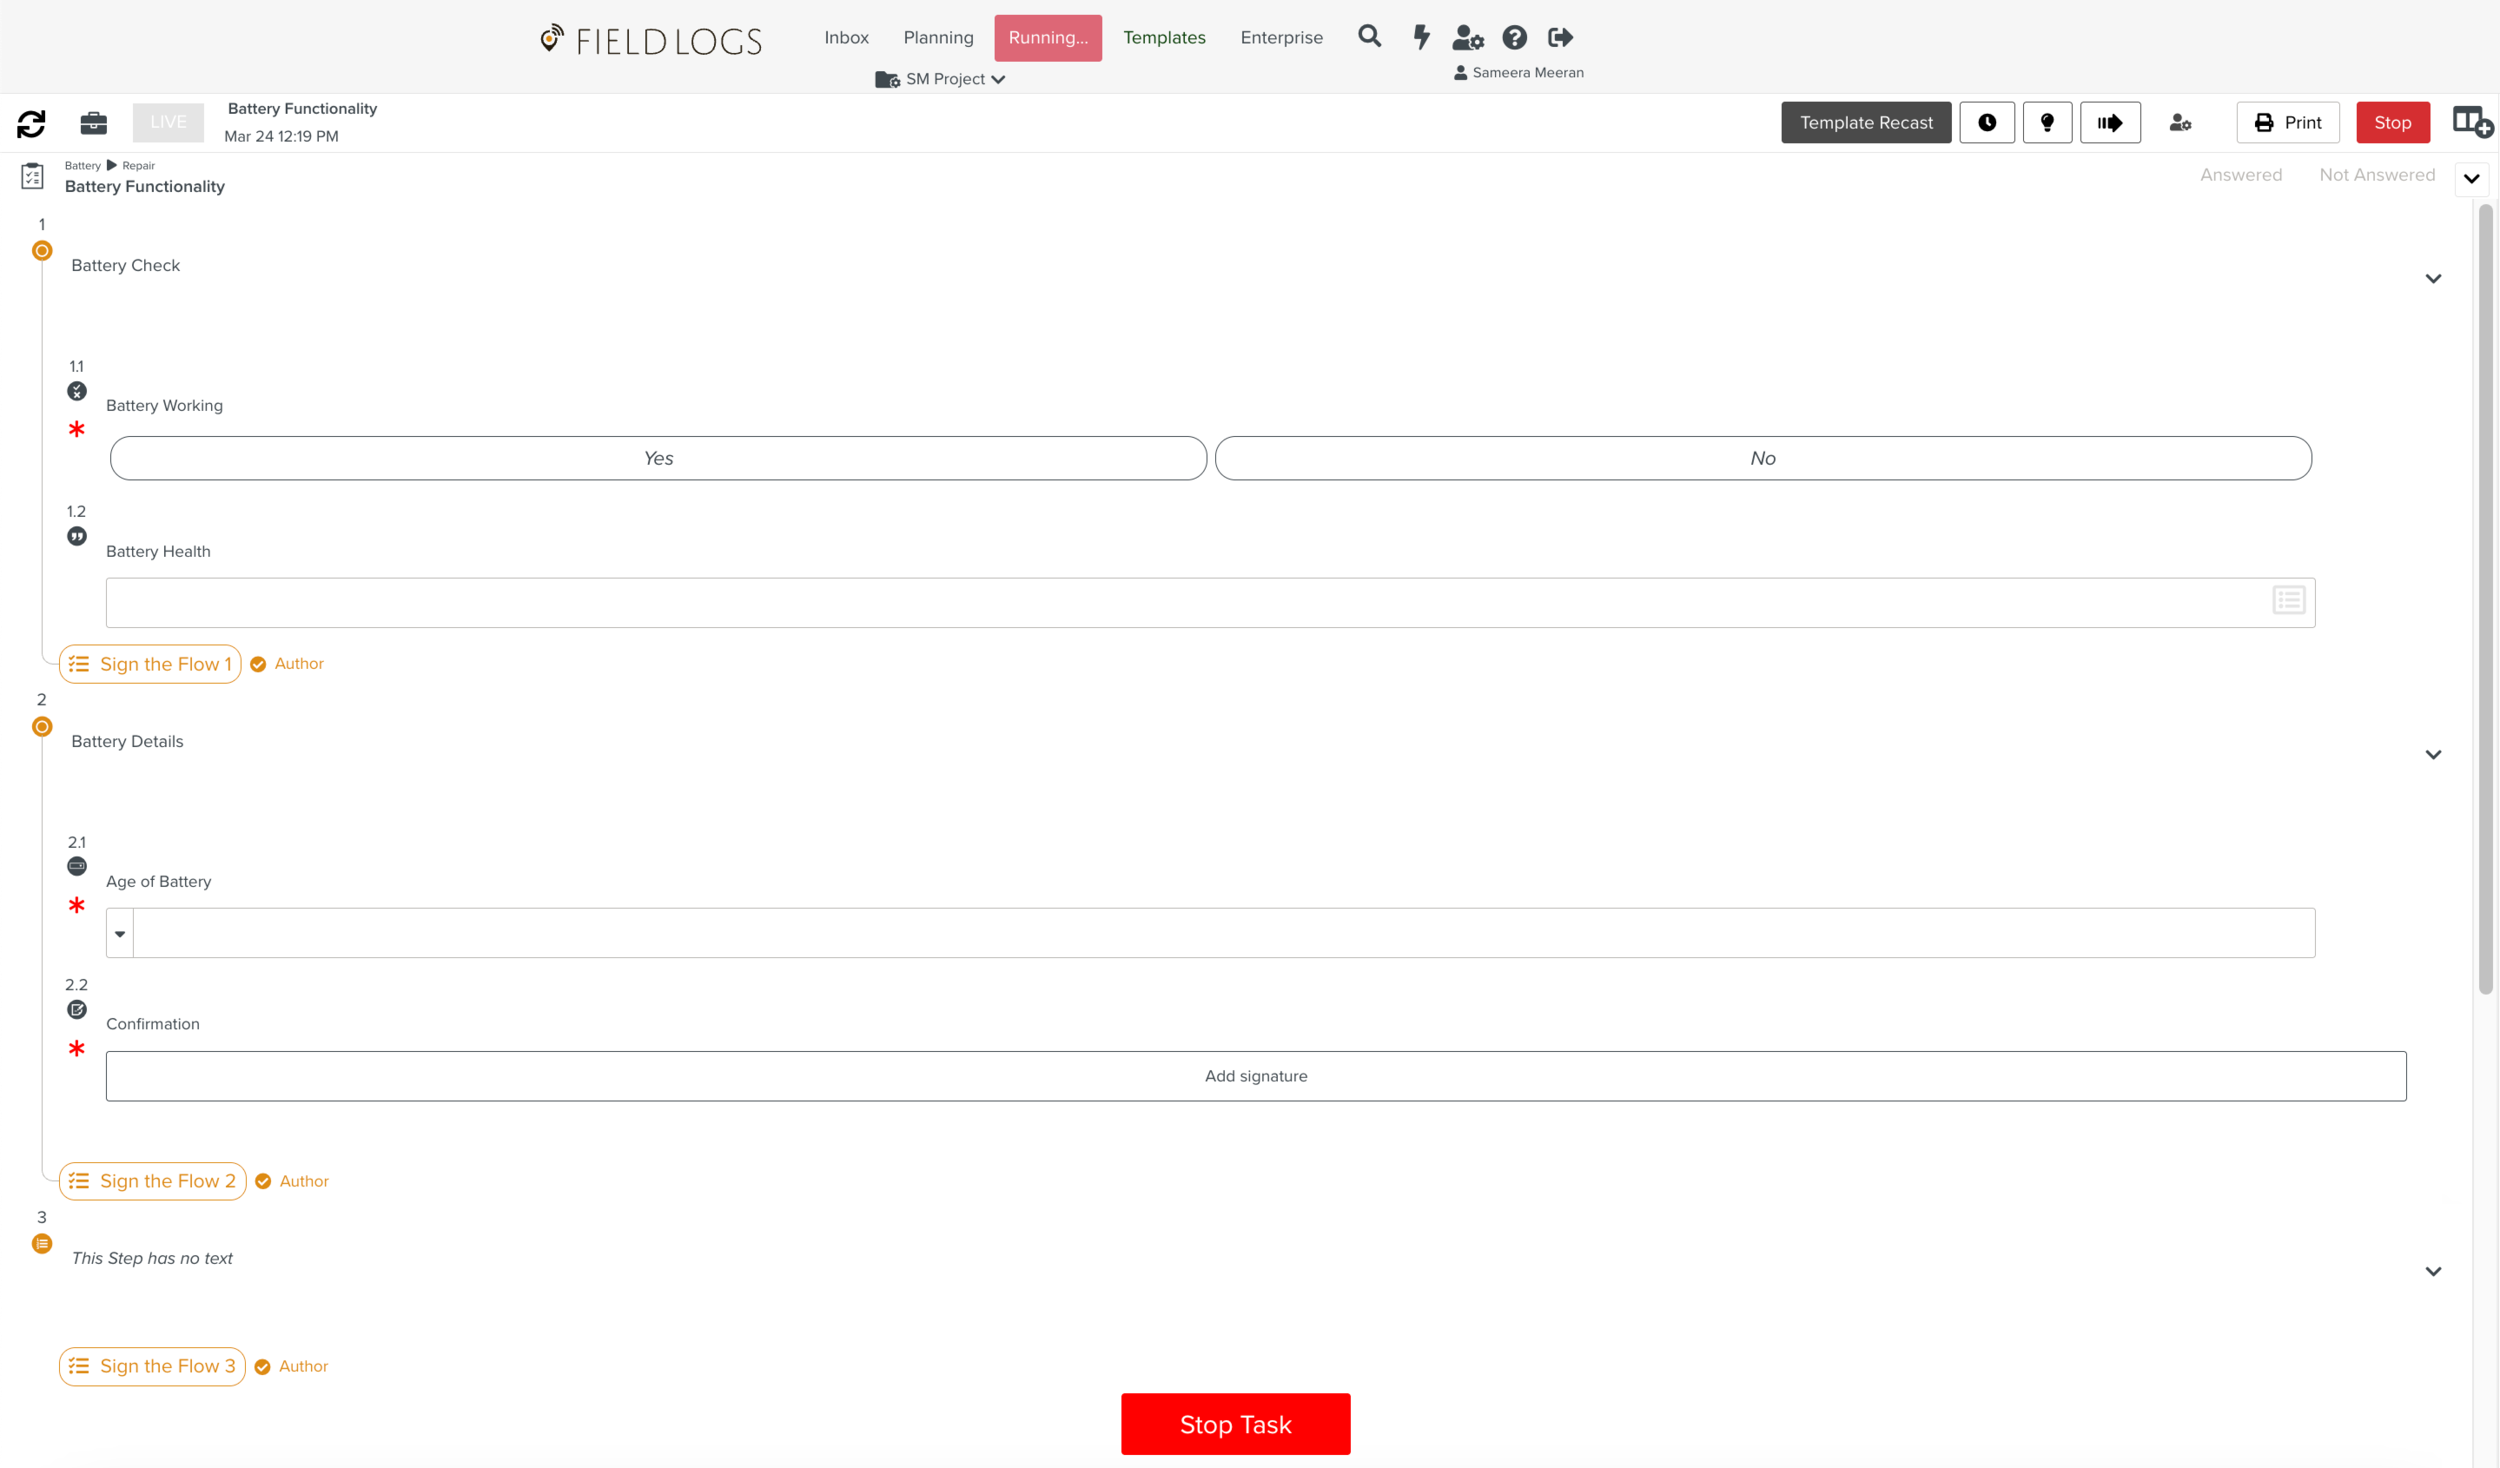
When the execution of the Task starts, The LIVE button will be visible to the user.

Caution
When the concurrent execution conditions are violated, you will encounter a Data Acquisition error. The following precautions can help minimize this error.
To refresh the page, use the Refresh icon
 indicated below. Do not refresh the browser.
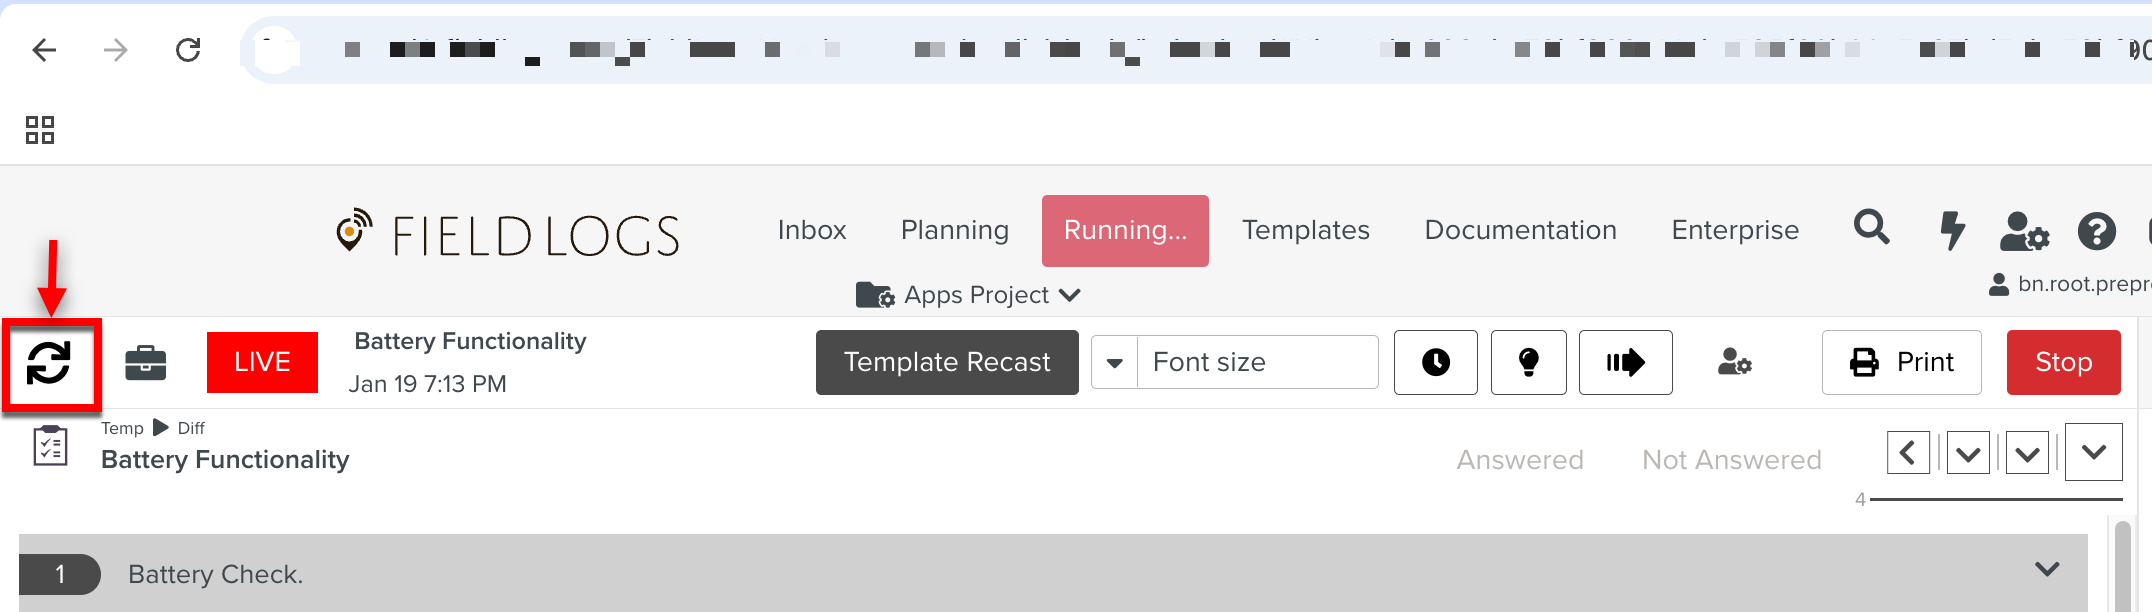
To move to another Task, Pause or Stop the current Task before navigating.
Note
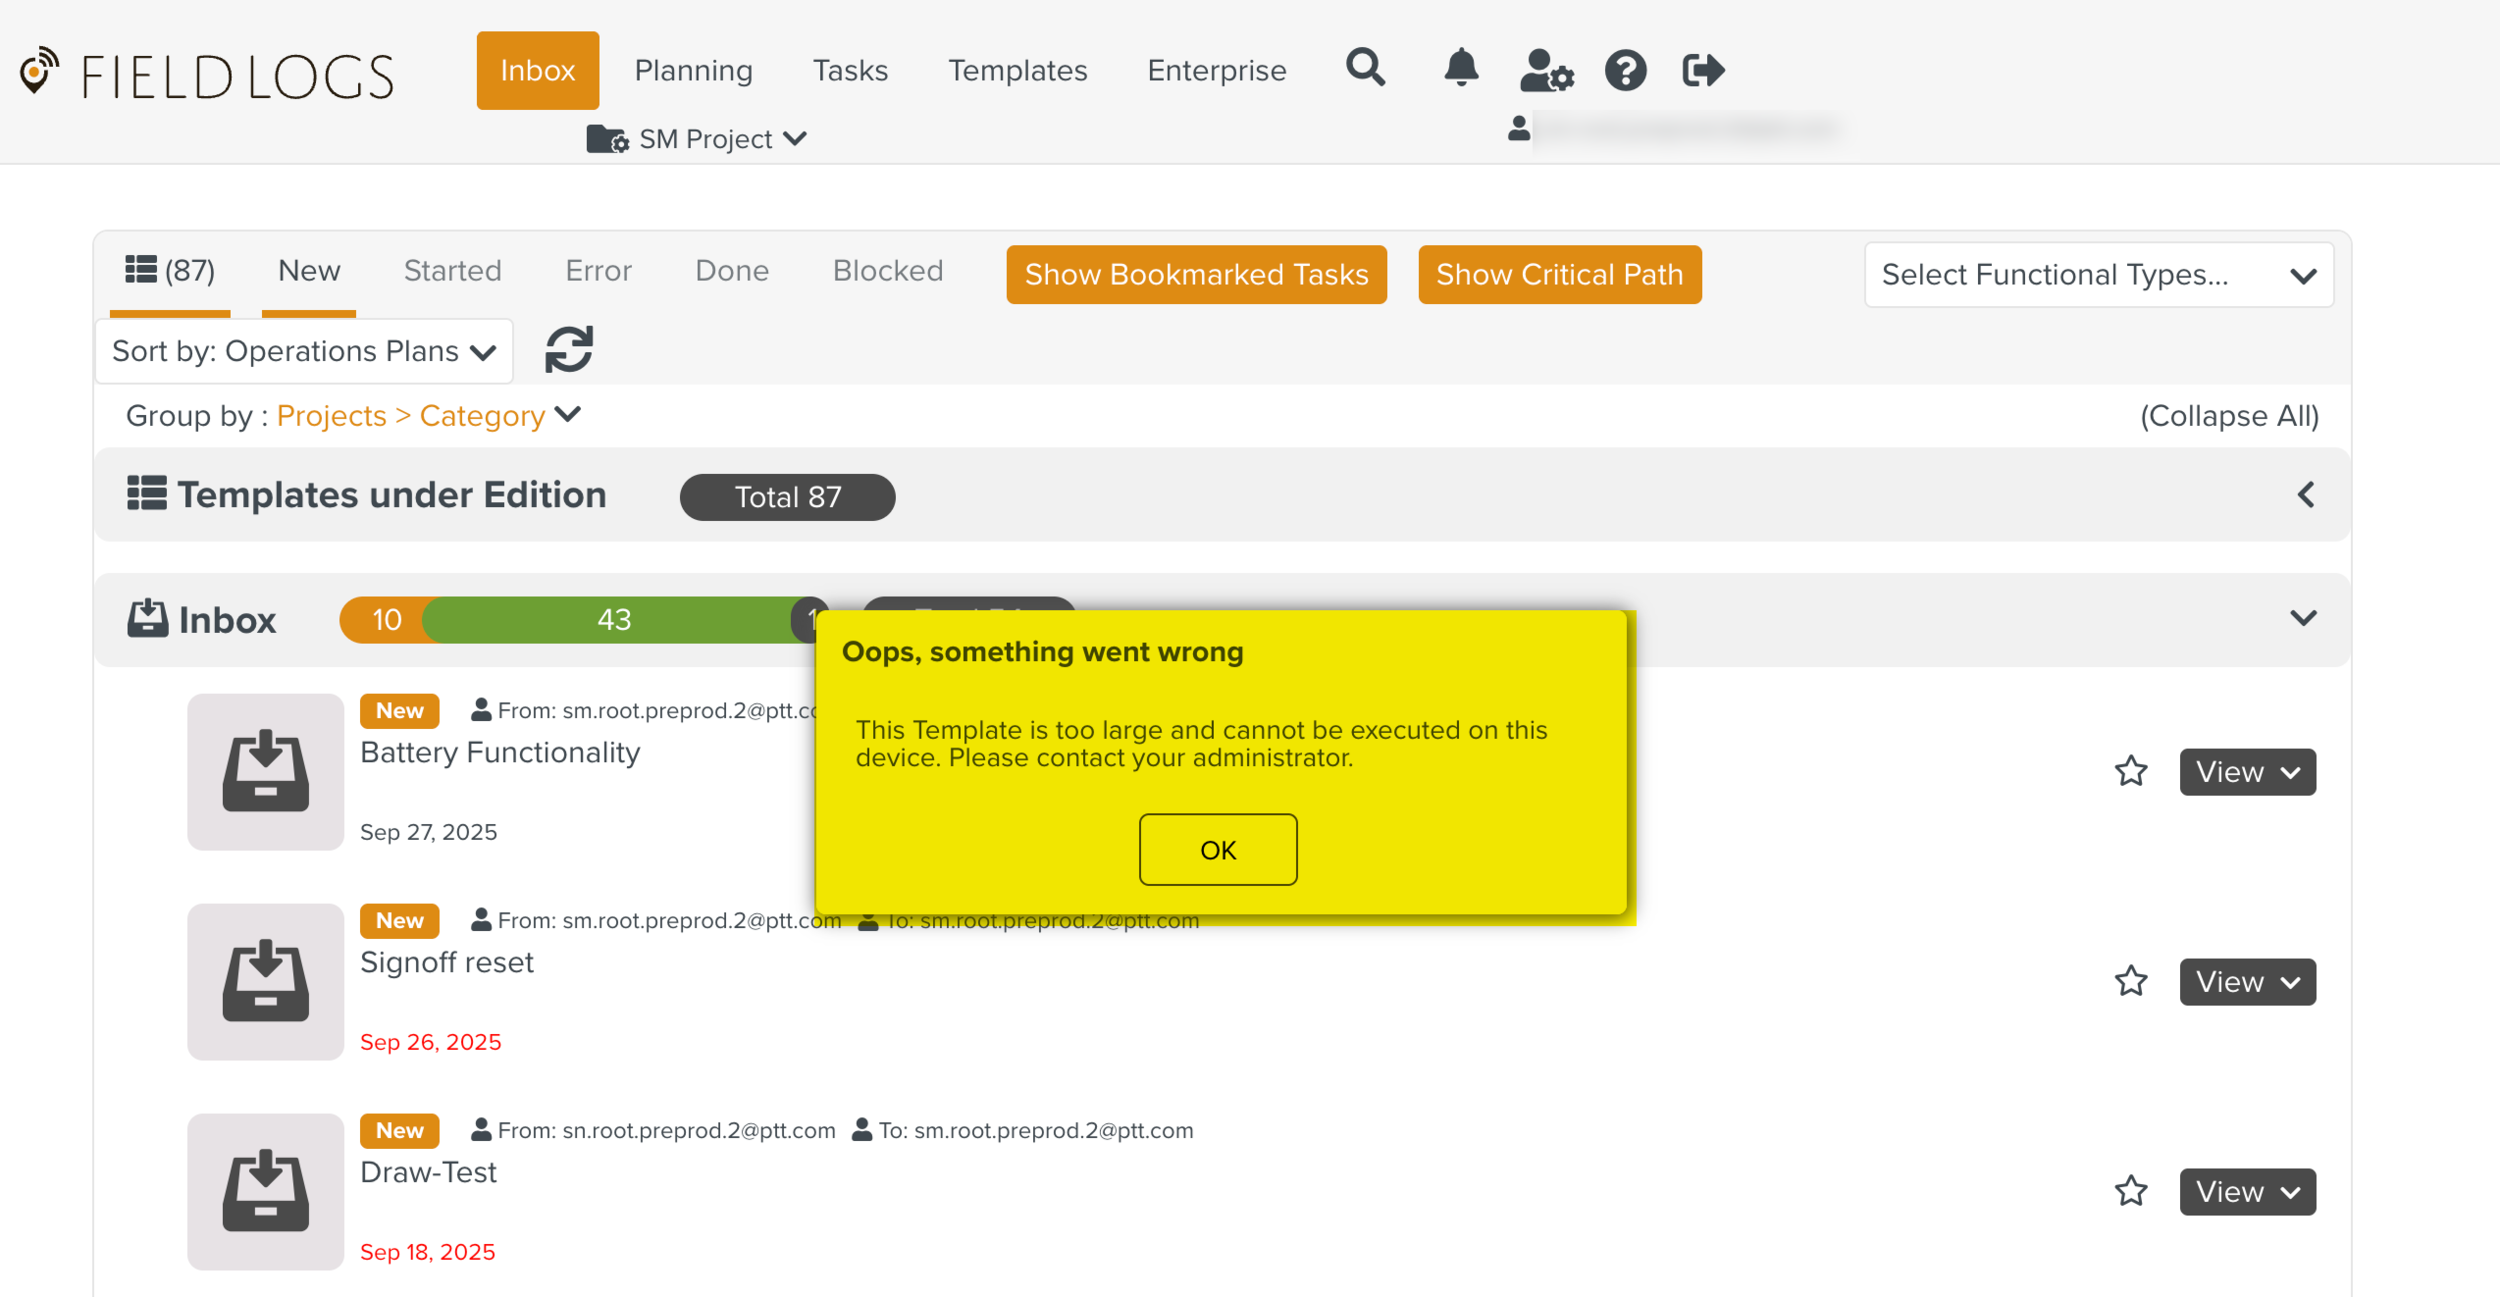
If the Template size exceeds the maximum limit, an error message is displayed. The Task cannot be run.
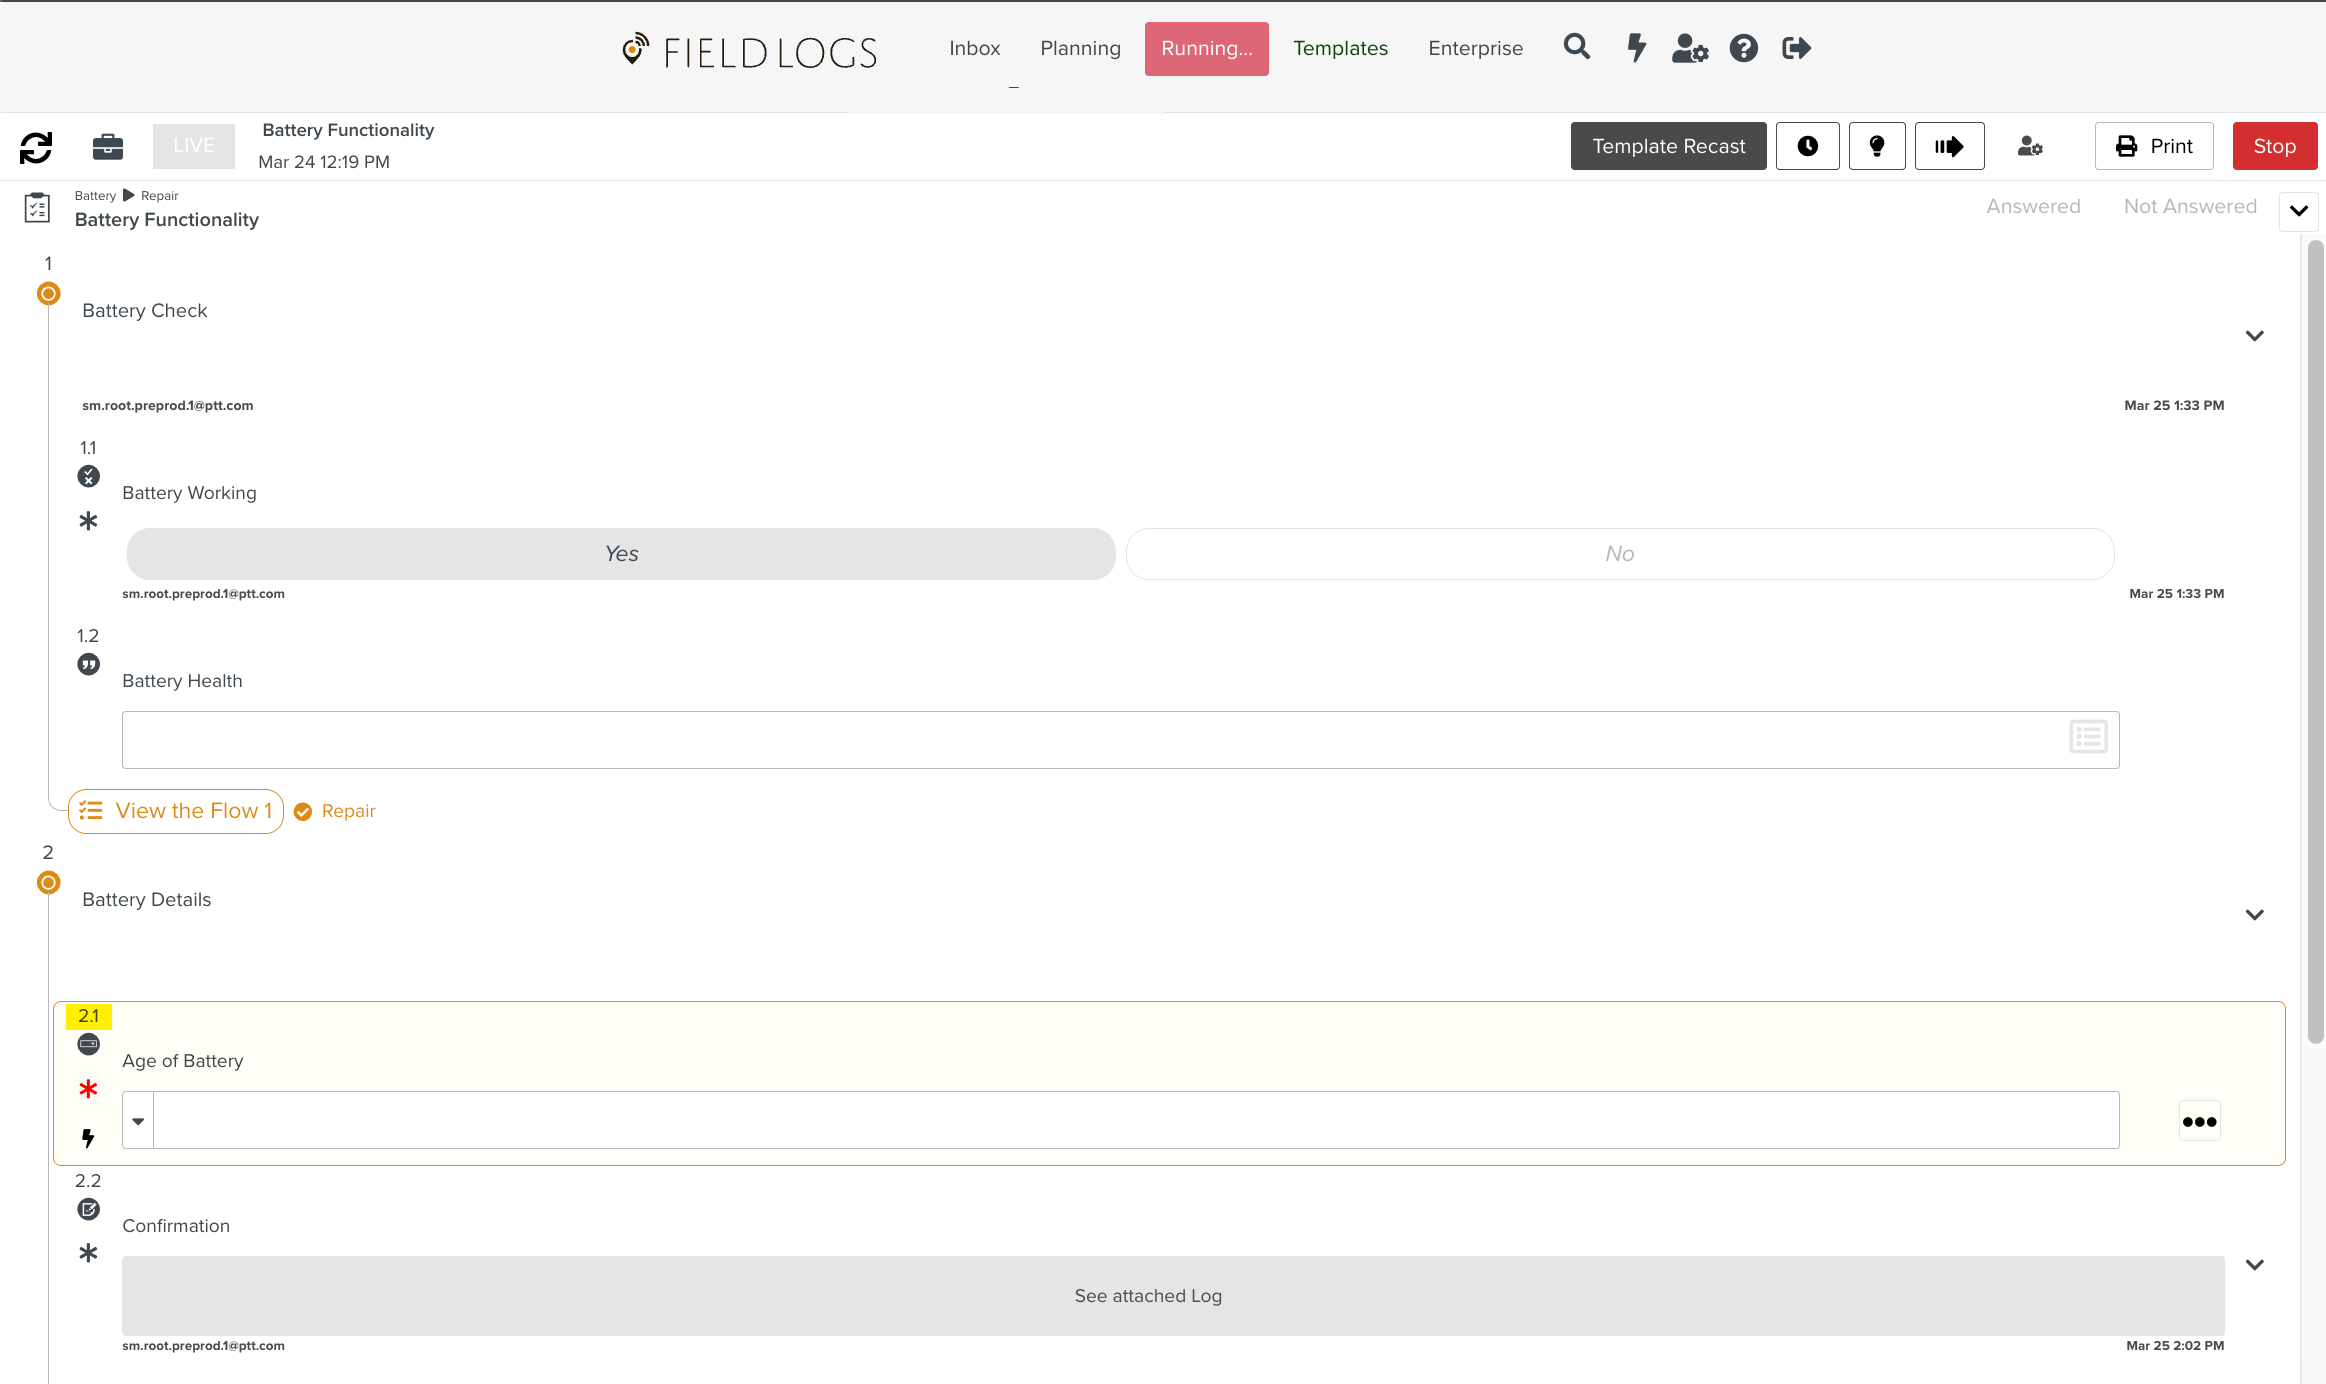
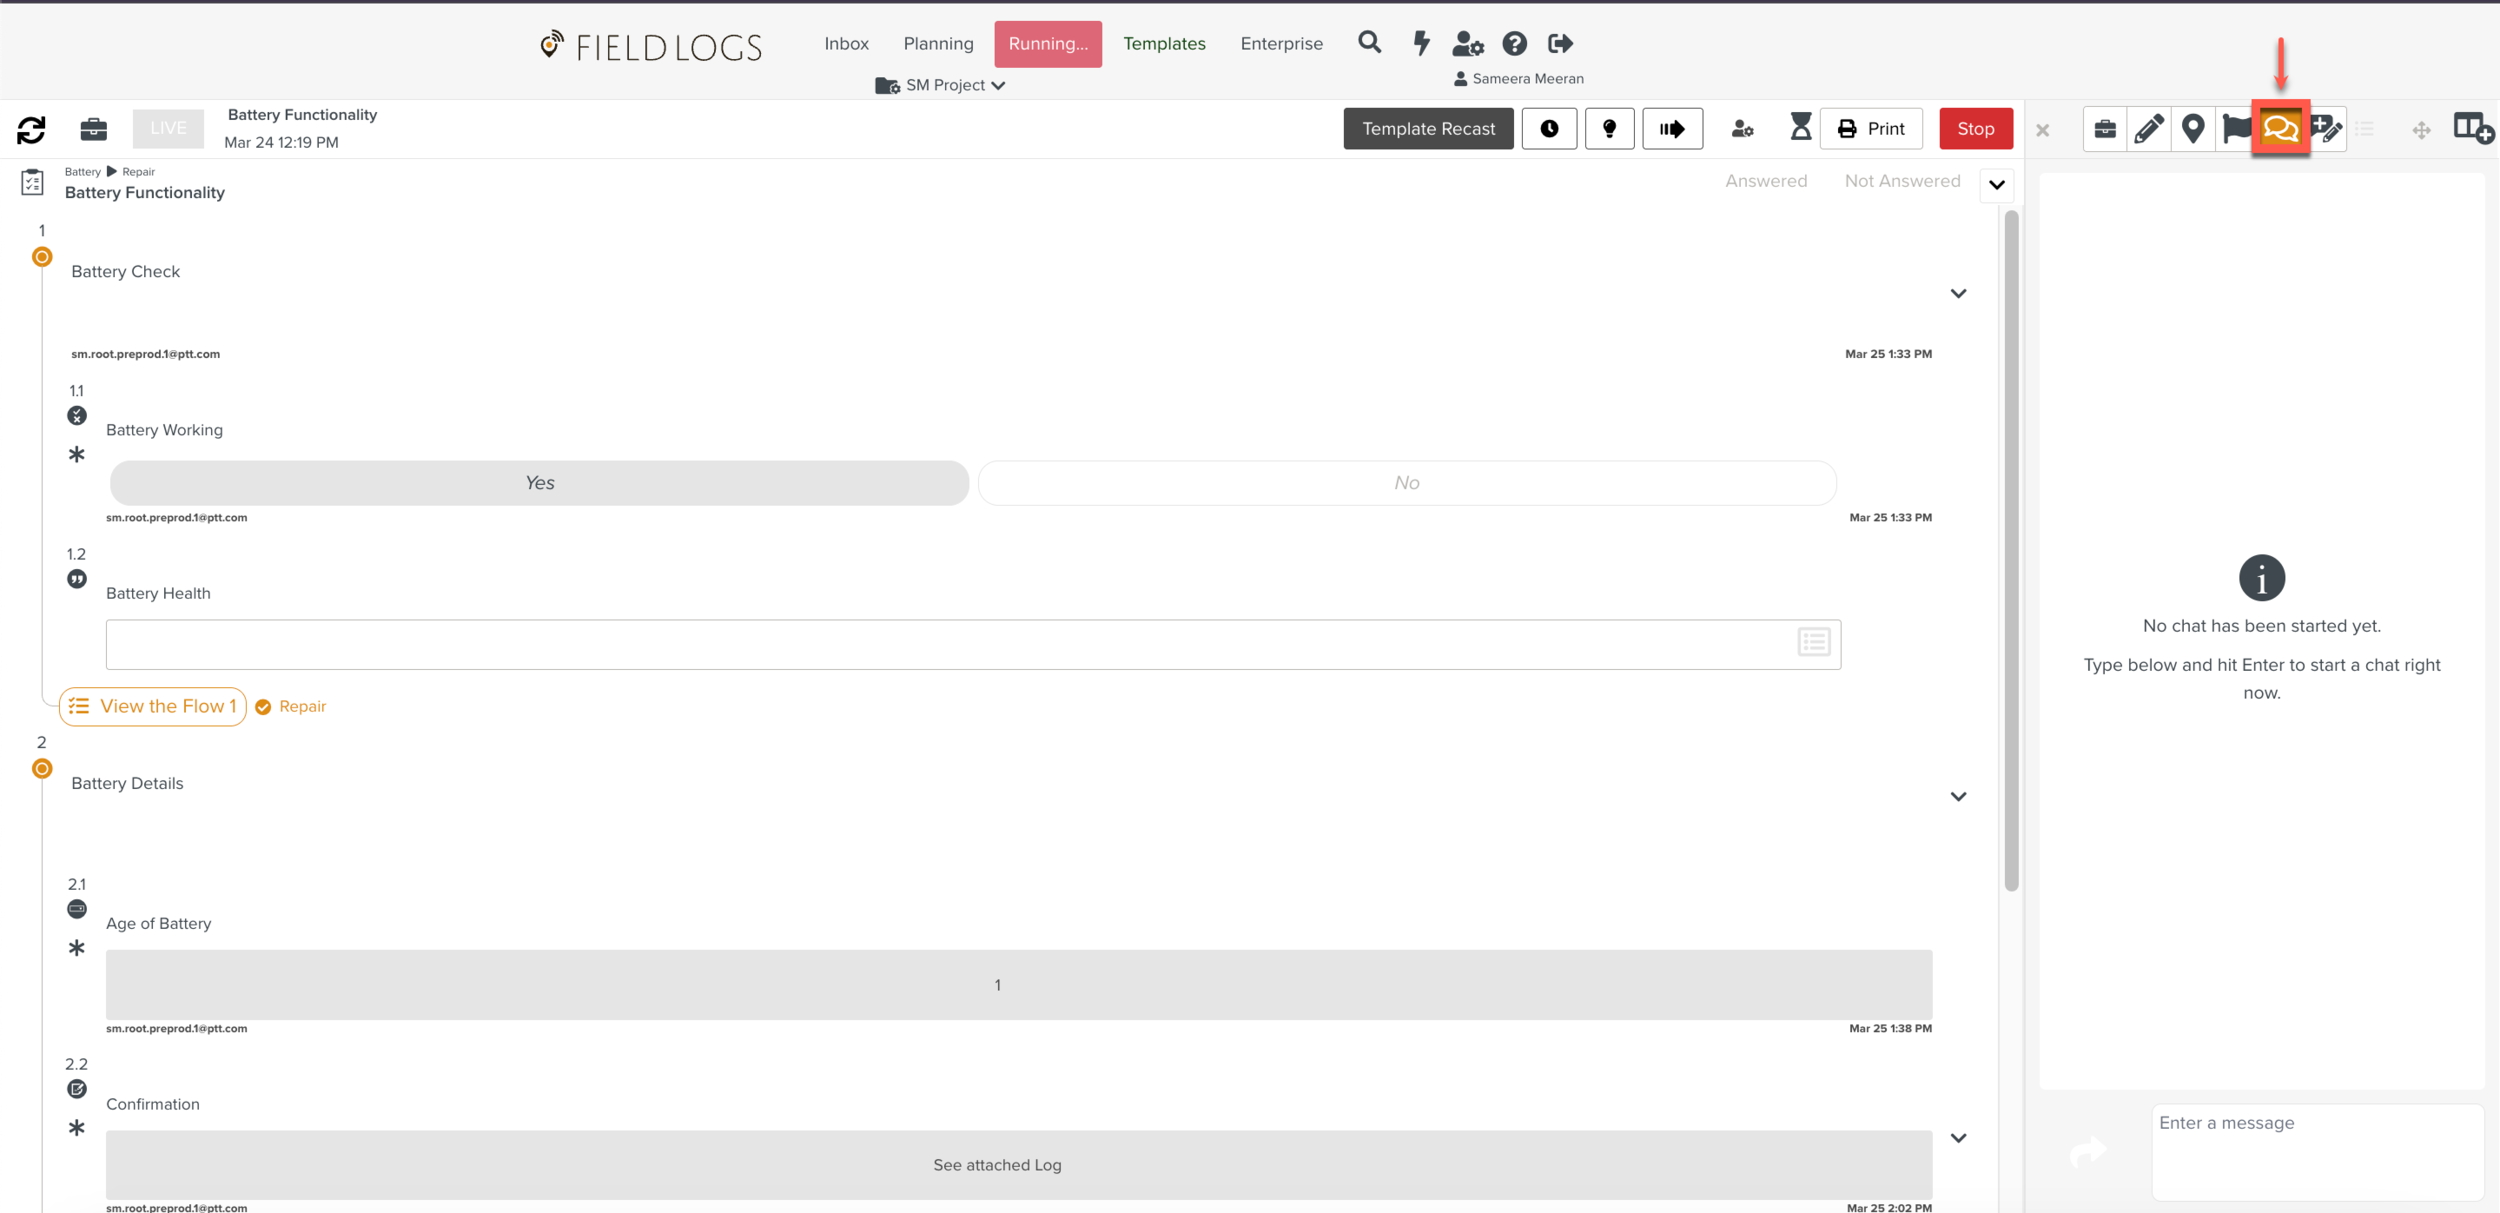
Perform the actions on a Task when the execution is initiated. This includes answering a Step, Validating a Step, and adding Blogs or comments to the Step in a Task.
Note
The Template defines:
The number of Steps.
The organization of the Steps.
The type of the Steps.
The type of information that you can or must enter in each Step.
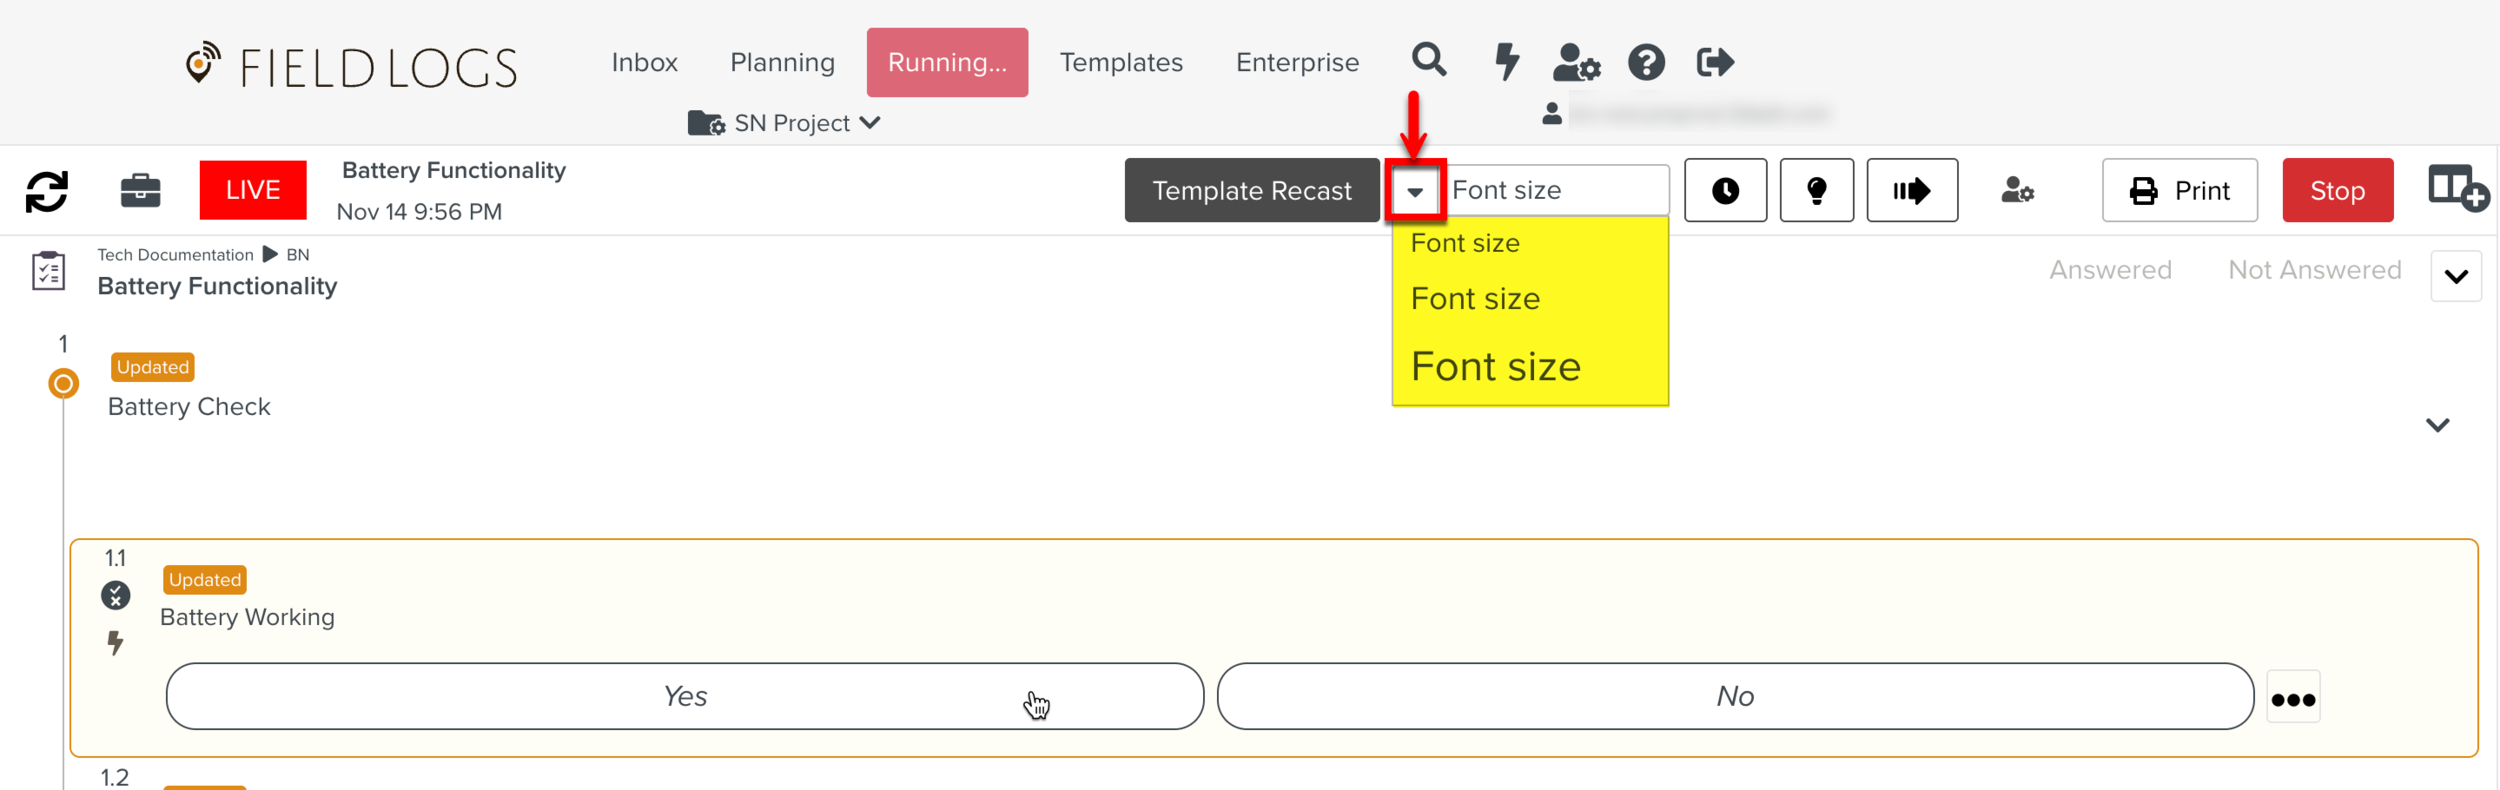
You can modify the font size of the Steps using the Font Size dropdown. There are three different font sizes available as shown below.
You can navigate to the required Step by clicking the
 icon.
icon.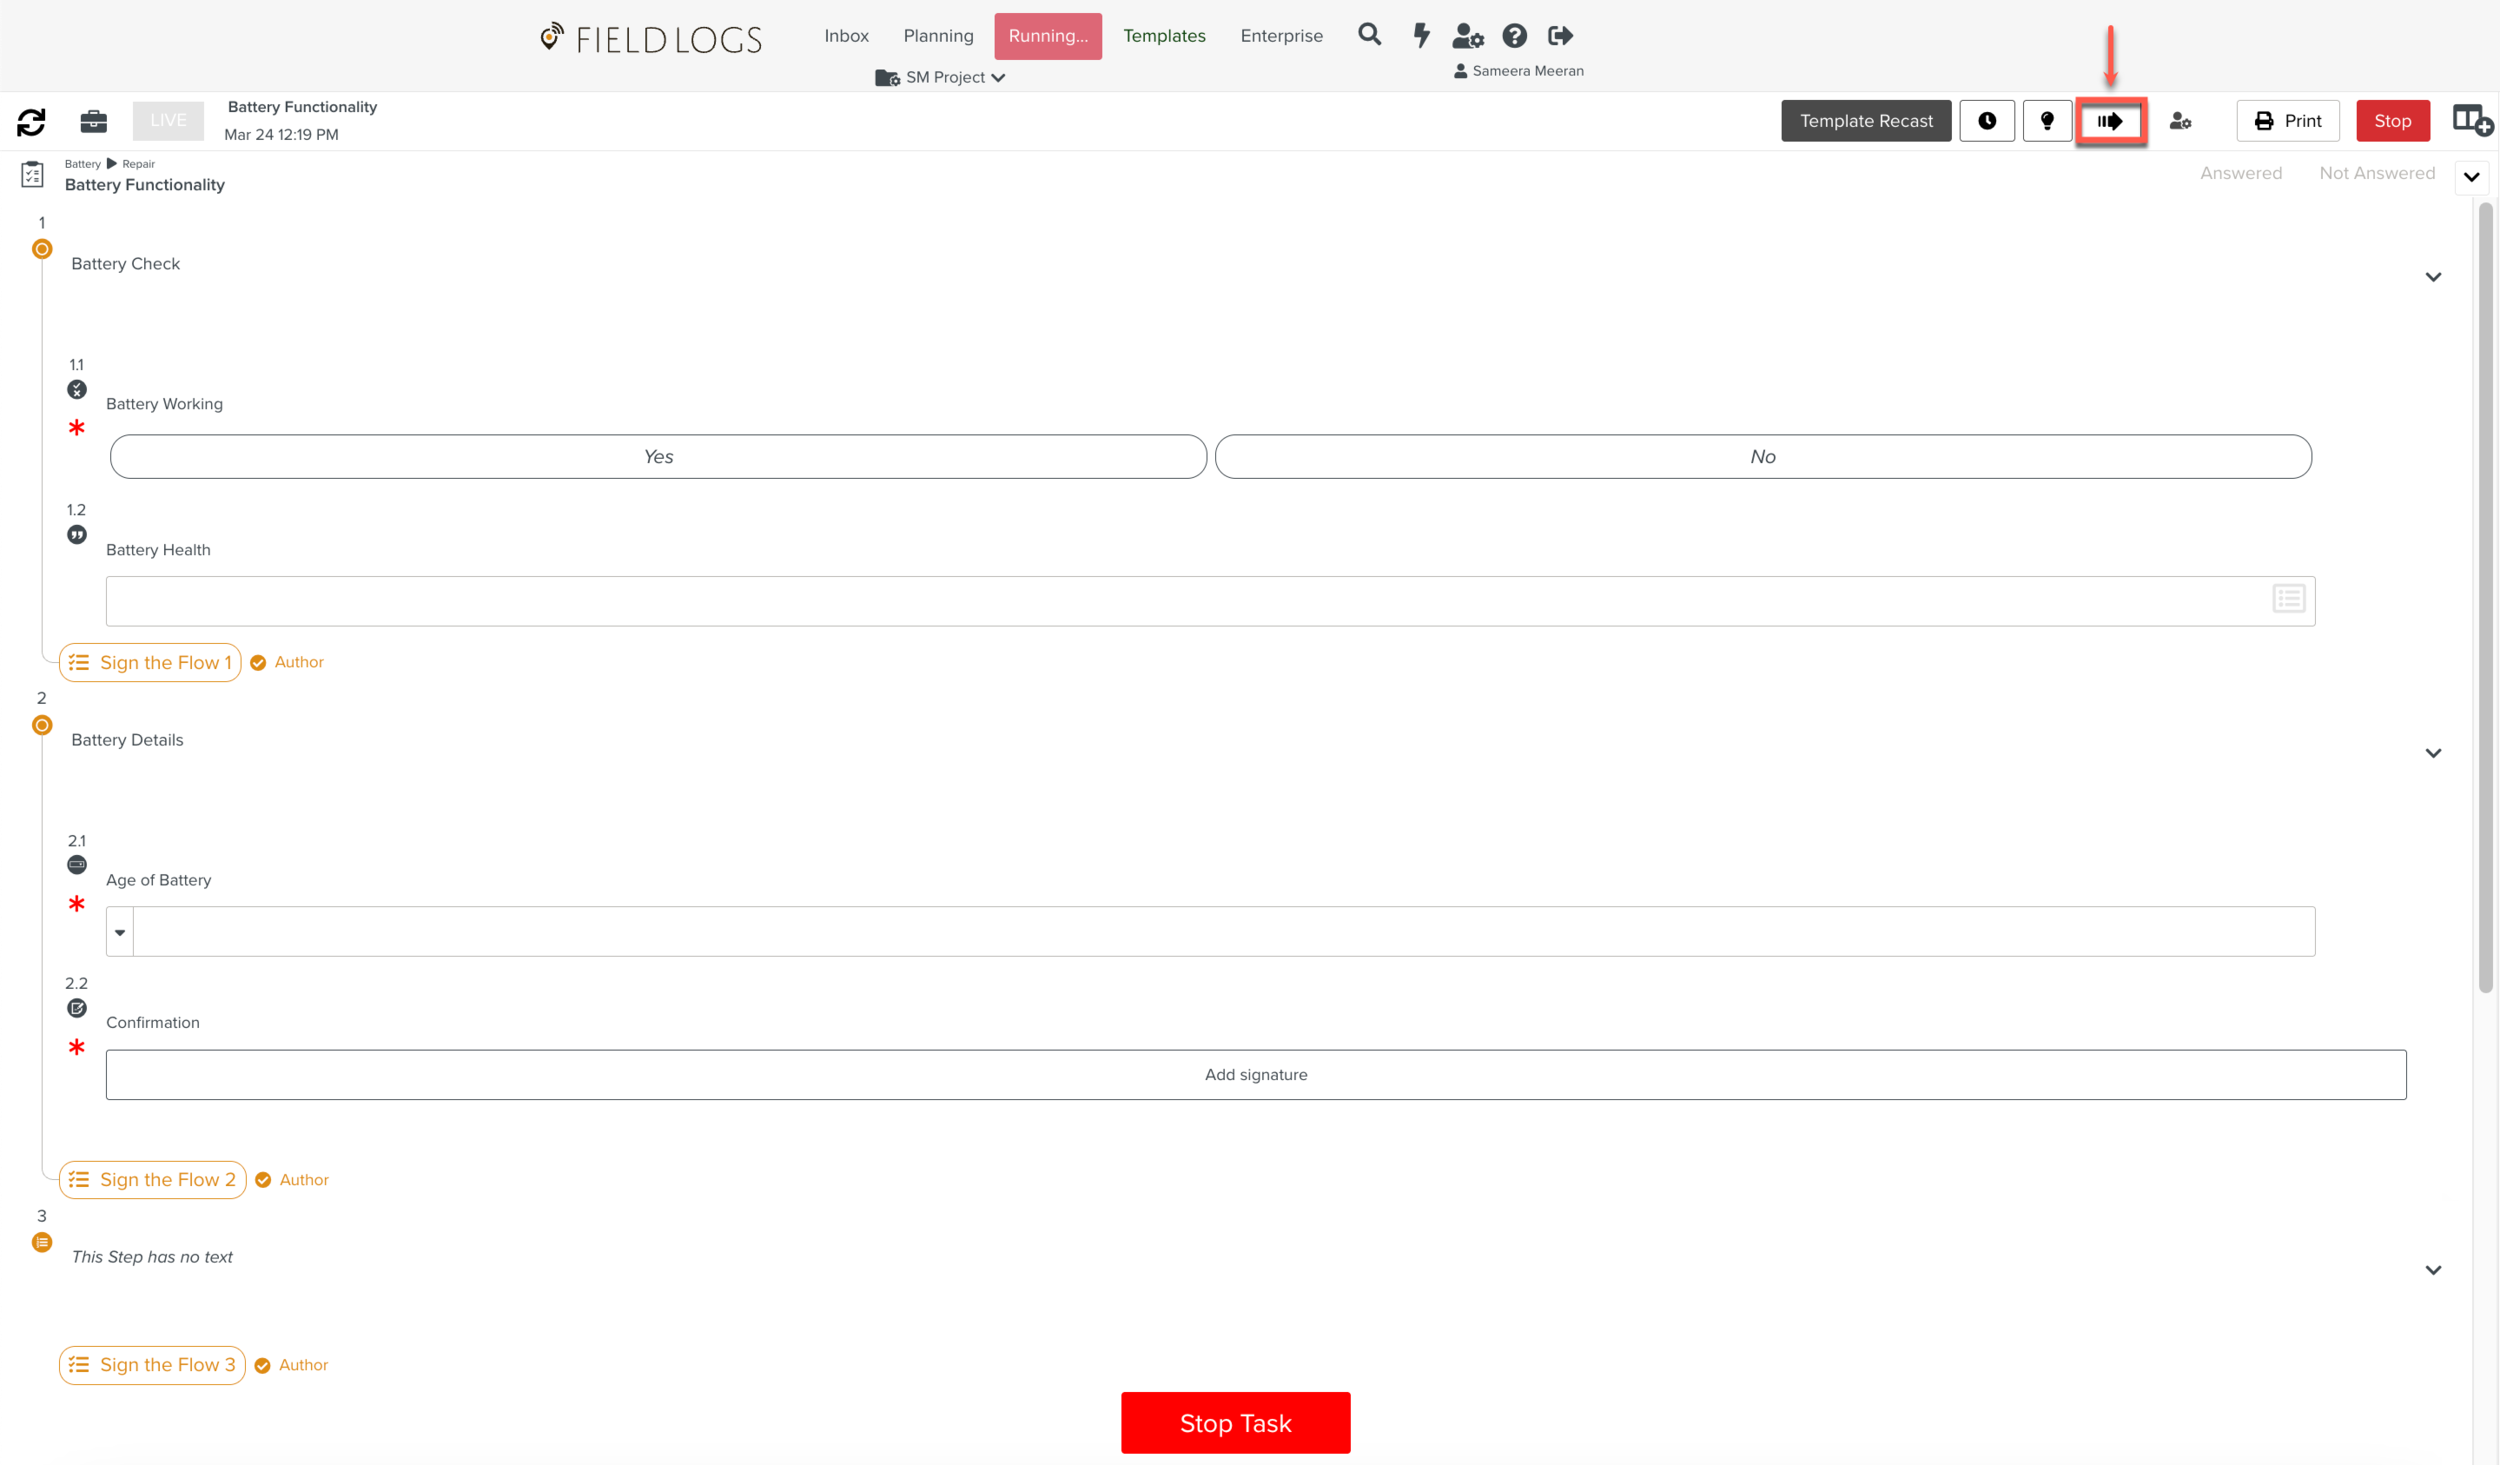
The Go to Step dialog is displayed.
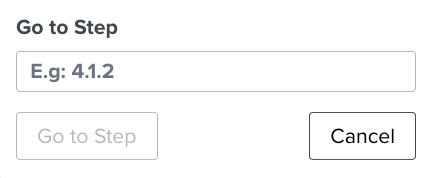
Enter the specific Step number and click Go to Step.
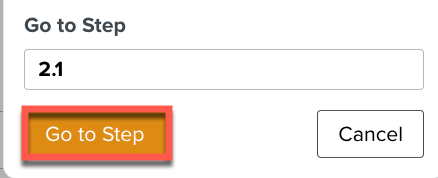
The screen scrolls to the required Step.
Note
When a Step is collapsed, it expands and navigates to the specific Step within the Component.
Shown below is an example where the Step is signed-off after Validation.
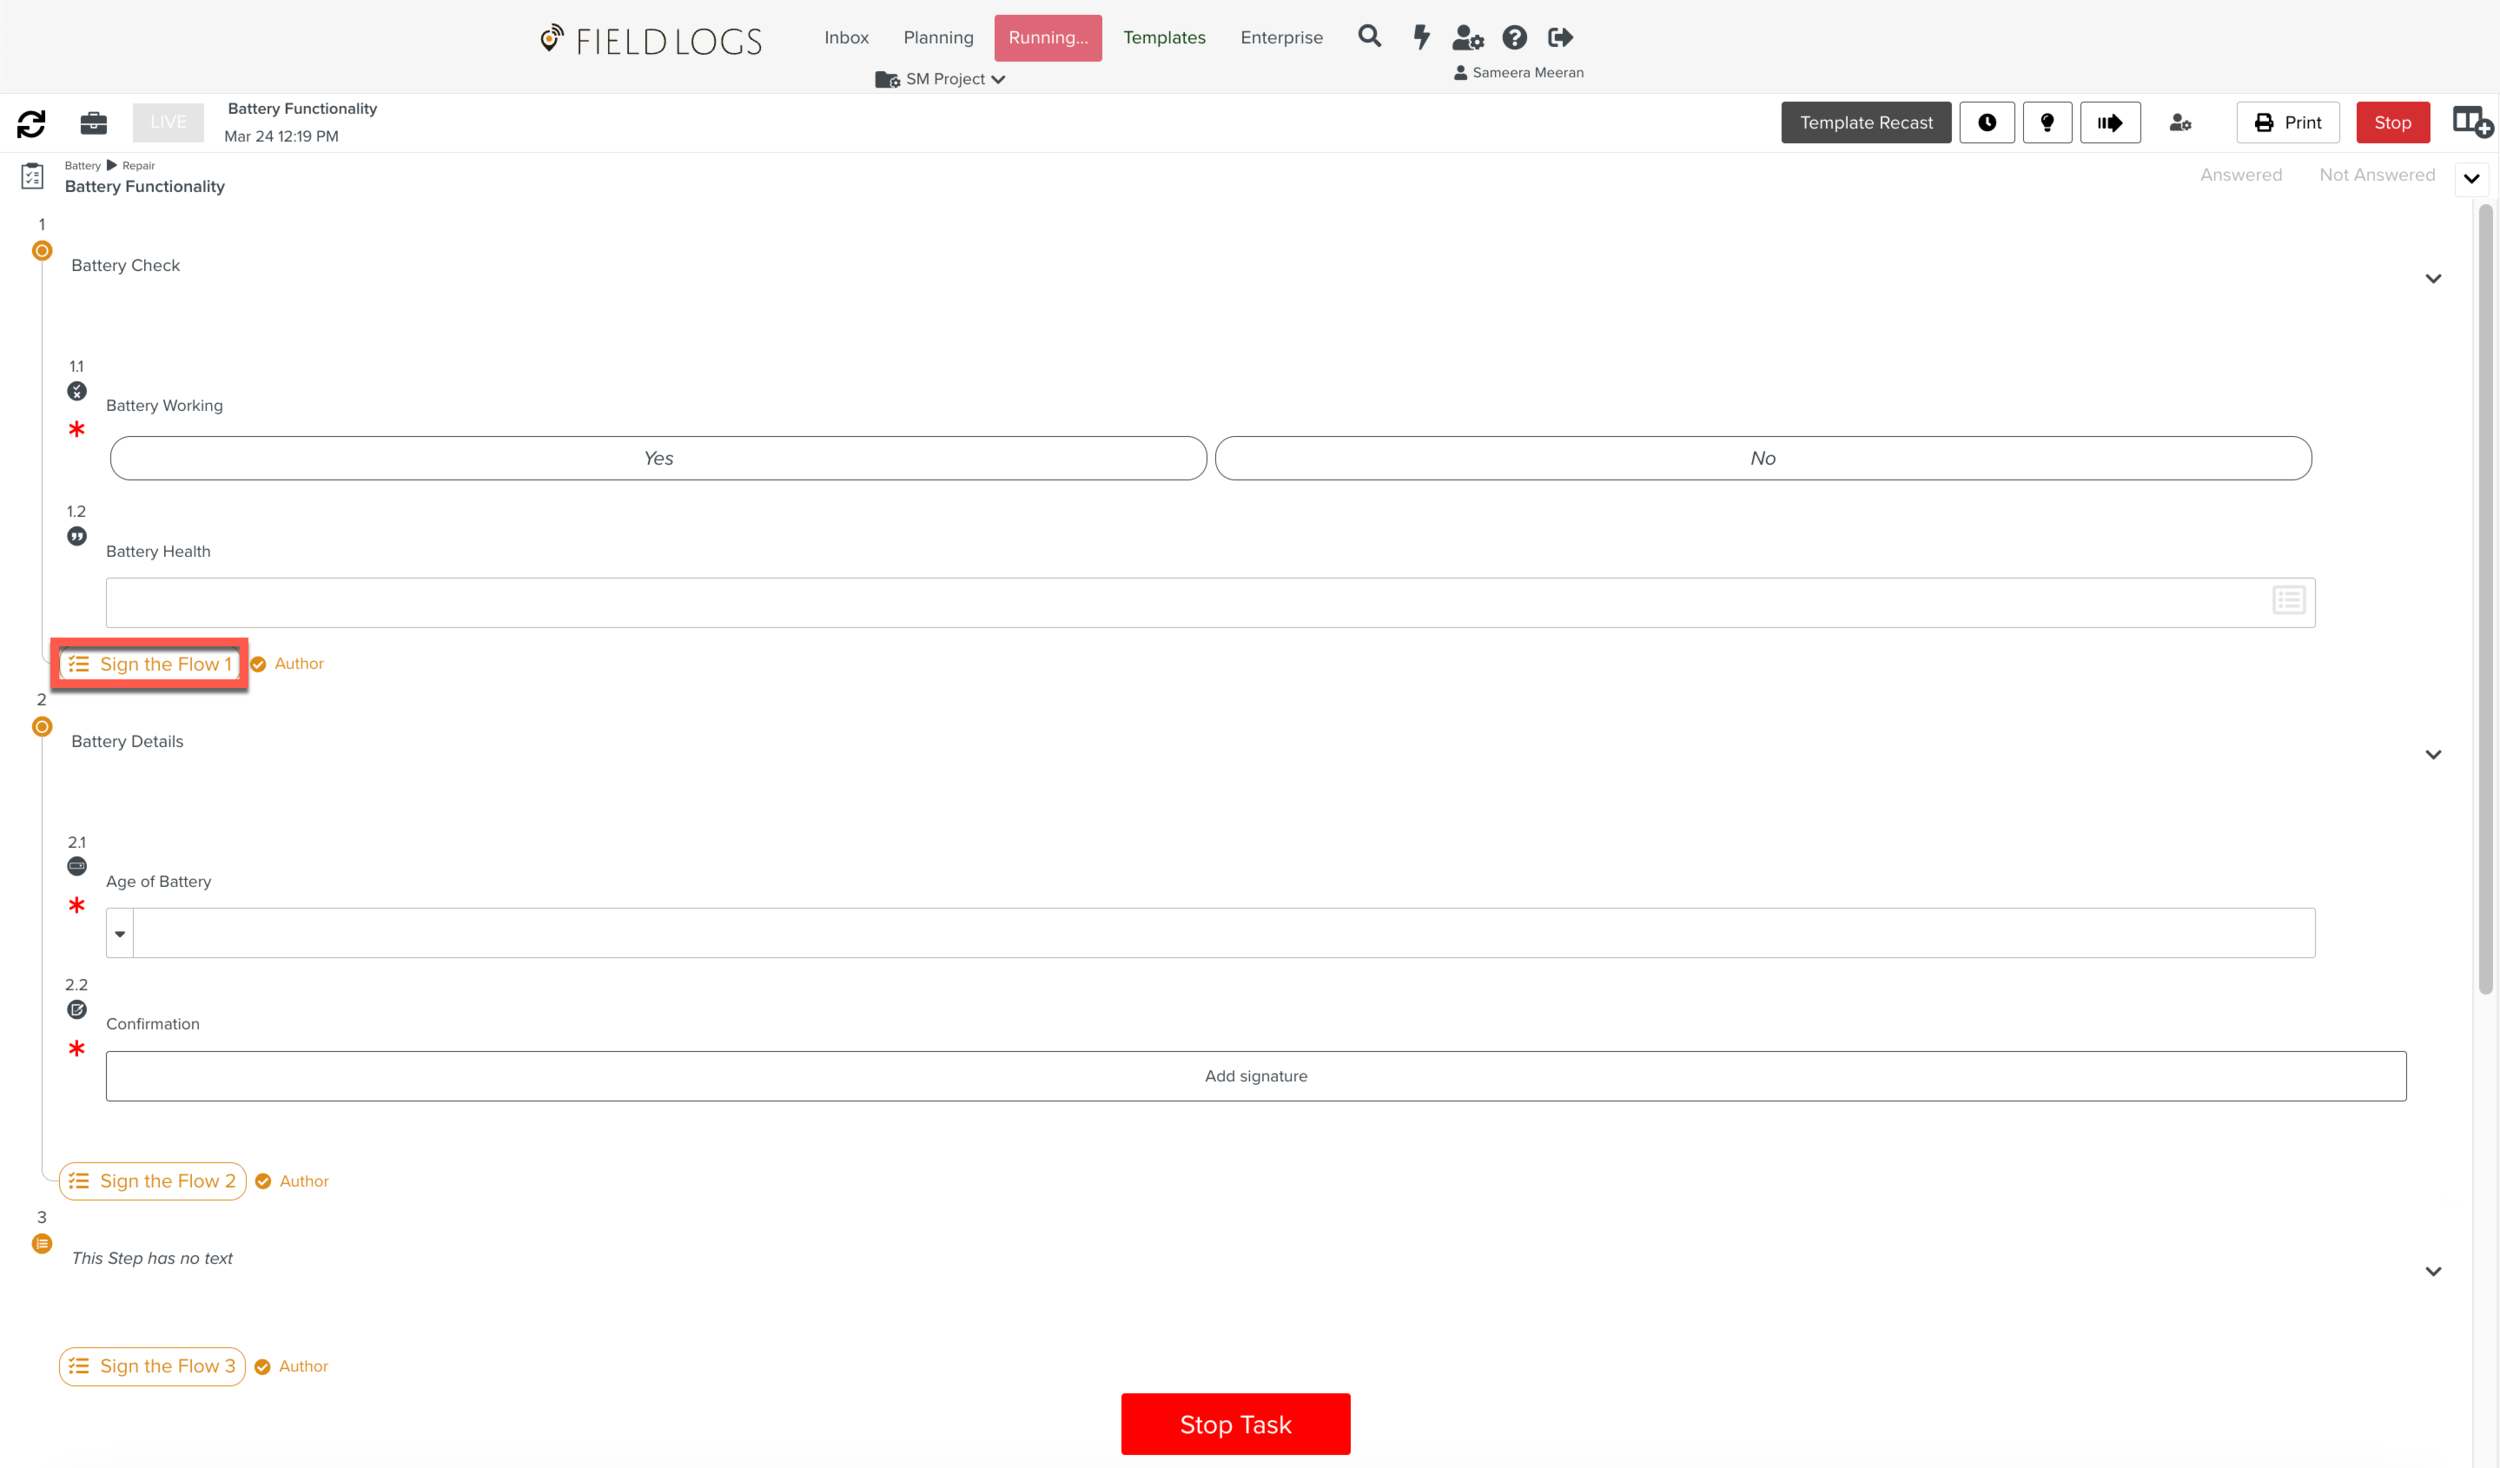
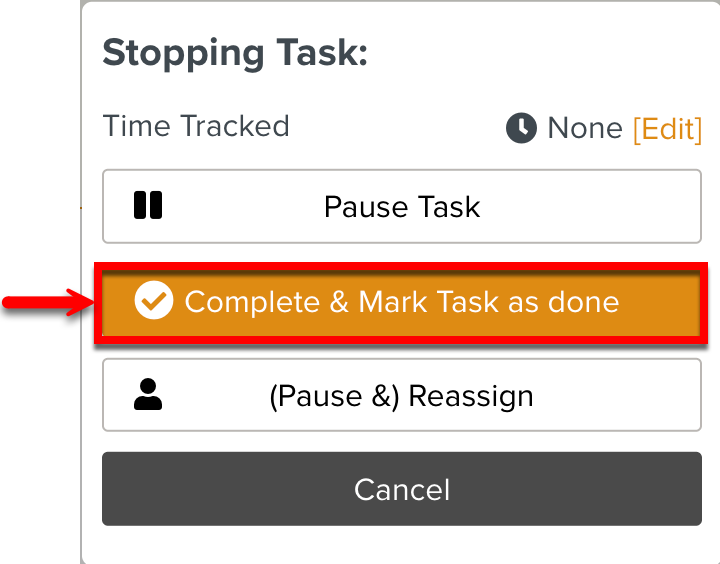
After performing the required actions on the Steps, click Stop Task.
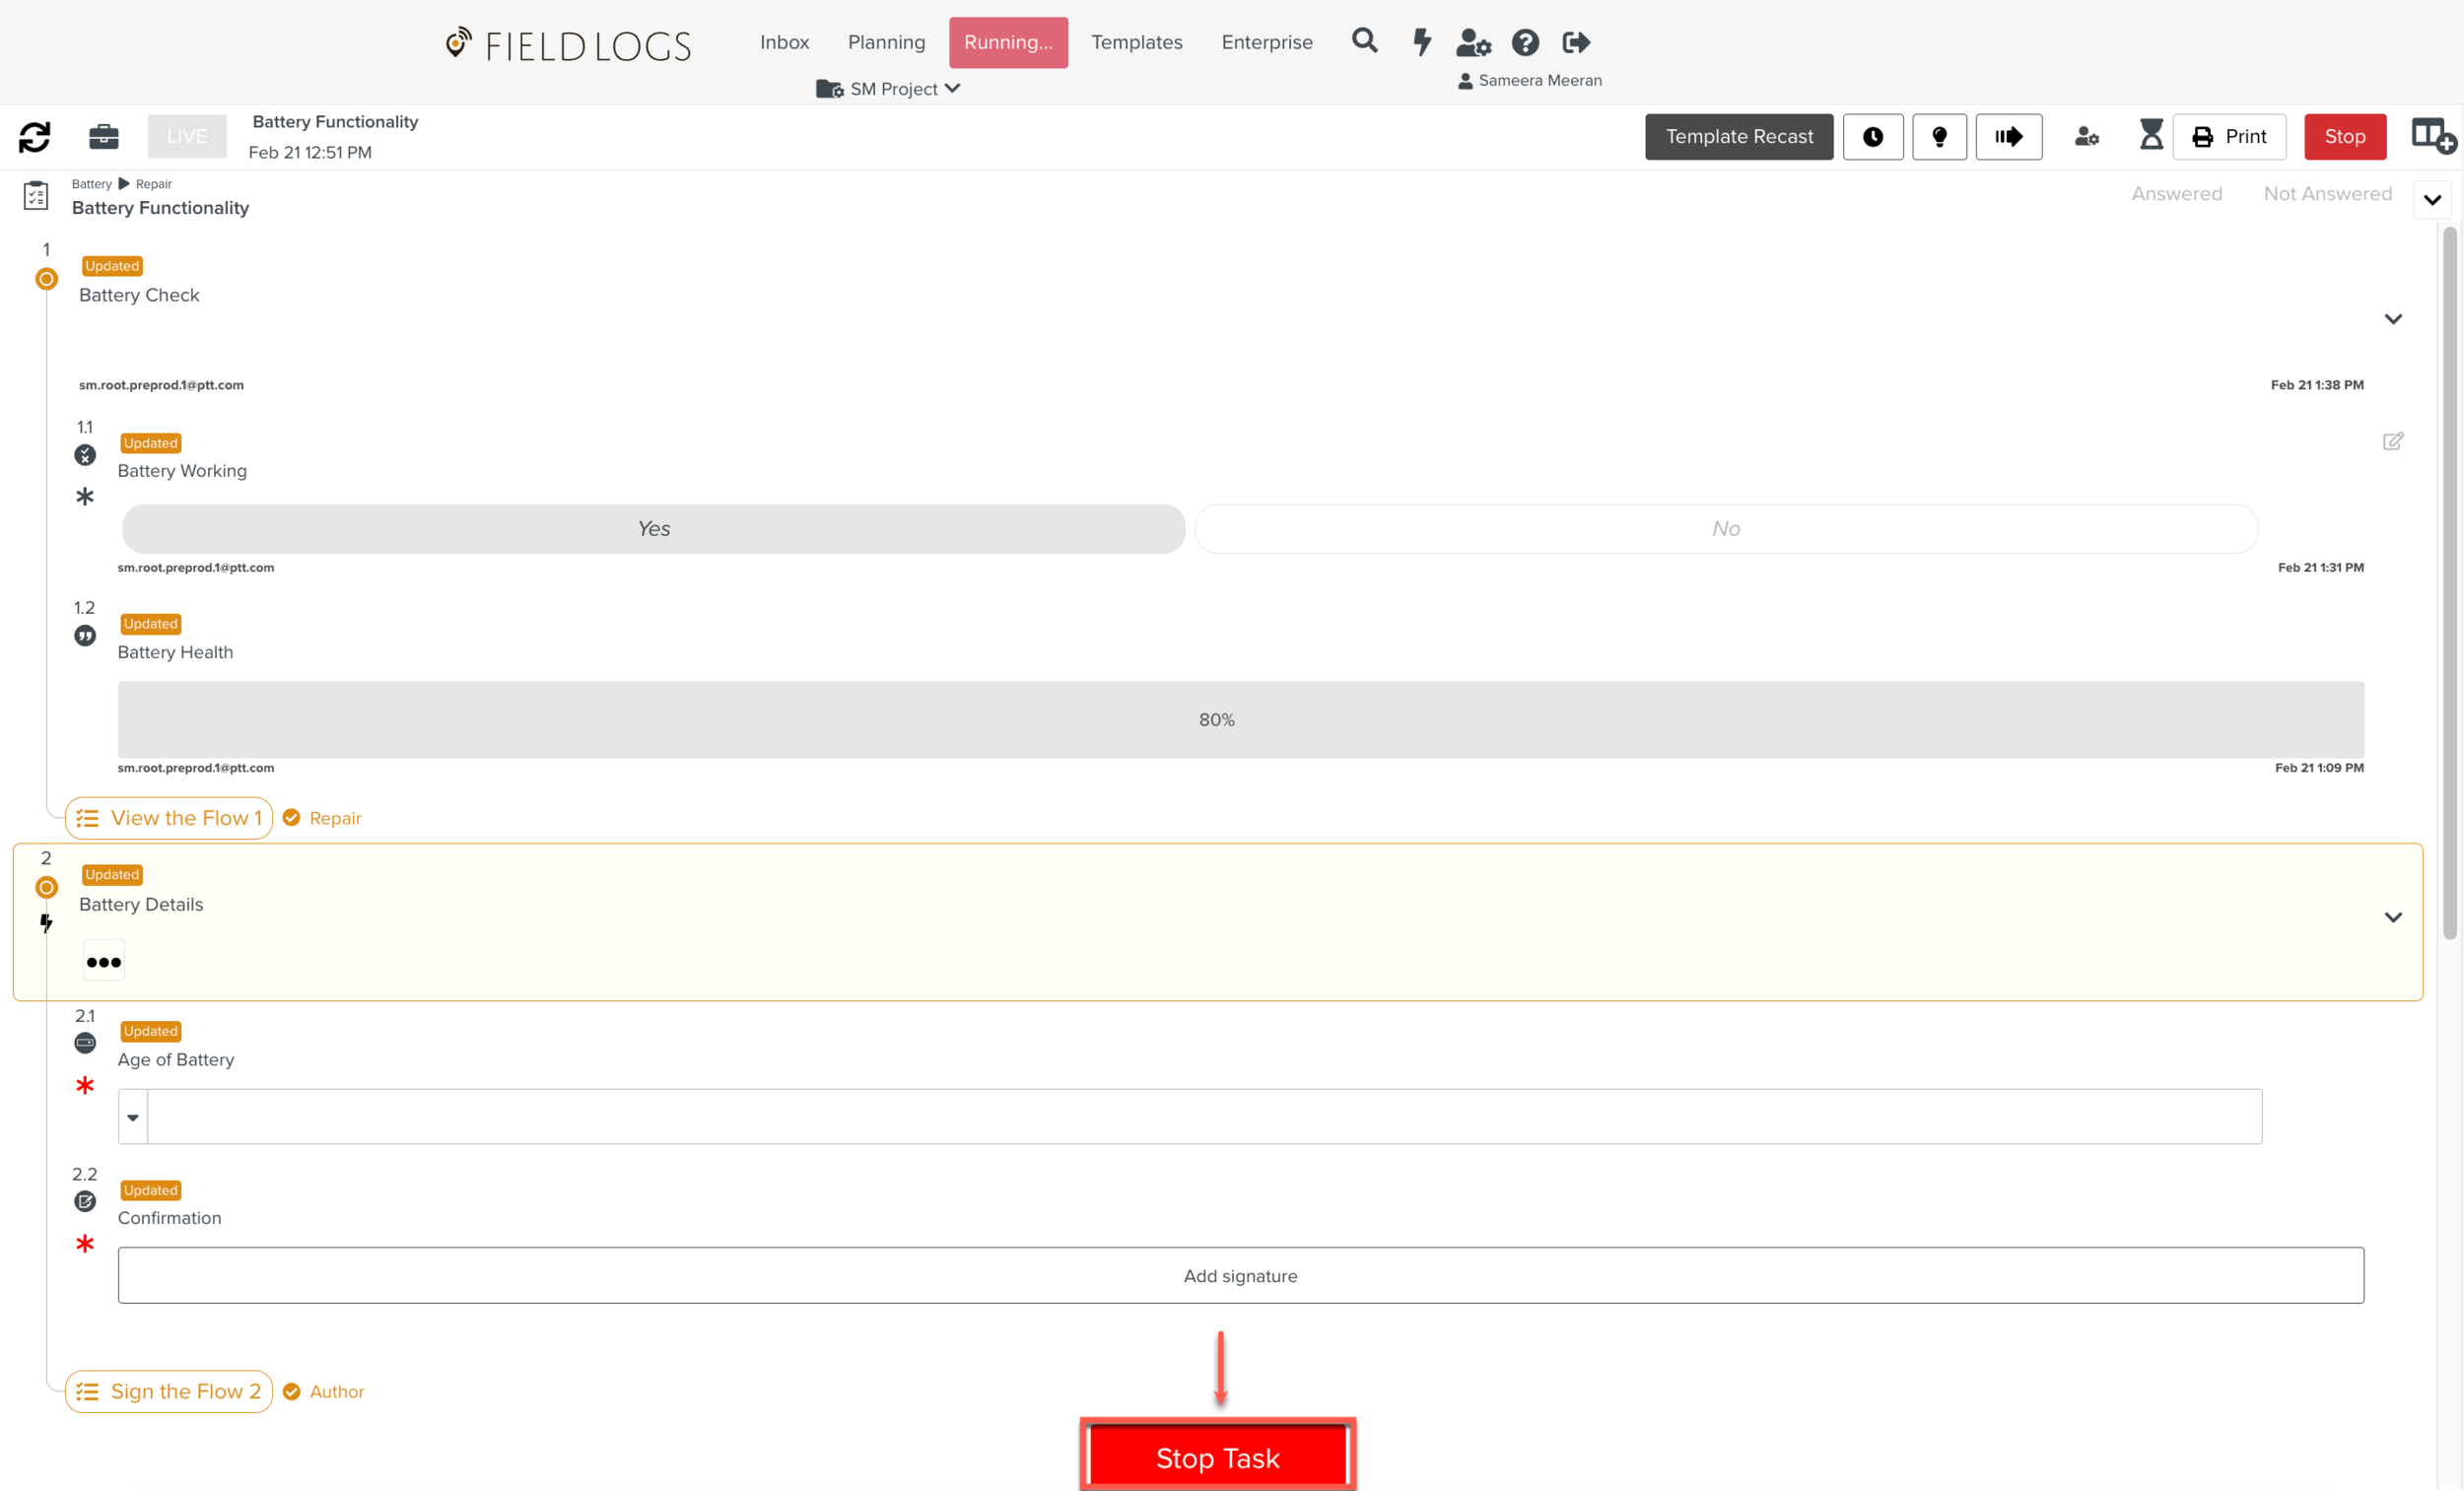
The dialog Stopping Task appears.
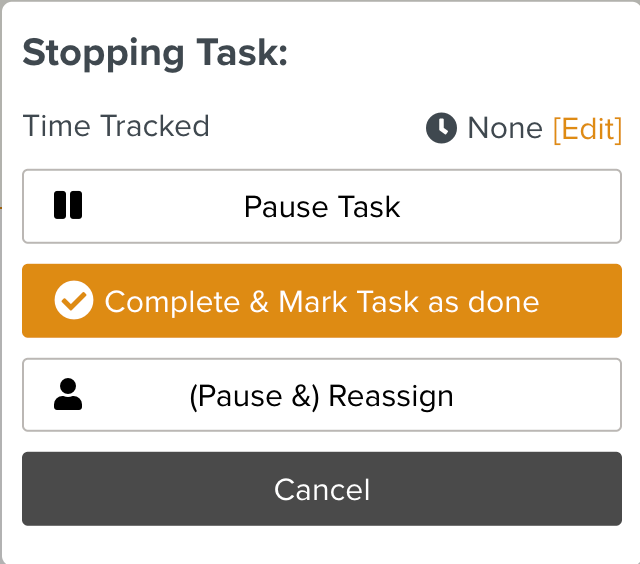
Click . This marks the Task status as Done.
To pause the Task and continue later, click .
To pause the Task and assign it to a different user, click .
Any changes to the Step background color persist across reloads and are visible to other users who work on the Task.
All the changes made in the Task by one user are visible to other users who pick up the Task.
Note
Using the Task chat, real-time messaging is made possible during the concurrent execution of the Task.
 |
Tip
Some Templates and members can have a runtime impacted by a Syncing Profile. Syncing Profiles is based on Execution Profiles rules defined. Execution Profiles enable/disable the same Task differently to different members which is applied at Runtime.