Viewing the Hits in Bundle Tasks
Hits are generated as a result of Screening the Baseline/Active and Newer revisions of the OEM Manuals. When you pick up a Bundle Task, you can view the list of Hits.
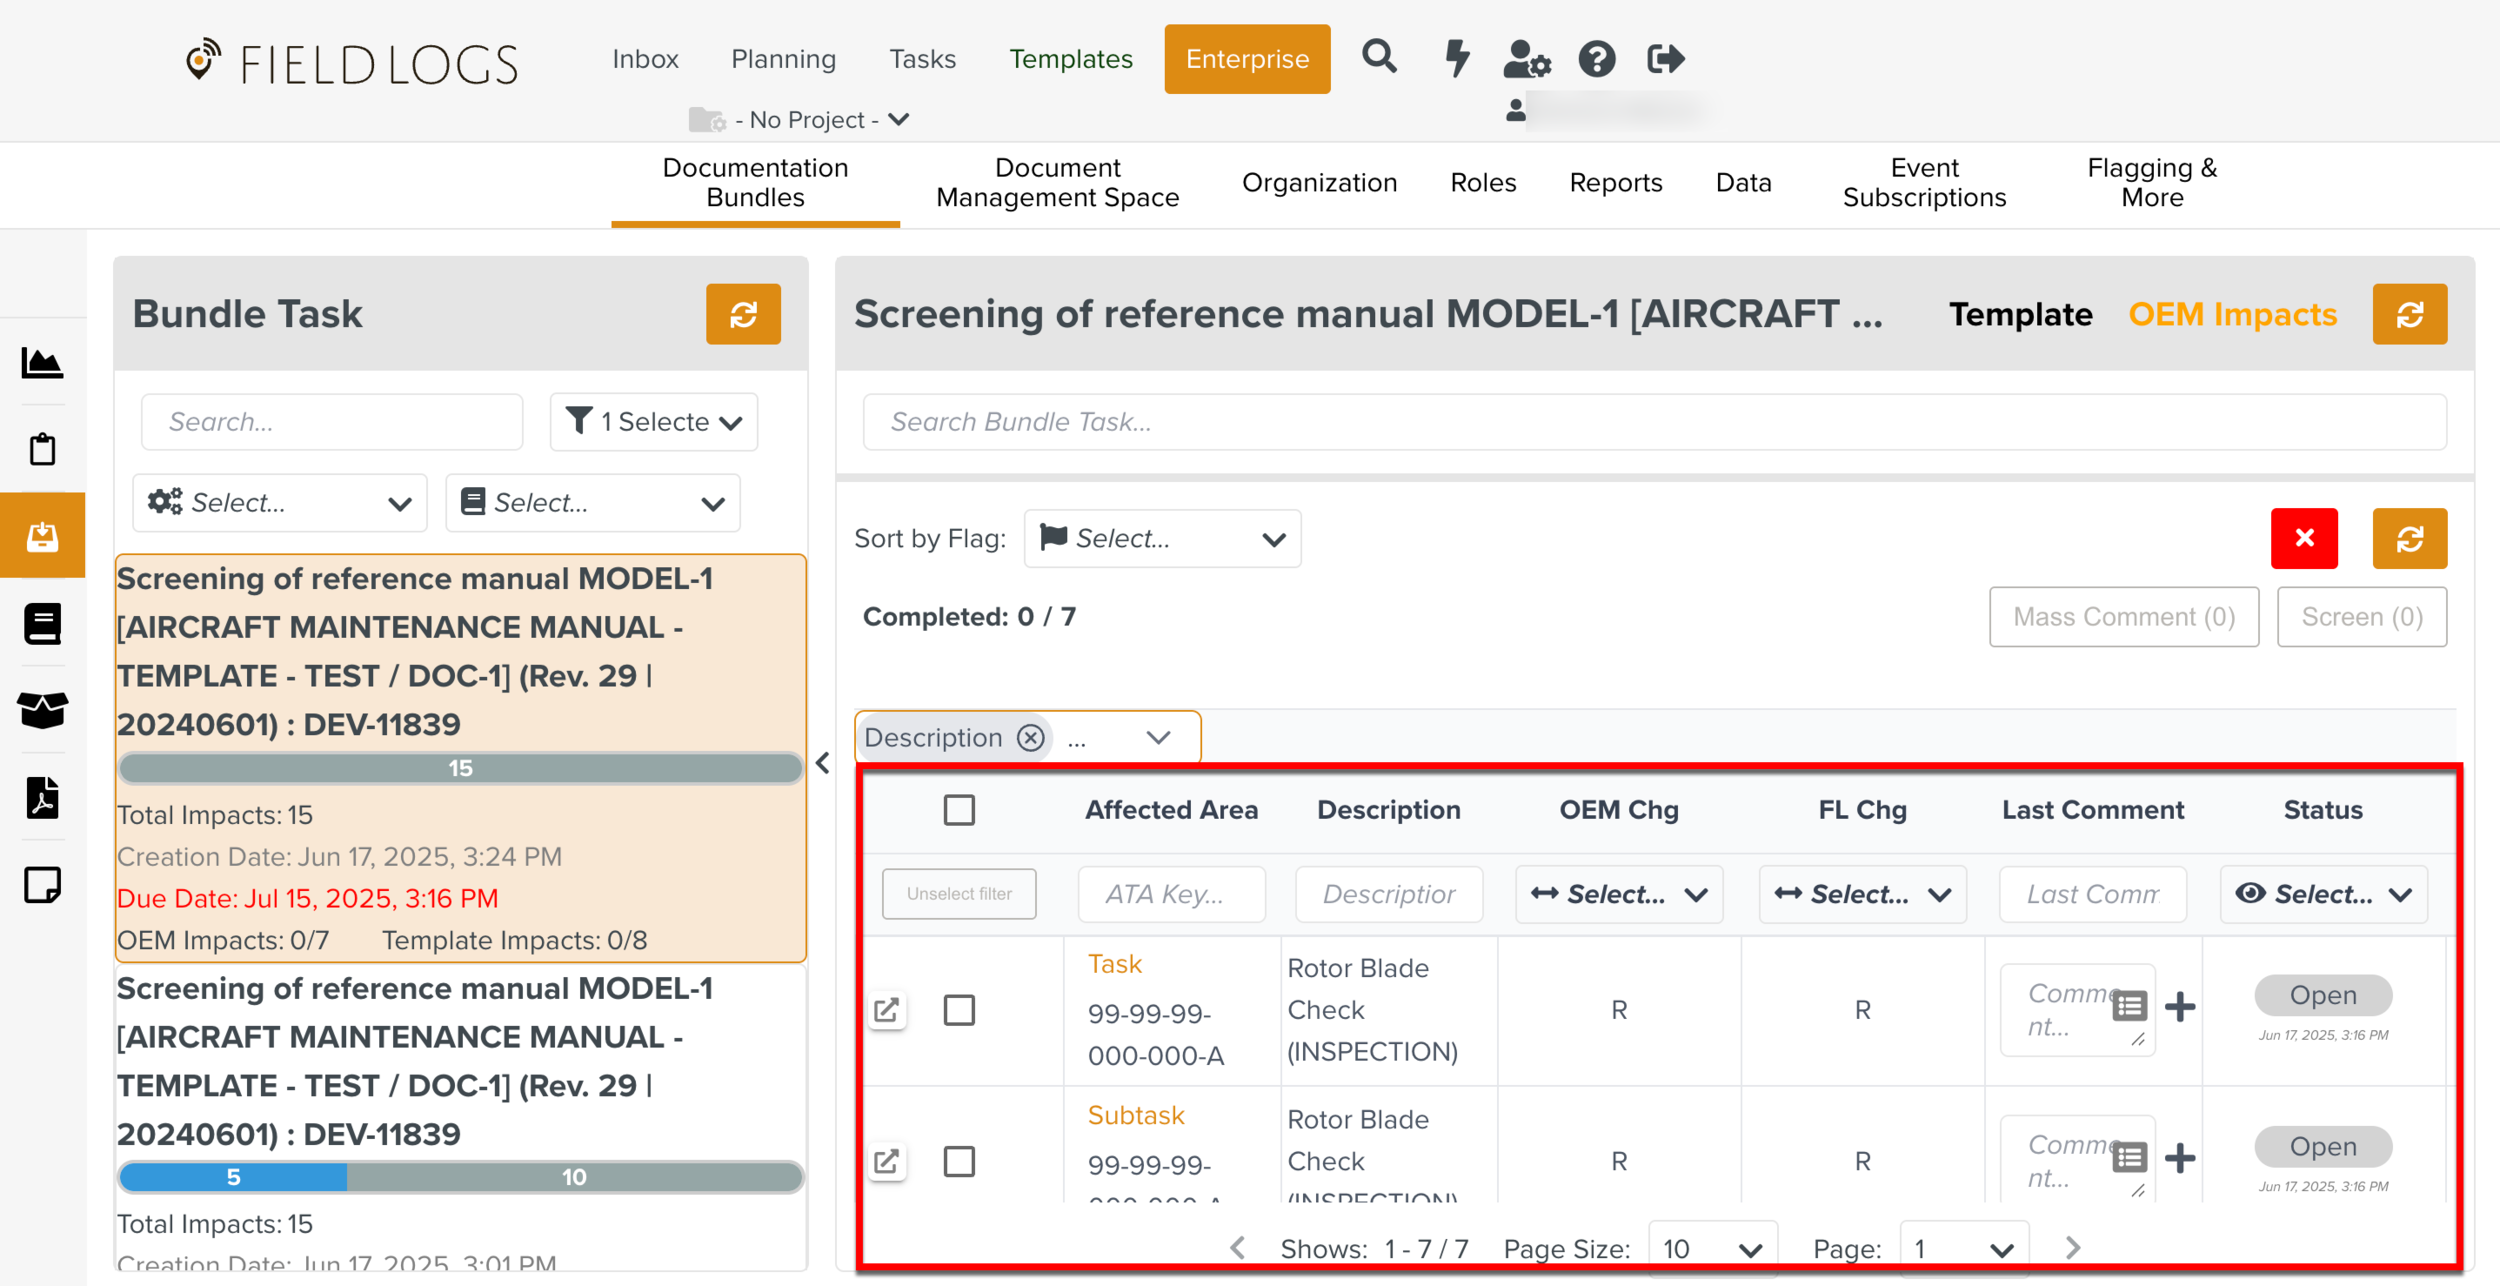
The Template and OEM Impacts options allow you to view the Hits under each category.
 |
 |
Note
Some Bundle Tasks can have both Template and OEM Impacts. In such cases, both categories can be viewed in two different tabs. For this categorized view, select or unselect both Template and OEM Impacts as shown below.
 |
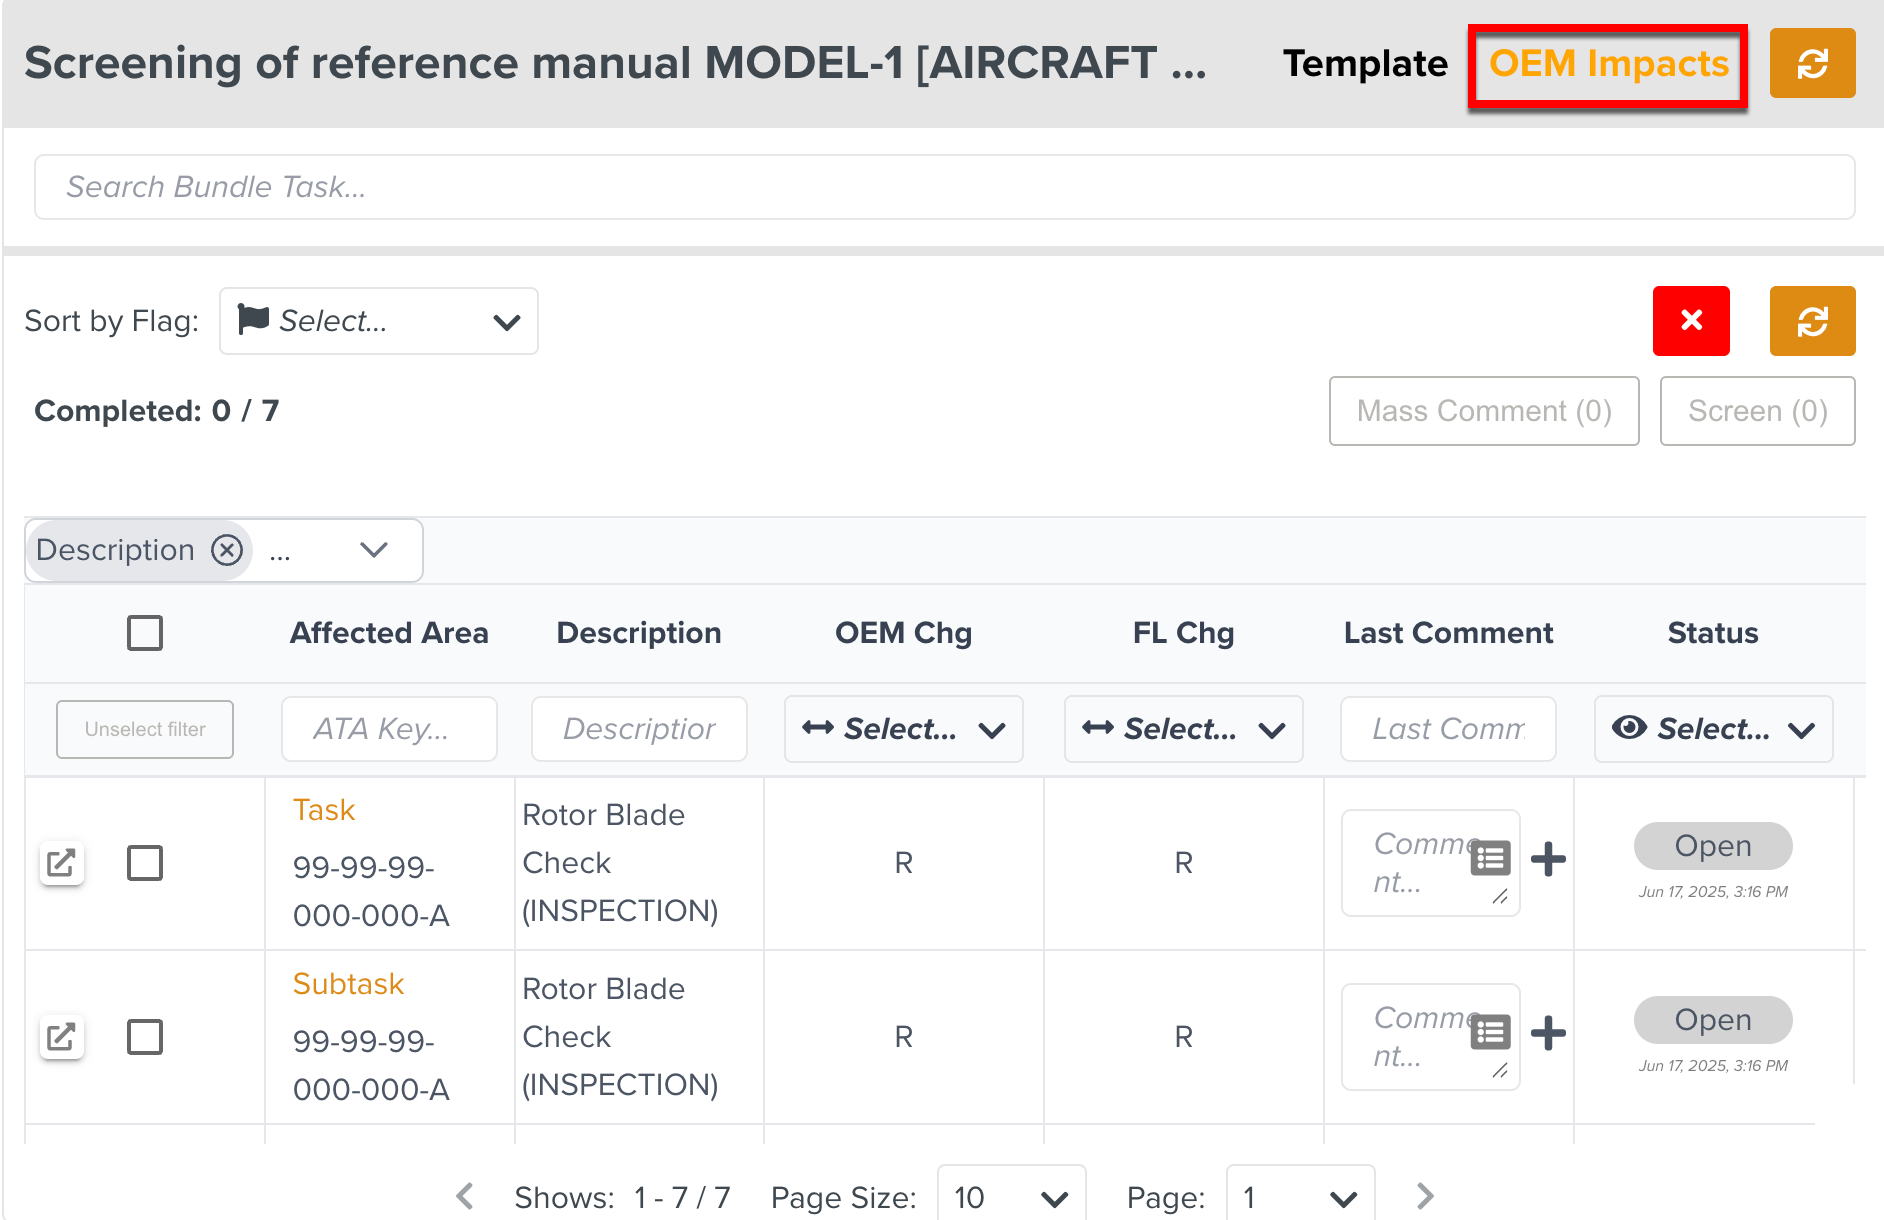
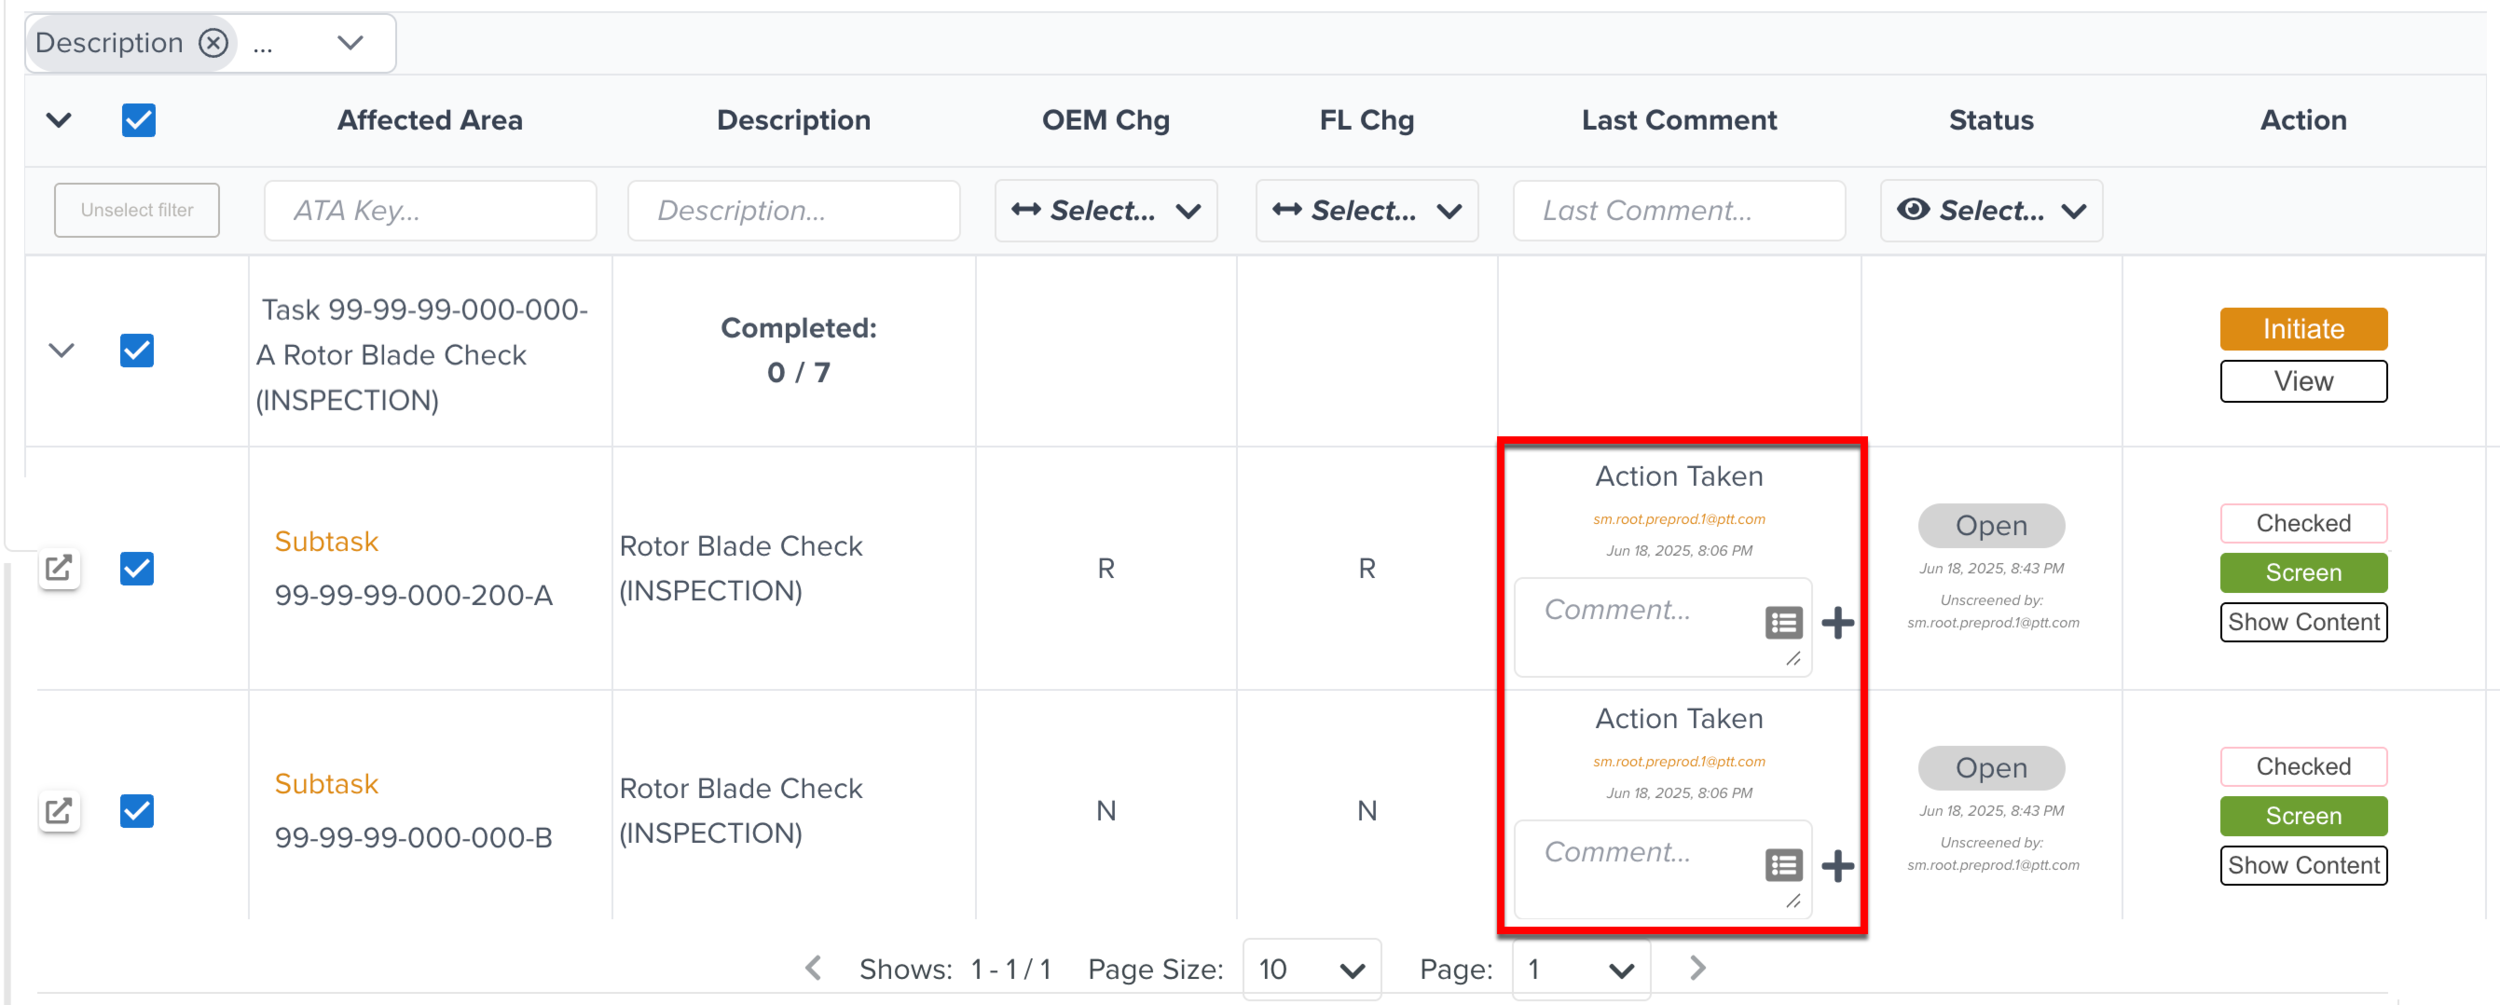
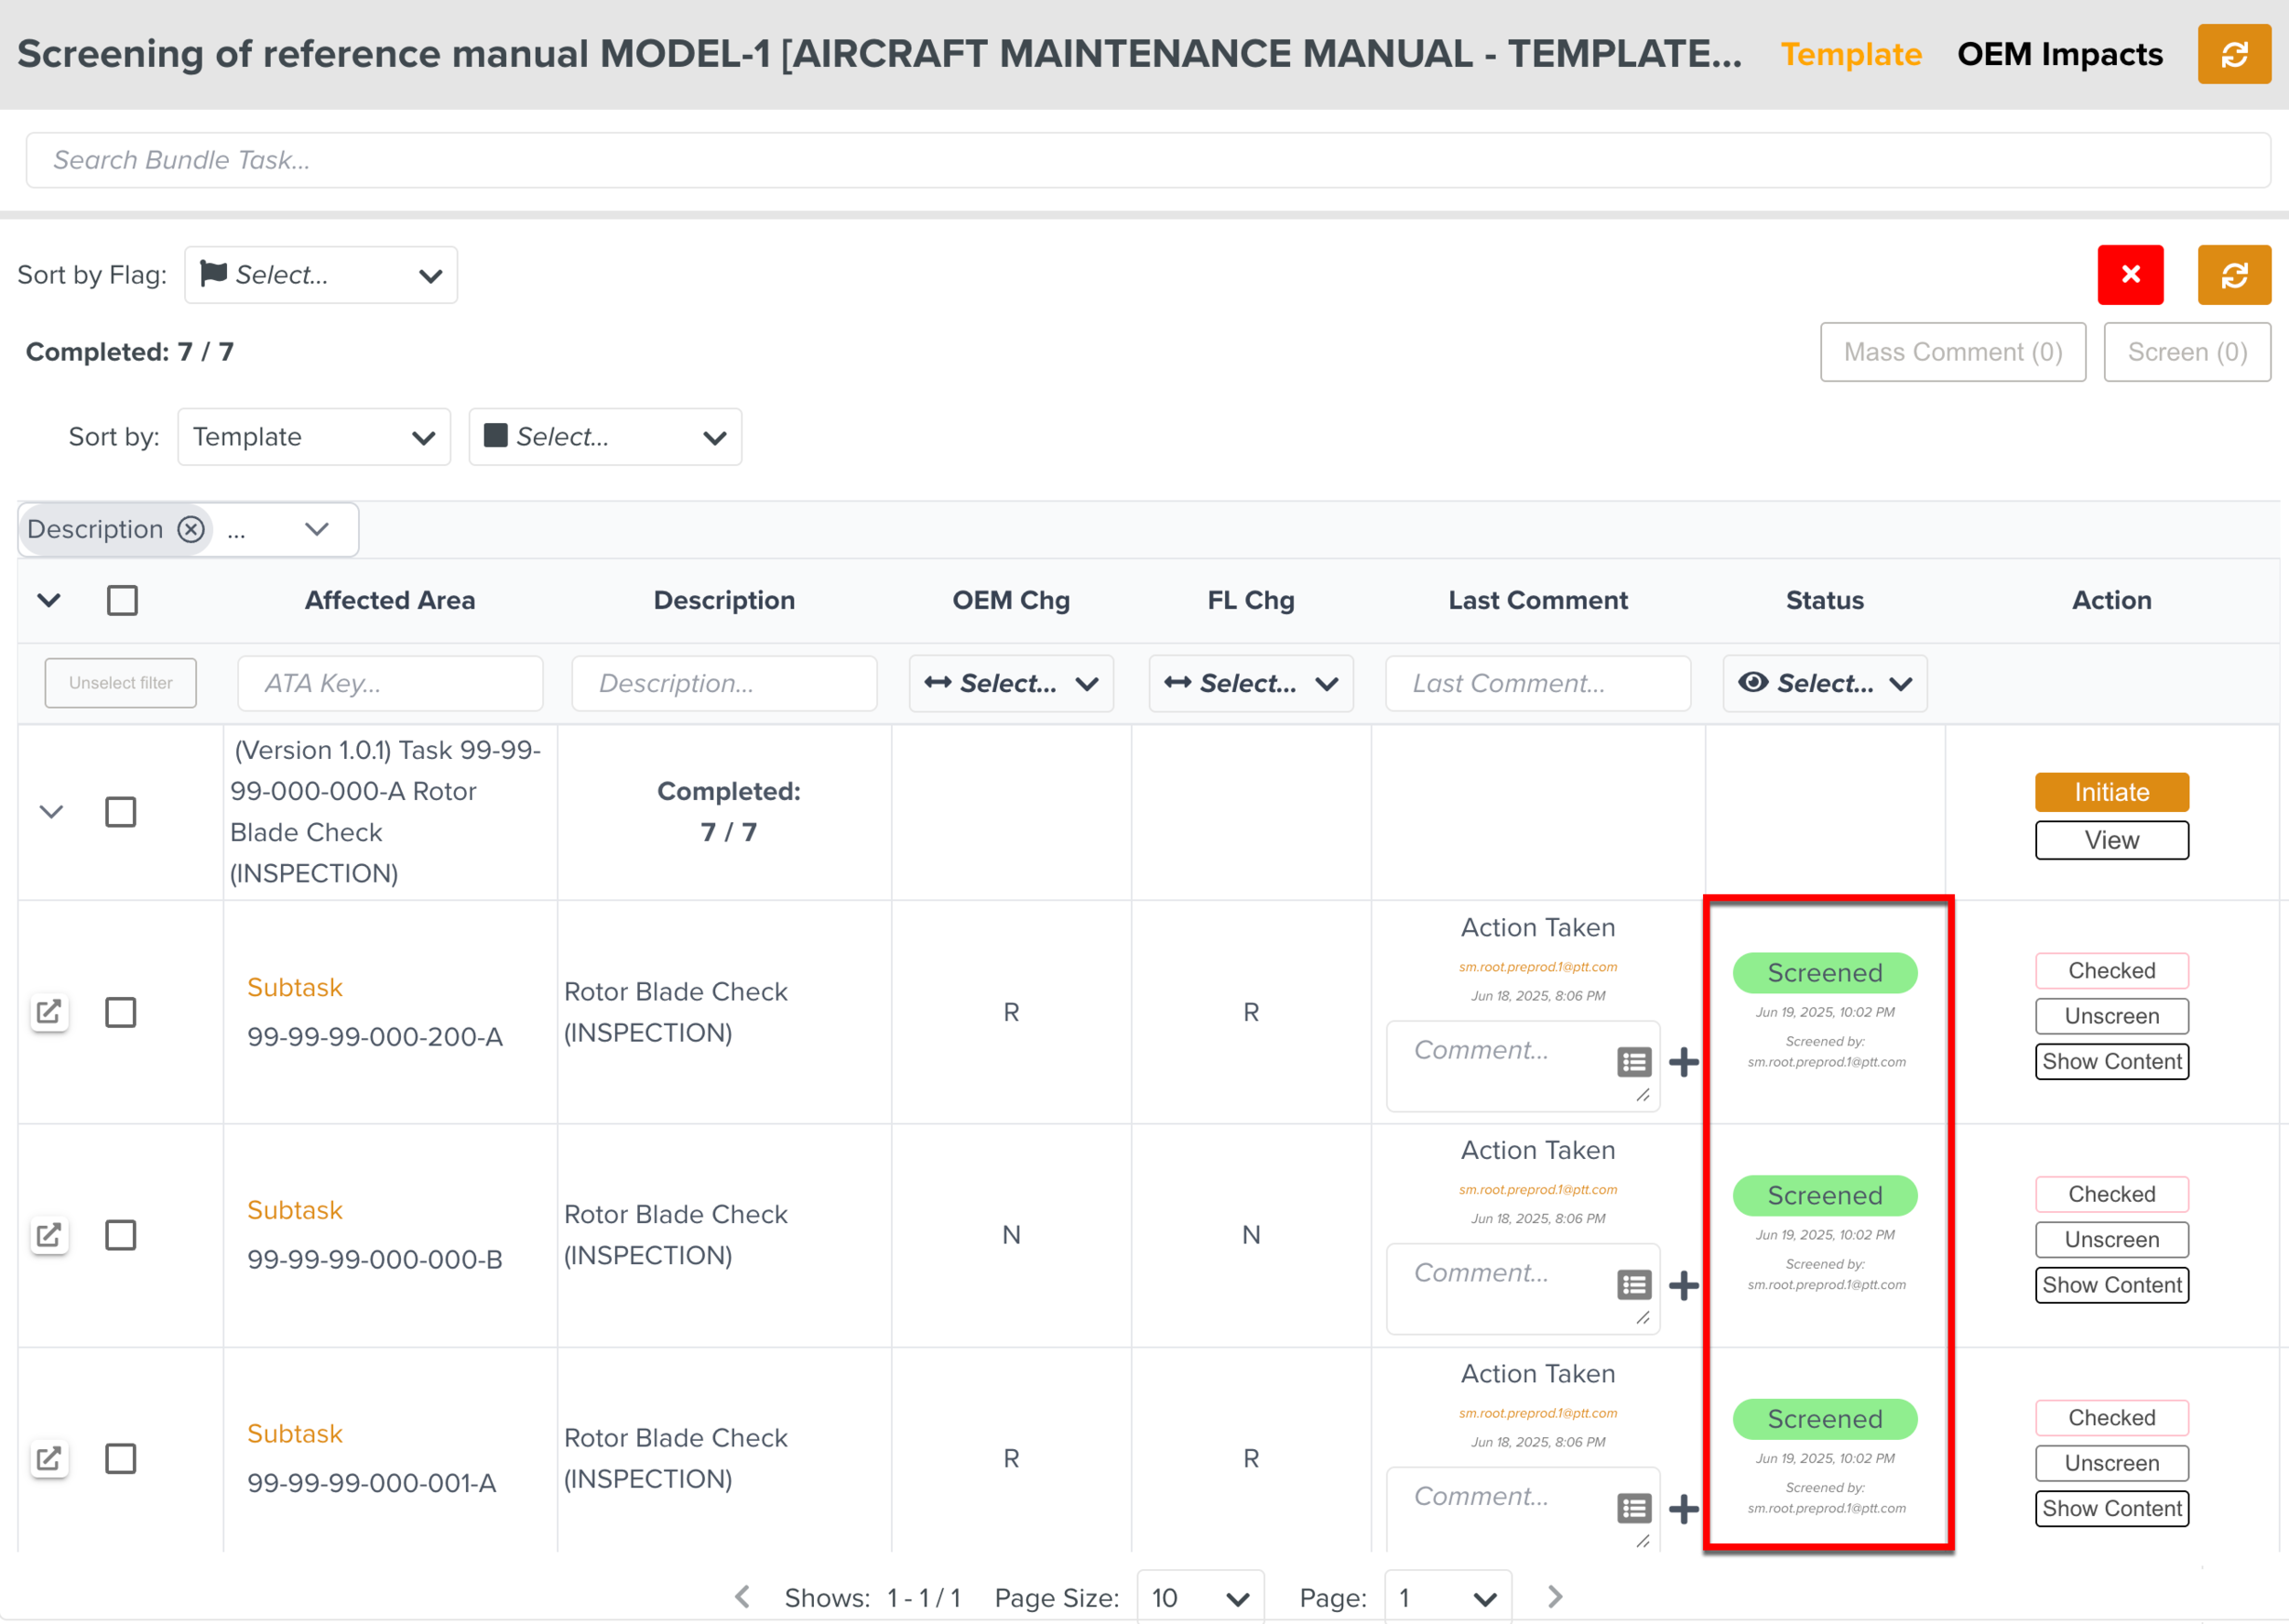
The Hits are displayed in a table and the impacted Subtasks are organized under their respective Tasks.
 |
The following information of the Hits are presented in the table:
Affected Area: Displays the impacted Task and Subtask number which is also called the Public Key.
Description: Displays the details of the modification.
OEM Chg: Displays the OEM change type.
When a revision to an OEM manual occurs, there is an OEM Change Type indicator that indicates the type of change that has occurred.
FL Chg: Displays the FieldLogs change type.
When a revision to an OEM manual is added to the system, FieldLogs checks the new Screening revision and computes a FieldLogs Change Type indicator for every Impact.
Last Comment: Displays the latest comment added.
Status: Displays the status of the Hits along with the date, time, and user details.
The following statuses are displayed:
Open: If the Hit is not checked or screened.
Screened: If the required action is taken and marked as screened.
Note
Custom statuses can be set using the Routing table.
Action: Displays the tasks that you can perform to complete the Screening of the Hits.
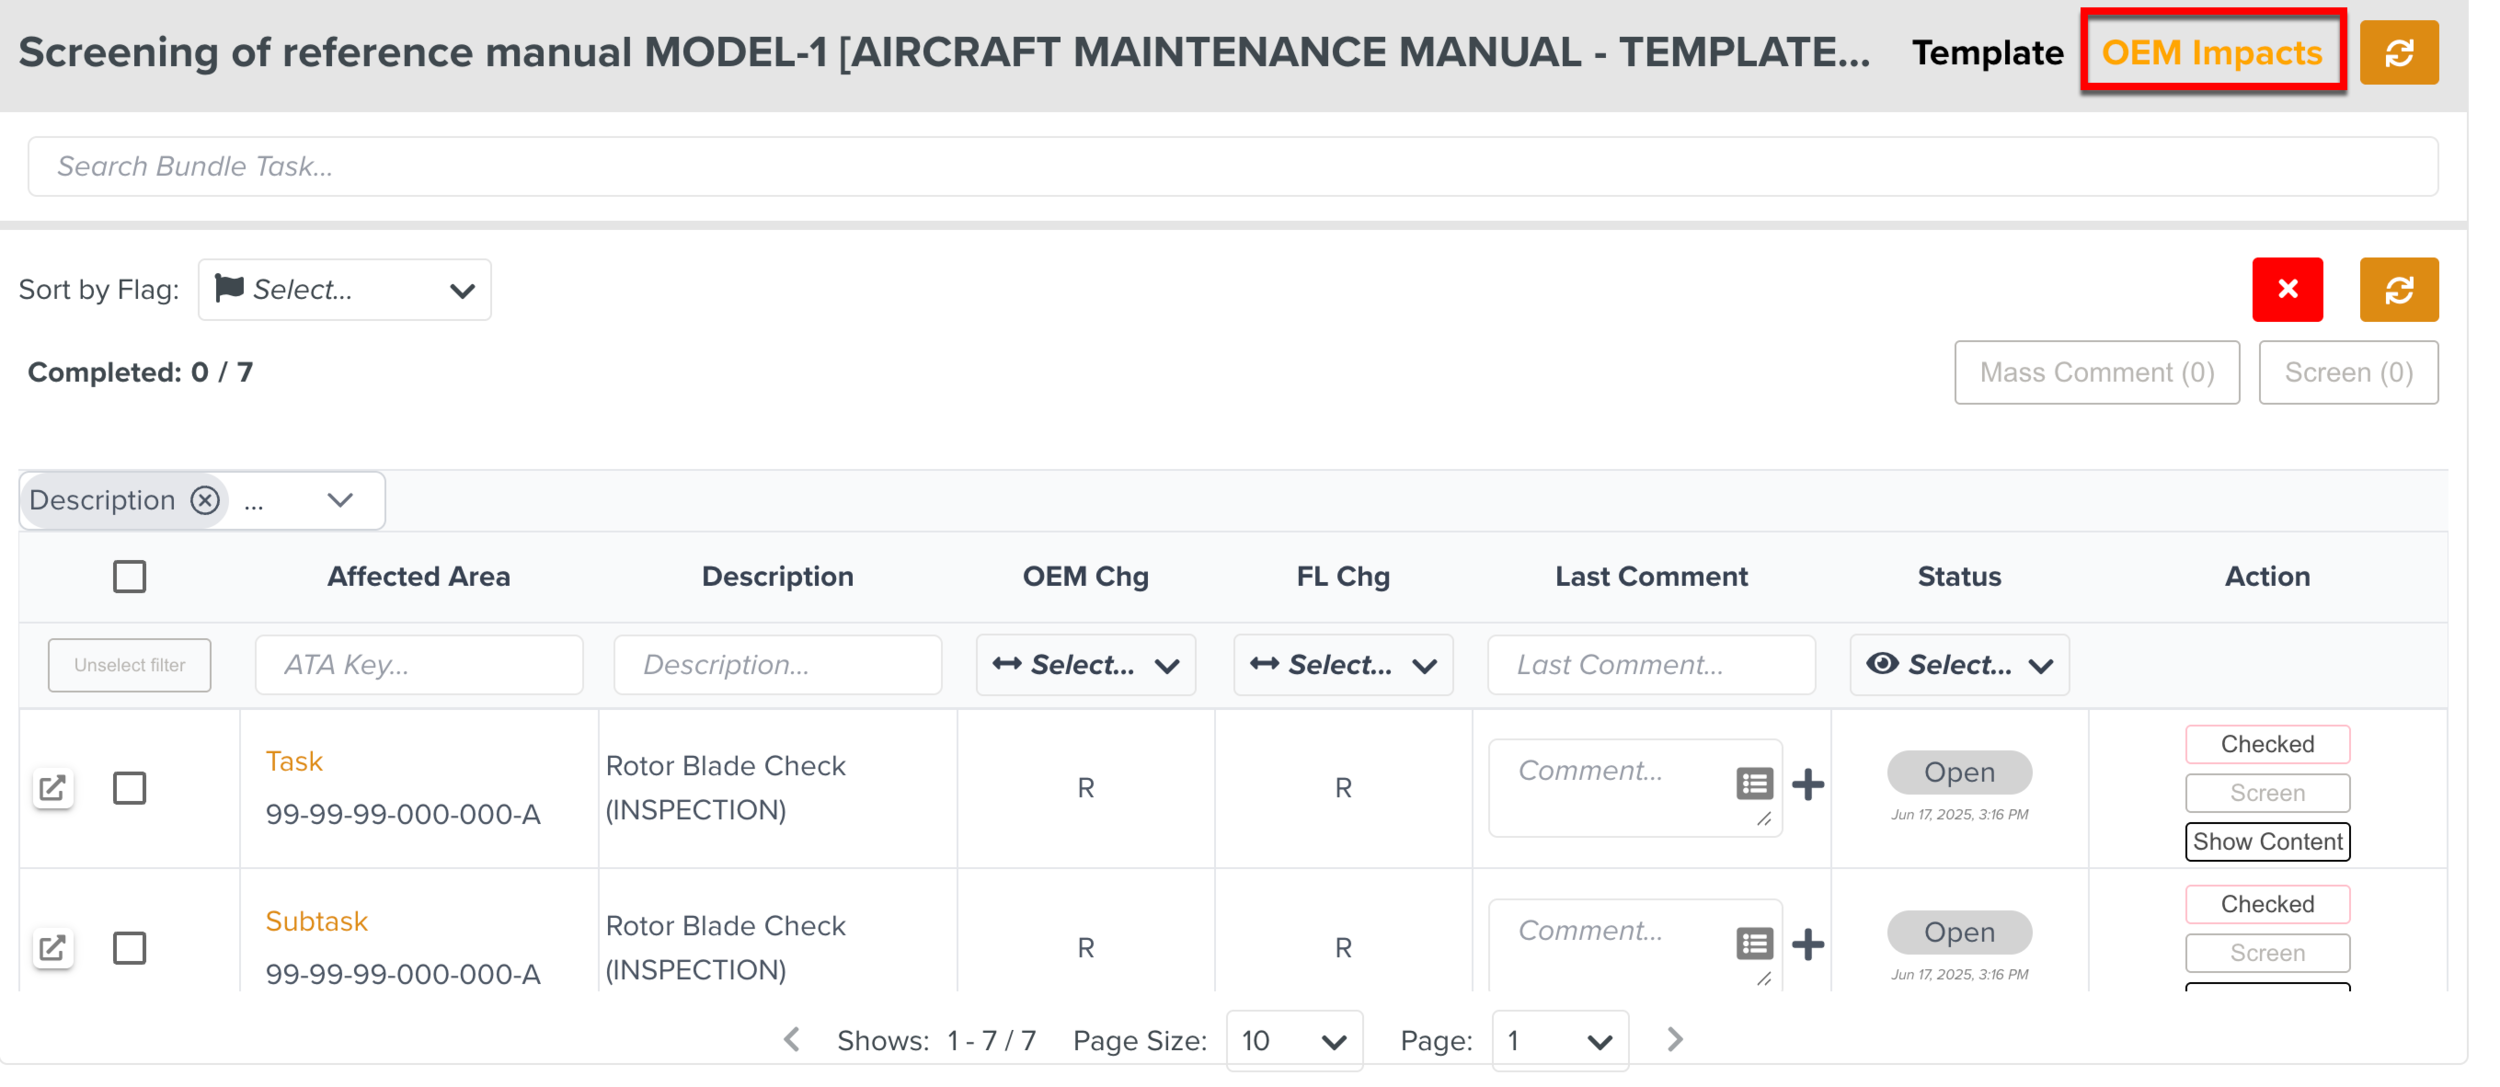
OEM Impacts can be viewed by picking up the Bundle Tasks under the OEM Impacts category. The list of OEM Impacts generated for each Task or Sub-Tasks are grouped into Bundle Tasks.
The relevant Hit information such as the impacted Tasks and Sub-Tasks, and the Screening actions are available.
 |
The Screening actions available for every OEM Impact allows you to perform the required tasks.
The Screening actions are grouped into the following categories:
Actions on Single Impact: You can verify the modifications of each Hit and screen them.
Actions on Bulk Impacts: You can leave mass comments and perform mass screening of one or more OEM Impacts.
Note
The Screening actions are enabled only when you pick up the Bundle Task.
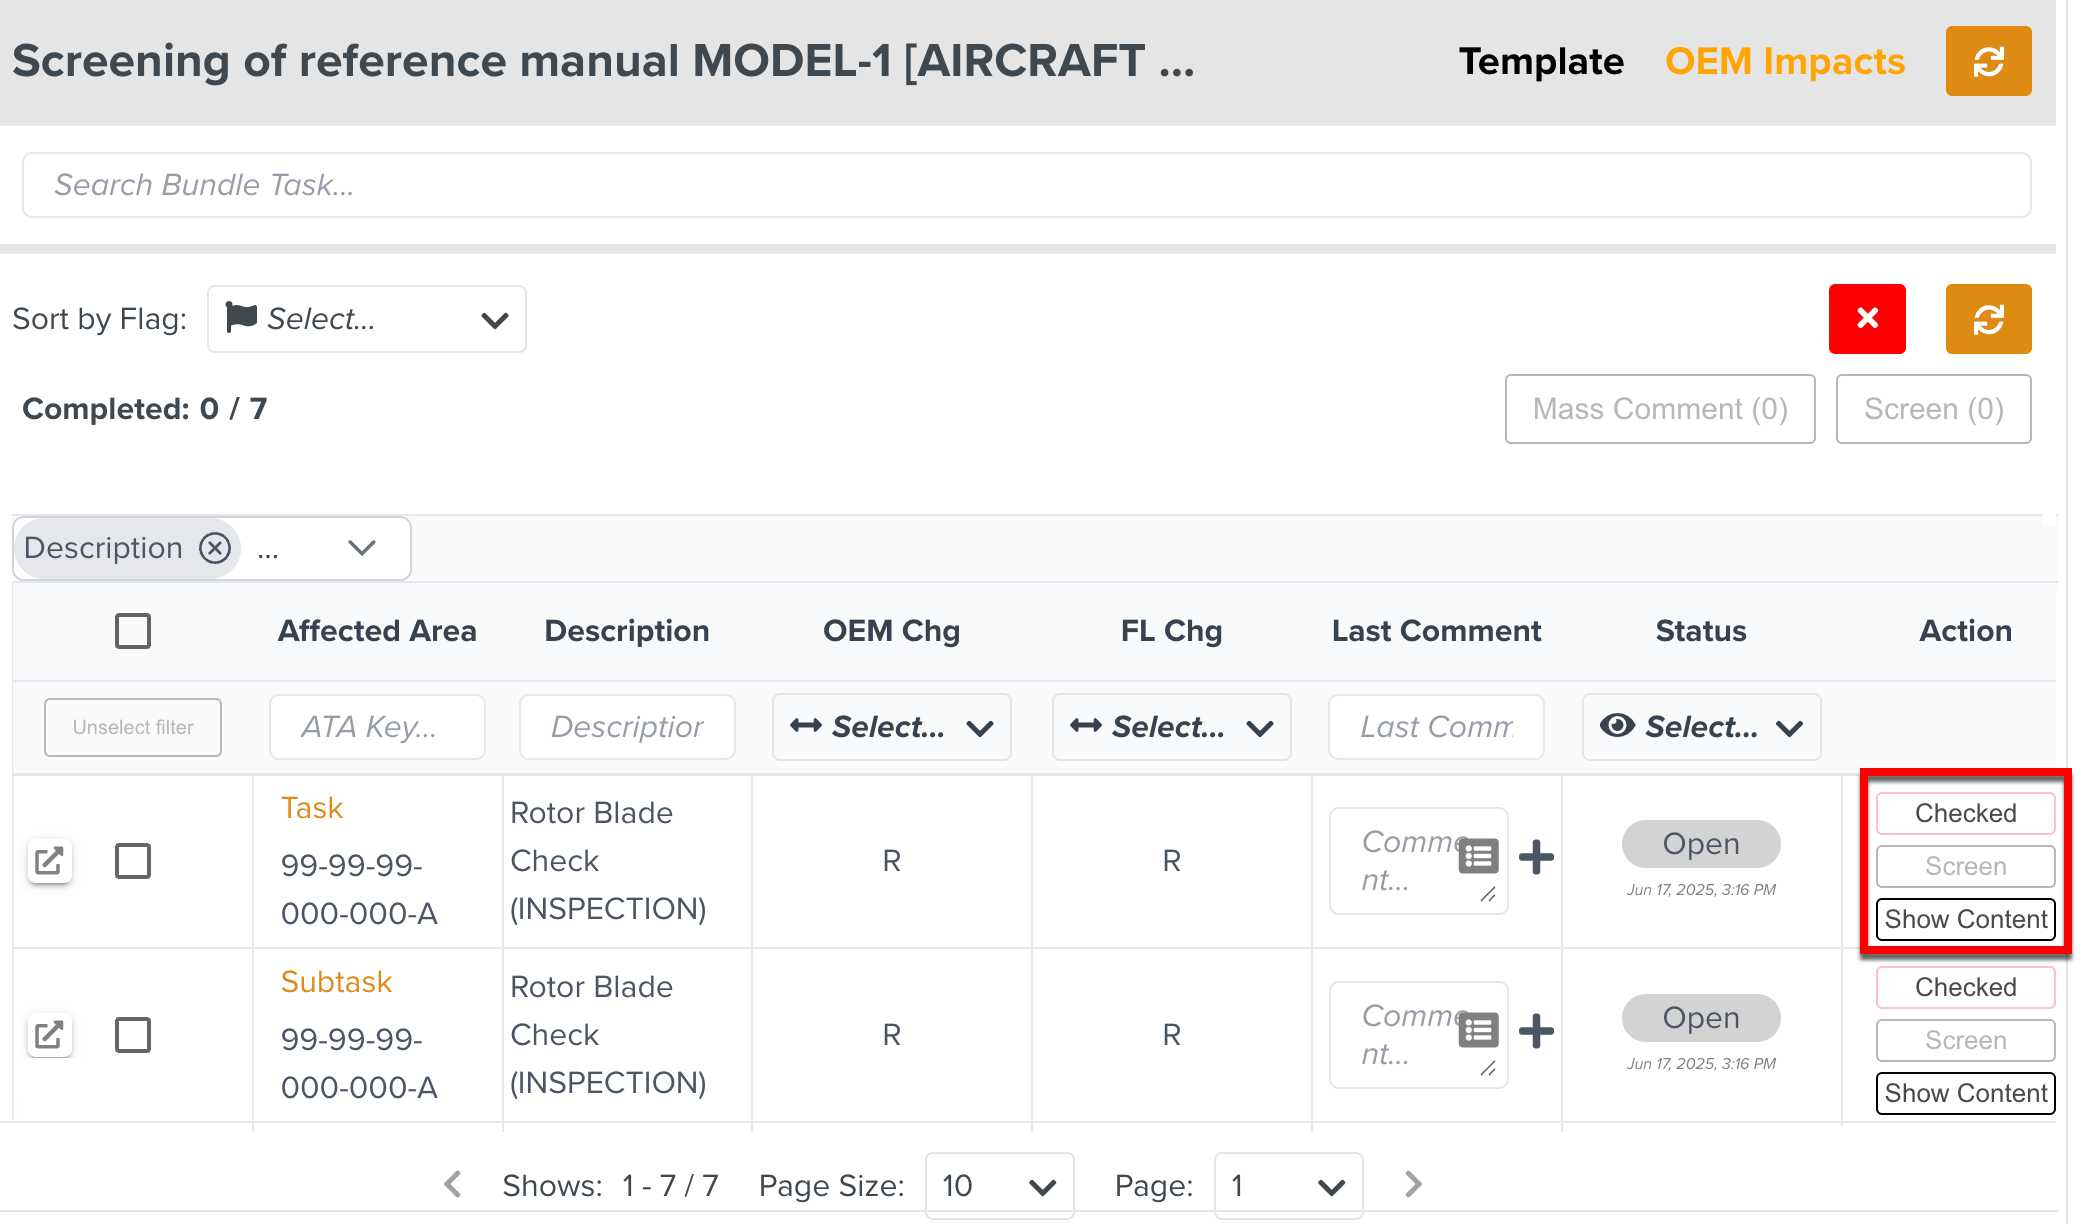
When you select a single Hit, the following actions are available:
 |
Actions | Descriptions | ||
|---|---|---|---|
Click to view the older and newer version of the manual content in a side-by-side view to verify the modifications. | |||
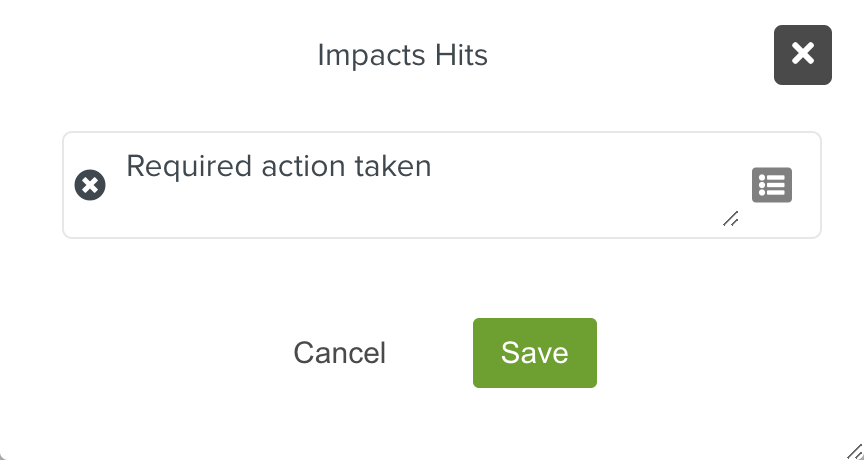
Add comments to individual Hit. You can either type the comment or use a pre-defined comment. ImportantThe button is enabled only when the comment is added to the Hits. | |||
Click to confirm if the required action is taken and the selected Hit is screened. Screening the Hits allows you to identify the Templates not requiring a modification and help asses screening progress. When you click the button after taking the required action, the status changes to Screened which denotes that the screening is done for the Hit.
NoteThe button then changes to which allows you to unscreen the Hit. Clicking moves the Hit to Open status and restores the button on the Hit.
|


Note
The button in the above example is a Custom Action. You can set Custom Actions with the help of the Routing table.
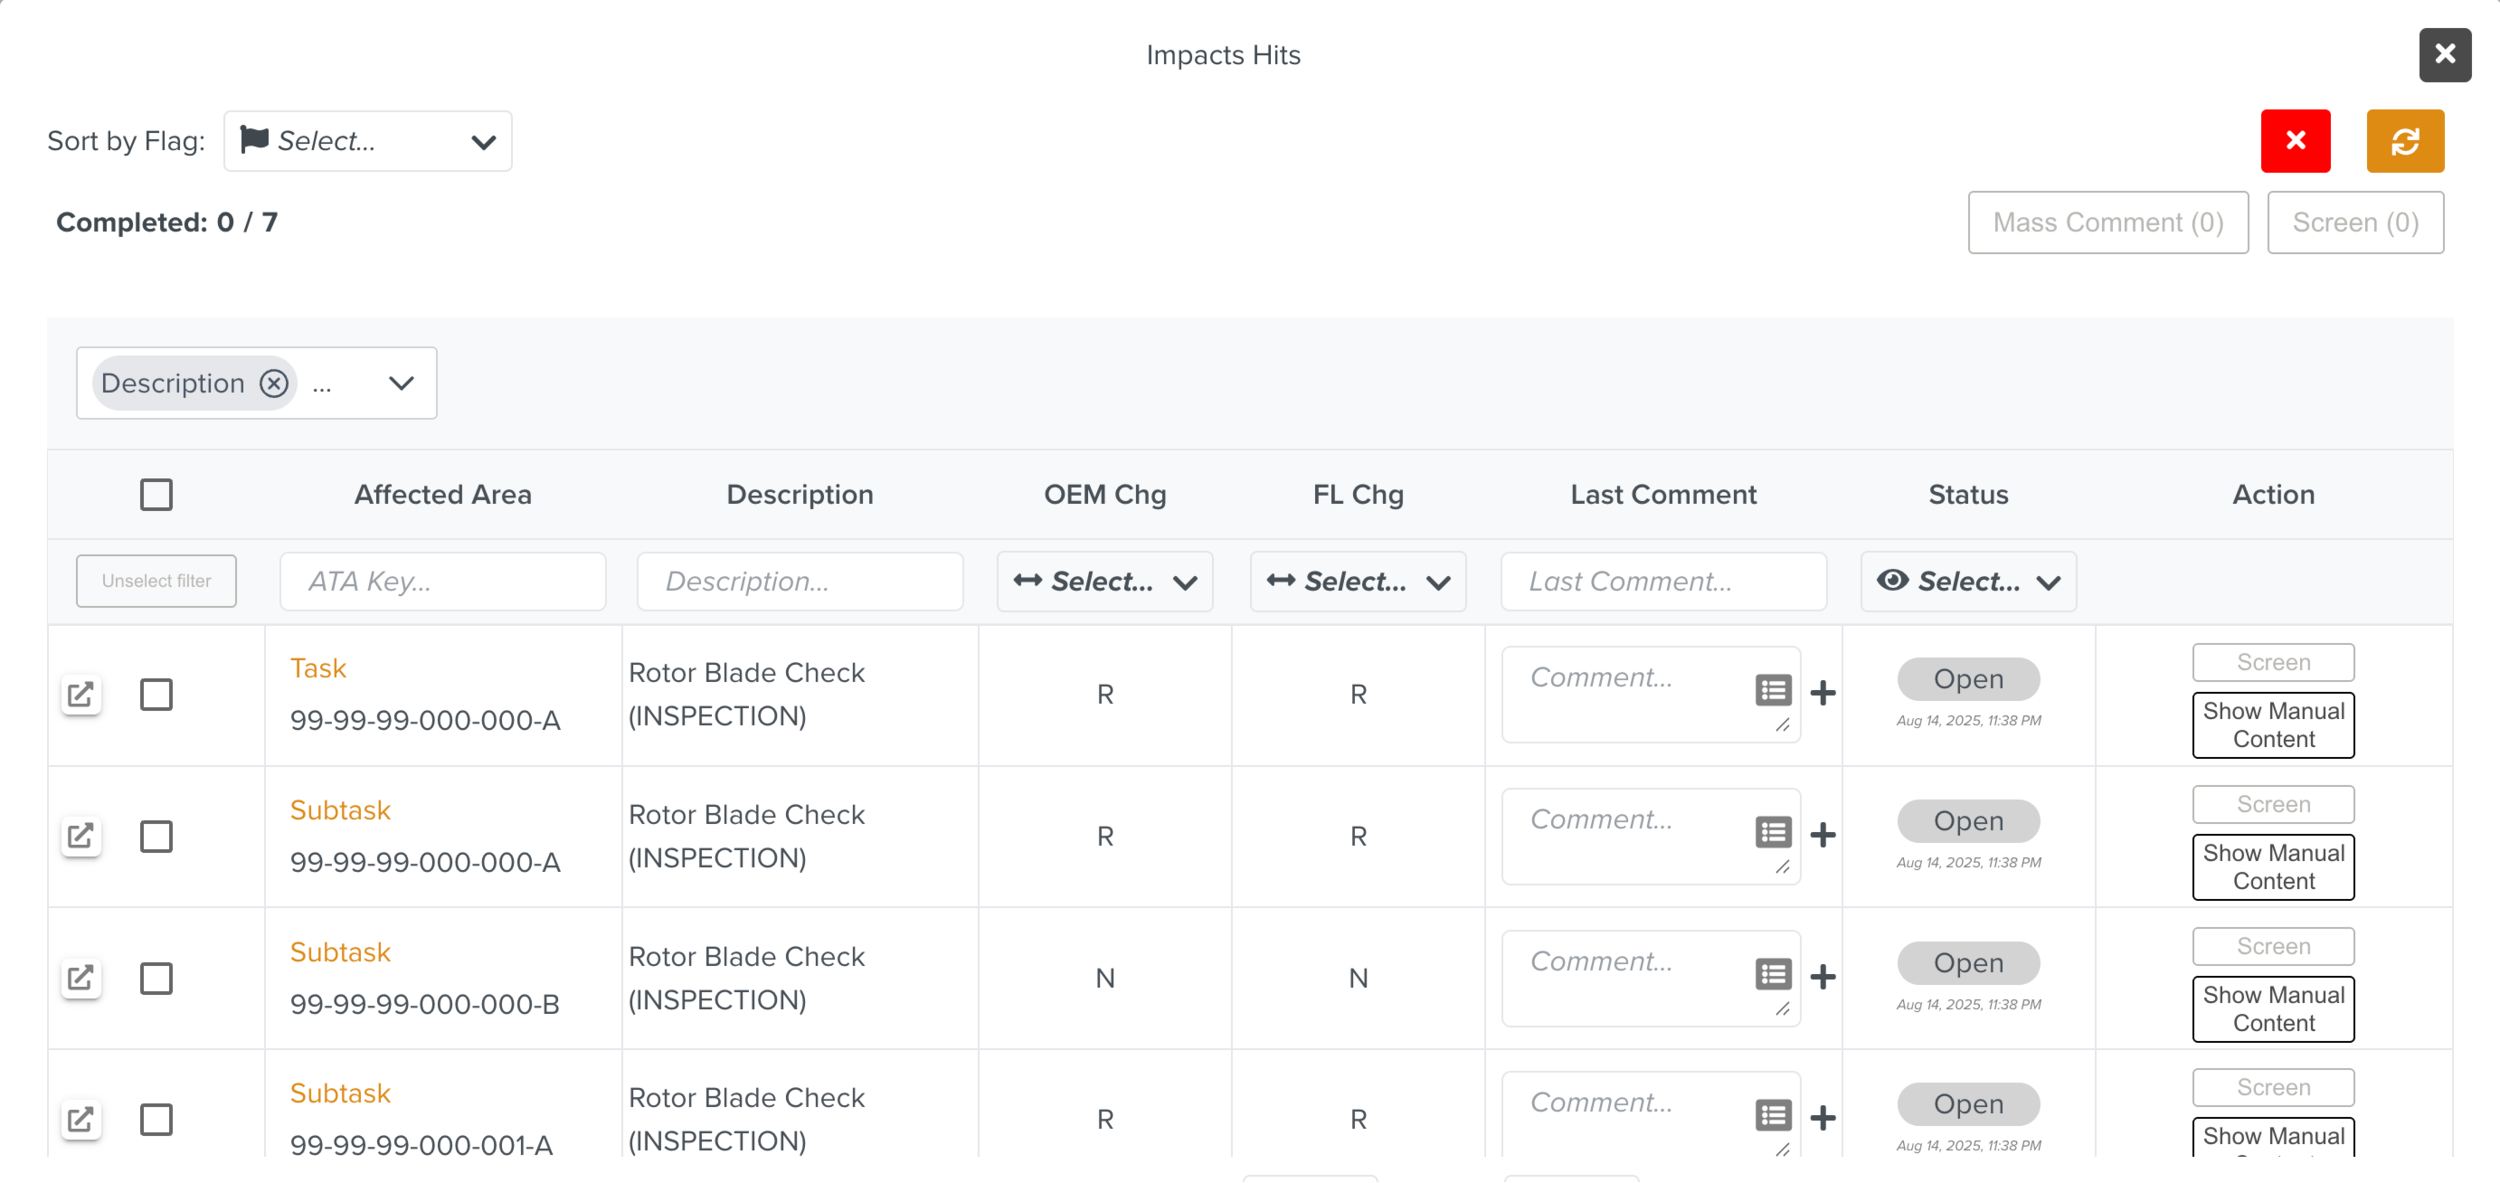
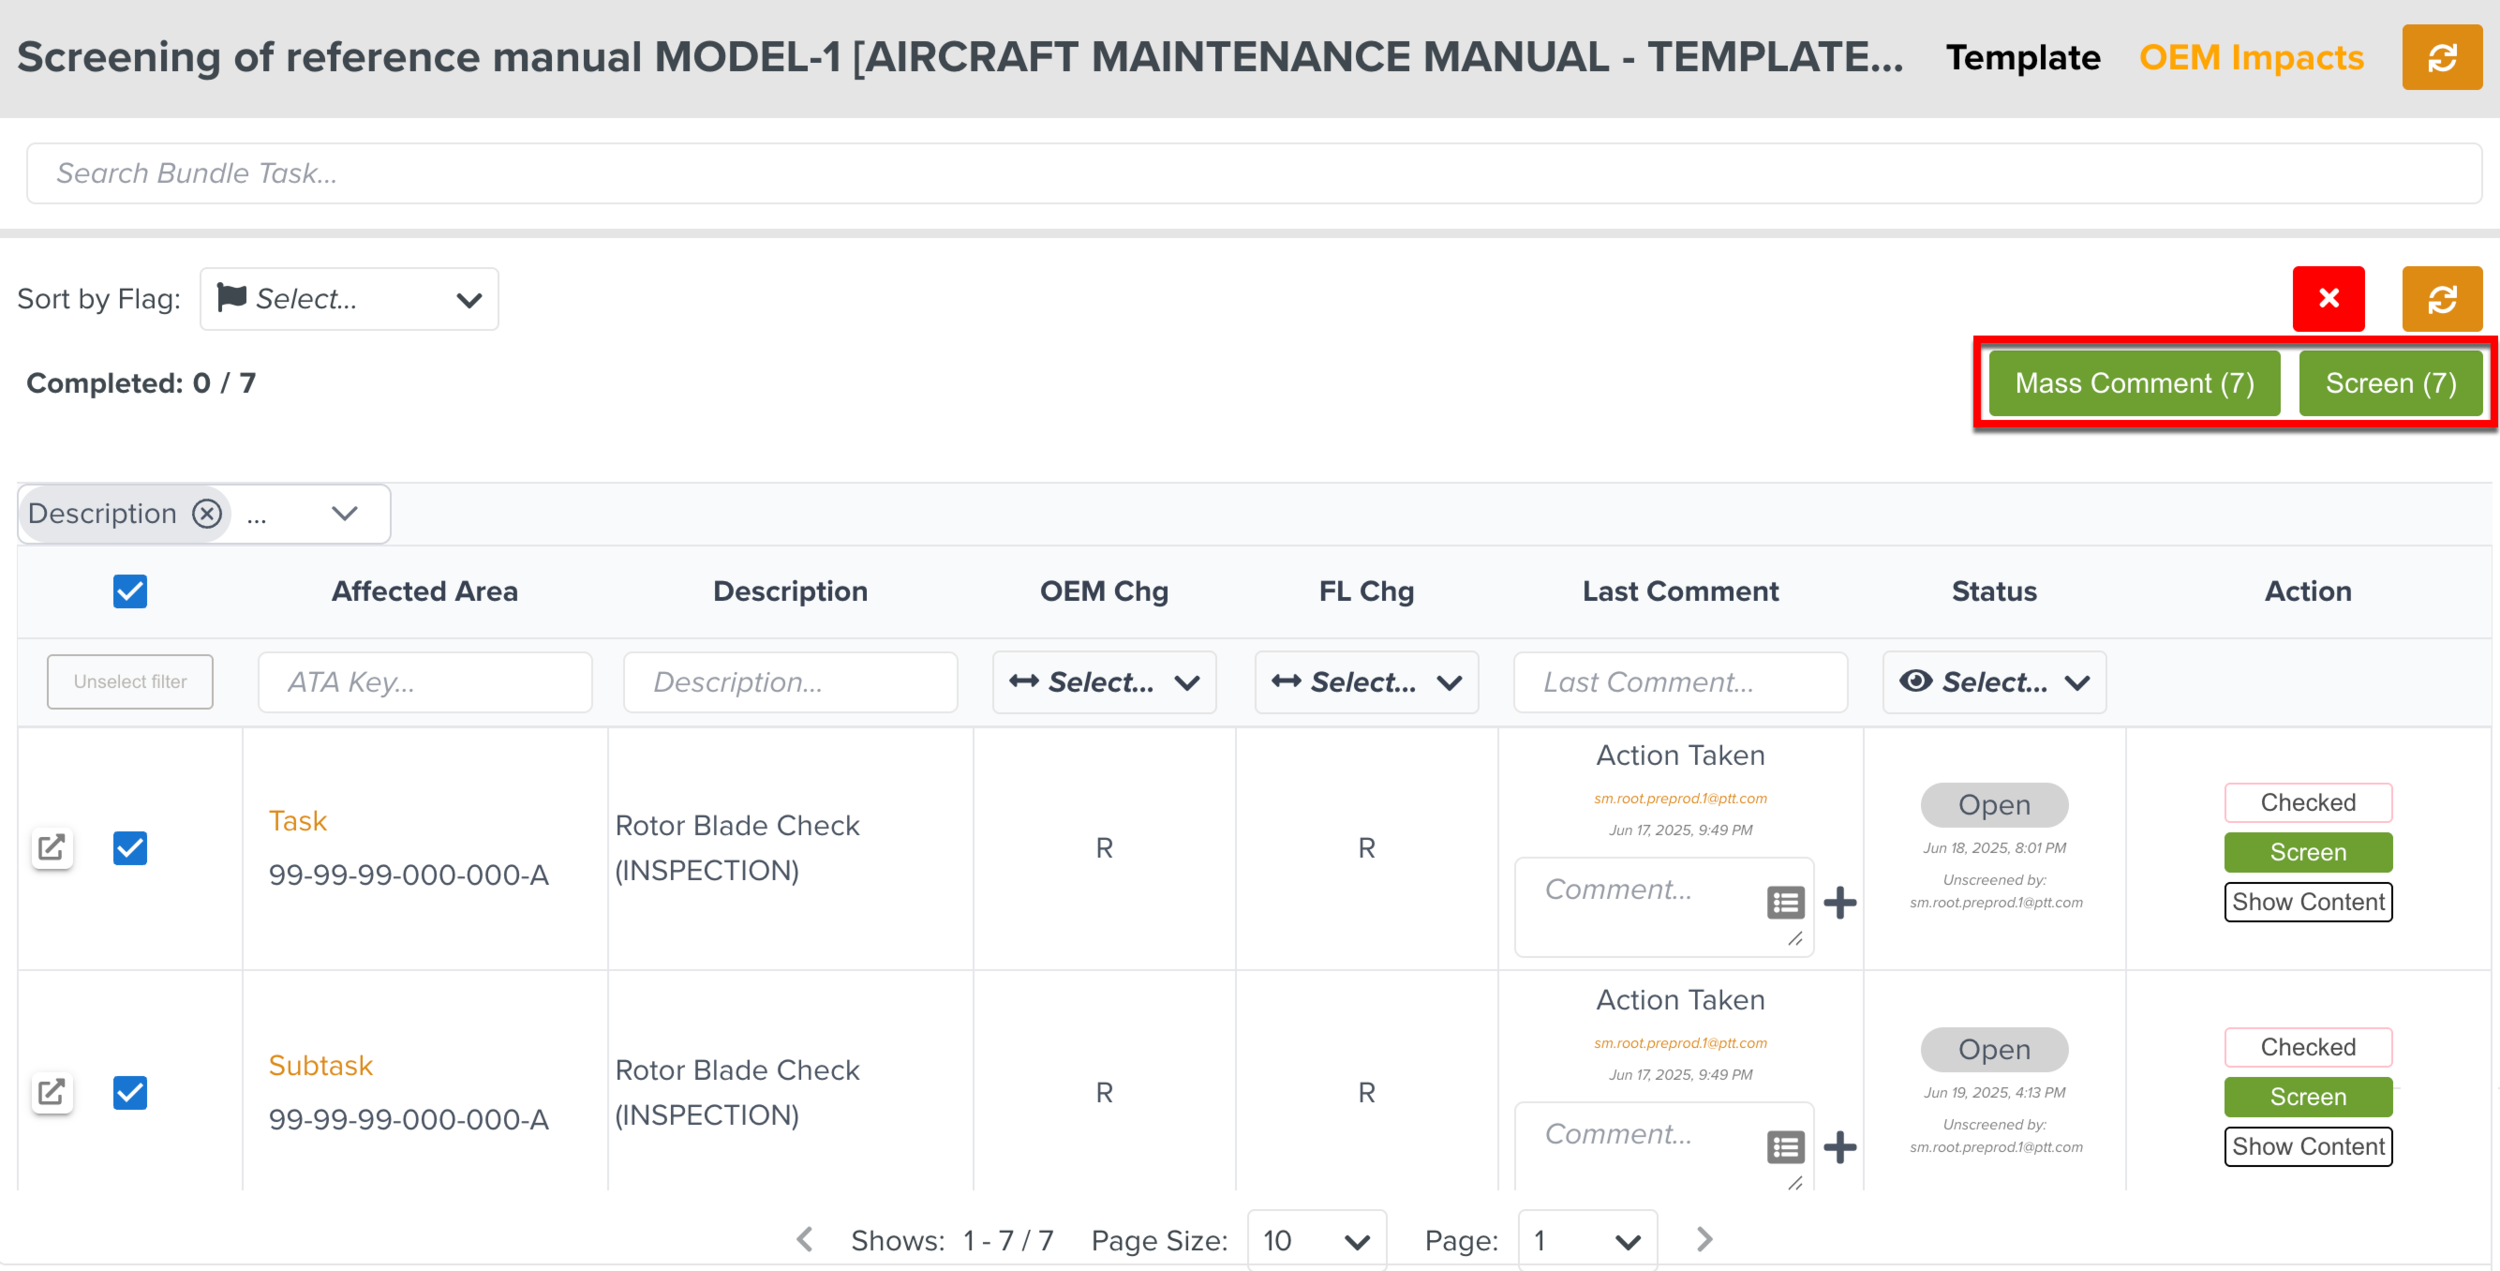
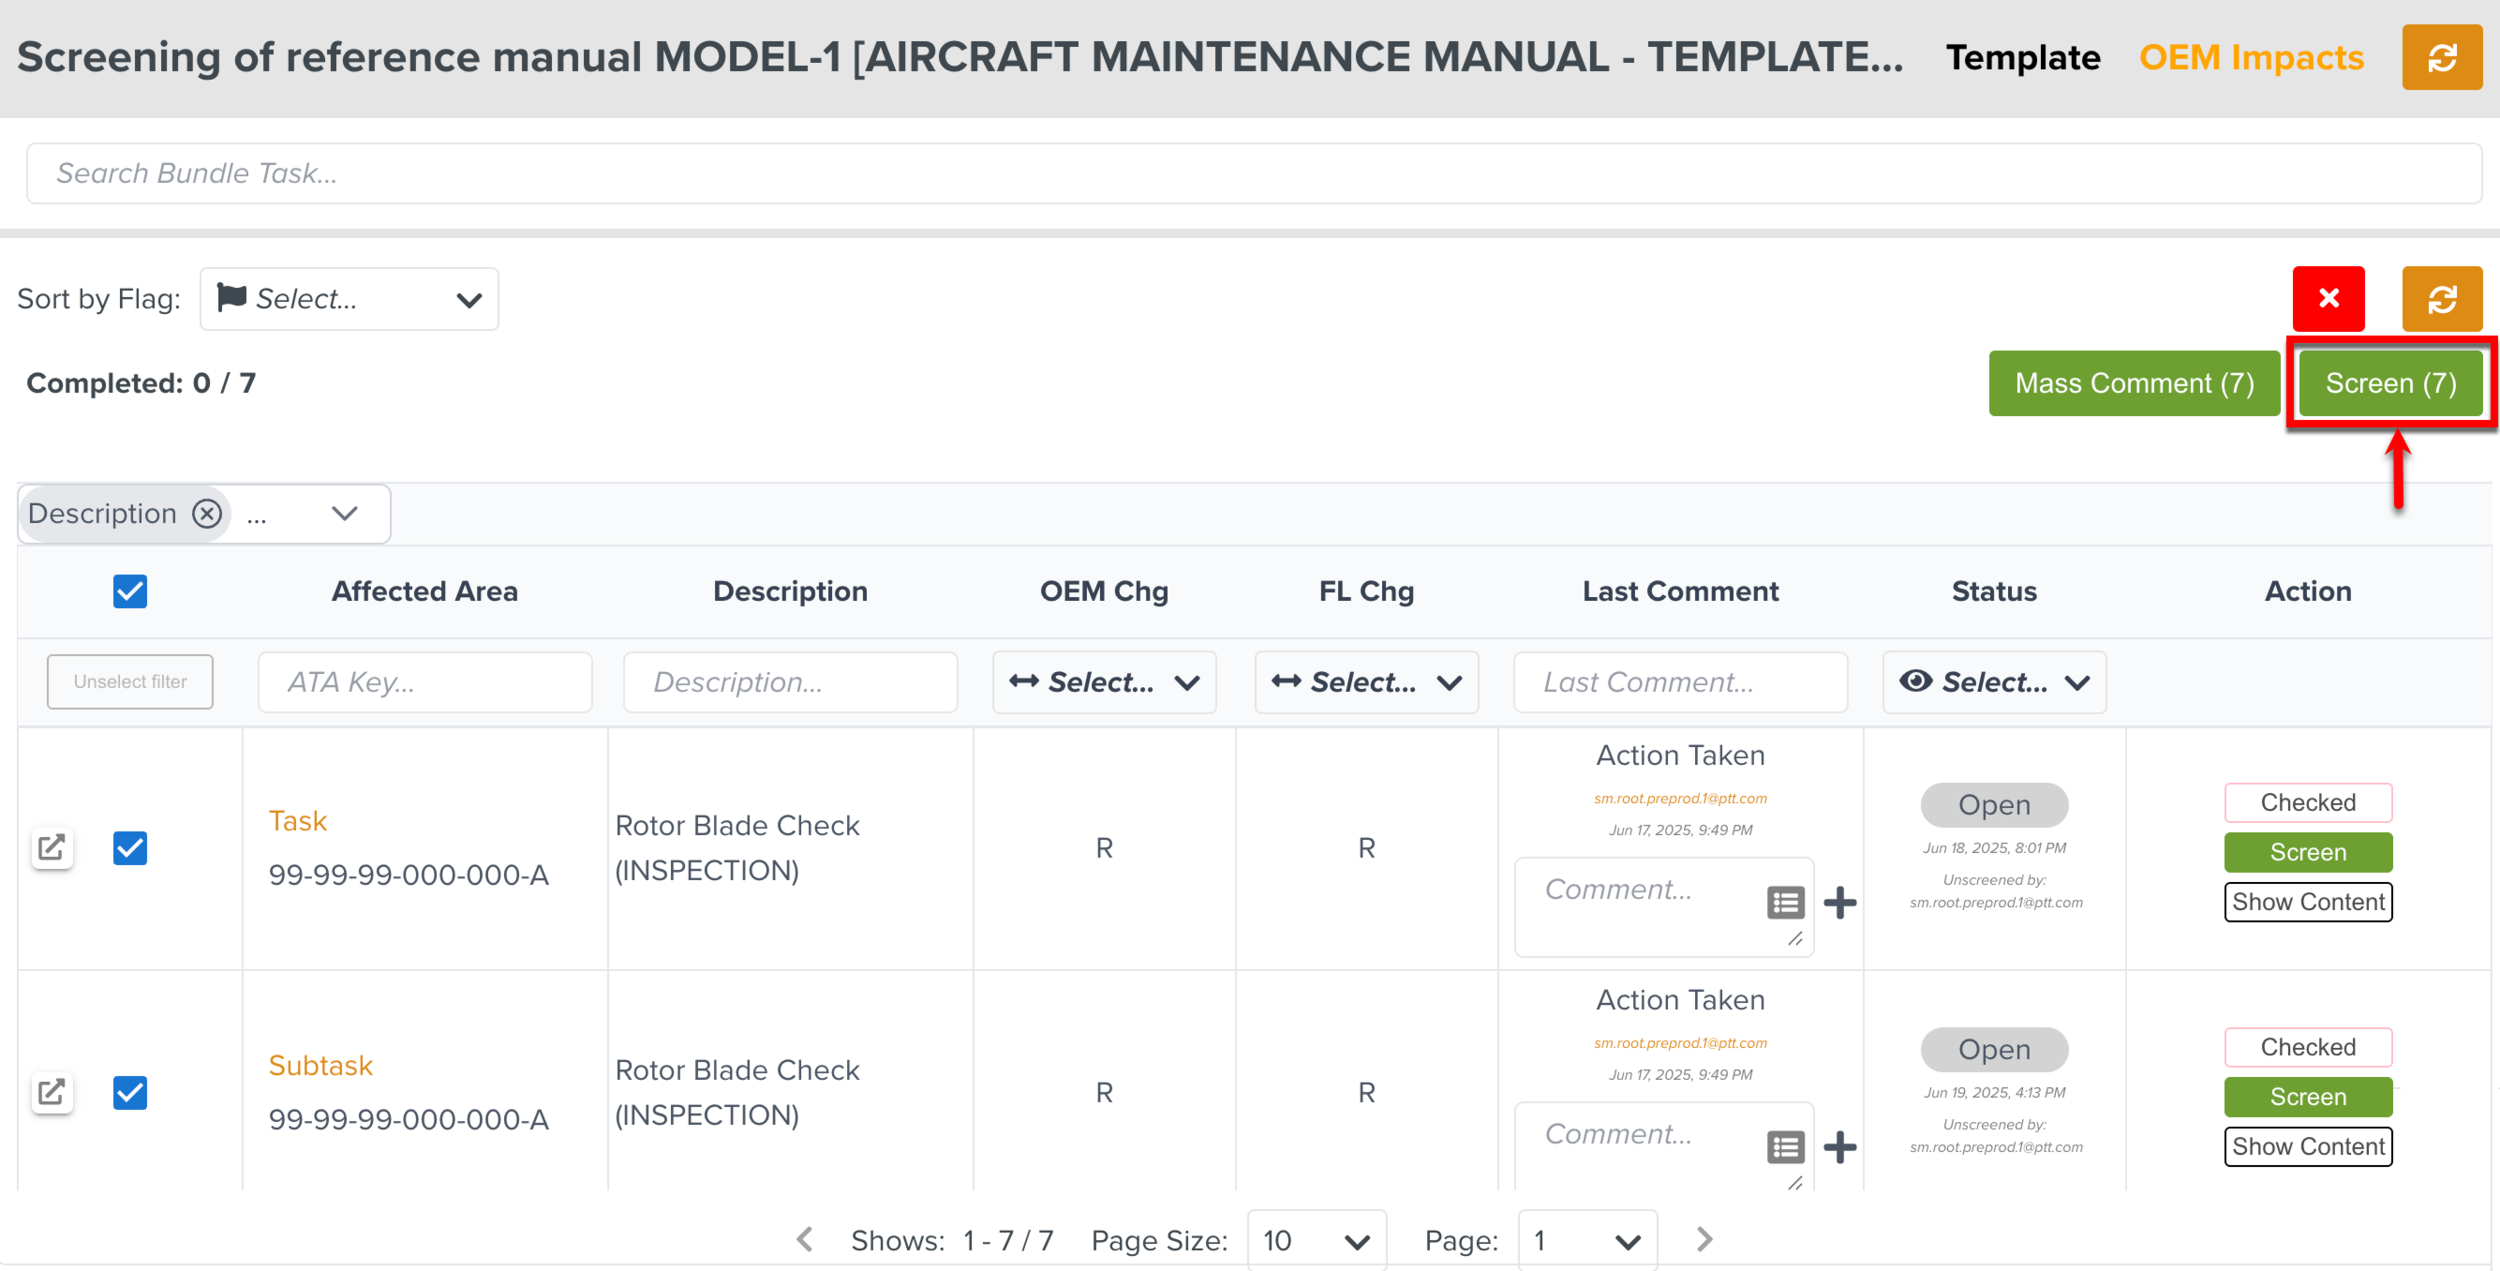
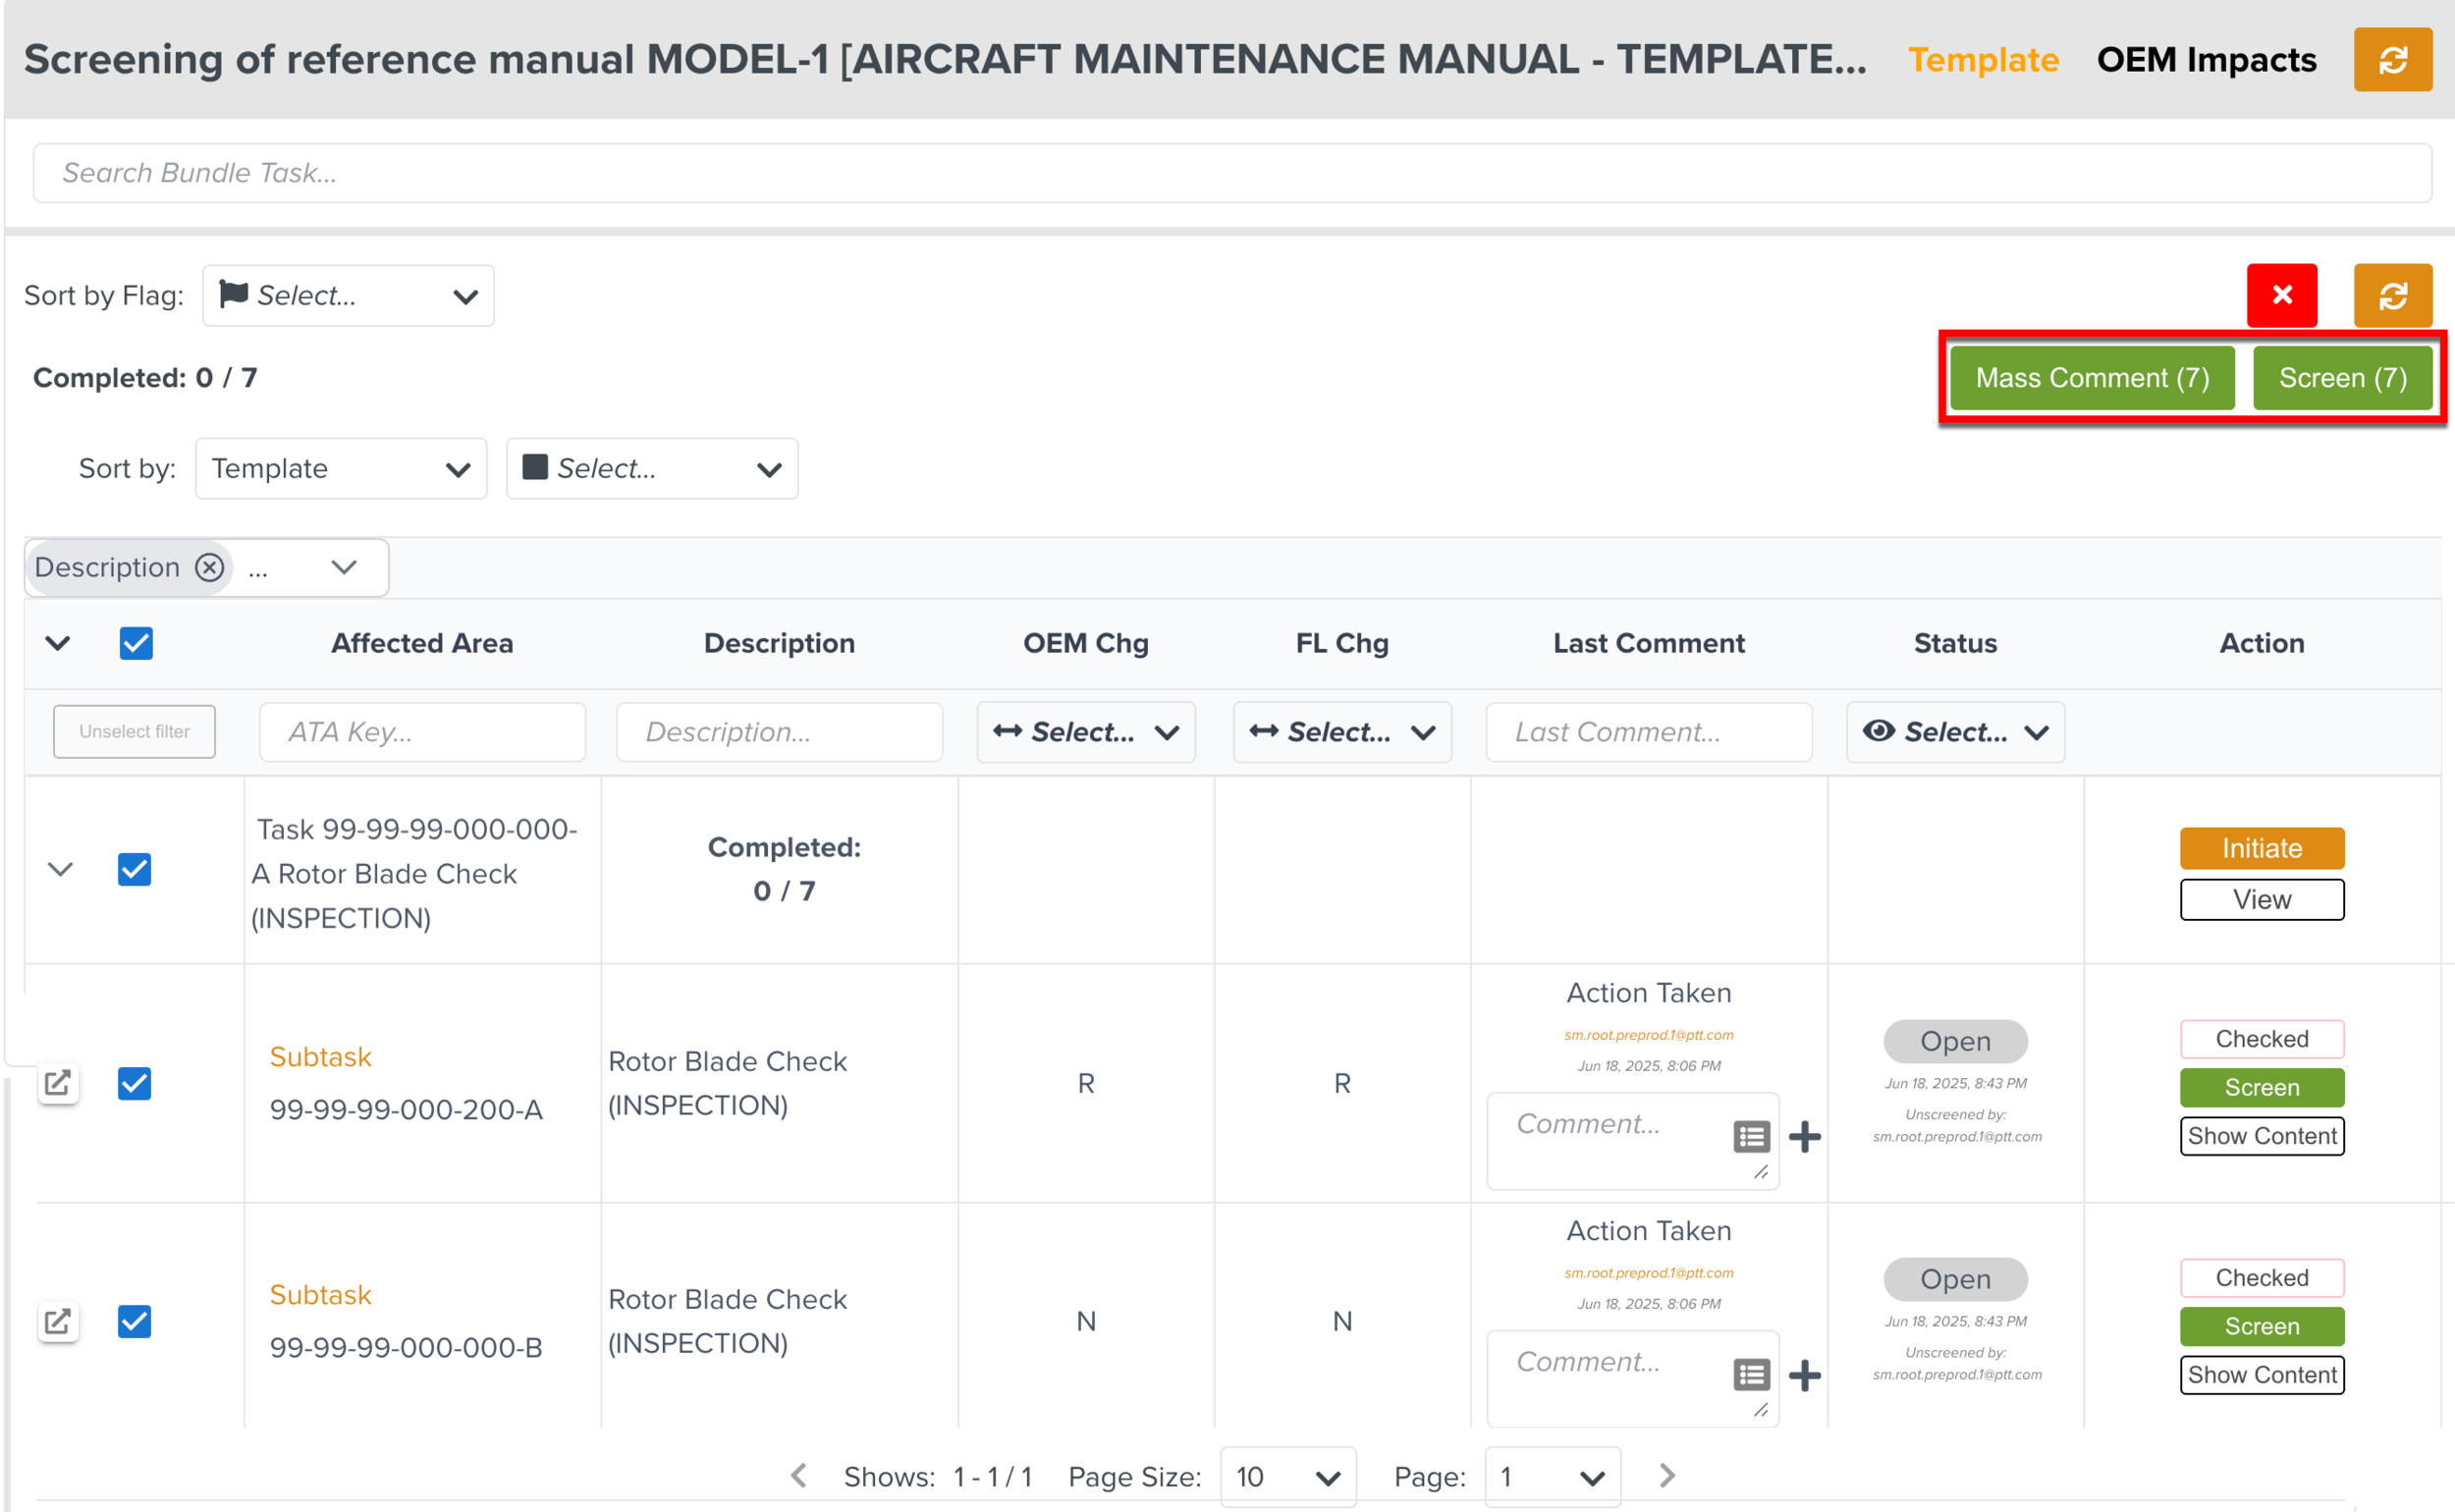
When one or more Hits are selected, the actions available are highlighted as shown below.
 |
Actions | Descriptions | |
|---|---|---|
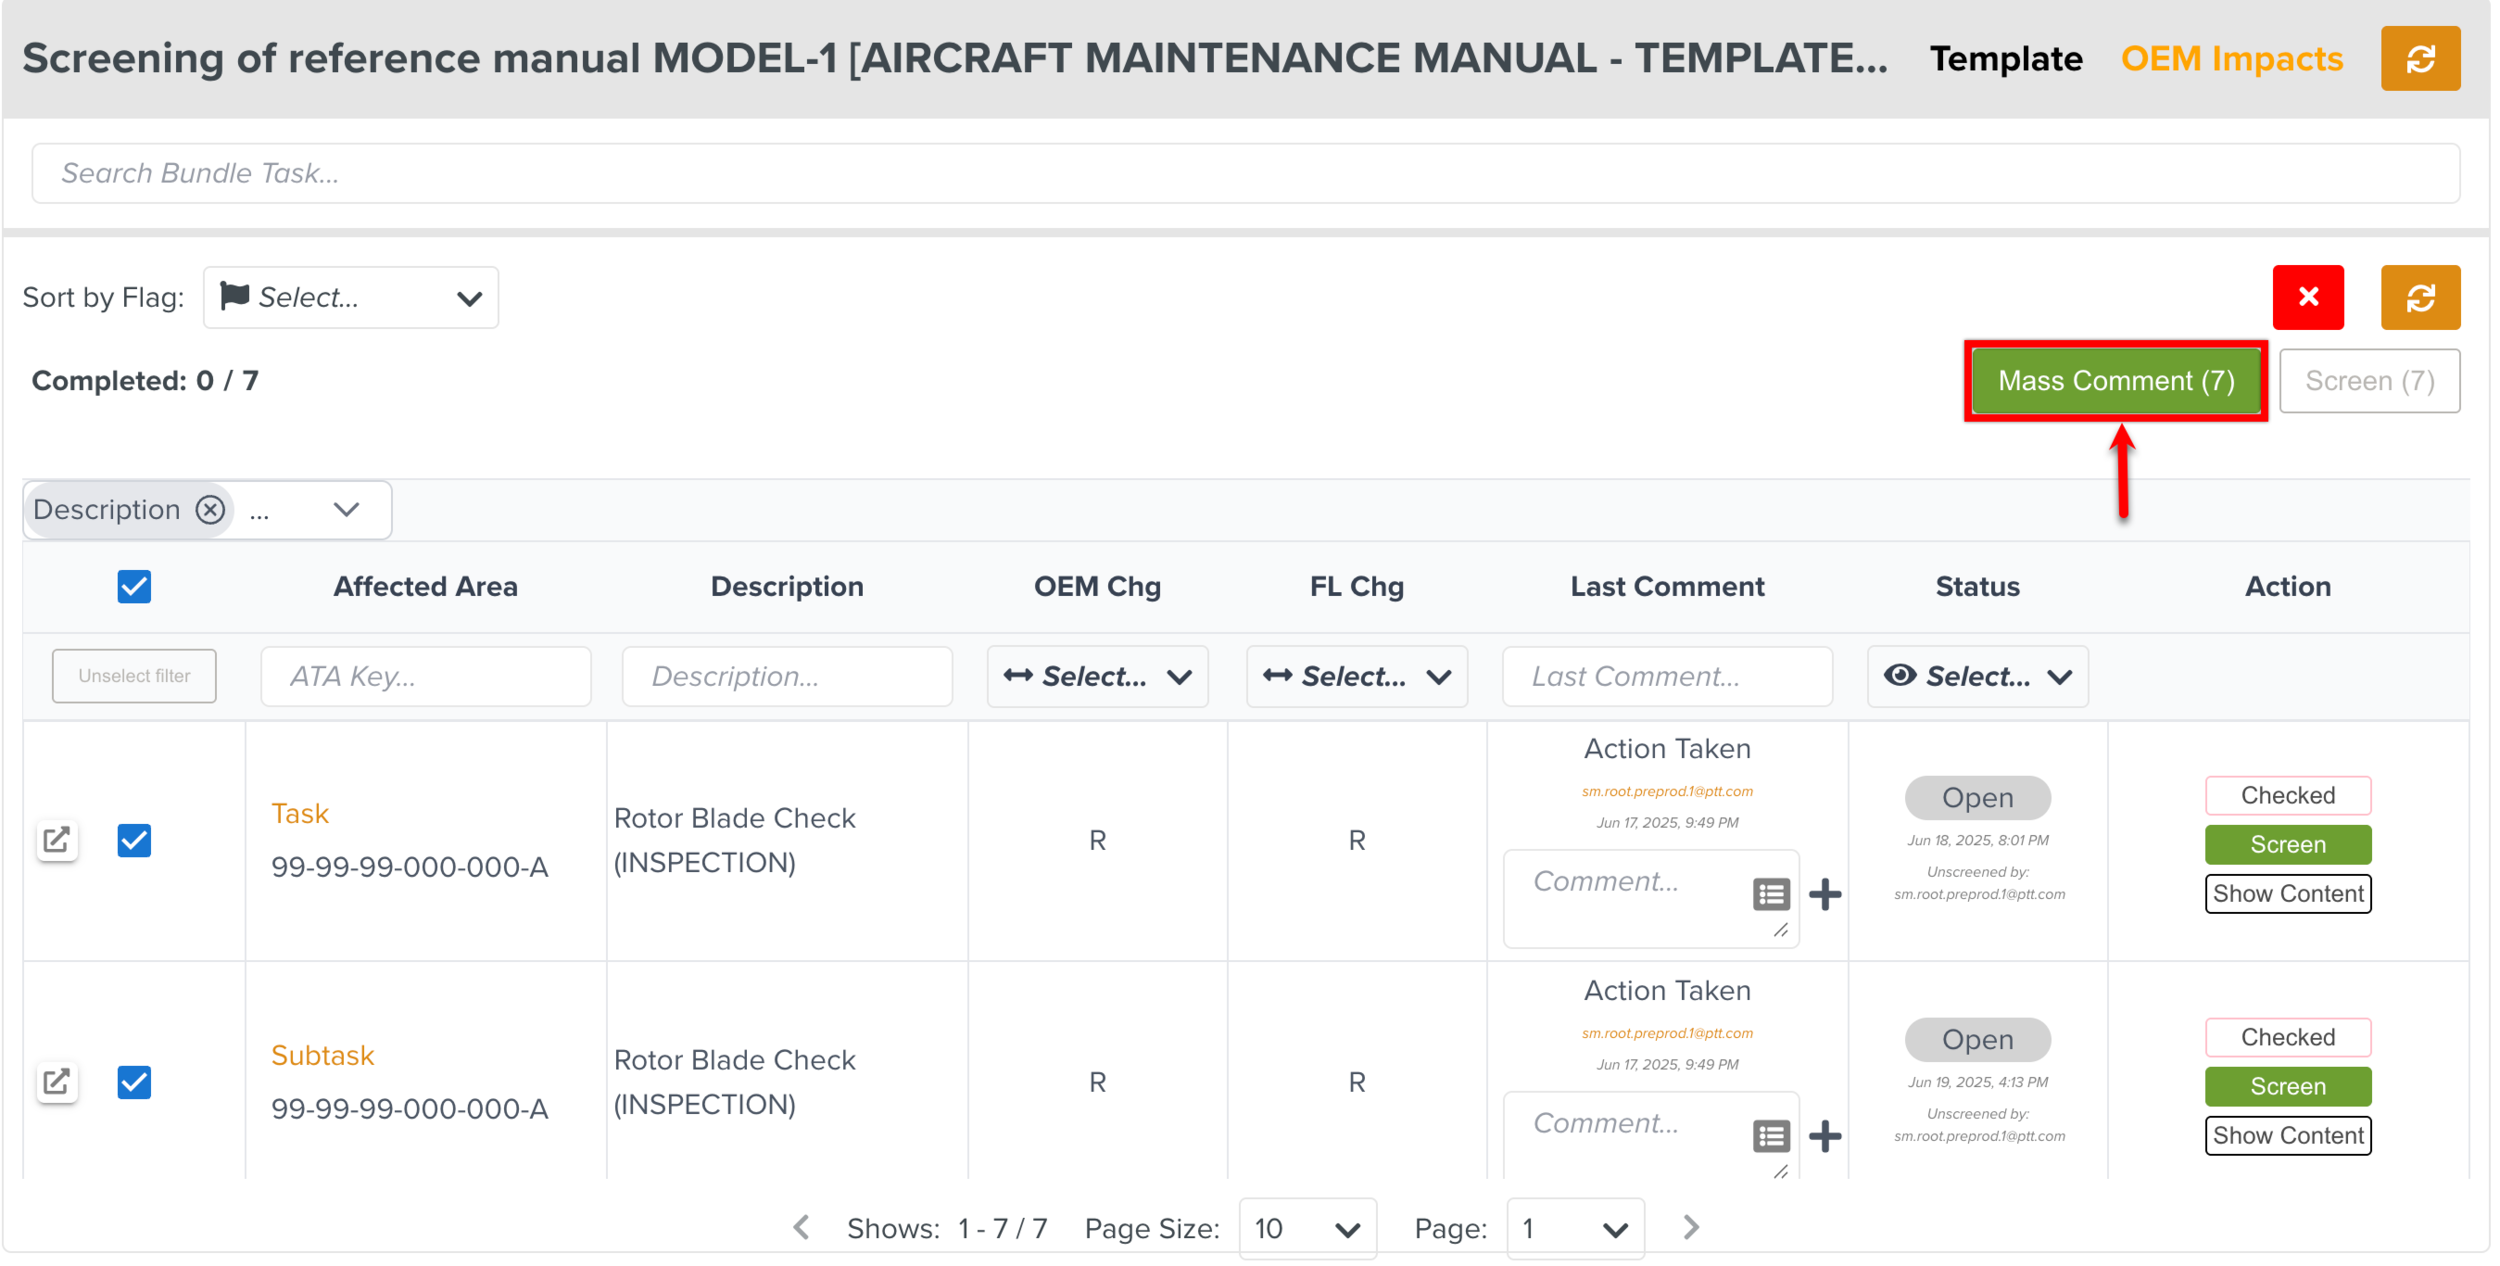
Add a mass comment to the selected Impacts. You can either type the comment or use a pre-defined comment.
The button is enabled when one or more Hits are selected. | ||
(Mass) | The (Mass) button allows you to perform a mass screening of the selected Hits.
CautionMass screening cannot be done if one or multiple Hits selected are already screened. |
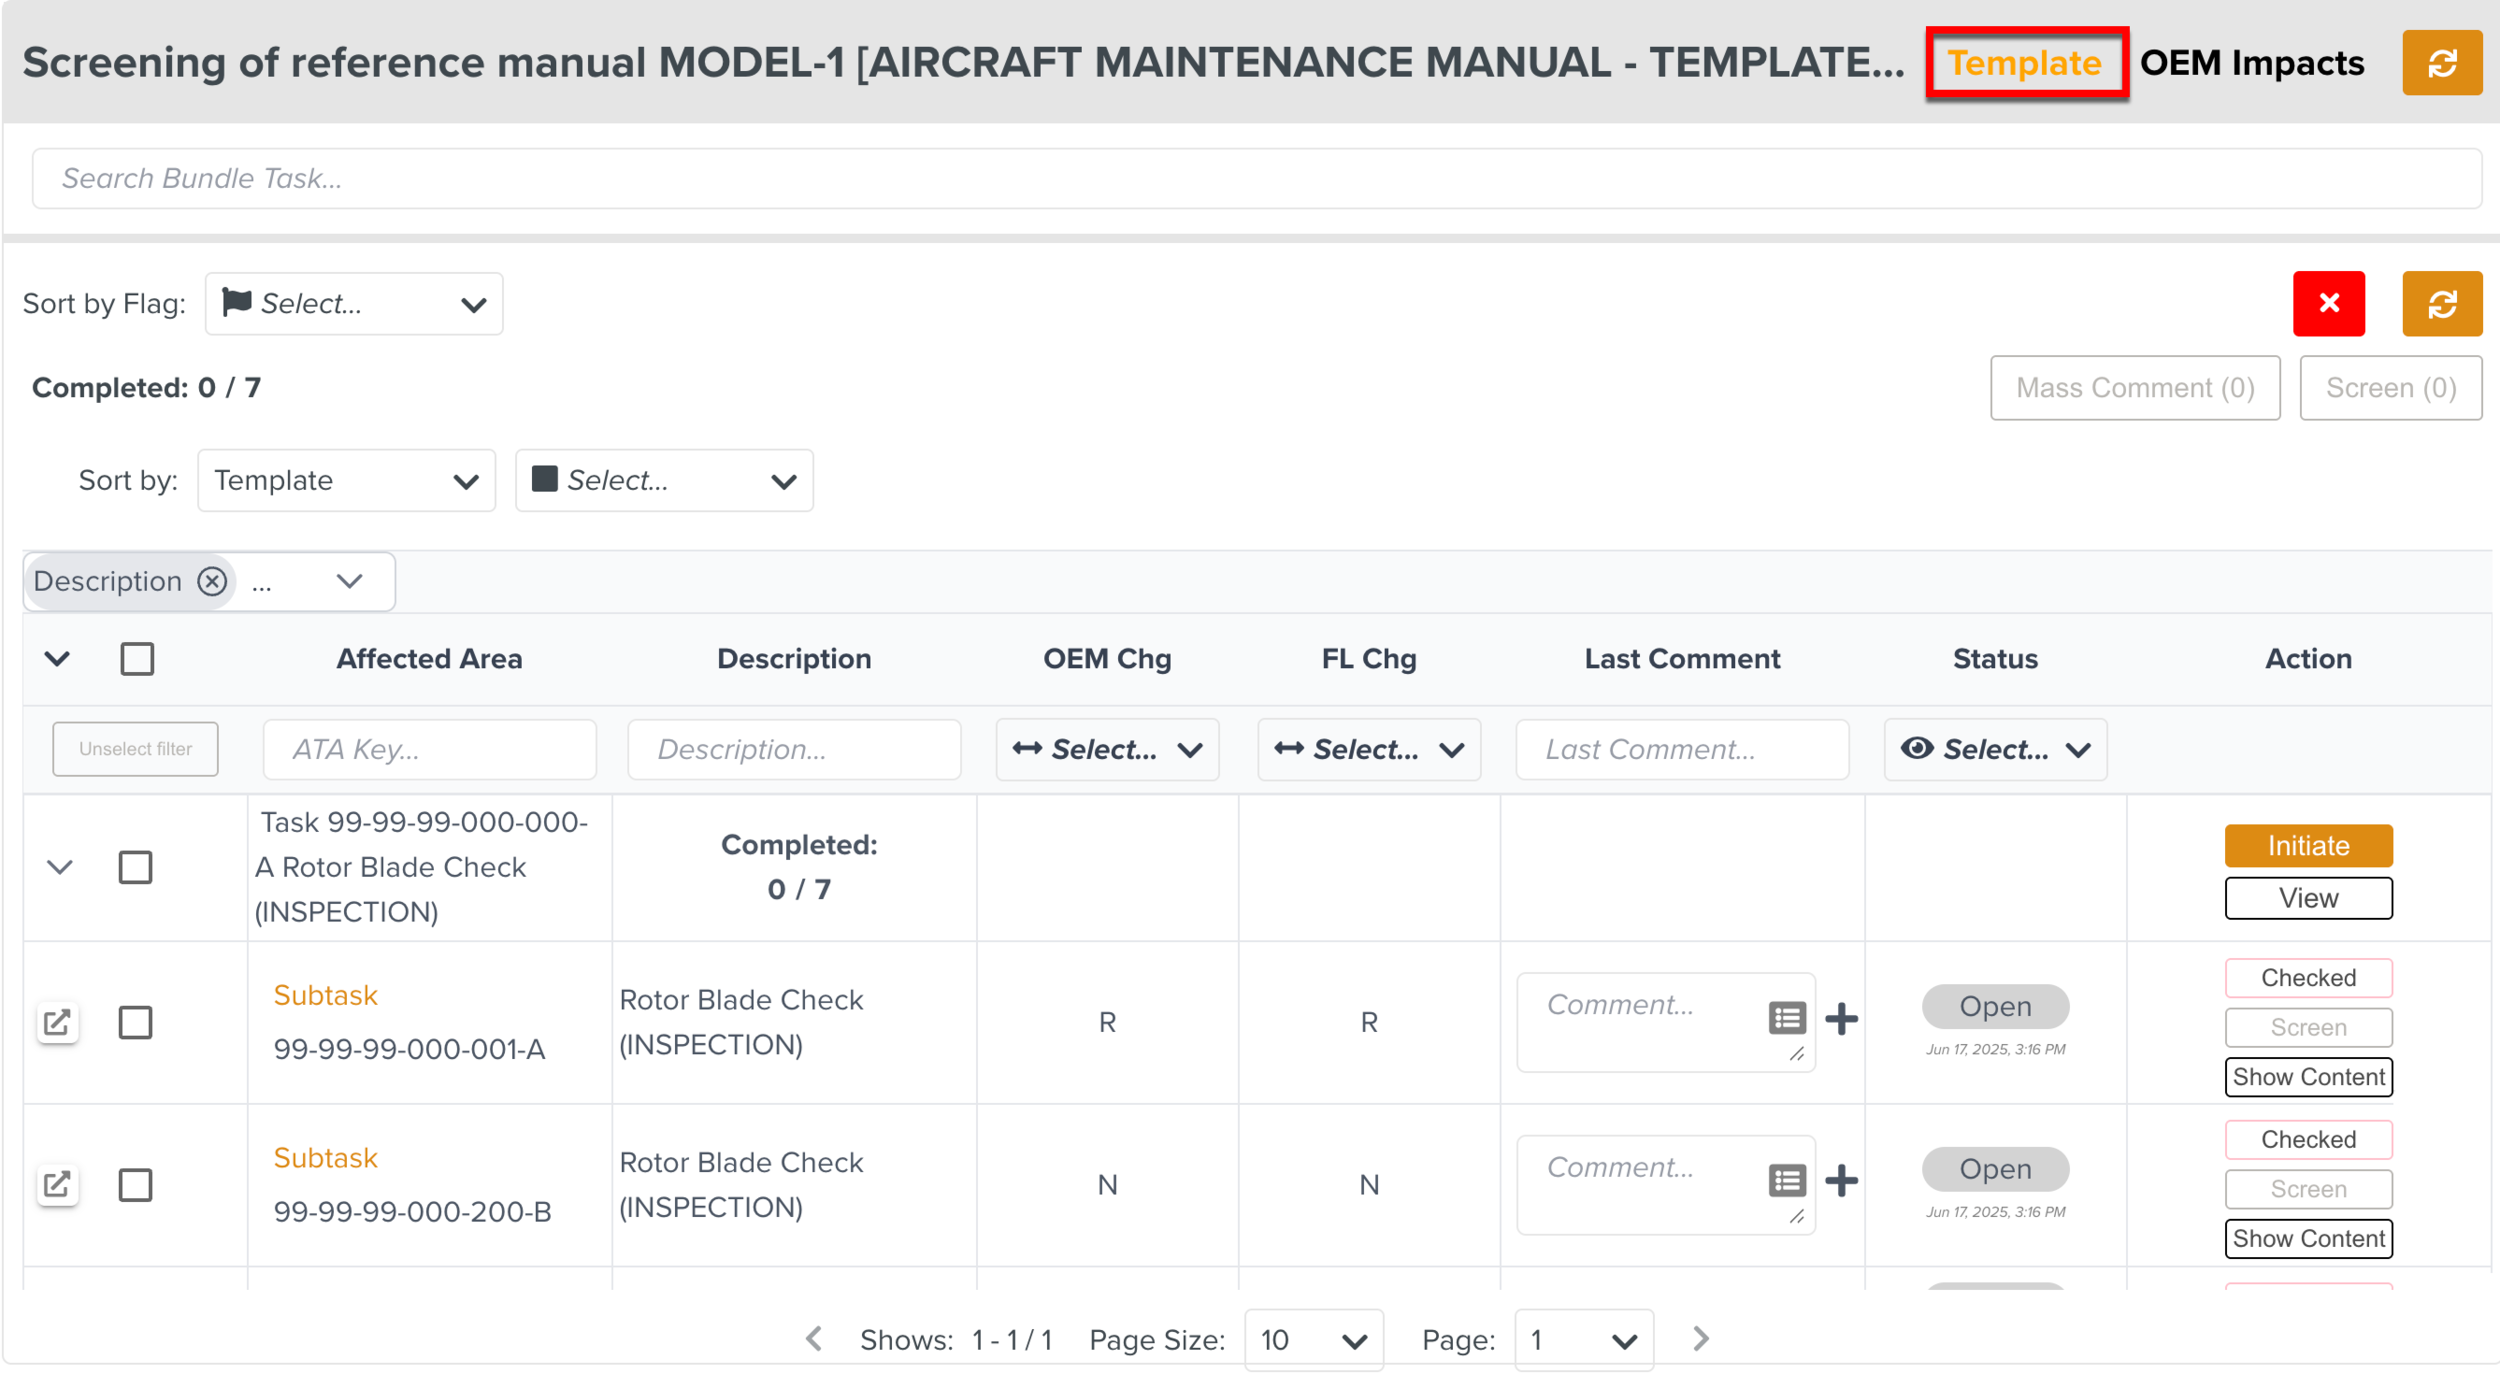
The Template Hits can be viewed when the Bundle Tasks under the Template category are picked up. Each Bundle Task is associated with the impacted Templates that are generated from the Reference Manual.
The impacted Templates are displayed with the corresponding Template Hits below it. For each Template Hit, the details of the OEM changes i.e. impacted Tasks and Sub-Tasks are provided.
|
You can perform the following tasks:
Verify the content
Leave comments
Screen the Hits
Initiate new version of the Template.
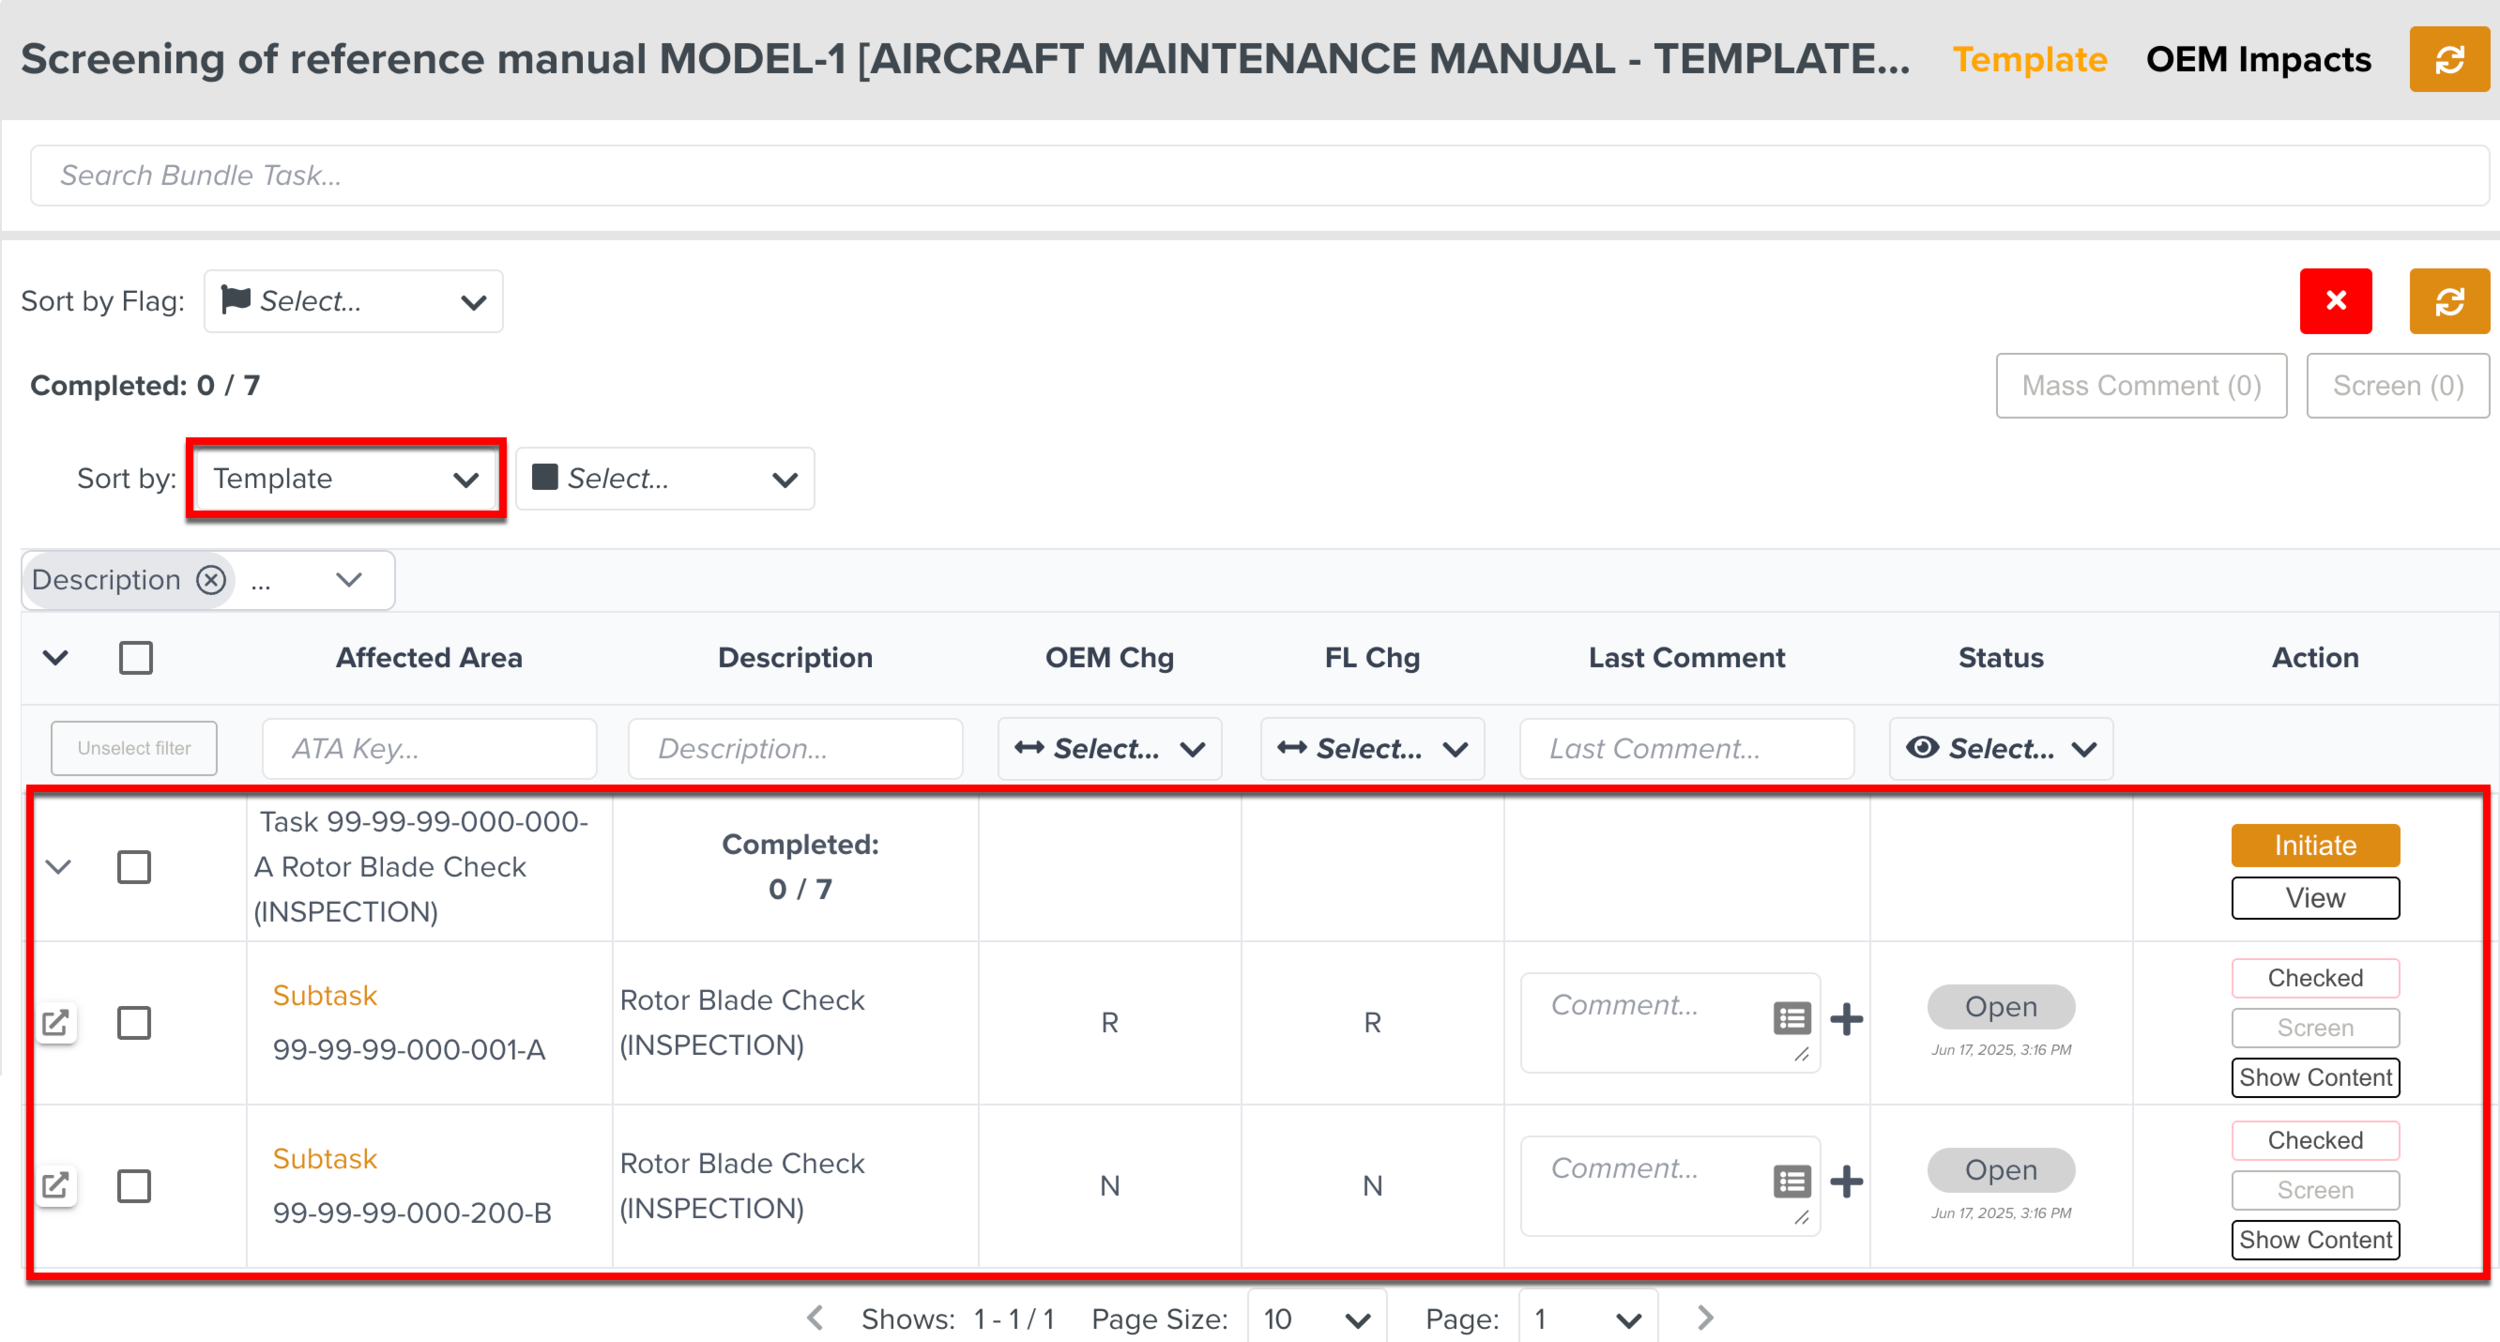
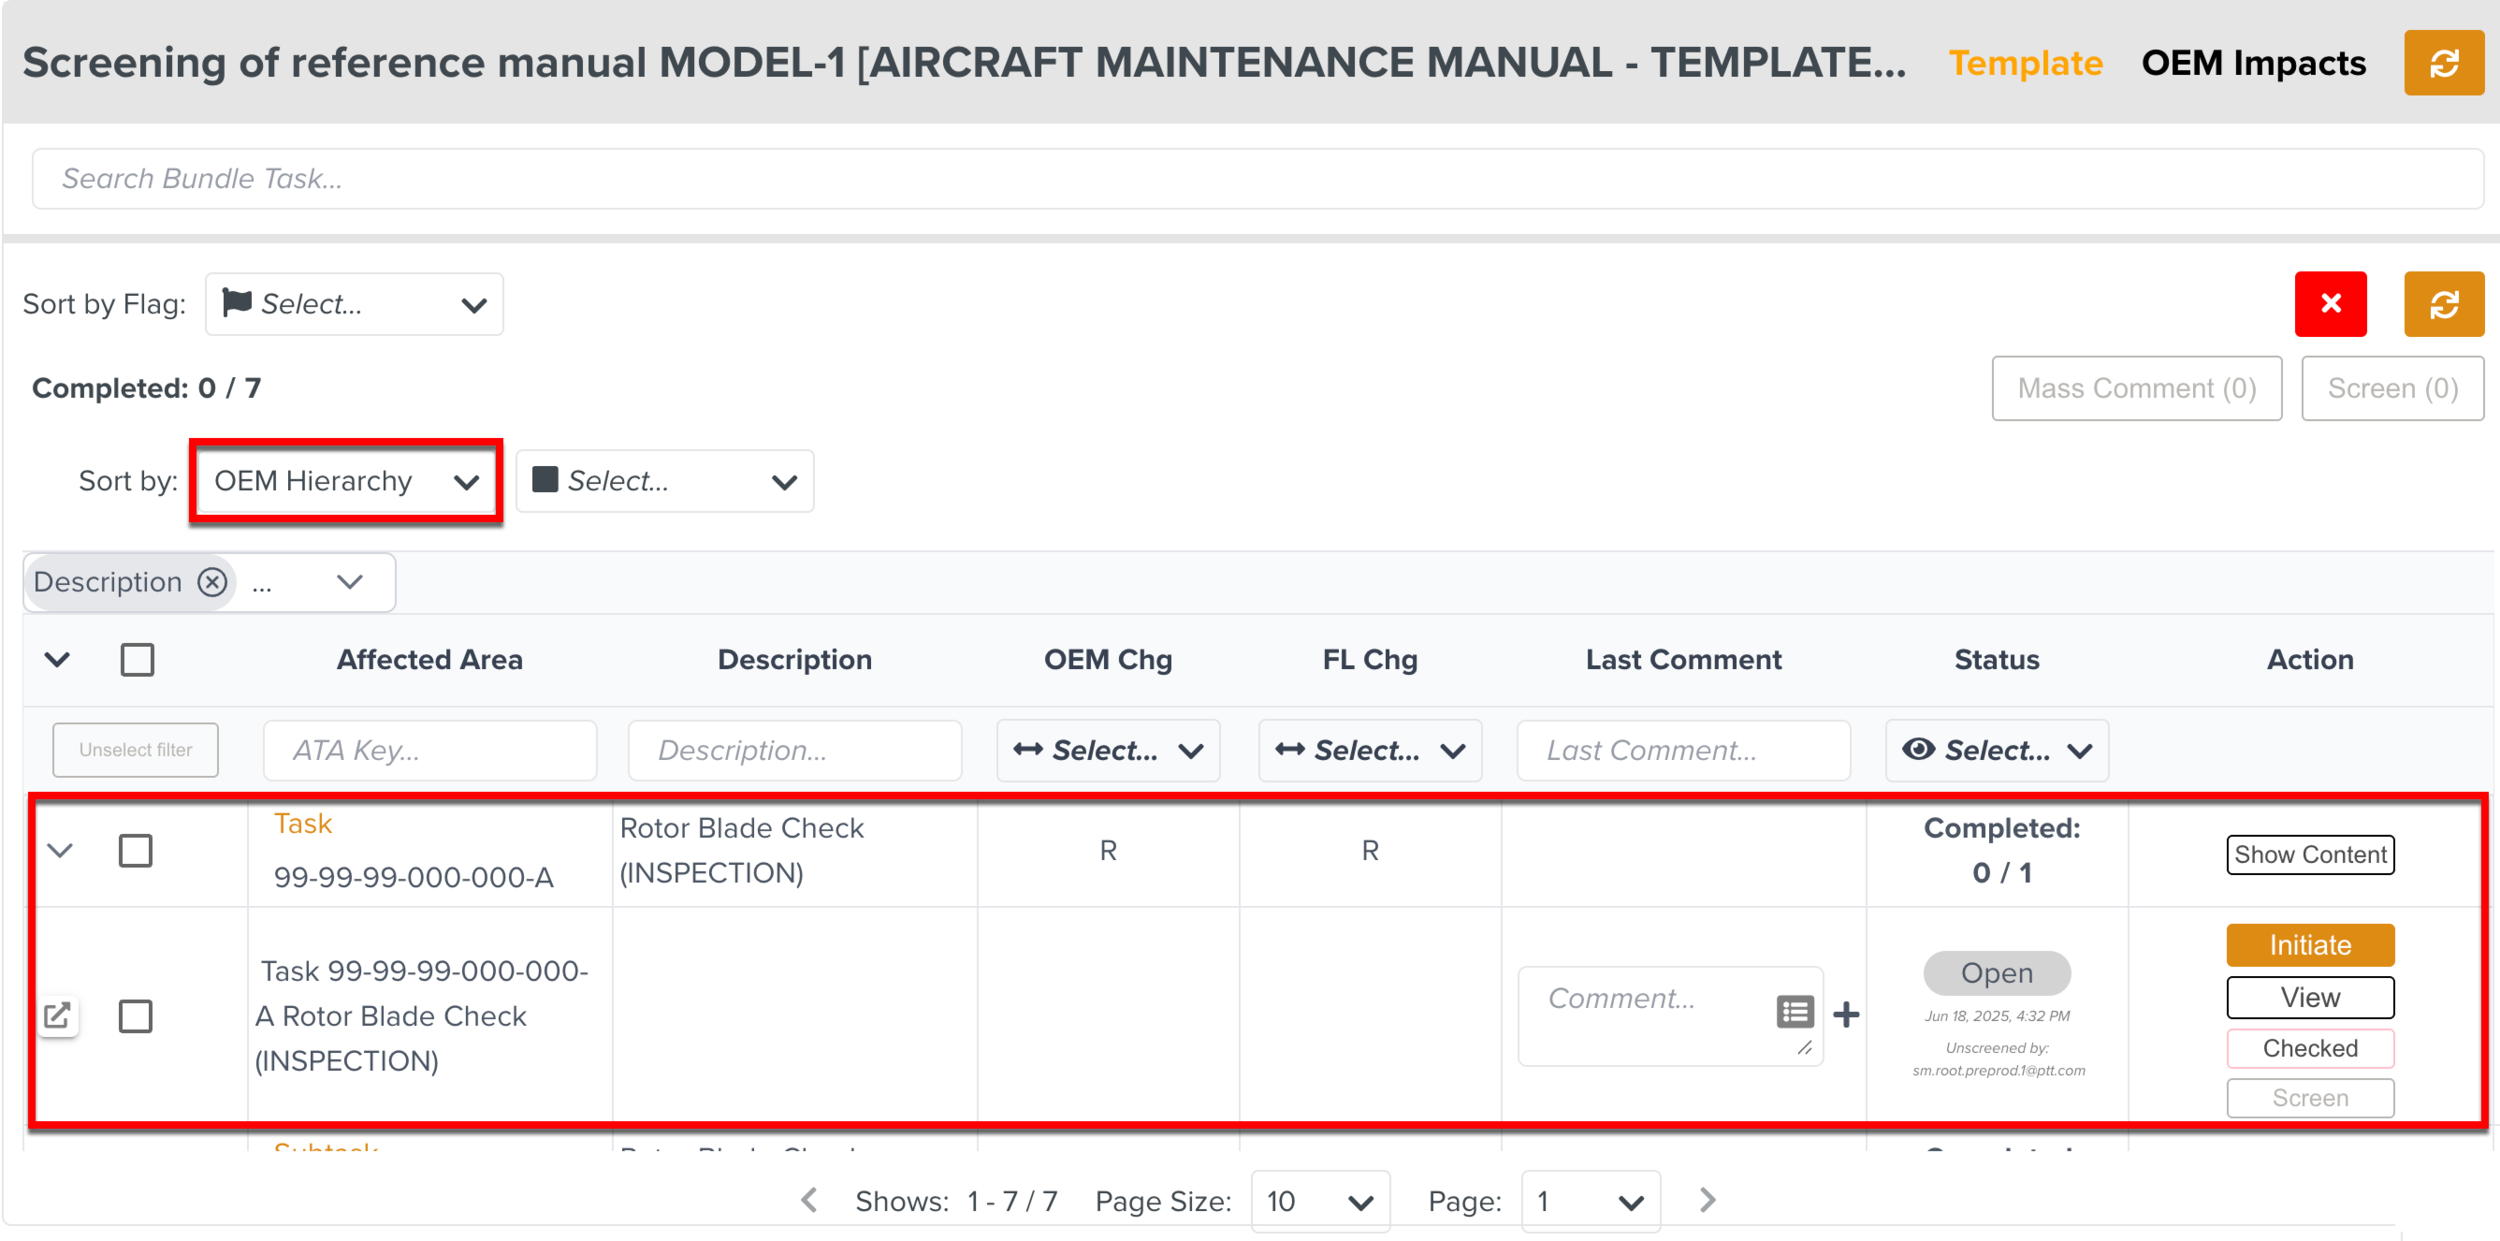
Hits can be sorted based on two criteria:
Sort by Template: View the OEM changes under each impacted Template.
Sort by OEM Hierarchy: View the match Impact sorted by Impacts information.
You can perform a Screening action on a single Hit or a group of Hits.
The Screening actions are grouped into the following categories:
Actions on Single Template Impact: You can view the impacted Template and initiate new version of the Template.
Actions on Bulk Template Impacts: You can leave mass comments and perform mass screening of one or more Template Impacts.
Note
The Screening actions are enabled only when you pick up the Screening Task.
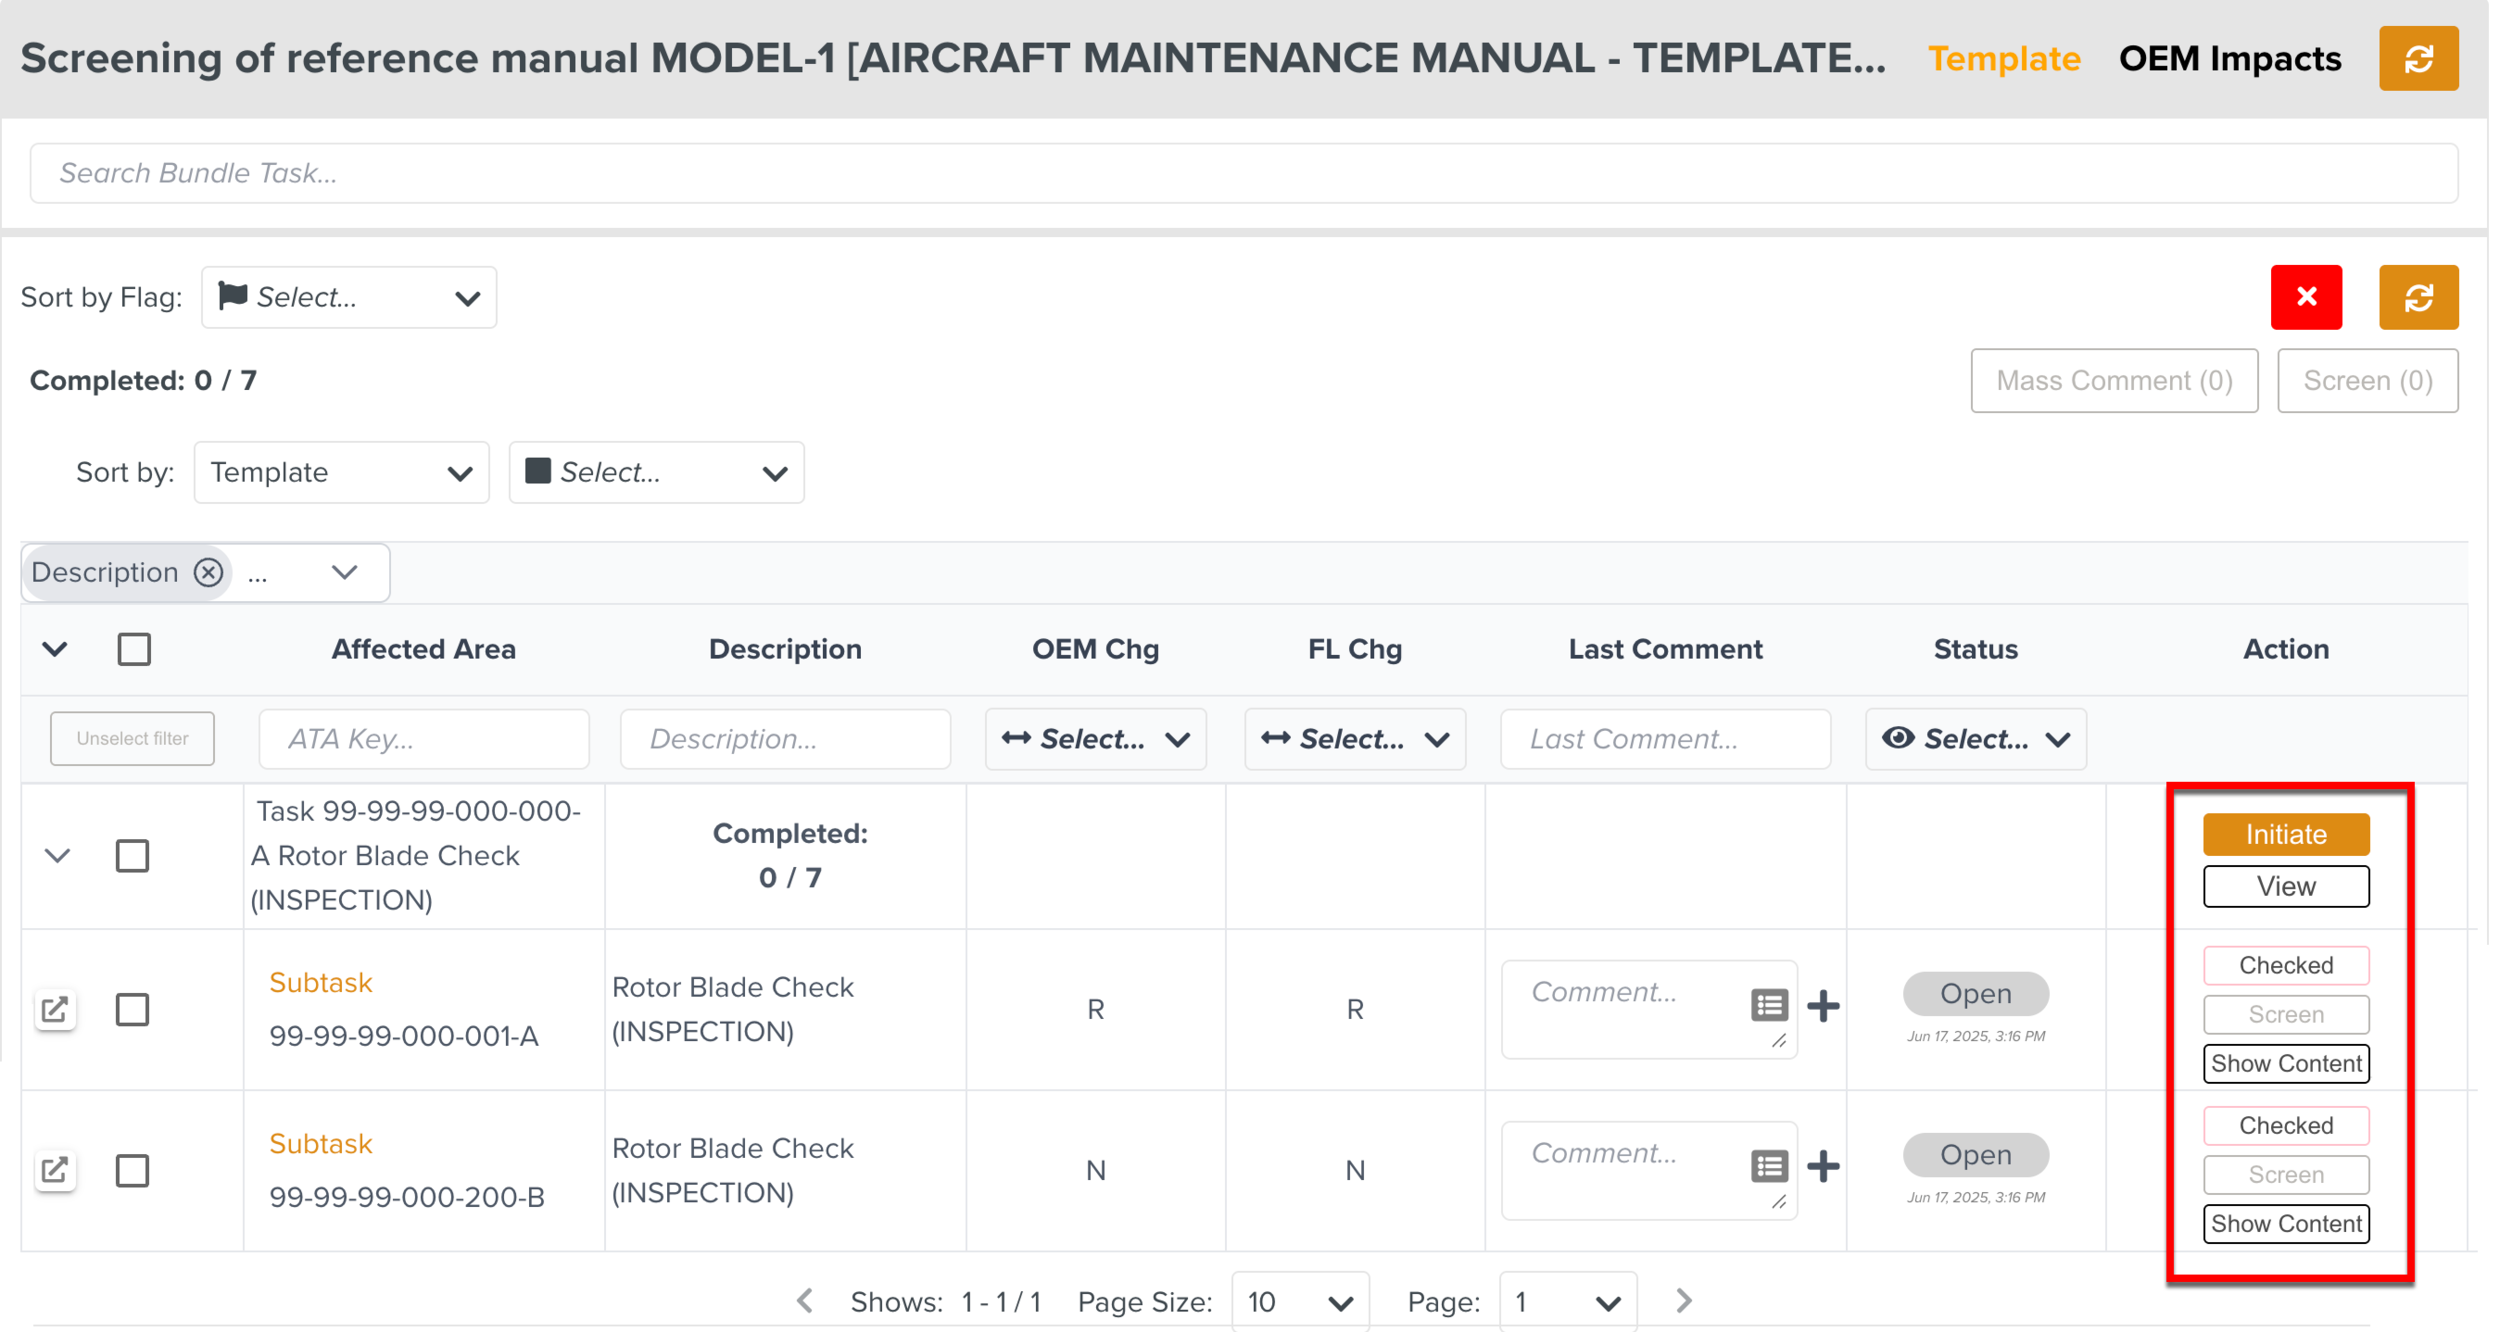
When you select a single Template Impact, the following types of actions are available:
Template level actions: The available actions are , , and .
Impact level actions: The available actions are and .
Template Level Actions
There are some specific actions available that you can perform on the Templates associated with the Hits.
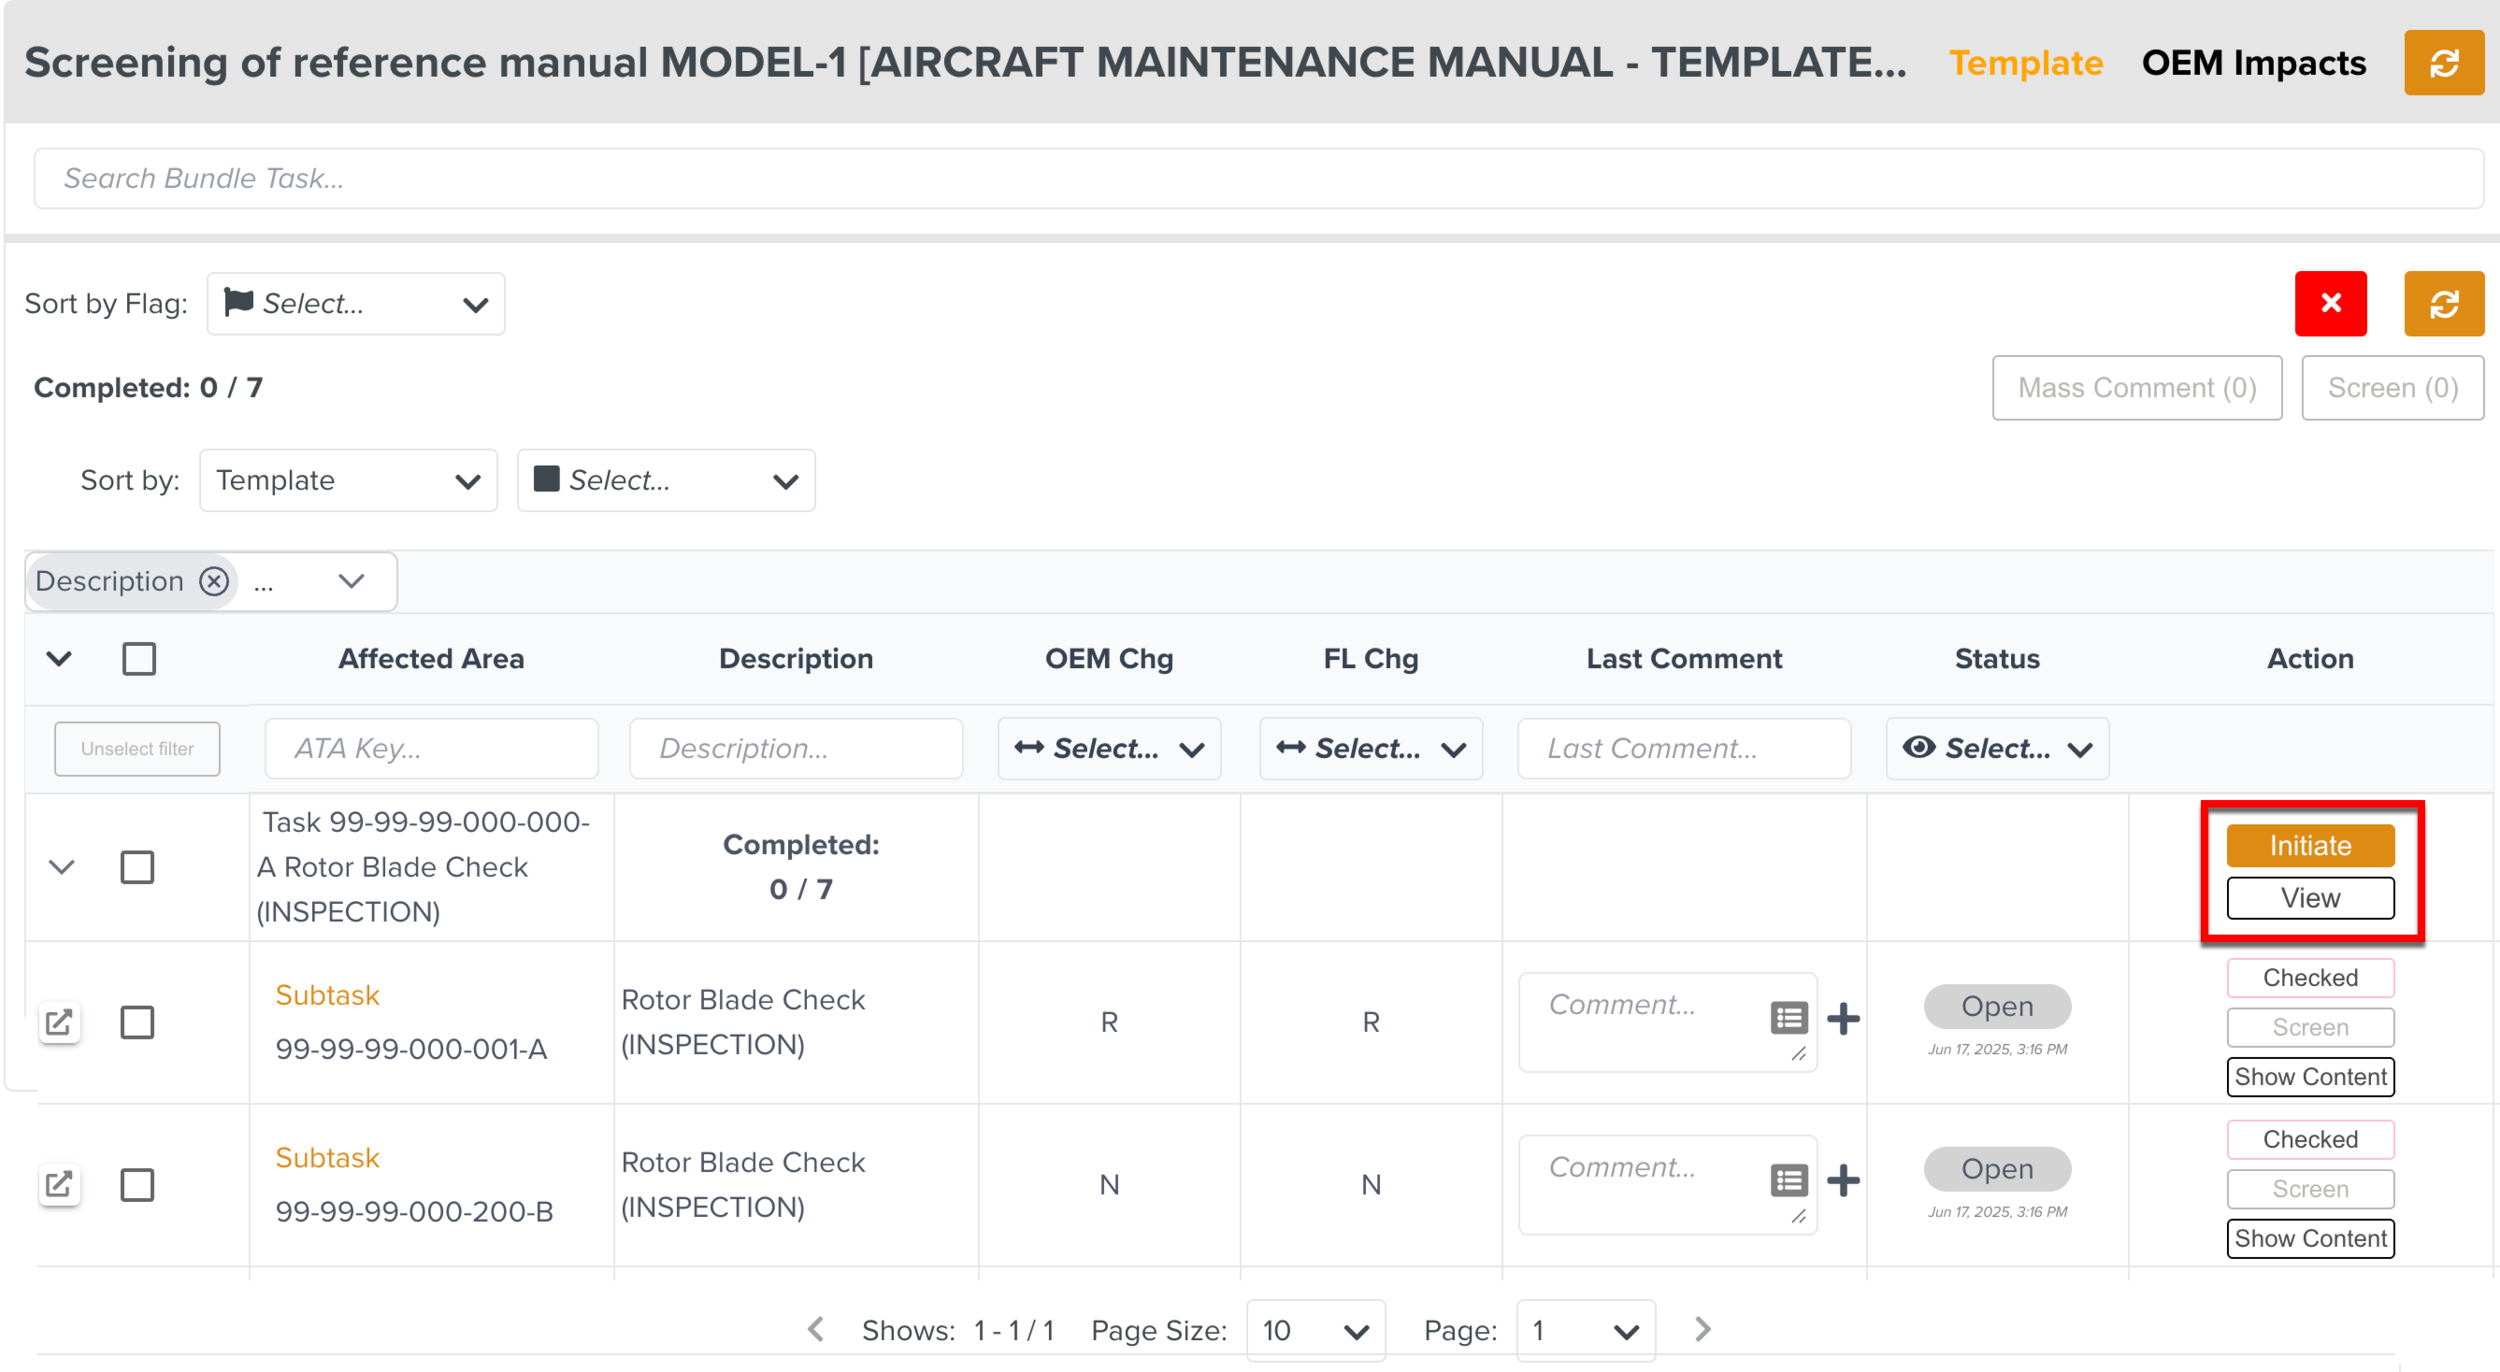
The actions specific to Templates are as follows:
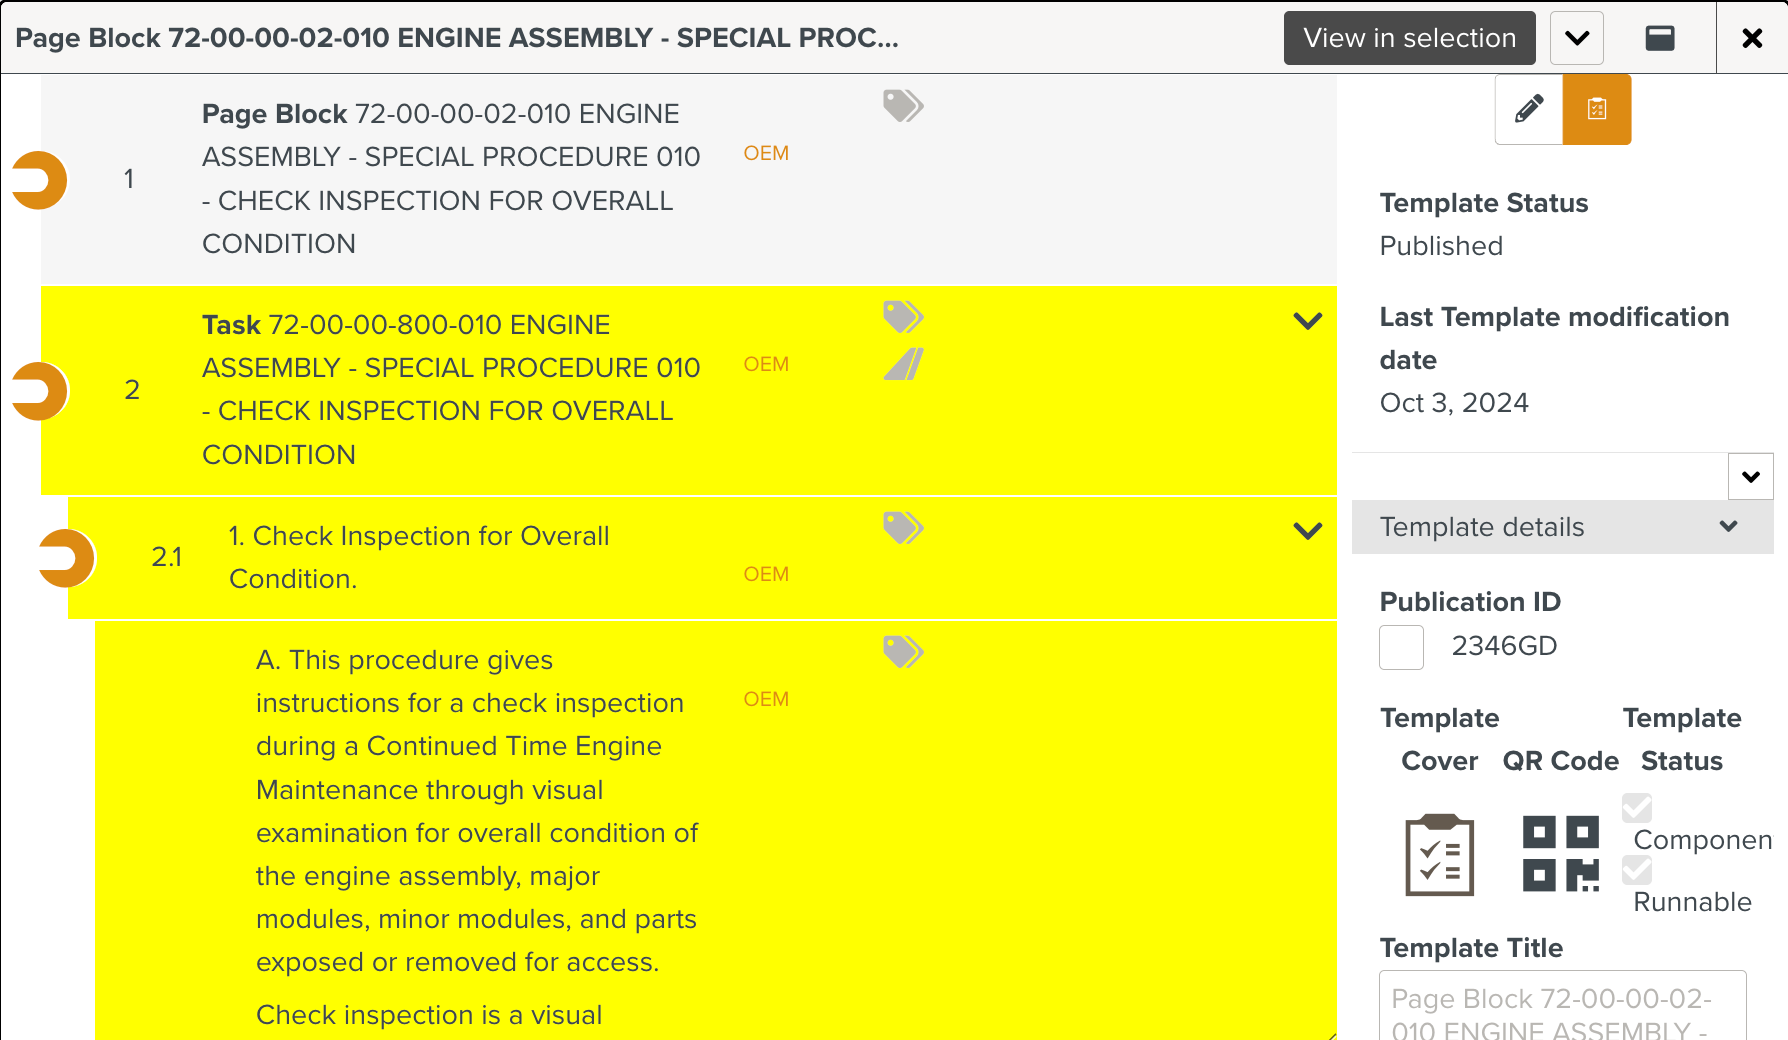
Actions | Description | |
|---|---|---|
Click to view the Templates with the changes highlighted in yellow in a separate dialog. The Template and Step details are also displayed in read-only mode.
NoteA Parent Step is expanded only if it contains highlighted Substeps. When you click the button, you are redirected to view the Template in the page Your Templates. | ||
Click to initiate a new version of the Template which follows a Lifecycle for Publication. NoteWhen a new version of the Template is published, the button changes to . | ||
Click to re-initiate a latest version of the Template. |
Impact Level Actions
There are some actions that are specific to the OEM changes in a Template Hit.
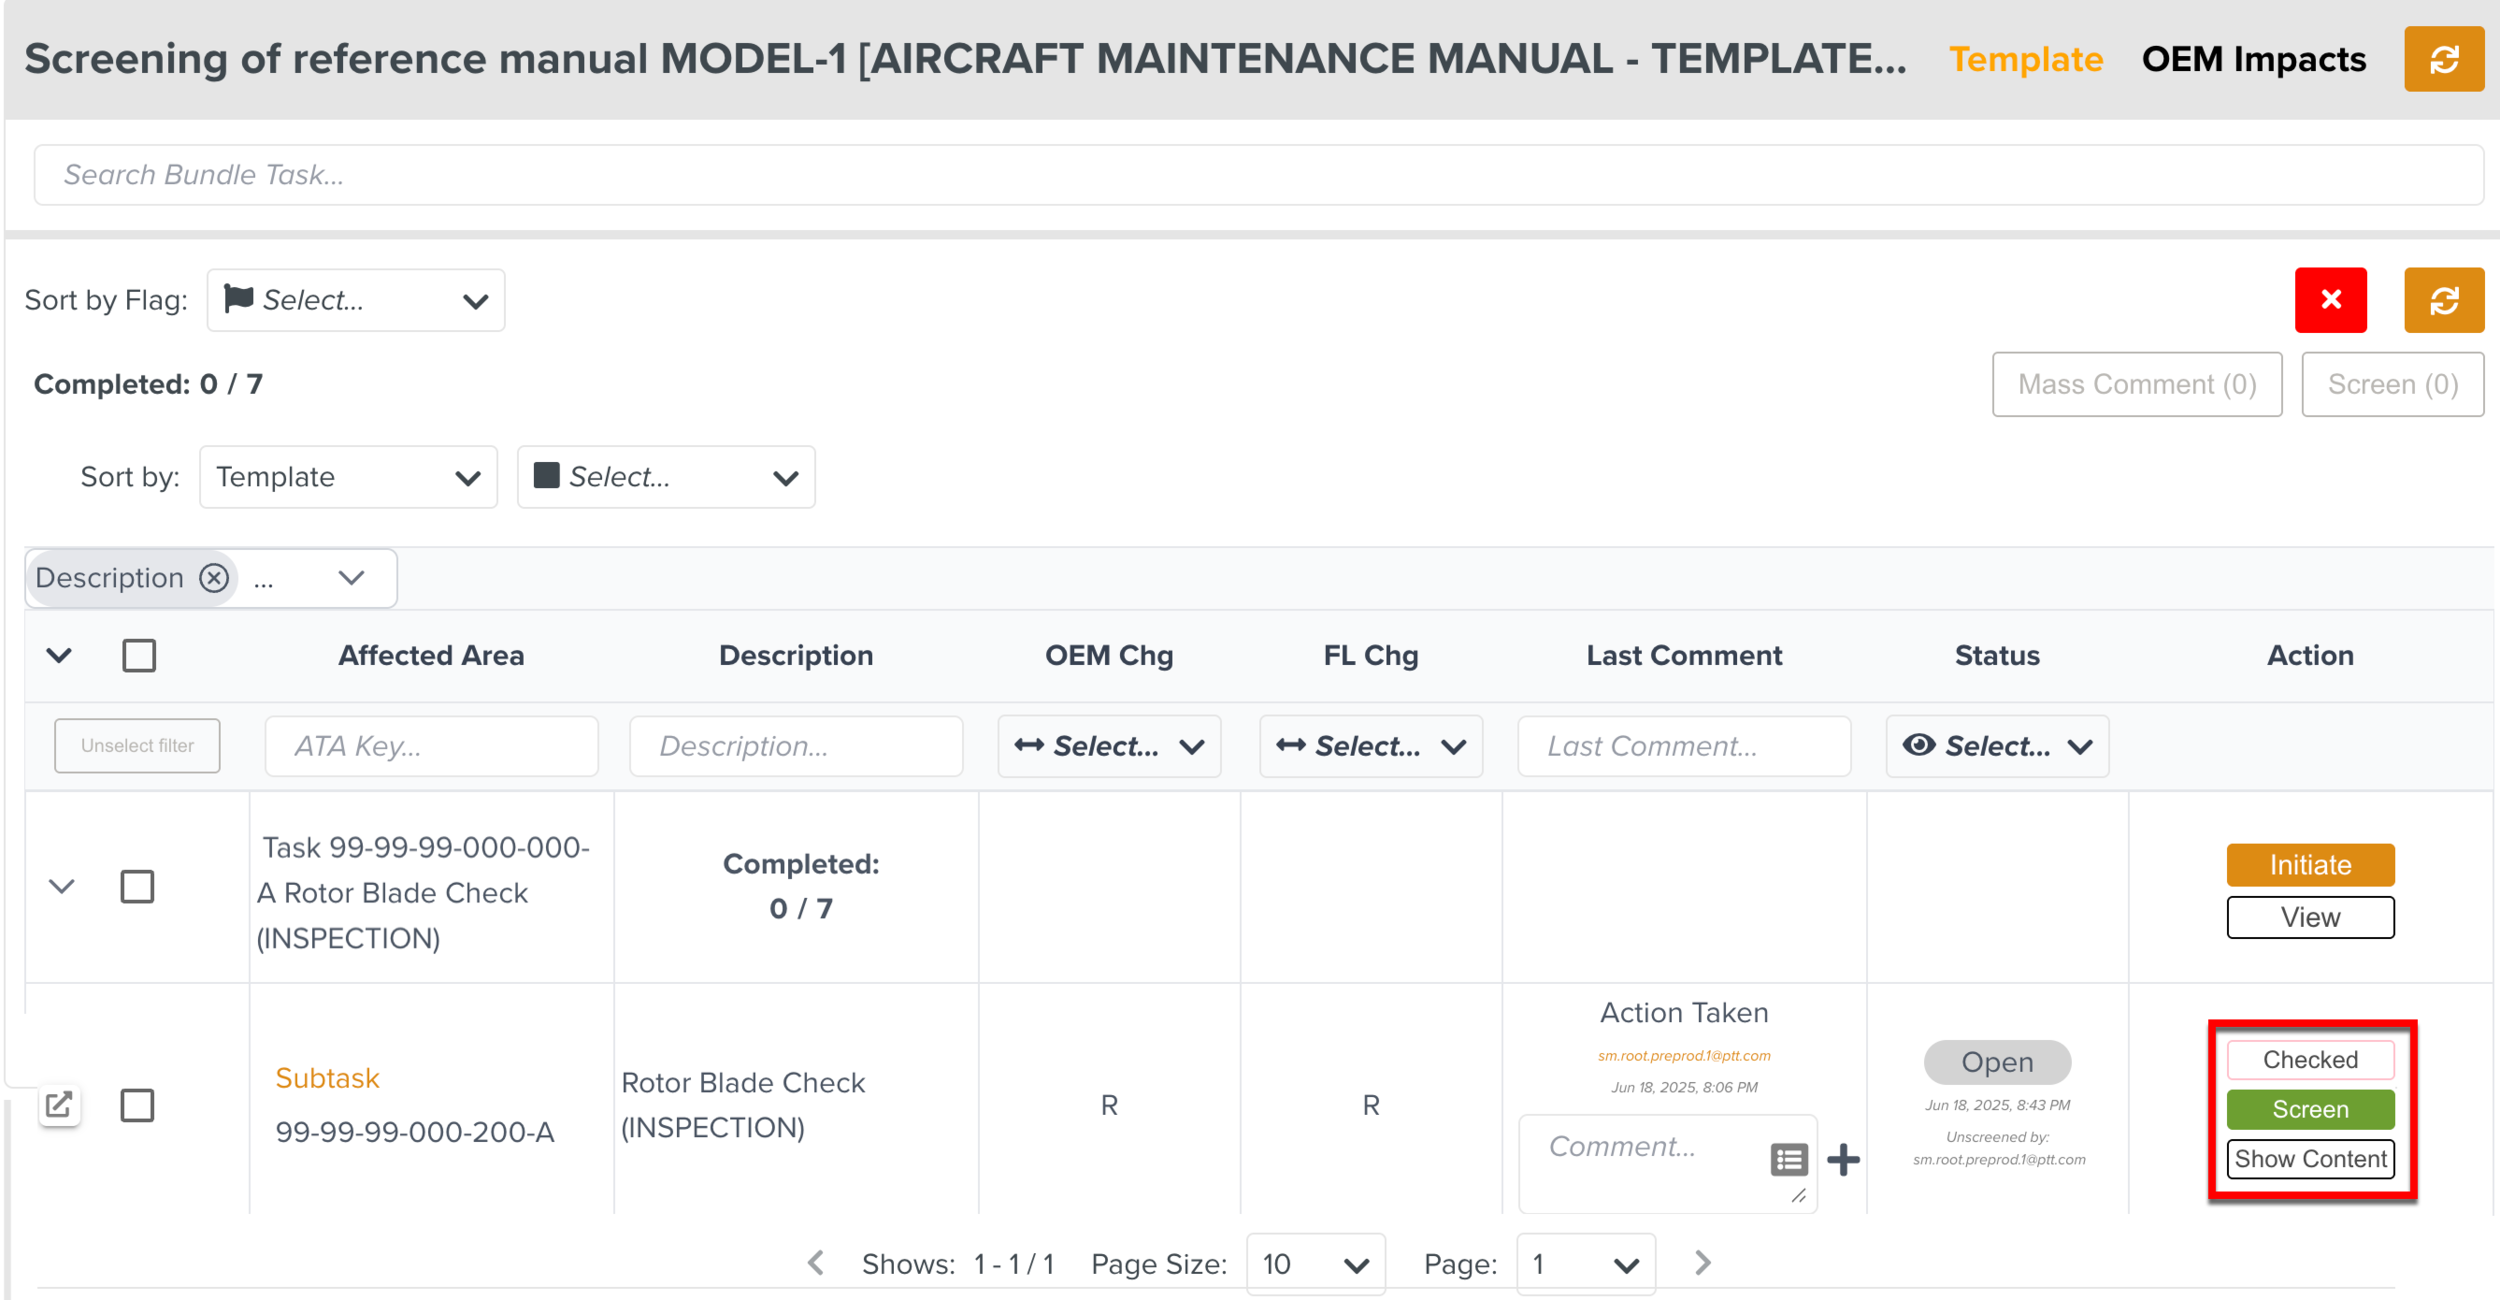 |
Following are the actions that are available for the OEM changes:
Actions | Description | ||
|---|---|---|---|
Click to view the older and newer version of the manual content in a side by side view to verify the modifications. | |||
Comment | Add comments to individual Hits. You can either type the comment or use a pre-defined comment. NoteThe button is enabled only when the comment is added to the Hits. | ||
Click to confirm if the required action is taken and the selected Hit is screened. Screening the Hits allows you to identify the templates not requiring a modification and help asses screening progress. When you click the button after taking the required action, the status changes to Screened which denotes that the screening is done for the Hit.
NoteThe button then changes to which allows you to unscreen the Hits. Clicking moves the Hit to Open status and restores the button on the Hit.
|

Note
Custom Actions can be set with the help of a Routing table. For example, here is a Custom Action.
 |
When one or more Template Impacts are selected, the actions available are highlighted as shown below.
|
Actions | Descriptions | ||
|---|---|---|---|
Add a mass comment to one or more Template Impact selected. You can either type the comment or use a pre-defined comment.
The button is enabled when one or more Template Hits are selected. | |||
(Mass) | The (Mass) button allows you to perform a mass screening of the selected Template Hits.
CautionMass screening cannot be performed if one or more of the selected Hits are already screened. |
Other options available are highlighted below.
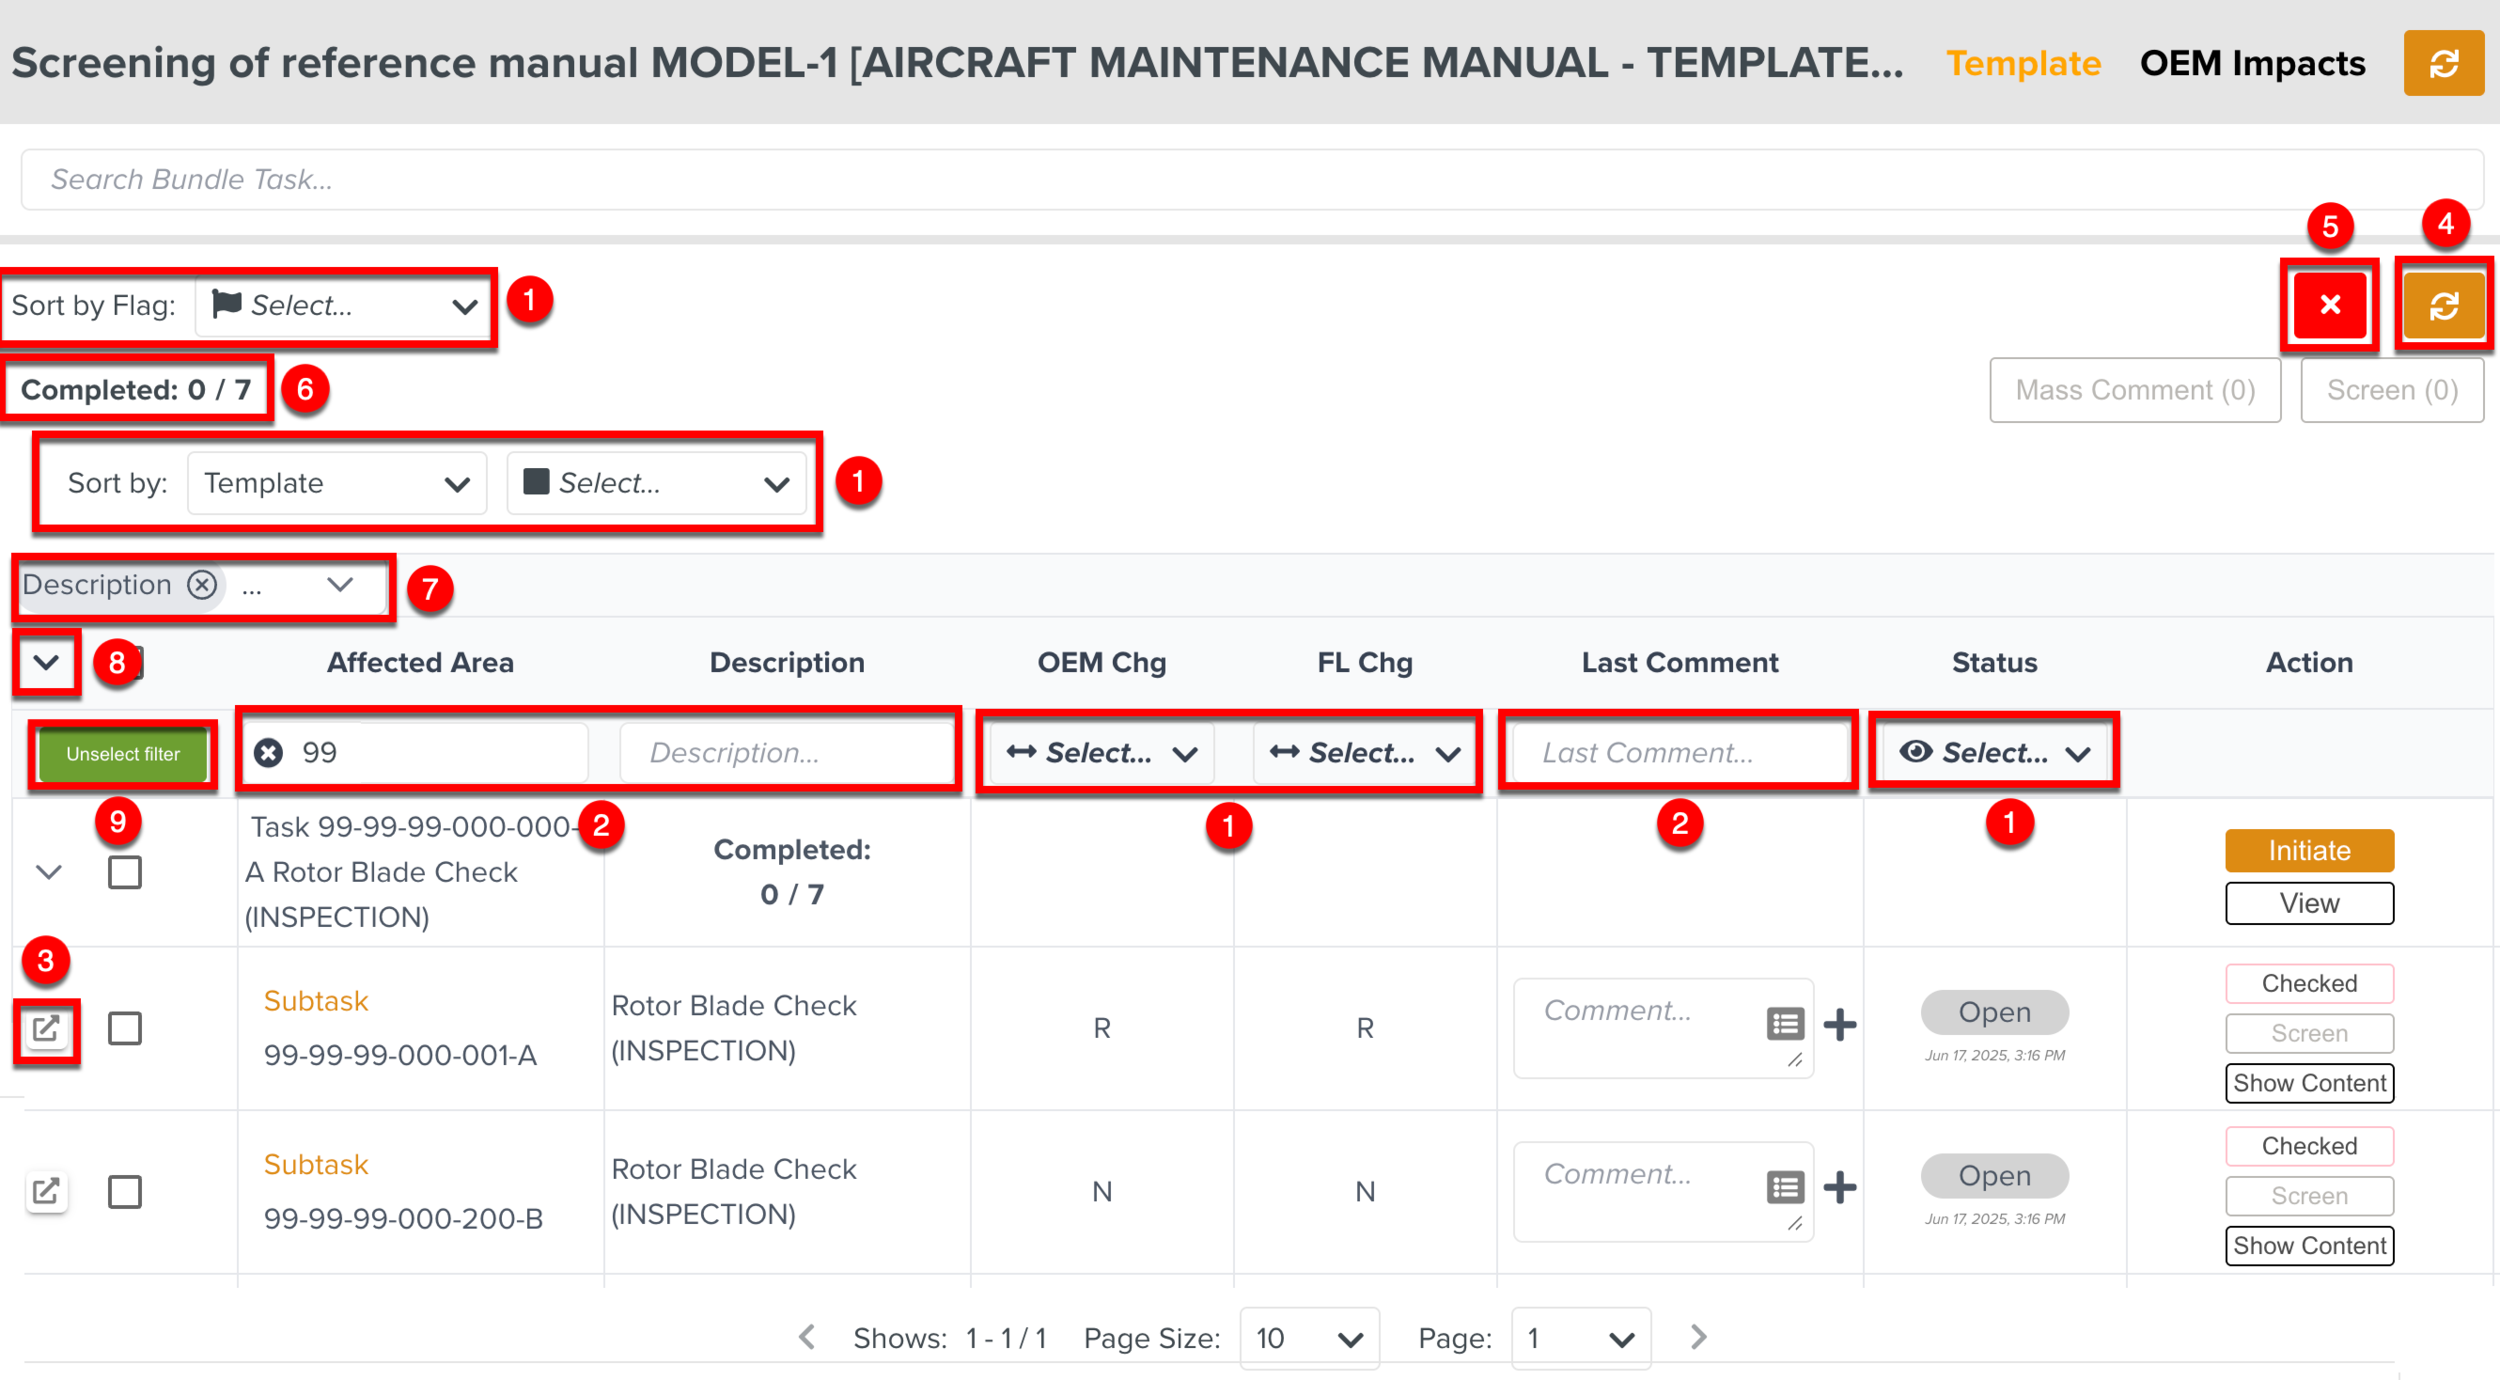 |
Sort the Hits using the following options available:
Flag
OEM Change Type
Status
OEM Hierarchy or Template
Functional Type
Note
The Sort by OEM Hierarchy or Template and Sort by Functional Type are only available in the section Templates.
You can use the filters to narrow down the Hits.
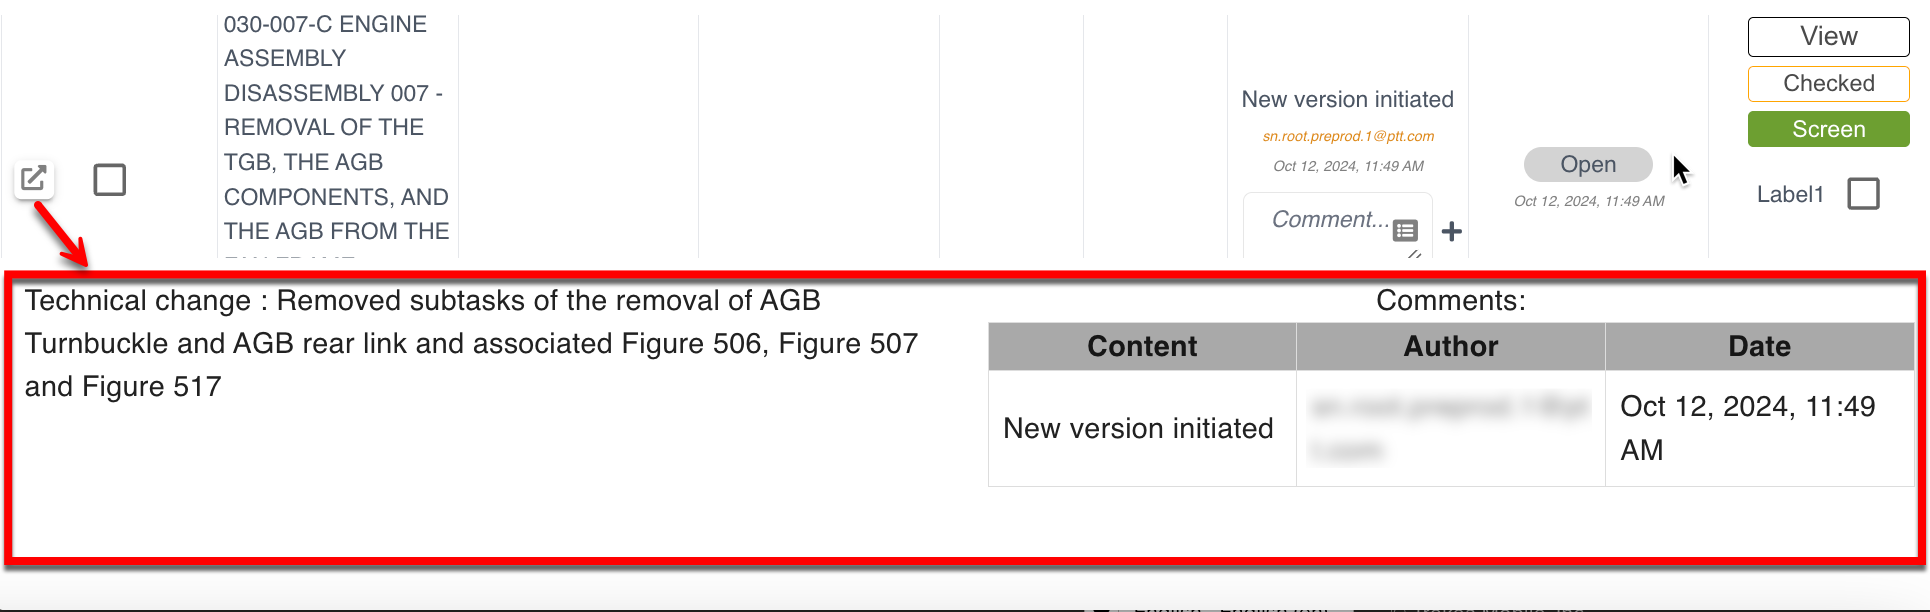
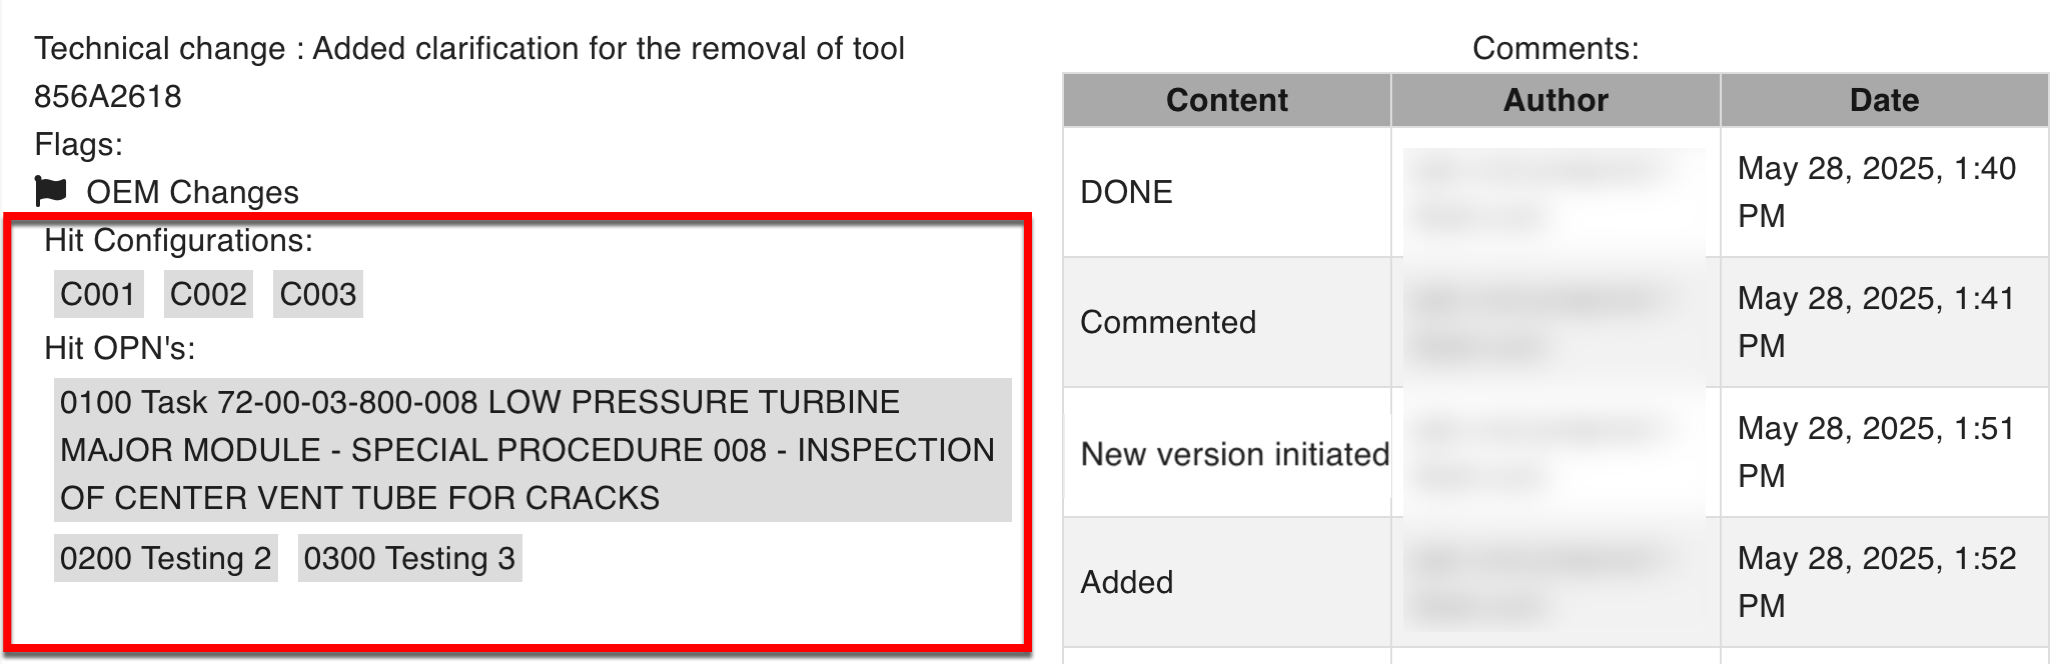
In the information pop-up, you can view the information such as the details of modifications, comments, user details, and time stamps.
Some additional information such as the Hit Configurations and Hit Operation (OPN) Numbers will also be displayed, if available.
Refresh
 to view the updated content in the page.
Use the close
 icon to stop viewing the Hits.
The progress of completion of the screening is displayed.
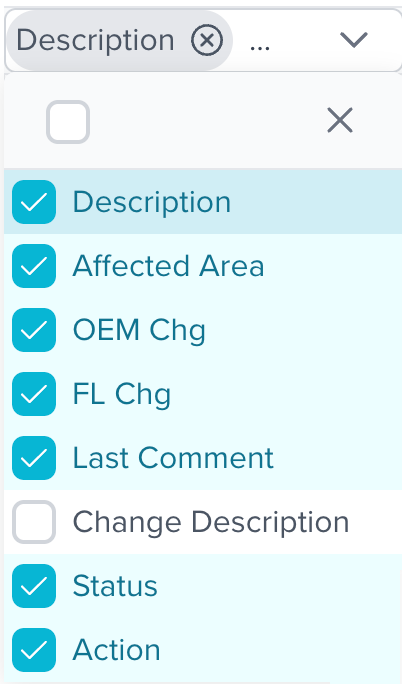
Select the columns to be displayed from the dropdown.
Click
 to expand and collapse the entire list of Template Hits.
Click
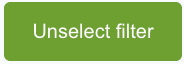 to clear all the applied filters.
You can define Custom Actions, Labels and Statuses to be used while Screening. The Routing Table is used to define these customizations.
The following customizations can be added:
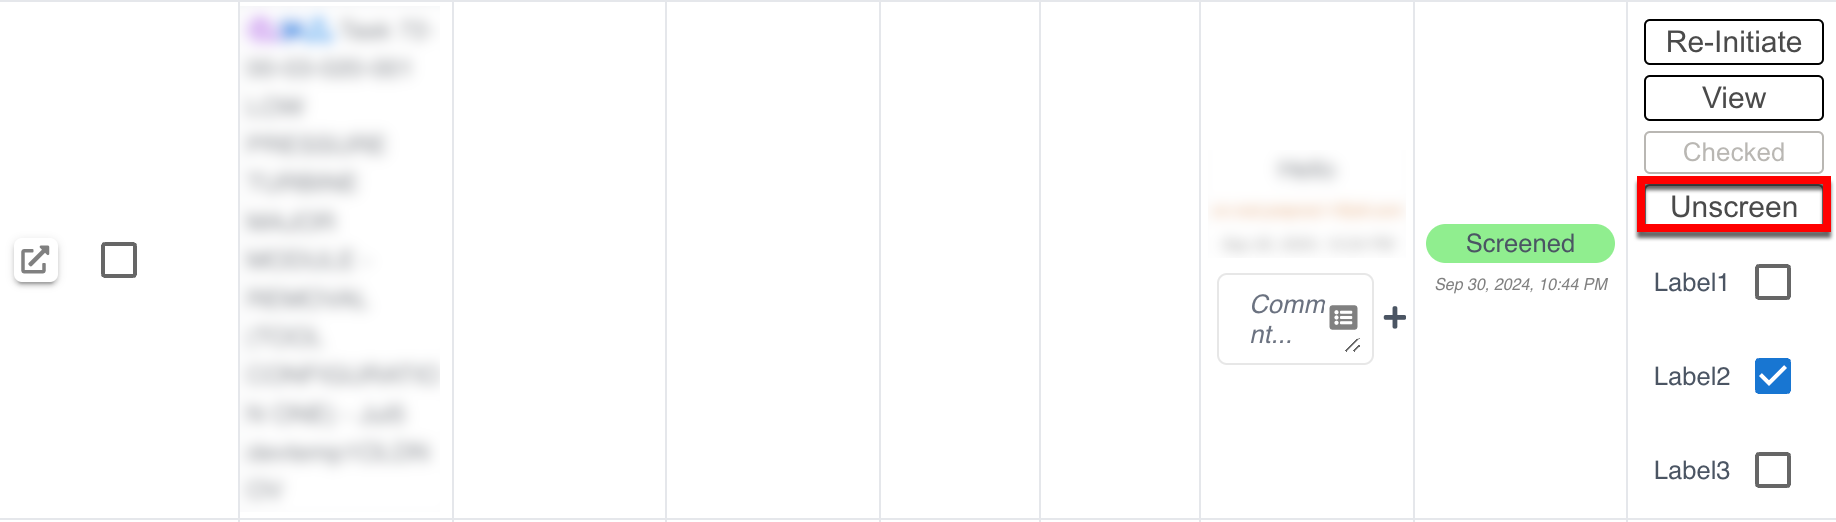
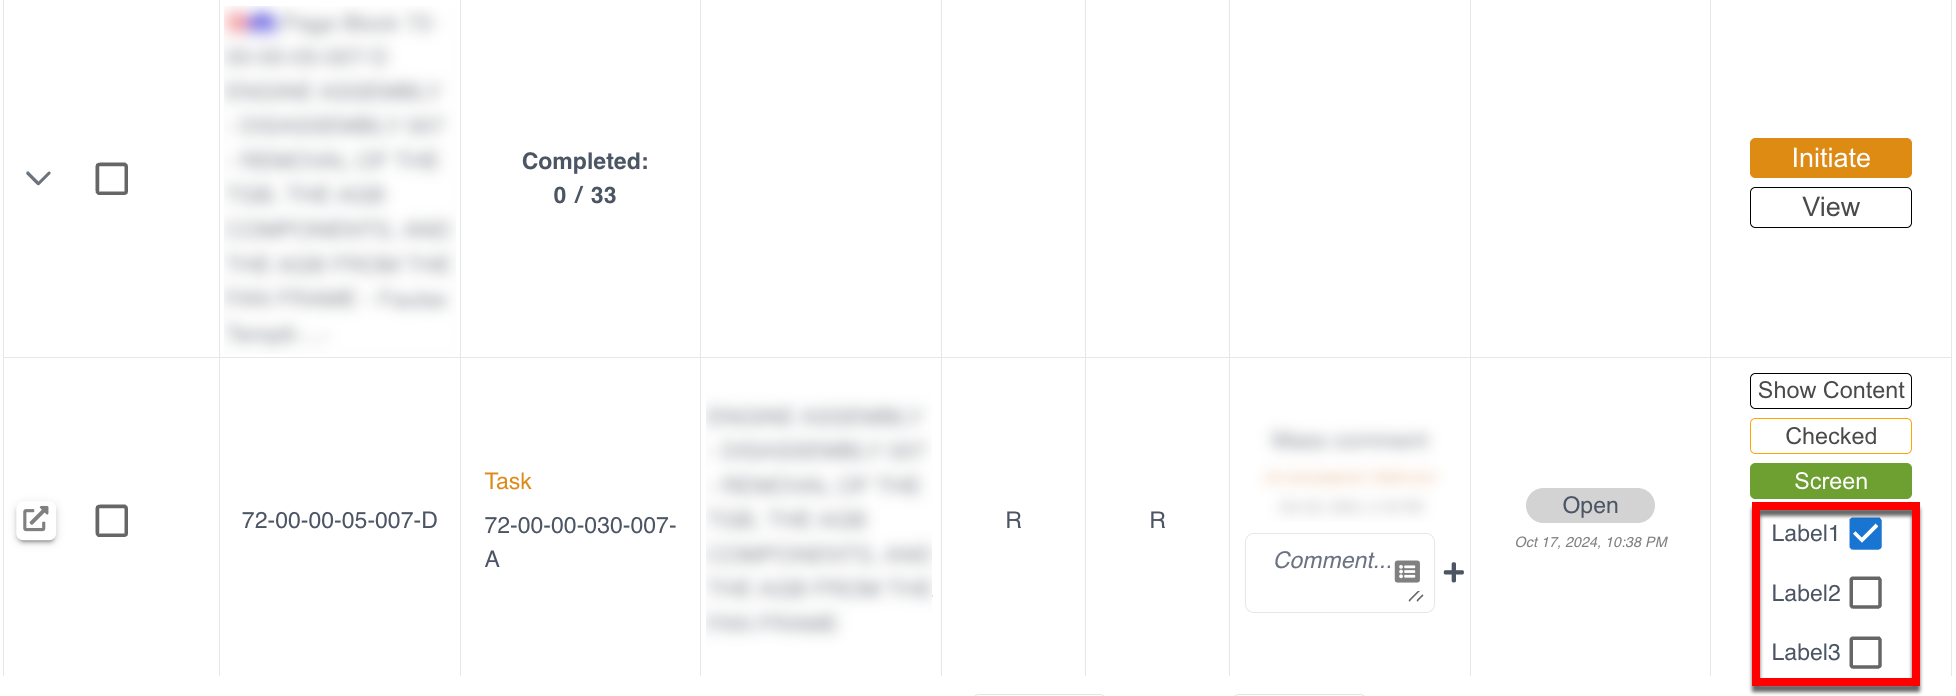
Custom Labels: They allow the screener to mark an impact with a Label.
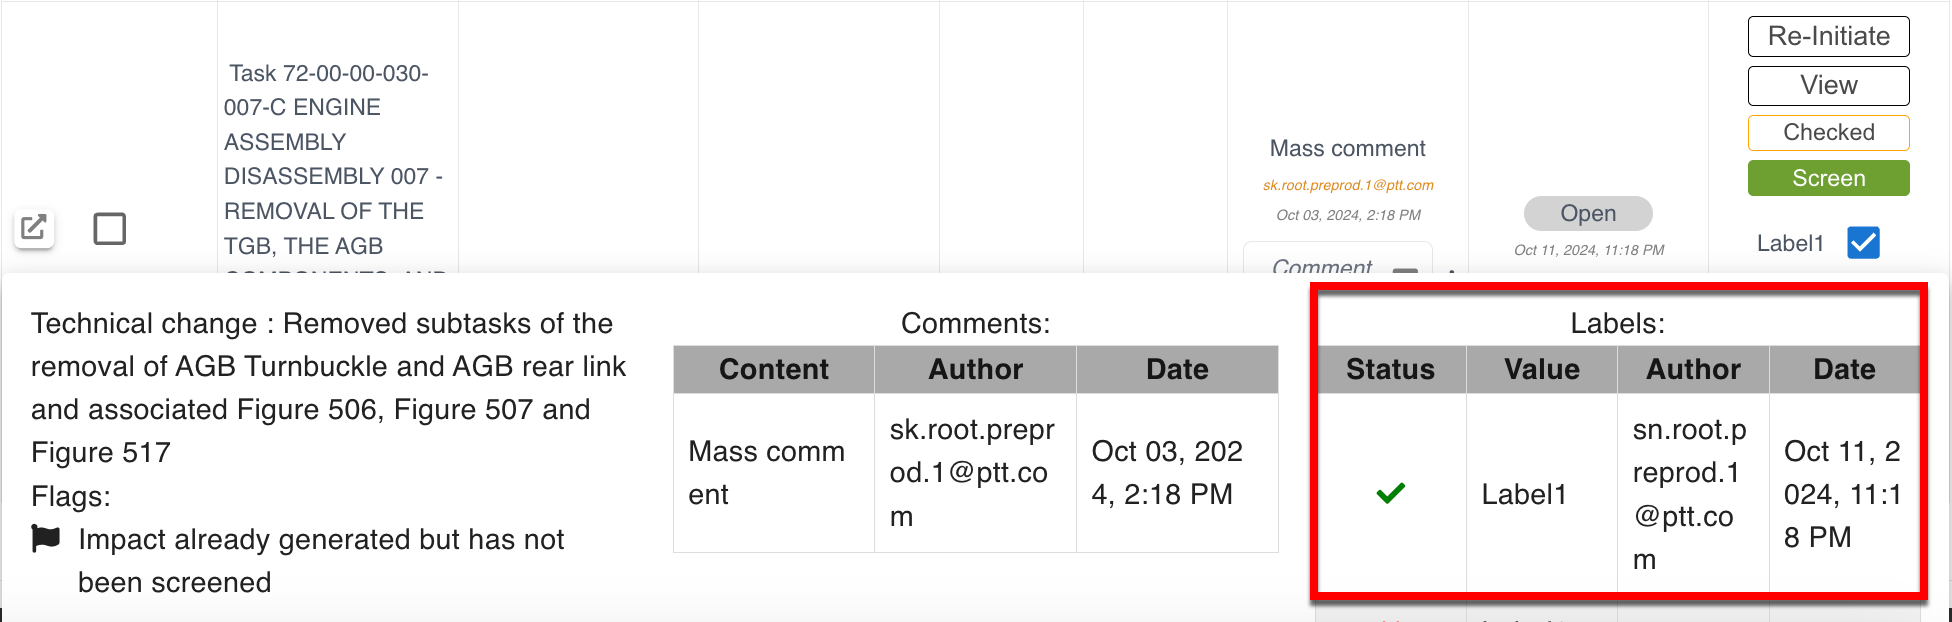
In the below example, there are three Custom Labels - Label1, Label2, and Label3 created. When a Custom Label is selected, the details appear in the information pop-up along with the user details.
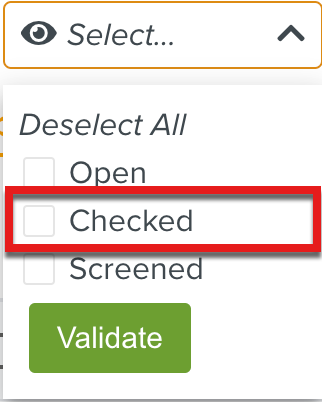
Custom Statuses: This allows an Impact to have additional statuses.
A Custom Status Checked is added to the Sort by Status dropdown as shown in the below example.
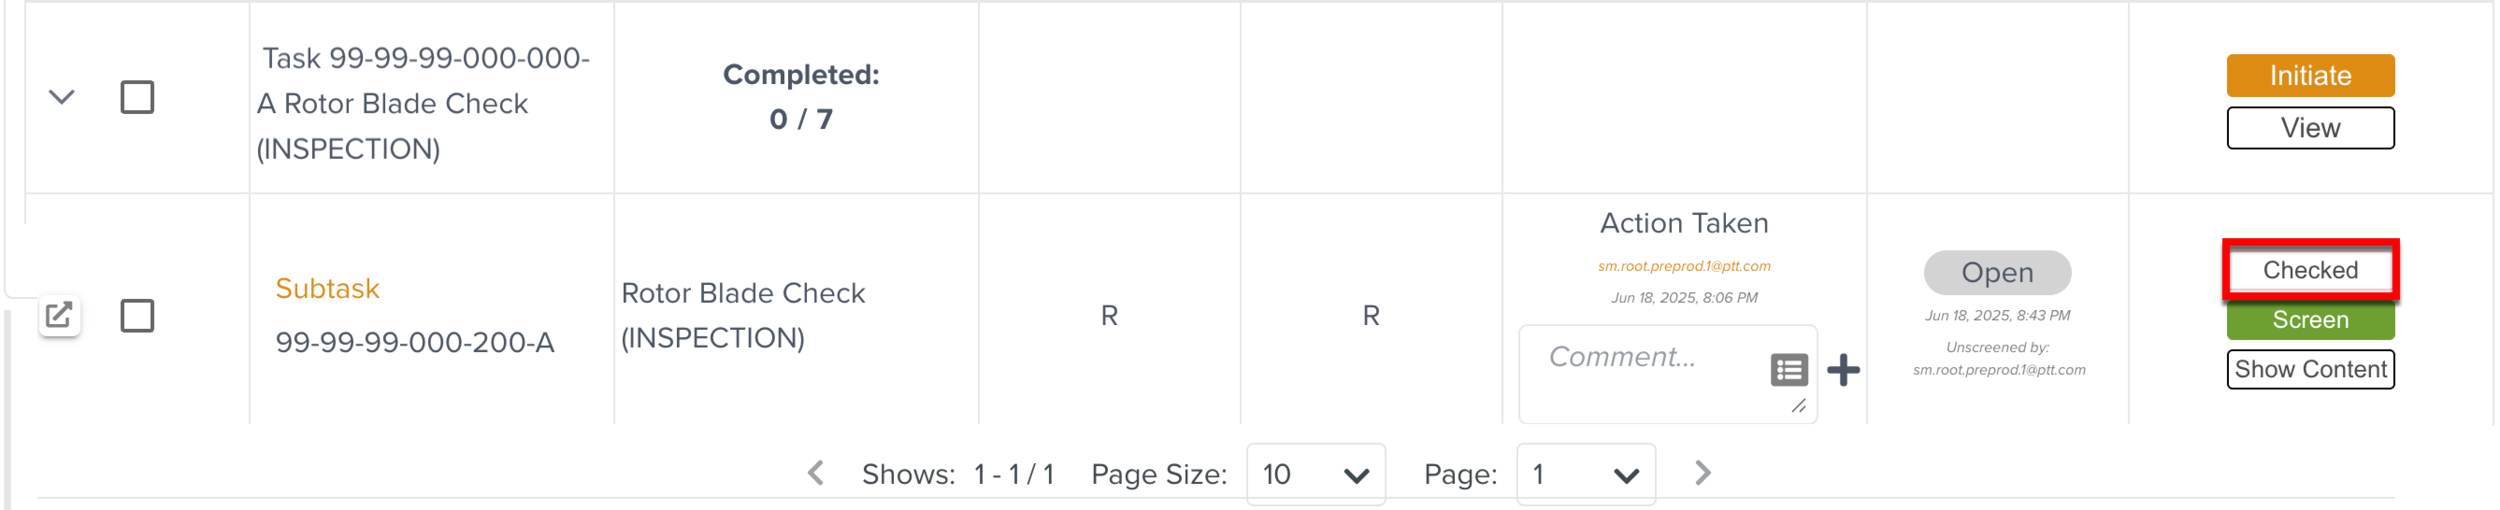
Custom Buttons: These Custom Buttons transition an impact to a Custom Status.
Here, a Custom Button is added to the Screening Actions of an Impact as shown in the below example. Clicking transitions an Impact to the Status Checked.
