Creating a Non Applicability
Note
To view the Enterprise menu, the user must be associated with a Security Role that has the appropriate access rights.
During Task Execution, the user might encounter a Step that is not applicable in the current context. In such cases, the Step can be marked as Not Applicable and a reason can be provided.
This will enable the user to proceed with the rest of the Task without answering the Step.
Important
Unless a Non Applicability is associated with a Non Applicability Group, it cannot be used.
A Non Applicability must be associated with the userset for it to be available at runtime.
The Syncing Profile of the user is used to link the required Non Applicability Groups to the user. All the linked Non Applicability Groups are then available to the user at runtime.
To create a Non Applicability:
On the main menu, go to > > .
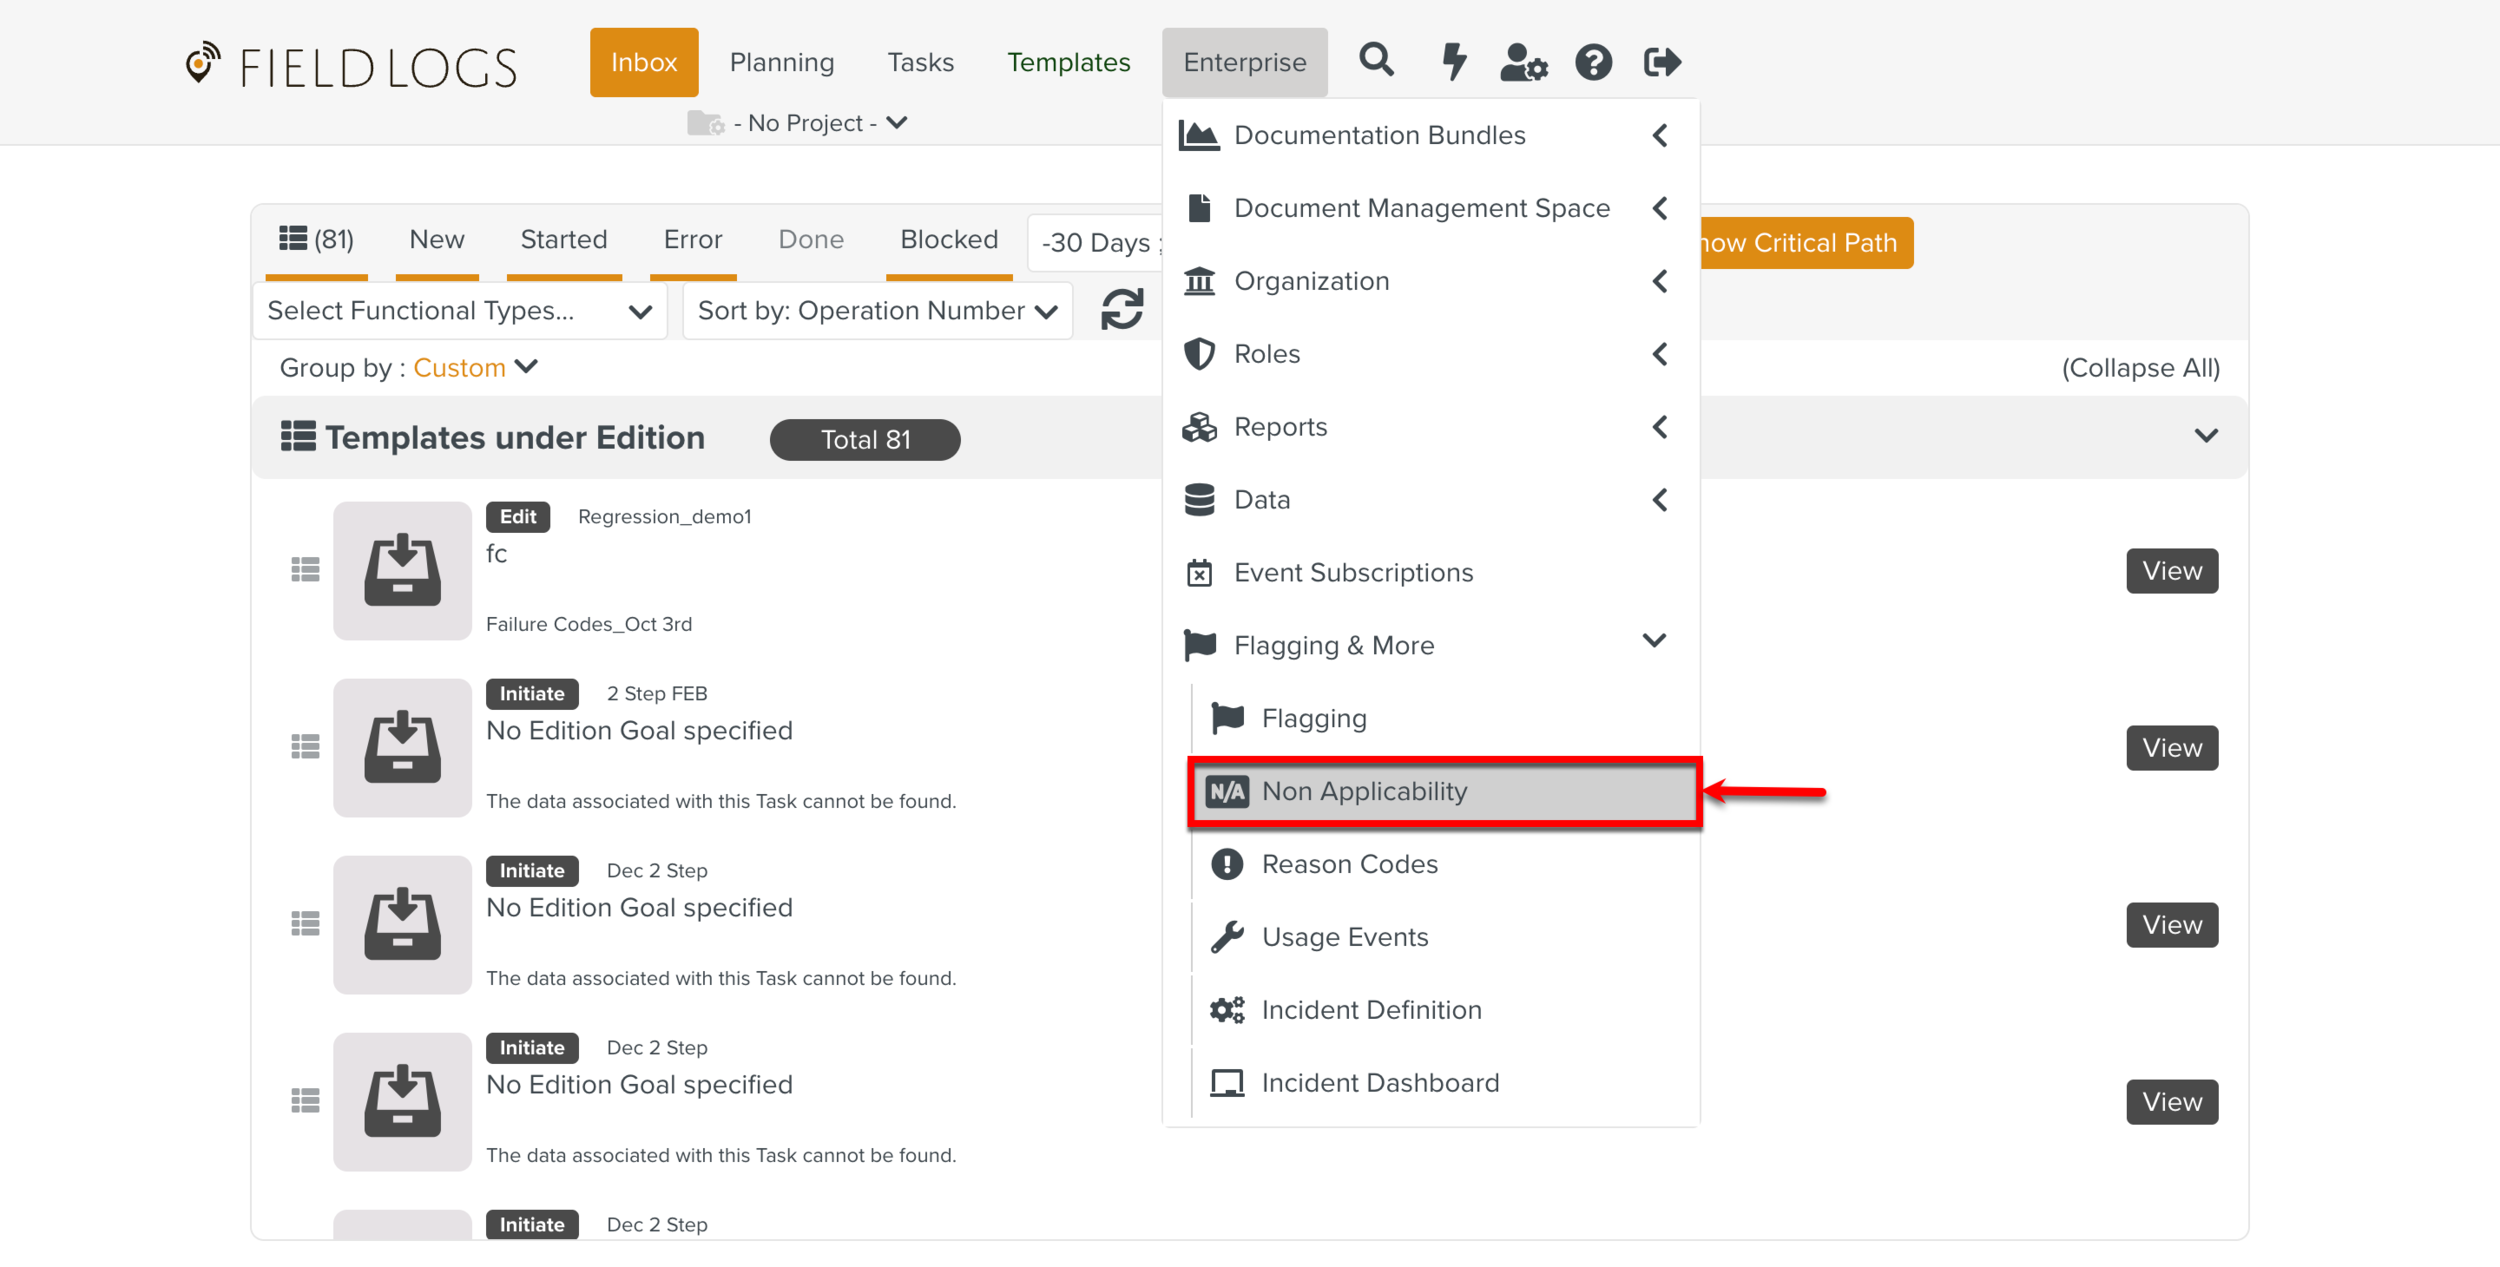
The page Non Applicability appears.
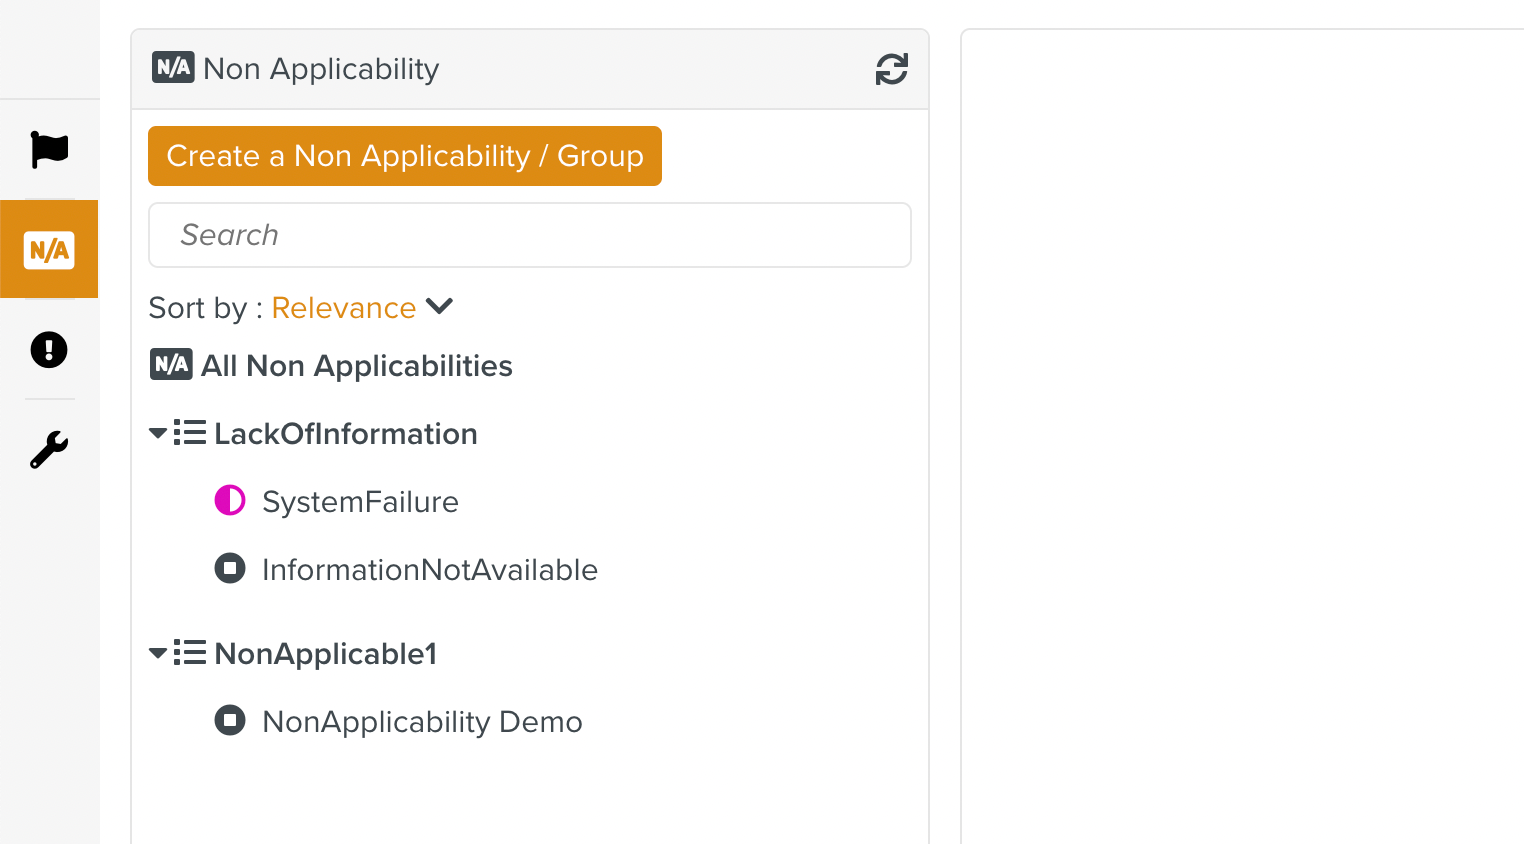
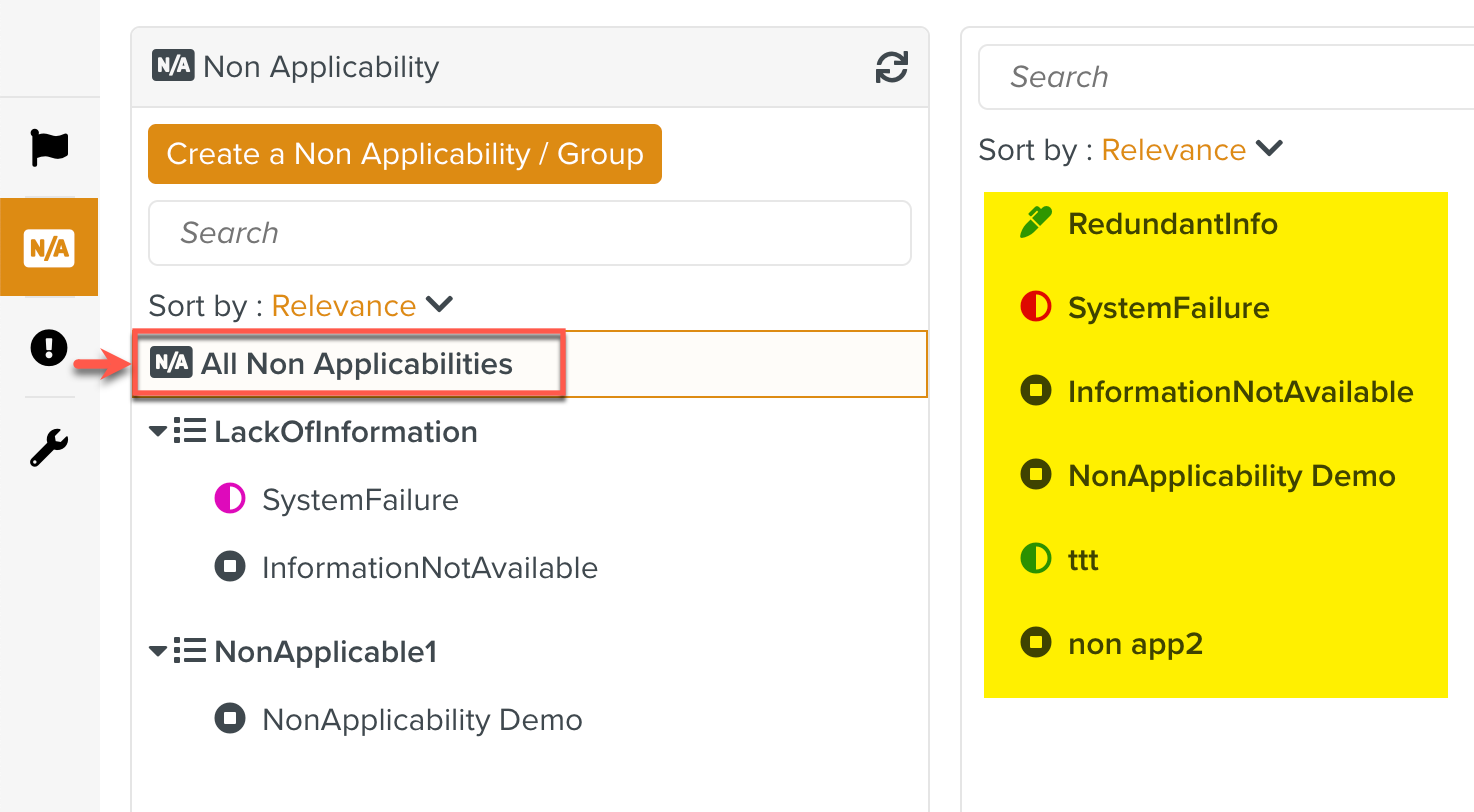
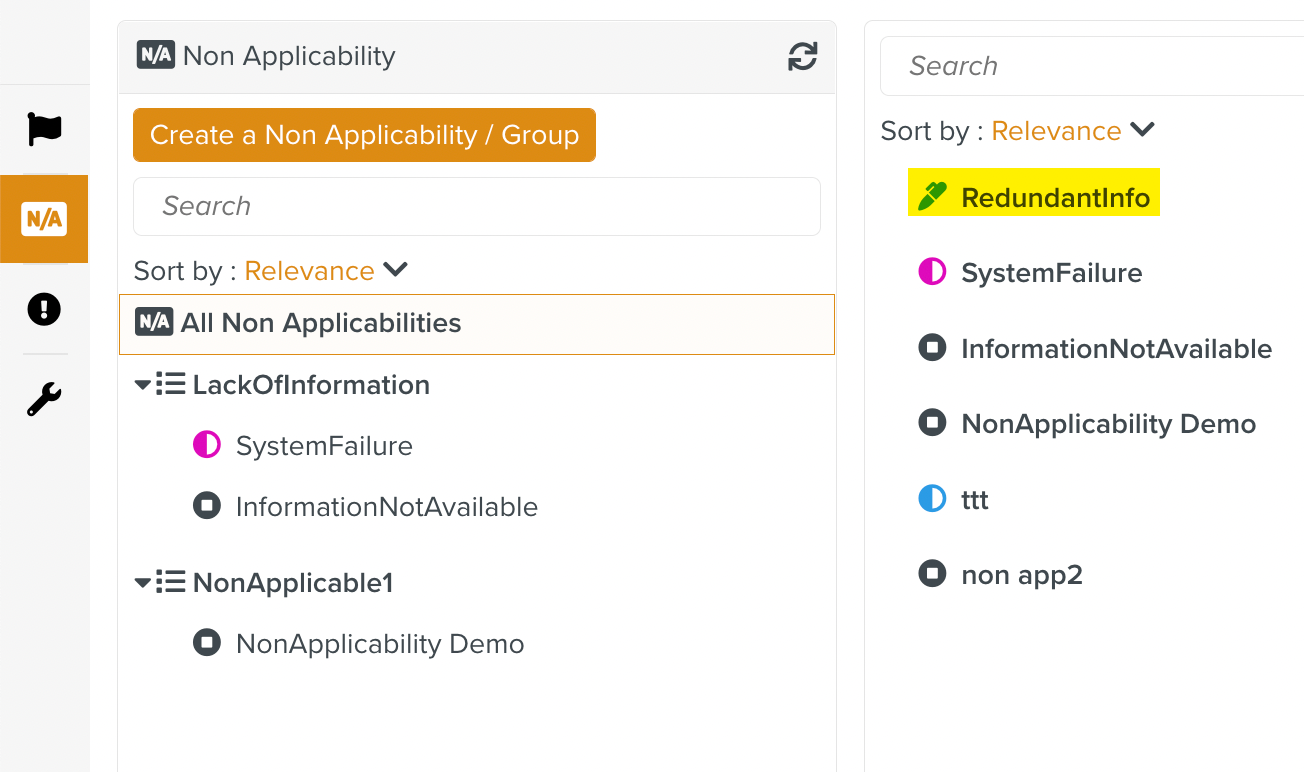
All the Non Applicability Groups created in the system are visible. To view only the list of Non Applicabilities irrespective of their Groups, click All Non Applicabilities as shown.
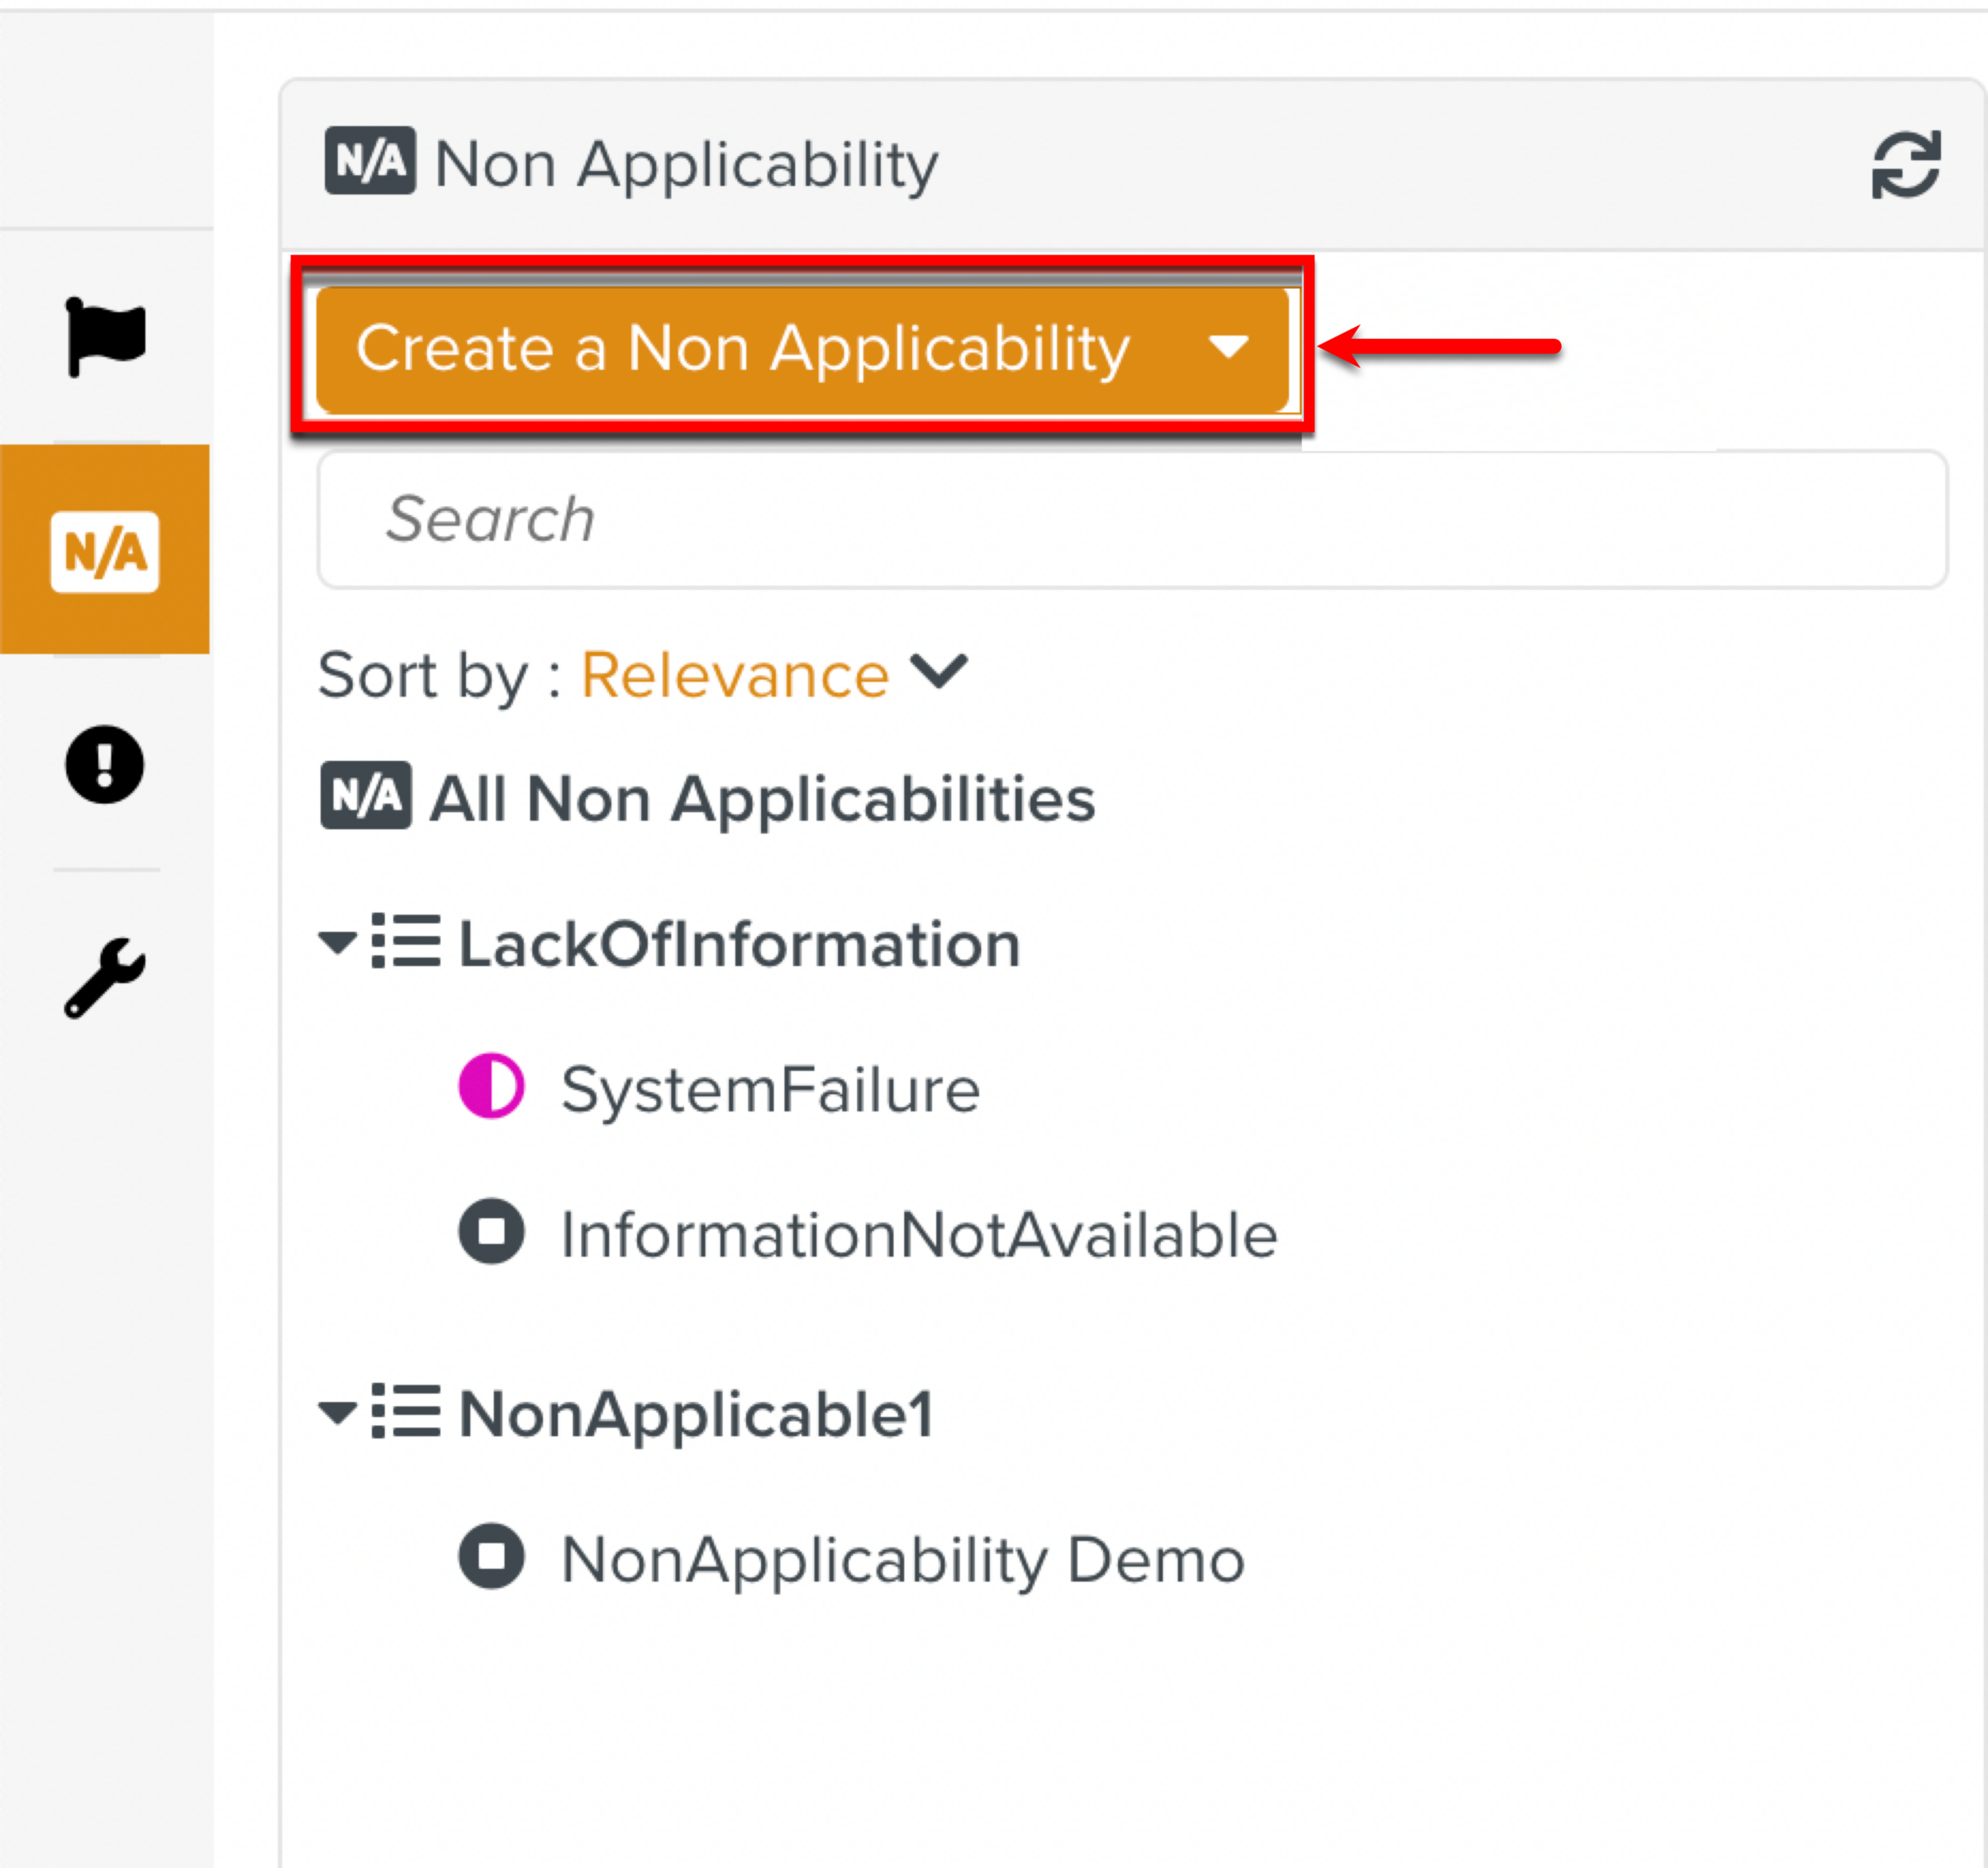
Click or expand the dropdown to click Create a Non Applicability option.
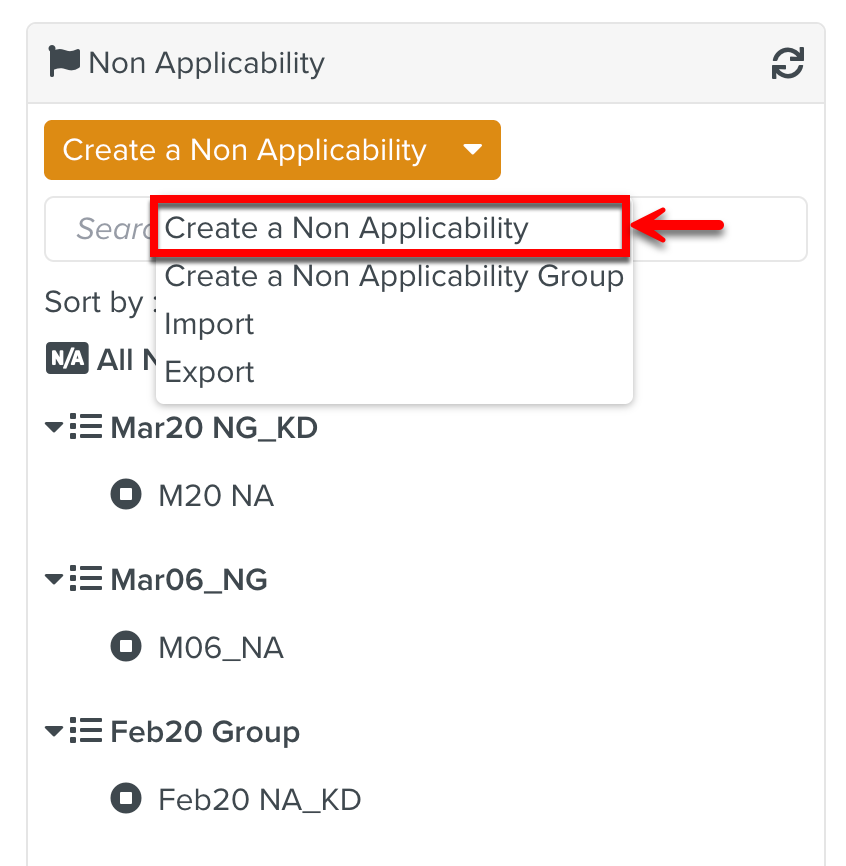
The below dialog appears.
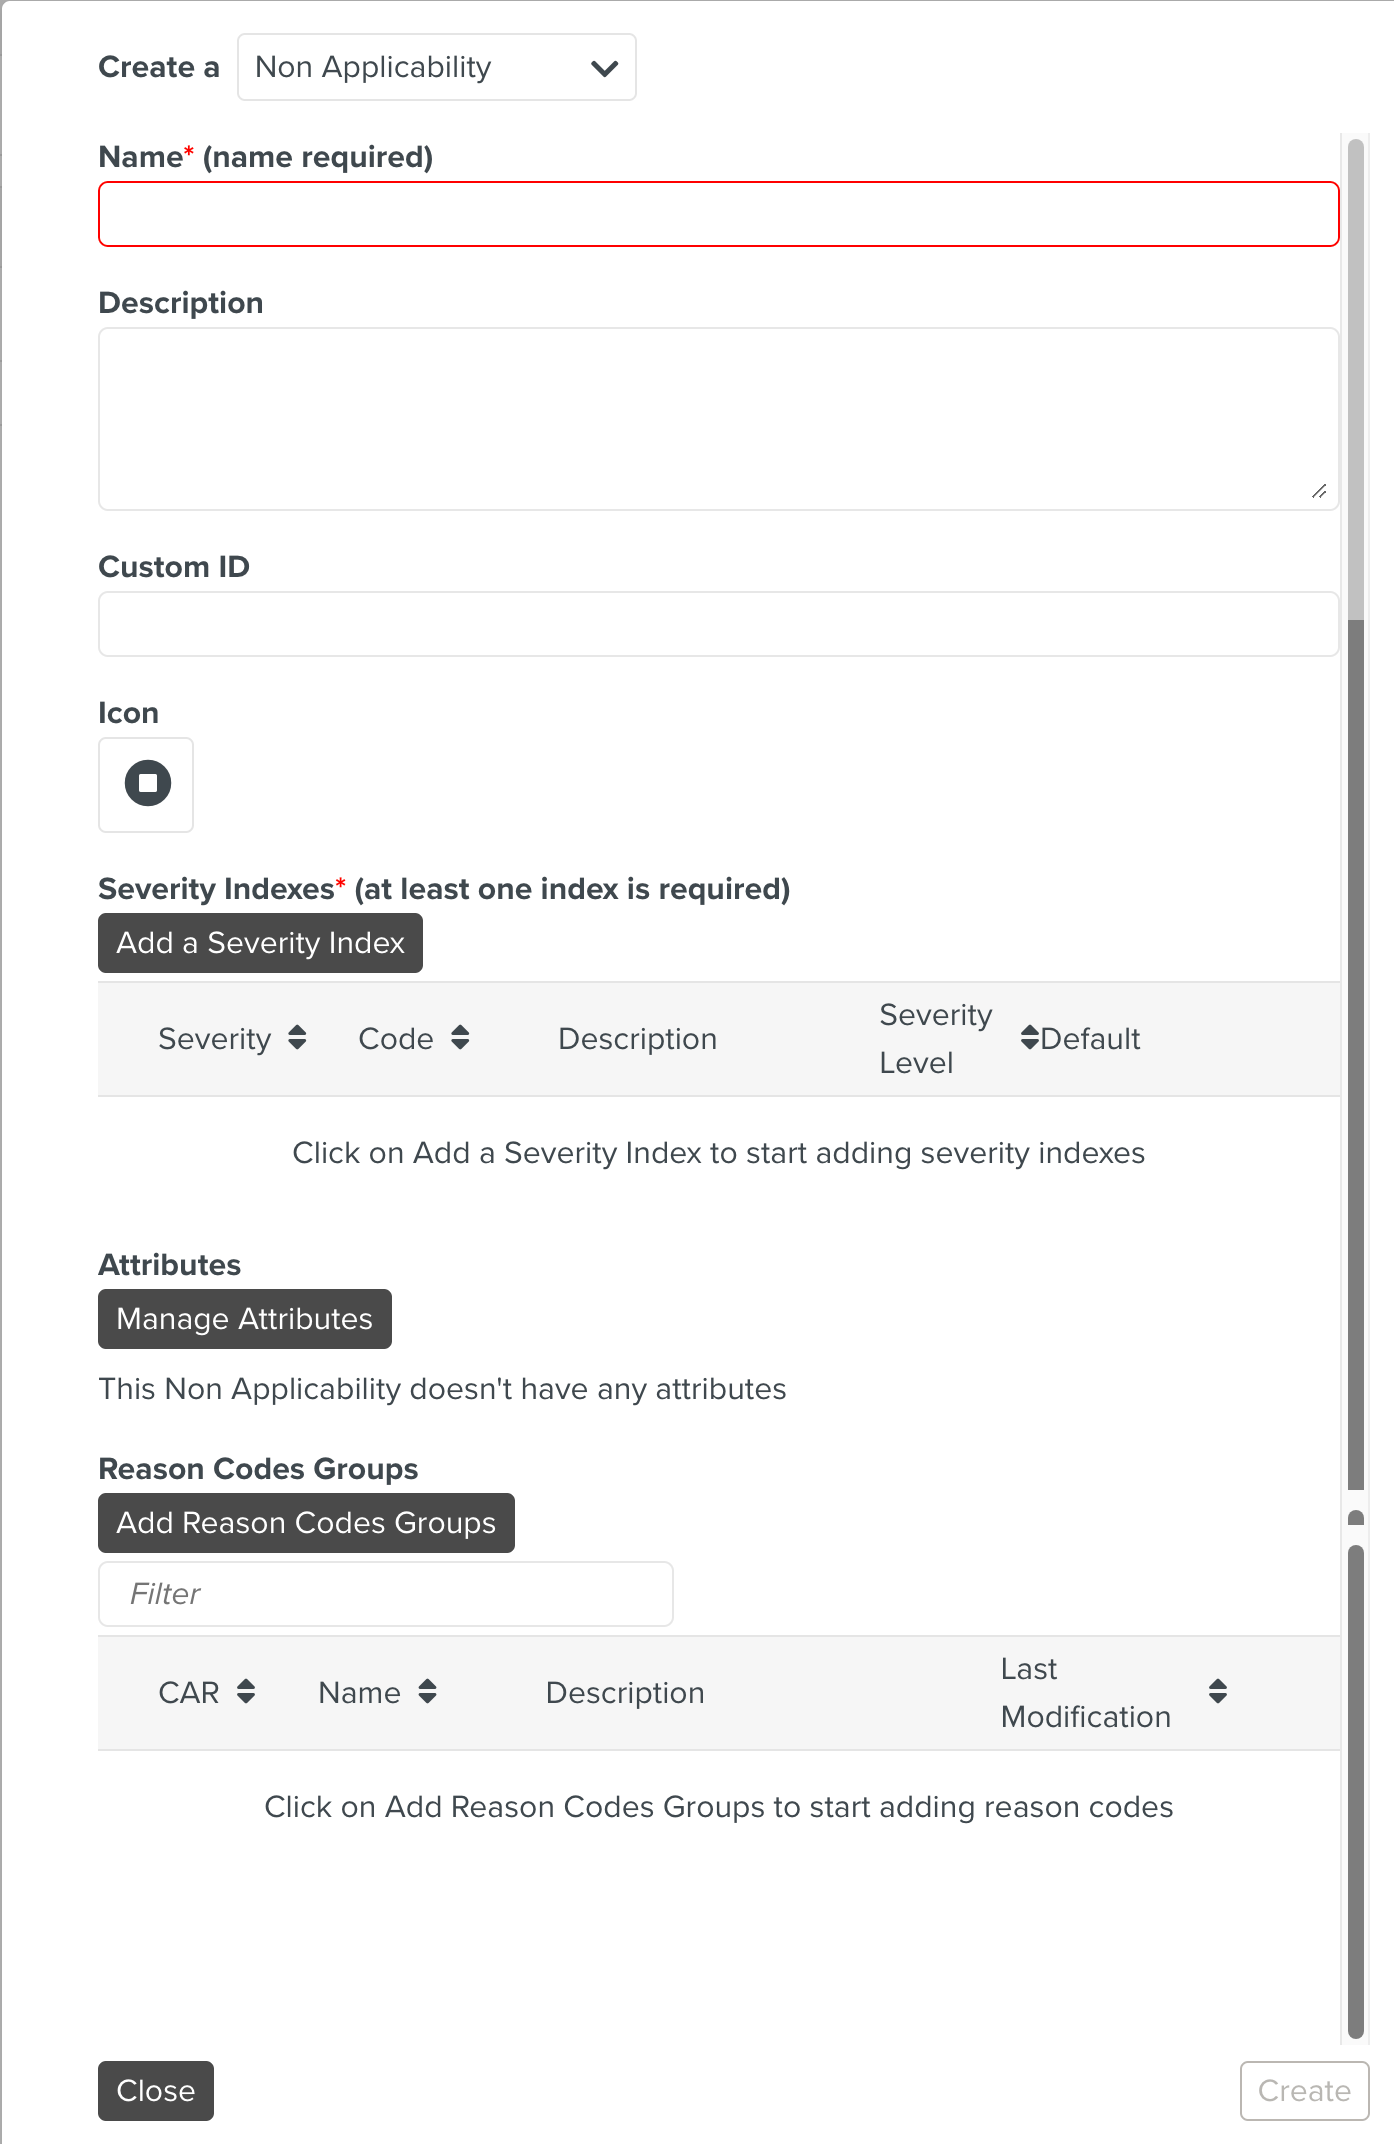
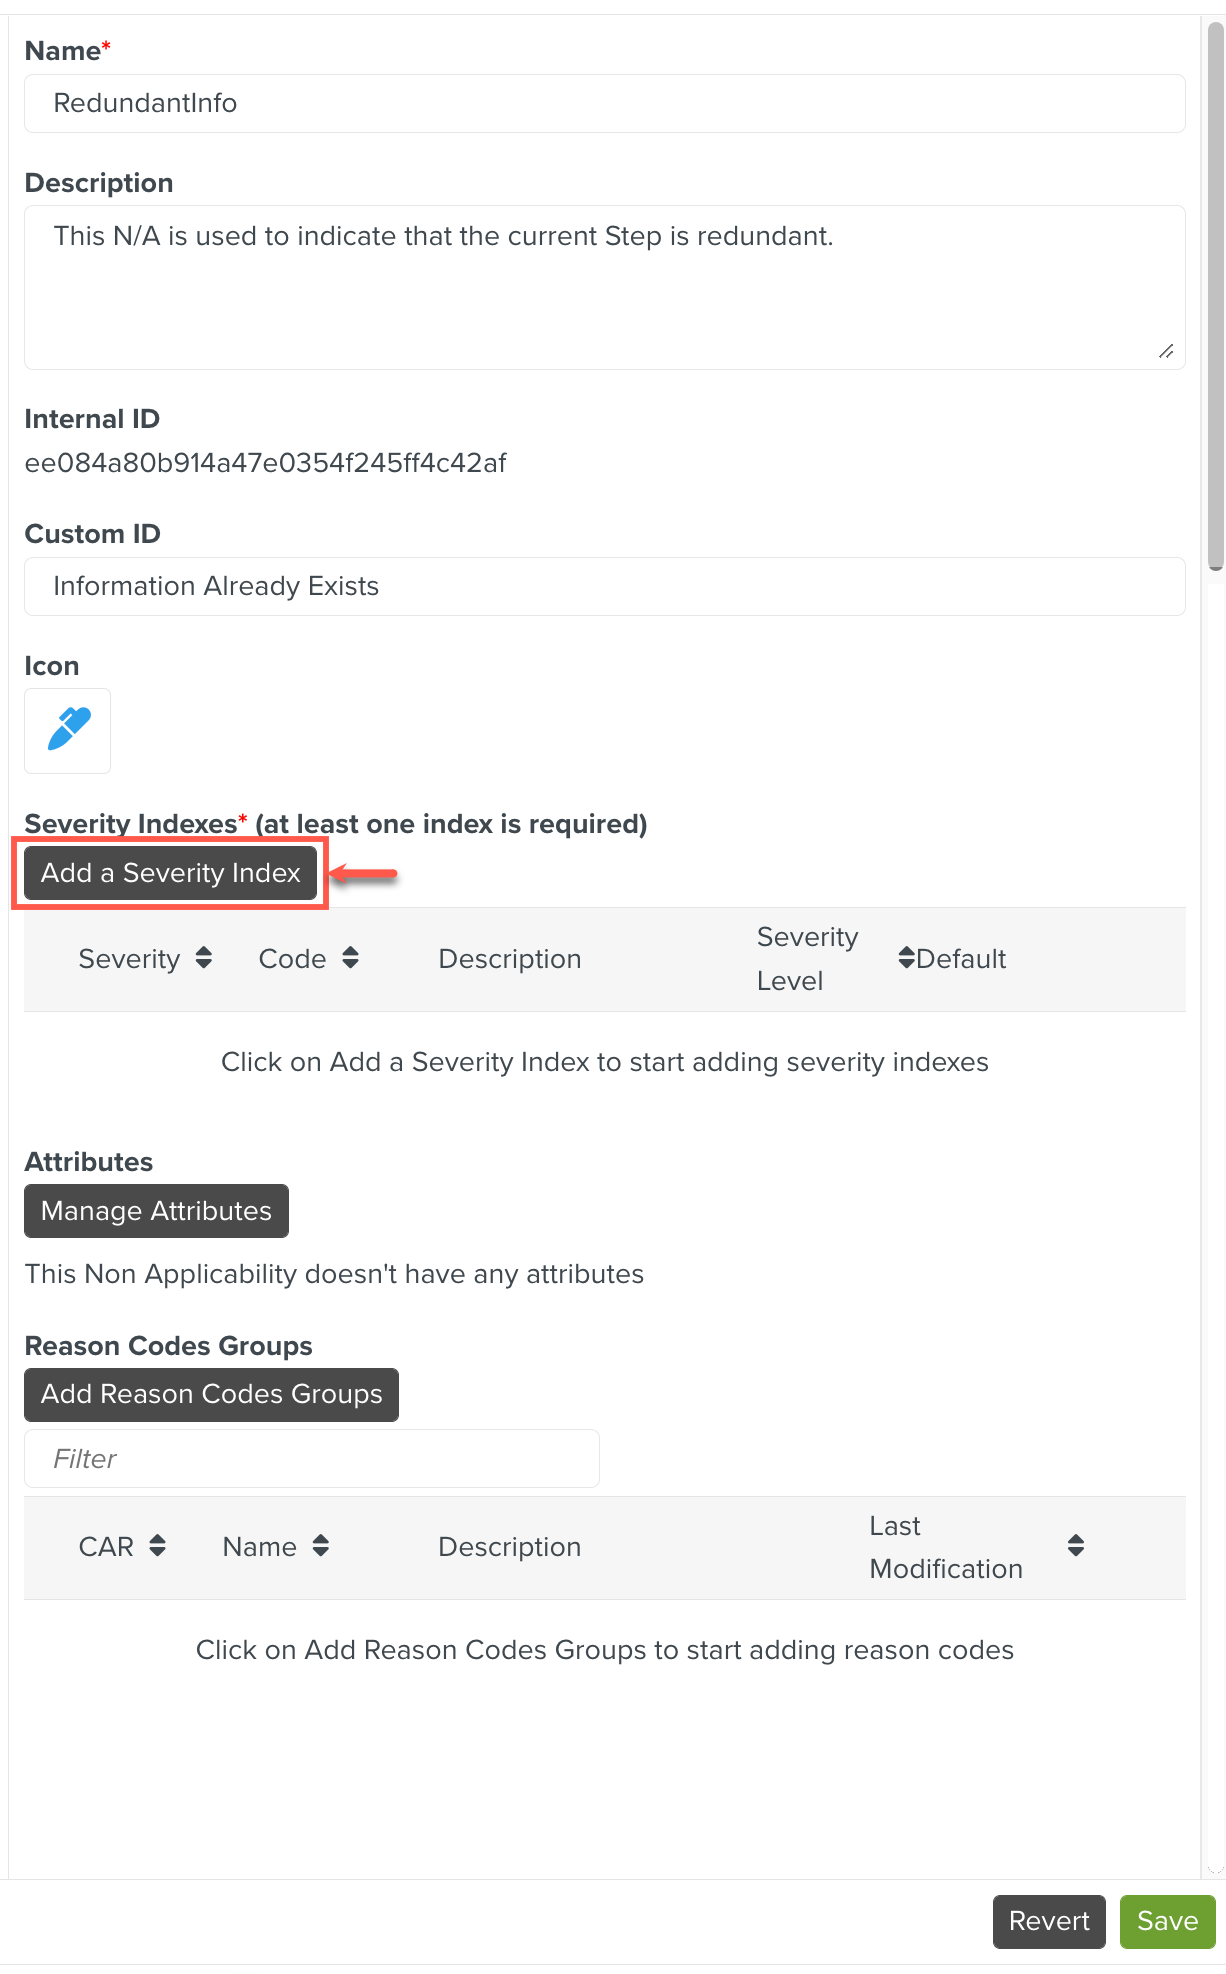
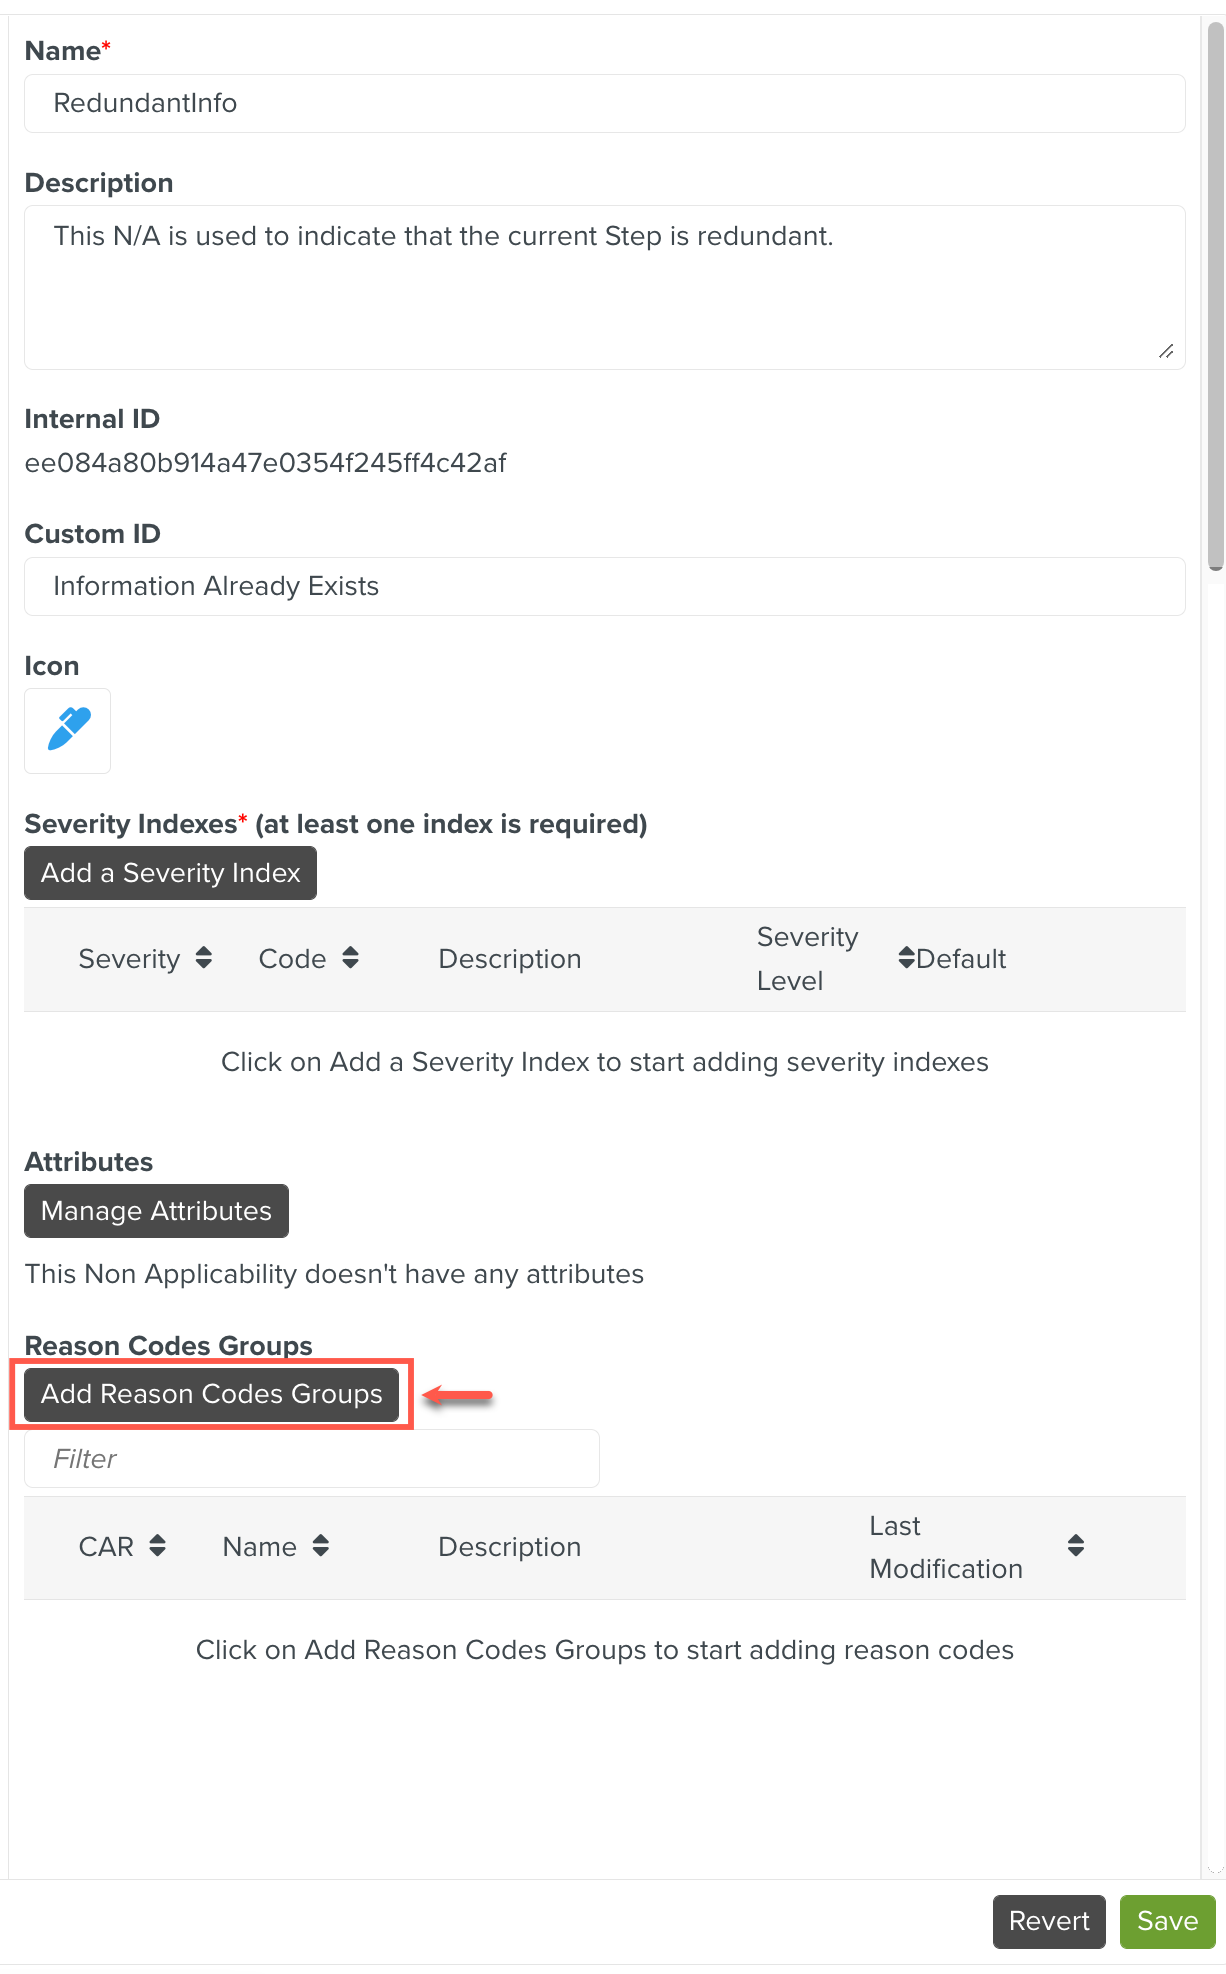
Enter a for the Non Applicability.
[Optional] Enter a for the Non Applicability.
[Optional] Enter a .
This allows a custom string to be associated with the Non Applicability. This is useful where the same Non Applicability might be referred to differently outside FieldLogs.
Note that the Custom ID Information Already Exists is linked to the RedundantInfo Non Applicability in the example below.
Note
Custom IDs should be unique across all Non Applicabilities.
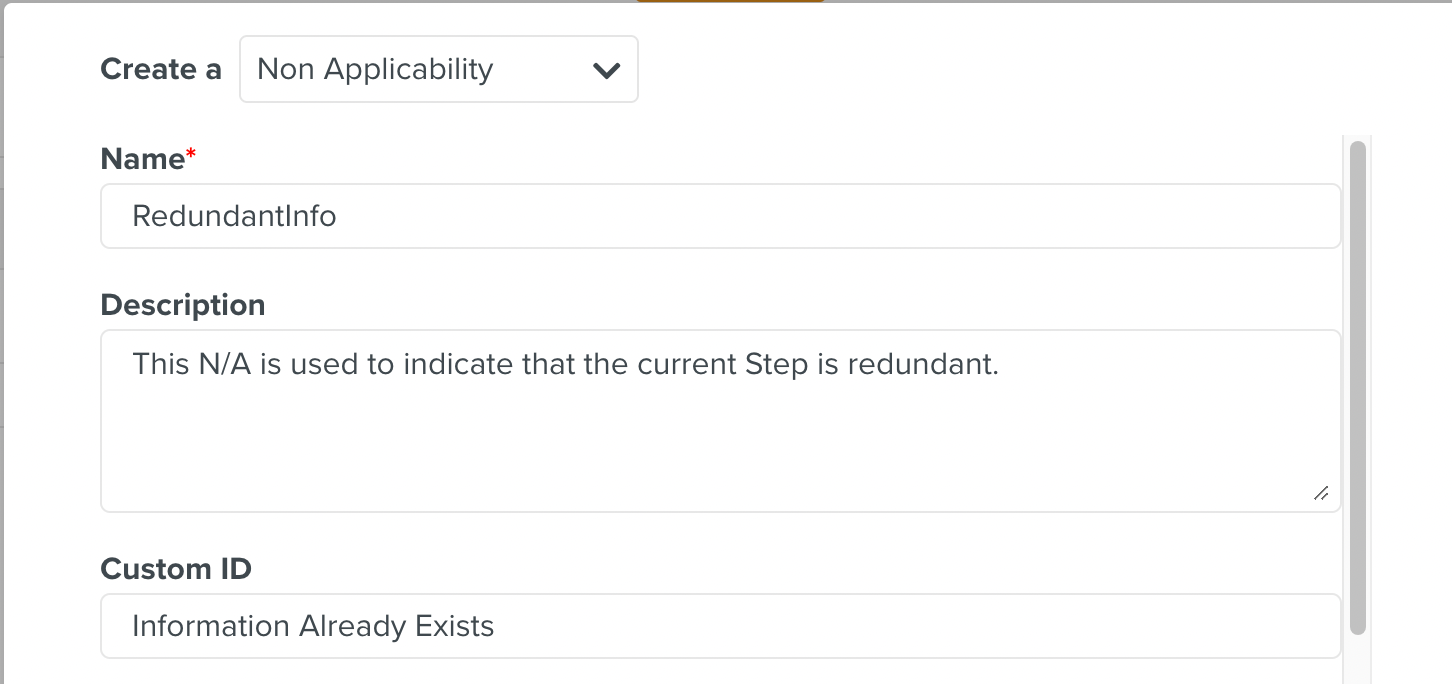
[Optional] Select an and a for the Non Applicability.
Click to add a Severity Index to the Non Applicability.
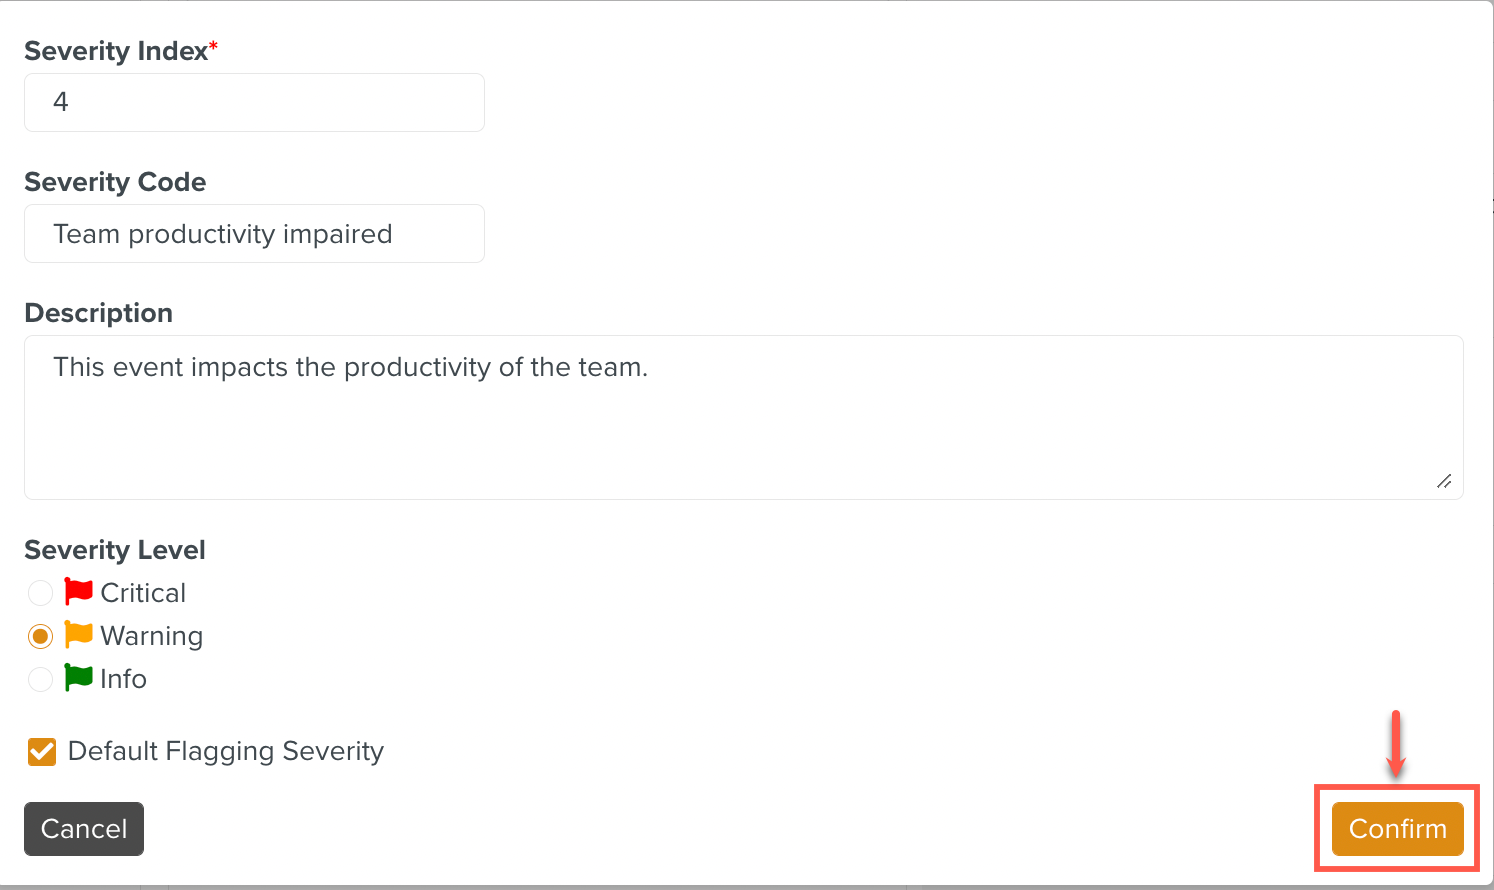
The Severity Index dialog appears. Enter the details of the Severity Index related to this Non Applicability and click .
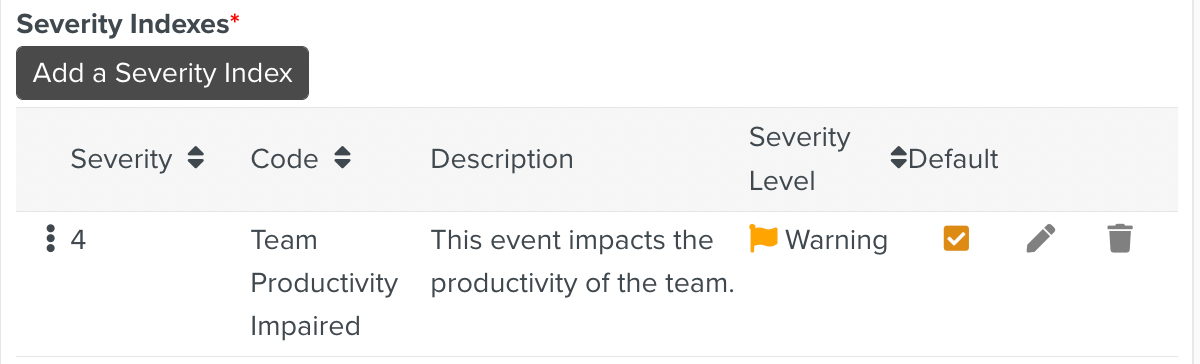
The Severity Index is added to the Non Applicability as shown below.
Click to add Attributes to the Non Applicability. These attributes appear on the Step at runtime.

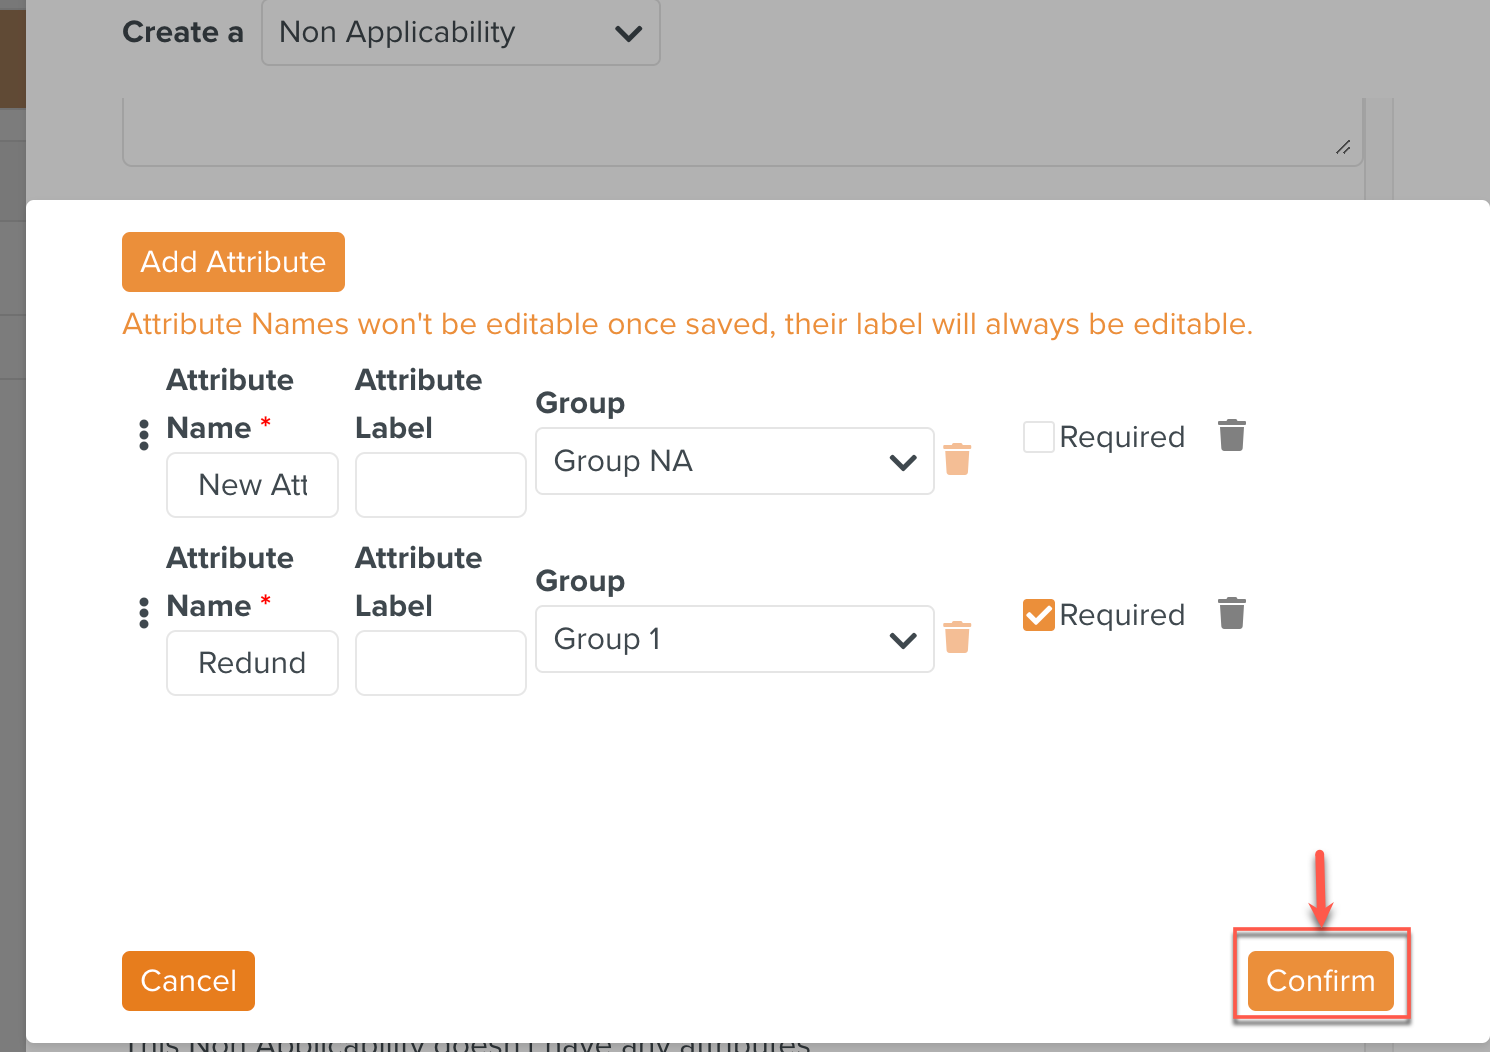
The Attributes dialog appears. Enter the Attribute details.
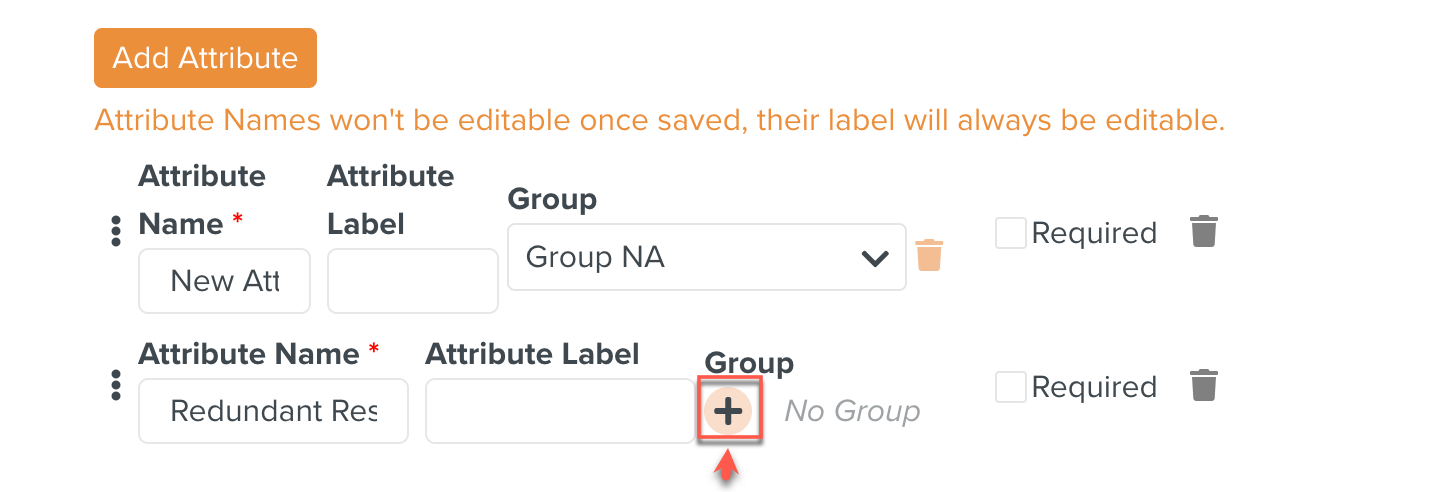
Click Add Attribute.
Enter Attribute Name.
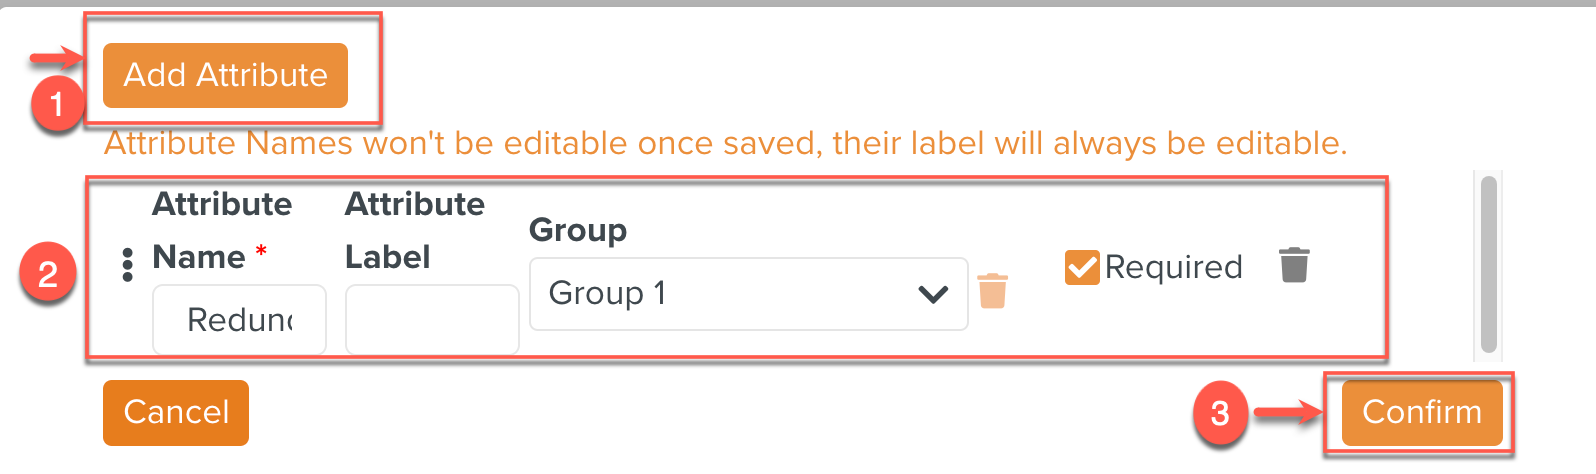
[Optional] Enter Attribute Label.
[Optional] Click the + icon as shown below, to categorize the Attributes based on a Group.
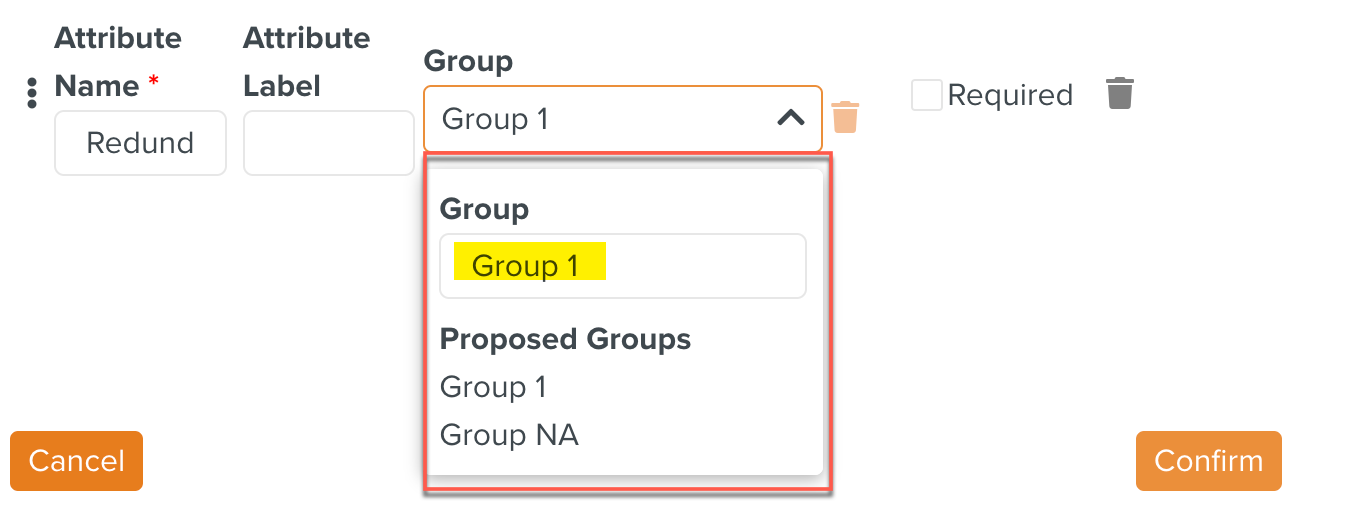
[Optional] Select an existing Group from the dropdown or create a new Group.
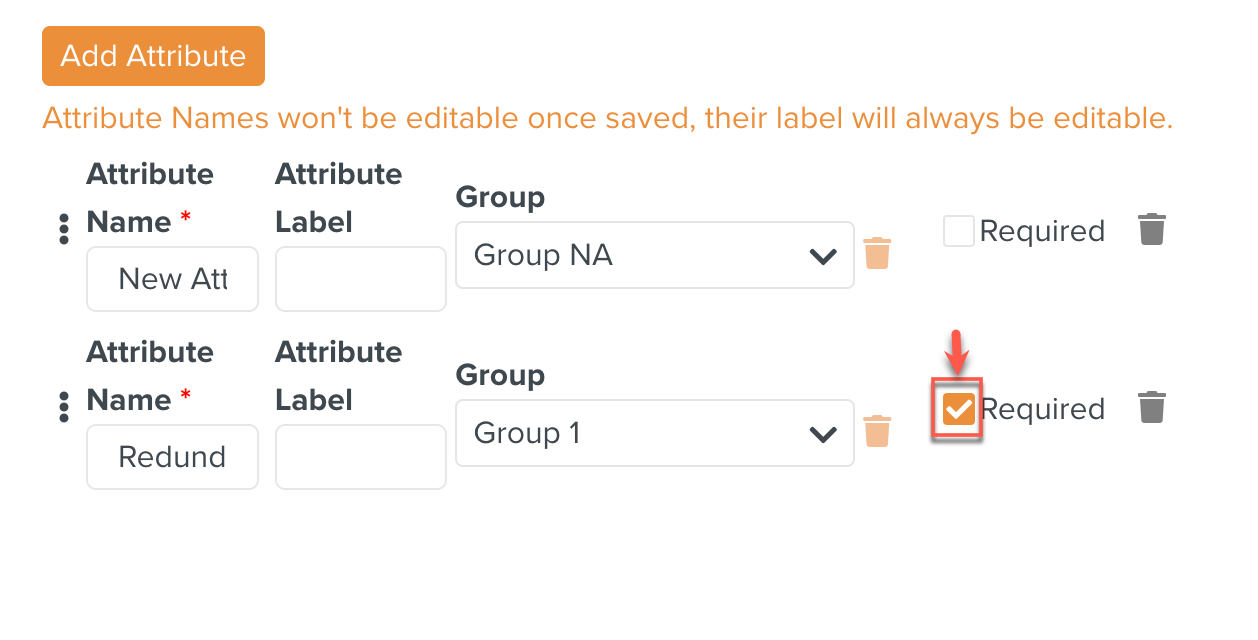
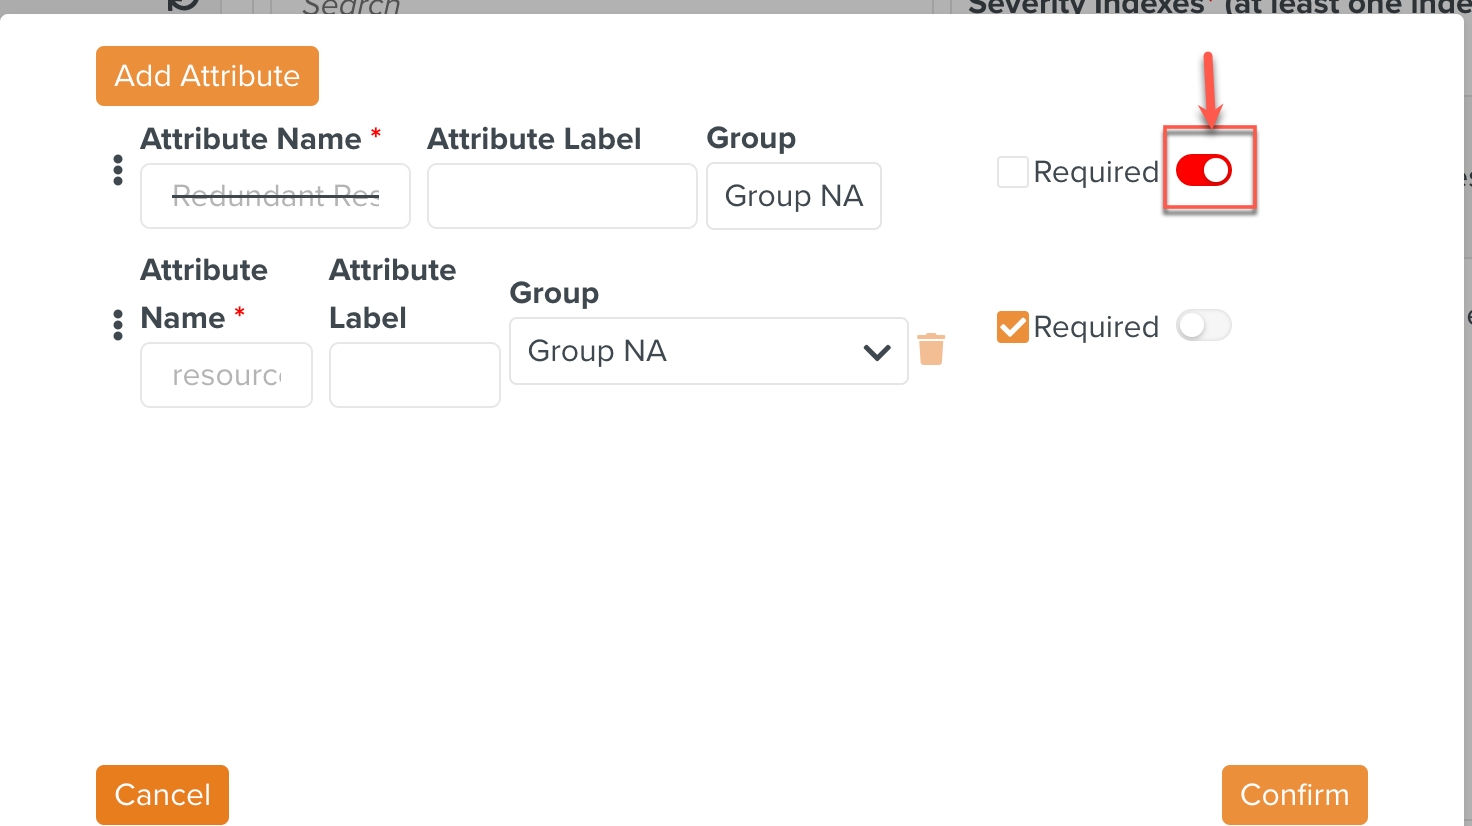
[Optional] Check Required as shown below to make an Attribute mandatory.
[Optional] Click the Delete icon as shown below to delete the Attribute.
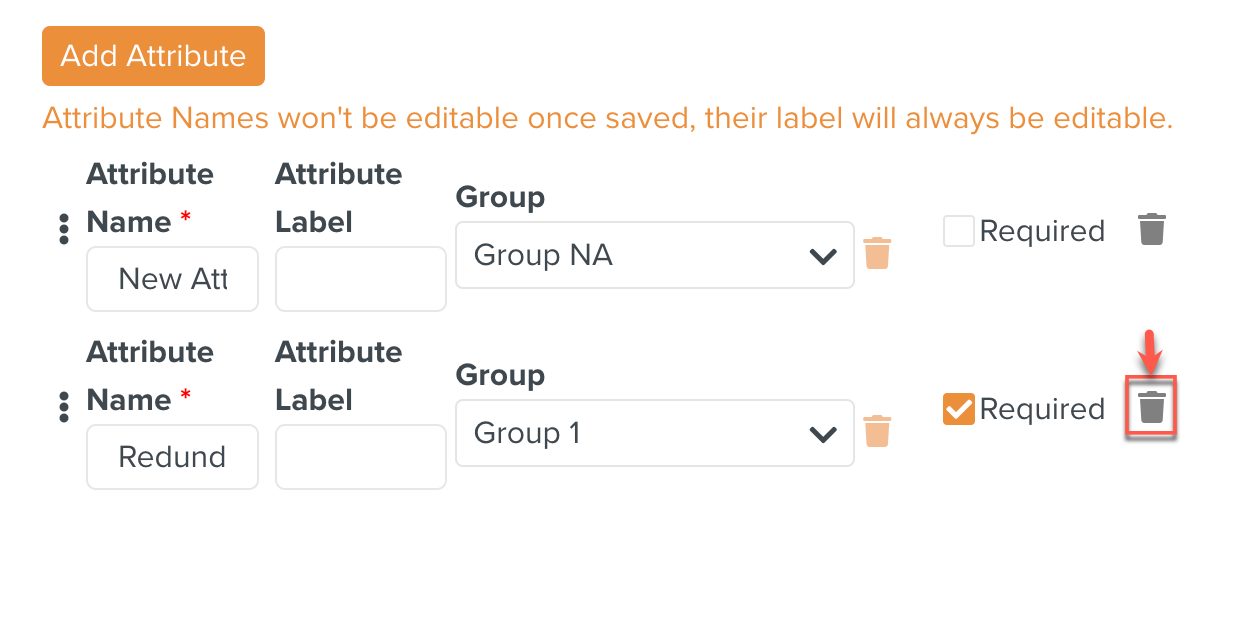
Click to save the Attributes added.
The Attributes are saved.
Click .
The dialog to select existing Reason Code Groups appears. Select a Reason Code Group and click as shown.
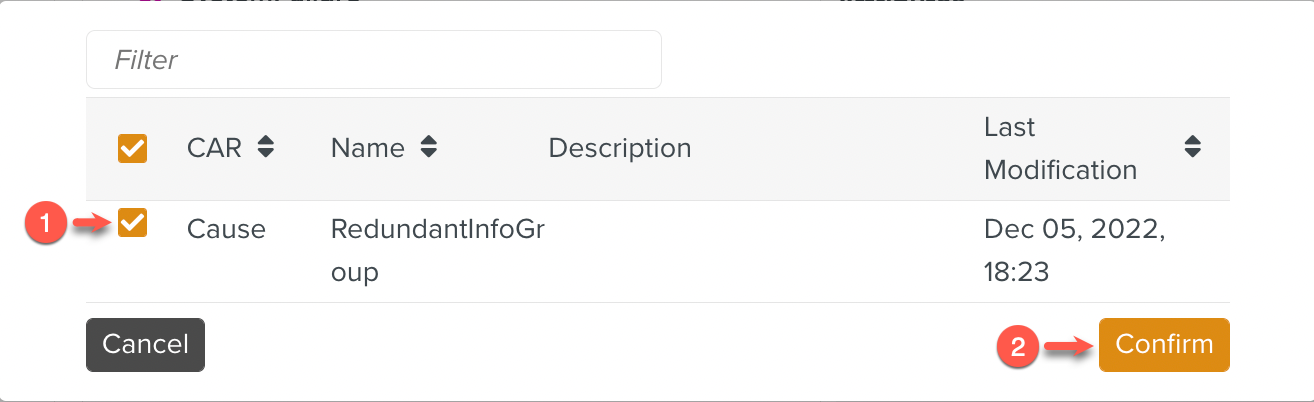
Click .
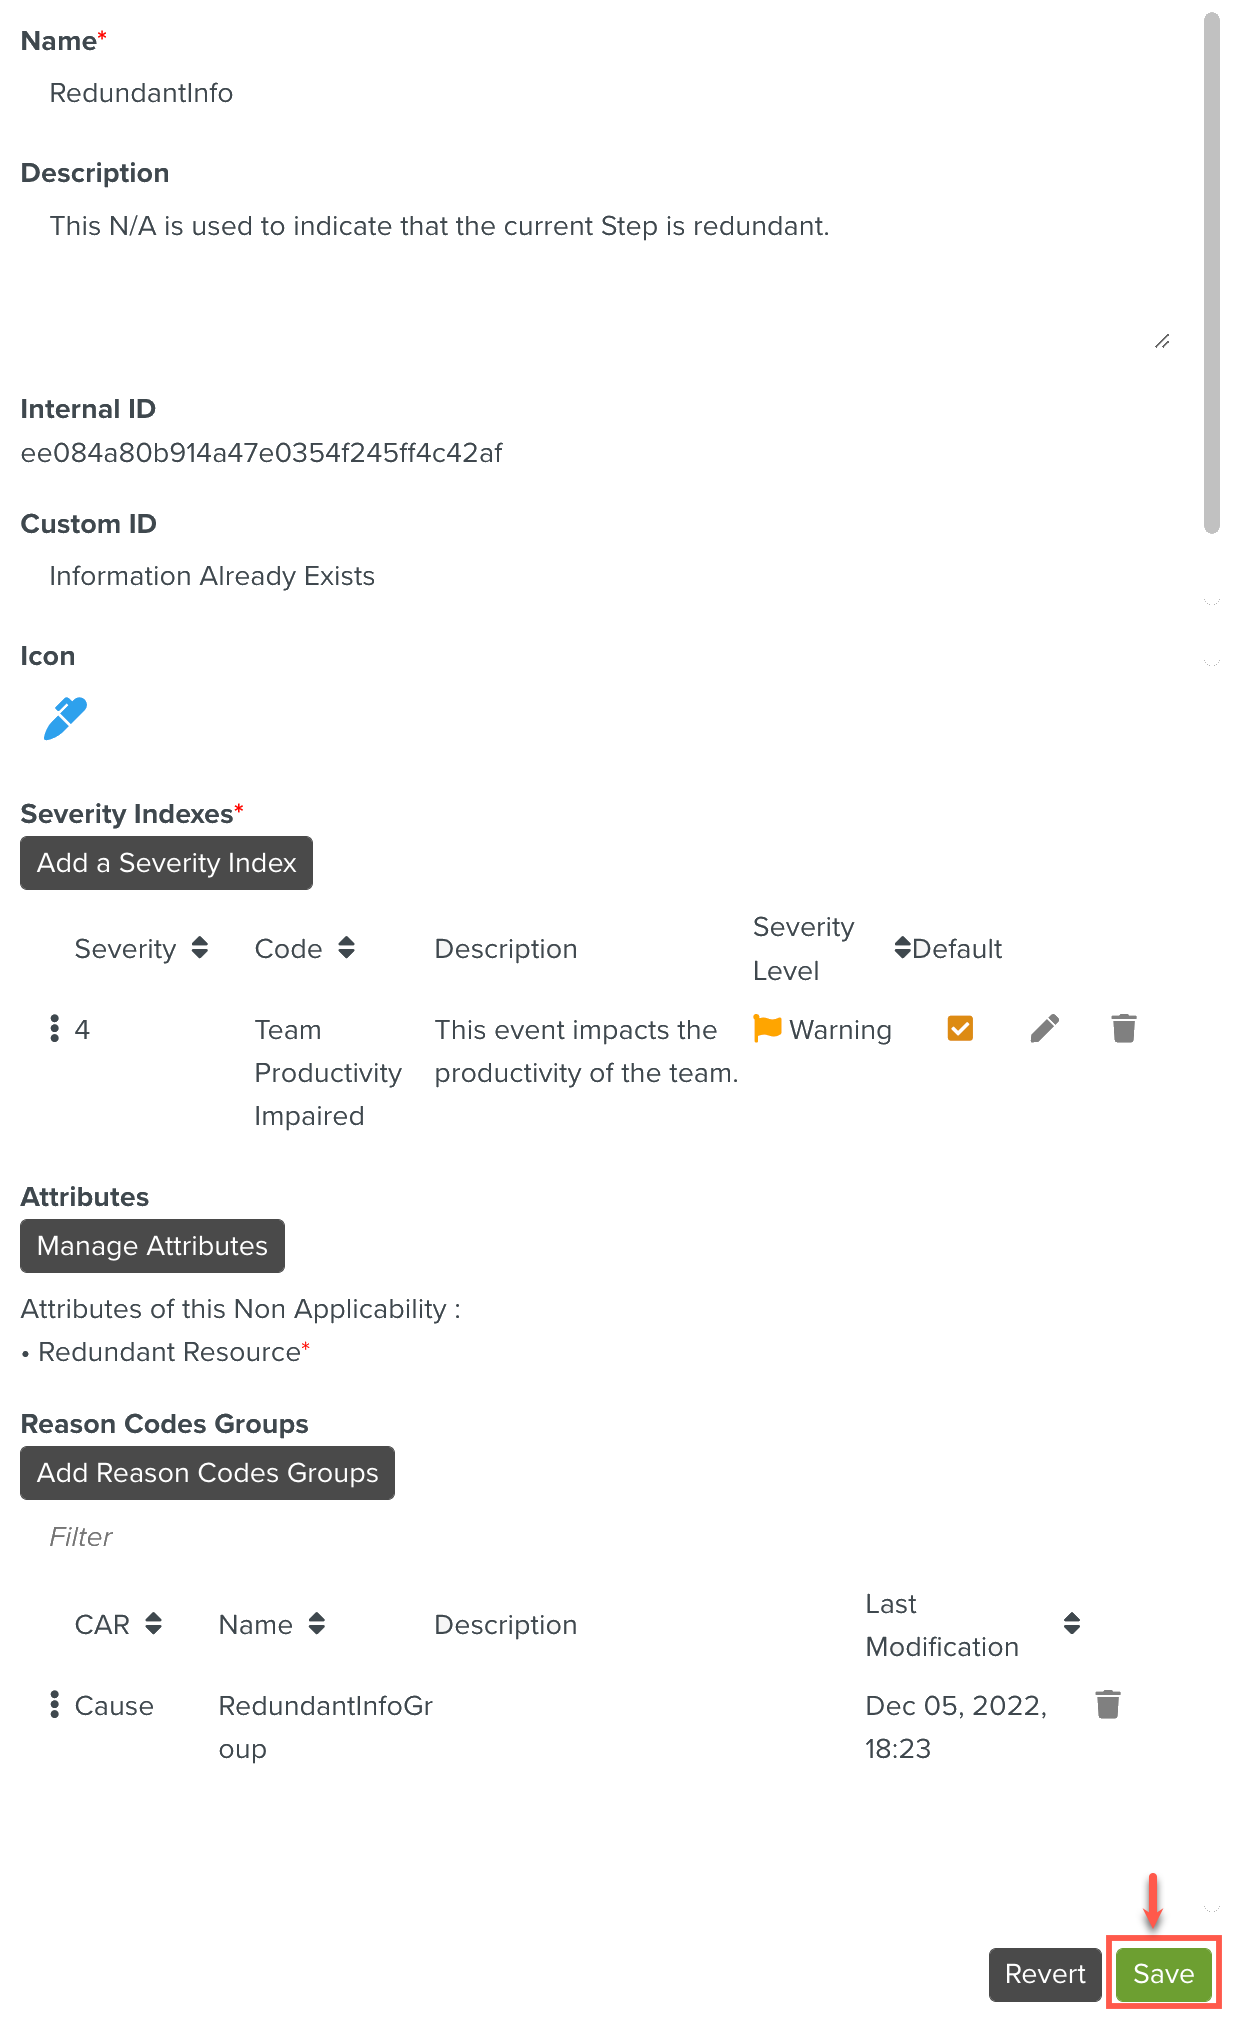
The Non Applicability is created as shown below.
Note
If a Non Applicability is not associated with a Group, it is listed under All Non Applicabilities. They appear in a separate pane as seen above.
Important
After creating the Non Applicability, any of its Attributes can be deprecated, using the toggle button as shown in the image.
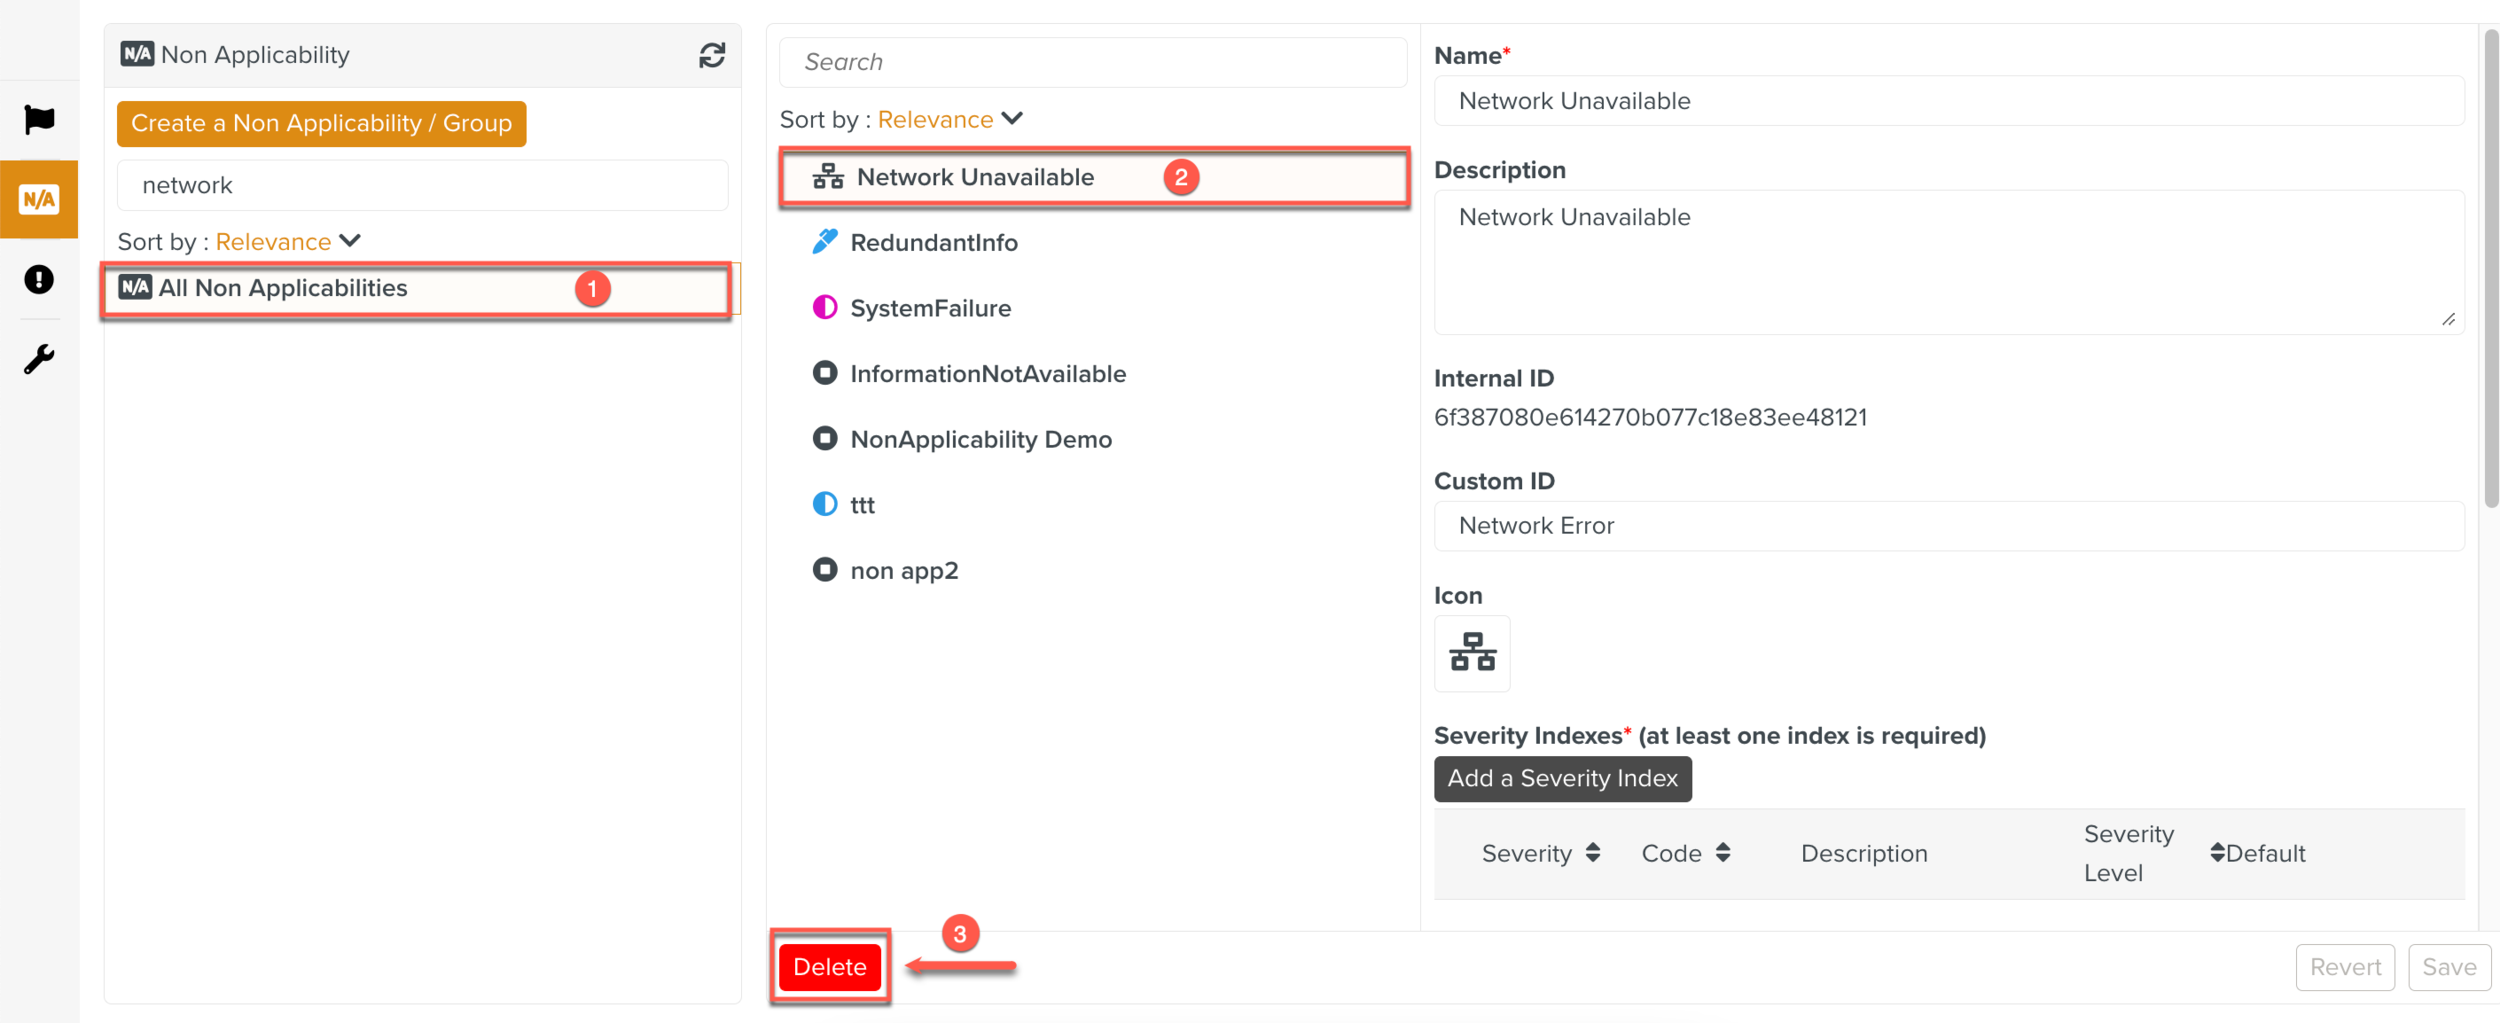
To delete a Non Applicability, select the Non Applicability and click as shown below.
 |
Non Applicabilities that are part of a Non Applicability Group cannot be deleted. The button appears disabled as shown below.
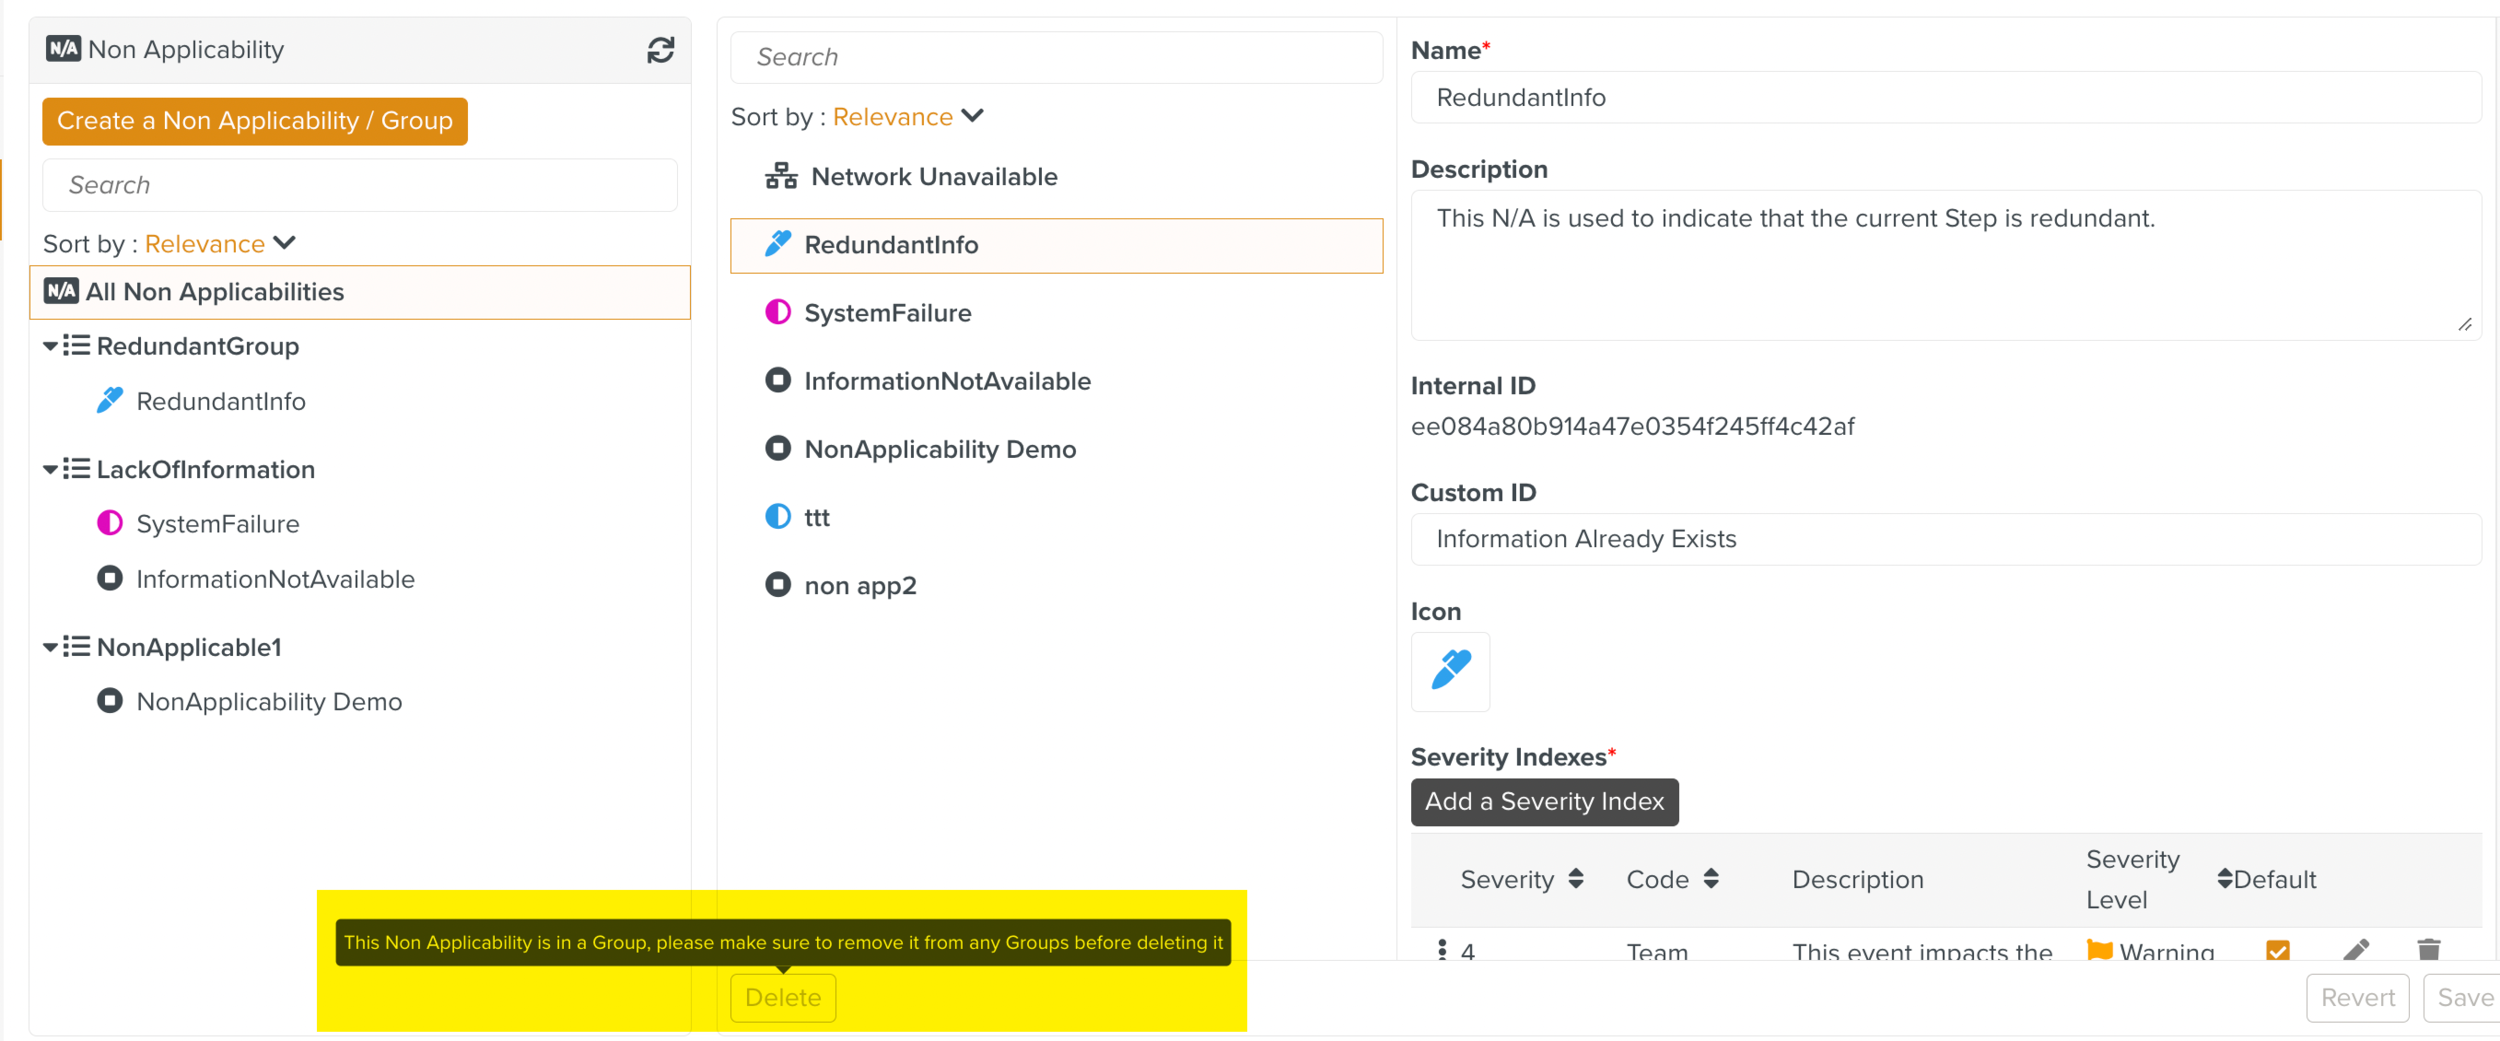 |
You can delete the Non Applicability after removing it from the Non Applicability Groups it is part of.
To create a Non Applicability Group:
On the main menu, go to > > .
The page Non Applicability opens.
Expand the Create a Non Applicability dropdown to select Create a Non Applicability Group option.
The Non Applicability Group dialog appears.
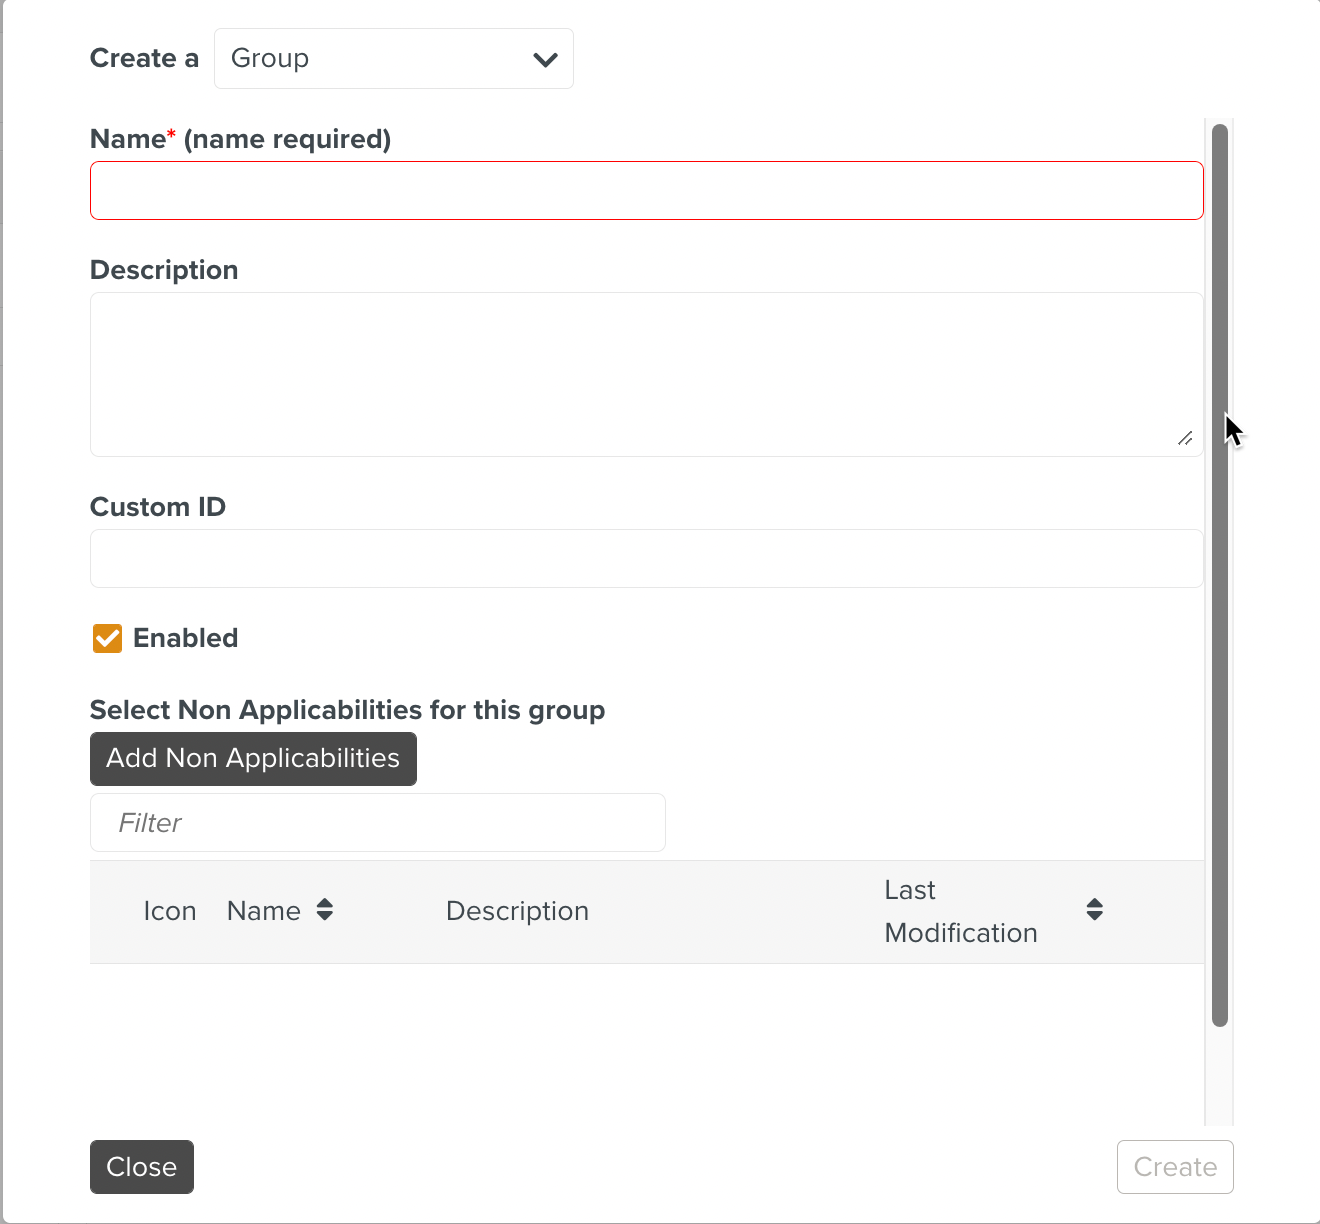
Enter a Name for the Non Applicability Group. This is a mandatory field.
[Optional] Enter Description.
[Optional] Enter Custom ID. This ID associates the current Non Applicability Group in FieldLogs to a string that is used to refer to the same Non Applicability outside FieldLogs.
Check Enabled. If this is not checked, the Non Applicability Group will not be visible at runtime.
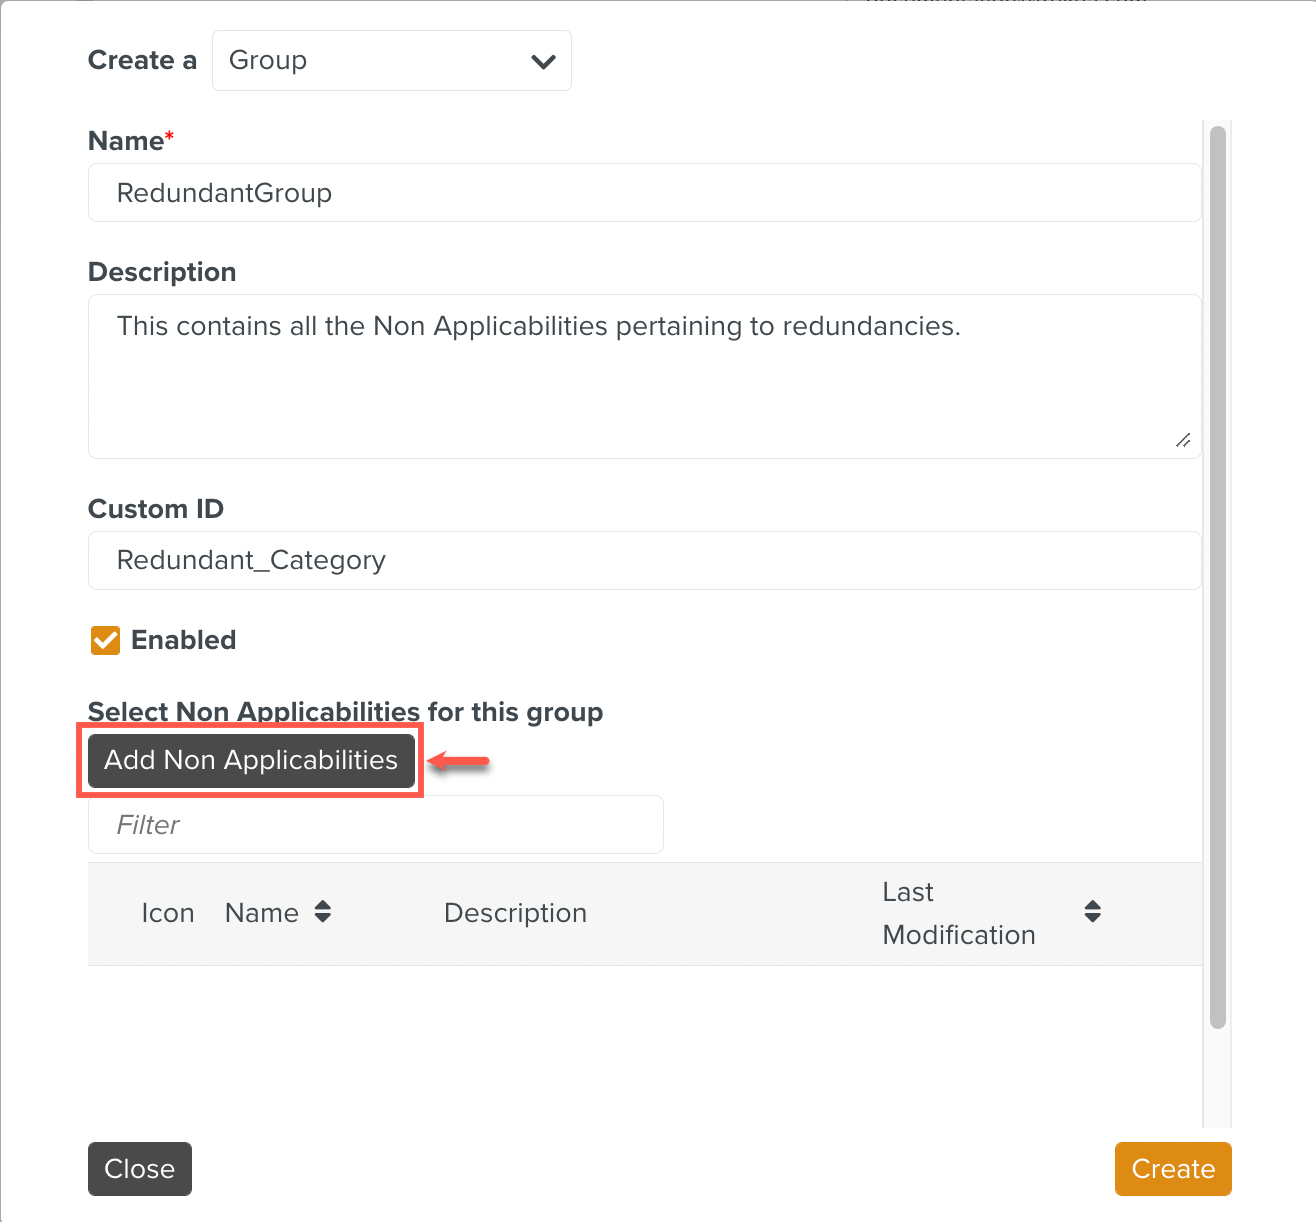
To add Non Applicabilities to add to this Non Applicability Group, click .
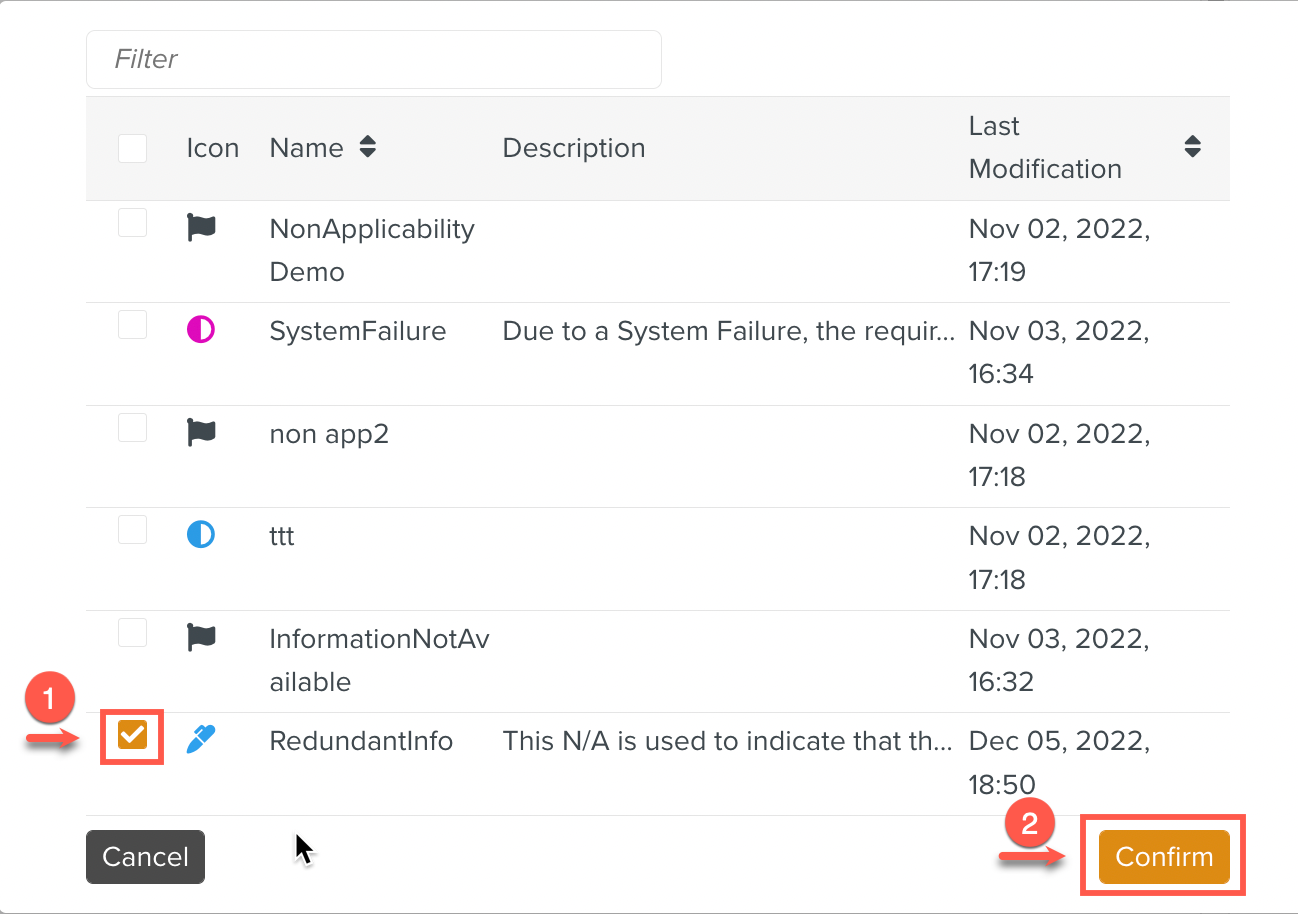
The list of available Non Applicabilities appears. Check the Non Applicabilities to add to the group and click .
The selected Non Applicabilities are added.
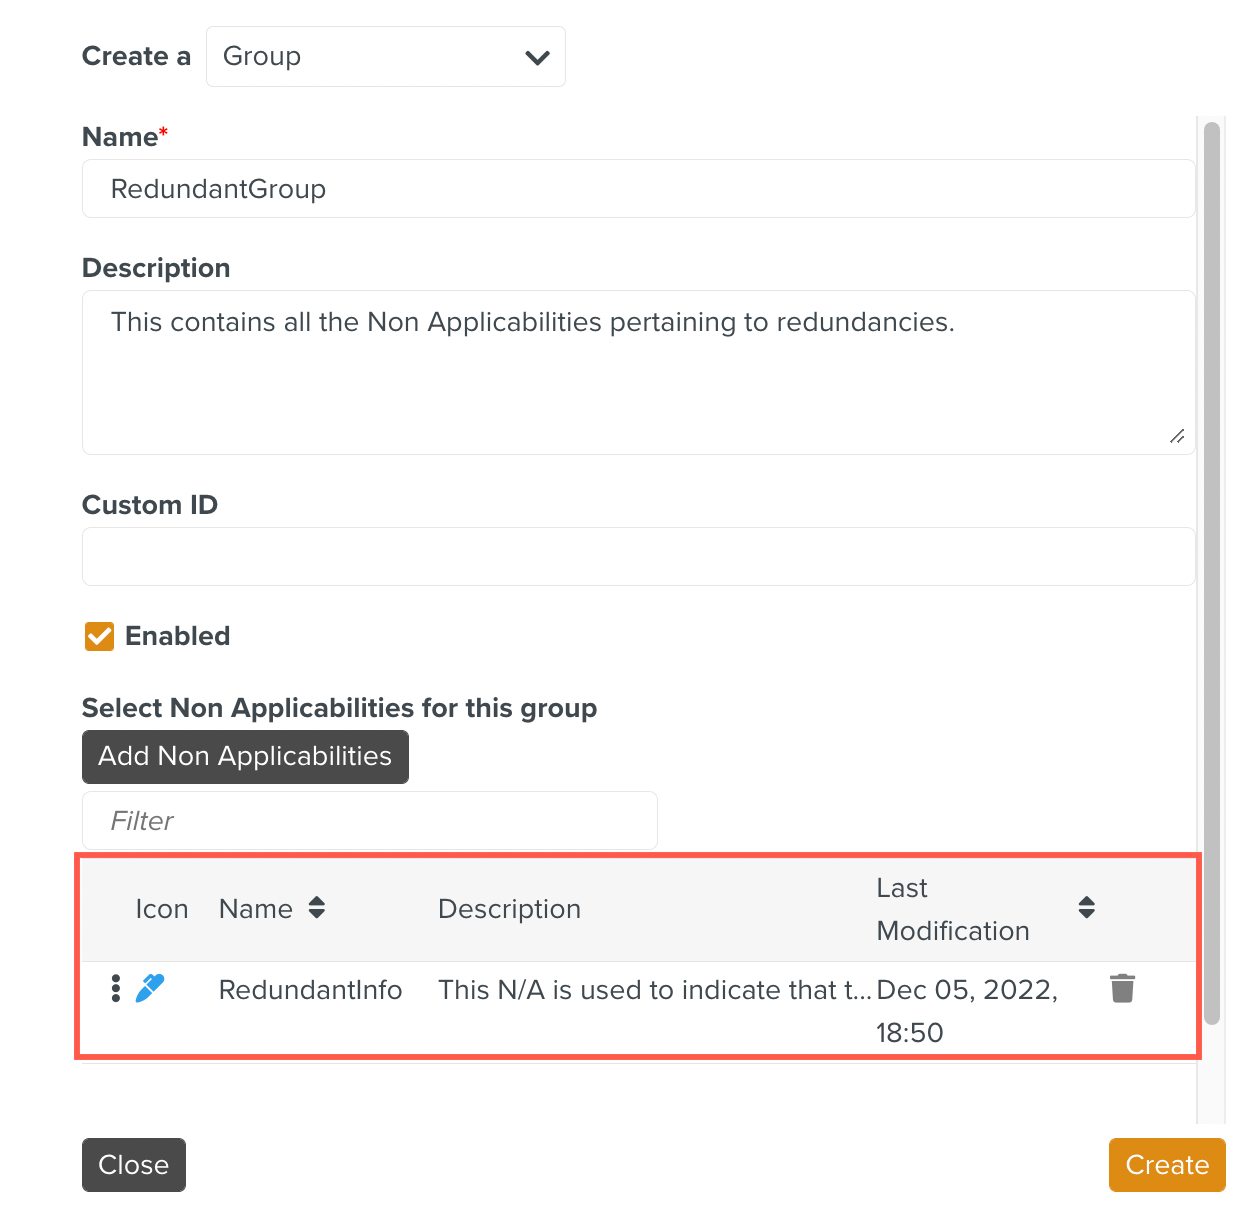
Click .
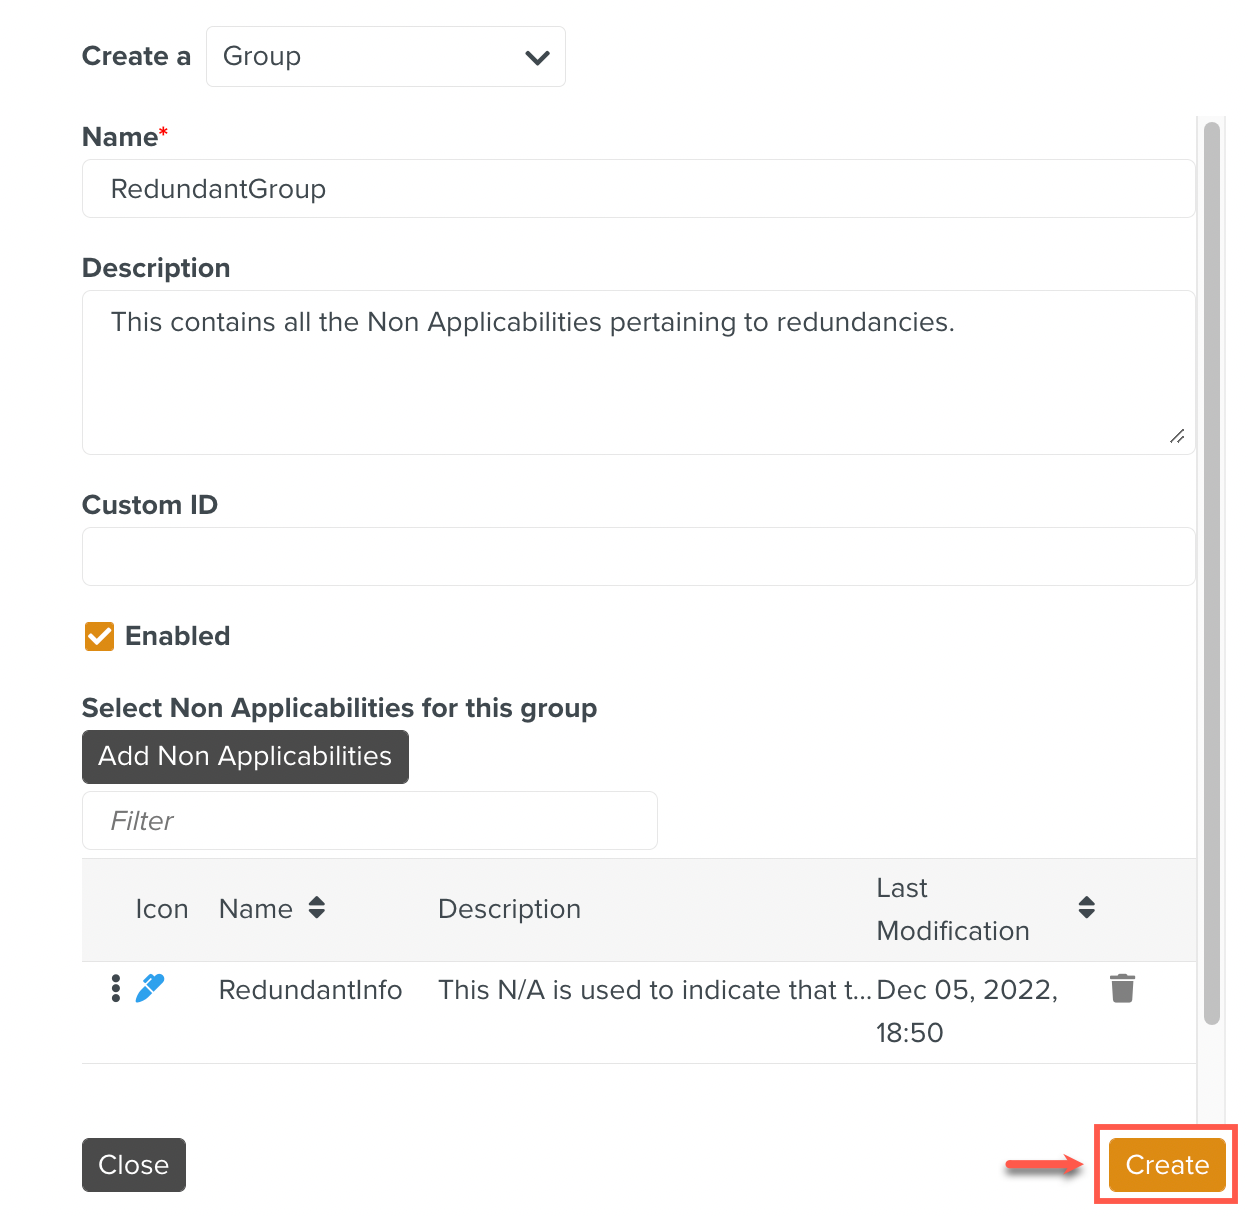
The Non Applicability Group is created as seen below.
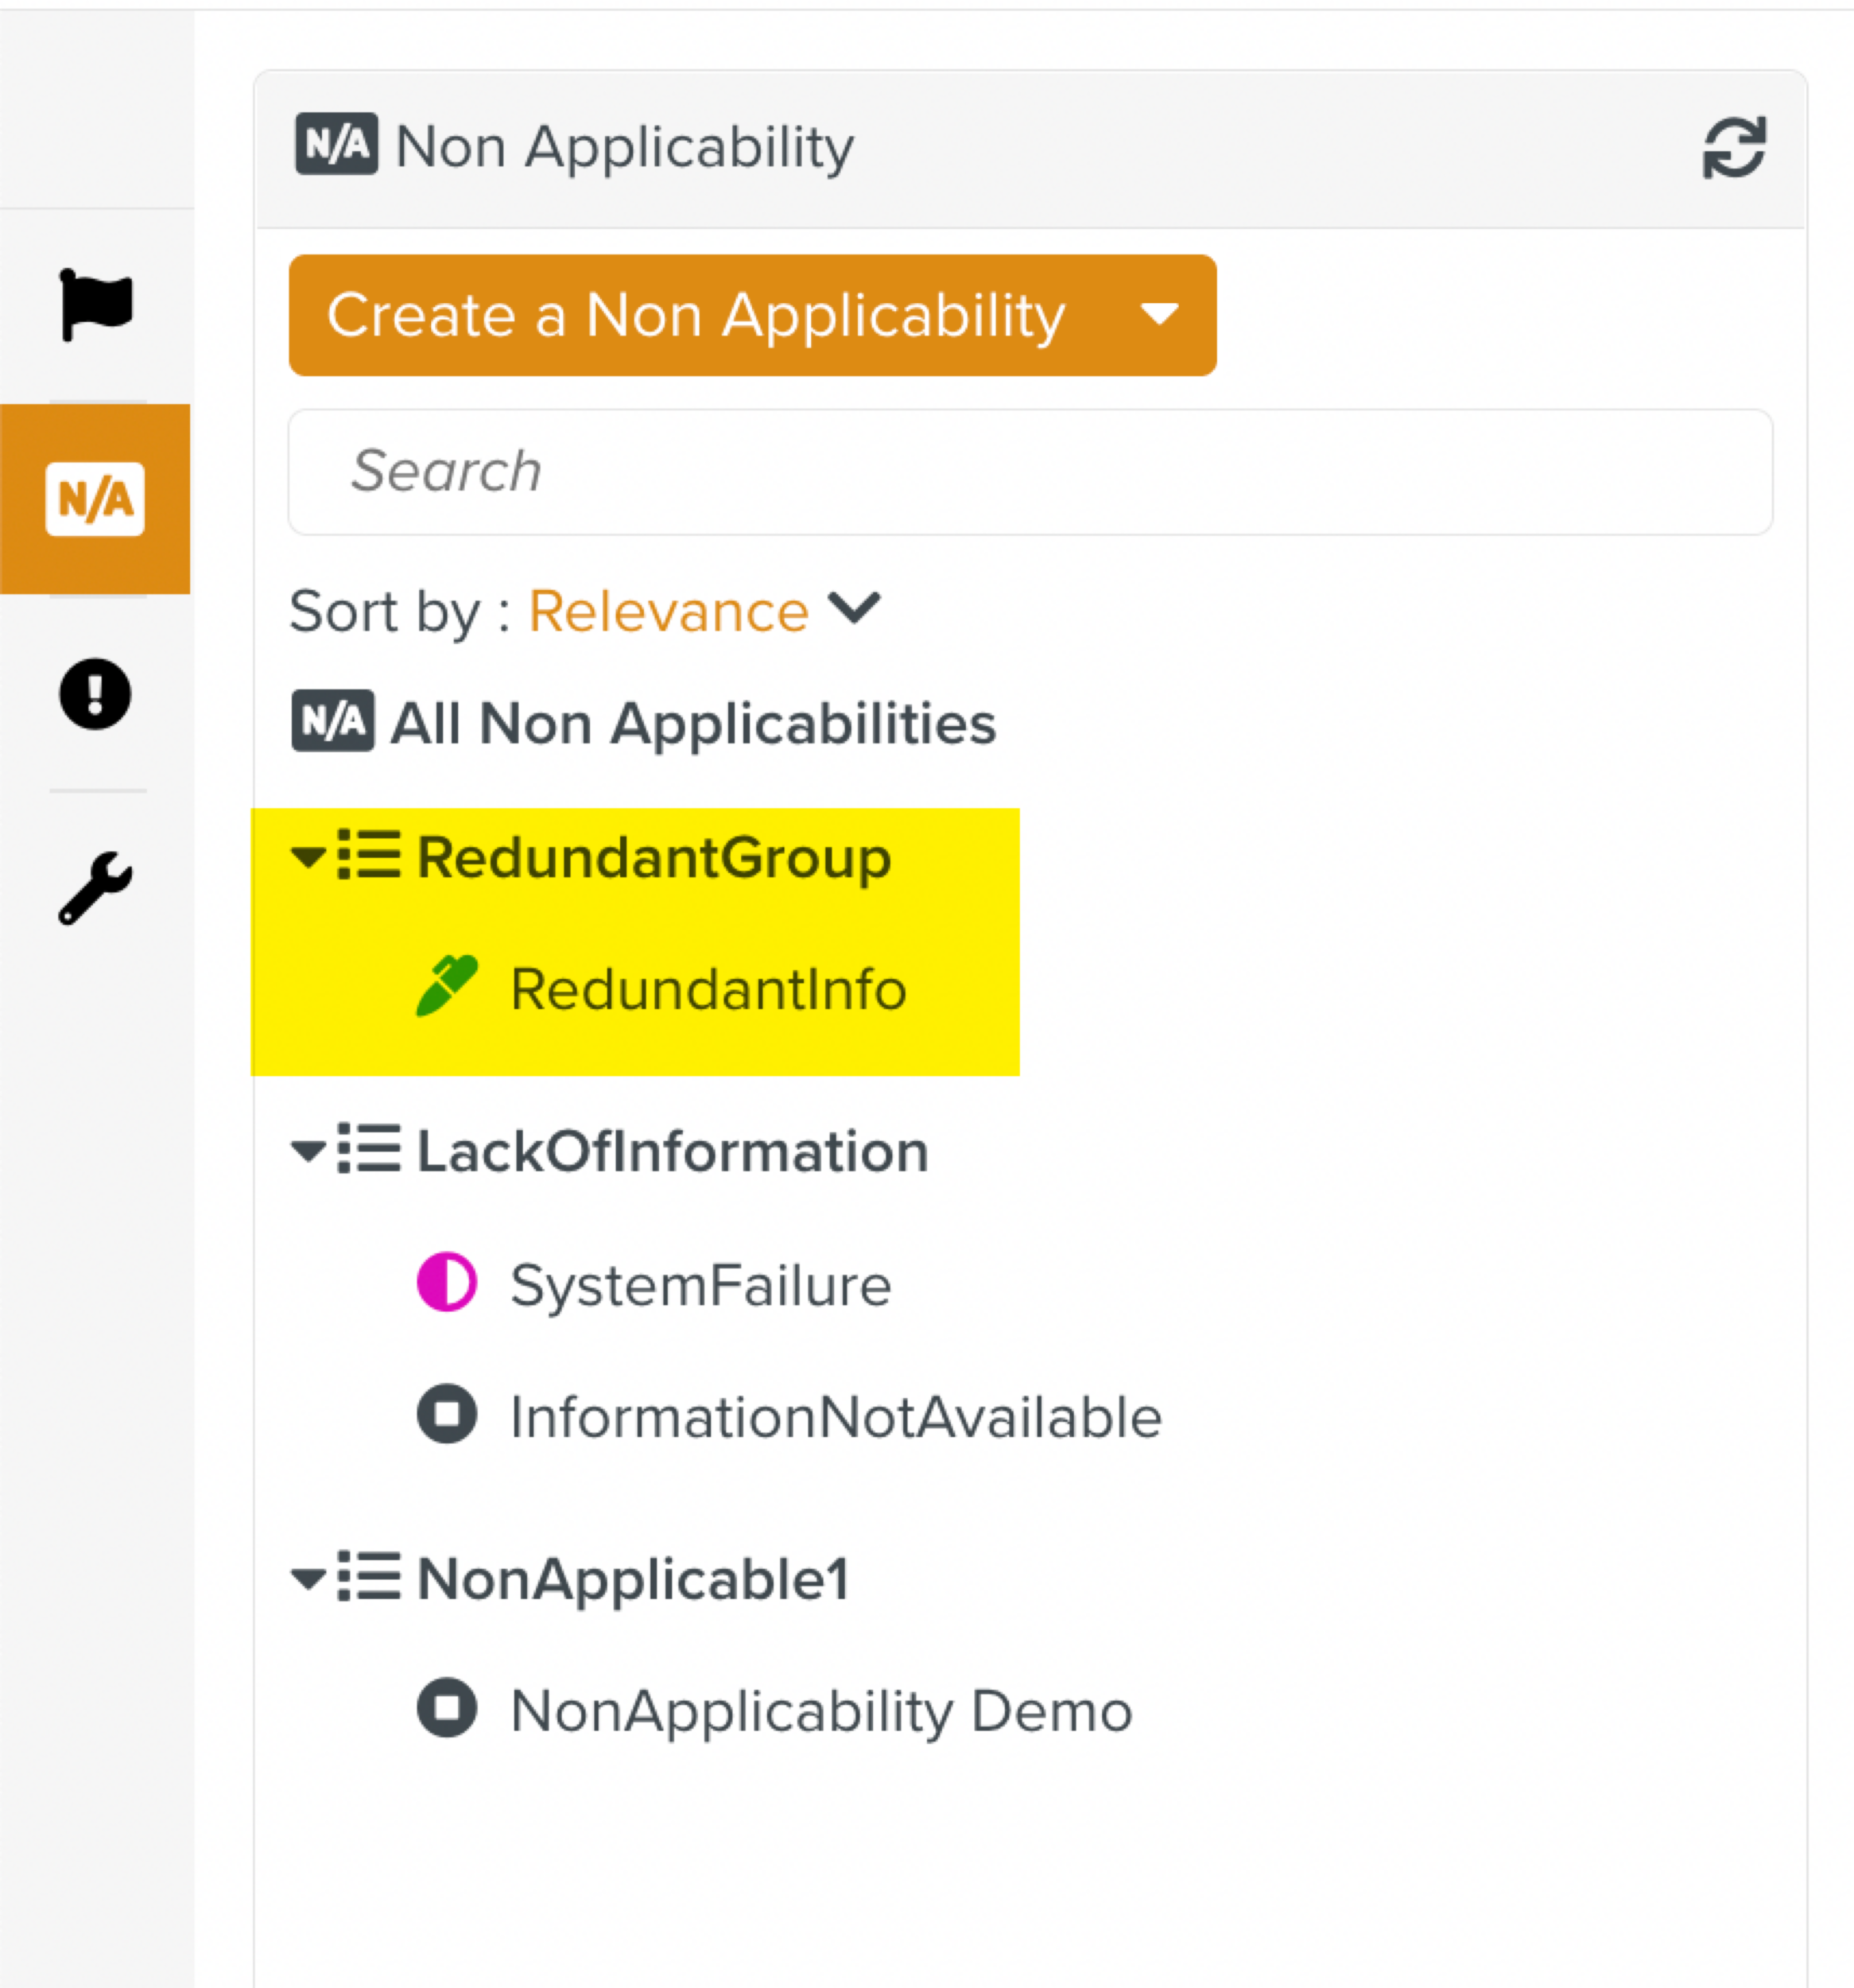
This Non Applicability Group should be associated with a Syncing Profile in order to be accessible at runtime. The added Non Applicability can then be used during runtime.
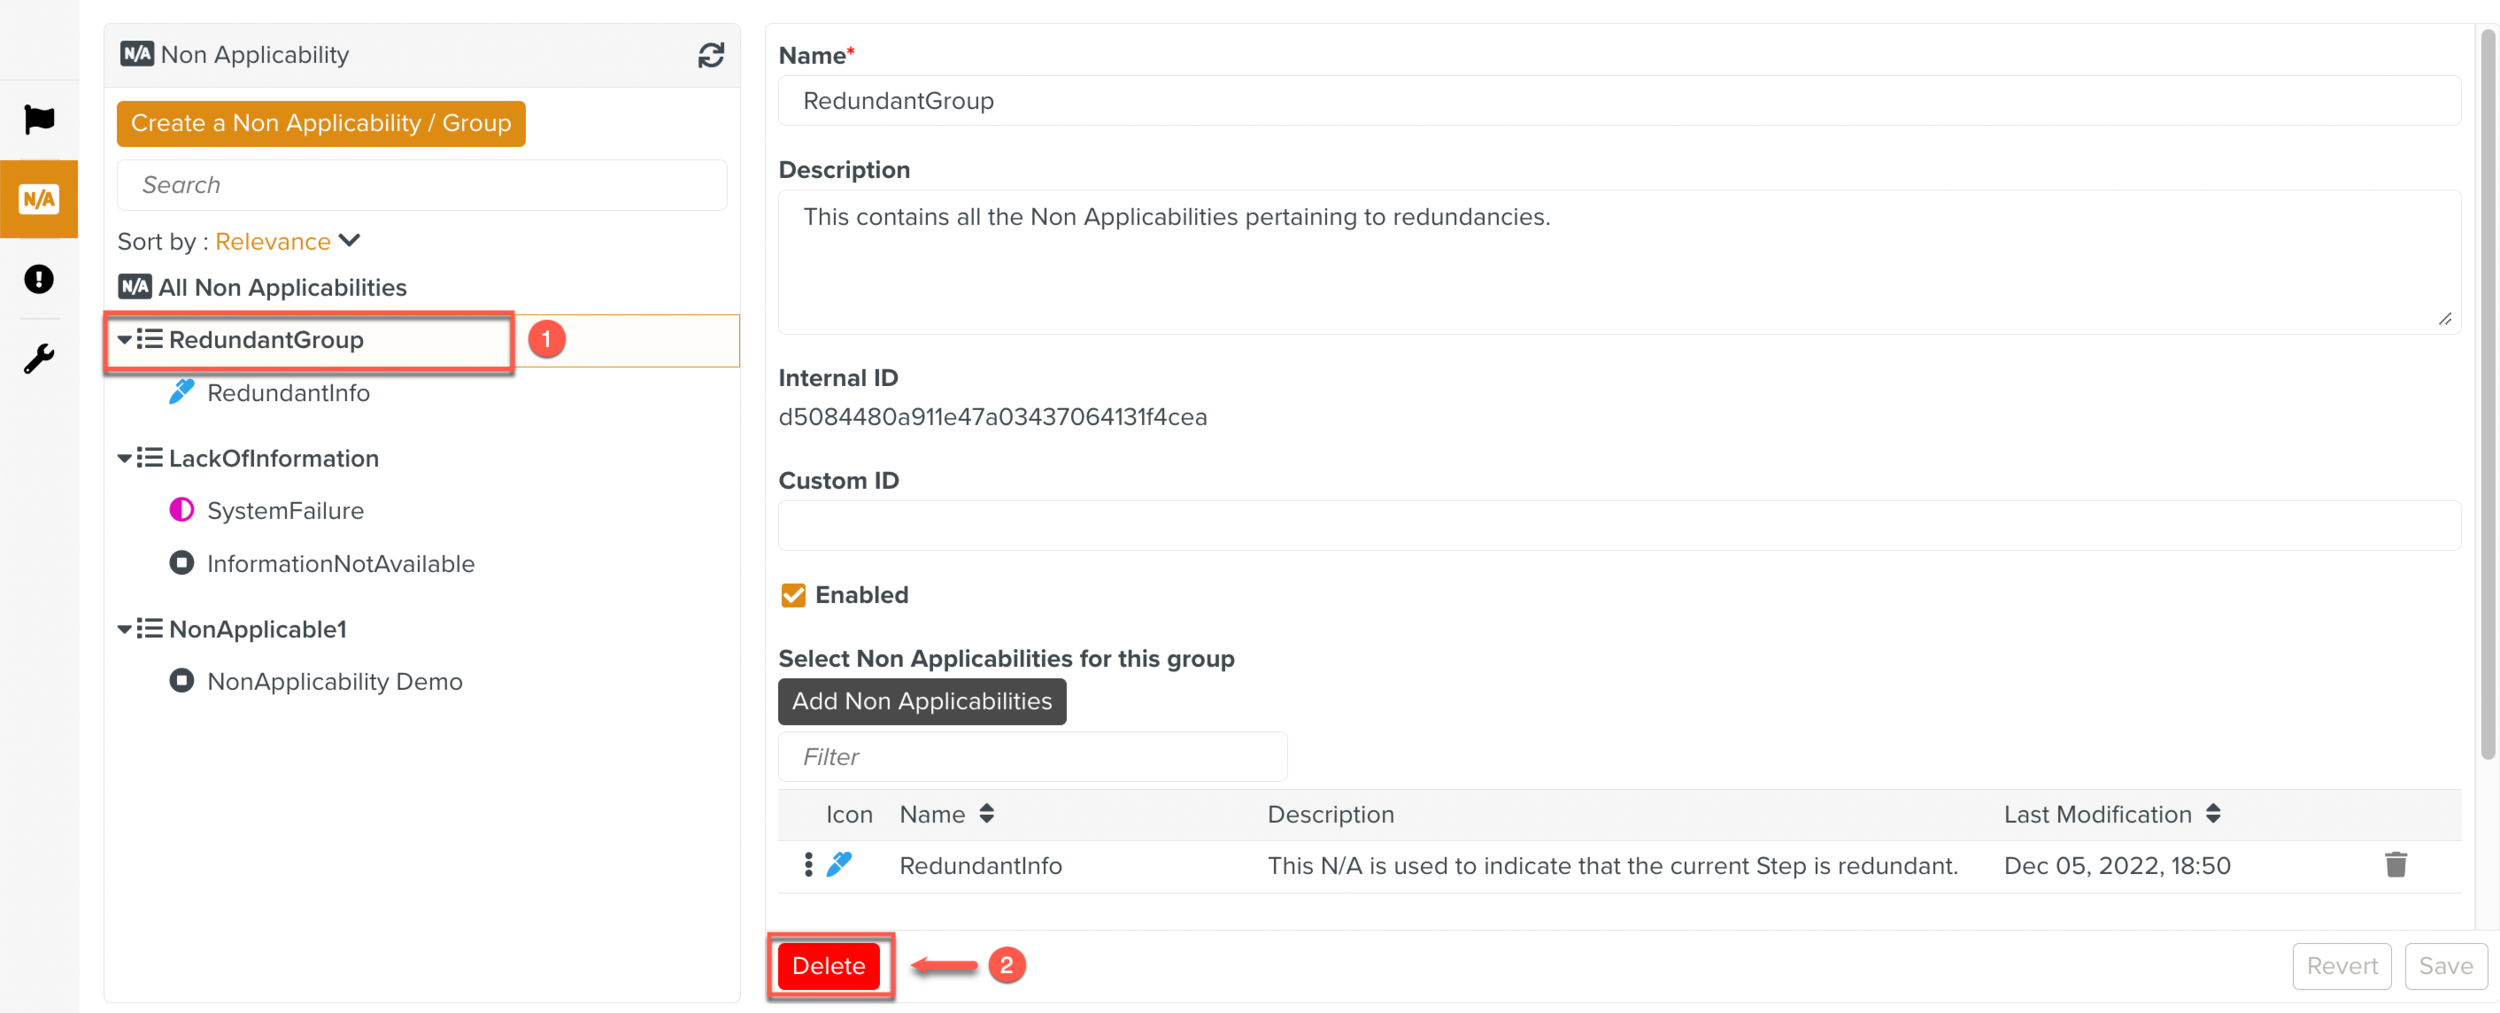
You can delete the Non Applicability Group by selecting it and clicking as shown below.
 |
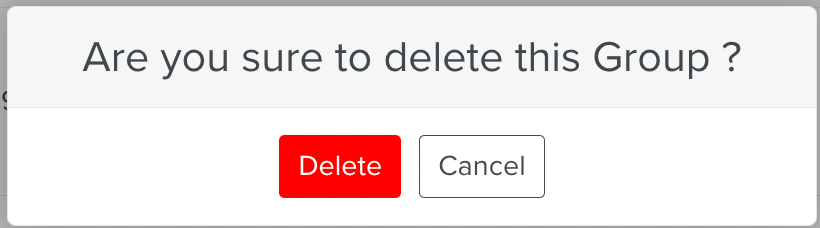
A confirmation message box appears. If the user clicks , the Non Applicability Group is deleted.
 |
Non Applicability At Runtime
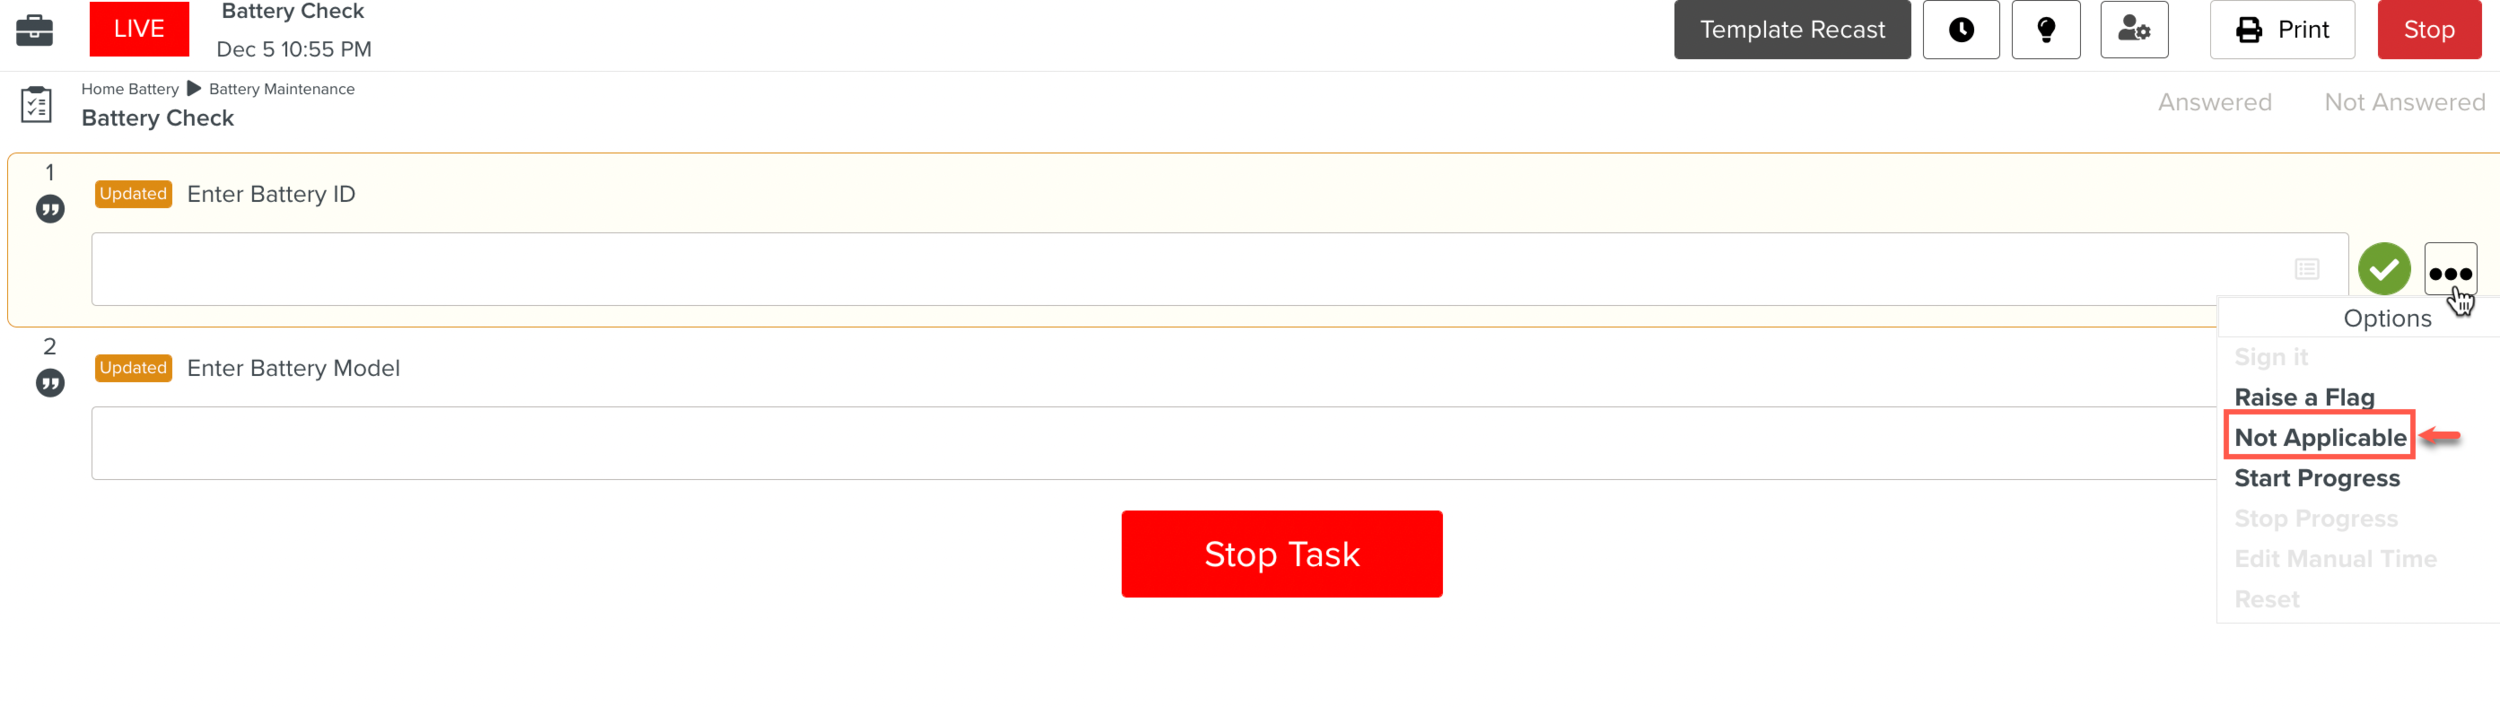
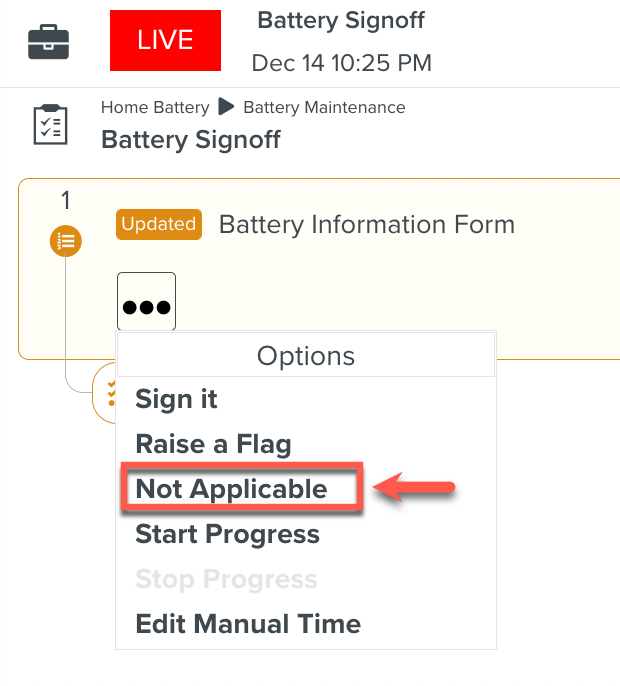
During runtime, a user can choose to make a Step Non Applicable as shown below.
 |
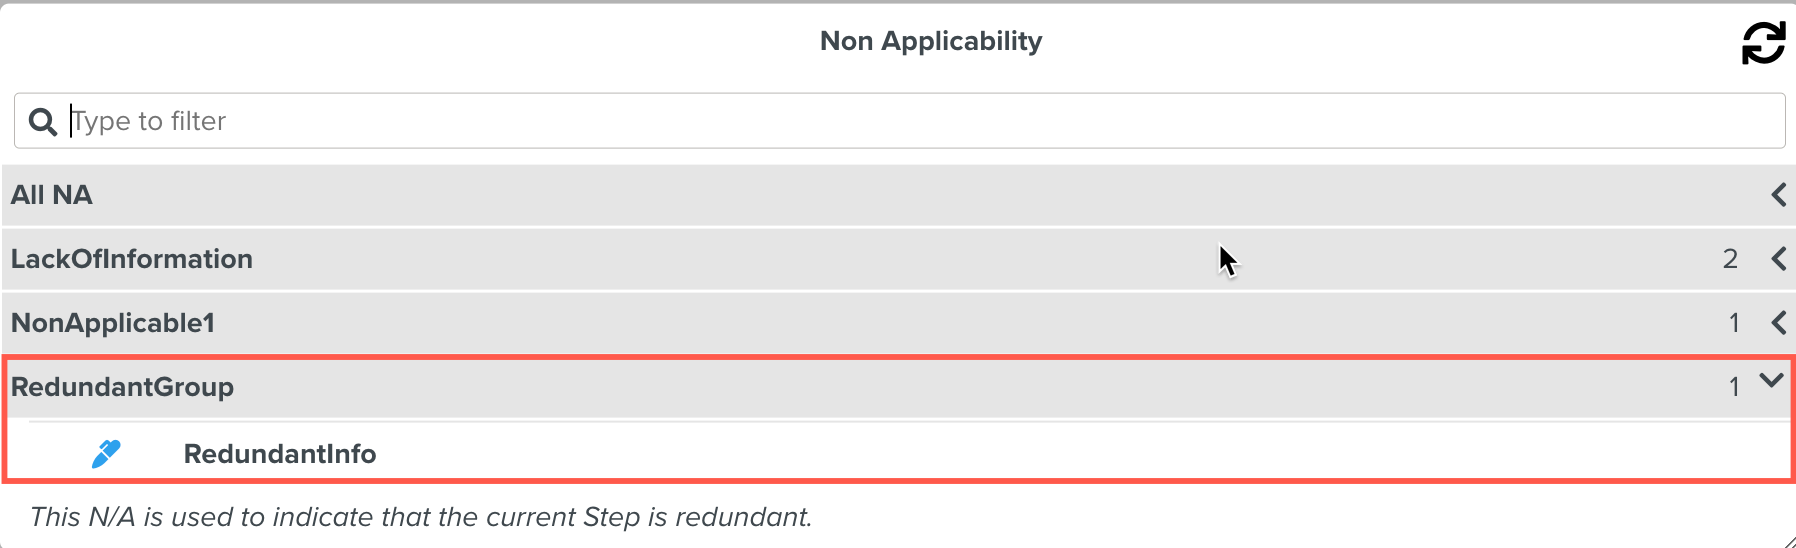
The below example shows the added Non Applicability appearing on a Step at runtime.
 |
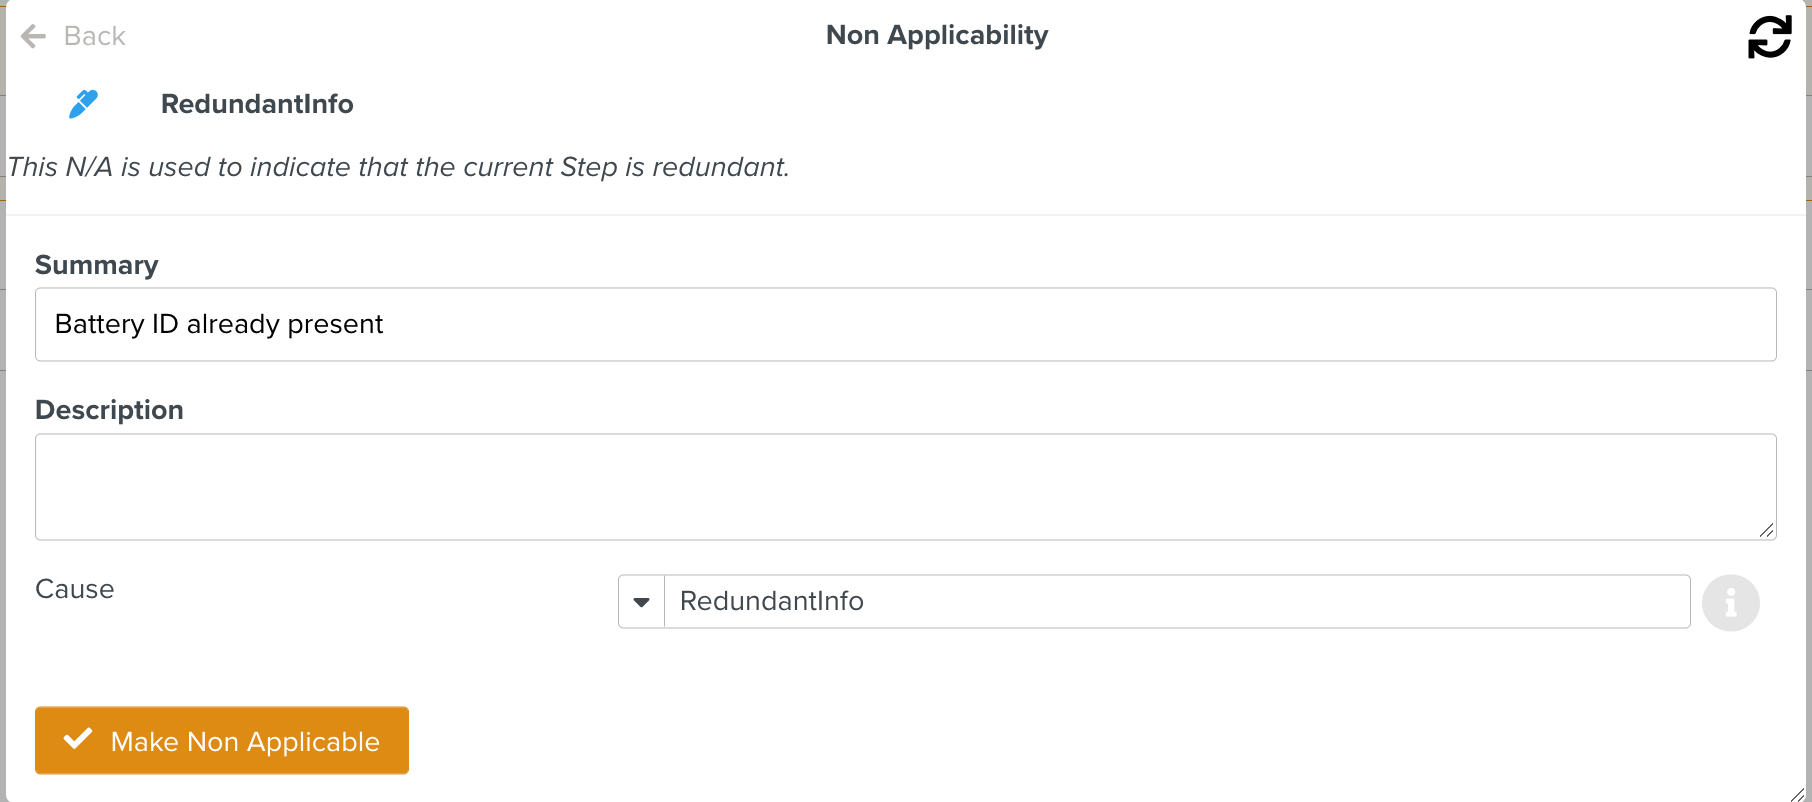
Selecting a Non Applicability displays the details. The user can add a description.
 |
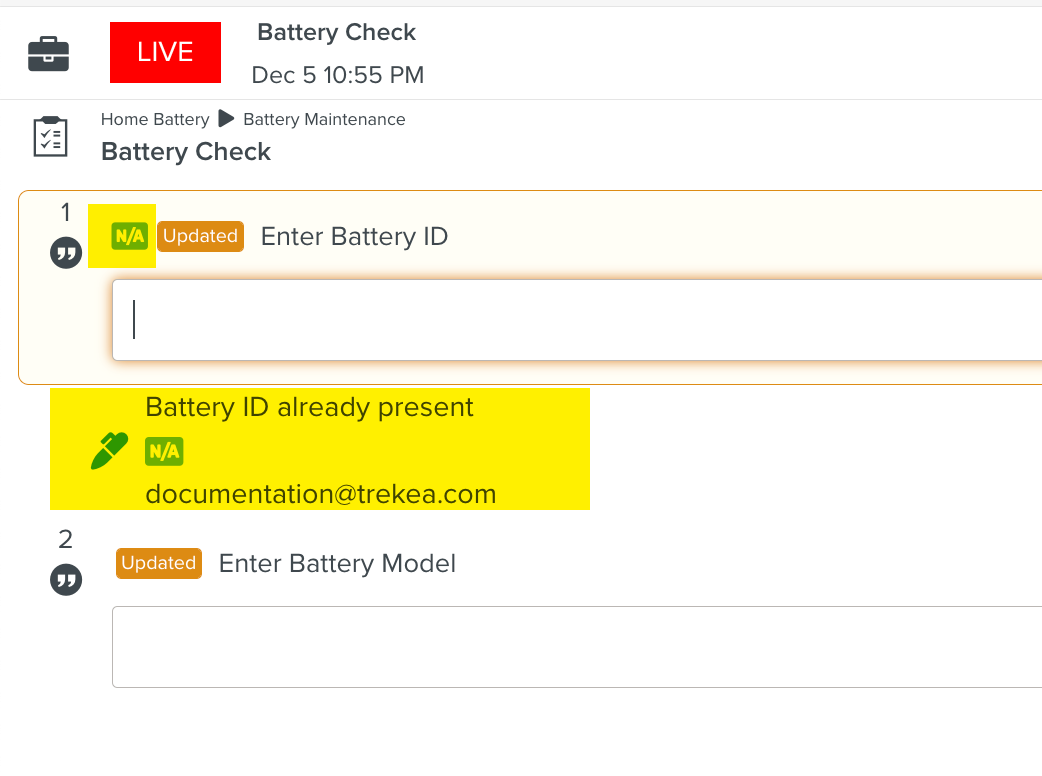
A Step that is marked Non Applicable has a  displayed on the Step as shown below.
 |
If the user validates a Step that is marked Non Applicable, the Step becomes Applicable again. A confirmation dialog appears to alert the user as seen below.
 |
You can create a Measure Point to listen for Steps that have been marked Non Applicable.
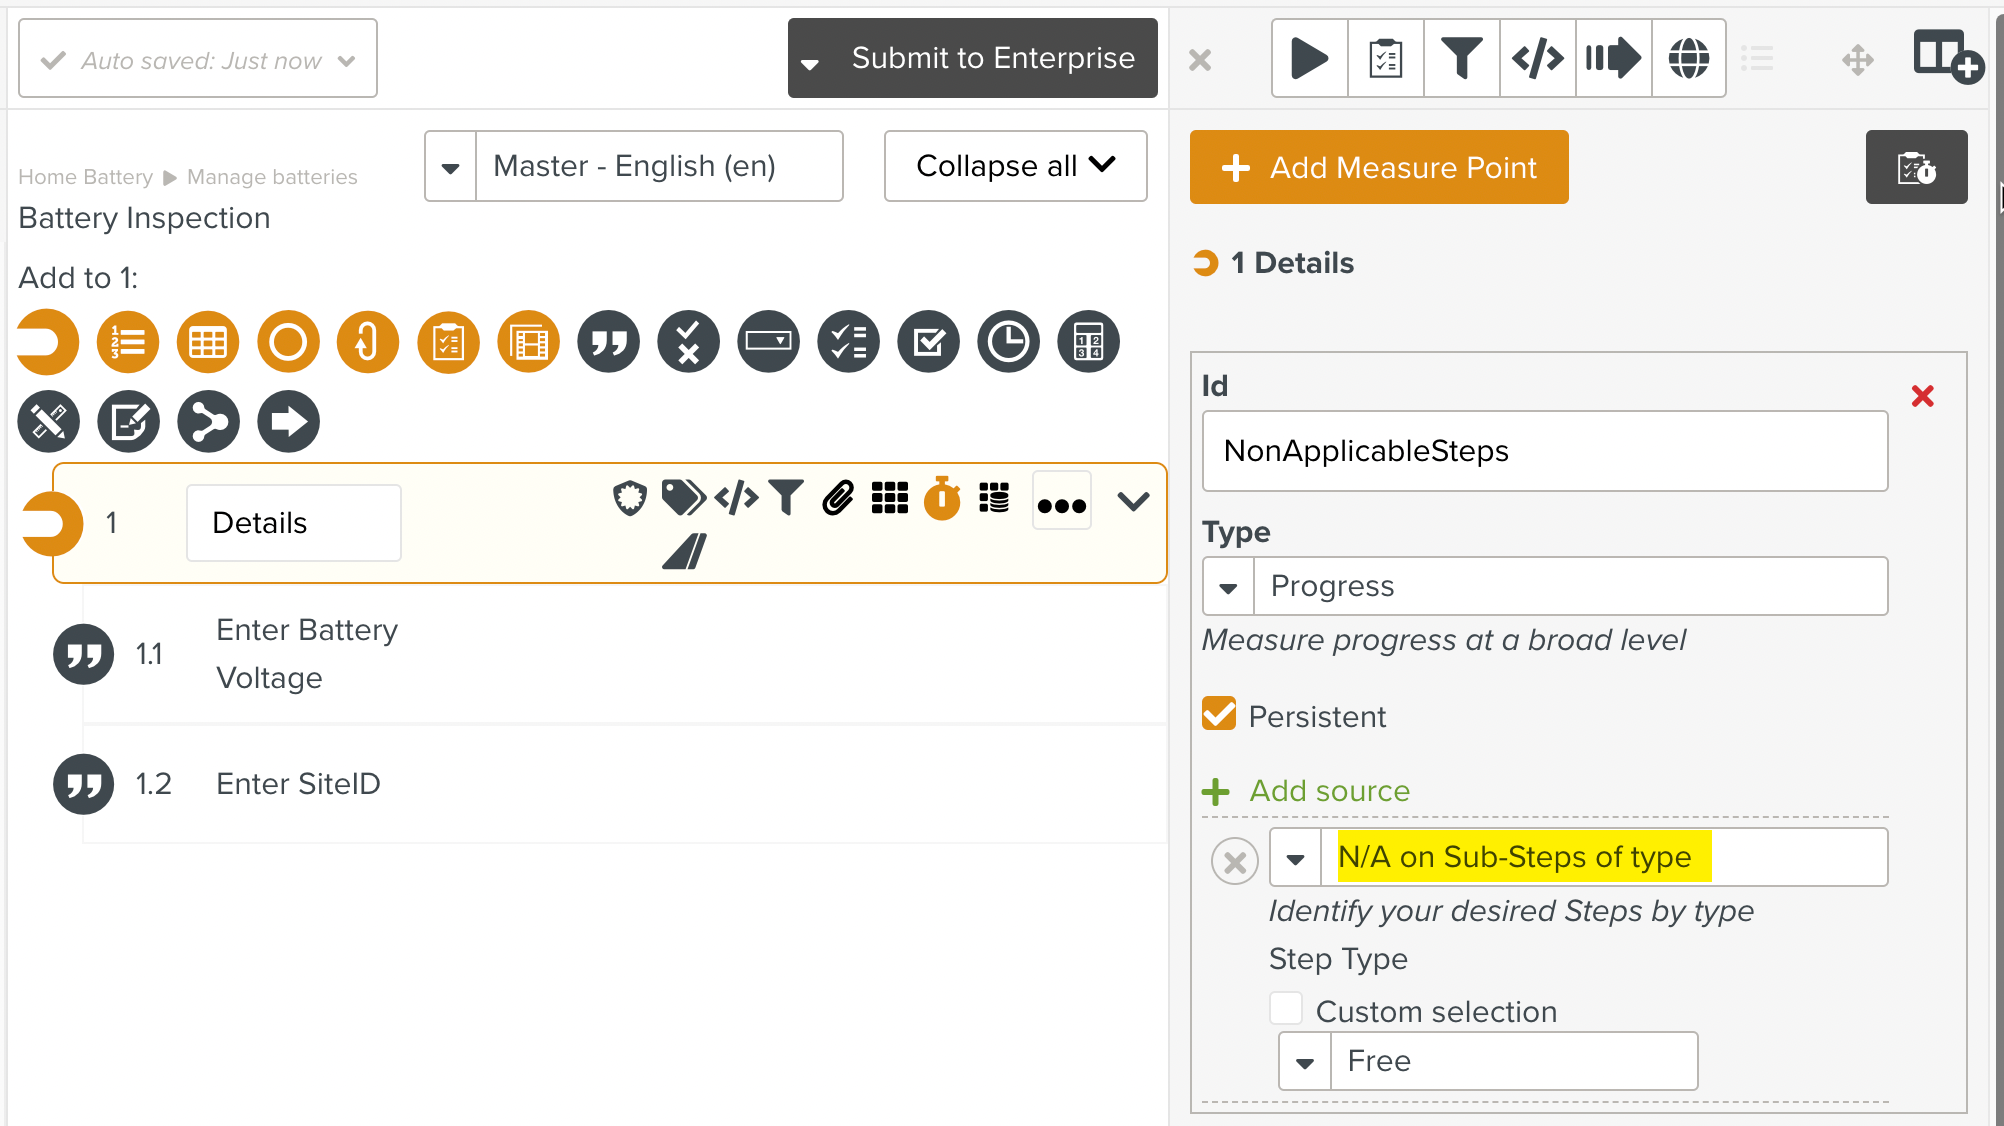 |
Such Measure Points can be set at the Step level and the Template level.
Steps that have a Signoff flow can be made Non Applicable.
There are two cases possible.
Case 1: A Step can be made Non Applicable after Signoff
In the following example, a Step has been validated and the Signoff is done on a Step.
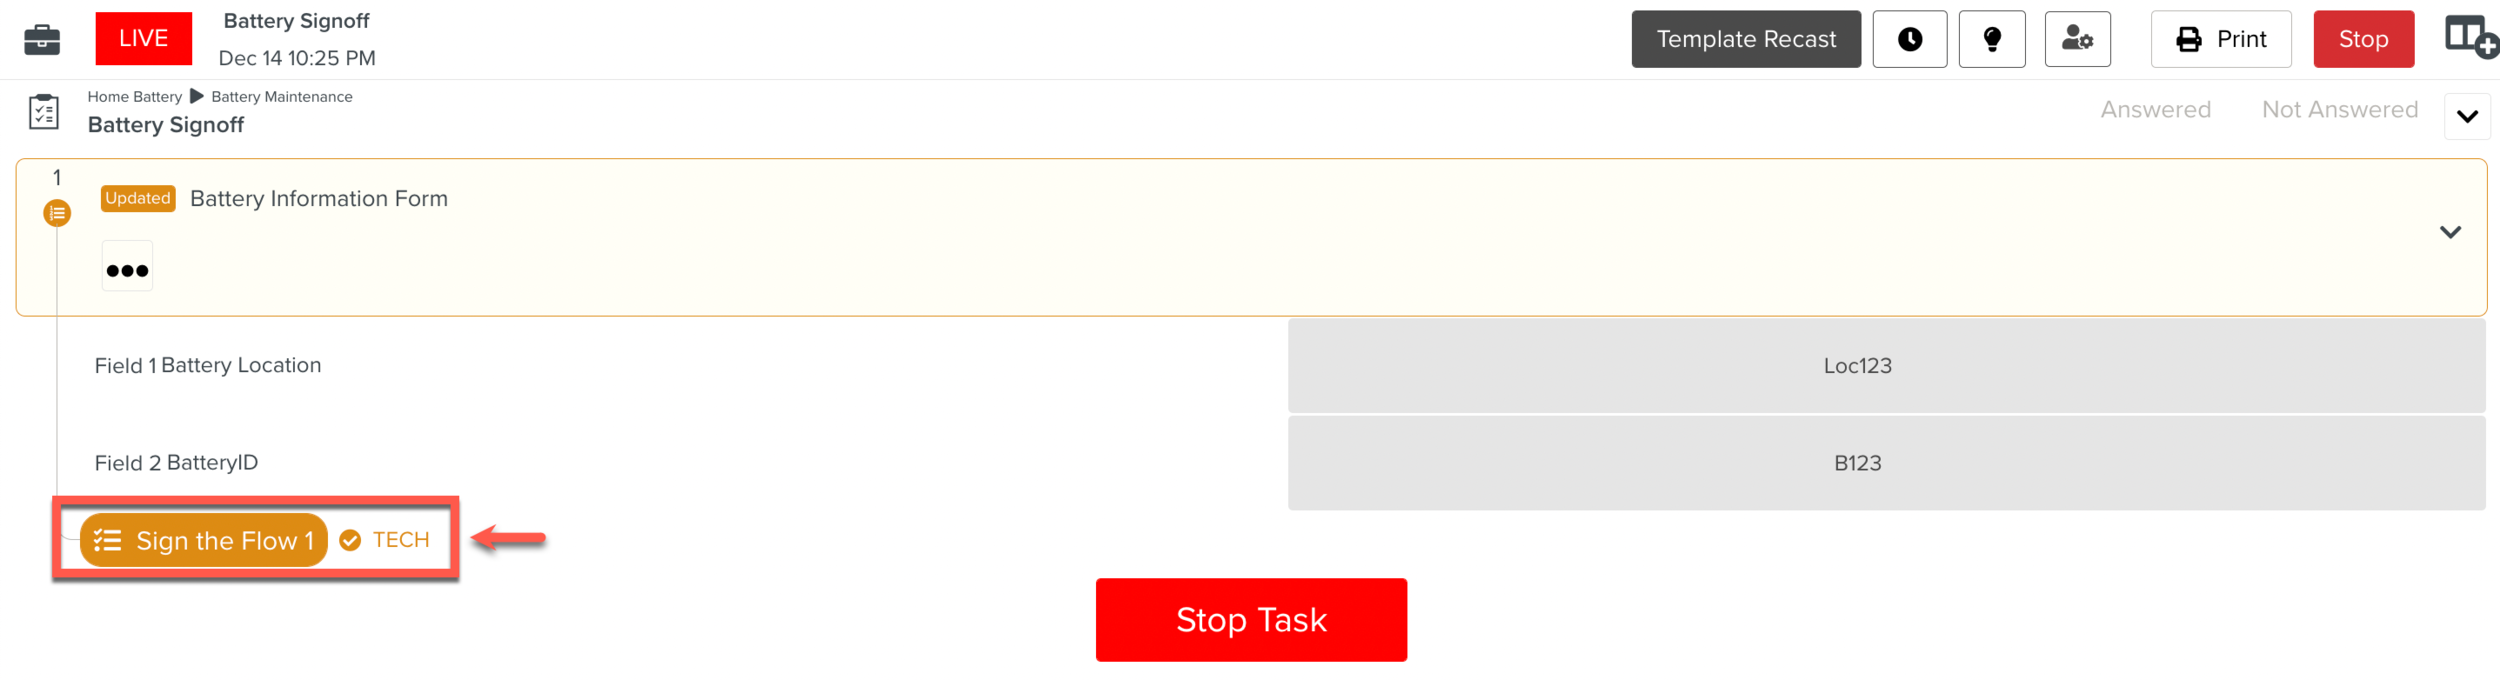 |
The Step has been Signed off as seen below.
 |
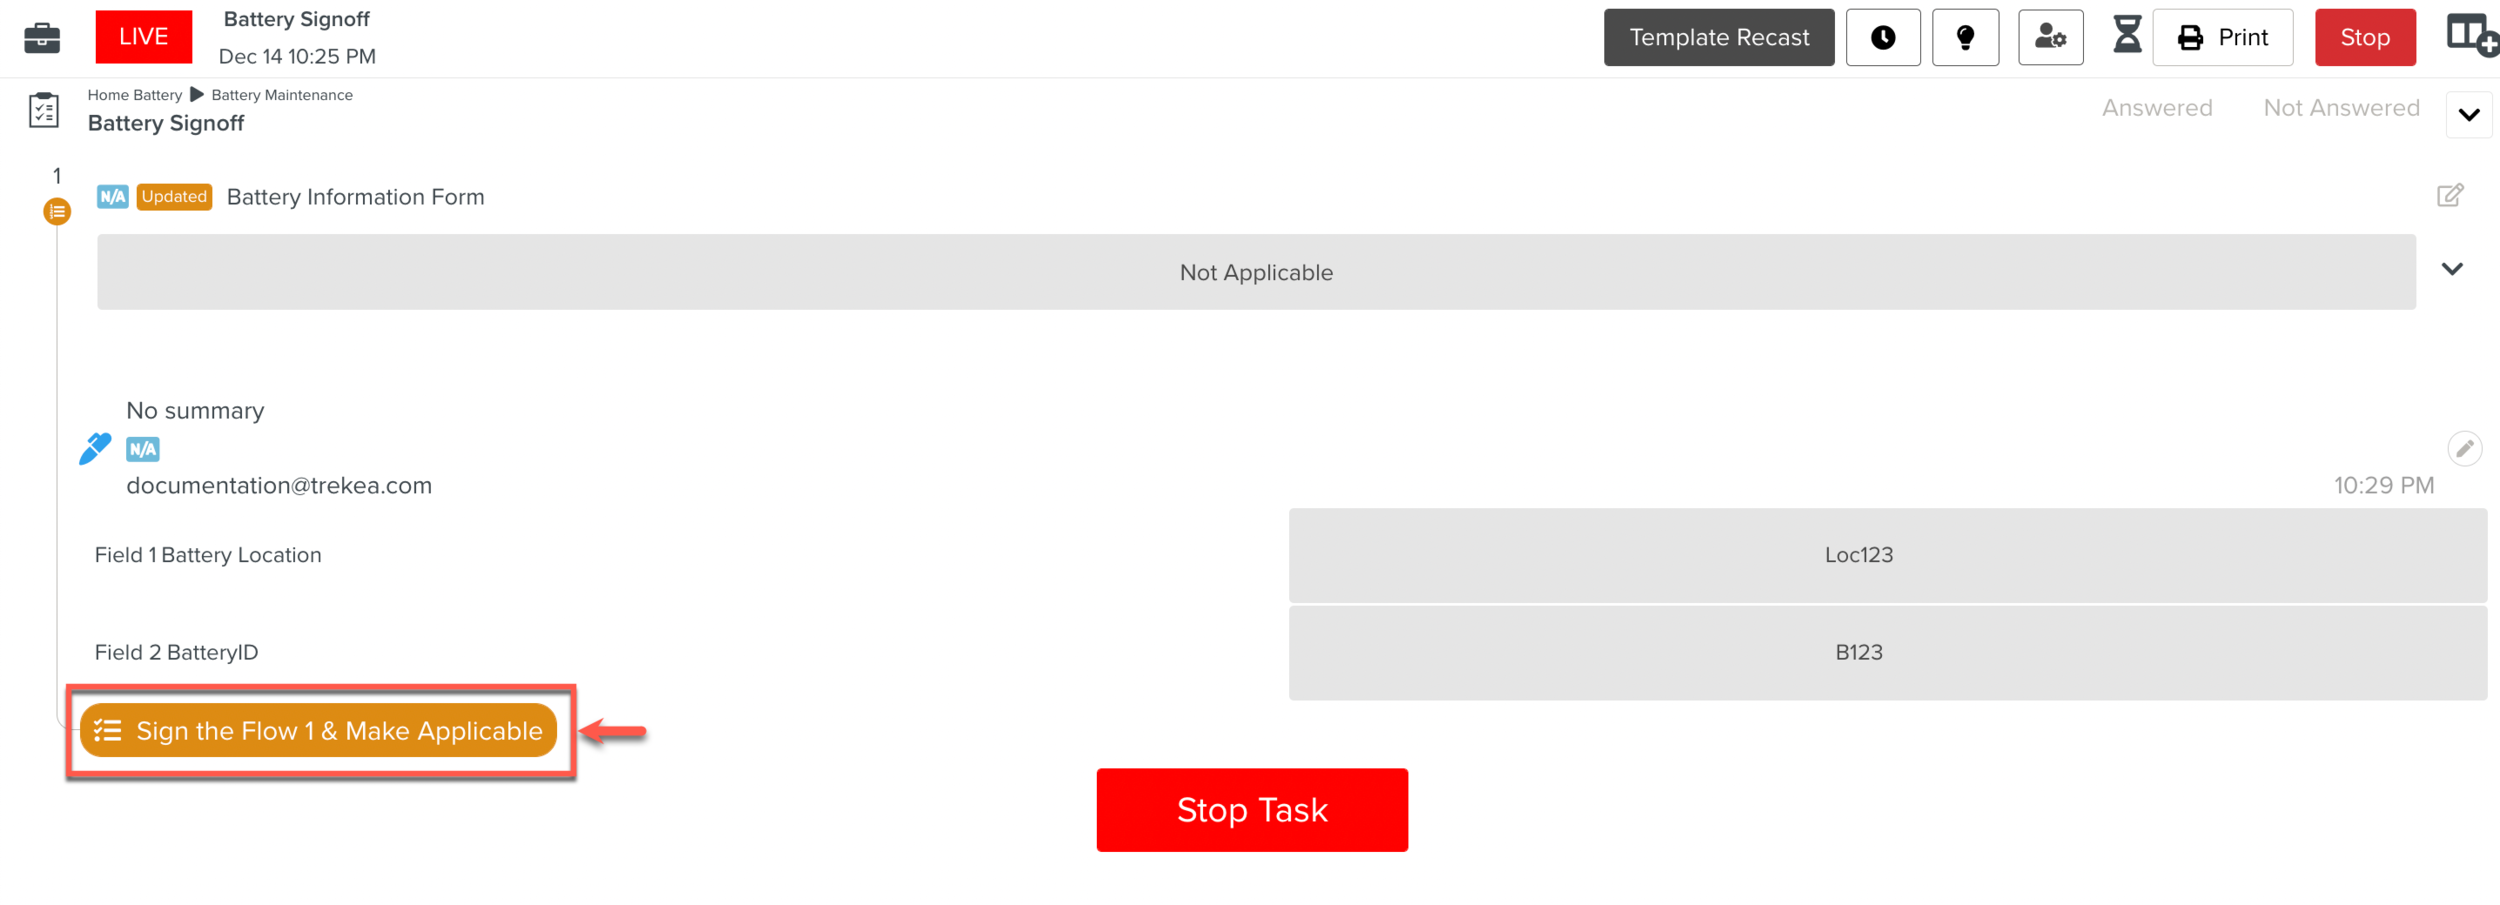
When the Step is made Non Applicable, the Signoff is removed. The option to Sign the flow and make the Step Applicable appears as highlighted.
 |
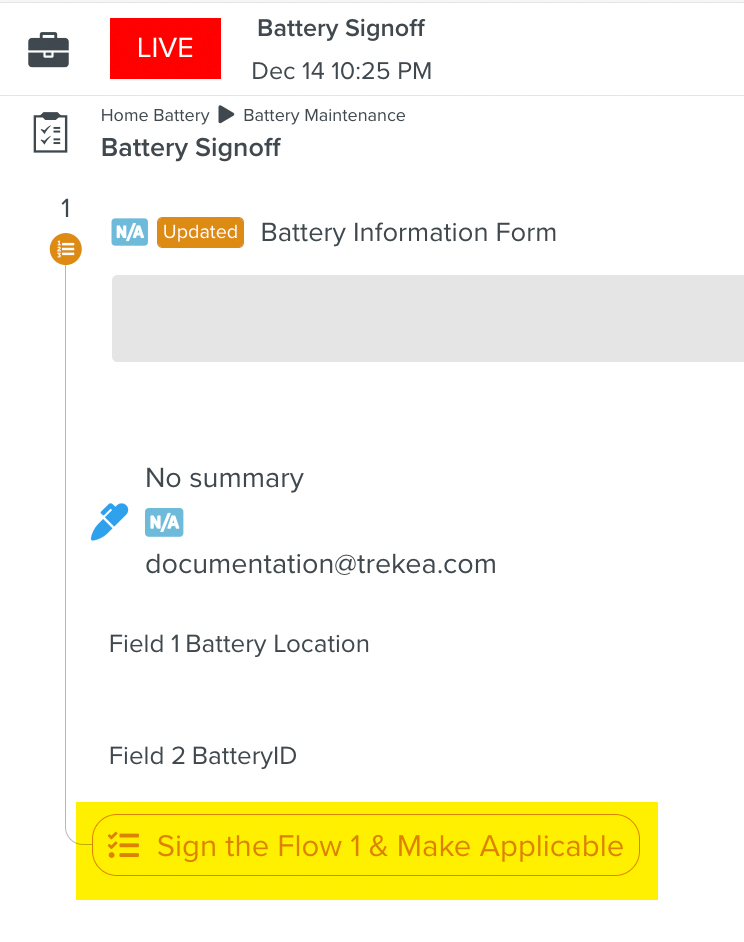 |
Case 2: Signoff attempted on a Step that is Non Applicable
Signing the Flow of a Non Applicable Step will remove the Non Applicability. The Step will become Applicable again.
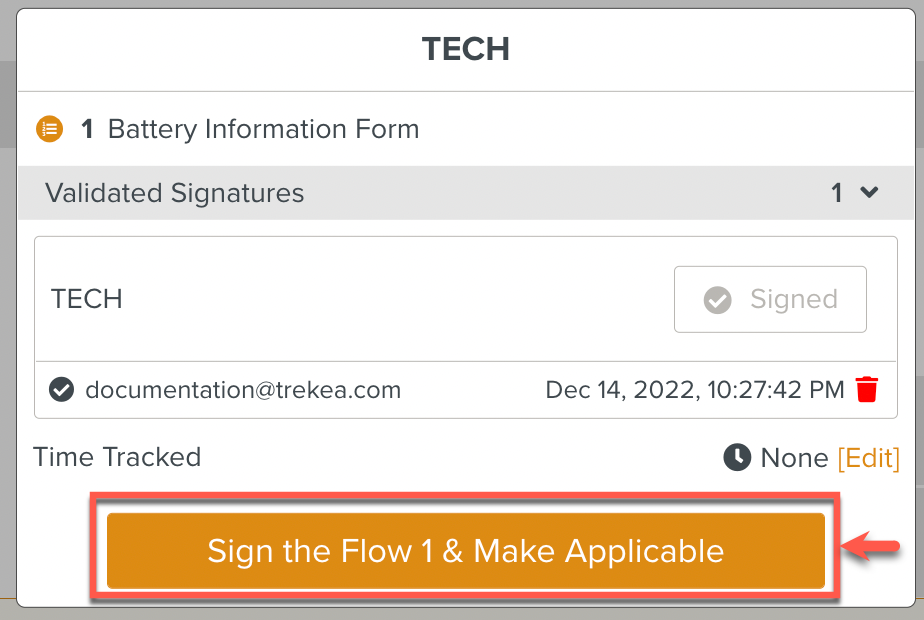
In the example, you can click as shown below.
 |
This prompts the user to Sign the Flow. A confirmation dialog also appears.
 |
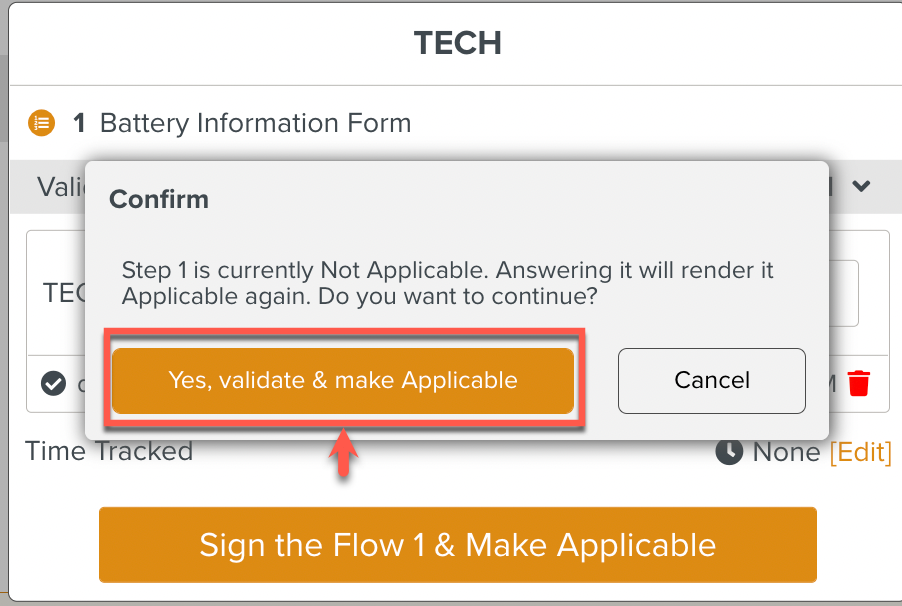 |
The Non Applicability is removed. The Signoff flow details are available on the Step.
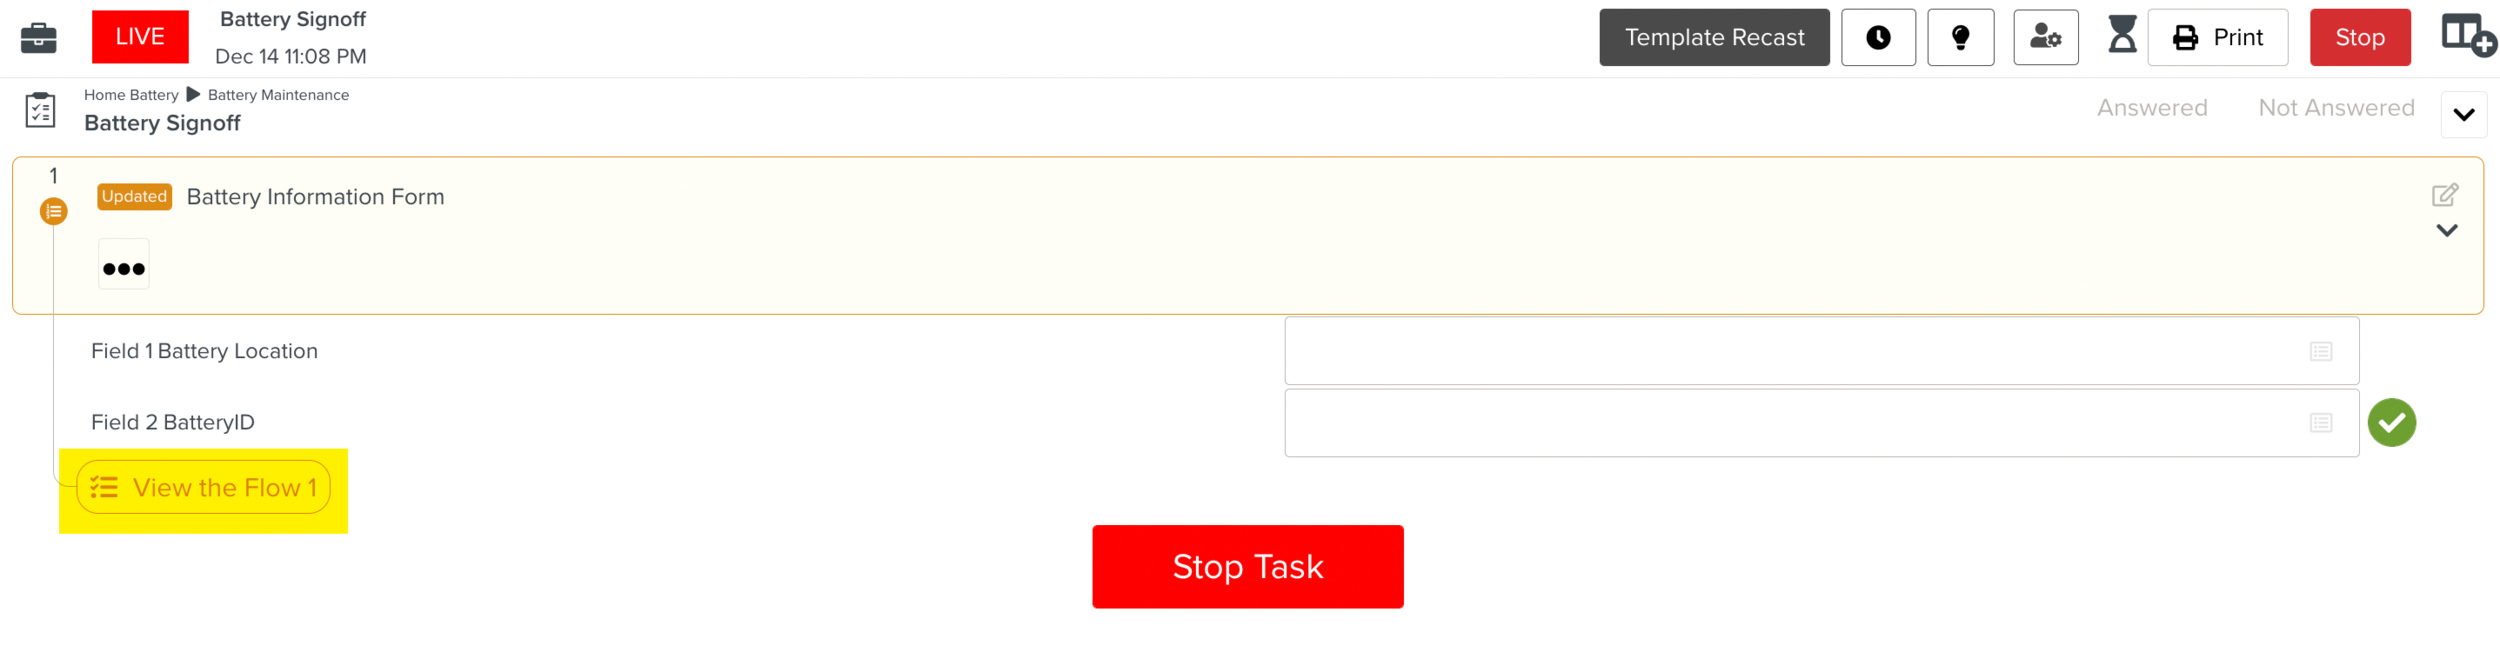 |