Adding a Lifecycle and Action Counter
The Counter contains a Lifecycle and Action(s).
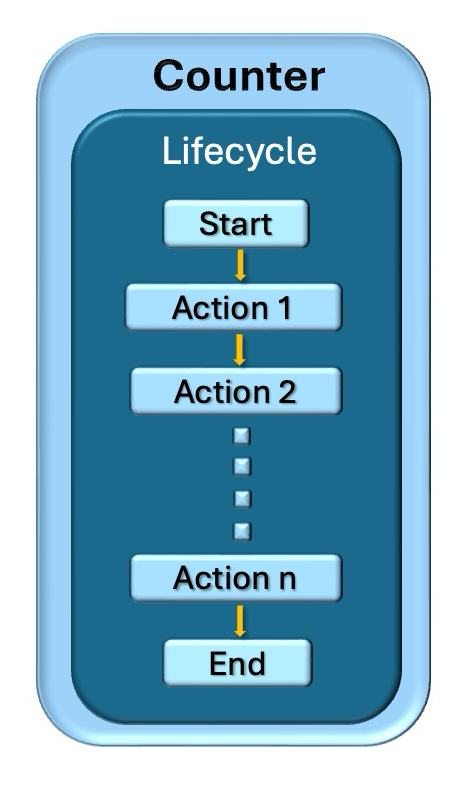 |
Lifecycle: The workflow for executing Actions within the Counter is defined in the Lifecycle.
Action: An Action instantiates a Template. A list of Actions can be used in the Lifecycle workflow.
The Lifecycle workflow process is triggered when the Counter is activated.
To add a Lifecycle and Action Counter type to an Operation Plan:
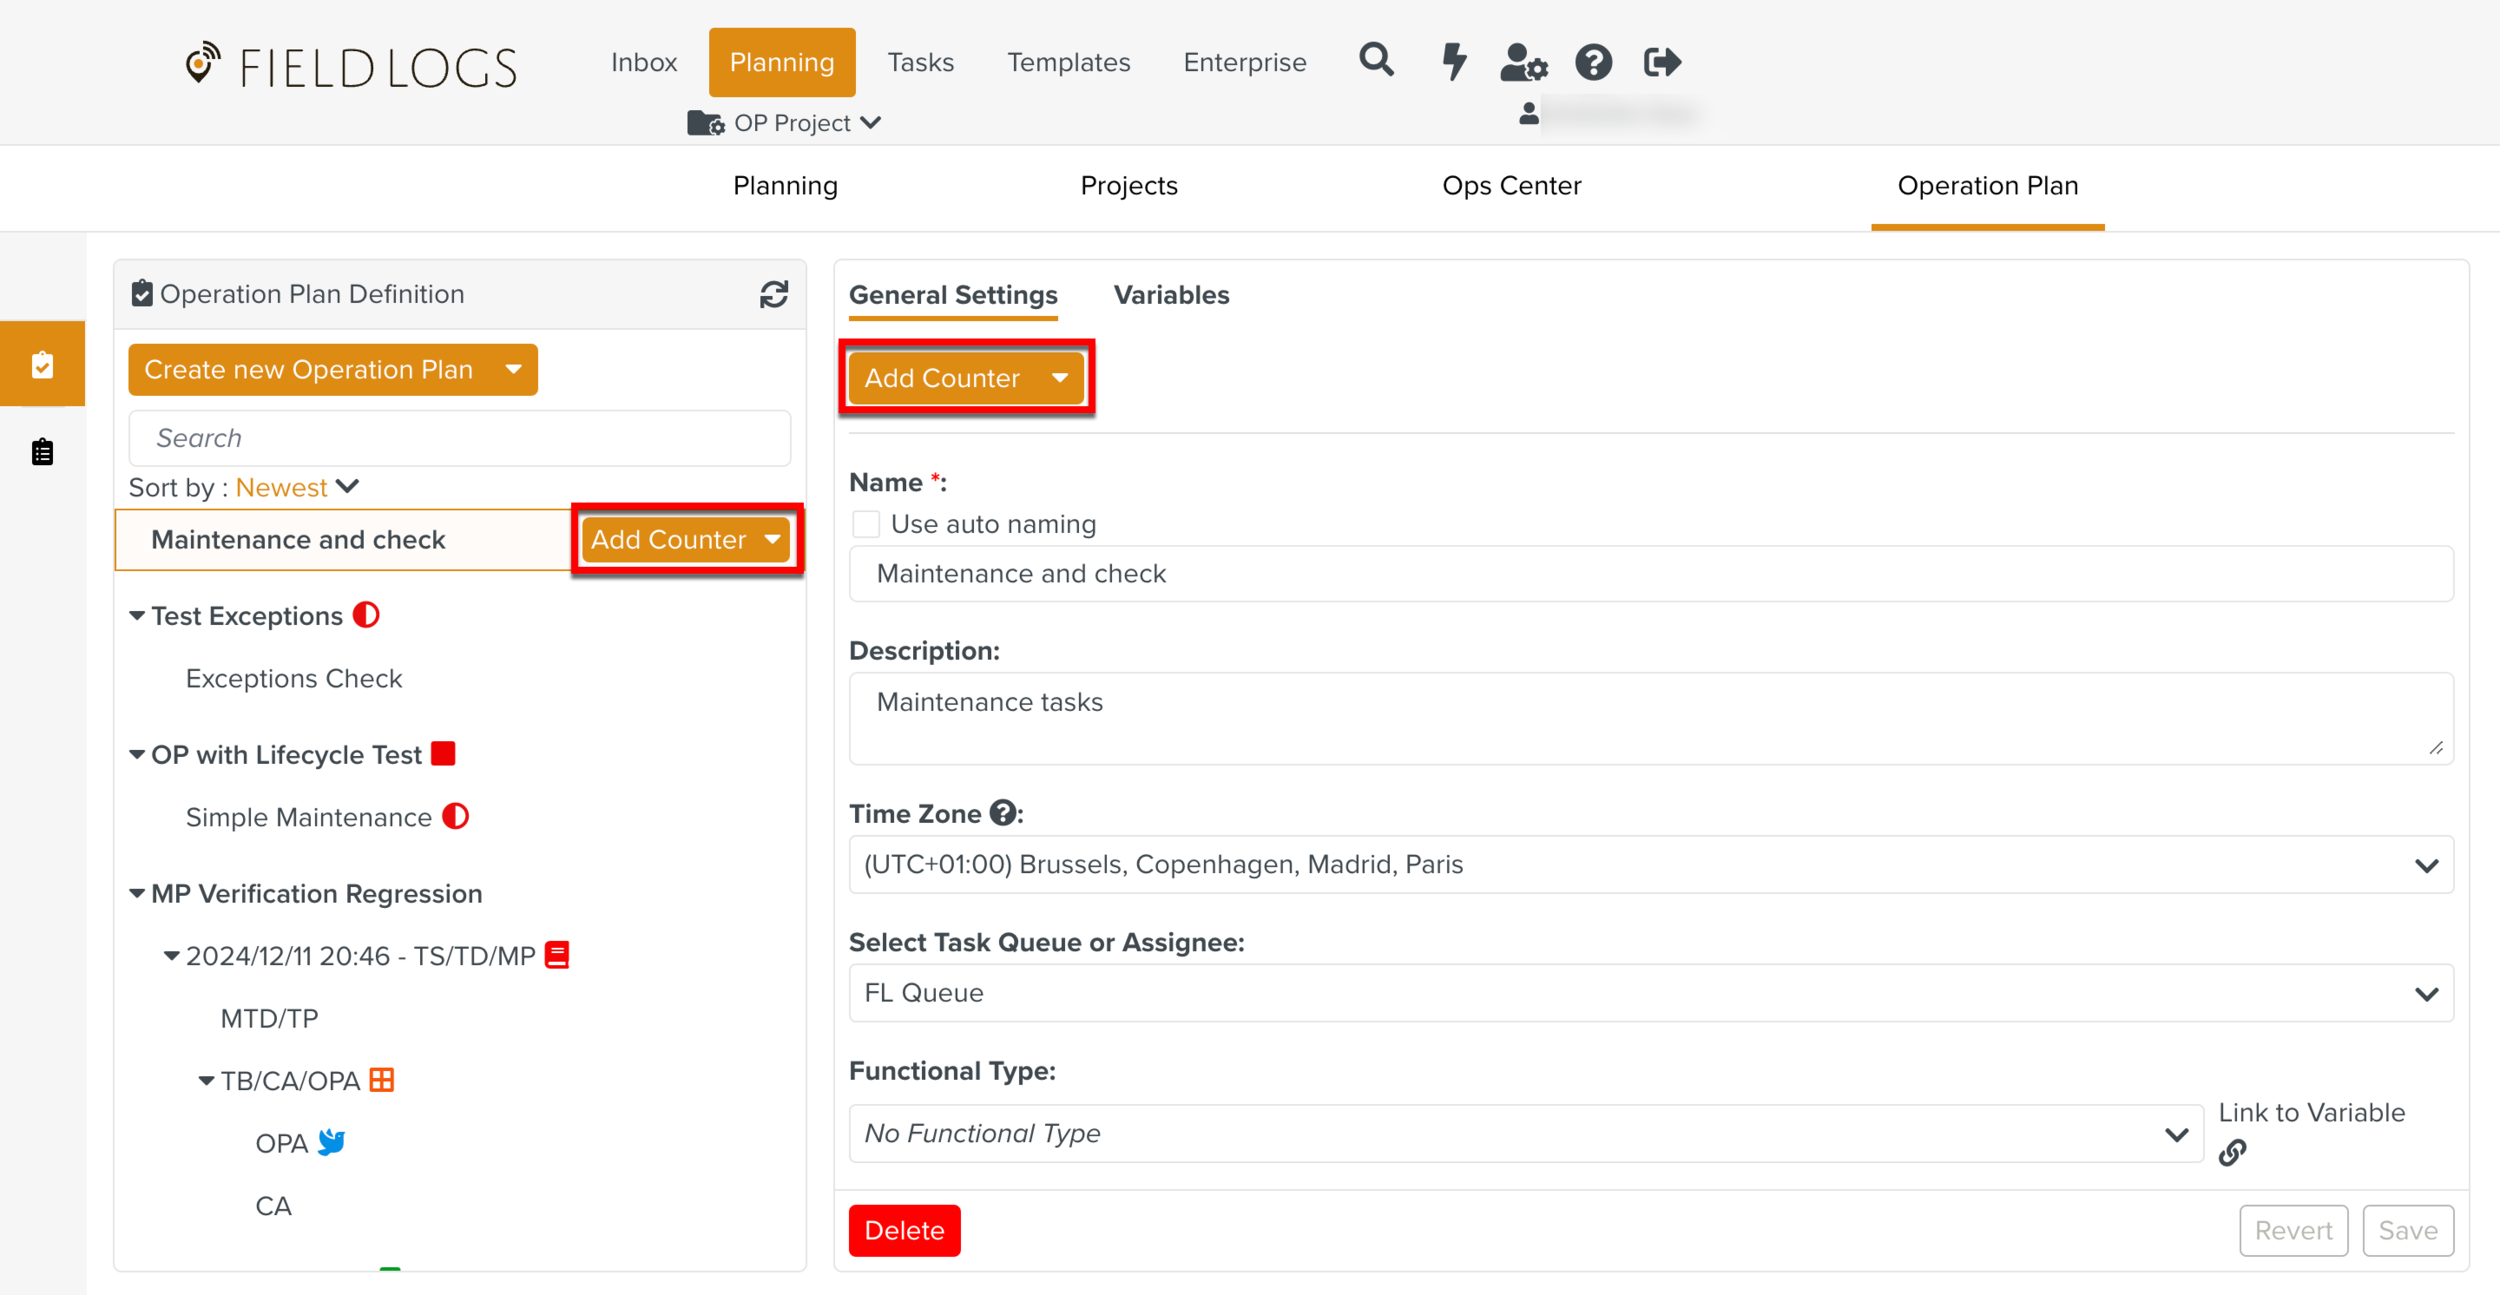
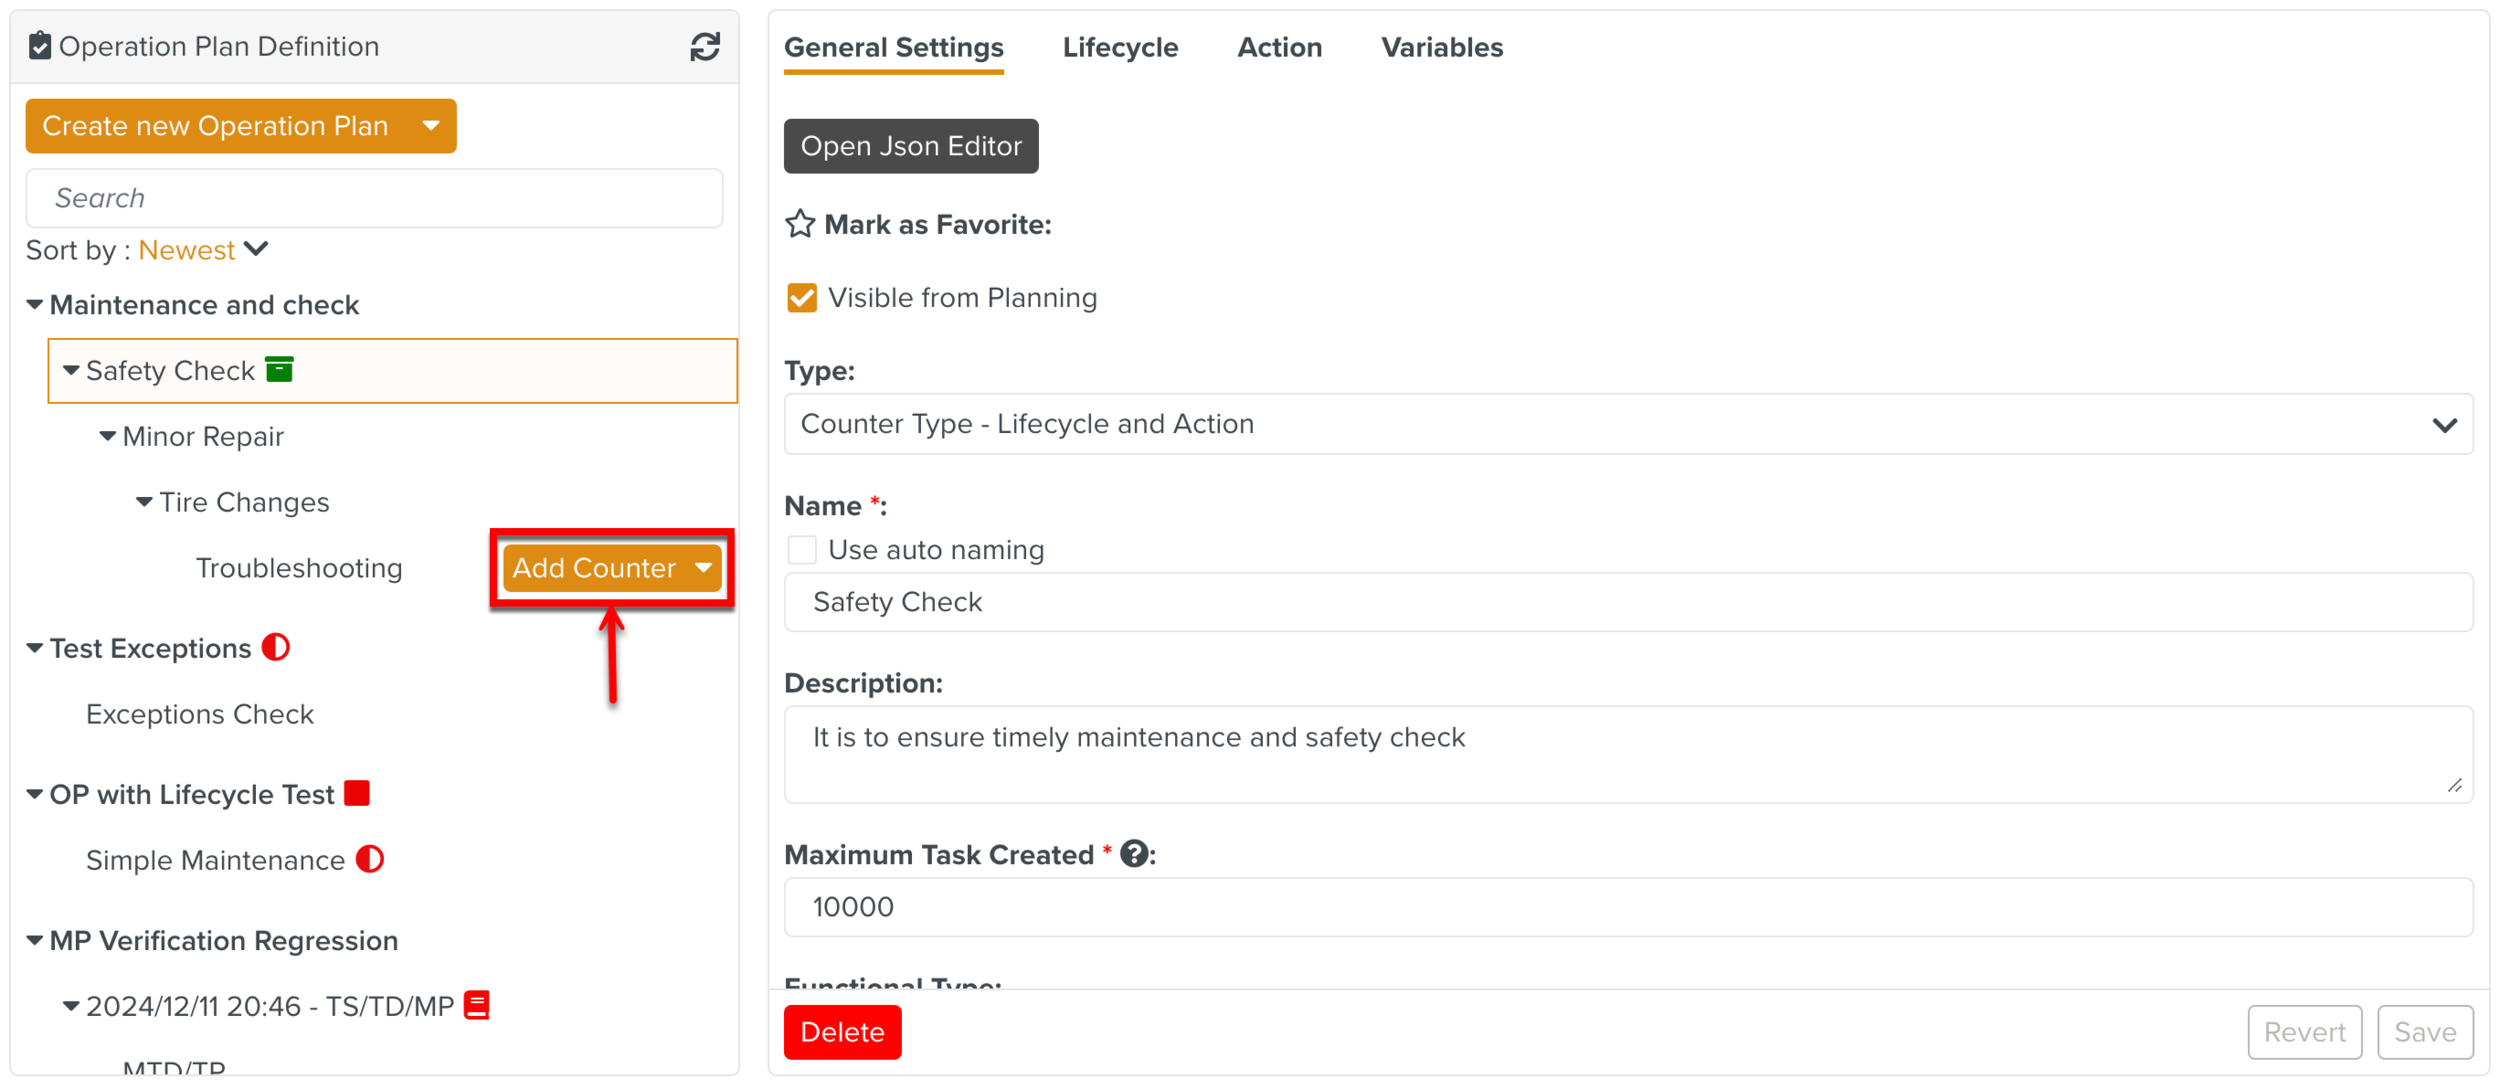
Click in the dropdown list near the name of the Operation Plan.
You can also use the dropdown list in the General Settings tab as indicated below.
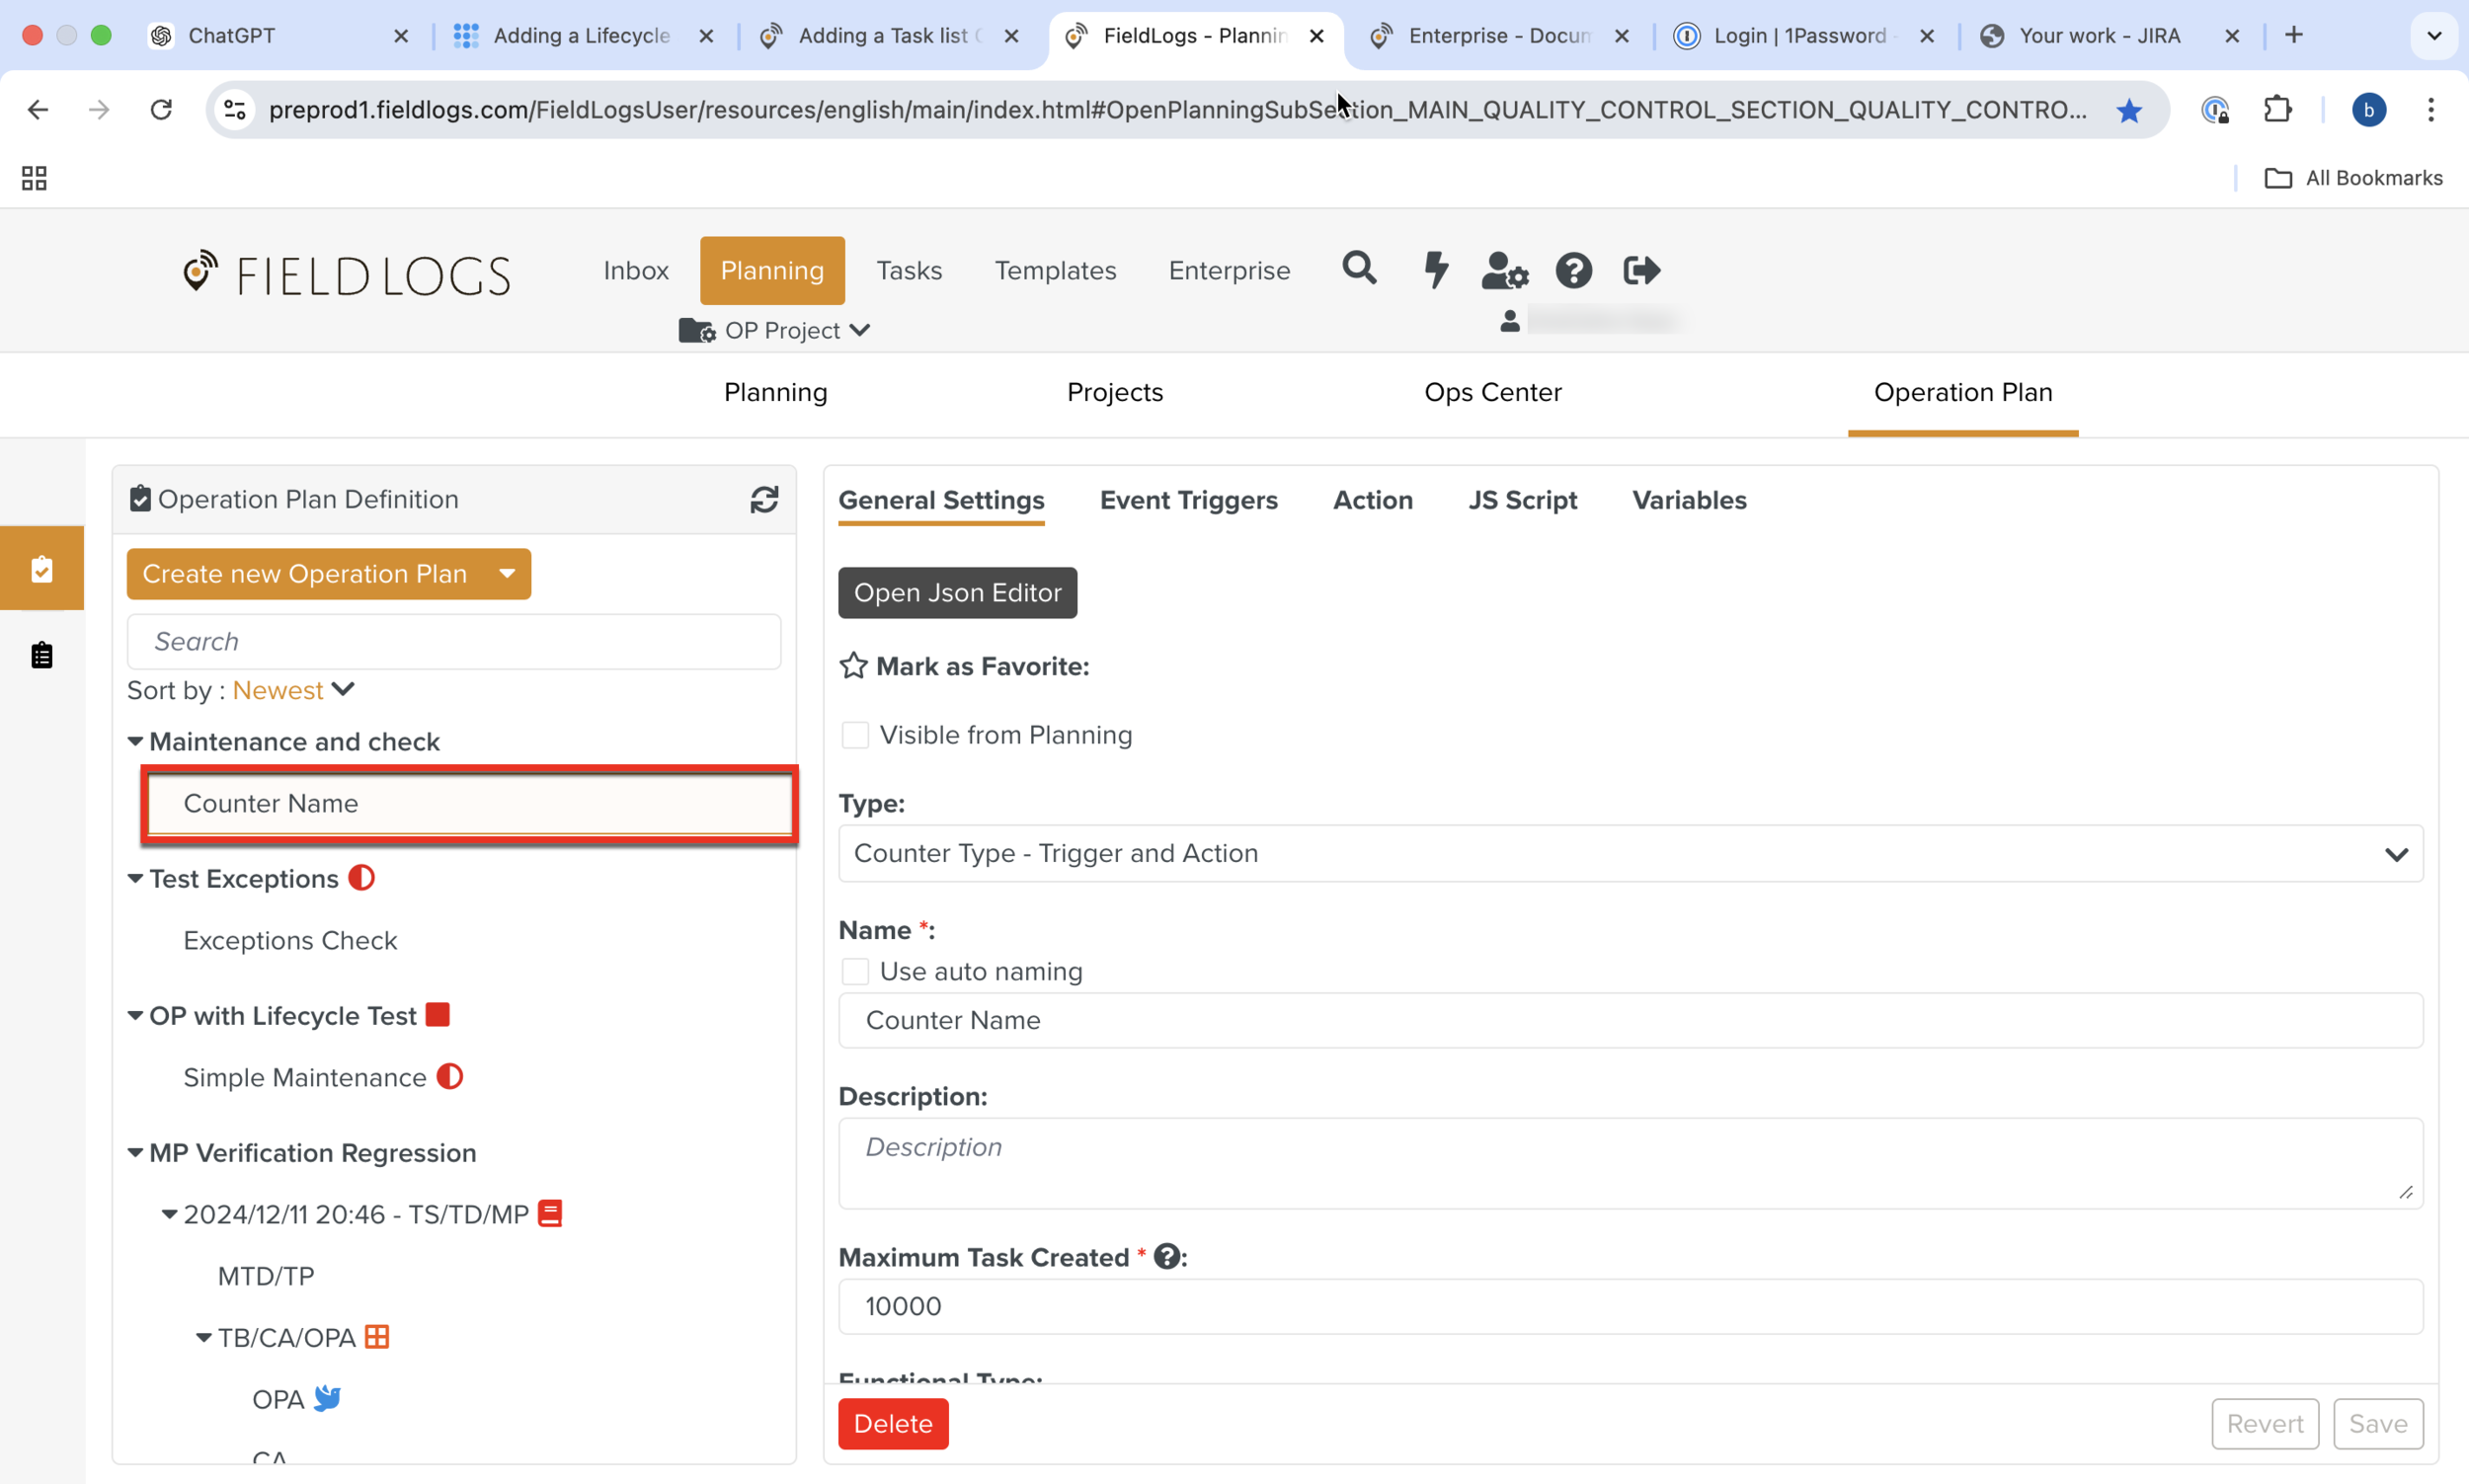
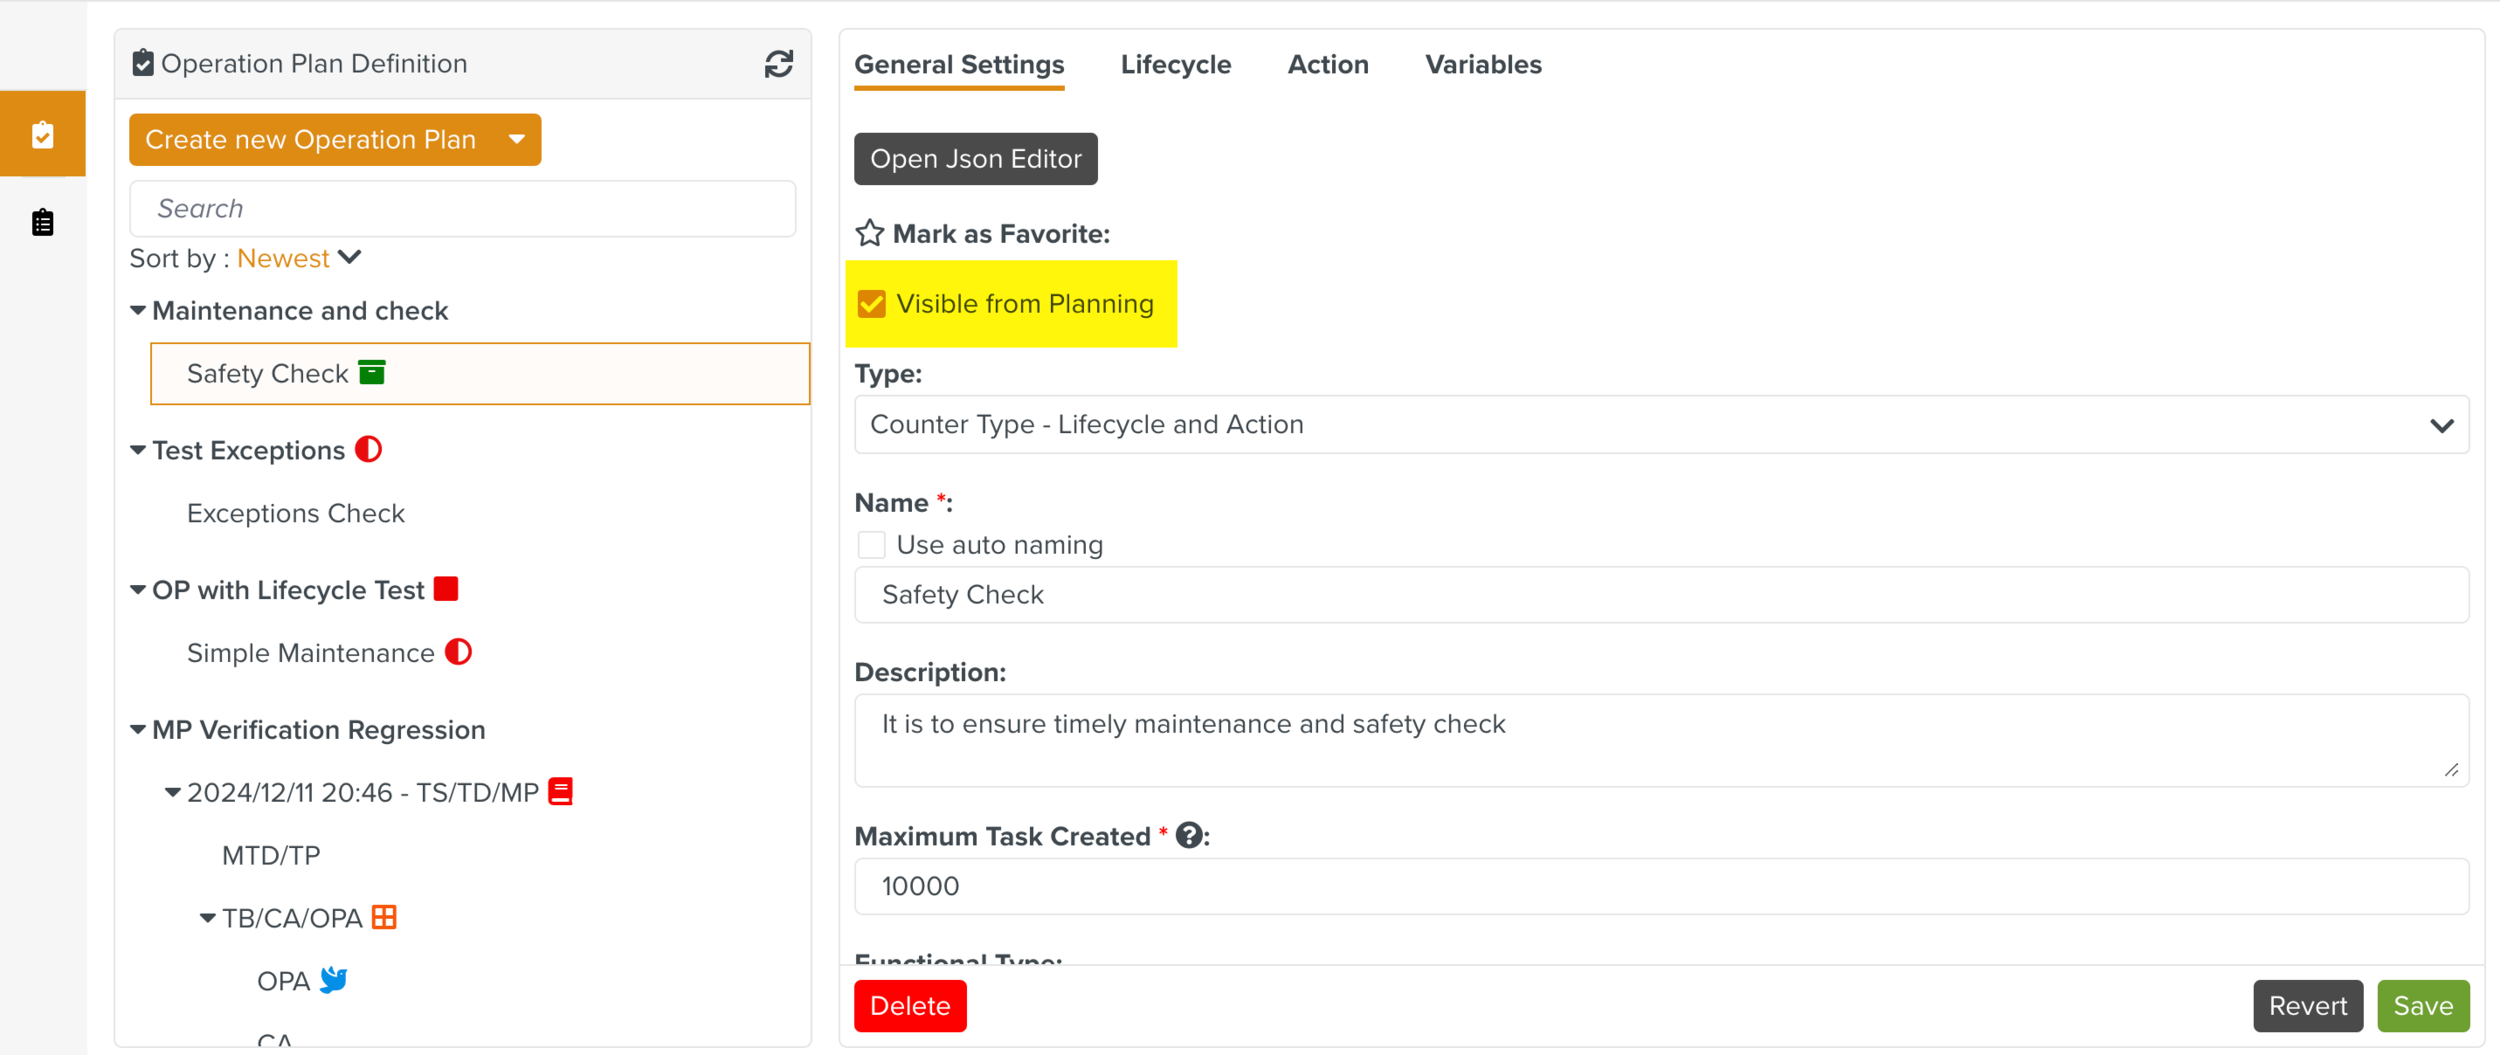
A new Counter is created under the Operation Plan as shown below. It is given a generic name Counter Name as highlighted below.
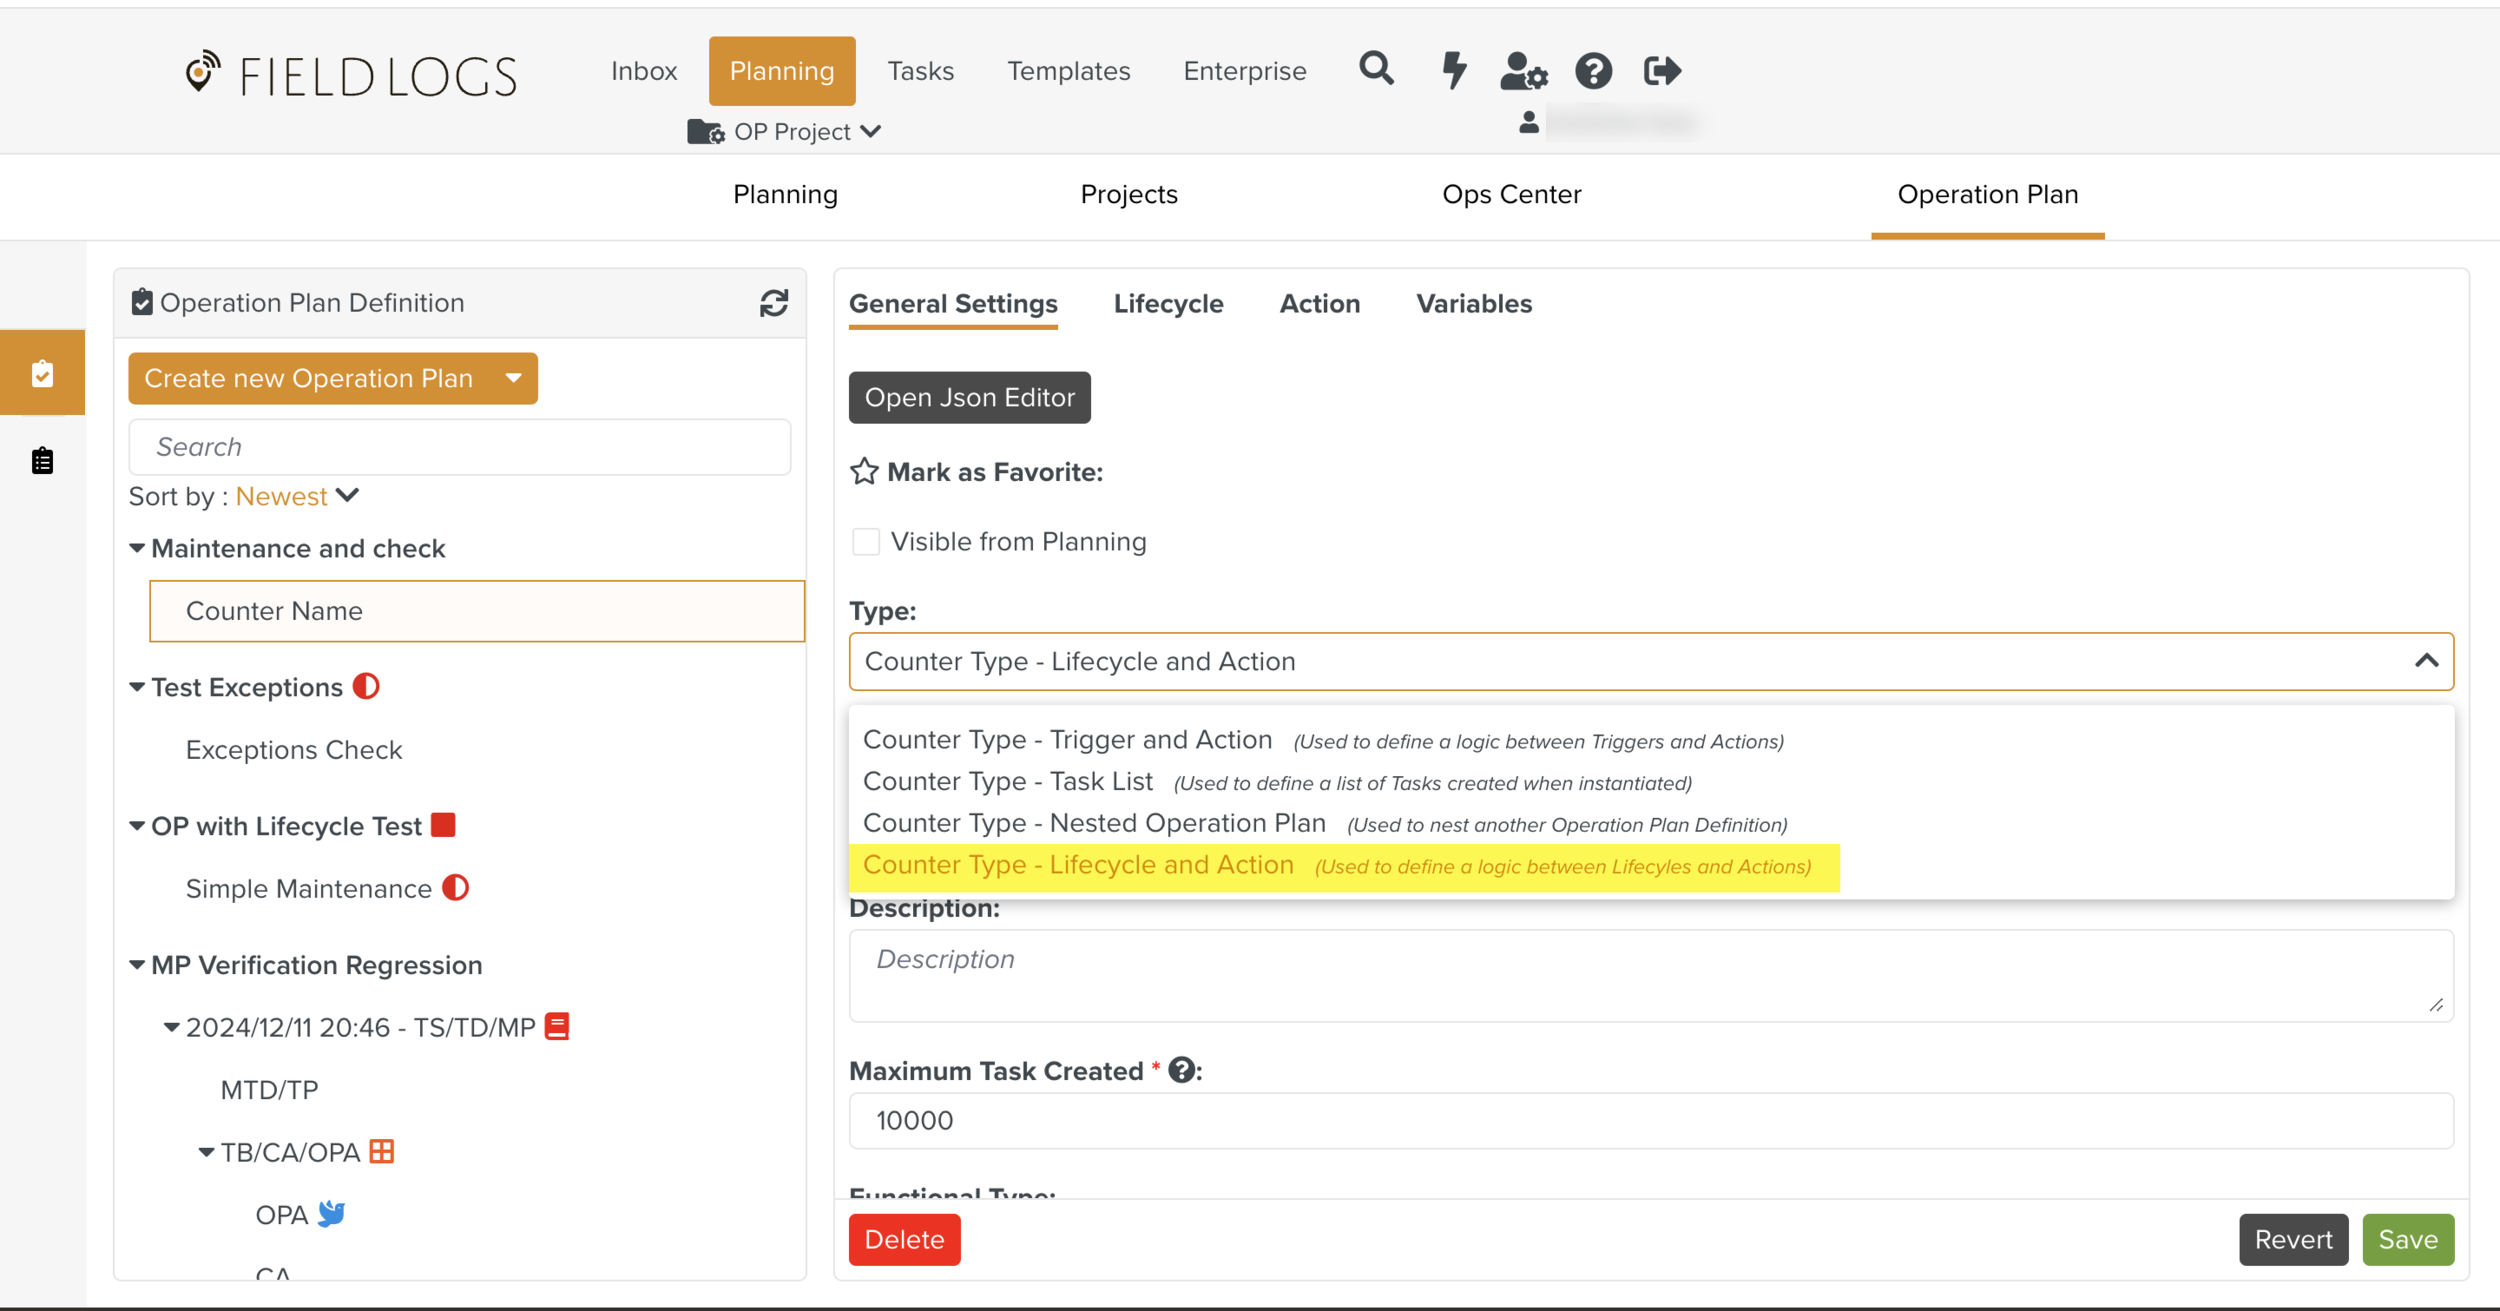
Select the Counter Type as Lifecycle and Action from the dropdown list as shown below.
There are four tabs to configure the Counter. They are:
General Settings
Lifecycle
Action
Variables
On every Tab, there are three buttons , and as seen below.
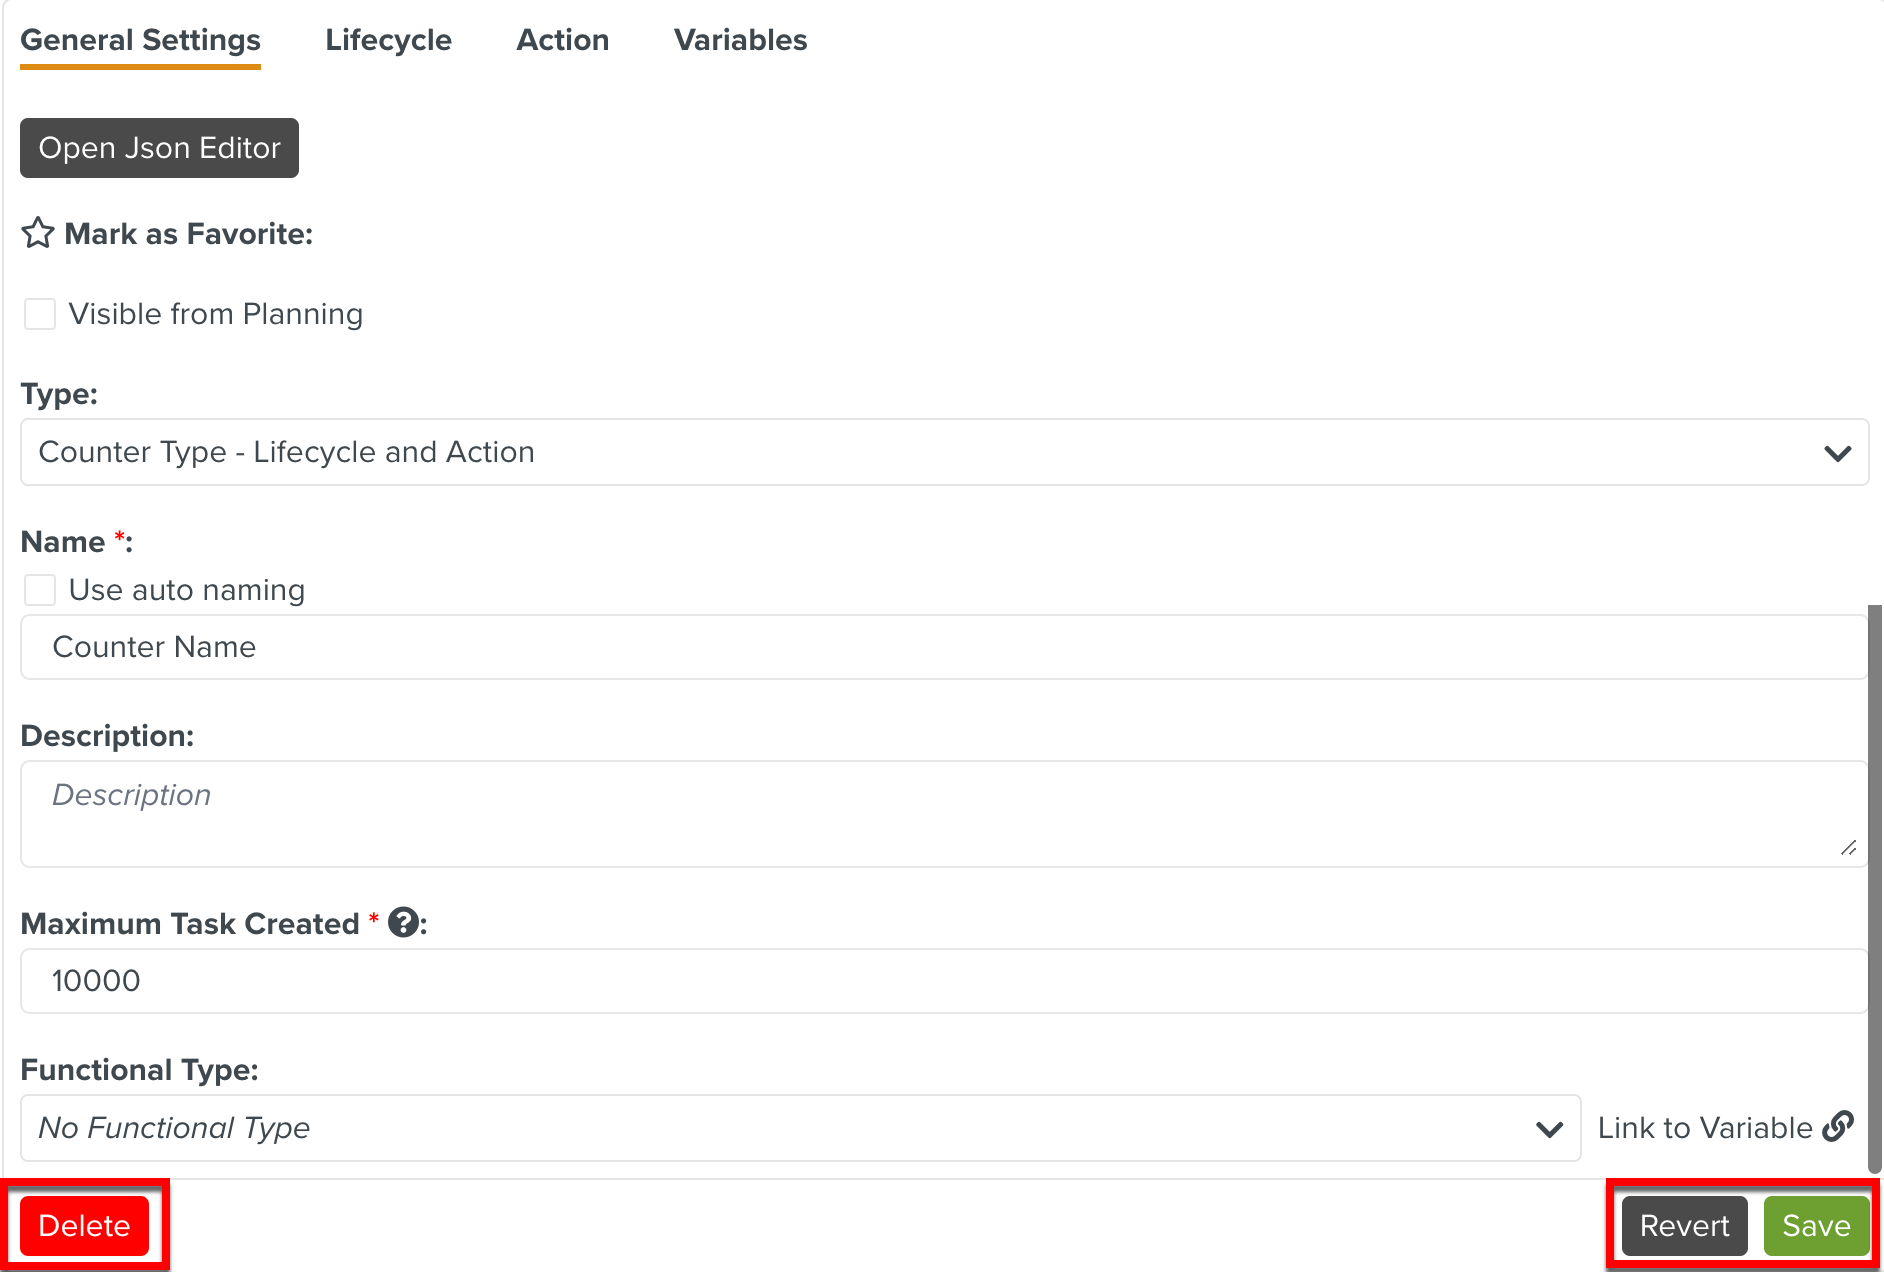
: Deletes the Counter.
: Commits all the changes done so far to the Counter.
: Undoes all unsaved changes.
You can add basic details of the Counter.
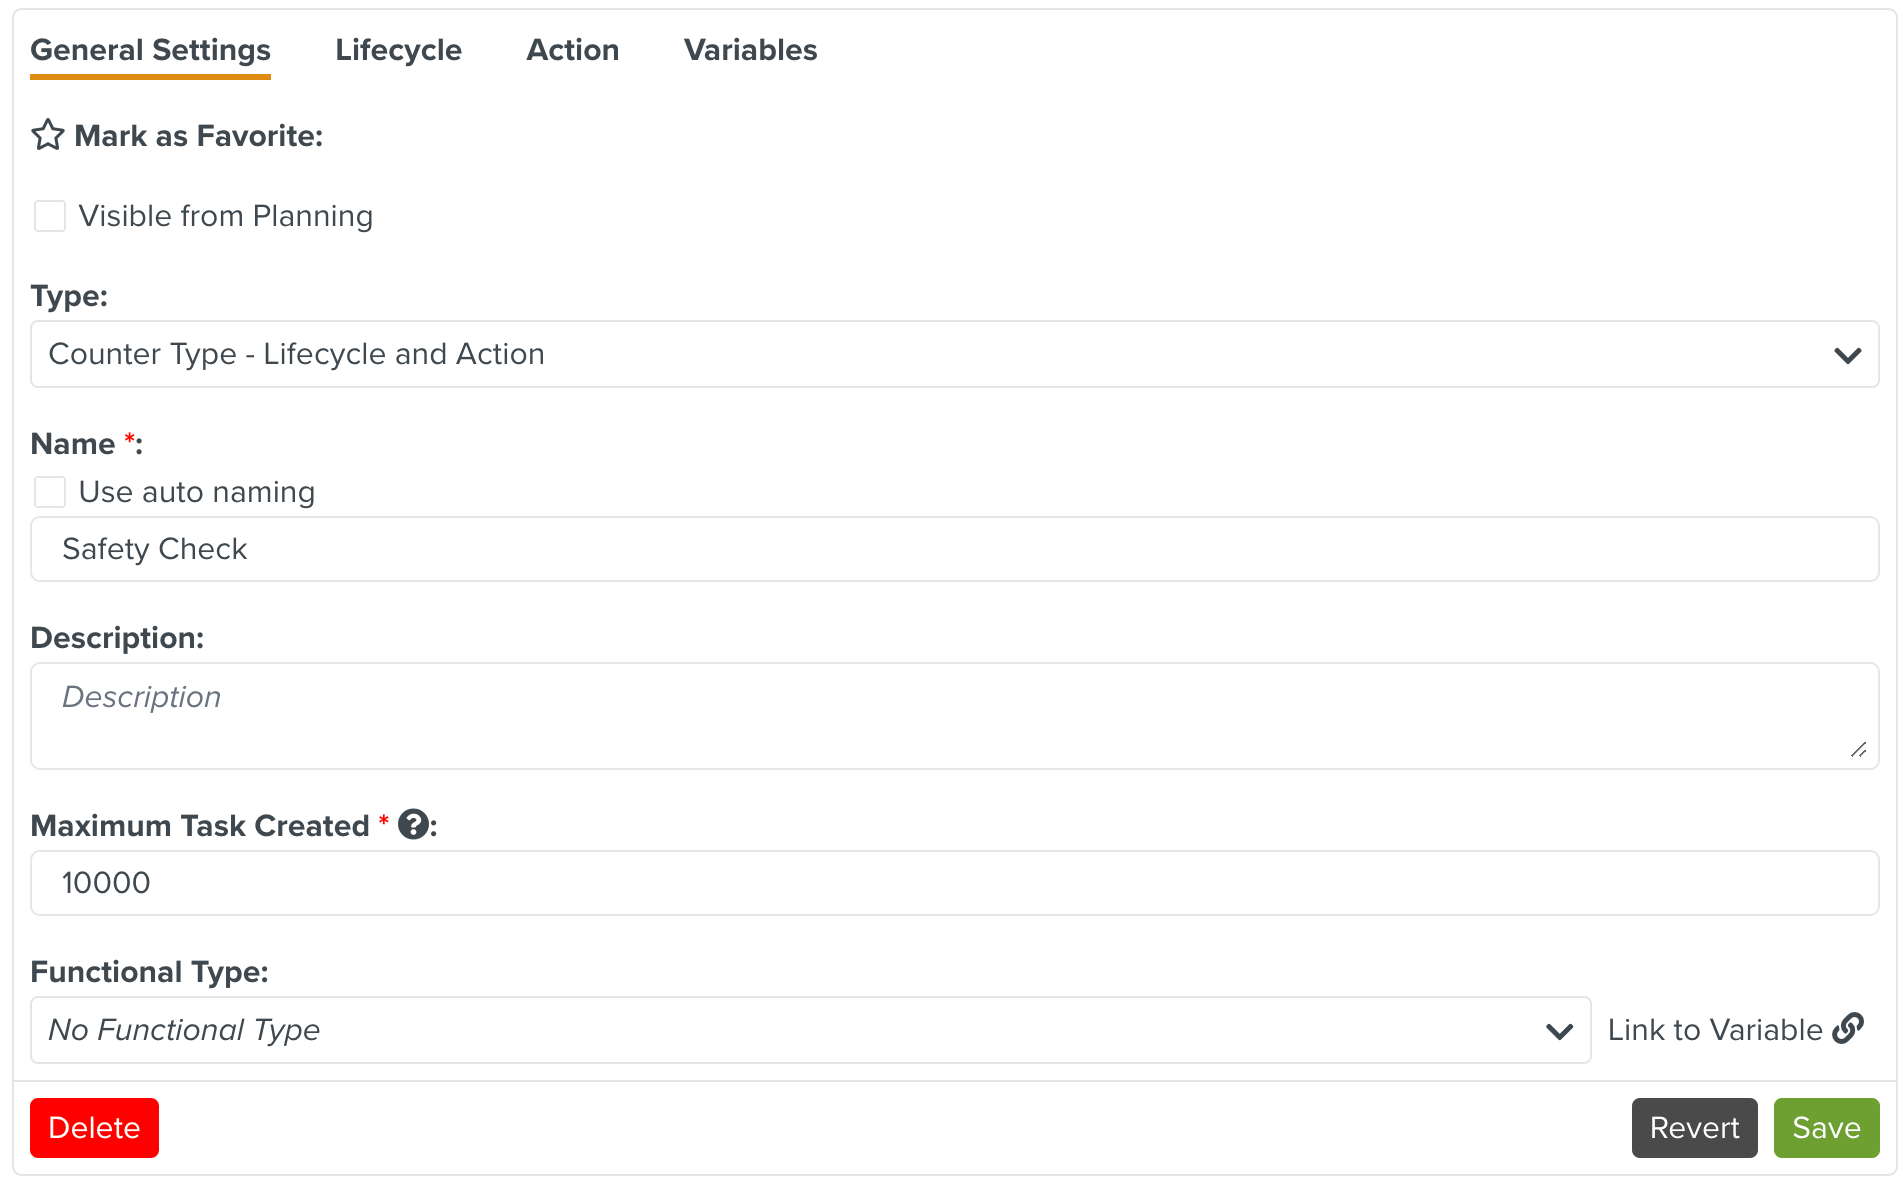 |
The following fields can be configured:
Type: Select the Counter Type - Lifecycle and Action from the dropdown list.
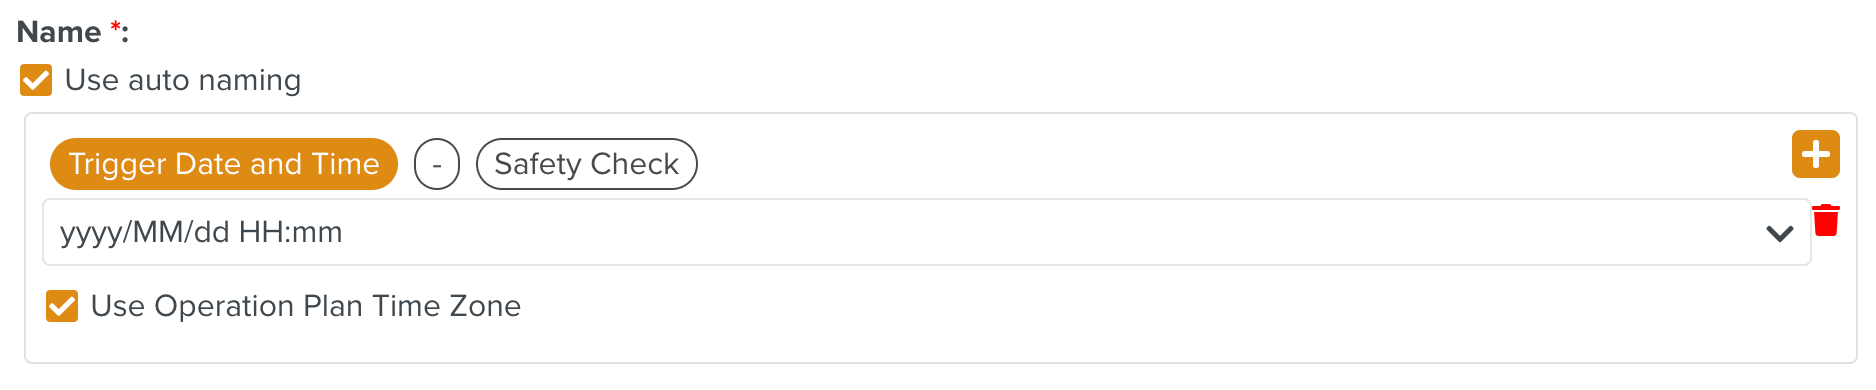
Name: Enter a name for the Counter. You can also use the auto-naming option. The auto-name format can be configured using the options highlighted below.
In the following example, the Text Safety Check has been used to create the auto naming format for the Counter.
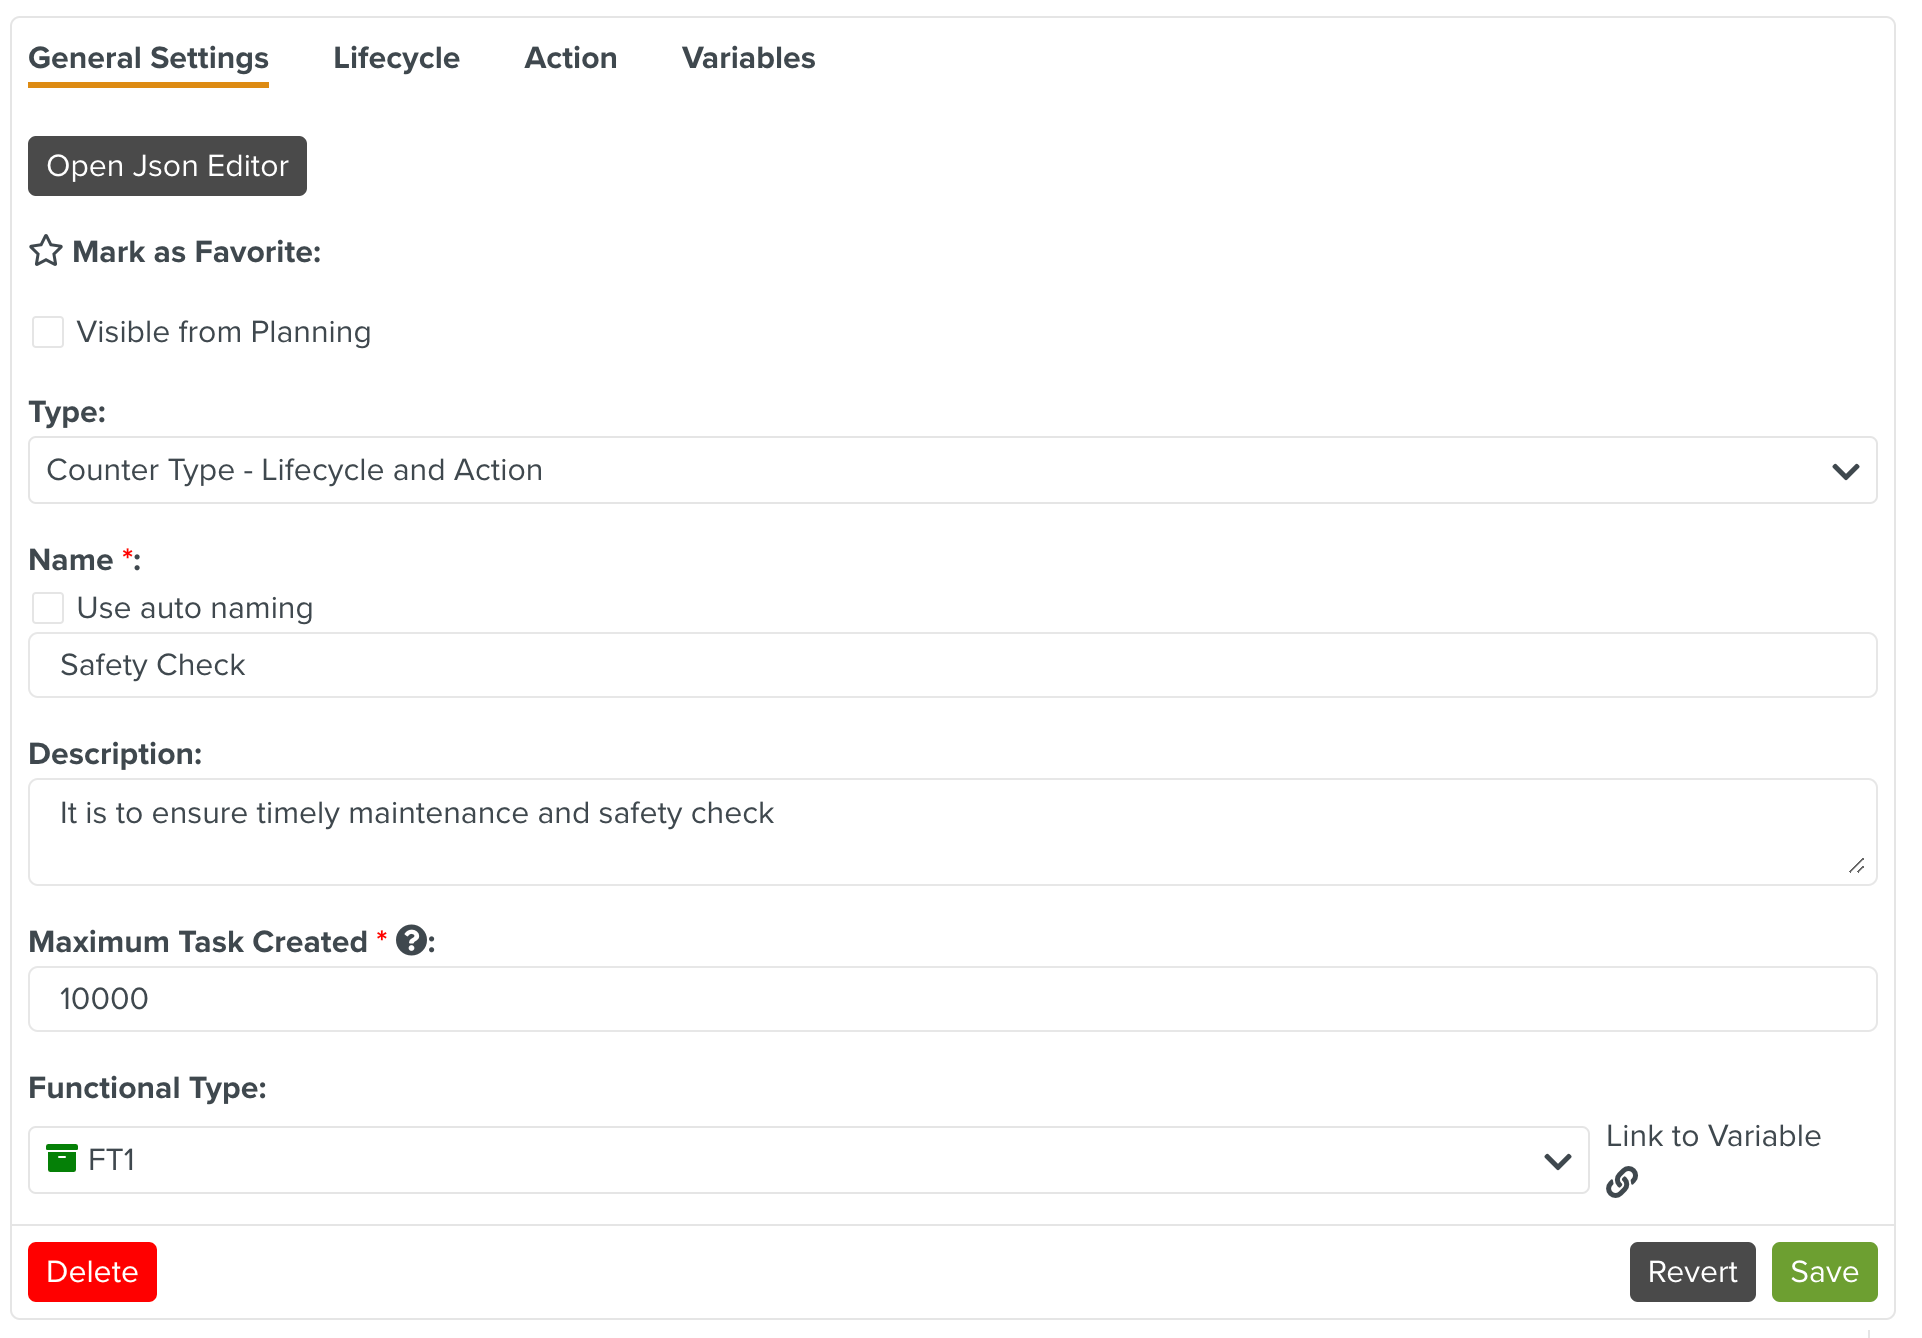
Description: Describes of the purpose of the Counter.
Maximum Task Created: This sets the maximum number of Tasks that this Counter can create. For a Lifecycle and Action Counter, only one Task can be created.
Functional Types: It is used only to visually highlight the Counter. It has no impact on the Tasks generated from the Operation Plan.
You can also use the Link to Variable option to link to a Functional Type Variable.
Visible from Planning: If this option is enabled, the Tasks generated are visible from the Planning and Inbox sections.
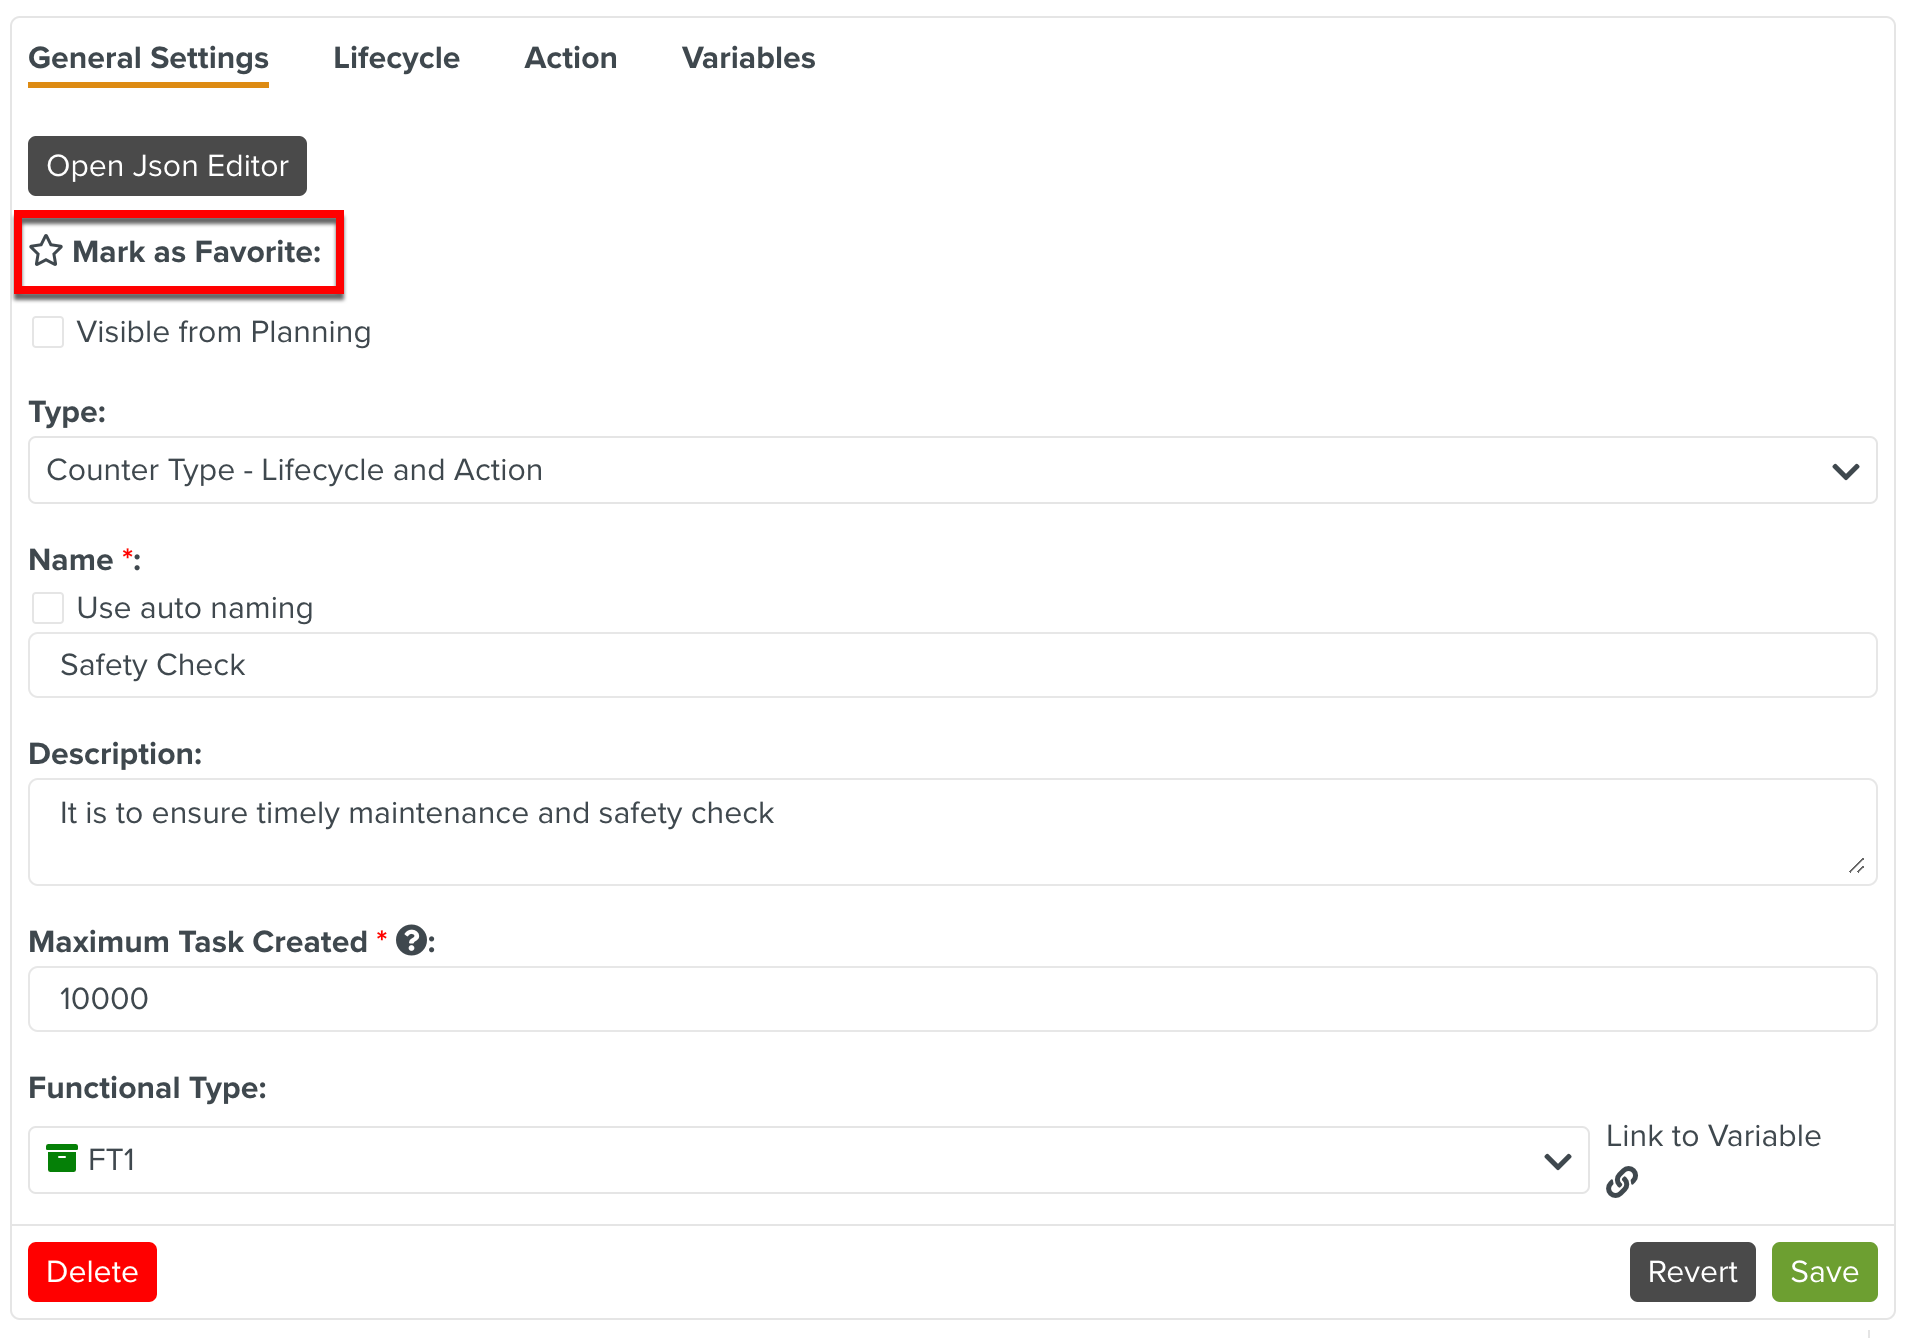
Mark as Favorite: This option allows you to bookmark a Counter.
A sample Counter with its fields set is shown below.
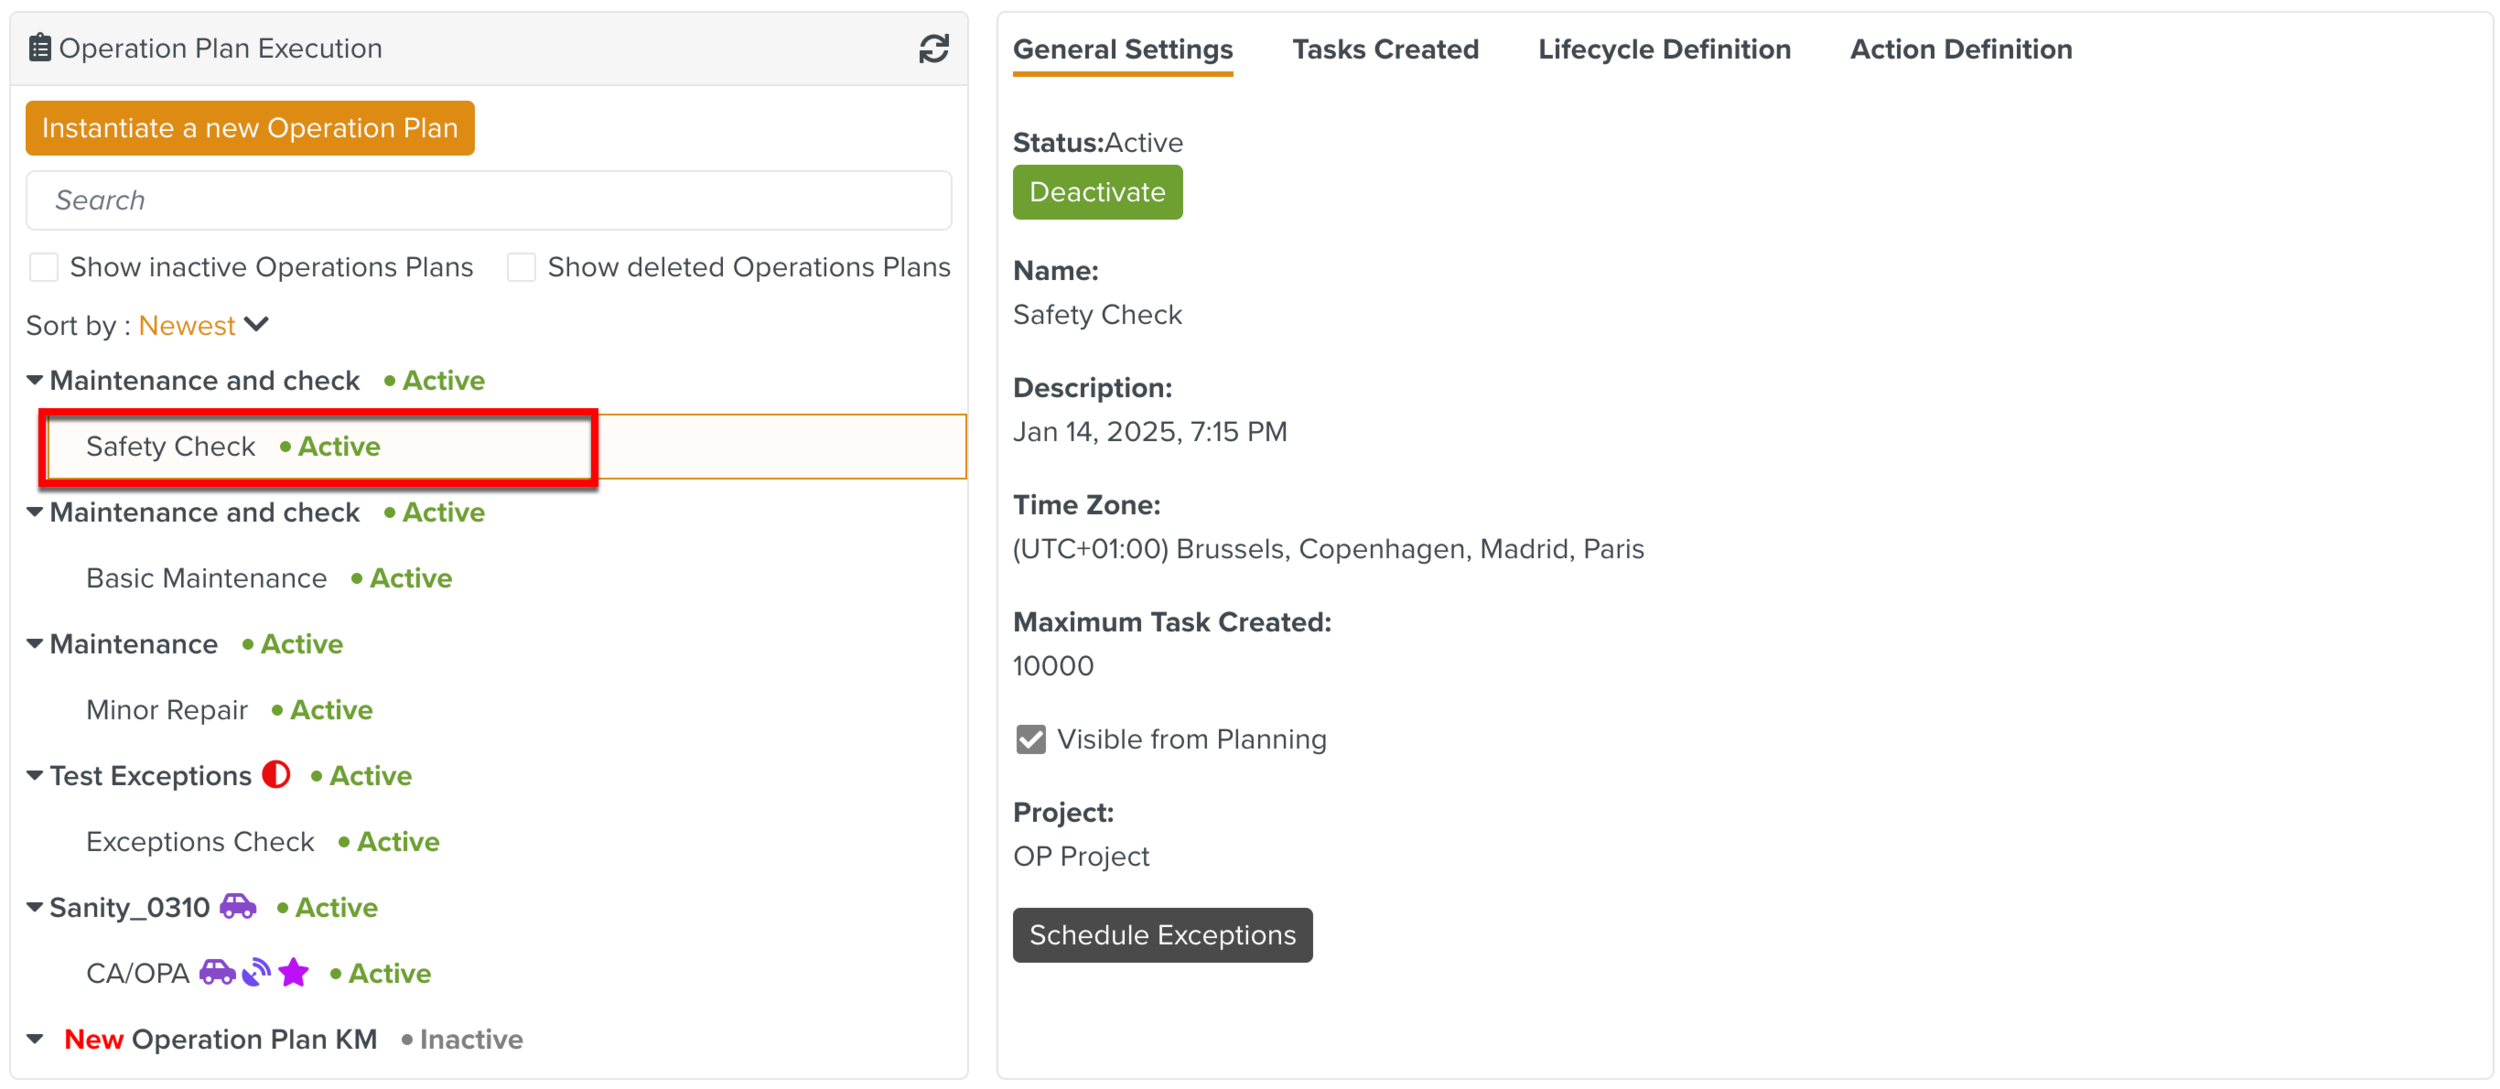
This Counter can also be seen in Planning and Inbox when you select Visible from Planning.
If this option is selected, then the Tasks generated by this Counter are listed under the Counter in the Planning and Inbox sections.
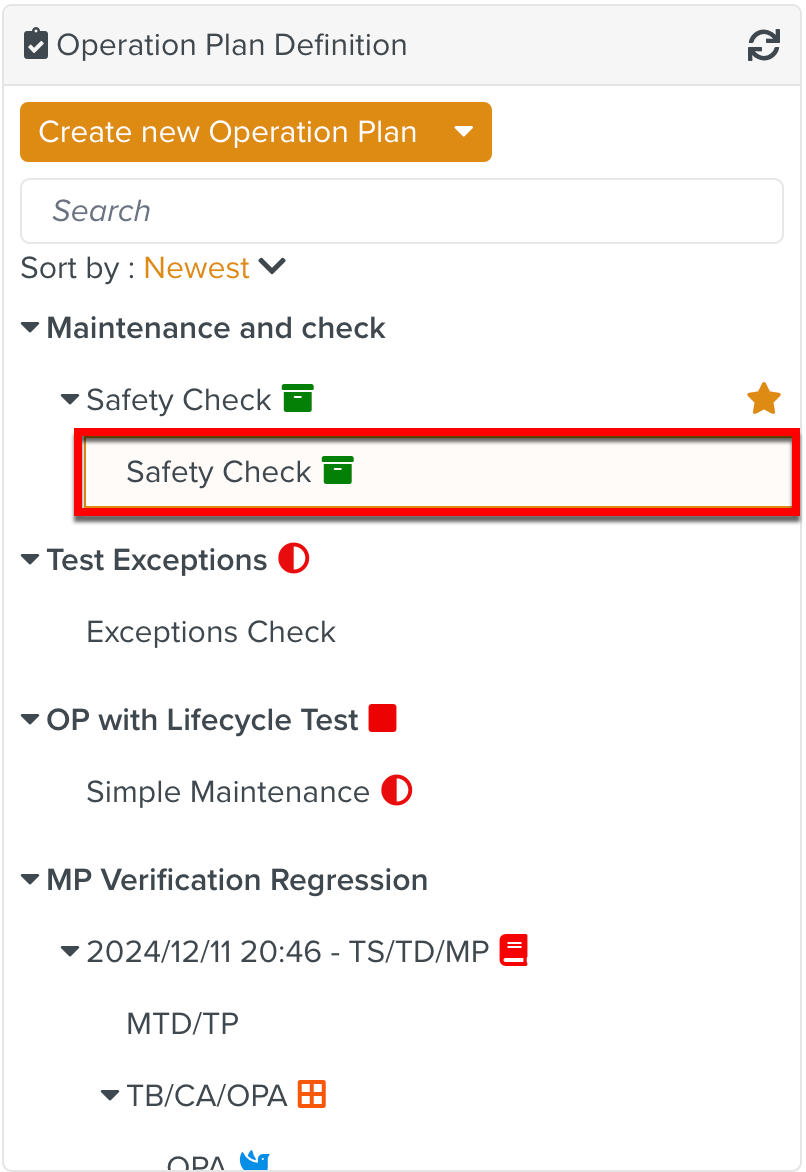
In the below example, the Visible from Planning option is enabled on the Safety Check Counter.
 |
 |
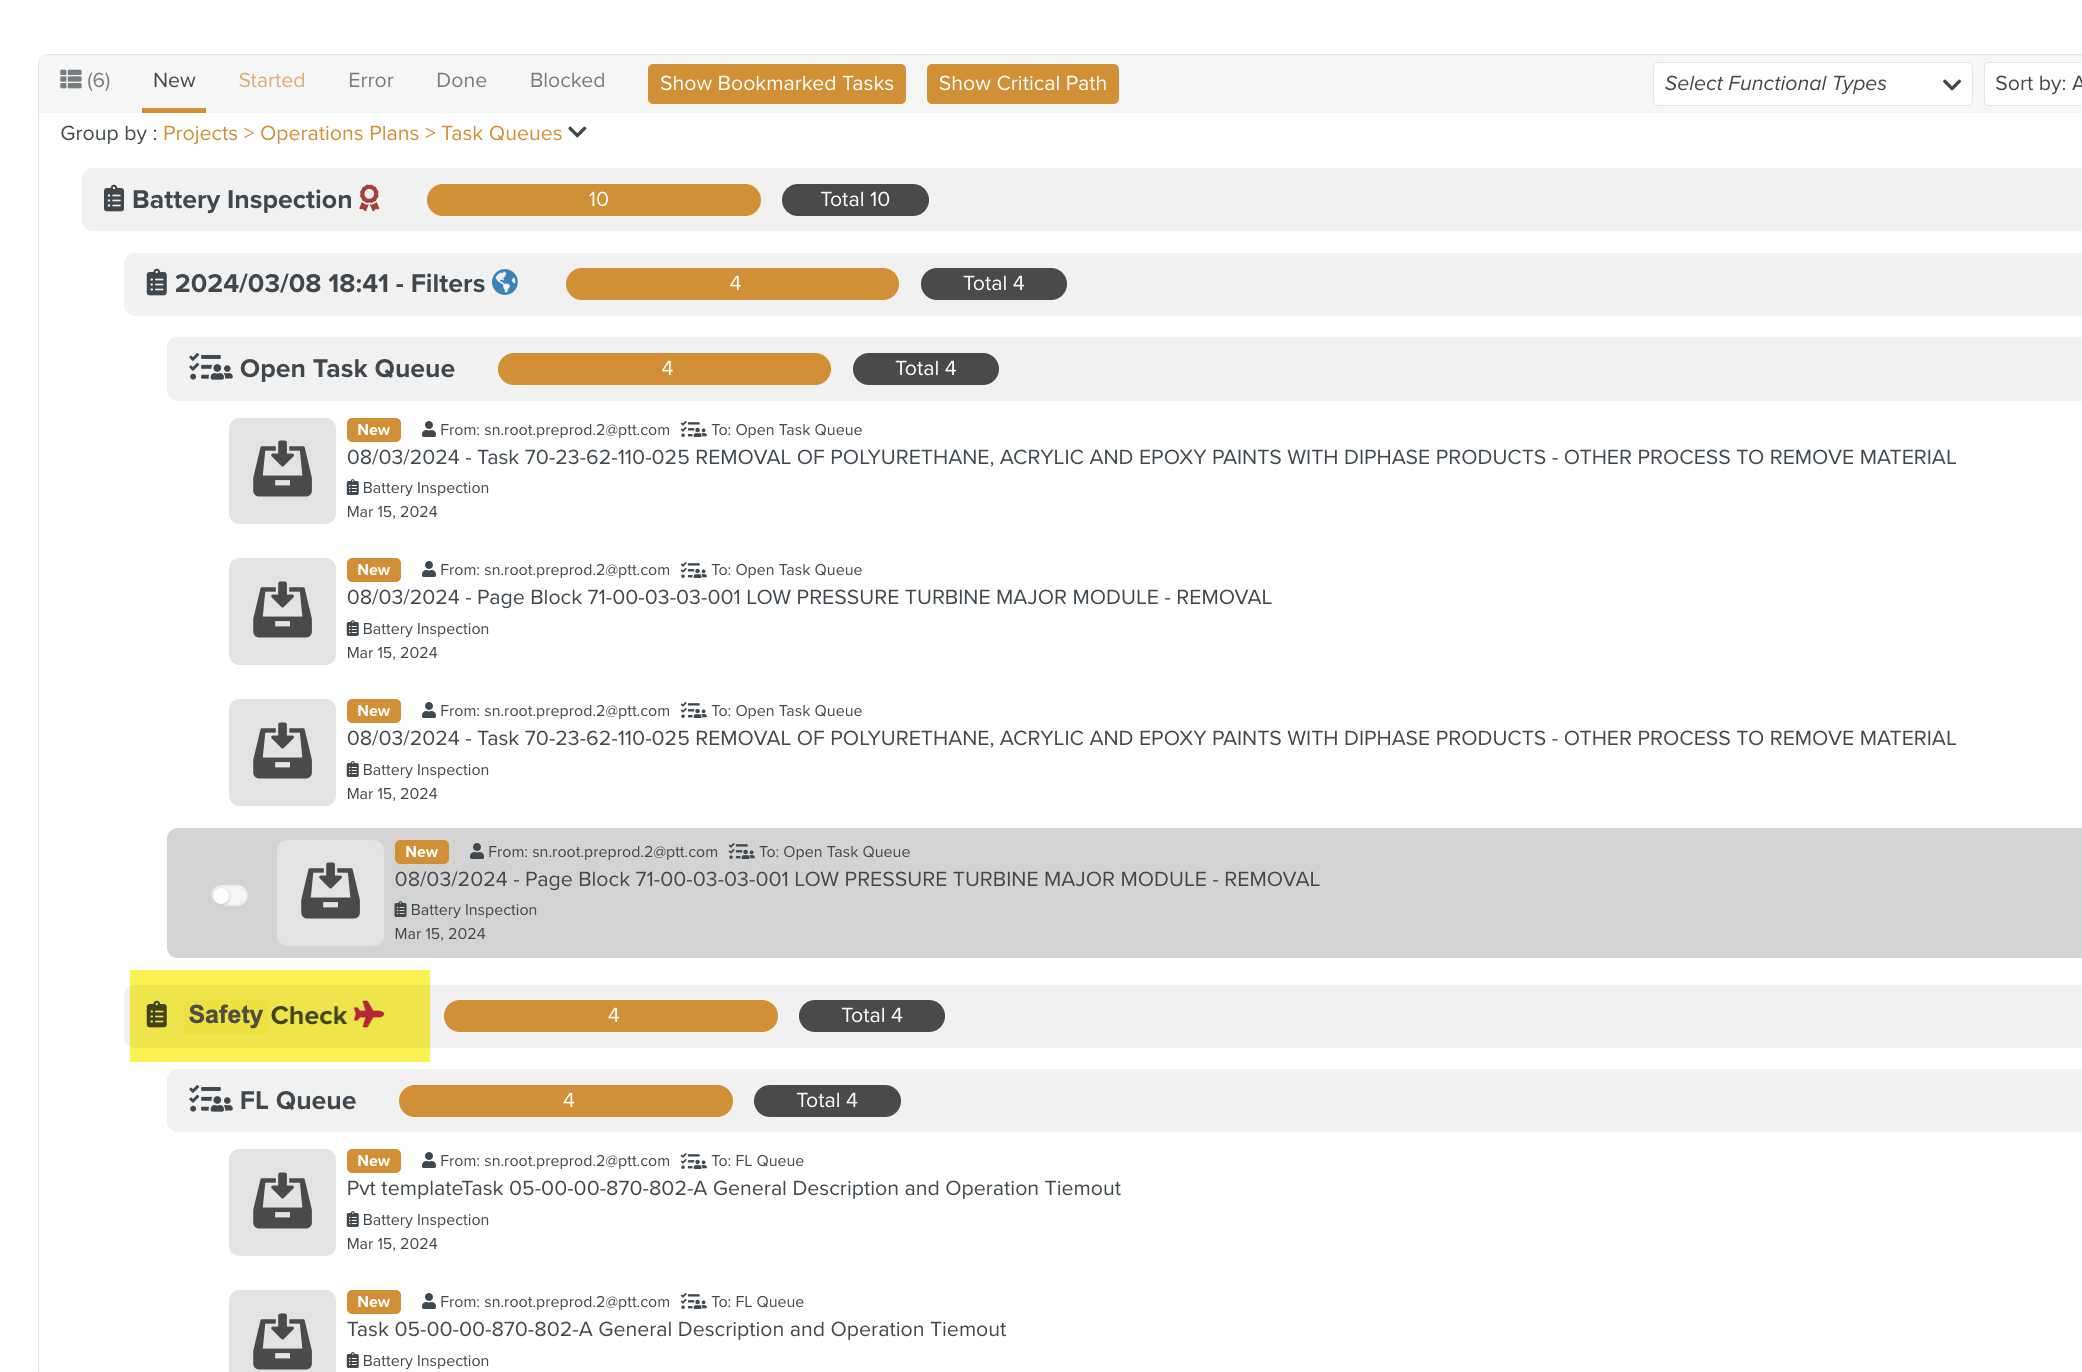
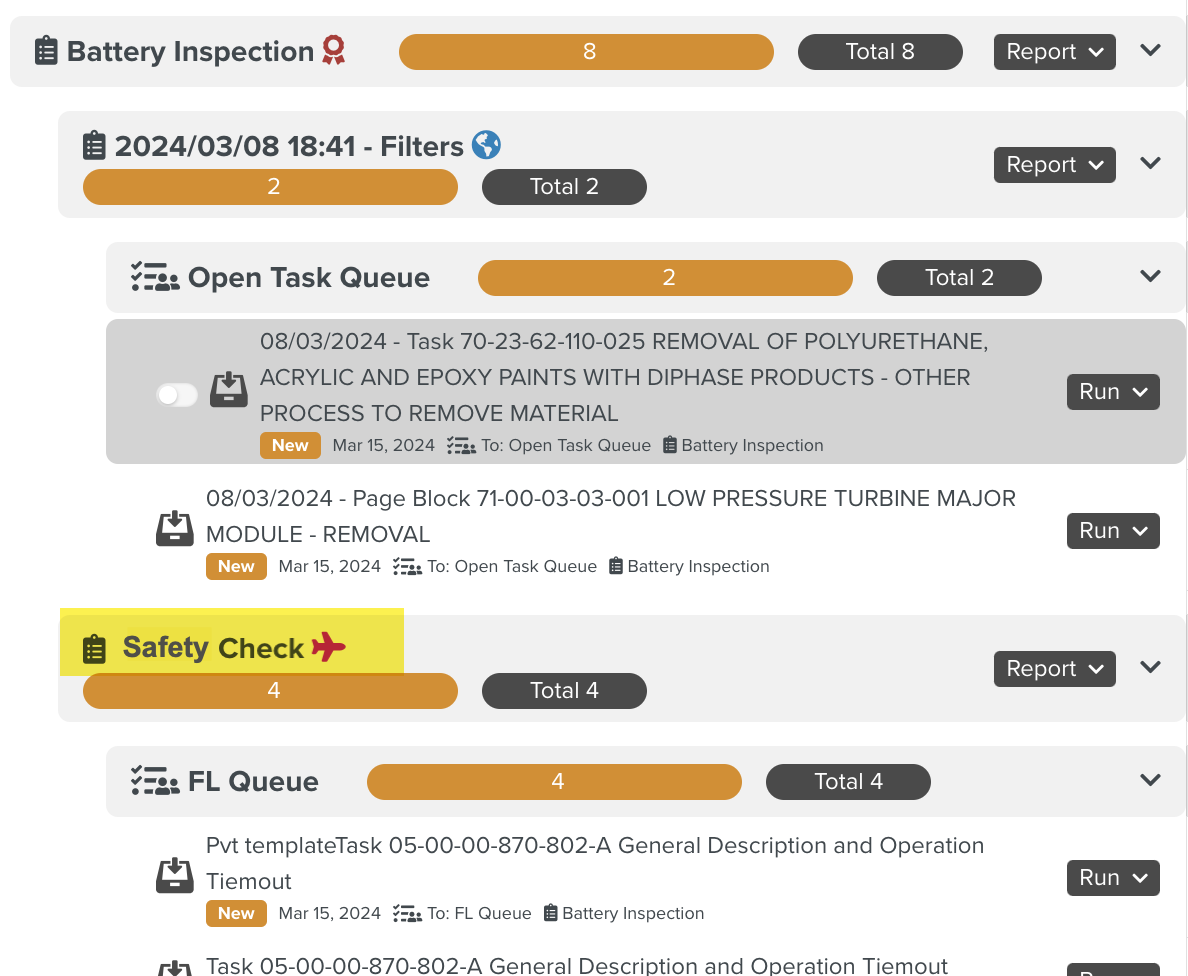
The Tasks generated by the Safety Check Counter are grouped under the Counter name in the Inbox and Planning sections as seen below.
 |
 |
You can re-use this Counter by marking it as favorite.
You can mark a Counter as a Favorite if you want to re-use it in other Operation Plans.
Click Mark as Favorite to mark the Counter as a Favorite.
 |
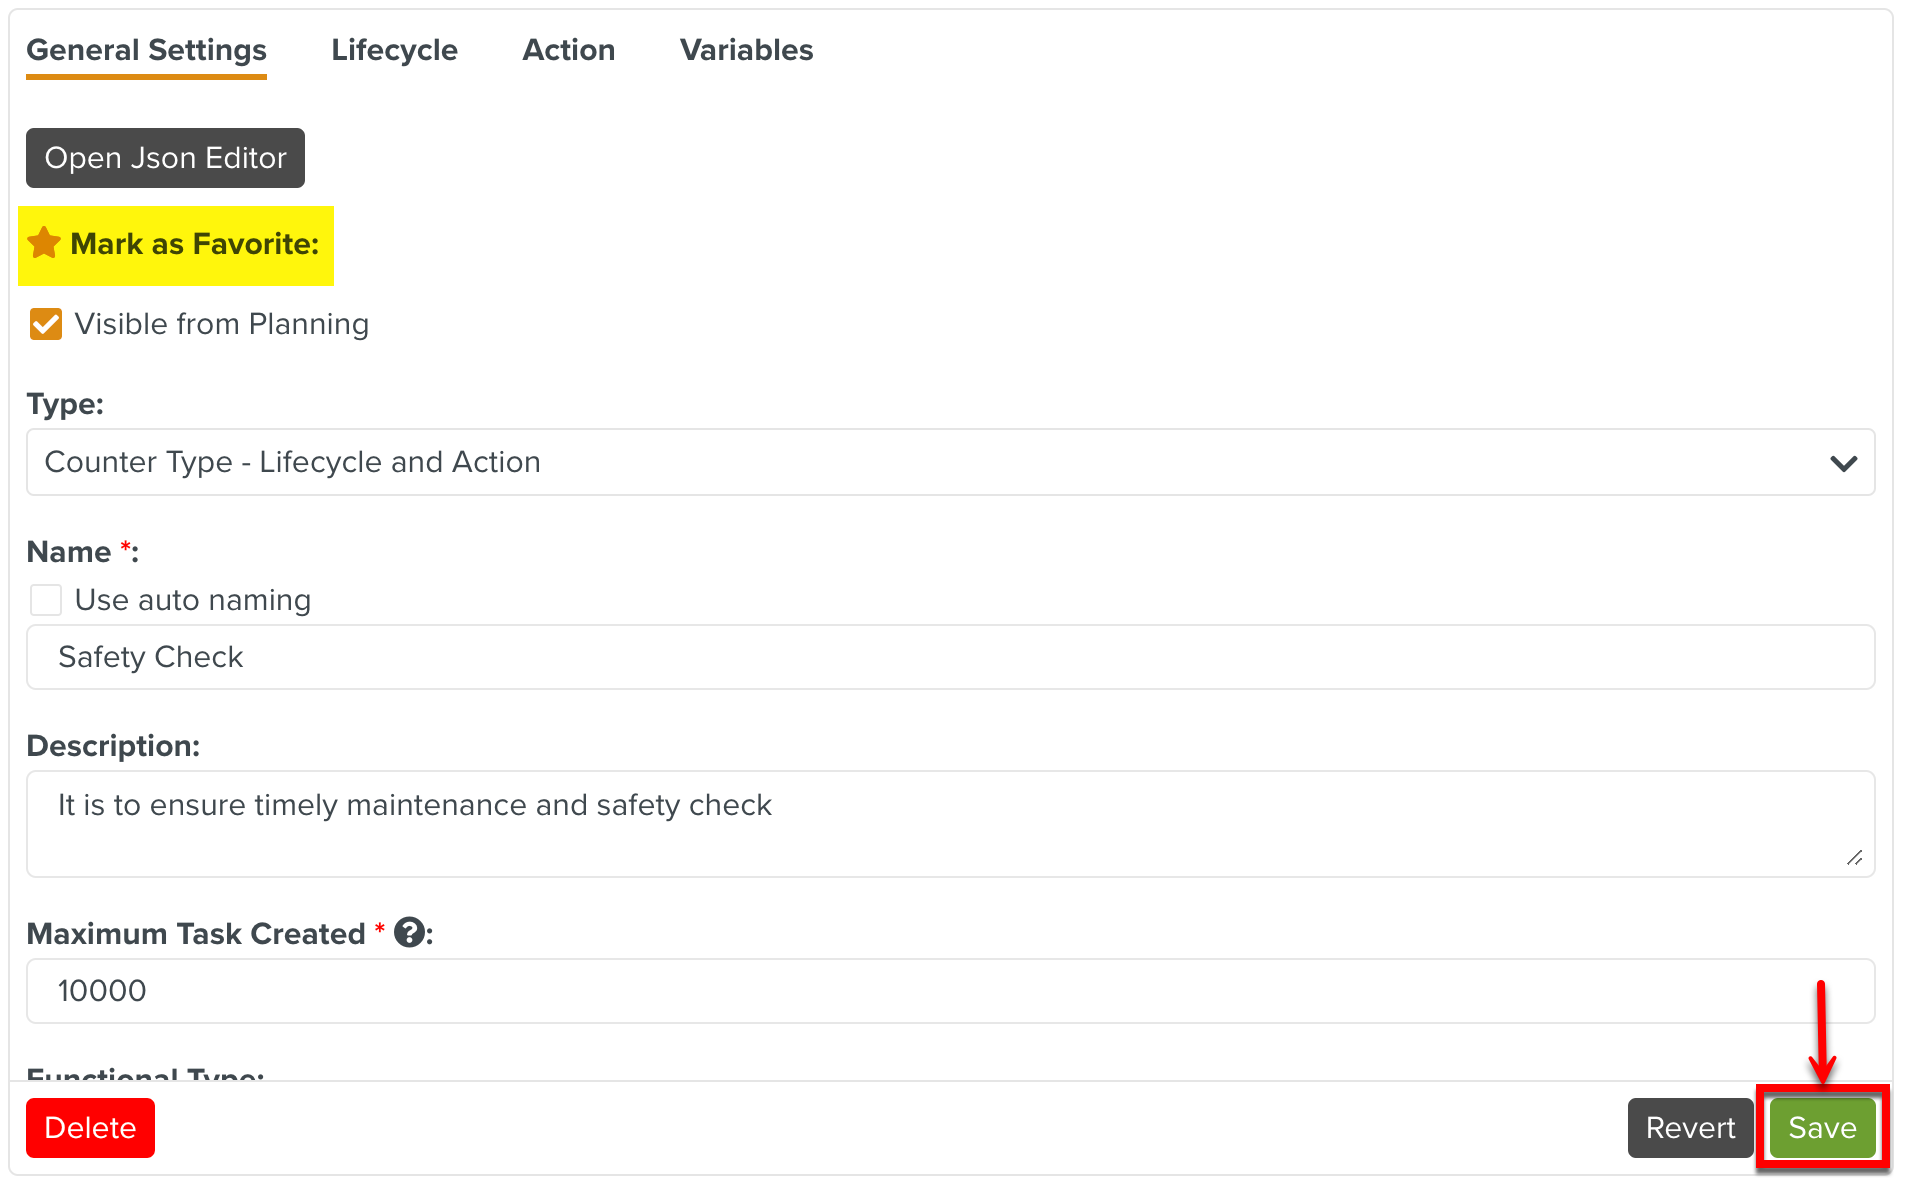
The Counter is marked as a Favorite as indicated by the colored star. Click .
 |
This Counter can now be re-used in other Operation Plans.
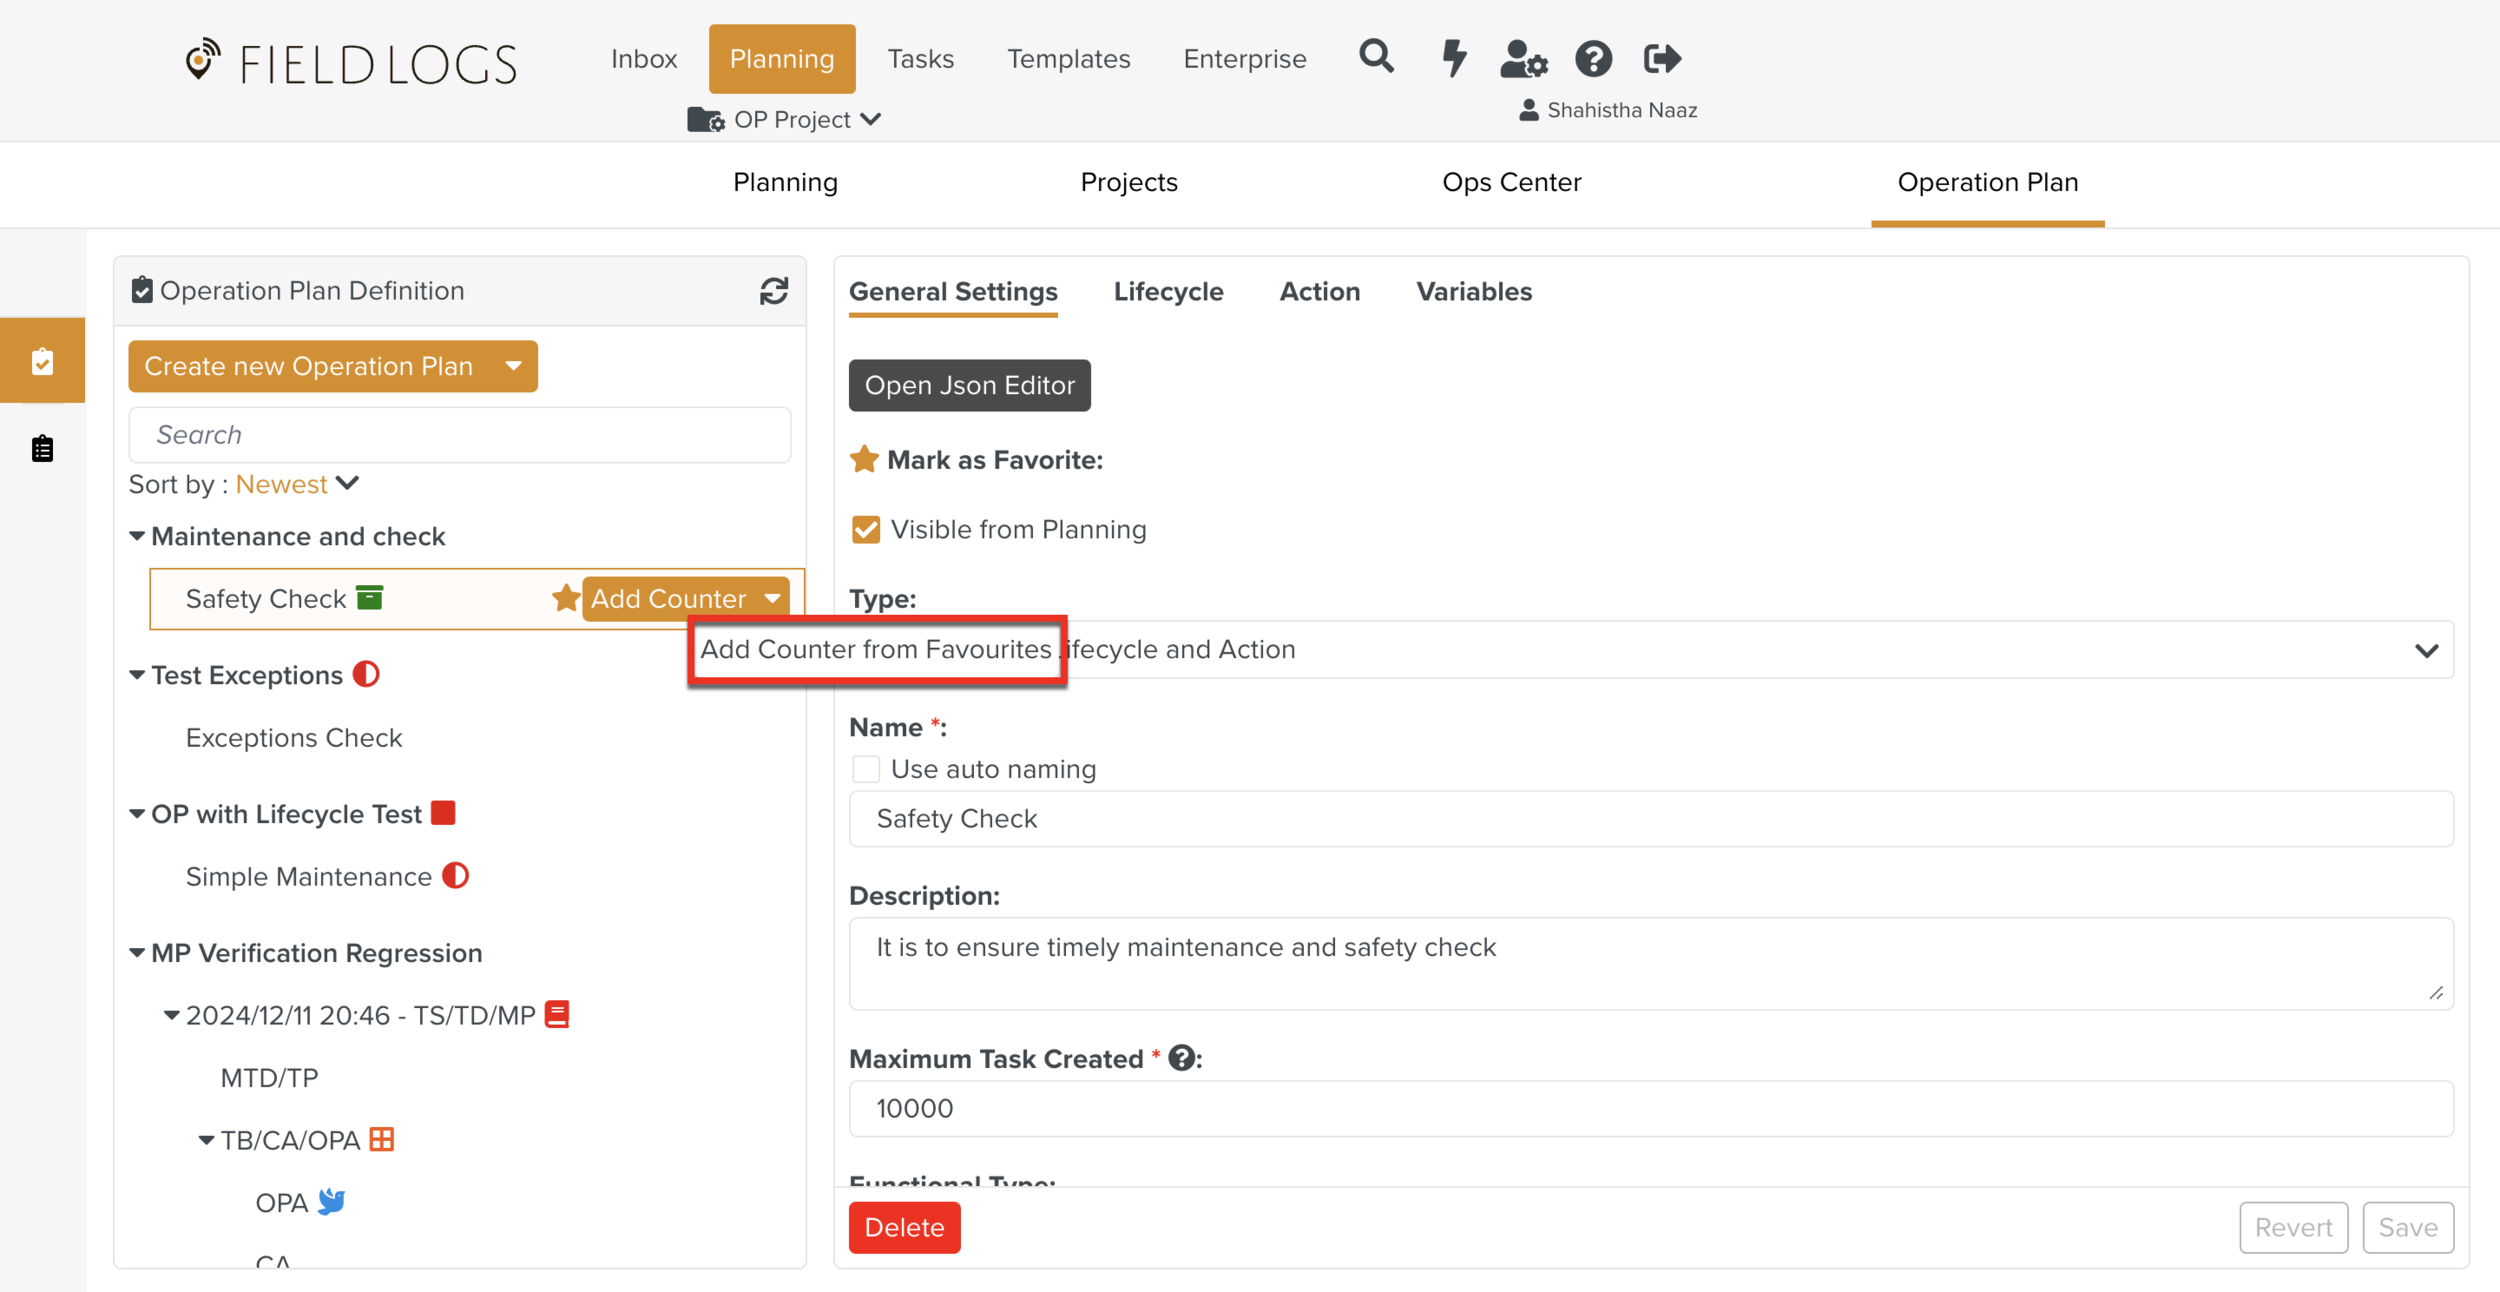
To re-use this Counter in a different Operation Plan:
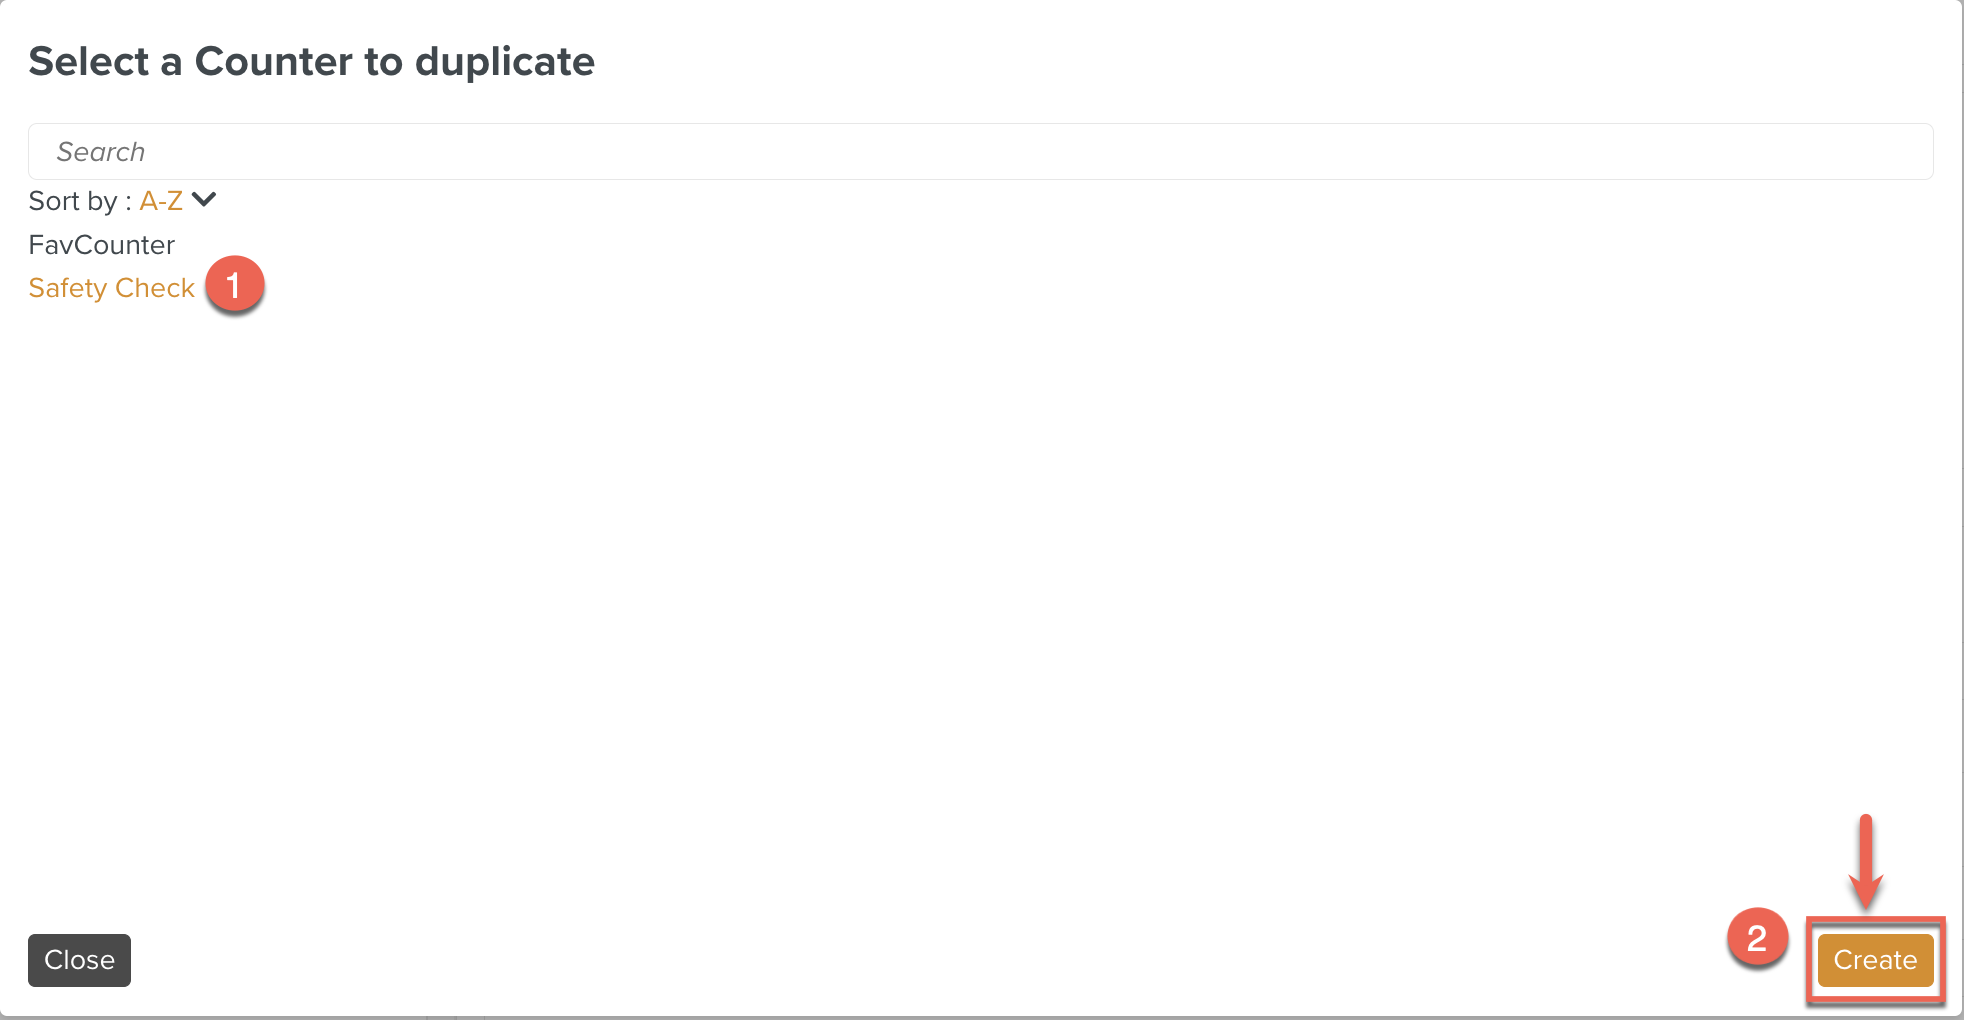
Select Add Counter from Favorites in the Operation Plan as shown below.
The list of Counters that have been marked as Favorite are displayed.
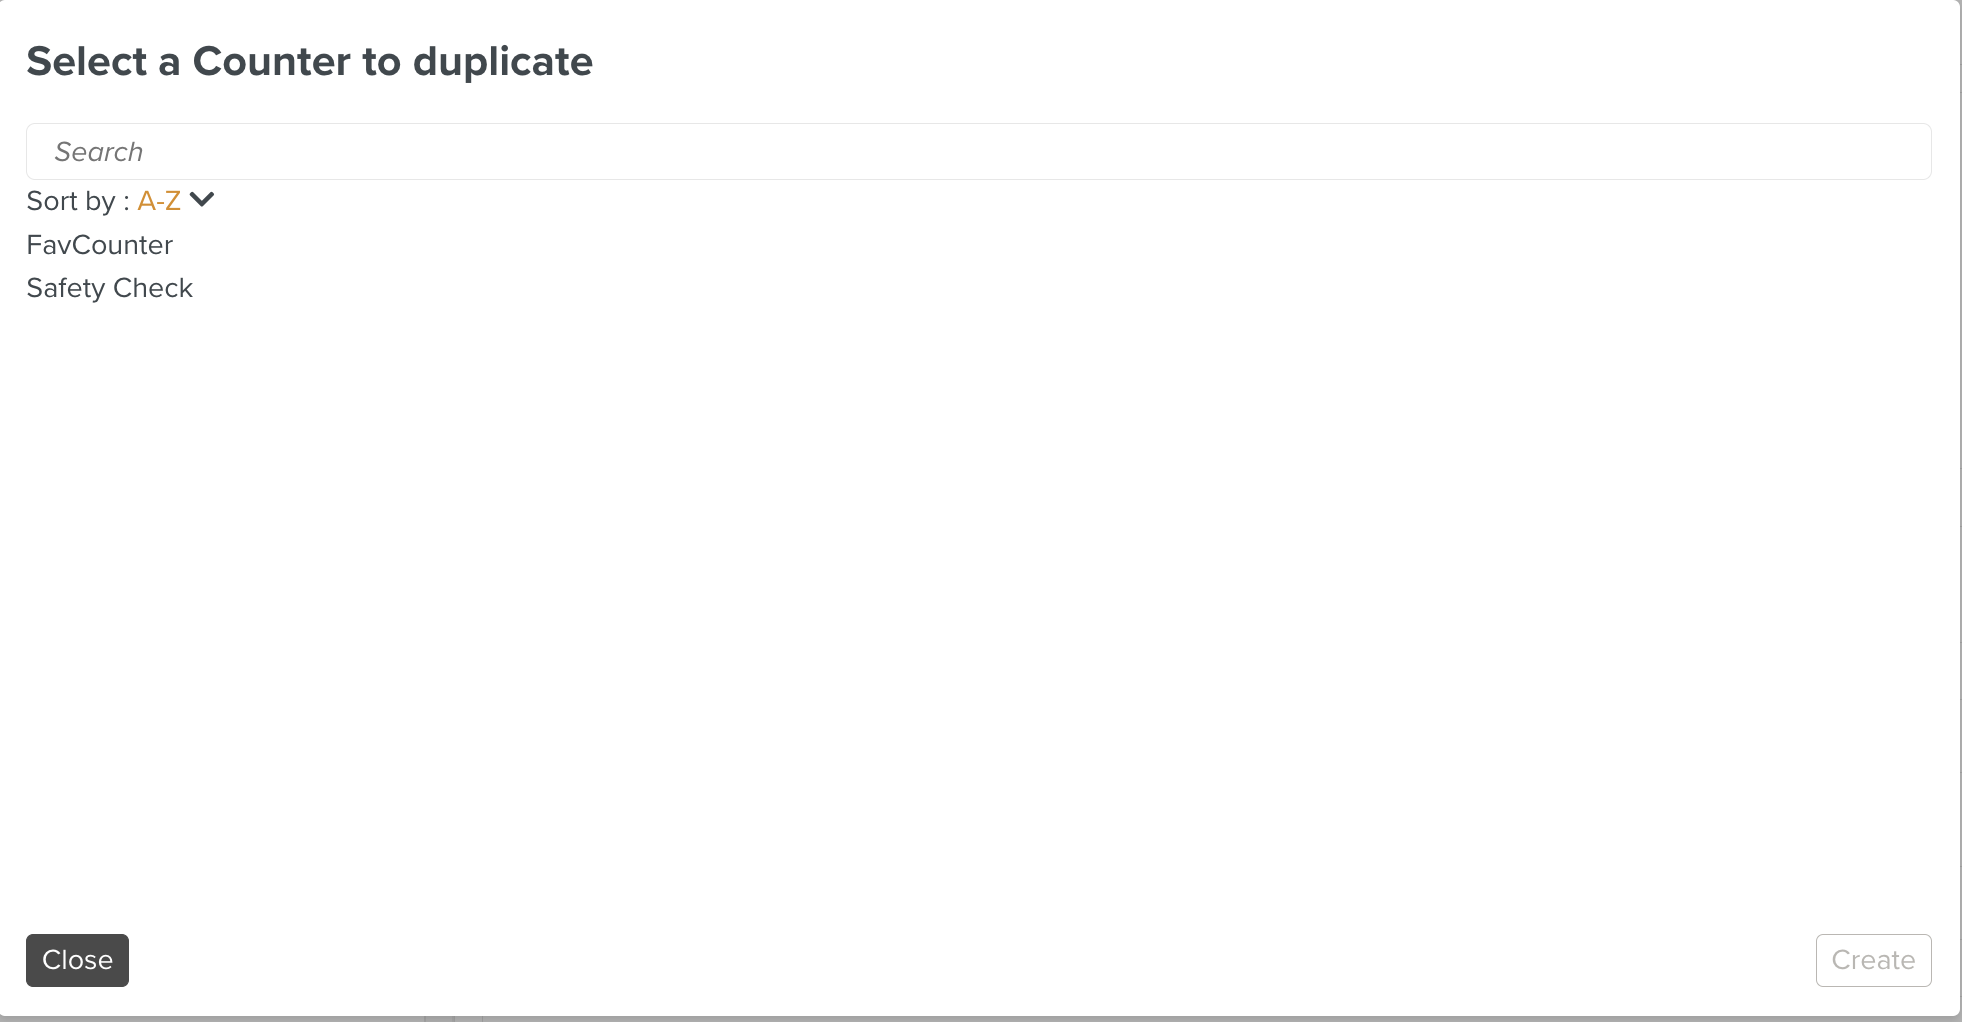
Select the desired Counter to add to your Operation Plan and click .
The selected Counter is added to the Operation Plan.
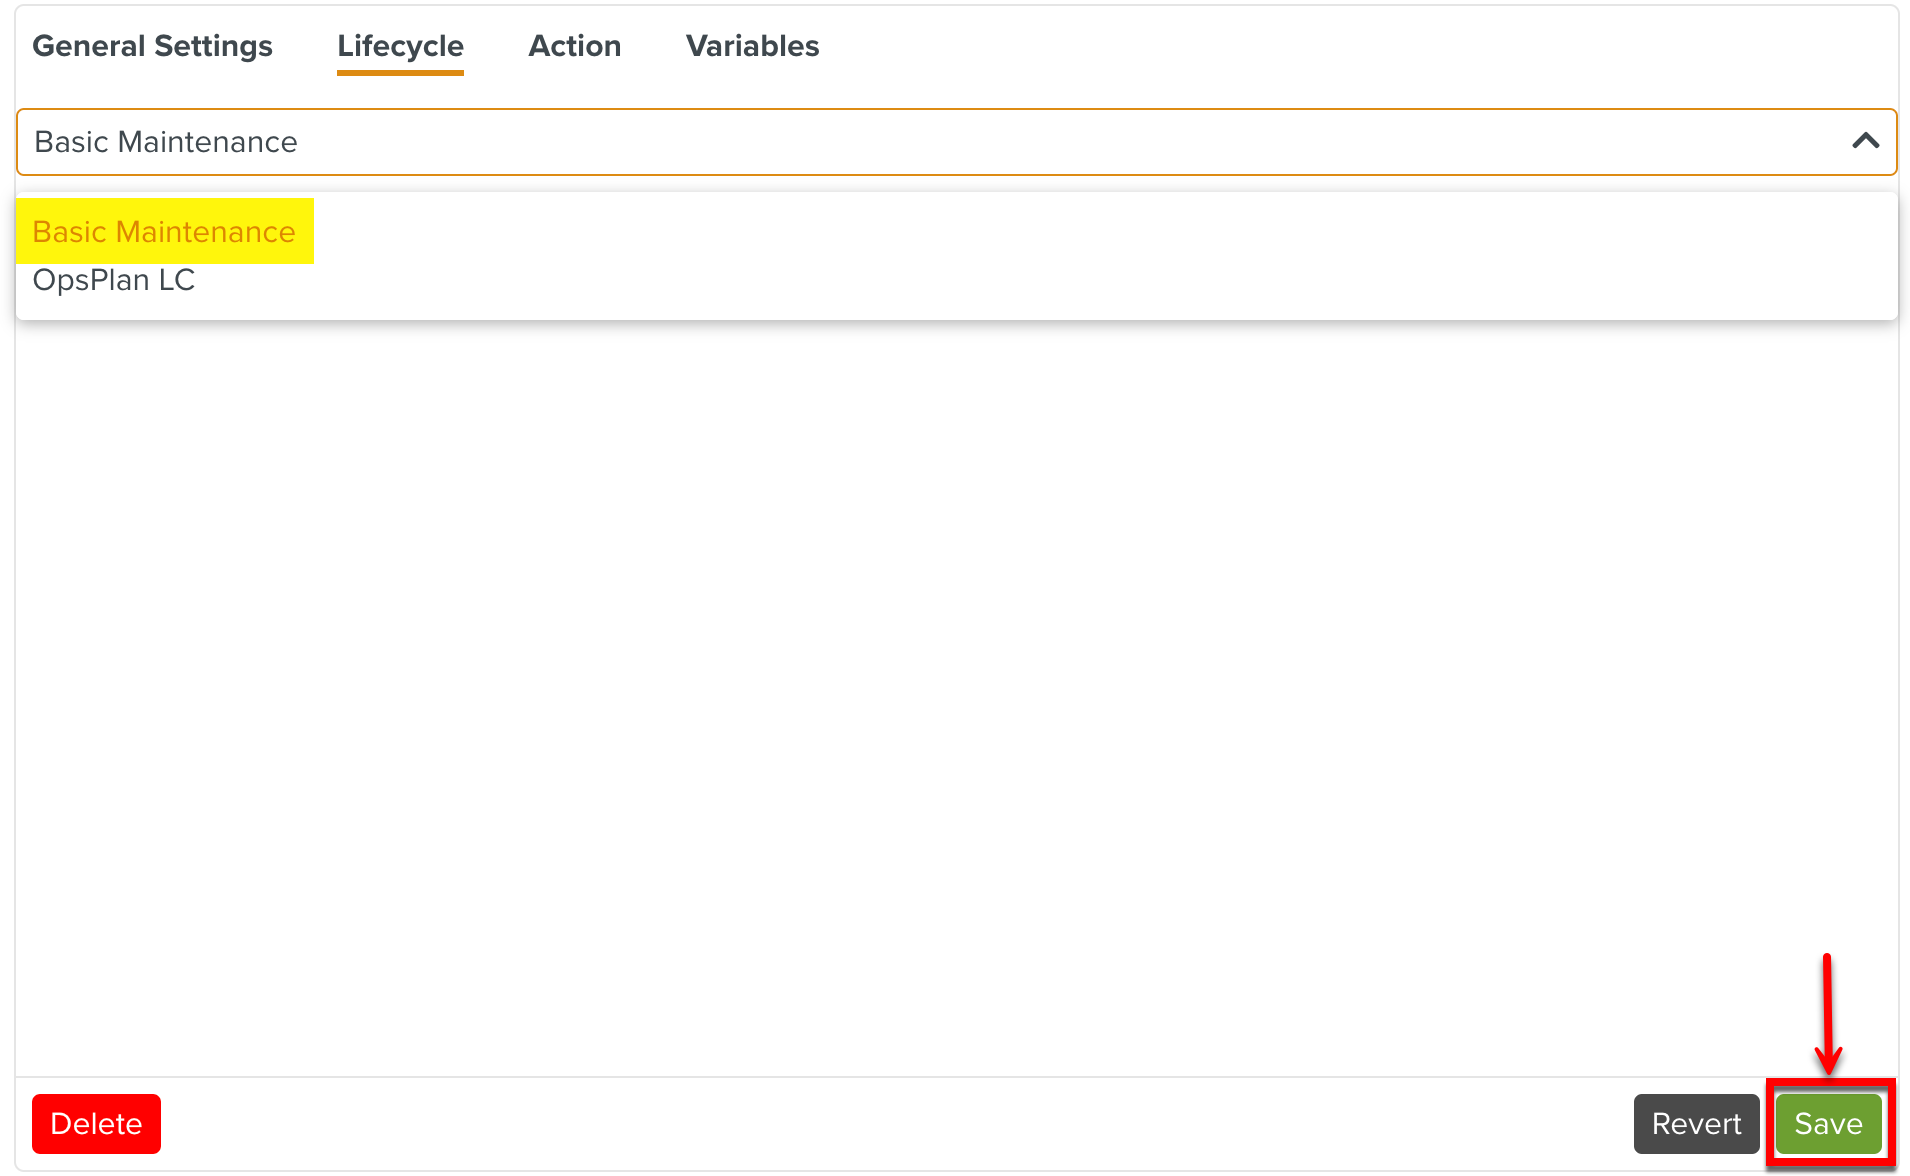
Lifecycle determines the workflow of the Actions in an Operation Plan.
In the Lifecycle tab, select the required Lifecycle from the dropdown.
 |
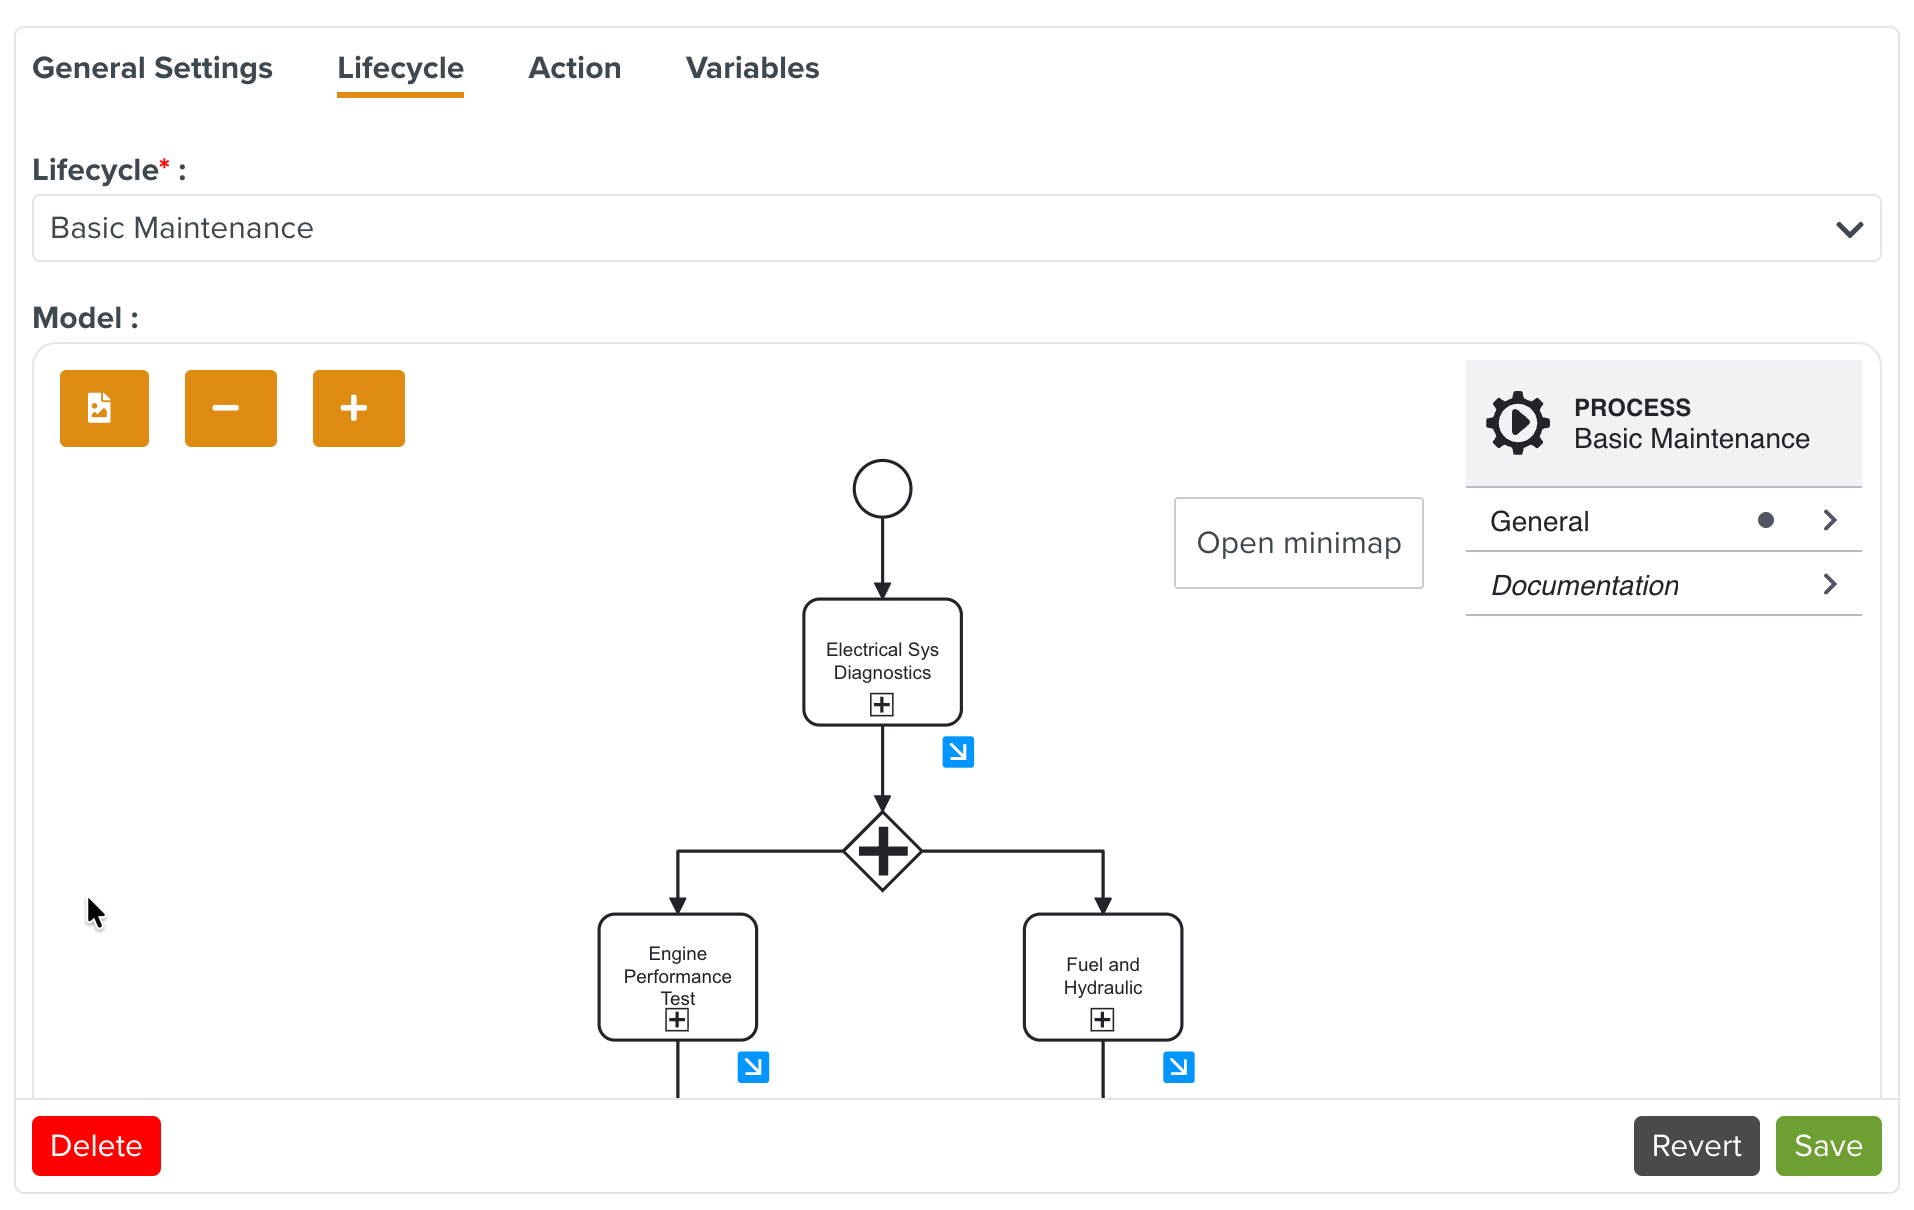
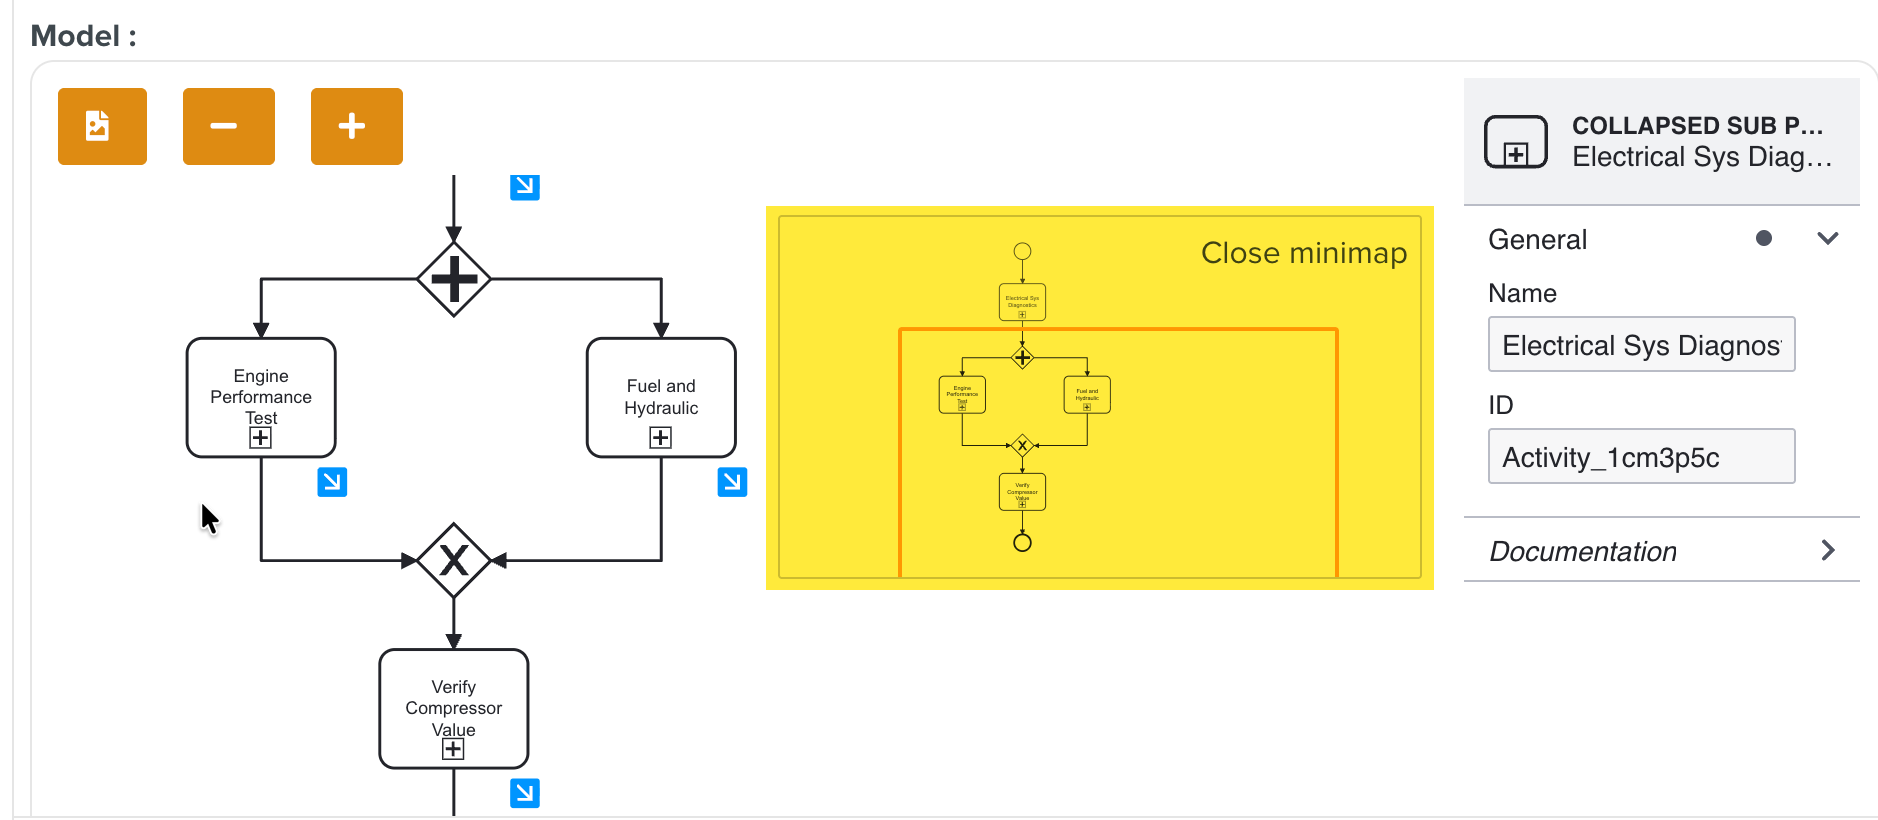
The Lifecycle workflow is displayed. You can view all the details associated with each stage. Clicking the blue arrow  on a Task displays the sub-processes.
 |
You can perform the following actions on the Lifecycle model:
Options | Description | |
|---|---|---|
| Download the lifecycle as a .SVG file. | |
| Zoom out of the Lifecycle model. | |
| Enlarge the Lifecycle model. | |
| View the minimap. Minimap provides a preview of the Lifecycle and highlights the portion you are viewing. Navigate to a specific area of the Lifecycle by moving the orange box in the minimap to view the corresponding area of the Lifecycle.
|


The Action (Create Task, Update Task, and Email notification) is made up of instances of one or more Templates.
For a Lifecycle and Action Counter you can create multiple Actions of type Create Task and Update Task. Each Action can have only one Template linked to it.
A Counter can in turn have Sub Counters as shown below. In the following example, by clicking , you can add Sub Counters as required.
 |
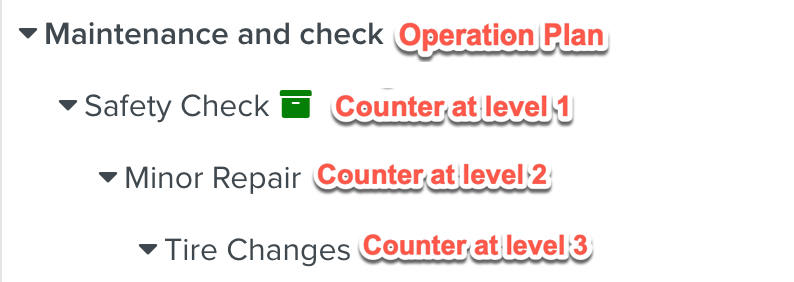
In the below example, Maintenance and check is the Operation Plan.
The Safety Check is a Counter level 1 which is created under the Maintenance and check Operation Plan. Minor Repair is a Counter level 2 which is created under Safety Check. Tire Changes is a Counter level 3 which is created under Minor Repair.
 |